bean.101
-
Posts
136 -
Joined
-
Last visited
Everything posted by bean.101
-
Man you are making sweet progress, its going to be mean on the track. Craig is really good to work with. He does a bit of machining for my work.
-
Hi we can do it at caraid, it will also need balancing aswell. Just call 3666428.
-
It's been awhile since ive done much work on the mk2 since i got it certed last year, so i have decided to do coil overs in it. It will be good practice for when i do the mk1 struts. I cut the spring base off with a cut off wheel then cleaned the tubes up in the lathe . Im running VW passat inserts, so i have shortened the struts 40mm.
-
I have started on my fuel tank, I have decided to use a skyline fuel pump cradle. Will save alot of pissing around and will be alot quieter than a external pump
-
Cheers guys, Porting dude is my work mate, He's charges $600 for porting and valve seats cut to match on a four cylinder 16 valve. Just give me a bell on 0221510572 during work hours.
-
Yeah Pete getting there slowly, your welcome to come have a geazer. It's out my dads place in darfield. I go out most saturdays, but won't be out next saturday. Give us a text on 0221510572 whenever keen.
-
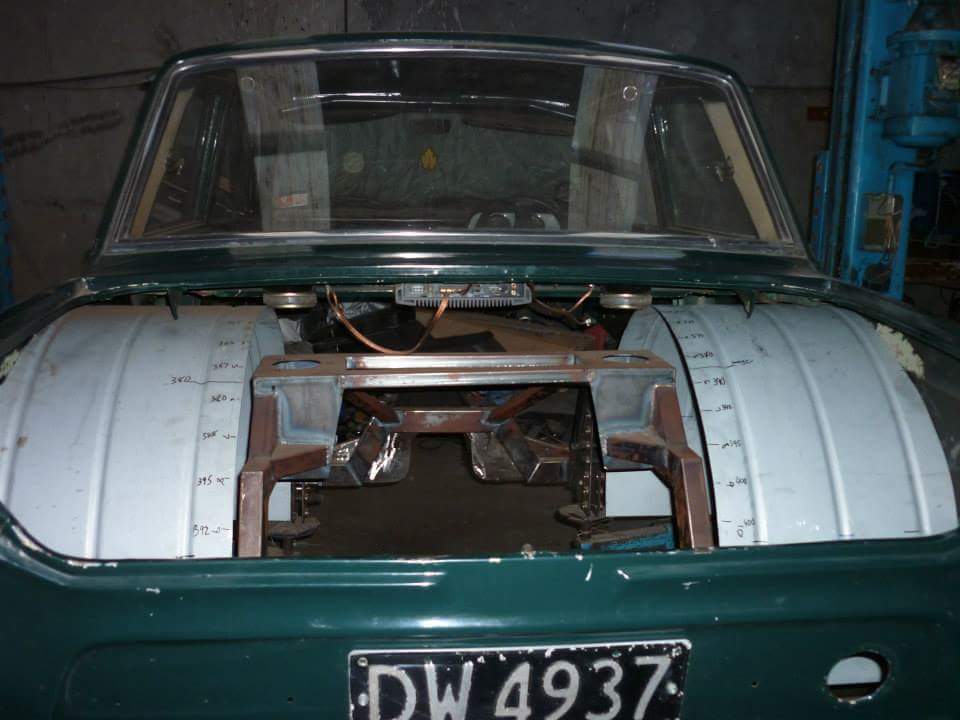
I test fitted my diff and put it through a range of movement to see if anything binds, And its all sweet. You can see where i welded tubb in, the paint burnt off the gaurd so i gave it a spray of primer till it goes to my mates panel shop. Will need to muck round with the ride height once get my fuel tank in.
-
Cheers Pete, Sorry won't be able to make it. Will try make it to the next one, Doing coil overs on the front of mk2 shortly. So will be keen to get out and about in it. Hows the anglia coming along?
-
I have be constantly derusting this so have been trying to get it into etch primer asap. I have used the wurth metal conditioner, it's crazy stuff. It makes the metal go a dark blue colour. I forgot to take some photo's. Got some of it in primer though. Also started on the centre panel between the tubs.
-
I have managed to get my boot floor in after making a cardboard template and a steel template to get the profile rite. Then welded it in
-
Ground all the paint off the inside of the rear guards, ready for the tubbs to be welded in Tubbs tacked in.

-
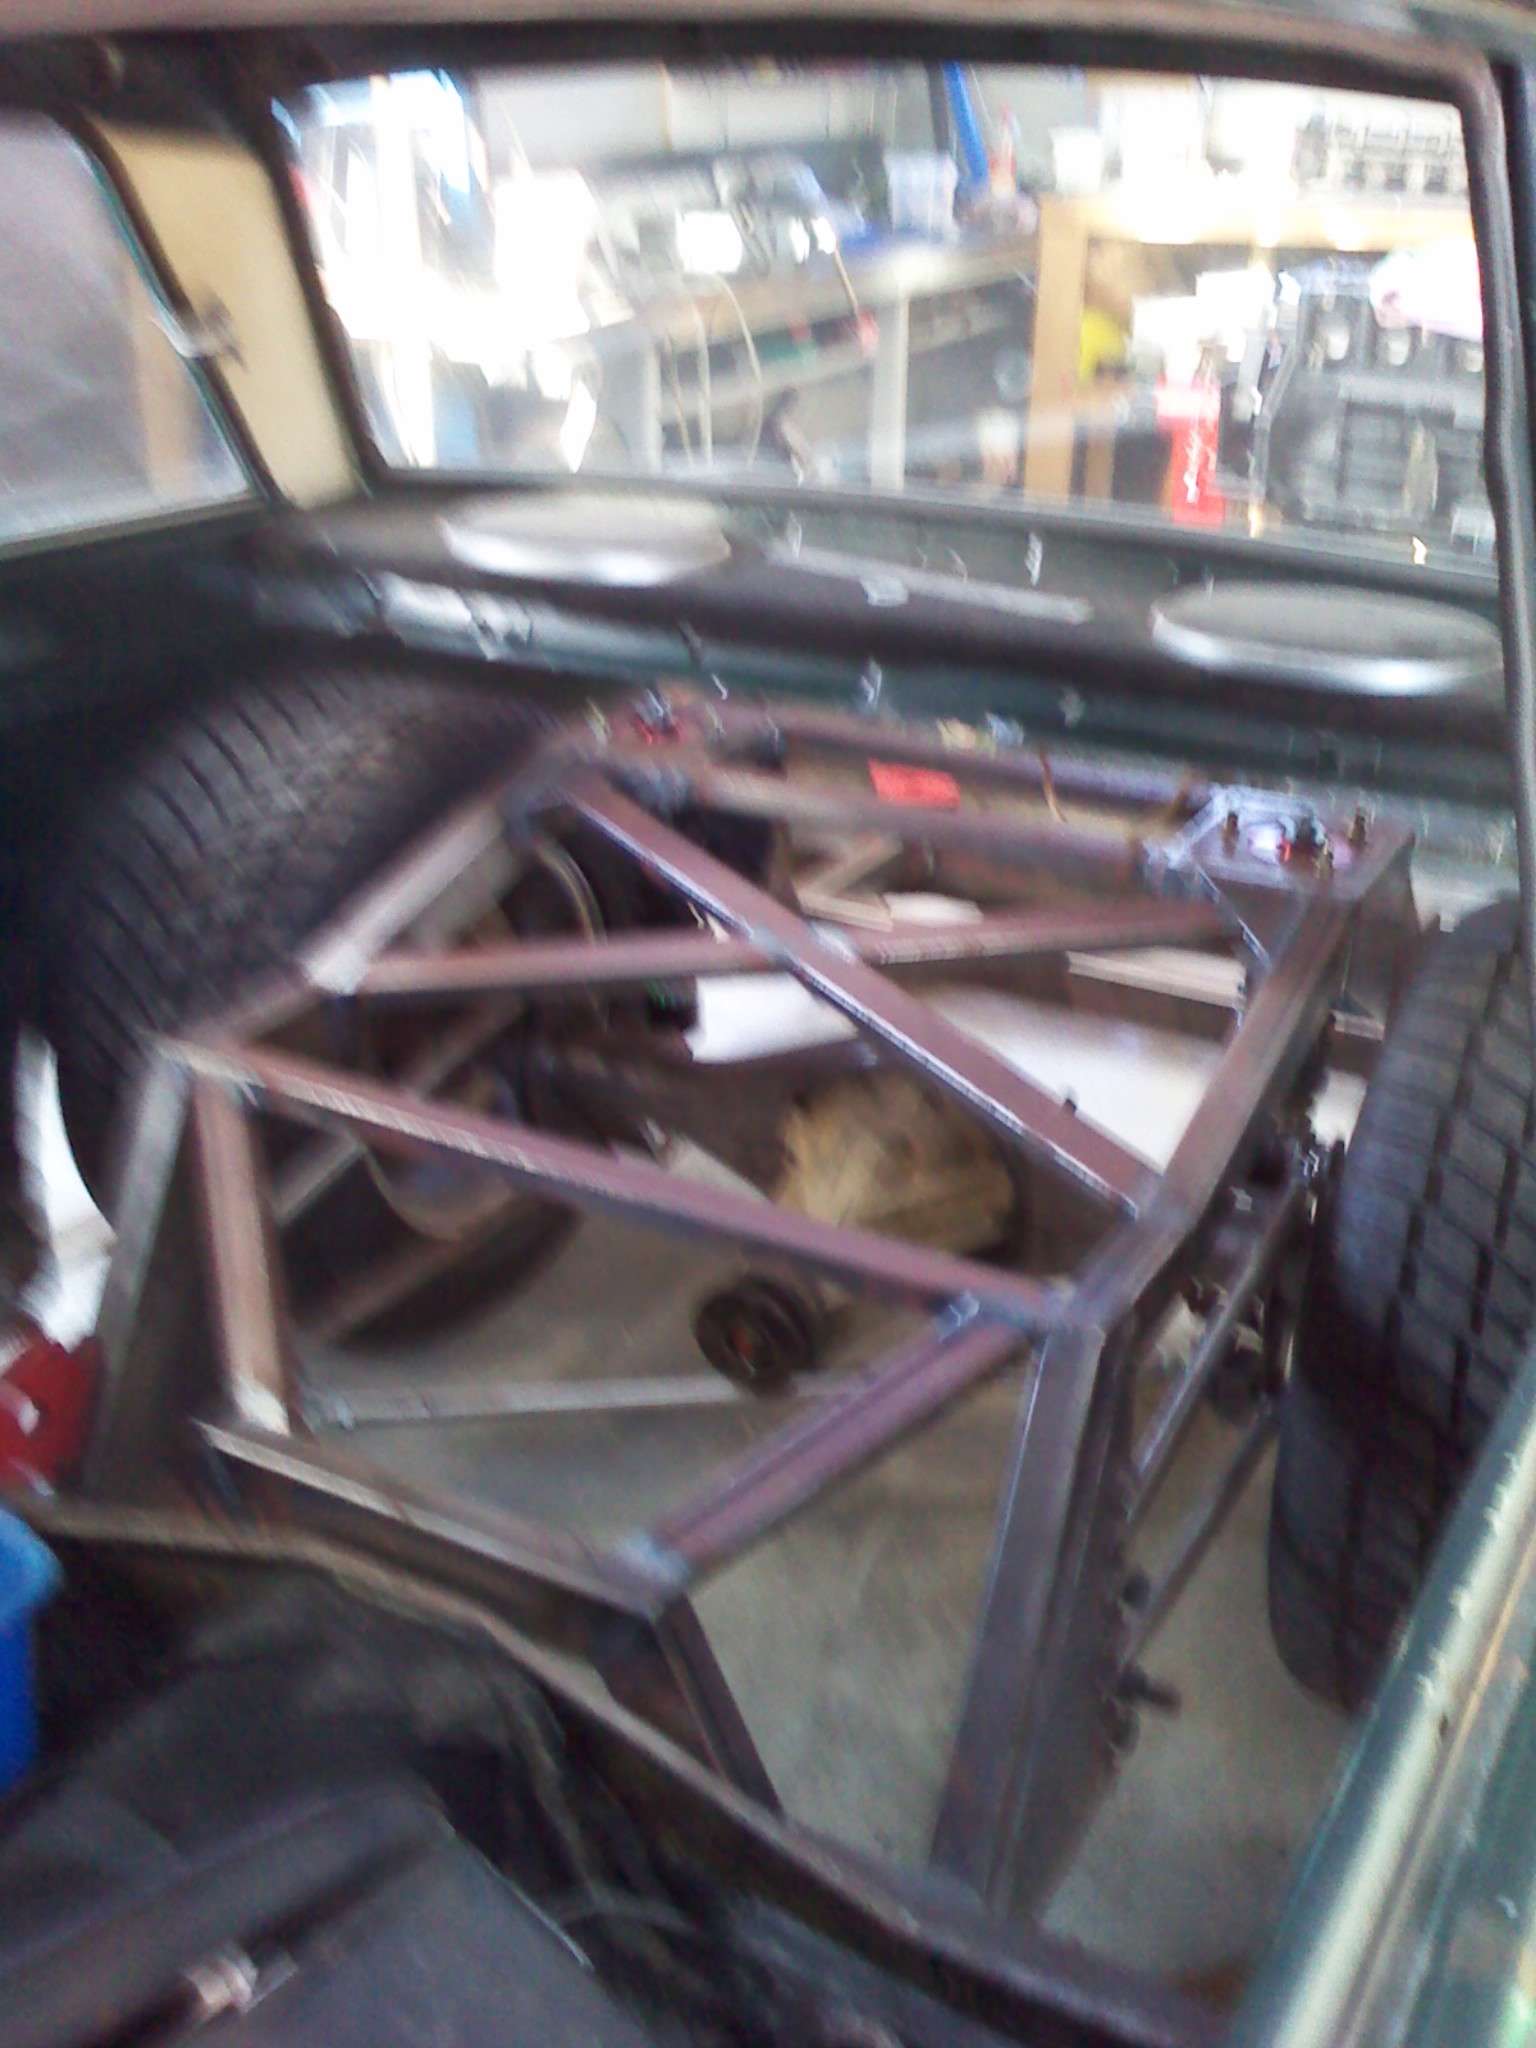
Just a couple of pictures showing that ive welded up my brackets finally. Just got to sort my caliper brackets and the diff will be finished. Got my tubbs trimed, ready to be welded in.
-
Sweet il get the Mk2 out for a cruise tomorrow, and come for a geazer.
-
Hey Pete i have only just come across this thread of yours, Looking good man!!!
-
Got my tubs the other day, looking forward to getting some time to fit them. Also made a inlet manifold for a vvl sr20 that we are building for a marathon boat at work, should be interesting as i don't think anyone else in NZ is using one in a marathon boat. I have used a 20mm thick plate and machined a radius into it rather than running trumpets. I just used a old drill bit for my radius tool. Ground the shape i wanted into it. I also used it to radius the outside perimeter of the plate.
-
They are about 450mm long from memory its been a few months since i made one, im making one for a vvl sr20 in a jet boat in the next few weeks. I can make one for you as wel if you want. I can email you a picture of what they are like straight off the press $150. If you want it tided up it's a little more. Just call or text me on 0221510572 cheers Brendin
-
Yeah Rich it's average. Im relieved to have it rolling, I hear Nigel has got you helping him sort his exhaust manifold.
-
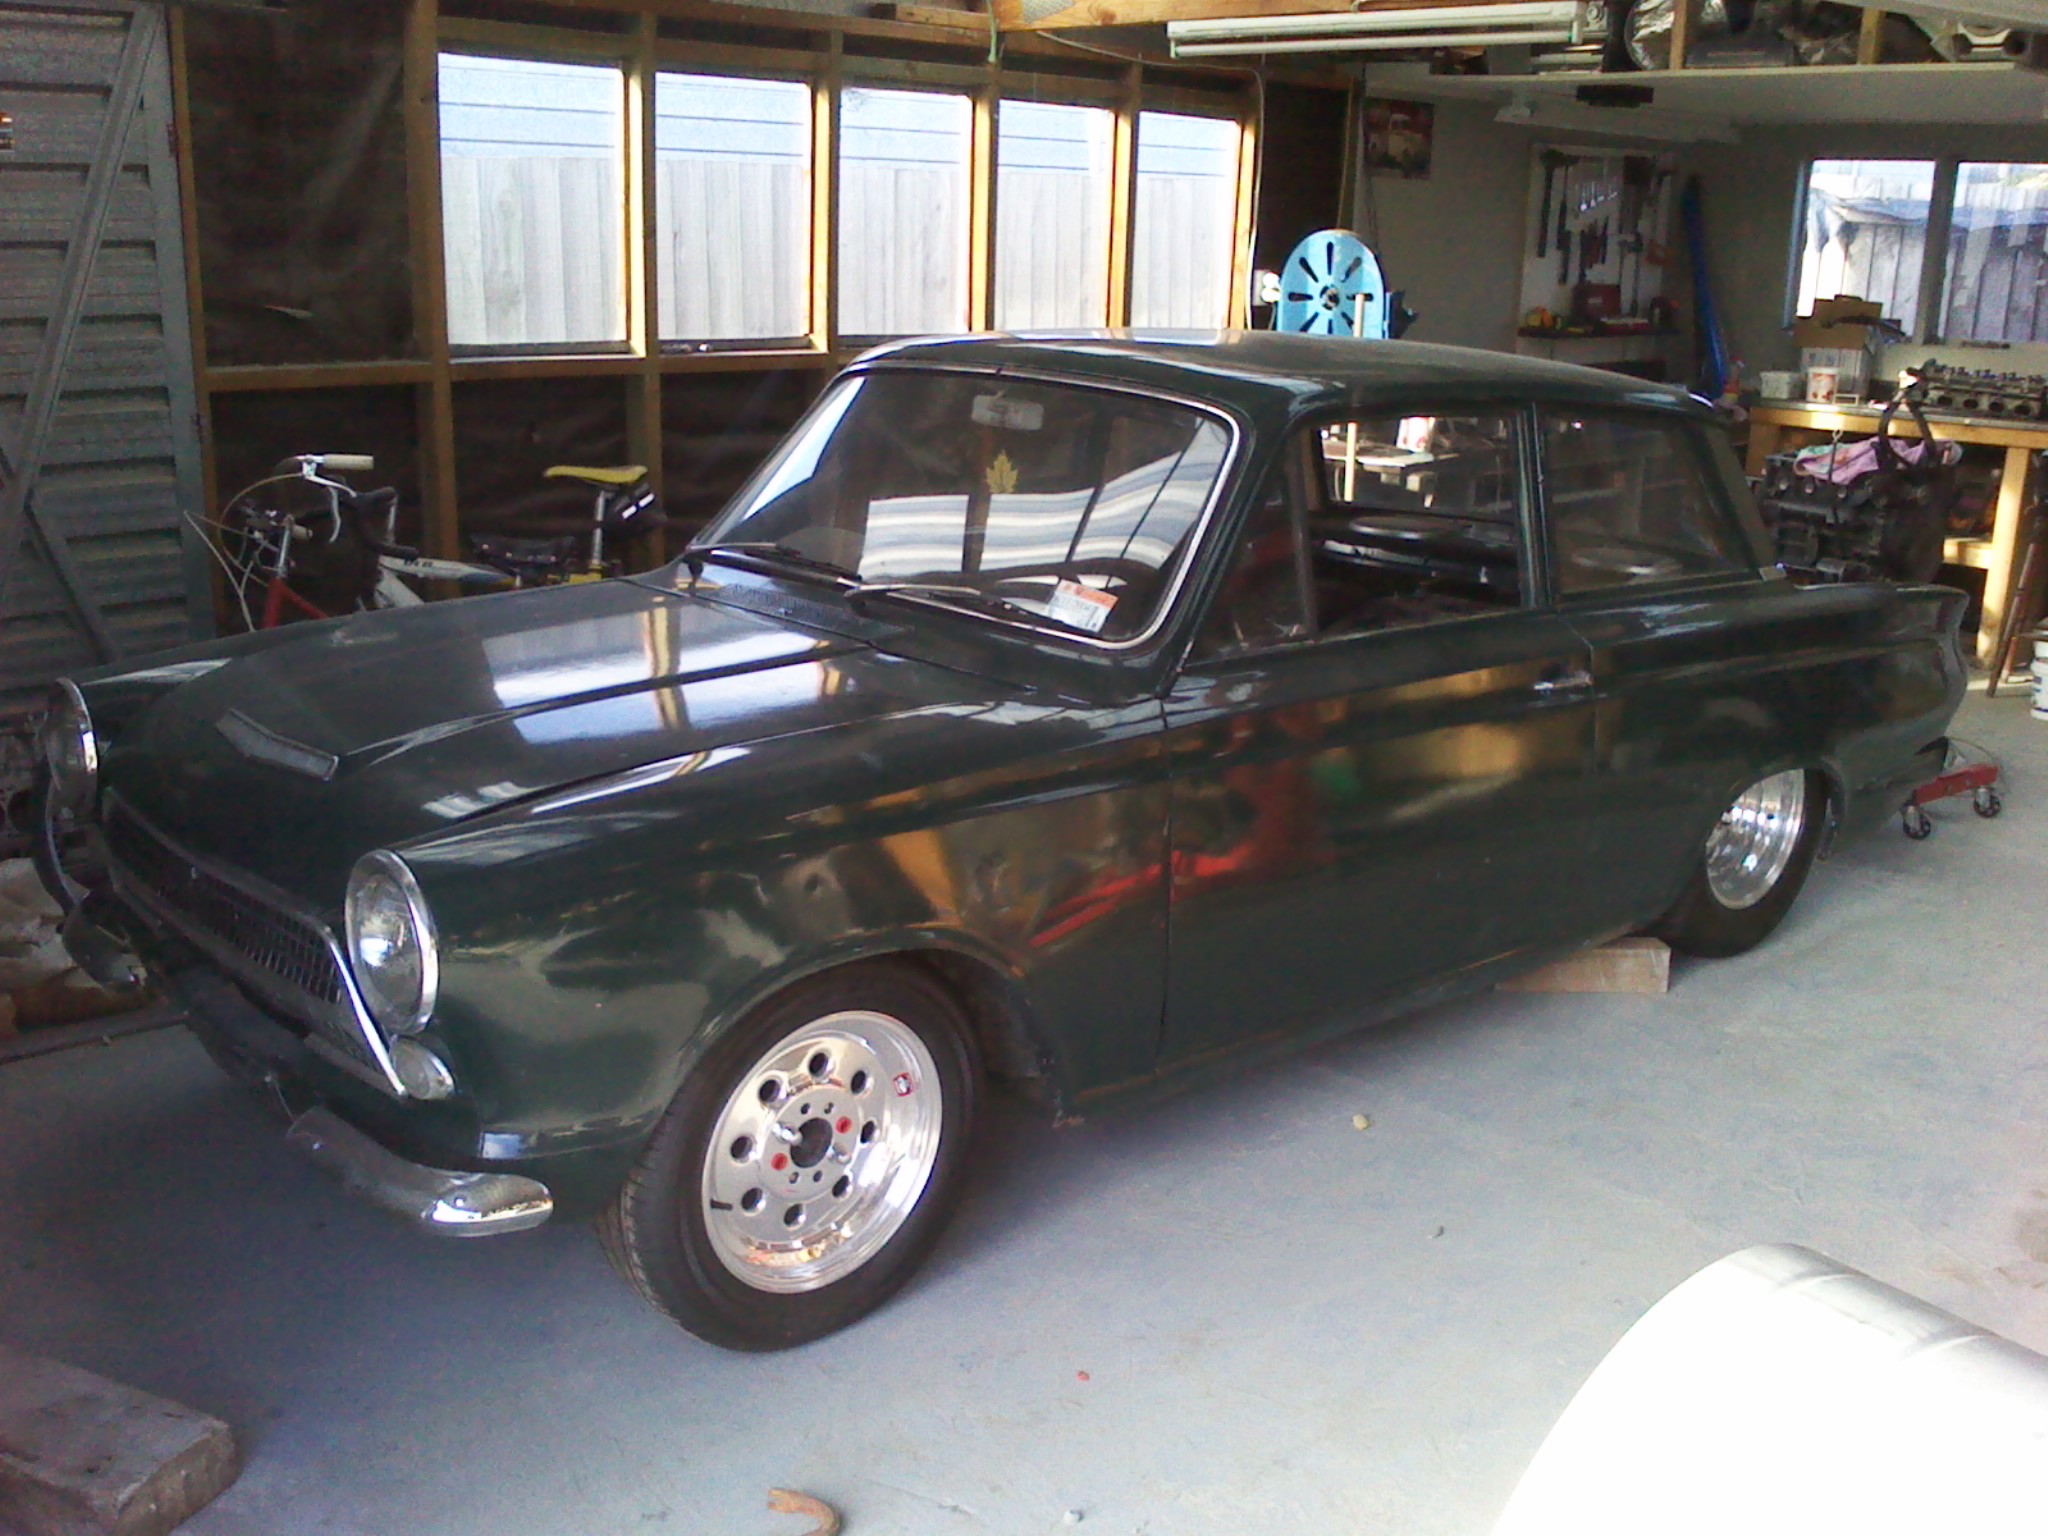
It's been awhile since i last done anything on the mk1, but with earthquakes constantly happening i thought it would be a good idea to get it rolling again so it can be moved. With anything over a mag 5 i get flooding into my garage. I also made some brackets for the diagonail link, it's sort of like a panard rod, It runs from one of the bottom front link points to the oppsite rear link, this stop the diff from moving side to side. I have only tacked the mounts onto the diff at this stage. So i will be pulling it out to weld up and fit the tubbs. Sat the motor back in so i can make intercooler pipes and mount the intercooler, mount radiator and finish inlet manifold. This is how it's sitting at the moement, i will be fitting coilovers in the front at some stage to lower it 50mm or so.
-
This is fucking great
-
Here's a few pic's of narrowing my diff. Cheers to Crazy Rich for lending me his diff narrowing kit. This is my axle redrilled to transit van, to take floating hubs This is the diff with asssembled, im running falcon disk's and adapters to run 4x10⁸ stud pattern Wheels on Had to cut my sump up to get engine lower in the engine bay, so while i was there i fitted a sump extension on the front for more oil capasity and surge protection. Here's a RB manifold i made for a mate, i cut one of the plenum shells i make in half and added a section to make it longer for a RB Here's a inside veiw you can see the the addded section
-
Got some tyres for the rear of the cortina, 295,50,15. So i had to sit them under the guards to see how they look,
-
Cheers mate,
-
These finally arrived today, shit it's like xmas. 15 by 10 for the rear and 15 by 5 for the front
-
Cheers Goodman, it was a tuff decision, It is nice only having oil leeking from the diff now tho. I just wanted it to go as good as it did before but without the reliability issues. The 460thou lift cam kept shitting itself, even the billet one rubbed the nose off. And the 5speed is great on the open road.
-
Iv welded up the extractors and ground the head manifold flange at work, I gave them a coat of stove bright. Iv found stove Bright to be great as it dosen't flake off. Here's a picture showing where i mounted the airflow meter, it would of been nicer to get it abit further away from the throttle body, but this just seemed to be the easiest opition. Here's how the cortina is sitting at the moe,