Roman
-
Posts
6757 -
Joined
-
Last visited
-
Days Won
32
Everything posted by Roman
-
Just pump gas, E85 is just too much hard work.
-
Yep just about! Need to fill gearbox with oil, bolt exhaust manifolds on, replace injectors, make sure the fuel pump still works. Then coolant is optional for first start, haha. But it's damn close.
-
At the moment I was just working on the basis that the V10 has 10 cylinders and makes 500hp, so 6 cyl worth of injectors should be 300hp capable no problem. However has rpm goes up, you need a slightly bigger injector to make the same amount of HP. As your deadtime gobbles up an increasing amount of your available time to spray.
-
A few hurdles... Only one side worked for the hoses. The next size up is 495mm long and sounds like it would work good. It's over $100 for the hose which is spendy. But for once in my life I want no joins in the radiator hoses damnit. So will just do it. (The non fitting side is currently 305mm) Then I've been making good progress on the wiring, a new roll of DR25 turned up so I finished the injector loom and tested it. Injector 1 - working fine injector 2 - working fine injector 3 - nothing injector 4 - nothing injector 5 - nothing Injector 6 - working fine I figured I must have derped the wiring somehow, so I pulled my loom back off and test it, traced wires back, blah blah. All seemed okay. Well, turns out that the wiring wasnt an issue, but the injectors are. 7 out of 10 of the BMW injectors are seized. BMW life! hahaha. No big drama, as it's probably a good idea to start with some slightly bigger injectors anyway. Internet says these factory injectors are somewhere around 248cc which might have been borderline for high rpm, depending on the deadtime. For interest's sake I will chuck these in Dad's ultrasonic cleaner and see if they unjam at all. Anyone got some suggestions on a good set of long pintle EV14 injectors? Over 250cc and under... say... 500. If there's some common 6 cyl car that is pickapartable I'll go grab a set. Needs the long pintle.

- 75 replies
-
- 12
-

-
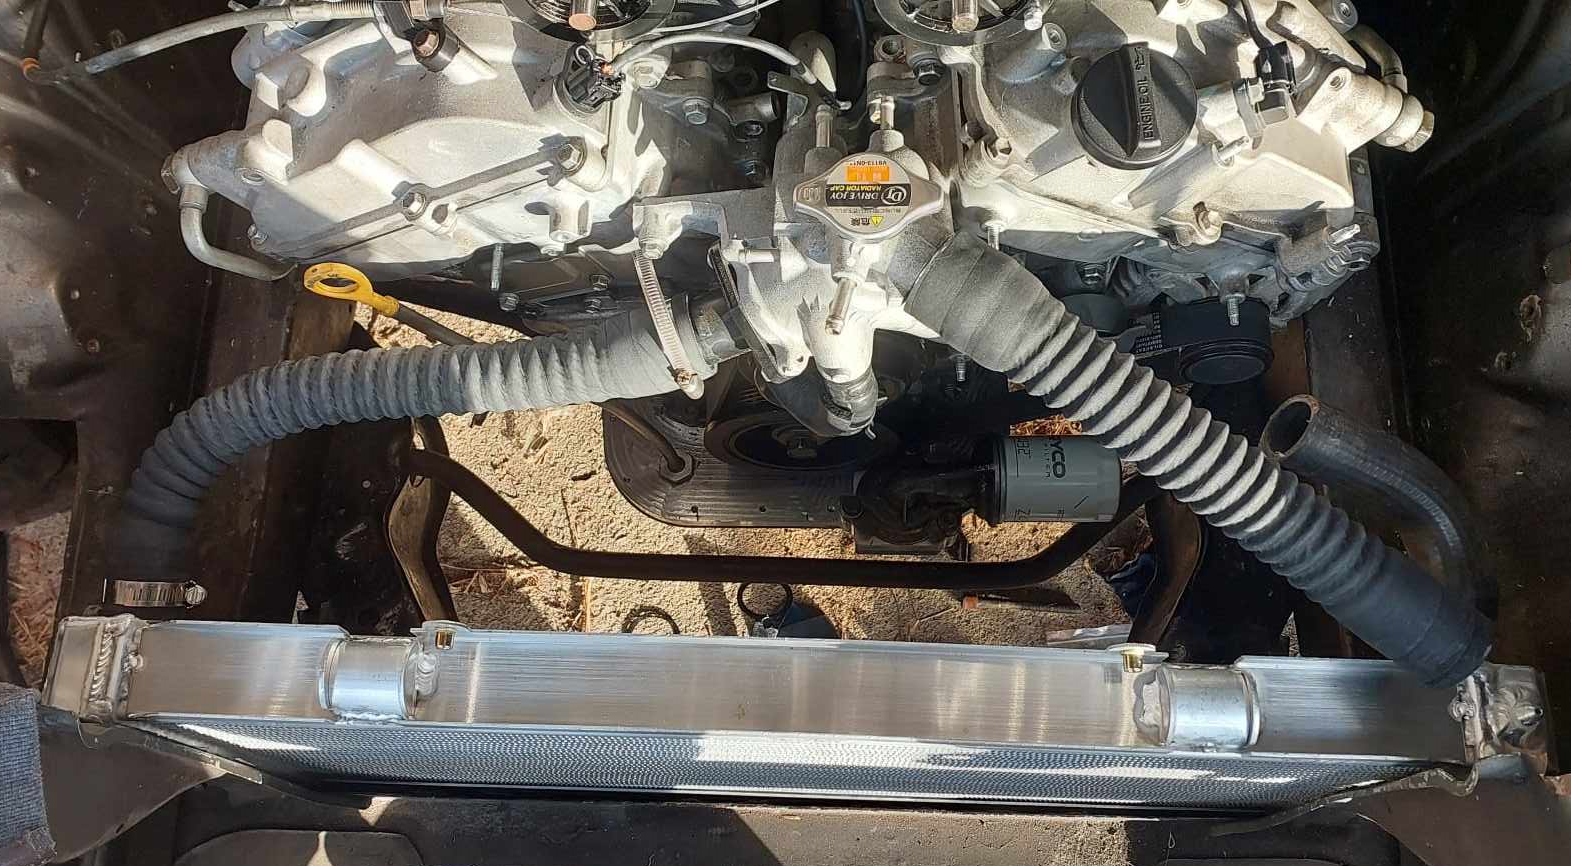
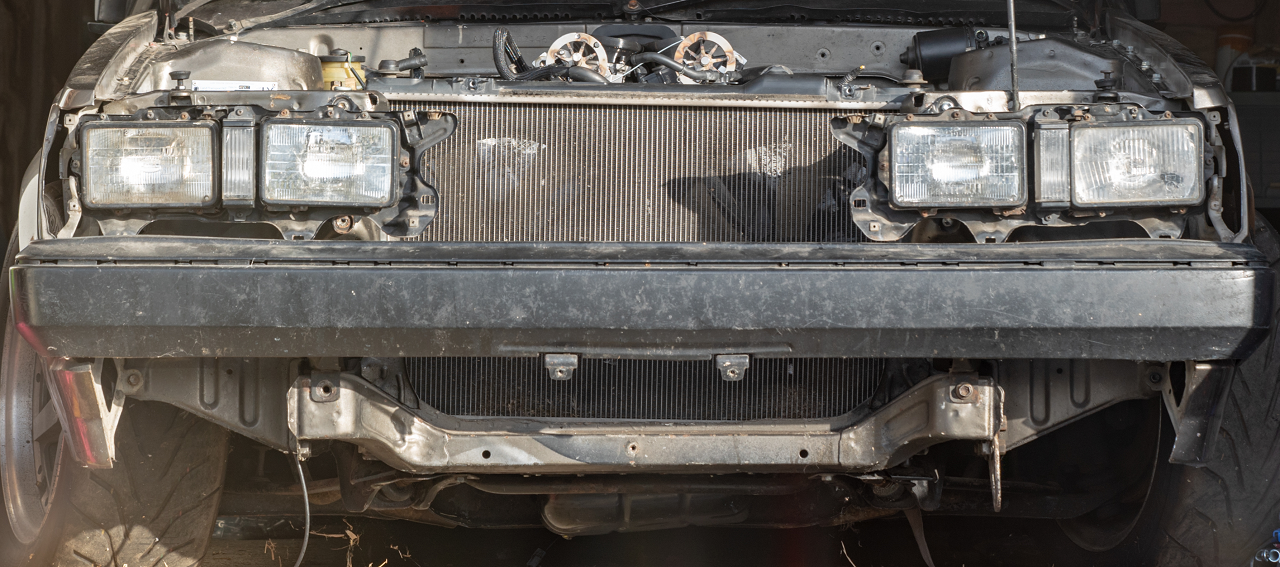
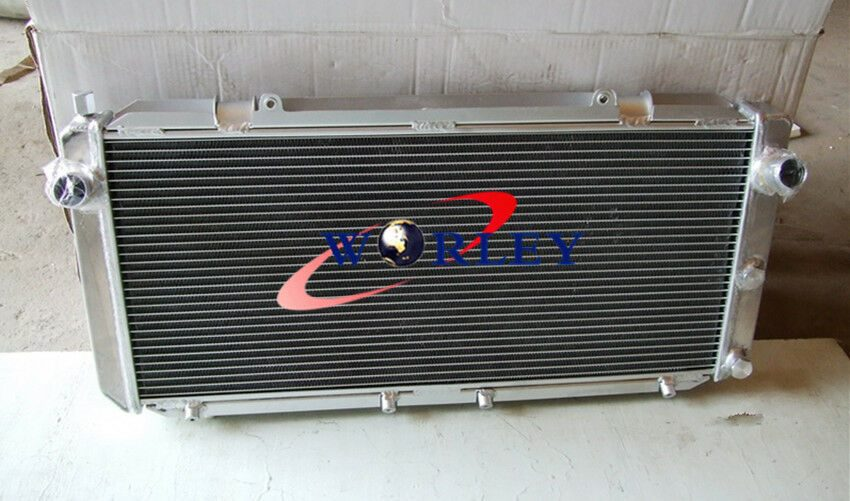
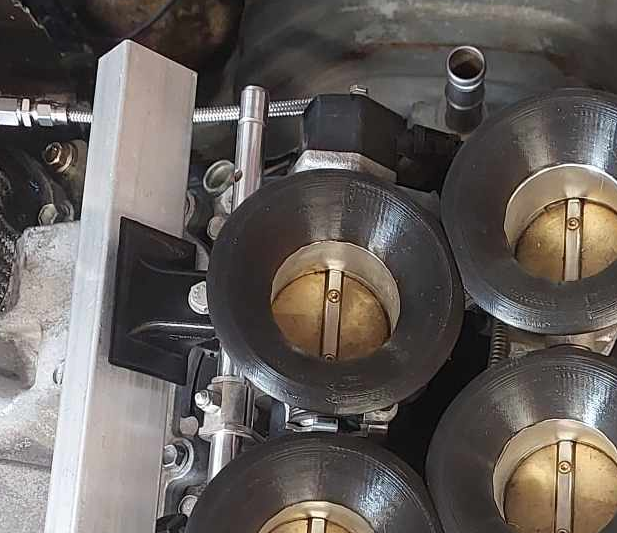
The SW20 radiator turned up, and thankfully it was indeed 755mm wide, not 770. So just needed a small snip up one side to fit. There isnt actually too much in the way of the fins being shrouded by the front panel, because those side parts are mostly the end tanks. So ended up better than expected, it will mount up to the front panel nicely. This is the amount of room to the crossmember level: My next problem was that the radiator outlets are 32mm, but on the motor they are 38mm. Wellllll, turns out that you can buy flexi hoses with 32mm at one end, 38 at the other. At what looks like good lengths (400 for one side, 300 for the other). So ordered some. Too easy! I'm glad to not need a join in the hoses this time. I printed some lower radiator brackets which bolt onto the crossmember similar to the ones I had for the Altezza radiator. I remember we made the altezza ones out of aluminium, and it seems like it took forever and was a really hard job. Now with a printer it's just incredibly easier to test print and test fit a few iterations within hardly any time at all. I've also got all the fuel lines connected, throttles are now mounted on carbon nylon manifolds, throttles are balanced and connected. My to-do list for getting the motor fired up is rapidly shrinking!
- 75 replies
-
- 40
-
-

-
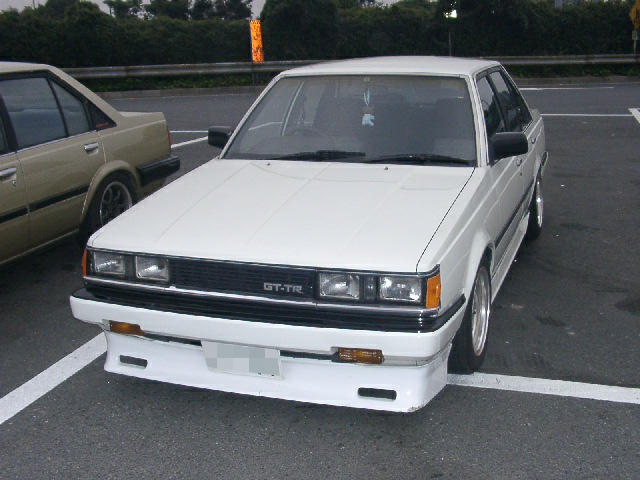
If you're looking at getting that wagon, probably want to do a rack and pinion conversion as the steering box stuff takes up heaps of space where you'd want to run the exhaust. Also most likely has leaf spring in rear of that wagon which is a bit gross compared to 4 link. Also, at the best of times with some $$$ spent these cars handle... not amazing compared to modern stuff. But with standard suspension etc they just wallow all over the road haha. Costs a fair bit of $$$ to get them handling and braking a bit better. With lots of weight in front and not much power would be kind of like wielding a marshmallow sledgehammer.
-
https://www.youtube.com/watch?v=-8I6soGvGeI
-
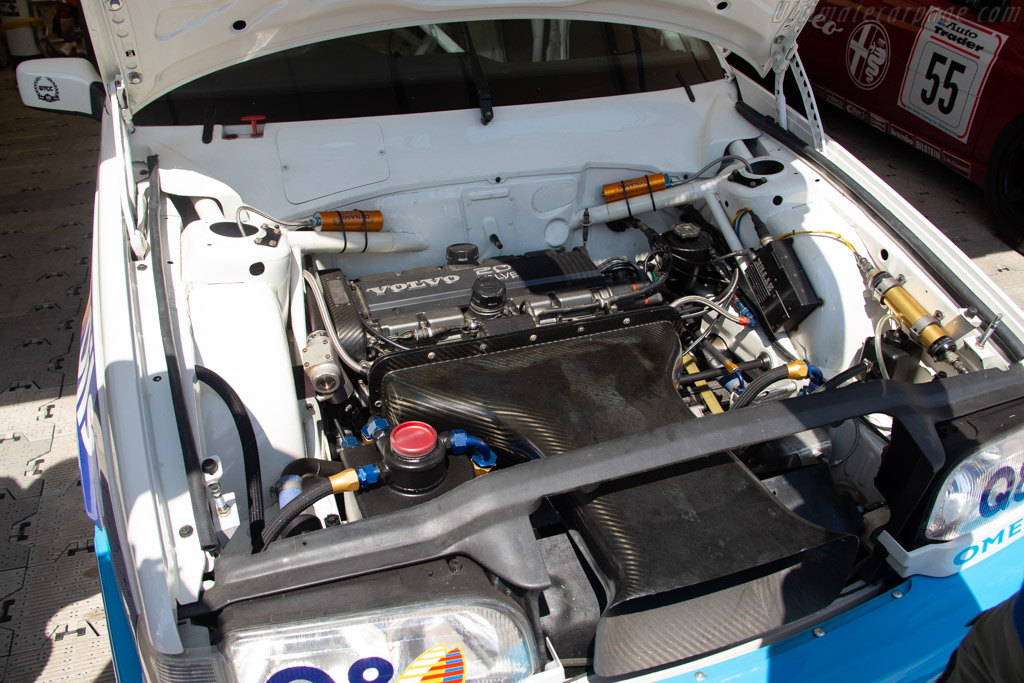
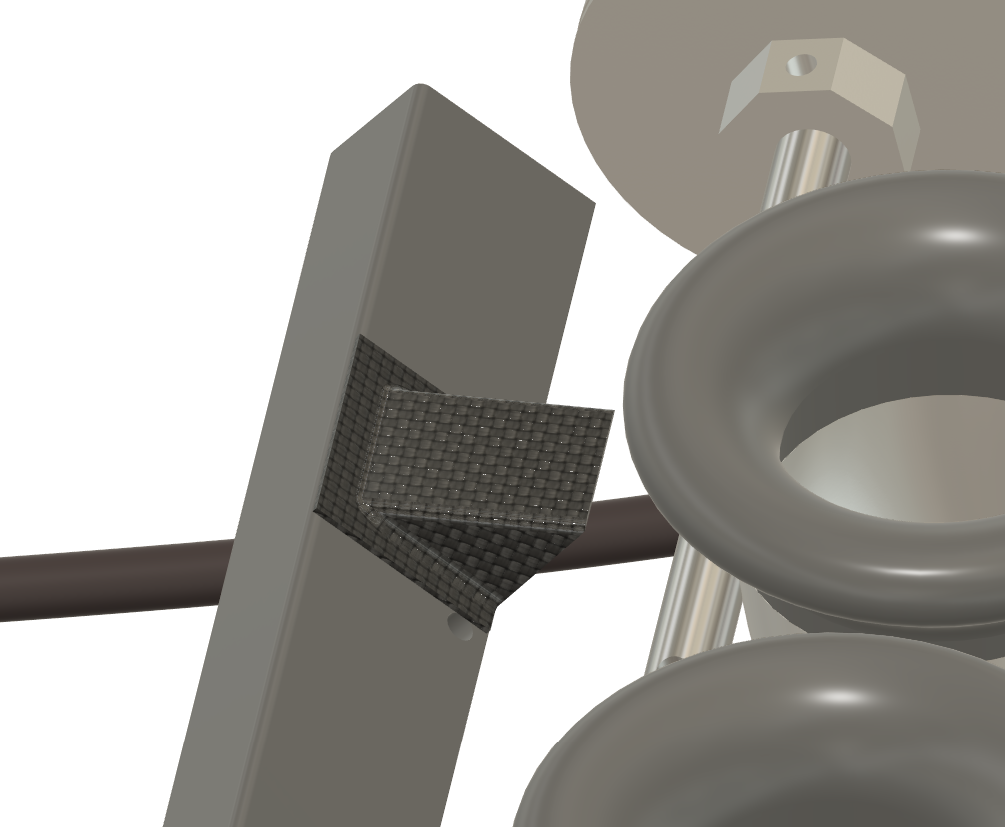
Yeah true. Apart from existing options not fitting, it's also that eventually I want to be able to have an intake something like this. Both because it looks cool, and works to hide a lot of other sins in my engine bay haha.
- 652 replies
-
- 13
-
-
I found an SW20 one that is a little different on dimensions: Core Size: 675mm *320mm *40mm Overall Size: 755mm *345mm *50mm Row: 2 Core If it turns up and is 770mm then I'm in trouble haha.
-
Yeah I hear you, and I am focused on getting this from current its current state to a running motor/car ASAP with no fucking around on non essentials. (Can do that iteratively once it's going, like echo. thats the fun part) As I want to know how well my engine scheme is going to pan out! So the seemingly easiest way would have been to keep the Altezza radiator that I already had - but the pipe sizes are wrong, and the pipe locations dont really work either. I was hoping the Mark X setup would just tick off all of these boxes, just have to remake some top and bottom mounts. But it's actually only as thin as the Altezza radiator (16mm) and the hoses didnt really fit too well since the radiator and engine heights dont match relative positions to factory. Bottom mounts will be easy, but the top ones tricky because it's tall. But once mounted it's going to be even taller, and I suspect it will hit the bonnet. So my thinking here is actually to NOT waste my time, rather than to dilly dally with unimportant stuff. So I'm cutting my losses and ironically going to SW20 parts haha. To get the motor running I dont need an air intake at all, and I dont need any radiator ducting. So I'll bang the radiator in there, work out the mounts, work out the pipes, then fill the damn thing up. This new radiator is 40m thick core as well, so hopefully zero cooling issues if I can get some air to it. This SW20 radiator was $220 delivered so meets the cheap and cheerful criteria!
-
Needs to be huge for a car that doesnt go! And yeah can probably tip it a bit, there's a reasonable amount of room ahead of the motor.
-
I've blown up shitloads of Bosch 4.2 and 4.9 sensors, so changed to the 14point7 Spartan controller, with the LSU-ADV sensor. It lasted the entire lifespan of the echo without blowing up a single sensor, and was running it "hot" on cold starts as well. (As it's designed to be more compatible with cold starts than 4.2 or 4.9) Compared to, I think my record with a 4.2 or 4.9 sensor for worst lifespan was that one lasted 3 days.
-
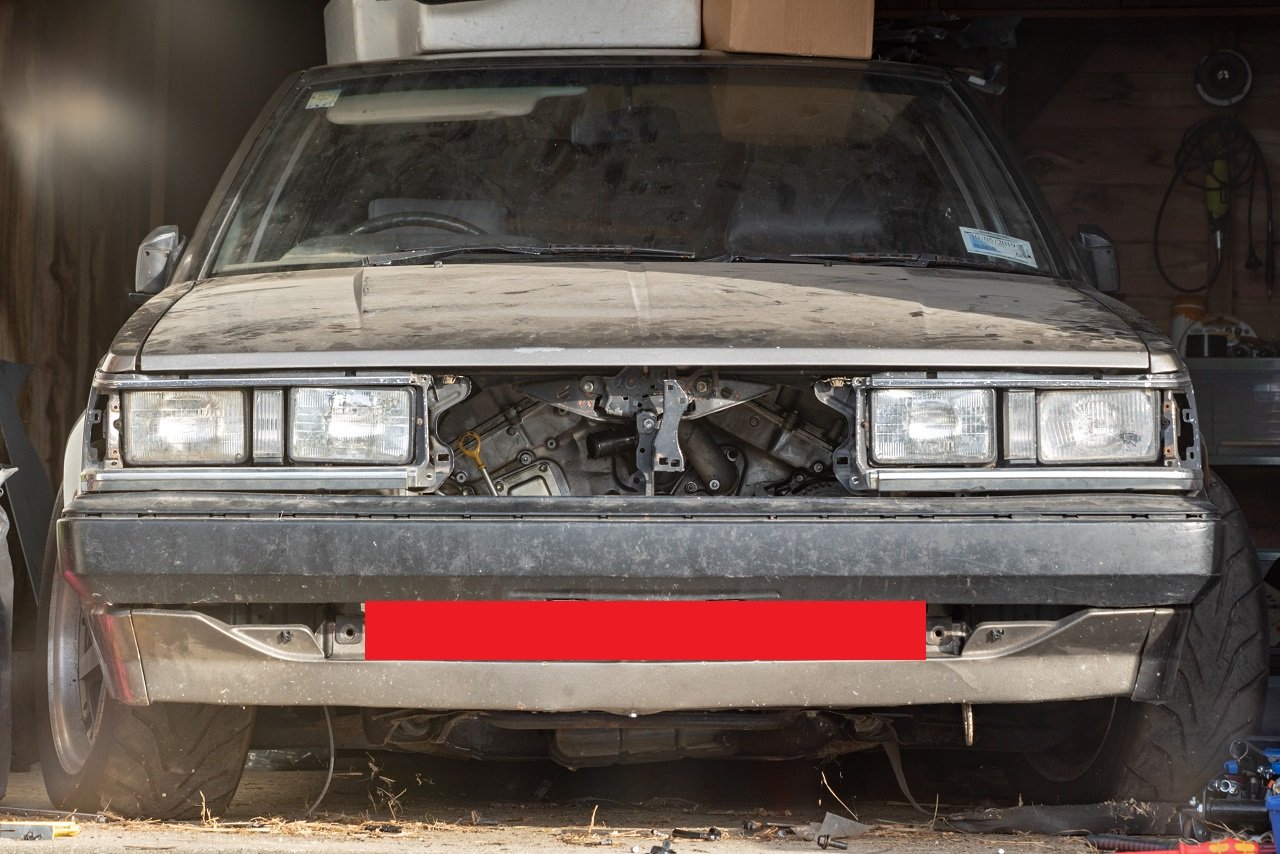
I think the general idea is that the faster you are going, the less air intake area you need for your radiator size. A lot of the time attack cars have tiny little holes for the radiator. Total lower grill entry area is 77542mm2 . Equivalent area to a 315mm circle. 57081mm2 for the upper grill entry. Equivalent area to a 270mm diameter circle. The front valance sits quite high on this car, but it's really hard to add something to the front to lower it that doesnt look like absolute shit. I very much do not like this style of front on this era car: This below though can look cool though but it's hard to get it right, often looks gumby when someone fits one that isnt wide enough or the right shape for the car. May also be incompatible with my rural driveway haha.
-
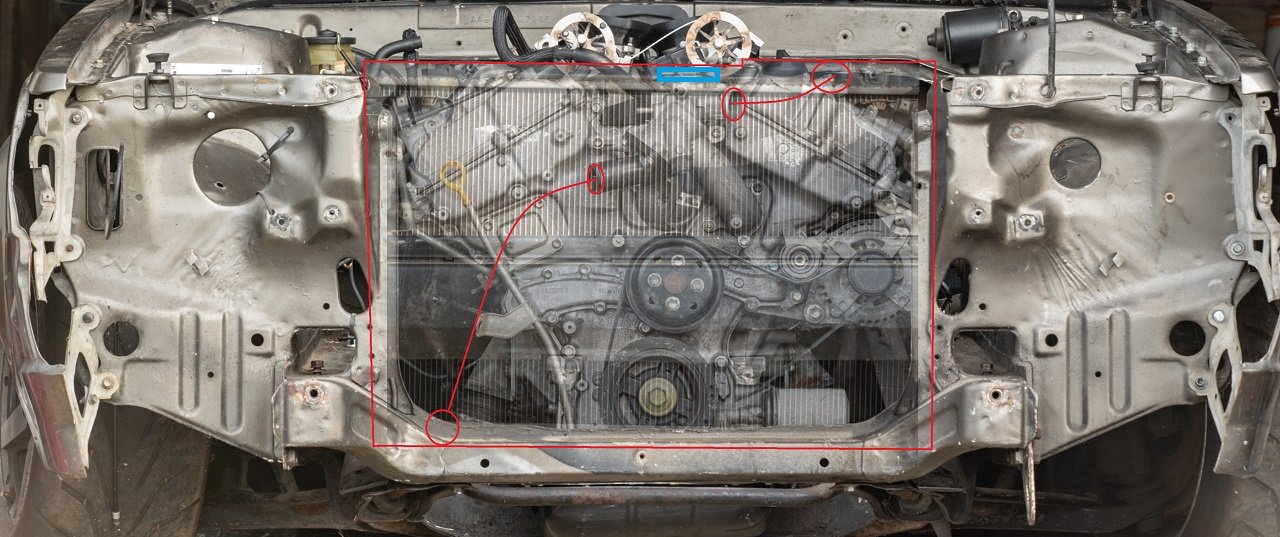
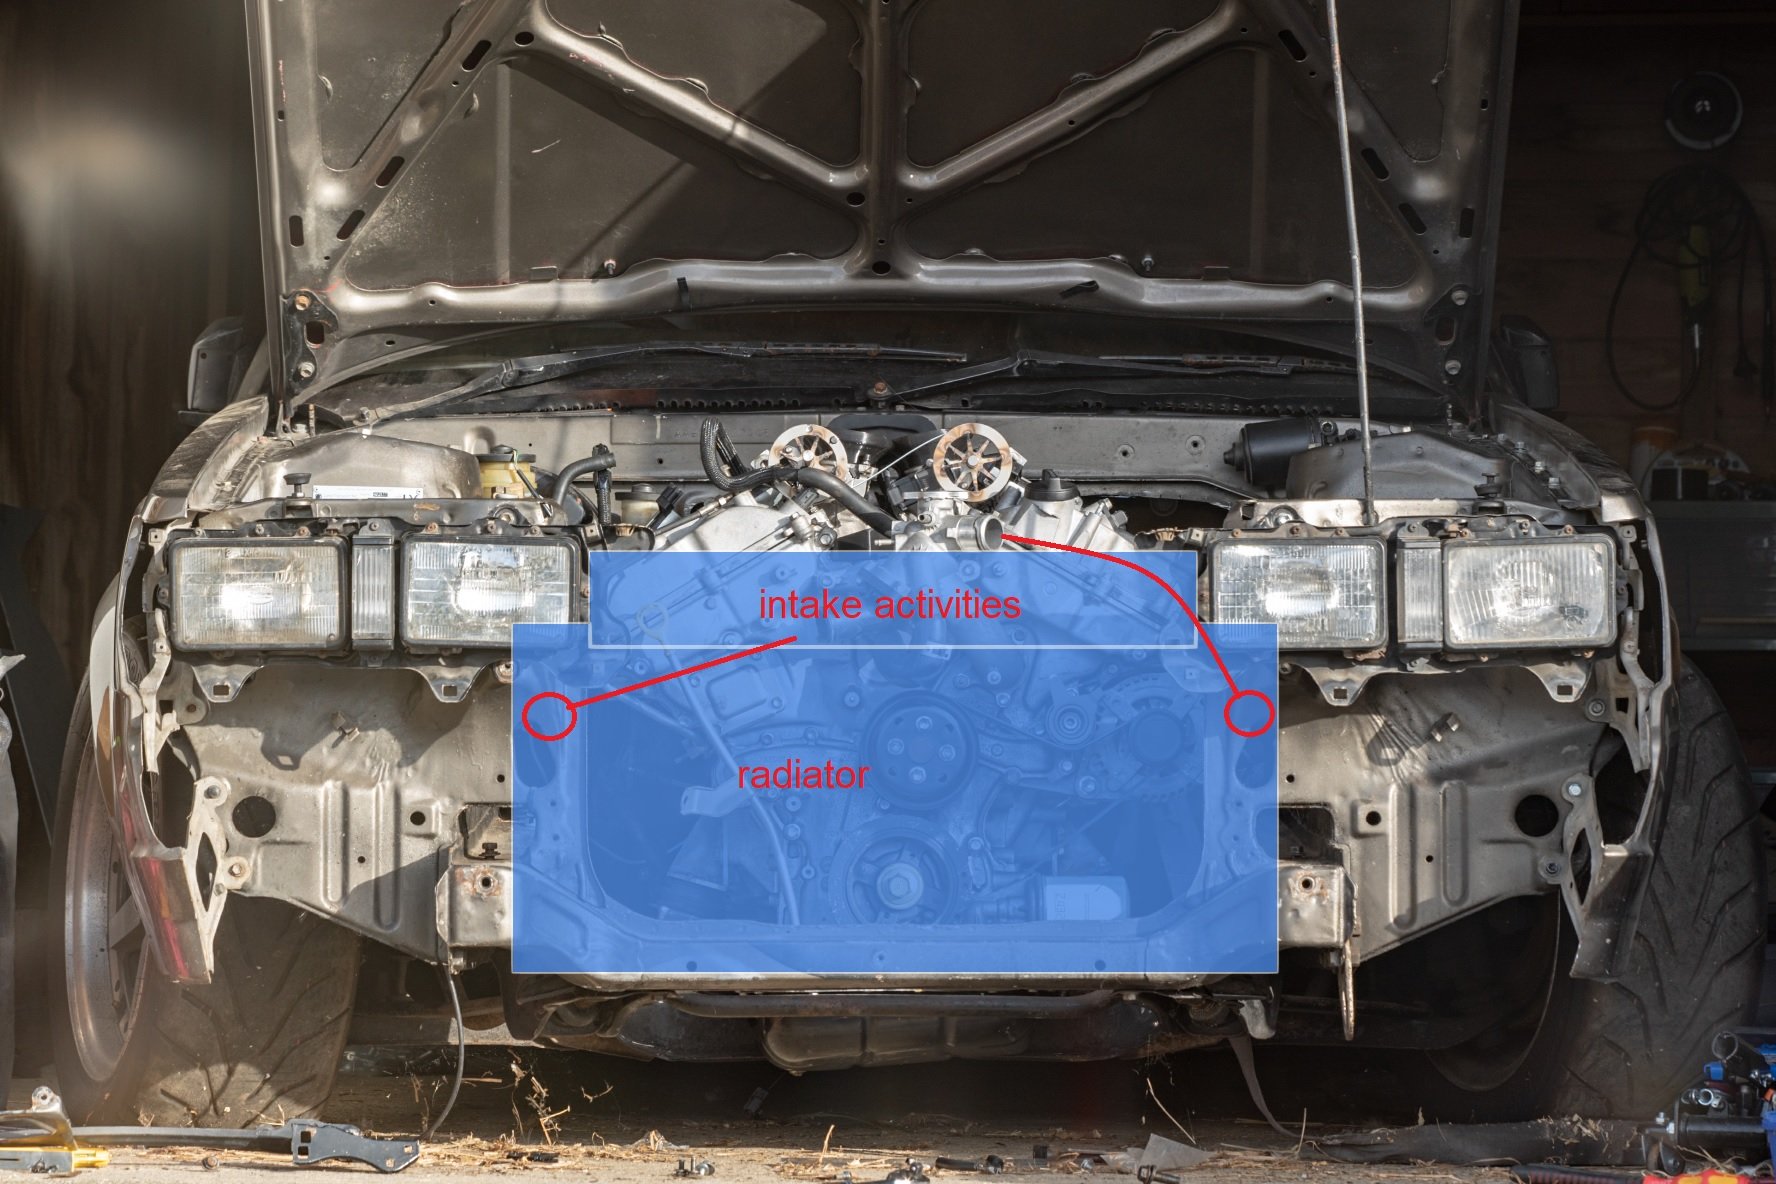
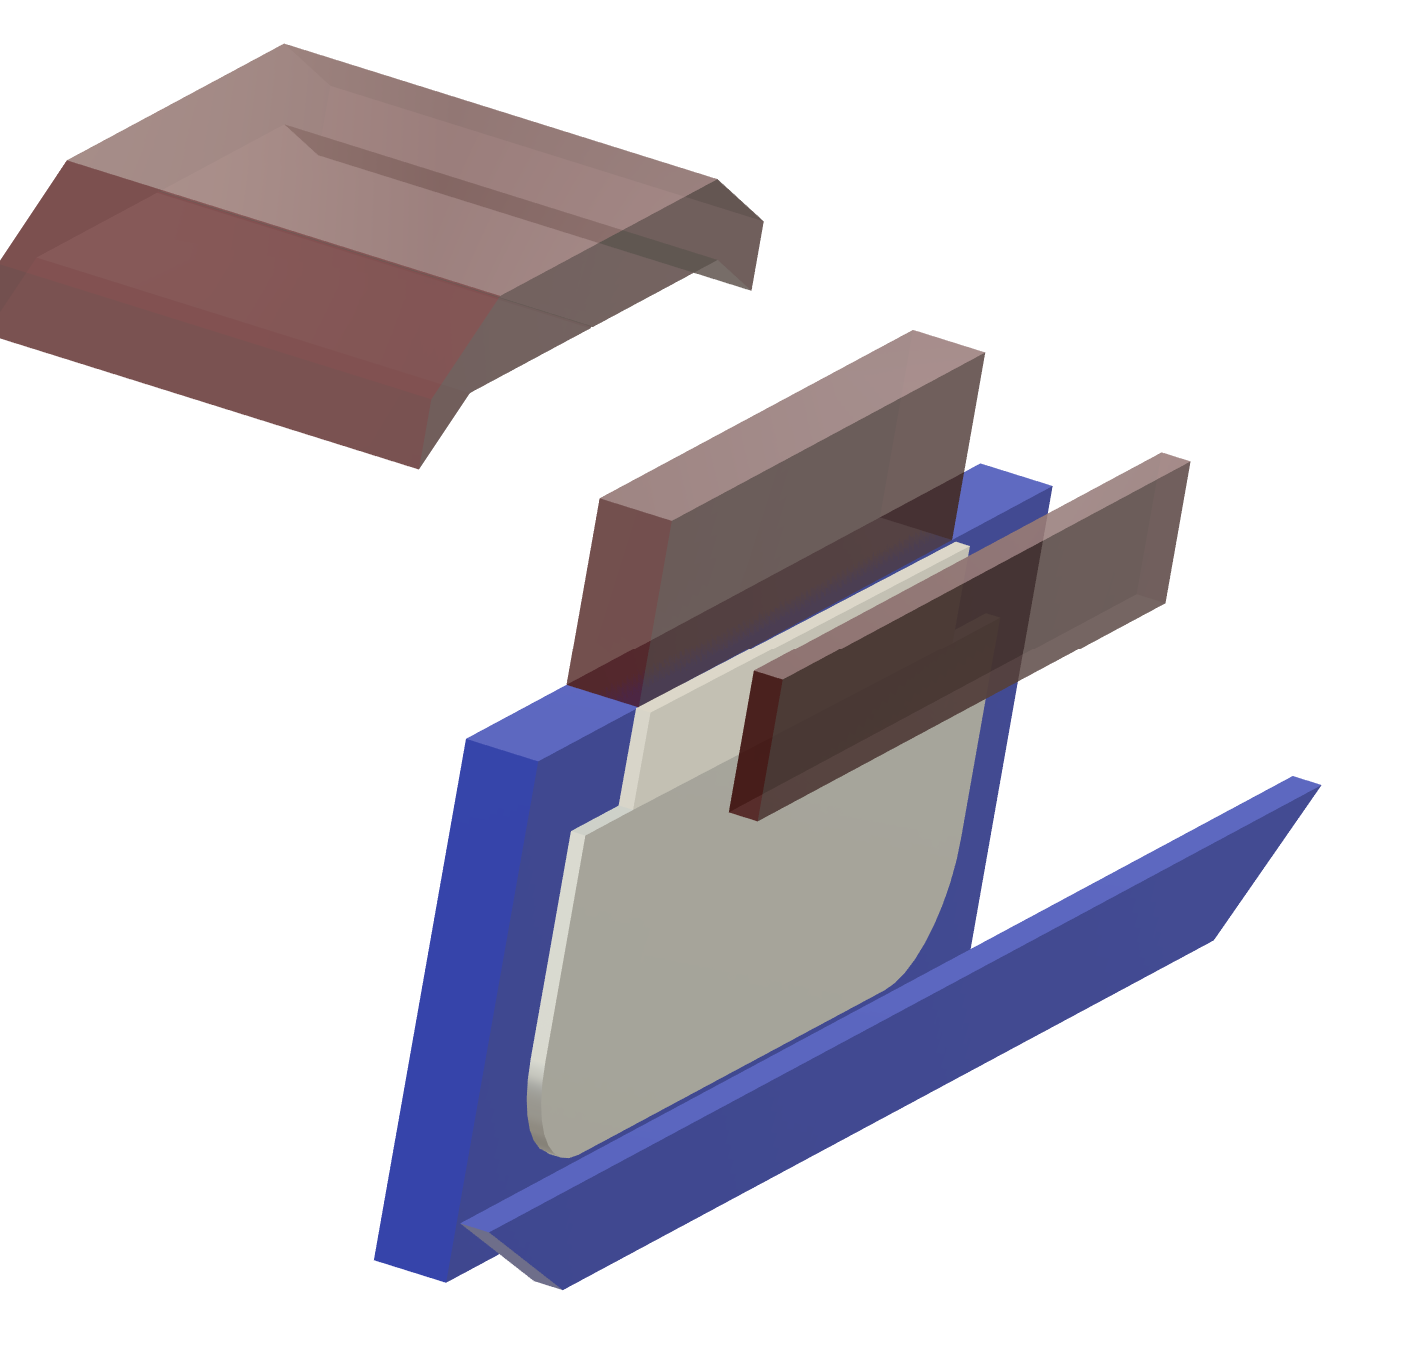
Radiator situation I've got the Mark X radiator in there currently, and although it made everything nice in a lot of ways in the back of my brain I know it's just not going to work quite right. As the top pipe sits too high. You can see it sits a little higher than the top crossmember too, and this isnt on any mounts yet. Just sitting hard against the bottom. The motor's radiator cap (in blue) sits a little lower than the radiator, and the top hose to the radiator flows uphill towards the radiator. All bad news for ever trying to bleed the air out of this thing. Another issue is that I'd love to have a front facing intake airbox that goes through to the front grill, like a lot of the BTCC type cars have. The best option I've found for a low, wide, twin core radiator that doesnt have a radiator cap (and does have an air bleed) is from an SW20 MR2. Being so much shorter, I can dedicate all of the front grill area for the intake. And they're a common upgrade item for MR2s, so cheap and plentiful. The radiator is 5mm wider than my chassis rails, but the end tanks are alloy and on the sides. So will just need a little slice and reweld to fit at the bottom. If I dedicate the top grill to doort noises, then I dont have a huge amount of frontal area for the radiator coming in from just underneath the bumper. Possibly need to remove the bonnet catch as well, but I'd prefer to keep it over having bonnet pins or whatever. This is a rough approximation of how much space I've got for each thing Red is intake stuff, blue radiator stuff, white is the open area that the radiator can get air through. So a lot of the radiator area will be fairly useless if hard mounted against the front of the car, as it wont get any air flow. so I'll try mount it as far back as I can towards the engine. All of this stuff is a bit off topic to my path towards getting the engine fired up, but I've been working on that too. Last night cut the fuel rails a bit shorter, so there's more room at the back. for the fuel dampers without hitting the body. Then also had the underside of the rails milled down so the throttle linkages dont hit the rail anymore. So that's just about all finished once I've retapped the ends and remade the AN lines to suit.
- 75 replies
-
- 26
-
-
-
Recently Dad's car broke the rear door handle, and no inside button. But it turns out he could log in with a canbus scan tool to pop it open.
-
TL;DR: Using a table to look up circle coordinates instead of maths
-
Welcome to Roman Dave's guide to drawing a circle on a screen when you are mathematically smooth brained Surely drawing a circle has to be one of the most common and easy things, so there would be heaps of libraries for it? Yeah there are, but they all use radians which makes absolutely no sense to me. So instead of figuring out why radians are good I'm going to brute force my way through the problem by not understanding anything. My LED screen has a resolution of 128x64. So If I want to draw some circles on it, or having a sweeping needle on a gauge that is circular, or, whatever. The answer is something to do with Cosine or whatever calculation right? YEAH PROBABLY. Instead you can draw a circle in Mspaint that is 64 pixels tall, then count all of the pixels around the perimeter. So thats the maximum possible number of visible divisions that my circle can have. Works out to be something like 3.something degrees per division. So I make a lookup table with 45 values in it (2 degree increments) then draw a quarter of a circle in fusion 360 and measure the X and Y coordinates as I rotate the line in 2 degree increments. It turns out that the X axis values are the same as the Y axis values, just starting from the other end. So I can have a lookup table with only 45 values in it to describe any point in the circle's X and Y coordinates to 2 degrees accuracy" (Flipping X or Y values depending on which quarter of the circle it needs to be) //X value = circleLUT [degrees/2] //Y value = circleLUT [46-degrees/2] int circleLUT[46] = {0,17,35,52,70,87,104,121,138,155,171,187,203,219,235,250,264,280,293,308,321,334,347,360,372,383,394,405,415,424,433,442,449,457,463,469,476,481,485,489,492,495,497,499,499,500};
-
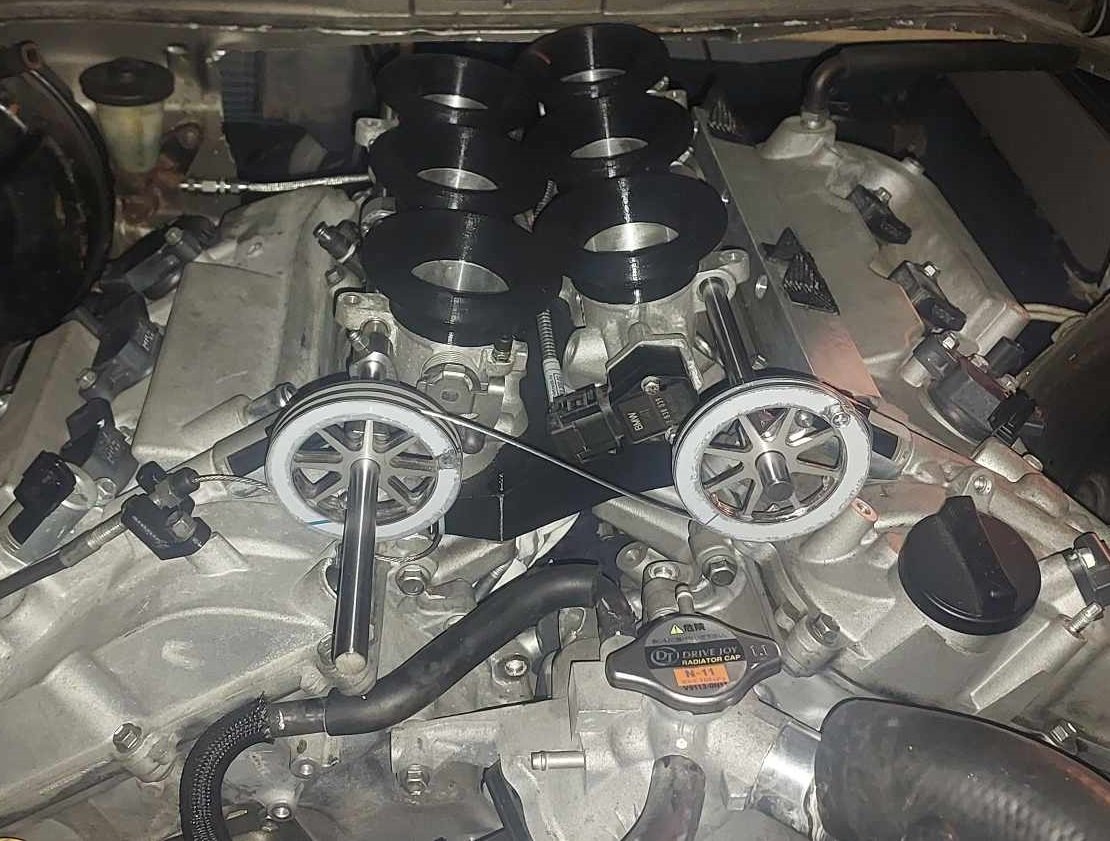
I will use those little slide on linkages that came with the throttles and will weld them to back of the pulleys. Then have some ability to set the angle when tightening it. I can also shorten or lengthen the cable. As one end can be unscrewed and moved. Then if it turns out i still need more fine adjustment. I will add a small tensioner wheel to the cable part way between, that can adjust to effectively tighten the cable.
-
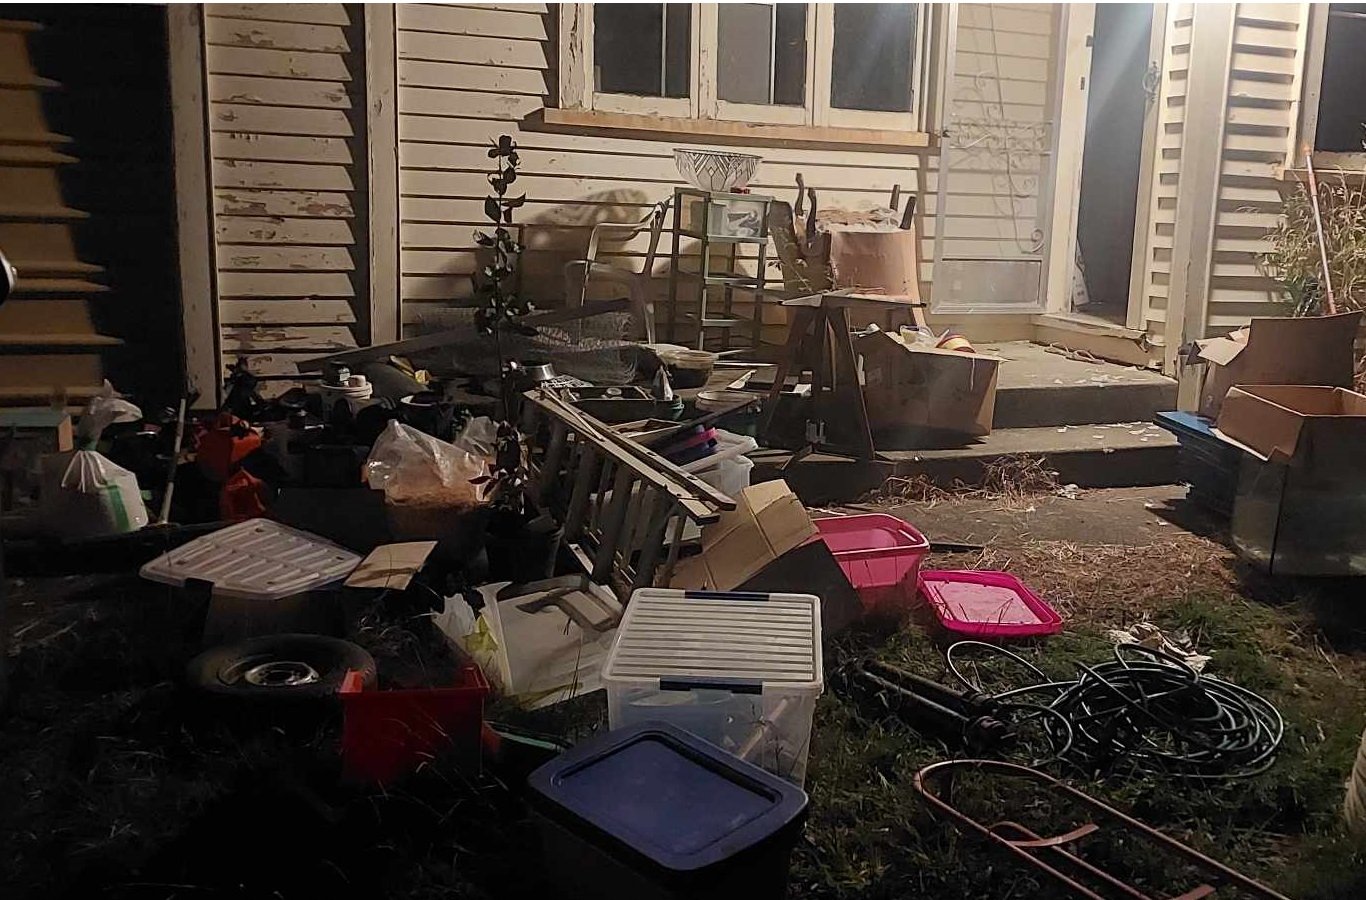
Alright so as of yesterday I'm finally out of mortgage prison! I finished moving house with heaps of time to spare, I definitely wasnt biffing trailer loads of stuff onto the lawn the night before settlement. I got some throttle pulleys cut from stainless. I'll put a radius on the inside of the pulley edges and deburr a few spots, but on the whole they came out really nicely. Quite heavy though, probably could have made some parts thinner. (Everything 2mm stainless) It's looking like it'll be fiddlier than expected to balance the cable length and pulley positions to get the banks even. One thing that I didnt take into account is that there is no tolerance for having a cable that is "overlength" as you physically cant slide the protruding end of the cable into the pulley. However I could probably chop out the relevant section of the pulley to allow this without any issues, as these are still significantly beefier than they need to be. I need to make some end stops of some sort to stop the throttle rails moving forward or backwards so everything stays aligned correctly. You may notice that in this photo I've got the linking cable on the wrong way up. It looks dumb having these on the front of the motor, but down the back is getting very crowded and I've got ants in my pants to get this damn thing fired up. I got the throttle rails drilled, took about 3 hours to drill 6 holes! We had to grind flats onto the rod to get through the hardening. Otherwise carbide bits didnt even make a dent. Next jobs are to print a final iteration of the manifold from Nylon, get fuel lines connected up, and keep working on the exhaust. Then I'm preeeeety close to firing it up!
- 75 replies
-
- 51
-
-

-
-
100% keen to come do some back breaking labor on some old timey machines in an illegal gold mine
-
Also just about every single microchip or processor or whatever in the world comes from Taiwan. China doesn't want to take it over so they can have cheap coilovers Also to be faaiiirrrrrr @kpr has used MaxSpeedings... Rods. in his projects with success. Rods yes, coilovers no.
-
True, interesting. This will probably be because theres the same amount of air as before but more of the space being taken up by methanol. So boost goes up. As you run it at a 4:1 ratio or whatever. (petrol 14.7:1 stoich, meth 6:1) Maybe also some of the cooling effect of methanol if it was injected before the charger. As roots blower runs crazy hot. Either way, cant wait to see how this goes with a modern efi setup this time!
-
Oh wow, I never knew Tony used the setup after you sold the RX4. Must have been making some awesome power to run that fast! What happened to the motor, was it load on the front of the crank made things break or something?
-
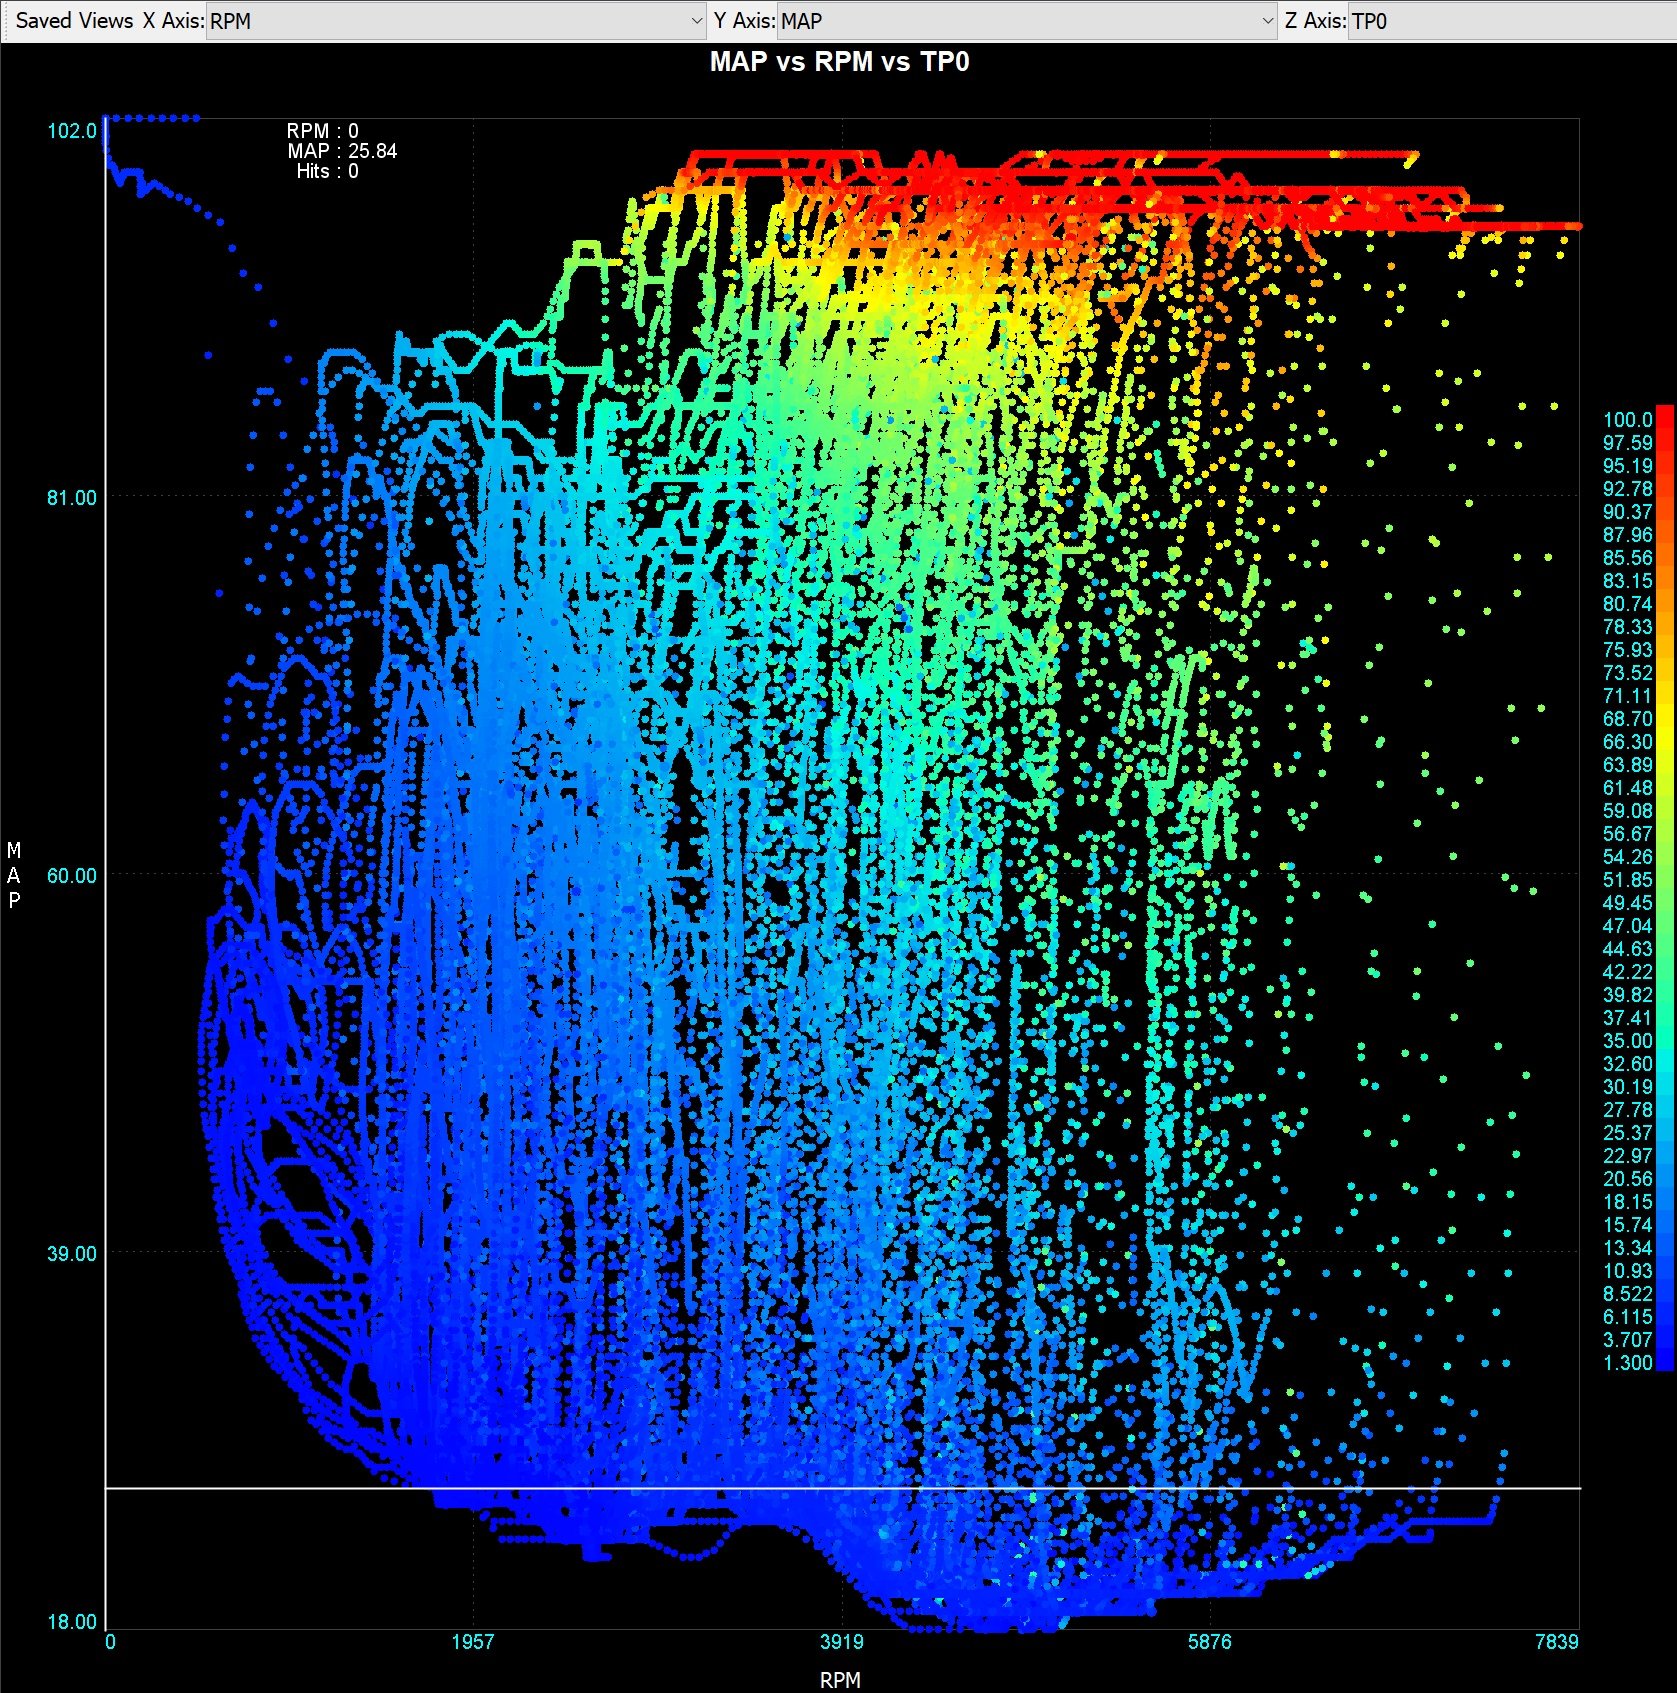
Hey @WORROY7 you should consider buying a copy of Megalog viewer HD. This way rather than viewing the results as a time plot, you can show it on an XY graph with different things as the axes which will give a clearer view of things. If you can export your log file as CSV or similar and send it to me I'll post you some graphs if you want. If an NA motor is doing low 90 KPA at full throttle then I'd be very seriously looking at why it's so choked up on the intake side. If it's more than say 3kpa below atmospheric pressure then it needs a better inlet. anyway, here's an XY plot of a beams 3SGE engine using a factory plenum with a MAP sensor connected.
-
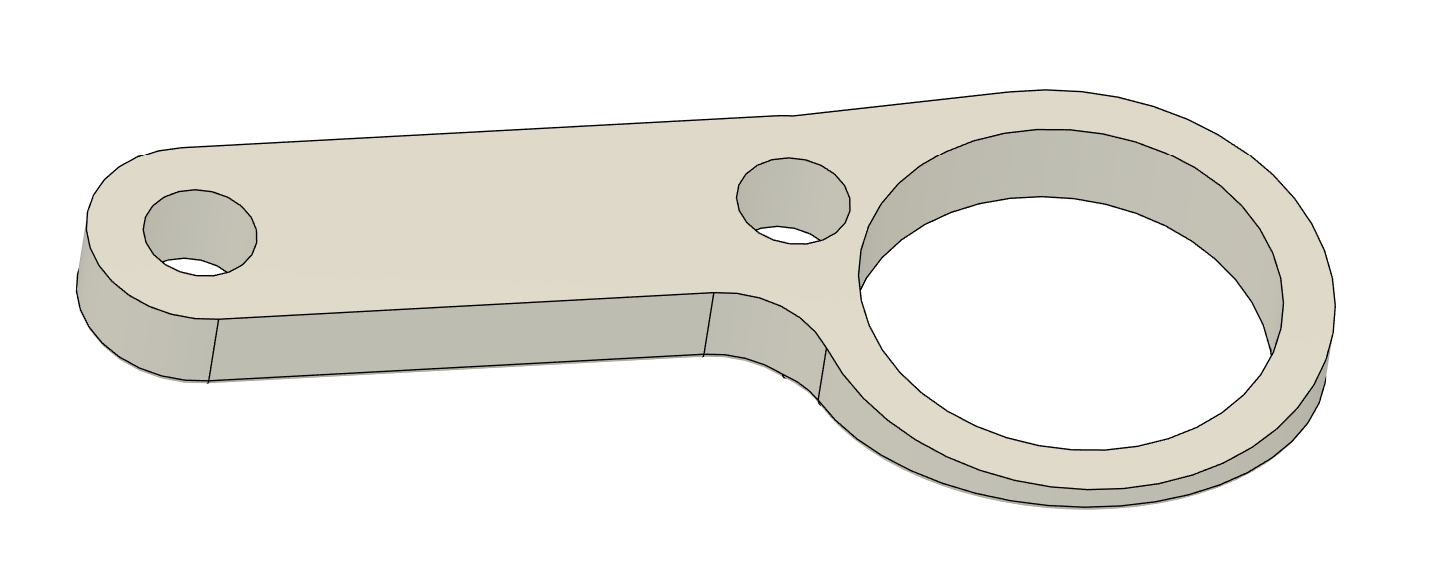
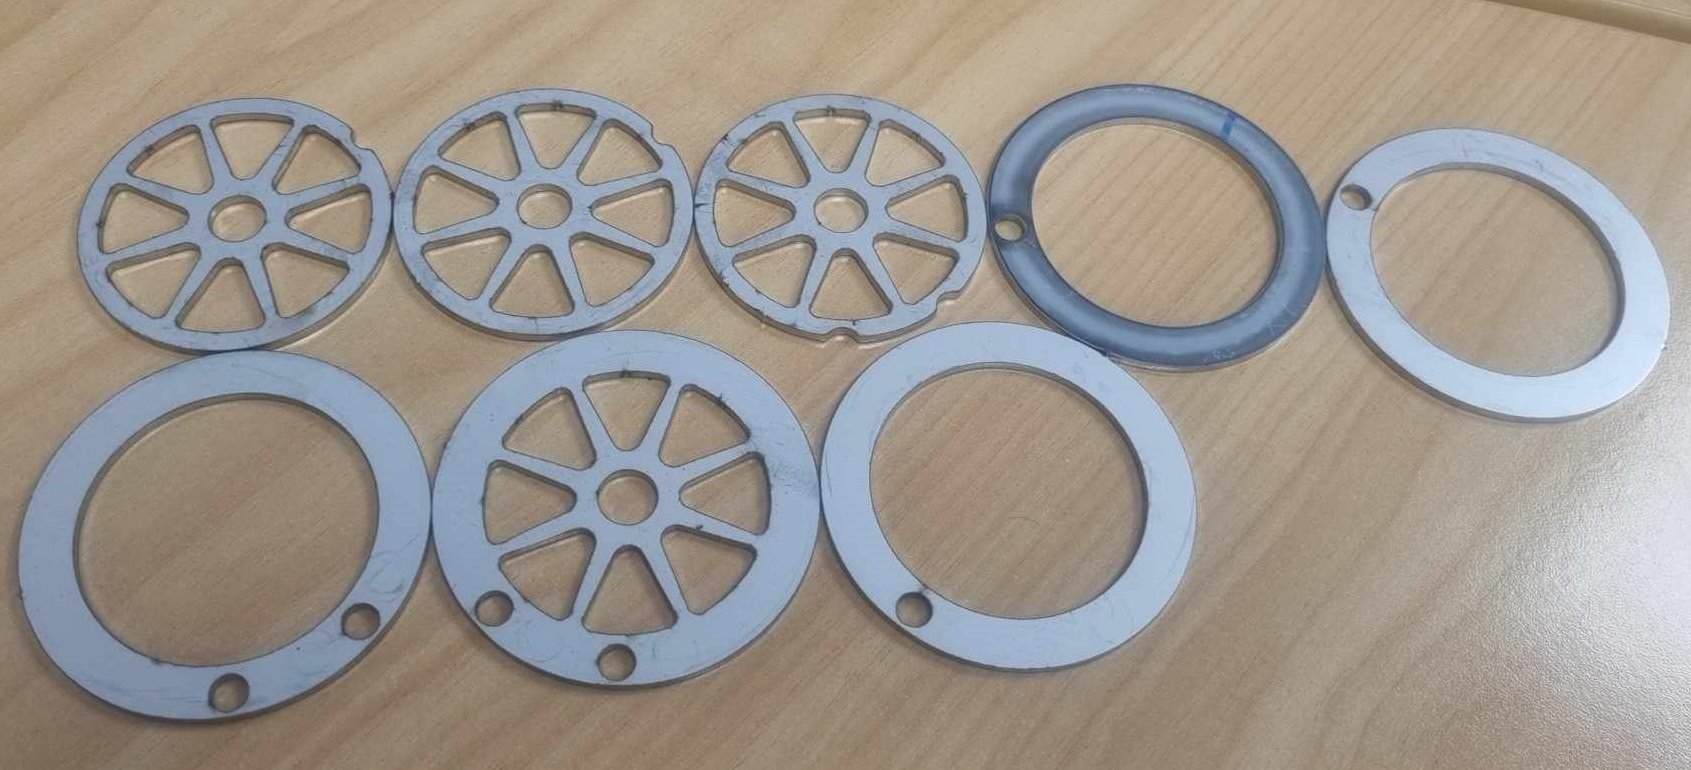
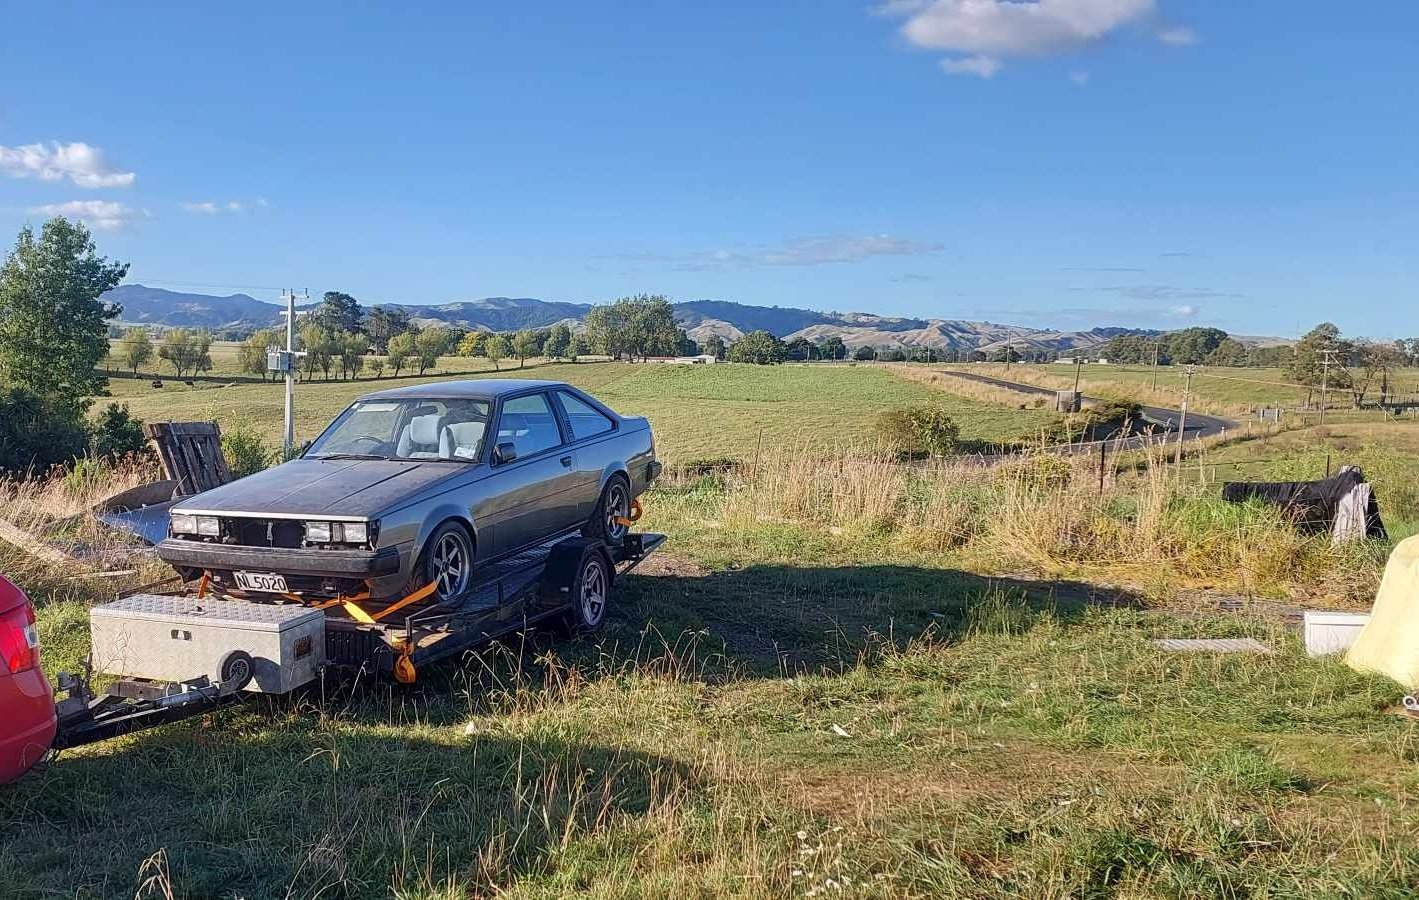
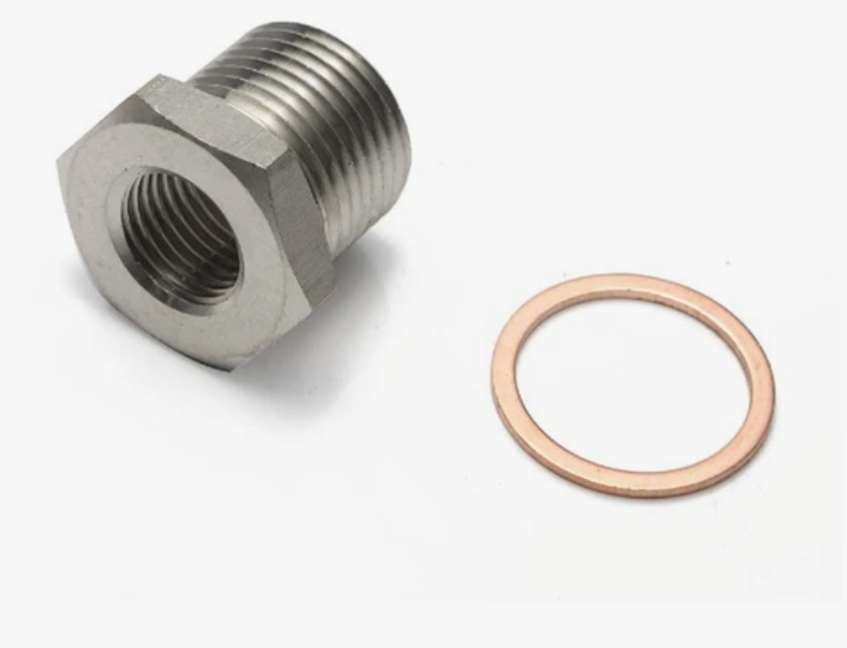
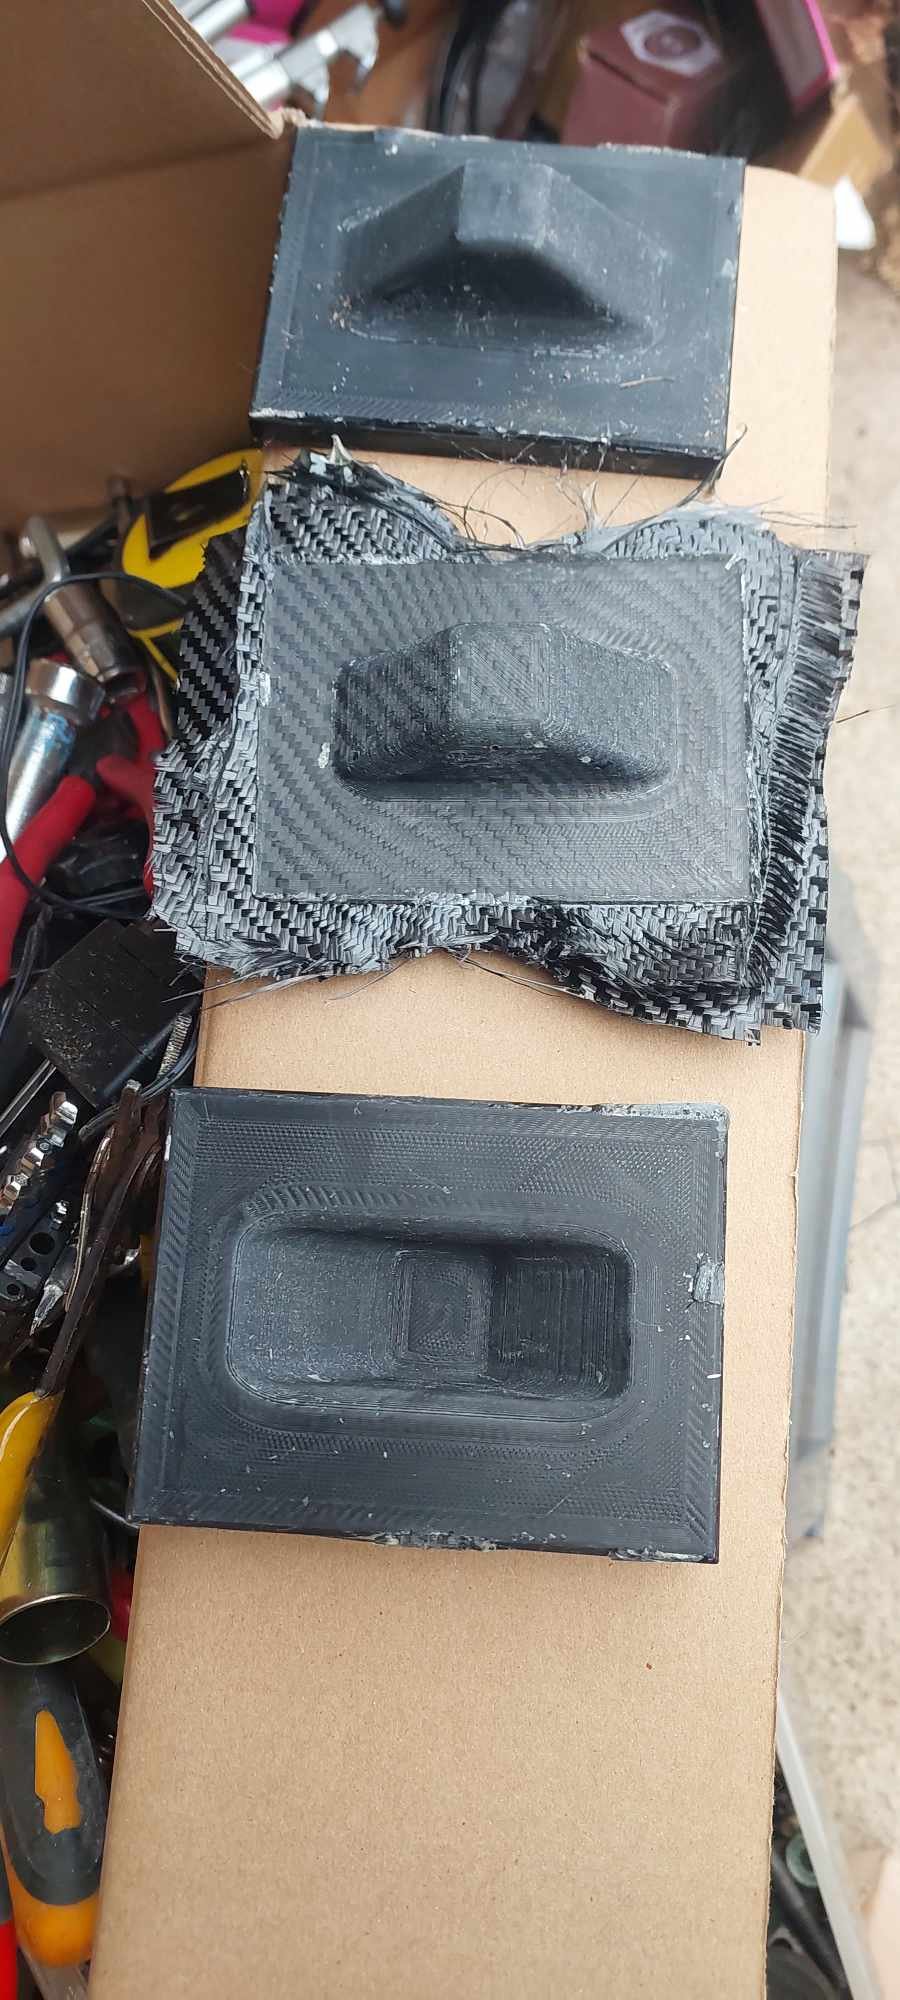
I finally got my car to my new home, rather than being an hour away. Sweet! I've only got a small single garage for now, but, thankfully it fits in better than I thought it would. Still a little bit of room around the sides. I'm stuck for progress on a few fronts until my old house sells, but at least I can keep chipping away at a few small things. So speaking of small jobs. My fuel rails needed some mounting brackets, and needed some threaded ends for the banjo bolts and pressure dampers. The problem is that I need an M12 thread for the Toyota fittings, but the rail has something around a 16.5mm hole. So I found an oxygen sensor adapter that has the right inside and outside threads to adapt this down. As it goes from M18 to M12. So problem solved without needing any welding. At the other end of the rails, it's just a straight M18 threaded fitting with no holes to blank them off. I will epoxy these in place so they dont rattle loose when the engine block is vibrating into the 5th dimension trying to do too many rpm. Then, fuel rails also need some brackets. So drew them up Printed them and test fit Then printed a compression mould with a 1.5mm gap, and a decent amount of draft angle on all sides this time. Turns out that 1.5mm is pretty good for 6 layers with this sheet I've got, everything just popped out awesomely! Managed to reuse it 3 times. (First time, didnt have enough layers in there) So these get cut in half to make 2 each. I've epoxied these to the fuel rail to hold it in the right position. Then once my fittings turn up, I will wrap the whole rail in carbon, draping over these so they are nice and secure. Which should also look a bit nicer than plain aluminum in the engine bay, seeing how they are visually prominent in the engine bay. Annnnnddddd thats it for now, but I can keep chipping away at some wiring tasks etc over coming weeks now that the car is home. Excellent.
- 75 replies
-
- 38
-
-