yoeddynz
-
Posts
17479 -
Joined
-
Last visited
-
Days Won
134
Everything posted by yoeddynz
-
going by the amount of time that the likes of Barry, Kendal and a fella in chch I have used (his name eludes me right now) have spent on various cert jobs I have done, plus the paper work, the training costs to get there and the fact they then have the responsibility on them, I don't actually think the costs are very much at all. The folk who grumble about the costs are probably the ones who did not follow the rule book or just ignored the certifiers suggestions and had to keep making changes because of stupid decisions on their own behalf. I'm just still fucking thankful we still have a way we can go about to legally build or modify our own cars because its always on the back of my mind that this will get scrapped by the dogooders one day. I have many of my own project plans I have yet to even draw up and am hoping for a happy future of making things.
-

Alex's budget off road tool box build- wheelybox 2000 finished!
yoeddynz replied to yoeddynz's topic in Other Projects
Cheers. I'll get some photos later- its very simple. -
Alex's budget off road tool box build- wheelybox 2000 finished!
yoeddynz replied to yoeddynz's topic in Other Projects
Well I got back into this and finally finished building the box and have now filled it with tools. Very happy with the finished product. Continuing on from my first post I added a few more bits. First off was a lid that covered the stainless tray. This was 18mm plywood left over from the shed build. I hinged it off from one side and made a swing out support to hold it up when its opened. Then I build a lift up section along the back to hang spanners and screwdrivers off. I added a lid to this bit. I ripped down some bits of eucalypt timber left over from the coffee cart we recently built for a customer ( that's another thing I must put some pics up of because it was a cool project!) These bits of timber were then profiled into corner cappings. With them attached Hannah then oiled it all and varnished the flip back lid. I made some handles. One main one for shifting it about the workshop and then a swing up one with more leverage that is for moving it offroad. I found a little handle we have had for yonks. Ideal for the lift up section... Finally a little box on the side for a few often used cans- wd40, spraygrease, zinc it black etc. I took no photos of all this because I was just absorbed with the build. Now complete I filled it with all the tools I use on car jobs etc. This was super fun because it meant I could shuffle loads of stuff about and off the walls. I could also move my old toolbox that took plenty of useful 'Flat six' sized space and put it under the bench. The bench area became a bomb site with stuff all over the place as I did a workshop bench spring clean. Got rid of lots of crap and re-organised a load of stuff into new trays I'd bought from Bunnings. This satisfies me no end. Anyway- back to the toolbox. Which now has a very catchy name. The 'Wheelybox 2000' pics. Closed up and ready to move... and opened up (a pic sort of like a toolbox equivalent of 80's Lambo poster with all the doors/boot/engine covers open).. In action... on the move.. detail shots... ( should have done a narrow depth of field shot of the cans through an open window...) the tray.. and for your amusement - this is what happens when I do a spring clean... So happy with it. It going to be a bloody useful asset to the business and save a lot of walking back and forth to the bench, especially when doing jobs on cars, trucks and tractors etc outside. Should have done it ages ago! My next plans for the bench area are to paint the plywood walls a bright colour and probably add a window over the bench - especially as we have chopped down loads of trees and we would now be able to watch the sunset through it as I tinker with Goldwing engines. I'll update the bushblock thread with that sort of workshop tinkering though. Better get back onto the Micras and the Imp 911 first eh....- 11 replies
-
- 25
-

-

-
@cletus What are the chances that one could build something like this and make it road legal in NZ.... If the builder were to do all the obvious cert things like the suspension arms are crack tested, bump steer is dialled out etc etc
-
SR2’s 1947 Vauxhall “Rigamortice” Discussion thread.
yoeddynz replied to sr2's topic in Project Discussion
Yeah por15 is available here. -
A true kiwi tuner would pop that pin out and grind a flat on it with a Makita - for extra advance lumpy cam doort.
-
Nissan Micra k11 - Mandy goes to a new happy home.
yoeddynz replied to yoeddynz's topic in Other Projects
Yes it is. Its all totally gone to plan and I'm glad its not turned into just another fucking project.. -
Alex's budget off road tool box build- wheelybox 2000 finished!
yoeddynz replied to yoeddynz's topic in Other Projects
There is room below that last drawer for a battery etc... -
Yeah ditto having a pair of them if you can afford it. Mine are on a stand so I can wheel them around the workshop closer to the job which saves time if using them heaps.
-
Alex's budget off road tool box build- wheelybox 2000 finished!
yoeddynz replied to yoeddynz's topic in Other Projects
Haha- I could make a train! Ones enough for now though cheers. I'm already doing a decent enough job at not doing required work on the imp project! -
Alex's budget off road tool box build- wheelybox 2000 finished!
yoeddynz replied to yoeddynz's topic in Other Projects
Fuck it looks like that stingrays lucky day. Could have been worse! Yeah I really should do something eh. There is the remaining locking bits on the back of the drawers but the rest of the mech wasn't there so I will have to see if I can make something that uses them. Failing that I could just have a couple of loops/rings, one top and one bottom and drop a length of wooden dowl down through them. Or even just a rubber strap or bungy cord. -
Nissan Micra k11 - Mandy goes to a new happy home.
yoeddynz replied to yoeddynz's topic in Other Projects
Minky is now under the knife. She's on the hoist and Hannah is taking her heart out. While up in the air I took the chance to snap some photos of her undercarrige. This is the first time we've actually put her on the hoist and looked underneath. WOW! She's sooo tidy and in such fantastic condition! Even the exhaust looks almost new... Here's the lowering springs. I have no idea what make they are but they are red so they must be fast... While Hannah was draining the autobox oil out.... I spotted a very exciting thing... Most JDM Marches normally have a daft arrangement where the fixed part of the caliper is cast into the strut bottom which means you can't swap in bigger/better calipers and appropriately sized bigger discs. The front brakes on this car are different to our other two cars (those two being PFL Marches) This car has front sliding calipers that mount to the struts in the usual fashion, like most cars, with two bolts. This is also the same setup that European K11 Micra have. This is fantastic news! The one thing that lets a hard driven march down is the brakes which are a bit lacking, especially on long descents like Takaka 'race' hill. I cooked the brakes on both our pfls down there. But with the Euro spec front brakes we can swap in the larger discs and calipers from a Sentra/Primera/'insert some common as muck nissan here' So yeah- happy about that !- 205 replies
-
- 14
-
-
For ages I have wanted a small tool bench with decent wheels I could wheel across our rocky yard for working on cars/trucks/tractors outside. Its always been on the back of my mind to build but I never got around to it. Earlier this year a retired friend gave us a load of old tools and workshop stuff including his old tool cabinet. It was pretty beat up and had tiny little wheels but the drawers work really well. So now I had a base to start with. NZ made. Guessing its 80's going by the font on the sticker. NZ made wheels too... I started with the build by hacking it apart... Luckily the drawers bit I wanted was self contained.. I had kept a section of old stainless steel bench top left over from some project I cant remember. It was missing one end but I had a plan and it was always going to be used for my ideal toolbox design.. I cleaned it all up, removed all the tar like glue that was on the underside and cut, bent and welded up the other end to match. I also welded up a drain hole it had.. I ripped down some eucalypt timber and cut it into an angle profile then used it to edge the stainless, now glued onto a sheet of ply. So with the top sorted I started on a frame. I needed some wheels and I had just the ticket. I have had these two wheels stashed away from when I did my apprenticeship back in the mid 90s. I was building a scooter that used a weedeater motor but never finished it. I had thrown away the rest but kept these new wheels. I still had the bearings they came with too. I machined the ends of some thick pipe to suit and made an axle... I bought some 100mm castor wheels with locks for the back from Mitre 10. Now a frame to mount them on. I rummaged through the steel rack and found suitable stuff to use... The drawers sit in place like such... I removed the handles and Hannah cleaned the drawers up so I could lob some paint at them.. Now I could start cladding it in plywood, using stuff left over from the mezzanine build. I had a pair of 500mm drawer runners from Bunnings left over from the kitchen build. Handy for a large drawer below the others.. Folded up a bit of sheet steel for the front... Made some stainless handles to match the others... And this is where I am up to so far... My next thing to sort out is the slide up section that all my spanners will go on. Then some handles, and finish the top cover that will be hinged so it can open out doubling the top area and exposing the stainless tray. We've already had some fun today going to Bunnings and Mitre10 selecting a few tools to add, the idea being I can almost clear the work bench area fully of car related tools. Itching to get back into finishing this now
- 11 replies
-
- 33
-
-
-
Zac's rotary redux project, because he has too much spare time.
yoeddynz replied to ProZac's topic in Other Projects
Far out. Such detail. I'm impressed. Thanks for sharing. I only want an fd even more now so I can tinker away on it like this. I think if I wrote in such detail about a k11 people would tune out quick? Those alloy pedals are lush! -
Nissan Micra k11 - Mandy goes to a new happy home.
yoeddynz replied to yoeddynz's topic in Other Projects
But yeah @Roman knows what's up. Then later on, when we've recovered enough, we'll swap the preface front end, with the spoiler etc across. But that involves painting and I don't get off on that. -
Nissan Micra k11 - Mandy goes to a new happy home.
yoeddynz replied to yoeddynz's topic in Other Projects
With camo paint and aluminum tread plate door cards. -
Nissan Micra k11 - Mandy goes to a new happy home.
yoeddynz replied to yoeddynz's topic in Other Projects
I really should do a white board drawing. Not just for the readers entertainment but in case I get lost. There are soon to be a whole lot of k11 parts, some in boxes, scattered all over the place. -
Nissan Micra k11 - Mandy goes to a new happy home.
yoeddynz replied to yoeddynz's topic in Other Projects
YUSS!!! Hooray. A 1.0 facelift runs on a pfl 1.3 ecu! Started fine and revved up fine. I won't drive it because I'm sure the fuel table is different enough that it would be out of the narrowband o2 sensors range of adjustment. So the only other main difference between the cars now is the brake system (oh.. Ignoring the lack of clutch pedal on minky) They both have abs and the pumps are pretty much the same. However the molly, with her flash racecar spec disc brake rear end, has a few pipework differences and a couple of what look like pressure reducing valves in line. Not sure exactly but once we have Minkys heart out I can check it out properly. I wouldnt be surprised if the master cylinder on molly is a larger bore to suit rear calipers too. Id post up a video of minky starting on a pfl 1.3 ecu but its probably more fun for you all to watch some paint dry so I'll keep that bit of excessive excitement to myself.. -
Nissan Micra k11 - Mandy goes to a new happy home.
yoeddynz replied to yoeddynz's topic in Other Projects
With a big job or of the way it's back into these little things. Minkys time to go under the knife and have her heart ripped out. But first... I have removed the brain box from Molly, who for those who can't remember (keep up - this is important stuff eh) is a PFL 1.3 manual. Then I removed Minky. A facelift 1.0 auto. If the brains are the same (allowing for different fuel tables) and Mollys brain will run Minkys engine, then this could potentially save a fair bit of loom swapping. So far so good. The plugs and pin count are the same... I wanted to test this out before we pull Minkys heart out. Tune in soon to see if the brain swap happens.
-
when you get near the end of the thread you'll find there's a fall out with some of the others and he moves the thread over to this new forum... https://brm-forum.org/thread/2/1972-mazda-rx2-doom-needful
-
Pics please. I remember you showing me photos of the stuff you machined up ages ago. Looked sweet!
- 66 replies
-
- 1
-
-
- noelex
- trailer sailor
- (and 7 more)
-
Your arse and beads go together like bread and butter....
- 798 replies
-
- 12
-

-

-
-
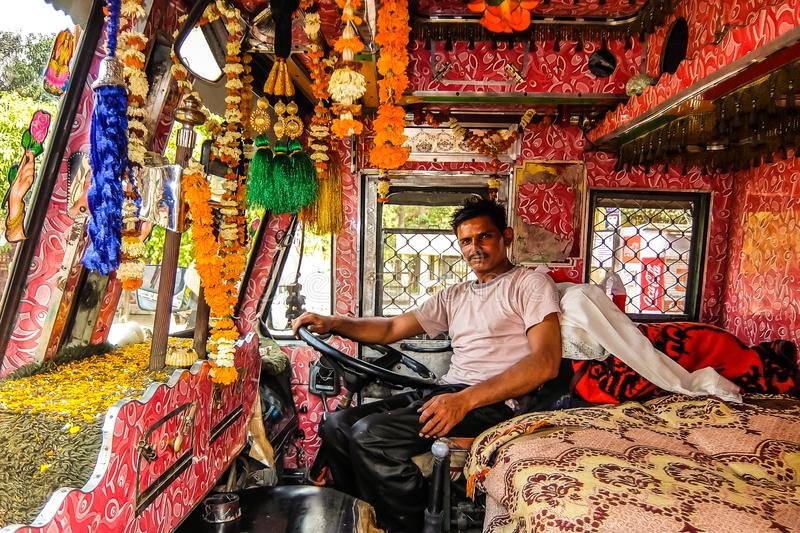
.....and before you know it you'll be the boss. HORN PLEASE!
- 798 replies
-
- 14
-
-
Don't stress. You could hide that fuck up with some of these...
- 798 replies
-
- 10
-
-
Dont be hard on yourself for you are supplying the worlds gardeners some of the finest wheelbarrows ever made. Be proud of that.