RXFORD
-
Posts
1,196 -
Joined
-
Last visited
-
Days Won
1
Content Type
Forums
Downloads
Events
Gallery
Everything posted by RXFORD
-
Prob depends how slammed you are and the size of rca compared to amount you are lowered. Not sure how bad the bumpsteer gets on those cars. Would be something cert man decides on at time of road test.
-
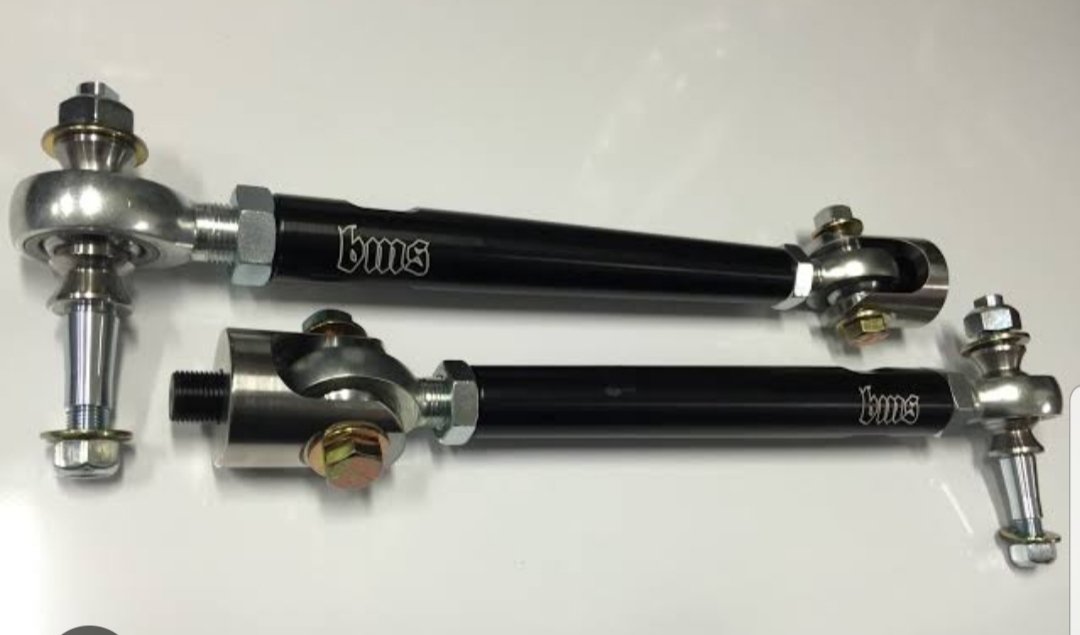
This kinda thing. Would need a mis-alignment spacer to stop it from binding throughout suspension travel. Have to check that it would actually help your situation by the time a mis-alignment spacer is fitted though.

-
If you want to get crazy, and you are certing it regardless, you could possibly replace the tie-rod end with a heim/rose joint. Either drill/ream the taper to be straight for a snug fitting bolt, or have a tapered adaptor machined to suit. But yeh, would need to discuss with cert man first, and its a bit of work.
-
Sounds like this...
-
Had this issue with my Gmc. Drop spindles and stock 15" rims cause clearance issues with tie-rod and lower balljoint. They like to peel off wheel weights. I found a smaller bodied tie-rod end which helped a little, but I also decided it was sensible/easier to have a few mm slip on spacer lasered to suit and be done with it. Don't bend knuckles, not worth the risk.
-

Help!: Pickup some wood trim - Flat Bush - AKL
RXFORD replied to Goat's topic in Upper North Island Region
Hey @cletus I owe @Goat a favour or 2, so I can handle this one. -
The carrier differences are to do with the pinion locations being slightly different, but other than that, I don't believe there are any other differences. The flange pattern to housing will be same, spline count will be same. Open vs Lsd sometimes have difference axles, you will need to measure the spline engagement. There are 2, maybe 3 different pinion flange bolt pattern aswell, so you will need to check that, or may be able to swap your orig flange onto the 4.8 pinion. Pm me some pics of the Calipers you have with a centre-centre measurment of the mounting bolts. I may have a cad file for those brackets.
-
Eww, cal brackets welded to cast/forged flanges.
-
I concur as Clint and Kpr said that its a 4pin Lsd. 5.29 carriers will also work with the 4.88 gearset, but those ratios are a bit harder to find. Its just a slightly different pinion location which is a bit dumb considering its still the same code and spline count. You could ask around on the offroad pages to see if anyone has a fucked 4.88 or above diff you could use the carrier from. I'm not sure what I have lying around, they are all buried in my container, but next time I'm in there I'l have a look.
-
You can set to 1.5° neg.
-
Ah yeh, I'm sceptical of that stuff. It looks more orangeish, which is more like straight copper. Cu/Ni is a bit more gold coloured. But if you have receipts for it, then hopefully itl be fine. I have been! Go work on your colouring book.
-
You say you got copper brake pipe... if its straight copper it won't pass cert. Needs to be copper/nickel ( also known as Cu/Ni or kunifer). Might pay to double check before you get into it. Or post a pic of the markings on it. Sweet project though!
-
Pics or it didn't happen
-
Is it a 'double D' type or just a flat section where the spline is for a pinch bolt to lock against? If its just a small flat section for pinch bolt it should be be fine as long as its machined in nicely and its not over done so the bolts sloppy or done with an angle grinder. Some have a radiused recess for the bolt instead of a flat. I have had PG Hydraulics's shorten/remake & respline shafts over the years with no cert issue. Is it an electric column?
-
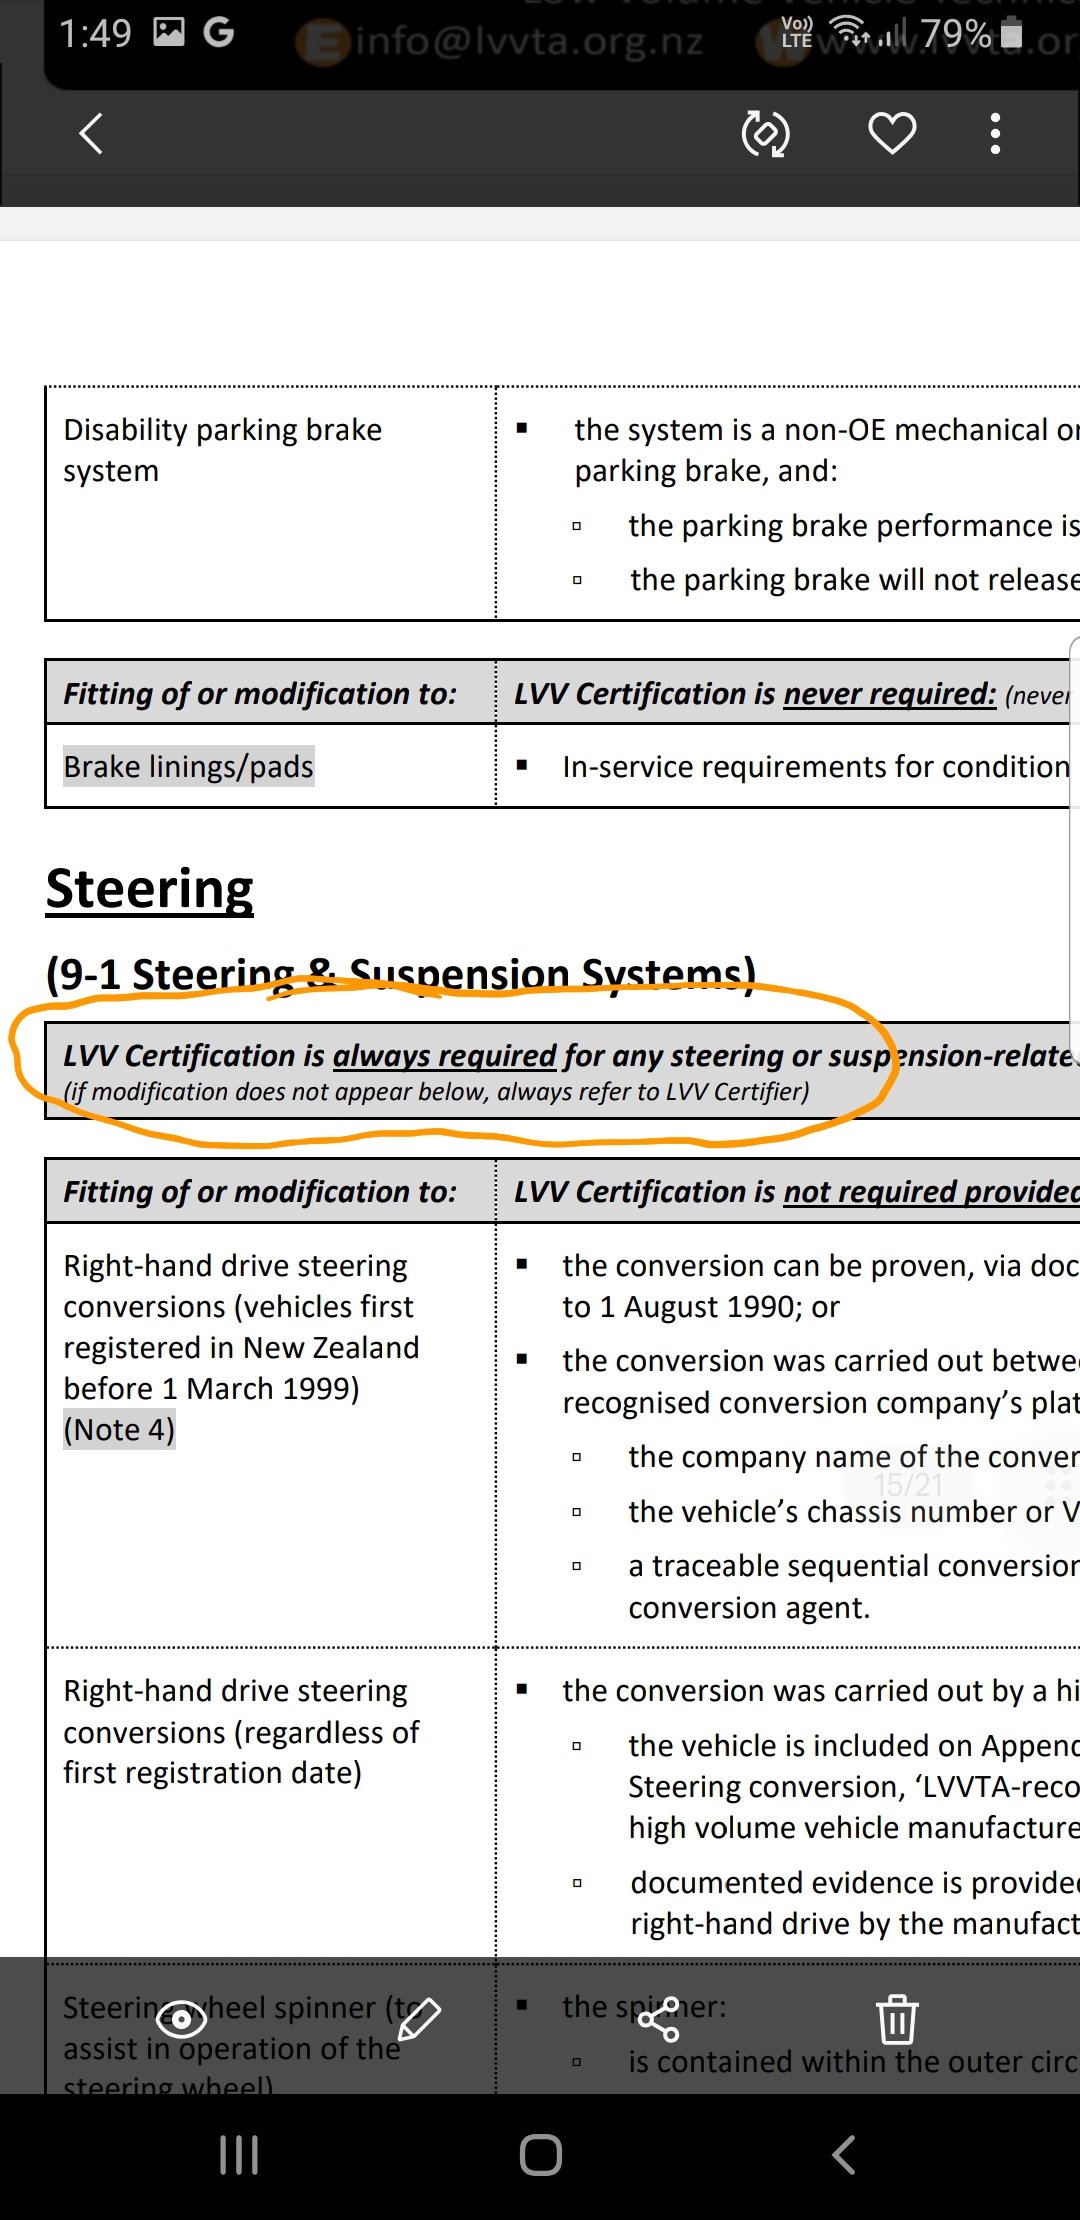
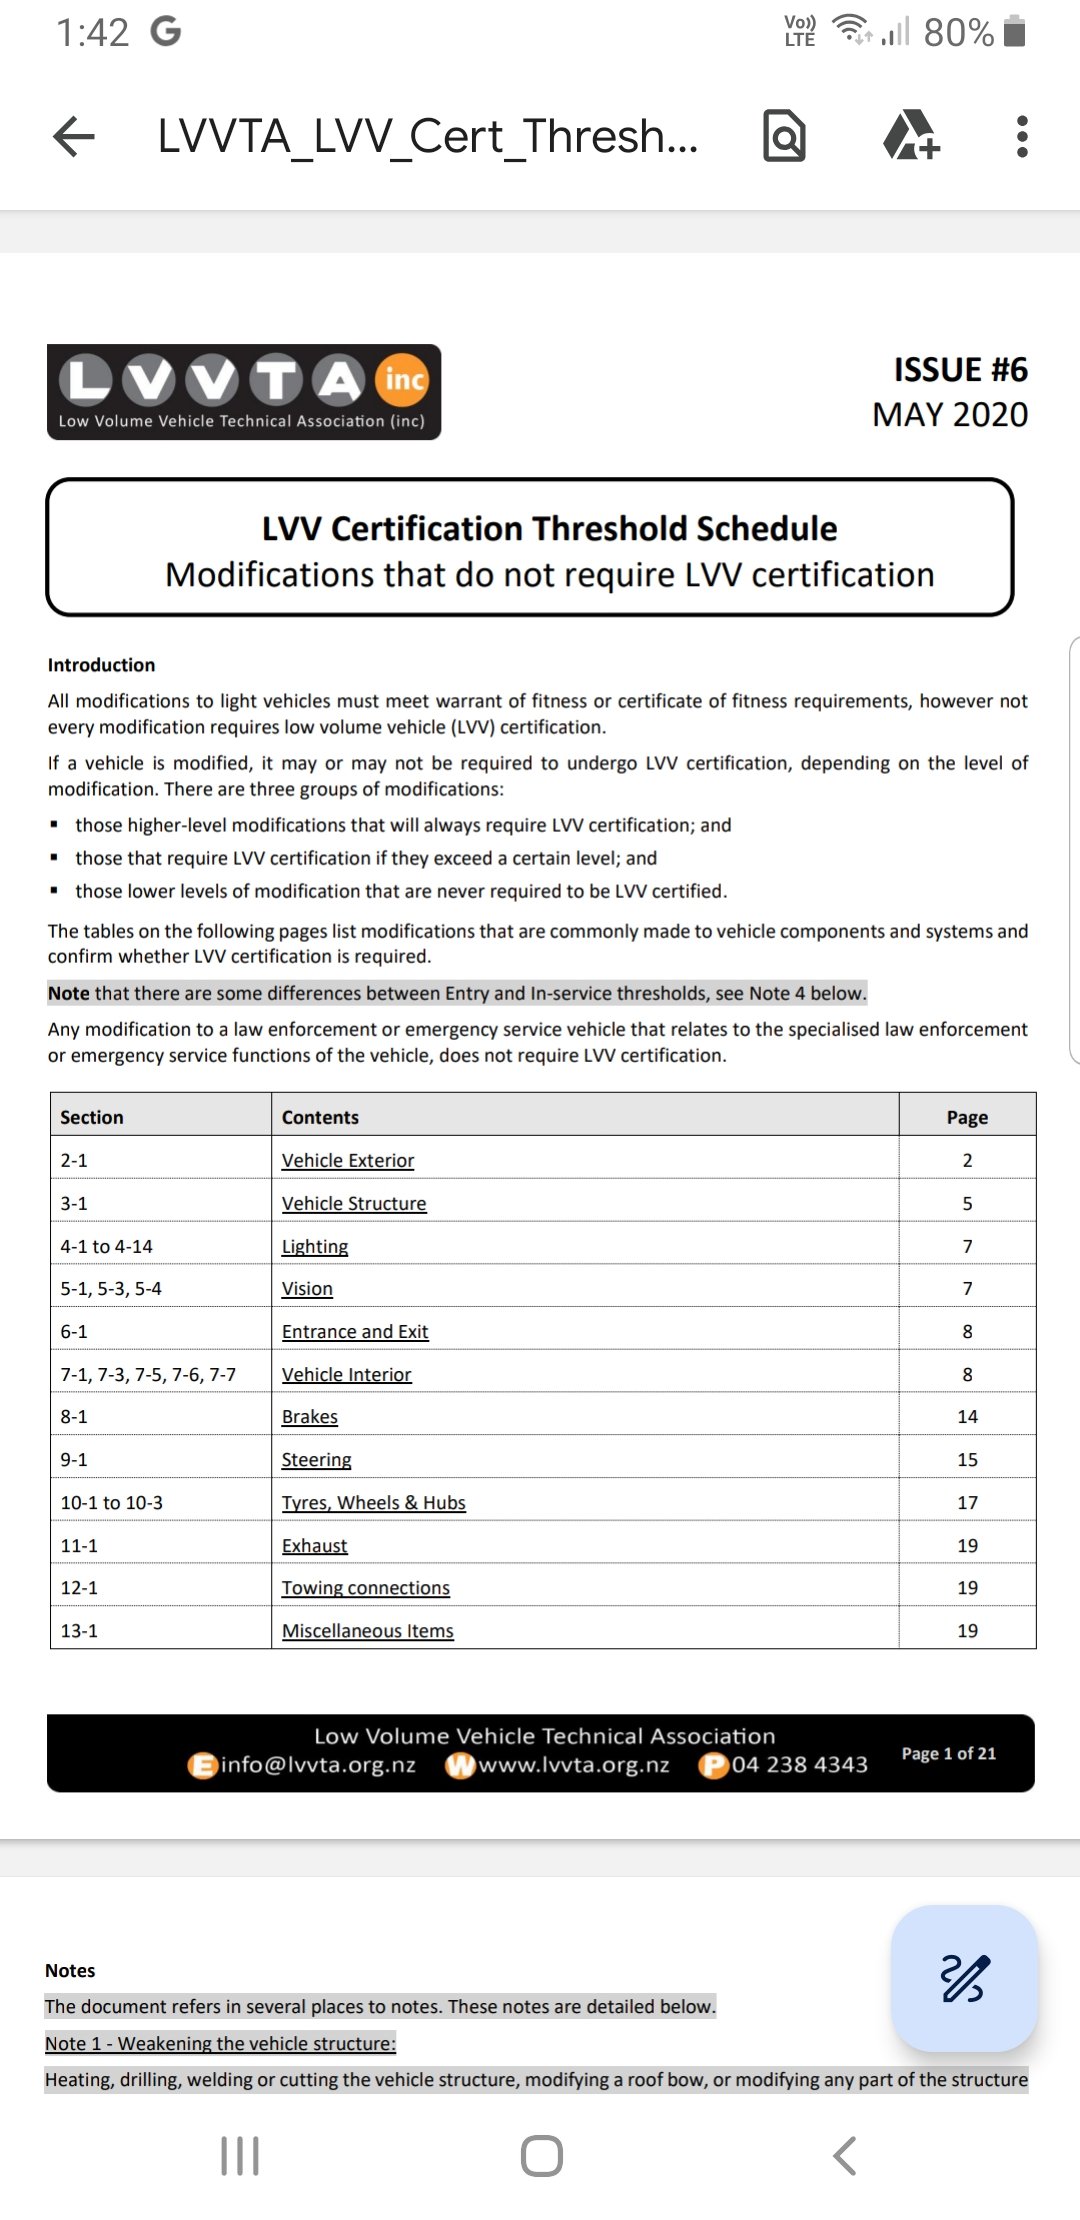
Screenshot from Virm and also from Lvv Thresholds Issue 6. Theres is very few things that don't require cert when it comes to modified steering systems, covered by Chapter7
-
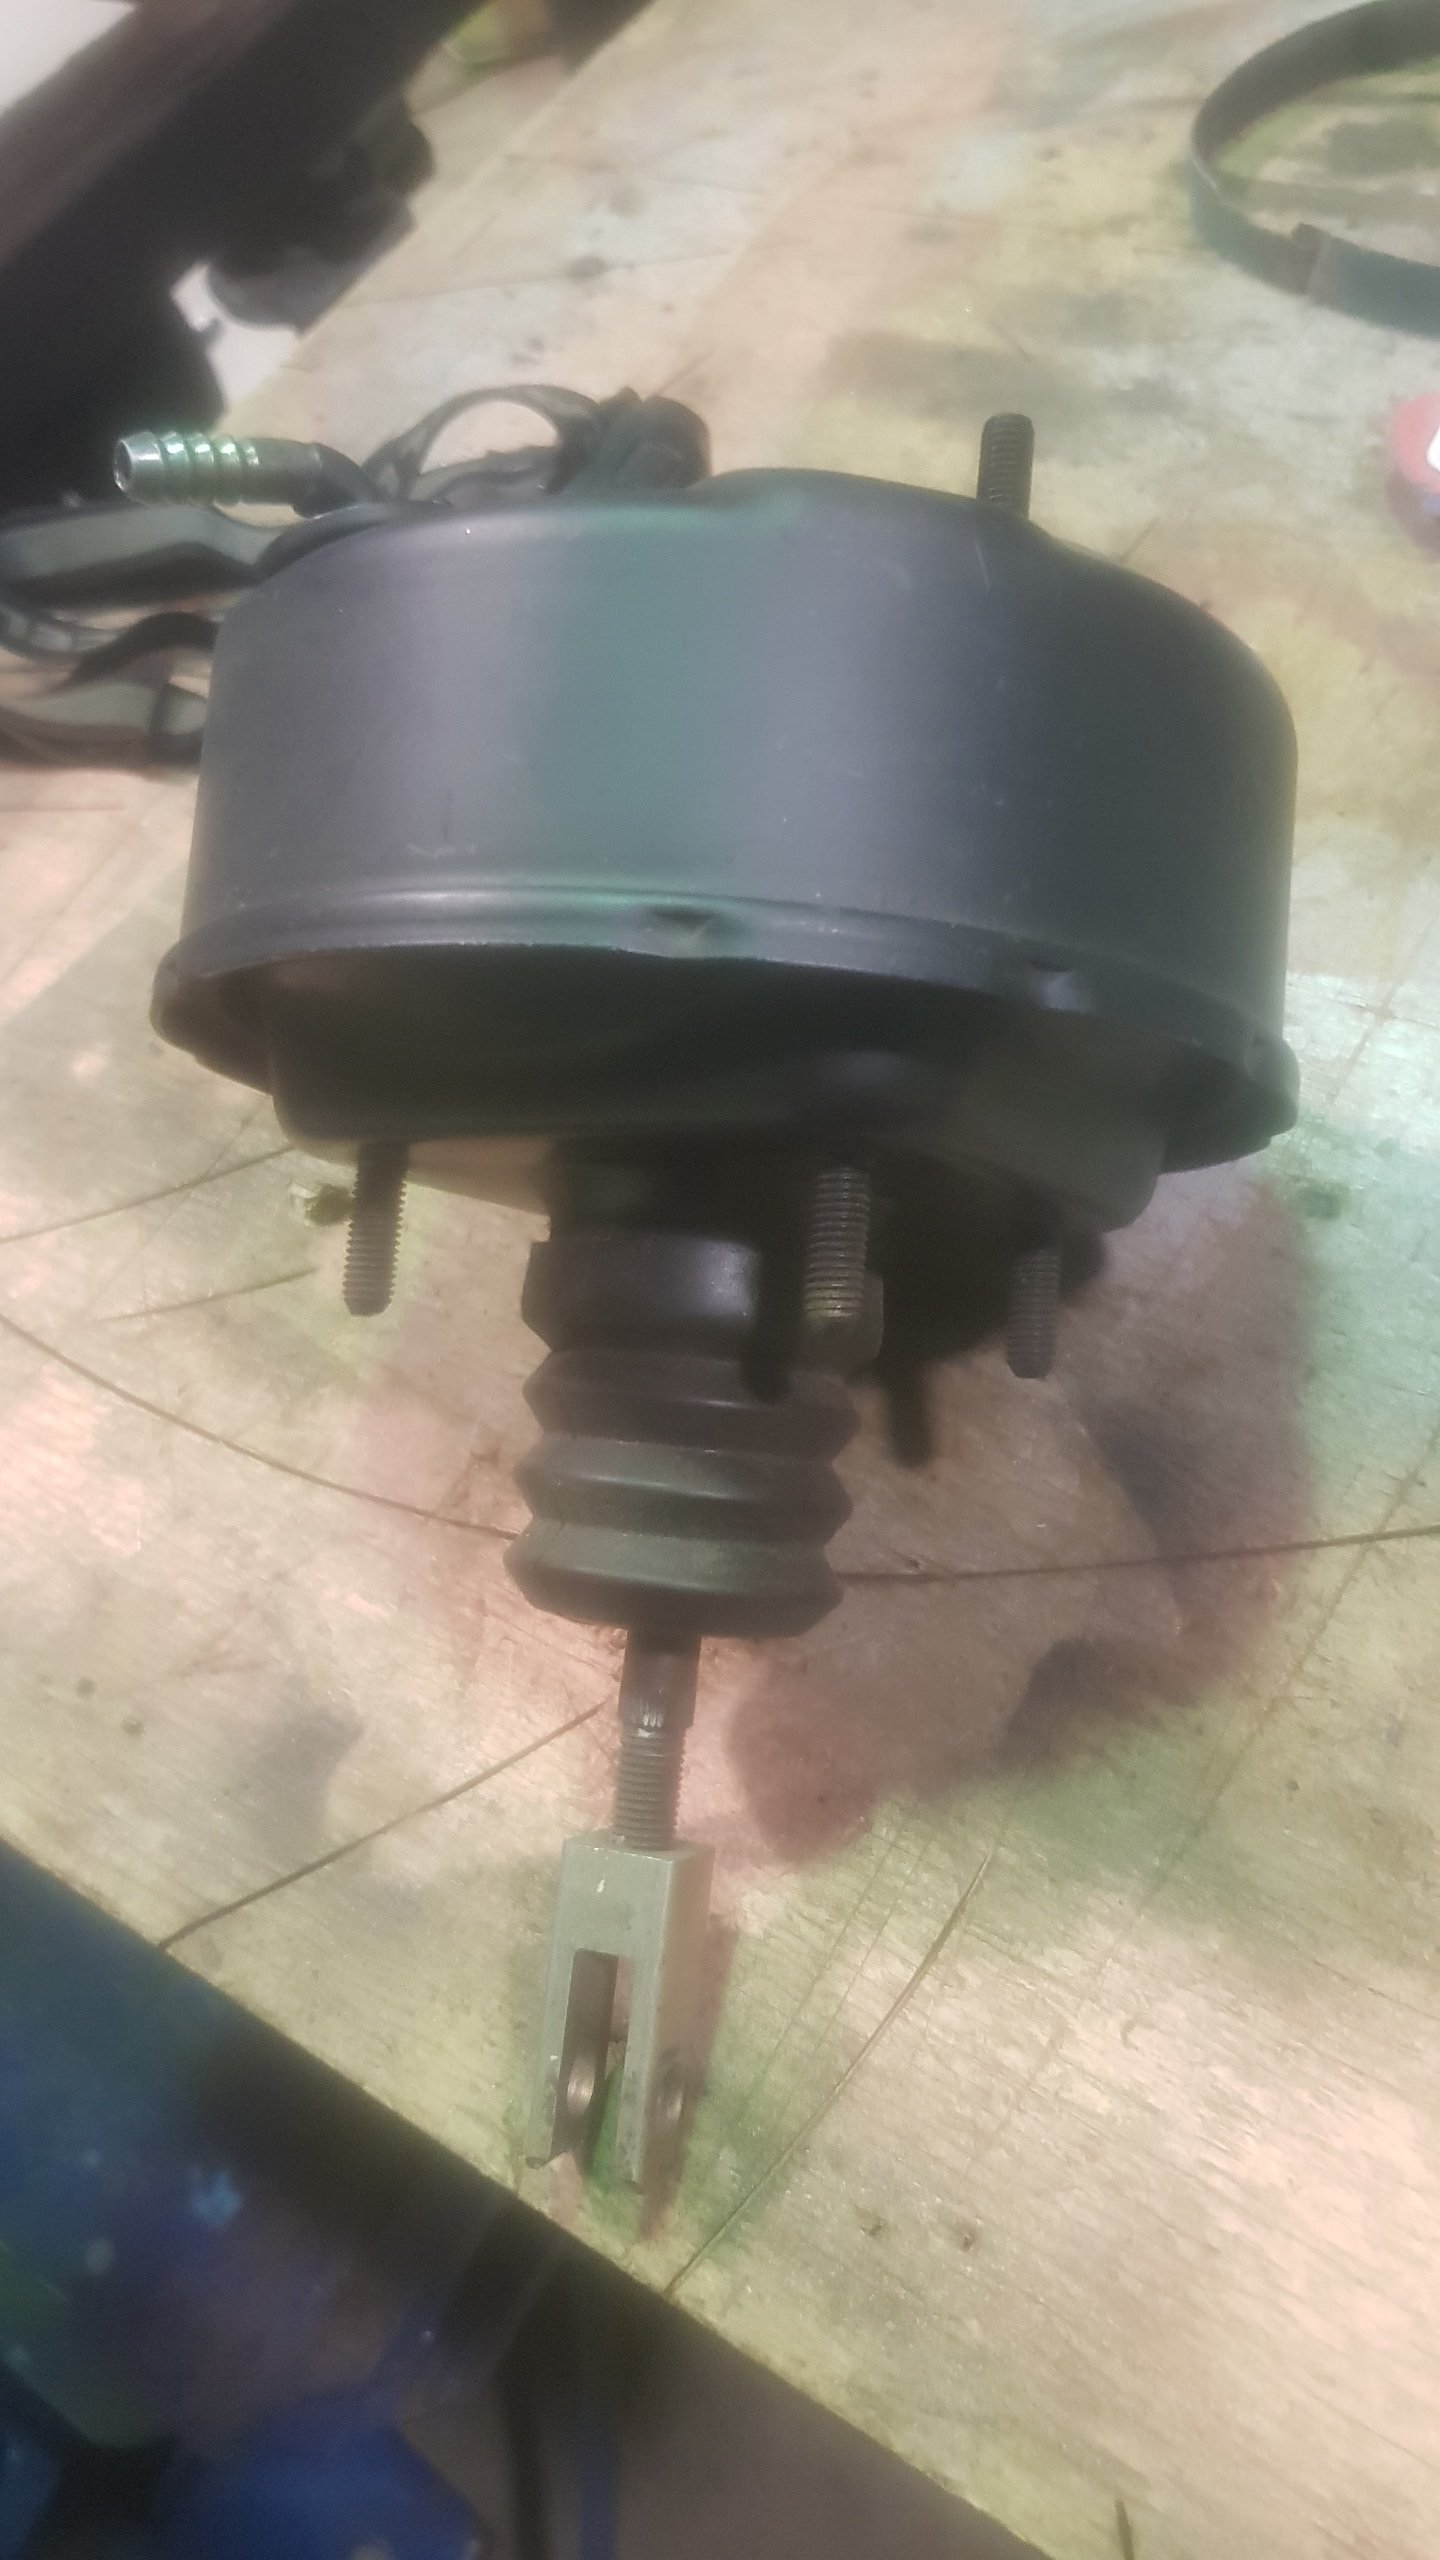
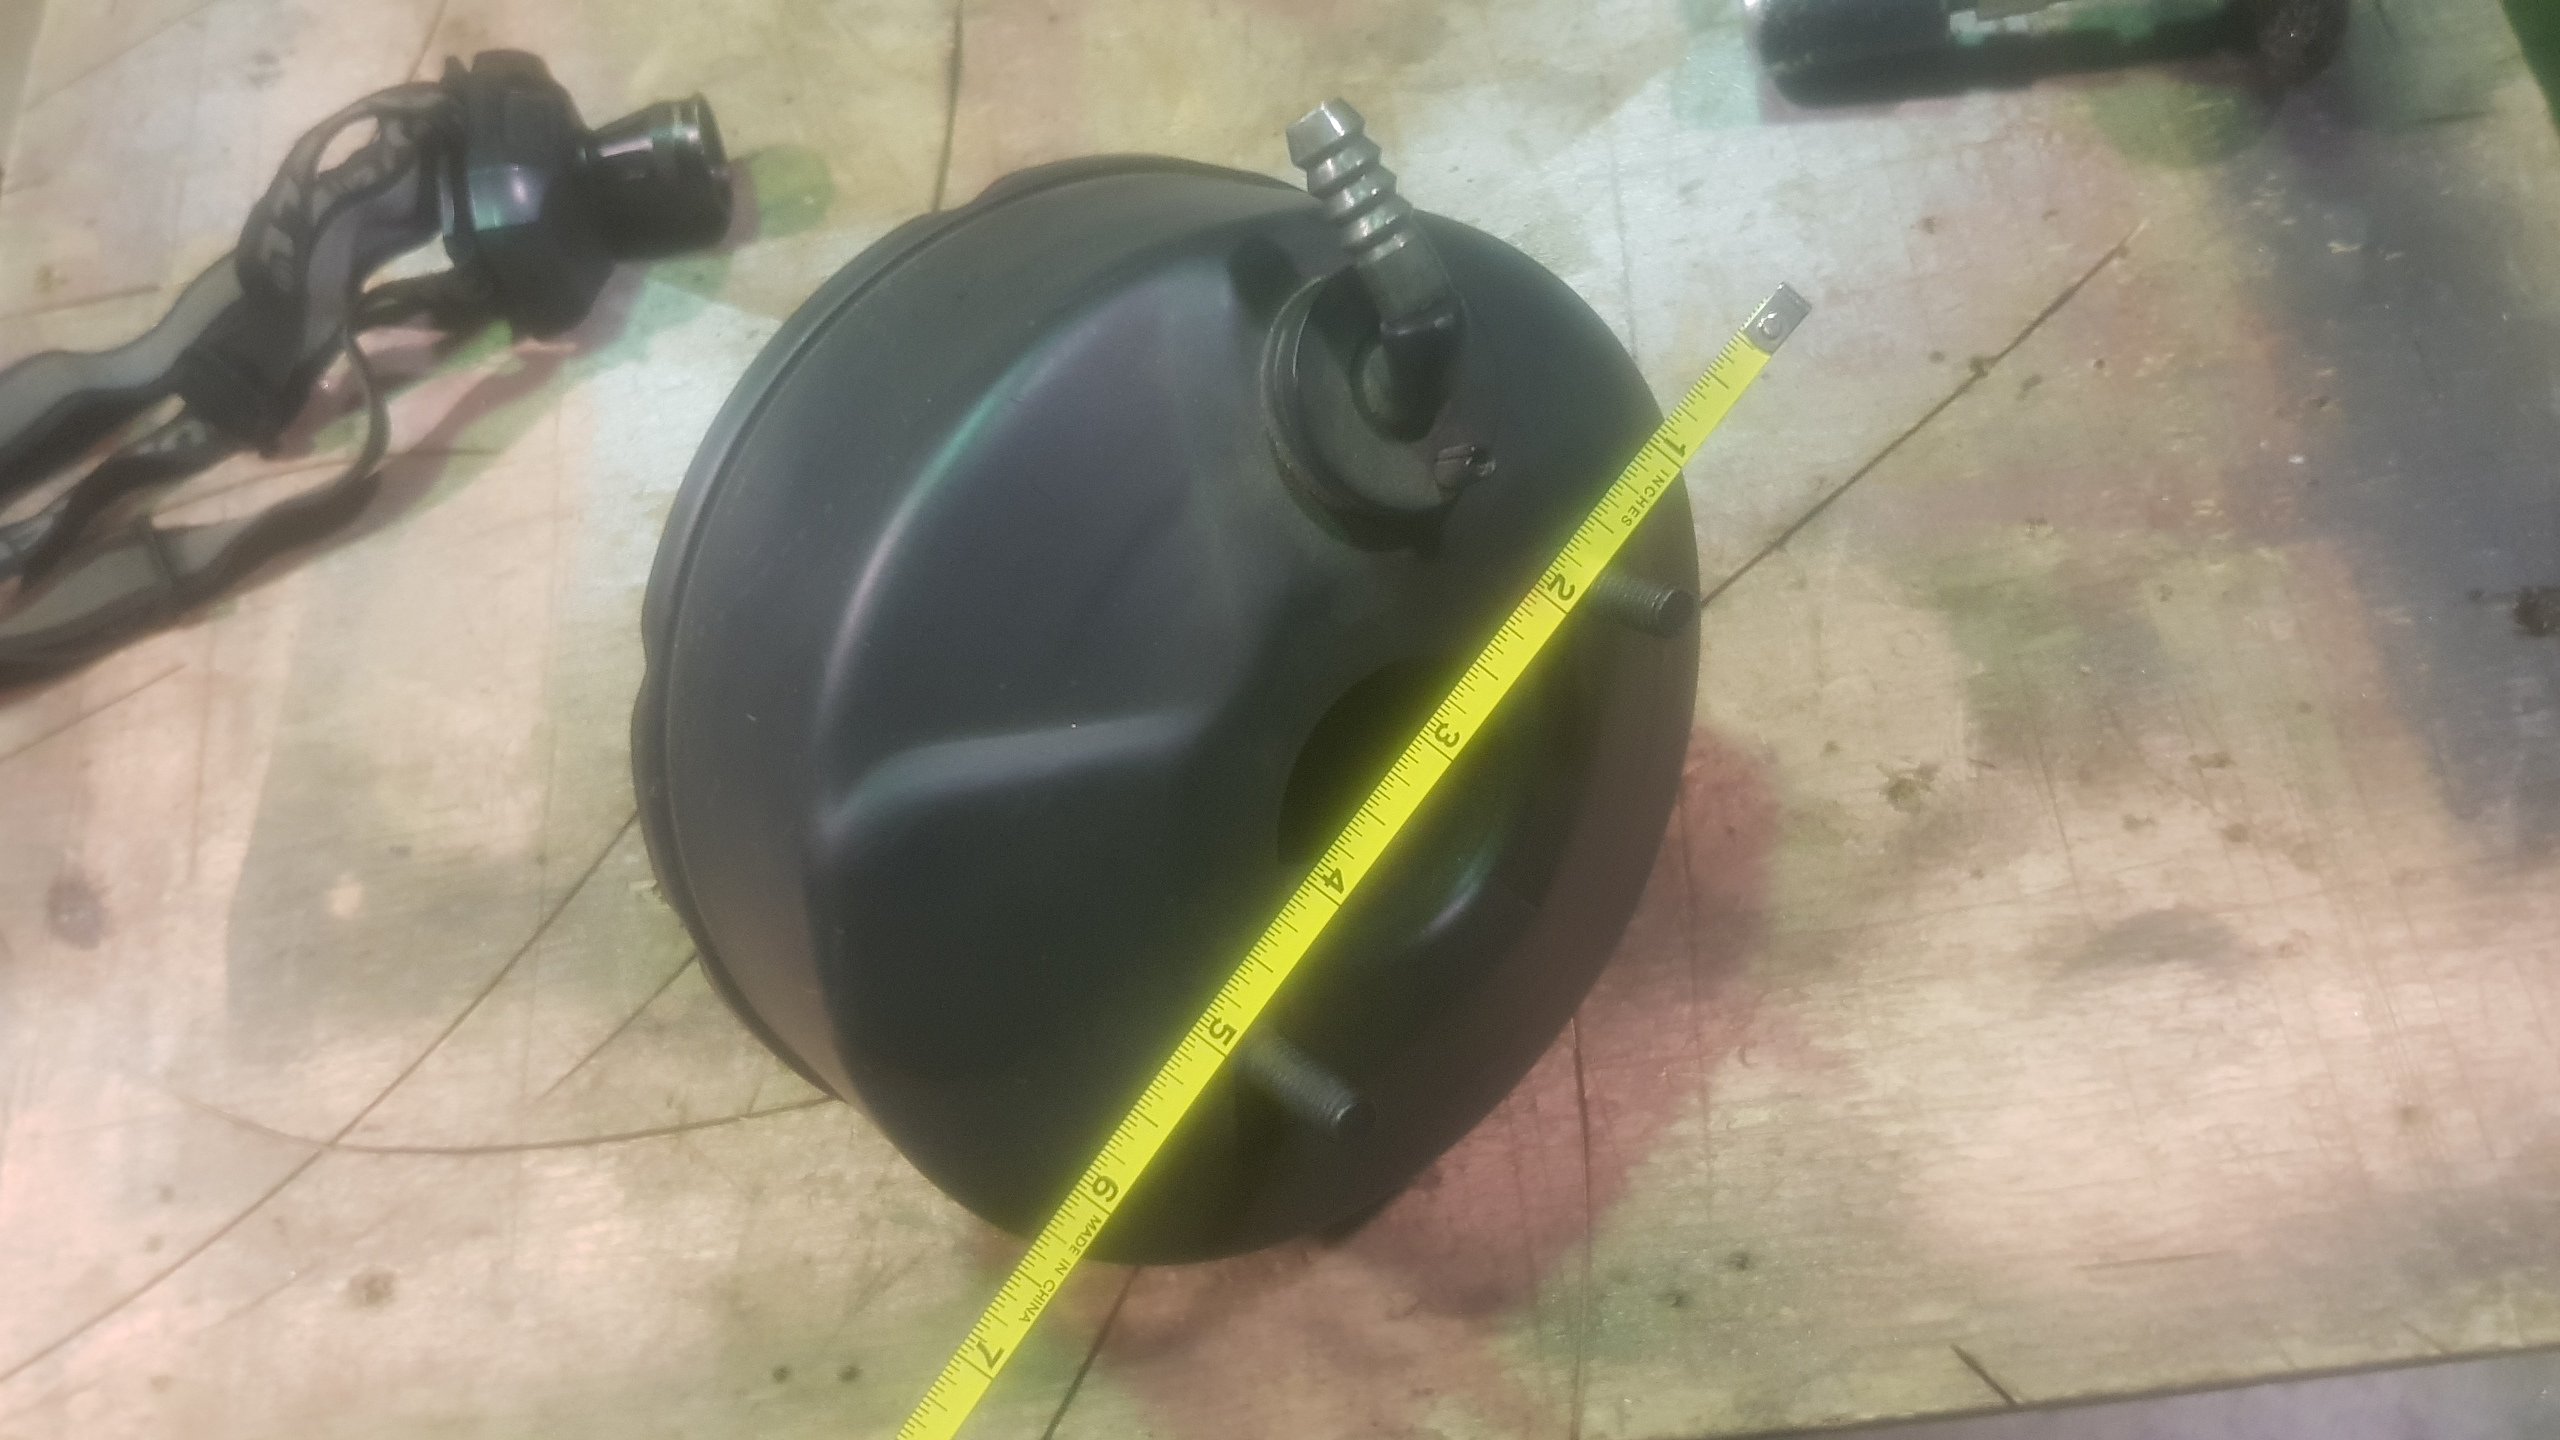
Whats the actual issue? You said you can't fit a booster between firewall and m/c? Is that because it would hit wheel tubs or something or would the booster diam be an issue and hit the engine? If its a booster diam vs engine issue, a way I have often got around this on minitrucks with air suspension or engine swaps Is to use a old Mazda 121 or Ford Festiva booster. They are 6.5" diam and 3.5" deep. Common Nissan 2-bolt master cyls bolt to them so its easy to find a bore size to suit your needs. Can also orientate the vac barb fitting whichever way you want.
-
Hubbies are a bit too plain. Could make up a press tool with some sort of mopar/plymouth emblem and stamp them to be less boring?
-
Kp60nick's D21 kingcab Soon to be Bagged on Cadillac Escalade rims
RXFORD replied to kp60nick's topic in Other Projects
Laid Outs creeping up Nicholas! Hondas can wait. You and Adam should be psyching each other up to get there and battle it out for some trophies. -
Yes, you basically just hand over bulk hard earned cash to a shop, then many days later you will receive something similar.
-
Shouldn't the logic with that be, do the tyres rub? If no then... Are the tyres correct for rim size as per lvv spec sheet? If yes then Are tyres the correct load rating? If yes then whats the issue. Wof guys obviously trying to safeguard himself, but if tyre size isn't on old cert plate, then his request of proof is a bit outside his paygrade and common sense should kick in.
-
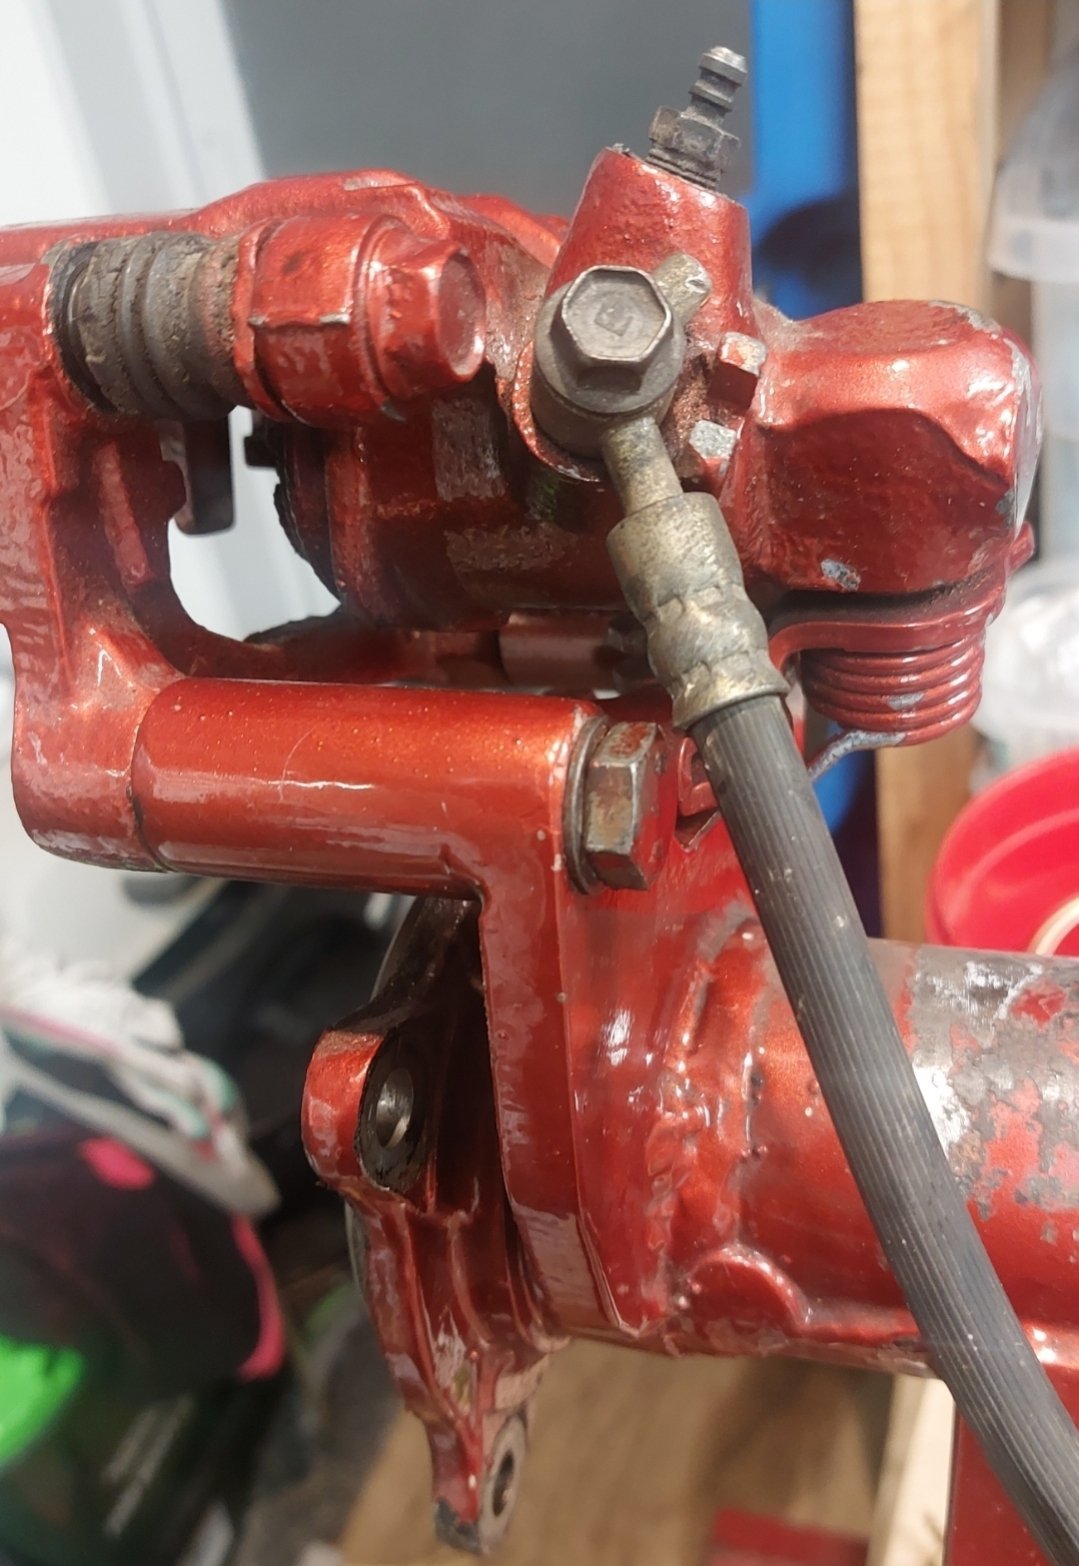
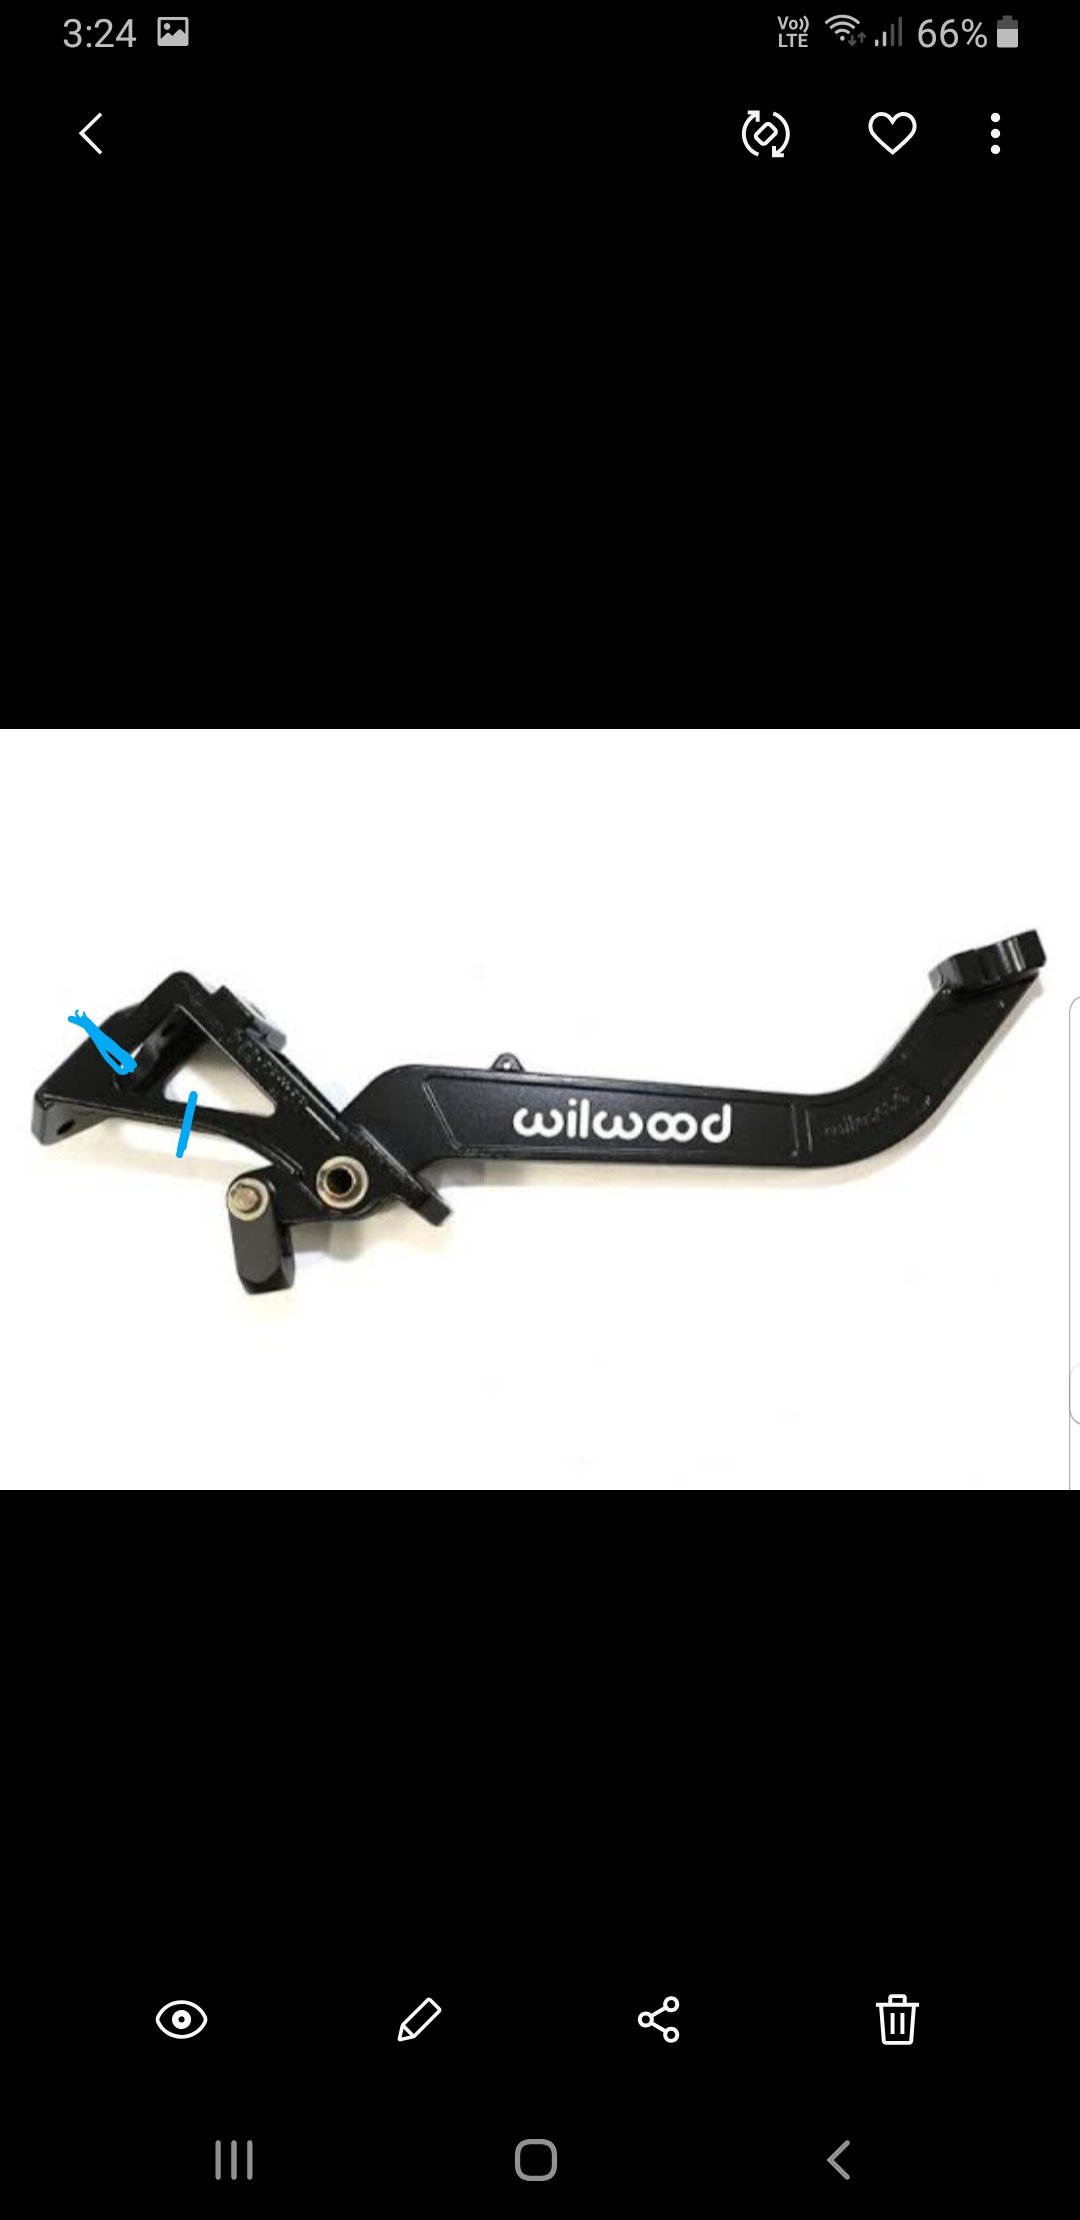
Unless there has been an amendment I havn't seen, It doesn't actually say anything in my older book about Ali brake fittings. Only specifies the type of tubing. But Clint will know for sure. I would be surprised if it was allowed as the chance of having the softer Ali flare seat get damaged or threads strip out whilst tightening the assembly would be greater. If its this type of Wilwood box with the open webbing they have a tendency to crack where I've marked the pic in blue. Have had to repair a bunch for stockcar guys and make reinforcing gussets. If the firewall flexes even a bit, it stresses the Ali webbing too much. I see that Wilwood has closed in that webbing section now with more material, so if you got a newer one it might be fine. Just gotta make sure the mounting is pretty rigid with those Ali ones
-
What sort of pedal box? Assuming aftermarket... Things I have had scrutinised before with custom mounted/aftermarket ones are whether they flex the firewall in a way that the original doesn't. Mk1/mk2 Escort reverse swing type do this, so I had to brace firewall to the strut tower. This ties in with the mounting of it which is more case by case. Adding floor & firewall doubler/load plates is common sense as is faster size. Also the pedalbox construction itself will be looked at. Whether its rigid enough. Some of the sheetmetal ones need bracing a fair bit. Brake pedal construction. This will depend on the kit you brought. The brake pedal ratio will have to meet requirements depending in your setup. How the brake pedal operates and pushes the booster/master too. Probably best to post a pic of the pedalbox you were thinking of using and Clint can tell you if hes dealt with them before. Speedflow/Gss do nice nickel plated steel bulkhead fittings in -3 for brakes/clutch. Have had no issues with cert using these.
-
Before you get too far, might want to check the chassis overlap section of that notch will pass cert. Will likely need to have a protrusion fore and aft, with a radiused end, like a built in fishplate. Like what @kp60nick has done on his Nav. It makes for a larger weld area and spreads the load. Any particular reason you don't like the ARNZ notch? Radius notches are far superior and designed to remove any stress risers that form in the corners of square notches. I would recommened having a reasonable size radius in the underside corners if you do use that style. Also, 6mm side plates is crazy dude. 4mm is fine. Stock frames are generally 3mm. Hanging 6mm off 3mm is like hanging a brick off paper.
-
Just crossthread them putting them in. That way they won't accidentally back out.
-
Personally I'd just go with m10x1.25 rather than ultra-fine. Mainly for ease of finding the correct lengths and less chance of cross threading. Is it a smooth or serated flange bolt? You need some form of locking fastener and lock-tite isn't accepted. Unsure if torqueing a serated one would be ok. That would be a Clint question. I just used black hi-ten cap screws which I got zinc plated and then heat treated. Mainly because I think they look nicer than hex head bolts. I used Nordlock washers for pretty much everything on my kits. They are one of the few locking washers that won't be affected by heat or vibration. The 2 places I couldn't use Nordlock, I used Schnorr washers. My rotors attached to the hub the same way as you described, I used a Nordlock under the head of cap screw which threaded into rotor, then I put a hardened flat washer and conelock nut on the back side as a safeguard. According to the rules, you're not meant to modify the heads of a critical fastener, but I'm not sure whether they also refers to drilling lock-wire holes. Another question for Clint. Could you just use a Nordlock washer instead and add a bit of lock-tite as well. Can pm you pics of how I did things if you want.