


zep
-
Posts
4664 -
Joined
-
Last visited
Posts posted by zep
-
-
16 hours ago, cletus said:
Ive got to have a look next time im on a computer if that method is still ok
The seat standard and CCM mentions that you CANNOT weld seat anchorages to a unibody vehicle
I have certed a lot of them like the pics, because its a time tested way of doing it but i have a vague recollection of a certifier update saying it cant be done unless it has an authority card
Thanks Clint. Happy to do it another way if needed. Just wanna make sure I do it right!
Another question of the fun bumpstop kind - since I'm swapping to rear coilovers, strengthening the towers and all that jazz, can I now just rely on the bumpstops integrated into the shocks? My understanding of the manual suggests it's ok.
-
17 minutes ago, Snoozin said:
100% would be putting the seat fabric into the door cards, it'd look ace.
You could ditch the door handle things entirely in favour of a Porsche RS style fabric door pull.
I did look into this, but the handles are actually great elbow rests, so I'm not too keen to get rid of them.
46 minutes ago, Early jap nuter said:I’ve done afew door cards with bung angled handles.most of the time we just re drilled the holes in the door to straighten handle. Small rivnut/plusnut seem to hold better and flex a lot less
That is a smart idea. I'll have a nosey around the door and see how it attaches. Sitting at this computer, my gut tells me that it's some kind of plastic riv nut as the screws are quite coarse thread.
36 minutes ago, Early jap nuter said:Most people paint the inside of the door to match.You can wrap the metal part of the inside of the door in vinyl and hide the seem behind the rubber seal
I have full length cards that cover the lower part, so that's not an issue.
-
1 hour ago, shizzl said:
Yup that’s it.
they hold up fine in rally cars even after cartwheeling down a bank.
the weld on tabs are good, allows you to move the seat inline with the steering wheel if it’s on the piss from the factory
Sweet, hopefully Clint comes back with the go ahead for certing purposes.
-
 1
1
-
-
16 hours ago, shizzl said:
You buy a kit from palmside for them
https://palmside.co.nz/collections/seat-brackets/products/seat-mounting-kit-x-members
This kind of thing? Would not require crush tubes as it's not bolting through an open section. I'd wonder about which is strong enough though.
-
@cletus What's the deal with making seat mounts like this? I have Sparco sliders that I'd like to bolt to them. Is welding them with end plates like that ok? I don't need them to be removable, and I'd only be able to put doublers in the trans tunnel, not in the sills. Should be way stronger than the stock mounts that I was going to make an adapter plate for, since they are just spot welded in!

-
On 19/05/2023 at 13:28, Snoozin said:
My (misguided, not rooted in any sort of design background) advice would be to make sure your seat and door trims maintain some carry over, whether it be in textiles used, or patterning etc.
The idea behind mine was to look conceivably factory, I didn't want to stray from the OEM insert style and stitching, but also needed it to flow to the seats without being too over the top. I don't think quilted or hex stitching is going to complement the kind of fabric you're working with at all, especially given your fabric is already a chequer of sorts, you'll end up with all sorts of contrasting lines and it could look a mess.
If if were me, I would simply take that "ribbed" section, make it a fabric insert that's smooth and not stitched, and mimic the pressed bits at door handle height in stitching, maybe contrasting to match the tones in your fabric.
It's simple, but simple never goes out of fashion.
Yeah, I totally get that. Are you suggesting to use the checker fabric in the door cards? I did buy an extra metre just incase that's what I wanted to do.
I do find the angles between the ribbed area and the handle slightly annoying. Was thinking of reworking the shape of the ribbed section so it's lines are more complementary with the handle.
-
Was talking to a mate and he brought up quilted patterns too
This Alcantara hex pattern is cool too
-
6
-
-
15 hours ago, GARDRB said:
Any requirements for your doorcards? Are you wanting a speaker, pocket or armrest?
This dude does cool porsche doorcards and interiors https://www.instagram.com/carboneliveries/
MK1 and 2 Golf interiors are good for inspiration too
No speaker as there isn't room, just the stock armrest and a pocket might be cool but it'd have to be a floppy one.
13 hours ago, Thousand Dollar Supercar said:Or if you're cheap and lazy and your door cards are in good condition, do this with black vinyl paint and stick-on chrome moulding strip:
Now it's the deluxe spec.

Plus you haven't added any extra colours / textures.
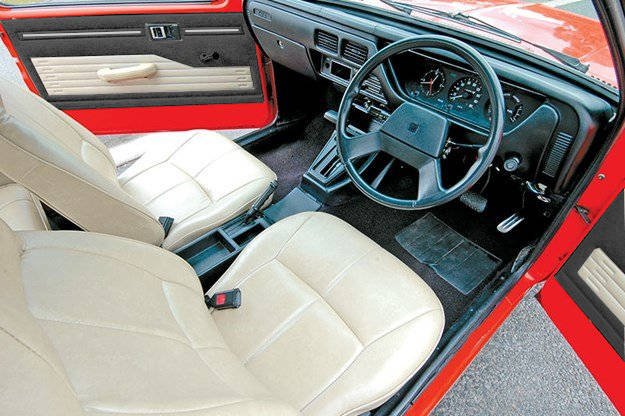
My main OCD gripe with the factory door cards in that picture is that the pull handle isn't quite horizontal, but the embossed lines in the door card are! This gives the appearance of a British car where they intended to get the pull handle horizontal but they didn't do a very good job, so it ended up crooked. If you made new door cards, you could eliminate horizontal reference lines in the vicinity of the pull handle so this wouldn't stand out.

The stock ones are well gone. I've got new board to make some out of. And I totally agree about the pull handle, such an odd choice. My pull handles are black and I plan for most of the card to be black, but I also bought enough of the Porsche chequered fabric to do an insert.
-
I'm looking for ideas for my door cards. The stock ones look like this:
My setup is black and I am keen to use a fabric insert similar to what old mate @Snoozin did with his KP:
What's cool?
-
1
-
-
- Popular Post
- Popular Post
Last bit of the recent puzzle is the suspension, which started probably a year ago. I always had custom springs and a nice uprated Whiteline swaybay up front, but never really got around to doing anything with the dampers. Now that I've gone 4 link, I decided to coilover the rear and find some suitably good front shocks to match. I spent countless nights measuring and making spreadsheets. I looked into rear coilovers from T3, Fortune Auto and others, and fronts from GAZ, Bilstein, Koni, Avo, Spax, etc. Nothing really seemed to be exactly as I wanted it. So I figured fuck it and decided to go custom. Looking around, I first called MCA but I didn't get the feeling that they would really put in the effort I needed for my setup. Then, while asking @Truenotch what he'd done for his race car, he mentioned Shockworks over in Aussie. I gave them a call and got a real good vibe from them. They were stoked on my project and keen to help, so I got together all the details they needed, including the corner weights of a stock Gemini as seen a few posts above and waited. And waited. And waited. And waited...
I'm still waiting. But now I'm in Melbourne waiting for the Grand Prix to start. So I figure I'm close enough to go out to their shop and give them a kick up the bum. I coax my sister into borrowing a friend's car and driving me out into the Dandenong ranges which is where they are located. I'm glad I did this, because it really lit the fire and not long later, here we are:
Looking damn fine. And now I can finally set off the next season of my Rube Goldberg machine which should see the car back in with Tim at ShoresNZ to finish the diff and coilover conversion and then hopefully off to the paint shop!
The last new bit for the suspension is a Whiteline swaybar for the rear. The car never came with a rear bar so this should be a good upgrade. I borrowed an AE86 one from @slacker.cam to mock it up and it fit good, so I bought one:
-
21
-
- Popular Post
- Popular Post
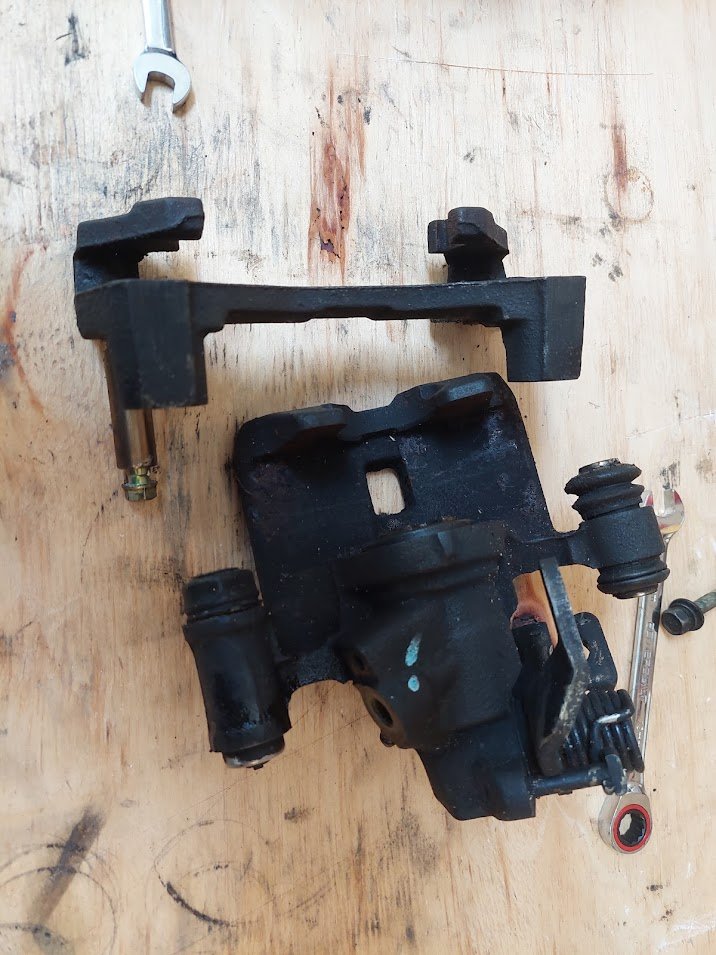
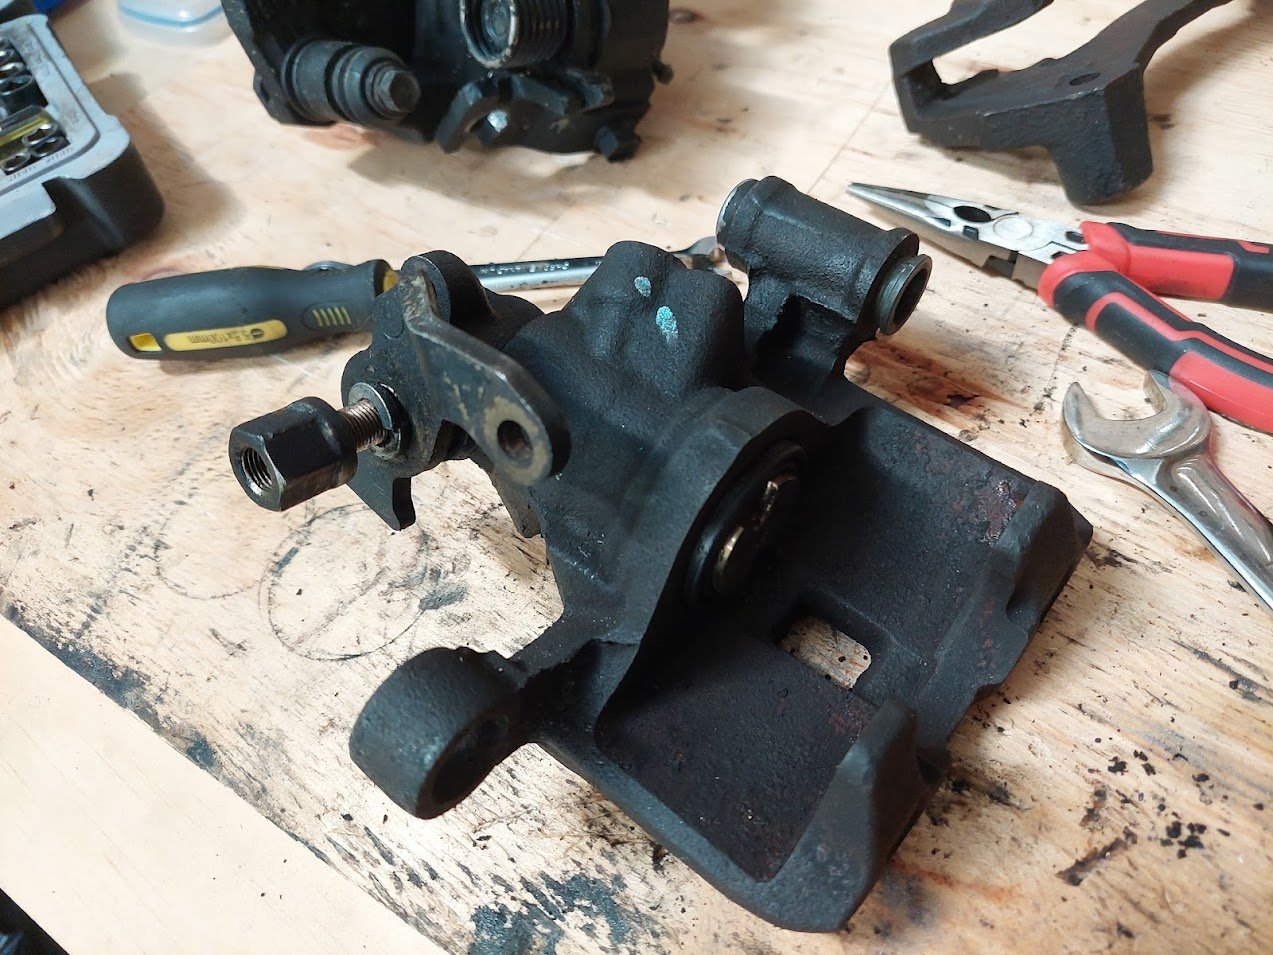
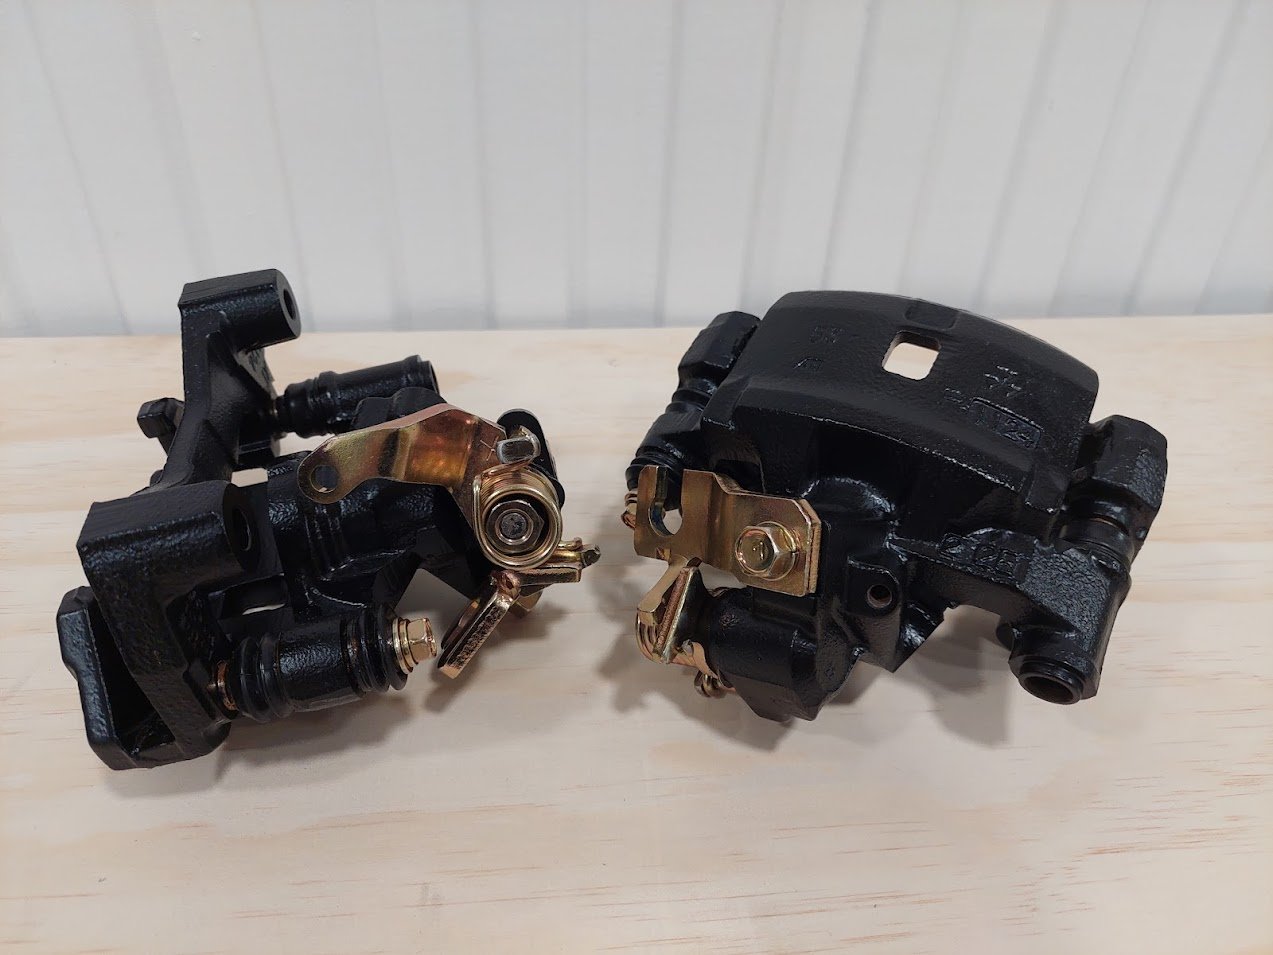
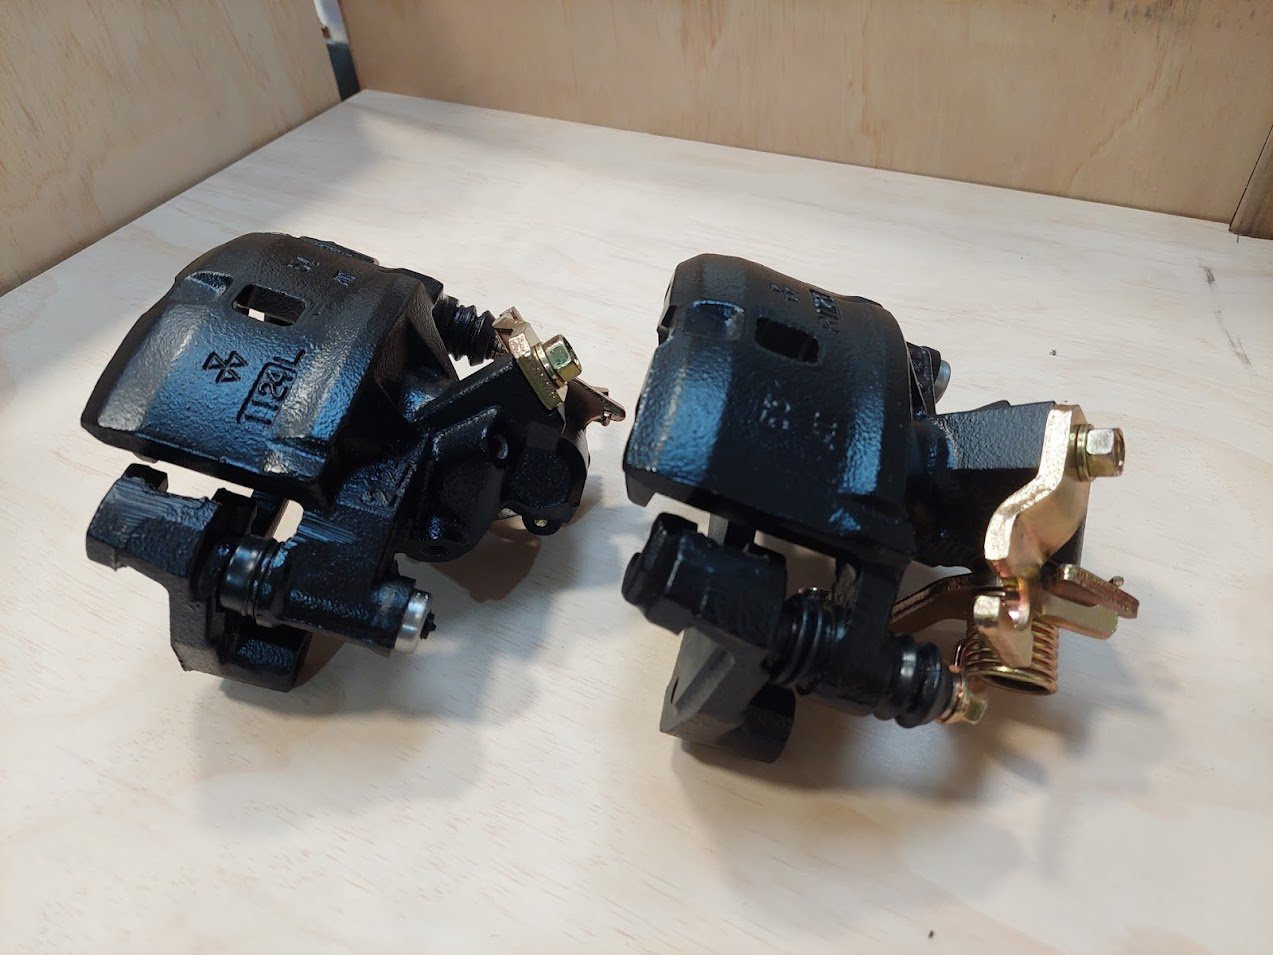
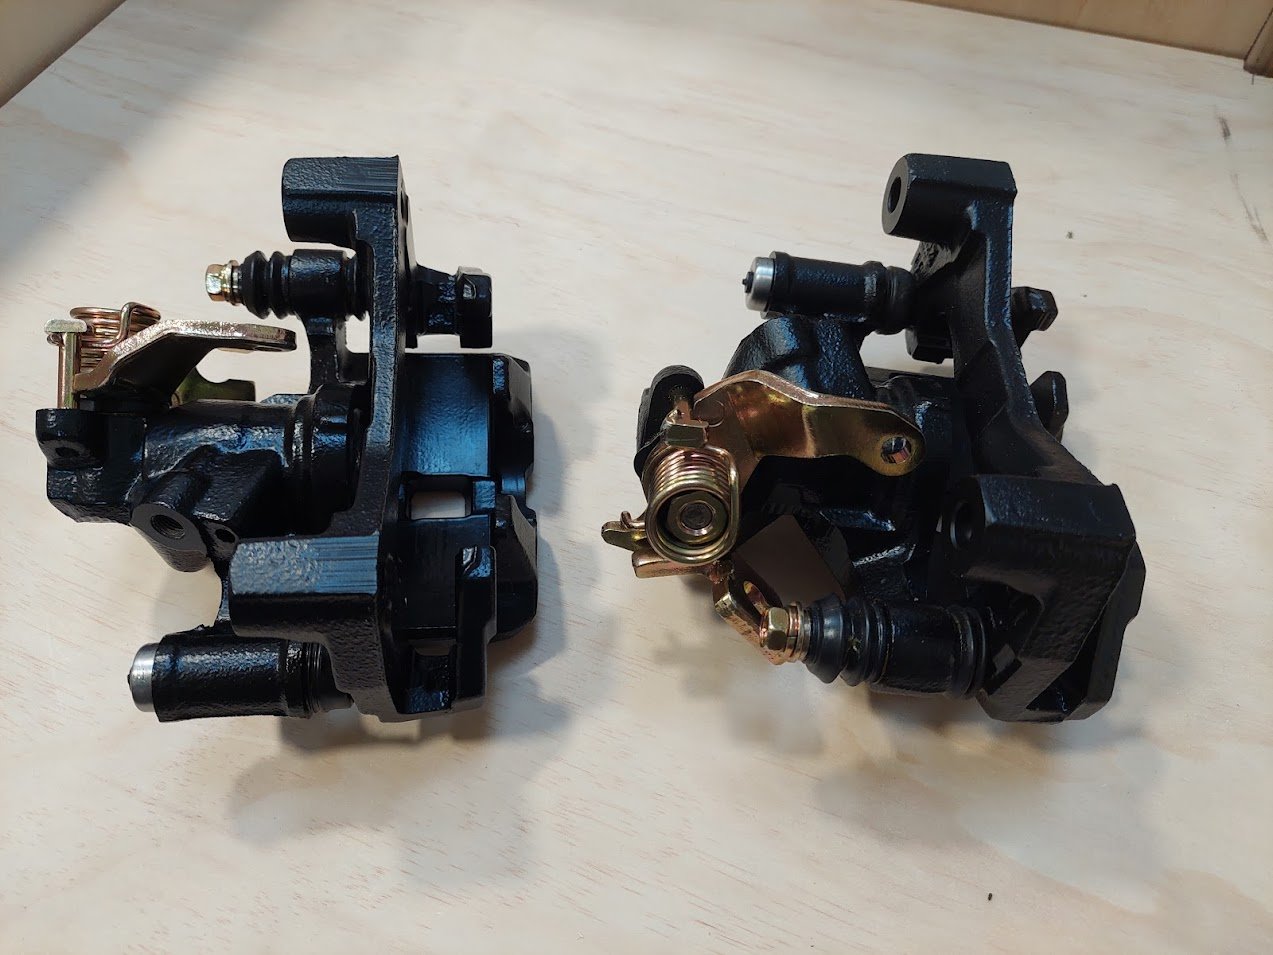
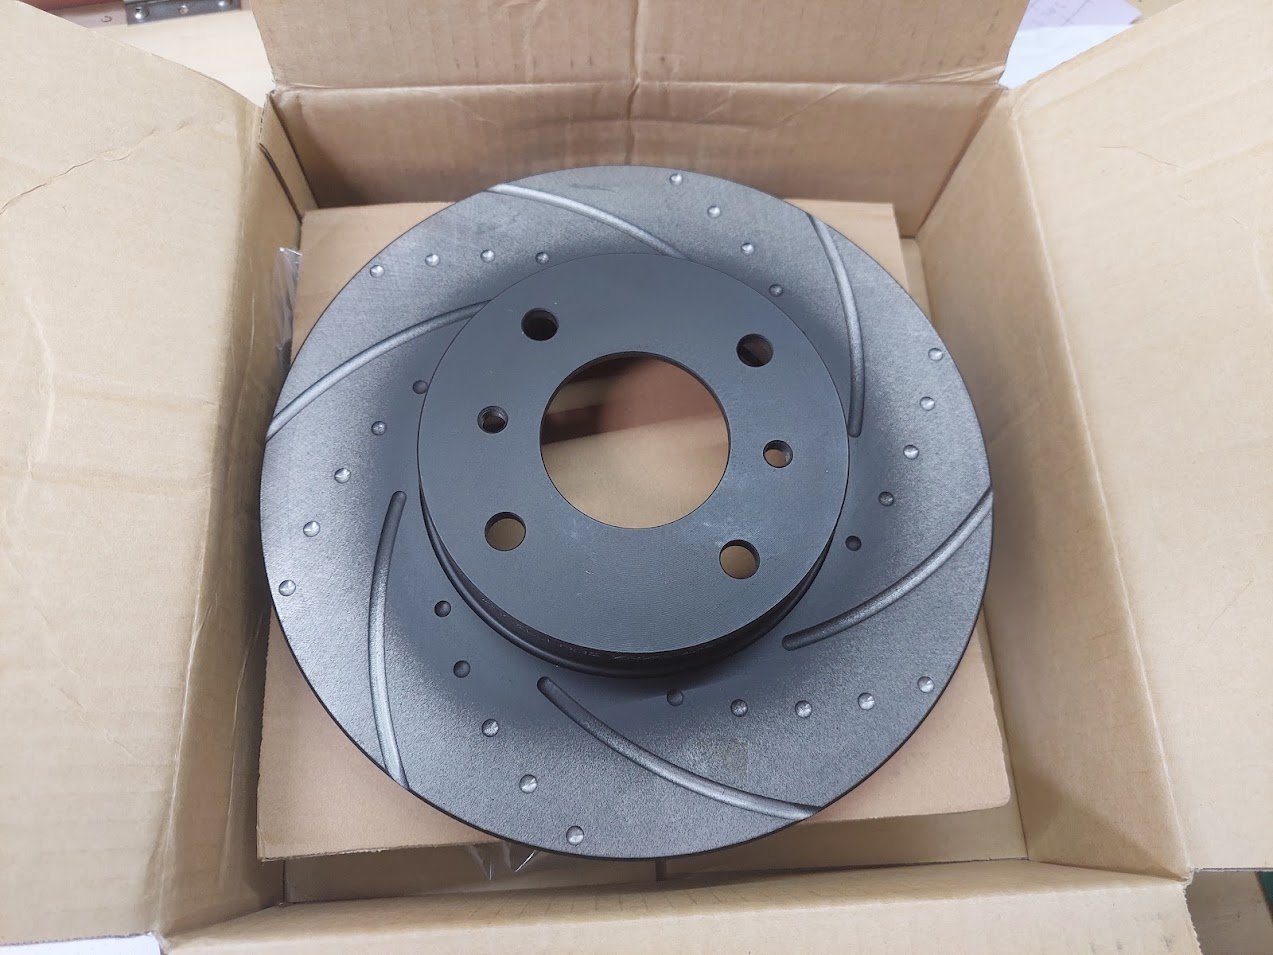
Next up are the rear brakes. Not a whole lot to say about these. They're the same AE101 Levin brakes that I used on my Hilux diff before. Pulled them apart, had the external bits gold passivated and the bodies coated by HPC. Bought a kit and put them all back together. I've also got some new Znoelli rotors to complete the rebuild.
-
18
-
- Popular Post
- Popular Post
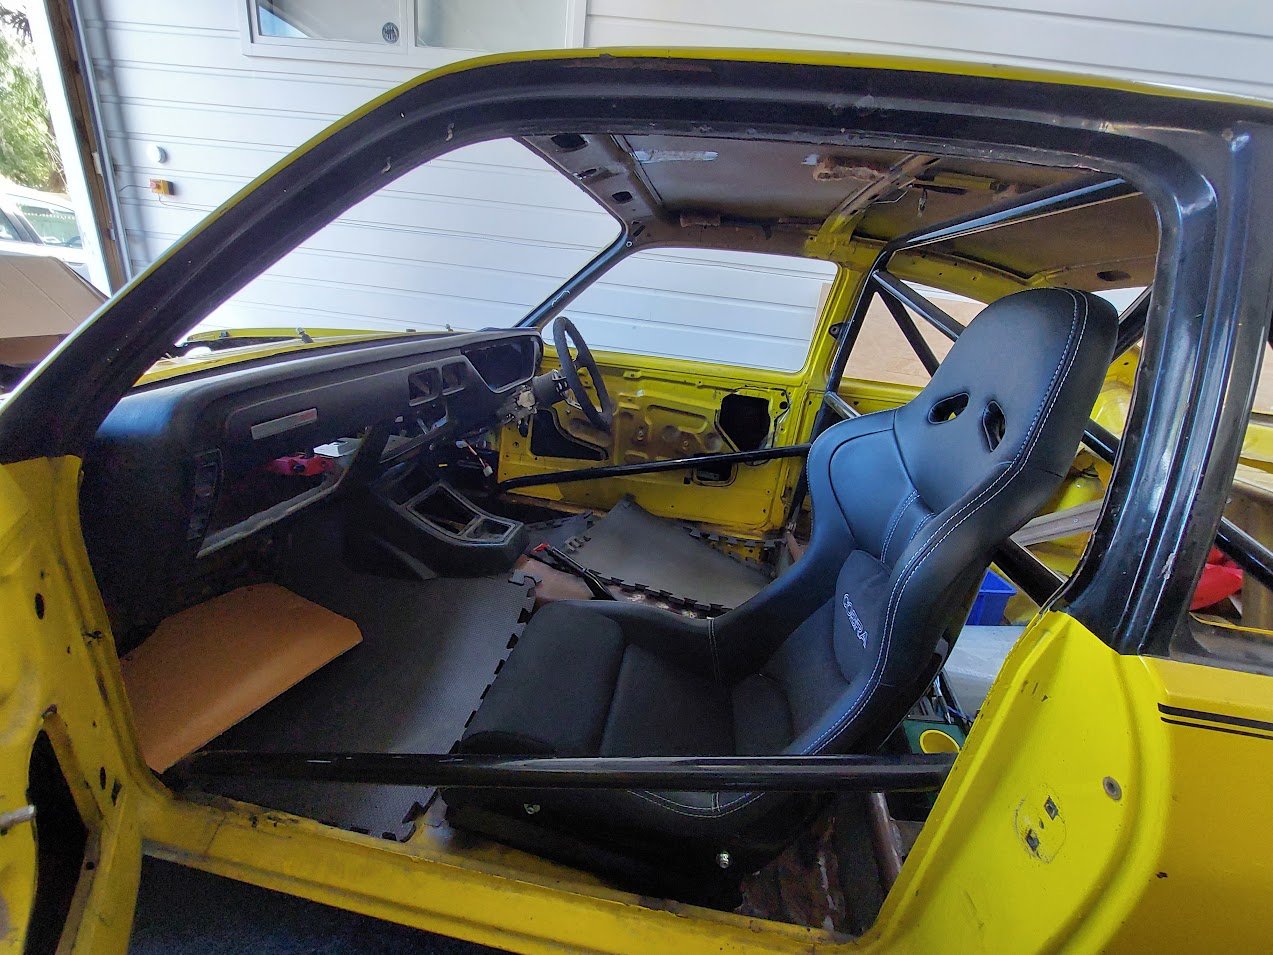
Last one for tonight. I bought some new seats. Cobra Nogaro. They are super nice, have inflatable lumbar support and low hips for using regular lap belts.
I am also waiting on some of this Porsche multicolour fabric to retim the cushions.
-
23
-
- Popular Post
- Popular Post
Shit I'm lazy at updating this thing. Just gonna trawl my gallery and make a few posts.
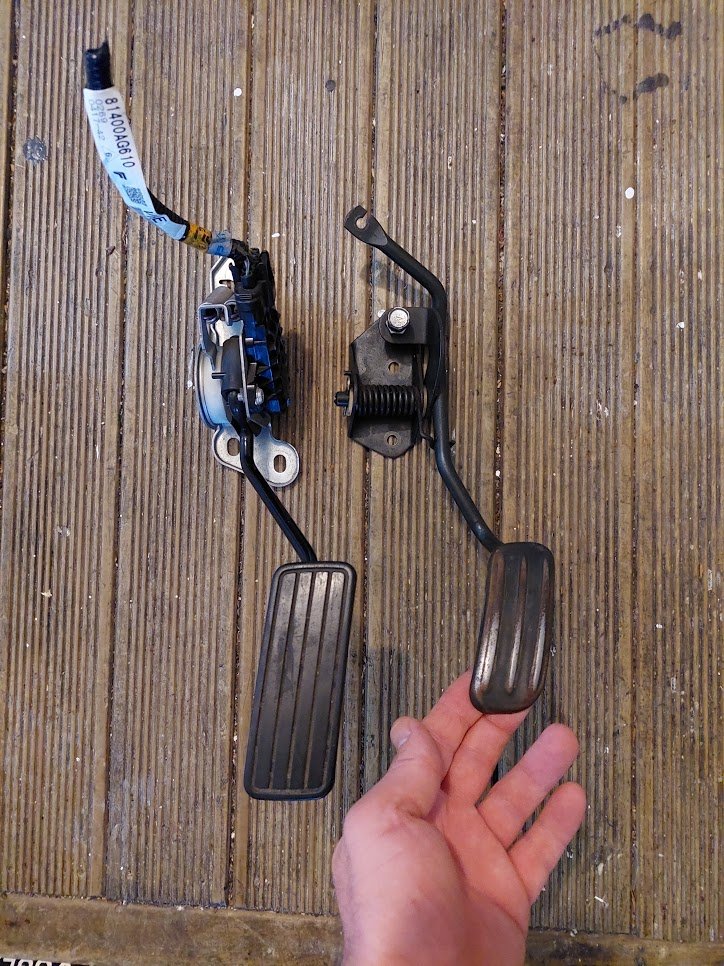
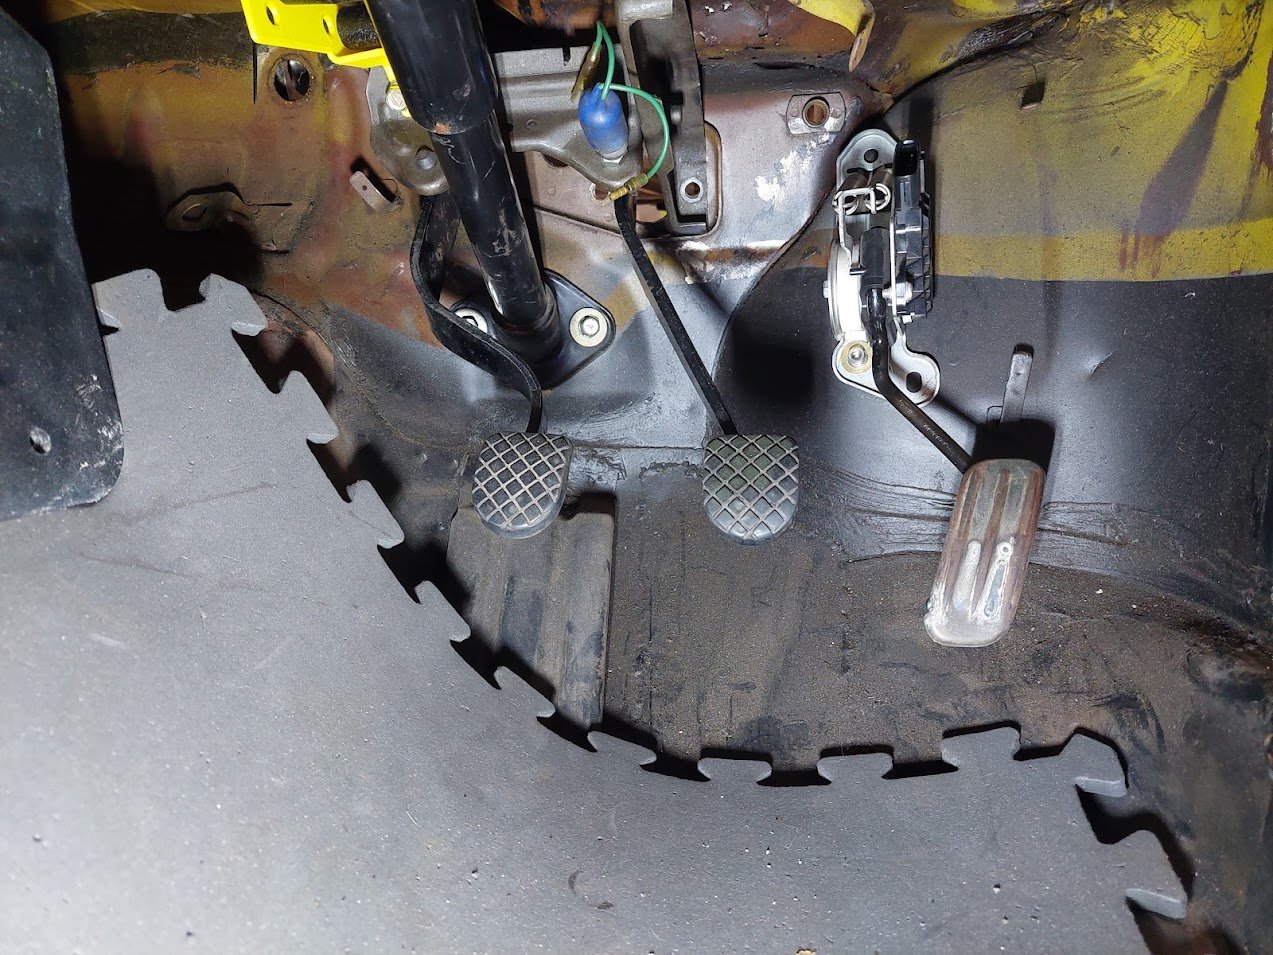
Aaaaaages ago I posted about trawling Pick-A-Part to find a decent pedal for my e-throttle setup. If you recall, this is what I ended up with - it's from an Outback (stock Gemini pedal on the right):
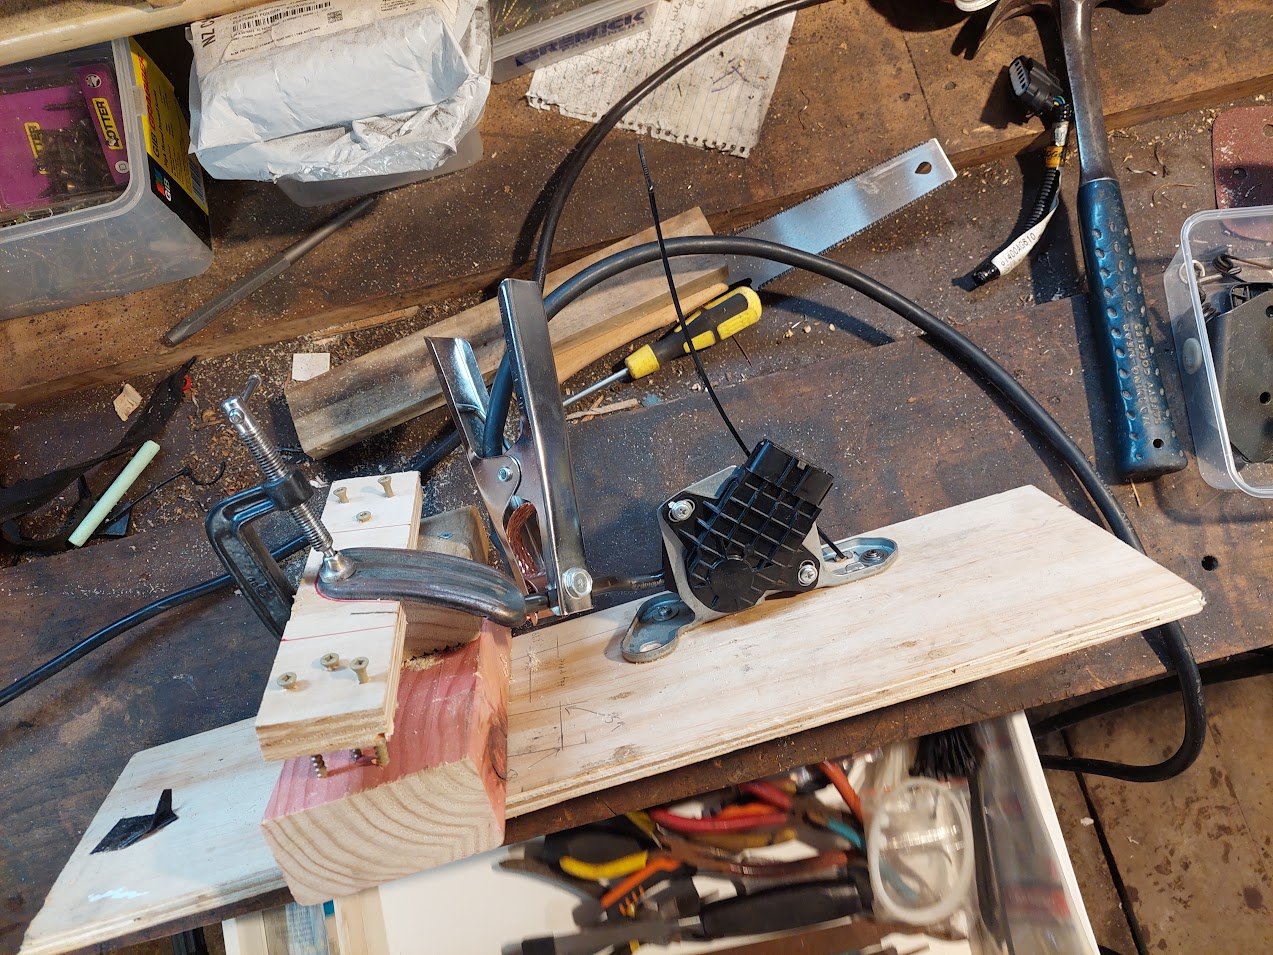
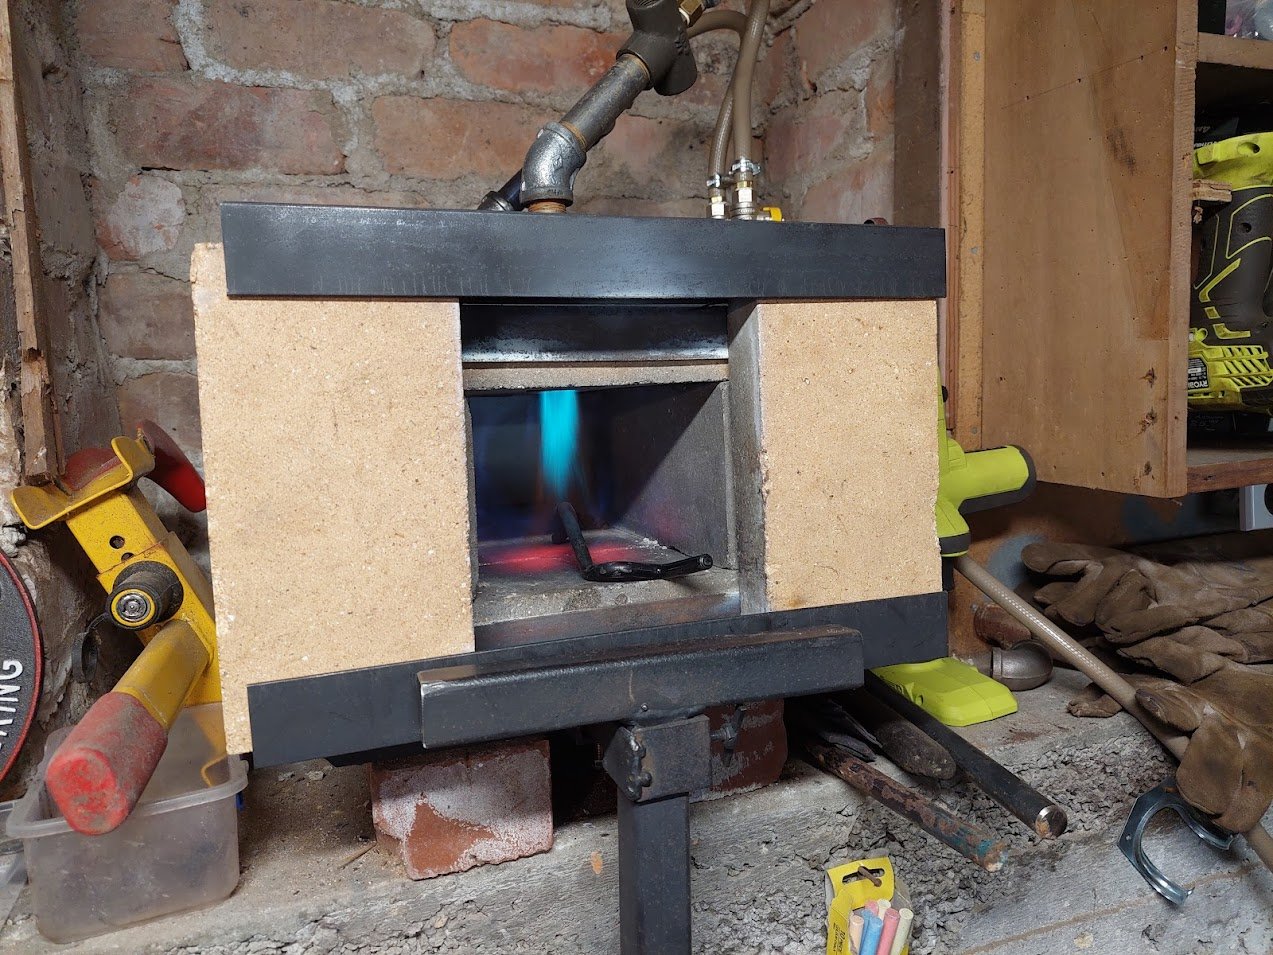
I was always keen to keep it looking stock, so I built a jig that is very gross but worked well, cut the Gemini pedal off and, after a lot of bending - including the use of a forge to heat up the arm - welded the pedal on. No one will ever be able to tell!
FORGE POWAH!!!
All done! Need to clean up some welds and have it powder coated still.
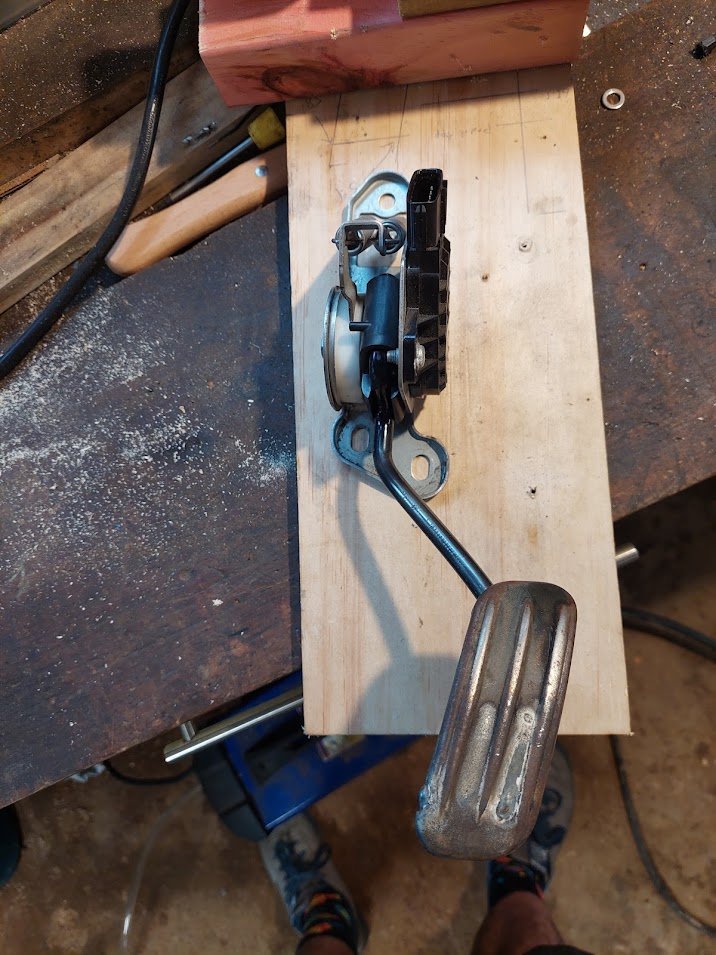
Let's see if it fits!
So yeah, there's only one bolt that actaully goes in from the stock setup. But that's all good, I'm going to build a new mounting platform for it anyway so I can shim it in and out and fine tune the pedal offset between it and the brake pedal.
-
15
-
If I'm CNC'ing up some steel caliper brackets (with dog-leg), is there a certain grade of steel plate I should be looking for?
-
- Popular Post
- Popular Post
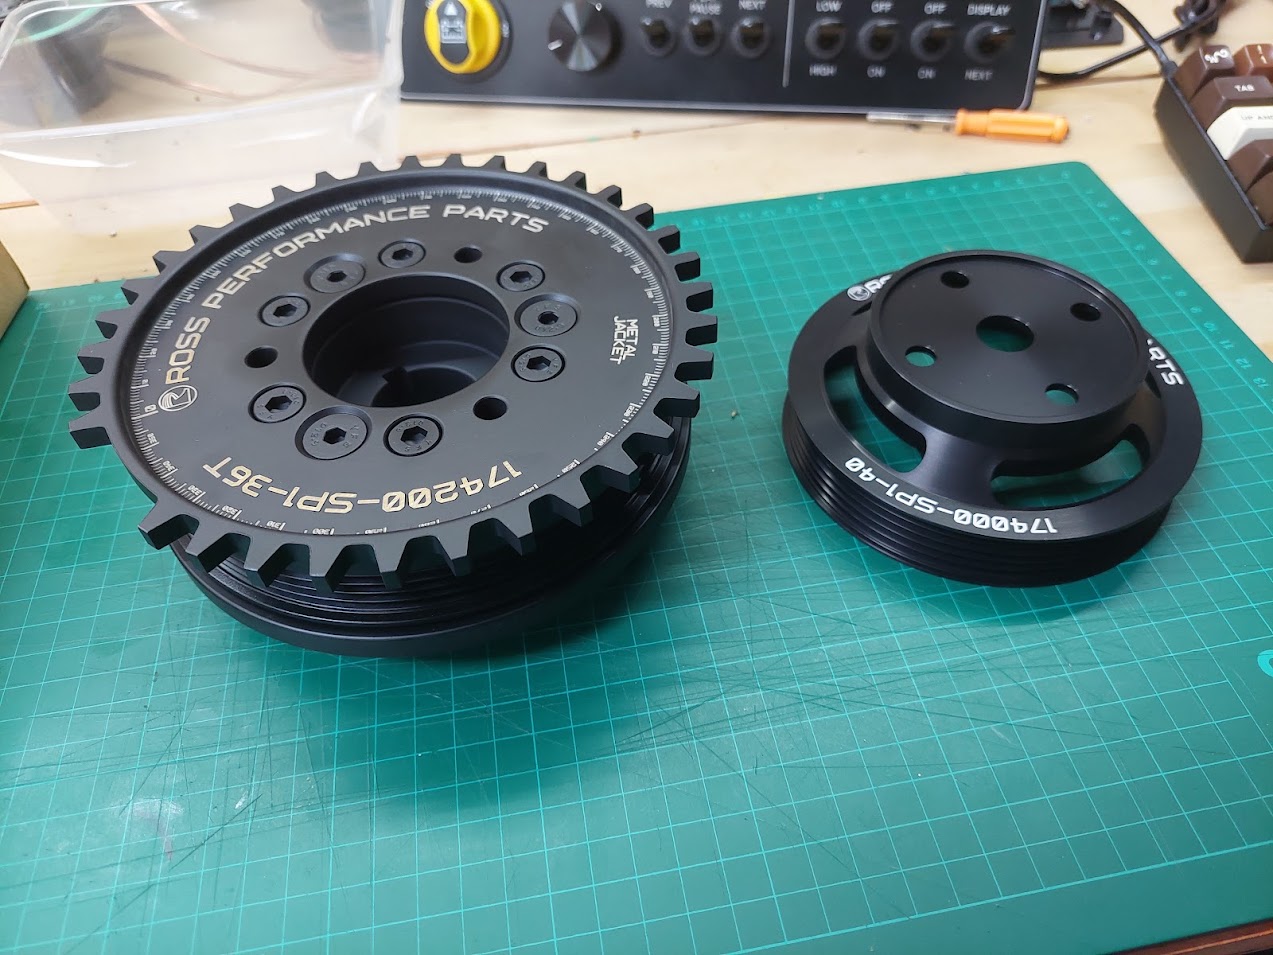
This week, two long term parts of the projects have arrived, like a fine wine plucked from the cellar. The first is a pulley set from Ross Performance Parts over the ditch. Isuzu 4Z engines are old but are having a revival among enthusiasts striving for good reliable power. For most of us, this means we have to develop new parts. While I'm waiting on others to develop parts for the top end - a new cam, high ratio rockers, etc - a few days ago I finally got my greasy mitts on this harmonic damper and waterpump pulley that I commissioned Ross to develop over a year ago. We got a group buy together and made it happen, and I am beyond stoked with how it turned out, but let's let a picture do the talking:
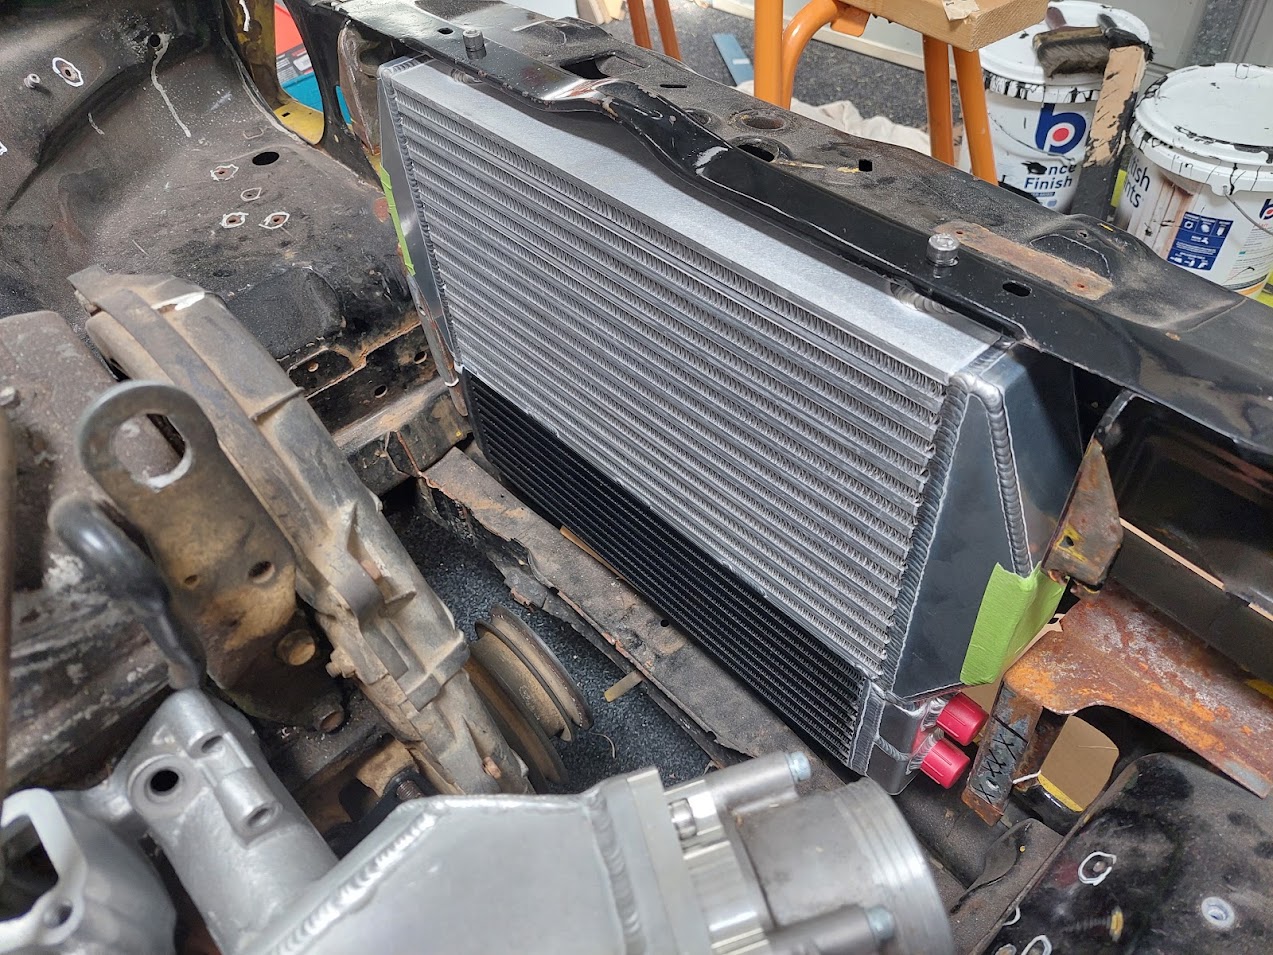
Look at them! The majesty! The next part started off as a simple request for a nice crossflow radiator and spiralled a touch. A huge thanks to Skeleton Welding down in the depths of the Mainland for putting together this intercooler / oil cooler combo for me. Well, he made the intercooler and modified a CSF oil cooler to fit nice and neatly. They turned up this afternoon and... wow! Such craftmanship! A perfect fit with zero ability to see the car in person. I opted for no in/outlet piping so I can get it all lined up at a later date, but it is looking great. Now that I have this, I can measure where the radiator needs to be mounted, and using the Ross pulleys I can figure out where the fan and (hopefully) shroud need to be positioned. This pictures, you ask? Just look!:
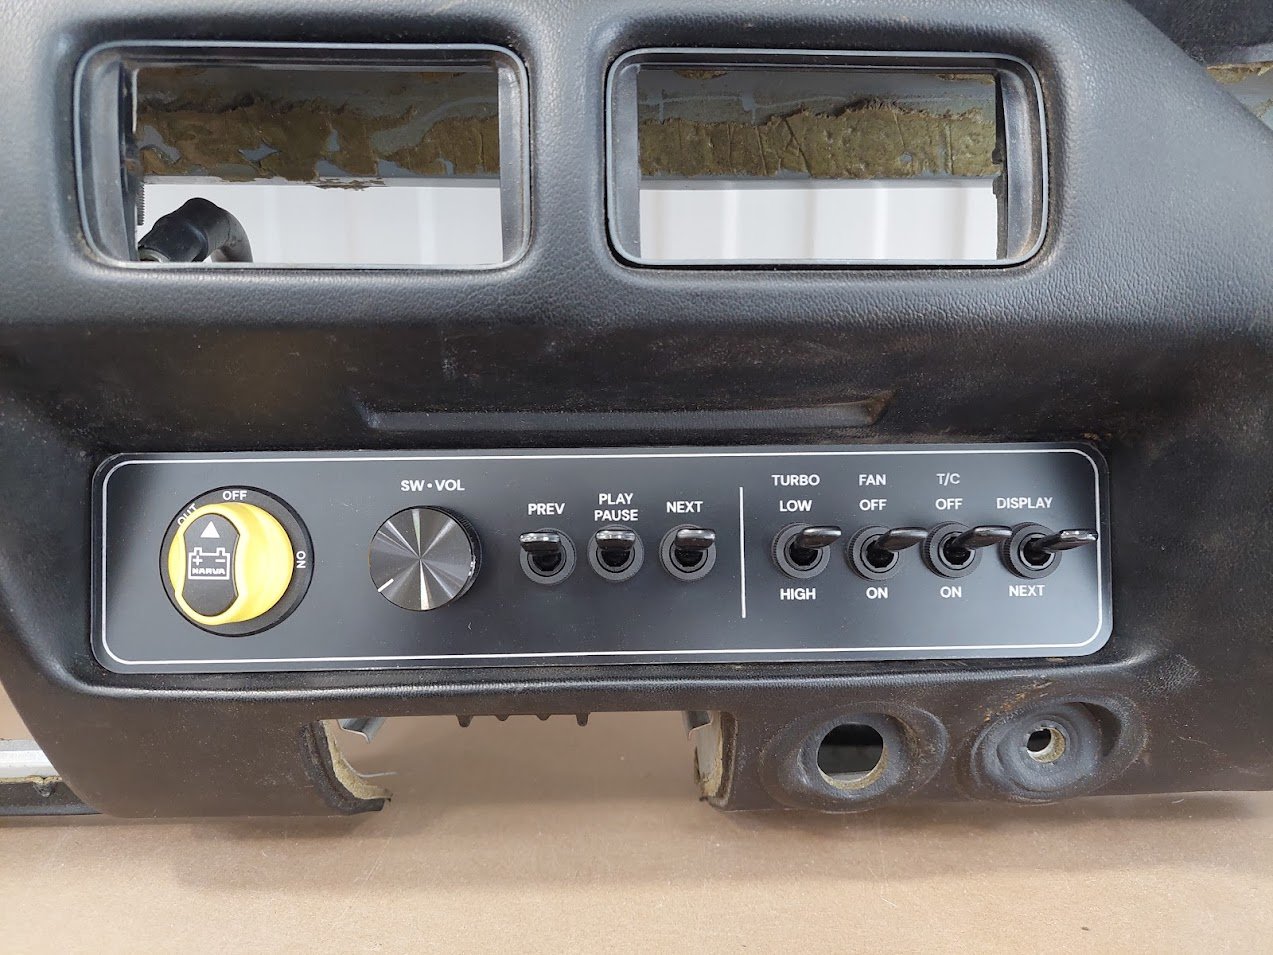
A last update follows on from the post above. You'll have seen the new dash switch plate I made, trying to look as retromod/periodmod as I could. Well I finally had a go at trying to get the stereo switches to work. Now that I've finally got a 12V signal on the work bench I could finally have a go. Here's a video proving it works!
Stoked with this too. Just need to wire in the volume pot to the panel and that's half of it done.
-
27
-
 1
1
-
- Popular Post
- Popular Post
It's been a while since I've updated. Not a heap of progress. I'm at a place where I need the rear shocks (at the very least) so I can finish up the diff and coilover conversion. At the same time I'll sort the front gussets and then we should be ready for paint.
Otherwise, here's a few pics of what I've been up to since my last post:
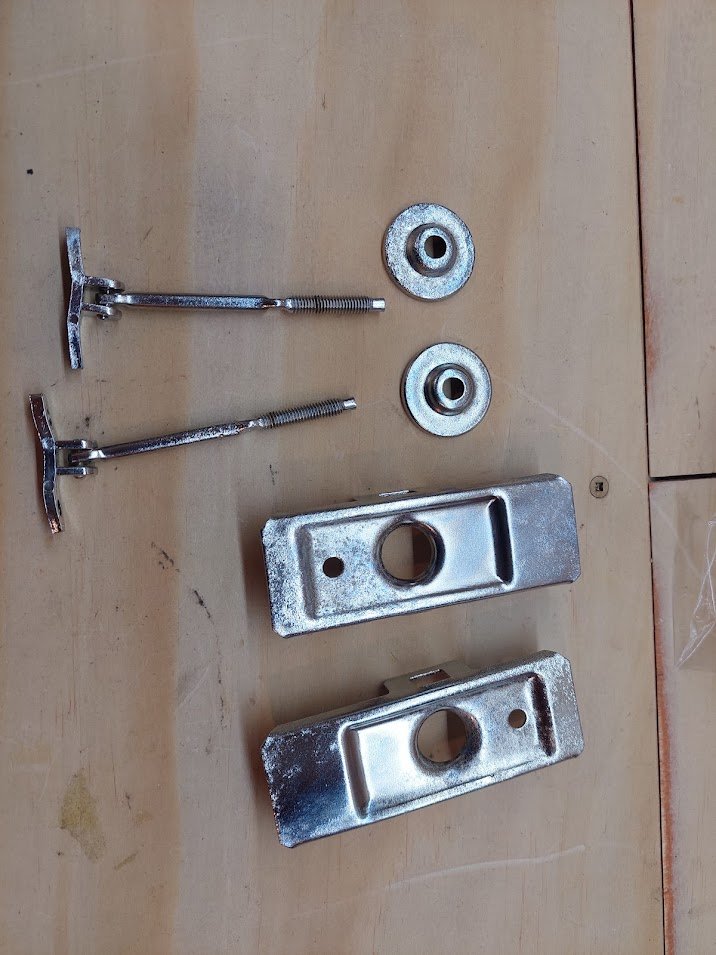
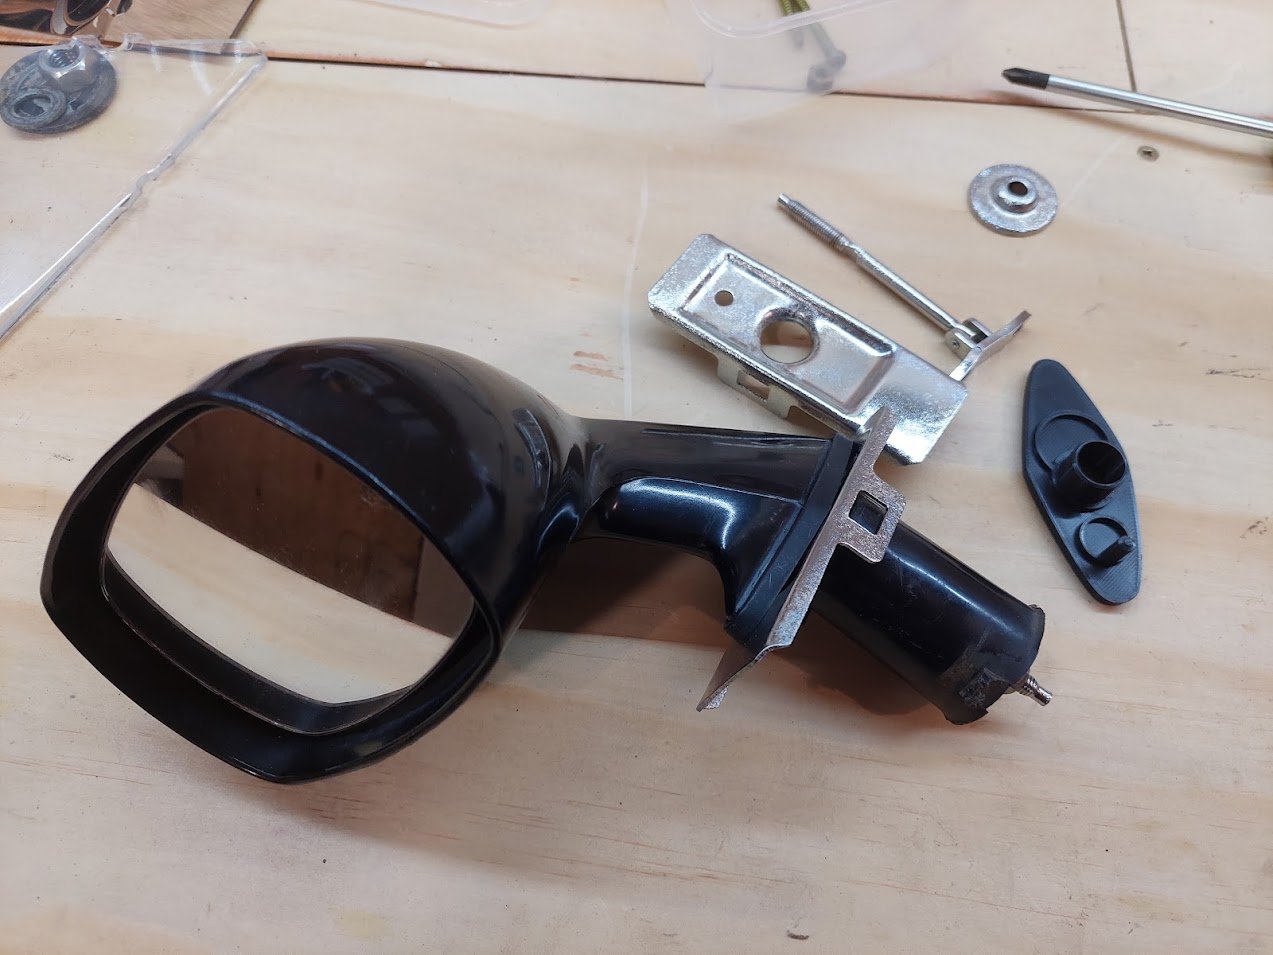
The fender mirrors I got from Malaysia were in pretty good knick apart from the plastic mounting plates. I spent a bit of time mucking around with Fusion and managed to print out a pretty decent replica. I'll probably get them printed in nylon when I actually put it all together. Also had the hardware chromed so it should last a while - not beautiful but you don't see it and it should do the job.
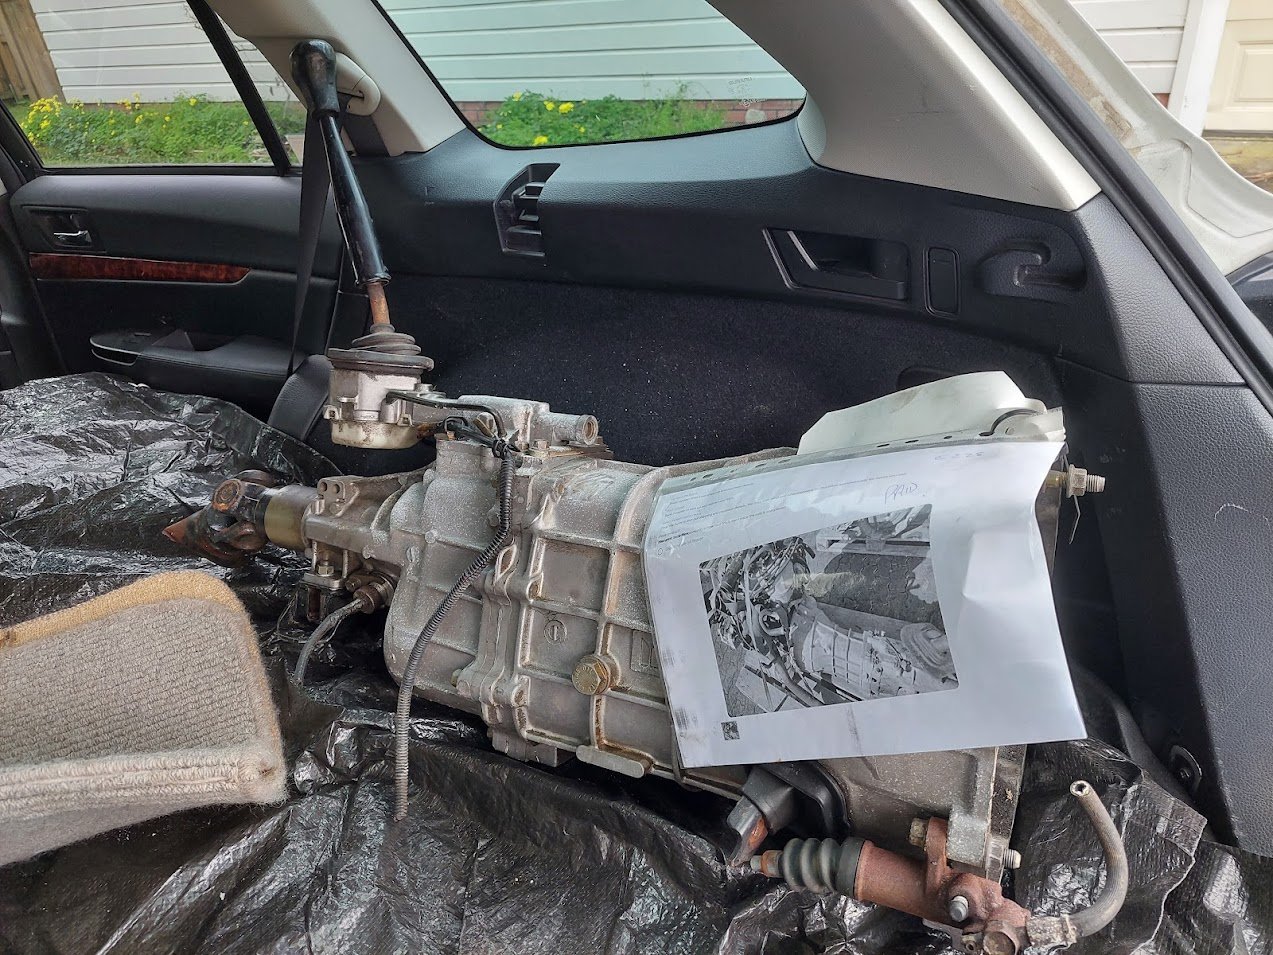
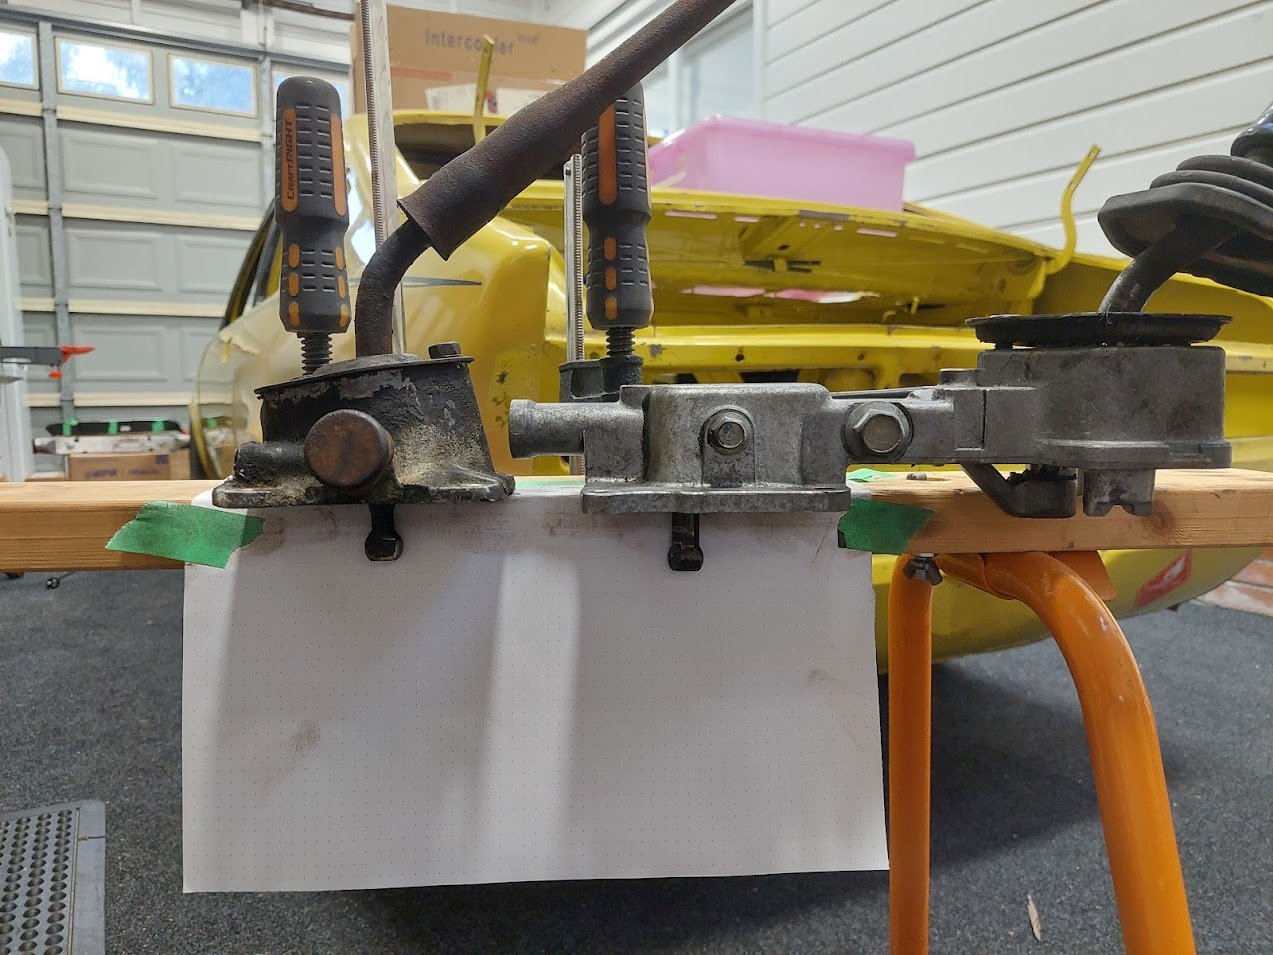
I picked up a MUA-5 Rodeo gearbox which is larger and stronger and allows me to switch to a hydro clutch. Bolts on and works with my existing flywheel. The remote shifter is super gross but unfortunately the gemini one, while I could easily mod the bolt pattern, is about 5mm too short. It shifts but I'm not into it. I'll figure something out.
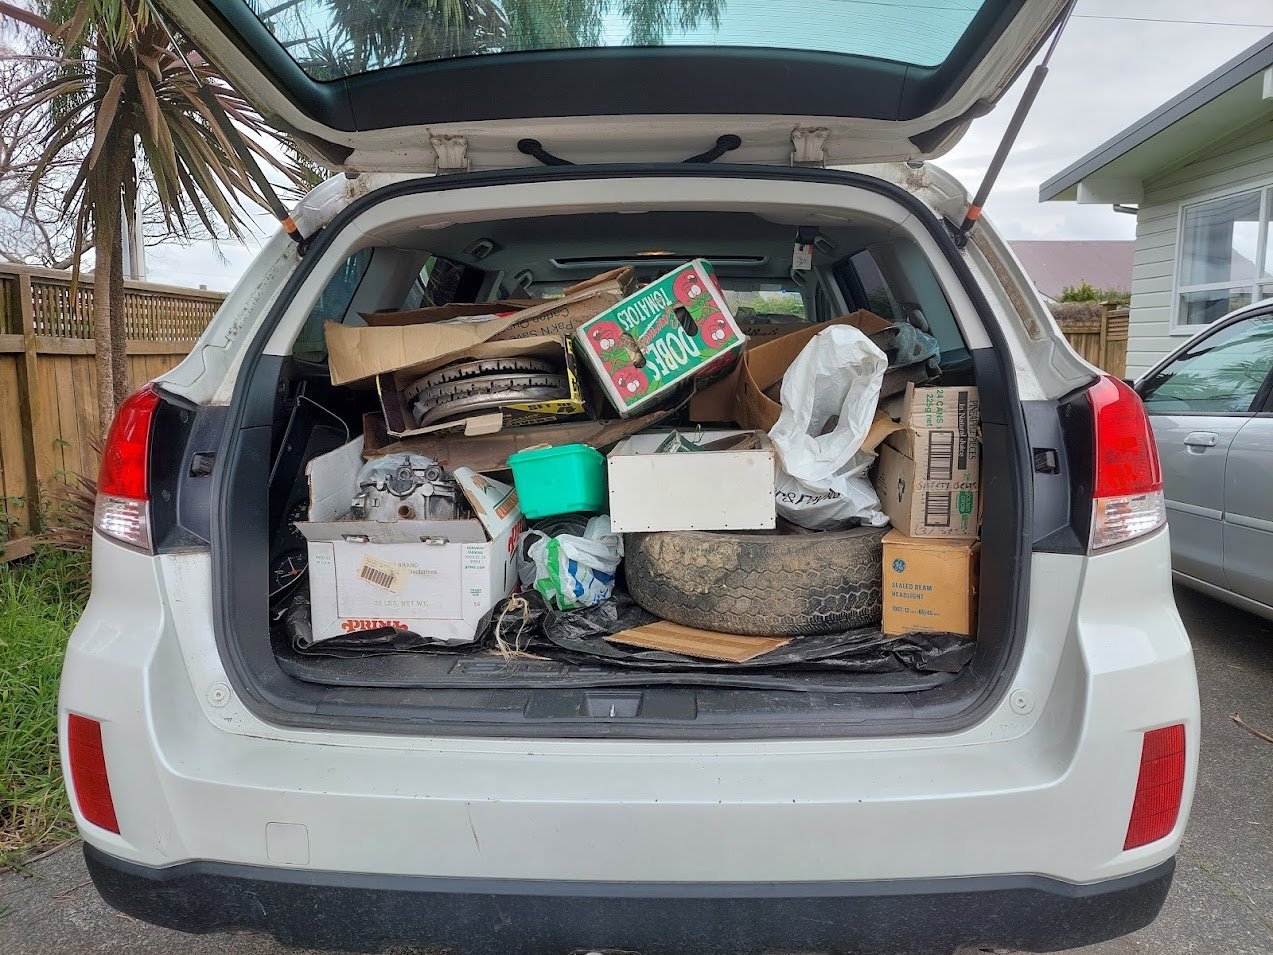
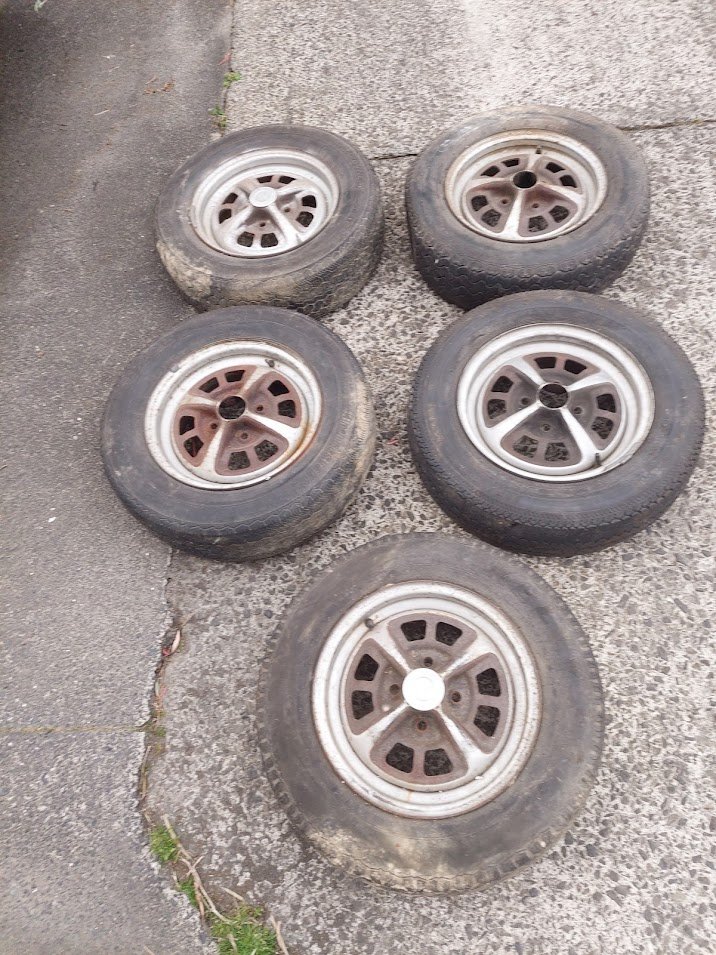
Bought an old barry's parts collection for no real good reason other than to have some spare parts. Anyone want a set of 4x100 Rostyles?
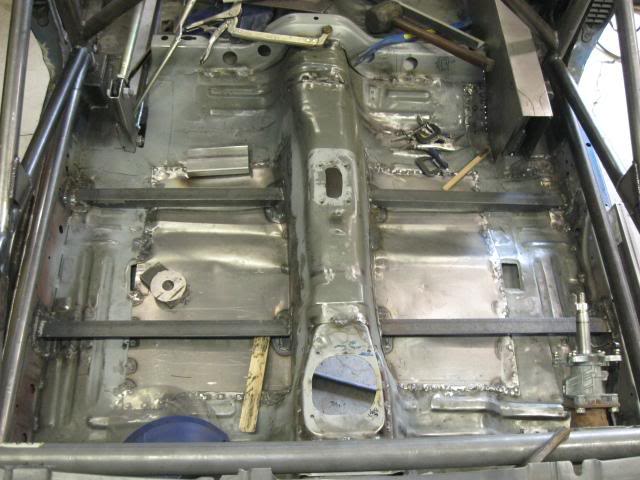
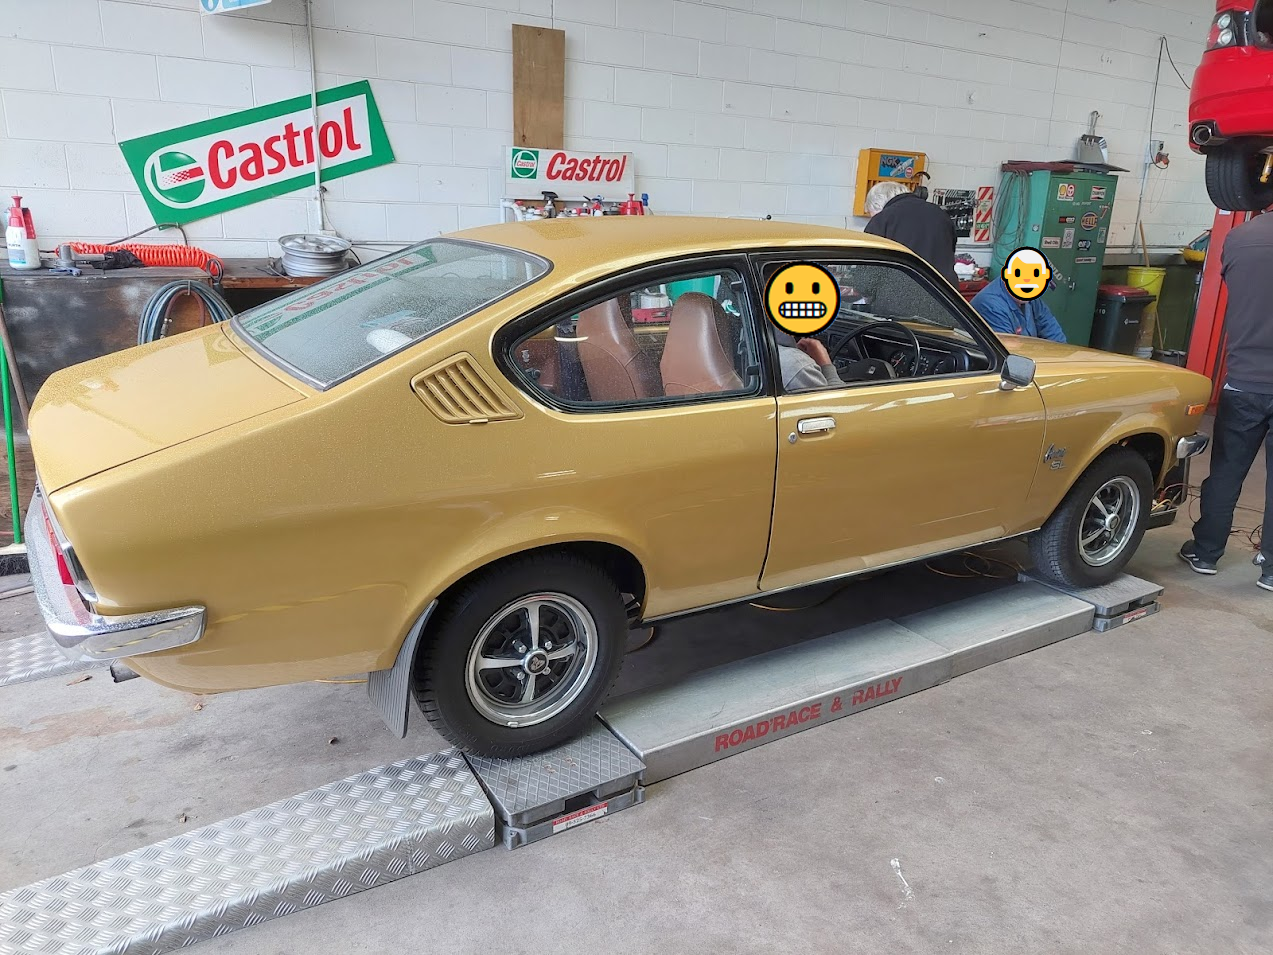
Took a mate's gem out to be corner weighed at Road Race and Rally. Needed this figures for the getting the shocks made, which I'm waiting for from Shockworks over in Aussie.
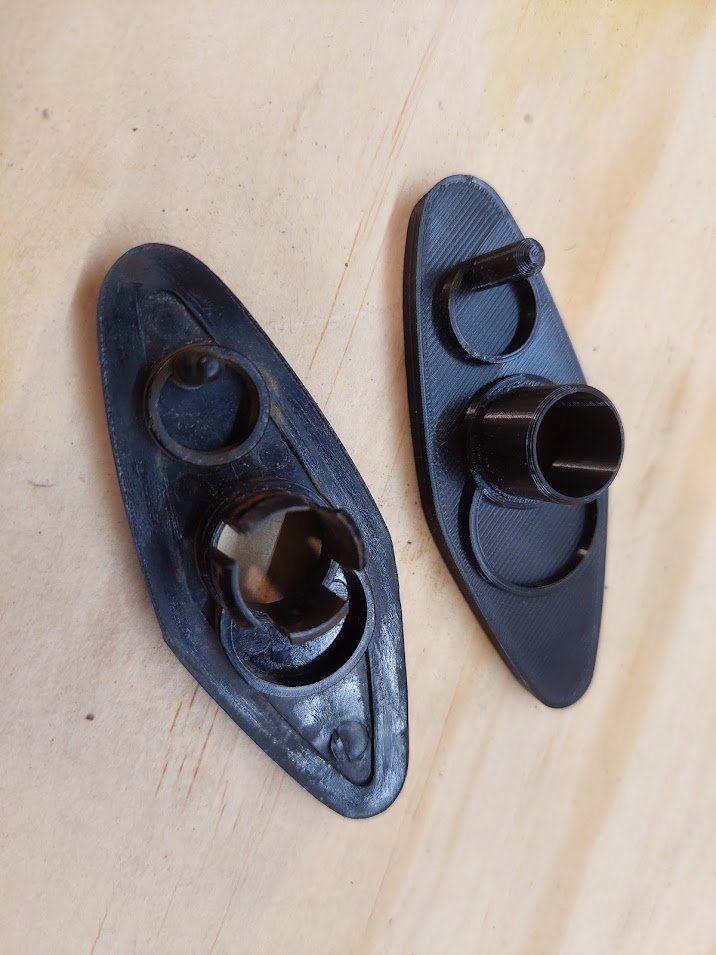
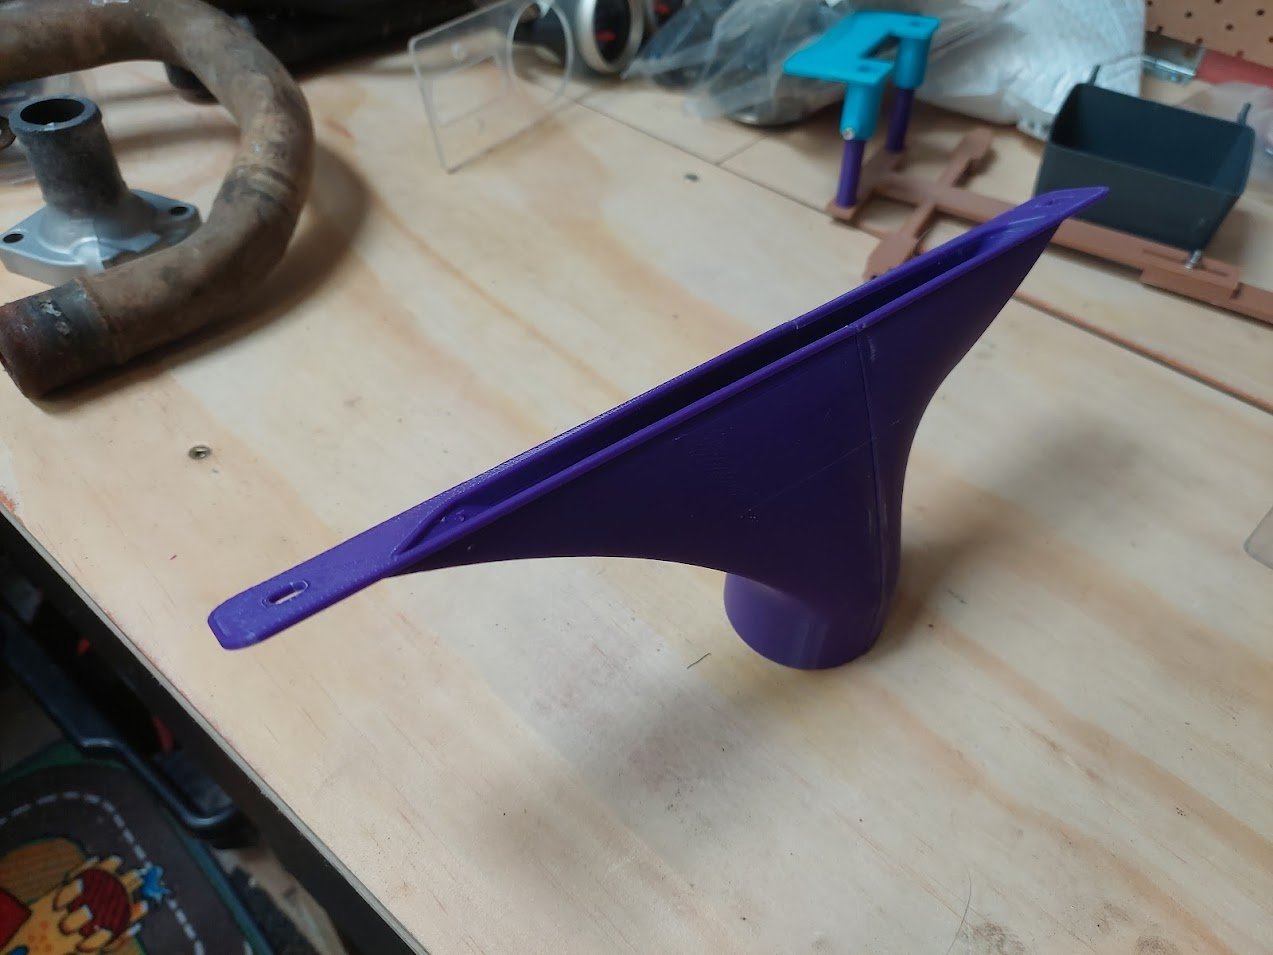
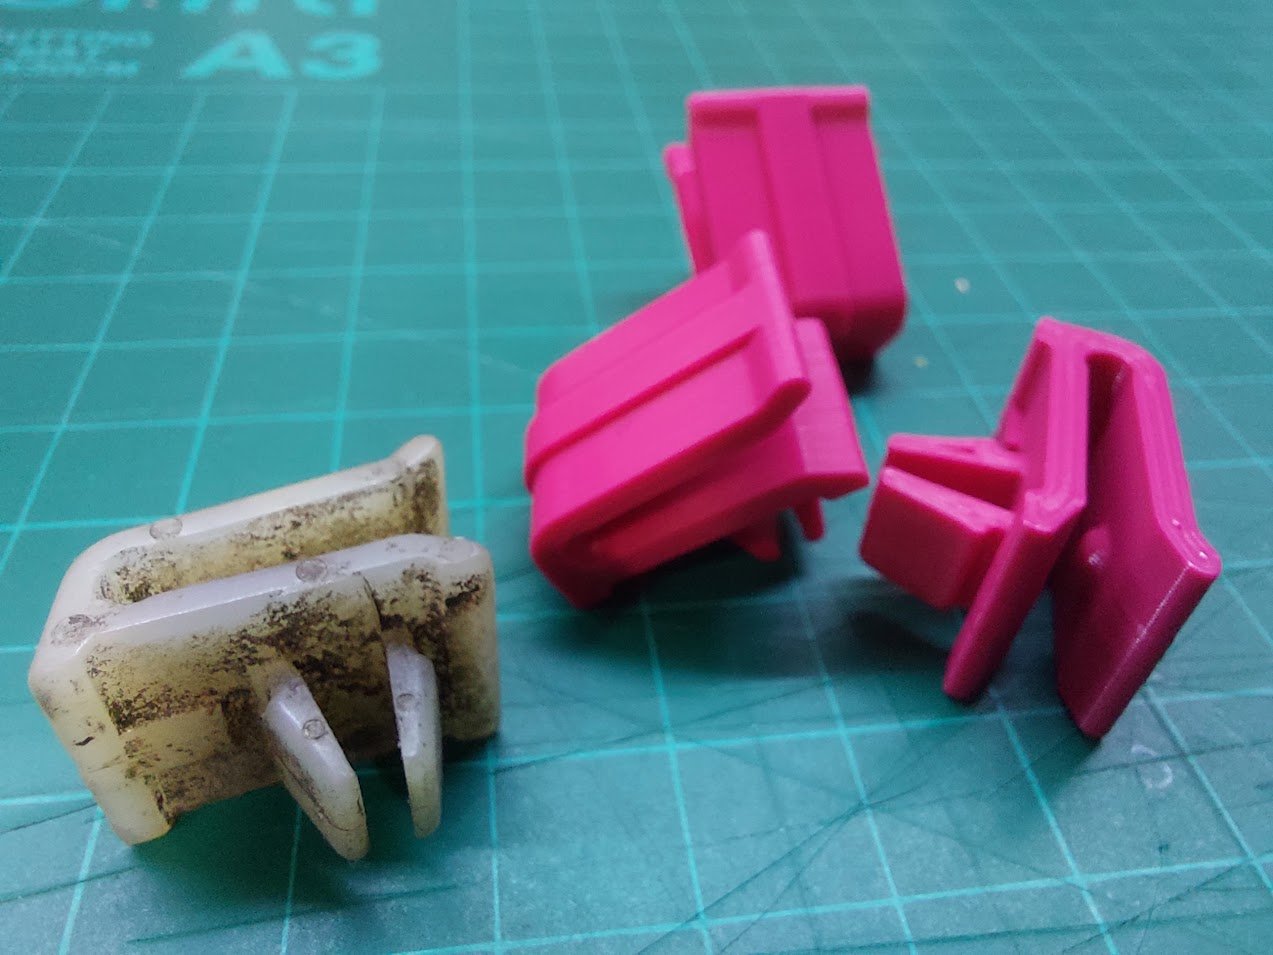
Been mucking around with printing new demister funnels since every stock one in the world has snapped at the bolt holes.
Also had a go drawing up headlight surround clips. These will definitely need to be printed in something stronger too.
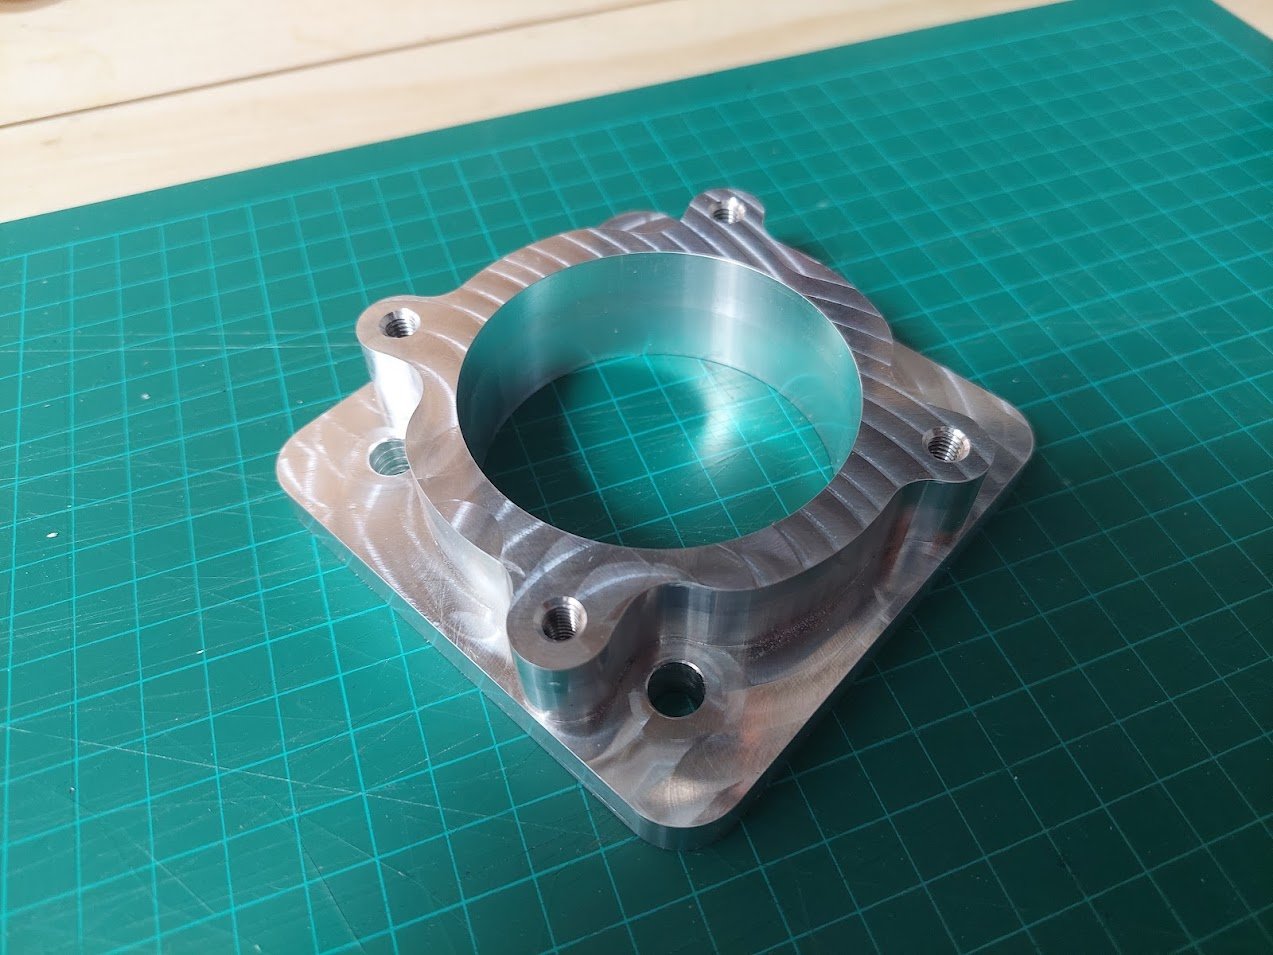
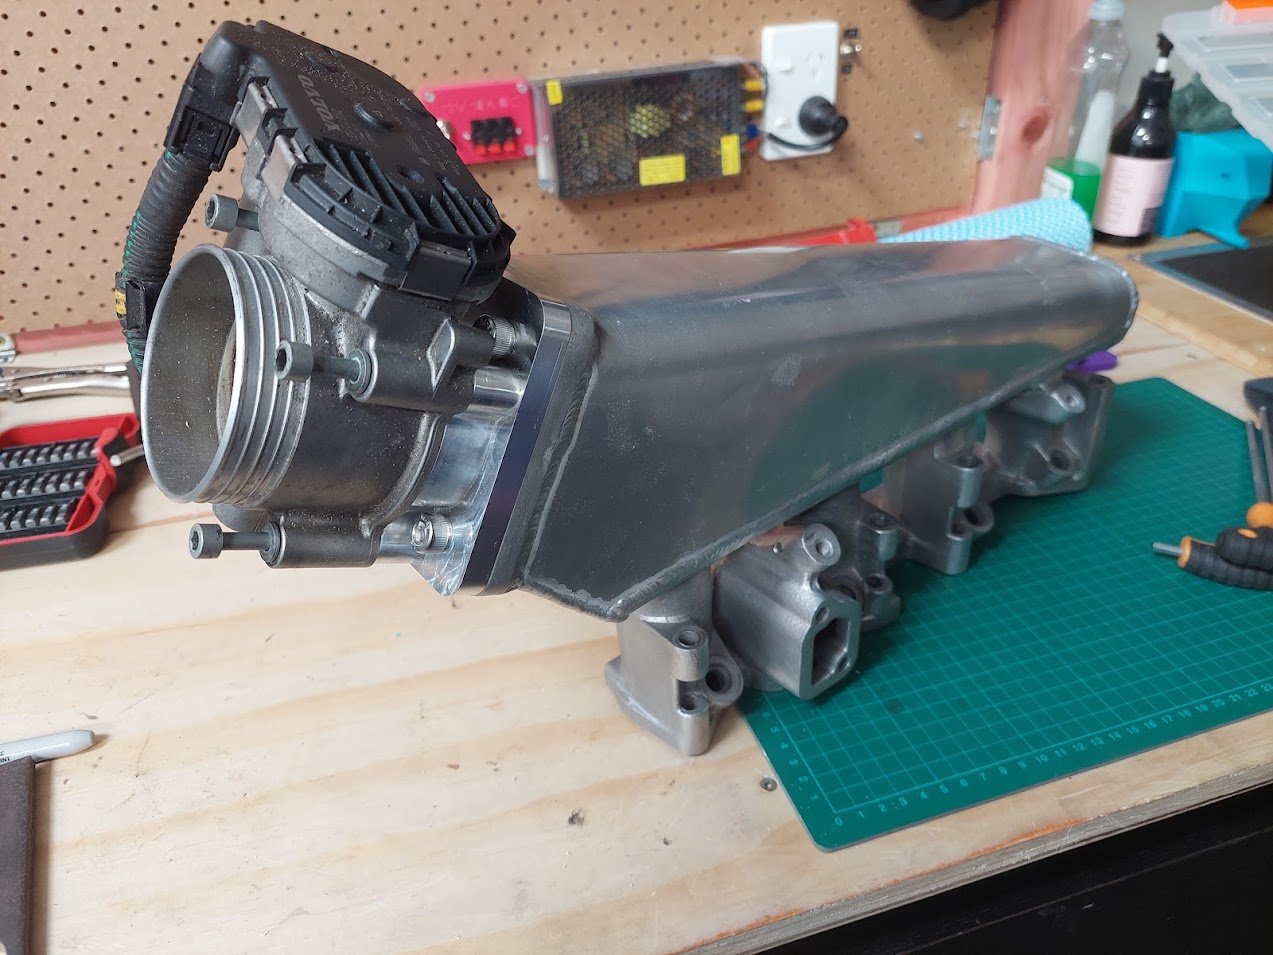
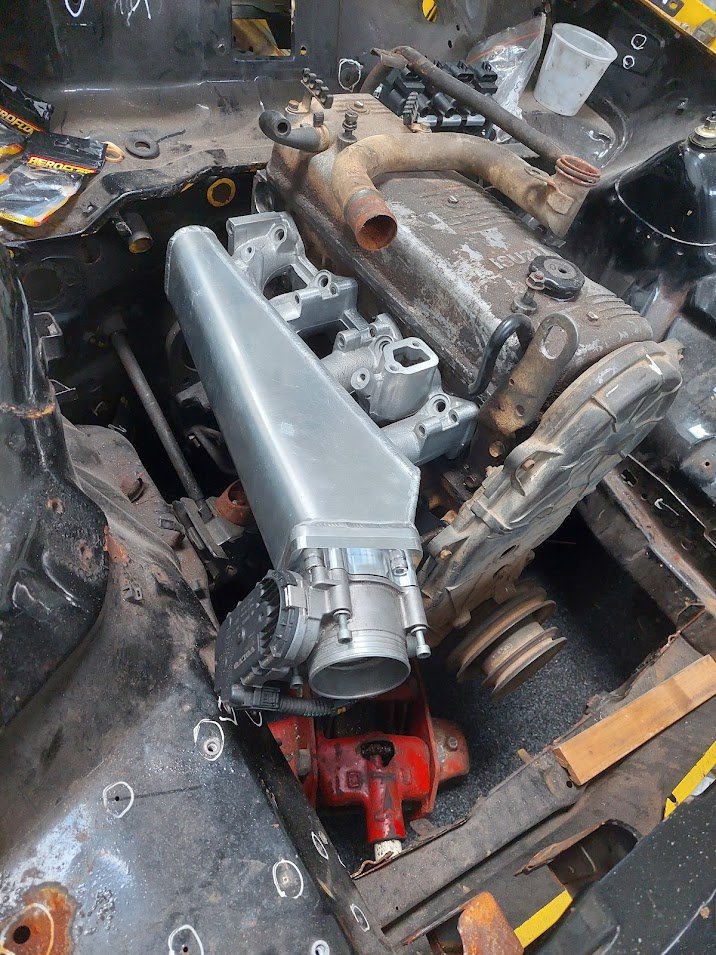
@Jerm CNC'd up the Bosch DBW throttle body adapter that I designed. Super happy with how it came out.
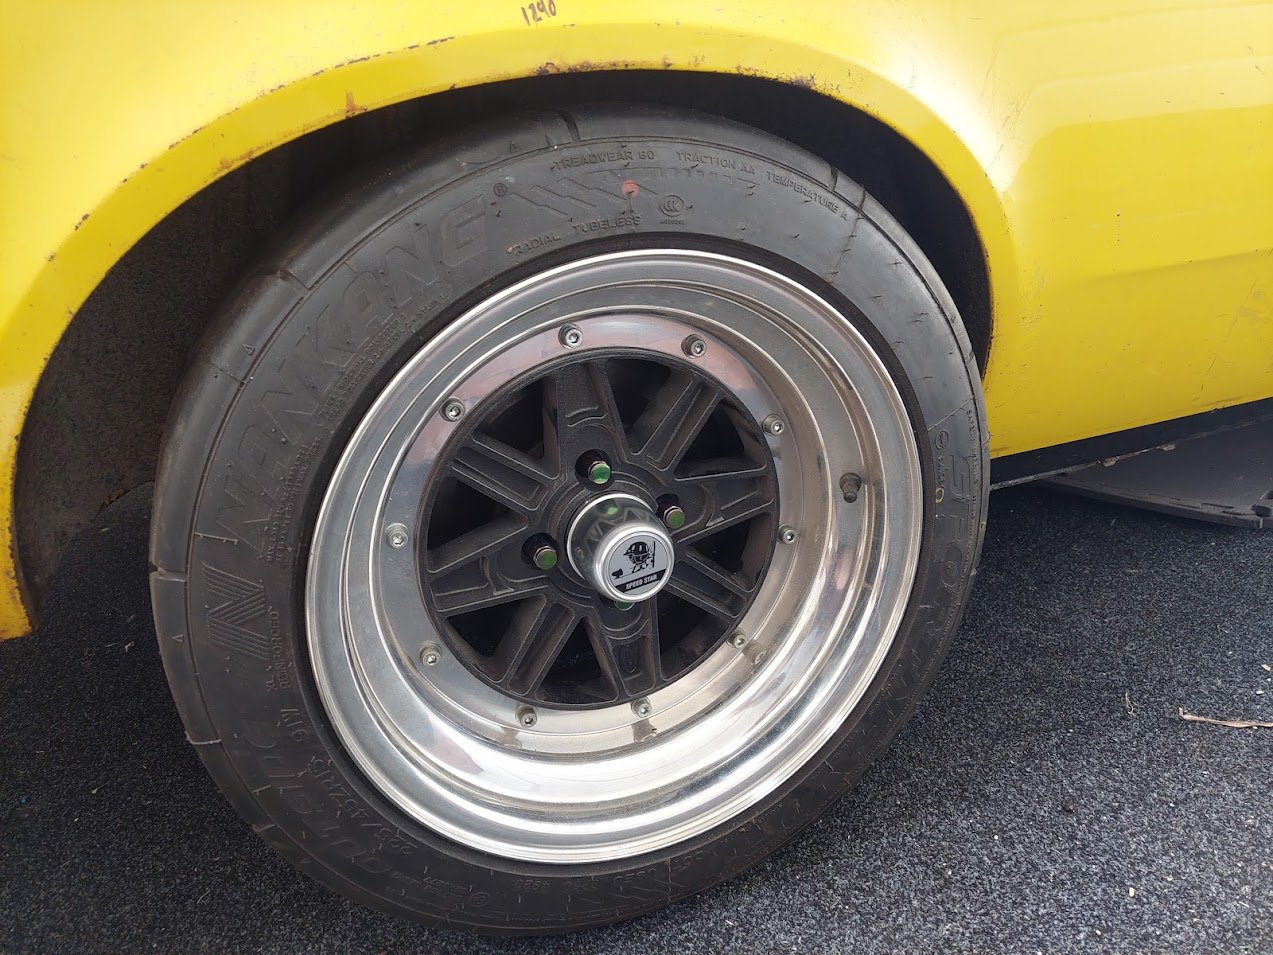
Got some new SSR centre caps made up in Japan. These are the MKII style, but I like the picture better than the MKIII one.
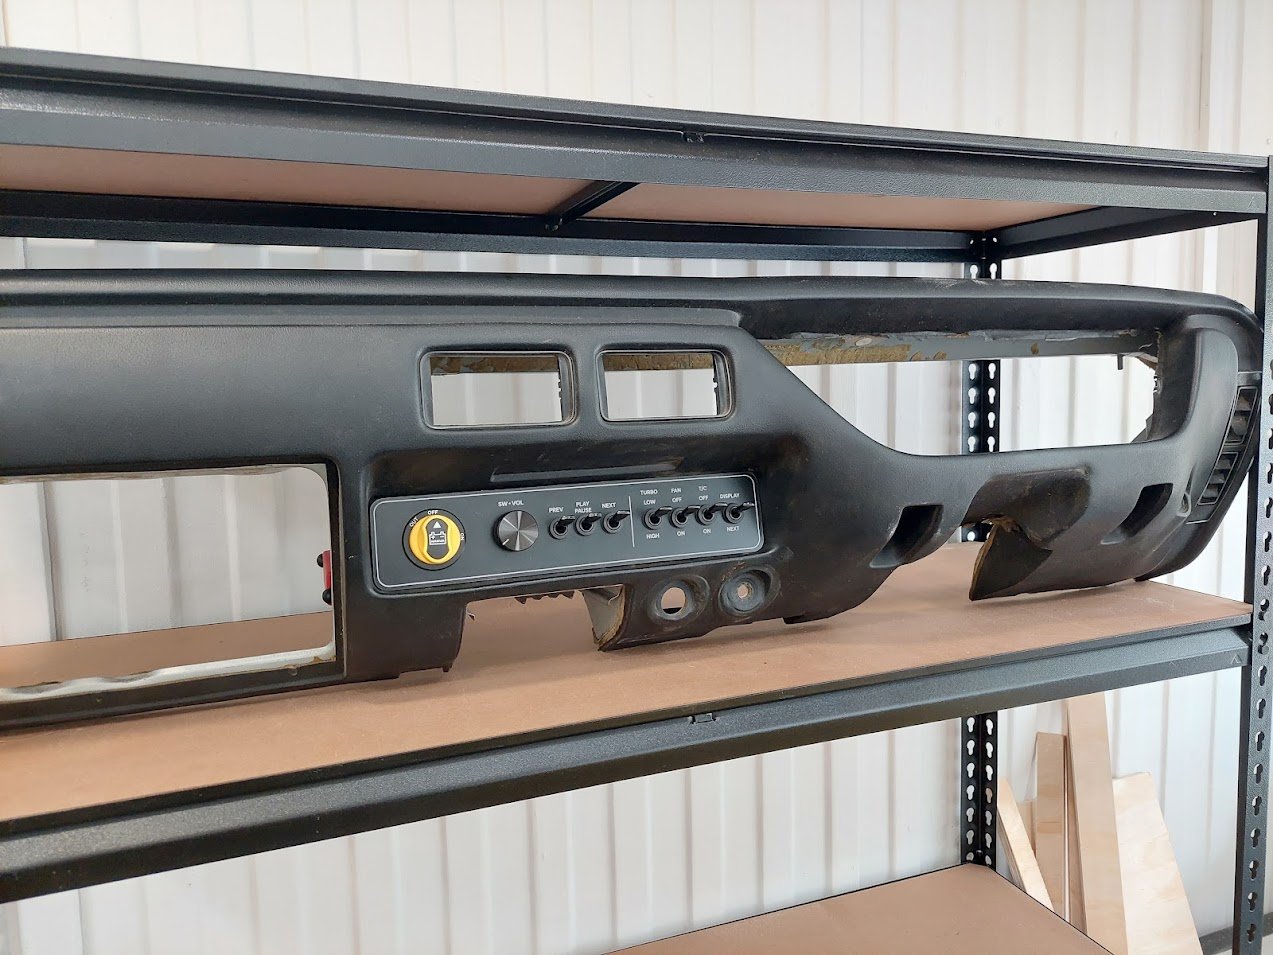
I drew up and had laser cut a new dash panel for all the different switches I need, including the bluetooth stereo. Took ages to find a font that was similar to the original!
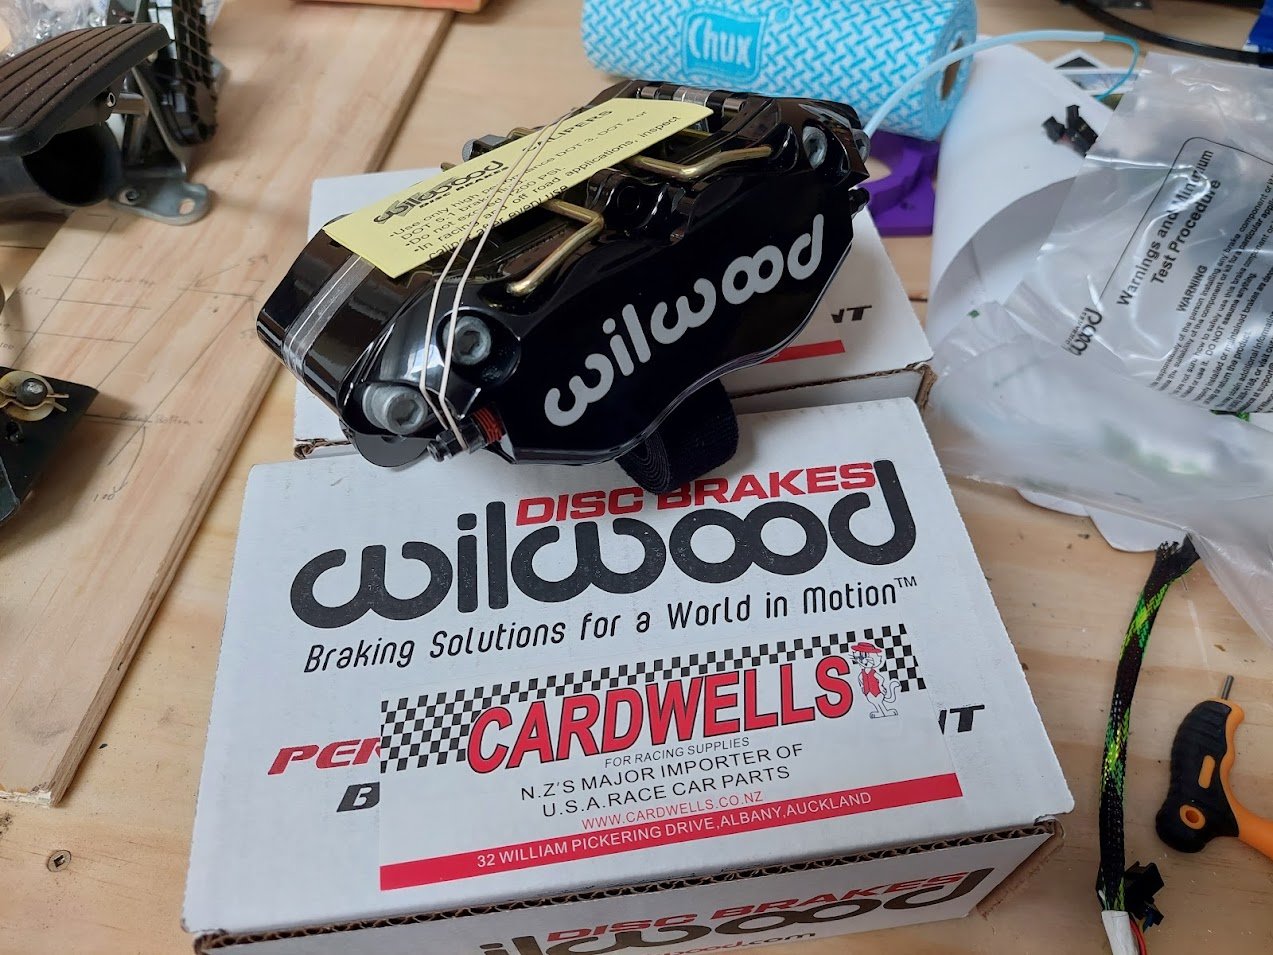
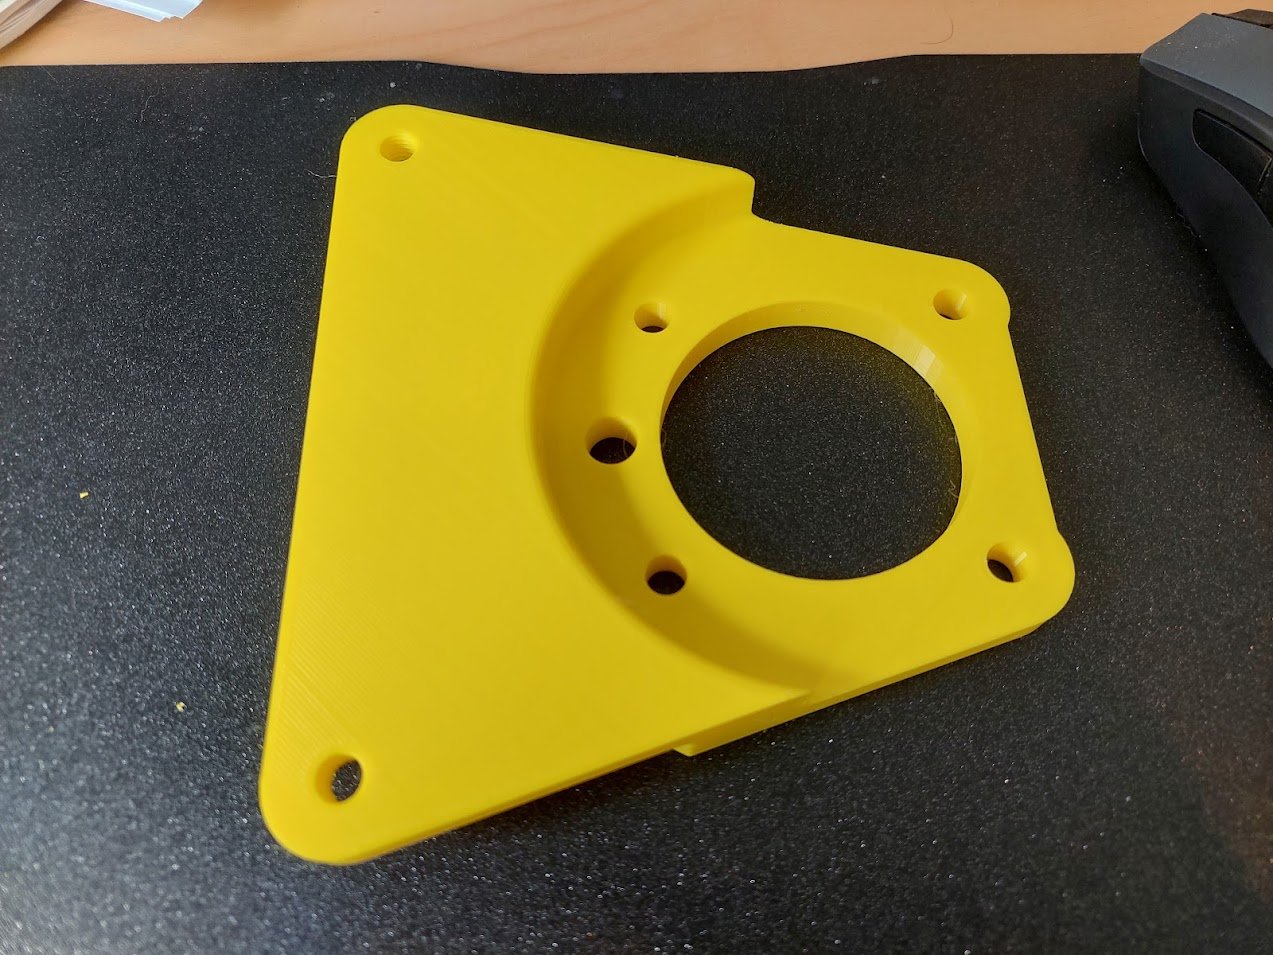
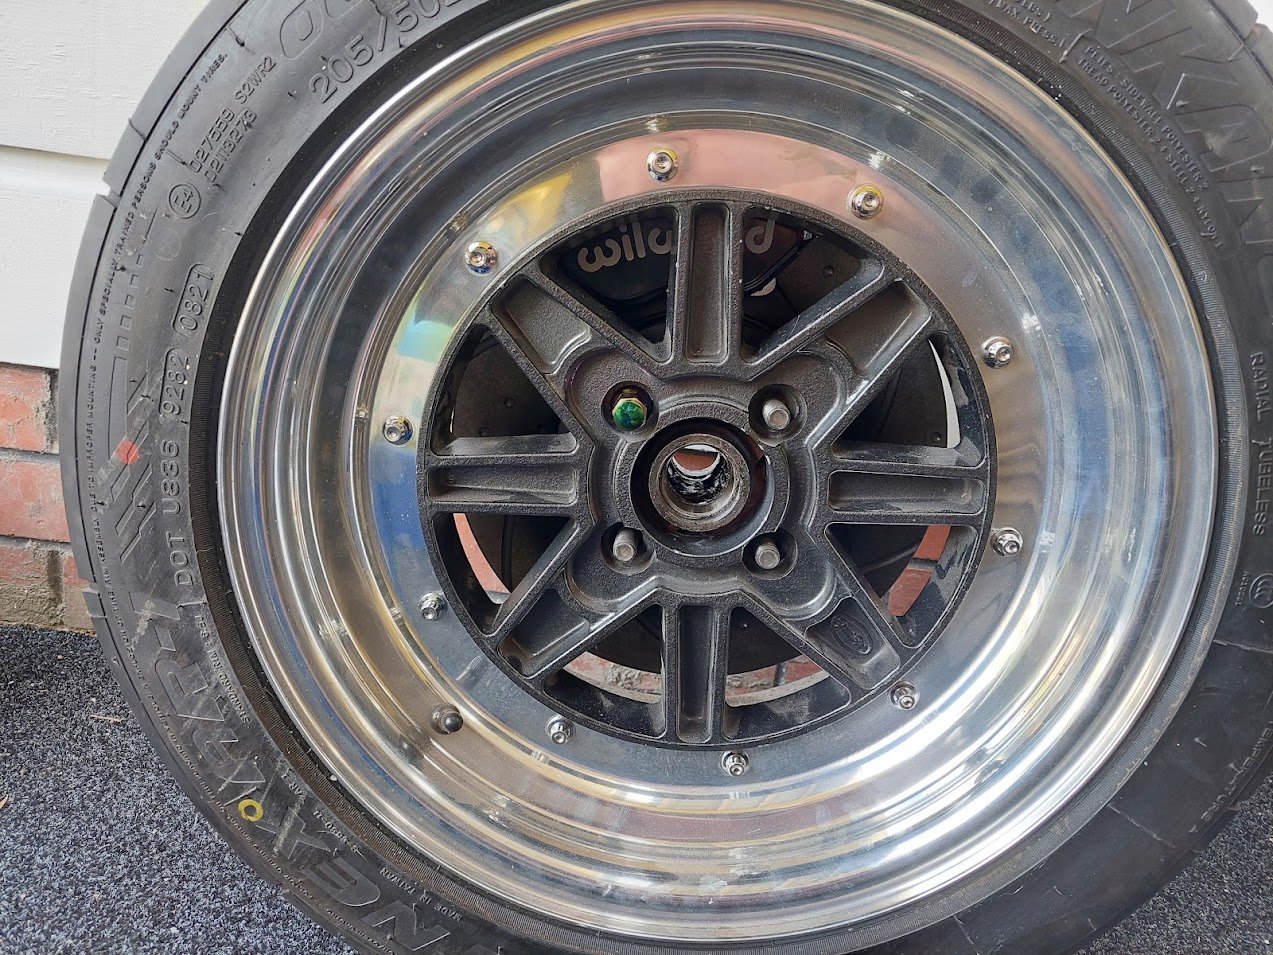
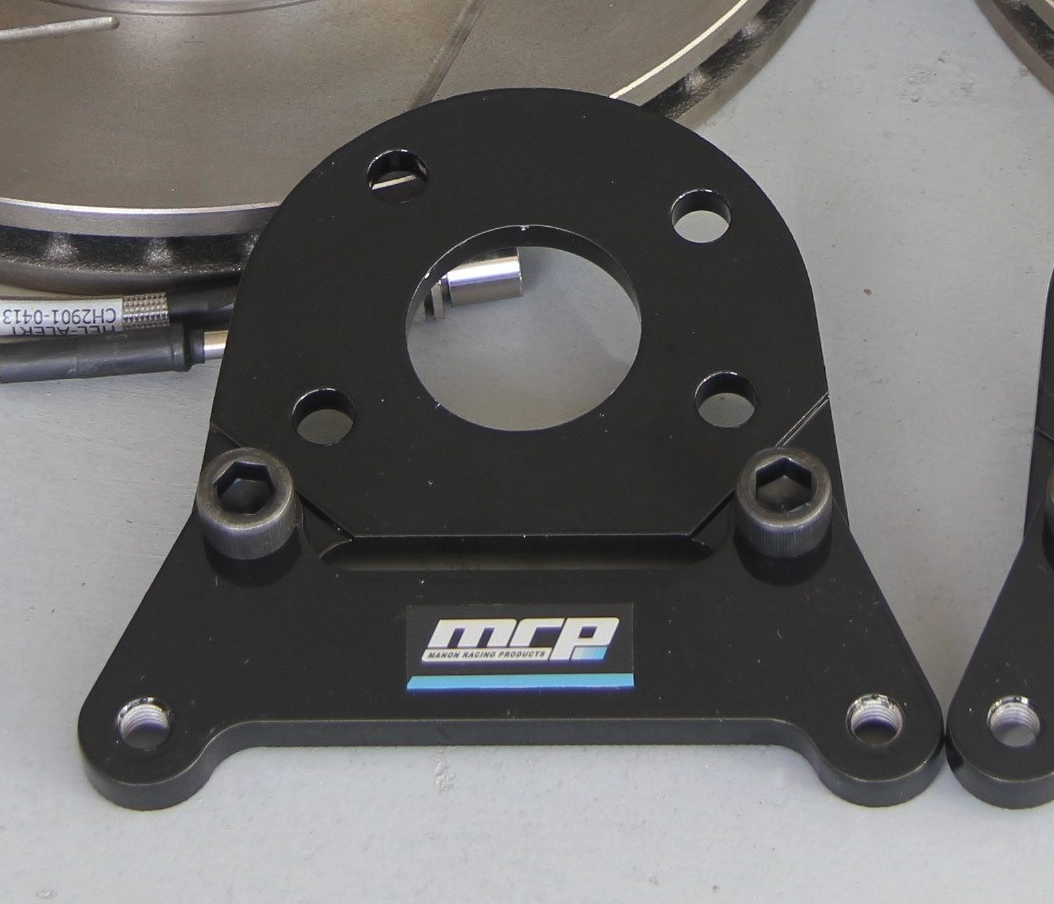
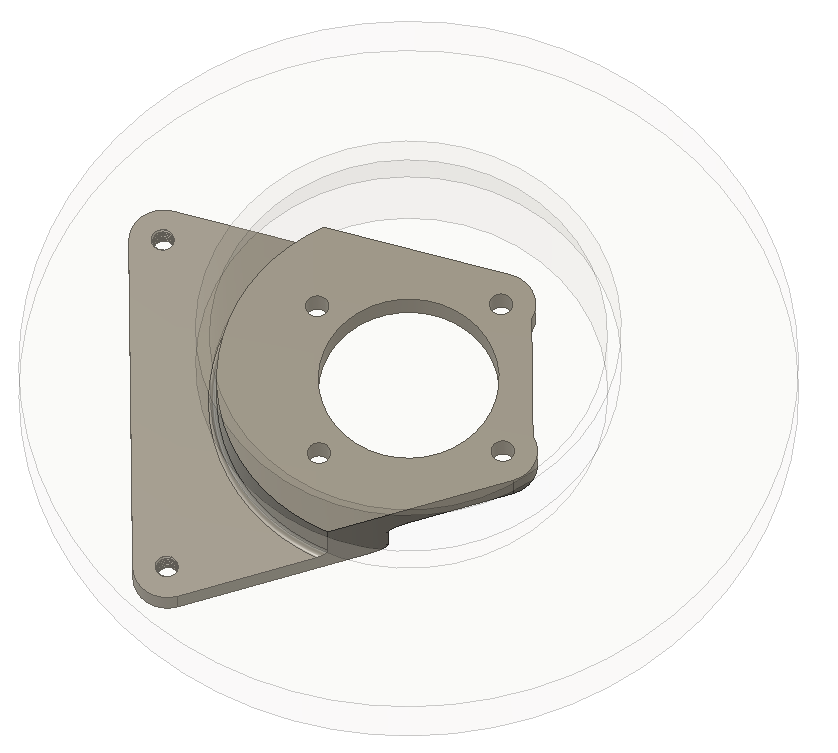
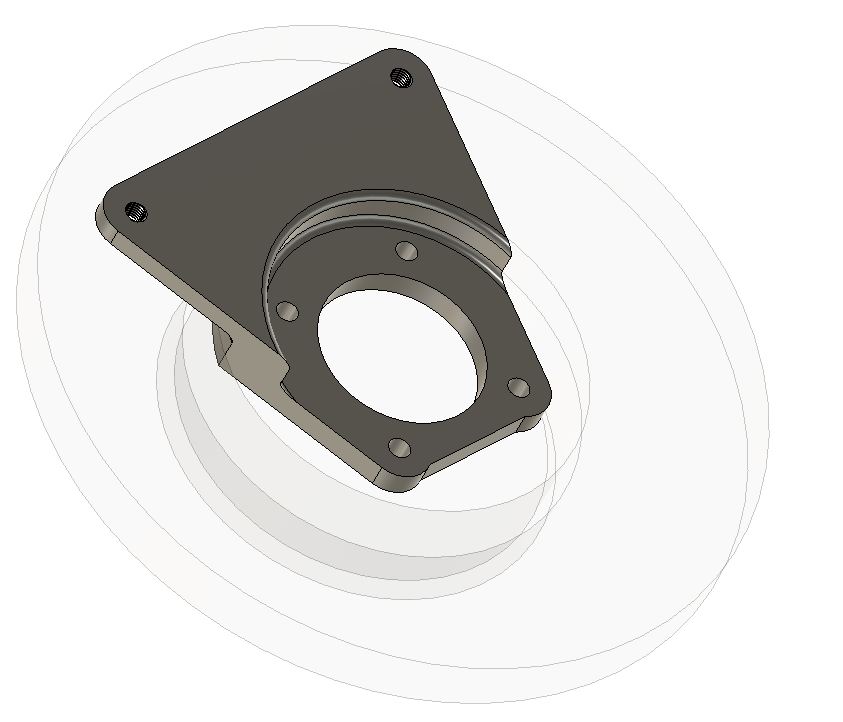
Unfortunately I had to ditch the Brembos as I could just not make them fit with the SSRs. I even bought shorter bolts and they still hit them with the deepest offset disc I could run. So I swapped for Wilwoods and bought some new Znoelli rotors for front and rear. Front ended up being s13 Silvia 4 stud rotors. I drew up and printed a new caliper mount, the one in the pic is not quite right. Thanks to @slacker.camfor helping me do the hard measurements yesterday and for helping me redrill the rotors to suit the Gemini hub. I've drawn up a new one that should be perfect.
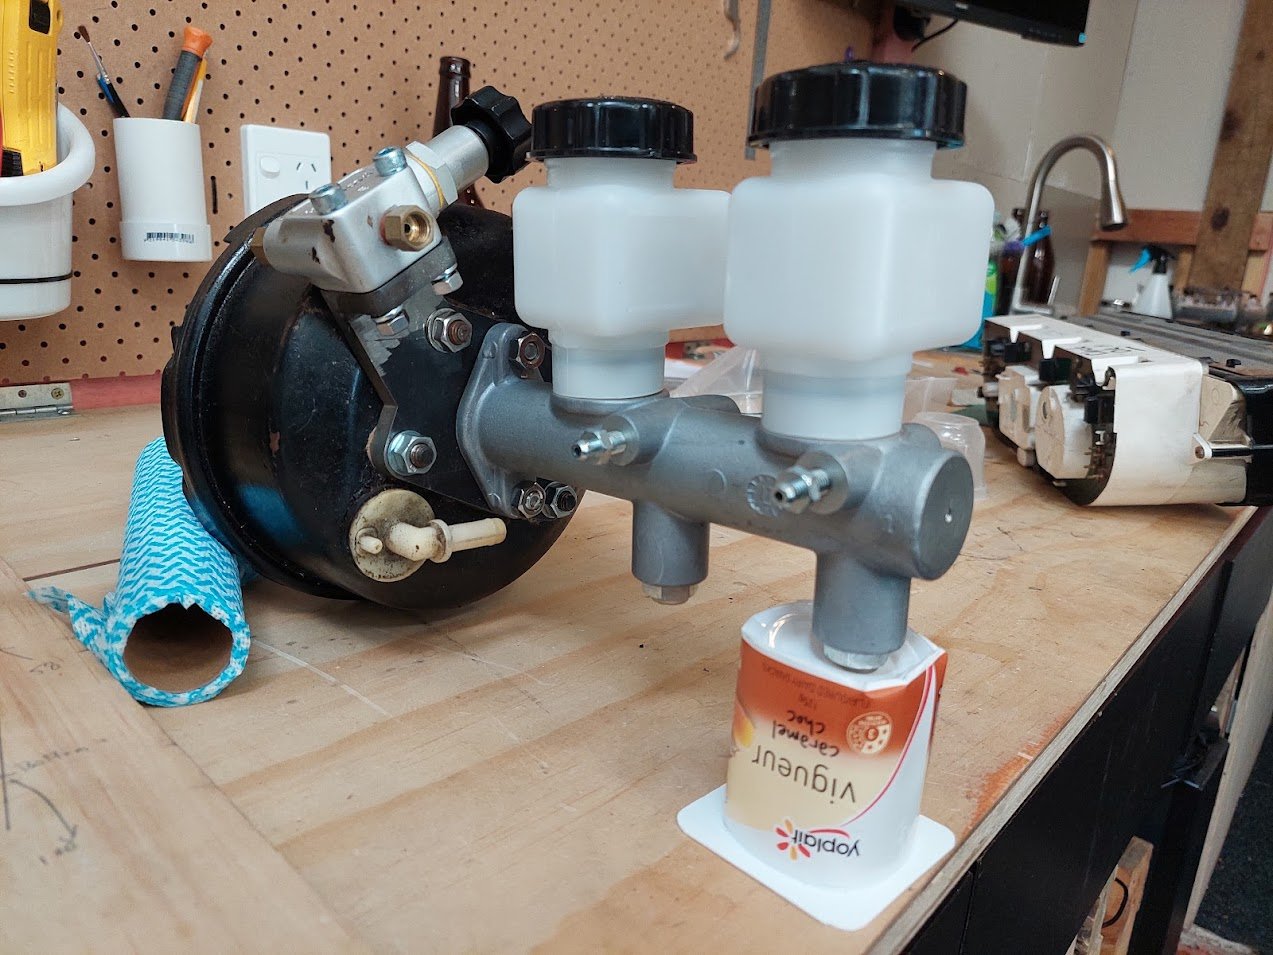
I also finally welded up the Wilwood brake master cylinder mount. Pretty happy with how it came out. I have also decided to run the plastic reservoirs as it's just waaaay easier.
That's about it!
-
30
-
Last time I bought gauges was from eBay. Autometer Sport-Comp. They are nice looking but not super cheap - just checked and they are about $200 NZD each on eBay.
-
1
-
-
22 hours ago, GARDRB said:
I'm not sure if you're worried about manufacturing cost, but it may be cheaper to make those from two laser cut pieces of plate that bolt together like Barry does with his MRP caliper brackets then getting them machined from a single piece. You'd want to make sure @cletus is ok with it of course.
Yeah, I've thought about this. The hardest part with that is that the back of the rotor is deeper than the front of the hub's caliper mount, so it will always need some kind of dog-legged bit.
-
1
-
-
2 hours ago, cletus said:
I think it might be a bit thin to do out of aluminum, steel would be a safer bet unless you could supply some sort of proof that it would be up to the task
Threads directly into 8mm alloy wouldn't be allowed, from memory wilwood brake kits (that do have thin aluminum brackets) have steel inserts for threads
Thanks. I'll make it out of steel. Could probably size up to 10mm at the caliper side just to be safe, just doesn't leave much room between the bracket at disc (approx 3mm).
-
Will it be okay to make this bracket out of aluminium? Caliper mount area is 8mm thick, steering knuckle area is 10mm thick. Holes for mounting caliper are threaded.
-
Cheers @sr2! I guess I should clarify that the standard car has solid rotors and twin piston calipers with a 48.1mm piston: 1,817sqmm. I upgraded to the 38mm floating and am going back down slightly to the 35.1mm fixed. So relative to a stock car the Wilwoods are up 213%, and the VT sliders were up 250%. I reckon the actual pad contact area will be relatively similar - hard to know as measurements for pads are not the actual material but the overall size!
My thoughts re the loss of clamping area - I was probably over braked before, if that's a thing. I know of a few actual race cars that run the same rear brakes as I have, and front 4-pots with 36.1mm pistons (Rx-7 calipers). If they can stop a car at race speeds (albeit in a car that is probably lighter than mine), then I think the 35.1 pistons should be ok. Hopefully any discrepancy will be small enough that changing pad compound and making adjustments to the bias will be enough to compensate.
-
Interesting stuff - thanks! I'm going to go with the 35.1mm pistons. Can adjust MC to suit if necessary.
-
22 minutes ago, mjrstar said:
Real question is why go for the 4 pots? Is it to make it look cool, as there isn't too much wrong with a well set-up 2 piston sliding caliper from a performance perspective.
You caught me! Nah, the setup I had on there before, while working well, needed to have the steering lock reduced so the calipers didn't hit the LCAs. It also pushed the track out 10mm each side, which is cool if you want wide stance but I'd rather my wheels sit inside the stock guards nicely.
I also need to find a disc to make these clear my wheels, but that's another issue all together.
-
 1
1
-
-
I'm upgrading my front brakes from a sliding setup to 4-pots, but having trouble figuring out which Wilwood calipers I should buy in terms of piston size to ensure it works with my current setup. Right now it feels good under foot.
Current setup:
Front calipers: 2 piston sliders 38mm x 2
Rear calipers: 1 piston sliders 29mm x1
Master: 1"
Boosted
Bias valve for the rear
Pedal ratio: 5:1.Wilwood have a few options for the piston sizes, with all four being the same size: 44.5mm, 35.1mm or 25.4mm.
Some things I've read say to only calculate the area of 2 pistons (one side) in a 4pot setup, but surely all pistons need to move?
What will be the result if I size up or down piston size?Cheers


For Questions Regarding WOFs/CERTs/NUMBER PLATEs
in Tech Talk
Posted
Cheers Clint, you're the man")