


NickJ
-
Posts
3375 -
Joined
-
Last visited
-
Days Won
1
Everything posted by NickJ
-
Most of the feedback i've read on china winches is they make the pull by lower gearing, you pay more for line speed at given pull.
-
Run the winch off the starting battery so that it gets the grunt of the alternator to help it out, if its a legit Warn you should be able to find a 24V motor on ebay. I have read about guys running 12V motors on 24V, just need to watch the temps and accept they will die sooner.
-
Man I likely spotted this at the same time you did, if I wasn't out on a work trip I would have jumped on it too, such a bargain! Although escorts aren't my flavour, the availability of spare panels makes them appealing projects to keep the hands busy. I wish you all the best with building momentum, you got this!
-
Brake fluid is glycol based, ATF/hydraulic is mineral oil.
-
Somewhat of a pain, but that was one of the requirements when we set up the Defender, cook/daily business out of the rain and sandflies Its kind of tricky and killed useable space, but we've done a few bad weather trips and journeyed sandfly country that proved its worth the effort. For our fridge I run at 4C while driving and then 8C overnight/parked, this really cuts the power requirements. Met a guy over summer who had a fold up sitebox on his ute, with the gull wing up it was over headhight shelter, inside he had a legit gas oven and cooktop, the dude was cooking up full roasts on 4wd trips, not to mention garlic bread on lunch stops.
-
Is it cost effective testing old standard injectors or just replace with new?
-
Anything to not sand bog, fuck I hate dust. I have been pondering what shortcuts i'll start taking once I get a sniff of compeletion! Poured some Argon on today

-
Seems to be the flavour of the build, "Just 5 more minutes"
-
Went to Napa, a very helpful bloke dug through the system, for one moment he did call Gav who took one look and said ooh, Bosch, nah, you're fucked mate and went back to his desk. Eventually we found some oversized ones that i've trimmed but unfortunately they probably won't work cos the braid is all wrong. Had another trip about to various suppliers, word is ex Auckland, delivery fuck knows or a new starter for $300 - 1200. Unfortunately, Gav speaks the truth. Thinking this one is gunna be left until I get back from a work trip in a few weeks.
-
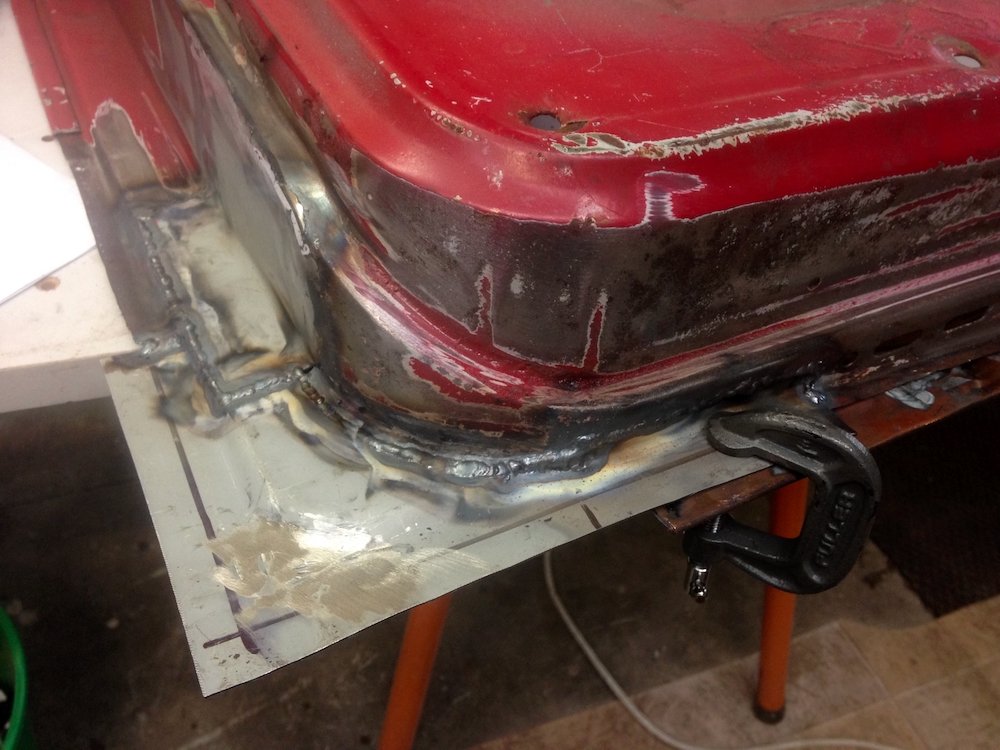
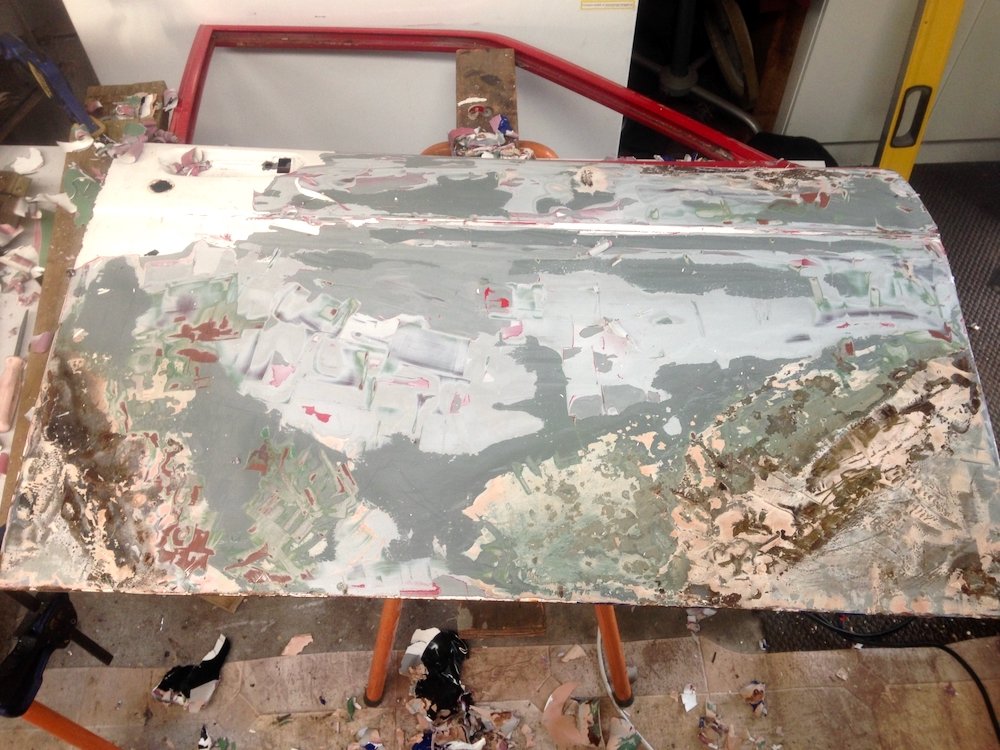
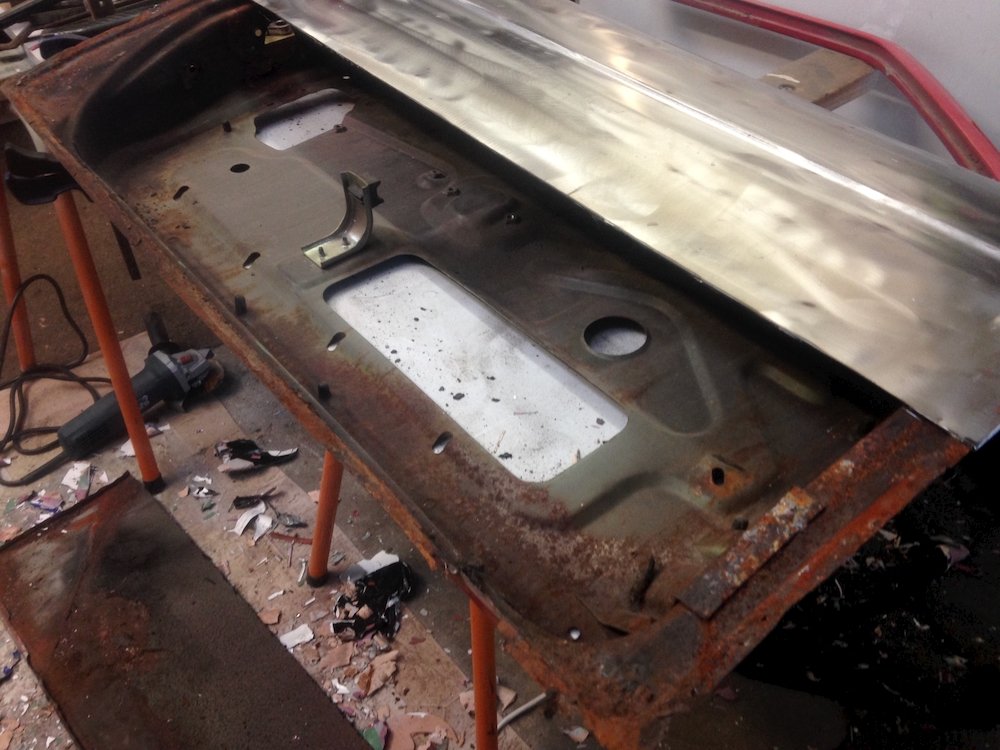
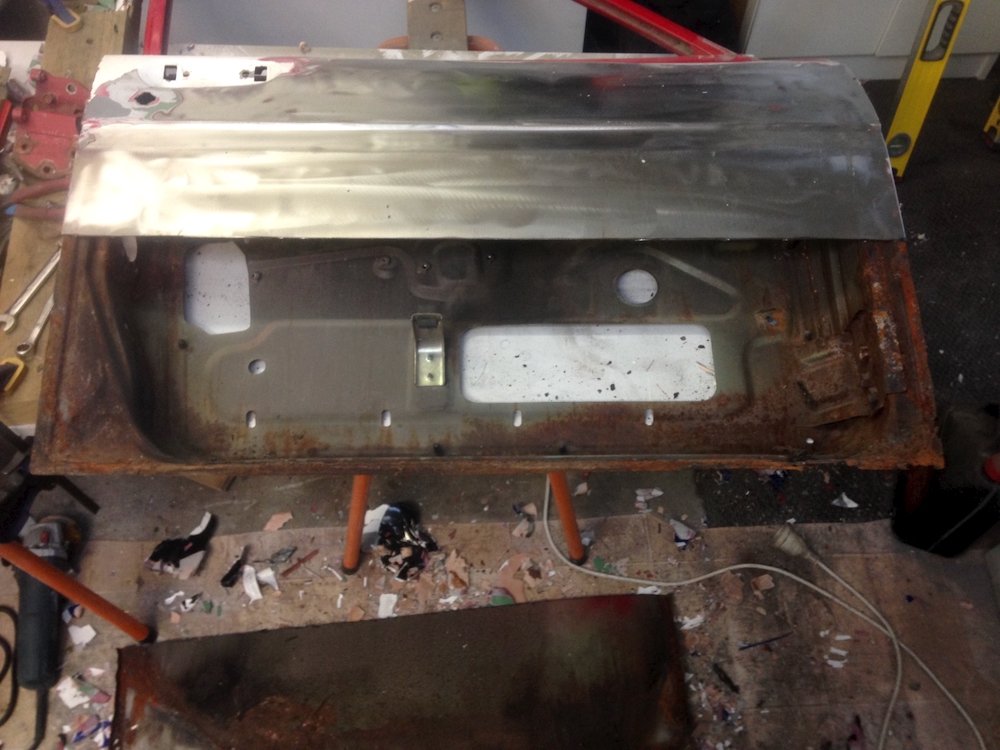
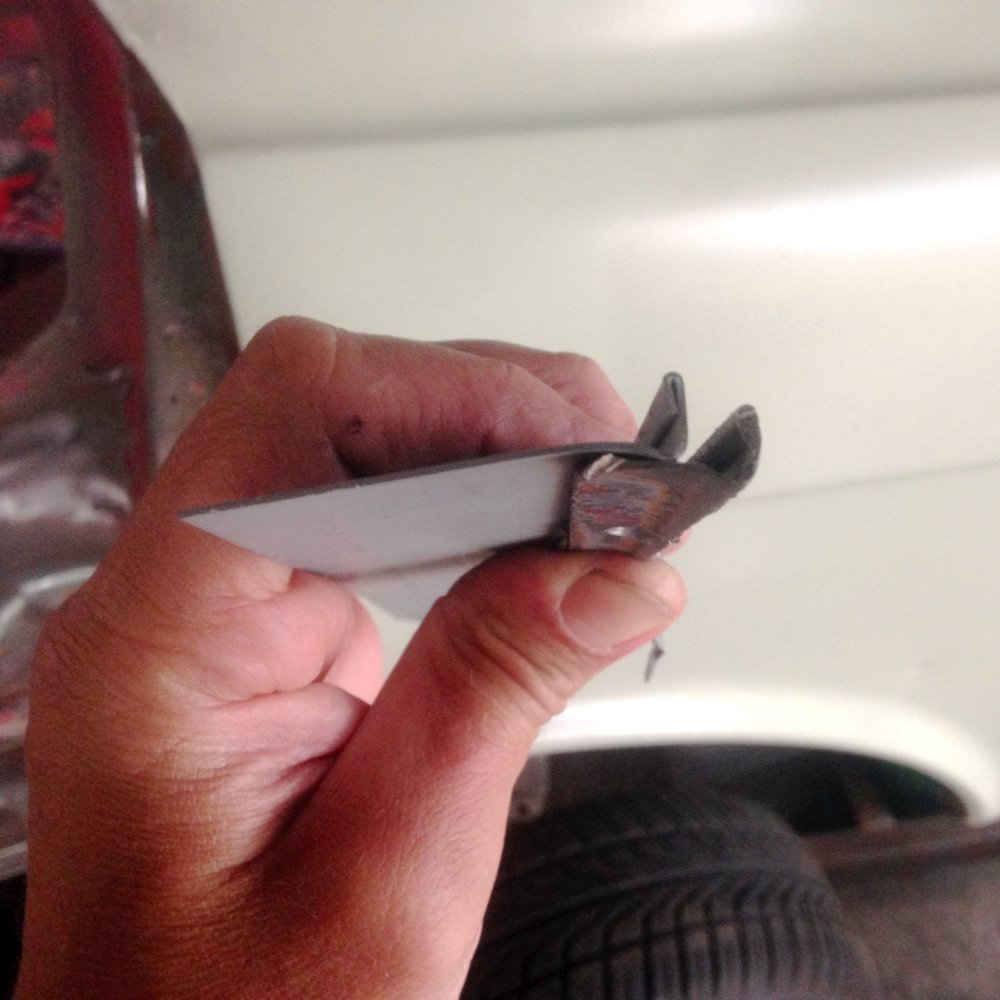
Will be an easy job, just bolt the door back on, check the lines, profit. Why are we such optimistic buggers? Good old bog cracking there, let's pick the scab eh? With signature gas welding I gave dad a call for some quality banter, yep, this was indeed his handywork, this door he repaired 30 odd years ago when commuting a fair distance with a young family and zero budget for the sole purpose of getting a clubcar running. While several methods uncovered are well scorned by the concourse crowd, for them to last this long is a sign that for my purposes, there is no need to get carried away, nothing really wrong with a quick tidy up, treat the rust, procure another 4l of bog and get that bloody front guard sorted. Anyhow, in 30 years time i'll be out to pasture and my kids can bitch between themselves about how poorly I treated their inheritance. Aaaaaaand OCD enters the room. Guided cut parallel to the sill showed the extent of the problem, releasing the stress in the panel, the lower half popped up 10mm. Removing the rest of the skin was easy thanks to Datsun's patented dissolving bodywork. Nothing too nasty, but I can easily see a few weekends of Tea and biscuits to get this back together!
- 53 replies
-
- 16
-

-
If only it wasn't a tri-diamond https://www.instagram.com/p/CSDia8IFYWu/ Also not very sandfly proof for cooking dinner, but some good use of space.
-
I hope he like British electrics before morning smoko.........
-
after 4x 17x7.5mm brushes for a starter motor, who holds good stock in chch? My usual parts supplier doesn't hold any
-
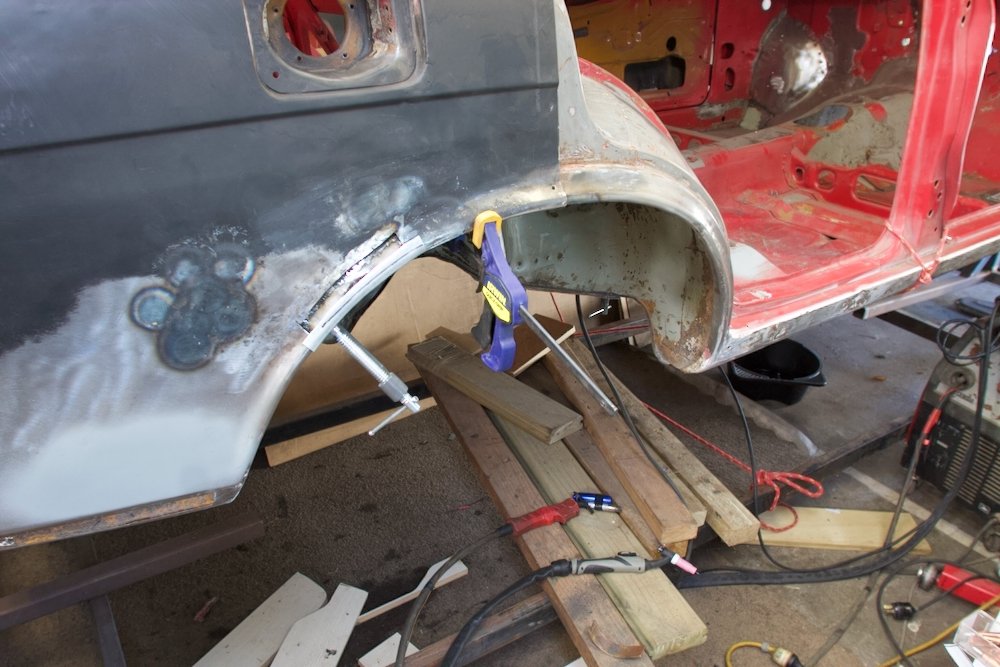
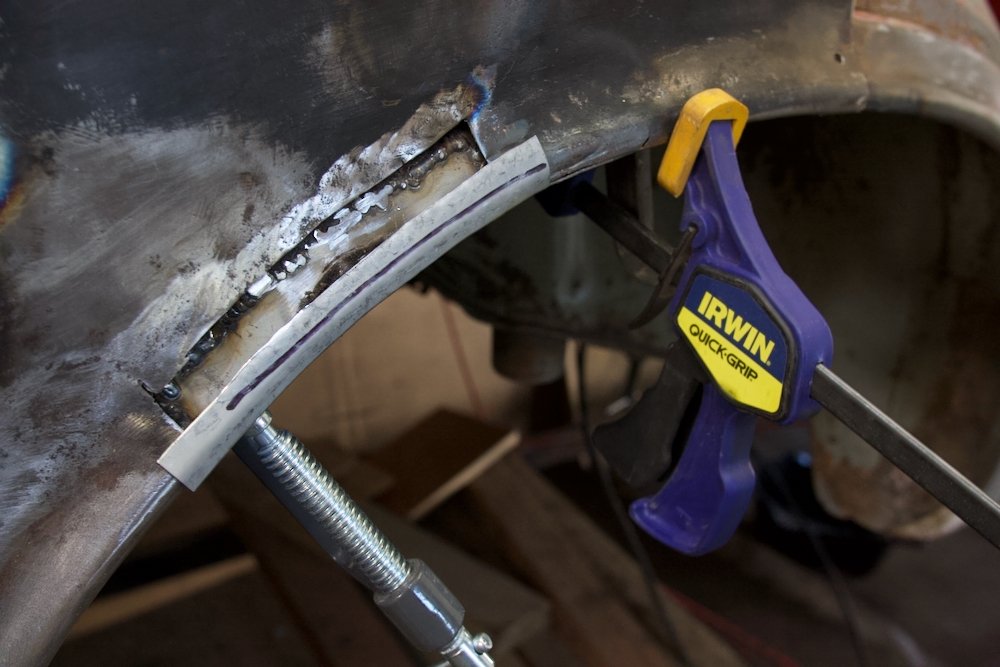
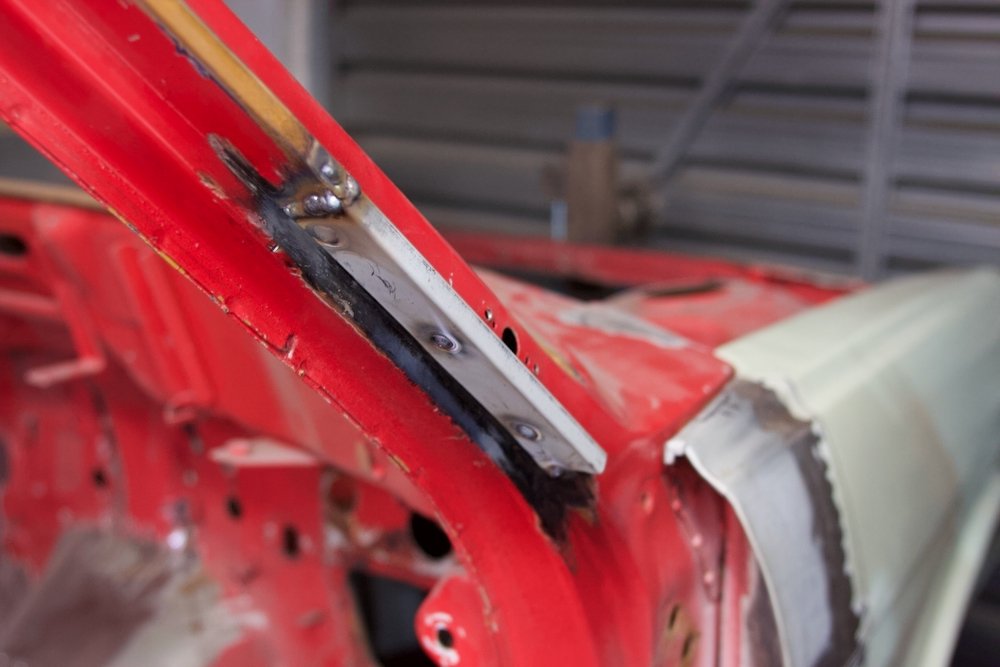
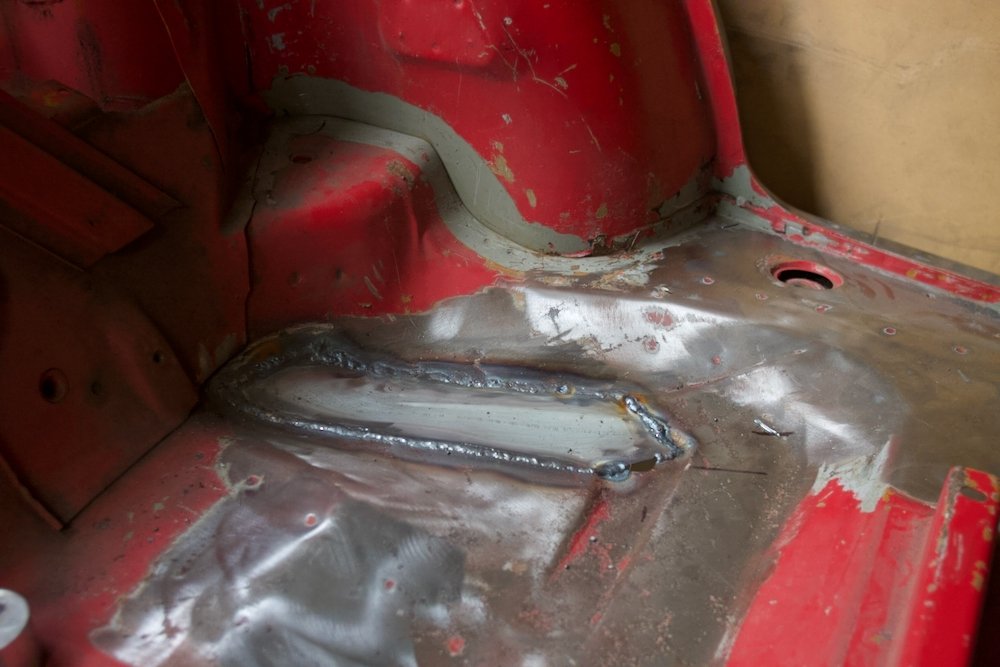
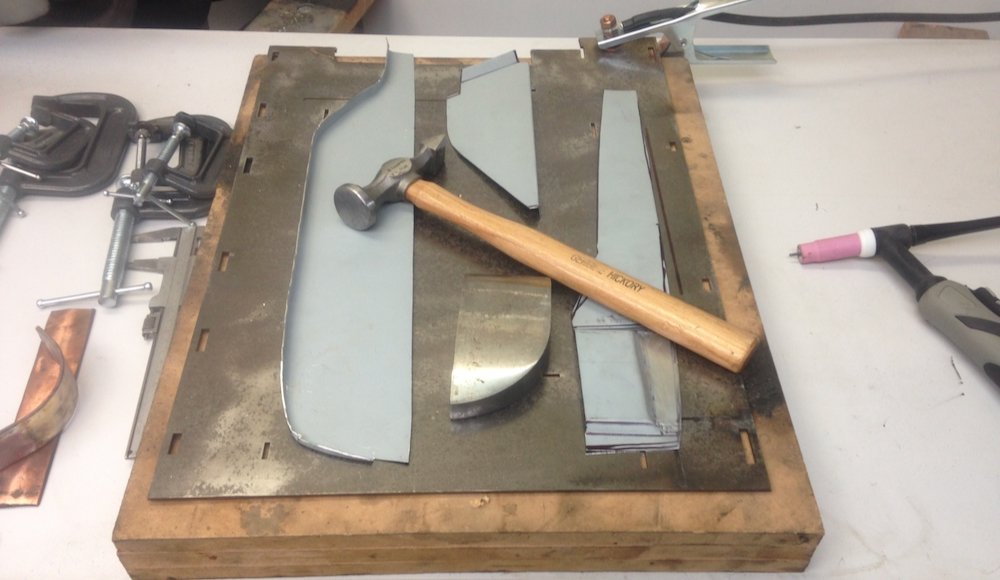
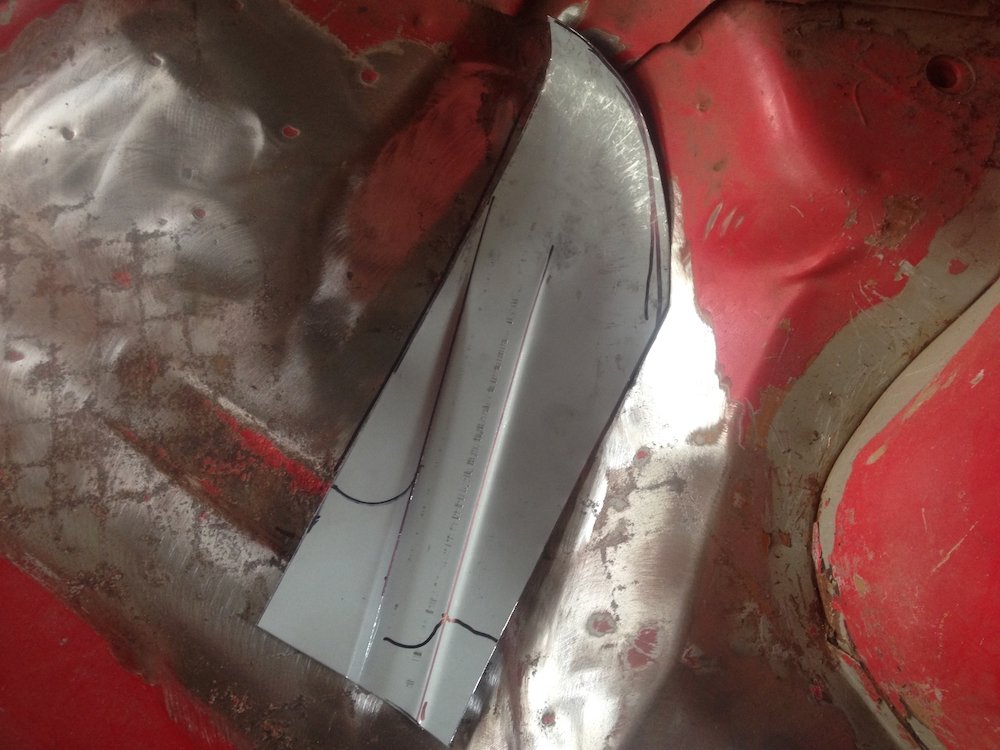
Just one more day and the rustwork will be complete. And other such lies. Fair to say for the last few months I have thought I was done, then i'd find more or a simple repair would need many, many cups of tea. One such issue is the RF guard, after feeling good about folding up a neat replacement, I read my template wrong which put the datums well out Completing this will need the door put back on to get the lines right, the guard should be flush with the sill......At this stage I think my reinforcement is scrap, but we'll see. Some time ago I figured out a recipe to fold up the gutter, made a large strip which was chopped up and scattered around. Under the rear seats took the best part of a day, mainly a hidden seam which spewed oil into the weld misleading me into thinking my gas supply had become blocked. Long weekend of rain allowed progress on the boot Tapping out patches Clecos again for cool points. And my current nemesis, the right rear guard The shape here has been puzzling me for some time, it holds the appearance of being kicked in, alot but then nothing looked right when pushing the panel back. Earlier I pulled out the material in fuel flap area but the panel between there and the lip had bulged inward. Not too sure how this happened or able to decide on a fix strategy I tried gentle tapping and pushing it around but nothing looked right or explained the amount of stretch present. Admitting defeat I made the call to patch it up as is and hide my shame under a tin of bog, worse off, I decided not to buy a bead roller for this panel and would need to make the patch from multiple pieces, this for some reason became a blessing. In shaping the patch pieces I spent way more time looking at the problem working out how to get everything aligned and where to place the welds. With the inner and outer guard separated it became clear the guard lip had collapsed 5-10mm inward of where it should have been, after some gentle hammer work moving the inner guard back out, the guard now sits flat against a straight edge, a bit more tapping and I should have this side sealed up. Wish me luck, tentative plan is to get paint on by winter........
- 53 replies
-
- 26
-
-
In light of new evidence presented to the Beehive, the current government have issued a raft of new laws aimed at motivating middle aged men away from their families and back into their garage working on projects. "By setting a firm deadline to which no old vehicles can be registered, we expect to see an increase in mental health as long forgotten projects are rushed through compliance" A government spokesman confirmed the date set as the week before oldschool.co.ng nationals. End. /No more procrastination bort
- 8982 replies
-
- 13
-

-

-
-
Long strand fillers can make it worse unless you can insert them 100% randomly (or 100% uniform for that matter) They change the structural response to the shrinkage making it even more unpredictable, two similar flanges could end up tweaking in different ways. The big but is they improve the end toughness by such a magnitude you're be silly not to, allow some meat to sand back flat/ holes drilled out larger etc. Just like you're doing, smash it all together and see what happens is about the end of it! Thats not one of the resins i've used but if its easily available its better than nothing. Lastly (hopefully sucking eggs/benefit of others/fun police) I assume you have an oven in the workshop? the fumes from post cure are pretty nasty, really not a kitchen thing (unless you're single, career autopainter and pack a day smoker)
-
Which epoxy have you found? I've used a few different types and they all have the same issue, you really need to have a rigid support structure during the post cure. The tg/hdt lags behind the cure temp so you should aim for post cure above service temp and expect the part to move. The cure steps given are usually a guide to ensure you keep thermal gradients in the part low to prevent warping (as the resin cross links more it shrinks, high thermal gradients make this non uniform causing it to pull which ever way) The better* way to post cure (and takes some time unless you push through tests) is to slowly ramp the part, for example push the oven in 10deg steps so it reaches the top temp in similar time, if the part has bulk increase the time steps. For a part that size i'd ramp over 5 hours to 180deg, I also use plenty of temp sensors to confirm gradients. *In production sense - There are activation energy levels that may require soaks but that is another level. You can't overdo it so for one off parts just take the ramp real slow and bob's ya fella.
-
Yep had it at 10lpm on the gauge and noticed that it seemed to flow way more than works under similar set up, tried turning it down and the shielding was crap, settled to about 8 on the gauge with a #7 cup seems to give nice results. the reg is only a cheapy, who knows what its actually up to. I don't think its wasting too much gas, I have done a shit load of unproductive welding, turned most of my scrap bin into a single lump trying new stuff. Thanks for the tip! It was doing something weird like that with starts, like a big burst followed by a lull that didn't do much for shielding if it fired in the lull, had to extend the pre-flow to get a nice start, i'll look closer cos man that long pre-flow aggravates my inner Yorkshireman. Saw the flow gauges on Ali but I can't bring myself to buy a calibration tool from there, is there anything local that not just the same thing with markup and trustworthy? On Bunnings bottles but tbh its a fuck around, the nearest never has any in stock and I end up driving across town anyway. West side of chch has BOC, Air Liquide and all the usual engineering supplies so there are many options. I just need to look, with the amount of welding i've done in the last year, i'd almost justify an account bottle, also found the air liquide mig gas is way nicer to use than core which is pushing me in that direction.
-
Its been a massive learning curve recently and I suspect there is even more to come but for now the urgency to get a pedal has diminished from learning more about the 4t settings (and is one less body part to coordinate!) I can totally see the filler speed being the way, but holy shit there is some muscle memory to learn before I can get near to laying out more than 100mm at a time! Messing around has rapidly chewed through the first bottle of Argon, will need to pick up another next week.
-
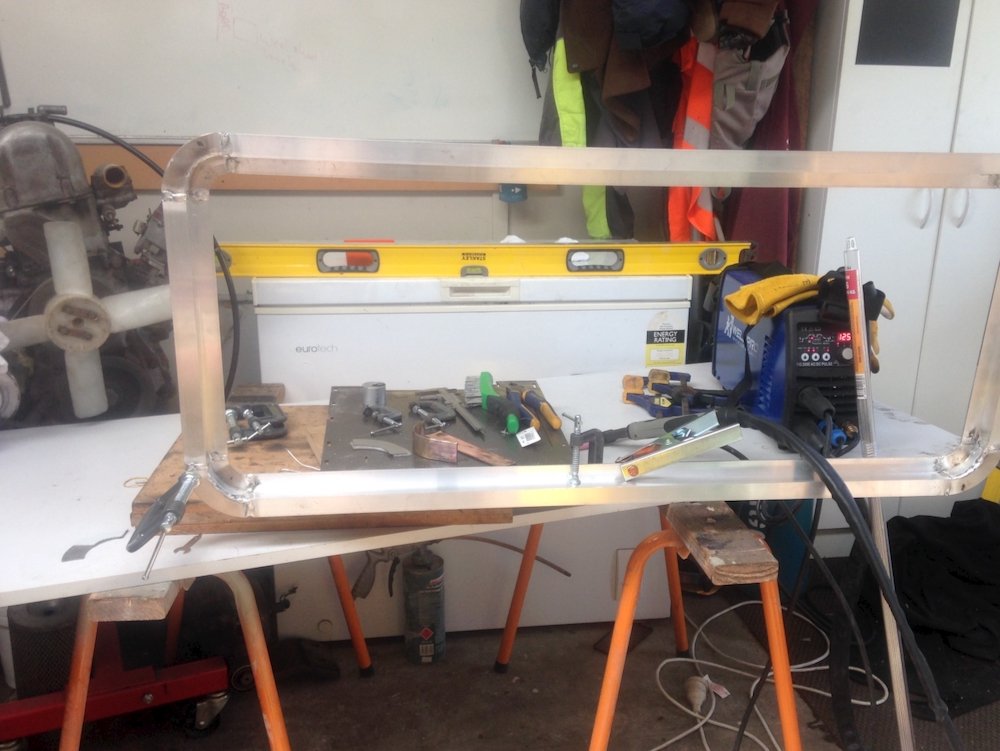
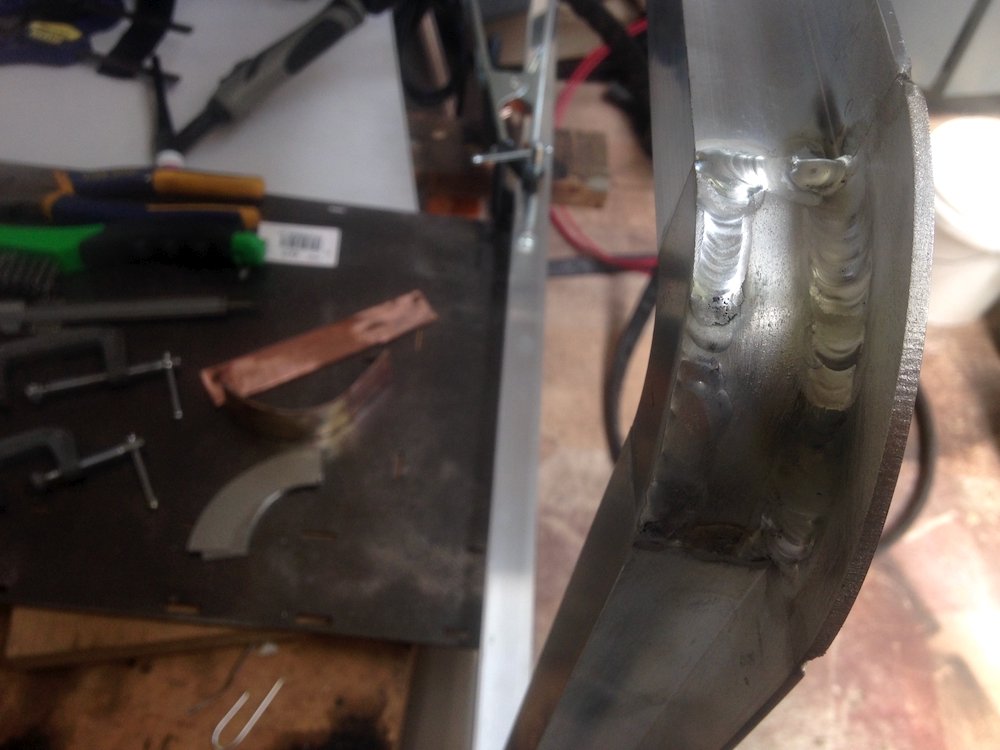
First Ali project nearing completion, gullwing windows for the back of the truck I finding 4t to be an absolute gem, set start current high, dial back on main current then taper off to bare minimum on finish, with many similar welds I managed to get the settings just right that I never had to mess with the torch dial. \ By no means an expert and the dremel will get a work out to finish up, but happy to get this frame together without making a real mess. Conclusion - The cheap tig is legit, hopefully I'll get a few years from it!
-
AS/NZS 2538:2004 is per stand and I believe the default required ASME is per pair.......
-
Cheers man! Gave pulse a go, gives a nice metronome to run with once all the settings were figured out. The dial is a bit hard for me, still trying to figure out the best way to hold the torch that gives control and easy adjustment, so far I get one or the other and with no clicks the feedback is limited to the sound/shape of the arc that I am yet to tune into. Will persevere, Argon is cheap and grinding discs are on special.
-
I plan on getting a pedal in a few months, until then its fumbling the dexterity to operate the dial and keep the electrode steady..... the Heatsoak is impressive, started out at 120A (10mm Al) after a few of the above beads I looked over and noticed I had turned it all the way down to 20A I have played with the pulse on steel, really cool, but the number of settings gets carried away, any rough starting points for Al?
-
So my problem appears to be talent. I'm definitely guilty of too much heat, it happens quite fast and I'm still arranging the coordination to keep up. I'm actually finding it quite exhausting, so far i've made every rookie mistake including removing the tungsten only to sharpen up the filler rod, needless to say the brain had a wtf moment when that hit the wheel! I've watched a few of that fellas videos in passing, so much to learn and then translate to muscle memory. On the progress side, laid my first ali beads, have to say i'm not sure what I was so nervous about! Started at the top, the bottom was me playing around with 4t and using the torch mounted current dial. Not going to win any art awards just yet, but enough to be encouraging to continue learning. Hoping to find some more scrap this afternoon to stick together.
-
Whats your plans for the machine? They're quite production focused arn't they?


.jpeg.740419f36baec564fd89773503bc5301.jpeg)

.jpeg.e861c5a7b7f036c2db29daa286505bb9.jpeg)
.jpeg.d2f0f12134c0ebe7efaa930abc39ea0e.jpeg)