NickJ
-
Posts
3,973 -
Joined
-
Last visited
-
Days Won
1
Content Type
Forums
Downloads
Events
Gallery
Everything posted by NickJ
-
Not Russian, but a large American van/camper, belonged to my grandfather in the 60/70s and my father found it in a shed in the far north, is now in his shed awaiting restoration, i'm that keen to see it run again i'm near organising the panel work behind his back, count yourself lucky Cook strait is so well placed! If you need yarns for the pick up mission Greg, get in touch!
-
Was having a beer at last weekend's meet when I finally put it together which Greg you were fixing this up for (makes sense really) When he drives up to grab it I should either jump in for the ride or drop off the speeduino gizmos for delivery Also, your prices are very competitive, how do we book?
-
Just select the resin on what you're doin (generally you'll have to post cure above the expected service temp) but resins do exist that can handle much higher temps. If you want to give prepreg a go, the silicon may be too soft, don't want to say it won't work, but chances are once the vacuum is on it will distort, dunno how much of an issue this will be? Also try printing the insides of the manifold and wrap the carbon around the outside, laying up prepreg on internal surfaces + vacuum is a pig.
-
Sadly not, degreased the engine bay yesterday and there is a split at the rear along a weld, might try an epoxy patch but I need to modify the sump for the new diff mount! that might be the motivation to pull the engine (again) I also need to work out a hoist for the shed/ engine crane, I forsee great spending.....
-
Cheers! thats given a few more keywords, this is close https://www.aliexpress.com/item/GSM-Power-Off-Power-Failure-Alarm-SMS-Remote-Control-Power-Socket-Switch-with-Phone-Alert-Temperature/32854634113.html?spm=2114.search0104.3.72.3b16a4ecabx9NT&s=p&ws_ab_test=searchweb0_0,searchweb201602_5_10152_10065_10151_10344_10068_5722815_10342_10547_10343_10340_5722915_10548_10341_10698_5722615_10697_10696_10084_10083_10618_10307_5722715_5711215_10059_308_100031_10103_441_10624_10623_10622_5711315_5722515_10621_10620,searchweb201603_28,ppcSwitch_7&algo_expid=86c6280a-03dd-403d-abe8-ff93811562fa-11&algo_pvid=86c6280a-03dd-403d-abe8-ff93811562fa&priceBeautifyAB=0
-
Yeah i've found plenty of little ones that monitor temp, but they don't address the power or have I missed them? a few weeks back while sorting gear I somehow knocked the power out in the shed, took over a week to notice, added to that, by the time the temp would have dropped, I would have been long out of town. Another alternative i've looked at, but not keen on is hardwiring the freezer to its own fuse.
-
Having trouble finding a freezer alarm, something that screams when the power is off and if the temp rises above a certain point for the chest freezer in the shed, anyone have an idea? i'm sure I could make something, but surely this already exists? Aliexpress maybe?
-
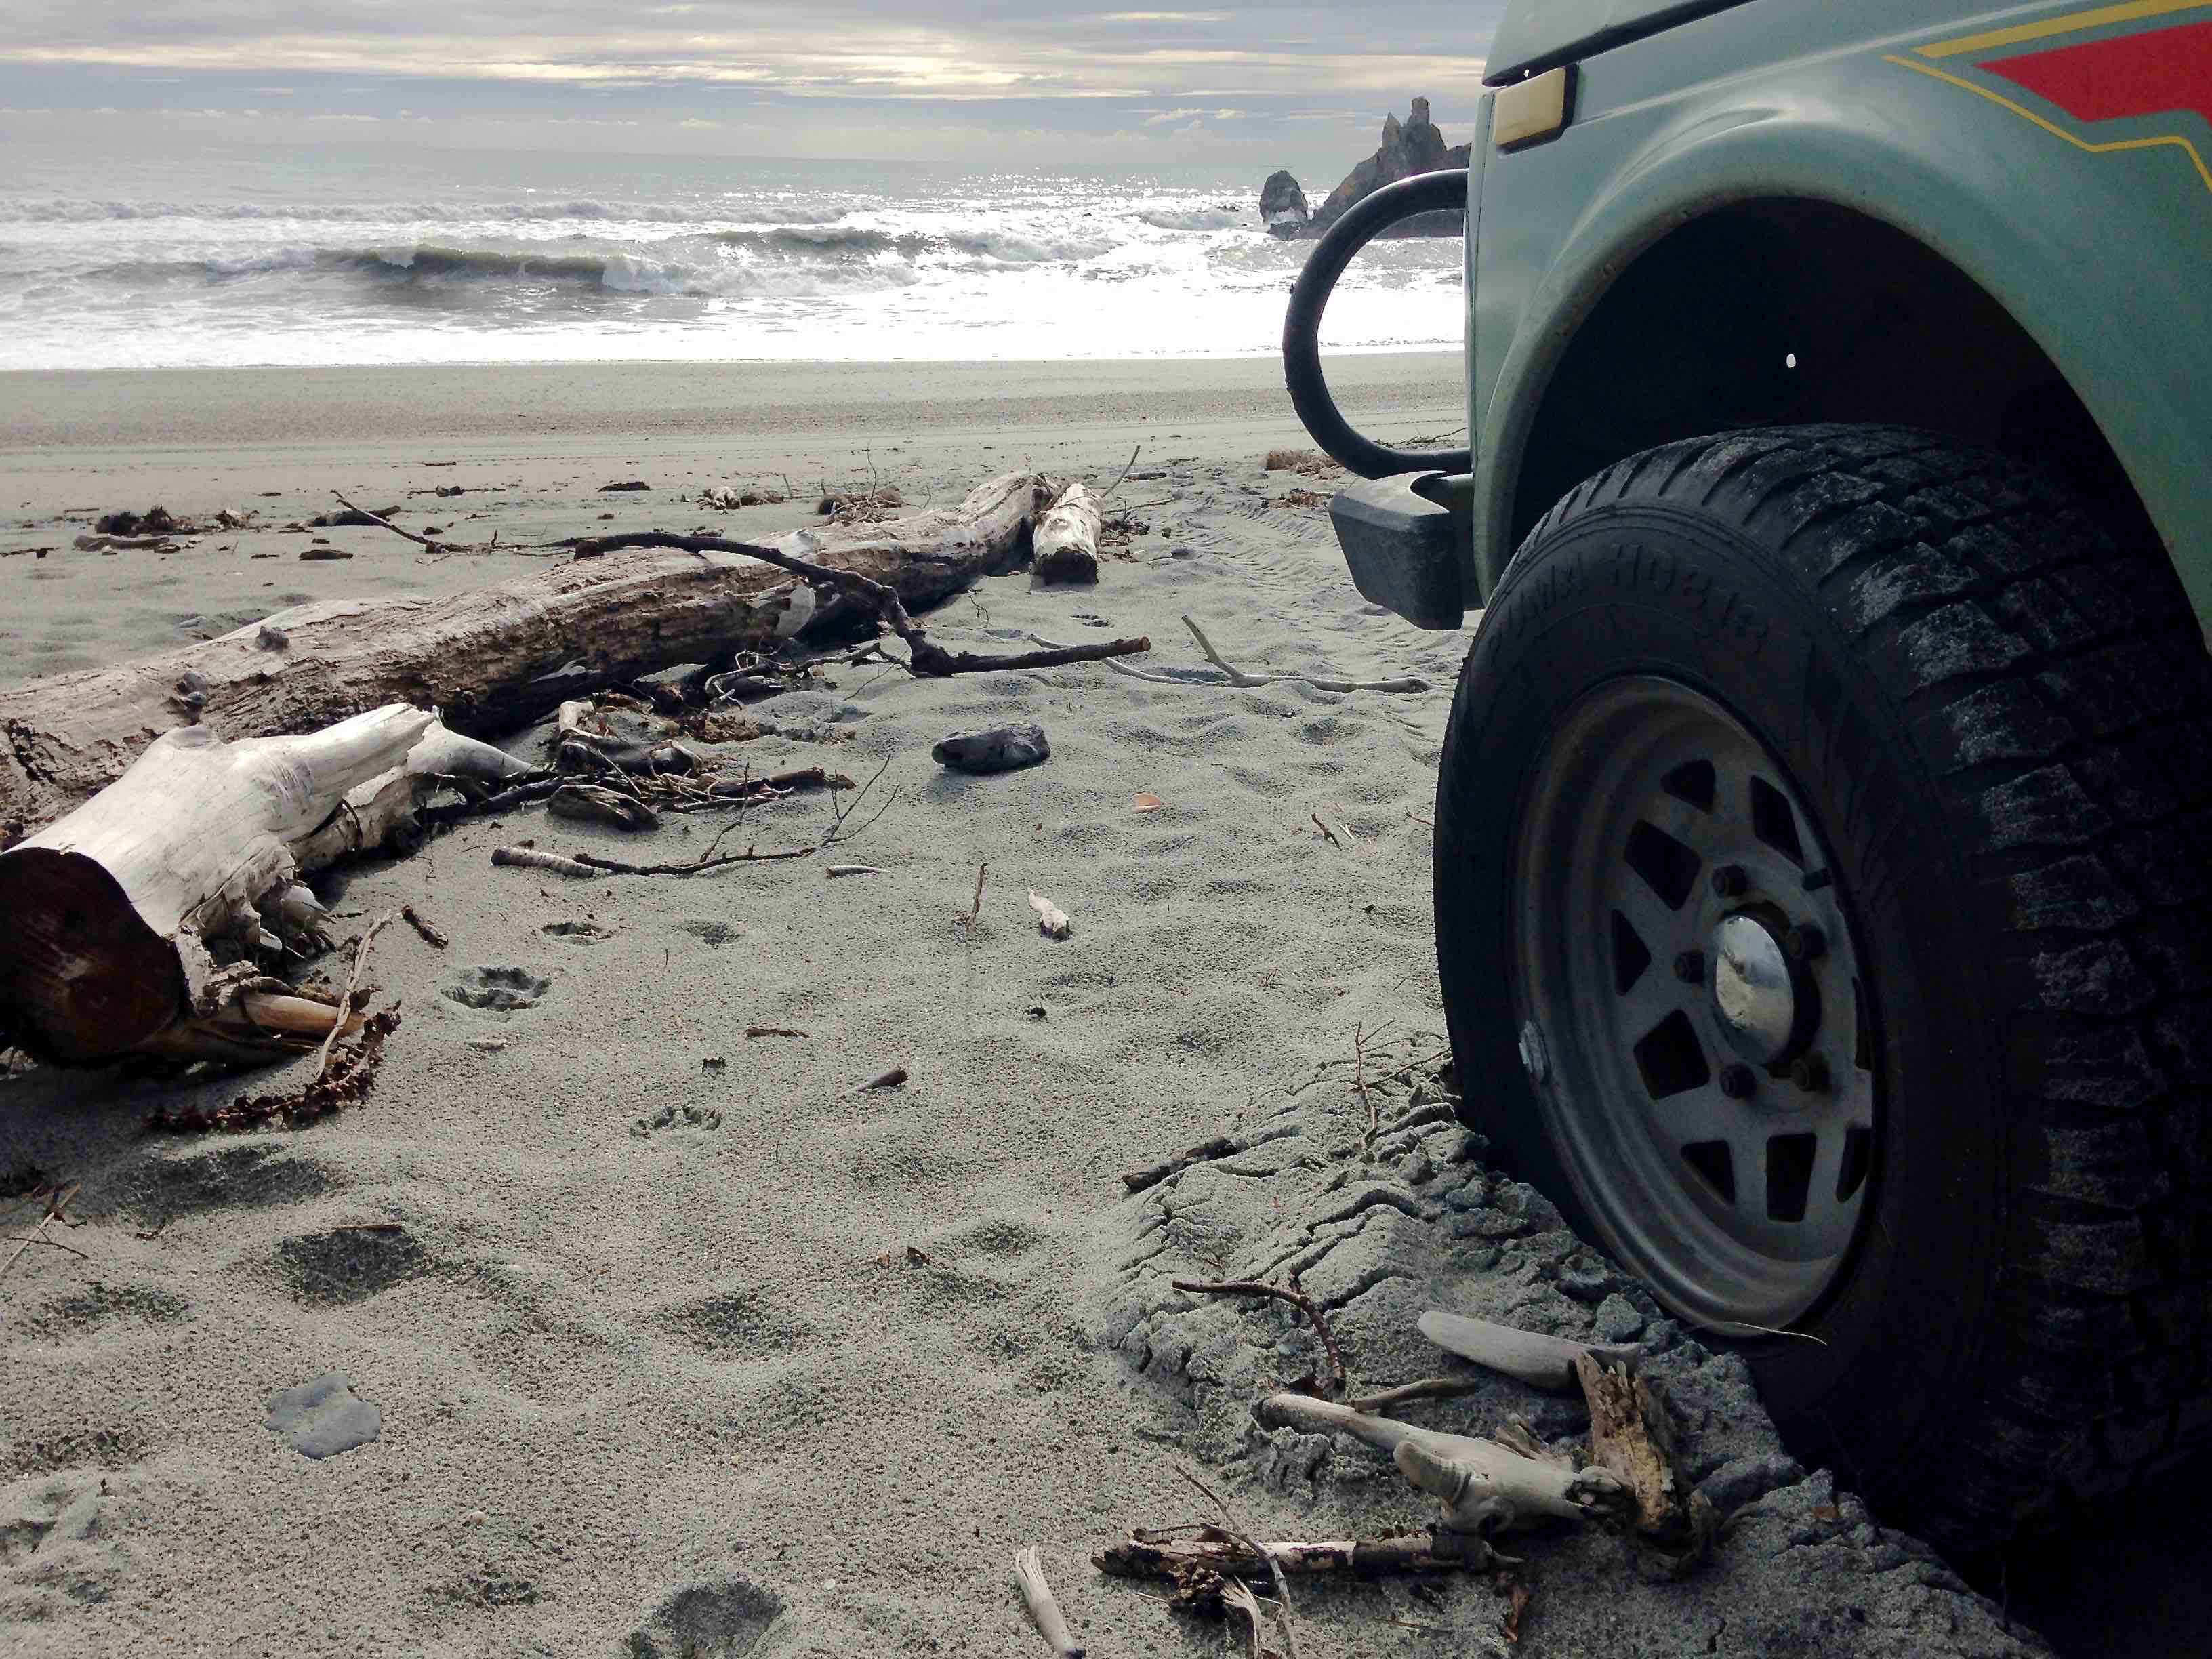
Development has slowed, but the Niva is driving well, even completing a few road trips. Fuel economy was a tad crap, but performance has been satisfactory, I had the wideband hooked up the majority of the trips and the results are pleasing, while still a bit rich, it never leaned out under full power, for now that will have to do! I recently returned from Jackson Bay via the west coast, here's a few pics, such a nice place to travel through. On the way I called in to catch up with a good mate, TCGC. Found some long straight (bumpy) roads Beaches Surf was a bit lousy On the engine fixing side I had a fellow OSer 3d print some intake trumpets, they look the part, I just need to tidy them up a tad, After 2000km of worry-free motoring something had to give, most likely picked up some British virus near Timaru and now sports a large oil leak from around the sump, i'll have to explore further, so for now she's having a rest as I focus on work.

-
Really? this I wanna try! I broke a M4 tap in a part, mate used a 2mm carbide ball mill to gently carve it out
-
How small is the screw? I regularly get 1mm holes EDM drilled 50mm+ If it turns, heat and freeze spray might help loosen it enough to slowly flick it out with a pic
-
You are correct in mixing more resin, also allow the resin to flow a while into the resin trap (I assume you're rigged something up?) can also help at this stage to drop the pressure a tad to prevent the resin outgassing . Spiral tube works well, but you can also notch standard tube to the same effect. Be careful of short stumpy flow paths, they can short easy, providing your pot life is sufficient, that length should be fine. I'm not sure of the layup you're using, but the peel ply can act as a short circuit preventing full wet out. What does your pump pull down to? your bag should go to that pressure too.
-
This makes getting a WOF for the Niva look like a casual wristy from a Scandinavian hitchhiker.
-
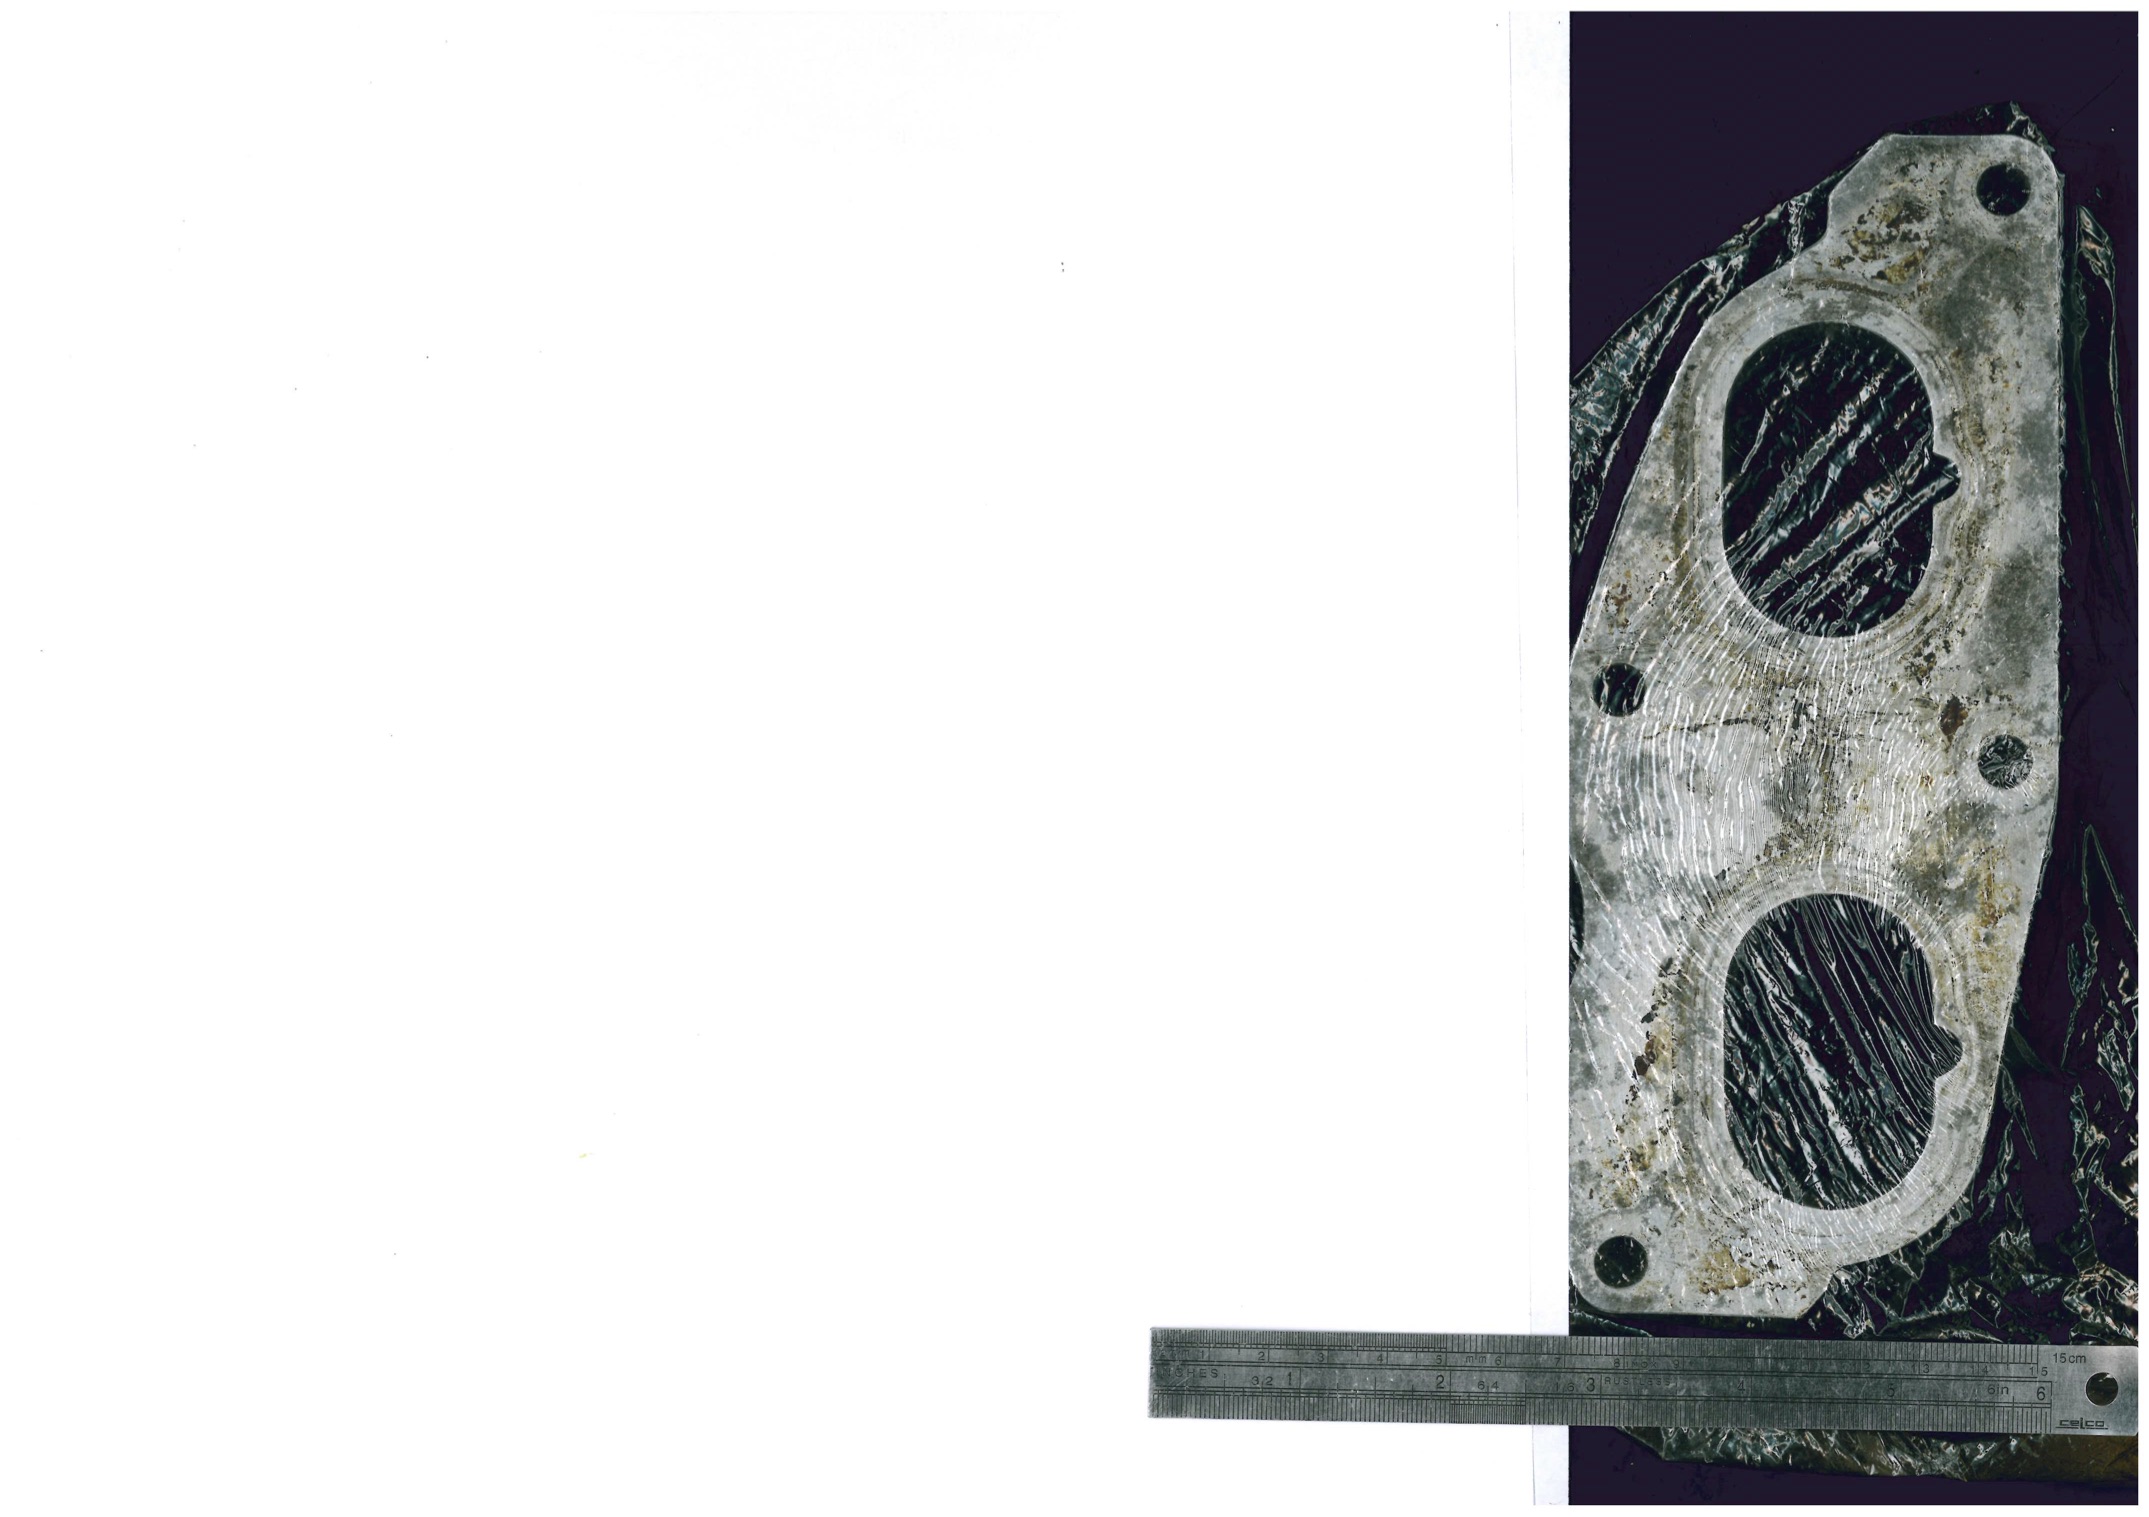
Measuring such things is wasting time, just photocopy it with a ruler for scale, import it into CAD and trace around what you want. Glad wrap is also good idea to stop the office lady kicking your arse for getting grease on the image plate. If the part can't be photocopied, take a sheet of A3 paper to make a crayon rubbing just like in kindy and scan that.
-
Slow down, thats moving way too fast for an OS project! For next time, we've got a waterjet and a good assortment of Al at work if thats your flavour
-
Yeah mate, easy, PM me deetails etc
-

Random slightly cool stuff you built but not worth its own thread, thread
NickJ replied to h4nd's topic in Other Projects
Apart from specialised cases, all electrical solders have a melting point around 200degC (true eutectic is 190 from memory) the biggest issue is getting heat into a joint, if you have two convex surfaces (iron tip and joint) then the heat path is minimal, a dab of solder increases the heat path area and all is happiness. In extreme cases, the eutectic may shift from compositional changes, this can happen in brazing, where once a part is flowed, it takes a higher temp to release the joint, but i'm unsure if this is documented in solder? -
mount the motor upside down?
-
Hi all, Looking for a sparky to hook up power to a gas hot water install and a few other jobs around the house in the next month, any suggestions?
-
Discuss here about Yoeddynz's little Imp project...
NickJ replied to yoeddynz's topic in Project Discussion
That video is nuts! so lucky to be OK -
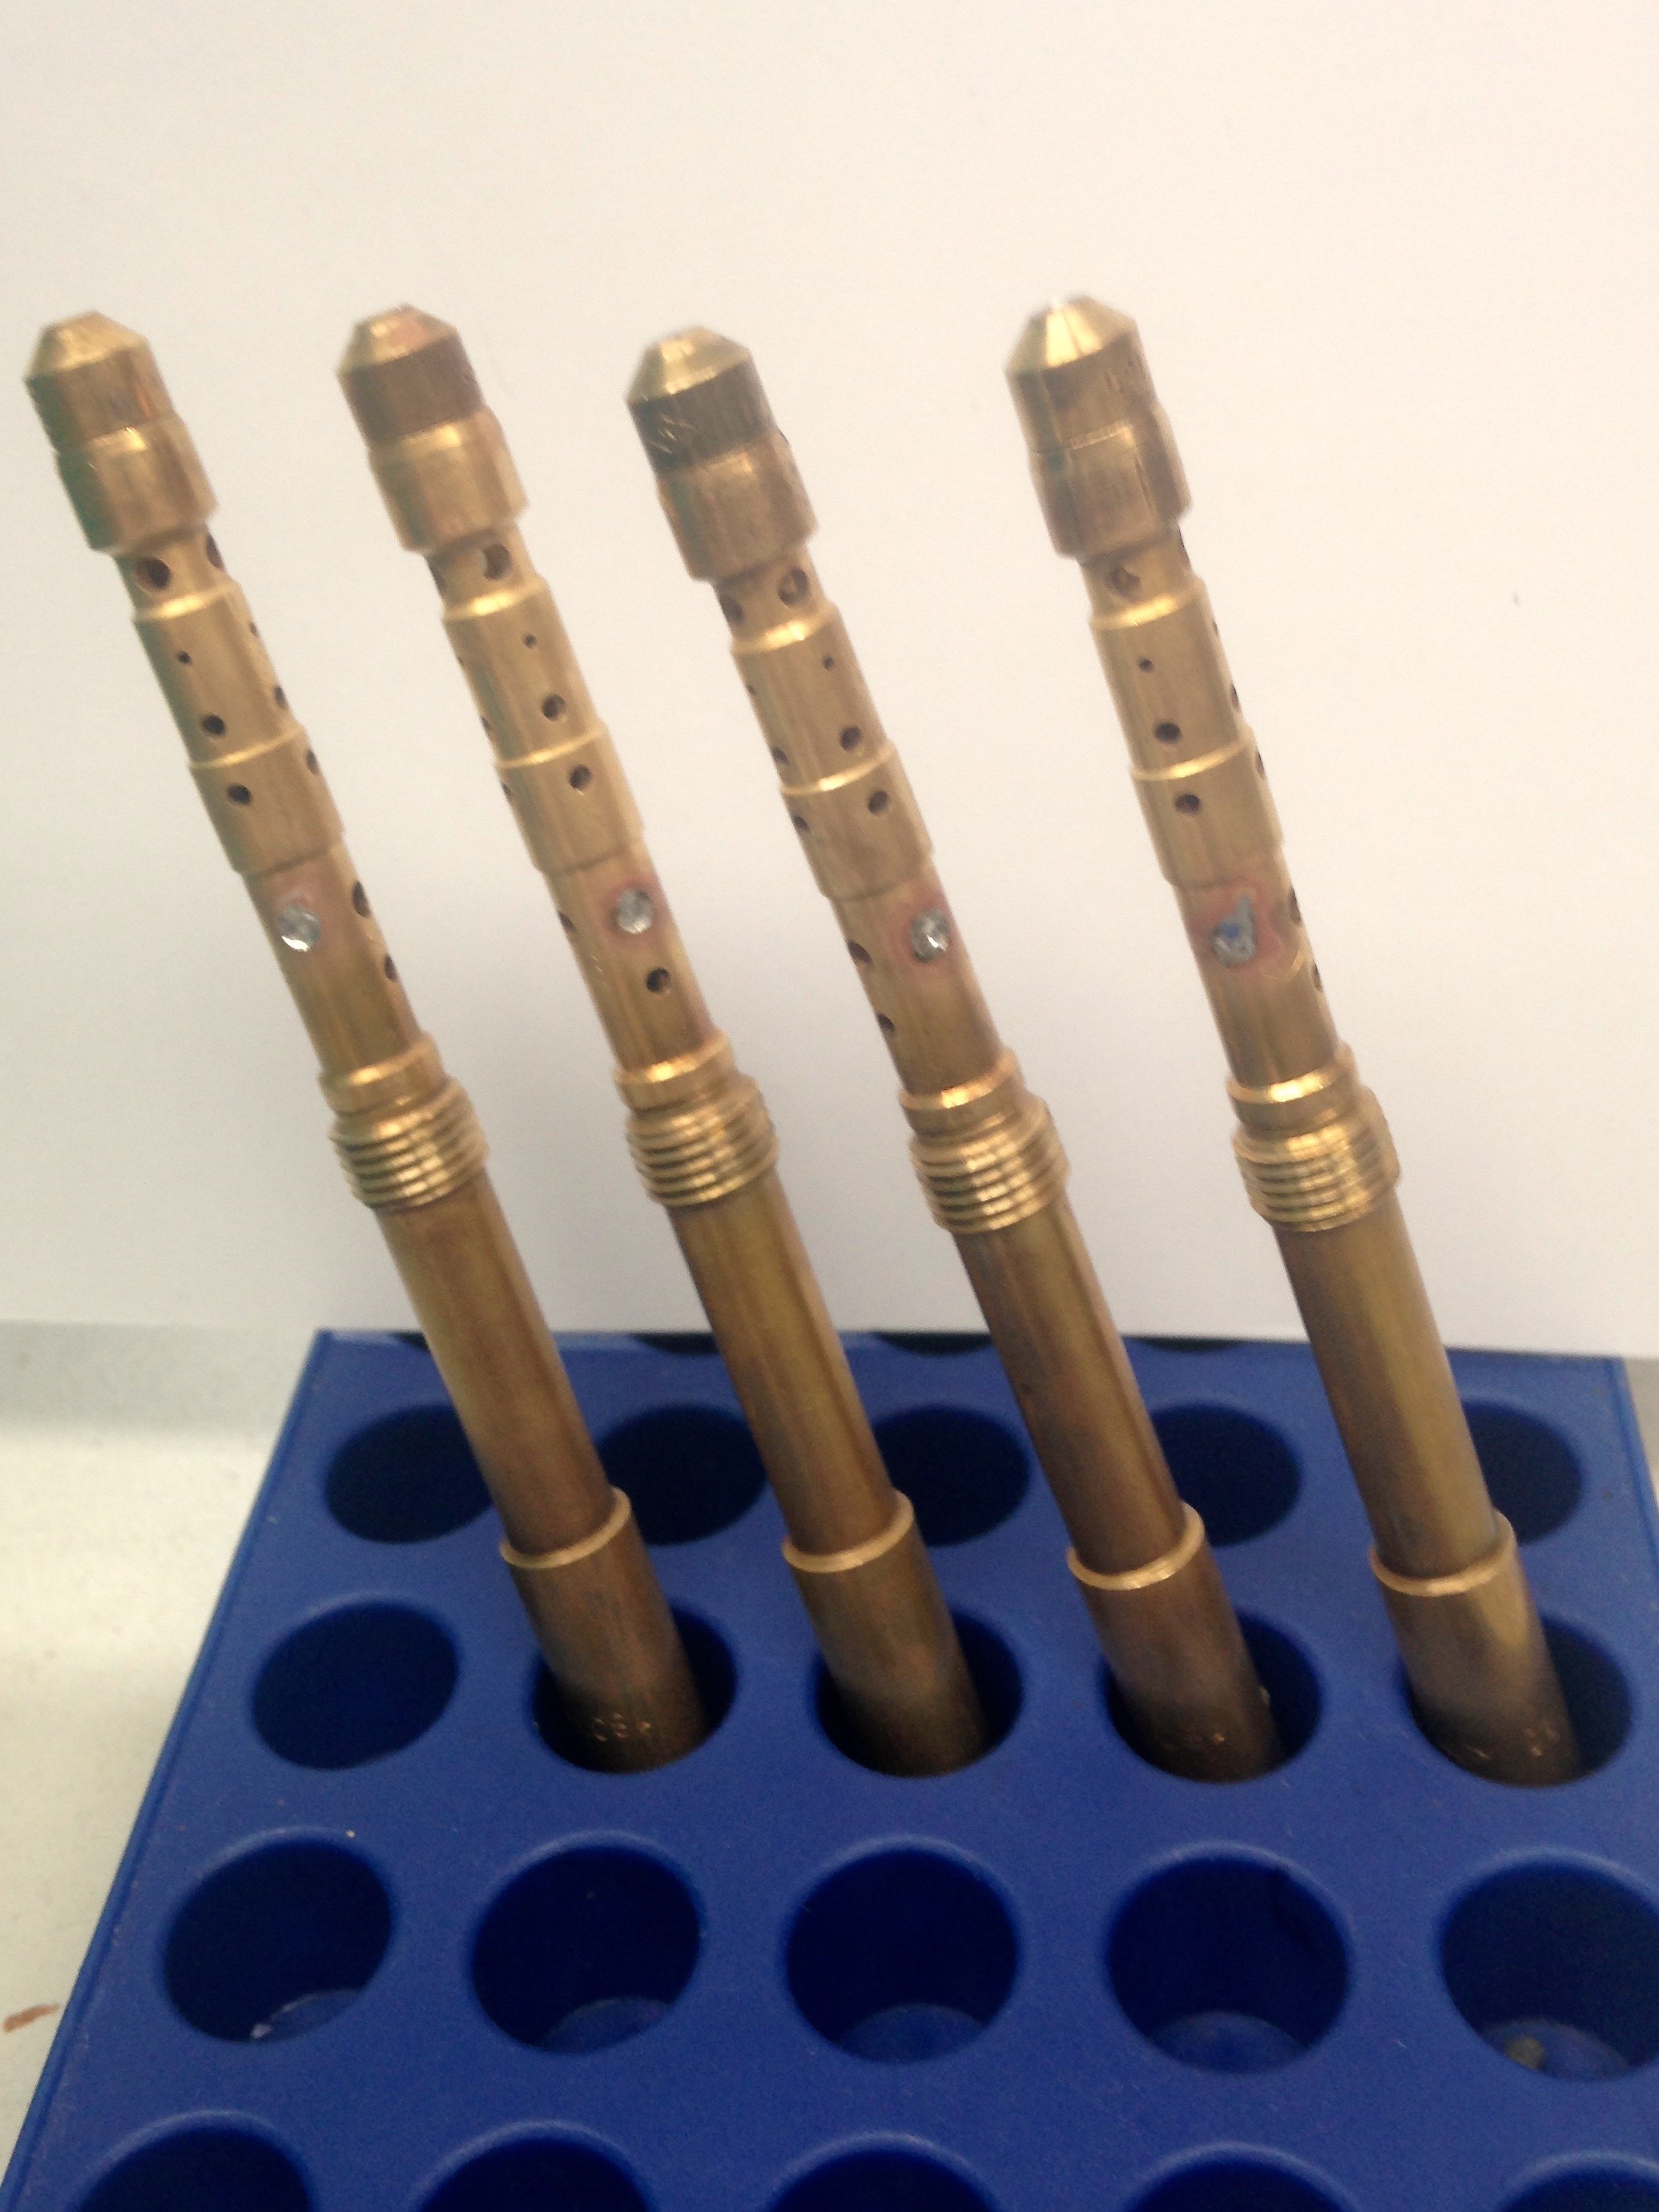
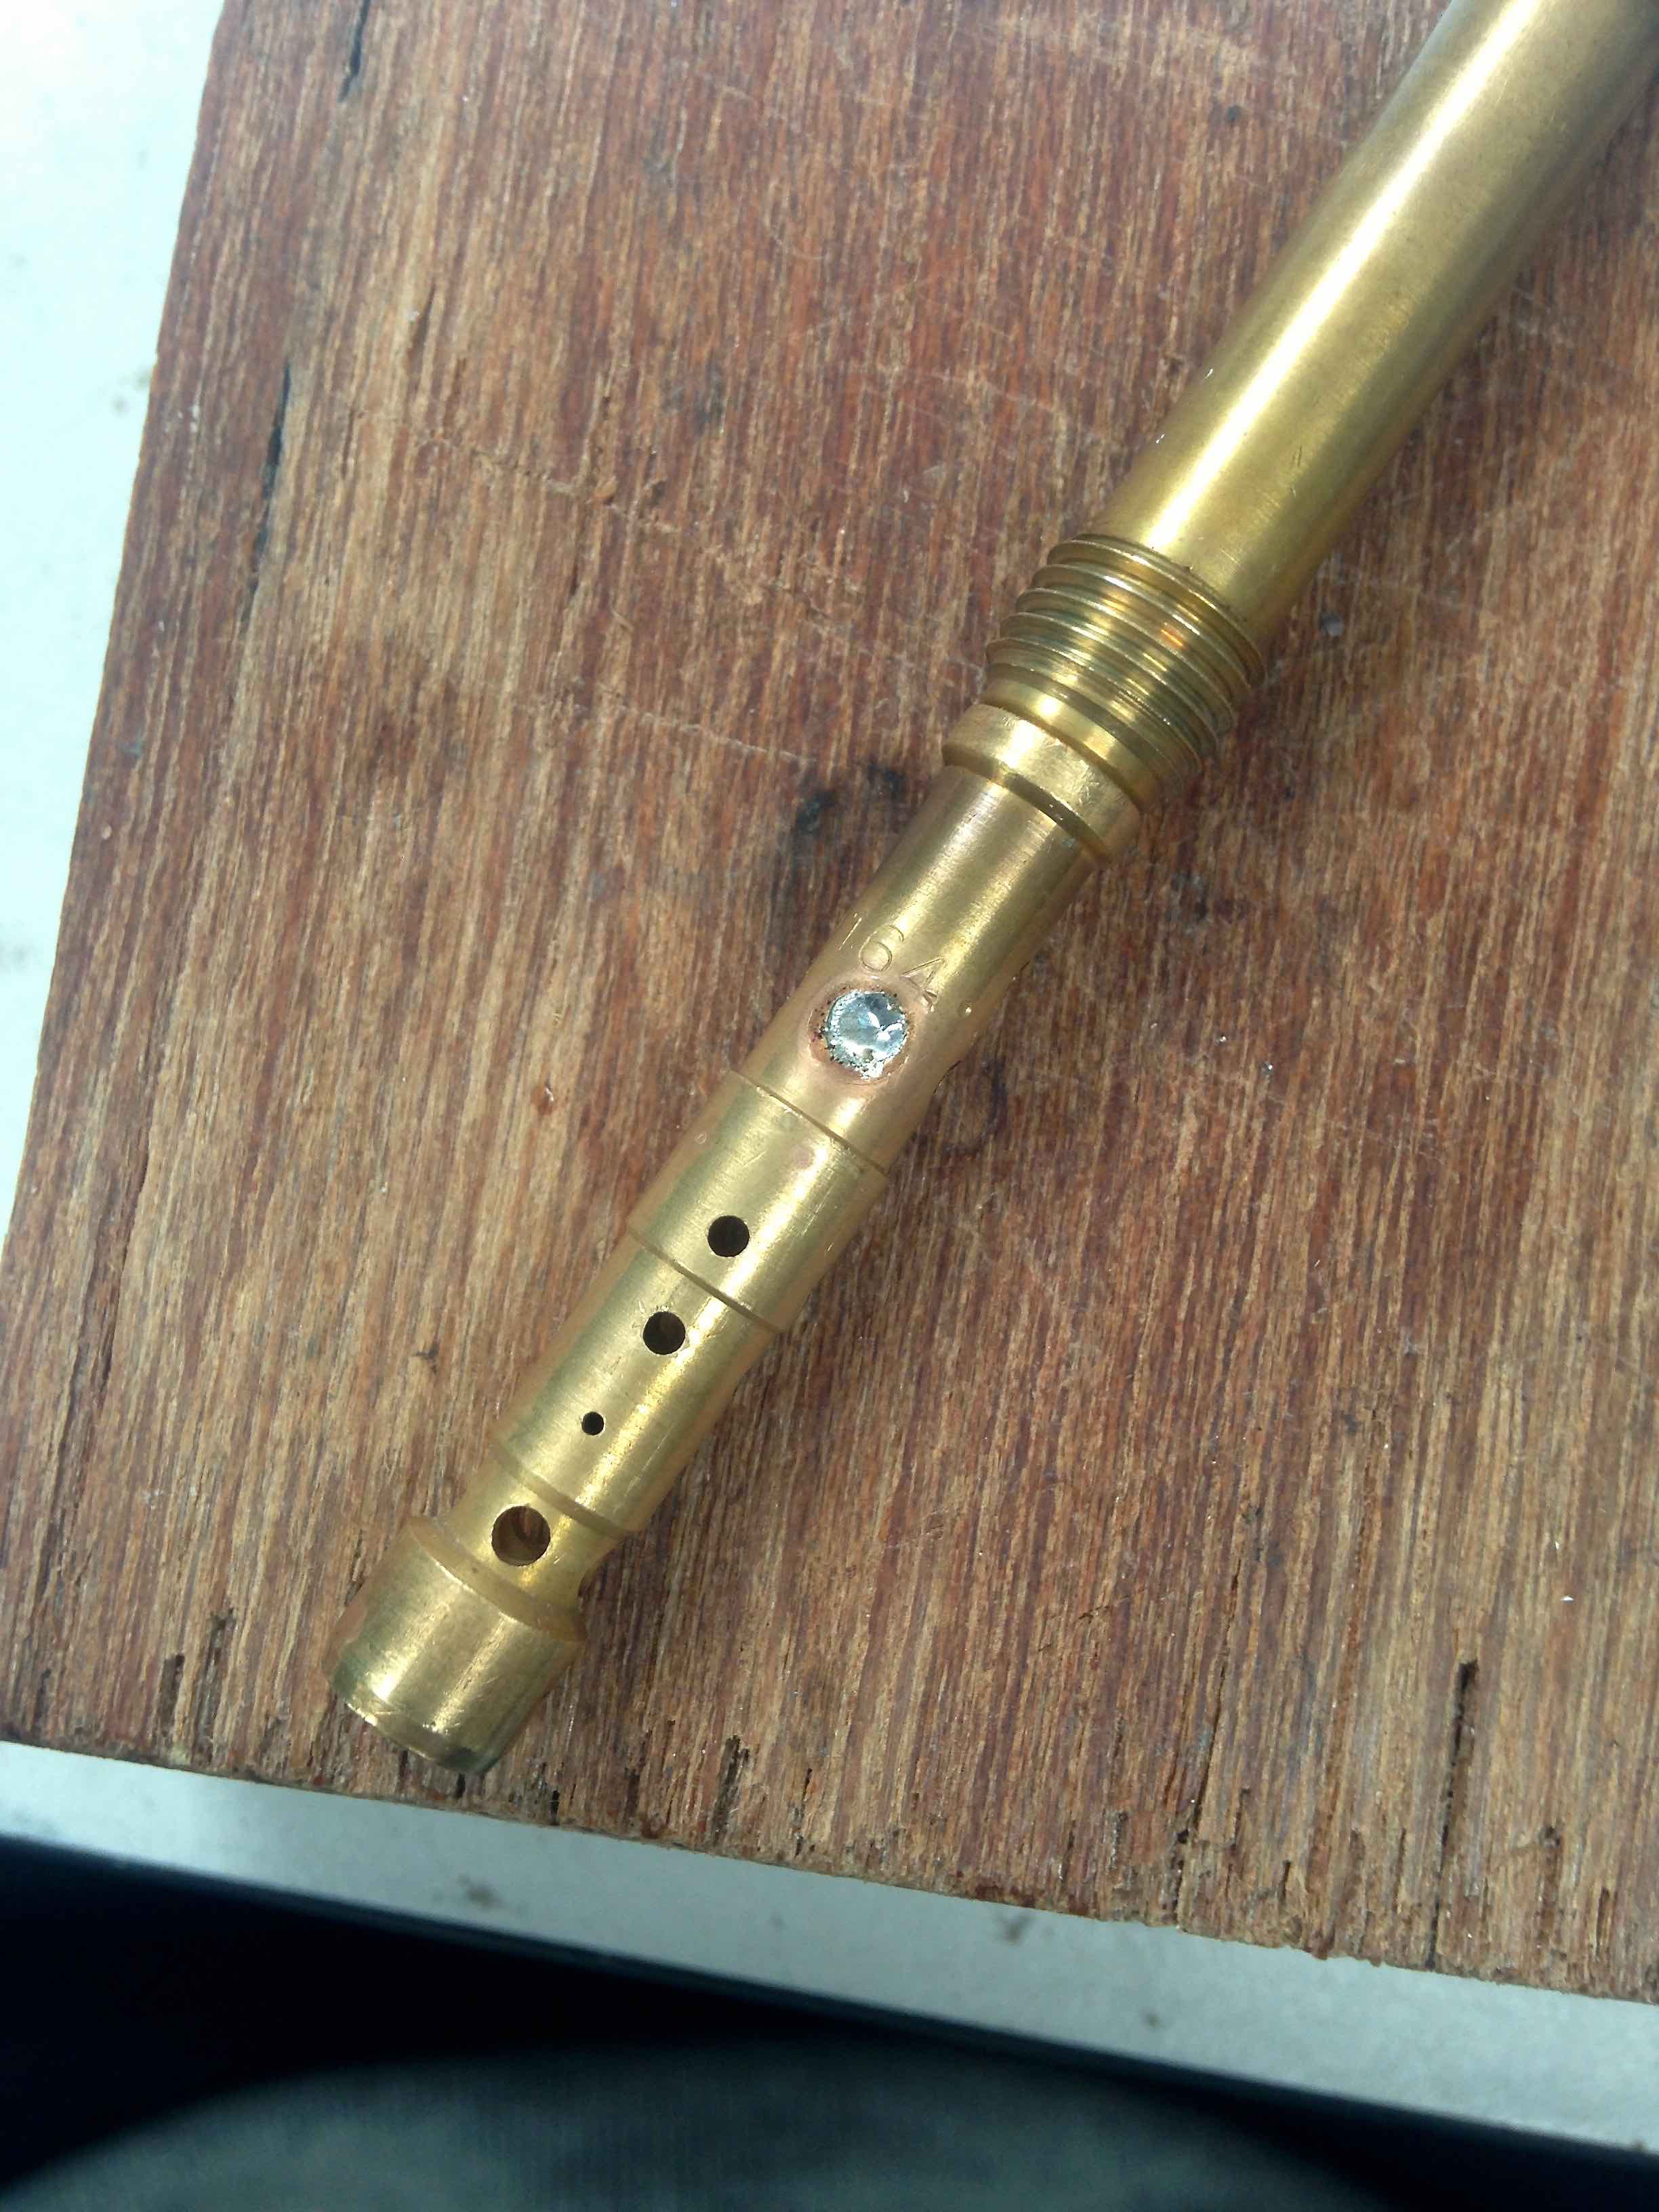
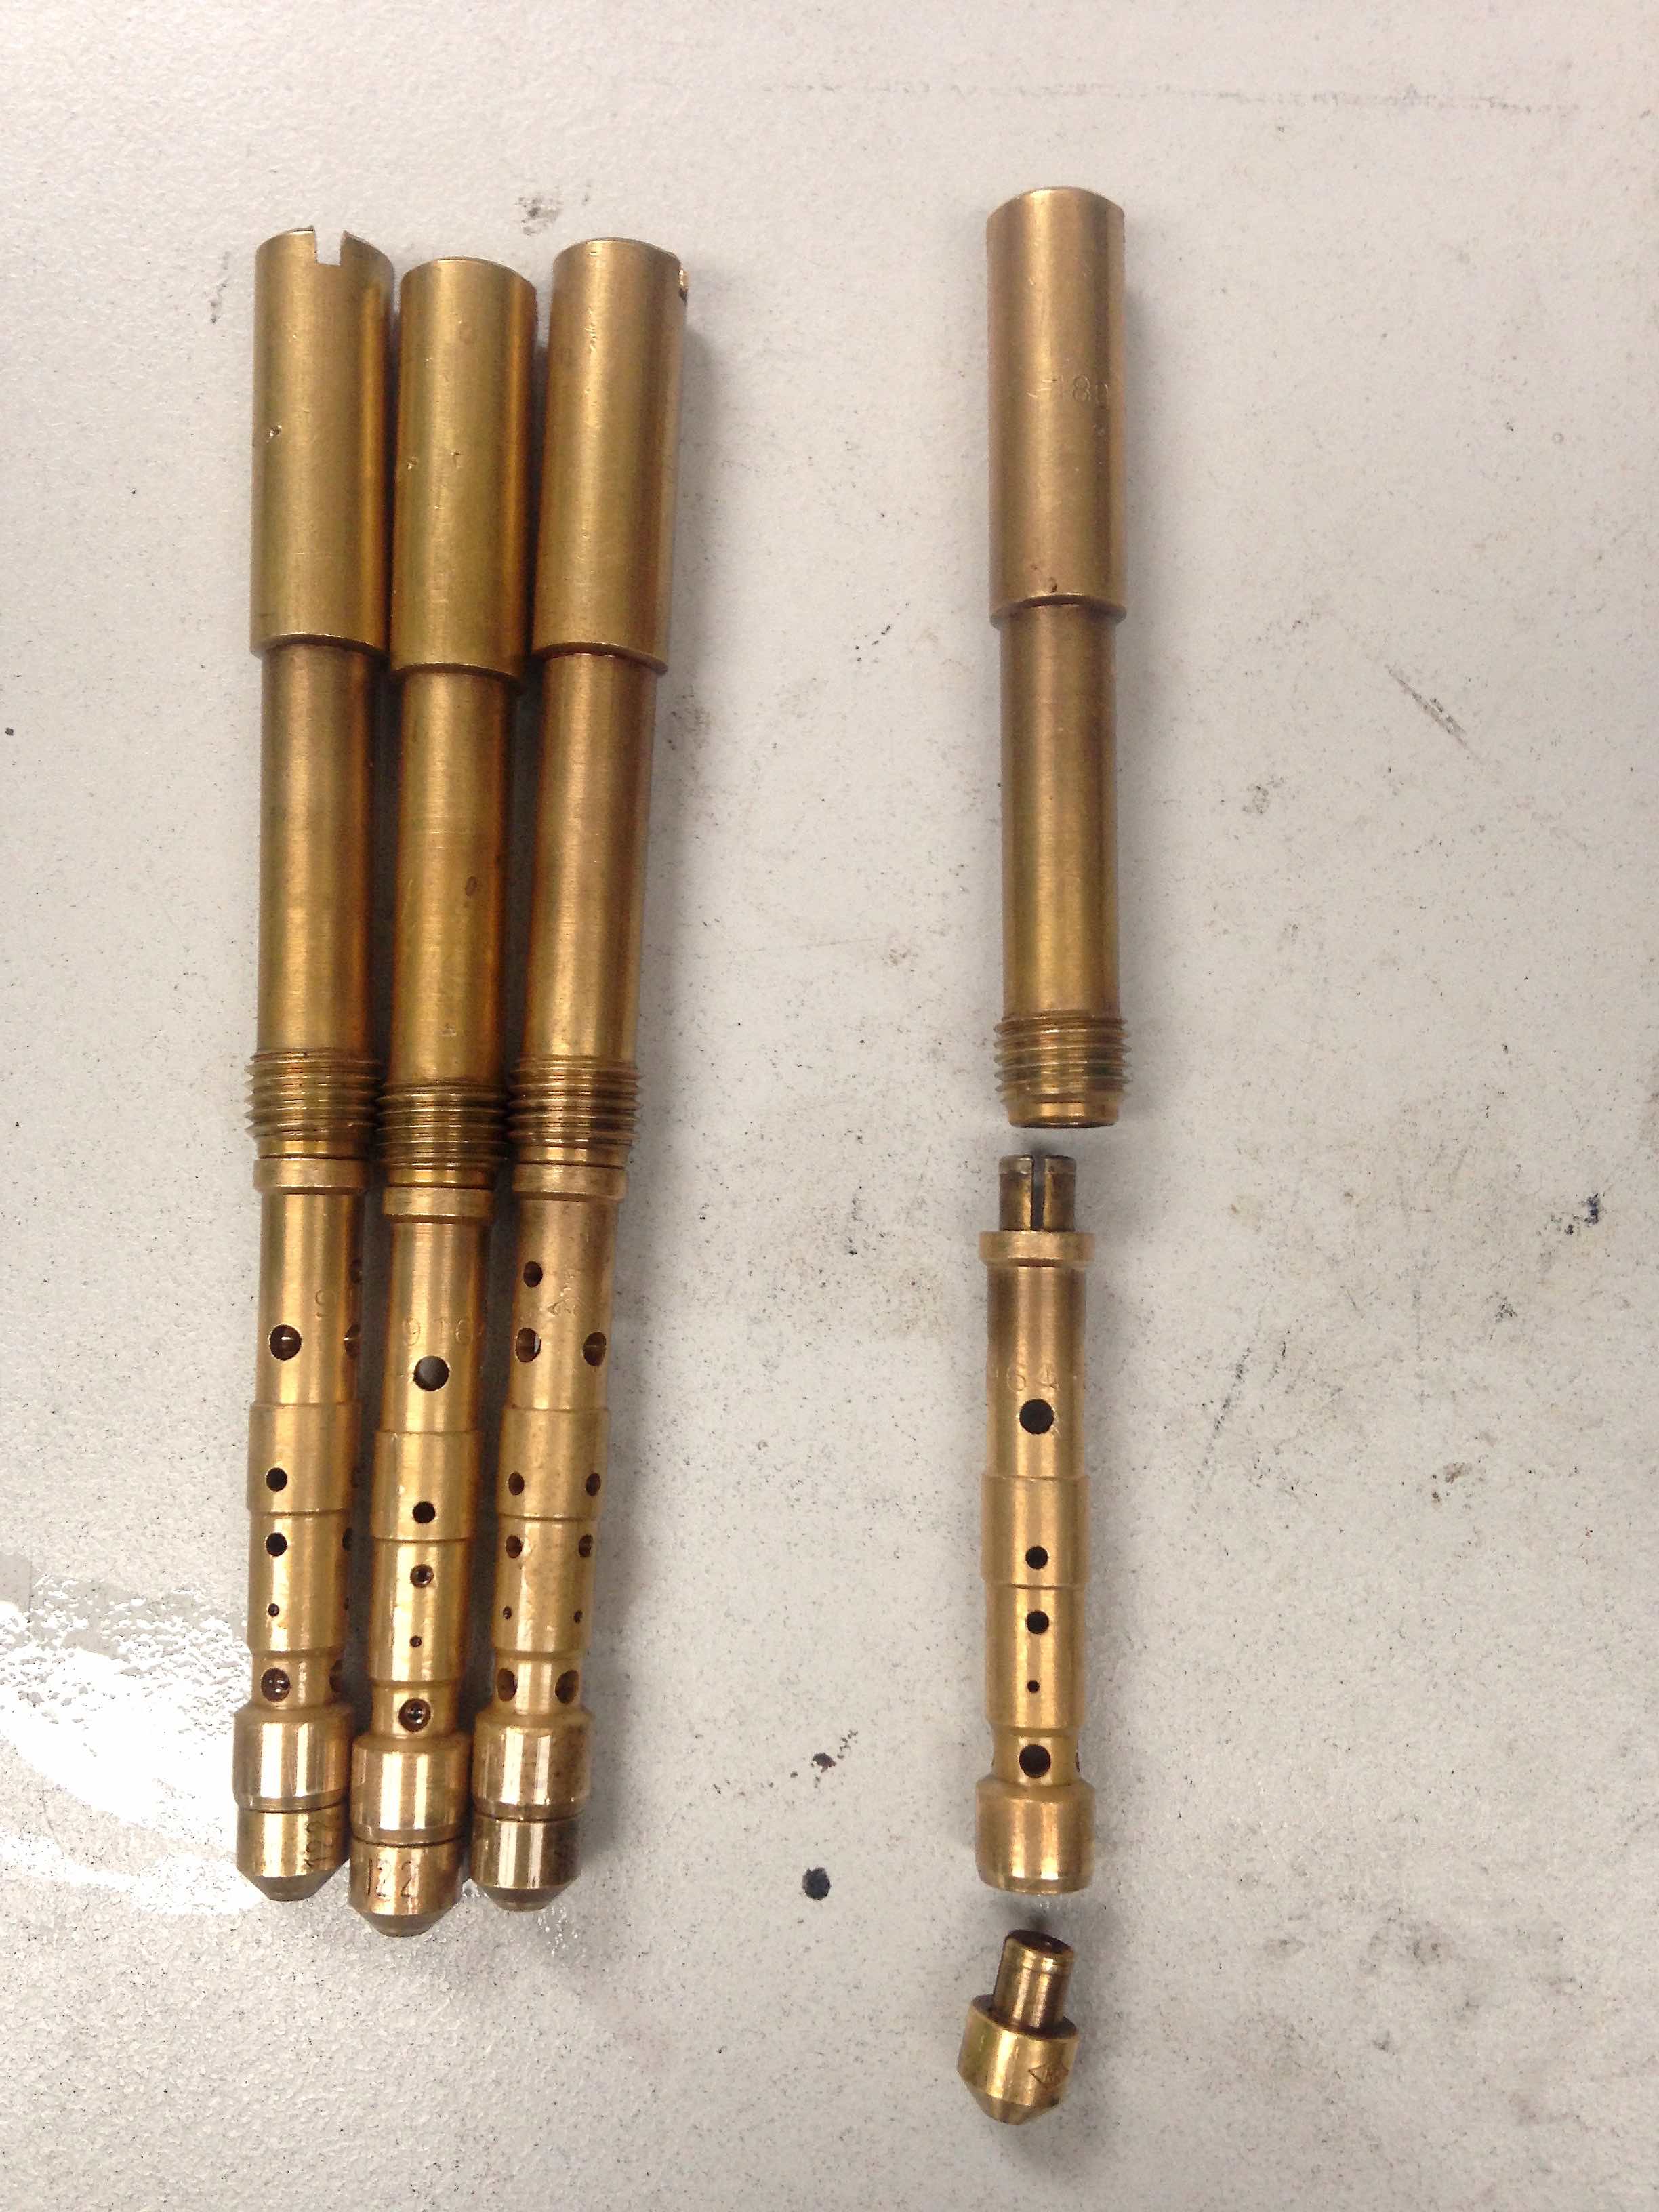
Pulled up my suspenders, slid on some spectacles and fired up the soldering iron, the day has arrived to attack the emulsion tubes! From the previous post, suspicions of the emulsion tubes not being right was strengthened, spending the day pondering methods to attack I settled on the 4 large holes at the top, from my understanding, the jet at the bottom controls fuel flow to the venturi, via the emulsion tube, which mixes air into the fuel assisting atomisation, this air mix is governed by the air corrector and the series of smaller passages along the length of the tube. roughly speaking, the holes at the top control mix at idle, the holes lower down, WOT. Having already messed with the air corrector diameter and unable find a combination that gave good mixture throughout, I was always left with a gaping hole around 3500rpm, so, dead spot around 40% throttle and 4 large holes around one third of the emulsion tube, reasonable place to start! Now, one would ask, why not just buy another set? well first of all, i'm cheap, a set of four to try would be a good chunk of efi money, second, i'm a sucker for learning and thirdly, the only difference between the 4 available styles is the body diameter of which I can't find solid data on what this actually changes. So, remove said items: Air corrector at the top, emulsion tube center, main jet bottom. Fill 2 of the 4 upper radial holes with solder and leave to dry Being a Friday night, I felt a quick drive was needed, so not expecting much I casually drove out to the open road and wow what a difference! the chasm is now a friendly ditch, I really should have hooked up the data logger as mixture stayed within acceptable limits for the first time throughout the rev range, more testing needed but a step forward in battling against the 50 fudges that constitute mechanical carburettors. PS, this is in no way an endorsement of twin carbs, EFI is king!
-
Some good learning today, have been bracketing jet size around what is currently working and found going from 110 main to 100 is like falling off a cliff, having the datalogger hooked up allowed me to see when the idle/primary system moves into the main jets, everything would drive fine up to 40% throttle, hit 45% and nothing but lean, this confirmed the primary circuit is close if not a touch rich and I can focus a bit more on fine tuning the mains. This also showed up a another gem, the lean hole that i've had forever between the two circuits is looking most likely to do with the emulsion tubes, I have increasing confidence now to solder up some ports in the emulsion tubes to see what happens. Lada themed curtesy image:
-
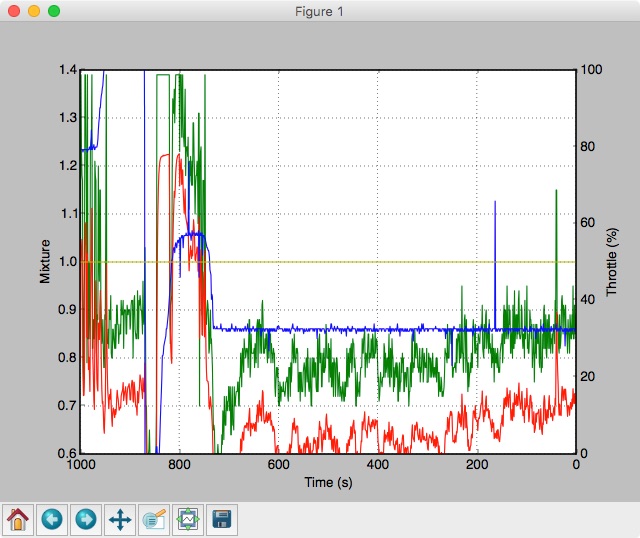
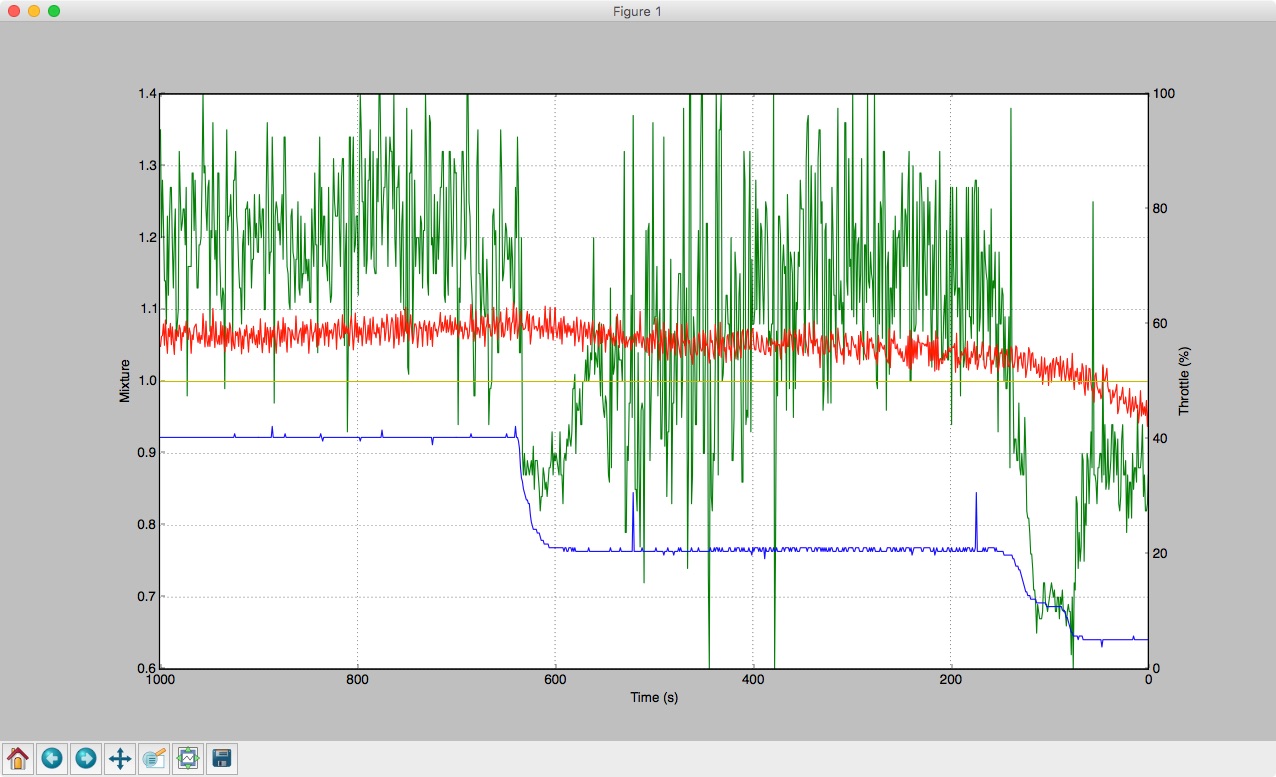
As normal in life, just as you commit to a project priorities change, sadly the EFI conversion is now on the slow boat as the house needs some funds, i've had the car long enough, whats a few more years! Having another think about the mixture, even though the wideband says its running lean at cruise, fuel consumption suggested otherwise, most likely cause, the brake booster, so that was disconnected and I went for a drive. 80kph with vacuum hose connected And with the hose disconnected/blocked off Blue=tps Green = wideband Red should be engine speed, but the analogue-digital converter wasn't playing nice so it just floated along with mixture. While there are a few months between the two comparisons, i'm confident this is worth chasing as there was no change in the brake feel, best be adding a brake booster to the shopping list! Another interesting point is the mixture plot has less fluctuations, interestings.... I'm also sitting right where I was told i'd end up, having to choose between cruise economy and wot performance, regardless I will fiddle with the jets and see what happens. I've also acquired some rear callipers from Bart, plan to graft some front disks onto the rear shafts and finally get rid of the constant wof issues drums are so keen to provide.
-
Don't you mean 0.0002 J?
-
Or were you having pizza for lunch?
-
Random slightly cool stuff you built but not worth its own thread, thread
NickJ replied to h4nd's topic in Other Projects
That jogs the brain, I used tin foil to shield the plastic sockets etc, should have been ok, but I wasn't keen on taking too much risk.