sr2
-
Posts
788 -
Joined
-
Last visited
-
Days Won
1
Everything posted by sr2
-
LOL, I didn't spot that. In that case he'll probably bring a 6 pack of Ouzo (I can see this getting messy.....!).
-
You possibly should have read the whole article? (Great link by the way). "Although the disparity may have been due to slight differences in tire hardness and inflation pressures, the dissimilarity was more the result of contact being made between the front fenders and tires as the front fenders of the test vehicle pitched forward and dived downward during braking".
-
No offense intended but I'll have to pull you up on your post. Mastervac boosters introduce the atmosphere (to the rear chamber of the vacuum suspended diaphragm) from the cars interior. Unless the OP's been carrying bulk cement mix in the floorwell for the last decade or so the blocked air filter diagnosis is very unlikely. Furthermore the rotating diameter of the wheels has little effect on the feel of the brake pedal, increasing the diameter lowers the caliper/pad leverage but also lowers the RPM/road speed ratio and vice-versa. Unless you're pushing the upper limits of brake heat dissipation and tyre adhesion for all intents and purposes nothing changes. A hard pedal on a Mastervac booster is most likely caused by a lack of vacuum (faulty check valve or collapsed/blocked vacuum hose) or a ruptured diaphragm, in the case of the latter it's easy to spot as the engine will run as if it has a huge inlet vacuum leak. If the assistance has been progressively lessening there is also the chance that the reaction disc has deteriorated but that's an outside chance. Re the OP's inquiry, a faulty mastervac is usually an easy to diagnosis with the right process. Send me a message and I can talk you through the process. Even better if you can make it to Milford (Auck-Nth Shore) rock round to the legendary sr2 man cave and we'll get you sorted. Edited to say; you'll need to bring Beer!
-
Duo servo was an early single wheel cylinder design that floated the pivot point between the brake shoes in an attempt to transfer some self-energising from the leading to the trailing shoe. They were cheap to manufacture, were forgiving re-adjustment but required uneven pad thickness and area to wear uniformly that reduced their effectiveness. The real breakthrough in drum brakes came with the advent of the twin leading shoe which ran two wheel cylinders finally achieving uniform pad wear and self-actuation on both shoes. Never underestimate how effective twin leading shoes were; it took quite a while for them to be surpassed by disks. The leading/trailing design (despite creating less friction, i.e. braking force) has a big advantage to the above in working equally well in both forward and reverse and lending itself to working with an additional mechanical (handbrake) system operated from a cam or similar mechanism. Rant over, (I used to work on this stuff many moons ago!). In my opinion (i.e. suck it and see) there should be no major shift in front/rear bias. If you do have a bias issue it will more than likely be from using a commercial vehicle with little or no payload. If you have any problems feel free to contact me, I’ll be able to point you in the right direction.
-
Not all 12 port Holden 6's were injected. The Blue 12 port had a Varajet carb and the Black 12 port was only available with injection as an option. An injected Black is a great start if you want to use a modern ECU, injectors, etc. but in standard form was primitive to say the least.
-
I've been building Tarmac Rally cars for well over 20 years, and despite it probably qualifying me as having at least some 'real world experience' I found it always pays to crunch the numbers. It's hard not to be too subjective when you're playing with something you're passionate about! I've got a great xl based program for calculating the rpm, gear ratio's tire diameters and final drives; I'm just not sure how to post it here?
-
Did you look at the two ratio's and do the maths?
-
. I made a spacer that fitted between the thermostat housing and the head and ran both the inlet and outlet under the inlet manifold and hooked them up to a twin-pass radiator.

-
We replaced the clutch in my sons 96 E39 528i with a solid flywheel. Worst decision ever, the gearbox rattled at idle and the clutch action was terrible! In the end we made the parts company that supplied it take it back and exchange it for a dual mass for an extra $150. The result was a super smooth acting clutch and no gearbox rattle, It simply wasn't worth the $150 saving! I'm not 100% sure re the E34 but the E39's that replaced them ran very tall diff ratios in the manuals. My sons car was running a standard 2.9 diff that had you in 2nd and 3rd around town and using 4th most of the time on the open road, the top speed however was quite spectacular! We bought a 3.44 ratio 325 auto diff from Zebra for $130, swapped input flanges (one nut and a lock-tab) and the transformation was like night and day, she pulls like a raped date off the line, you can use 4th around town and she cruises in 5th on the open road with 4th in just the right spot for overtaking. Fuel consumption hasn't appeared to change and as the traction controll and speedo work off the ABS sensors everything works as it should.
-
At the risk of hijacking the thread; may I put forward a little welding helmet tip for fellow old school-old farts out there. Yes I know our mothers told us it would make us go blind and yes I know both sound advice and youth is wasted on the young, (I blame the demise of my eyesight on Ellie McPherson's considerable err... um... 'attributes') but a $14 investment (even if it is from the BOC Gestapo) can have you welding as well if not better than 30 years ago. I use a 1.75 lens (while still wearing my reading glasses) and with an average quality auto-dark helmet I can see everything and most importantly have confidence again in the quality of my welds. https://www.boc.co.nz/shop/en/nz/boc-welding-magnification-lens
-
100% in agreement with Cletus , using a breaker-bar will more often than not only do what the name suggests i.e. break something! Pour the concoction of your choice (I just use CRC) into the bores and rock the car in high gear. Repeat the process for a few days and if the motor wont free up no amount of additional force will have you end up with a serviceable motor, you'll probably just do more damage.
-
No.......don't tell me.......Annabel Langbein.....is that you? (Edited to say I use Kero, a ton of elbow grease and a fine wire brush for the burnished Aluminium look).
-

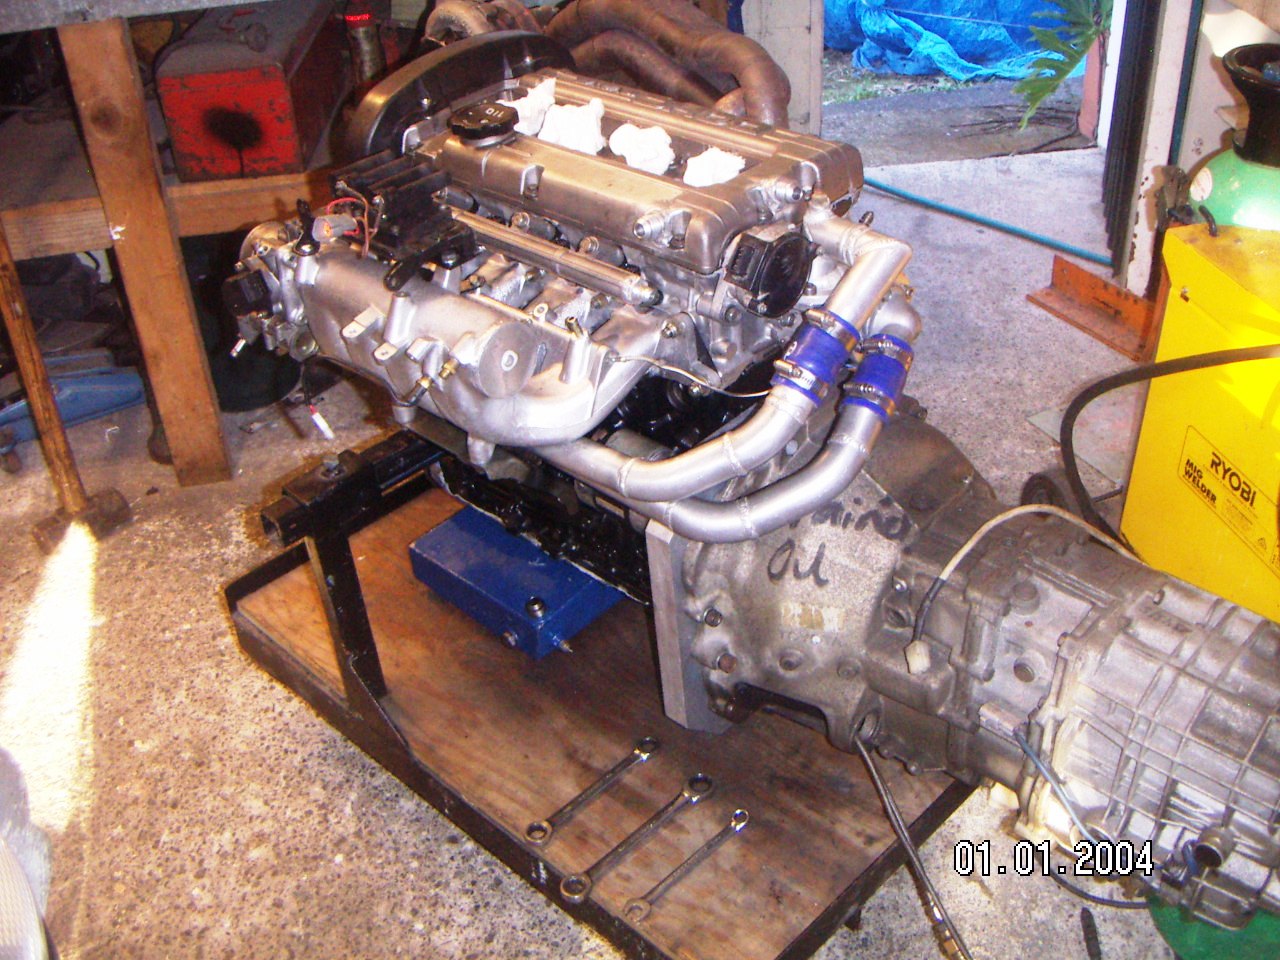
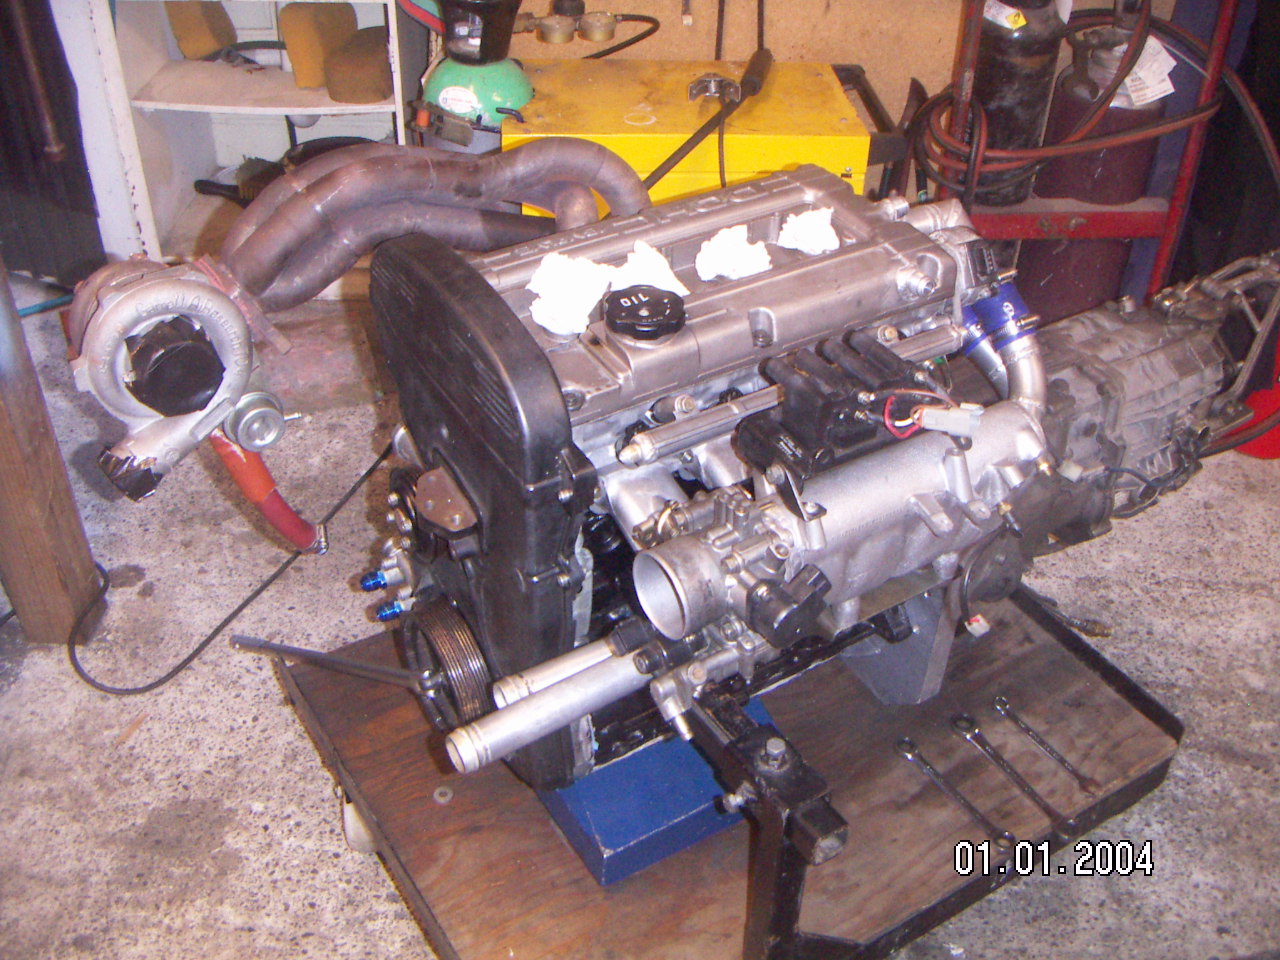
SR2’s 1947 Vauxhall “Rigamortice” Discussion thread.
sr2 replied to sr2's topic in Project Discussion
Yes I was watching it as well, just sold for $310, a good price in my books. I'm picking it was an early 186 YT stage 3. Good to see it has the square cast push-rod holes (no need for guide plates if running roller rockers). It also hasn't got the high compression combustion chambers which 50 years later is a huge advantage, most of the blocks and heads have been skimmed so many times the challenge has become how to keep the compression ratio low enough for BP98! Edited to say I was watching http://www.trademe.co.nz/Browse/Listing.aspx?id=1261061577 The inlet ports looked very YT but the single rather than double valve springs and the lack of an emblem on the valves left me at the least confused if not skeptical. -
Having had my proverbial arse kicked by a number of Bob Homewood tuned/built cars over 20 plus years of motor racing I would say dismiss his expertise at your peril. Love your build, I've had a soft spot for 'Dark 3's" for many years.
-
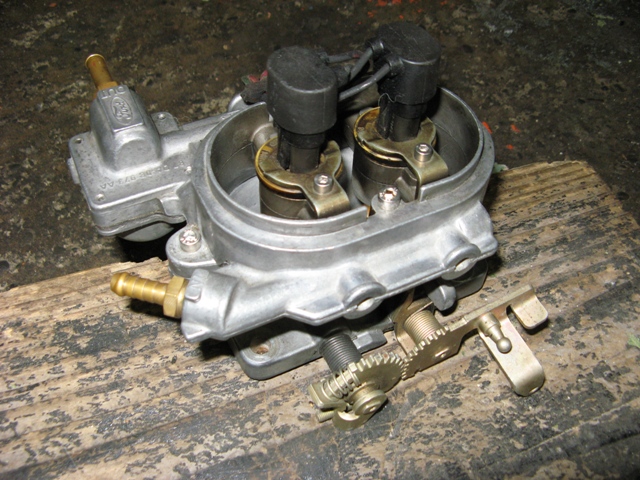
Easiest route would be a TBI (throttle body injection) throttle body off an EA Falcon. It has a built in throttle position sensor, idle stepper motor, fuel regulator, has two huge injectors that were intended for a 3.9 litre engine and has almost the same stud pattern as a 28/36 or 32/36 DCD Webber. Use either an aftermarket manifold or simply an adapter plate (easily sourced). You can hide the whole lot under an HQ Holden or similar if you really want to keep the natives confused. (The one pictured below was $30 from Pick-a-part).
-
Yes it blew me away completely; they were very helpful and sent me a laminated smaller sized copy to keep in the glove-box. The service was that good it almost made me feel guilty for giving the officious little sods such a hard time when they insisted I fill one out in 1992!
-
The LVVTA has copies of all the declarations submitted when the new cert regs came in in 92, just contact them. When I requested they sent me a photocopy of a deceleration I lodged 25 years ago, it still had my handwriting on it.....scary!
-
If you are going down the path of unassisted brakes (which is still a viable option) converting to a tandem master-cylinder of the same bore diameter would be a pointless waste of time, money and effort. I have yet to ever find a standard assisted braking system that didn't verge on being un-driveable with the booster disconnected; try lightly pinching off the booster vacume supply on your daily driver (with a pair of vicegrips) and you'll appreciate the point I'm making. I'd be looking at downsizing your (3/4" or 13/16"?) master-cylinder to either 5/8" or 9/16" as a first attempt; if you're taking that route be prepared for it to be a trial and error exercise. Unlike single out put master-cylinders (i.e. the ones we run in Tilton and Willwood pedal boxes) Tandem master-cylinders require a push rod that runs as parallel as possible to their bore. If you are changing pedal ratio's it should only be done by modifying the position of the fulcrum (pivot) point, be very aware of the fact that by increasing pedal leverage you will be decreasing stroke - very easy to paint yourself into a corner. (Believe me I've made that mistake in the past!). Have to say I agree with Fliboi re: raising the HP while reducing braking efficiency being a potential issue, shame you're at the other end of the country otherwise I'd be offering a hand getting it sorted. What a fantastic project, cant wait to see how it all works out.
-
Great little video but if I may, a few comments. I'm not sure where the '900 to 1200 psi' came from, it's a meaningless number unless you're taking into account total swept piston area, pad area and compound, rotor diameter, etc. (I've seen 2,500 plus psi on many occasions). The choice of master-cylinder diameter is not simply one of how hard of soft you want your pedal to be, the critical issue they failed to address is one of pedal travel and in some setups not getting a pedal at all! Bottom line is if you reduce master-cylinder size you increase pedal travel; a soggy feeling pedal that only firms up close to the floor is anything but ideal. There is a good reason why the majority of cars produced 50 plus years have had servo assisted brakes. Until recently (when we have access to ABS systems that are comfortable in a completion environment) I've always run non assisted brakes in our race cars. It's a very fine line between a firm enough pedal, minimum pedal travel and sufficient front/rear hydraulic pressure but we achieved it with a lot of track testing, a spares kit with a selection of master-cylinder sizes and a service crew that could swap them out in a 10 minute service stop. IMO (for a street car) removing the booster from a standard braking system and reducing the master-cylinder bore with the expectation of retaining sufficient braking and pedal firmness will probably end in tears. To put some figures on the equation a VH44 increases boost by an approximate factor of 190% a VH40 300%, achieving the same amount of unassisted braking would involve 2-3 times the amount of pedal travel. Yes a tandem master-cylinder is a great way of adding redundancy to a braking system but bear in mind (if running a booster) if you have no firewall space to run the standard Mastervac you’ll need to fit two VH44 Hydrovacs to retain brake proportionality.
-
Although going from a Mastervac type booster to a Hydrovac type is a step back in time , performance and reliability by the look of your overcrowded engine bay it's your only option. Both the VH40 and VH44 share the same crack crack pressure of 35 psi and runout pressure of 450 psi so under normal driving conditions there shouldn't be a huge difference in driveability and feel between the two. Early single circuit disc/drum combo's were always a compromise between the low pressure high displacement requirement of the drums and the high pressure low displacement of the disc calipers i.e. they tended to run smaller diameter wheel cylinders for the drums and bigger caliper pistons (remember with a single piston floating type caliper you need to multiply the piston area x2). All this considered I'l go for the VH44 option Just remember with a single circuit Hydropower system there is no 2nd chance; a failure of either the pushrod seal or or a failure of the circlip that holds the assembly in place leaves you with a pedal that goes straight to the floor. Don't take any chances with 2nd hand units unless you strip, inspect, and assemble with a new kit.
-
Hi, I need a little more information. What car are we talking about, how standard is the braking system and why do you want to fit a remote booster?
-
A good step in the right direction, do they have a chapter on the use of composites?
-
It's quite common on many cars, including those with ABS. Static pedal creep (within reason) is nothing to be concerned about.
-
Love your work mate, what a project!
-
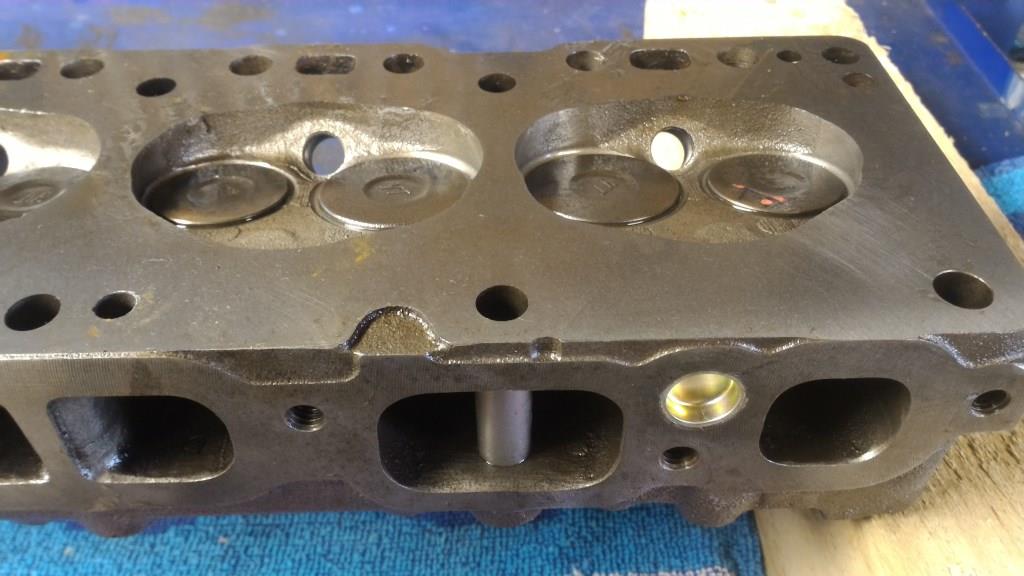
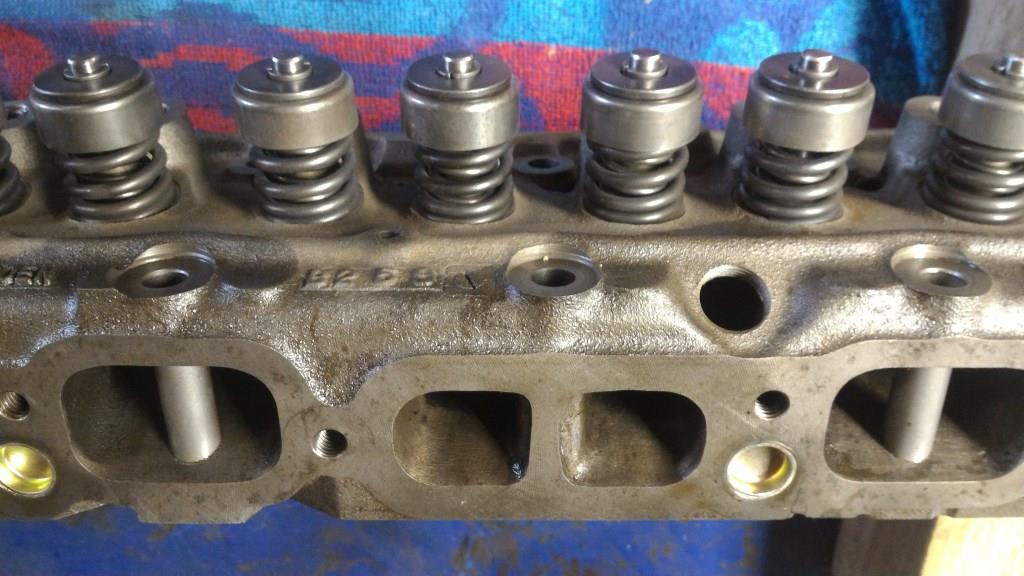
On closer inspection the decision was made that the pitted exhaust valve stem was not going to be an issue, (Holden 6’s are not known for loosing valve heads) and that for the time being we’d run with the existing original Yella Terra valves. A light skim……. Valves & seats faced and lapped……… The Y/T Double valve springs were within spec so it was reassemble with new frost plugs and valve seals. I even shouted the old girl a new set of stainless manifold studs and brass nuts, the obligatory yellow paint will come later. And one more job is ticked off the list…...
- 185 replies
-
- 11
-