a.craw4d
-
Posts
4,099 -
Joined
-
Last visited
Content Type
Forums
Downloads
Events
Gallery
Everything posted by a.craw4d
-
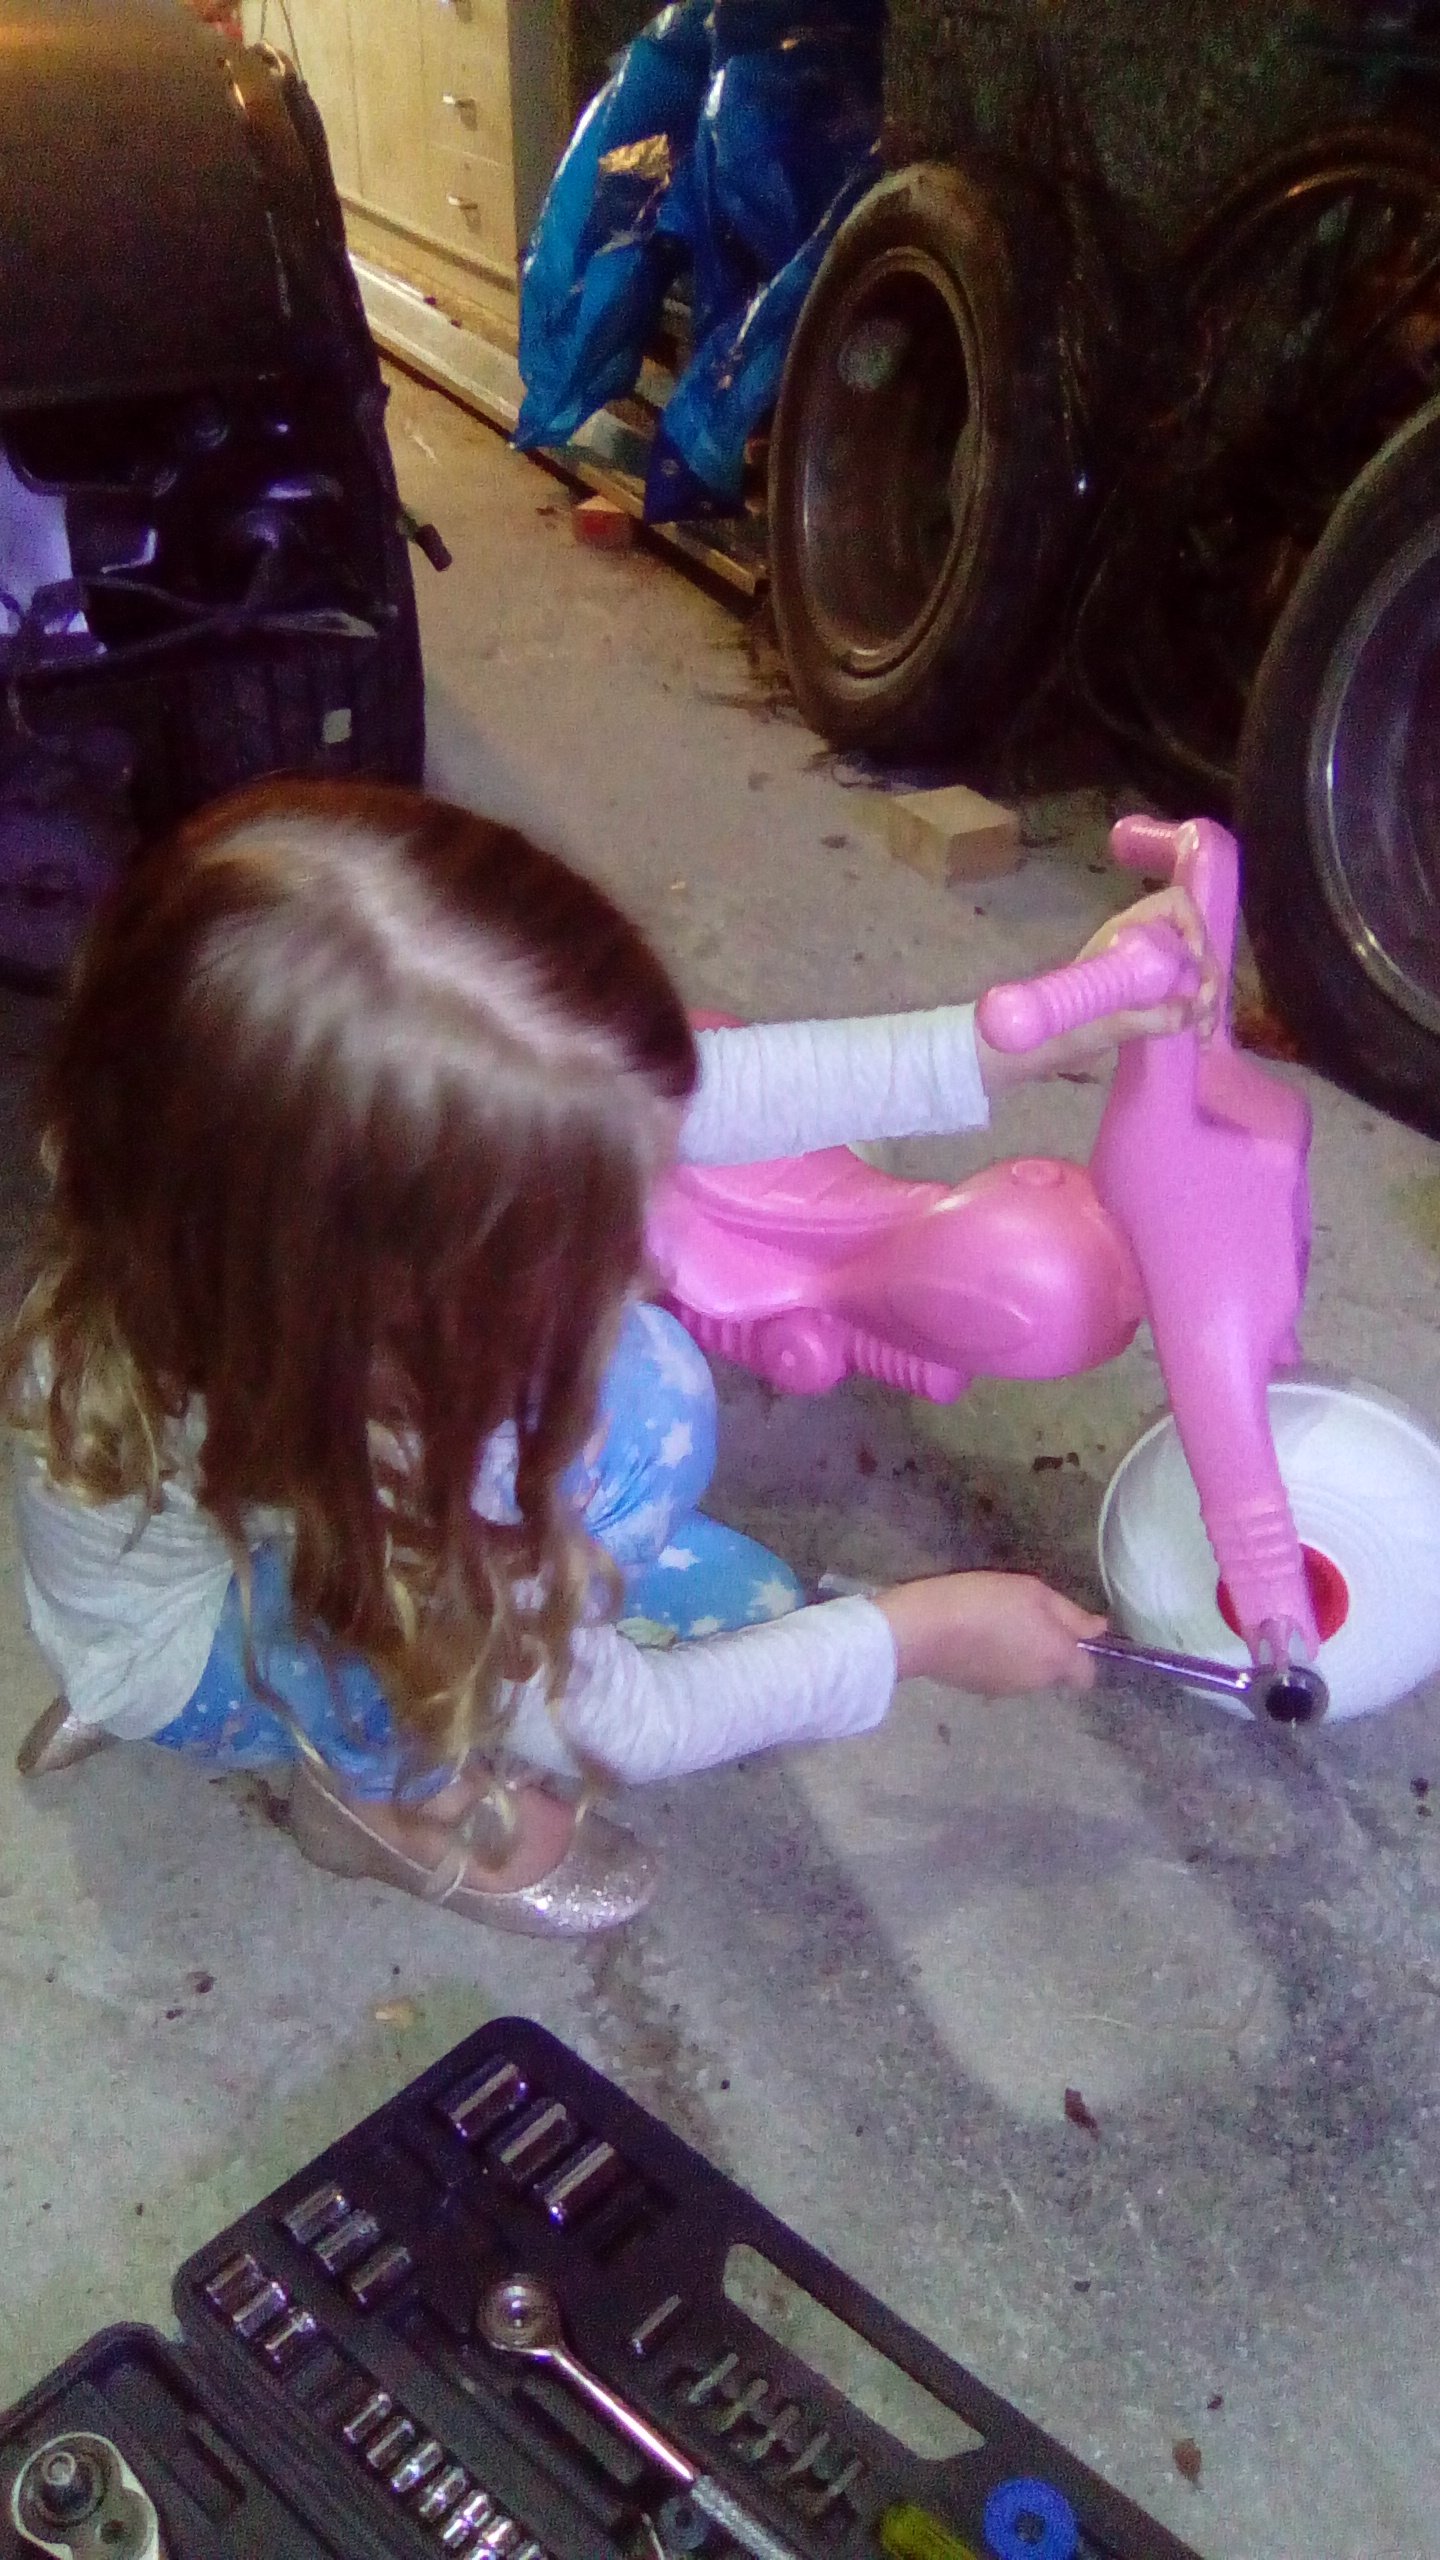
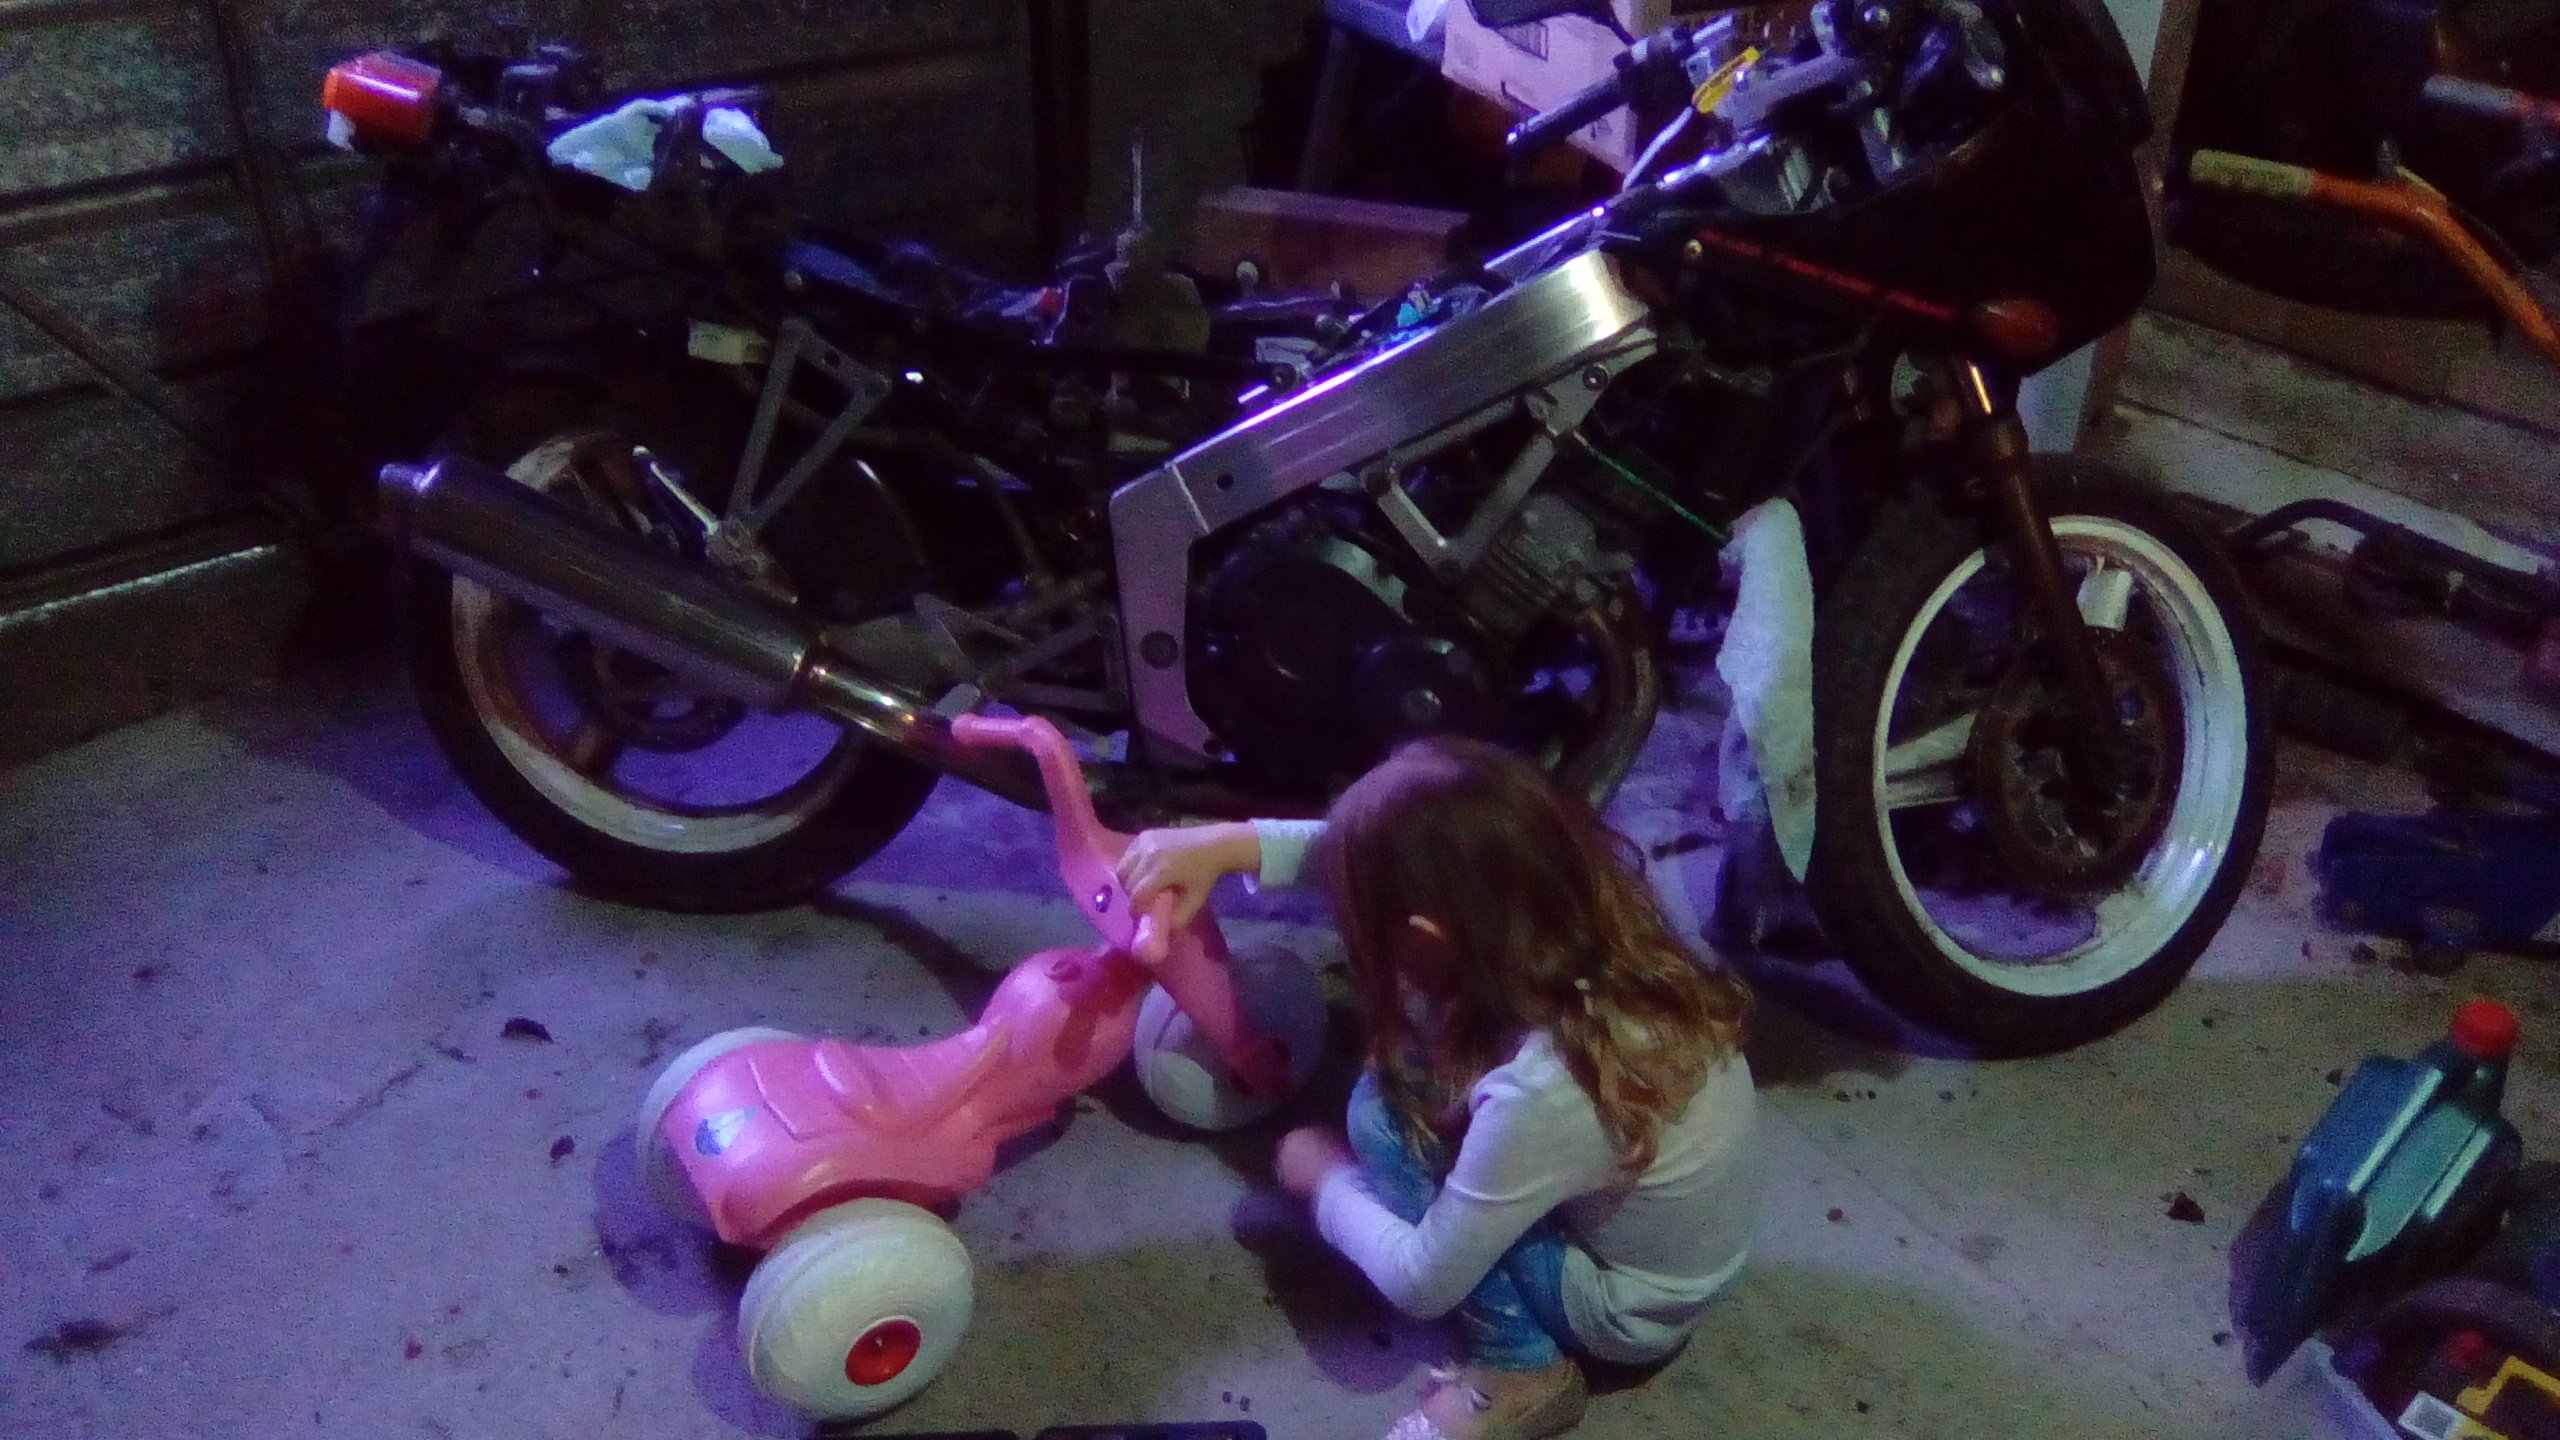
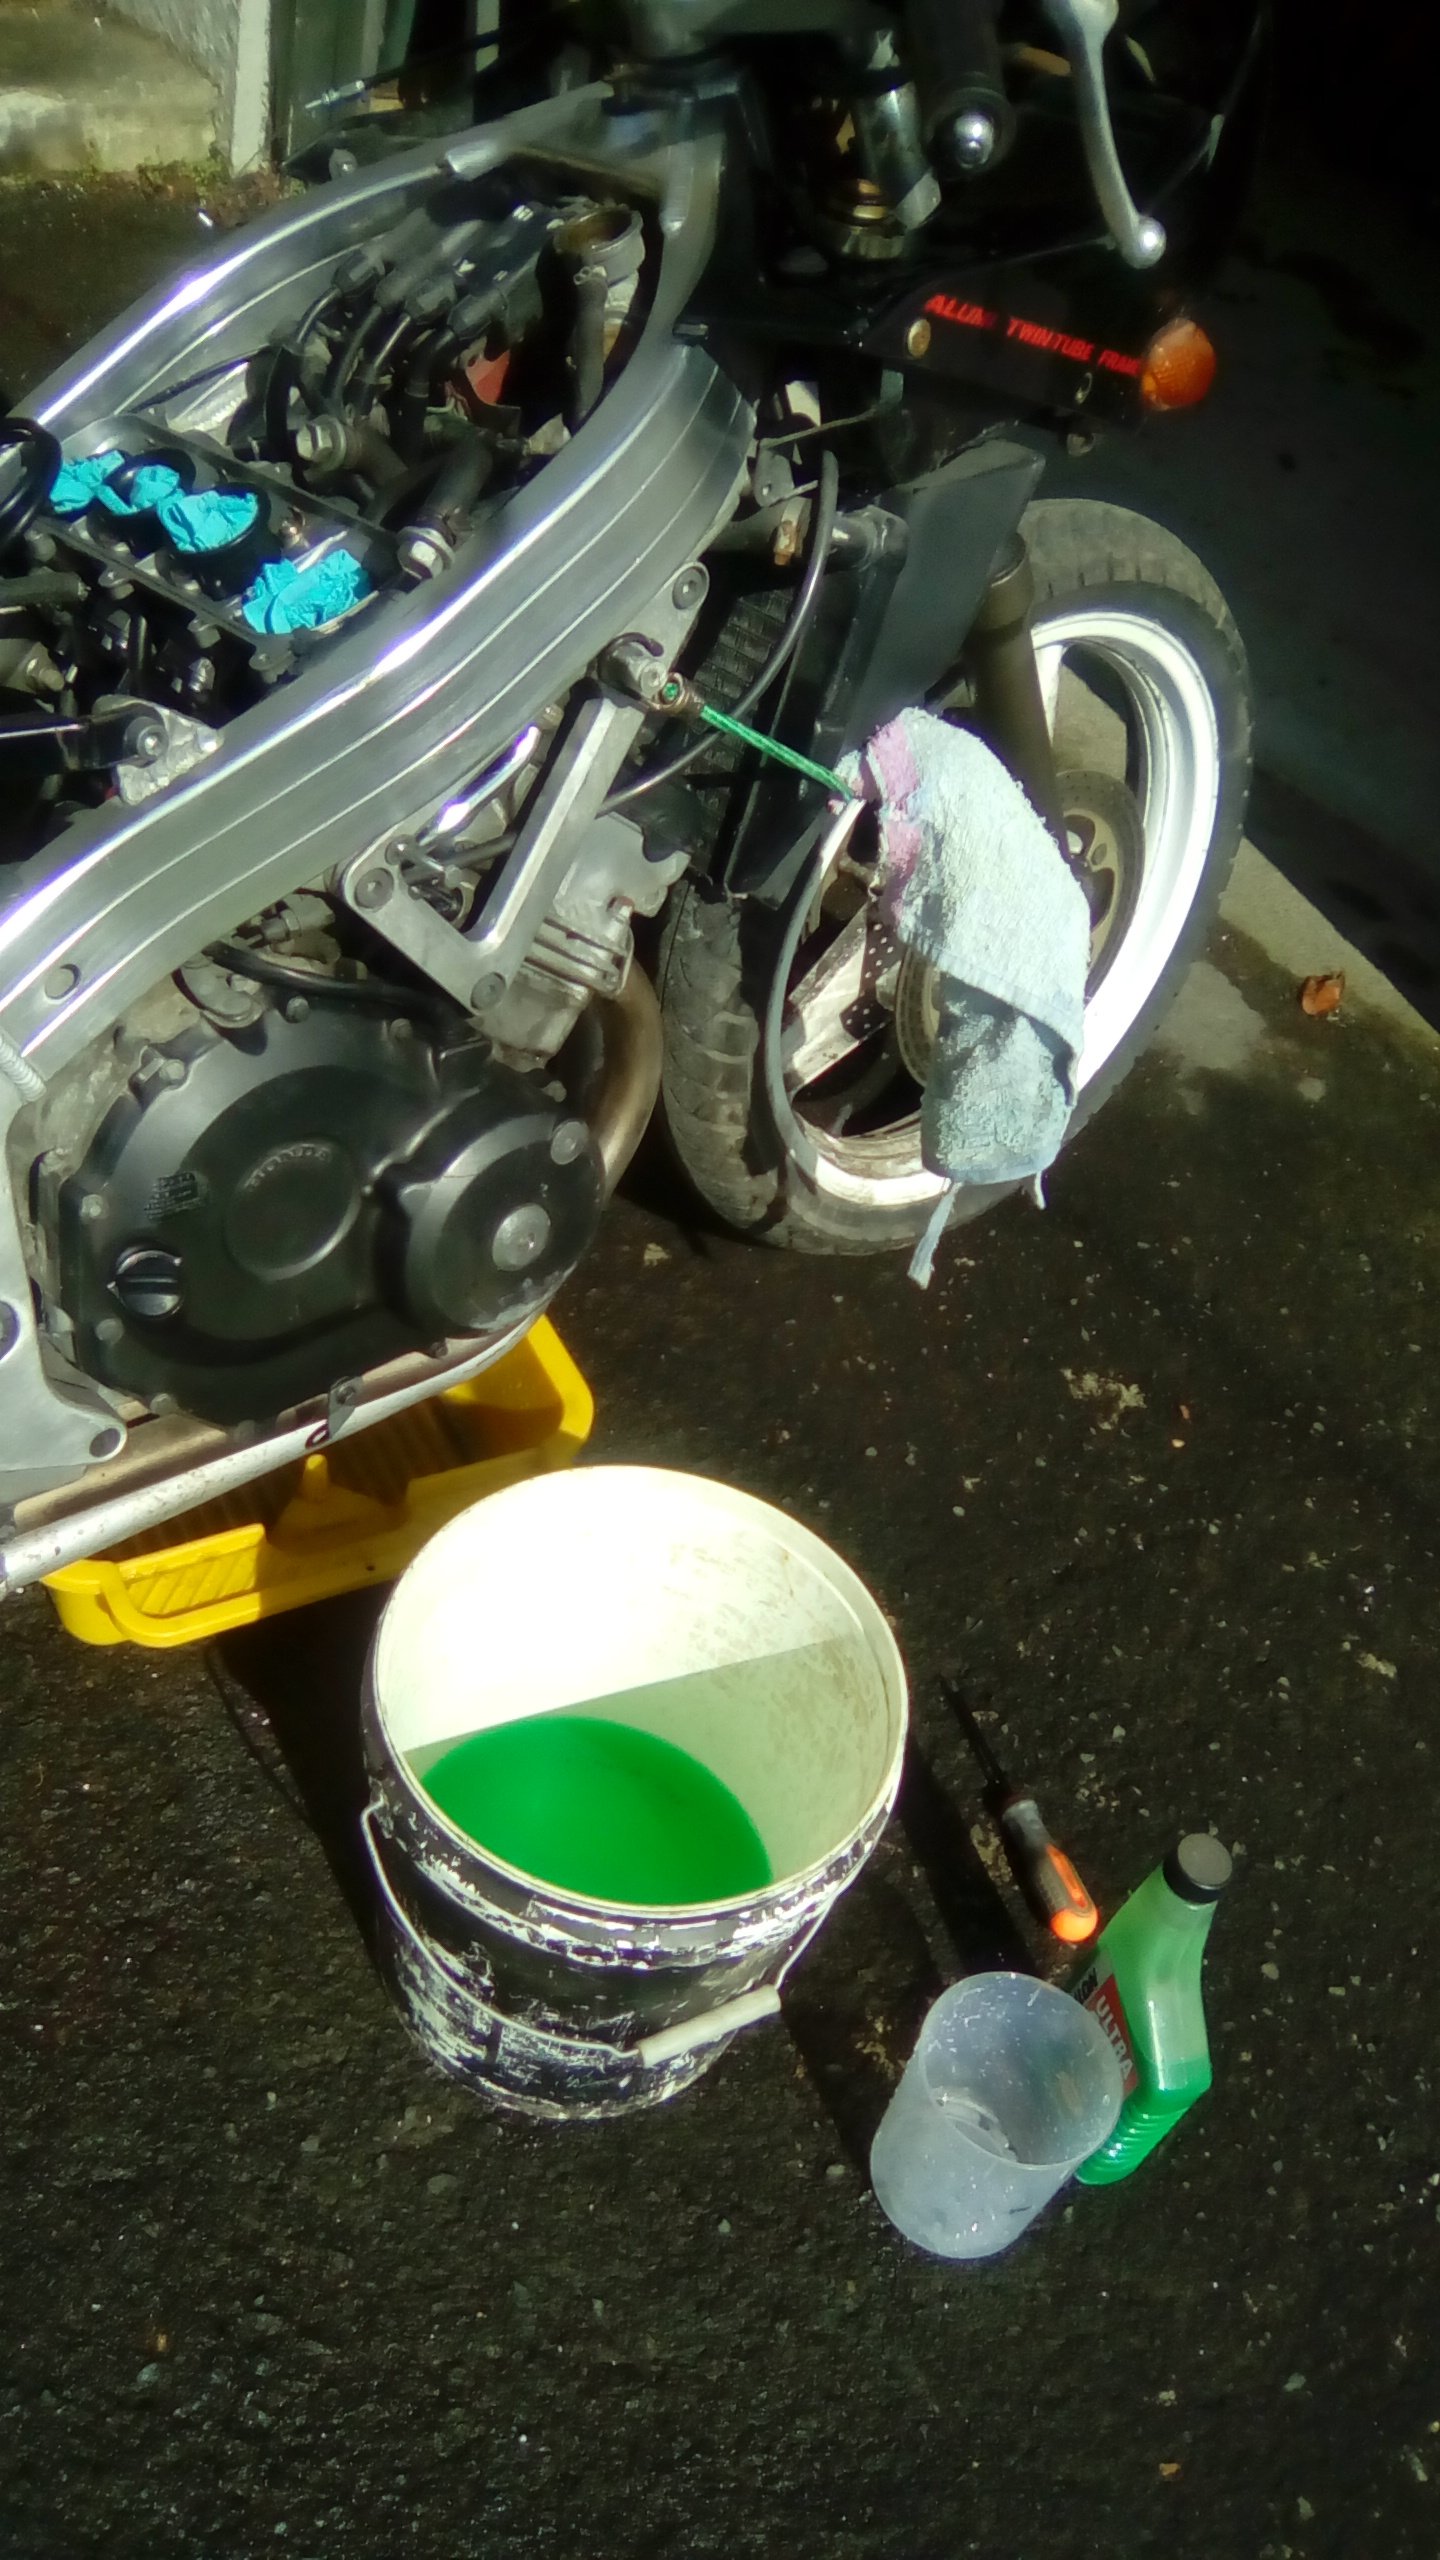
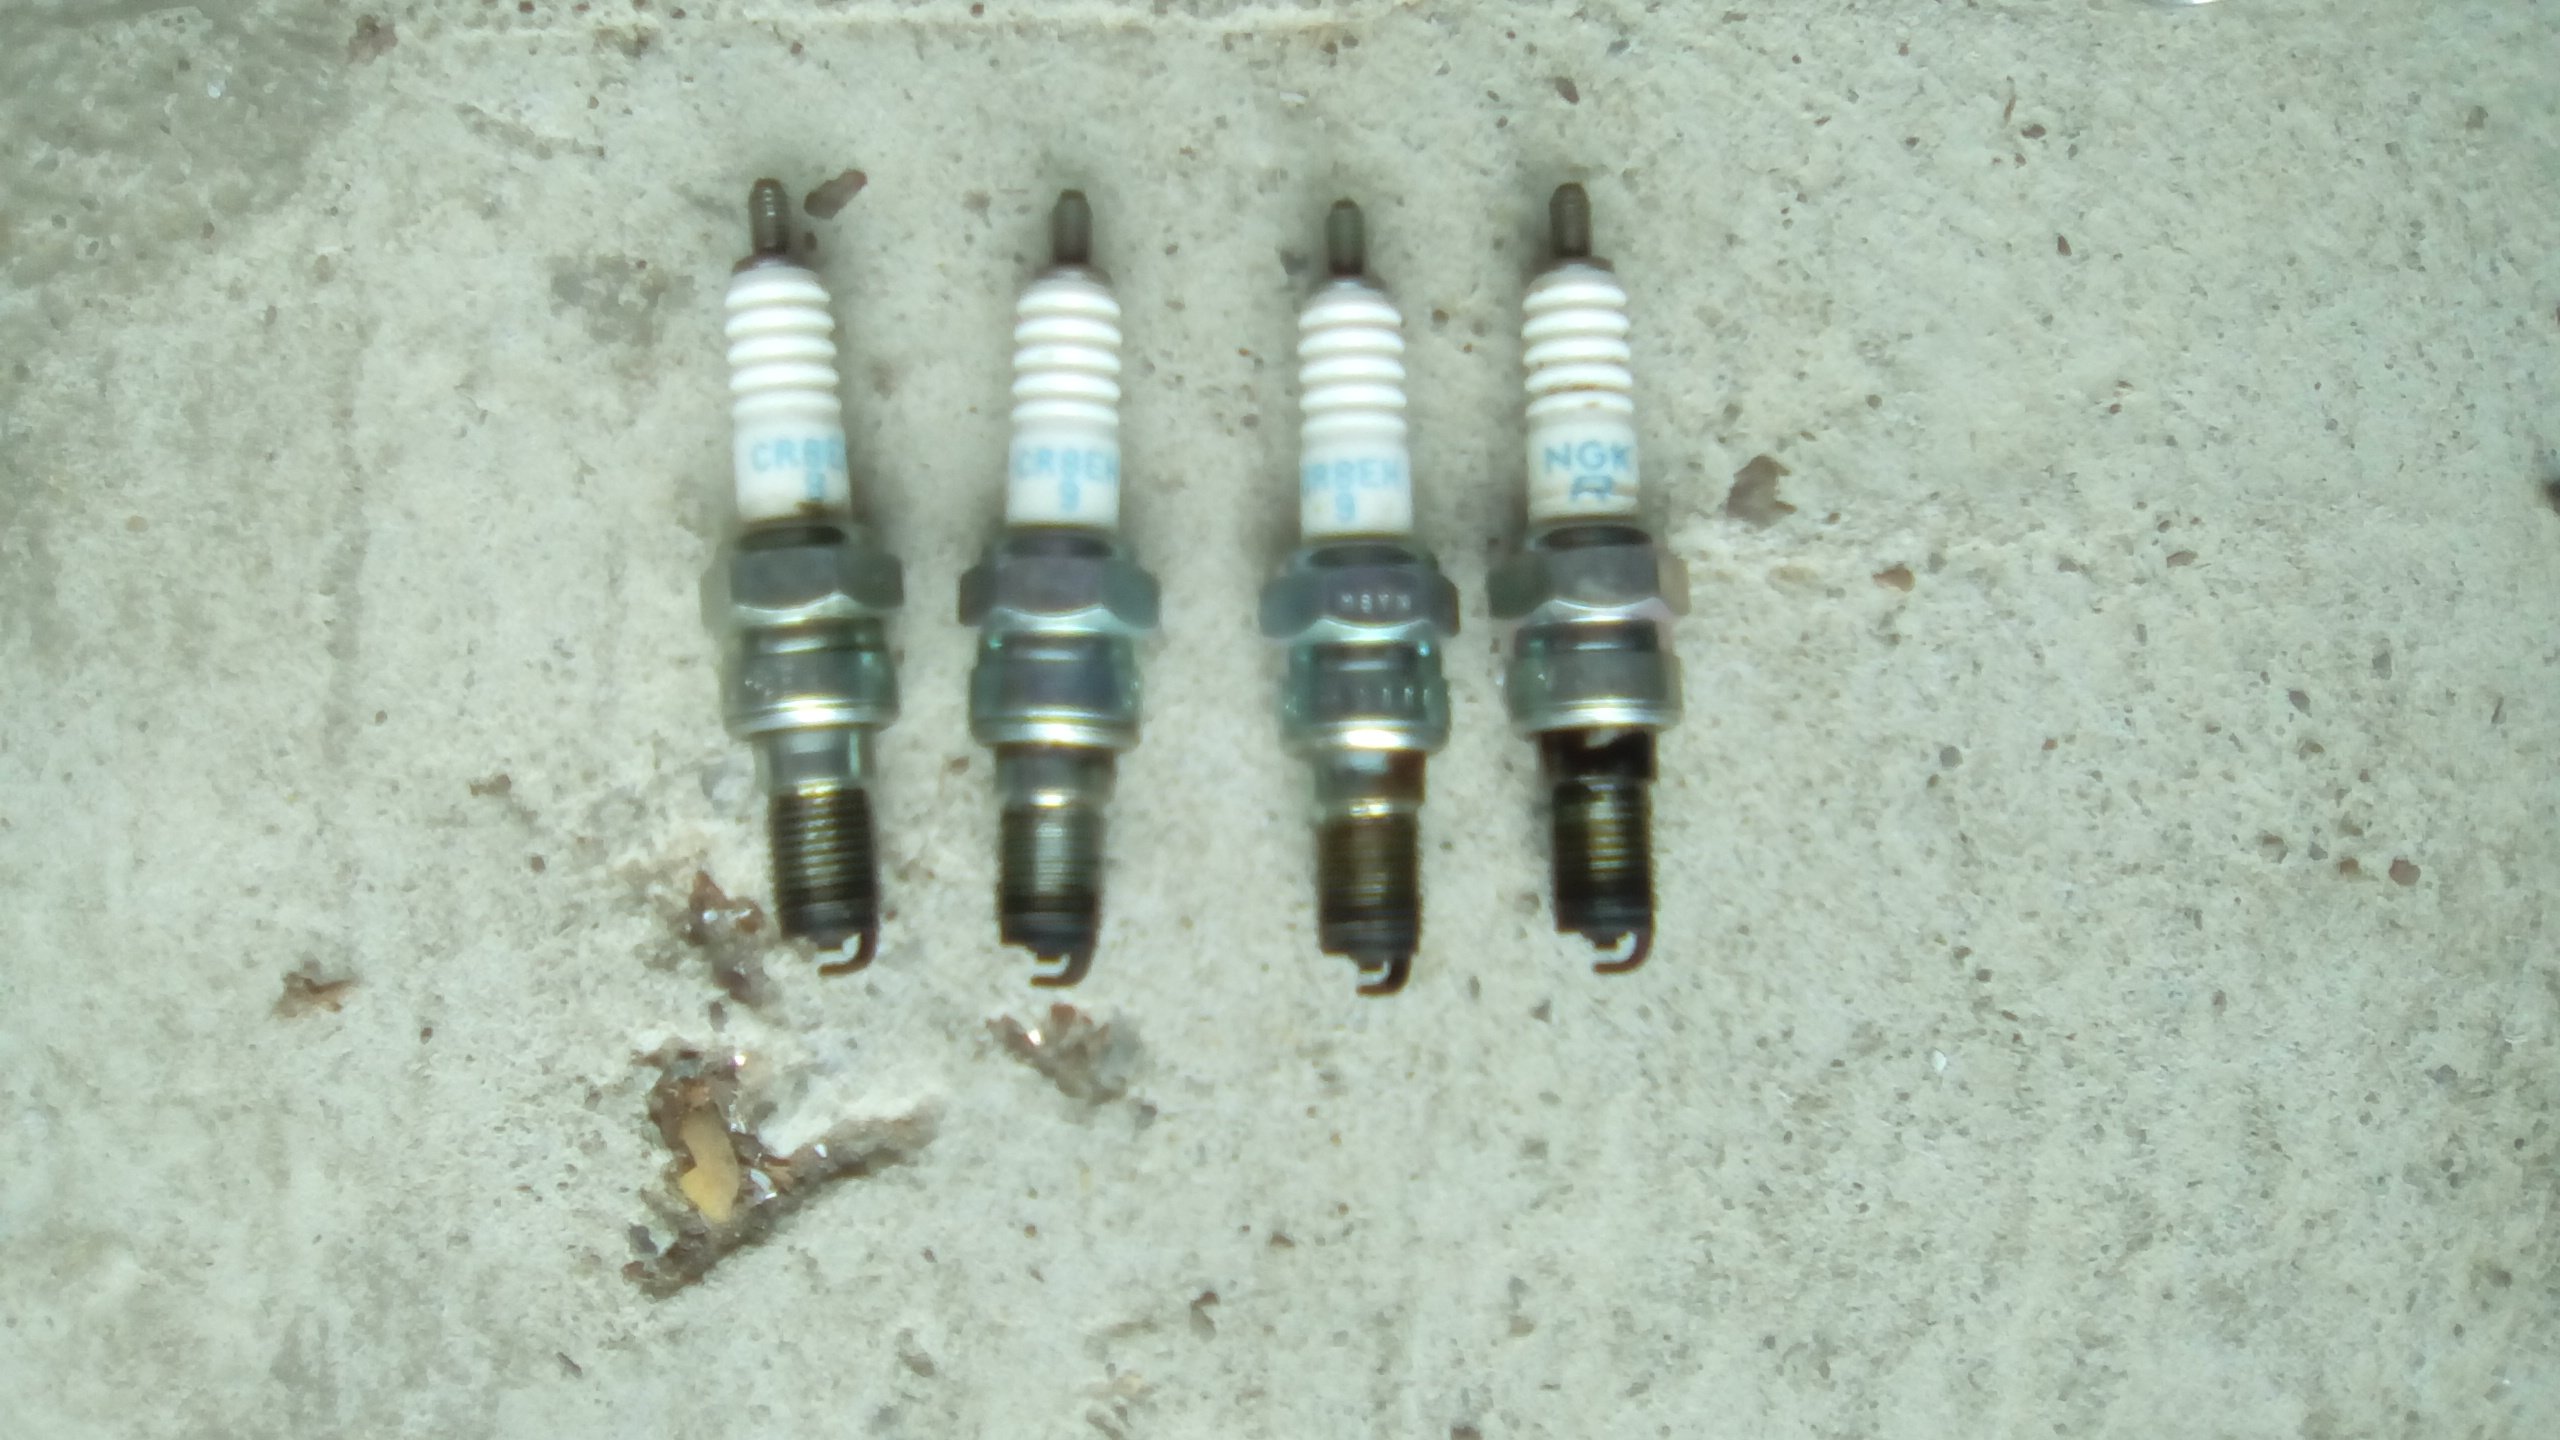
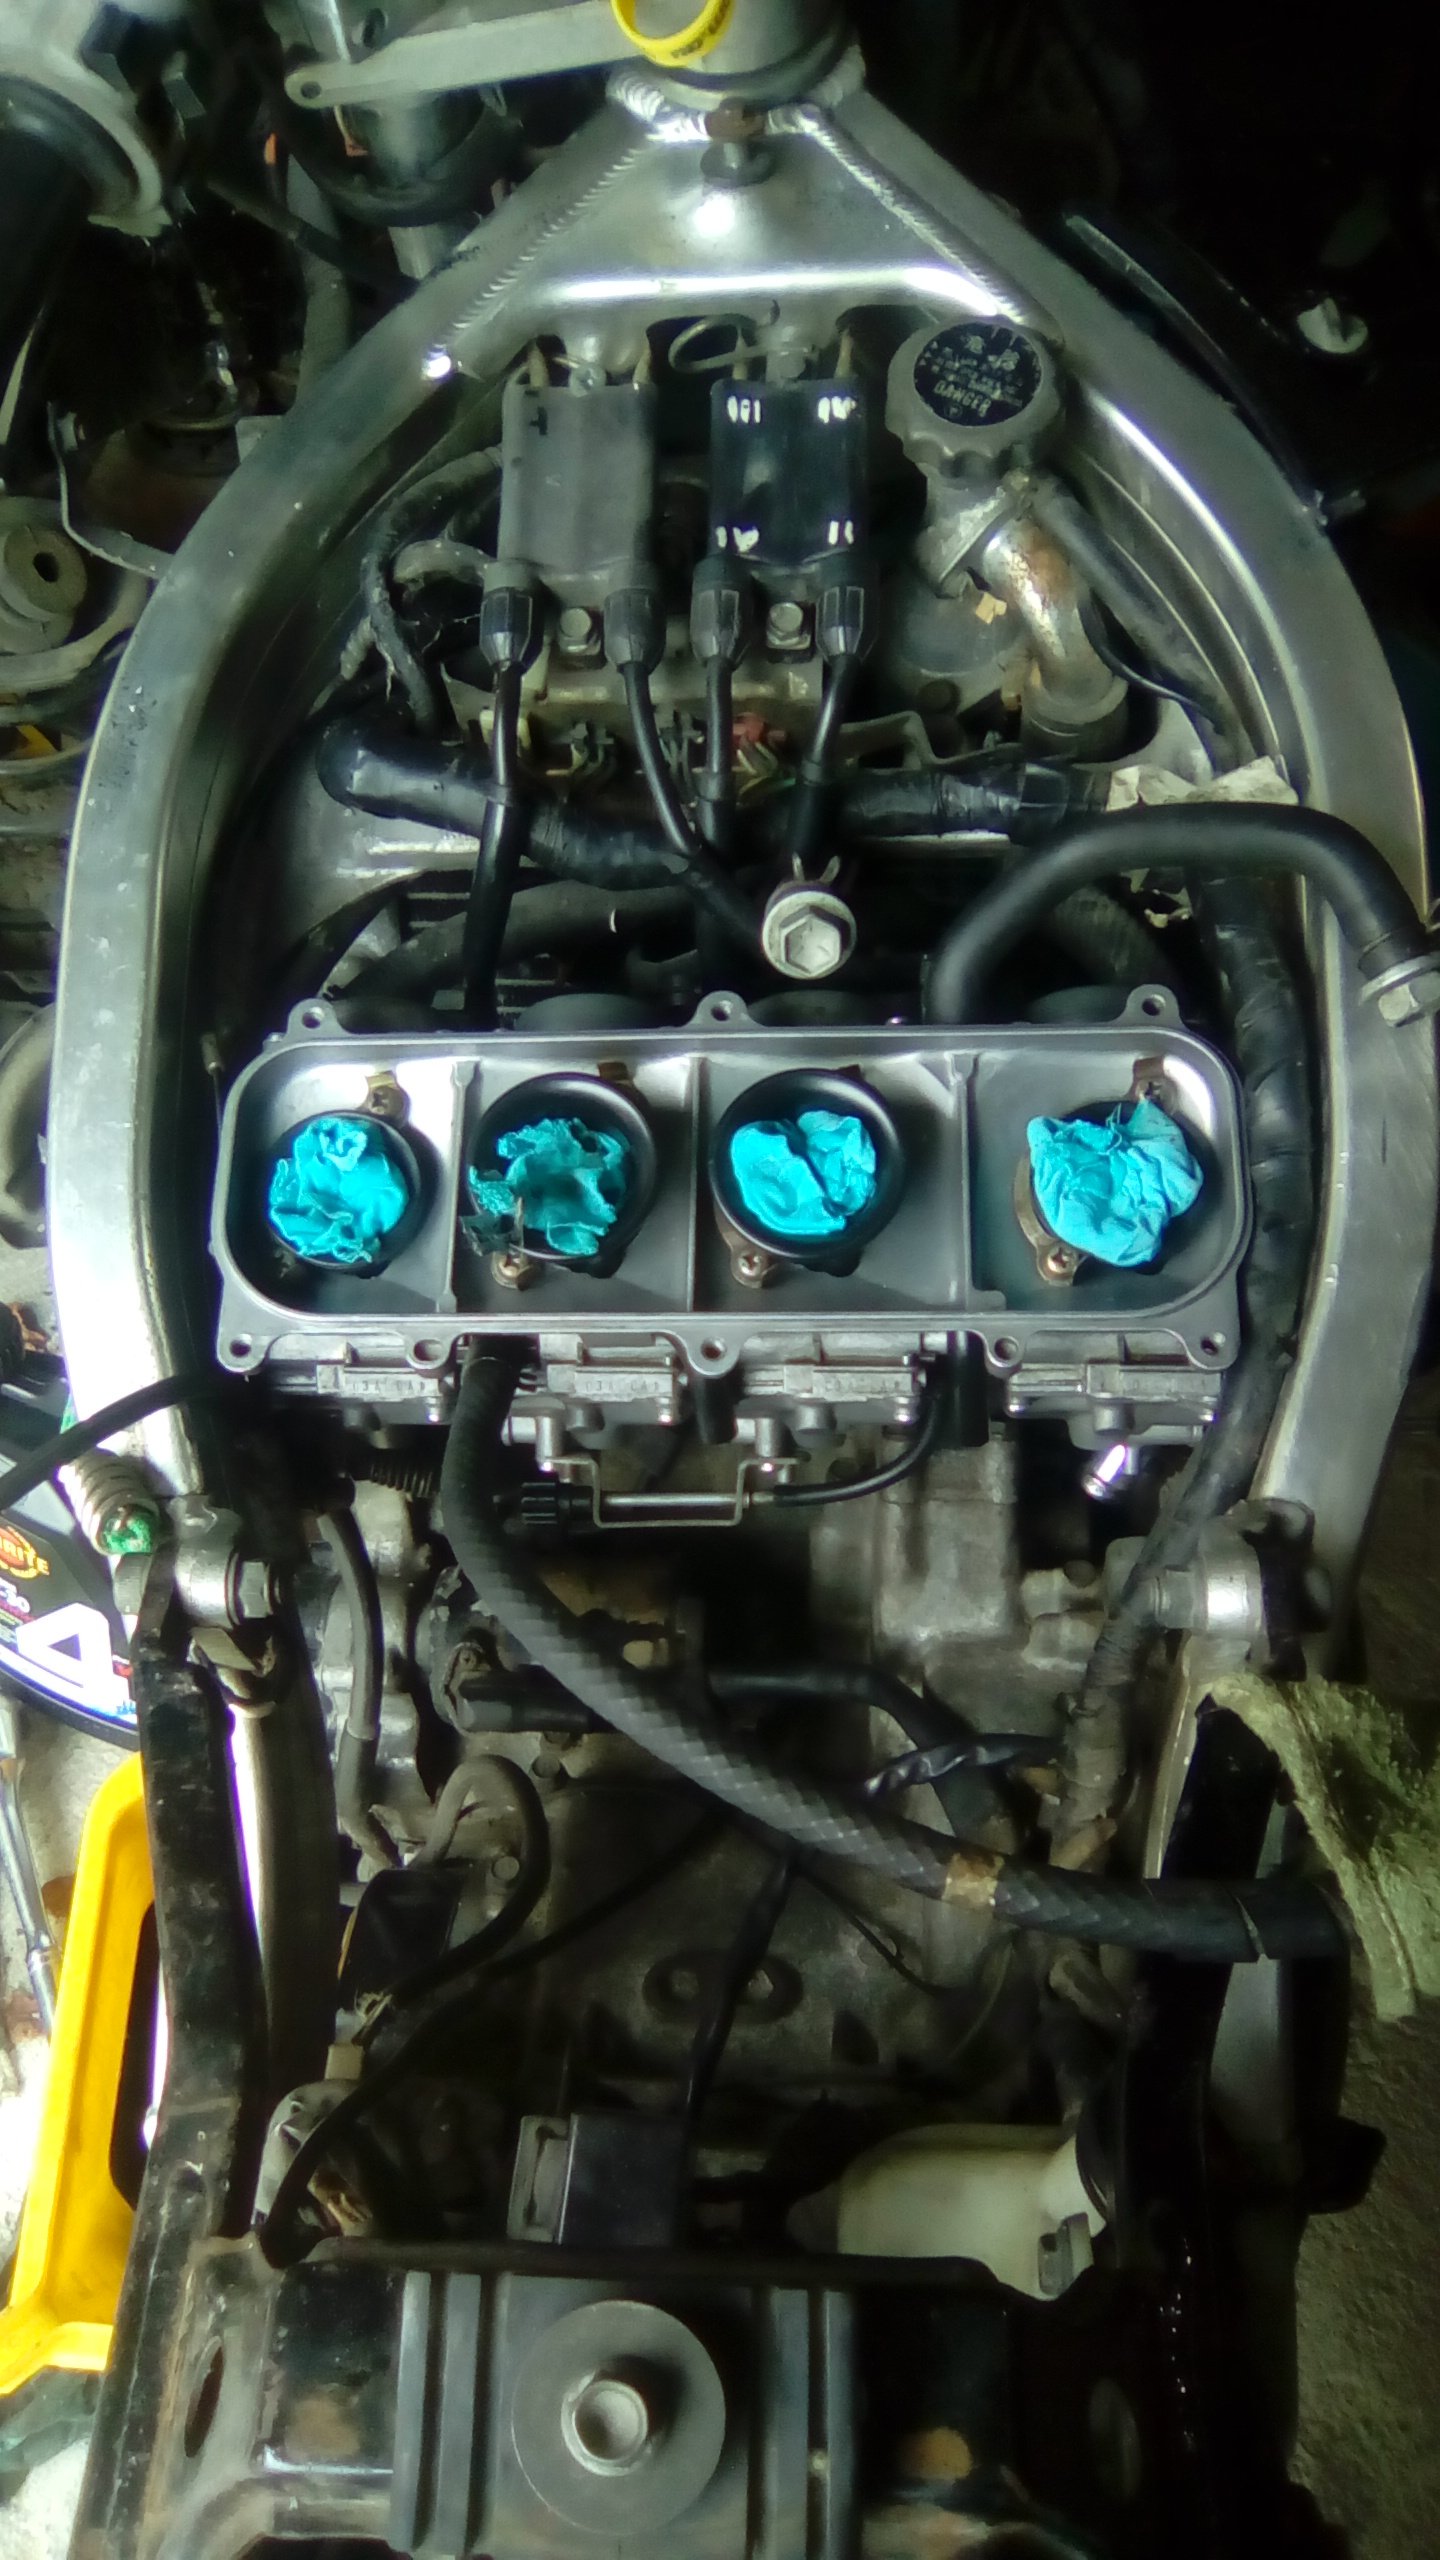
I'm posting on here mainly so I have a record of what and when I've done something so sorry for the boring bits. Small progress. I had a coolant leak so little miss 4 helped me pull a hose and pipe off and go shopping for an o ring, on the condition that she can have the old o ring because her motorbike needs it. She fixed up her bike. And I mixed up some new coolant and fixed mine. (I don't have a fancy jug so bucket it was). Pulled and checked the plugs, #1 was wet with gas and the lead isn't flash so will tape it up for now. Otherwise they appear ok.

-
And it goes again! I'm so stoked right now. Will try upload a shitty video later.
-
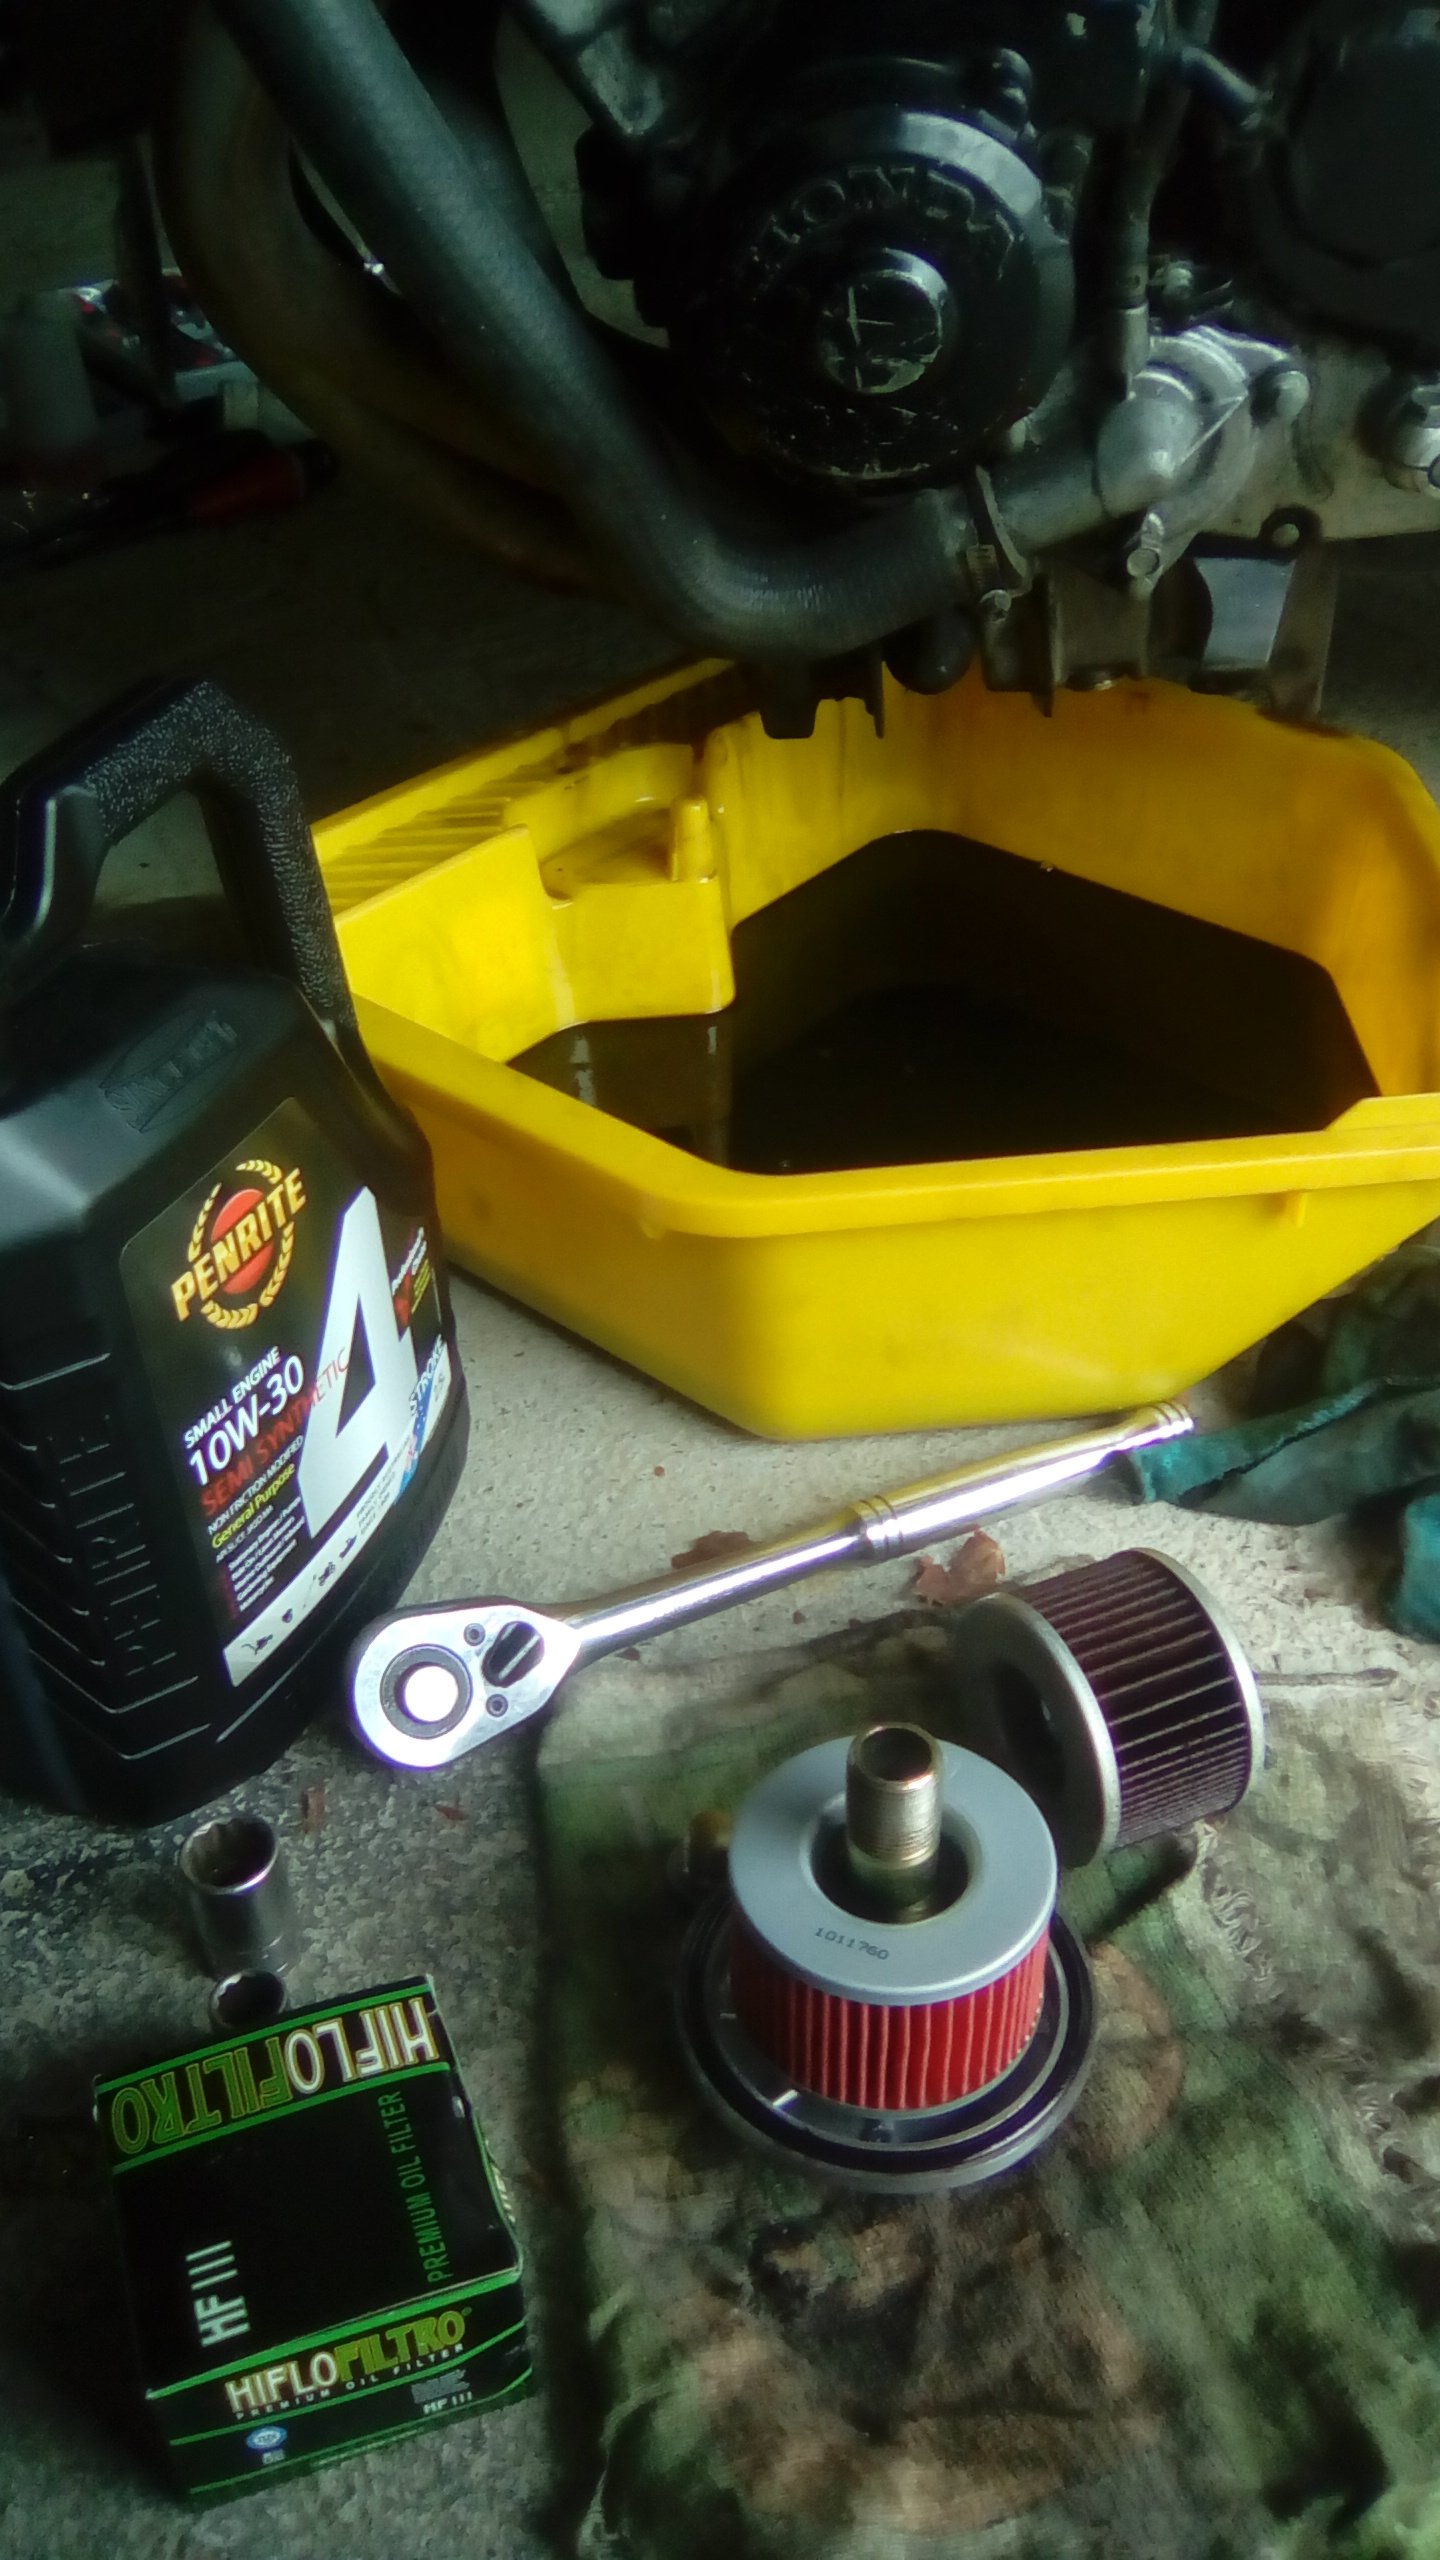
Today's going better than yesterday. Carbs are back on. Drained what's supposedly the oil. It came out more like dirty petrol, it smells a bit like petrol and is really thin like petrol. Match test didn't confirm petrol so I don't know what's going on. Hopefully it's old gas that has made its way into the oil from sitting for years. Fingers crossed everything is ok. Anyway, out with the old um stuff, and in with the new.
-
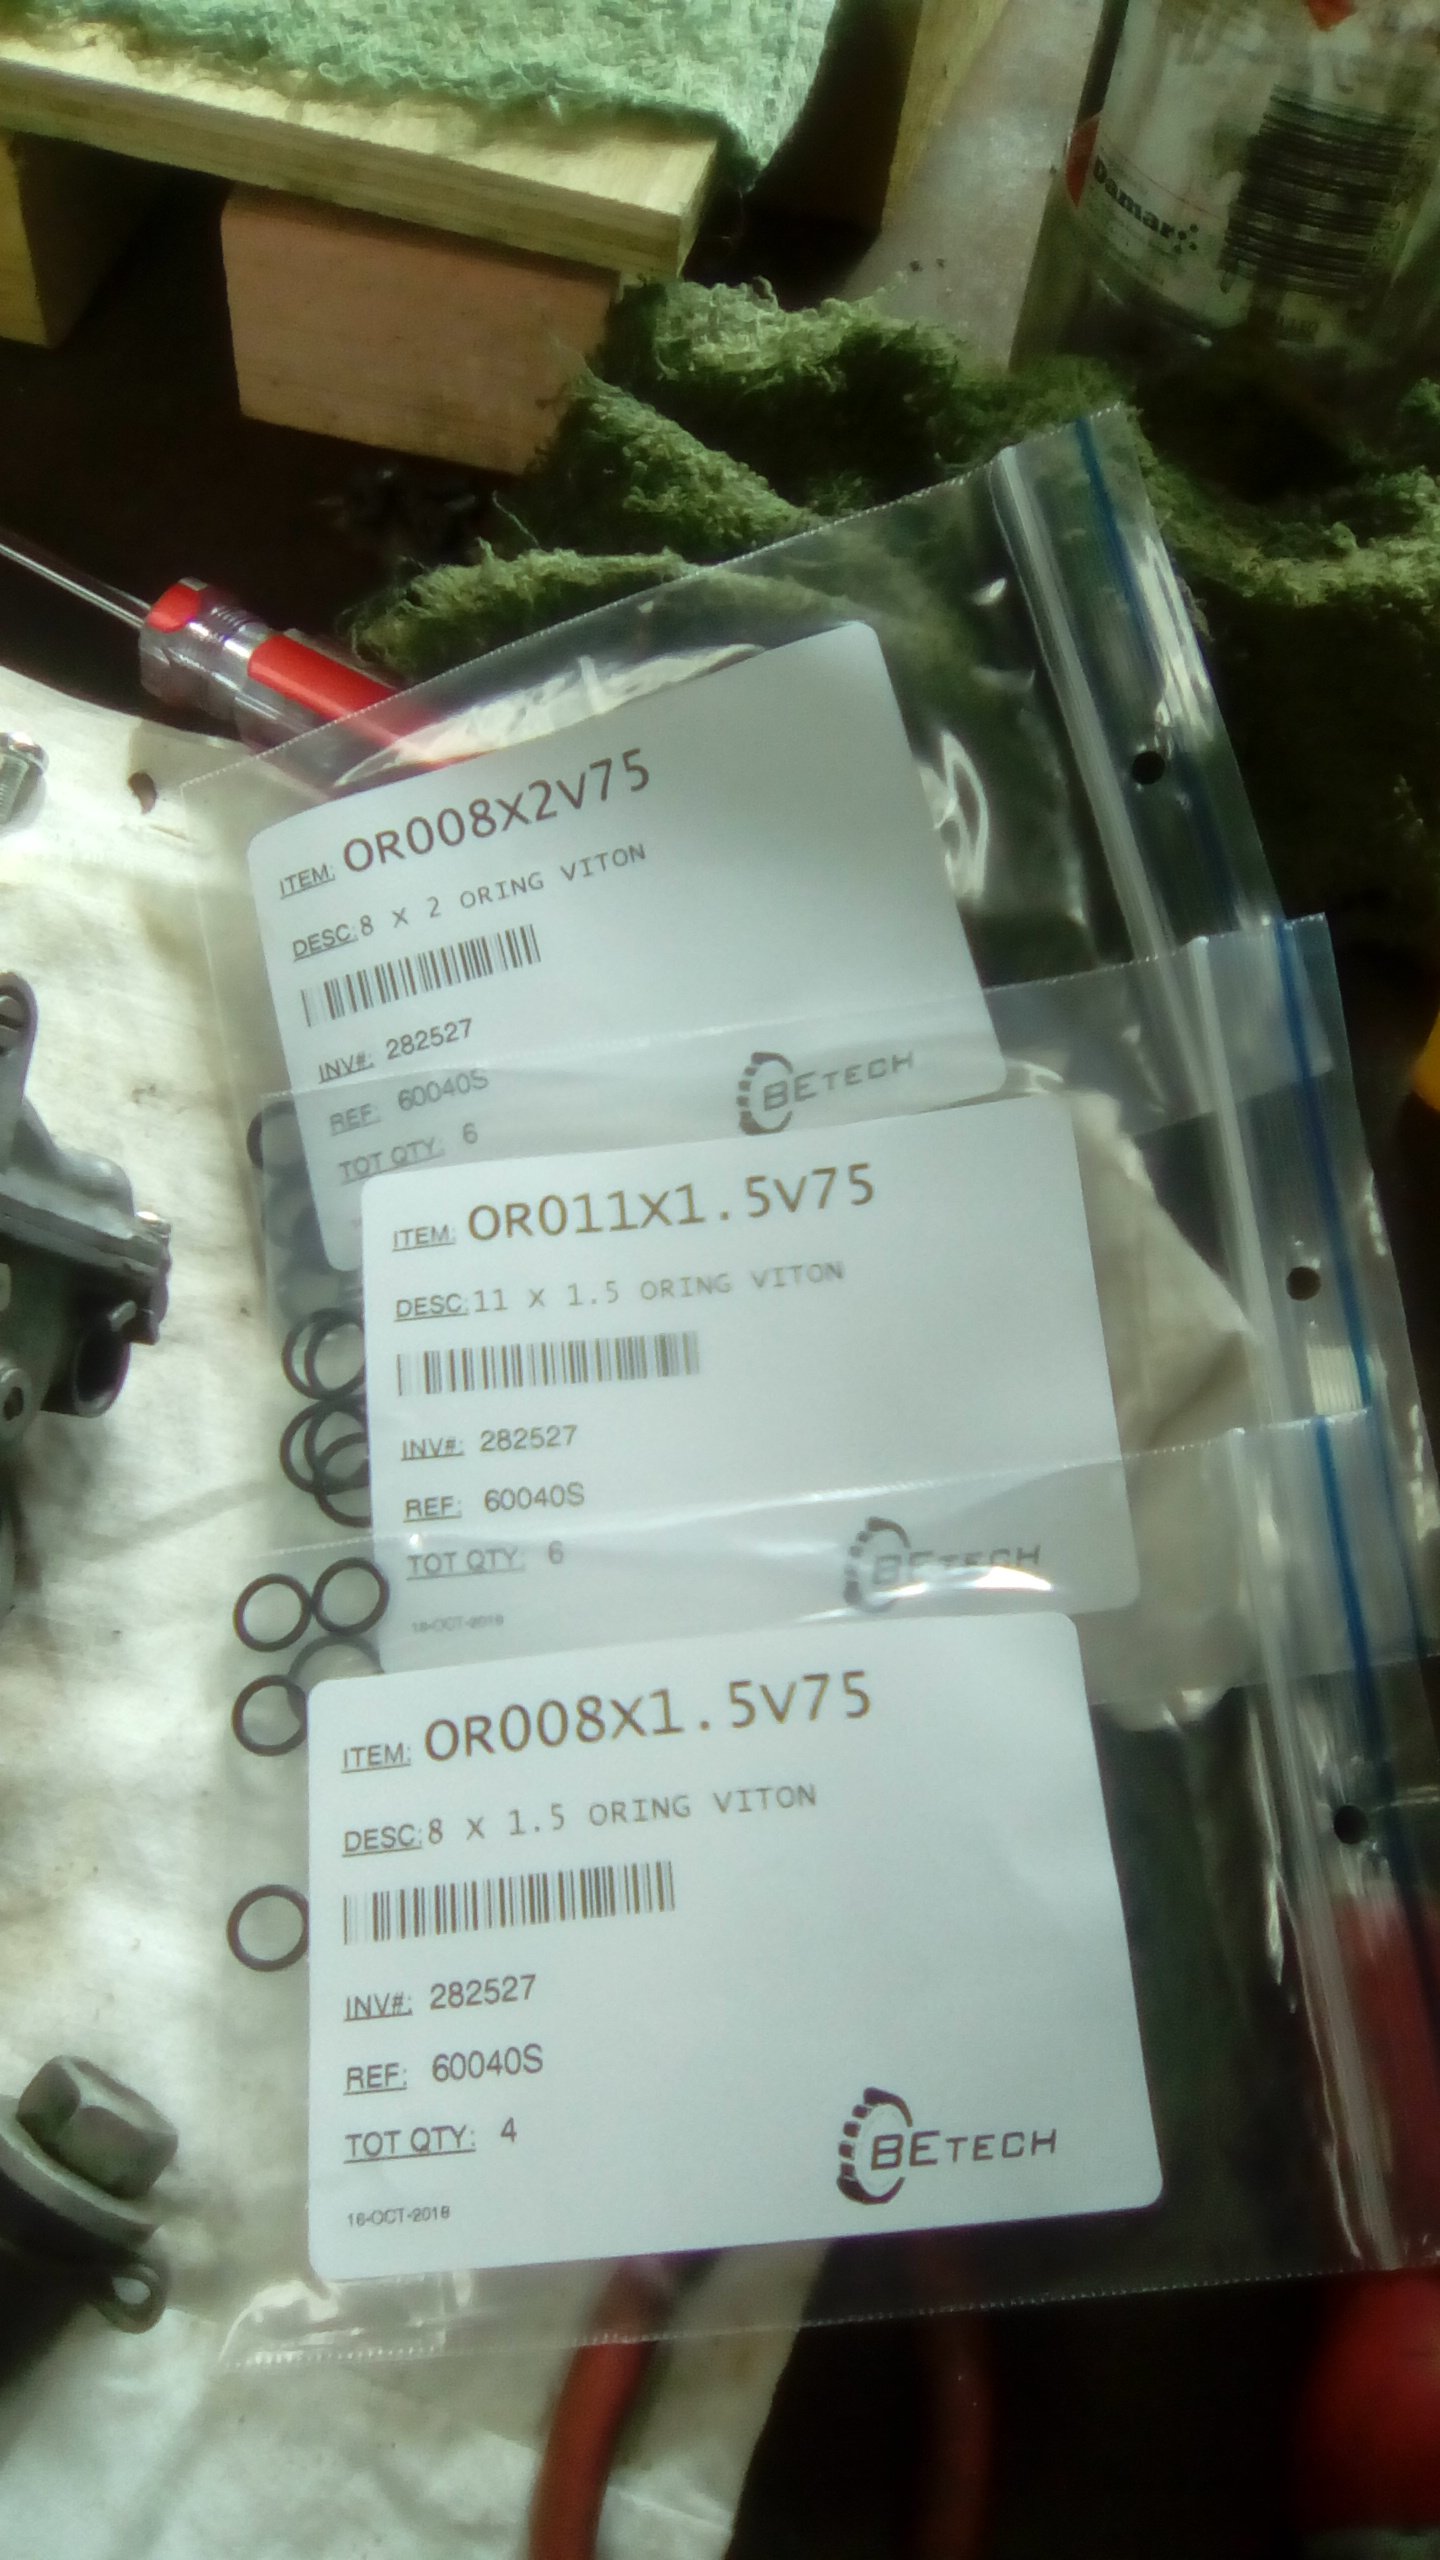
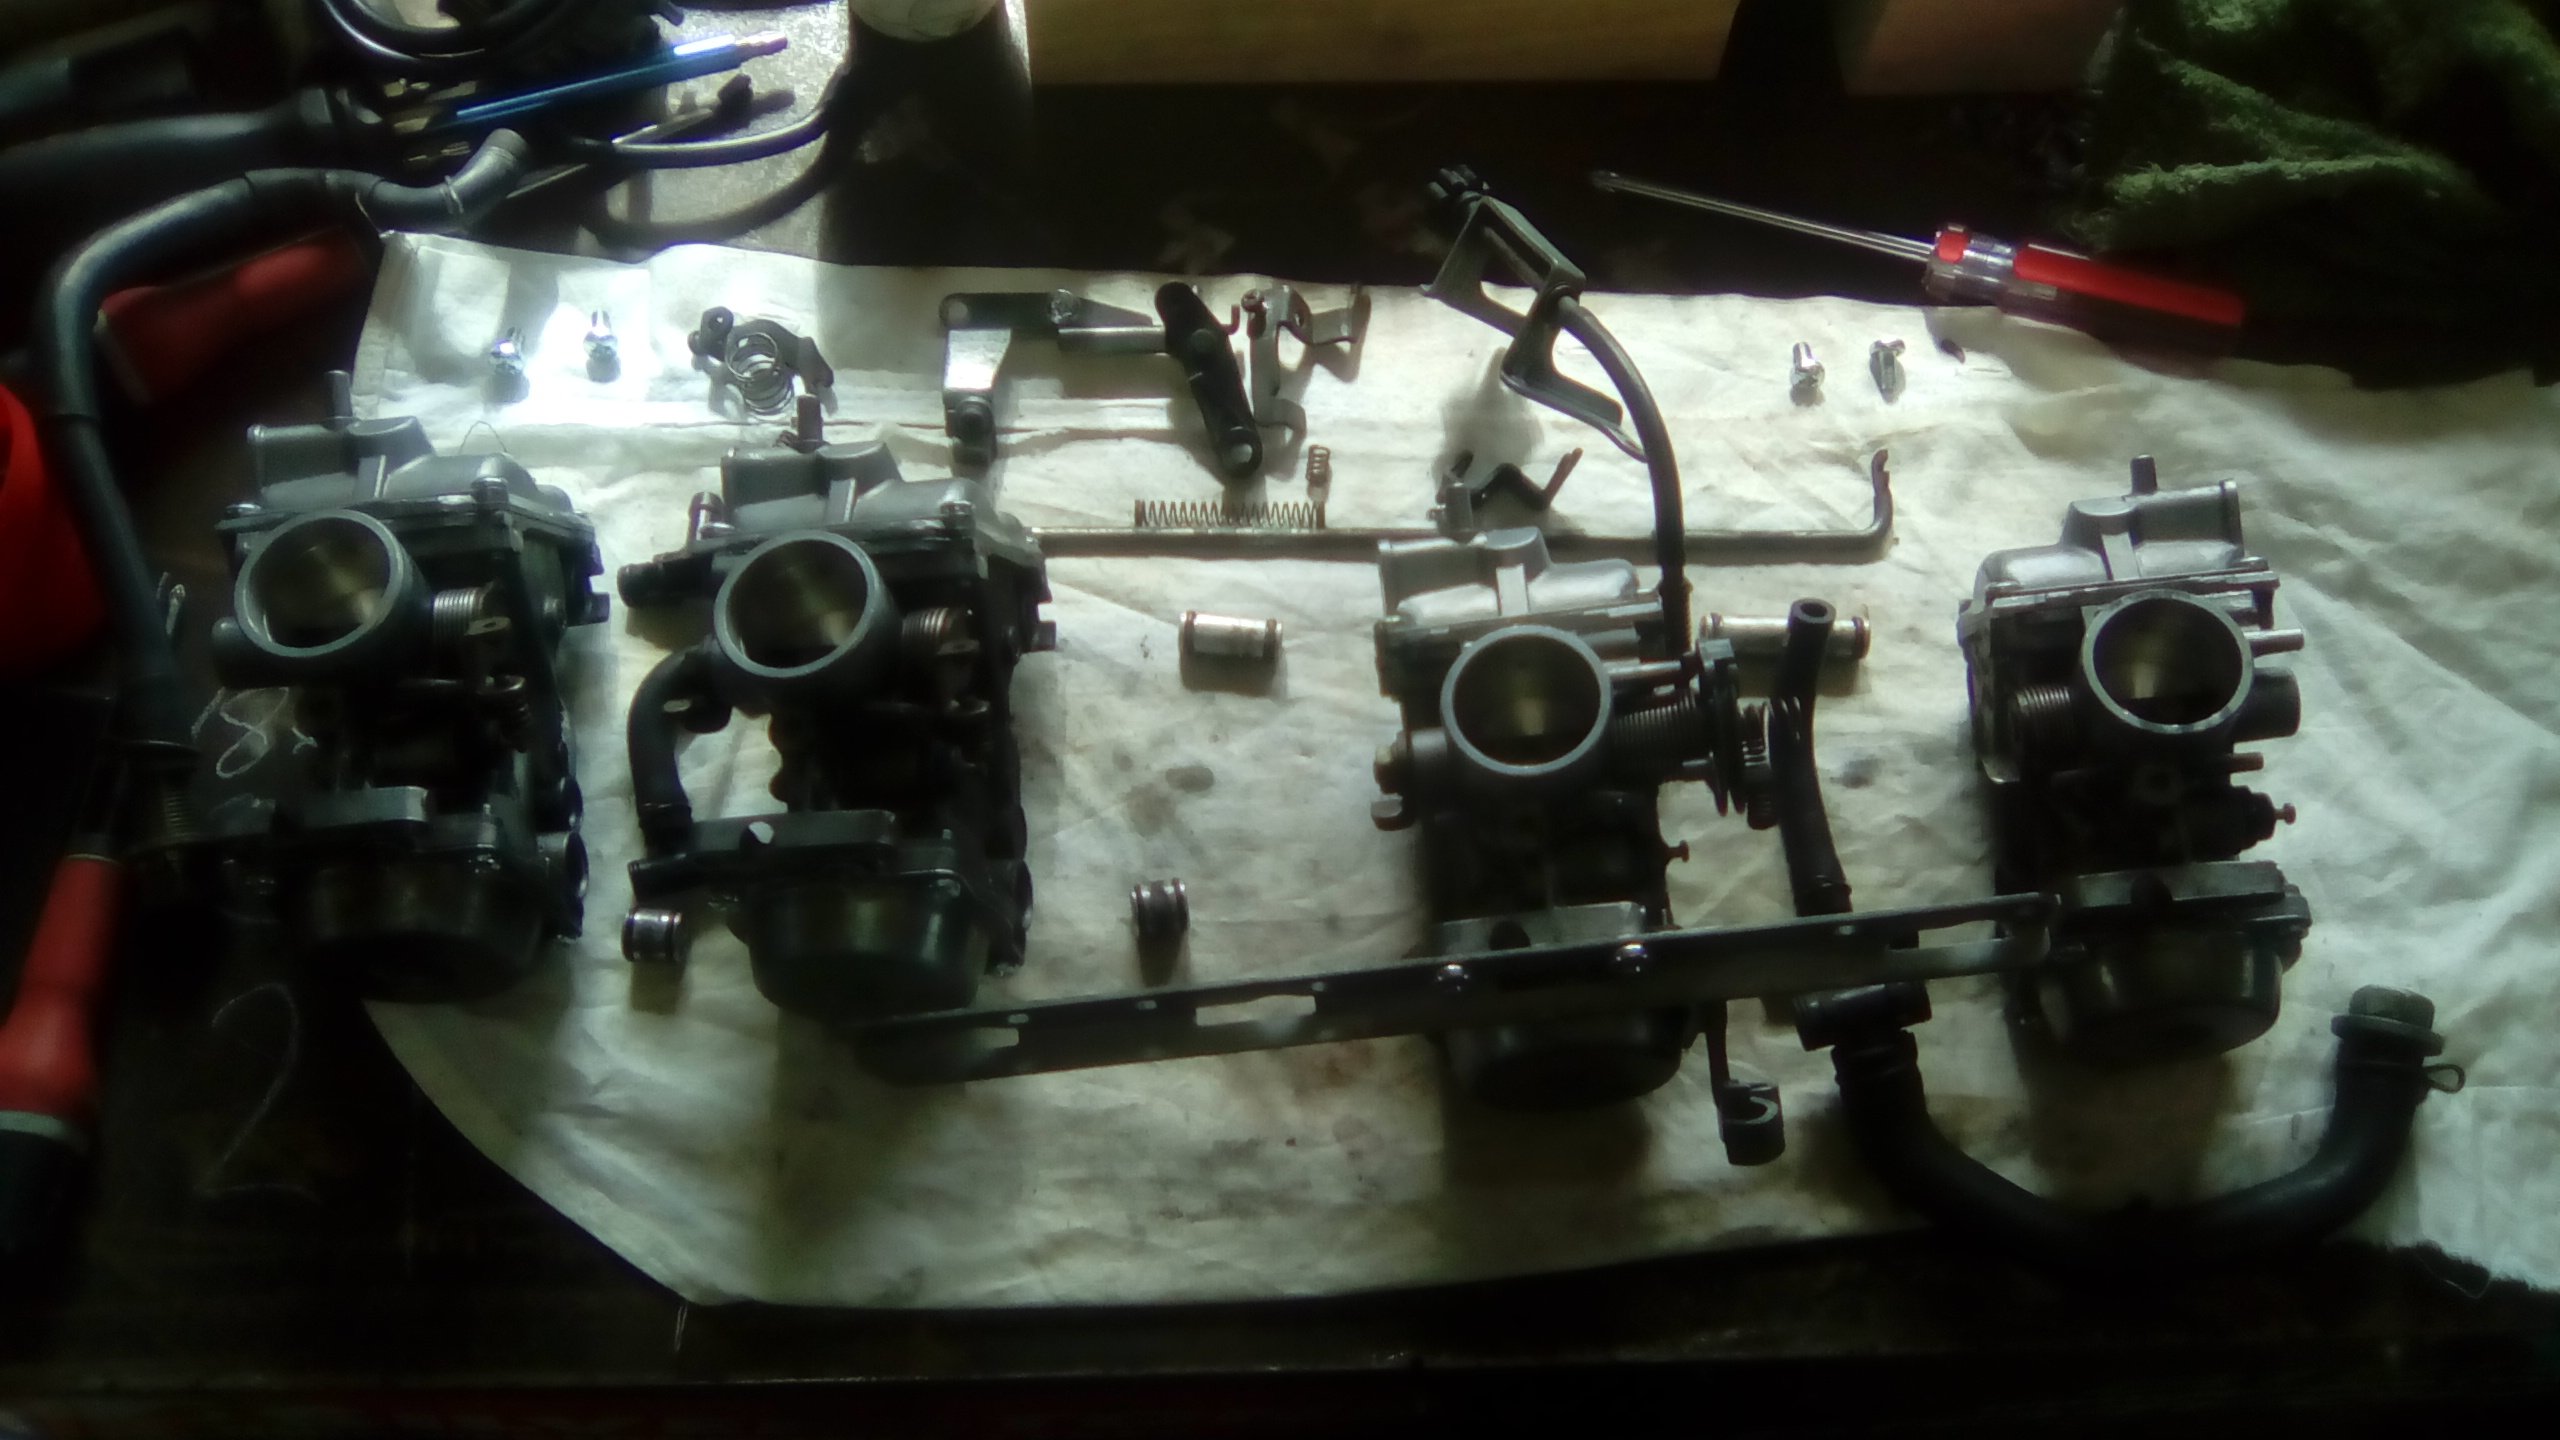
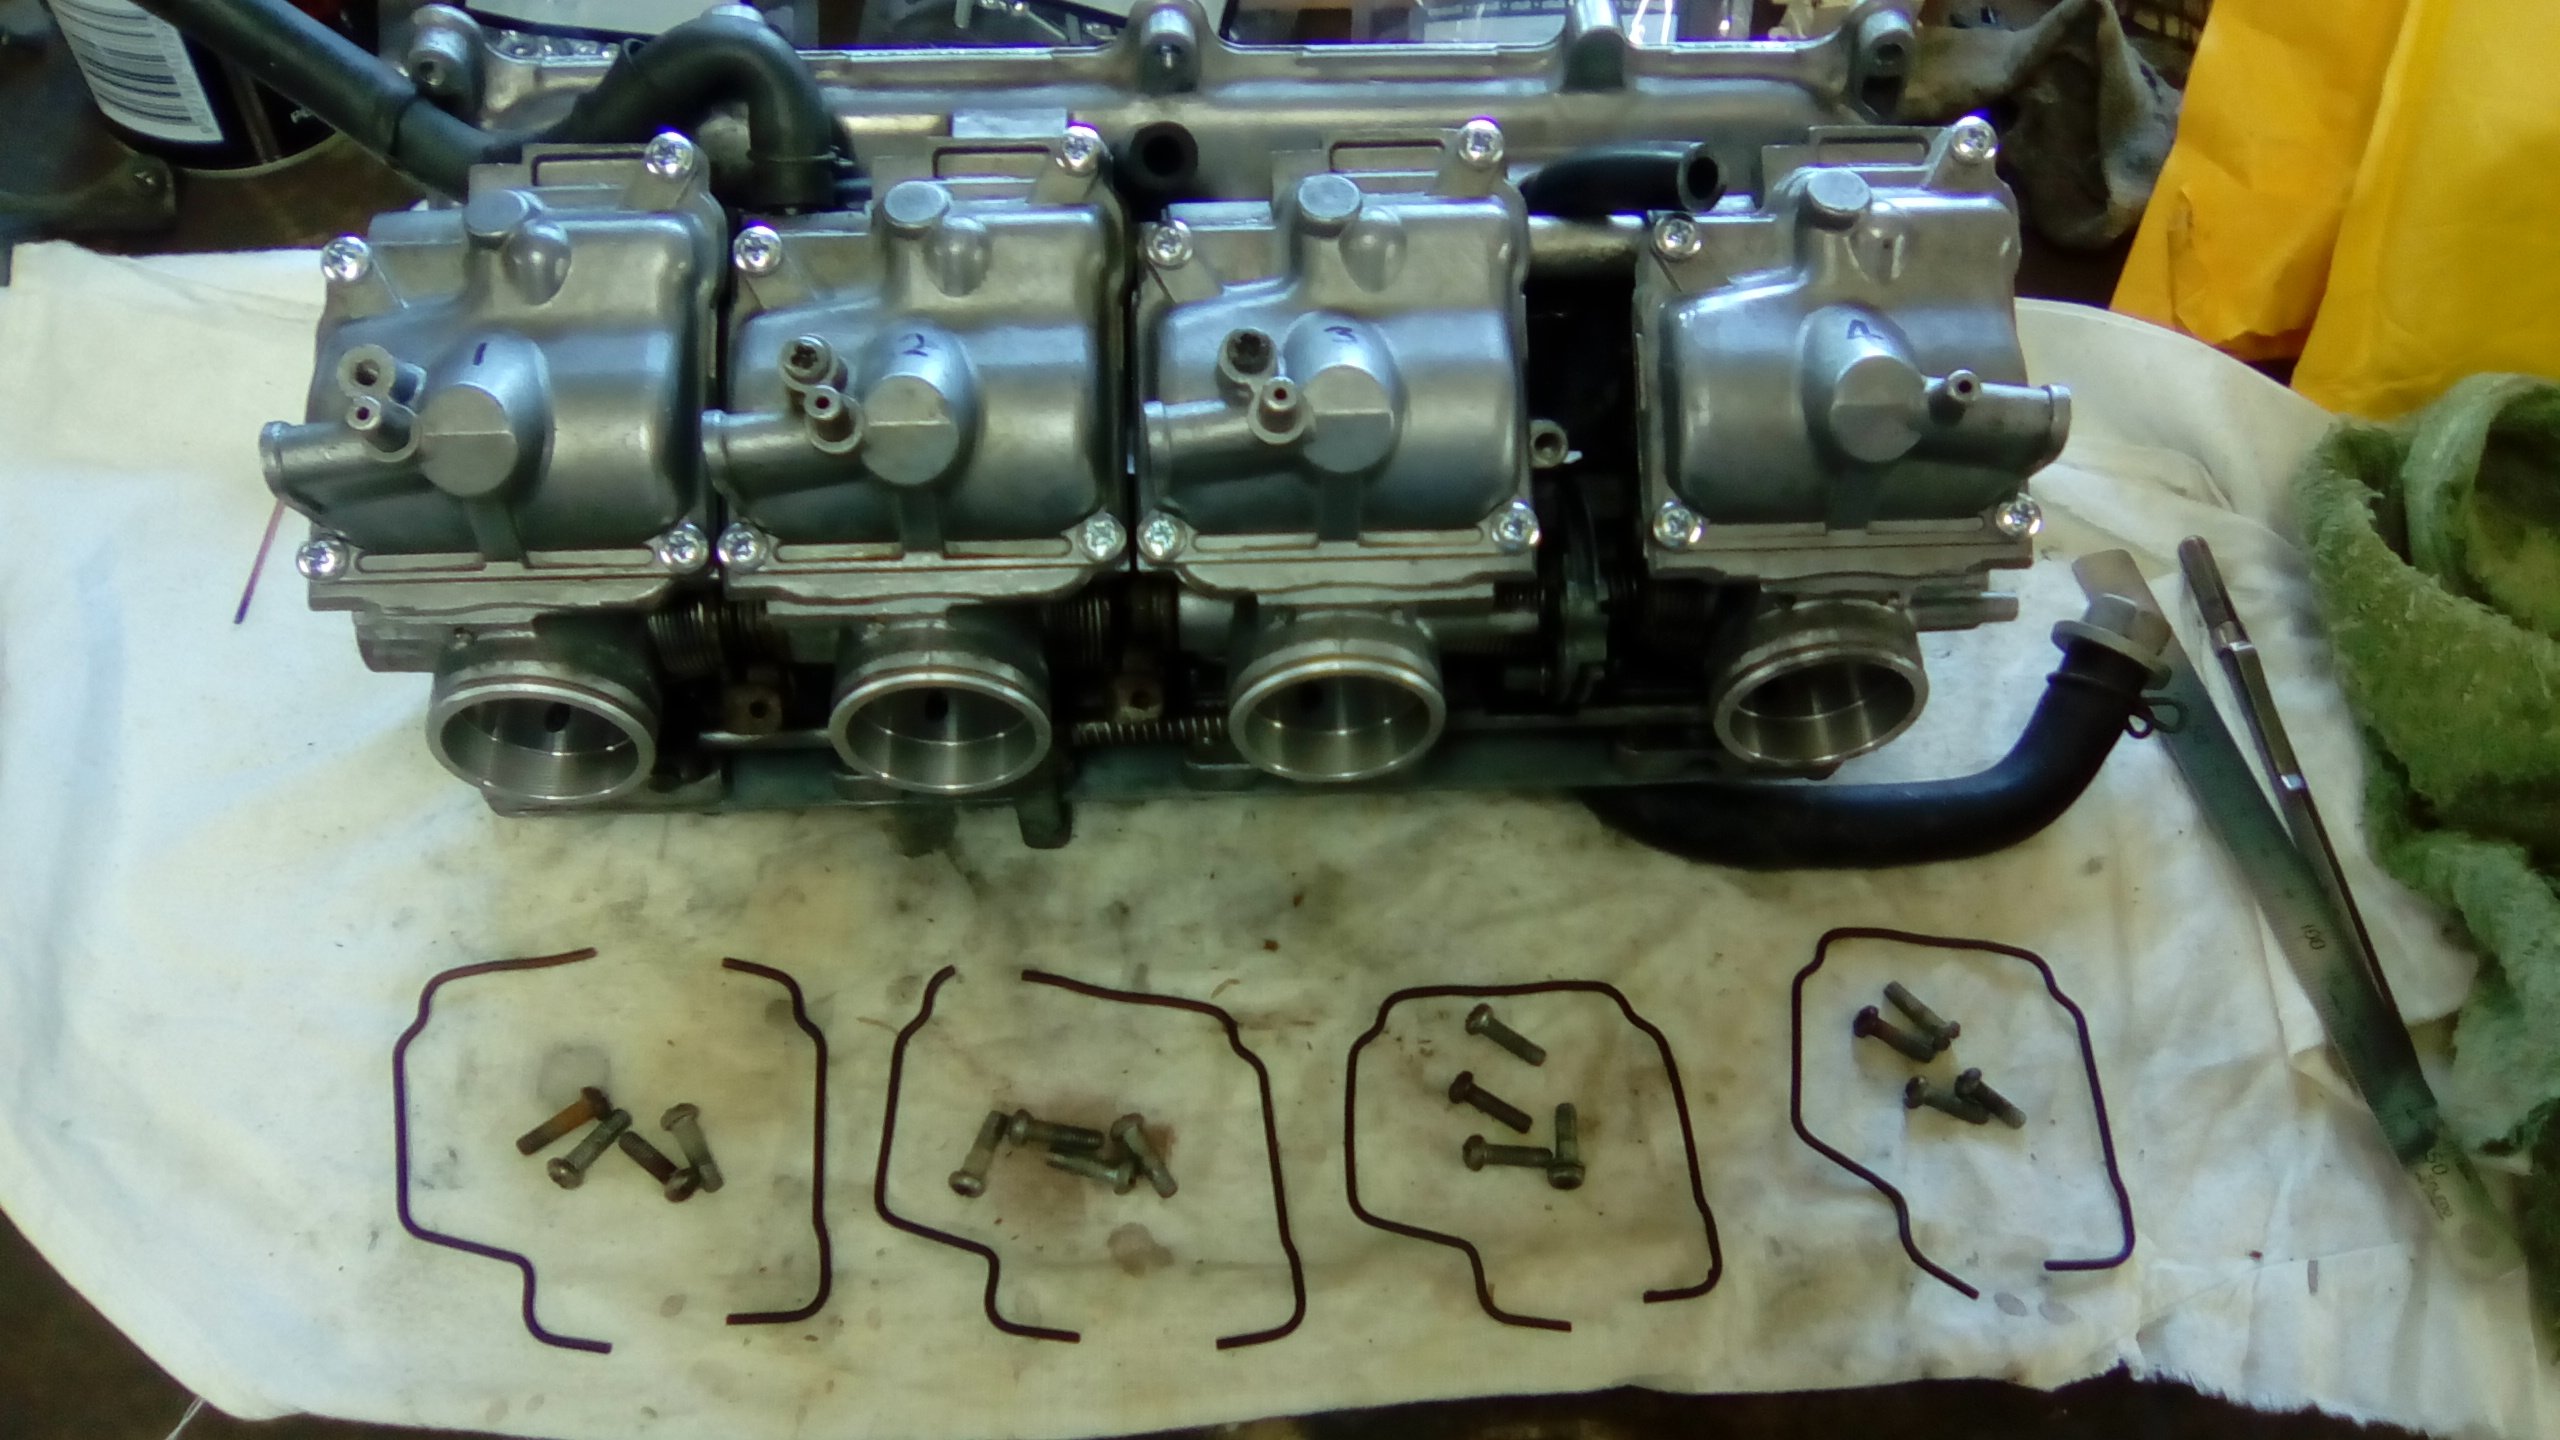
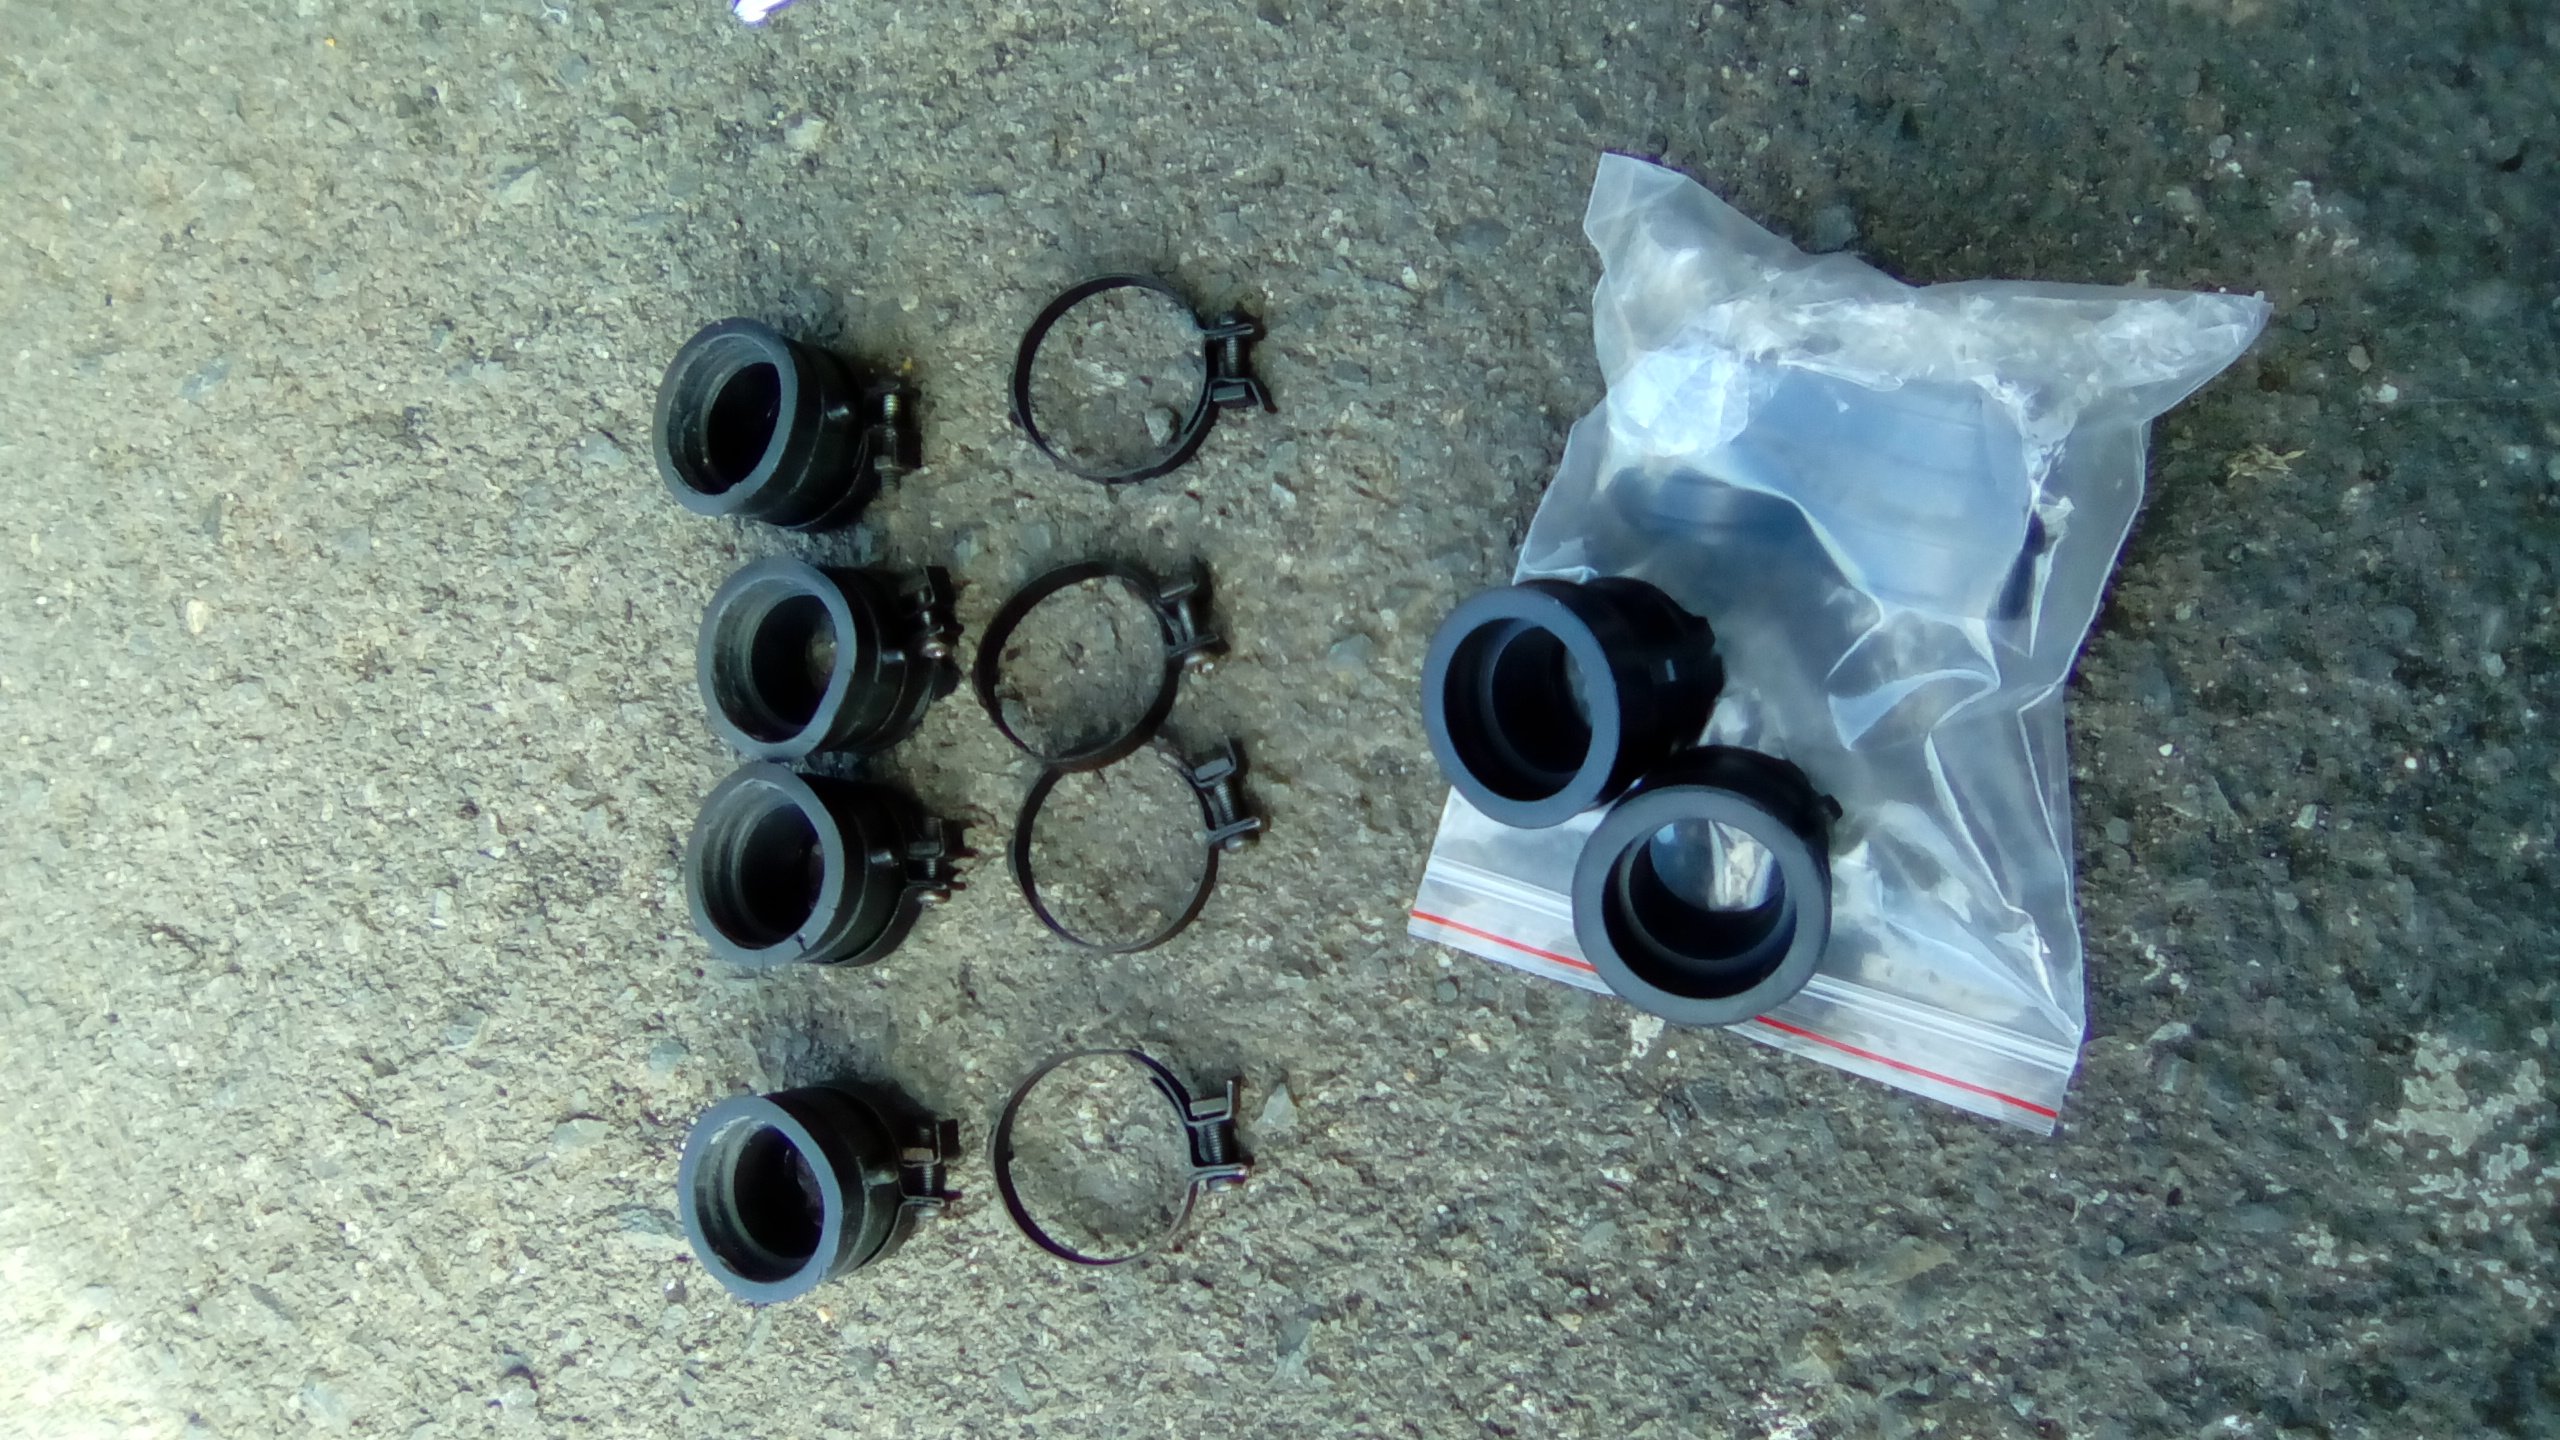
Wow its been awhile. Bought some viton o rings. And pulled apart the four carbs and replaced all the o rings on the little joining pieces. Sounds simple but things were super tight going back together while keeping all the choke pieces and springs in place. Took 3 hours of my day to achieve this but glad it's done now. Hope to get the carbs back on the bike tomorrow then give it an oil change. @C Kennedy gave me some thinners ages ago to start striping the matt black paint off so really should get onto this soon. Oh yeah, and reassemble all the brake calipers and maybe replace the rear disc. Should make a list.
-
That was going to be my next question. I hope you ride it into the liquor store when you do a beer run And shake your fist at young hooligans on the way home.
-
Love this. Any chance you could reinstate the original body work? Then chuck on granddad's best tweed suit.
-
Looks good. Any reason you wouldn't get a frame powder coated again? Interested to know.
-
What kind of lengths are you thinking will need to be shifted? Something like the above could be hashed together with front ute axles maybe. Could be cheaper than the helicopter option.
-
Love your work. Would something like this work for you? Even if the rear steering was done separately by someone sitting on the back kind of deal.
- 106 replies
-
- 1
-

-
- honda big red
- quad bike resto
- (and 2 more)
-
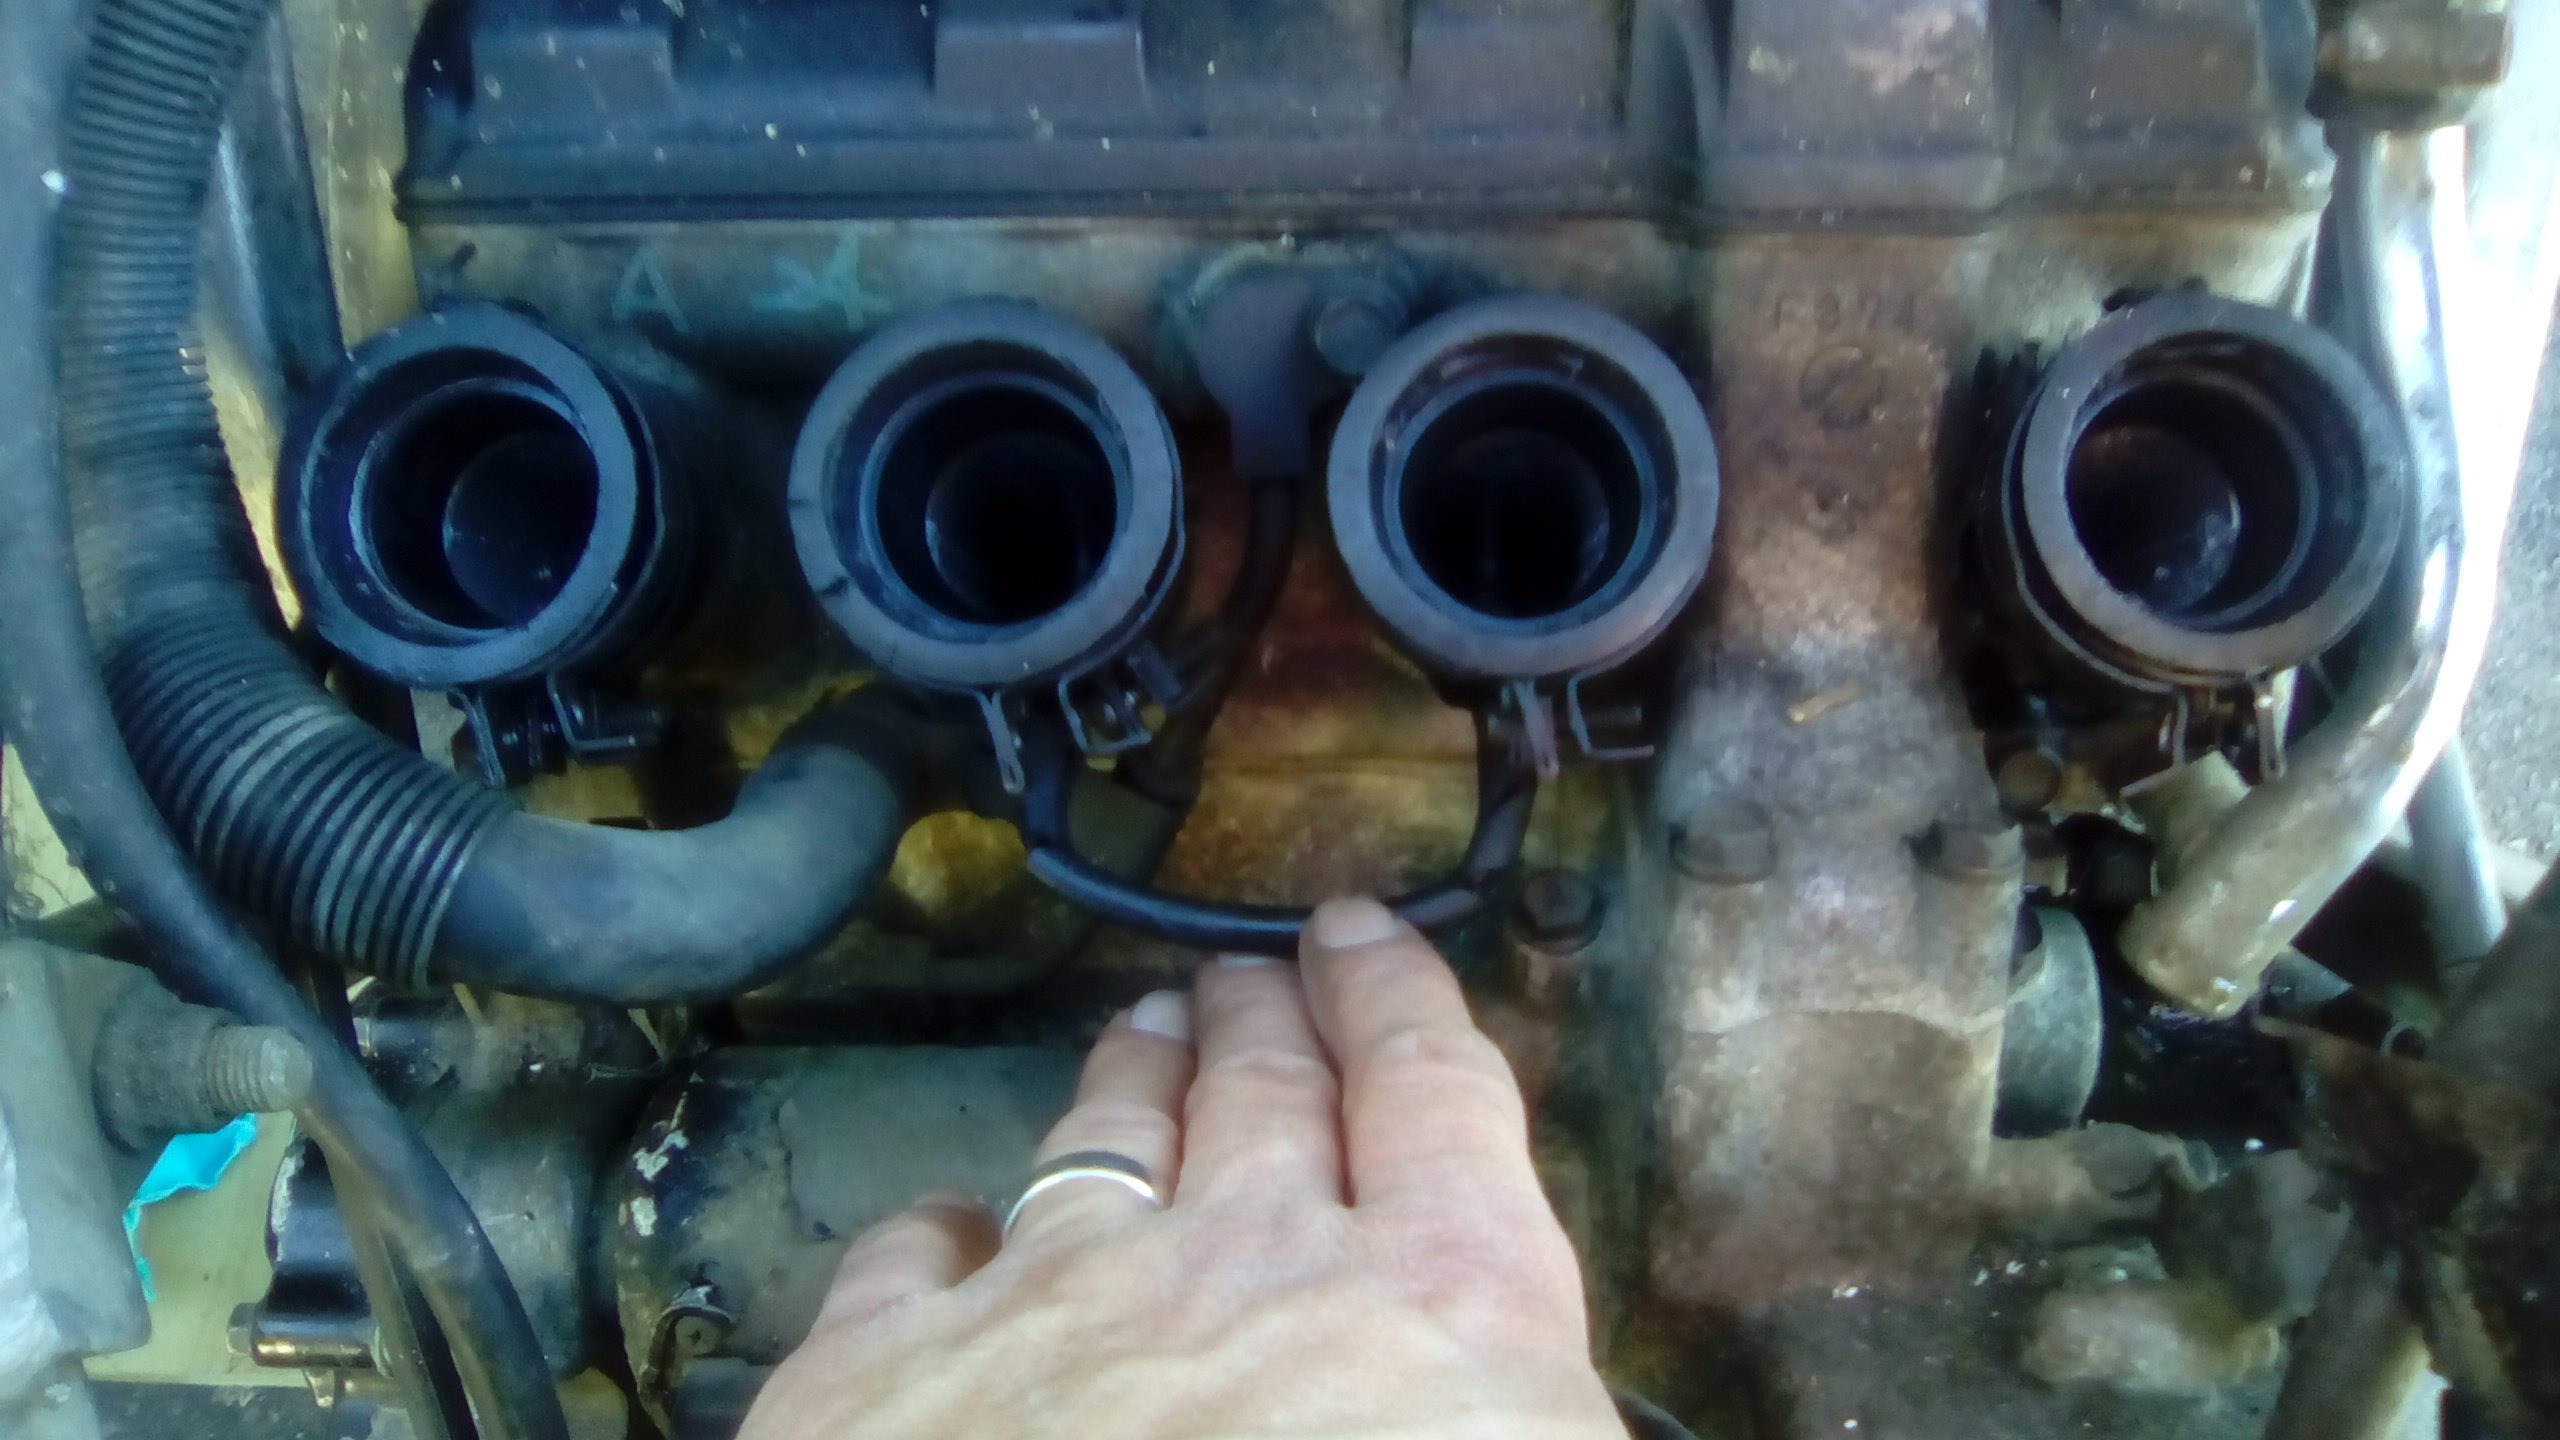
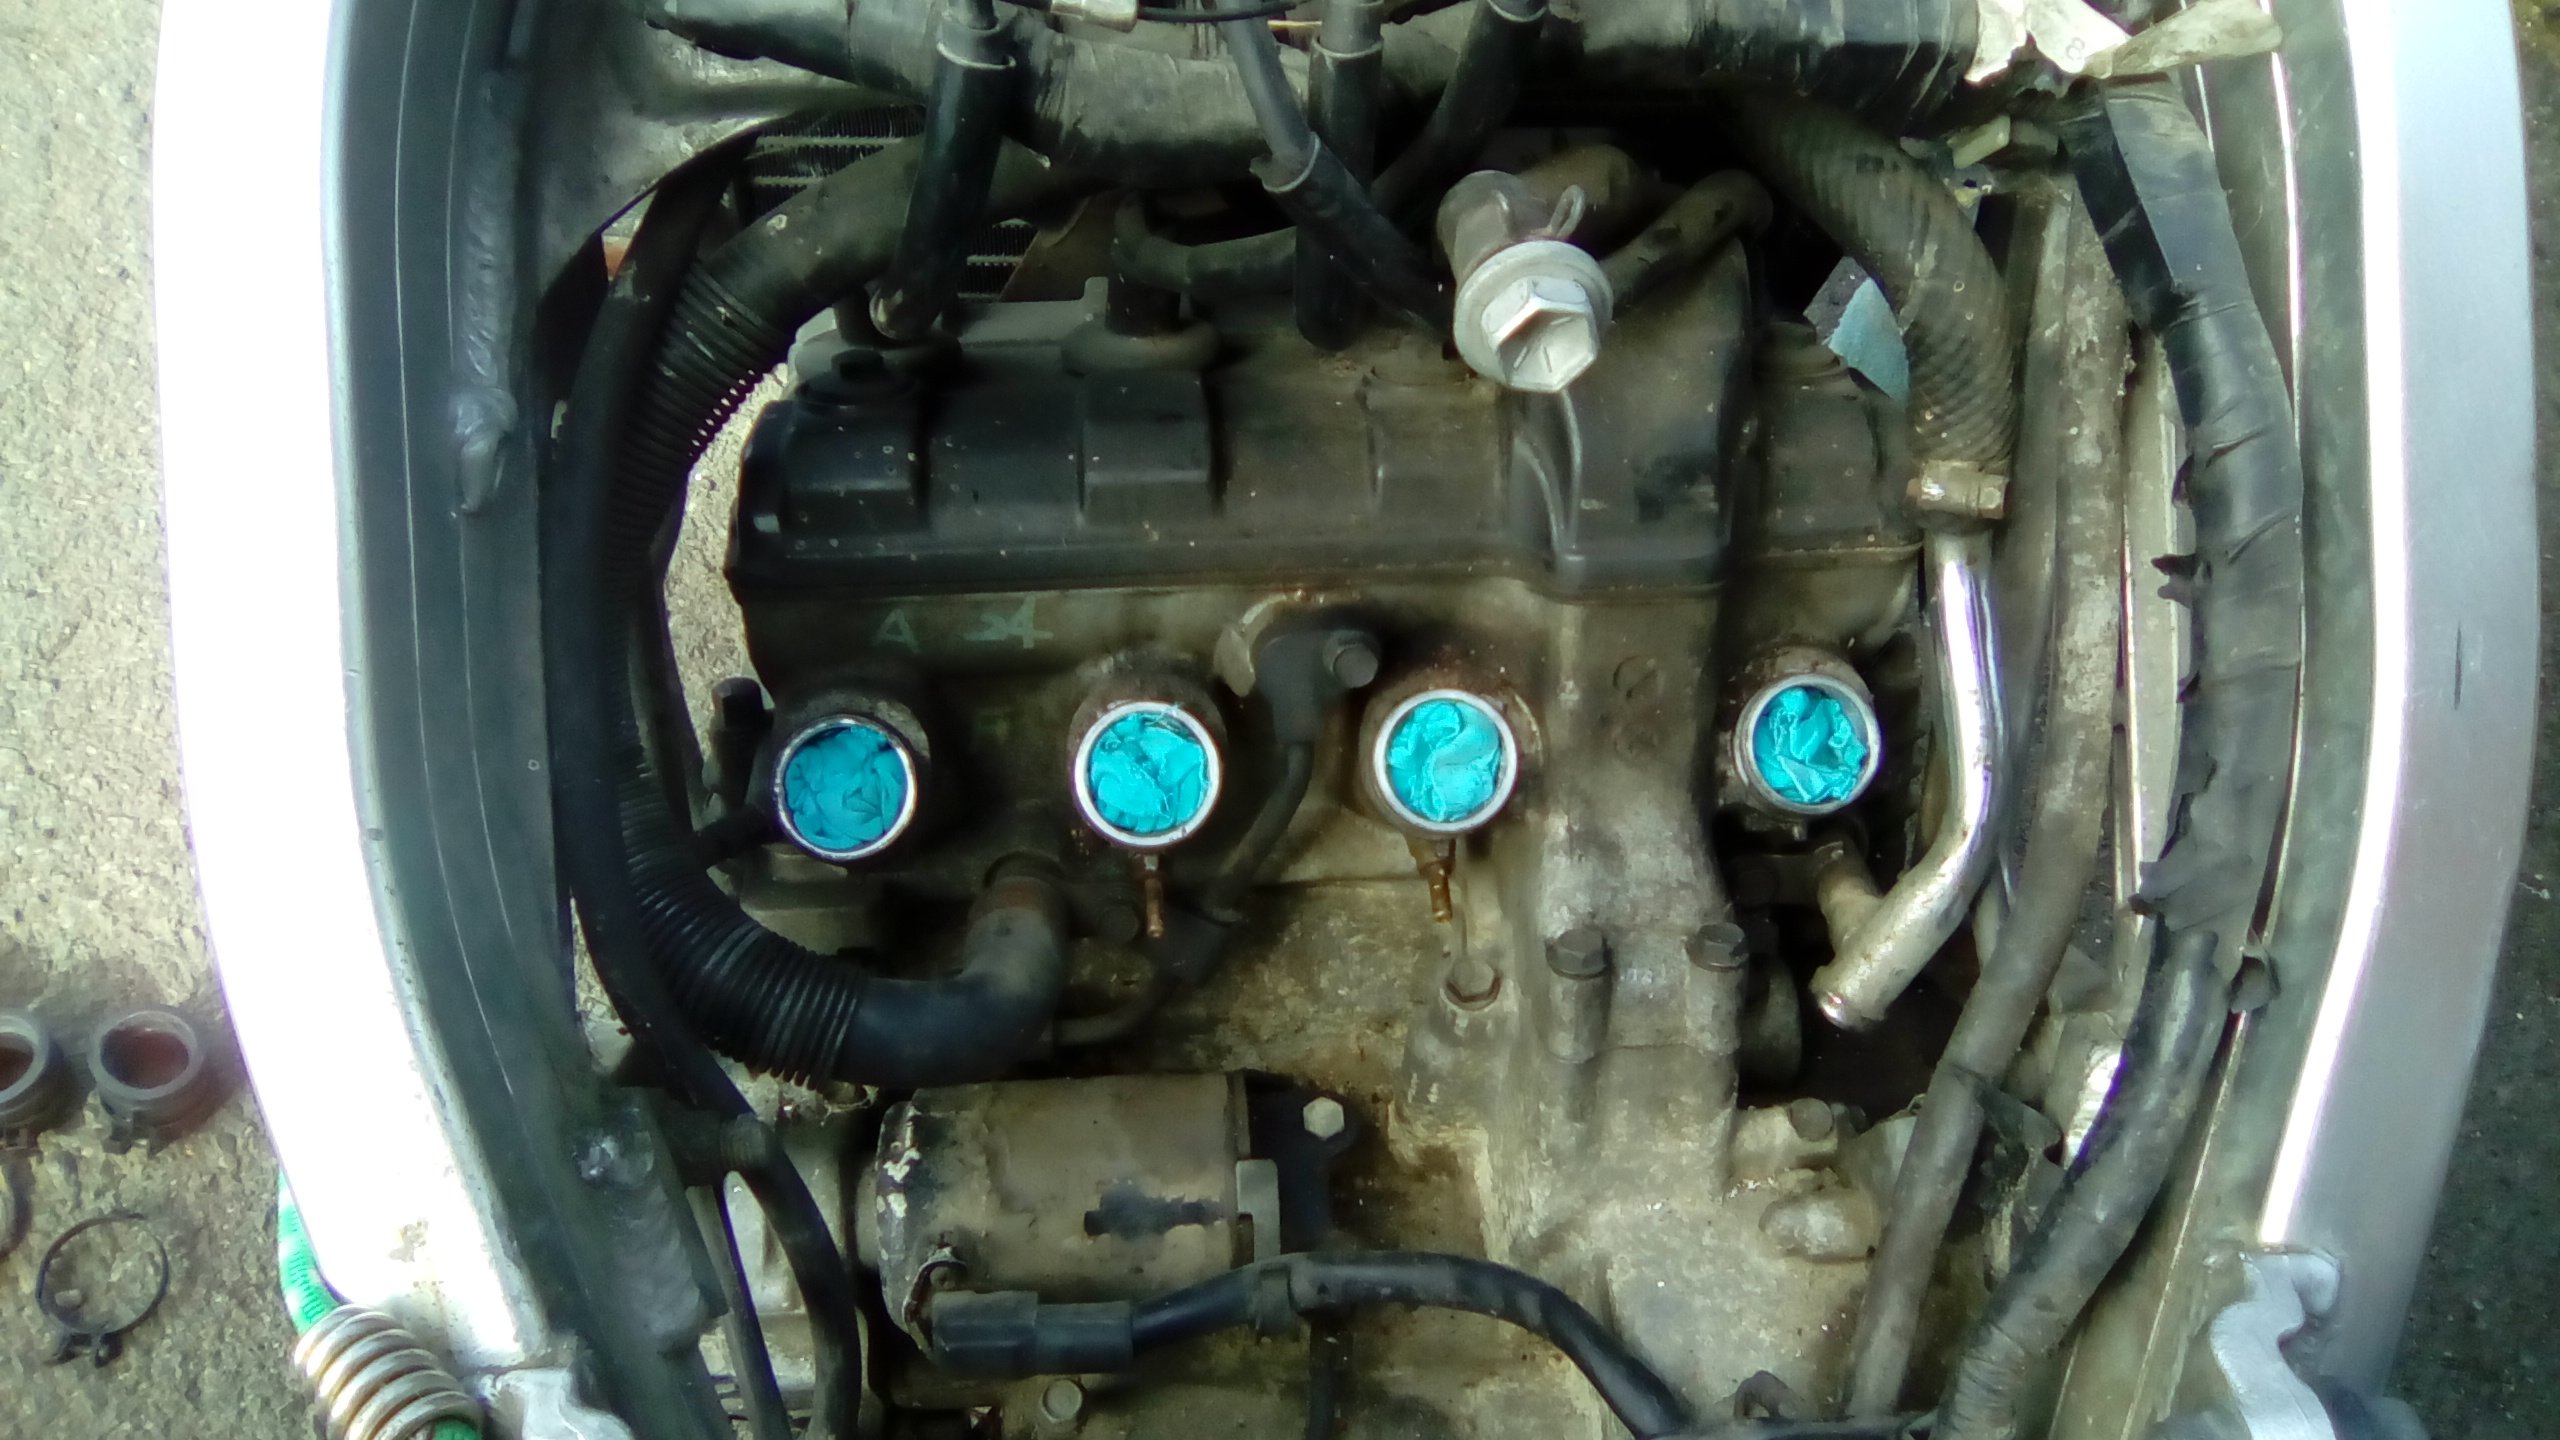
Back when I first pulled the carbs off I found this little hose between #2 and 3 cylinders. You can see the hose tails in a pic two posts above. In the parts catalog it doesn't really show this area but the most I can make out is there should be a couple of bolts plugging up the holes where the hose tails are. Does that sound right? I'm guessing these are for when you balance the carbs and should be blanked off when not in use? Also being quad carb I don't imagine having two cylinders bridged is a good idea.
-
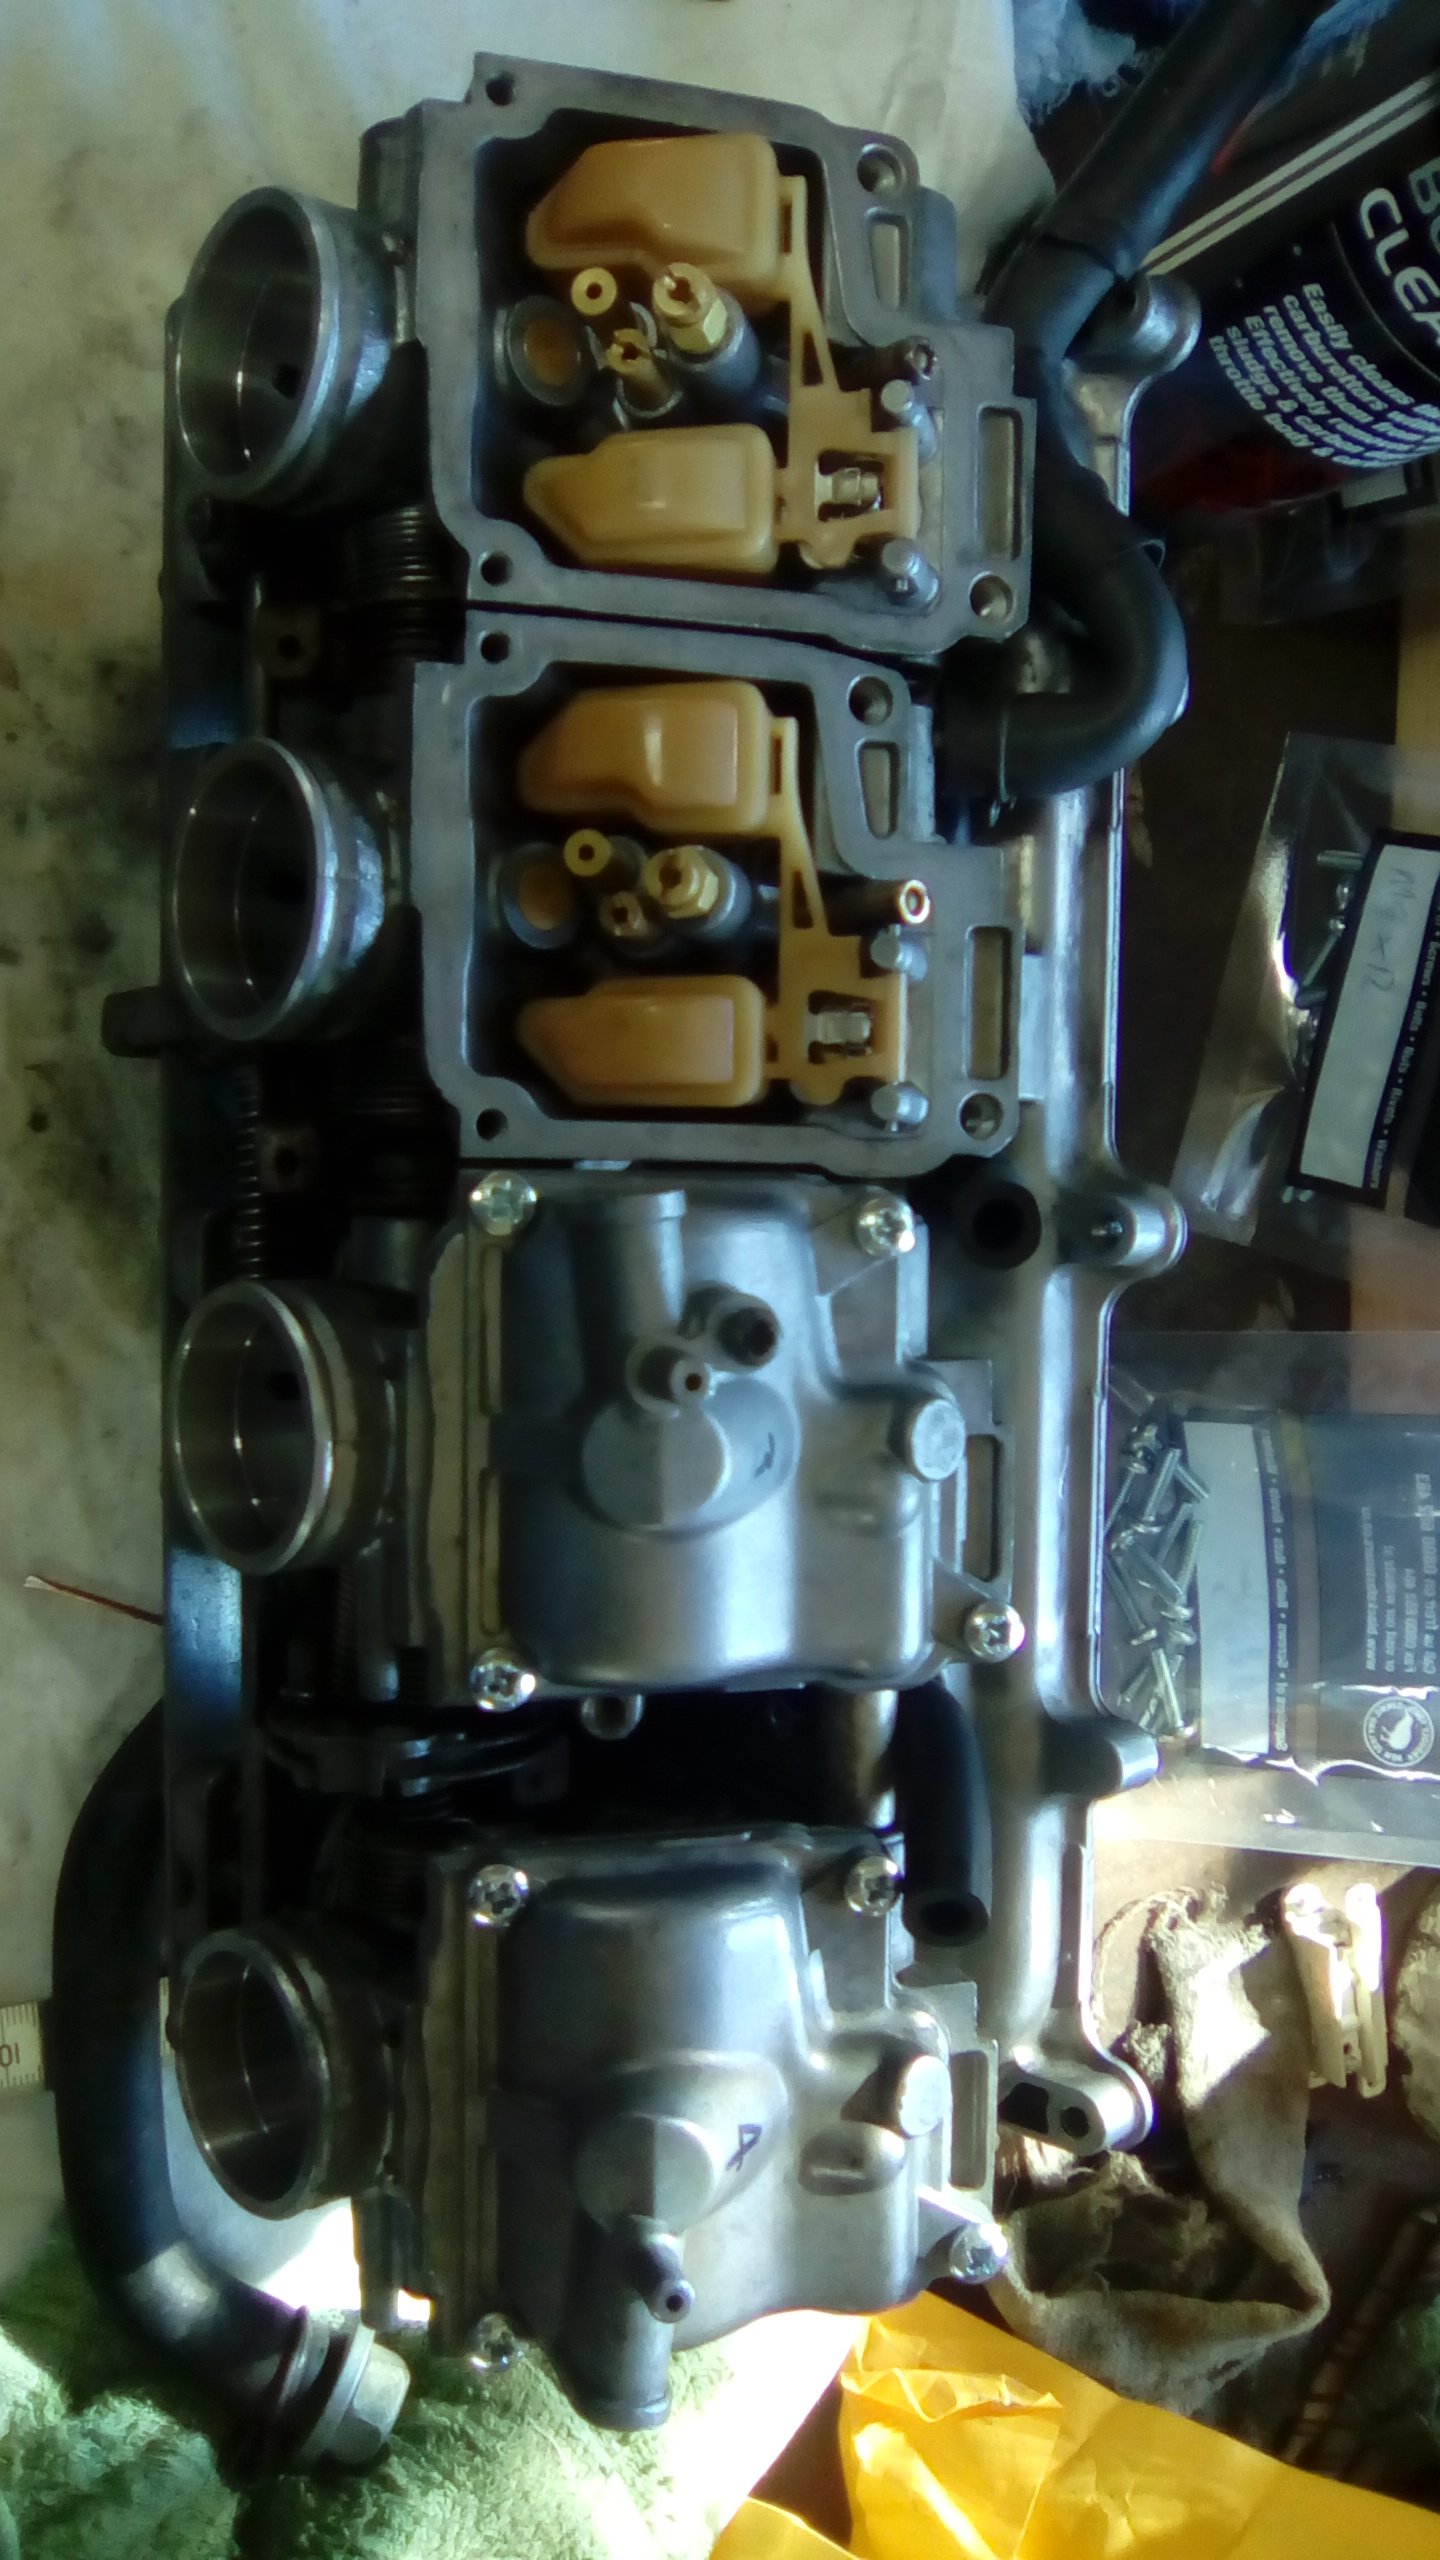
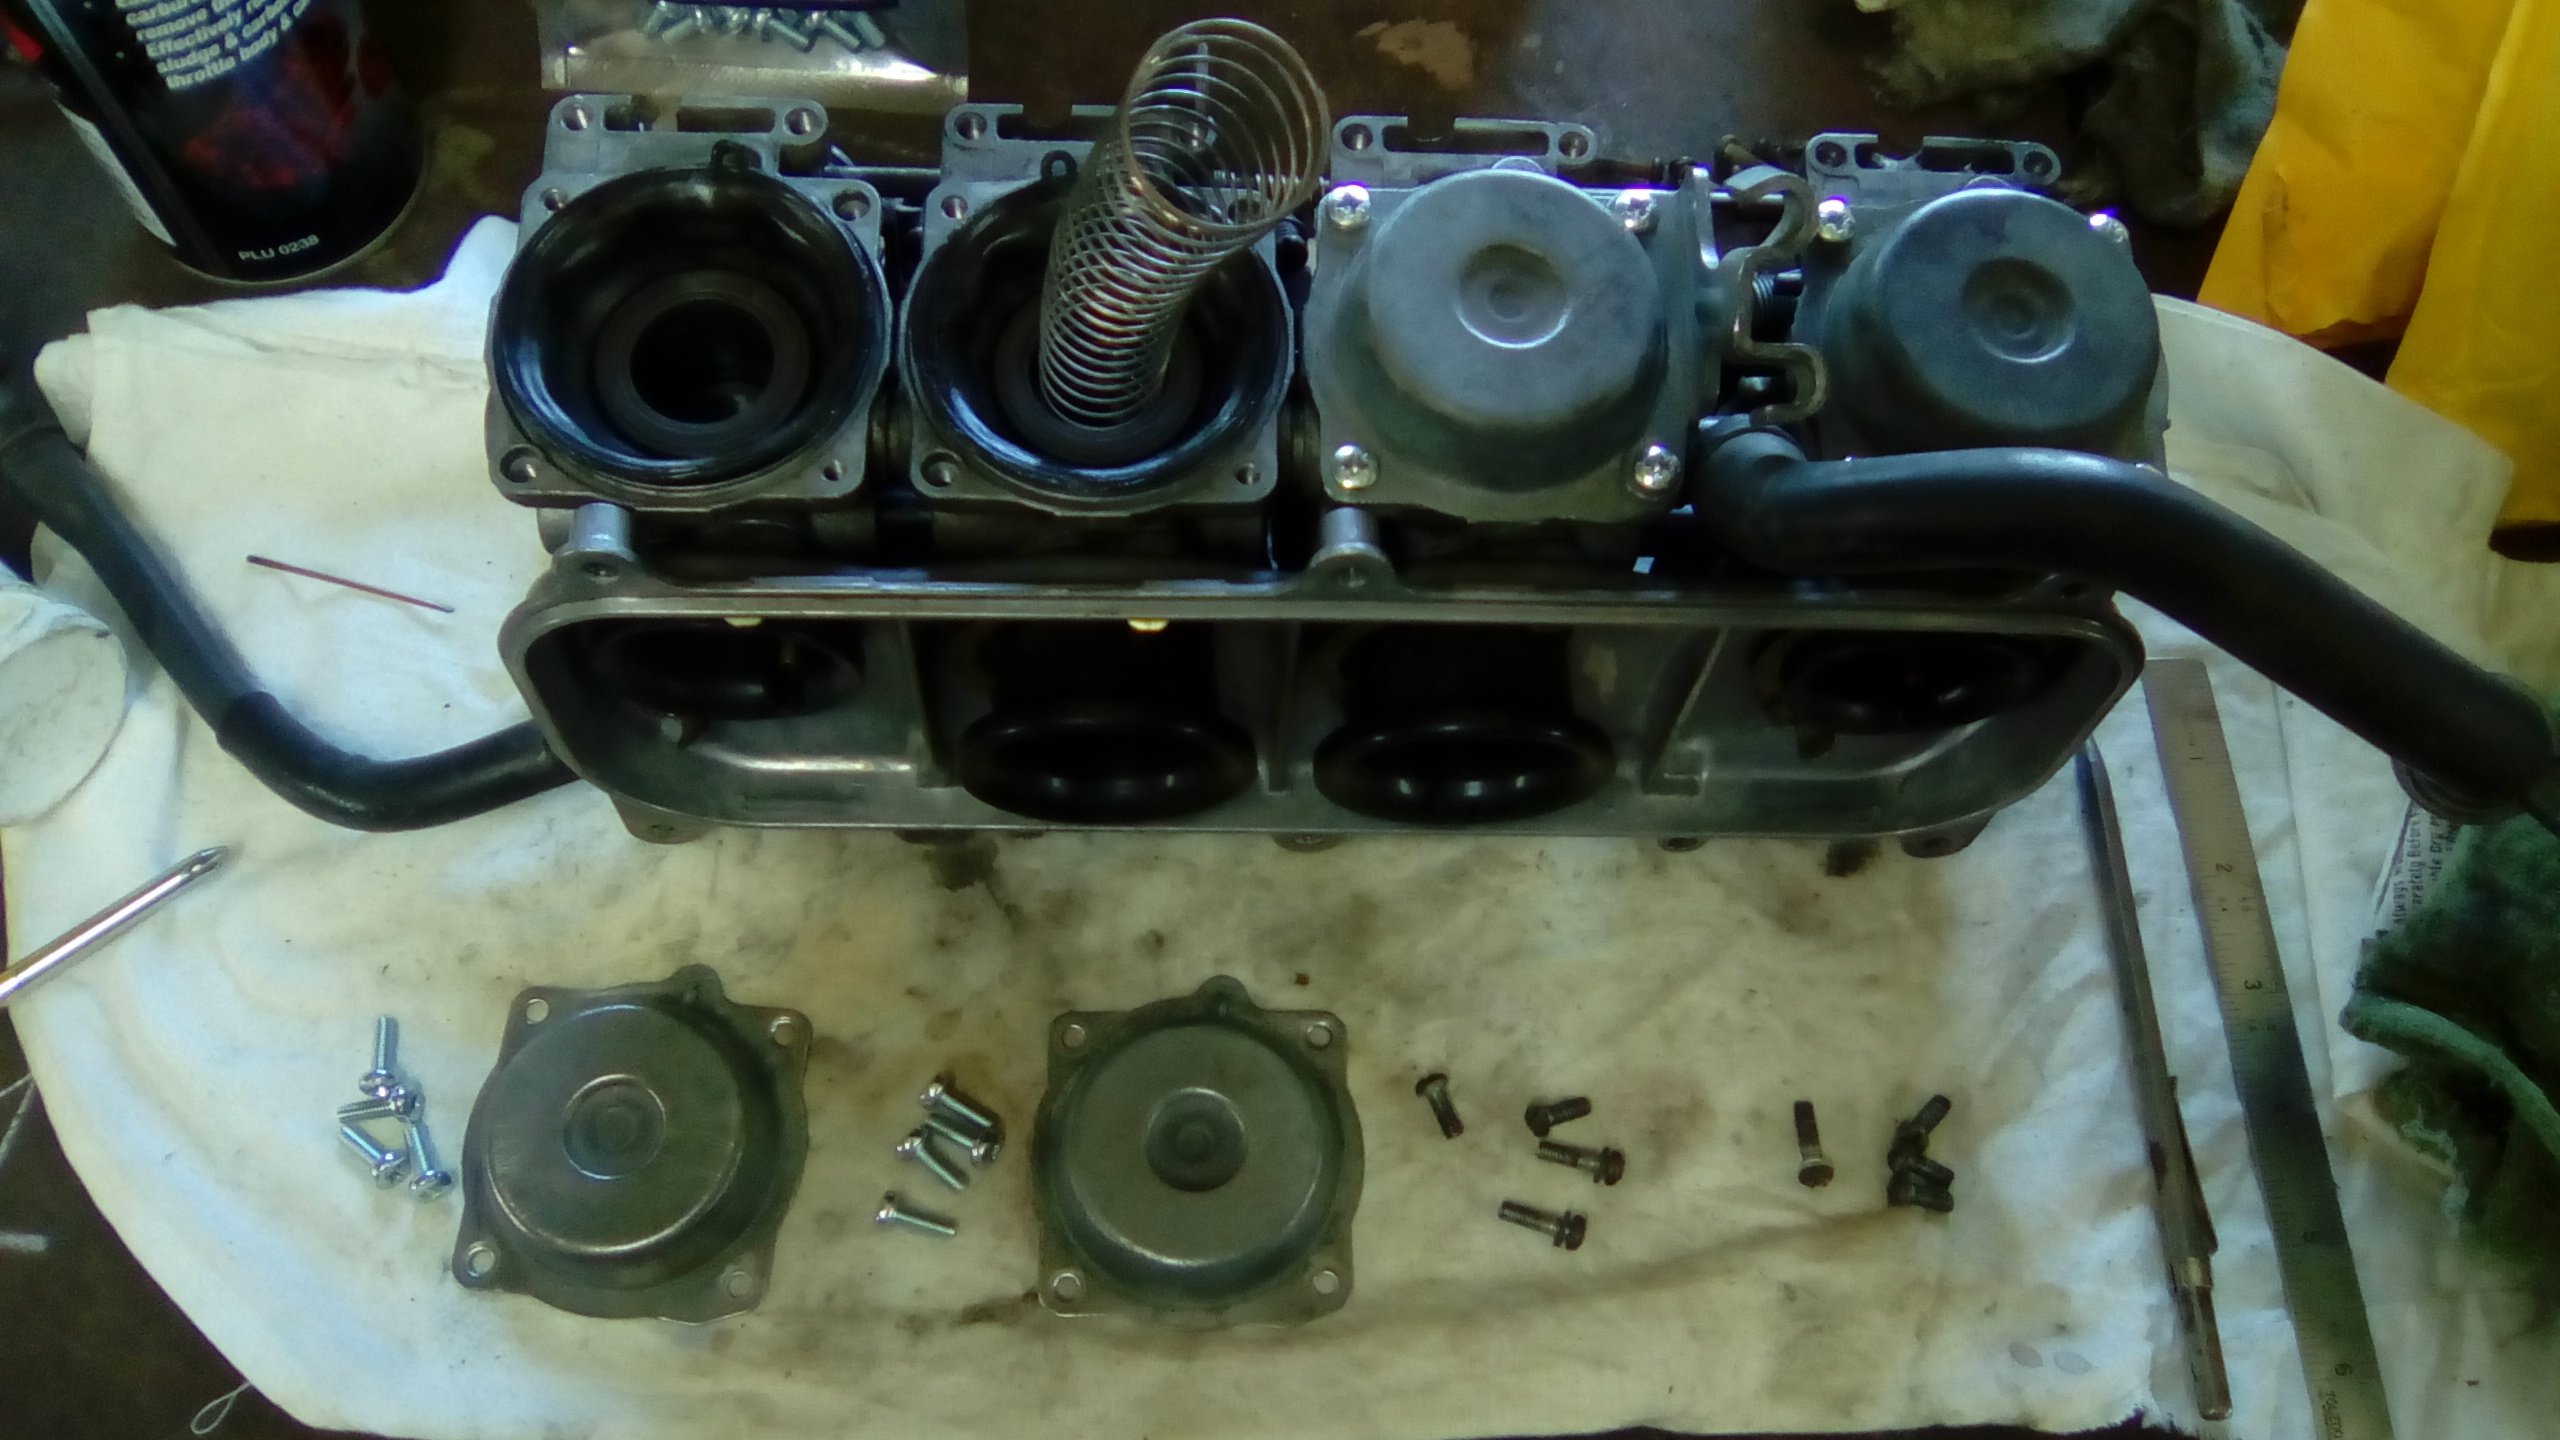
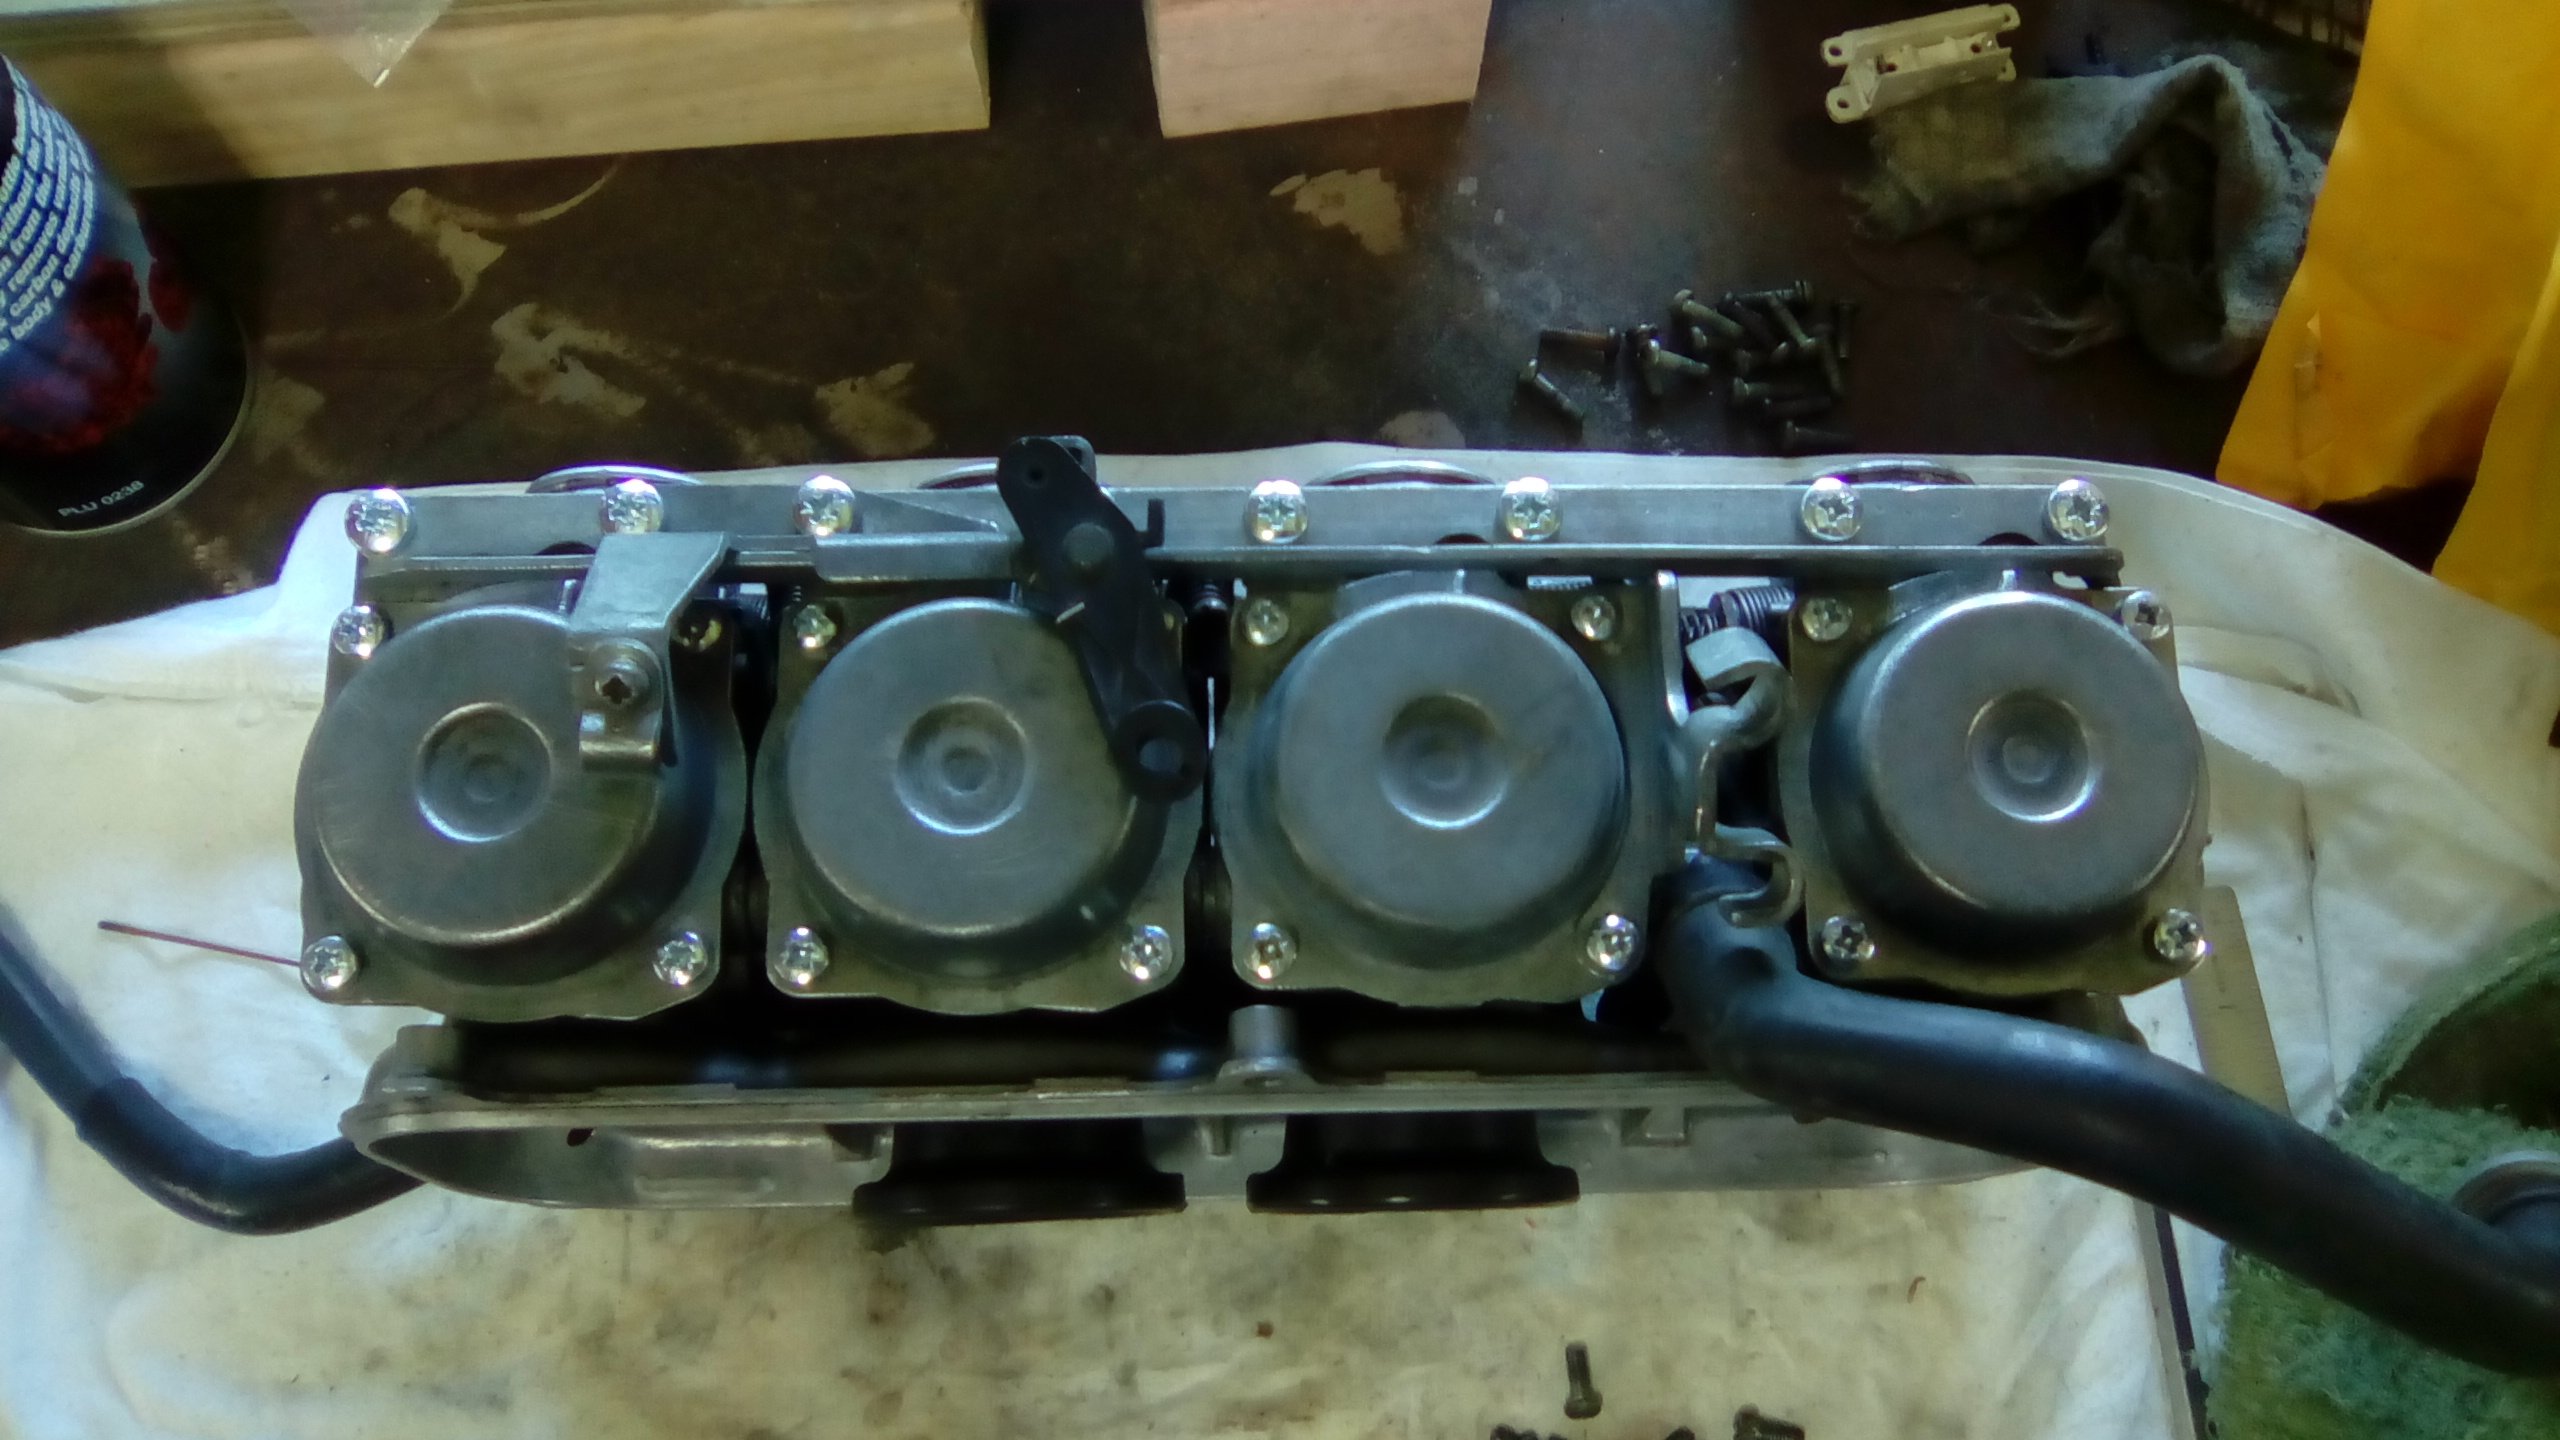
Bear with me while I try dumping some photos. New screws as well since most of the old ones were fucked. Float bowls done. Chucked together the other side. I installed the one on the right first then found the cover piece cleans up nice with a good wire brush. And all done. At this point I was going to have a go at adjusting all the butterflies as some were obviously out of sync. In a brain wave I thought it best to tip some gas down the fuel line and check for leaks, good idea as there's a leak around the tee piece where the fuel line goes in. Bugger. Anyway I've pulled the end carb off to get the tee piece out, the o-rings look ok but I'll get some new one's when I get a chance.
-
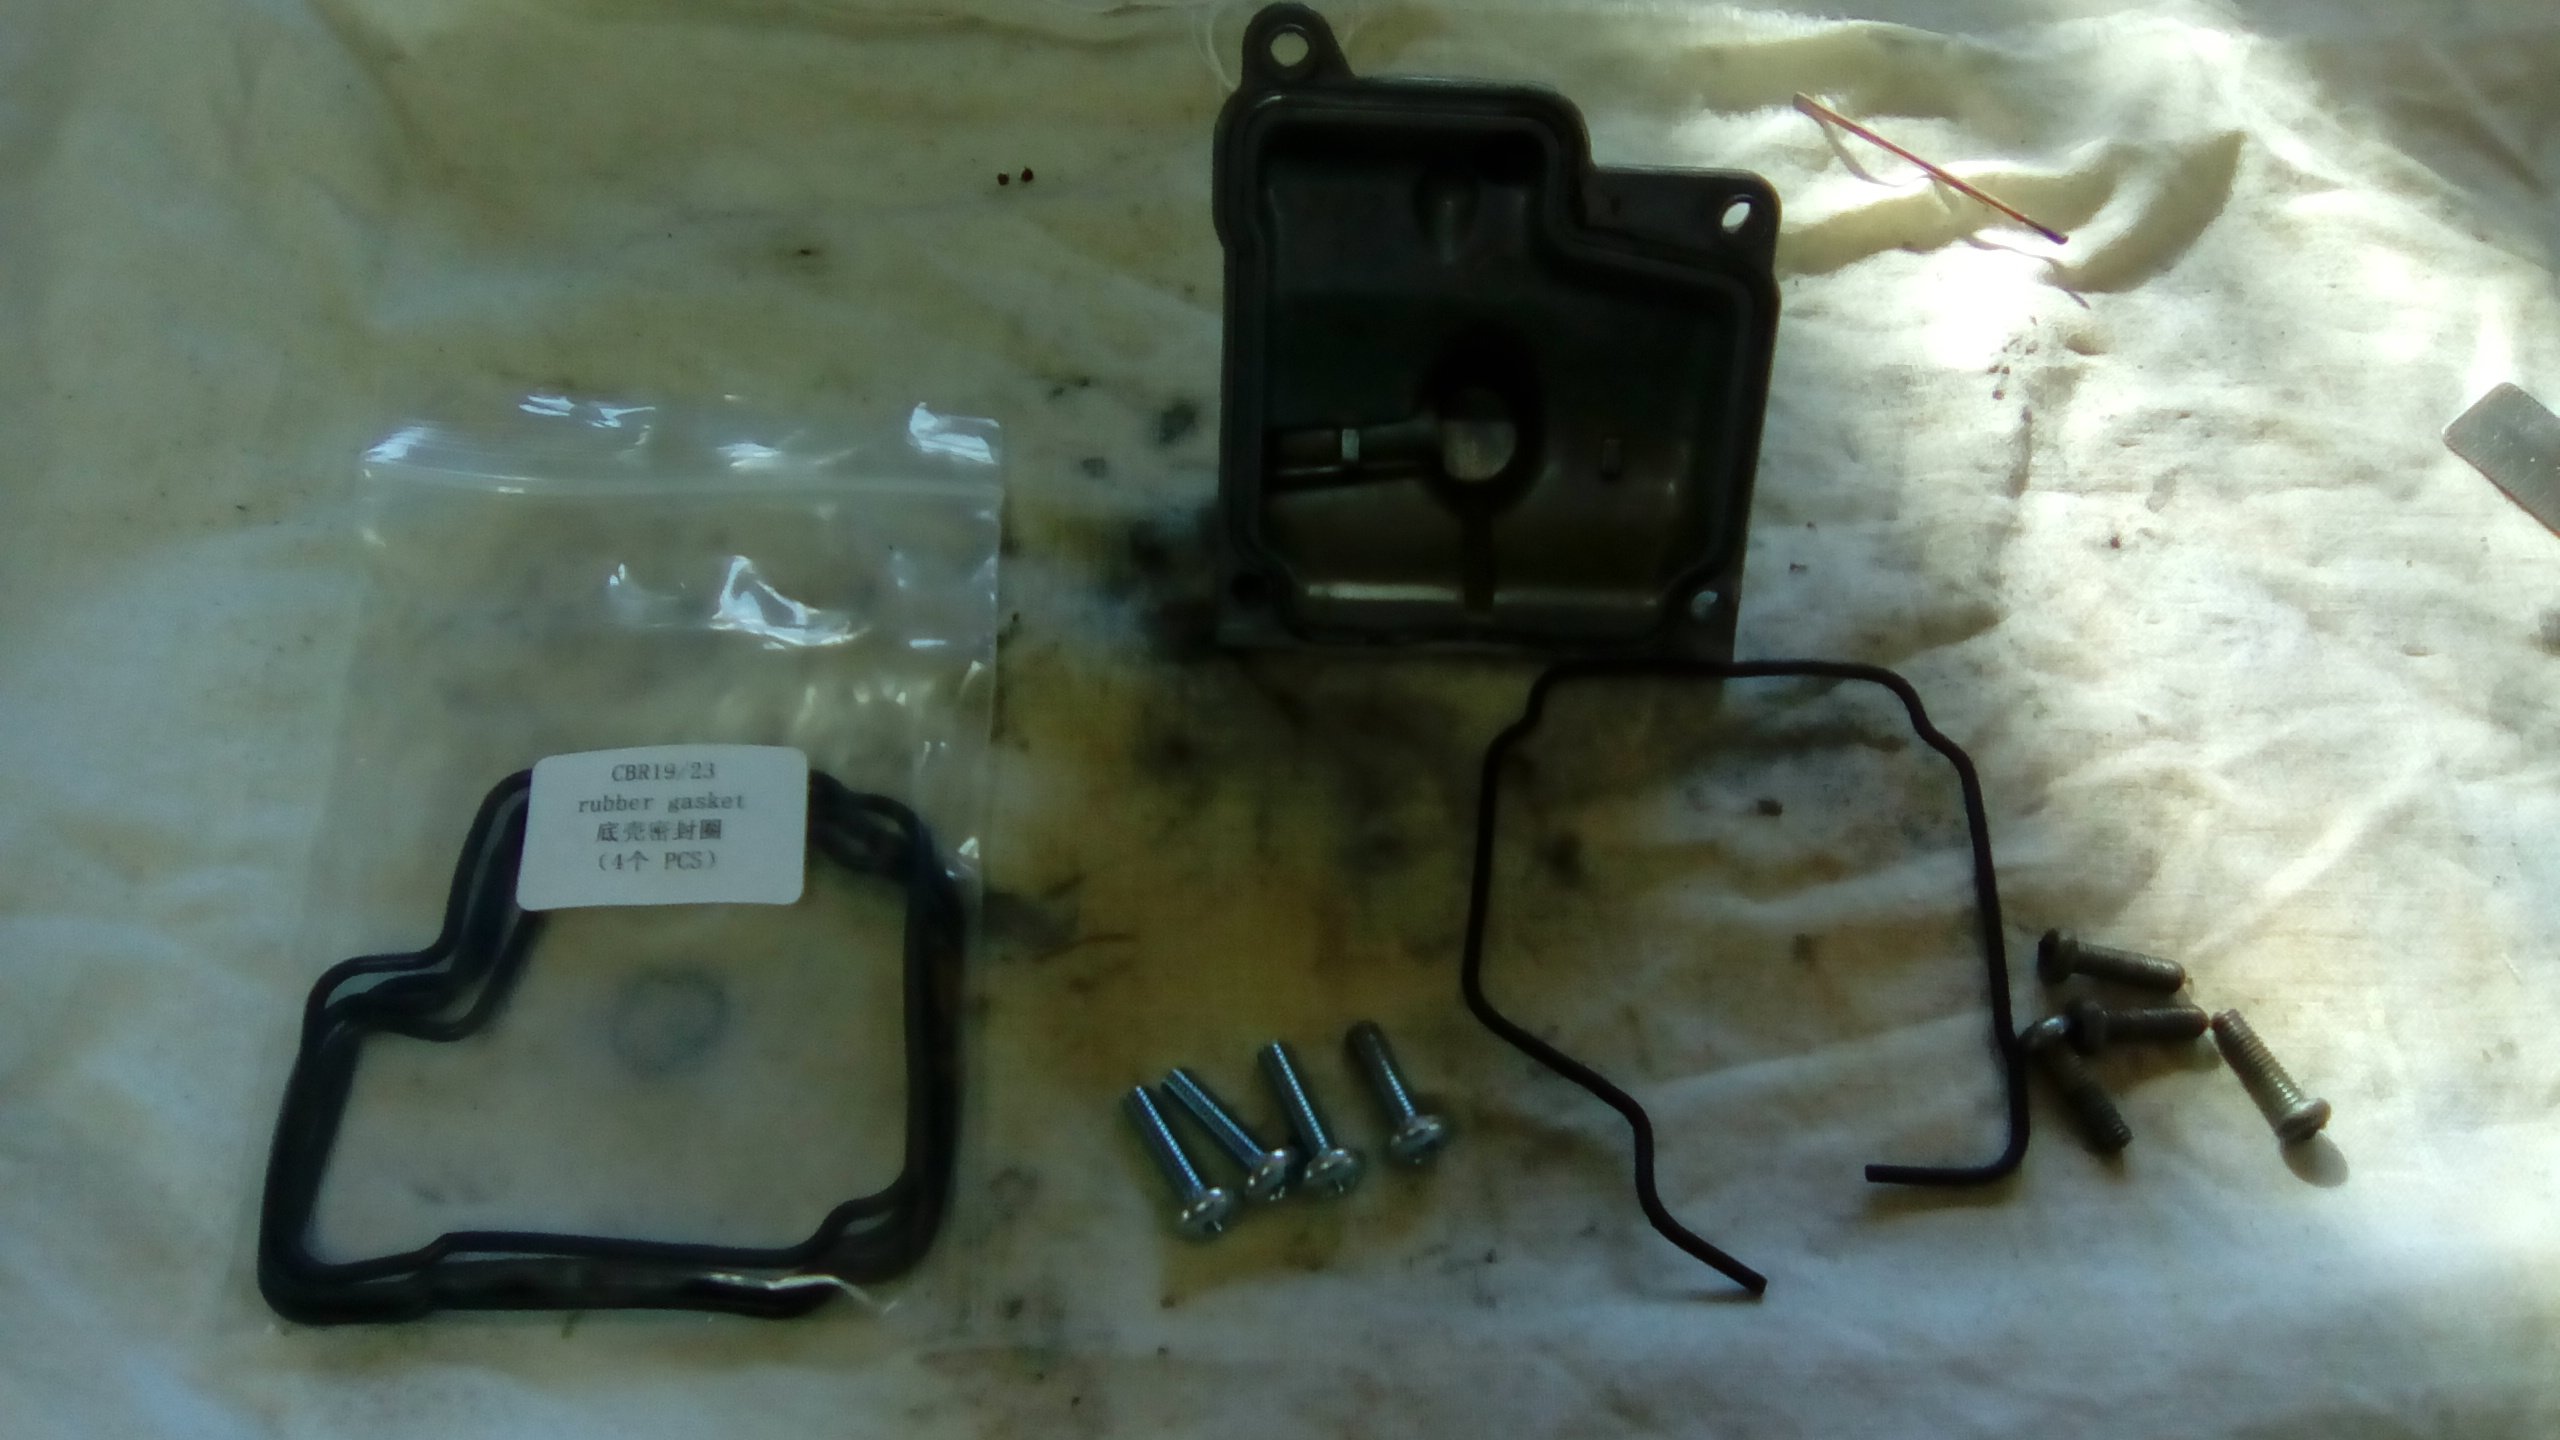
Ok so I've finally spent a little time on this lately. New parts turned up. Will clean up this area before I refit the carbs. Started cleaning and reassembling the carbs with new float bowl seals.
-
Yep. You'll see droplets of oil appear on the surface, simply wipe them off.
-
Re tig welding dirty castings. Have a play with the balance setting. One way is max cleaning, the other way is max penetration. Lean towards the cleaning side and you'll find oil soaked castings and painted surfaces easy as to weld. A good preheat will draw a lot of crap out first too.
-

Kimjon's 110cc 4 speed pit bike motorised drift trike build
a.craw4d replied to Kimjon's topic in Other Projects
Nice work there @Kimjon. Just out of curiosity, without sleeves on the tires can you wheel stand these? -
This true for wheels? Good if it is because I'd like to be able to run both factory wheels and something with better offset and width.
-
Will try that if it happens again.
-
Don't think so. I'll pull the plugs out later but I don't really know what I'll be looking at/ for.
-
The Altezza only does it when I fuck up starting it so lose of fuel pressure could be the cause there. Doesn't explain what happened to the demio though.
-
Do or can efi engines flood? Our altezza sometimes can be a bitch to start if you get it wrong the first time. If you accidentally release the key just before it starts ( and I mean split second before it bursts into life), it then takes a lot of cranking and spluttering before it'll start again. Before I got a decent battery it would run out of start juice first. I know this sounds a bit retarded but when you're so used to a car you sometimes release the key when you know it would've normally started, being distracted by kids and running on auto pilot doesn't help. Anyway this morning it happened to the misses in her demio, she took the other car and I tried it about half an hour later. It took a lot of cranking but eventually came back to life. Has since restarted fine each time. Anyone had this happen to them before? Any suggestions? Would cleaning or replacing plugs help? Cheers people.
-
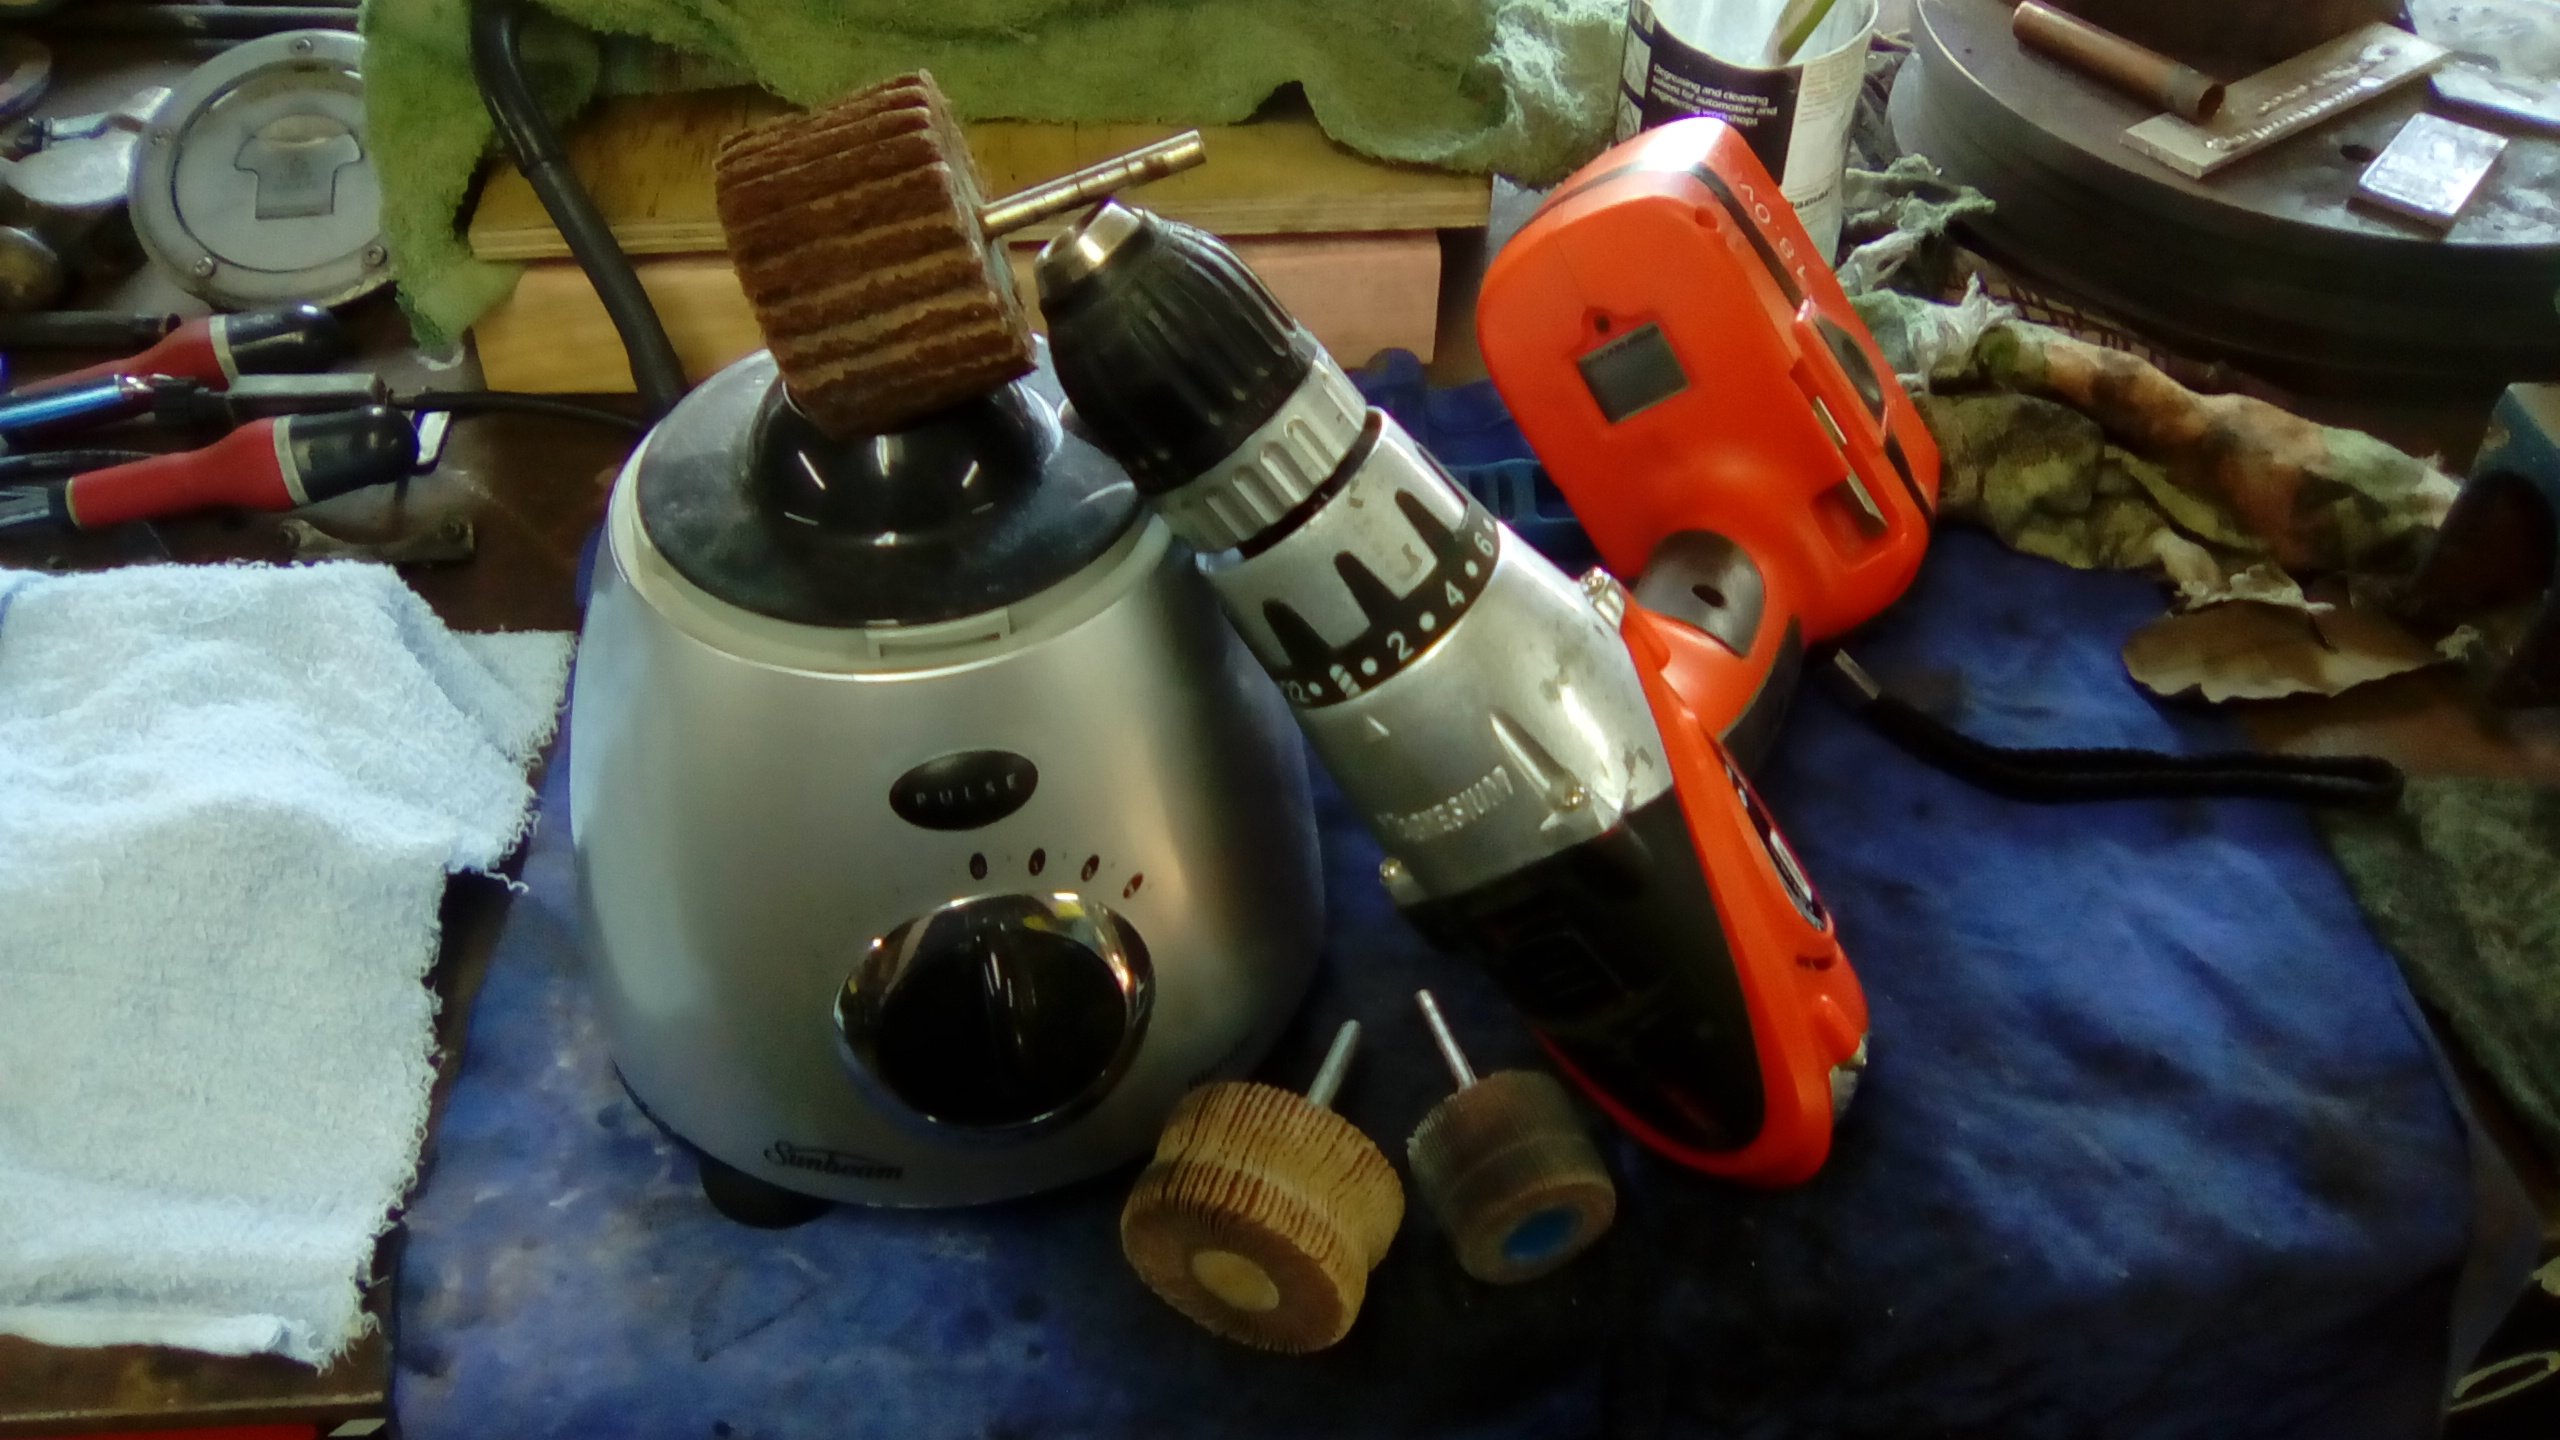
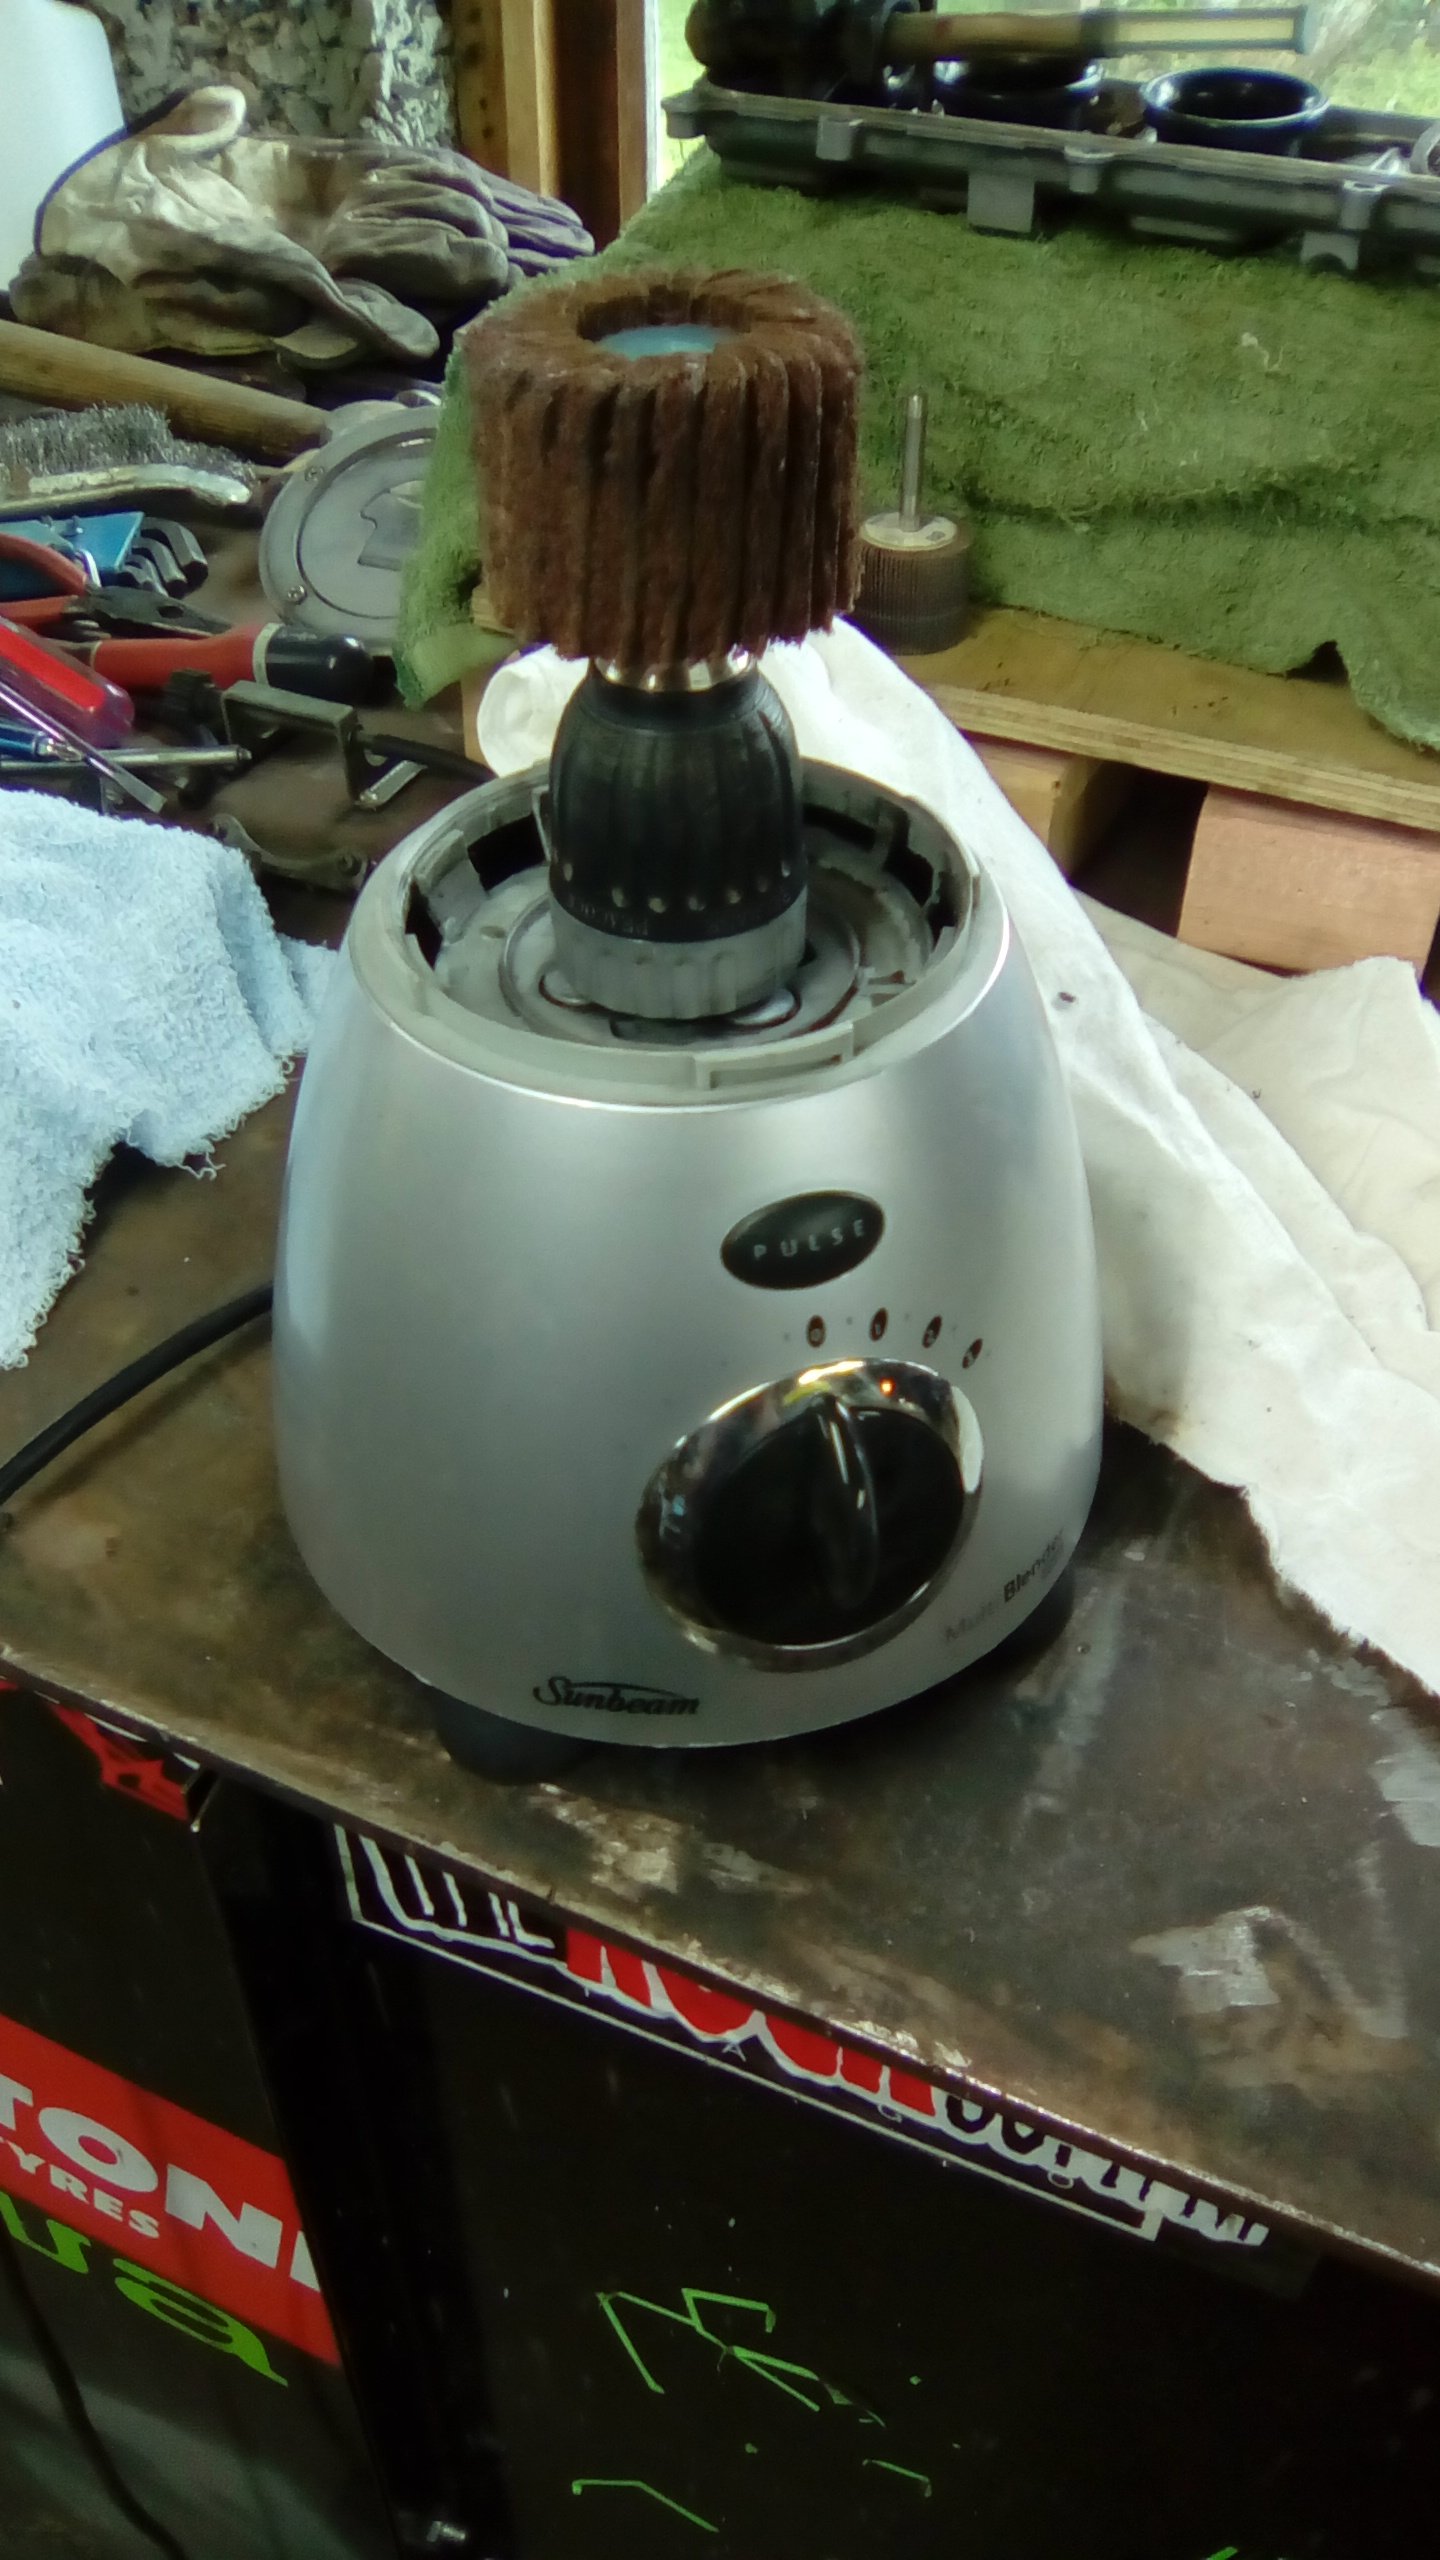
I'm getting a bit side tracked here while I wait for parts to arrive. I like the look of brushed alloy and have some die grinder flap wheels laying around but no die grinder, an old battery drill with a good chuck but pooed battery and a 900w blender base that goes good. Let's see how this goes ah. Edit. And nope. Turns out a drill chuck isn't designed for 1000000rpm and wobbles about like anything. Has potential though.
-
No harm in trying. Vid please.
-
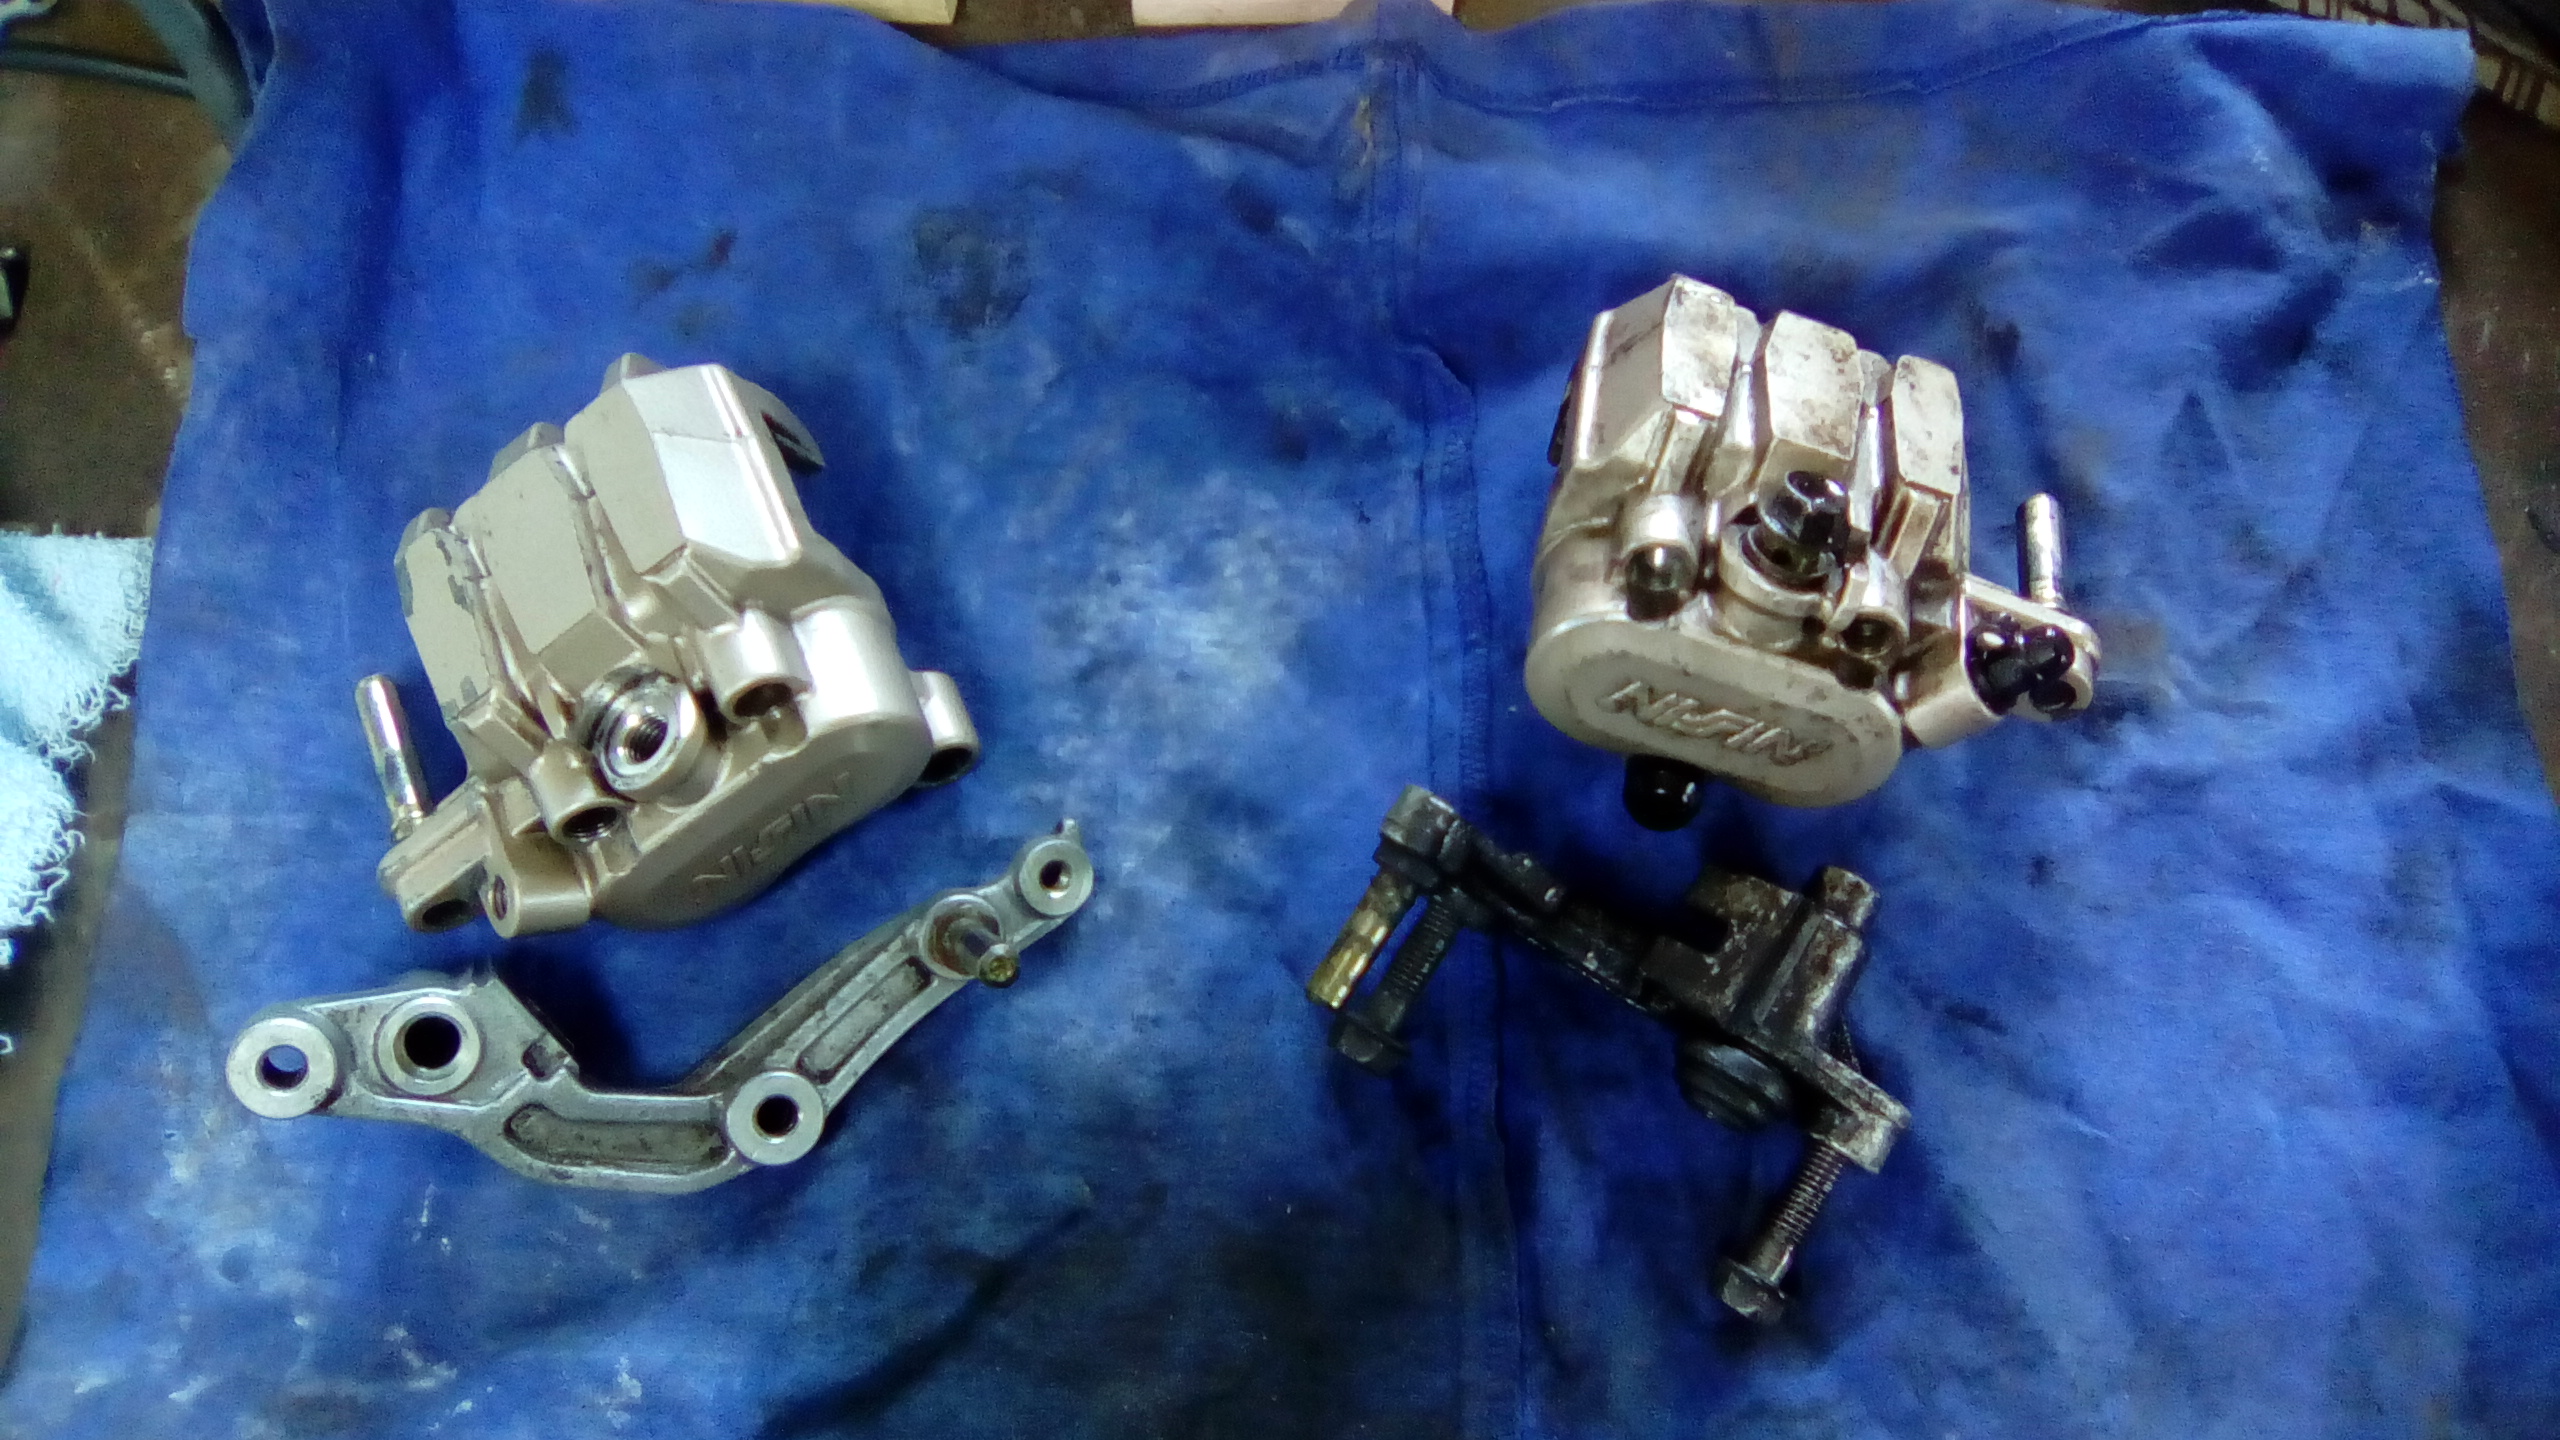
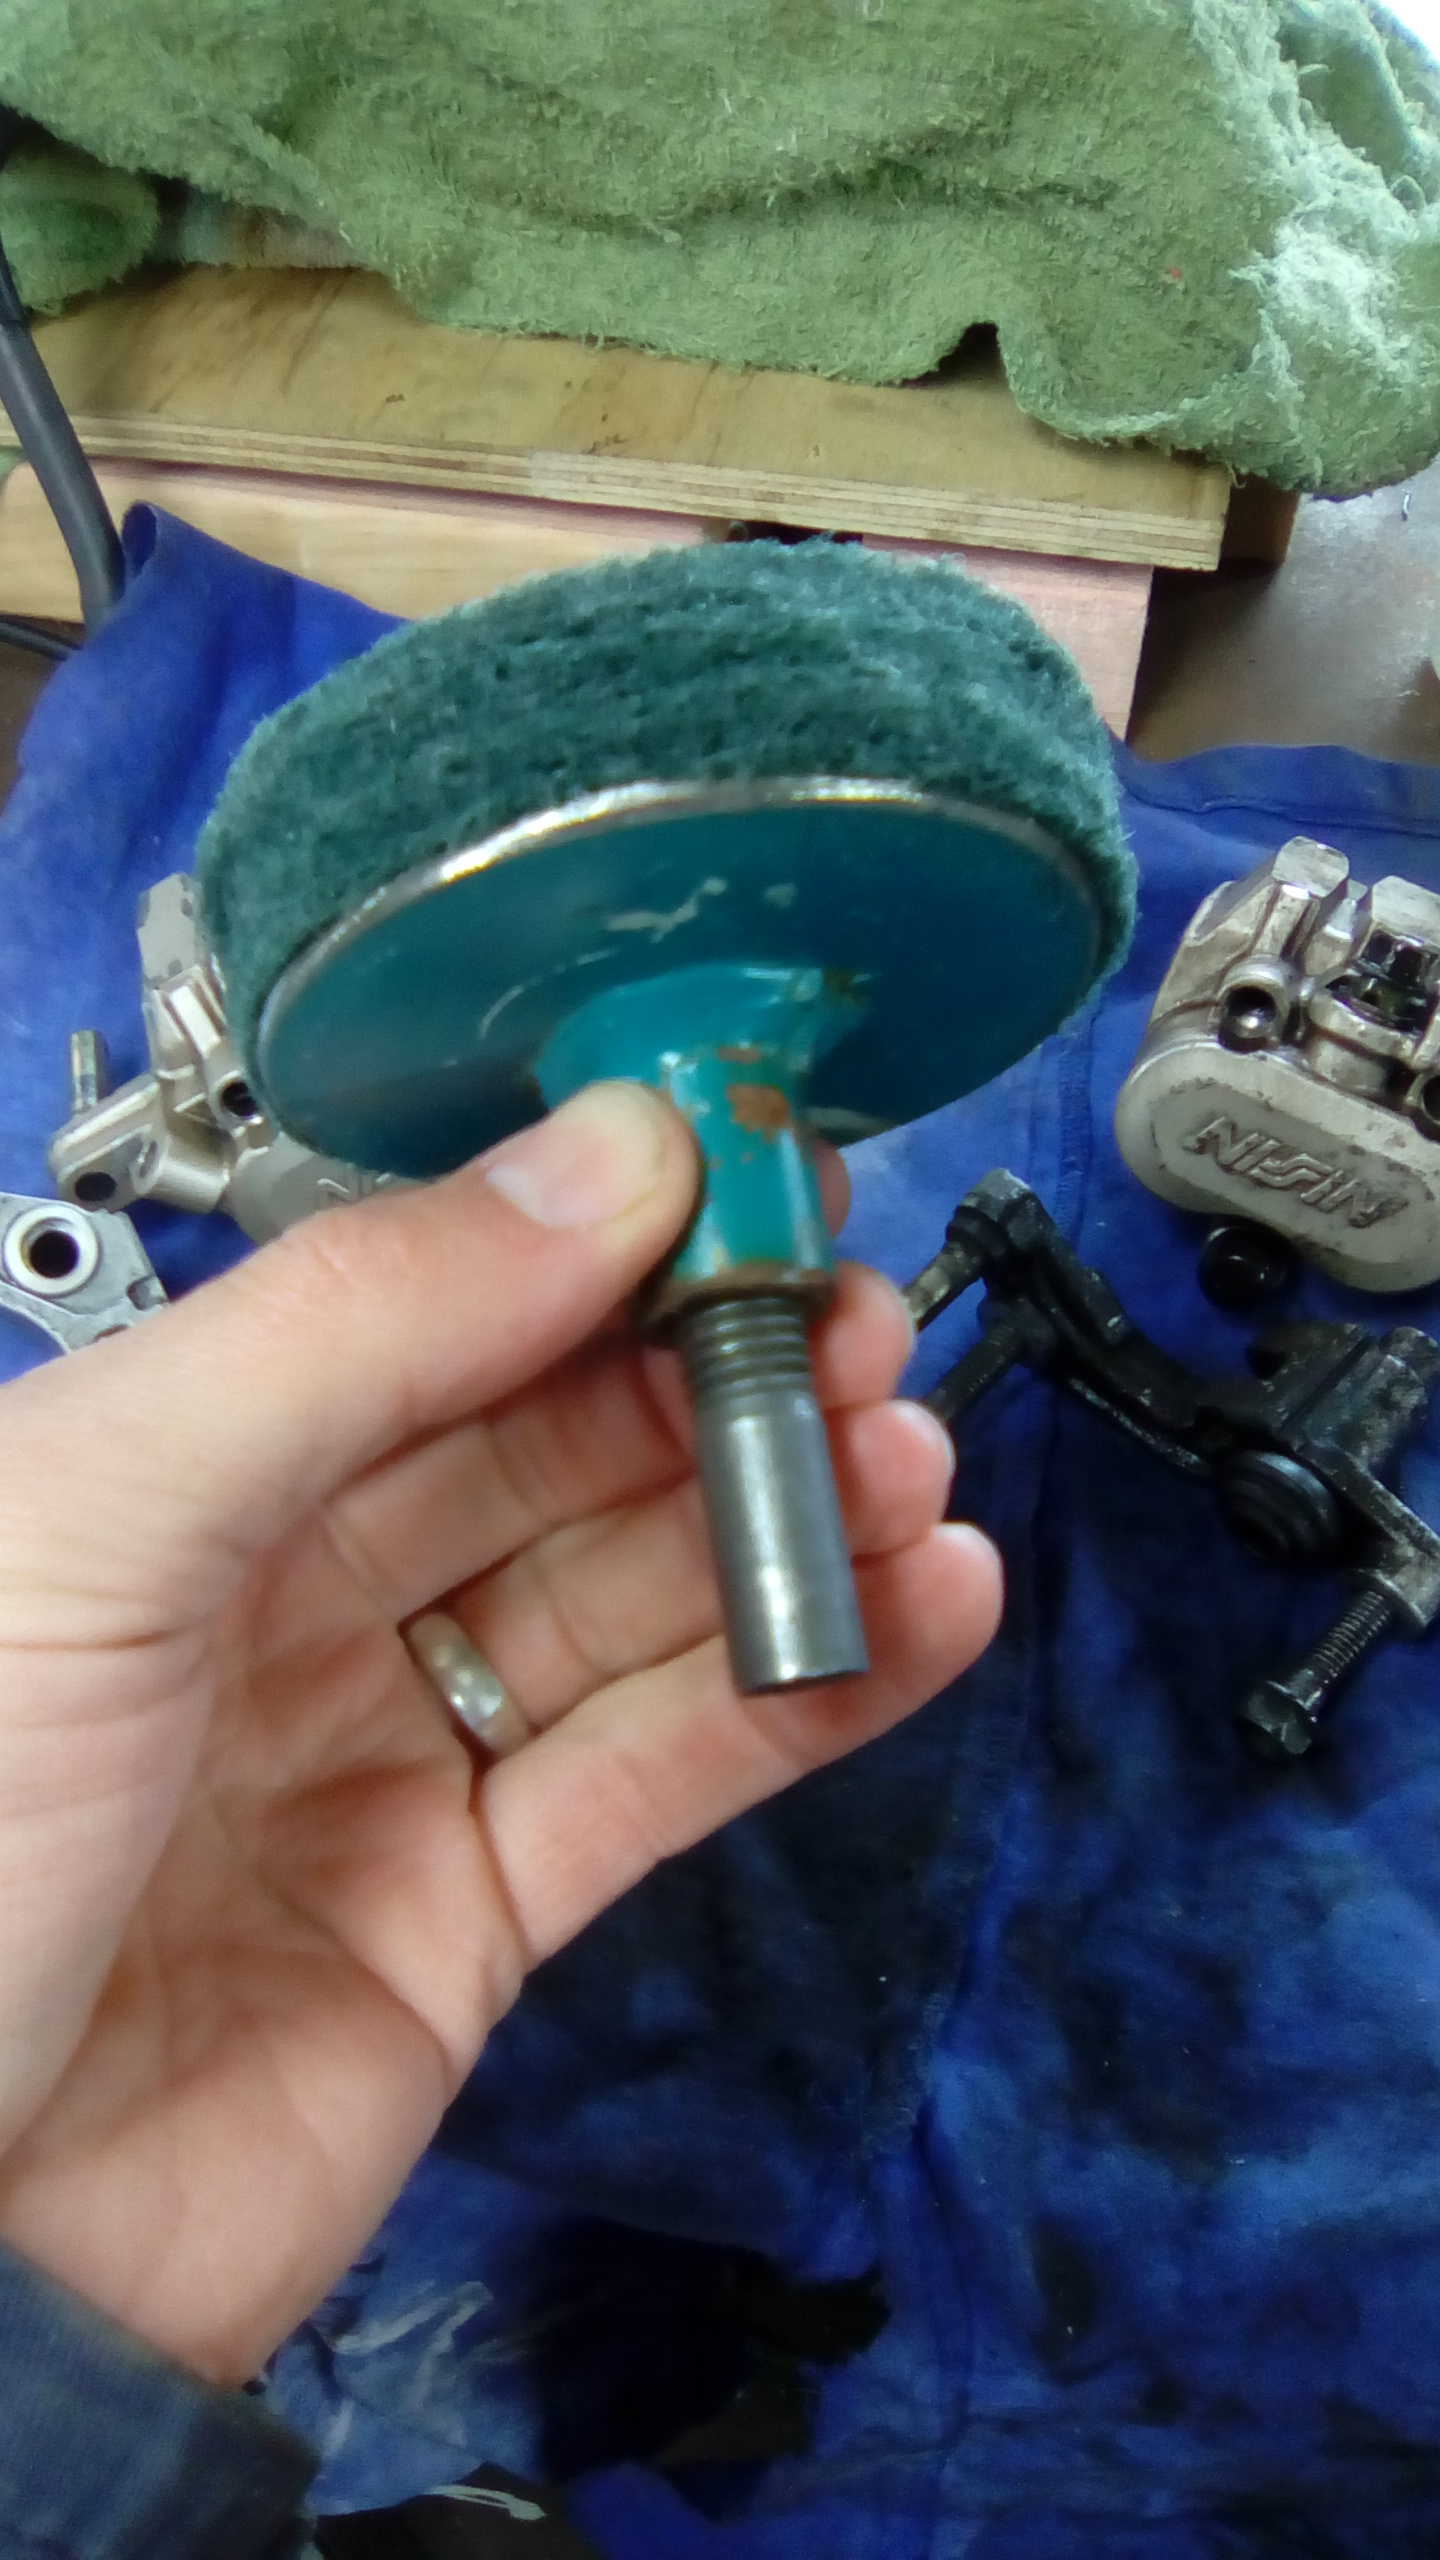
And because updates with no pictures are poos. One caliper and bracket cleaned up. Will actually get some brakeklean and degreaser to finish these off. Was using petrol, toothbrush, wire brush and elbow grease to get this far. And the diy buffer/ polisher v2. First one I used a jam jar lid and a small bolt but it gave up and fall apart.
-
Been a bit slack lately. Been scrubbing away at the brake calipers in my spare time trying to make them look good again. Turns out the fronts have been up graded to mc19's with bigger pistons at some stage. I'm waiting on a couple of aliexpress purchases to turn up so I can put the carbs back on. Will give it an oil and filter change then fingers crossed, get it going again. My parents are picking up all my brake seals while in aus so will get them back together in a few weeks when they return. Made a little buffer attachment for the drill with scotchbrite glued to it and attacked a bit of the frame with it. Well now I'm thinking of pulling the whole bike apart to do everything with it . It worked quite well, unfortunately you don't see most of the shiny bits once the fairing is on. Must resist that urge until I've got it going at least.