azzurro
-
Posts
2,878 -
Joined
-
Last visited
-
Days Won
4
Everything posted by azzurro
-
sounds awesome!
-
stink about the pulley - I remember having similar issues when i swapped out the old pump for the newer style one on my old 1608. Swapping in a 2 liter solved most of those issues . Also had the faff with swapping to electric fan from the 2300 water pump mounted one, had to source a 1500 pulley to sort it, whcih was much easier than trying to find the old style water pump i think there are a couple of types of (non electro fan) twin cam water pump pulley, one deep one shallow (early/late or small cc/bigg cc? - i dunno ) , but if you have swapped from the big ol' factory electro magnetic one to a more modern style maybe you have the wrong pulley? Could be the cranks are slighlty different offset too? I have a couple of both here to measure if you want?
-
yeah, front shaft should be treated as effectively an extension of the crank/gearbox centreline and should be parallel. The guibo is only designed to deal with the engine/box moving slightly on its mounts, not suspension travel. A couple of washers between the bearing and mount will raise it, or between the mount and chassis will lower it.
-
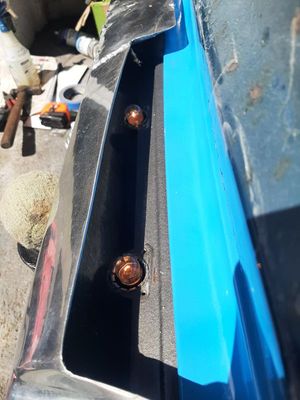
Re brakes, the rear most reservoir is for the front brake circuit as this gets used first, then with more brake pedal travel the rear circuit (front res) starts coming online. If onlr front was draining while doing the rear circuit too, wonder if the pushrod is set up too long or short or something and not quite pushing the bits in the cylinder to use the rear circuit chambers? Maybe the sliding bits in the cylinder have been put in backwards? I had this issue on the 1100t van. Have had issues in the rear with the proportioning valve on the diff too, esp when it's lowered but usually it's just stuck off doing nothing. But if they seem to work fine, maybe it's just Fiat things? Driveline vibe - had exactly same issue, hard to assemble the driveshaft out of phase but try disconnecting the 4 bolts from the diff end, turn 180 then reattach. Could be the angle of the diff pinion too? Does it match the gearbox/front shaft angle? It's looking good man!
-
Keen as
-

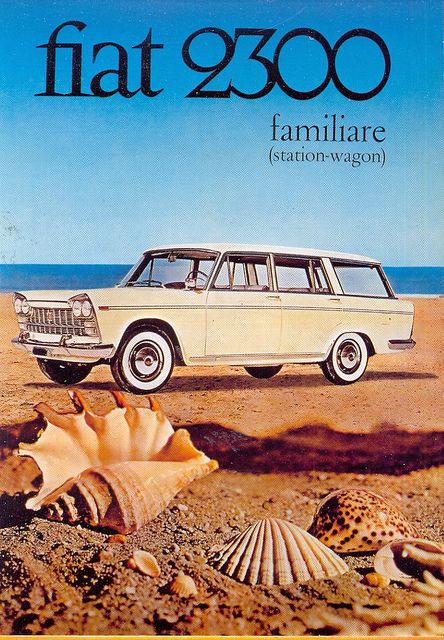
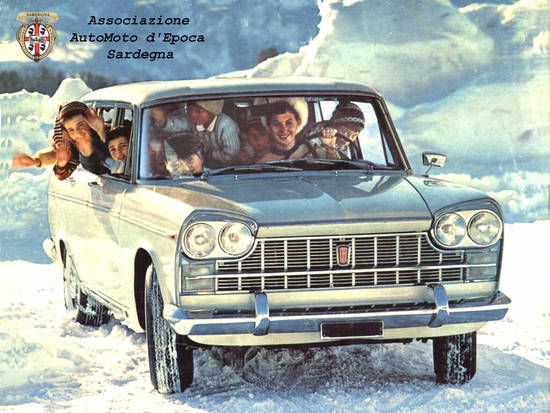
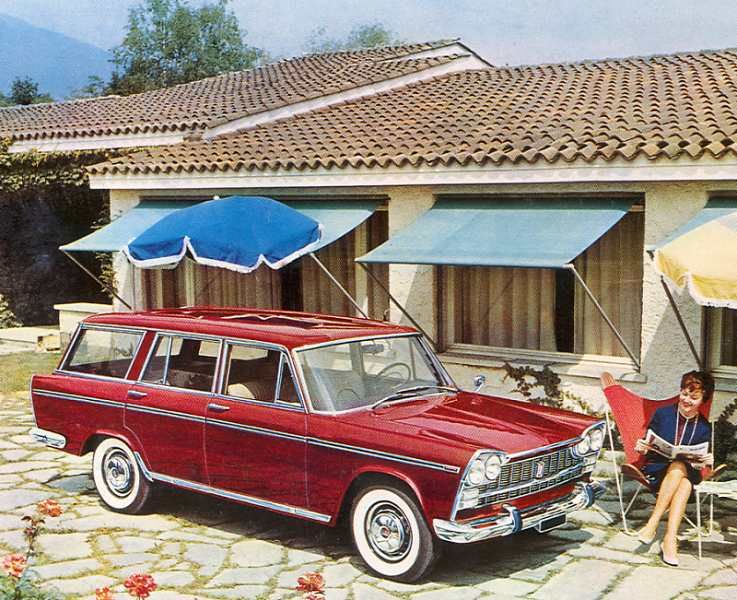
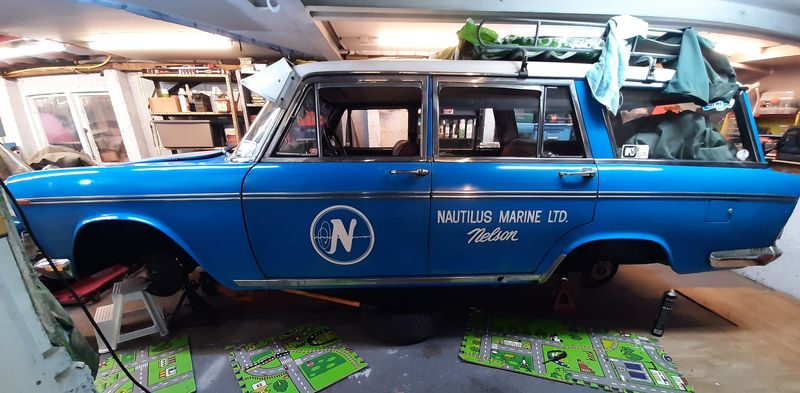
azzurro's 1966 FIAT Duamilatrecento Familiare (2300 Wagon)
azzurro replied to azzurro's topic in Projects and Build Ups
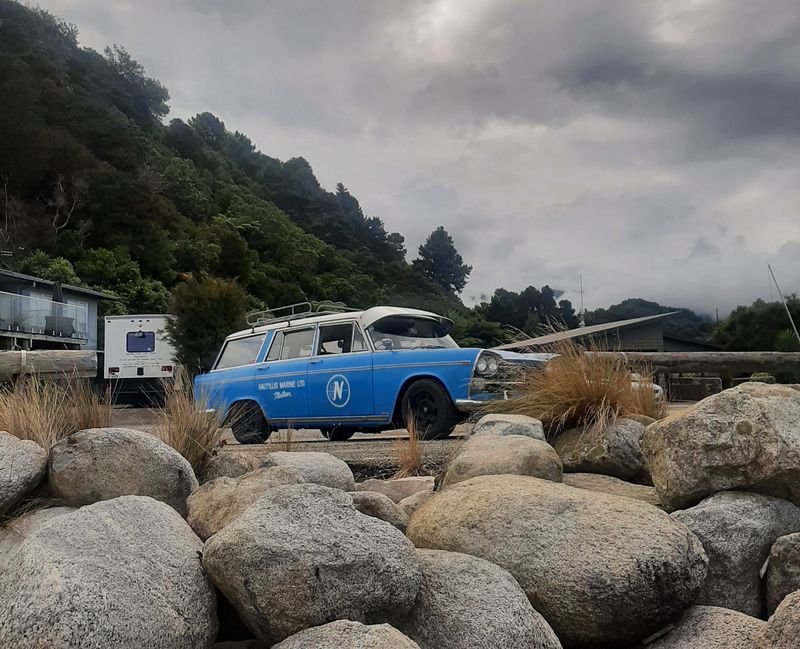
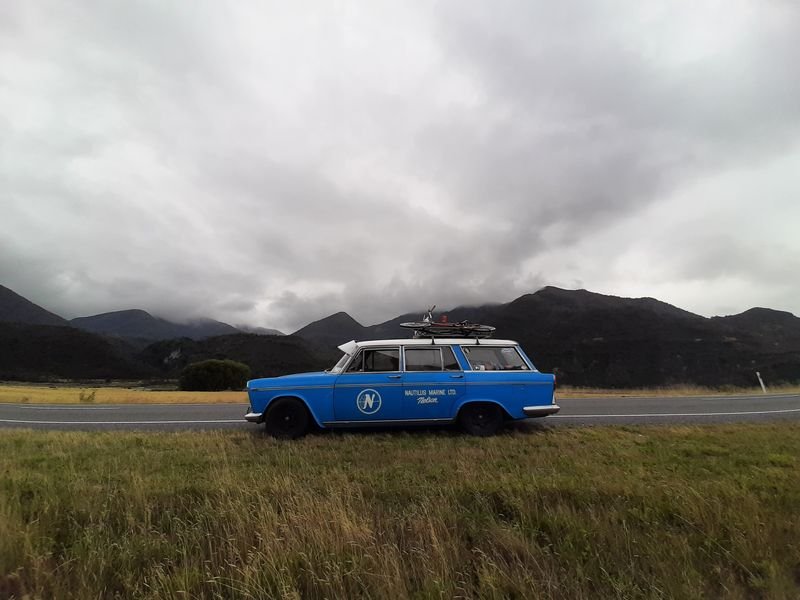
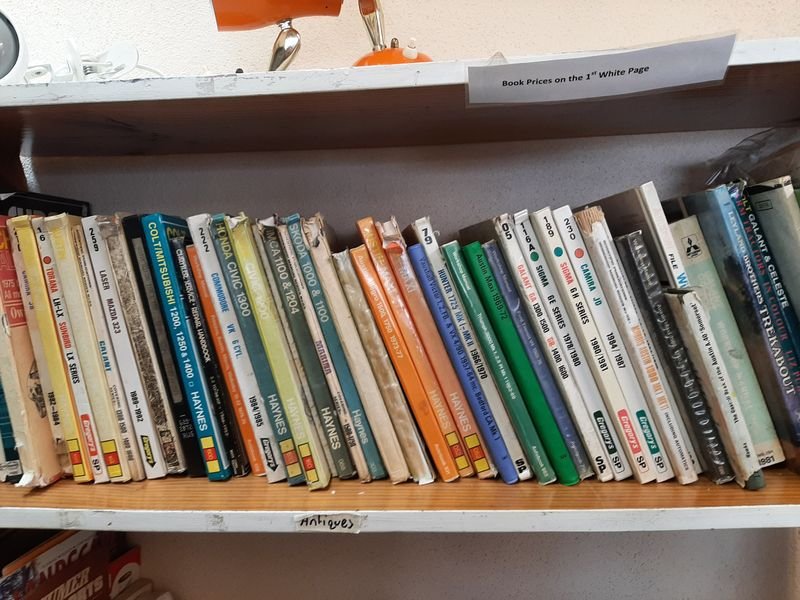
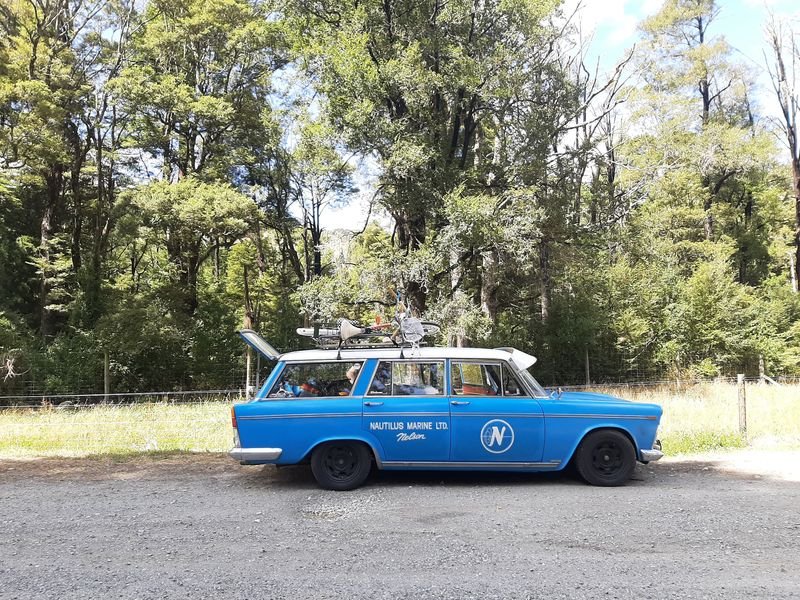
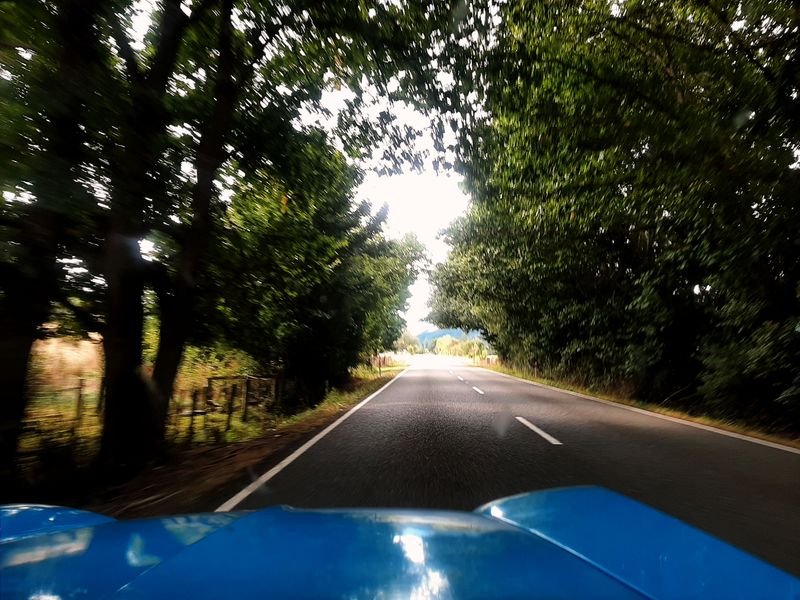
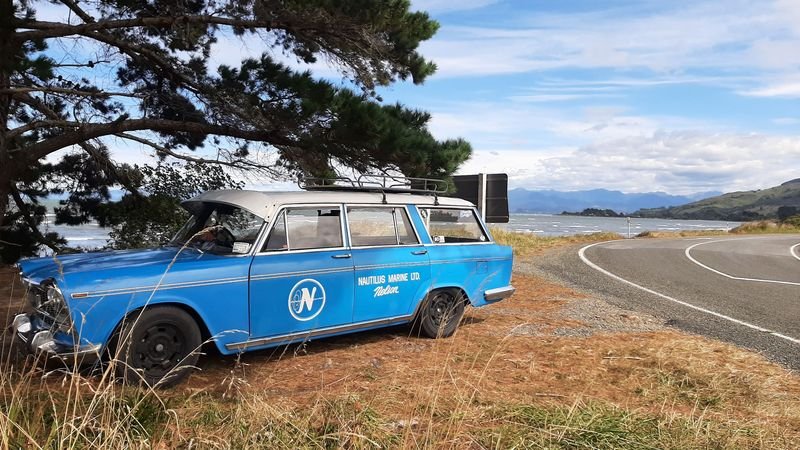
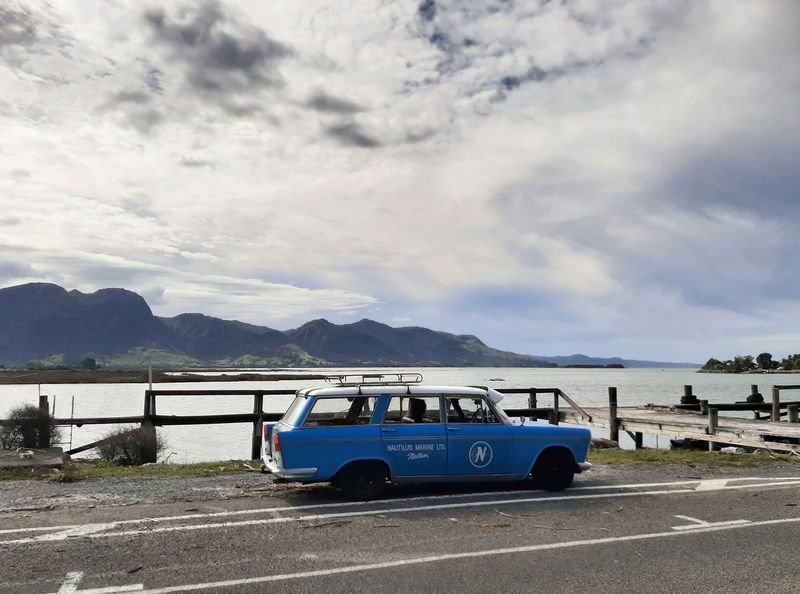
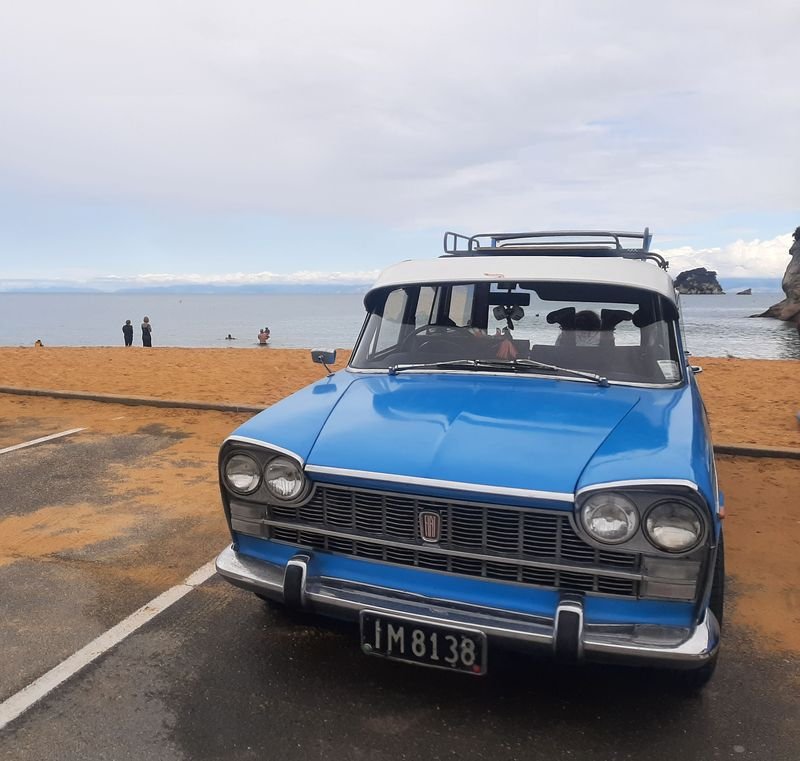
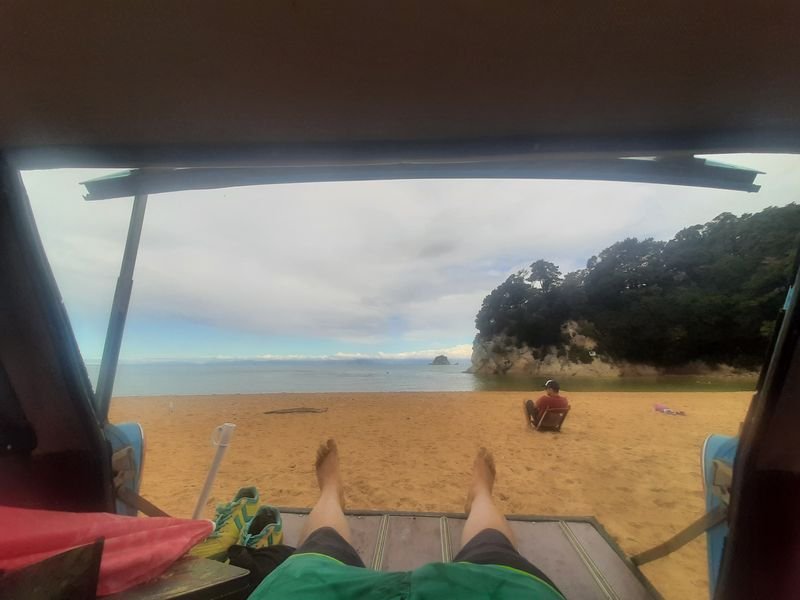
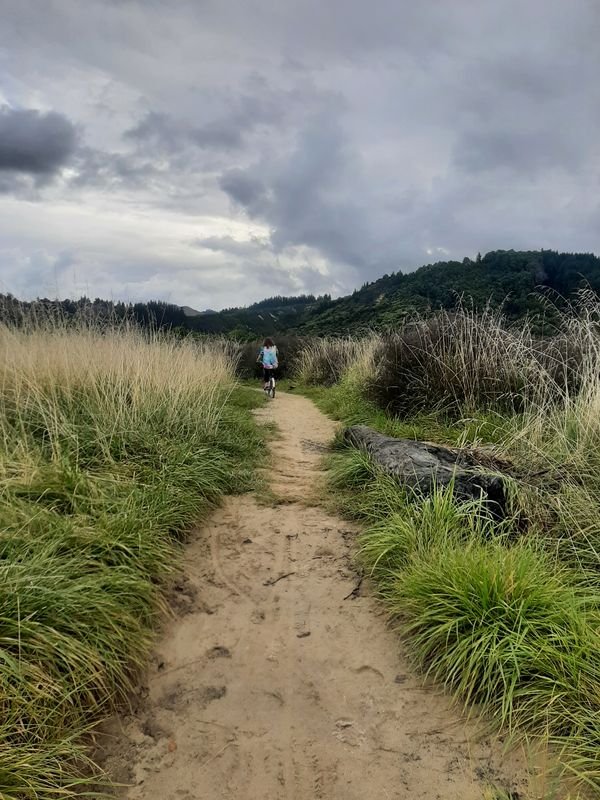
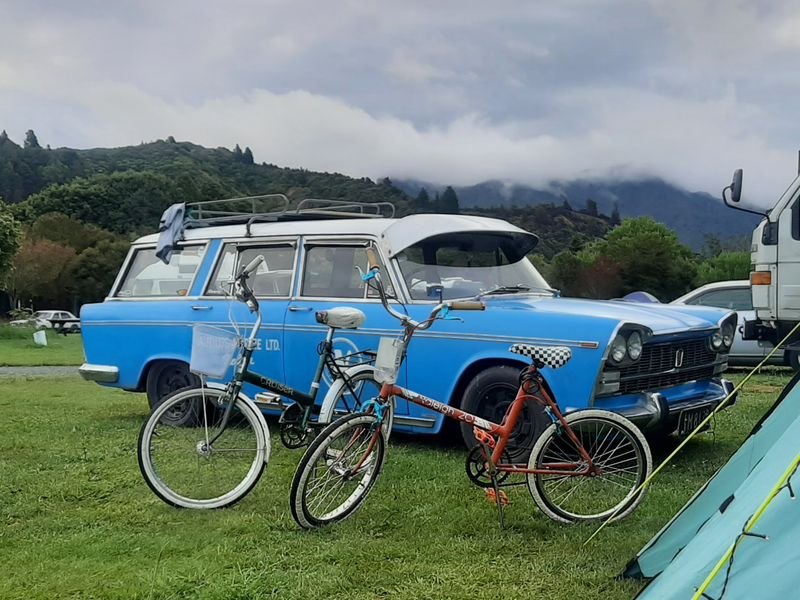
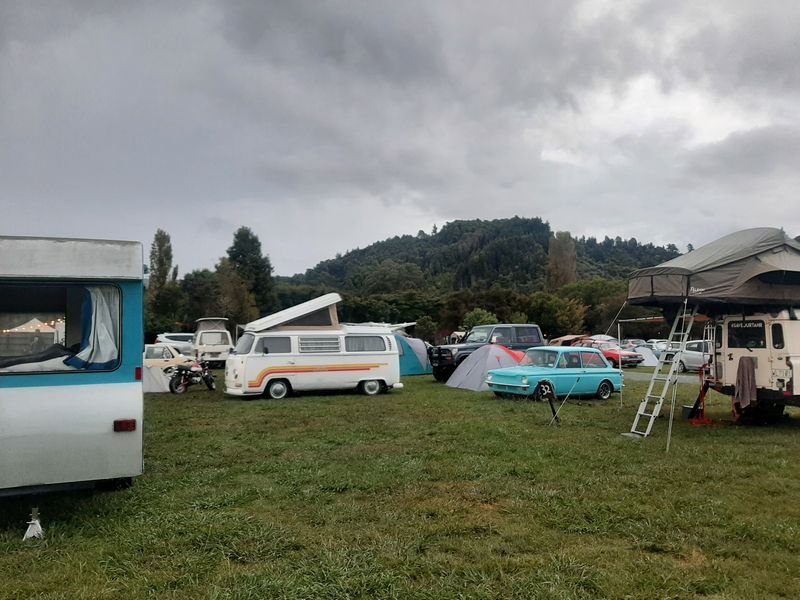
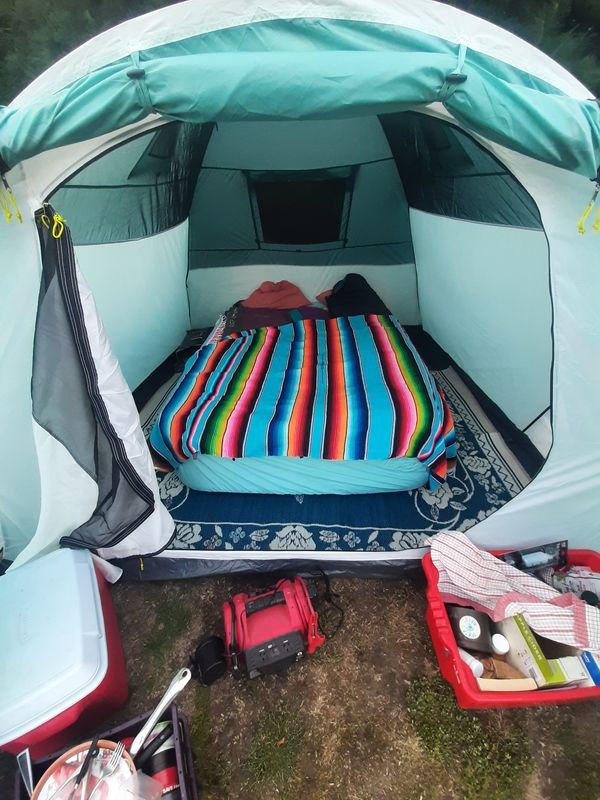
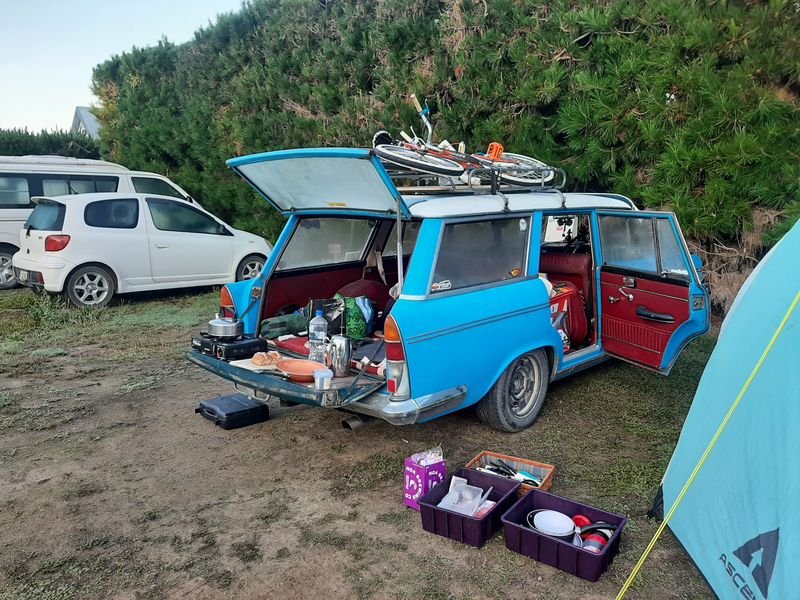
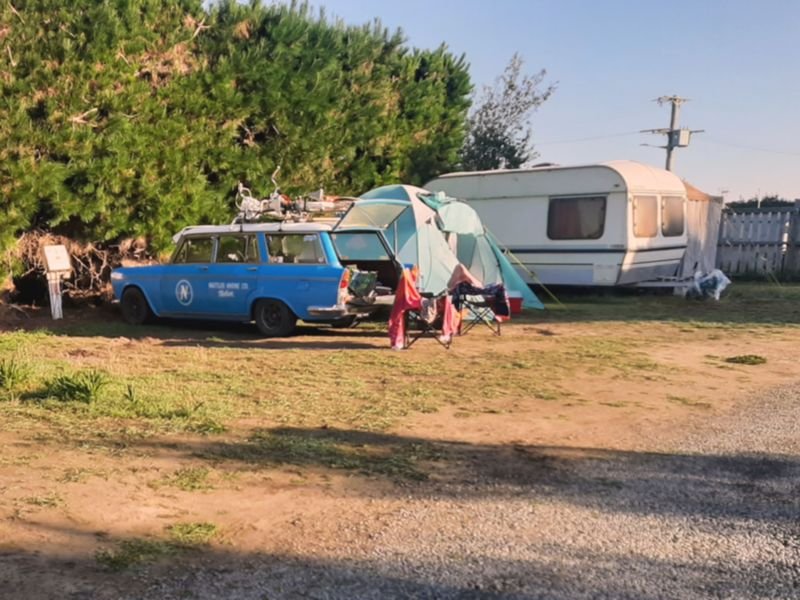
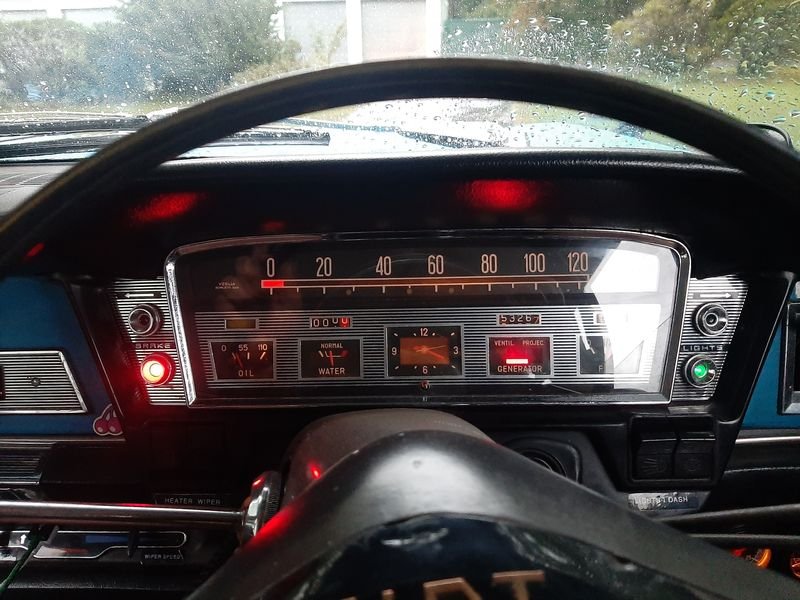
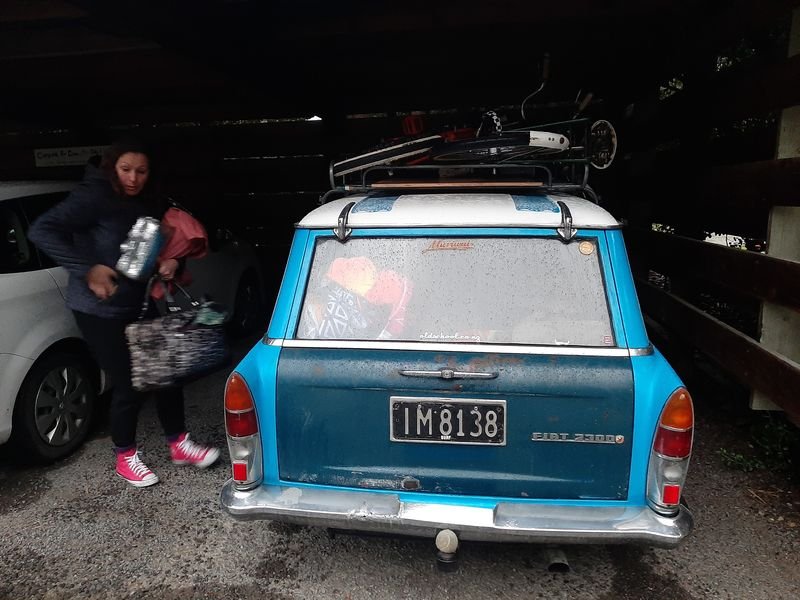
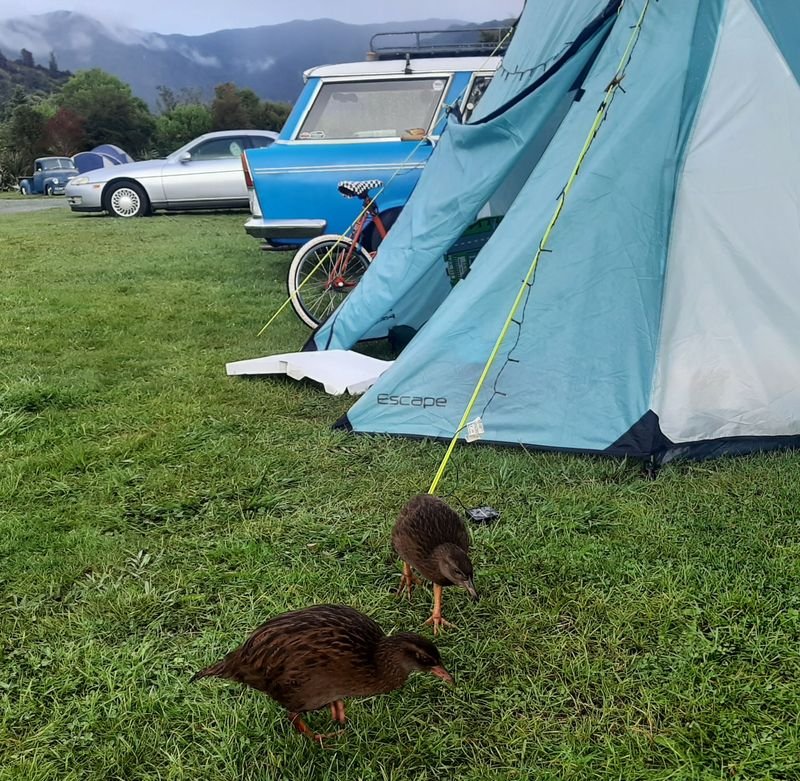
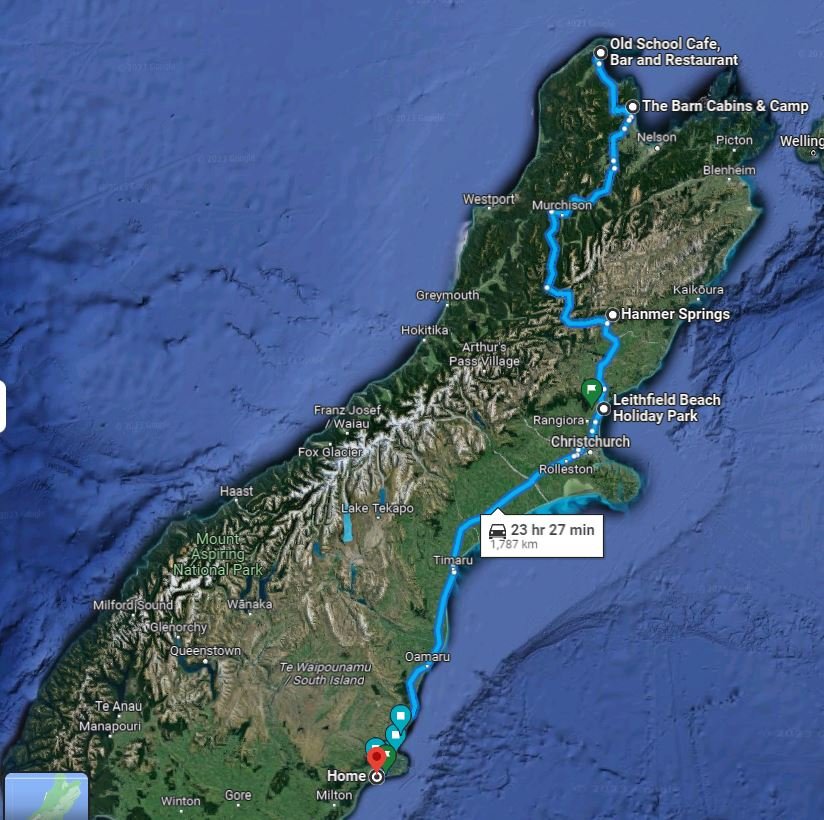
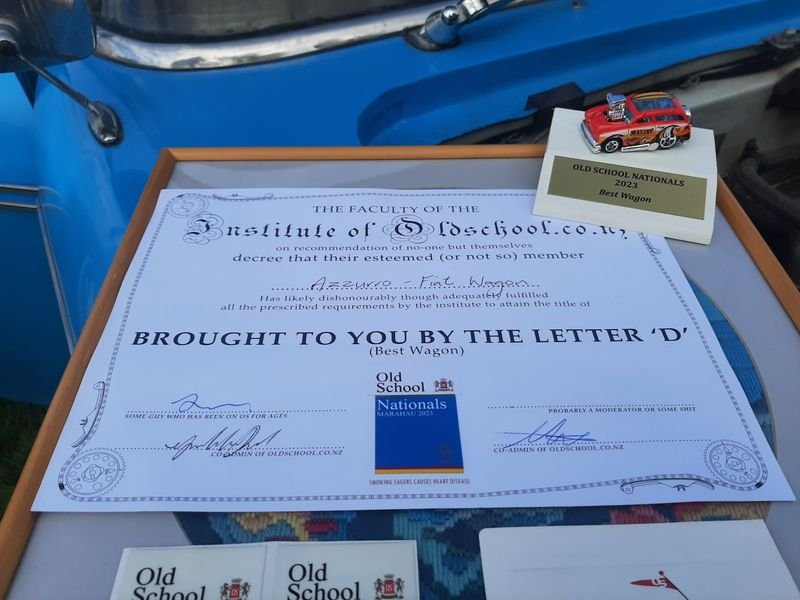
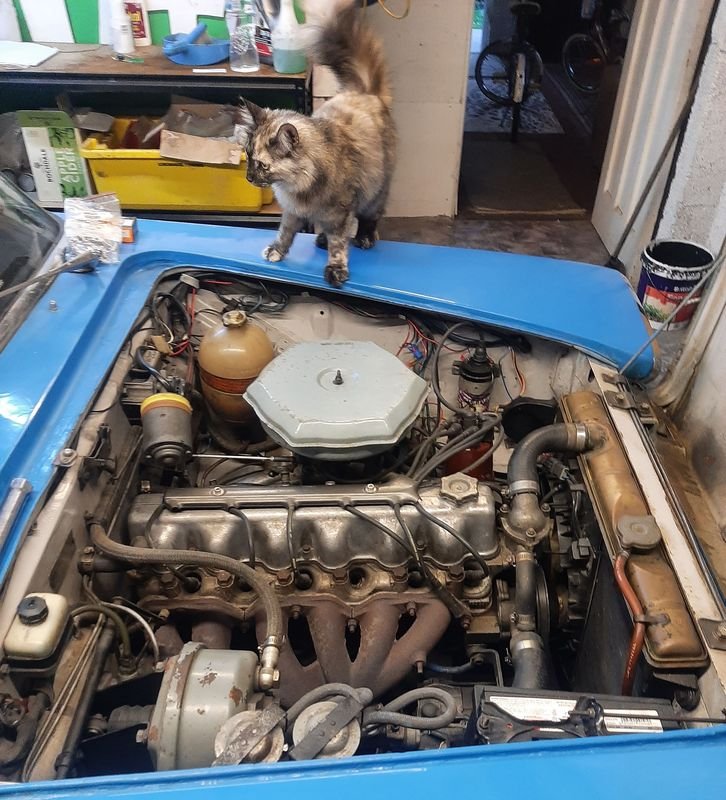
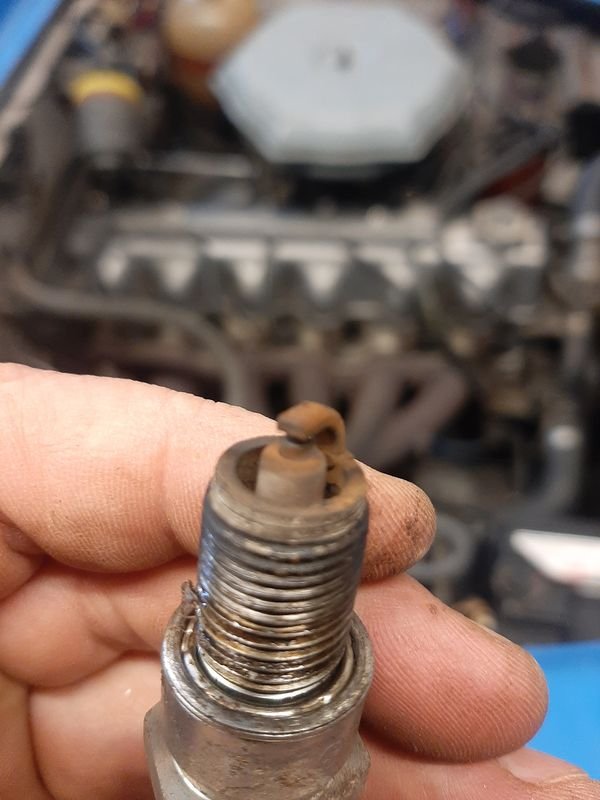
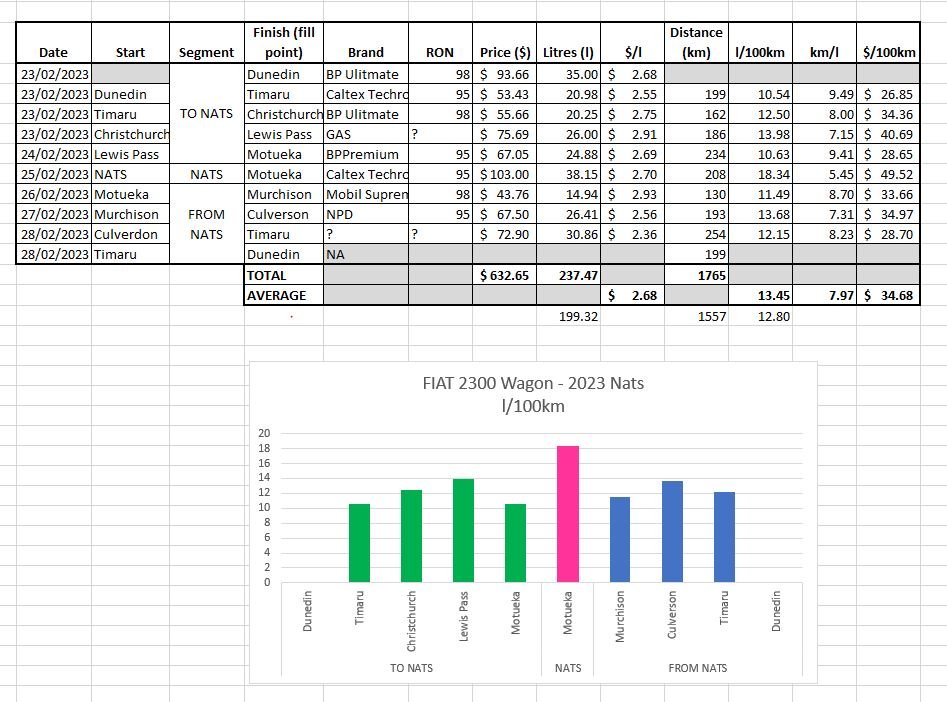
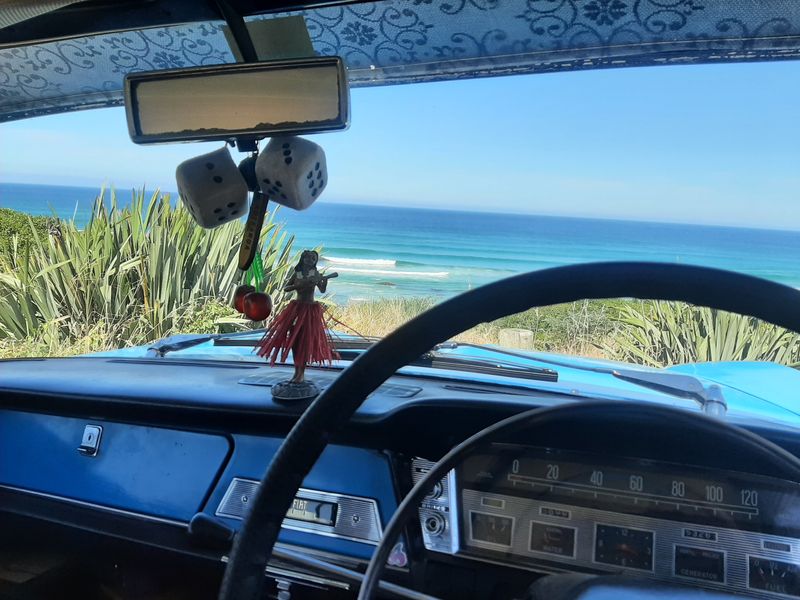
Trip up to nats and back was awesome. DAY 1: THURSDAY, DEPARTURE Loaded the Mrs, 2 bikes, a tent, blowup bed and pump, 2 chilly bins, 2 tool boxes, food, clothes, oil water and some spares, and a million of camping stuff, To the gunwhales! Pre flight systems check, then dropped the cat off for a weekend in cat prison, and hit the road to Nelson. It rained pretty much the whole day, so stereo, wipers, heater and lights all giving the alternator a good hard testing. Dry spot on the road to Hanmer First night, we didnt make any plans as we werent sure how far we would get, or if we would get there at all, but ended up making it as far as Hanmer Springs before calling it, and left the booking to Kirsty, we ended up staying in the Hanmeet Campground, in one of the cabins. Ended up being both the coldest and most uncomfortable night of the trip. DAY 2: FRIDAY - TO NELSON Next day was better, no traffic due to a bad accident just before the turn off to Hanmer from Chch side meant we had a clear easy run up though the valleys to Motueka. Op shopping all the way Lovely roads, with the 2300 singing at about 3500, making about 85-95km/h And then Nats DAY 3 and 4: NATS Saturday and Sunday To be honest, after setting up the tent on Friday night, its all a bit of a slightly hungover blur, but lots of good chat, and cruising about, cheeky birds, looking at things, swims and bike rides And best of all won a thing DAY 5: MONDAY - HOMEWARD BOUND Packed up Monday morning(ish!) to hit the road back to Dunedin. Again, no real plans, but a 125 parts car popped up on tme on the way, but despite making plans to look, Kirsty had booked us into Leithfield Beach Campground, which had an early closing time on a Monday so had to boost it. The town is full of the worst judder bars but nice beach and lots of period correct caravans. Also not far from Sunbeams lovely house and man cave, so popped out there for a howsit before retiring back to Villa d'Azzurro Camping like we mean it. We dont travel light DAY 6 - ALL THE WAY HOME Bit of a frosty start, but keen to get rolling home, still at least 6 hours away. PHEW! Was A Big Mission, but the wagon went great! Used less gas than I was expecting, averaging 12.8l/100km (excluding the blast over Takaka Hill), and on some stretches, close to 10l/100km, which isnt bad at all considering the weight and drag from the bikes on the roof. Used hardly any oil, maybe about 1l, (in fact was overfull because i put a wee bit in every time i checked it because i just couldn't believe it), and no water. Cat was happy to be out of the cattery Sparkplugs looked really good too, very pleased with the look of those after 2000km of hard running! Have a pretty bit list of things to sort out including swapping the pass side wheel bearing (lol - was pretty grumbly by the time we got home) some exhaust tweaks, mainly to move the flanges (low point) further forward which will improve clearance, and probably another muffler before the diff to take out some of the harshness as it only has one at the rear (i feel old!) a slightly longer bolt for the drivers side torsion bar to wind it up a bit (i know, i know, but its maxed out and was bottoming out, not good, but the pass side has lots of thread and no tensing for every bump) replace a couple of ball joint covers (torn/eaten by brake fluid) swap out the inop gbox speedo drive (have the part, but need to fit, which is a box out job, which will be a gearbox seal replacement, and clutch disc clean & adjustment
- 108 replies
-
- 36
-

-

-
- unicorn poop
- rust
- (and 8 more)
-
azzurros 1966 FIAT Duemilatrecento Familiare Discussione
azzurro replied to azzurro's topic in Project Discussion
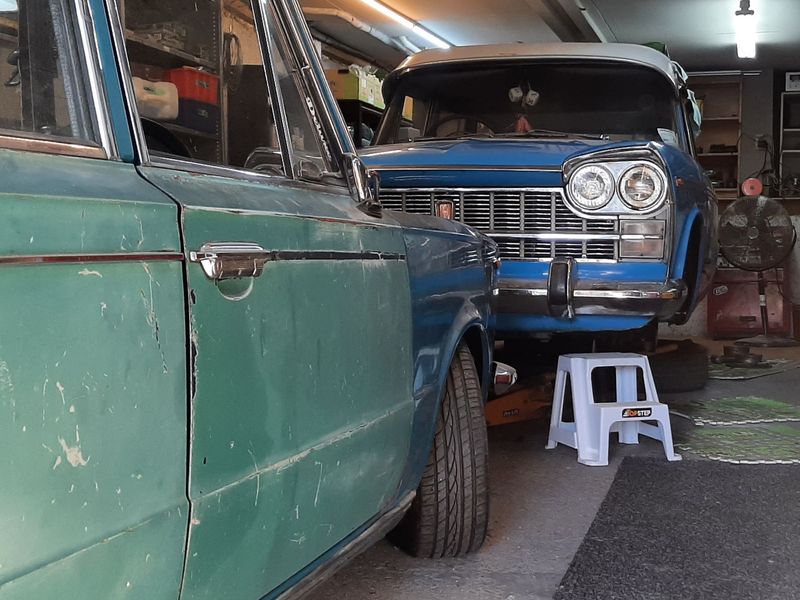
Thanks duders, nice to know theres a lot of love for this old bus. I actually had a back up plan of the 125, which has a 5 speed gear box and is much better suited to both long drives and moder traffic, but turns out the hanger bearing is flogged out (that will be the drive train shudder then) so thats a no go. I have some sika flex in it at teh mo, but have run out of time. Wagon it is! -
azzurro's 1966 FIAT Duamilatrecento Familiare (2300 Wagon)
azzurro replied to azzurro's topic in Projects and Build Ups
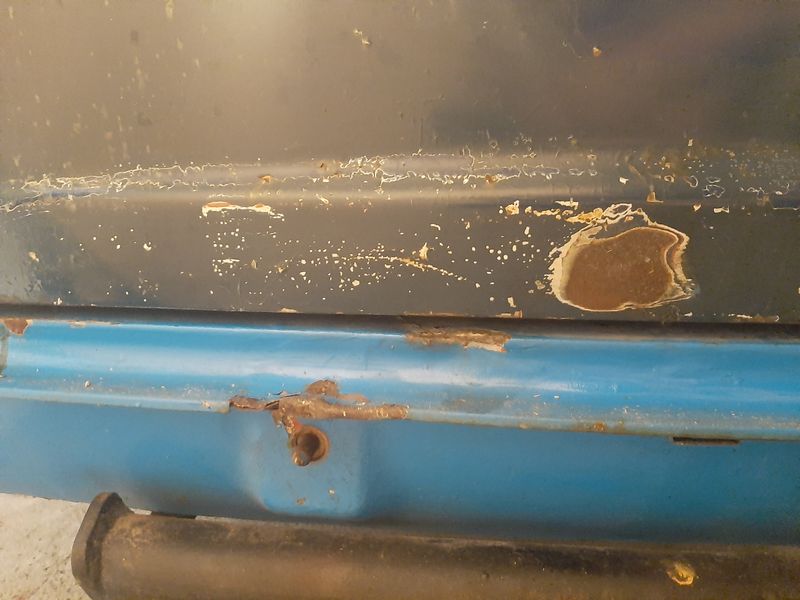
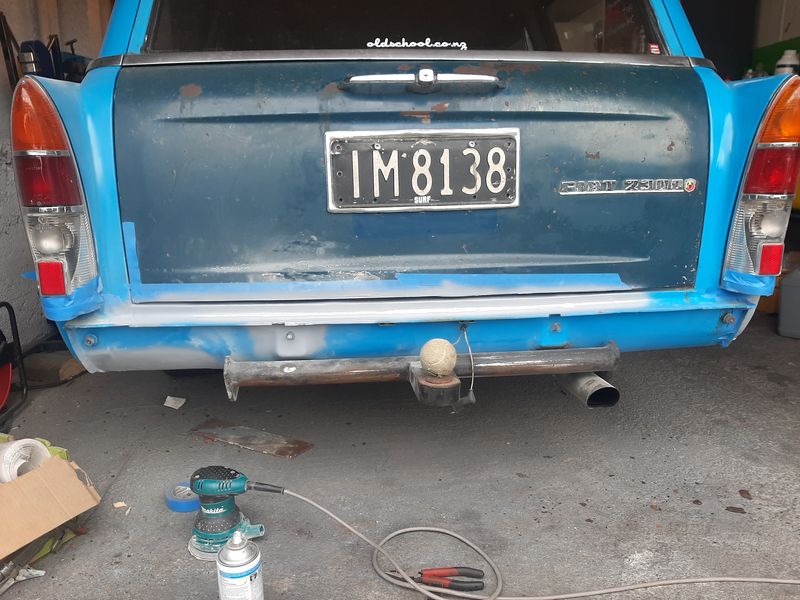
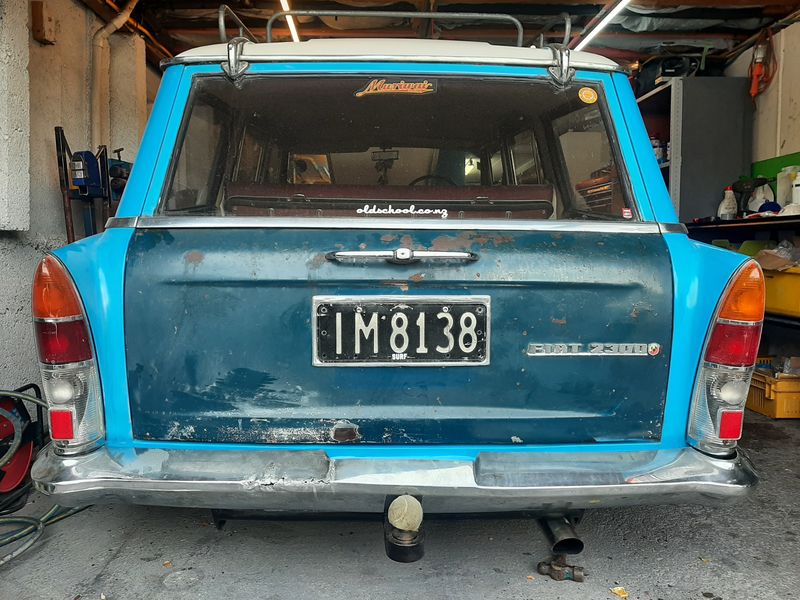
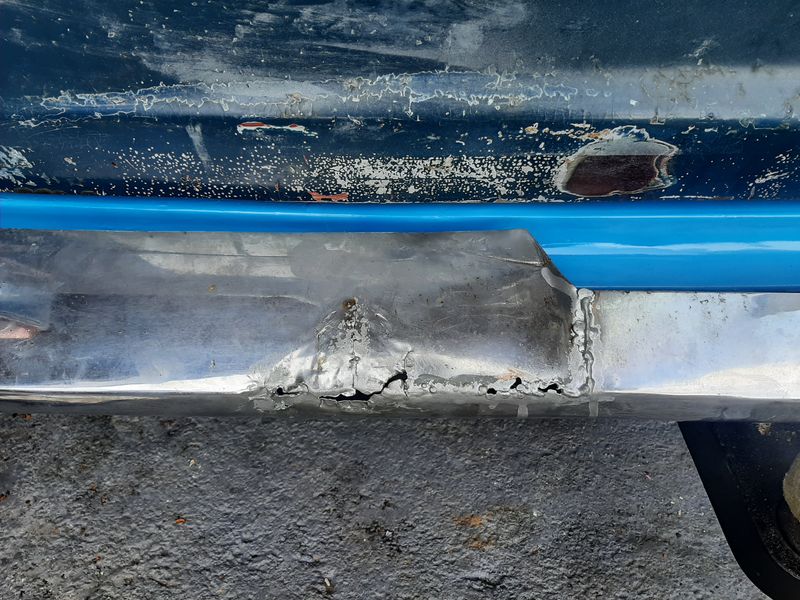
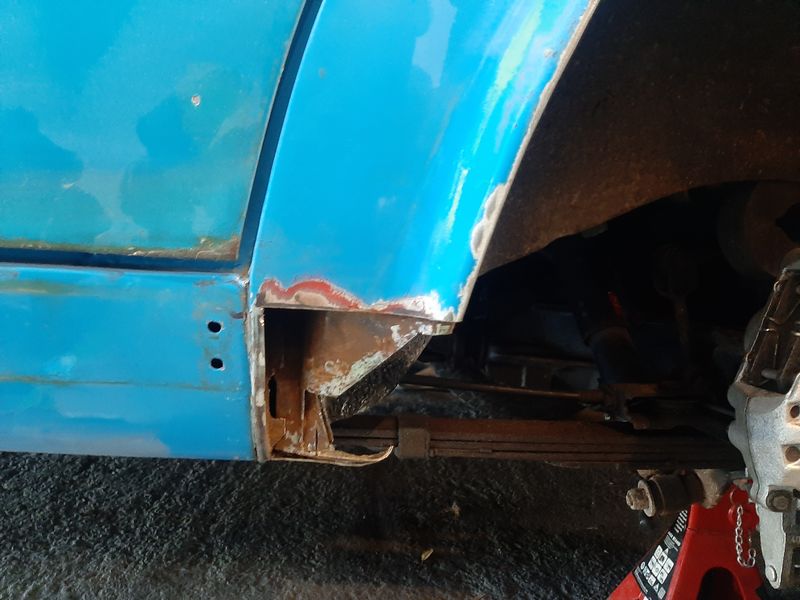
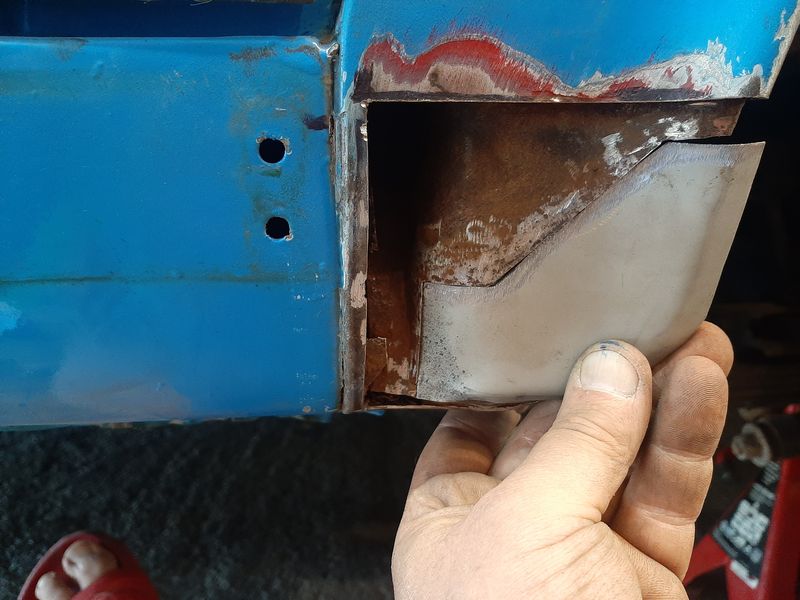
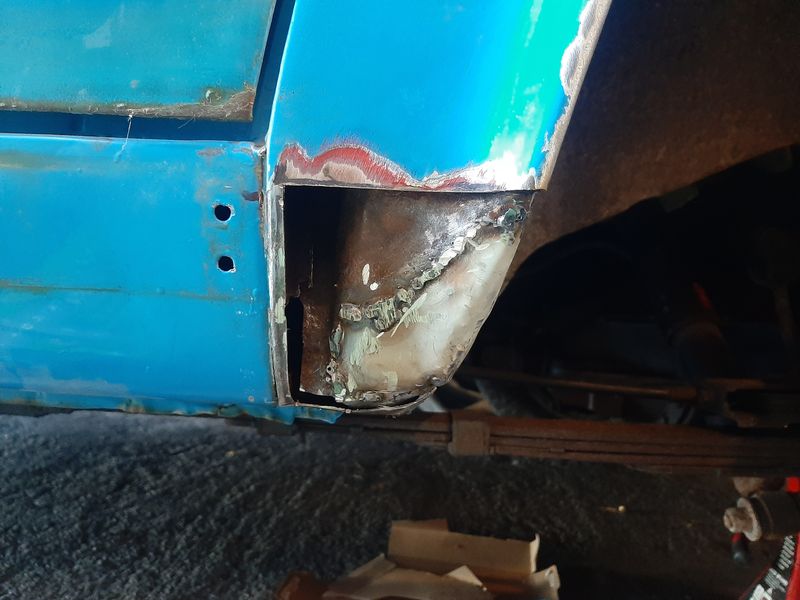
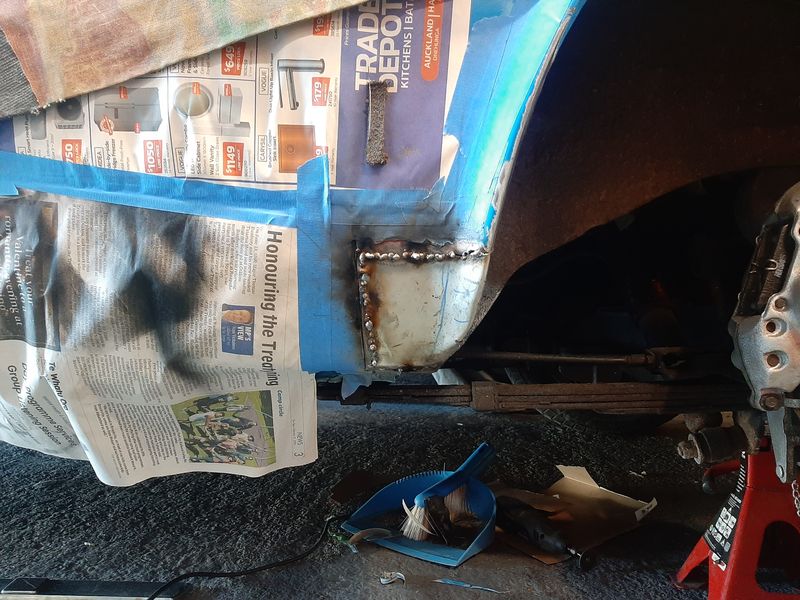
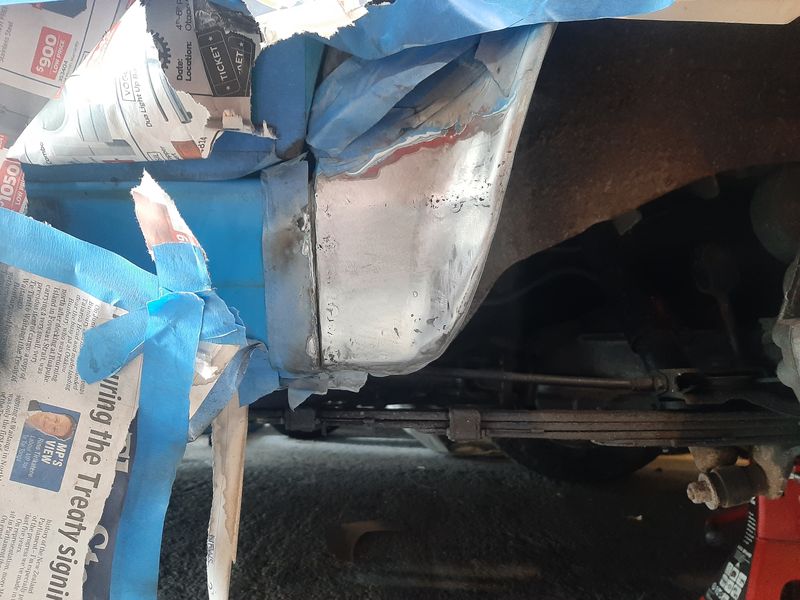
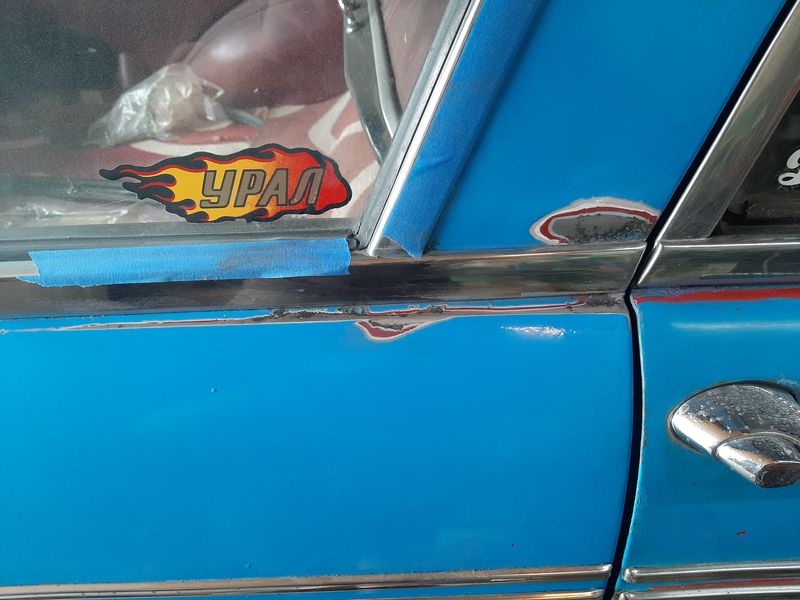
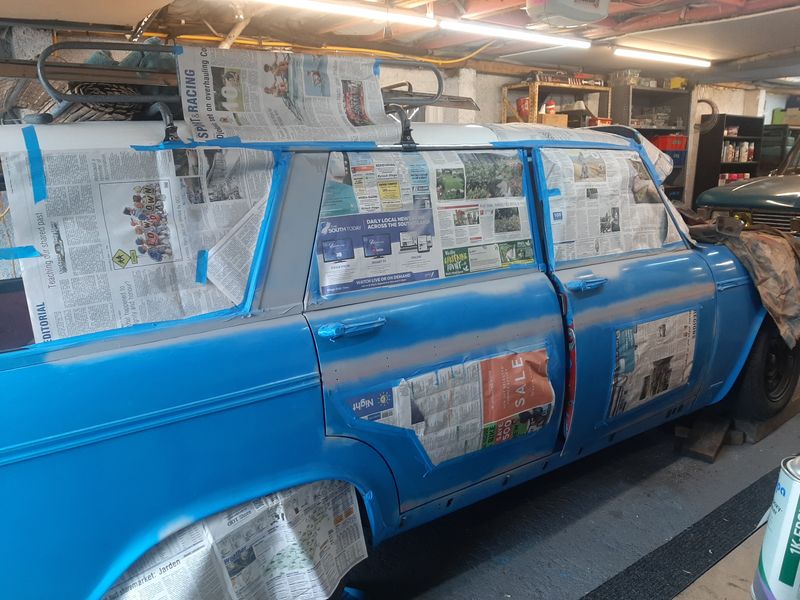
Of course wouldnt be a FIAT refresh without a wee bit of body work. This all kicked off with my pre WoF check noting only one licence plate light working, and no amount of tappy or wiggly would get it going again. Problem is, Id dented the rear bumper (backed the towbar of my old van though it DOH!) and tore it years go, and removing the licence plate lights is now a bumper off job. Bumper off means i could knock out the dent and weld the tears, fix the rust where it had dented the body, and also, remove and fix the overly complicated bulb holders. No before pics, but this is after knocking out the dent in the body line/seam that usually hides under the bumper, couple other boo boos there as well. Crazy light set up, glass semi circles under slit metal domes and M3 (!!!) screws holding this all down with a rubber gasket on a metal plate, that has pressed in bulb holders, with no drainage, facing up. Bonkers Anyway, old bulbs were rusted in, and the base was full of crap, so a soak in teh evaporust and new bulbs and we have working lights. Fixerating - hard to stop picking scabs! And newly bashed and 'welded' bumper back on. Better than a torn hole but not exactly good. Unfortunately the metal is very thin and weak and covered in chrome, so i didnt want to spend too much time breathing it in chasing holes, so it got some drift stitches. May put a sticker on it. And an actual rusty hole, passenger side rear dogleg. Chop back to clean metal Inner patch shaped up Burned in Outer bent up and in Few more pinholes to go but we are basically done here. And then, becasue i was going to have the paint out, why not pick a few scabs before the WoF man sees them? Pretty much did the same on both sides. And then time for a test run to blow the dust off APPROVED Did a GPS check on the way there, 3500 rpm is about 88kph, so its gonna be wagon time! With 4.4 gears at 1:1 in 4th with 195/60R14s, vs the equivalent of 165/92R14s as originally specced, i loose about 11% to the tyres (3500 rpm with the original tyres is 58mph), but shes for stylishly hauling all of the brats up the mountain, or parking on the beach, or just sharing a joke with on the patio, not for vmax runs on the autostrada* *the book says "maximum speed under full load on level pavement and with run in engine" is 100mph, or 160kph, which would be pulling ~5800rpm, max power is at 5400, with 98hp. At 3500rpm the book suggests 75hp, and fuel consumption of 220g/hp/h, which calculates out to ~22l of 98 per 85km, or ~25l per 100km. Will report based on actual use in due course.
- 108 replies
-
- 36
-
-
-
- unicorn poop
- rust
- (and 8 more)
-
azzurro's 1966 FIAT Duamilatrecento Familiare (2300 Wagon)
azzurro replied to azzurro's topic in Projects and Build Ups
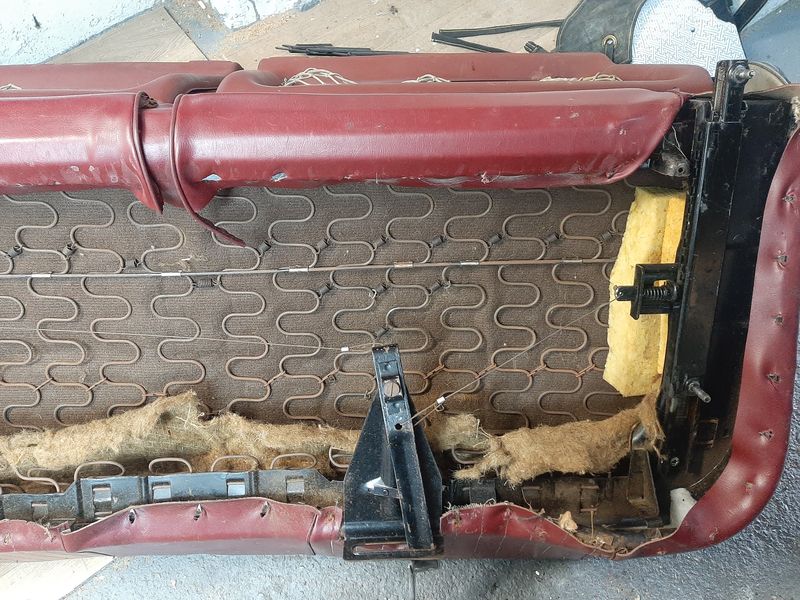
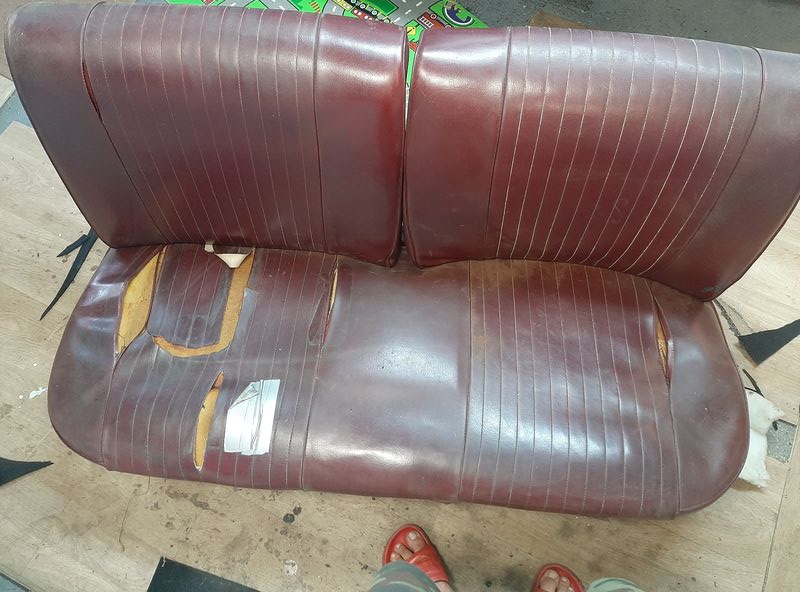
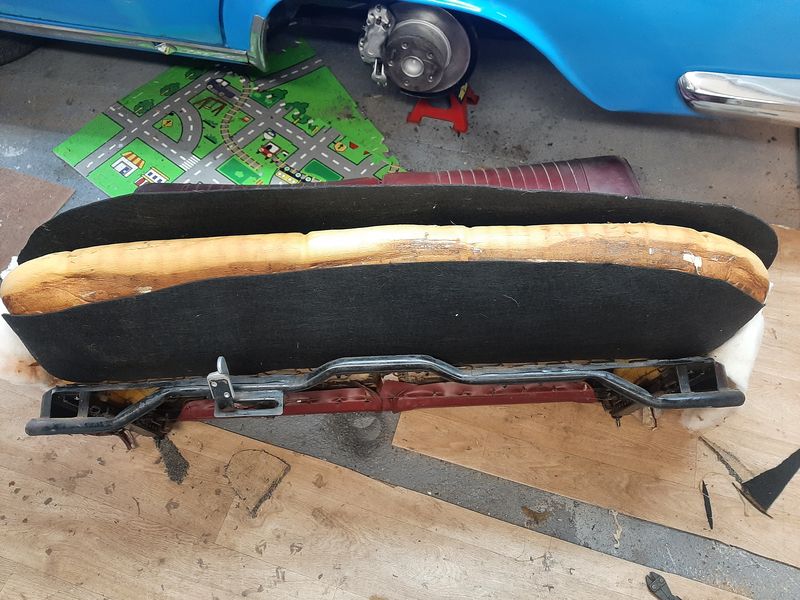
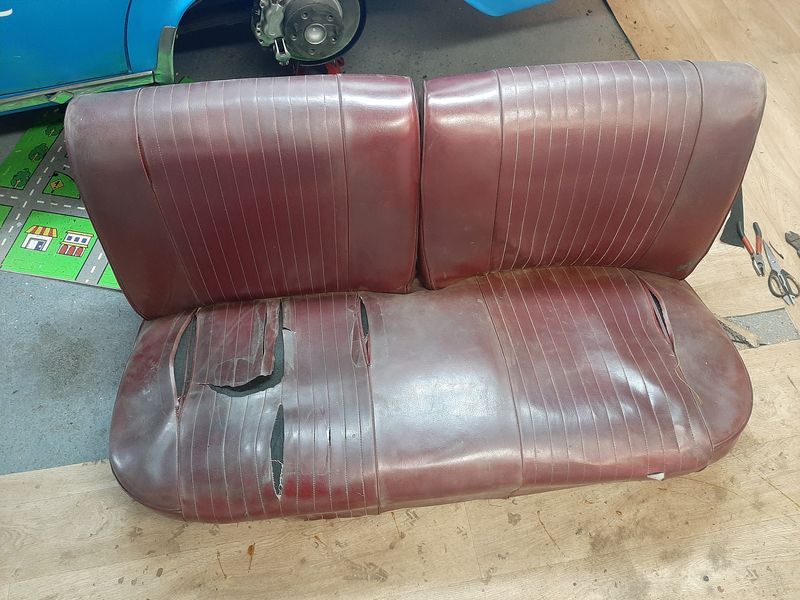
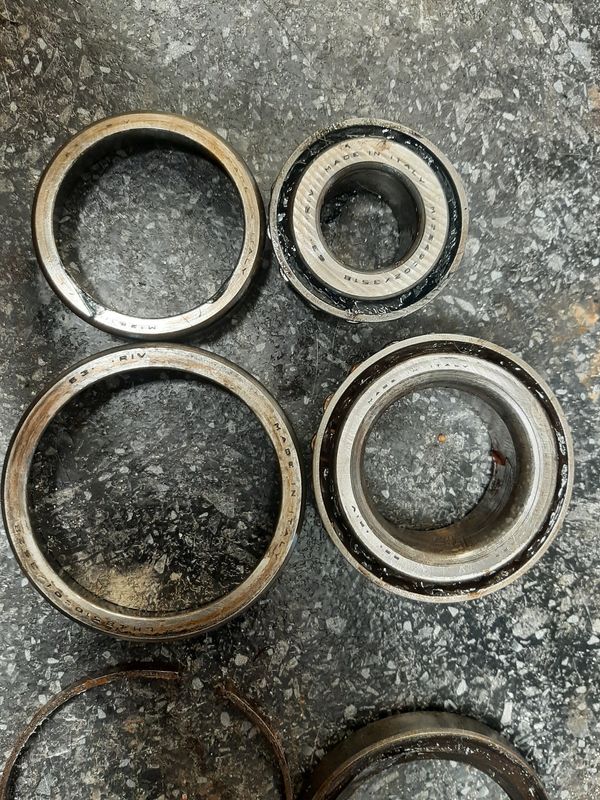
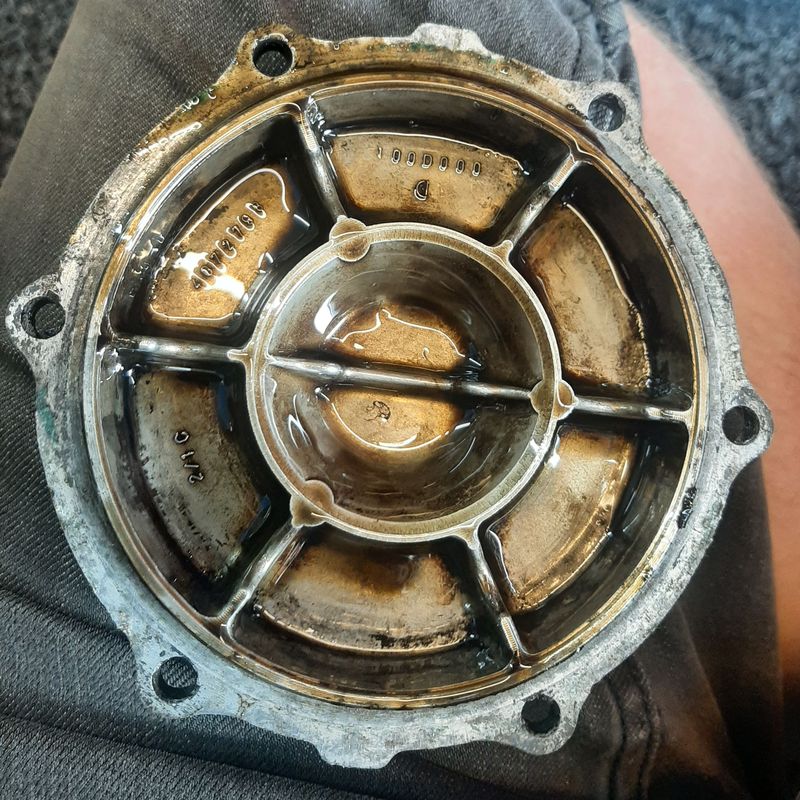
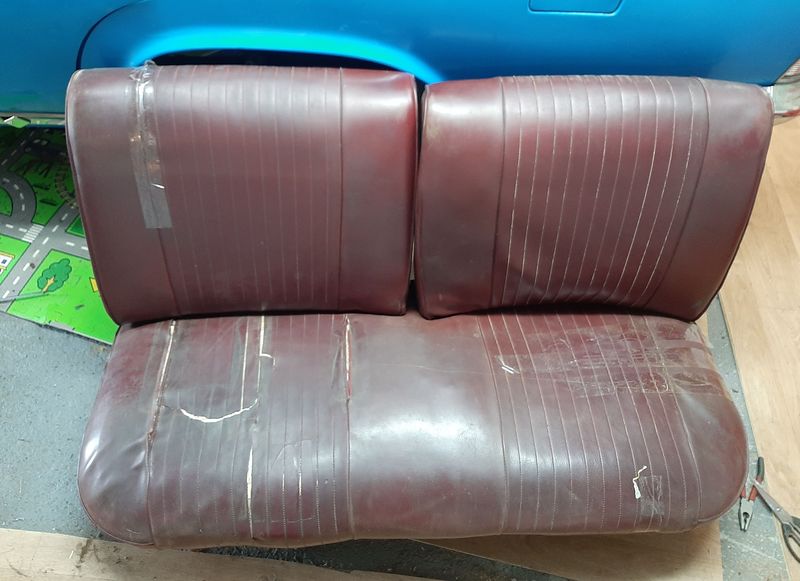
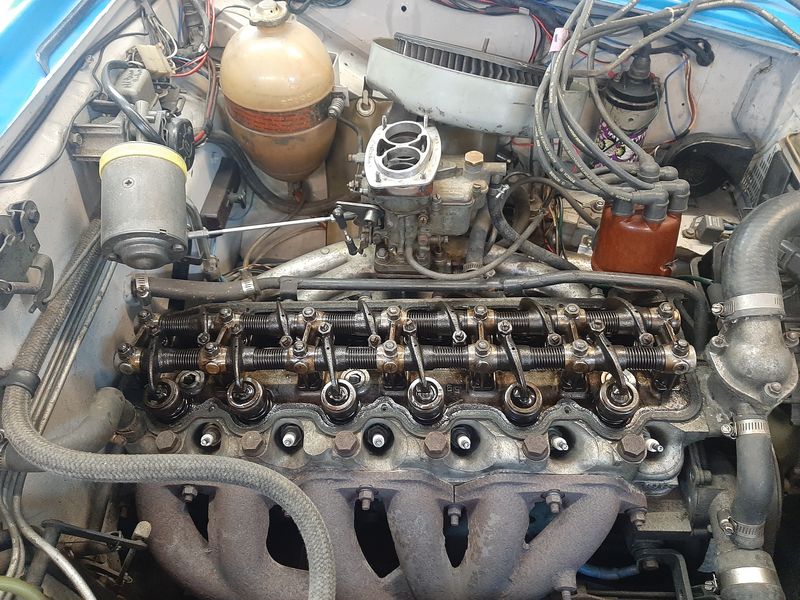
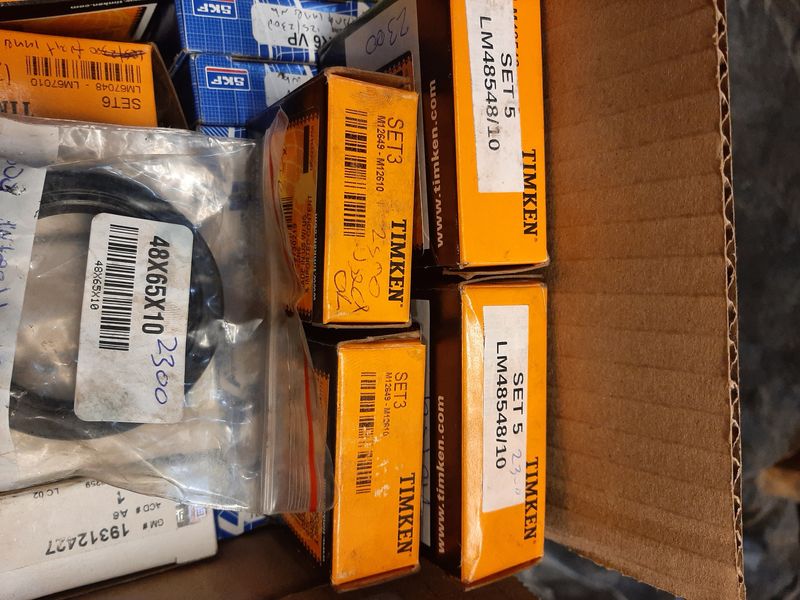
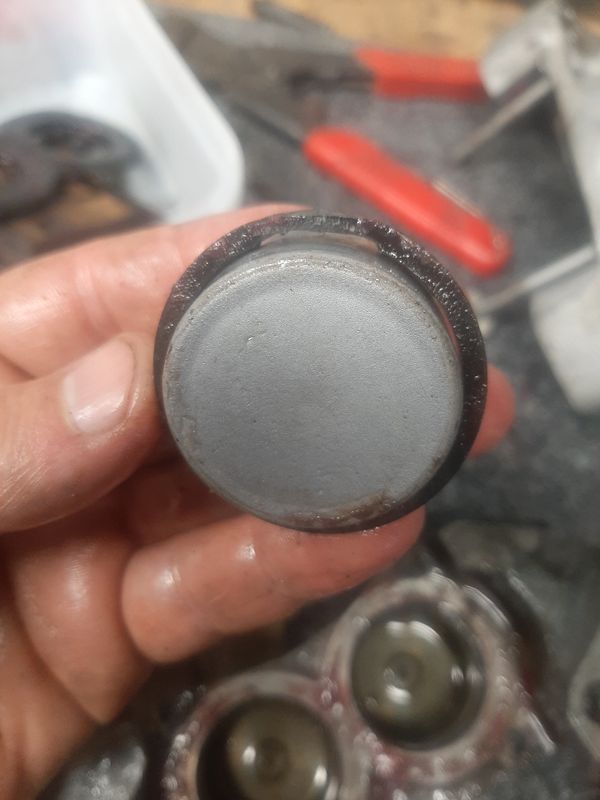
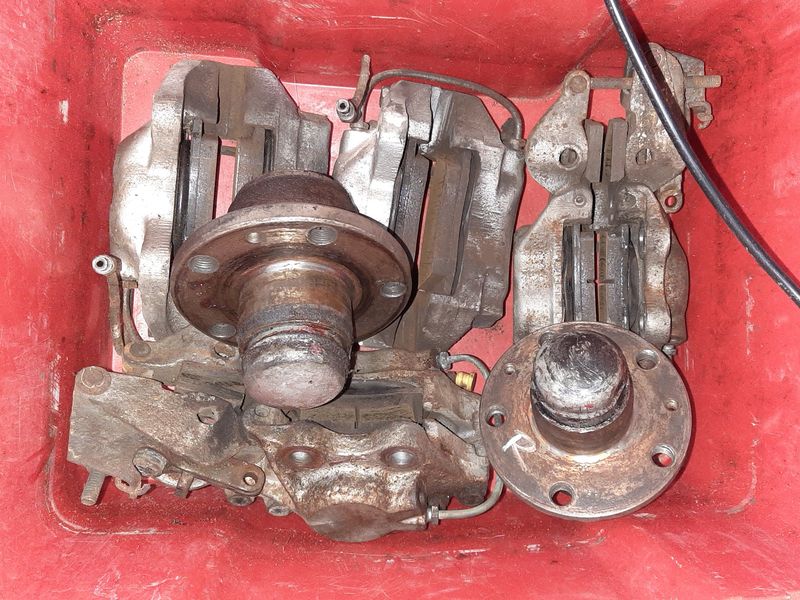
Brakes sorted, time for WHEEL BEARINGS. I ordered some stuff from Rockauto a while back based on the part numbers in my 125 and 132 parts manuals, assuming they would be the same (some places list them for the 2300 as well), also because the last set i had bought for this,way back when i first got it, i actually used in the Ute becasue the ute were fucked and this was fine... once i had them in stock, Ugh nope too small, fuckety fuck where am i gonna get some of these on short notice? but for under $100 i have a lifetimes supply for my 125/125p... now with the brakes off i could knock out the seal and the races and find the part numbers. When i rebuilt this originally i reused the original bearings and seals, just cleaned and regreased so theyve never been fully out before Started on the drivers side as this was where the noise seemed to be coming from, the outer was fine as i already knew, but the inner race had a wee bit of pitting probably from when it sat and was starting to get some waviness. Now i could get a look at the numbers on these original Made in italy RIV bearings, lead me to find they are common as muck! Set 5 for the inner bearing and Set 3 for the outers! The grease seal on the inside i measured up and it was also a reasonably easy to find 48x65x10 seal not the 48x66x10 listed on some parts sites. So yay. Now i have more bearings in my box of wheel bearings, including for the pass side if needed. I could have probably just replaced the inner bearing race tbh, and i felt bad about not reusing the original 65 yo bearings but i was in there so.... INTERIOR This has a front split bench and the drivers butt had blown out and was going saggy. I mean the seat, gosh. Couldnt see anything wrong on the underside like a broken ring or anything, so must just be the splits in teh cover letting everything sag a bit more than it was Went to spotlight and got some cheap felty stuff Cover back on Carpet seaming tape on the underneath as a hail mary APPROVED! ENGINE Yep still there. Swapped out the glass 'firestarter' filter for a metal one with a 90deg outlet that fits much better, cleaned the carb bowls (quite a lot of sediment), wired the electric fuel pump to a switch in the cab (just need it to prime the lines if its been sitting for a few days), charged the battery, checked the stereo and cigarette lighter works, reglued the phone holder. After a few long idles test runs dropped the oil - this is the centrifugal filter on the crank nose - works very well at collecting (concentrating?) impurities but nothing much to see there. Nice Dropped the gearbox oil (wanted to eliminate the box as a source of the noise) and that was pretty clean too. Adjusted the tappets, couple were a little loose, checked the timing, andjusted the spark plug gaps (way too big!) and it now runs like a sewing machine and starts first crank I did notice this when checking the ignition timing - - seems like its been like that for a long time so im gonna pretend i didnt see it
- 108 replies
-
- 18
-
-
-
- unicorn poop
- rust
- (and 8 more)
-
azzurro's 1966 FIAT Duamilatrecento Familiare (2300 Wagon)
azzurro replied to azzurro's topic in Projects and Build Ups
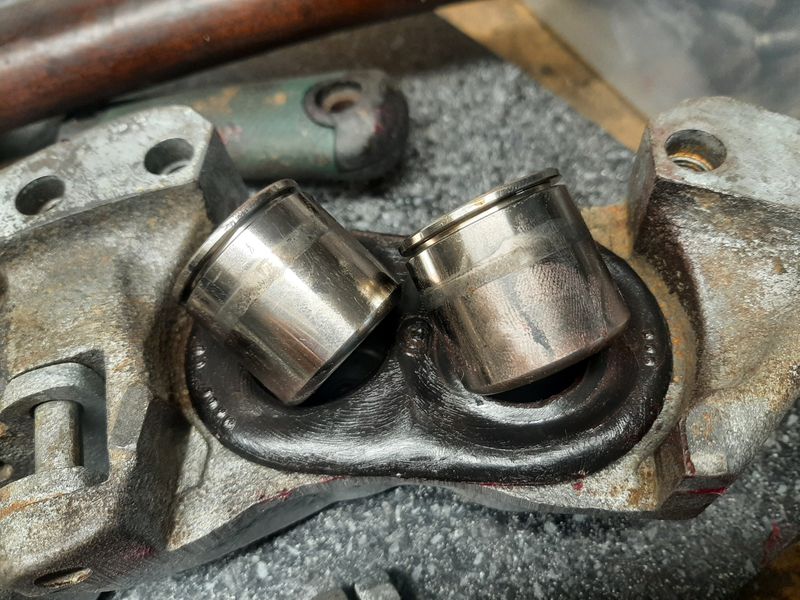
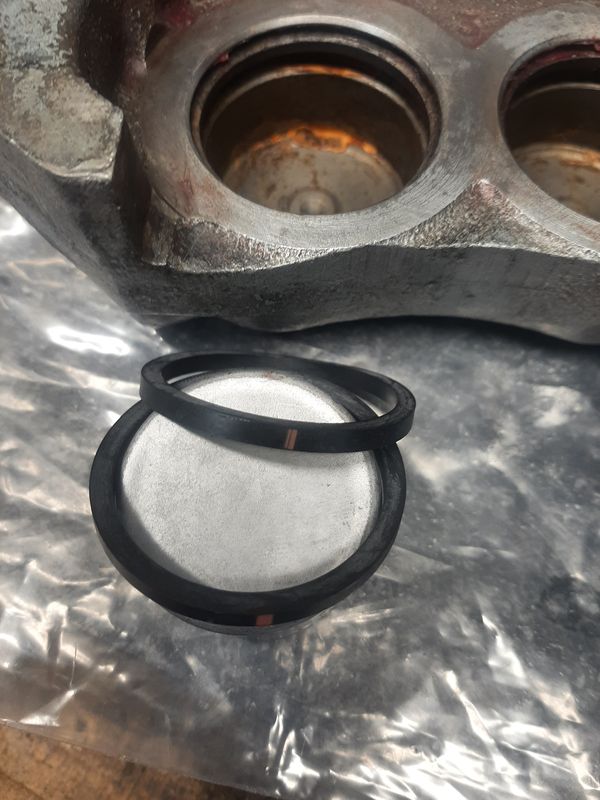
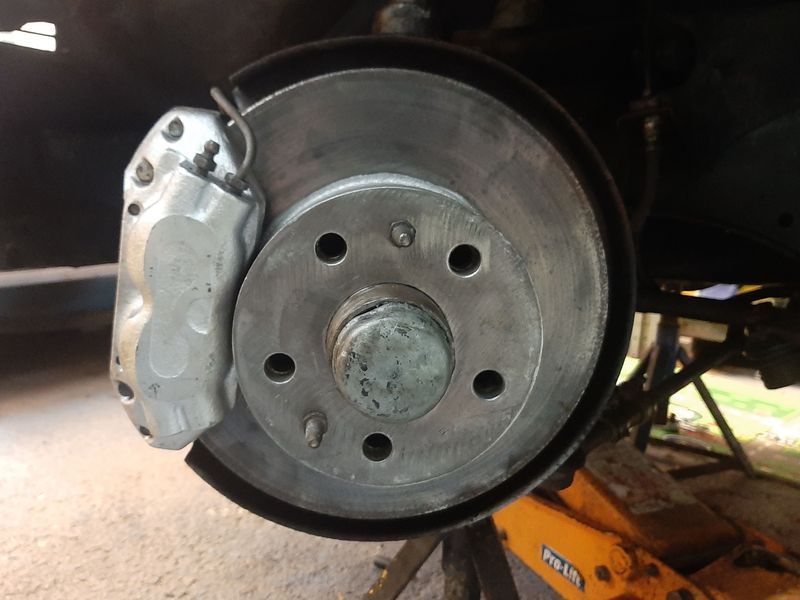
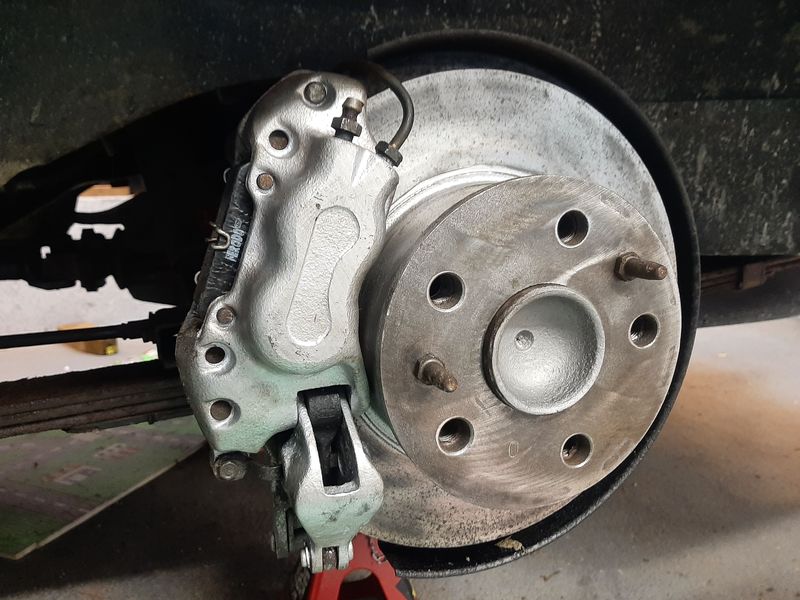
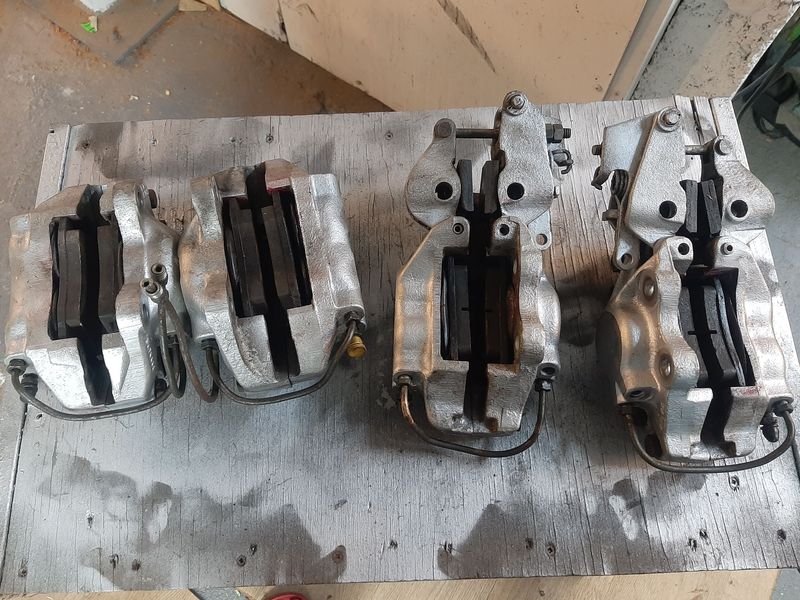
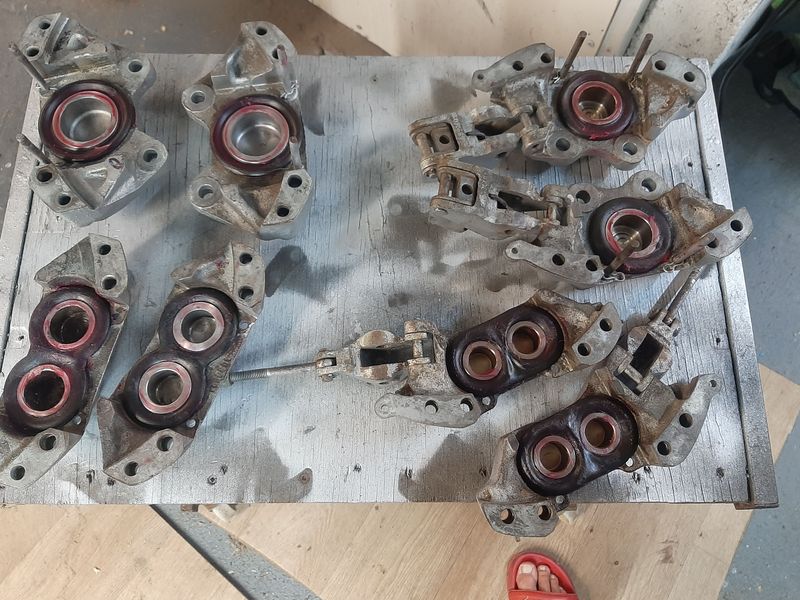
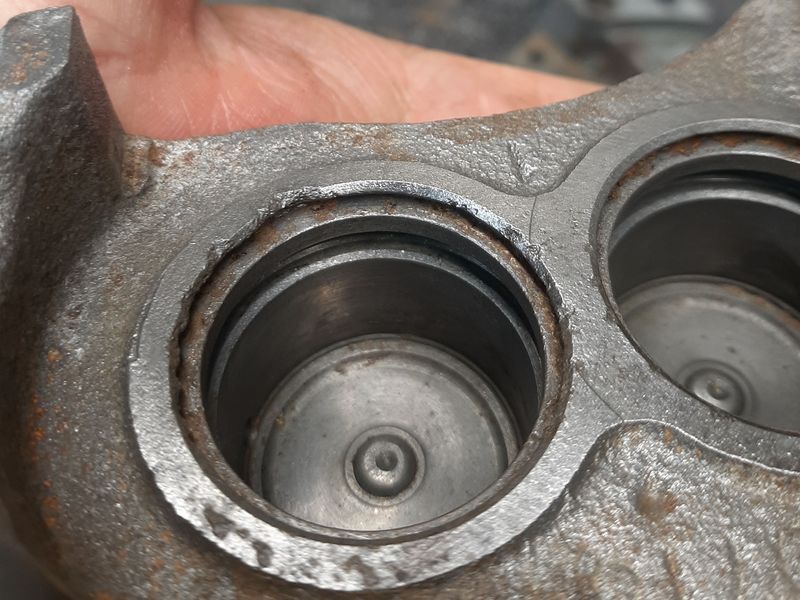
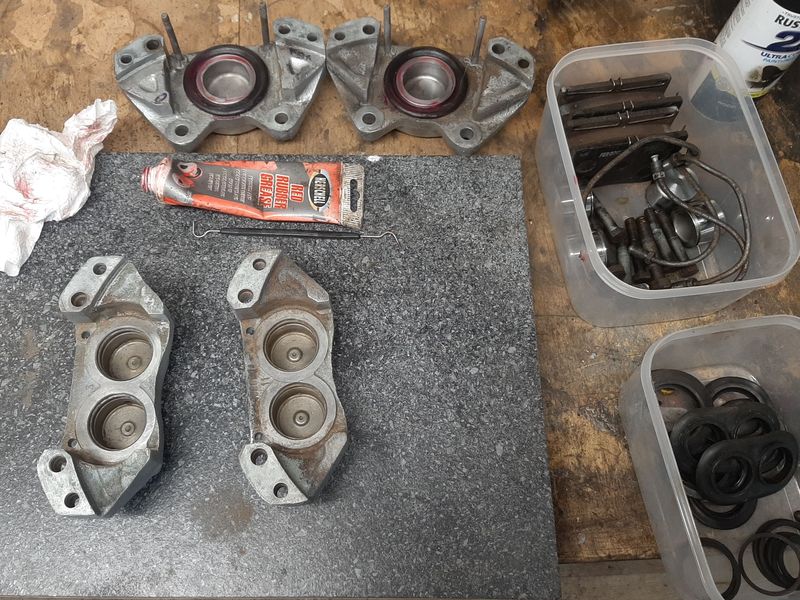
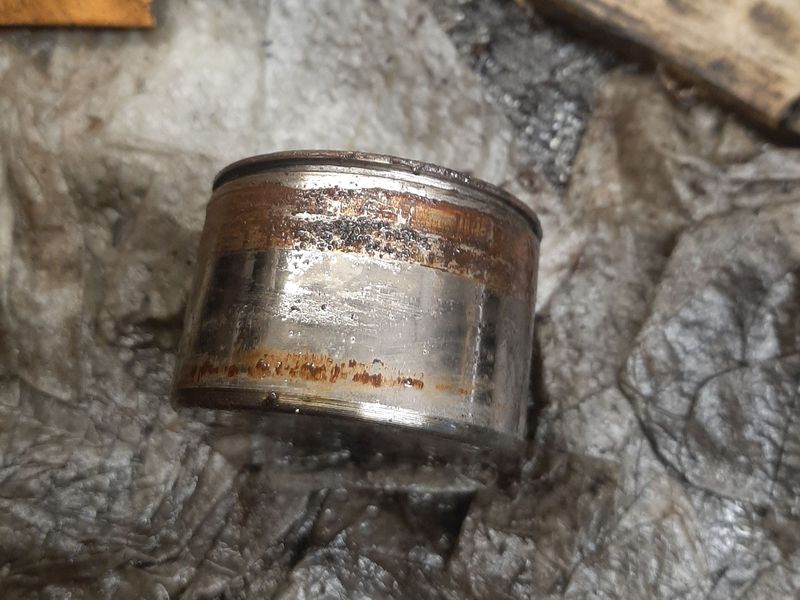
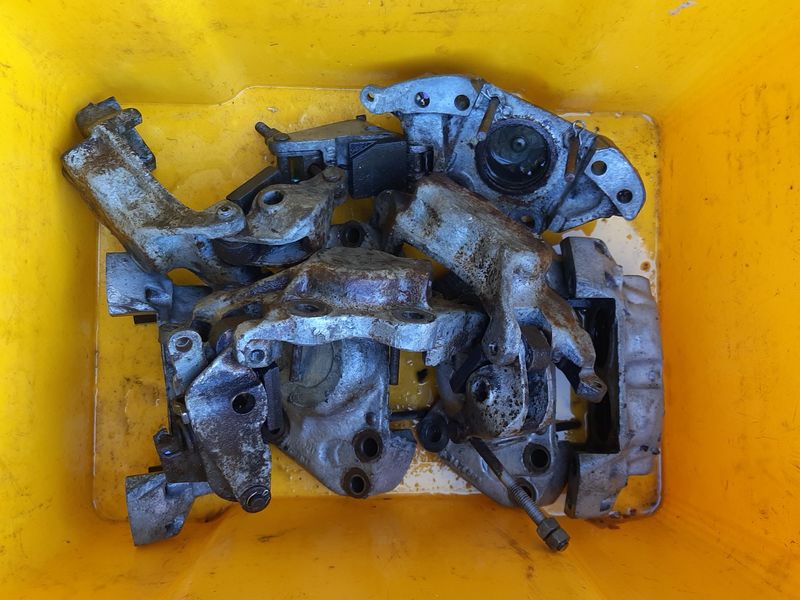
Been pulling finger to get this piece sufficiently ready to drive 800km/10 hours one way to nats. Last time i drove it any distance (from the transporters yard to home back in 2021?) the brakes were a bit sticky.and there was a grumbling noise from somewhere in the front end that was speed dependant. First job on the list, sticky brakes. A combo of being parked on the lawn at Muriwai a lot before we moved down here, and sitting a lot since. These have 4 wheel disc brakes with Girling 3 piston calipers front and rear (12 cylinders!) so plenty of scope for shenanigans assumed the position Pulled the calipers and the front wheel bearings Disassembled the caliper halves ready for cleaning- at least one piston per caliper was stuck but they all came out eventually. The design of the external dust seal on the calipers creates a water trap. This was the state of a typical piston when they popped out - they are stainless steel, but the rust off the cast caliper bodies. They all cleaned up with a soak in exoff to clean them, then the bodies into evaporust. This is the worst caliper after coming out of the evaporust after a day or so, the lip that holds the external dust seal (and any moisture) is a bit chewy but the cylinder seal part and rest of the body is fine Assembly Used lots of red rubber grease (compatible with brake fluid) as the assembly lube rather than brake fluid which cause its grease will help to keep moisture out, its not hydroscopic (so wont absorb and hold water in the external side of the cylinder walls) , and its less fresh paint destroying than brake fluid on my nice new caliper paint. Cylinders x Twelve! 12! Flippin count them! Reassembled - all the pads, seals and etc were fine from last time i refreshed them, and got reused Rears back on Had a look at the wheel bearings, the inners are not removable without removing a seal but seemed ok, outers looked good, and the grease was still red from when i first restored and repacked them Bleeding didnt go so well one piston was leaking past the seal. Thought i had maybe rolled the seal, but I must have had a bit too much rubber grease stuck behind the seal and inserting the cylinder took a bite out of it. Honestly thought that that was a fatal blow for the wagon coming to nats, getting seals from Europe off ebay or whatever would never arrive in time. Went with my tale of woe down to Sims Brake Services (who have been helpful and friendly before, they did a good job resleeving my 1100T master, and supplying bits to rebuild its hard lines) hoping they could order a cylinder kit from some car with Girling brakes with similar diameter piston, that might come in in a few days, but turn out they had a big box of baggies with seals of many diameters, and handed me a couple right then and there for a total of $7, so crisis averted!
- 108 replies
-
- 30
-
-
- unicorn poop
- rust
- (and 8 more)
-
azzurro's 1966 FIAT Duamilatrecento Familiare (2300 Wagon)
azzurro replied to azzurro's topic in Projects and Build Ups
Spare post for 2022 -
azzurro's 1966 FIAT Duamilatrecento Familiare (2300 Wagon)
azzurro replied to azzurro's topic in Projects and Build Ups
Spare post for 2021 -
azzurro's 1966 FIAT Duamilatrecento Familiare (2300 Wagon)
azzurro replied to azzurro's topic in Projects and Build Ups
Spare Post for rest of 2020 -
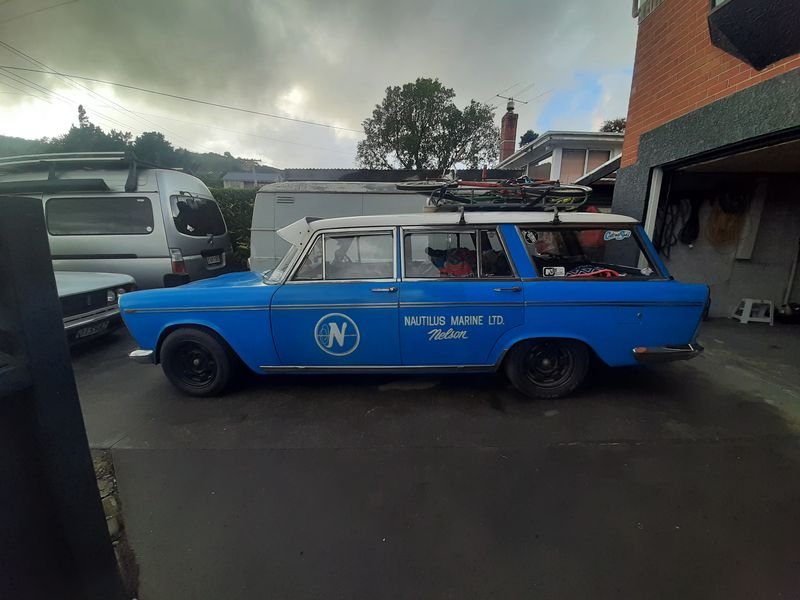
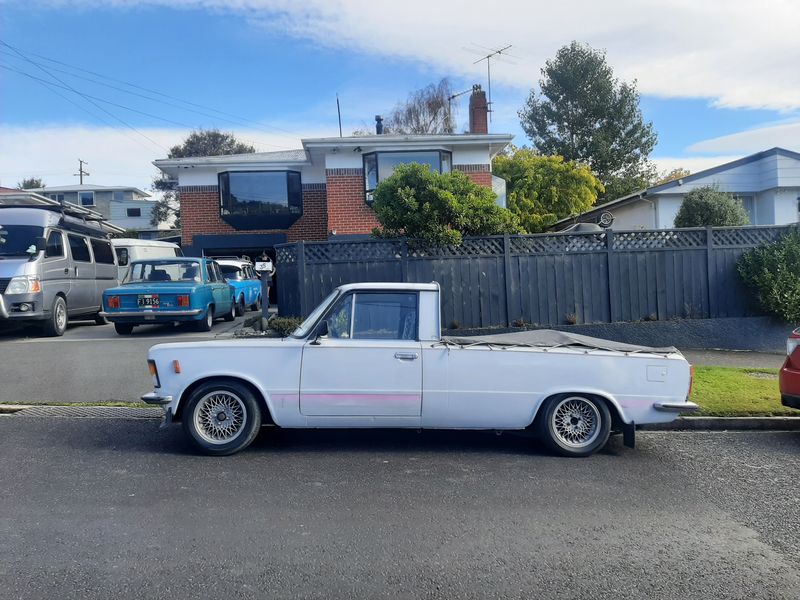
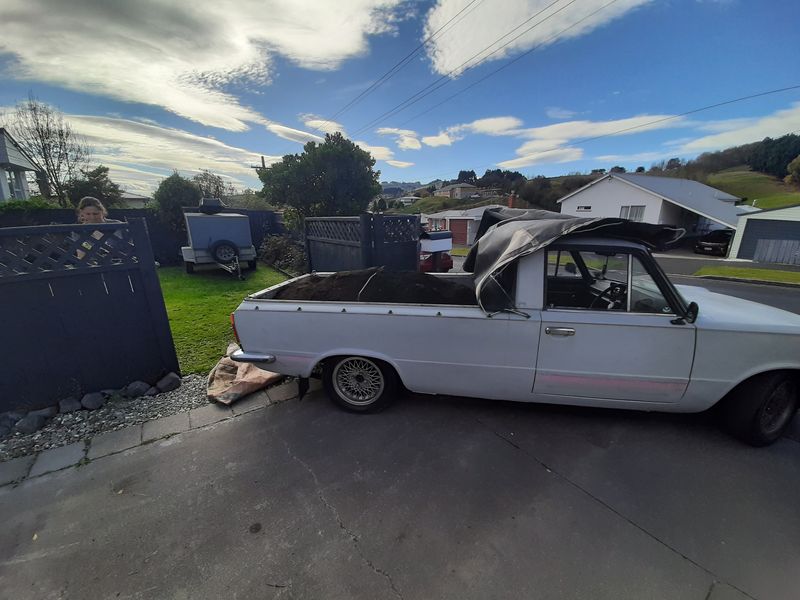
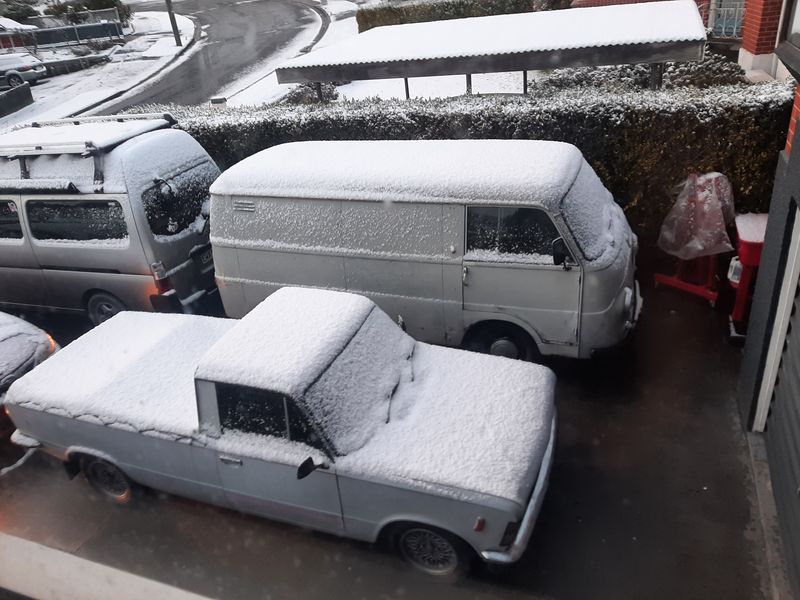
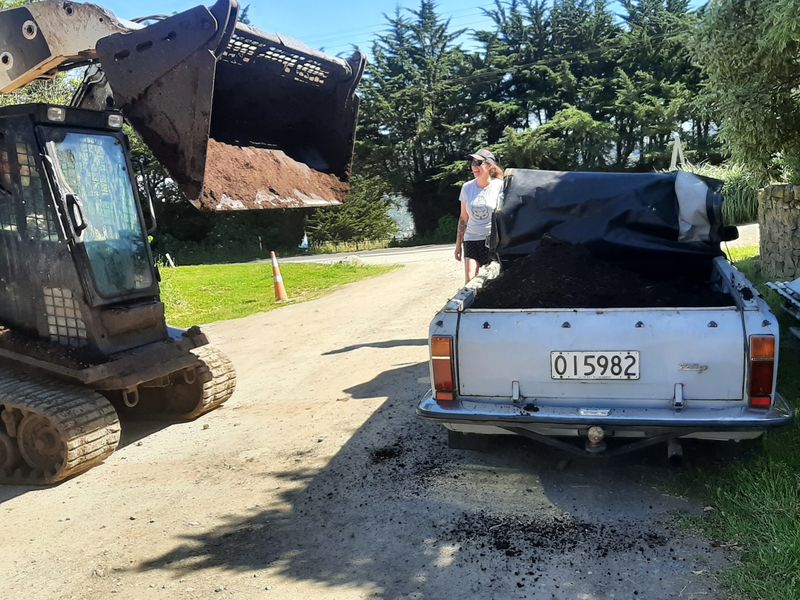
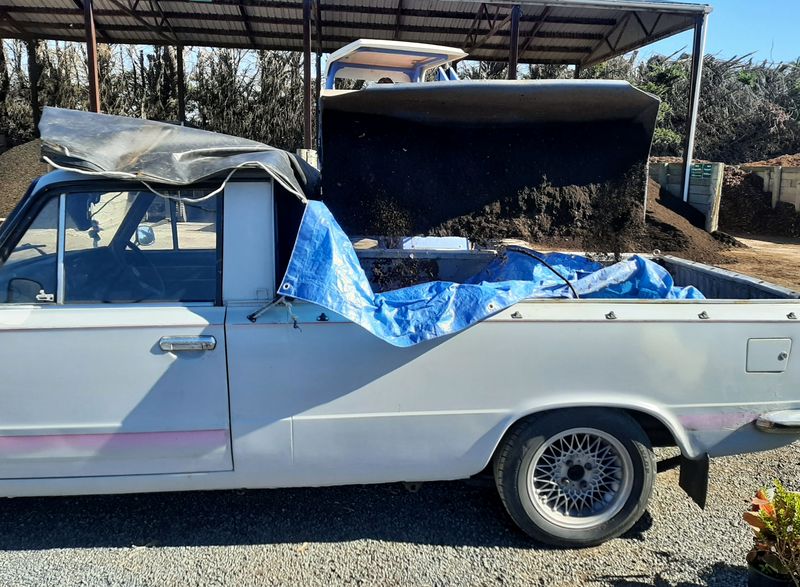
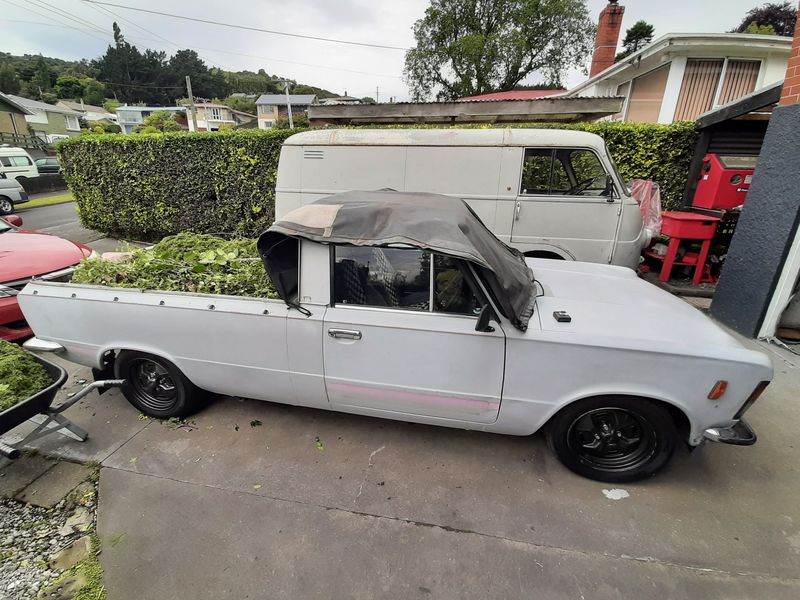
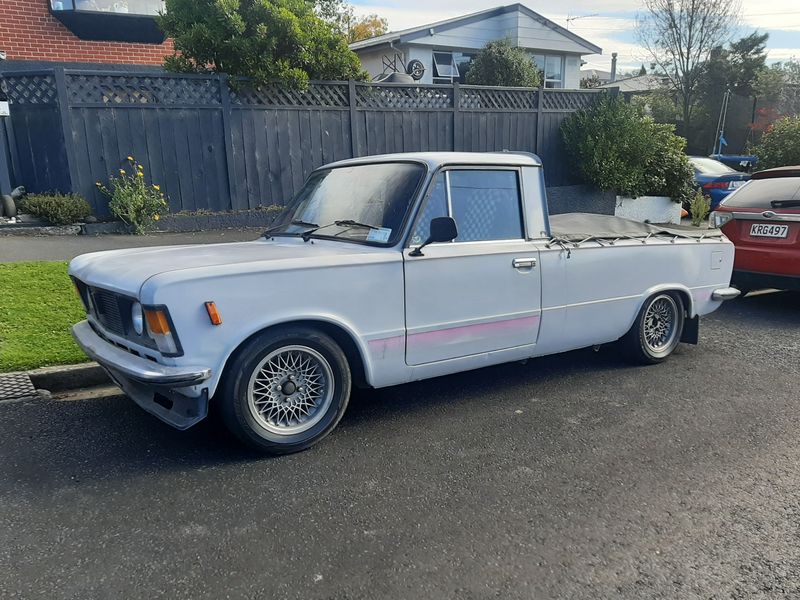
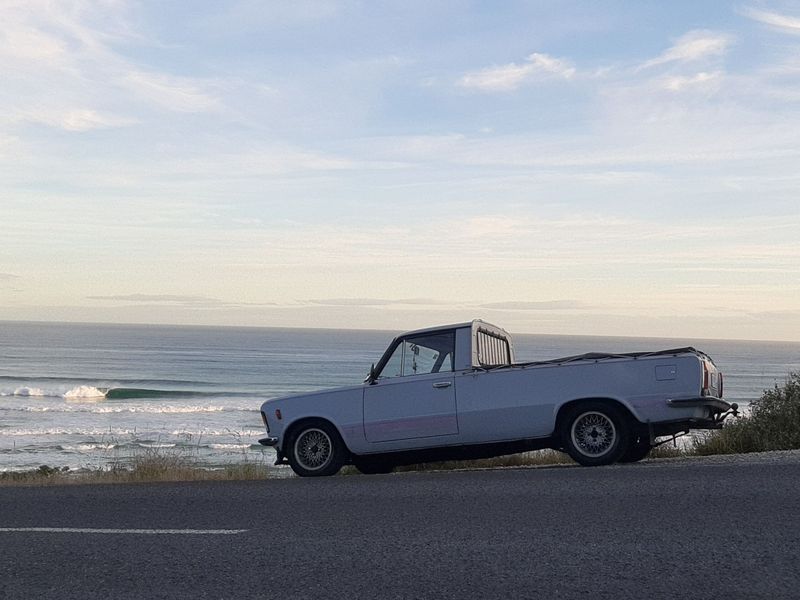
18 months since last update, Not too much has happened. Its pretty reliable, sits outside on the driveway and starts first pop. it goes to the dump every couple of months, and we use it to get compost and dirt for the garden. Gets used harder than your average Ranger The Direzzas on the meshies have gone hard and started sidewall cracking, so I repainted these 14" 131 steelies and fitted some spacers on the rear. I like the colour. Moar Dirt Another load of Green waste Next job is probably redoing the pinstripe (ive had the stuff for over a year) and maybe looking into getting some pink stripe sticker/kicking rad graphix made up to fill the gaps either side of the doors. The brakes could probably do with a going over too (i think a caliper or two is sticky).
- 81 replies
-
- 31
-
-
- gottacatchemall
- fiat 125
- (and 4 more)
-
The dowels are just for alighnment of the head so you could get away without them and rely on the head bolts, but not having them would make my teeth itch too. But, fo what its worth, the 1500/2300 engines dont have them from factory (tho i did drill my 2300 head and block for a couple because why not). The water pump thing is wierd! Id look at smooth off a casting dag in the block, or hook a drill on the pulley end and 'lathe' it with a grinder a bit, or is the impeller just way too big?
-
Ill take D all day long, thanks xo
-
These are the coolest. That looks like a Big Job TM, but also looks like you know what your doing! Please keep posting
-
Sleeektoy's 1965 Daihatsu Compagno. Discussion
azzurro replied to sleeektoy's topic in Project Discussion
Maybe, the deTomaso relationship is related to the earlier Vignale conection?
-
Sleeektoy's 1965 Daihatsu Compagno. Discussion
azzurro replied to sleeektoy's topic in Project Discussion
https://en.m.wikipedia.org/wiki/Vignale According to wiki, Carrozzia Vignale was a coachbuilder in Turin (the T in FIAT) building several FIAT based specials (500 and 1100 models as suspected!) around that time before getting swept up by progressively bigger fish (de Tomaso) and ultimately Ford. Based on the practice at the time, suspect the engine and underparts would be in house Daihatsu, possibly from another model in production, but the body and or interior bits may be alternatively sourced, built or speccced by Vignale, so likely parts bin, maybe from Fiat (sure look like), or maybe a Daihatsu manufactured copy? -
Sleeektoy's 1965 Daihatsu Compagno. Discussion
azzurro replied to sleeektoy's topic in Project Discussion
Cool! The name and interior/exterior design is obviously very italian. If this is more than imitation as flattery, and there was a design house involved or manufacture partnership, finding bits could be much easier. Not nesessarily cheaper, but probably more plentiful. Dash Switches look like fiat to me (whole car looks like an 850 or 1100 or 1200 coach build!), but steering wheel is more alfa in style -
azzurros 1966 FIAT Duemilatrecento Familiare Discussione
azzurro replied to azzurro's topic in Project Discussion
Im a Bulls Rat, from 10-18ish, lots of good times. Razza looks like its taken over the block! -
Cool, im in for whatever
-
I have a cheap aliexpress gun style one. It shoots an optional red dot and has a colourful led screen that only funtion is to show the measured temp at approx where the dot is. Have used to tune sideys (exhaust runner temp) check radiadiators, wonder about double glazing, diagnose busted oven elements and similar. Reccomended tool, feels solid and seems surprisingly sensitive as you wave it around and gives a good sense of relative temps of things.
-
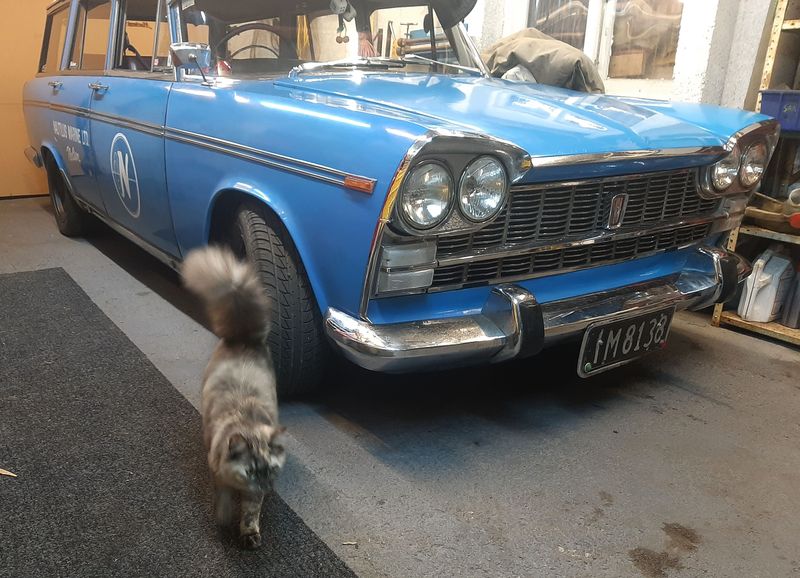
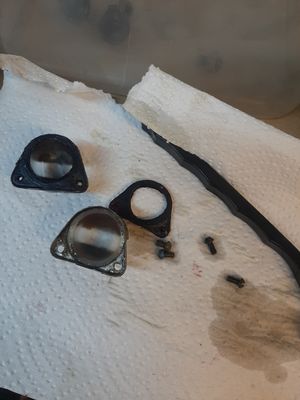
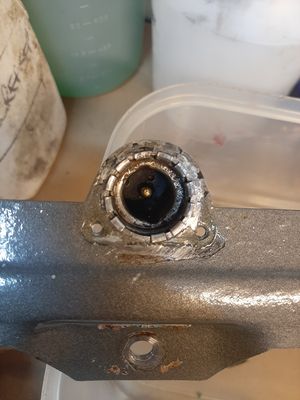
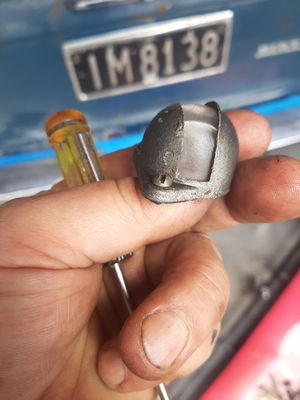
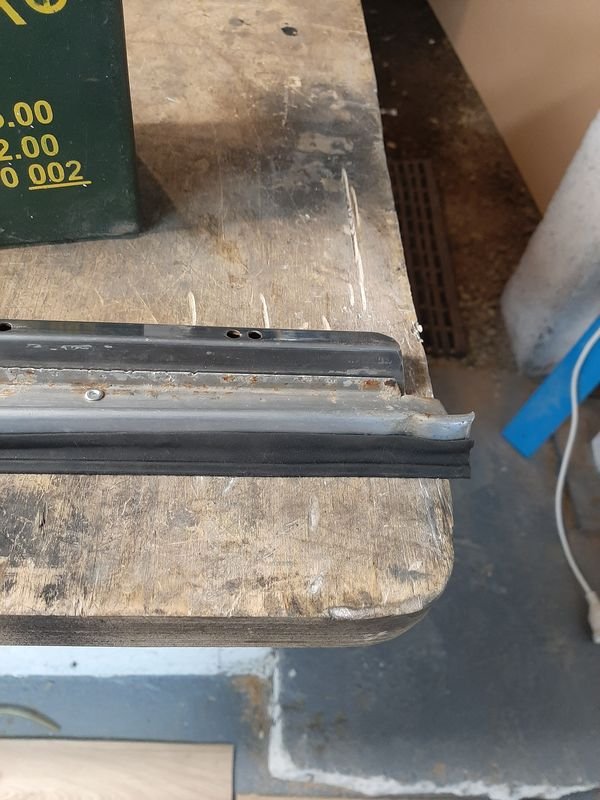
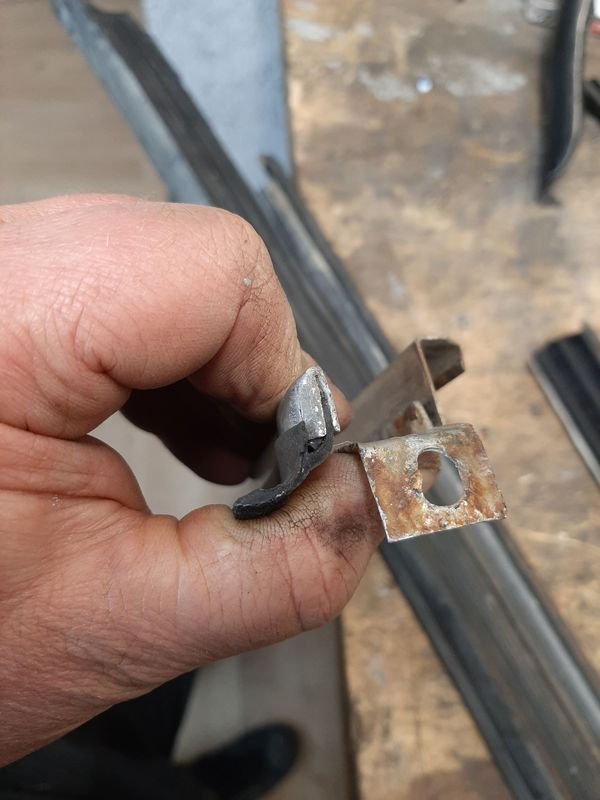
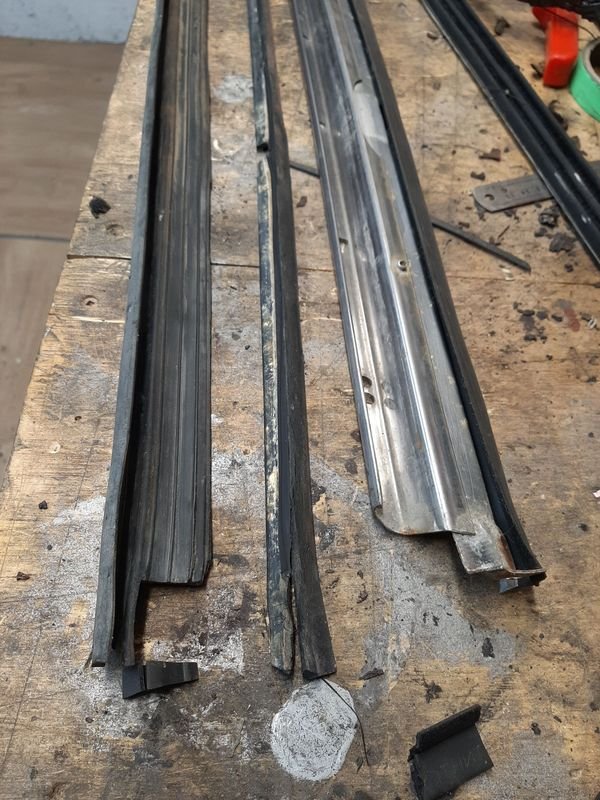
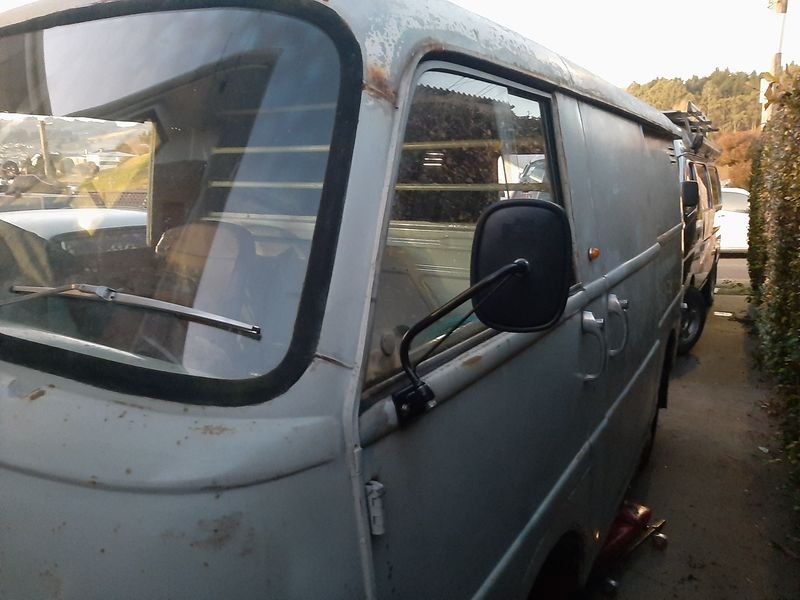
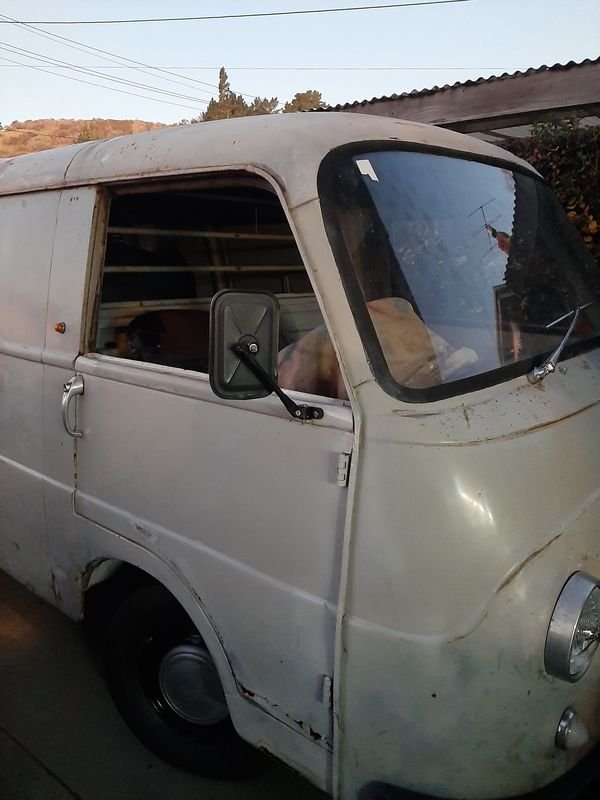
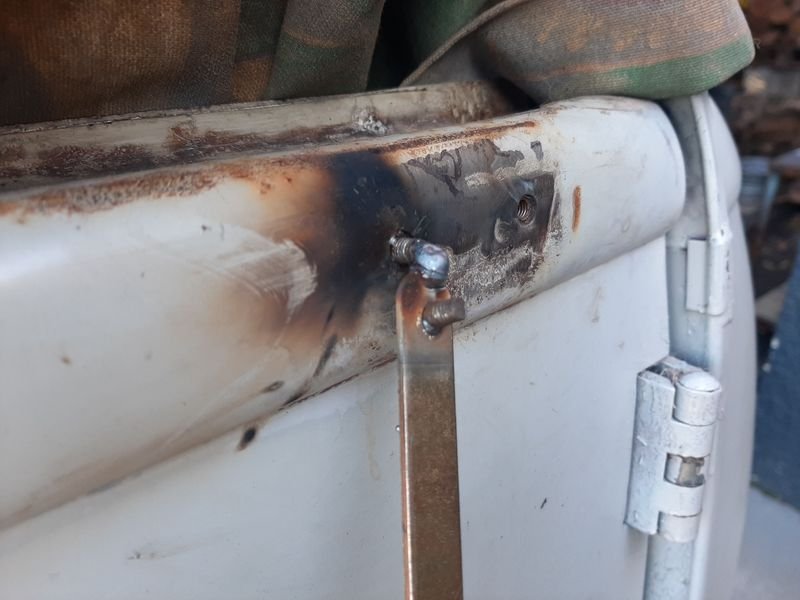
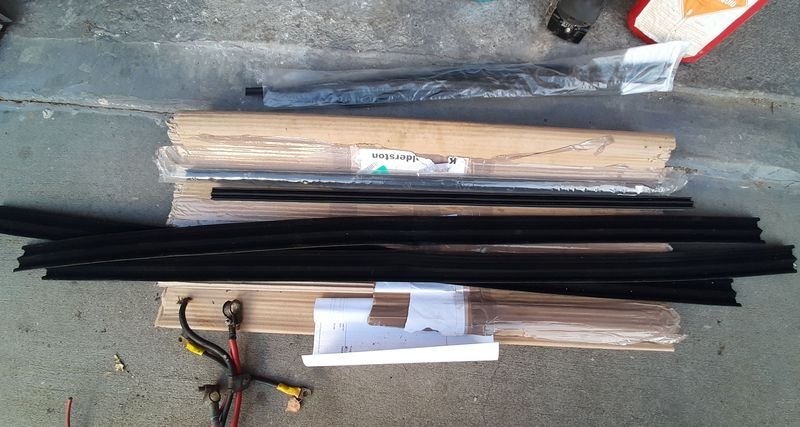
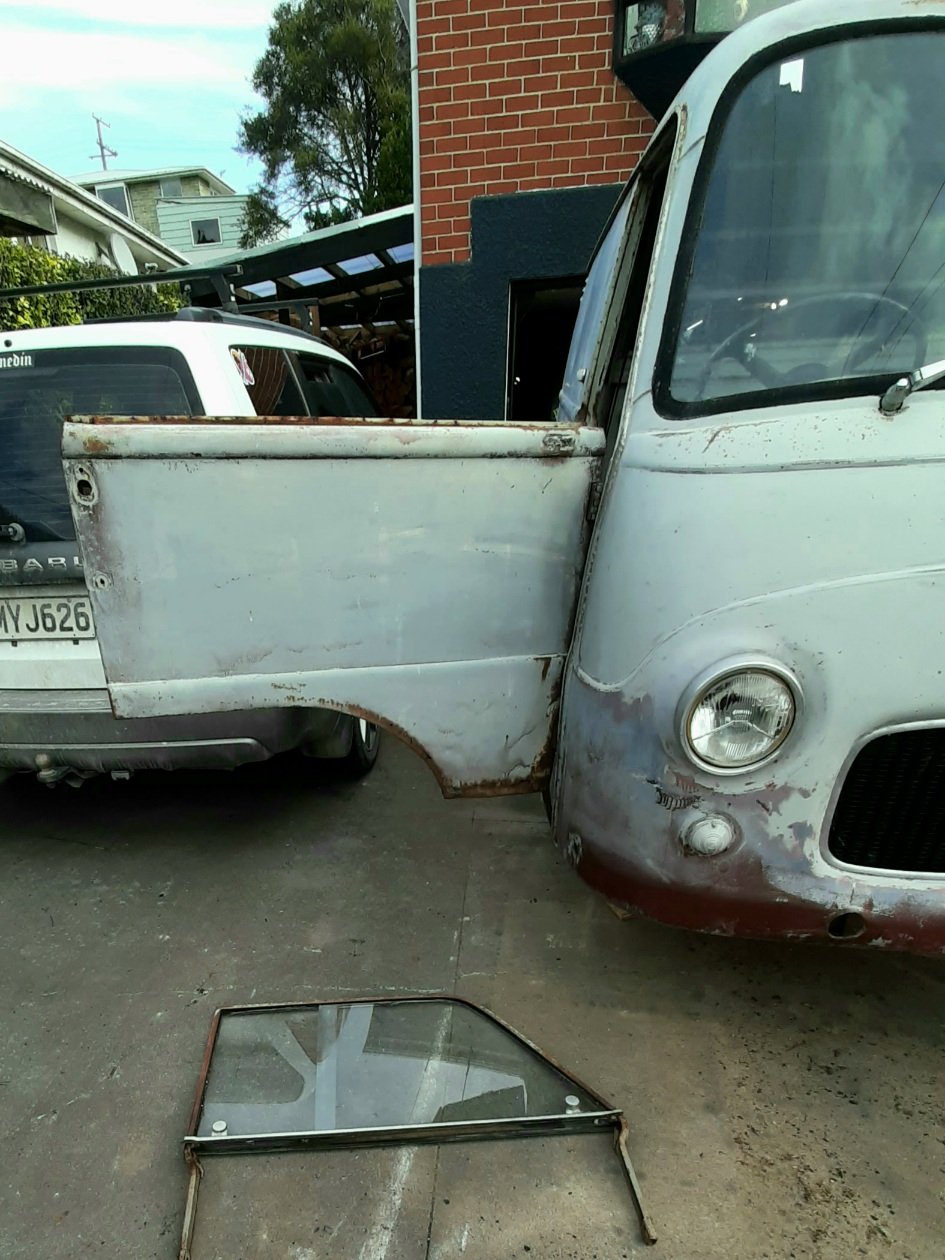
Before driving it, i needed to sort out the drivers windows - Id previously pulled the frame and scraped the rusty windlace out to measure up for new bits, and to close the window that was stuck open, but now the panes are basically just sitting in the channel and i dont like my chances of finding new ones. This pic from when i first got it shows how the glass just sits in a separate frame on top of the door, without it the door feels very light! These have two sliding panes like a Mk1 mini or LandRover, so thankfully was able to fairly easily enquire about sizes and order some from the very helpful chap at mini bitz, one metal backed strip for each base (not quite long enough - so ill have to use some old stuff or a bit of rubber stuff to fill the gap?) and then 1.5 mini sized lengths of the rubber stuff for each frame. I also got a bunch of 124/125/lada window scrapers to try and replace the outer seal of the lower frame trim where it sits on the top of the door Lower channel in bits with the outer side trim cut off the base rubber 124/125 window scrapers trimmed and jammed into place And reassembled showing how they will look sitting on the door - pretty happy with that, i think the scrapers were about $3US each Both doors mirror mounts had broken off screws stuck in there, and M5x1.0 are pretty small and easy to snap!. Managed to get them all out eventually. Found an Italian made but aftermarket replacement (for a 850 amigo van) for the passenger side, doesn't quite sit right, but certainly good enough, And this one that was on the passenger side when i got the van, can now go on the drivers side. Van looks more complete now I also - replaced the brake pressure switch (and made a jumper lead to covert the factory bullet terminals to spades) so the brake lights now work only on the pedal instead of being always on - failed to replace the oil pressure lamp switch as both of the spares i found have different threads - i need to order a special one with a M10x1.5 thread (both my common/cheap spares are M12x1.5 for twin cam) - tightened a few bolts and clamps - tidied out my 'bins of bits to go on the van' to discover there aren't too many bits left to go on! - painted the door frame ready for assembly and maybe reinstall tomorrow.
- 64 replies
-
- 24
-
-
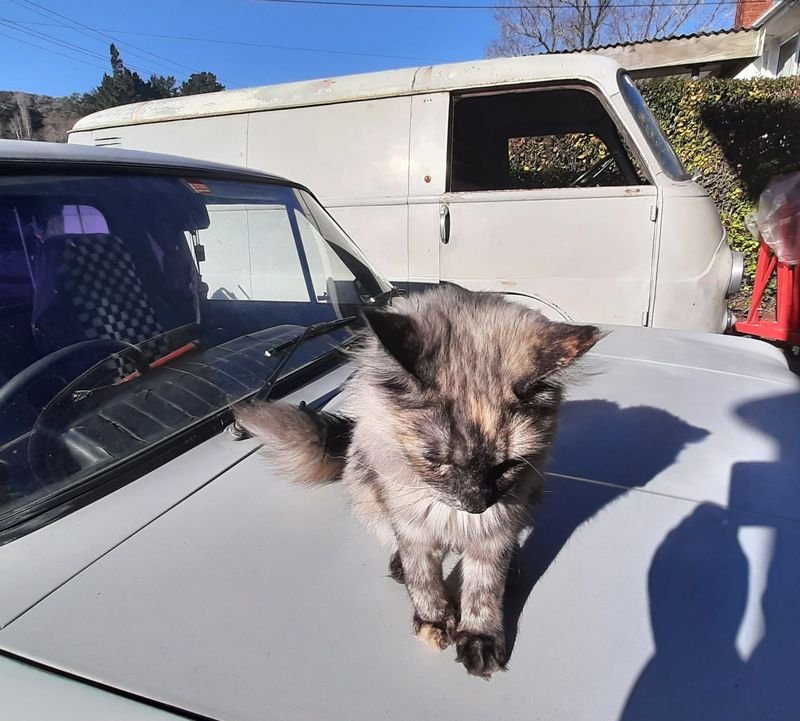
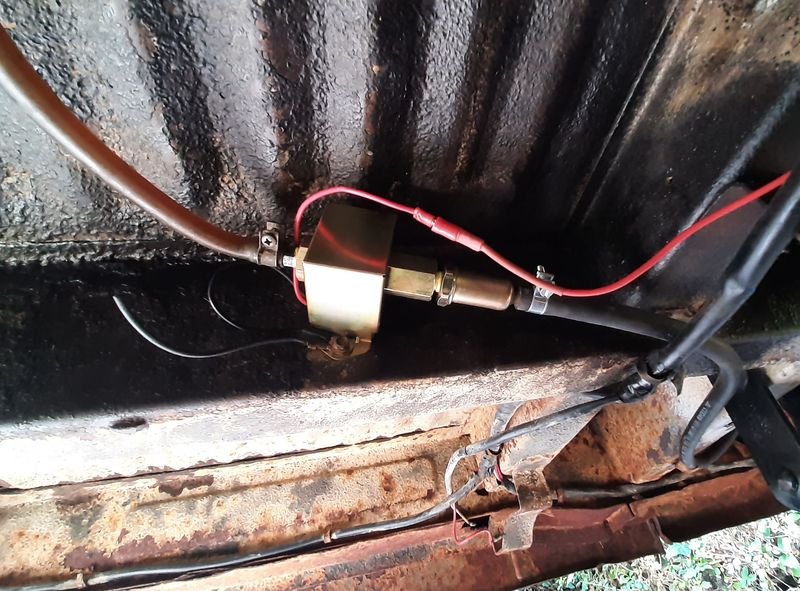
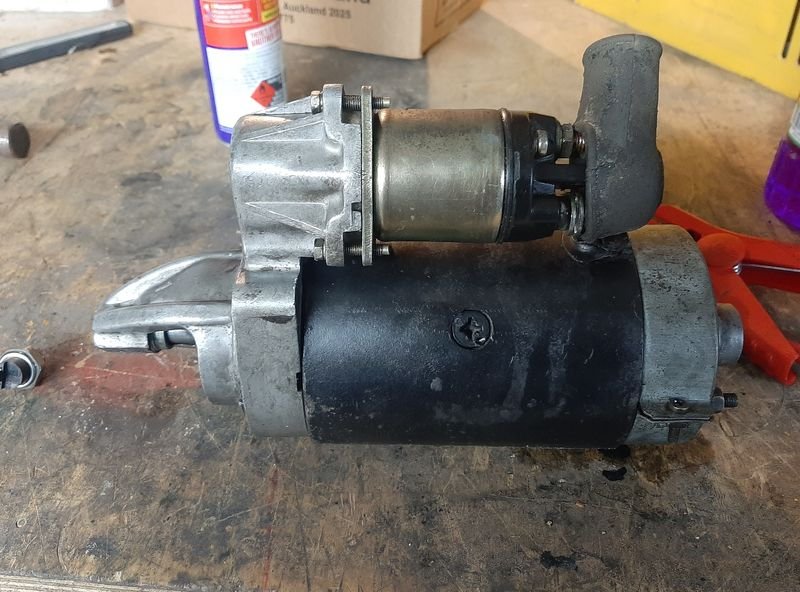
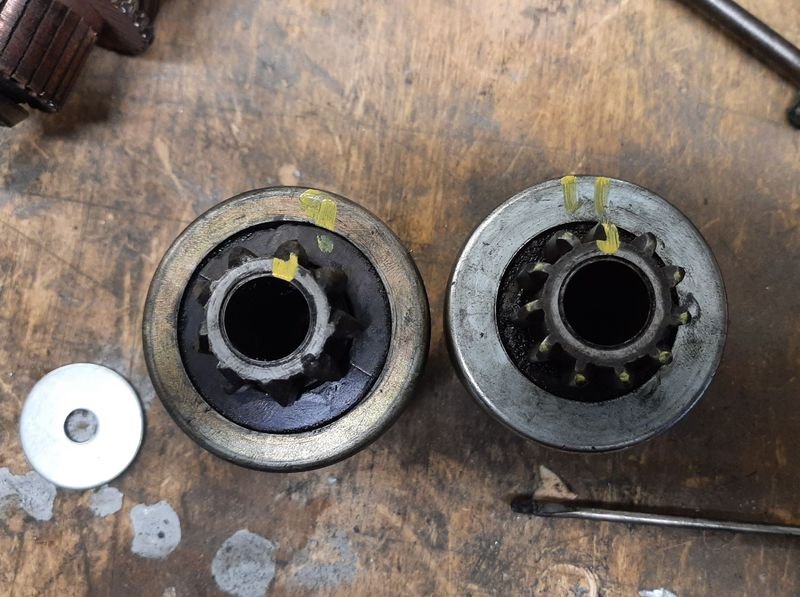
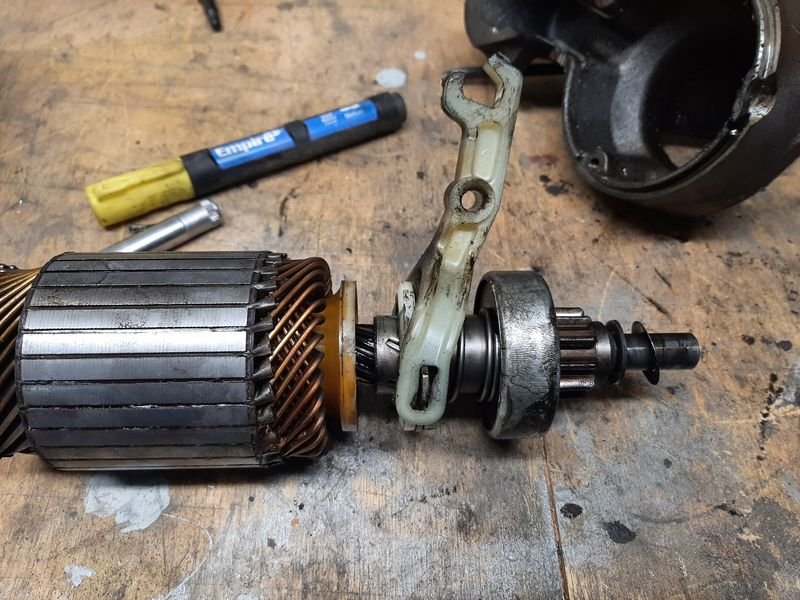
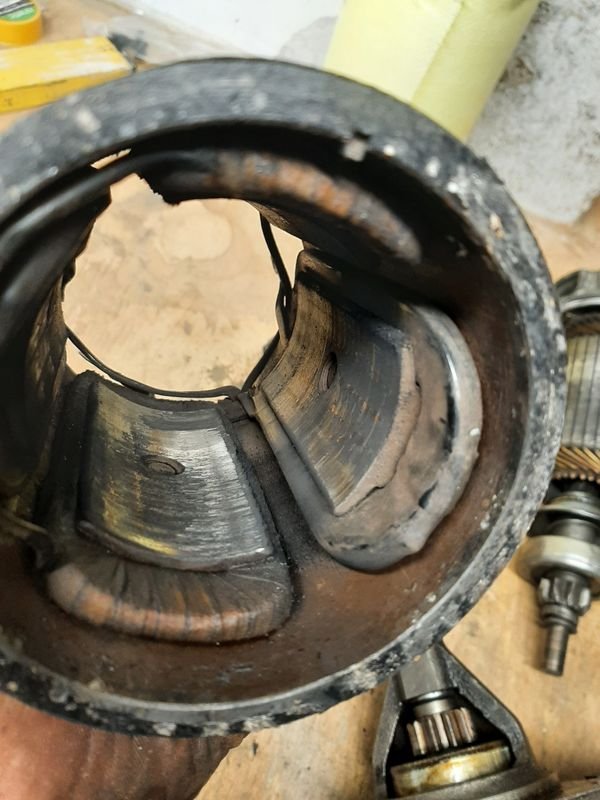
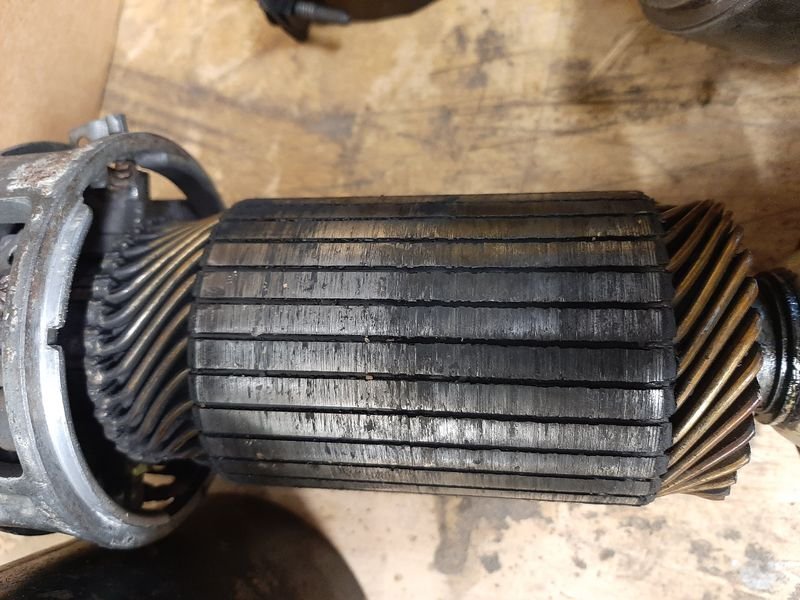
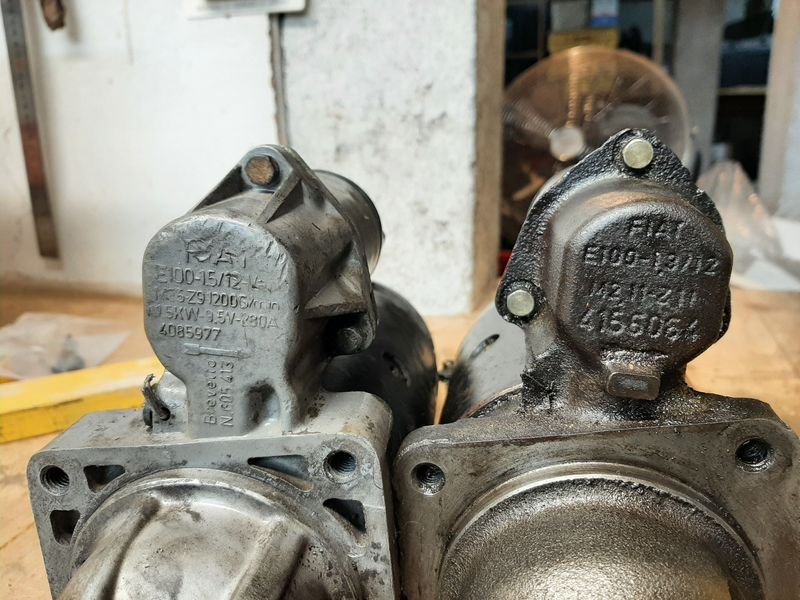
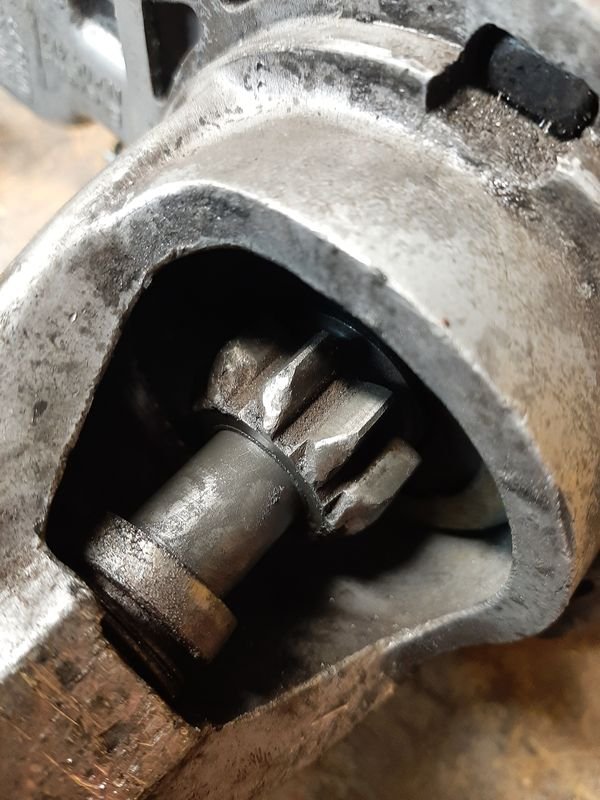
Not been up to much on this for a while, been busy with the diy and a new (old) job and stuff. Anyway, the 'rona finally caught up with me so ive had a week off work, spent the first half not doing much but feeling sorry for myself, but last couple days been feeling a lot better and so ive been pottering around with a few jobs on this. Have a pretty bad brain fog still and things have been taking longer than they should and getting done twice due to silly mistakes Its pretty actually close to being drivable, in that the engine runs, the brakes brake, all the lights work etc, but the starter motor being so cranky (lol), combined with the fuel setup makes it a liability. So wanting to sort those out first. The battery cable setup was a bit of a lash, so in the interests of finalizing things and eliminating poor electrical connections as a casue of my starter problems i finally installed a proper earth lead(s), battery to body; body to alternator mount; and alternator mount to starter bolt. Will probably add an engine (from a different bolt) to body lead as well. Much tidier now but the starter still sounds terrible, getting hot and carrying on, so time to whip it out for another look. I think i broke this bakelite nub off the solenoid on extraction, but certainly wont be helping going forward. Bench tested intermittent and noisy, just like on the engine. Mashed up teeth wont help with pinion engagement, or the flywheel long term Disassembly shows the real issue, the rotor been grinding on the field winding plates because the shaft bushes are flogged out ($8 parts). Looks like the pinion had also been grinding on the nose housing as the stopper was installed backwards so it was able to go too far forwards, and the aluminum housing was also a bit worn (need an extra washer) Must have been dead shorting itself out every revolution, amazing it worked at all, but not as a amazing as the *bad noises* that it made while it did it I have another later model starter, i think from a rwd twin cam, that is very similar in look and in much better condition. Interestingly it has a cast pinion head vs the earlier versions aluminium which makes it super heavy instead of just really quite heavy. Probably was the design solution to the hardened pinion wearing the softer alu nose housing over time. Bench test = good! Unfortunately the teeth count and spline count on the new ones pinion is wrong, original with 9 teeth and 3 spines on the left, 11 teeth with 6 splines on the right. Been looking online and seems 9 teeth/6 spine pinions exist so ill order up one of those along with a few other bits to rebuild this better starter as a spare, eventually. Internals are very similar (slightly cheapened/improved in equal measure) but different enough to not allow everything inside to swap around, and overall a much better candidate but needs must. So improving the original with bits from the spare meant i stole the bronze/oillite nose shaft bushing, the (uncracked) solenoid, the rear commutator brushes housing (that also includes the rear main shaft bush), and reused the old shaft/rotor, 9 tooth pinion and the housing, reinstalled the stopper correctly and added another washer to make up for the wear and... Spun up much nicer on the bench than before. Basically new bushes would have meant no problems. Also decided to tidy up the fuel scenario, i dont have a proper fuel tank yet, but a can on teh passenger seat with a hose from teh engine bay was not going to cut it even for a quick private track run through the gears. I got a couple of cheap cube pumps from trademe on the basis that i need a spare to make sure that the one i install never breaks. Original CAVIS fuel line reused to the rear, and poked the feed up though the filler tube to the relocated can which is now jammed between the wheel arch and the back door. Much better. I just run these on all my cars now, on a switch under the dash somewhere to prime the lines when its been sitting for a while (once the tiktiktik changes to toktoktok theres pressure and you can usually flick it off at that point as the mechanical pump can now do its job), saves on cranking the starter for ages, and the mechanical fuel pump seems happy sucking though them even when they are off. Starter now cranks much much better (the pinion still inst throwing out every time, probably the mashed up teeth). With the engine now starting and running off the key reliably and without needing constant fuel fiddling, i dialled in the ignition timing (it was slightly retarded) and adjusted the carb using teh highest vacuum method, and now it starts first crank and sounds crispy. Also my cheap gauges are cheap, and only the voltmeter works, but i got a hell of a fright when the electric fan kicked in off the relay and cycled a couple of times so thats great - shows its cooling the radiator sufficiently. My helper was also very helpful
- 64 replies
-
- 16
-