Adoom
-
Posts
2,279 -
Joined
-
Last visited
Everything posted by Adoom
-
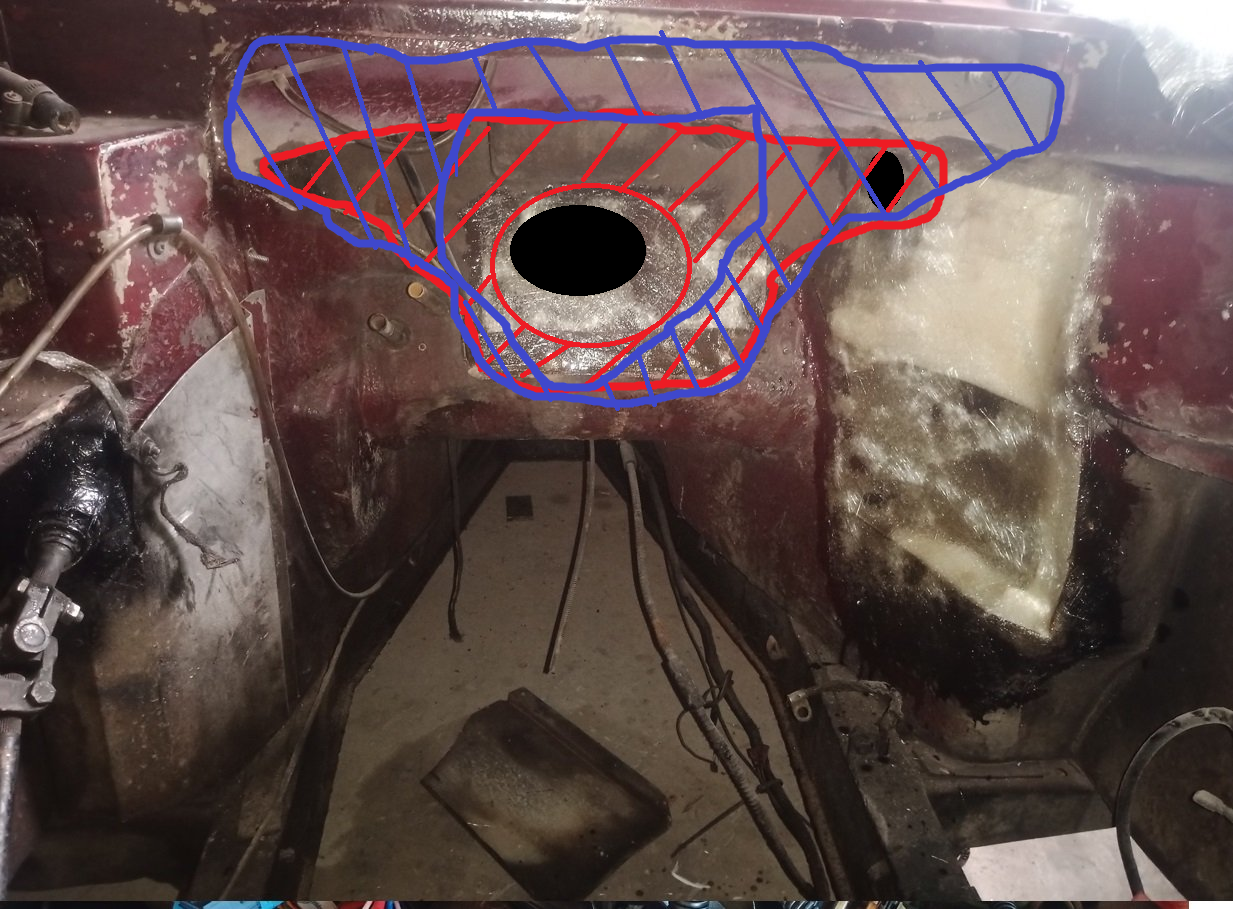
So there's a big oval hole and a small hole covered up? Over that is a red pair of underpants with a large round hole for a circular metal vent that looks like a radiation symbol? Covering over all that, sealing the area below the top vents, is a larger purple pair of underpants with a big hole that the access plate(which was in the boot) goes over?

-
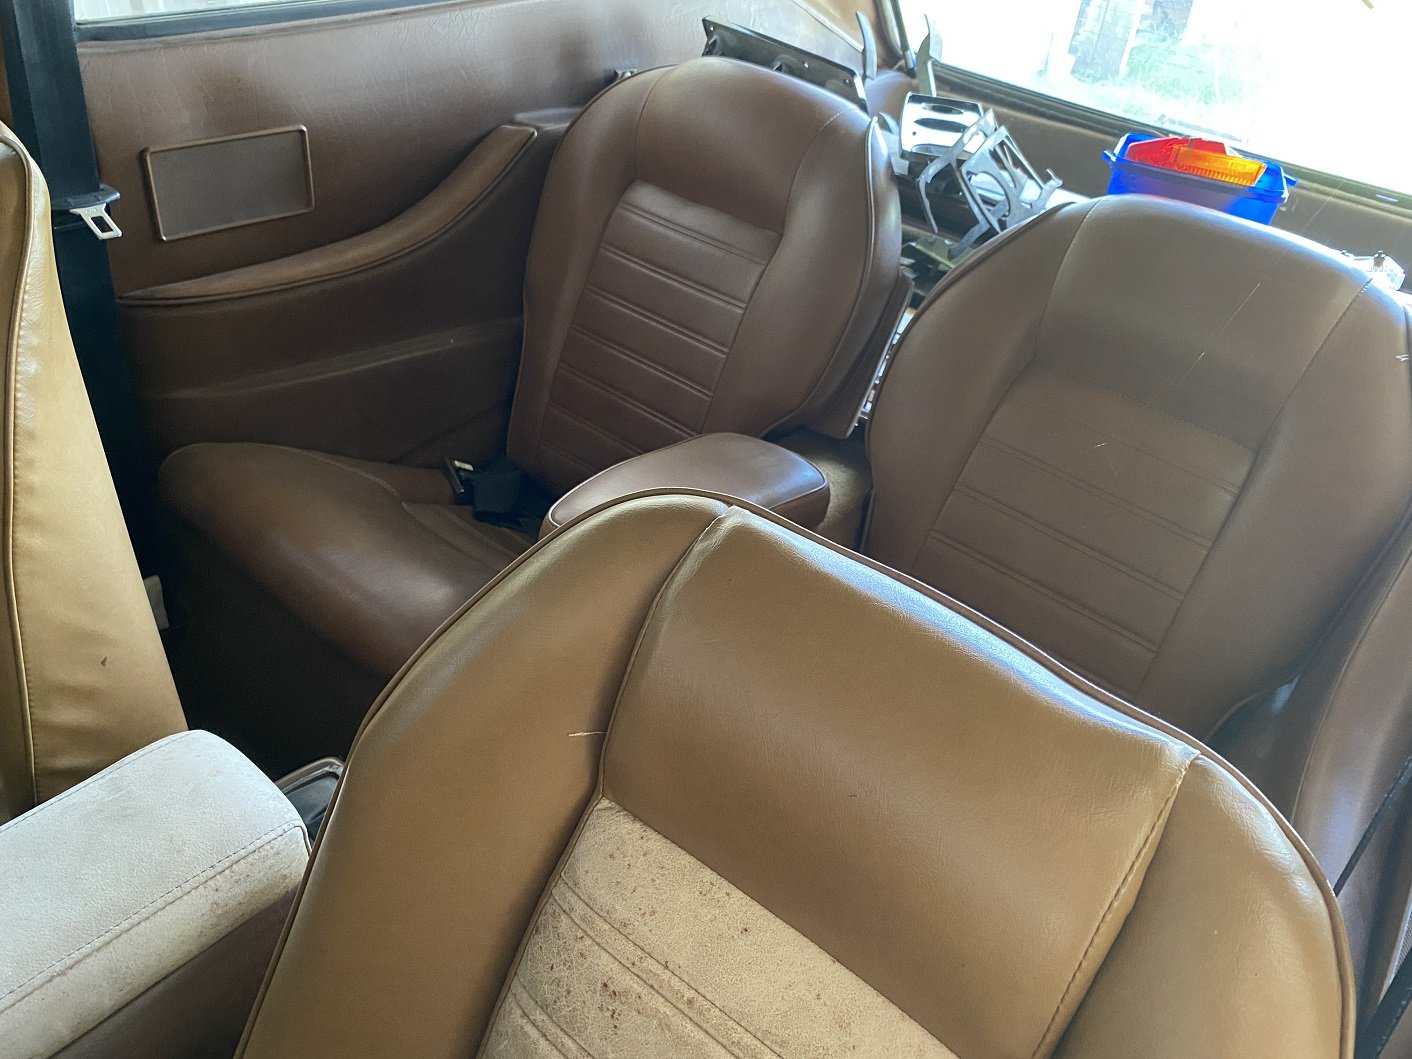
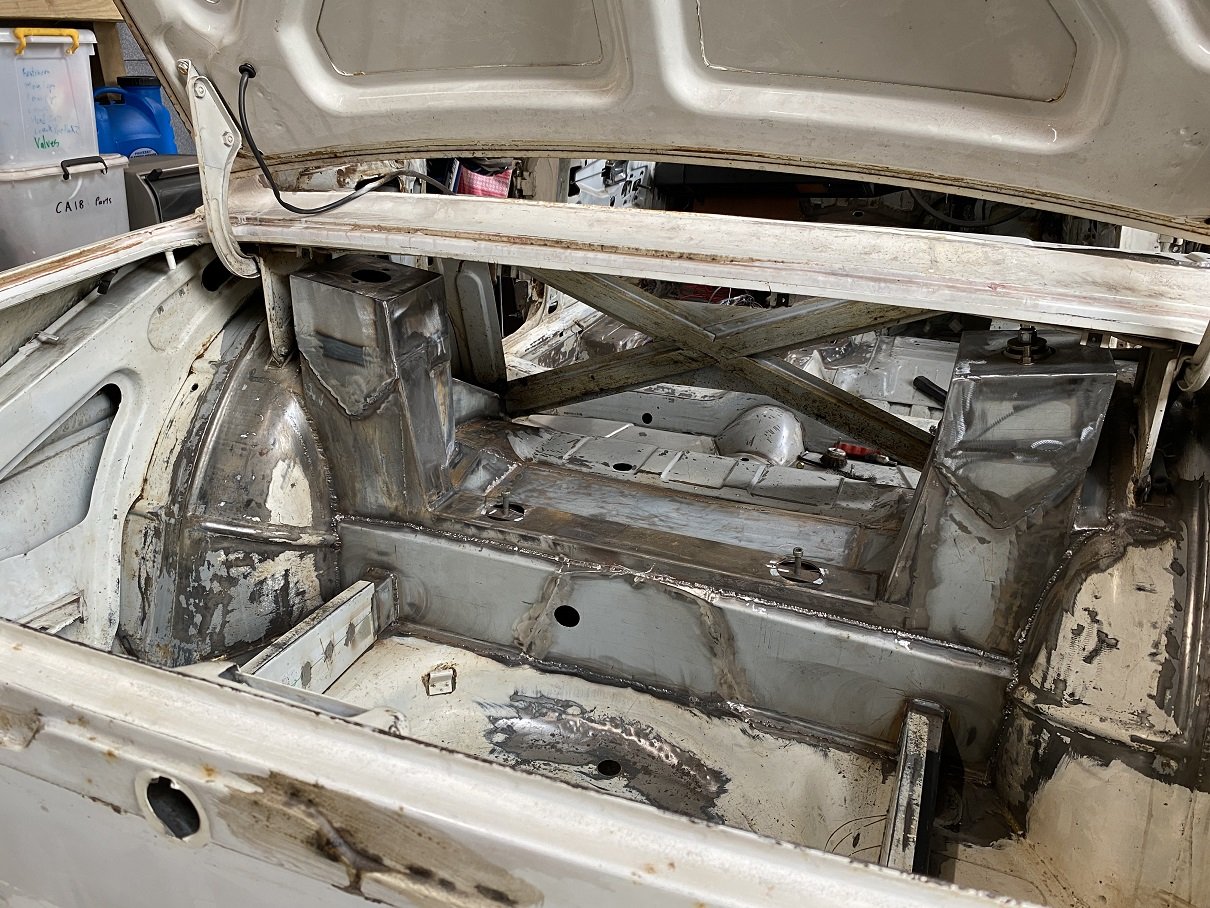
I was meaning to ask if you'd actually got the ecotec running as EFI and what you'd done for the fuel. I plan on pulling out the fuel tank eventually to have a clean and inspection under there. Yeh, there's not much left of the heater box thingy. I want to do something there to make it look less like there's a big bit missing. I think I might actually have the room to reinstate it, if I can figure out what it's meant to be like. I suspect there's supposed to be two kinda chambers or something? And a kind of rotating circular vent that's gone now? I've not had much luck finding any pictures or photos of the area that aren't obscured by an engine.
-
It's a separate chassis with a fibreglass body. The chassis is pretty substantial. The diff is a Salisbury which I understand is.... big? Like a Jaaaaaaaag? I dunno, maybe okay. The brakes are a question mark. They are 10.5", but solid. The calipers are weird, two small pistons inboard and one large outboard. Maybe I can get away with better larger calipers and good pads. The front suspension is mostly Triumph TR6 so I guess brake upgrades that go on a TR6 will work.
-
This is the early poverty spec LE0 that only has VVT on the intake.. The fancy 195kw one also has VVT on the exhaust cam. But hopefully with a better flowing headers, exhaust and intake I'll get more than factory 175kw. I'll have to make headers they need to route over the chassis rails not between them.
-
Your text goes here.
-
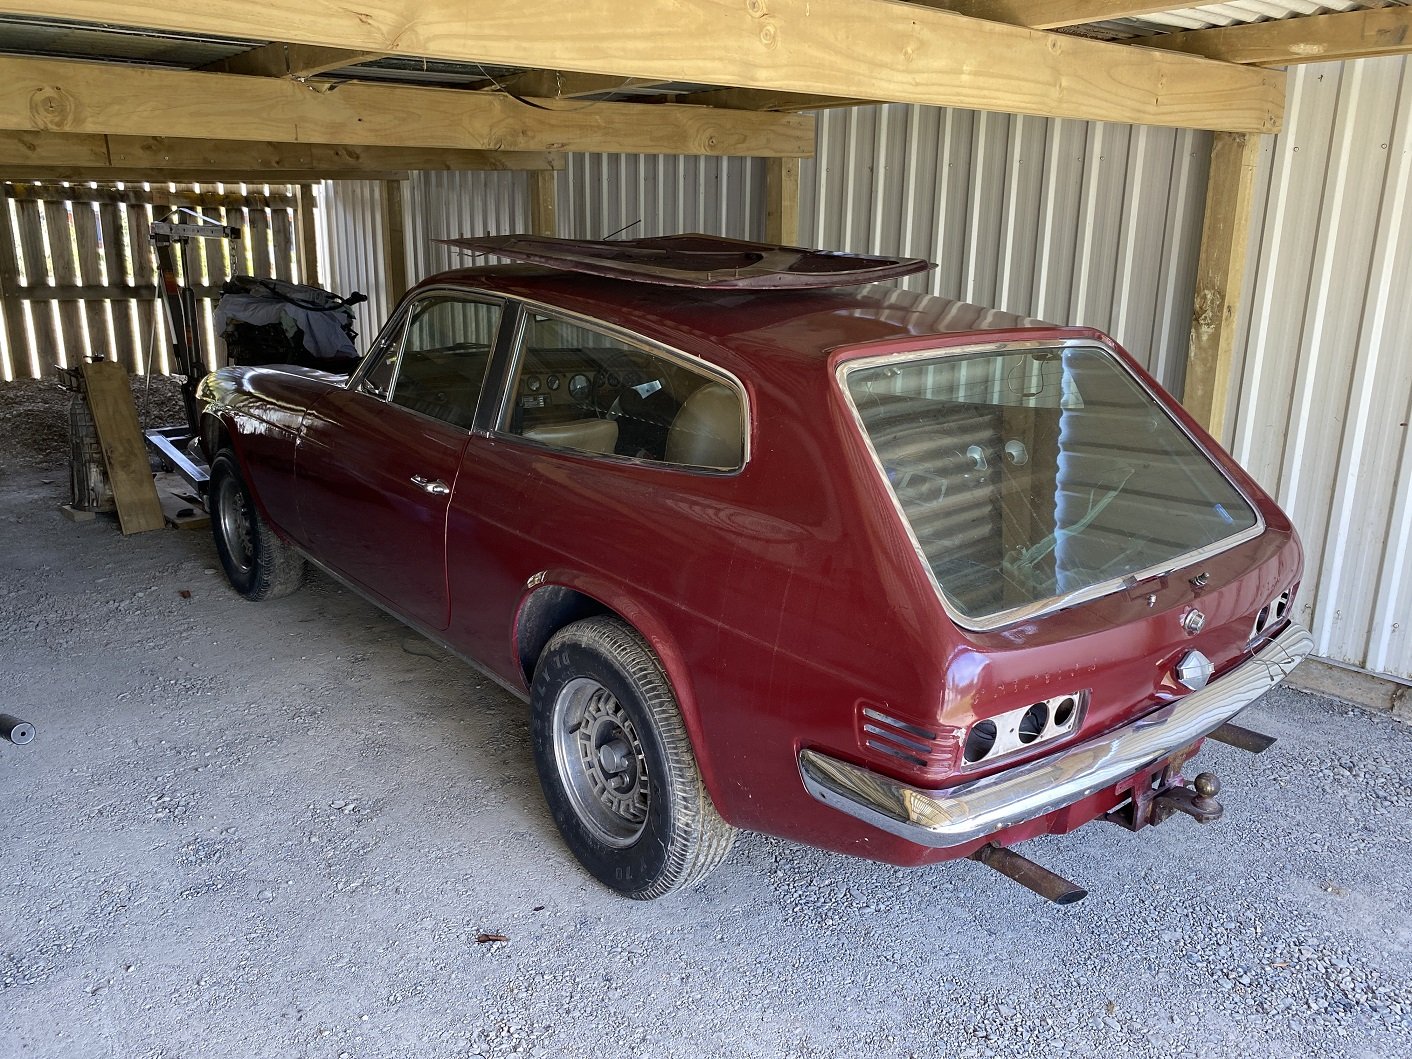
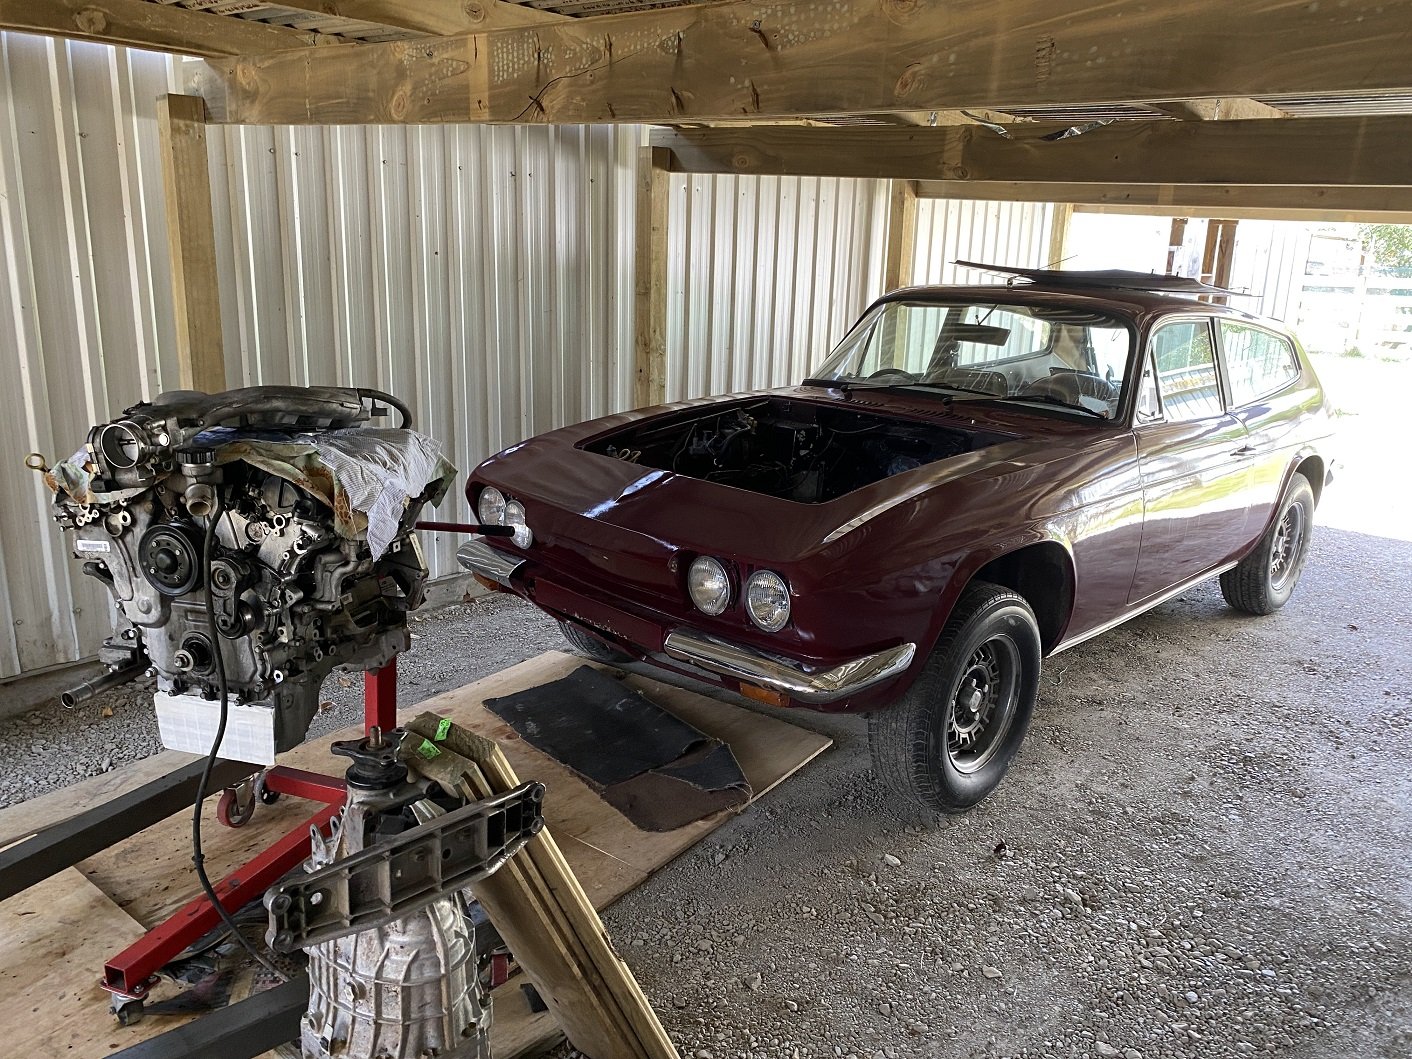
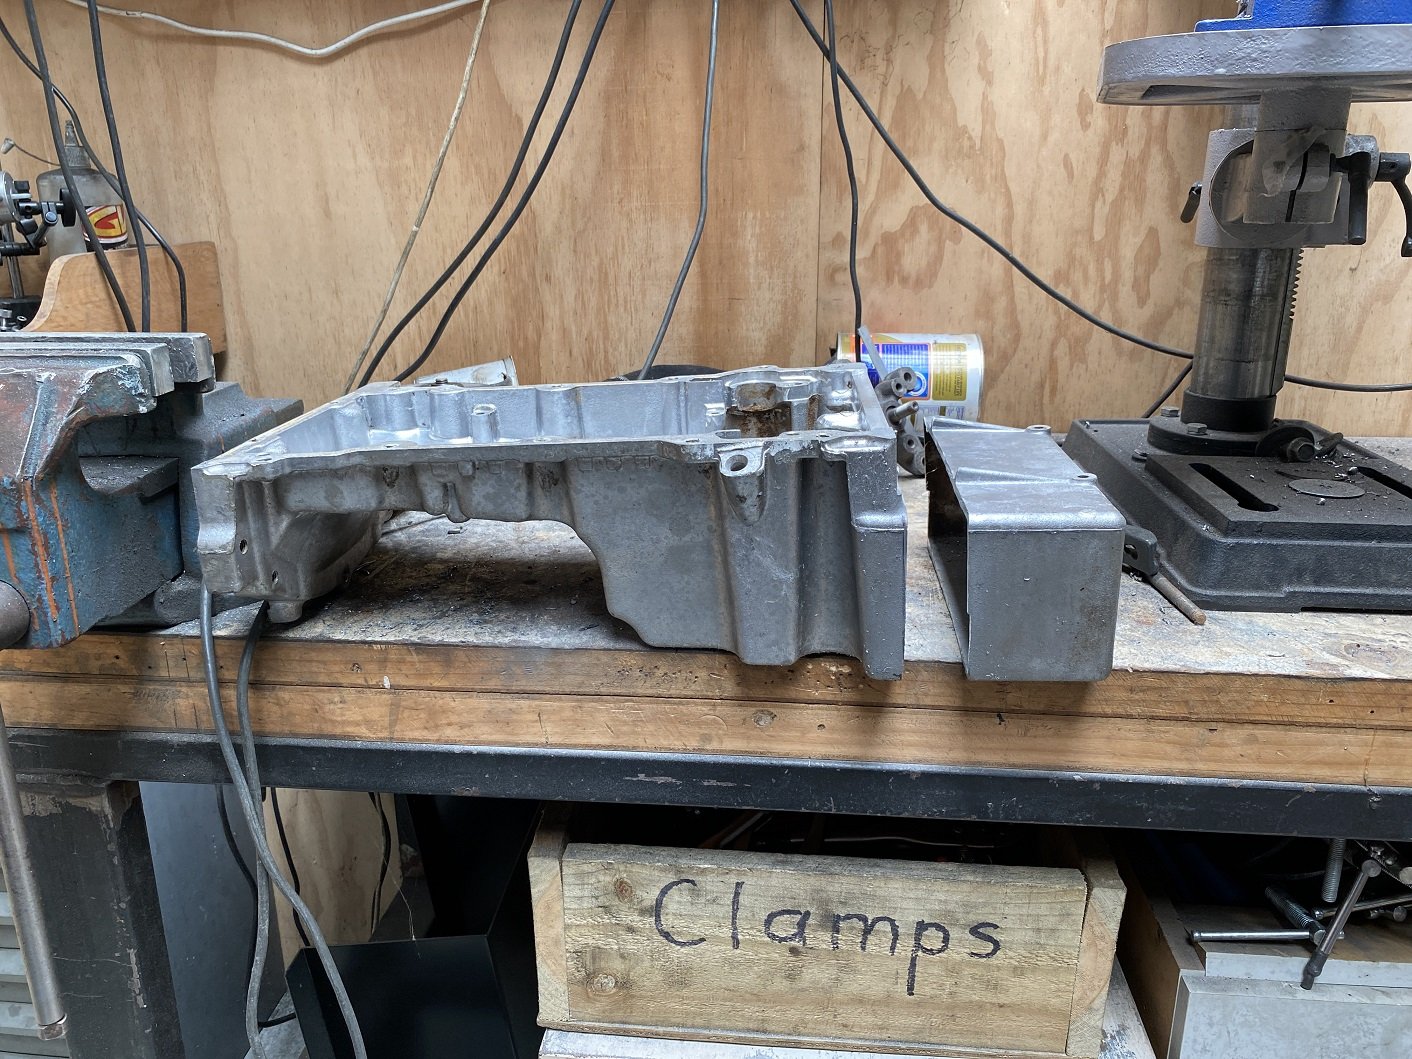
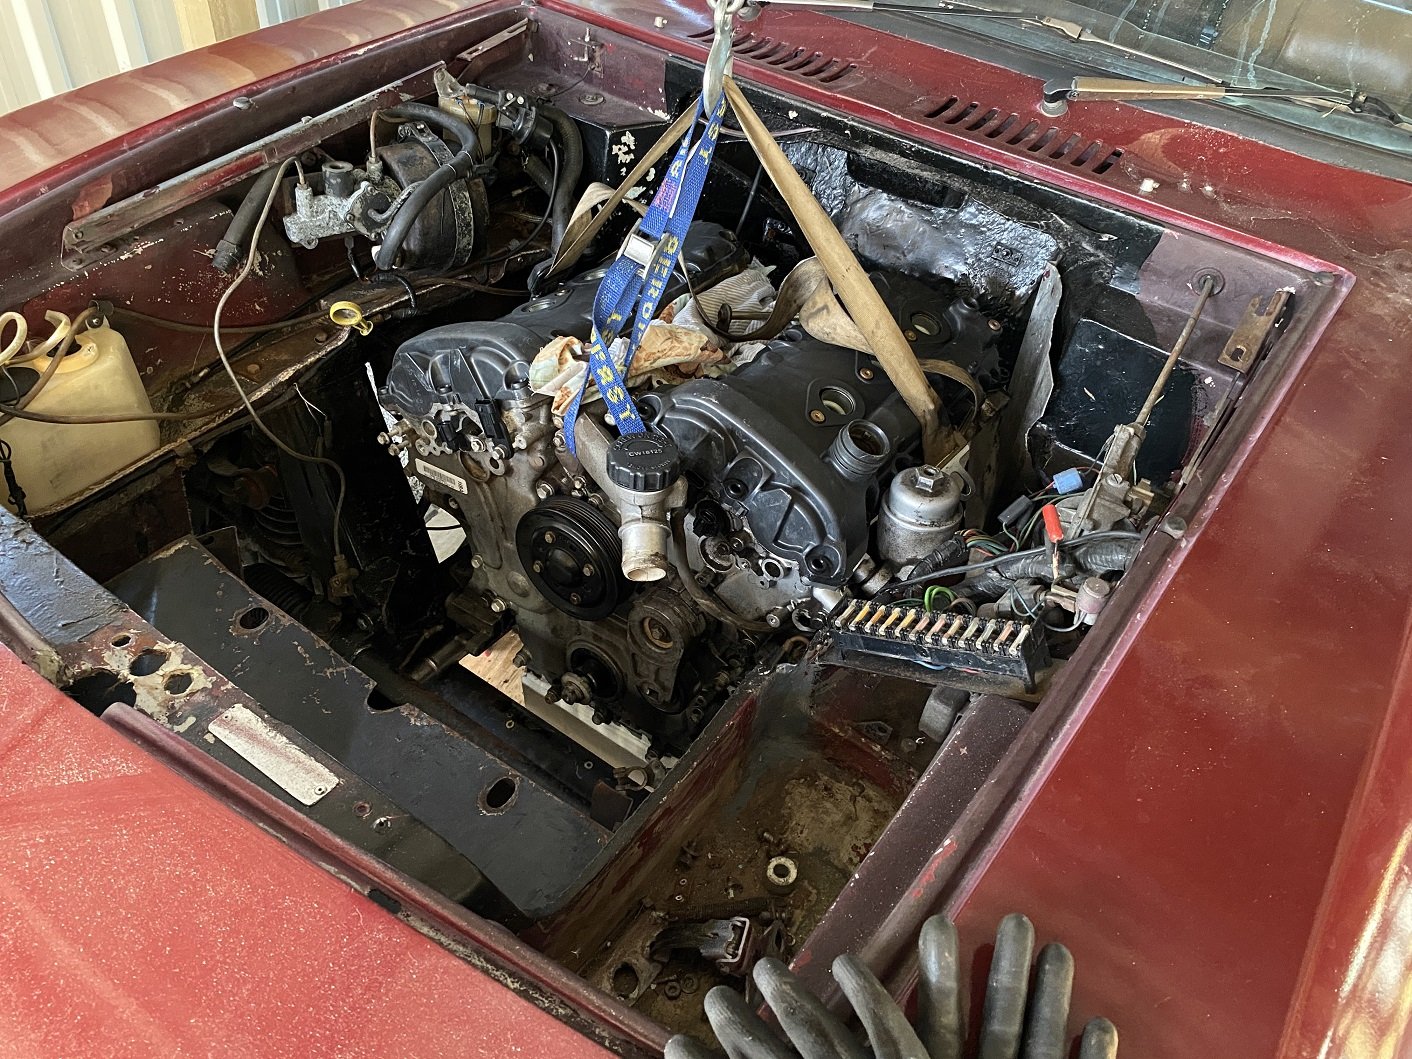
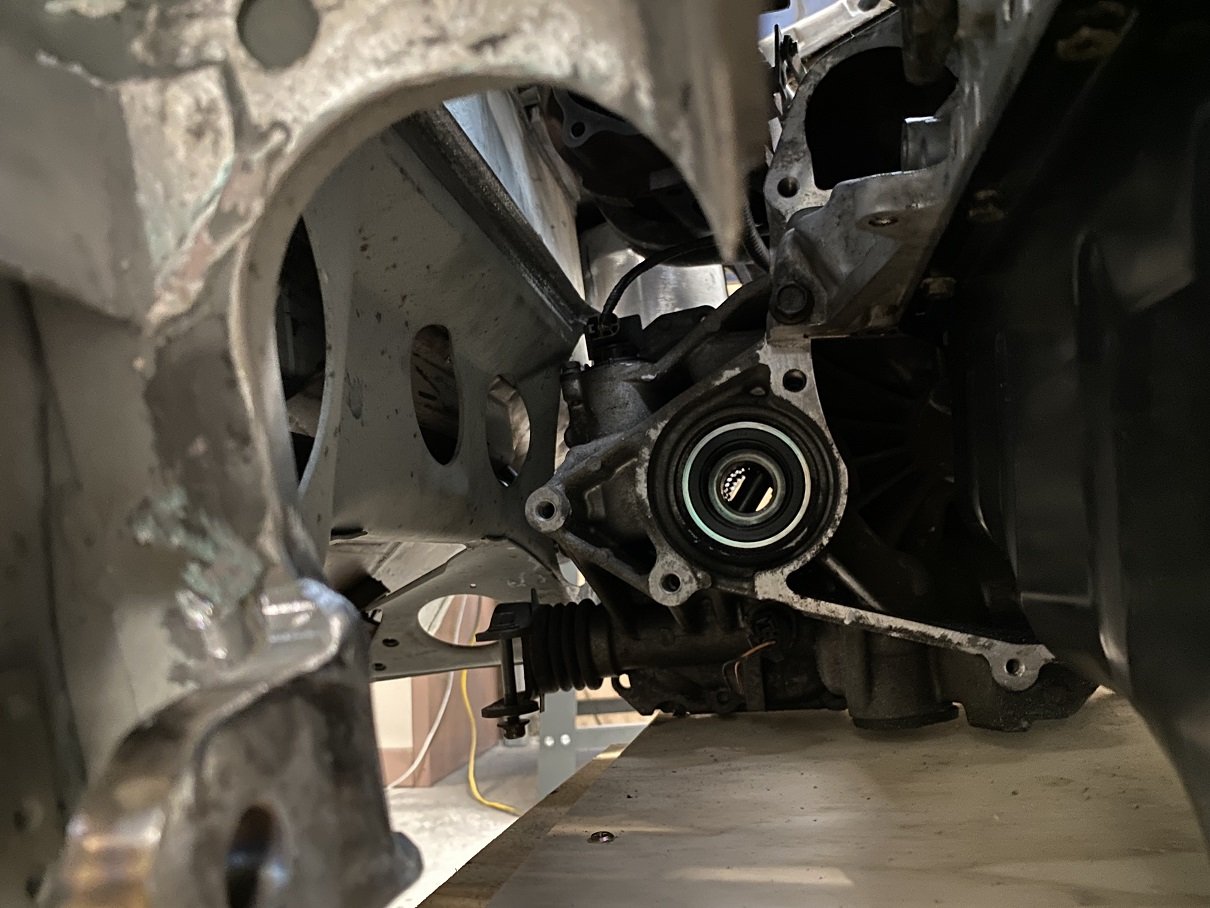
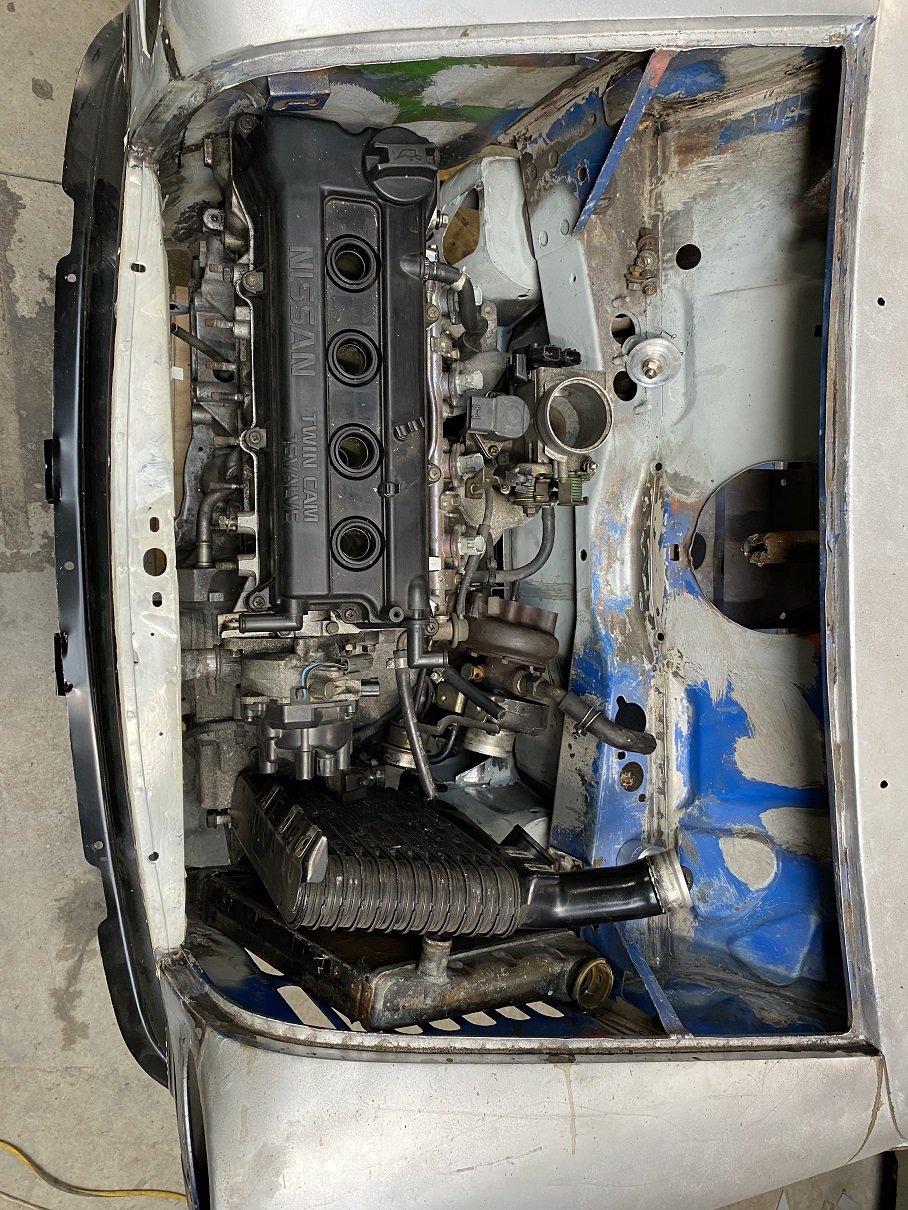
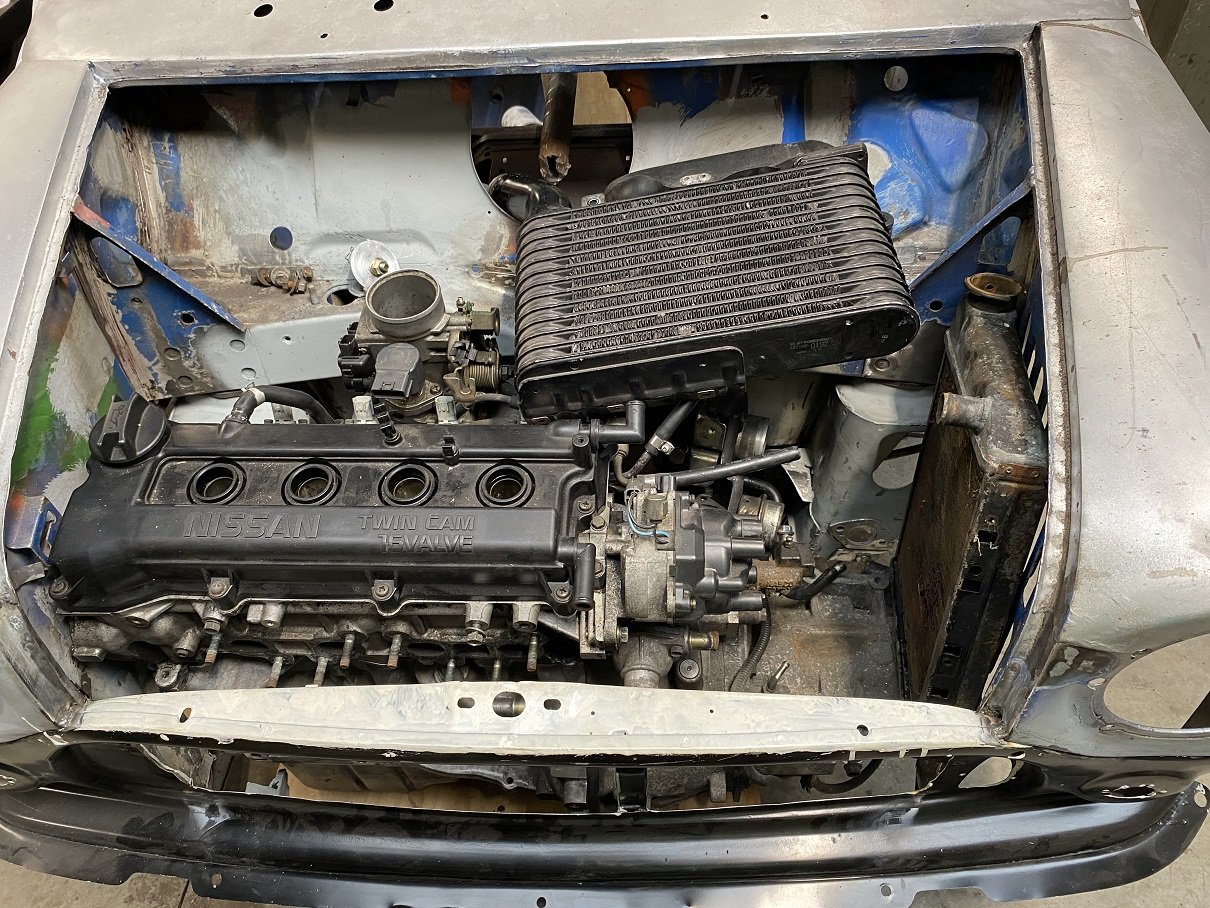
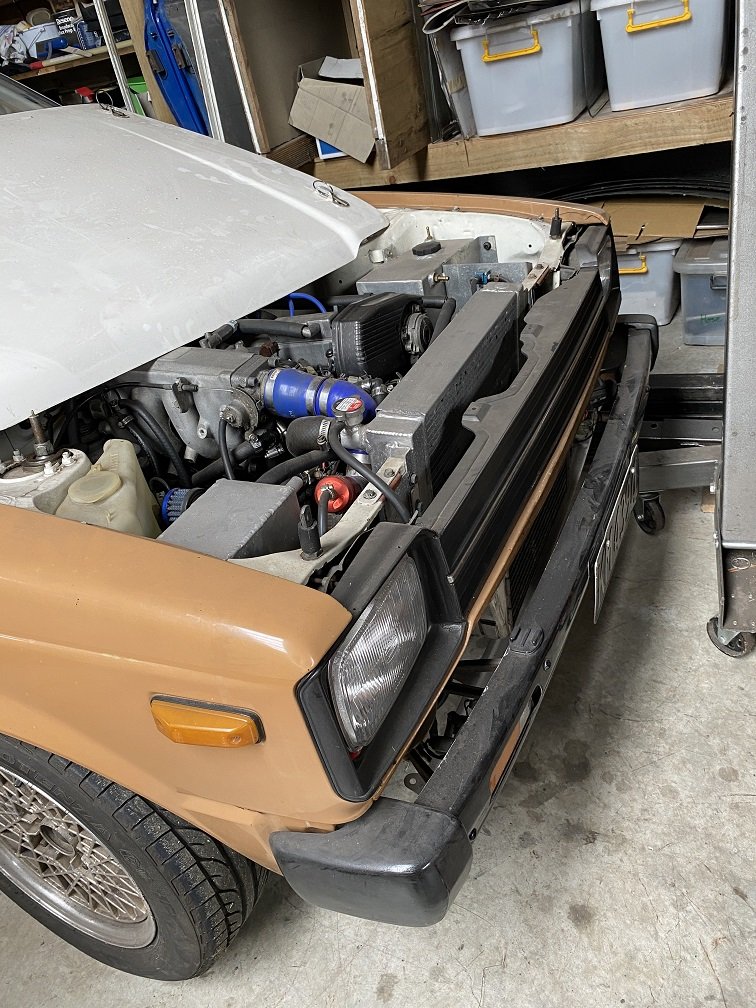
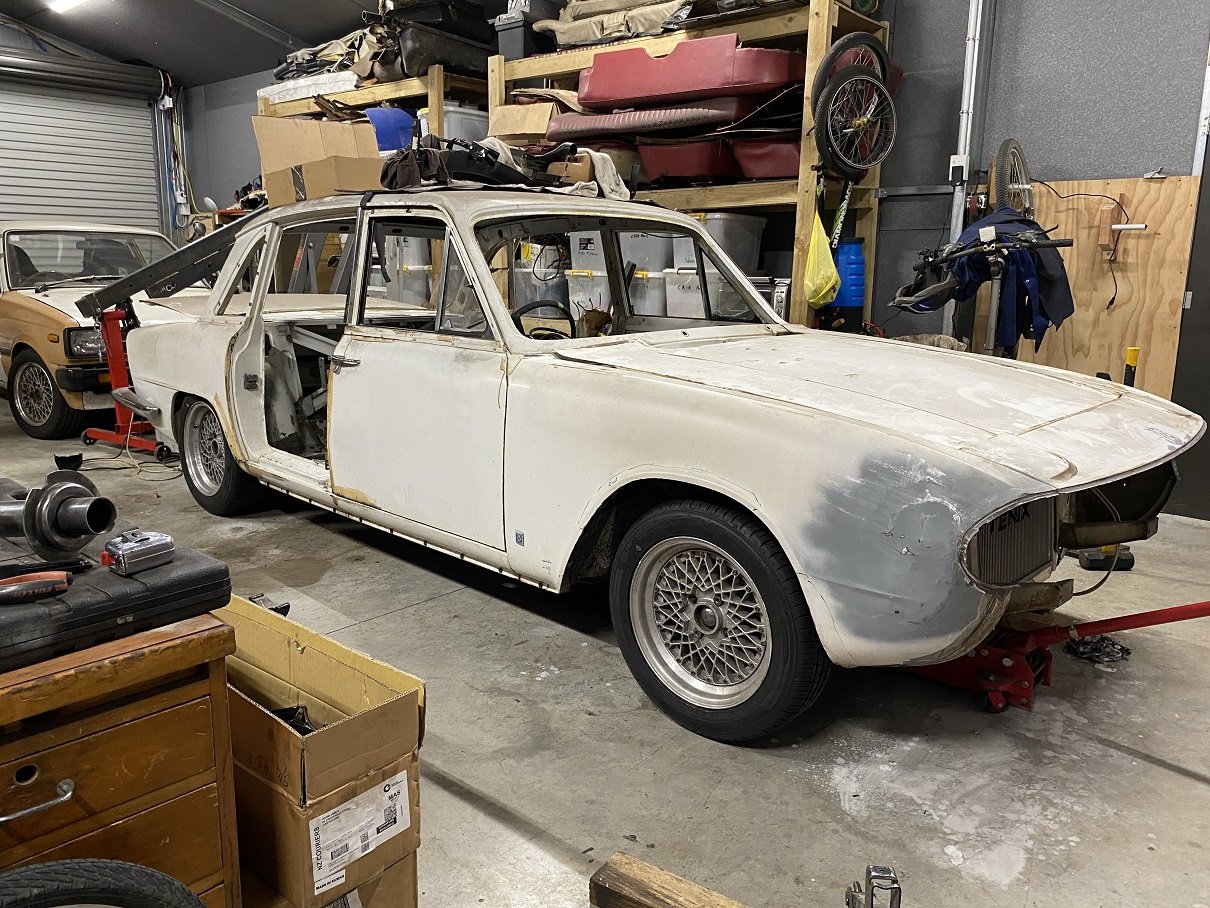
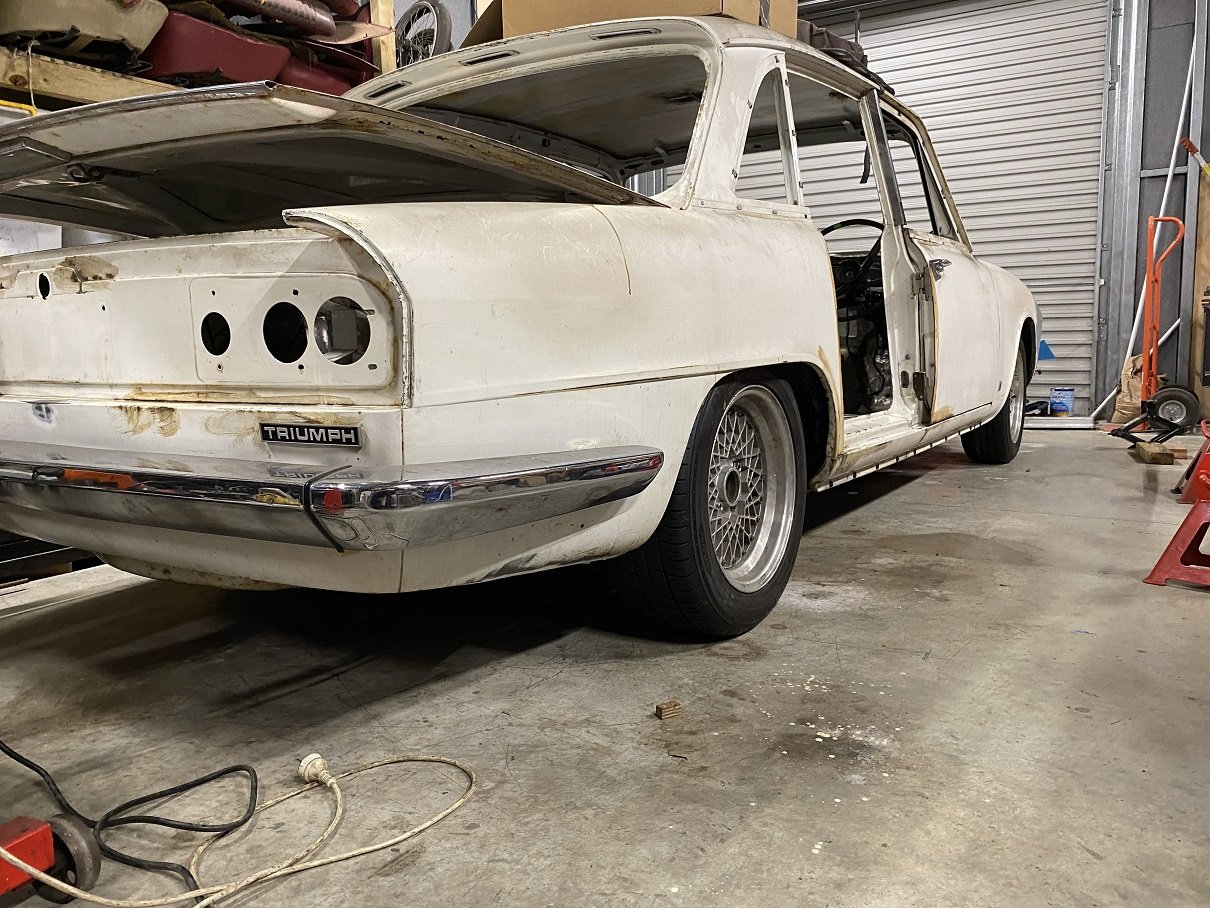
@dmulally twisted my arm... not very hard. But this is mine now. I had to build a lean-to for it to live in because my garage is full. Needs and engine and gearbox. I figured a 175kw Holden 3.6 Alloytec with a 6spd manual should be the business. Damo had a V6 Ecotec in it previously so I assumed there was a fairly good chance it will fit. These engines have issues with the breathers blocking up if you don't change the oil when you are supposed to. The breather is hilariously tiny and so are passages in the baffles in the cam cover, so it's REAL EASY for it to block up. Then the heads start filling with gunge that causes issues with oiling and timing chain wear. The engine I got has this issue so it may be stuffed... but it was cheap. soooo. I got a gearbox from an importer in Auckland as well as a used aftermarket Exedy one piece flywheel and clutch(OEM is a dual mass flywheel). I'll have to run an aftermarket ECU. I looked into using the factory ECU but as far as I can tell, you cannot easily get it to work without also having the matching body ECU. A brake light lens is broken but they are available from UK. The "SCIMITAR" badge letters and the emblems are missing. Damo thought he had the letters, so maybe they will turn up. If not, they are also available from UK. The door is apart because I was trying to get the electric windows to work. ELECTRIC WINDOWS!!! Turns out it was a bad earth under the bonnet. Being a fibreglass body, everything had it's own earth wire and they all run back to the same spot under the bonnet. I also fixed the horns, just chucked them in the ultrasonic cleaner and they started working again. NEWS FLASH, the engine didn't fit. But I did some sump surgery and now it does. Only a oil level sensor is in the front portion, so no need to move the pick up pipe. I'll make up the missing capacity in the rear section. There is a big bracket for the alternator and some coolant pipes on the right side that I'll need to relocate to center the engine. The alternator may need mount backwards out the front of the engine. Otherwise, it seems to fit without issue. Oh and FUCK ME, the front pulley is on TIGHT! You have to pull from the center hub because the outer is rubber mounted. My big puller would not fit so I got a smaller 100mm one. It was not happy. I don't expect it to be able to remove that pulley more than 3 or 4 times before the threads are destroyed. I left it off because I'll need to inspect the timing chain at some point.
- 6 replies
-
- 36
-

-

-
LOL! I just got a tf035 from a 1500 Mivec Colt at pickapart yesterday for my 1300 nissan engine mini thing.
-
Oh and alternator will be high mounted behind the oil filler cap, that seems to be a std solution in other K11 minis.
-
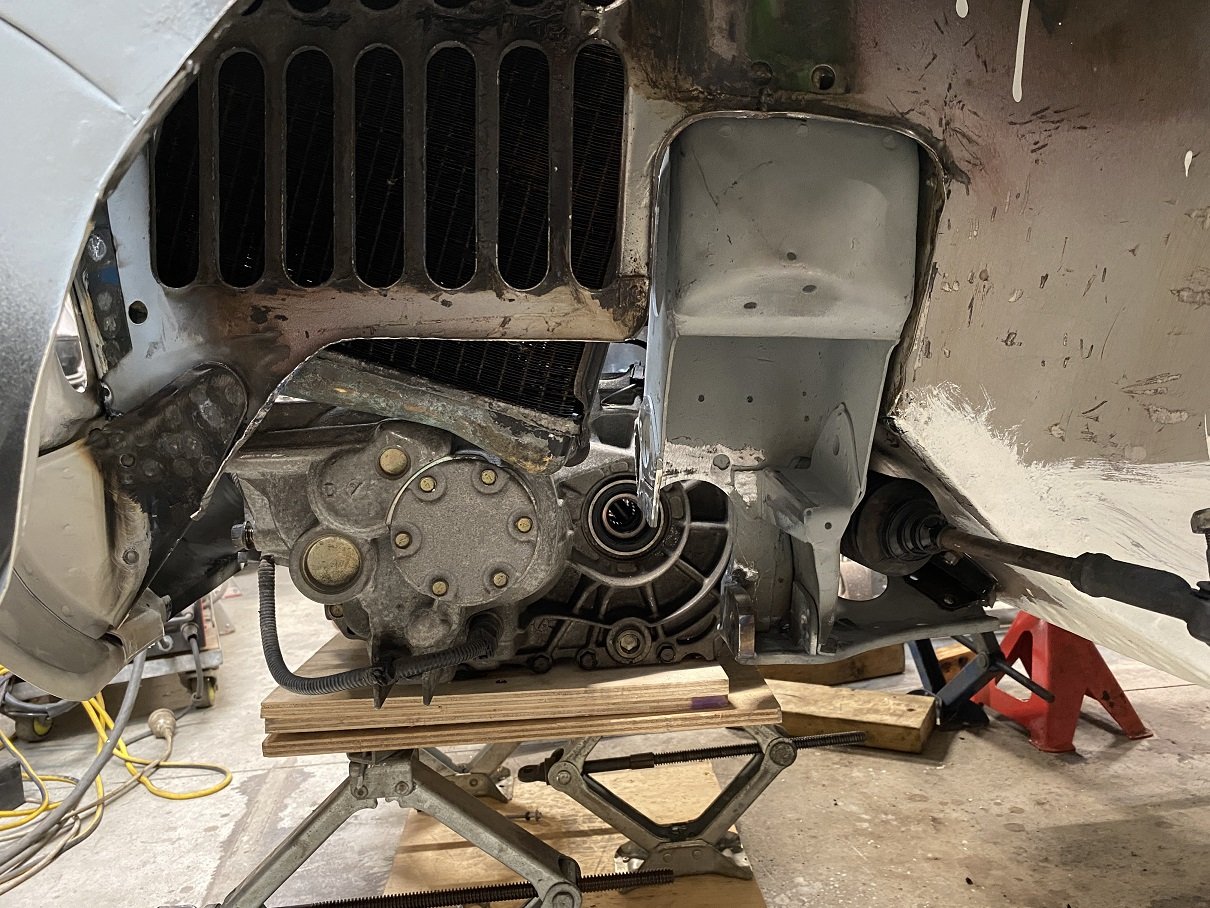
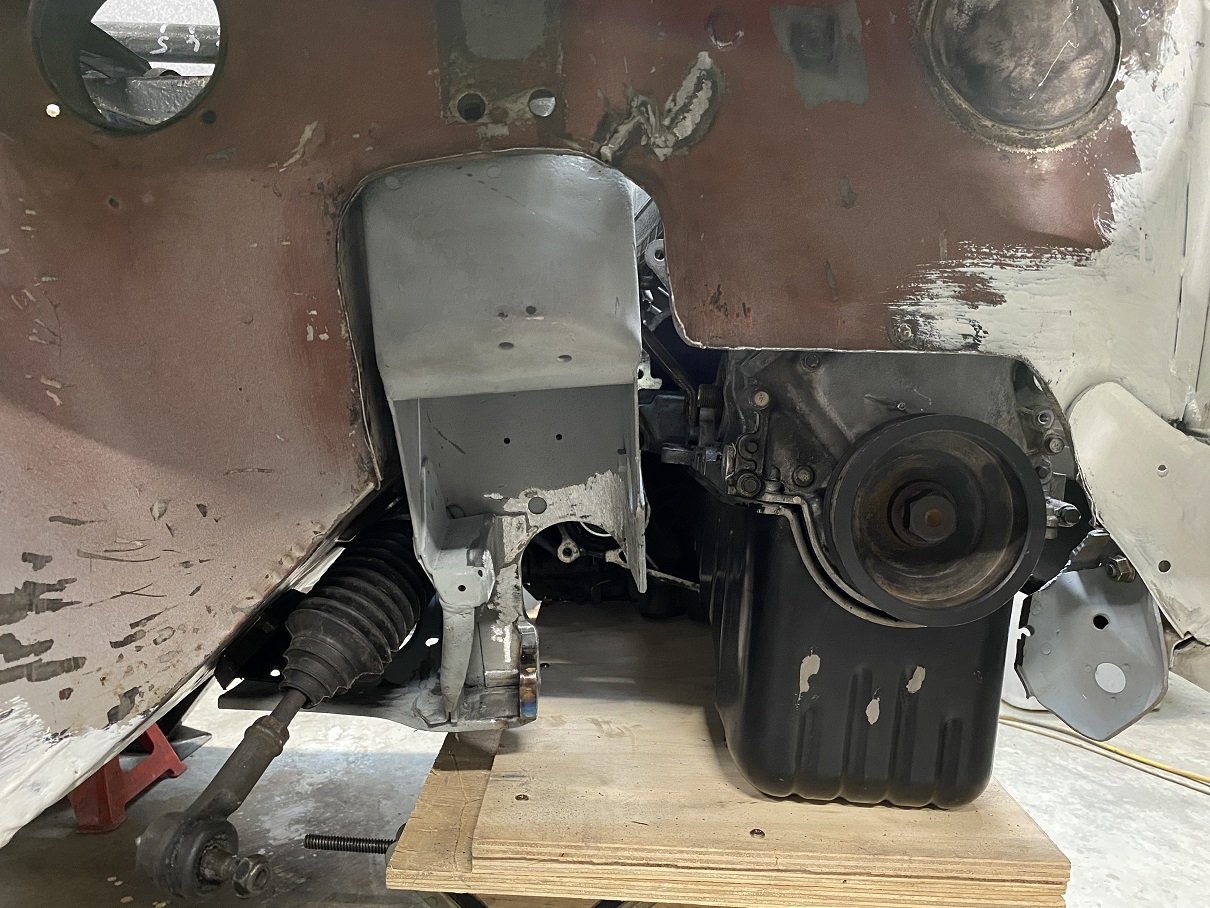
The engine is pretty much in the only place it fits. With more trimming around the back of the subframe I might get another 10mm before the gearbox meets the steering rack. I'm going to step the top/front corner of the inner wing into the guard to get a little more clearance off the corner of the head. I threw some "stunt parts" in the hole to see if there is any chance this is going to work. Mounting the turbo at the front will have almost all of it in front of the grill.... But if I put it over the gearbox... There might be enough room to run the manifold under the engine, then up the back to the turbo then back down for the dump pipe. Loads of room if I top mount the IC.... interwarmer styles. Gonna need a powerful fan and vents... Only done the lower control arm mounts so far. Still got to make a bridge under the top arm mount. I trimmed the inner guards and hammered some new flanges to put some stiffness back in them. Turned out quite good! There will be a CV and driveshaft here to try get an up and down pipe around.
- 52 replies
-
- 14
-
-
-
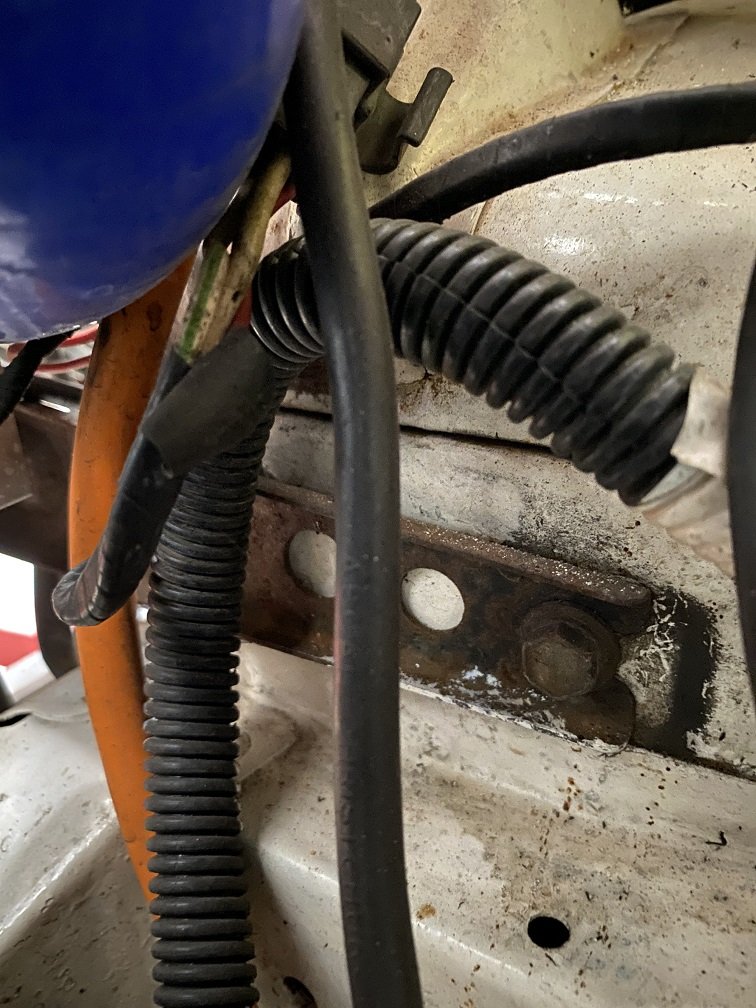
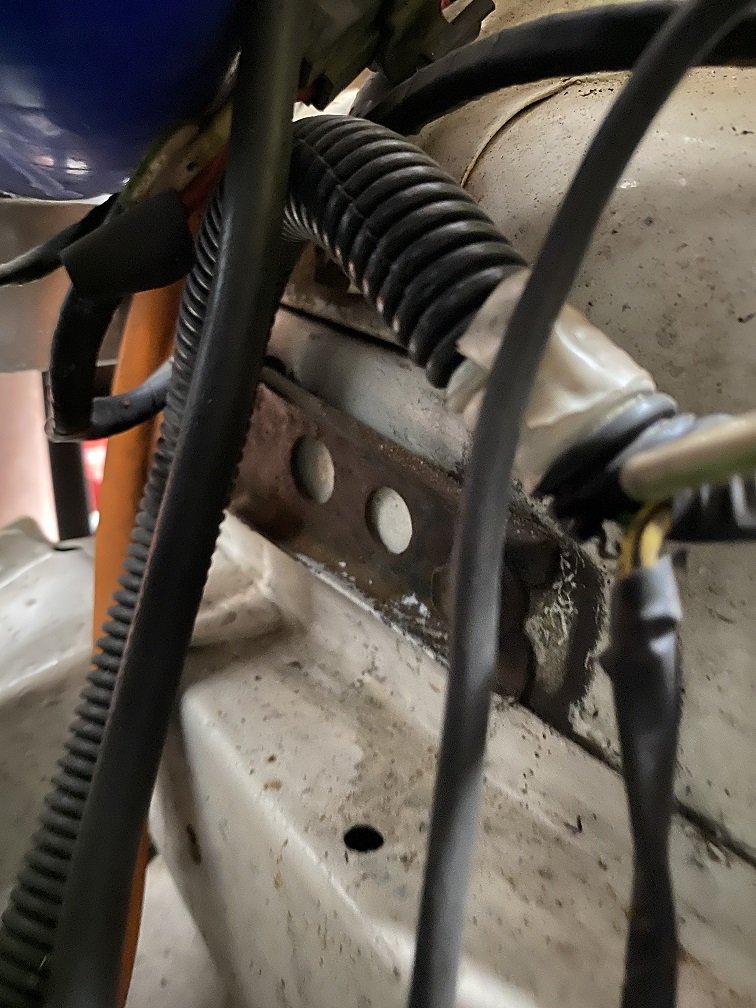
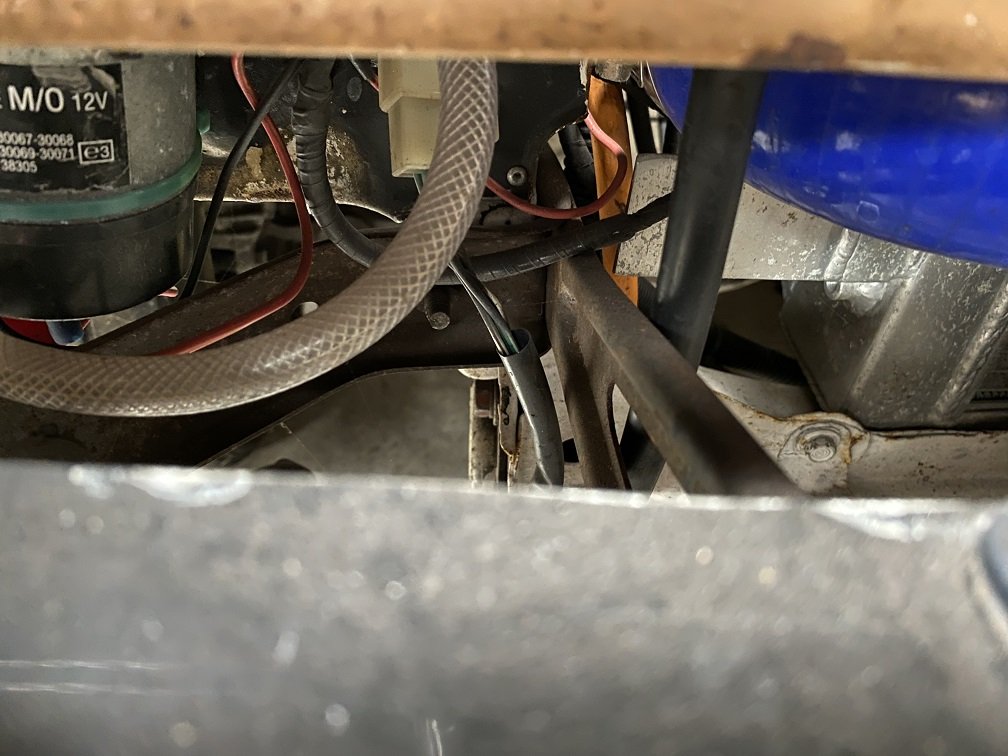
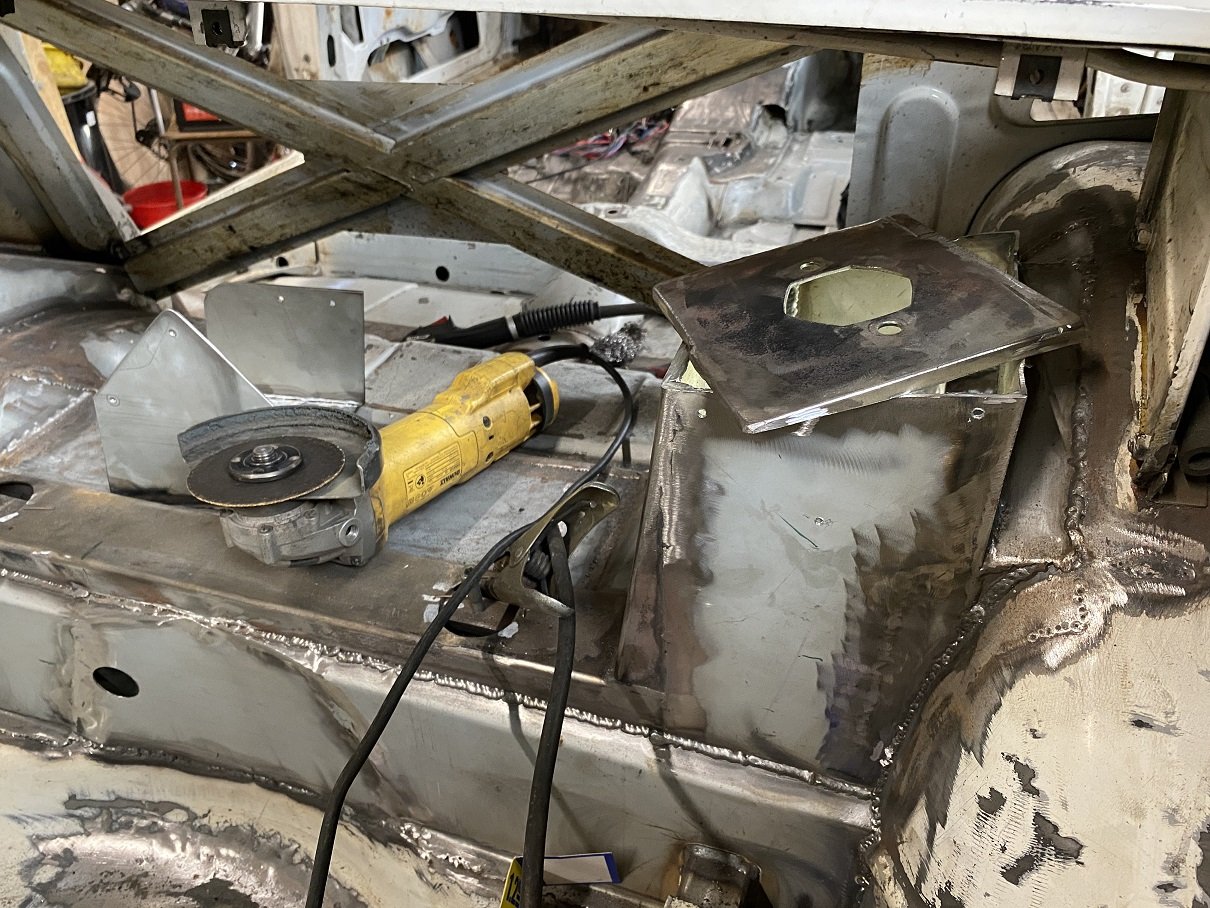
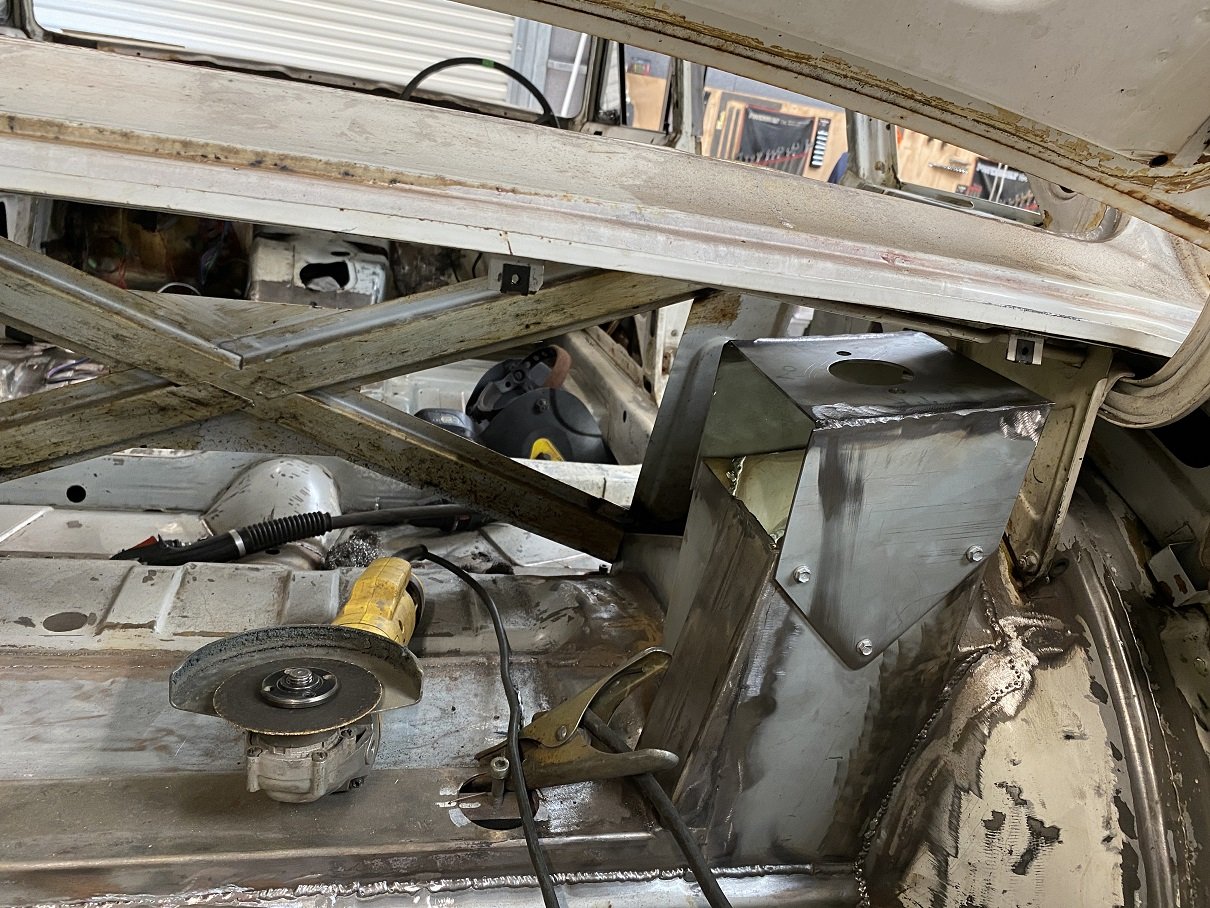
Sounds like the same as mine? There is a lot of business going on in mine that is in the way, but hopefully you can see what is going on here. The bracket also supports the indicator. This is the right side mount.
-
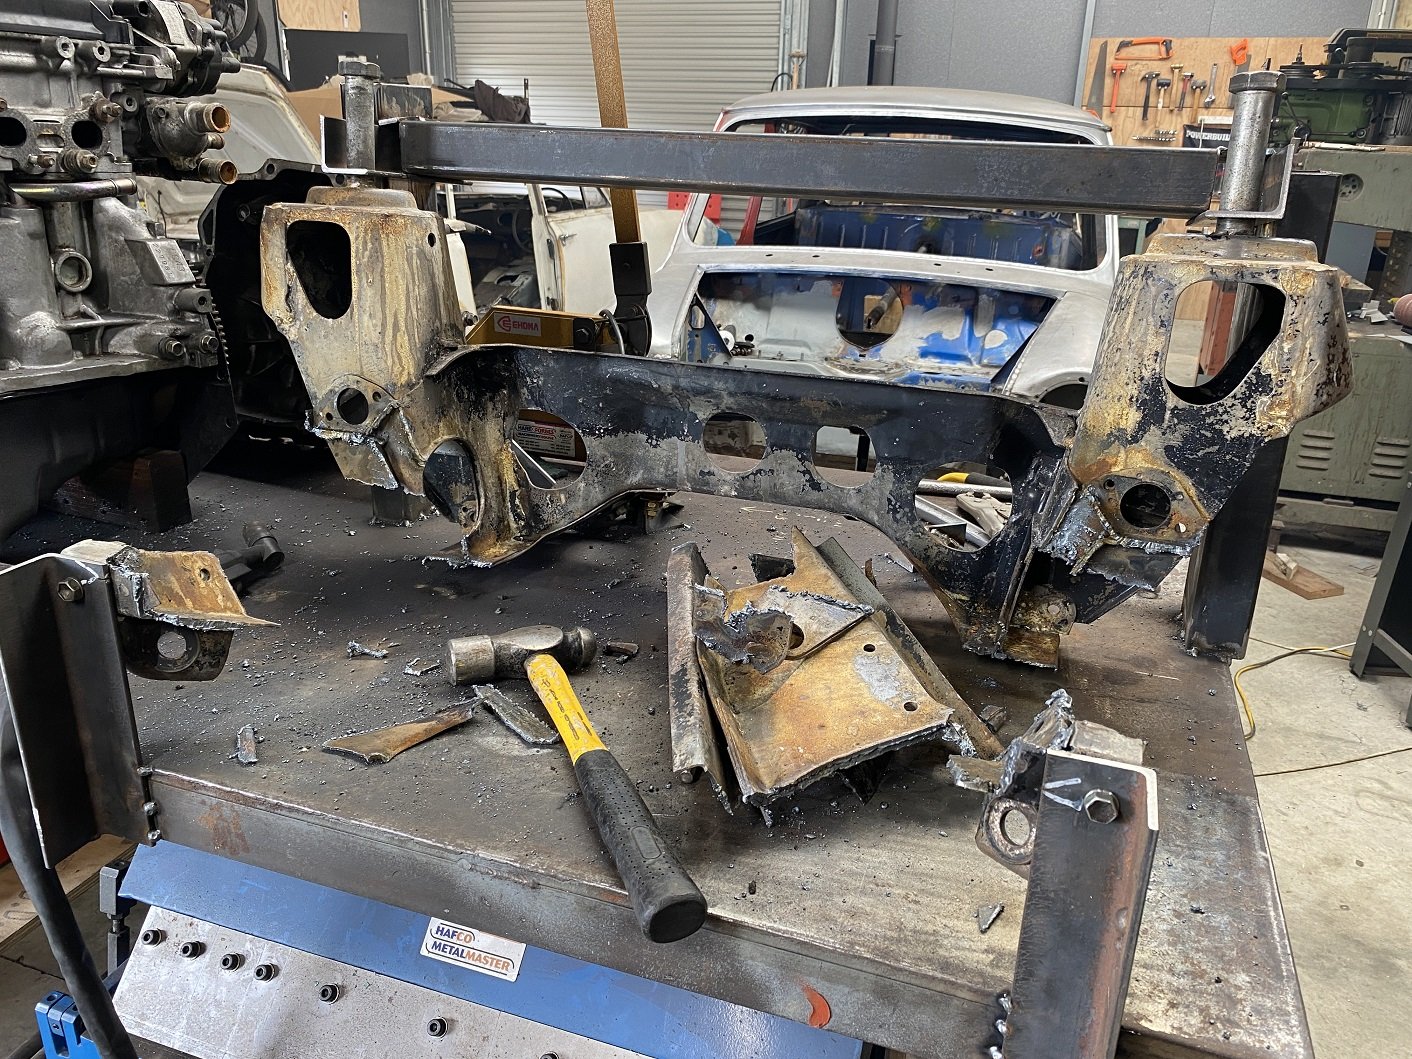
I thought I'd do some work on the poor neglected mini. I took out the subframe and welded a jig for it on my steel bench so I could cut it up and weld new bits in and have it still bolt into the car. I used the plasma cutter for the first time in years and years. After cutting it up I realised that I'd mounted it too low to fit the engine in the subframe while it's in the jig. Le Sigh. I guess I can work around that by fitting the engine in the car to ballpark where stuff needs to go then use the jig for the welding. I've since added some tabs to the jig to prevent the front mounts from turning on the bolt. Right now, the big bit of the subframe is in the paddling pool full of citric acid to clean it up a bit.
- 52 replies
-
- 14
-
-

Random slightly cool stuff you built but not worth its own thread, thread
Adoom replied to h4nd's topic in Other Projects
So I mentioned at work that I wanted an lpg weed burner, but didn't want one $300 much. Work comrade suggested I could make a forge burner for under $100. The 'jet' is a mig tip and yes, I have used soapy water to check for any leaks. Progress so far of forge burner on a stick. Yes, I am the shittest cameraman. I was concentrating more on not setting myself on fire than aiming the phone. -
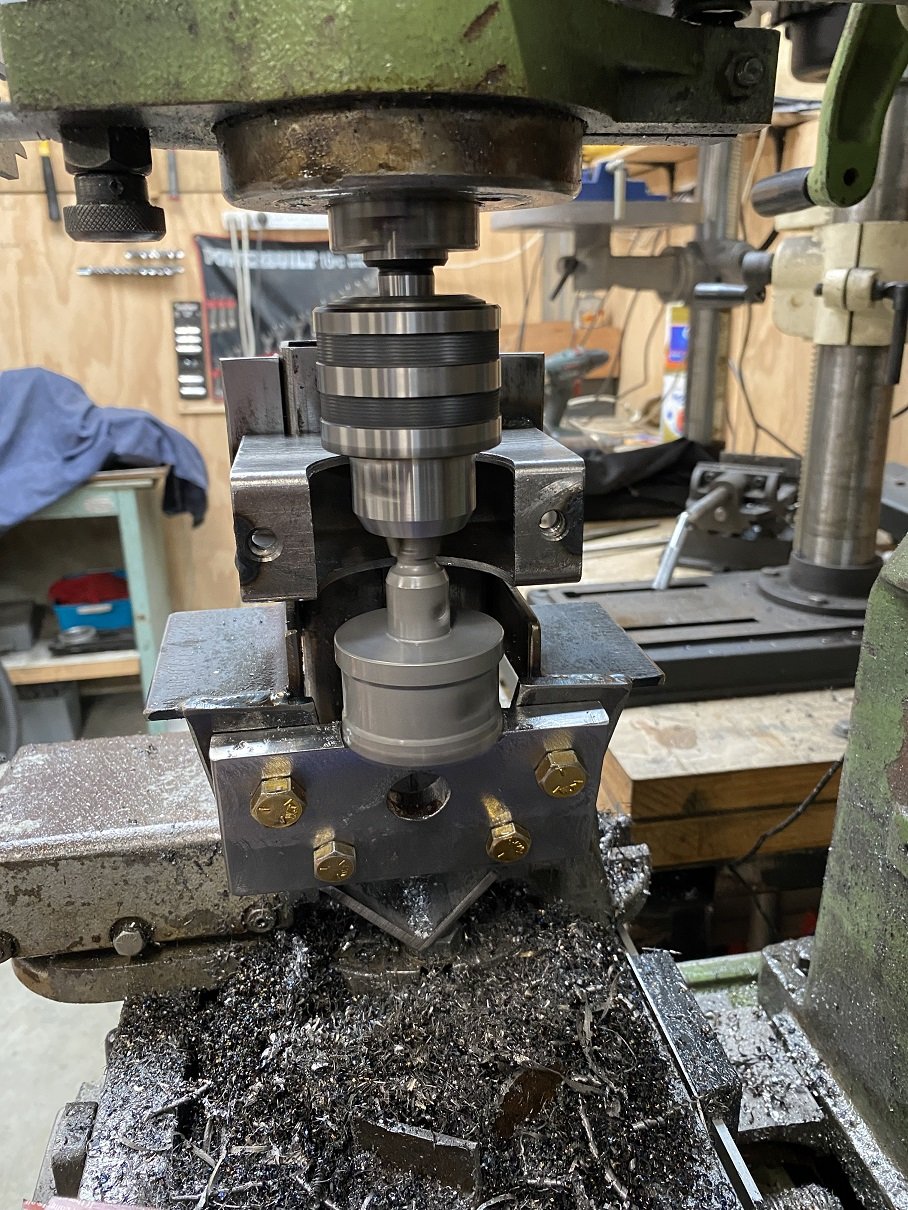
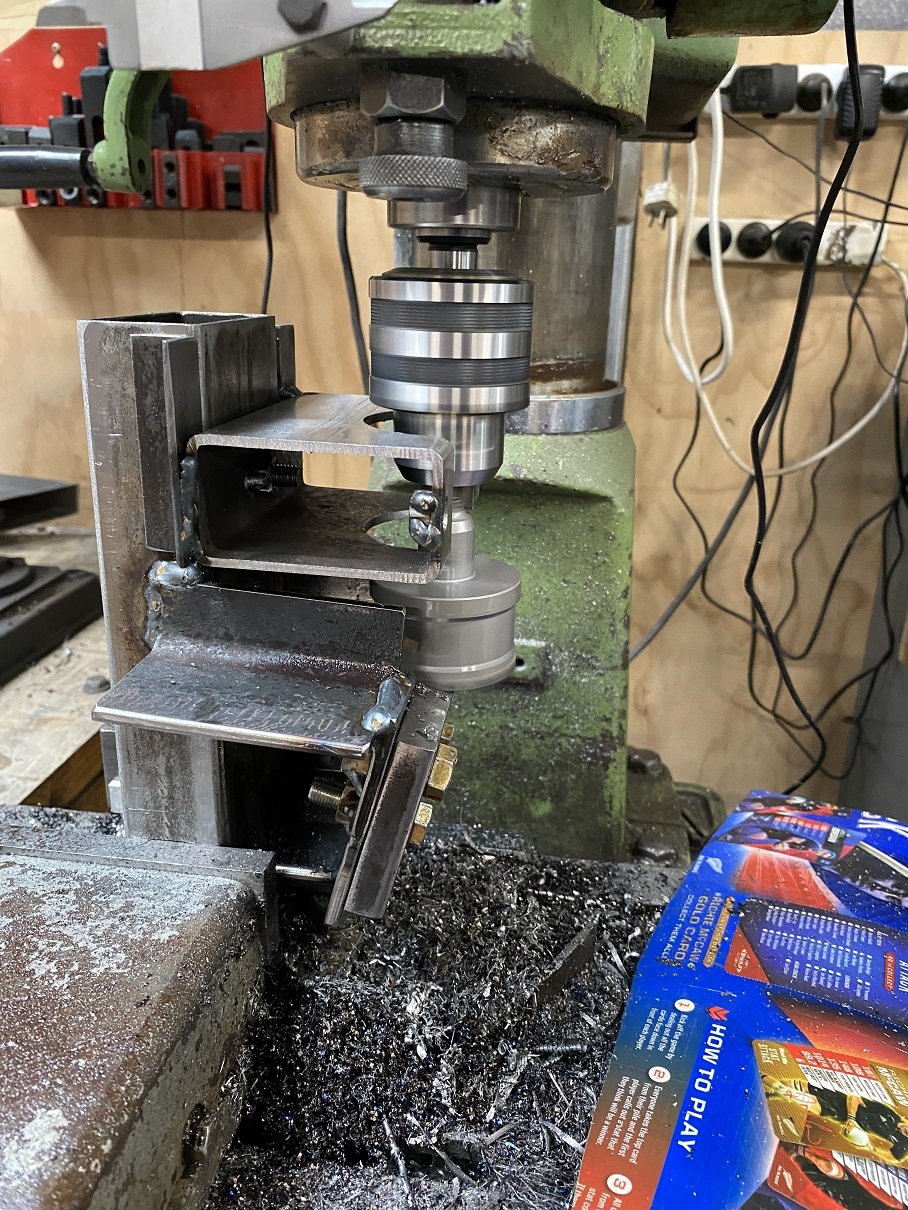
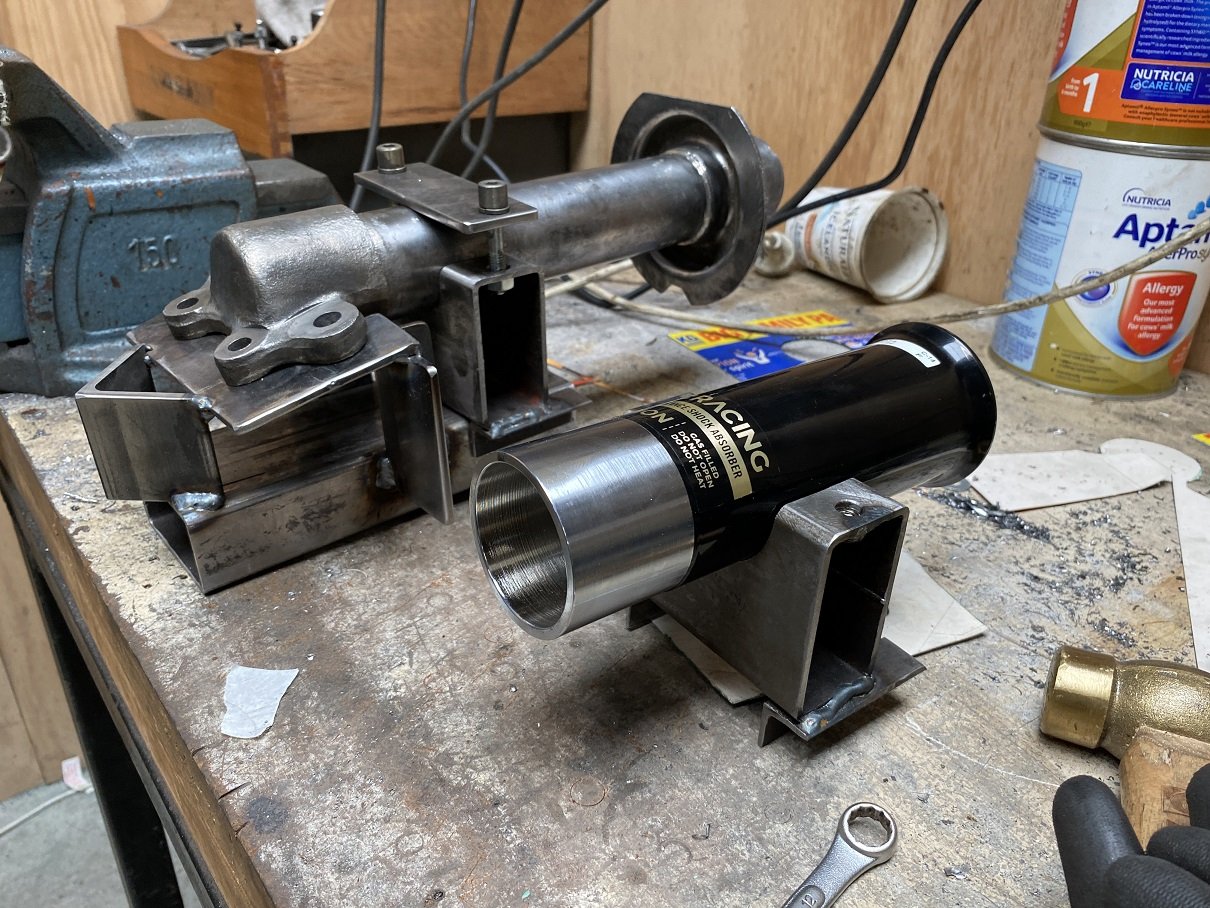
Well, the holesaw in the mill kind of worked, right up until I tried to push it too far and it jammed, chipped a tooth and bent the holesaw shaft. I finished it off with the vertical bandsaw and powerfile.
- 201 replies
-
- 18
-
-
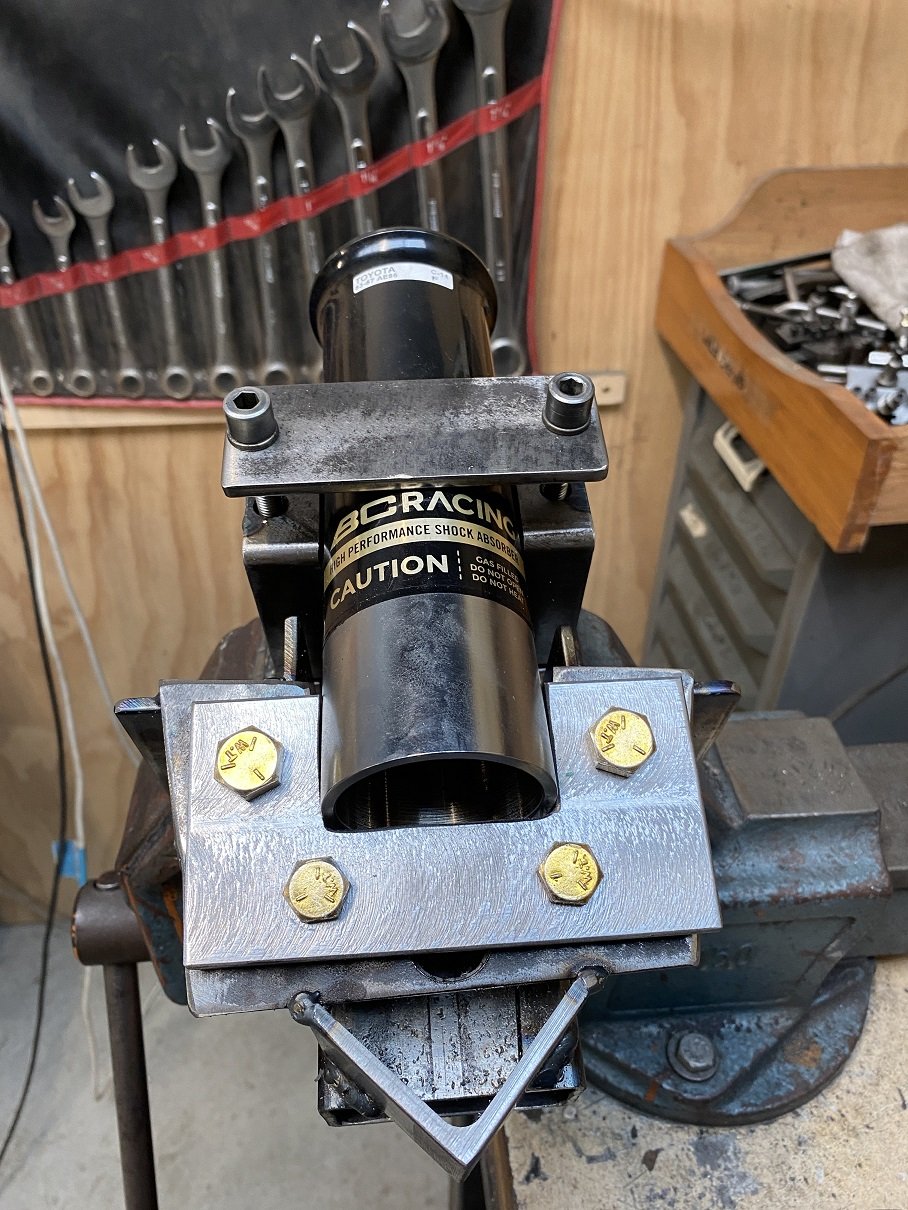
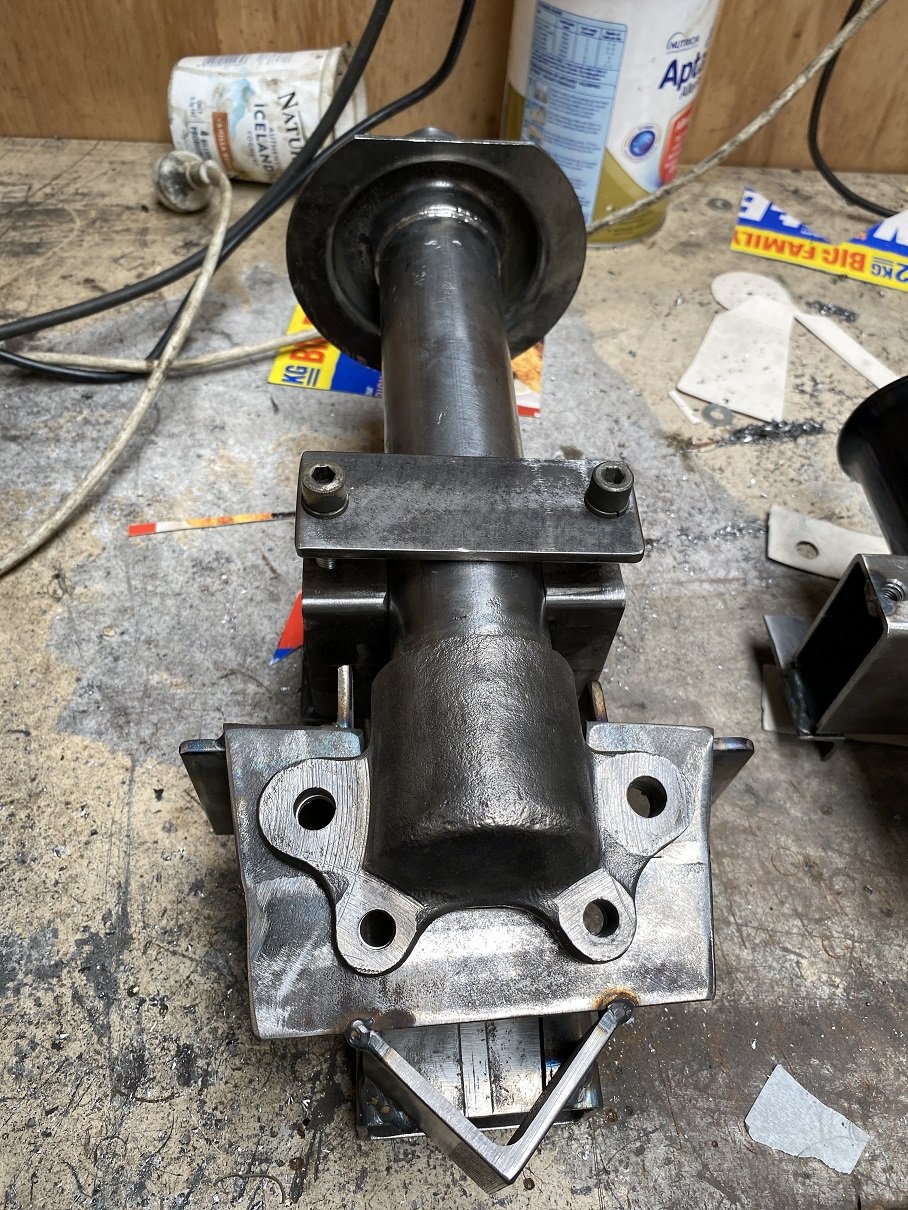
Making a jig to align the flange on the coil over tube. Fortunately the left and right sides are the same, so I only need one jig. I'm hoping I can stand the jig on it's end in the mill and use a hole saw that is the same diameter as the tube to cut the middle out of the flange. The flange still needs milling flat, and it's 2mm too thick.
- 201 replies
-
- 15
-
-
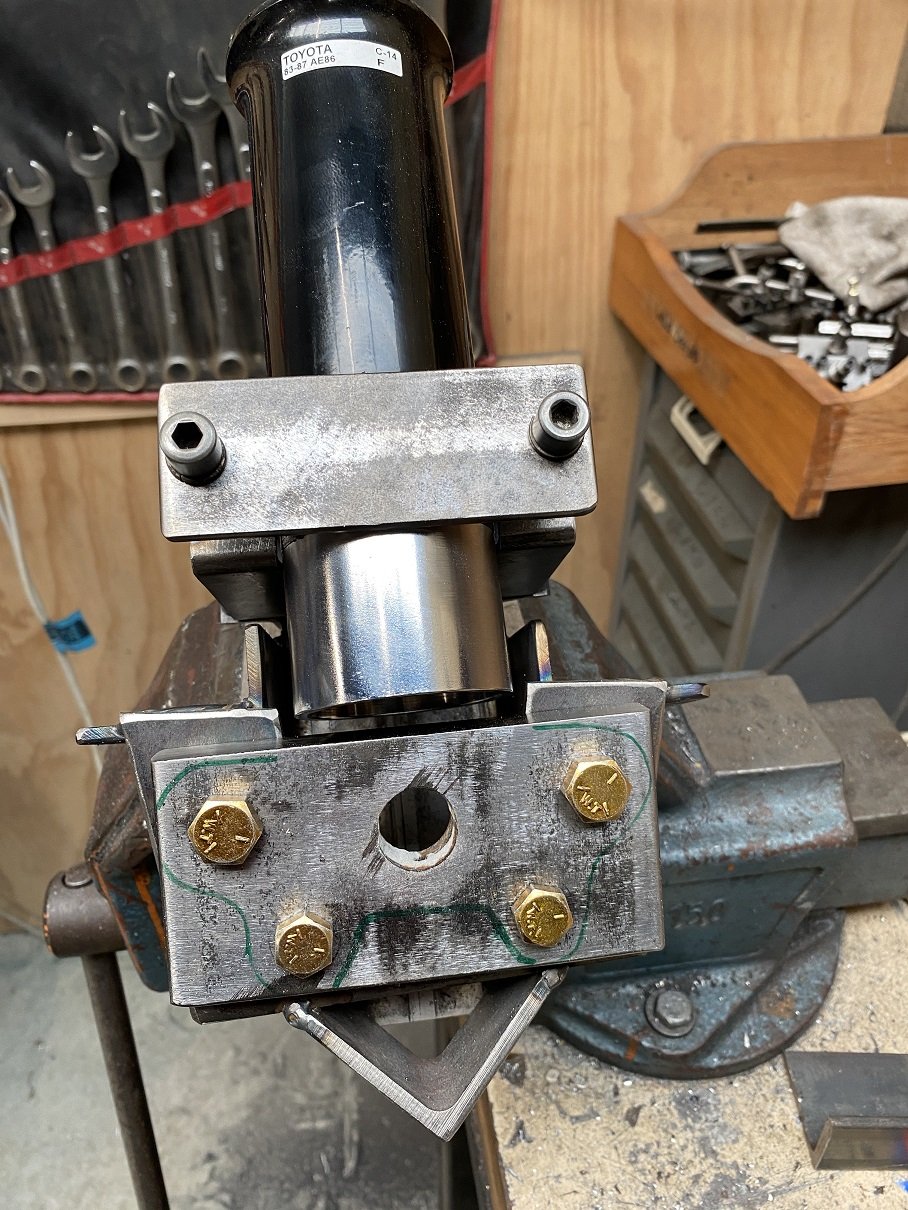
And the other side is done. I took it down off the axle stands to see how it looked. The subframe MIGHT, be 5-10mm closer to the left side..... or it's a 70's British car and it's not symmetrical. I have allowed for some misalignment by not welding the mounting studs in, they are just clamped by those two cap screws. So they can be moved around a bit when it's on a wheel alignment machine, then they can be welded solid. The front is supported by the jack, no springs or coilovers up there yet. The front arches are just SO ENORMOUS. I've measured the ground clearance of the front cross member and it's 180mm........ factory height.. .. But the sump is another 50mm lower. I'm not worried about the sump since it's it's in line with the wheels. The gearbox cross member has 130mm clearance, I'm a little concerned that it might catch on those really tall speed bumps like they have in Upper Hutt. I could probably trim it down by 20mm, but the only way to make it any lower profile is replace it with a heavy bit of 10mm flar bar which just seems so crude.
- 201 replies
-
- 24
-
-
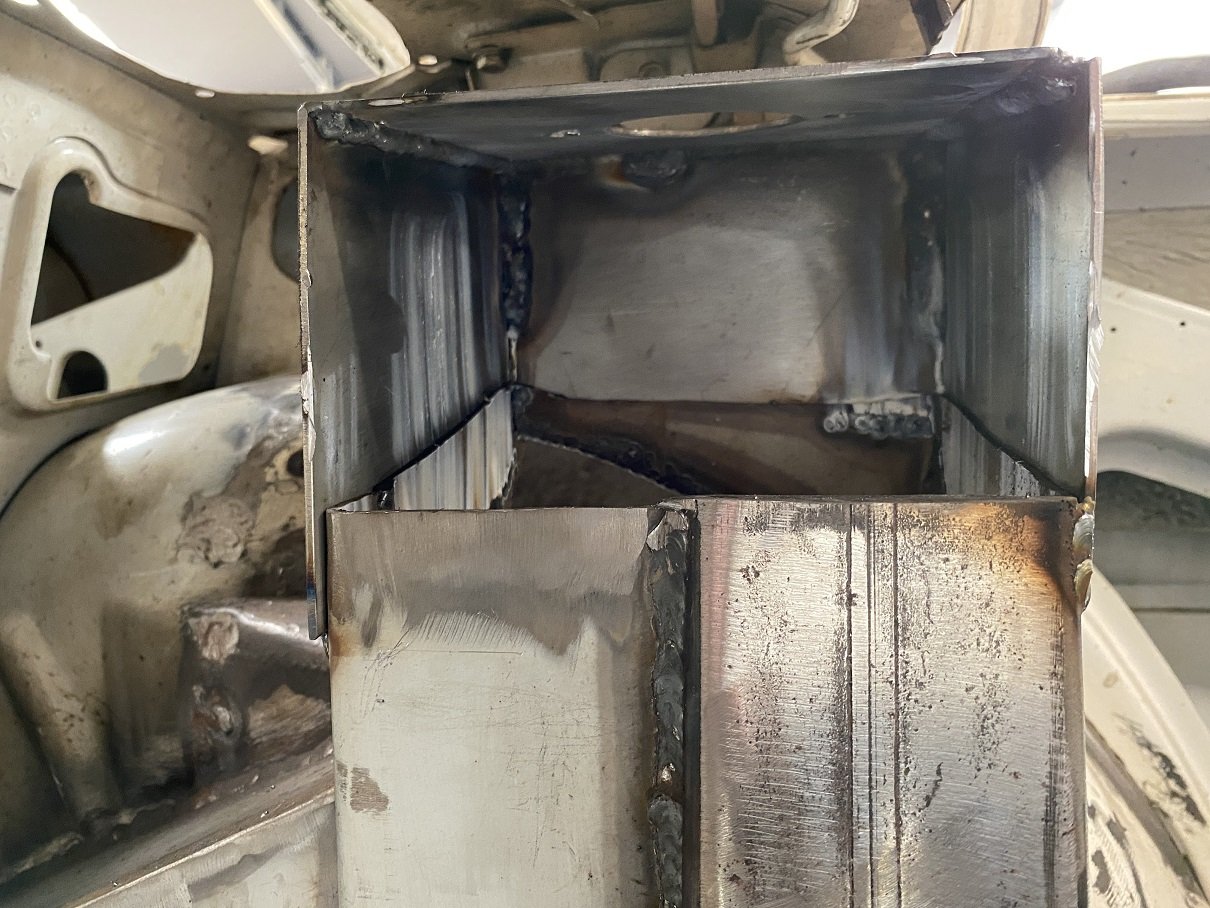
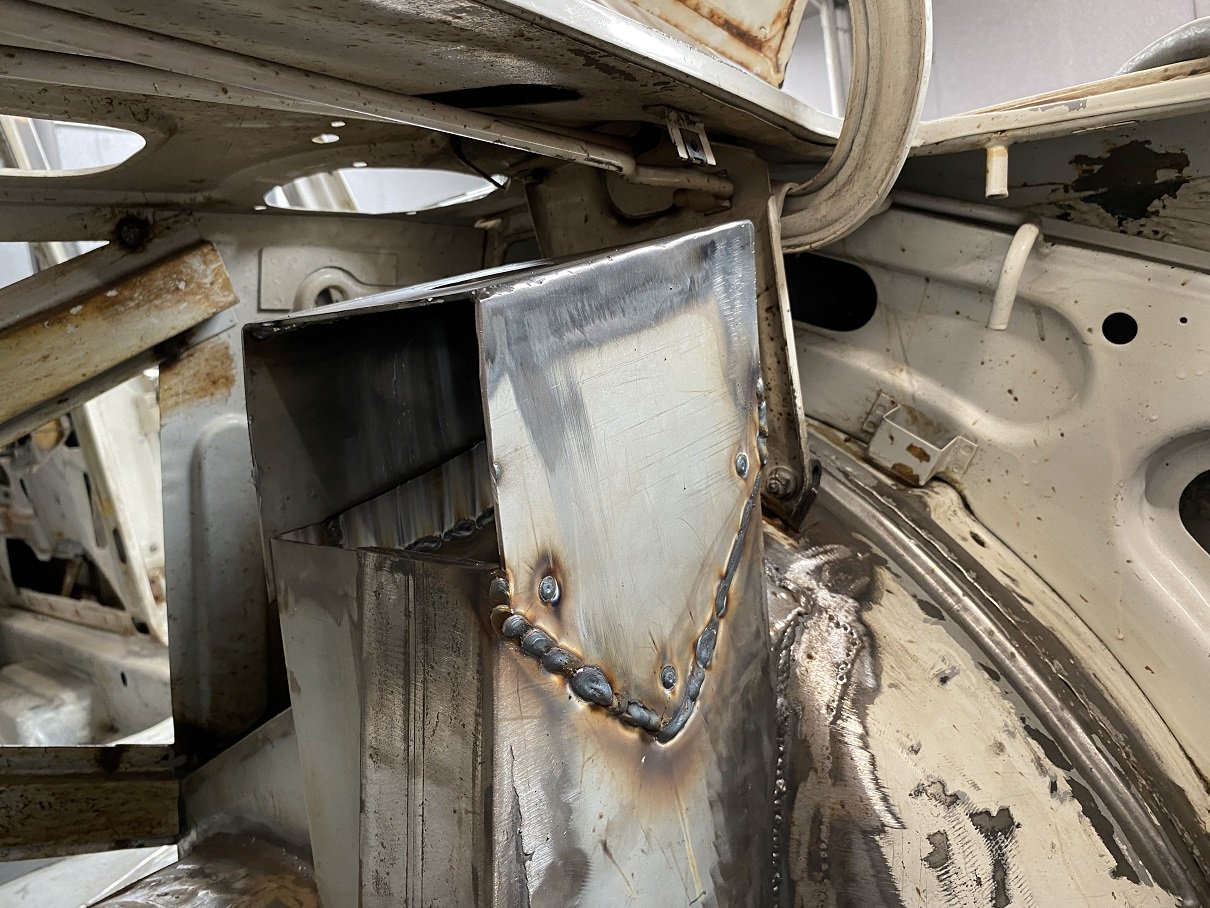
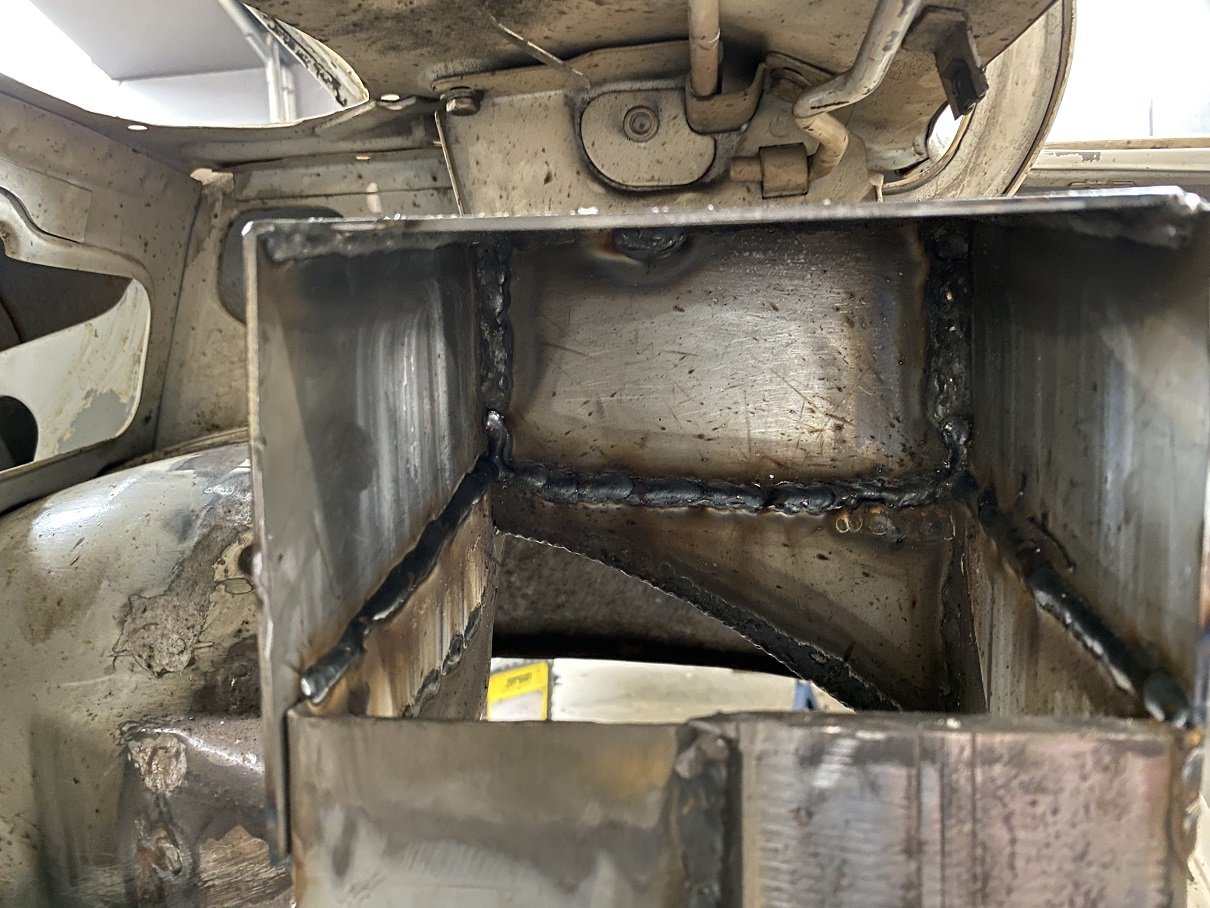
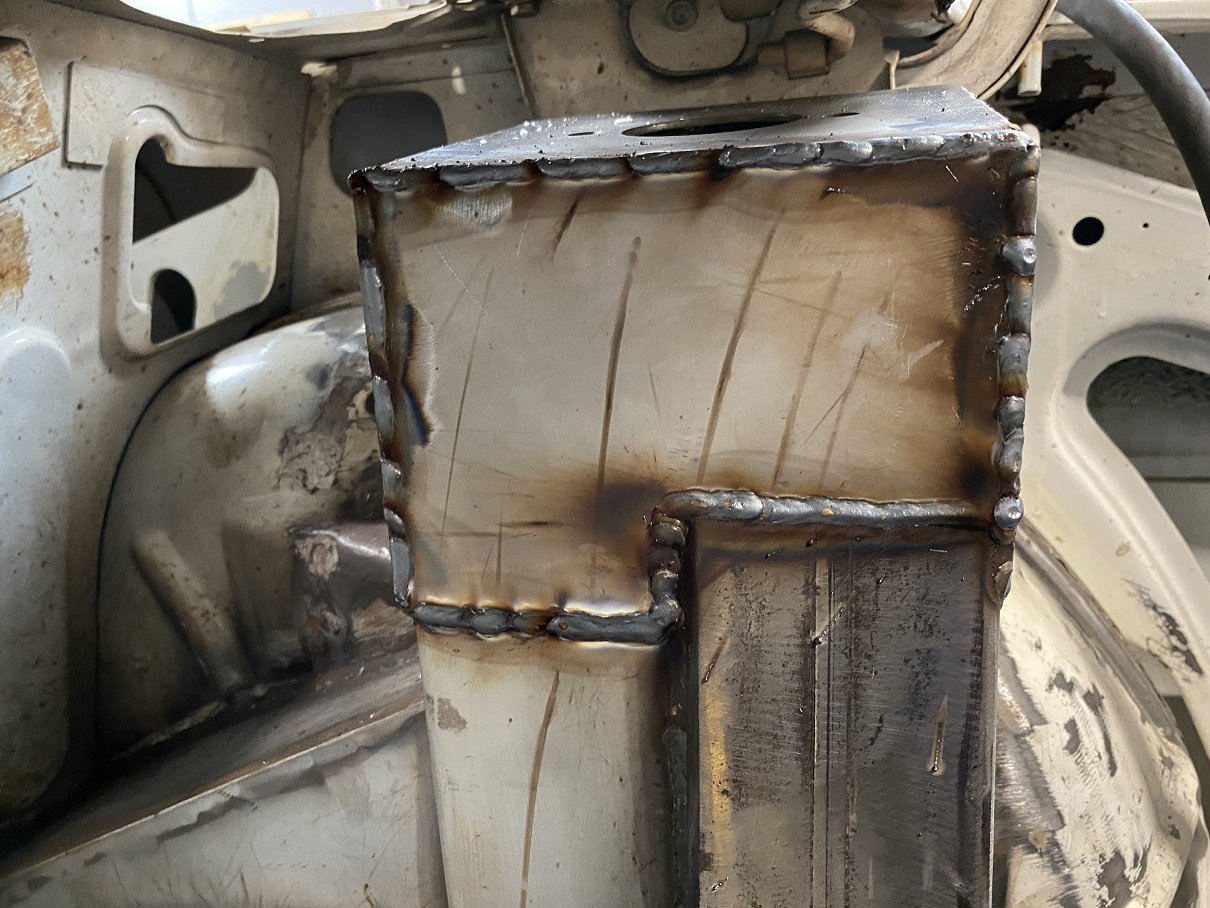
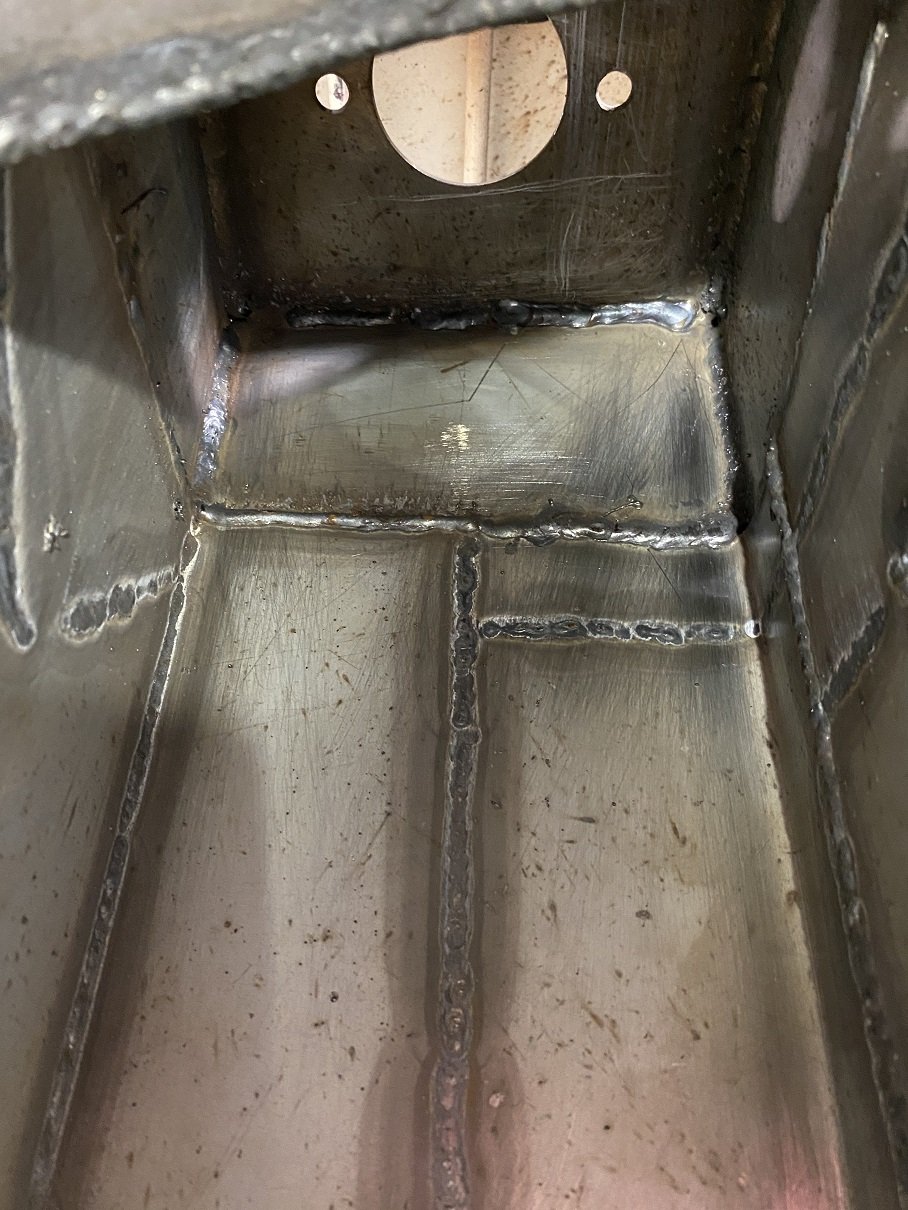
I needed to make the strut towers taller so they would work with the coilovers. Not shown in the photos is how I partially fabricated the new top and held it in place with wooden spacers and tek screws. Once I had it tacked together I could cut the old top off and use the teck screws for alignment. I welded the joins inside and out with it removed to make it easier on myself. I left one side off so I could see to do the indie welds joining it to the tower. Do the inside welds. Close the hole. The access to see wtf I was doing was real bad, but I also welded the back of the closing plate. No pics, but the coilover fits now and I can adjust it so it's at ride height when the spring is compressed. There's plenty more adjustment left to fine tune. Got to do the other side now.
- 201 replies
-
- 16
-
-
....that gearbox adapter plate. It looks very rectangular.
-
Plus one for these guys. Greg is a good guy and has made me a couple of clutches. I have one of their hybrid puk clutches in my Starlet behind the CA18DET, organic on one side and ceramic(?) on the other, so you get some clutch feel but it can take more power than a fully organic clutch. It must have been at least 7 years ago though. Might have been around $600 back then.
-
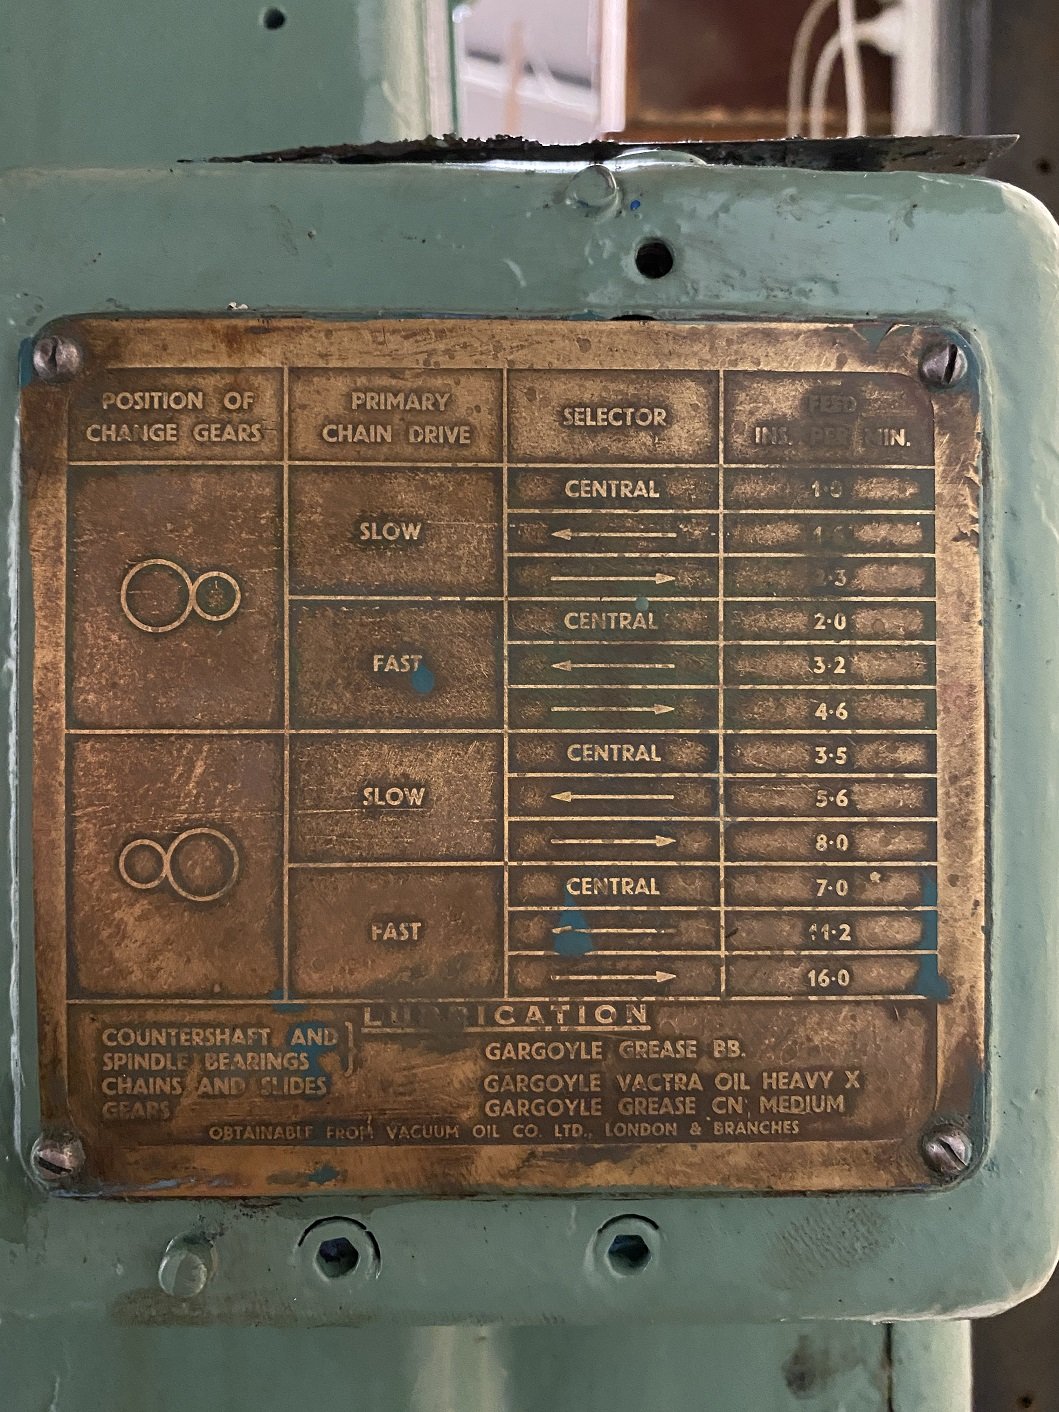
The heavy oil is easy. I'll just use way oil, the stuff I have is super tacky. But I've not been able to fin out what is the difference between 'grease BB'(apparently a bearing grease) and 'grease cn medium'.
-
The knee is REAL heavy. I wonder what the equivalent oils/greases for these are.
-
I've got most of a full sheet of 0.8 cold rolled, but seems more like 0.7 to me. If that's a suitable thickness, let me know and I'll give you some. Adam
-
The whittling option was referring to making a steel version of the cast lower cup thing with integral side flanges. That would be a lot of work. But the plate option welded directly to the coil over strut tube is what I will likely go for, if I get technical approval. I do know a guy who can plasma/flame/laser cut stuff, but it's only 12mm, so I'd likely just use my bandsaw.
-
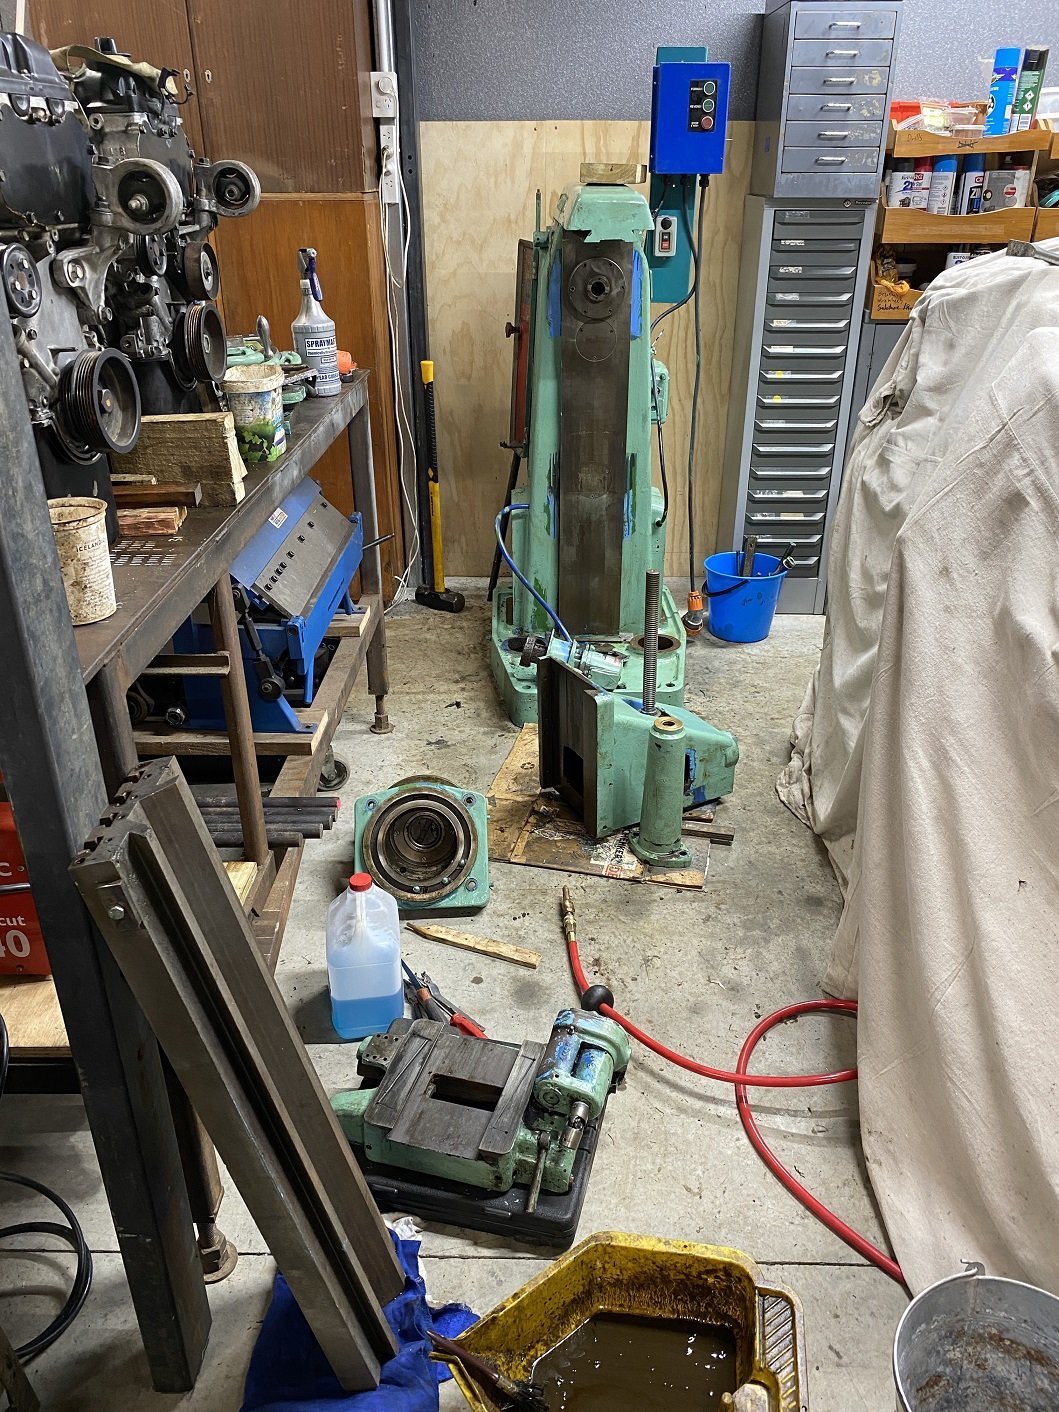
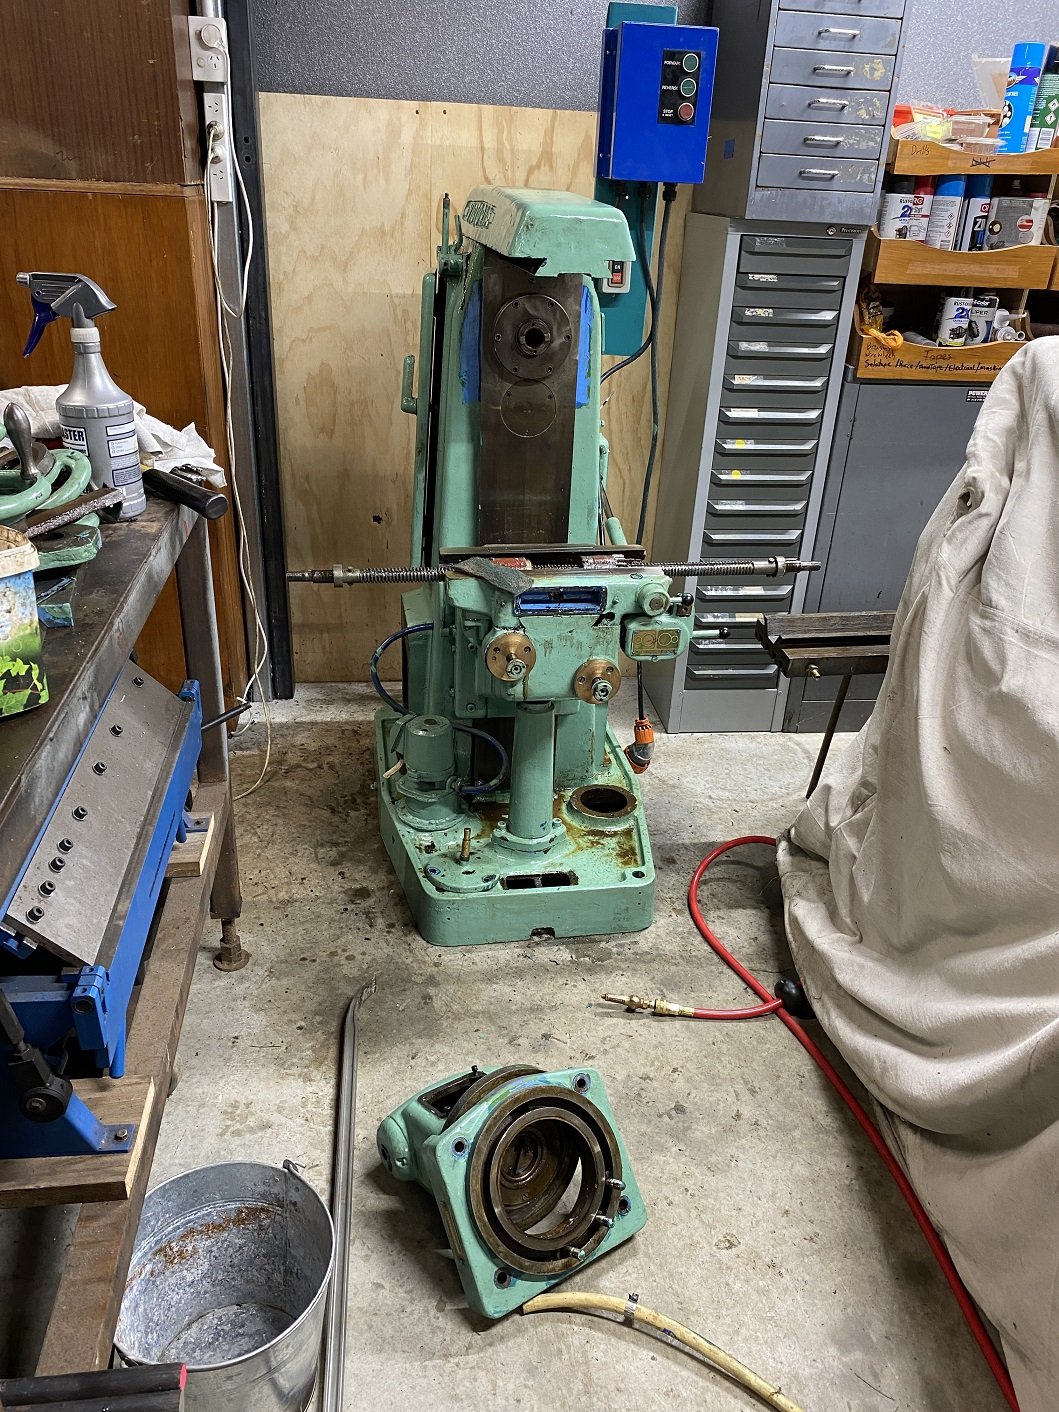
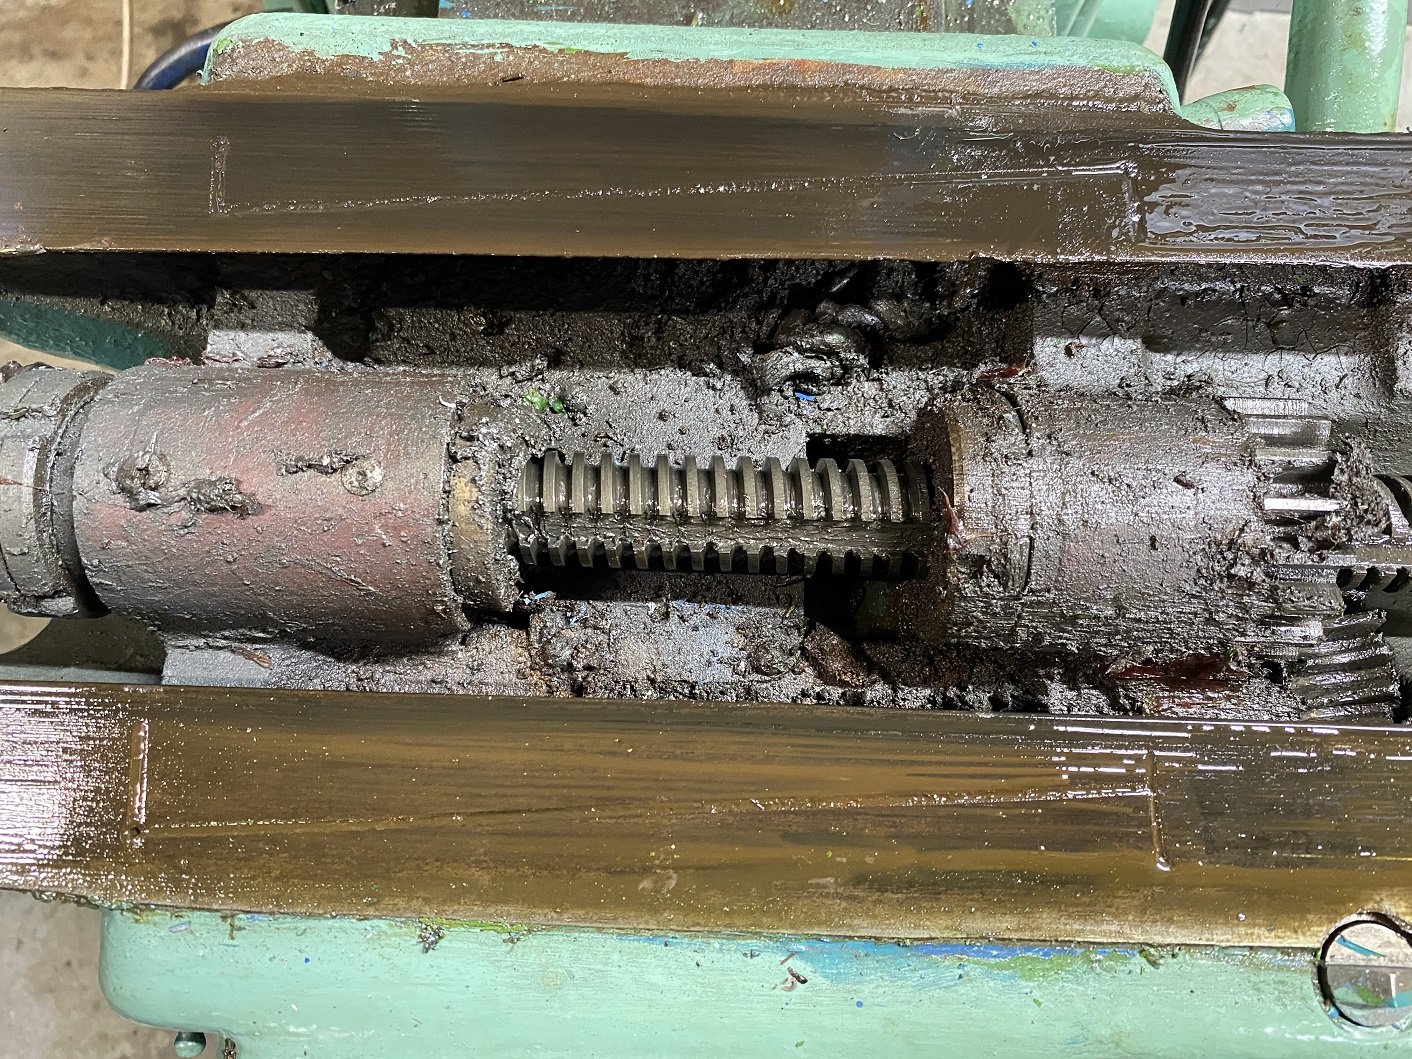
I've been taking it to bits to clean. The overarm support is really bloody hard to move, I've been using the sledge with a block of wood, then once it was forward enough, there are some holes I can get the prybar in. The part of the gib strip I can see looks suspiciously like aluminium flatbar..... Hopefully it's not. Just because they look like grease nipples on your mill or lathe, doesn't mean they are used for grease. OIL! OIL! OIL OIL OIL OIL !!!!!!!!!! No wonder it took so much effort to turn the wheels. I cleaned up the top surface and it's real dark, like black, but I can't feel obvious scoring, so I'm hoping it's okay.
-
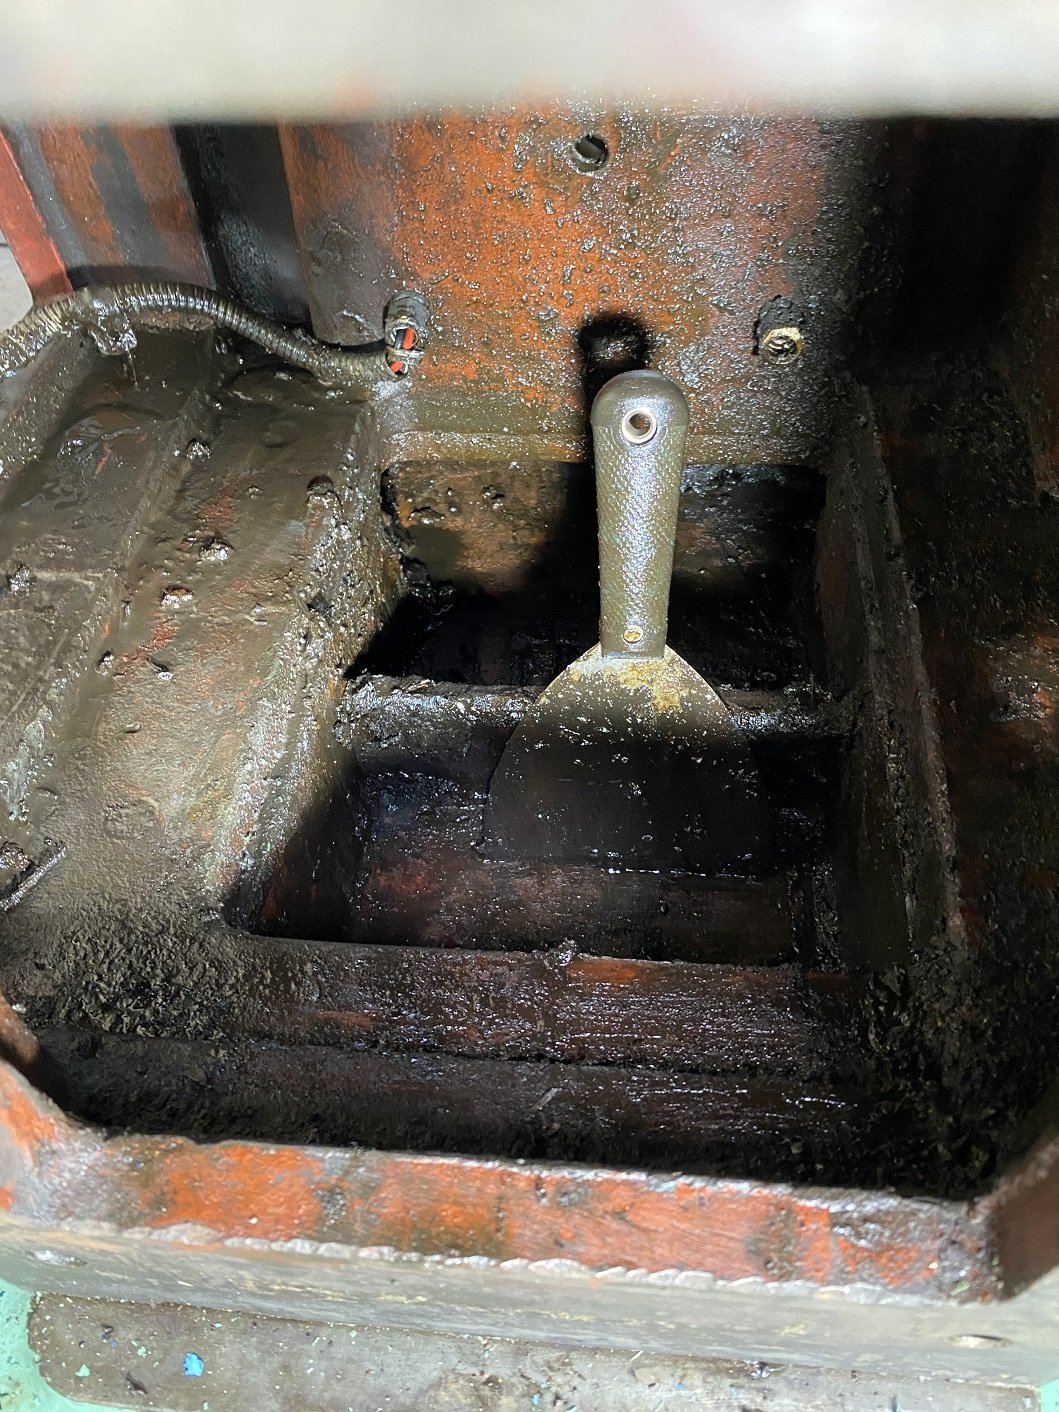
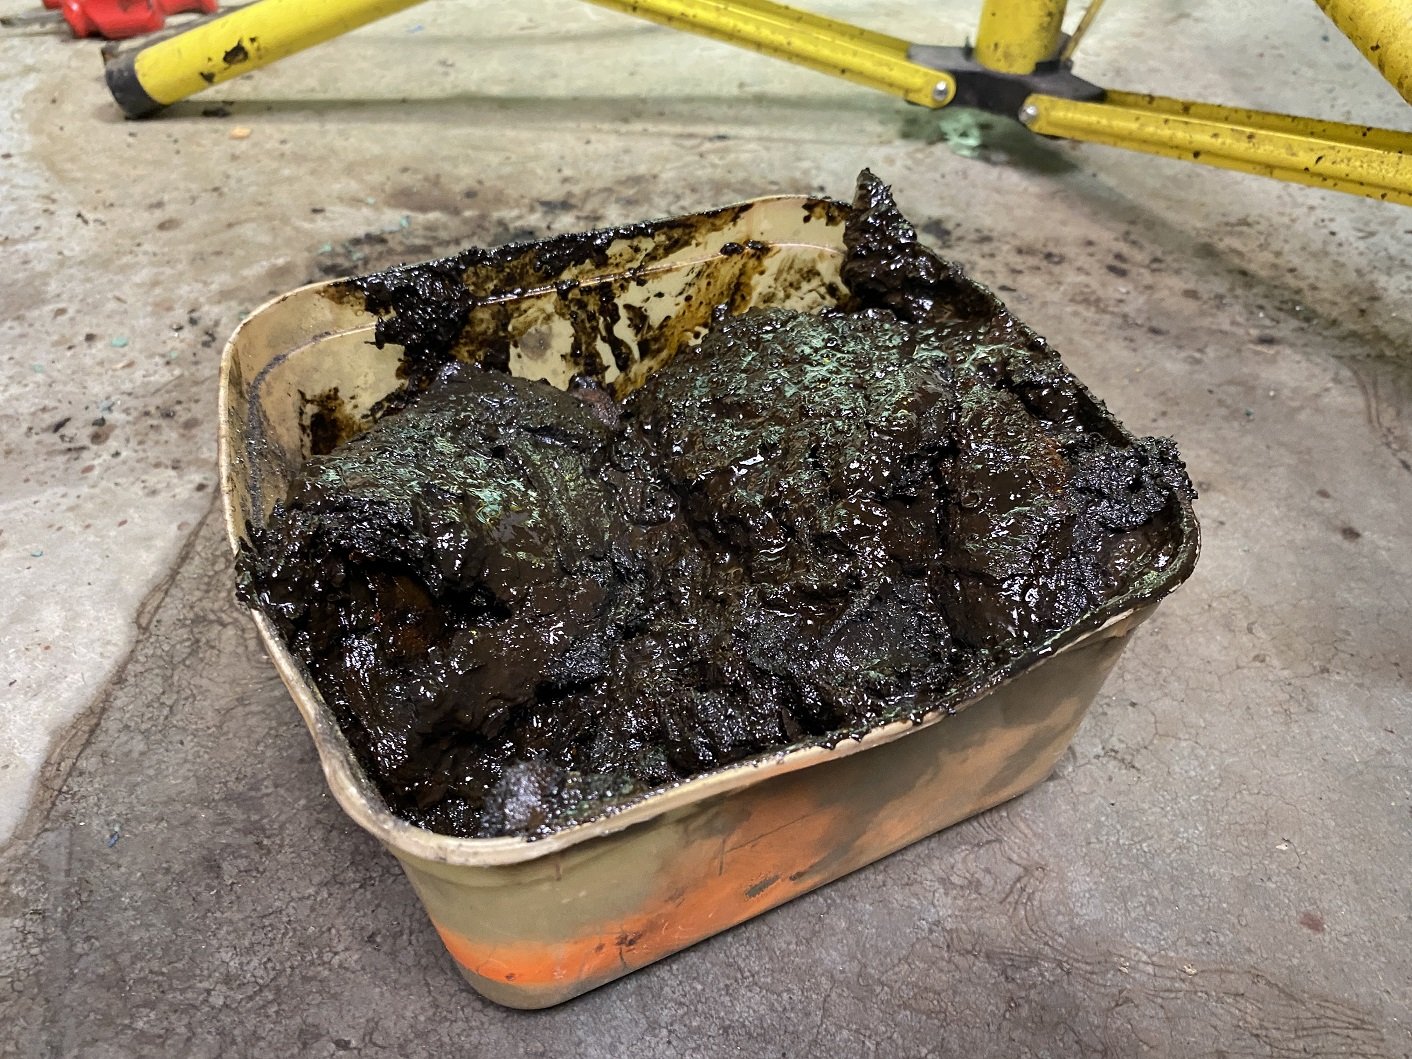
With the motor out, it was less hard to clean out the sump sludge. I filled two icecream tubs with all the sludge I could reach. But I think there may be a cavity at the back I don't have enough elbows for, as well as the area in front of the column. So glad it doesn't smell... Since I can't reach all of it, I've emptied about 3 litres of undiluted ExOff degreaser into it and I'll leave it for a few days. It seems to break it up quite well scrubbing with a brush, the brush doesn't become instantly packed with grease(it's possibly more like oily mud?). I'm thinking I can maybe suck it all up using some hose attached to a bucket and have the shop vac sucking the air out of the bucket. There is a drain plug on the side, but that's totally just going to make a big mess on the floor.
- 10 replies
-
- 11
-
-
Jason’s Bush Block and Self Sustainability Ramblings - Ready for Roofing
Adoom replied to j.e.d.'s topic in Other Projects
BEST! GATEPOSTS! EVER! I'd love to make giant gateposts like that on my residential section.