

slacker.cam
-
Posts
558 -
Joined
-
Last visited
Everything posted by slacker.cam
-
Here's a small update on the electric water pump saga (originally posted July 2010). The background is that when I modified the 20V to have the pipes from the radiator enter at the front of the engine I decided it would be a cool idea to use an external electric water pump. I had previosuly used them extensively on our Formula SAE cars (http://www.fsae.co.nz) and I liked the idea beacuse: - Reduced load on the engine (the elec pump is far more efficient than a mech pump) - No need to make complicated water outlets or have complicated plumbing - No need for a thermostat (saving weight and reducing complexity) The idea was to remove the innards of the 20V water pump and weld a plate over the hole in the back where the water would normally enter and weld a new fitting on the front - this should give me tidier plumbing. I did this AGES ago (as documented above) but I've always been concerned by the idea of having no thermostat on the car. This website has some great information on cooling options for 20V 4AGEs in RWD configuration: http://s-86.com/s-newcoolingguide.html You can see from the website above that on the 20V motor the thermostat orignally lives in the block that bolts to the back of the motor. This is not used in my setup so I need a different solution. The other options were to run an external thermostat (ugly) or get a water pump from a RWD 4AGE (expensive). Hence the attraction of the electric pump. A good friend of mine has always argued that the car should have a thermostat as it increases the pressure inside of the engine and helps to reduce localised boiling. Recently I have been thinking about this a lot as I don't want to risk damaging my motor. I now believe that this is a false statement (at least in the 4AGE world) as the thermostat on a 16V motor is at the start of the cooling flow and would therefore put the engine at a lower pressure than the radiator. The image below shows the flow direction: In addition to this I also stumbled across the FAQ on the Davies Craig website. This has made me even more confident in not running a thermostat. This is an excerpt from the page: What do I do with the engine’s existing thermostat? If you choose to use the Davies Craig Digital Controller you should remove the engine’s thermostat – the Controller is the new “thermostat”. The Digital Controller allows you to electronically set the engine target temperature and it adjusts the rate of coolant flow, hunting for, and then locking onto the temperature you set. You have five (5) options; 70c, 75c, 80c, 85c and 90c for either economy or performance, unlike your thermostat, which is set at one temperature by the engine manufacturer. More can be found here: http://www.daviescraig.com.au/Electric_Water_Pumps__EWP-content.aspx So my thoughts are now far more positive and I think my solution will be very elegant. It will be ultra simple from a plumbing perspective and if the marketing material is correct then I stand to gain a decent amount of power by ditching the mechanical pump
-
Fast forward to July 2010 for this.... Well this is totally out of order but I've spent the last few hours playing on SolidWorks and I wanted to share what I've come up with I wanted to be able to visualise and play with some different roll cage designs before I took the car to the fabricators so I dusted off my mechanical desgin hat (I'm an electronics engineer most of the time) and whipped up a few concepts. The results are below. Basic steps were to import a blueprint drawing of the car, start placing points in 3 dimensional space, connect them up and then create the actual tubes around the line drawing. I'm pretty happy with how it's come up but any input would be greatly appreciated! This is the first time I've got a cage put in a car so all I'm going by is photos of others peoples designs and what I 'think' would be good. In NZ most roll cages are built from mild steel tube in 38.1mm OD and 2.5mm wall thickness. The weight of the tubes for my design will be around 56kg, plus the mounting points and whatnot. Note: As of today (May 2011) my ideas for the cage are slightly different. After talking to Tony Lynch I've decided to move the harnesses back to the rear axle line to give the belts a bit of give in the event of a crash. I was orignally worried about the belts going slack in a crash but Tony suggested that having them go too tight and crush my insides was slightly more concerning . Made sense to me.... At this stage it looks like Tony will be building the cage for me. Hopefully very soon - although I've been saying that the cage is the 'next step' for about 2 years now haha.
-
There's more to post here as I sort through all my old photos and write it up...
-
As the car was oginally carburettored the fuel tank needed to be modified to accept an EFI fuel pump. My car will have an in tank fuel pump that will act as a lift pump to a surge tank. I already have a Bosch 910 external pump for the main pump and a Sard fuel pressure regulator. It just so happened that while I was doing this part of the project that my Dads Jeep Cherokee developed a problem where it would run fine when cold but would die after 20 mins of running. It turned out to be the crank angle sensor but he mistakenly diagnosed it as a faulty fuel pump. The upside of this is I now had a perfectly good in-tank pump looking for a home. I took the standard AE85 fuel tank pickup and bent the pipe to work with the Jeep pump. I'm still not totally happy with how this works as I am dealing with two different pipe sizes and it just doesn't fit quite right. To get the wires into the tank I used an awesome fitting from a VN Holden Commodore fuel tank. It is a plastic fitting that has two wires passing through it and is o-ring sealed. If you ever need to get wires into a fuel tank I highly reccomend these fittings.
-
Around this time I bought a set of brake calipers and rotors from a S14 Nissan Sivia K's. 280mm rotors up front with 4 pot calipers should do well on this little car. My road car is a S14 and with good pads I have never had brake fade on the track so I figured they would be a good choice here. One of the drawbacks of the S14 calipers is that they are cast iron - so they are relatively heavy. I plan to swap to Z32 calipers when the car is running, maybe a set of Willwoods if money permits. The difficult part of this conversion is building the mounting brakets for the calipers and making the system work with the front rotors mounting over the hub, rather than behind it like the original setup. The rear caliper brakets weren't too bad and will be machined from a flat plate and machined to the correct thickness (12mm). I designed the brackets on Solidworks ready to be laser cut along with the front ones. No pics sorry of the brackets but here is the front rotor comparison (note that these are AE85 rotors, not AE86 ones): I also machined the front hubs down to fit inside of the S14 rotor. These need a steel ring machined to locate the rotor on the hub correctly. As of yet (July 2010) I have not yet done this. Somehow an entire year went by and it's 'now' the start of 2008. Next on the list was front suspension and brakes. I finally got a chance to modify the front struts for the D2 adjustable setup. The strut inserts did not fit correctly so i had to modify the big nut that holds them in to place. I turned it down in the lathe so it was shorter and had less wall thickness. This sorted the problem and the front spring/shock assembly was complete. Now that the car was effectively rolling again I set about doing some panel work. The original bootlid was fairly well rusted out and I loved the look of the TRD ducktails so I killed two birds with one stone and bought a fibreglass bootlid with the ducktail molded in. This saves me some weight and I never have to worry about rust issues again! This is how the car looked in June 2008: I repaired, filled and primered 2 guards ready for final paint and started on some rust repairs over the next couple of months. I found a significant amount of rust in the right rear wheel arch and in the area behind the bumper. A lot of this had been repaired badly in the past and had been covered with bog. Pics:
-
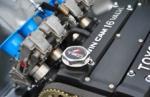
During the second half of 2006 not a lot happened. I was busy with University study and other projects/girls. I decided that I would use a MegaSquirt to run the engine as I enjoy electronics and couldn't afford an expensive Motec or Autronic. I couldn't justify spending a lot of money on a mediocre ECU like a Link either (they are a lot better these days however). The MegaSquirt would allow me to ditch the distributor so no firewall bashing would have to take place. I also modified the 20Vs cooling system to work in RWD format. I know there are a lot of people that believe that the 20V should not have the coolant path changed but I feel that its a reasonable tradeoff for a neat and reliable cooling system. Therefore I modified the back of the head to open up the flow path from exhaust side to intake side. I made the channel as large as possible using an angle grinder and die grinder (sorry no pics). I made simple blockoff plates for the rear and side of the motor out of 5mm aluminium. As this is a track car I am not running a heater core so no additional connections needed to be made. I like(d) the idea of running an electric water pump as this would allow me to electronically control the water temperature and do away with the thermostat. The idea is to provide a restrictor plate to mimick the flow restriction of the thermostat and by sensing the water temp I will electronically regulate the speed of the water pump. As there is no thermostat to bypass the raditor when cold the pump will always idle at a minimal flow level to prevent localised boiling and hot spots. I am still not certain that this is the best way to go about the cooling. Any ideas/feedback would be great. I got one of these http://www.daviescraig.com.au/Electric_Water_Pumps-EWP80__12V__ELECTRIC_WATER_PUMP___PART_No__8005-details.aspx. It will sit between the bottom radiator outlet and the original water pump. The flow direction is cold water out of the radiator is pumped into the front of the block. I modified the 20V water pump to simply act as a connection to the block: In the next summer holidays (start of 2007) I sourced an early Hilux LSD diff. I sent the diff head away to be reconditioned by Steelie Gears here in Auckland and set to swapping all of the mounts from the standard AE85 diff across to the hilux. As it was from an early hilux I was lucky and did not have to get the housing and axles shortened. I made a jig out of MDF and piano hinge to get all of the mounts lined up in the correct place for welding. The photos explain this better than I can: I then fitted it into the car to ensure that everything lined up: Then painted and reassembled the whole thing. Painted with a 'CRC Black Zinc' rattle can. It got treated to a new set of bearings (pinion and main wheel bearings) and new axle seals. I got the axles redrilled to 4x114.3 and turned the hubs to the correct diameter for the brake rotors by angle grinding them while spinning the axle by hand. It worked really well! It's now a 95% brand new diff:
-
While all this was happening I bought a damaged AE101 Levin and grabbed the 20V Silvertop out of it. This was actually my old car so I knew that the motor was in good condition. The plan was (and still is) to get the car running with the NA motor and then build up a more powerful motor later. This would allow me to worry less about turbo manifolds, intercooler piping, and the like and more on actually getting the car running. Because of these plans I wanted to lay a solid foundation in the gearbox, diff and brakes department. The natural choice was to therefore use a W55 gearbox with a custom bellhousing and a hilux diff with the mounts swapped over. I got hold of a good condition gearbox and new bellhousing from a company called Reardrive in Palmy (edit: saw they were still there while at nats over the weekend). The bellhousing was expensive but this was offset somewhat as I was able to swap a T50 bellhousing that I already had. Once I had the gearbox I drilled/cut the approriate holes in the firewall to accept the clutch master cylinder and grabbed a manual pedal box from the parts car. From what I remember the clutch master and slave cylinders were surprisingly cheap. Next on the todo list was to find a suitable clutch as the original gearbox was automatic. In keping with the bullet-proof driveline theme I got my hands on a late model 4AGZE 224mm flywheel with OEM friction and pressure plates. I got this from Karl Skewes funnily enough. I now had enough parts to bolt the engine and gearbox together and test fit it in the car. While I was at it I installed the spigot bearing. Clutch fork is W55, can't remember what the release bearing is at this stage... This was a good day: After test fitting the engine I found that the shifter location was slightly too far forward as the W55 I bought had a mid-mount shifter on it. I decided to enlarge the shifter hole in the body to make it fit (I now regret that slightly). The only painting I wanted to do was paint the engine bay so I wouldn't have to pull the engine out later on when I repainted the rest of the car. I spent days cleaning and prepping the engine bay. The first lot of paint got ruined as I was painting outside and it started to rain. I nailed it on the second try however. The engine bay was now a nice satin black: This was in March 2006. While the front suspension was out while painting the engine bay I bought a set of D2 suspension for it. It was not great but it would be enough to get me on the track. It wouldn't be hard to upgrade later on when money allowed. I started putting things back together:
-
Discuss this piece here: Cam's 1985 Toyota AE85 Racecar These posts have been posted to a different forum but oldschool seems to be my home these days so I'll copy and paste everything over and keep both threads up to date from now on So first up is some background on the project to date. Hopefully this follows as a story in reasonably chronoloigcal order. I got obsessed with the thought of owning an AE86 when I was still at highschool (8 years ago) and even though they were far less popular (and therefore less expensive) back then; there was no way I could afford a decent track car. So in 2005 I got hold of a stripped out AE85 for very cheap and decided this would be the base of a ground-up track car build. It cost me a whopping $251 - getting it home from Taupo cost me nearly as much in gas and trailer hirage! This was the state the car was in when I got hold of it: It didn't take me too long to realise that I was in far over my head from both a skills an monetary point of view. The body was in very bad shape and it was going to be a nightmare trying to piece back together an entire car from a pile of pieces that I didn't even take apart. Towards the end of 2005 I came across a driveable AE85 and picked it up for $1500NZD (pretty cheap for anything AE86 related). It had no WOF but didn't need too much work done to make it legal. The original car immediately began donating parts in the way of a LF guard, indicator lights and pop-up unit as the car had been in a minor front left accident. I also built a rough as guts under diff exhaust (as it had none to start with), got both front and rear bumpers reconditioned, fixed some minor rust (bootlid, around windows, etc) and got the thing on the road. It was only an AE85 with auto box, drum brakes and the 3A motor but it felt great the few weeks I had it on the road. The good points about this car were it was complete, had the facelift interior, bumpers, and lights and wasn't insanely rusty. In early 2006 it was time to start pulling it all apart. Plans at this stage were to replace the running gear and suspension, strip the interior, install a half cage and go and have some fun on the track. So first to go was the engine and auto box:
-

Upper North Island Nats Travel Plans
slacker.cam replied to peteretep's topic in Upper North Island Region
Brad, our plan is to head down via the same route. Hopefully we can play catch up. We're meeting at bombay at 6pm so we'll be a good hour and a half behind you guys. Otherwise we'll see you at camp! -
(re)Tuning my LINK for drivability, help! (new turbo)
slacker.cam replied to zep's topic in Tech Talk
Yeah, i can bring my laptop. Hopefully the PC Link software will run on win7 as my old XP laptop has terrible battery life these days. -
(re)Tuning my LINK for drivability, help! (new turbo)
slacker.cam replied to zep's topic in Tech Talk
I can tune it. All the software is the same. Anyway, all we really want to do is check whats going on first and foremost. I'll bring my wideband. 105 can bring the tail pipe tube. Put the softer spring in the wastegate and drive gently to nats. Problem solved! -
(re)Tuning my LINK for drivability, help! (new turbo)
slacker.cam replied to zep's topic in Tech Talk
Have just been talking to Leon. It looks like the new dump pipe doesn't have a O2 meter thread on it. That pretty much rules out road tuning for now. Bollocks. -
(re)Tuning my LINK for drivability, help! (new turbo)
slacker.cam replied to zep's topic in Tech Talk
I love tech threads like this! It's all good information. I mostly agree with Fred (for a change ). The points about tuning it yourself and AFM vs MAP based car are excellent. An AFM car doesnt give a shit about what the VE is as it knows exactly what the airflow is. Whereas with a MAP car the VE is effectively what you are tuning (ie. how much air is actually being sucked into the engine with each stroke). I still stand by my feelings about the VEs not changing largely though. It should have been tuned conservatively last time which will add some safety factor too. I have absolutely no proof of this though. Its just speculation. The VE is largely determined by the flow characteristics of the head and cams. A bigger turbo does not necessarily equate to being a more efficient turbo! The two areas that I am most concerned about are: 1) if the new turbo spools faster then you will need more fuel in these areas, and 2) if the old turbo was running out of puff up top then you will need more fuel up there. -
(re)Tuning my LINK for drivability, help! (new turbo)
slacker.cam replied to zep's topic in Tech Talk
Totally agree. If you're not confident then drop the boost and make it safer. I am optimistic. If the maps are flat then you can't hurt anything. Having said that - I dont want to be responsible for you blowing motor due to it leaning out... -
(re)Tuning my LINK for drivability, help! (new turbo)
slacker.cam replied to zep's topic in Tech Talk
Ring Torque Performance. Ask for their advice on wether putting a different turbo on will siginificantly affect your ARFs. My gut feeling is that it will not. Mostly due to it being only slightly bigger. Id you had changed cams then it'd be a different story. Failing that you're welcome to borrow my wideband tonight and see what the AFRs are doing with the new setup. Brad - why do you say the engine will grenade itself at 8k? Because it's not strong enough, or because you feel that the tune won't be suitable up there? -
(re)Tuning my LINK for drivability, help! (new turbo)
slacker.cam replied to zep's topic in Tech Talk
First thing (I forgot to say this before you left last night) is you downloaded the maps/setup out of the ecu right? I suggest the first thing you do is save them somewhere safe just incase you make a meal of it and you want to go back to how it was. You're probably already on to this but just want to make sure... Secondly even if the car hasn't been tuned above your current rev limit the ECU will extrapolate out the top cells so it's not like your car will suddenly stop working. Infact the maps are probably pretty flat up there anyway so it should be fine. If you have a look at a 3D map of fuel and it looks relatively flat above 6k then I would suggest that you're not going to have any big issues in the short term by raising the rev limit. Bare in mind that this is all just my opnion but if it were my car I would happily up the rev limit to 7k just to make the thing driveable. It definitely sounds like it's the MAP cut that's giving you grief though - that's why it sounds like it's not opening the wastegate. What is it currently set to? You 100% need to raise that value up above the maximum boost that you get with your new setup. The easy way to solve the issue is just make it really high (assuming you're confident that your motor can handle the max boost you'll now make). The only other option is to get a lower pressure spring like you suggest. Also, it's always best to change one thing at a time and see how it affects the car. I'd start with the MAP cut as the rev limit shouldn't be mega violent like you're describing. Are you able to take some screen shots of the maps (fuel and ign) and of the map and rev cut screens and post them up? -
Upper North Island Nats Travel Plans
slacker.cam replied to peteretep's topic in Upper North Island Region
Yep I'll do it. I work just down the road in Glendene. Hook me up with some deets. After work would be best for me - say around 5:30 but during the day would be ok too. We're leaving on thurs so it'd have to be tomorrow or wed night. Is that going to work? -
The tank has a drain plug so it'll be easy to throw a couple of litres in and bounce it around a bit then drain it. I suggest maybe pulling the return line off the end of the rail where they join into that tee piece and aiming it at the ground/into a coke bottle when you hit the key. That way you can visually be sure that its pumping fuel. I agree with KK. Just full it up and turn that shit on. If you dont want to bridge the wires on the AFM plug then just plug the AFM in and it'll be sweet. Oh, and I figured out why it wasnt working last night. You need to undo the nut on the positive terminal of the battery and whack the purple wire with the yellow lug on. We were trying to make shit happen but I forgot to connect the power Good luck!
-
Upper North Island Nats Travel Plans
slacker.cam replied to peteretep's topic in Upper North Island Region
I'll be convoying with Zep. Will be leaving as soon as we can all get off work on Thurs. -
AUCKLAND MEET : Wednesday 13th April
slacker.cam replied to EURON8's topic in Upper North Island Region
What is a "whip" ? That bastard should be part of a bit of a sideshow act that should be very entertaining Wait, you've got a girl again, and are whipped? Since when did this happen? Yes, I have a new girfirend and I intend to bring her and liberally apply stickers to her person... http://www.urbandictionary.com/define.php?term=whip -
AUCKLAND MEET : Wednesday 13th April
slacker.cam replied to EURON8's topic in Upper North Island Region
Shit yeah! Keen for a burger. Will be good to say bye to that bastard Fred too Will bring my new whip and sticker it up. -
So I've got to make a move from where I'm living at the moment as the house has been sold. I'm looking for a place either North or West but would consider more central if it makes sense. It's just me - single dude, 25, electronics engineer, dont smoke, no pets. Looking for a place with a spare garage space as I need to keep my AE86 out of the weather. Don't really need any room for tools or anything cos I'm moving my race car, tools, parts, etc up to my parents garage to make life more simple. Let me know if you're looking for a new flatmate or you know someone else who is! Keen/able to move in ASAP (have to be out by the 15th). Cheers boes.
-
AUCKLAND MEET - Wednesday 16 March
slacker.cam replied to EURON8's topic in Upper North Island Region
Sweet. I'll be there again. Zep has no excuses this time so I'll abuse him into attending. -
I have a few ideas about what may be causing your issues but some others on here may be more knowledgeable than I am as I haven't done any MS stuff for a couple of years. Where are you located? I have a normal stimulator and a JimStim that you can borrow if you're in Auckland and want to eliminate the variable of your DIY stim. Are you sure that you're getting good comms? Is the timer counting up in TunerStudio and is it showing connected/disconnected when you power cycle the MS?
-
Good points have been made here so far with regards to not needing dual maps and the benefits of the later model links (and megasquirts) for injector resolution - and therefore idle quality. One thing that hasn't been mentioned yet is who's going to tune the car? This is a important consideration as if you plan on getting the car tuned on a dyno then the quicker the dyno operator can get the results you want the less cash you're going to shell out for his sercives. Therefore if you go with a link (which pretty much any tuning shop in NZ should have experience with) you will probably spend less on tuning than if you go with a megasquirt (or other less common ECU) as unless the tuner has used them before you will effectively be paying for him to get up to speed with the software. Some tuners may not even tune ECU brands that they aren't familiar with? If you plan on road tuning like Fred did then all of this is out the window however I do see megasquirt as more of a learning tool than a plug and play ECU. I would suggest not going down the MS route unless you are comfortable with busting out the soldering iron and reading large amounts of information to get everything up and running. If you want to just get an ECU in there, wire it up and get it tuned then my vote is definitely with Link - especially the G4's. There are plenty of other good quality ECUs that are common in NZ but I have no experience with them so I wont make any comments on those...
