~Slideways~
-
Posts
1,607 -
Joined
-
Last visited
Everything posted by ~Slideways~
-
I also ended up send the Link ECU back to Link in Christchurch to put it through their stress testing etc. It made sense since I had no explanation for the intermittent misfire. That GOD DAMN misfire I have been chasing for bloody years. A few weeks later and I have had a reply stating: Visual inspection revealed a solder blob between IGN5 and 14V NOT making a direct short circuit. This could change under load +temperature+humidity ratio conditions. Fault however could not be replicated on the bench. Removed solder ball and tested ECU. Passed functional stress test. So not a certain cause but also a possible cause? All of this time and it may have been a manufacturing defect completely out of my control? ...fck.
-
That now leaves me with what to do. I can't get new injectors, Toyota NZ confirm they are not available. Next option is to get some Bosch 630cc's (from a known supplier, because fck that noise) so they still have a pintle cap for a proper spray pattern. I message the local guy and he is certain that I should just use the Xspurt 1000's that I originally did. He was going to talk to Chris at Prestige but haven't heard back yet. I guess they do work, but not efficiently.
-
The other thing to sort was injectors, the st215 ones I had been using had cracks in the plastic of a few. Another 2 flowed 8-10% less than the others. So I thought to keep it simple I will buy some brand new genuine denso/toyota injectors. Found a seller on ebay with lots of good feed back, selling these exact injectors and stating 100% guarantee genuine. They were $299 AUD, not $50 sets from Aliexpress. So I thought I was safe. About $400 NZD landed. They arrived and many things pointed to being fakes. They even came in 'genuine' Toyota boxes. In the end the most glaring was the pintle cap holes are rough compared to real ones. I noticed the bar code looked very generic, i.e. repeating patterns which shouldn't happen. I went back to the seller and they 'don't know what you are talking about' and 'I sell these to Toyota Service Centres in NSW'. I even spoke to Mark at Toyota in NZ and he said the label was convincing but the number used was not correct. I tested a bar code reader on the cambelt I bought recently and the barcode matches the part number on the label, but these fake labels just display gibberish. He has agreed to a refund and I have sent them back. So that was/is a pain in the arse to deal with but as long as Ebay's refund system actually work I should be ok. What a cnut though.

-
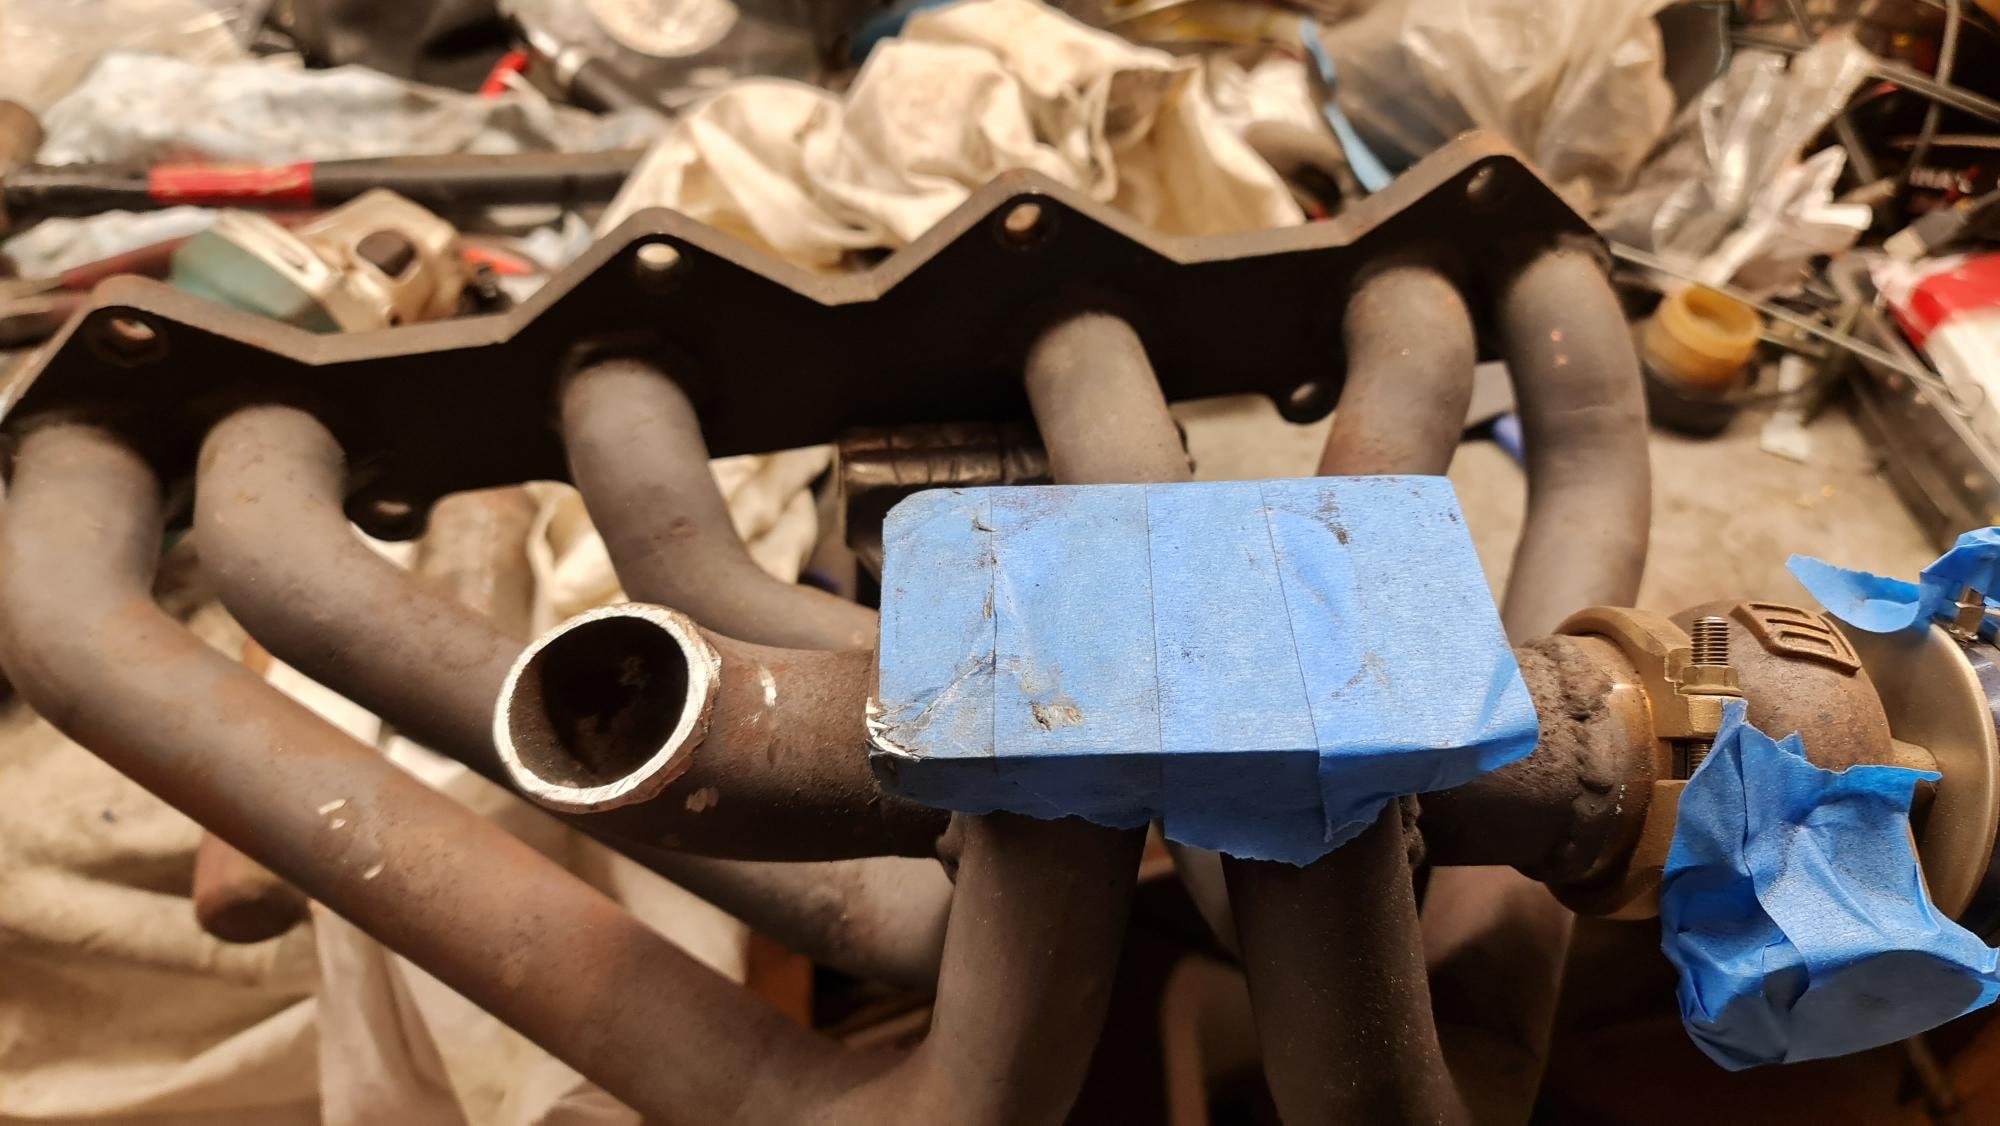
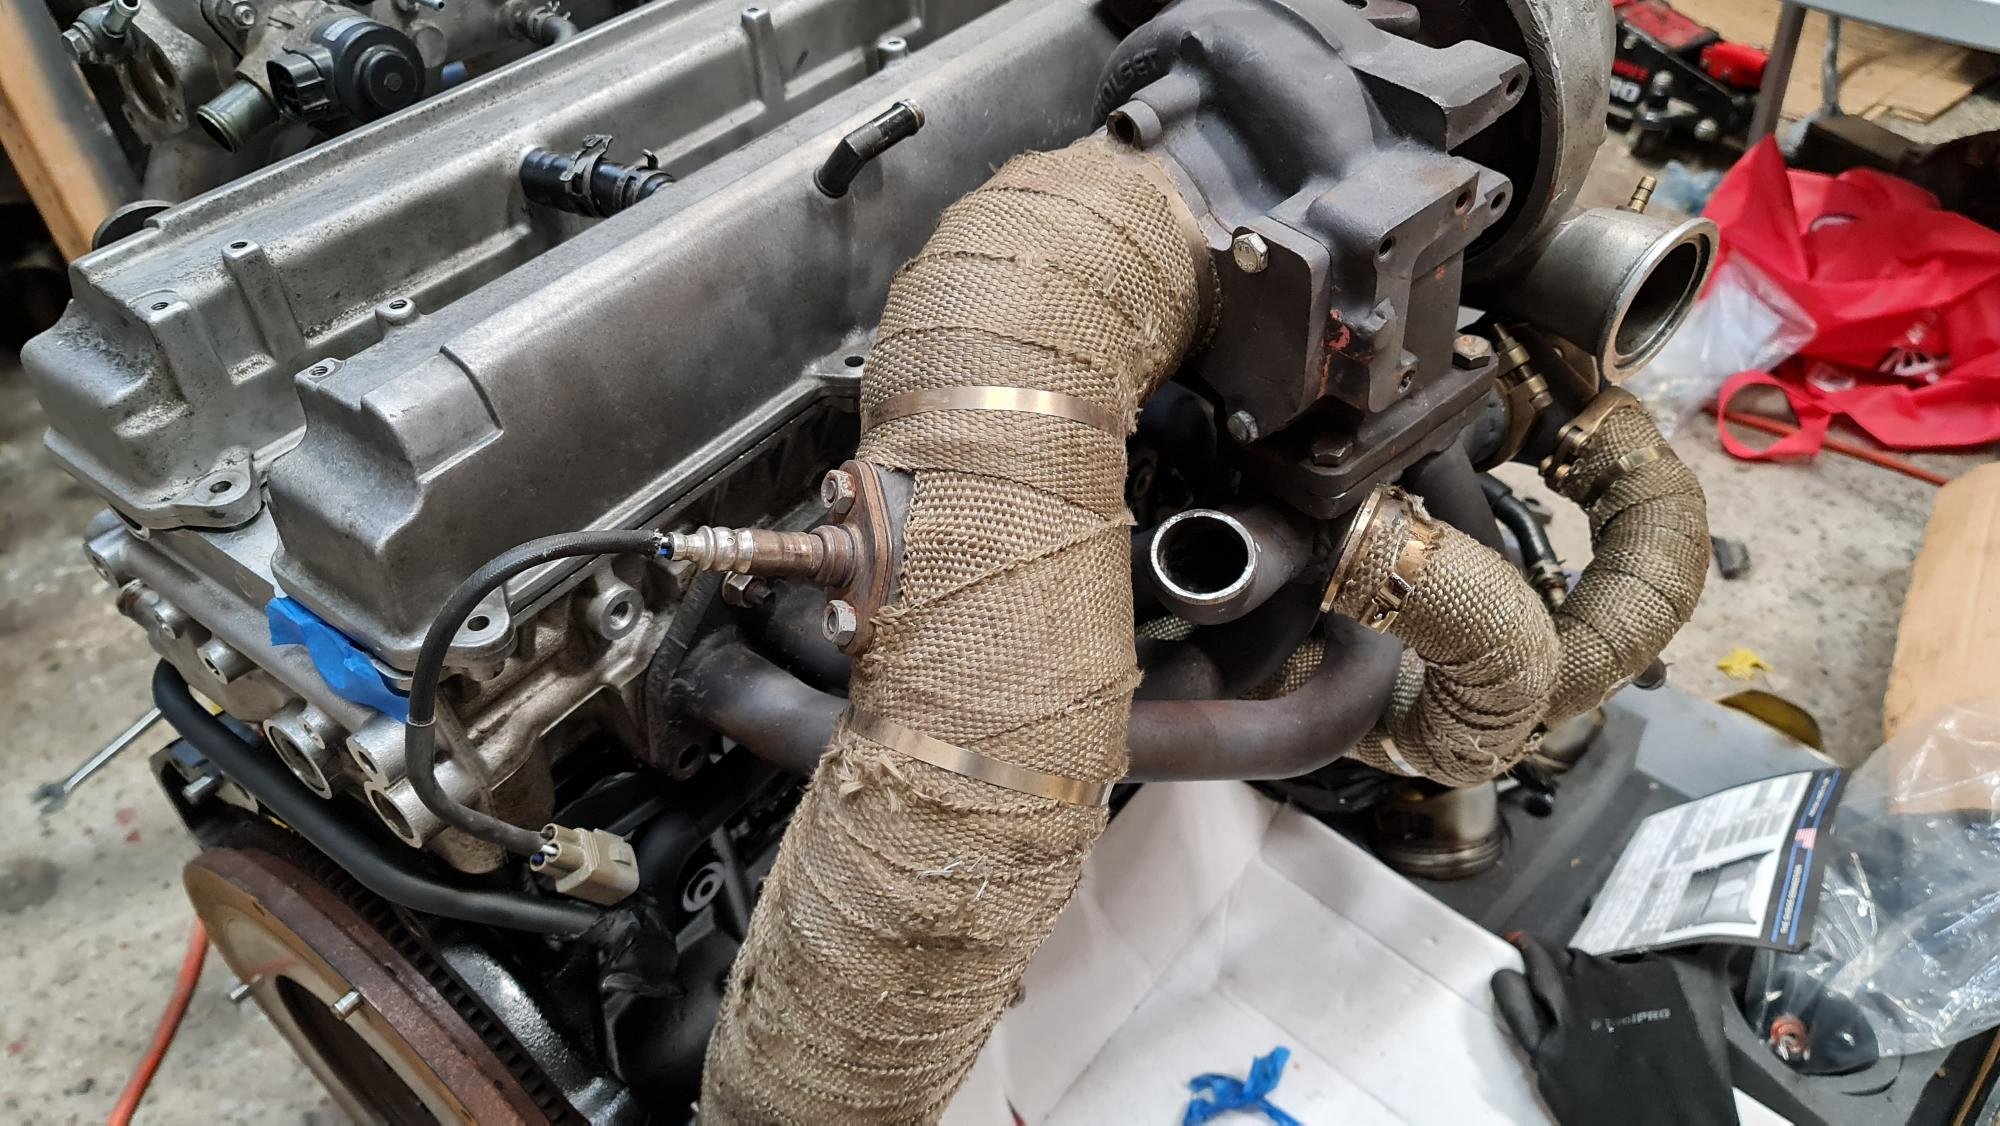
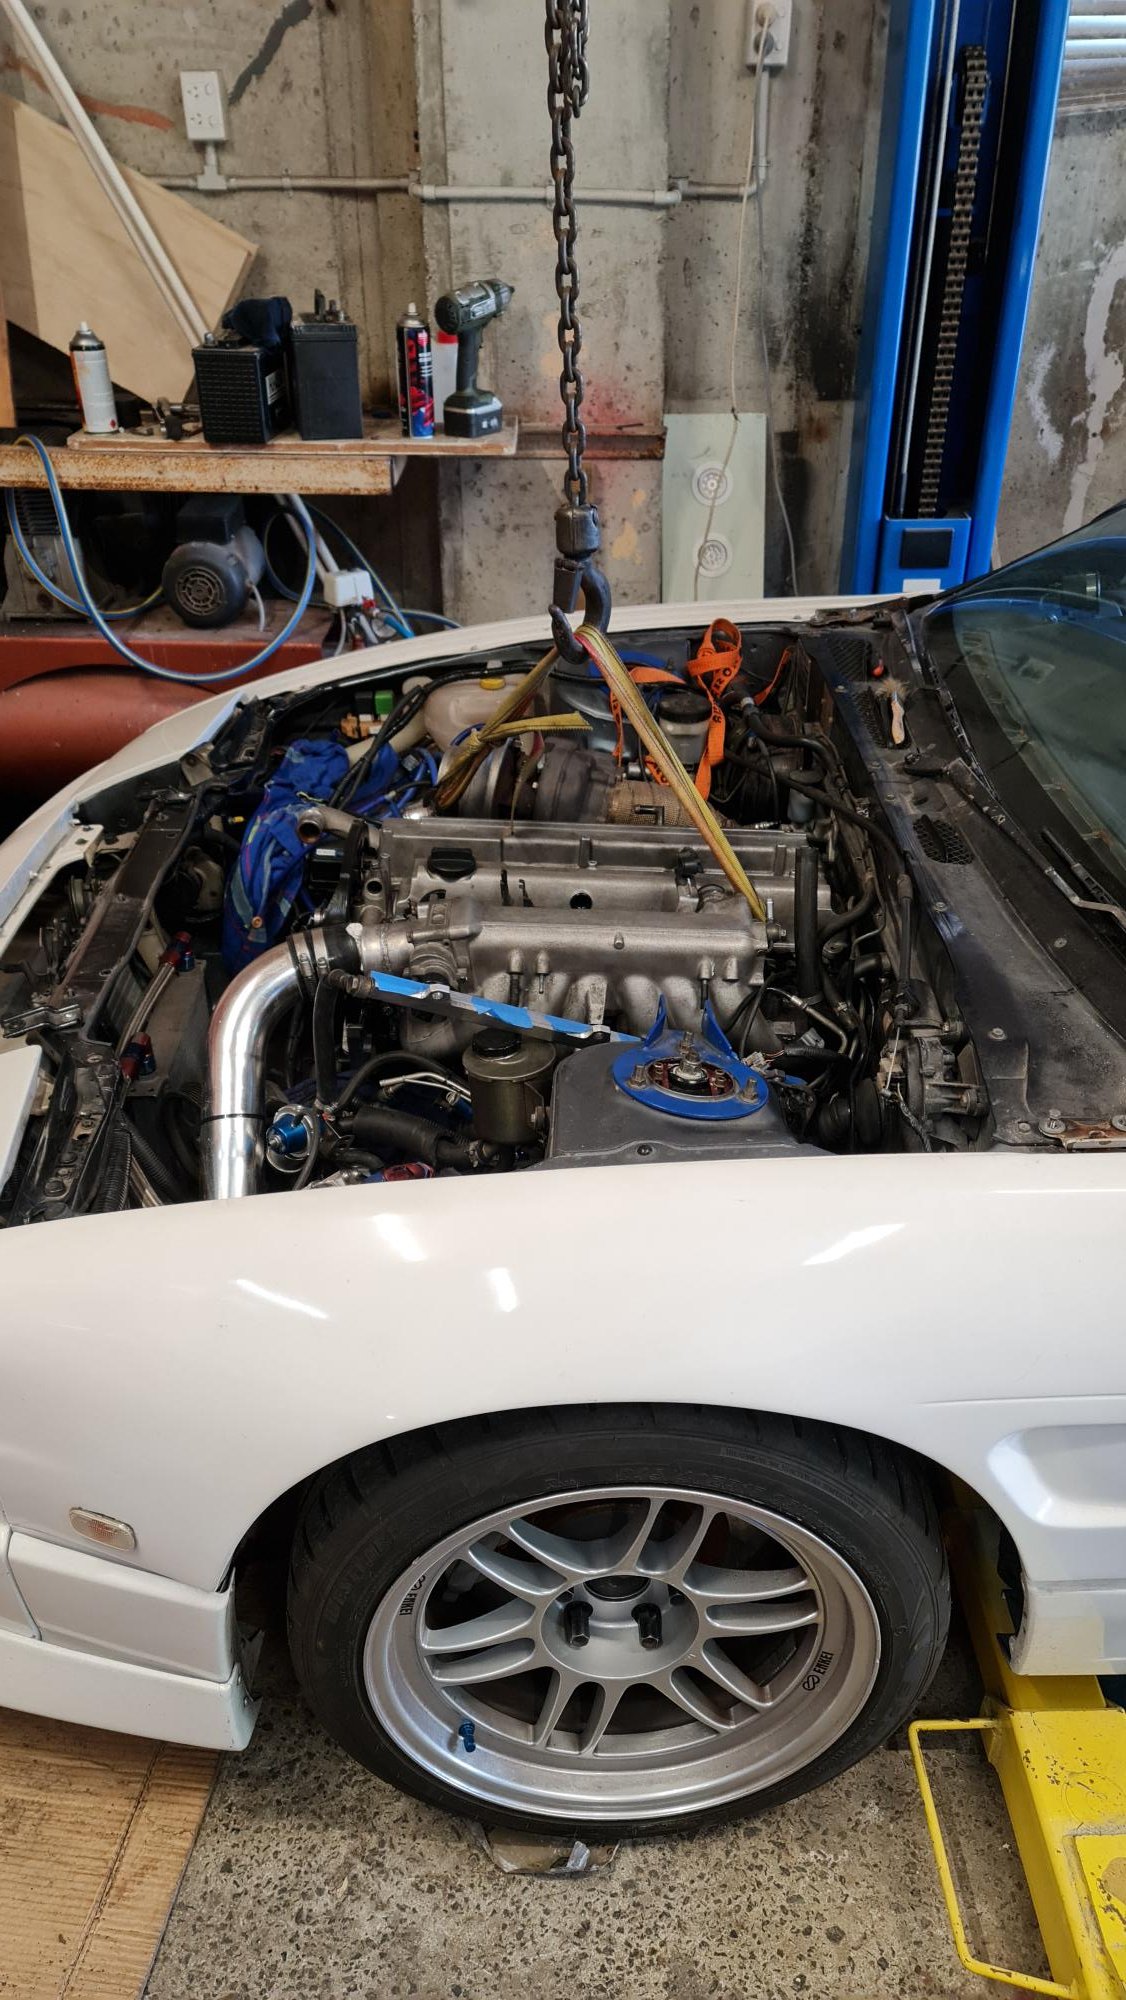
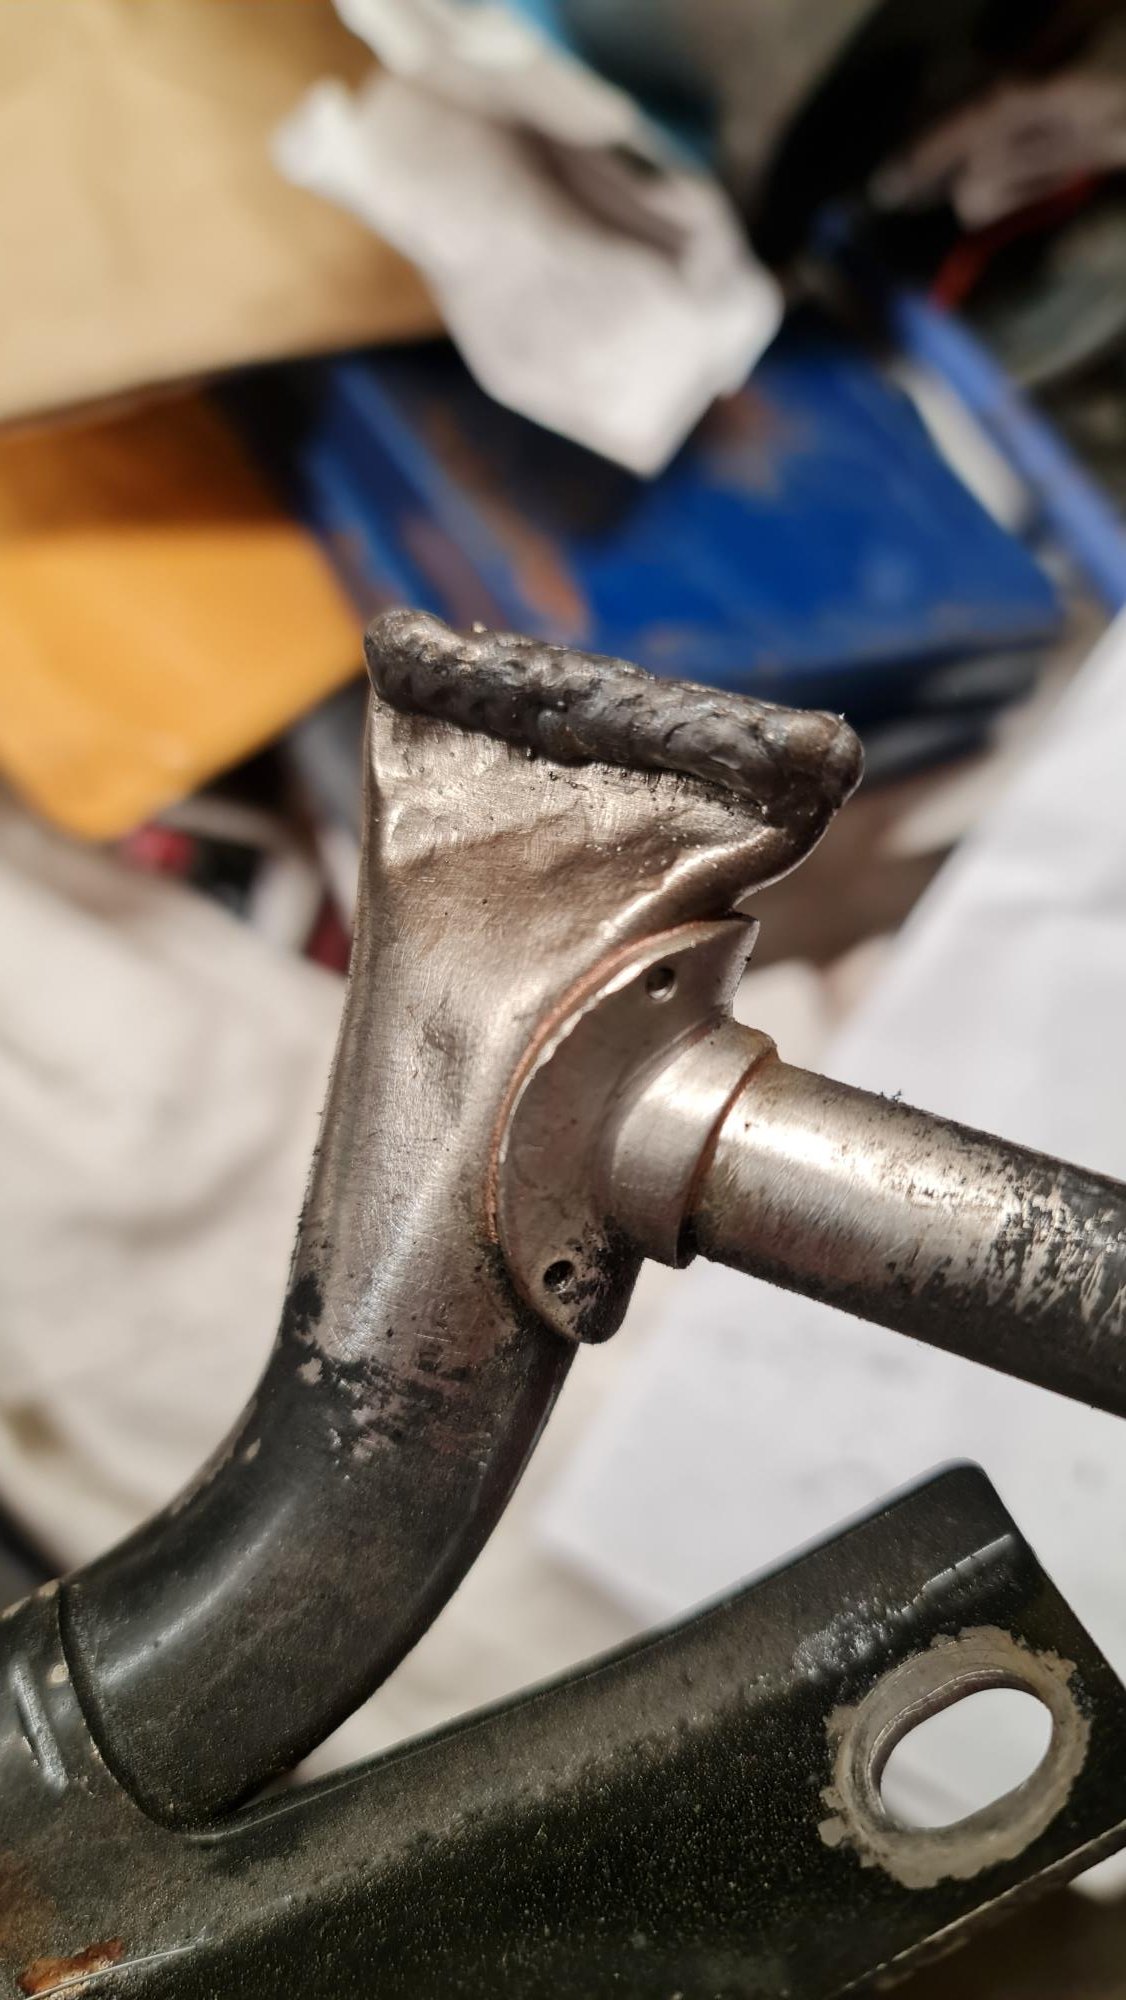
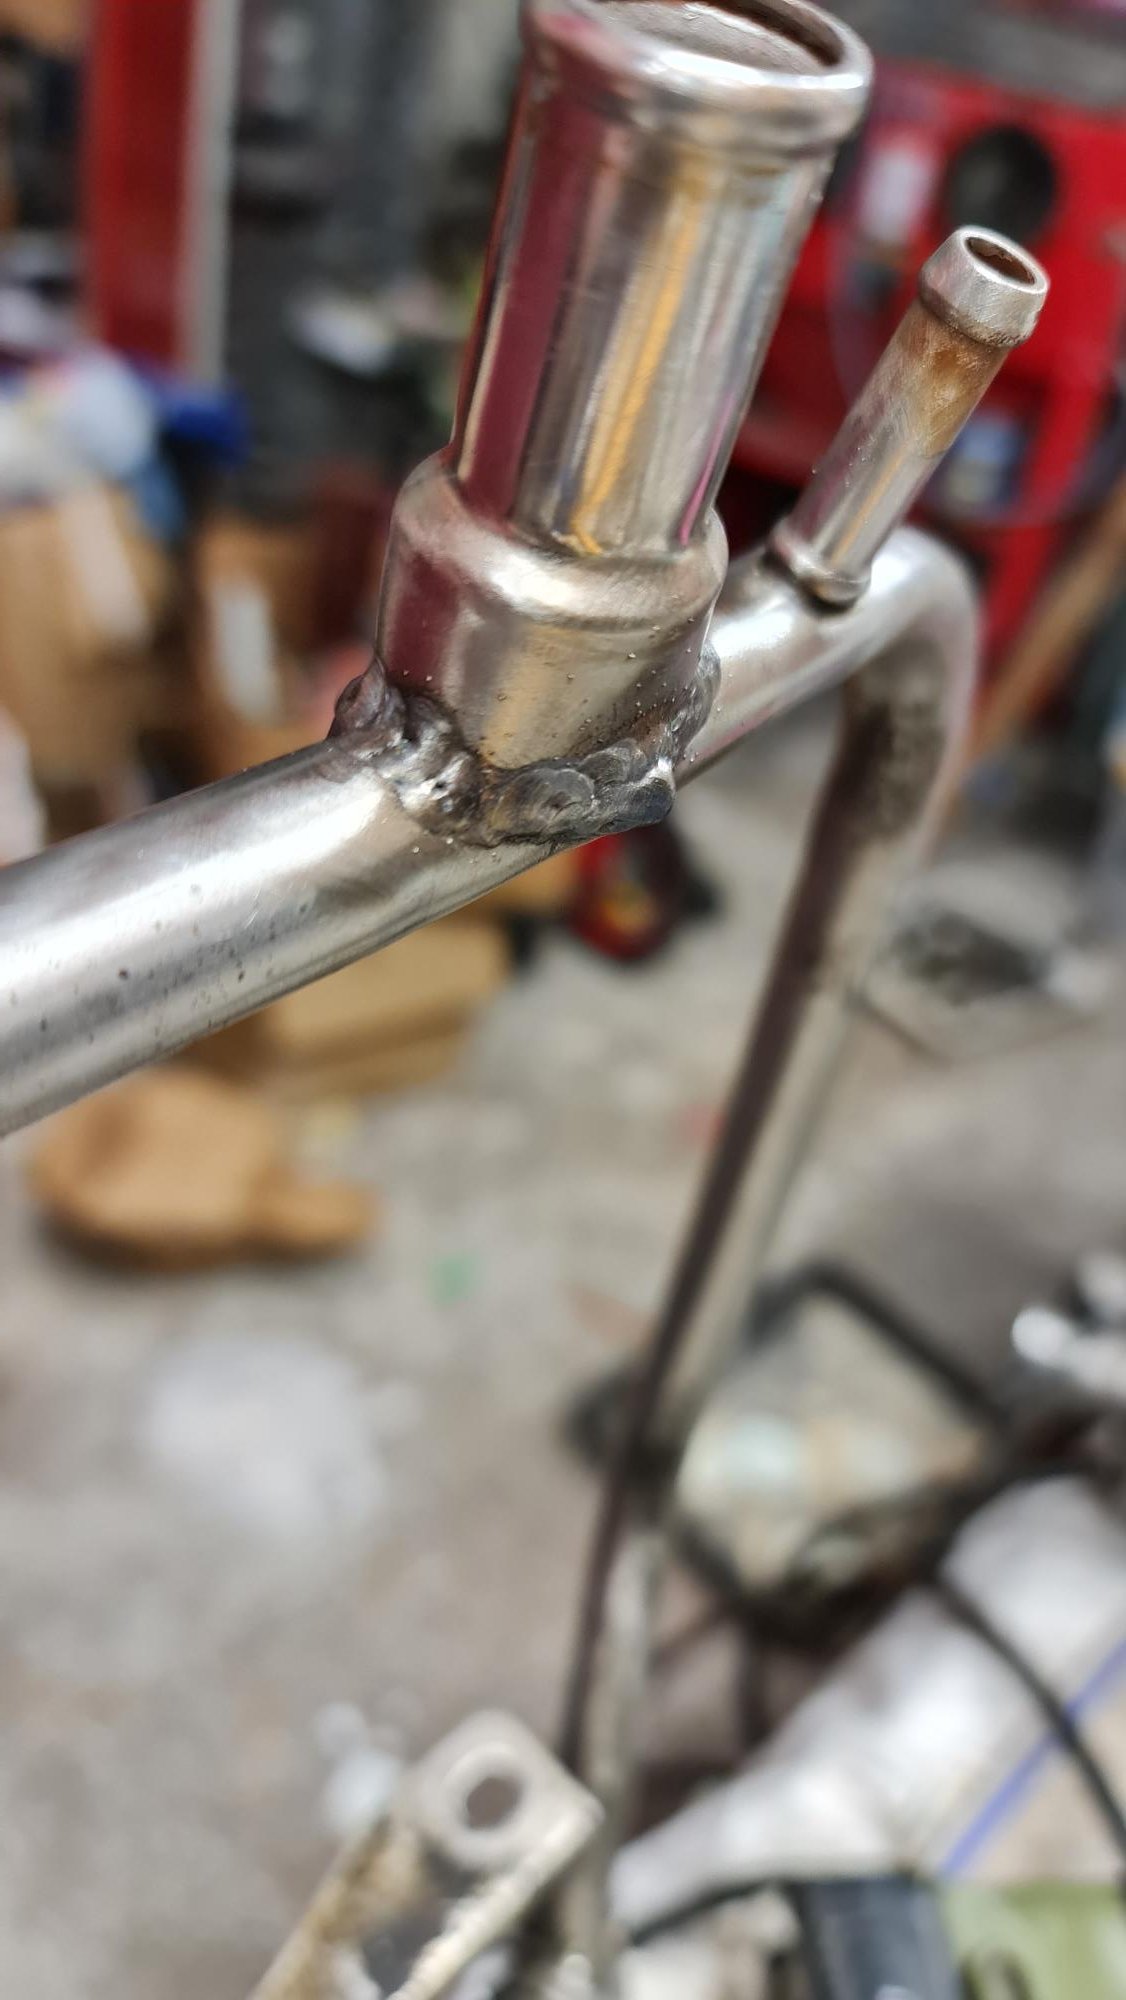
Another thing I wanted to change was the location of the second wastegate, it works but the vacuum line gets too hot. I've tried a few things to solve it but now that it's all out I will move the wastegate up and away from the heat. It means changing both ends of the wastegate but it'll be worth it. Cut off: Test fit on engine to see what I can do, it's easy enough to just raise it up but the hard part is making sure the exit doesn't get in the way of the brake master cylinder. It was looking quite close so I ended up putting the engine back in so I can be sure. Bloody good to have it back in, but since I didn't have the pulley o-ring at this stage it still need the cam belt and pulleys etc. Got TGP bits to finish that:
-
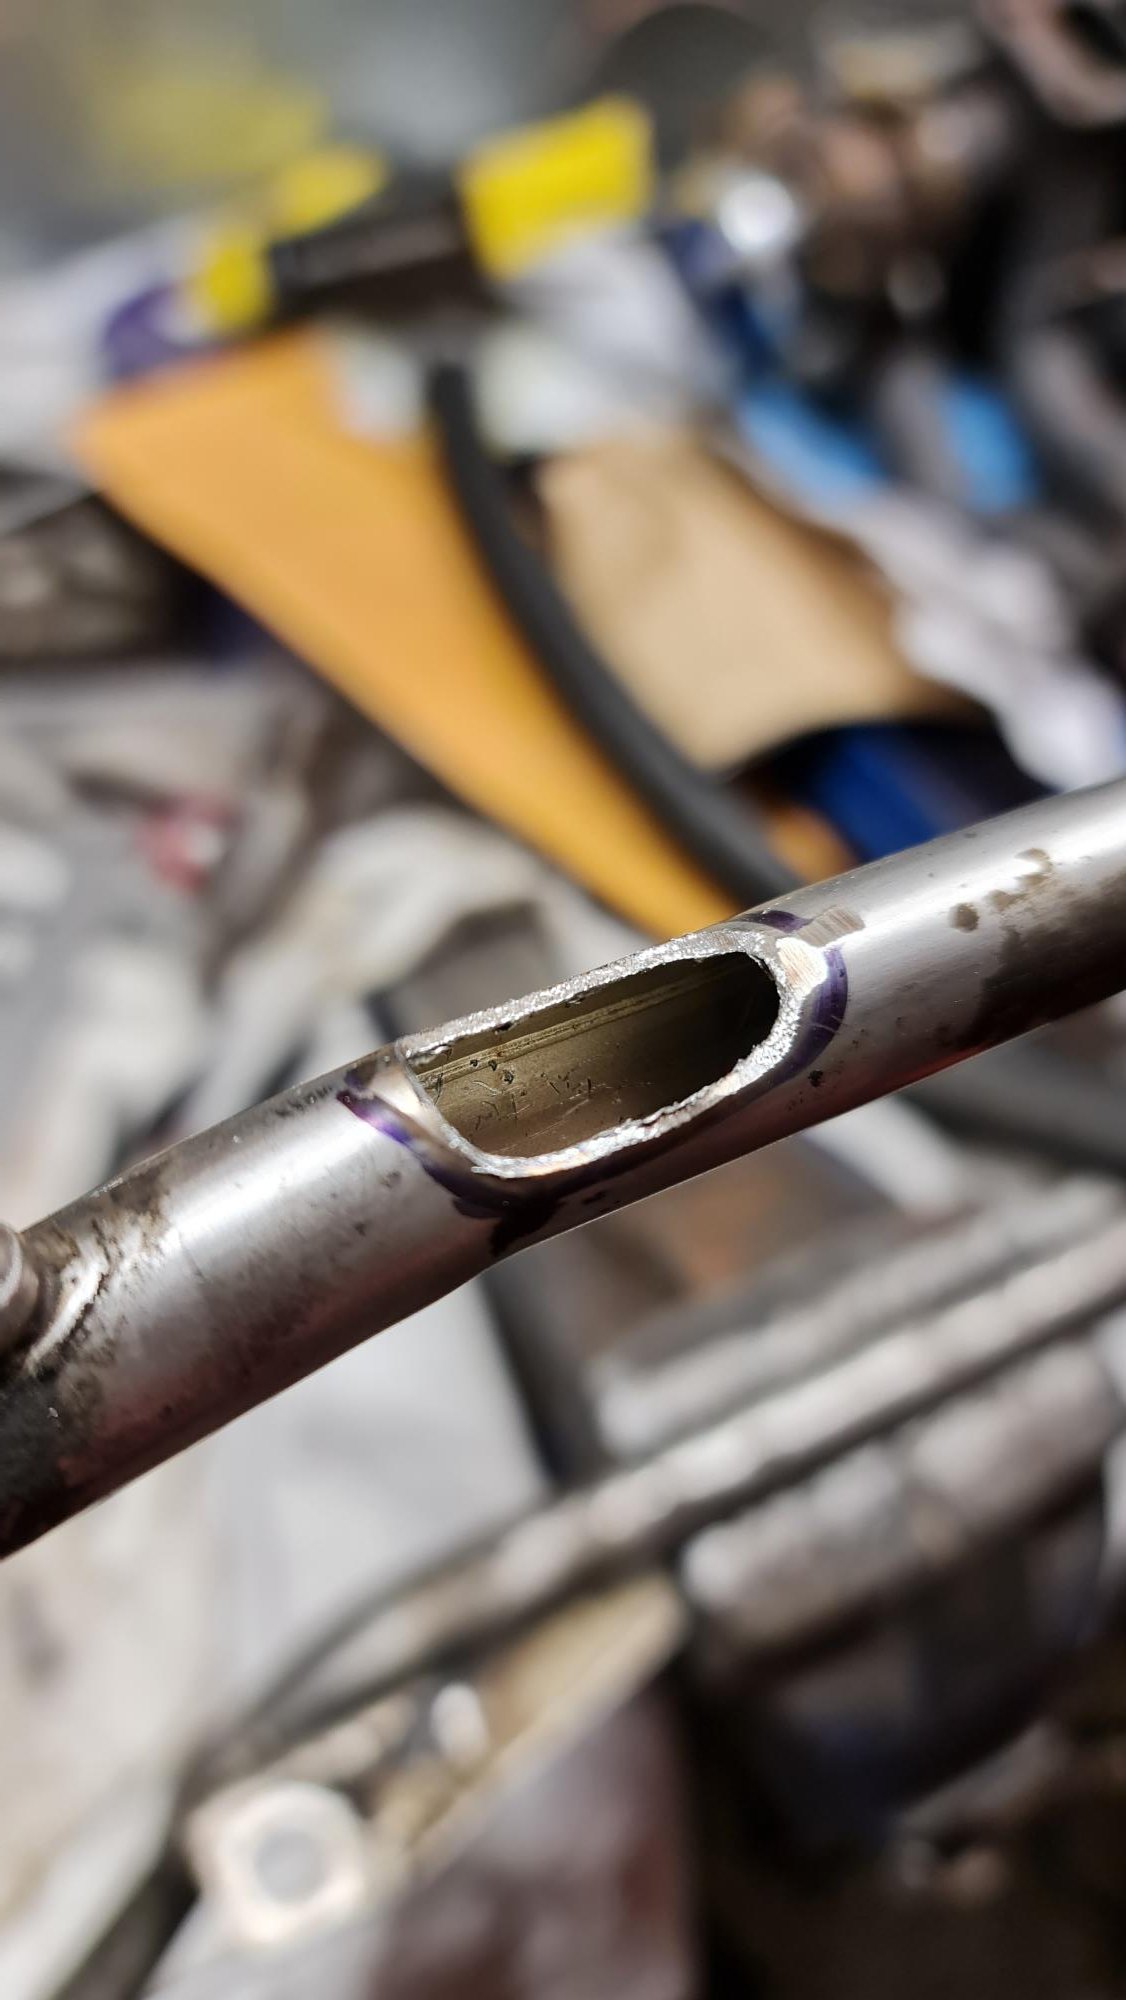
This water hard line points to the turbo down pipe, and gets in the way. It is the outlet for the heater, which is on the other side in the Nissan vs the Toyota. So I cut it off and welded it up, plus jb weld to be sure. Gives more clearance and simplifies the water lines by moving the hose to the other side of the engine. Normally the rest of the hard line is just to feed the oil cooling sandwich plate and the water feed to the idle stepper motor controller jobby. So I made a hole on that side which is under the intake manifold and much closer to the heater inlet on the firewall. Welded on, yes it's coming from a smaller pipe but I don't think it'll cause too much problem with the heaters water flow. Also covered with a little JB Weld since I had it.
-
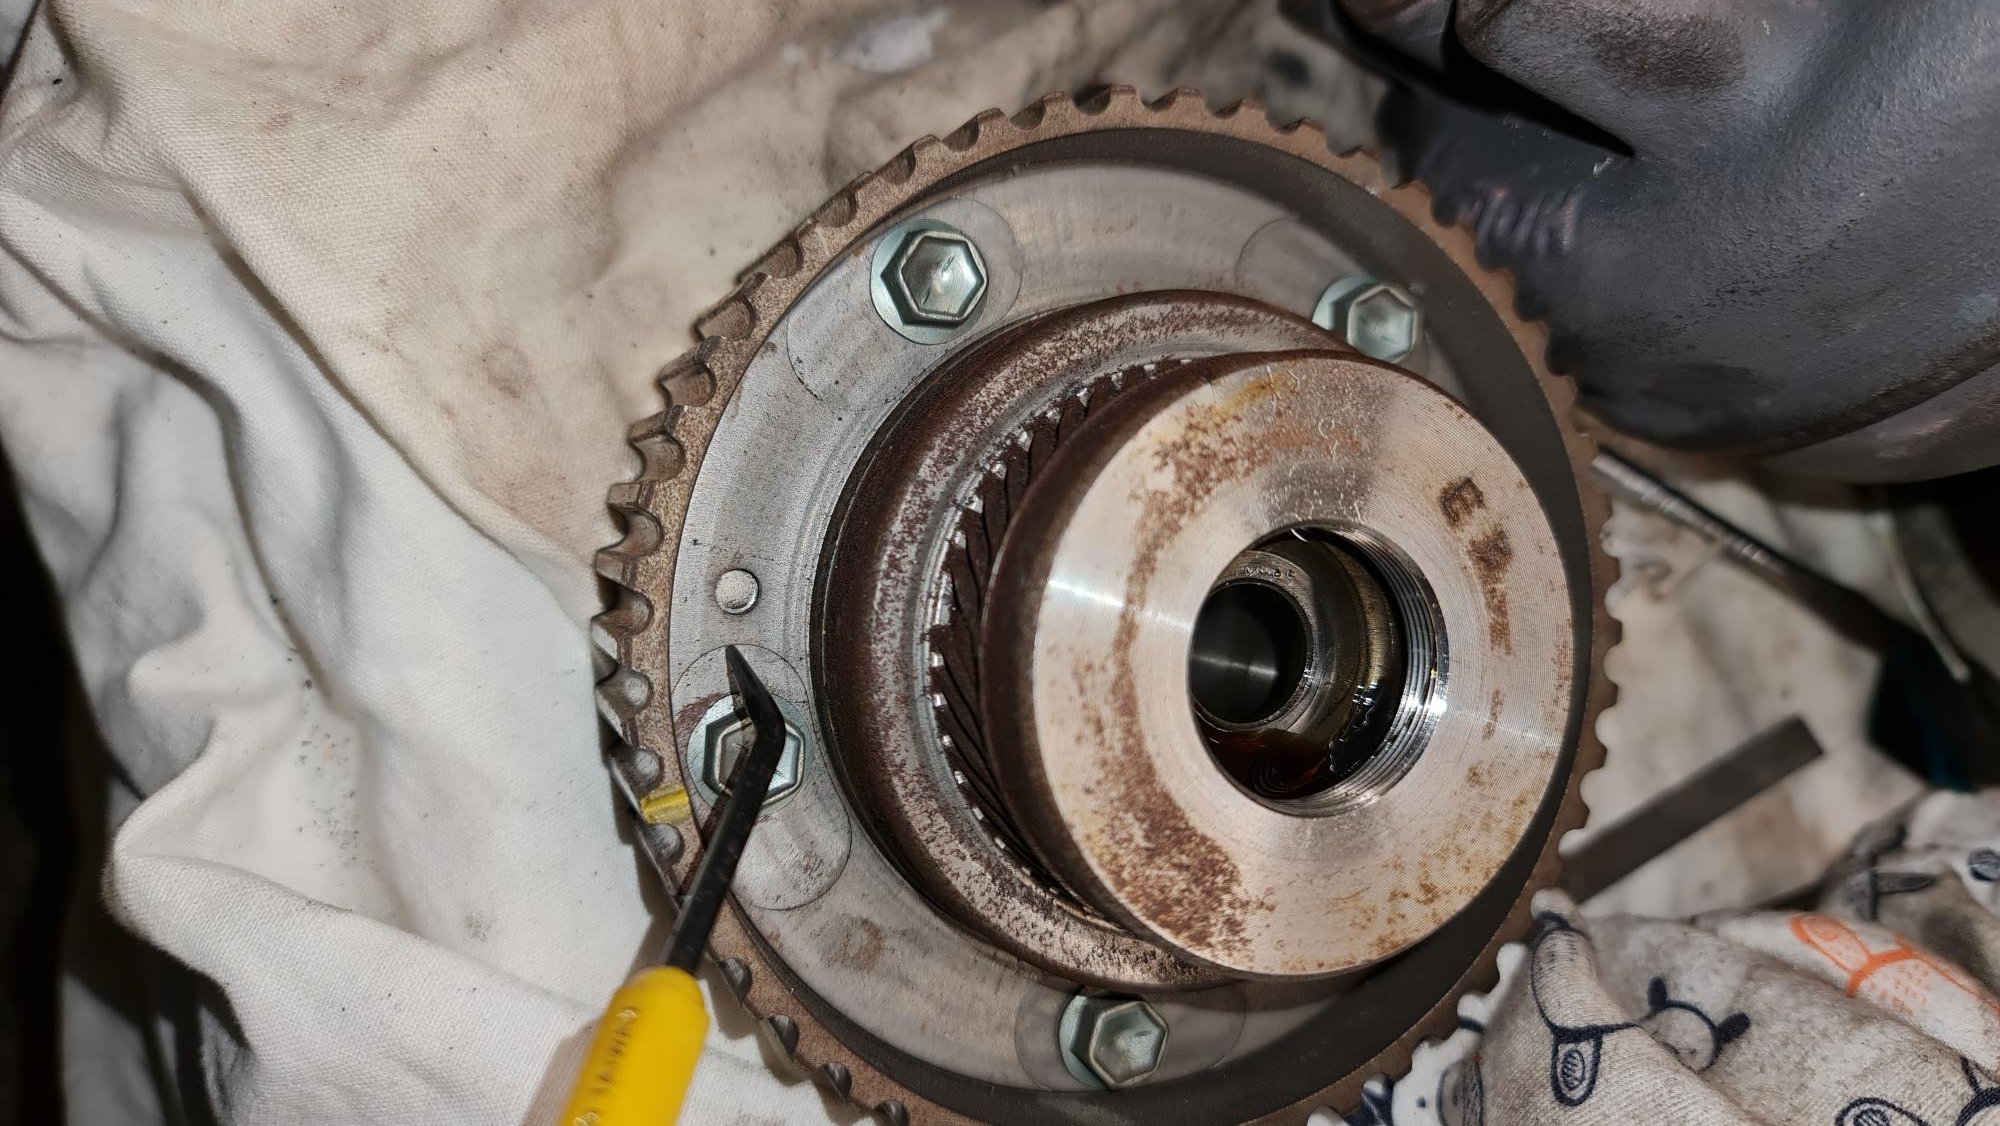
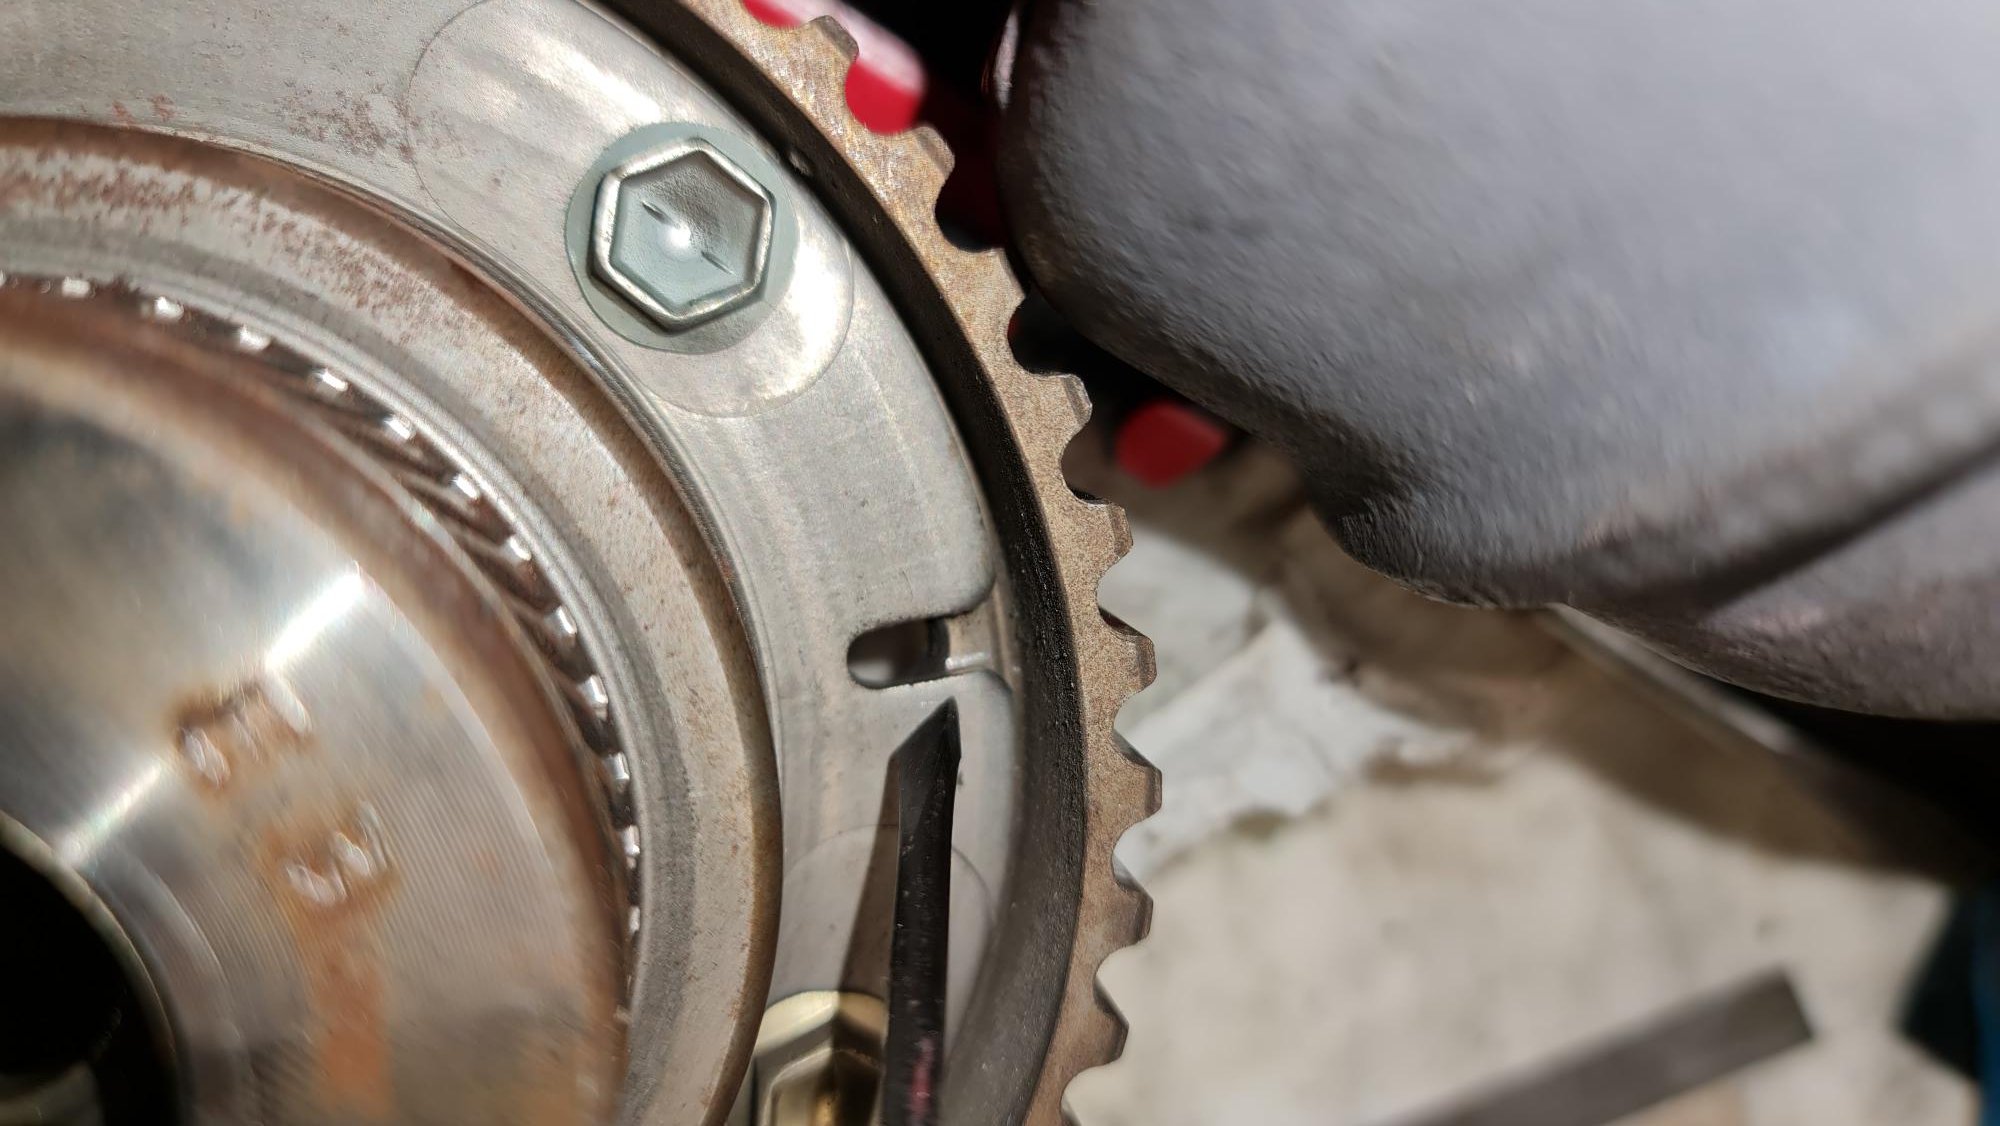
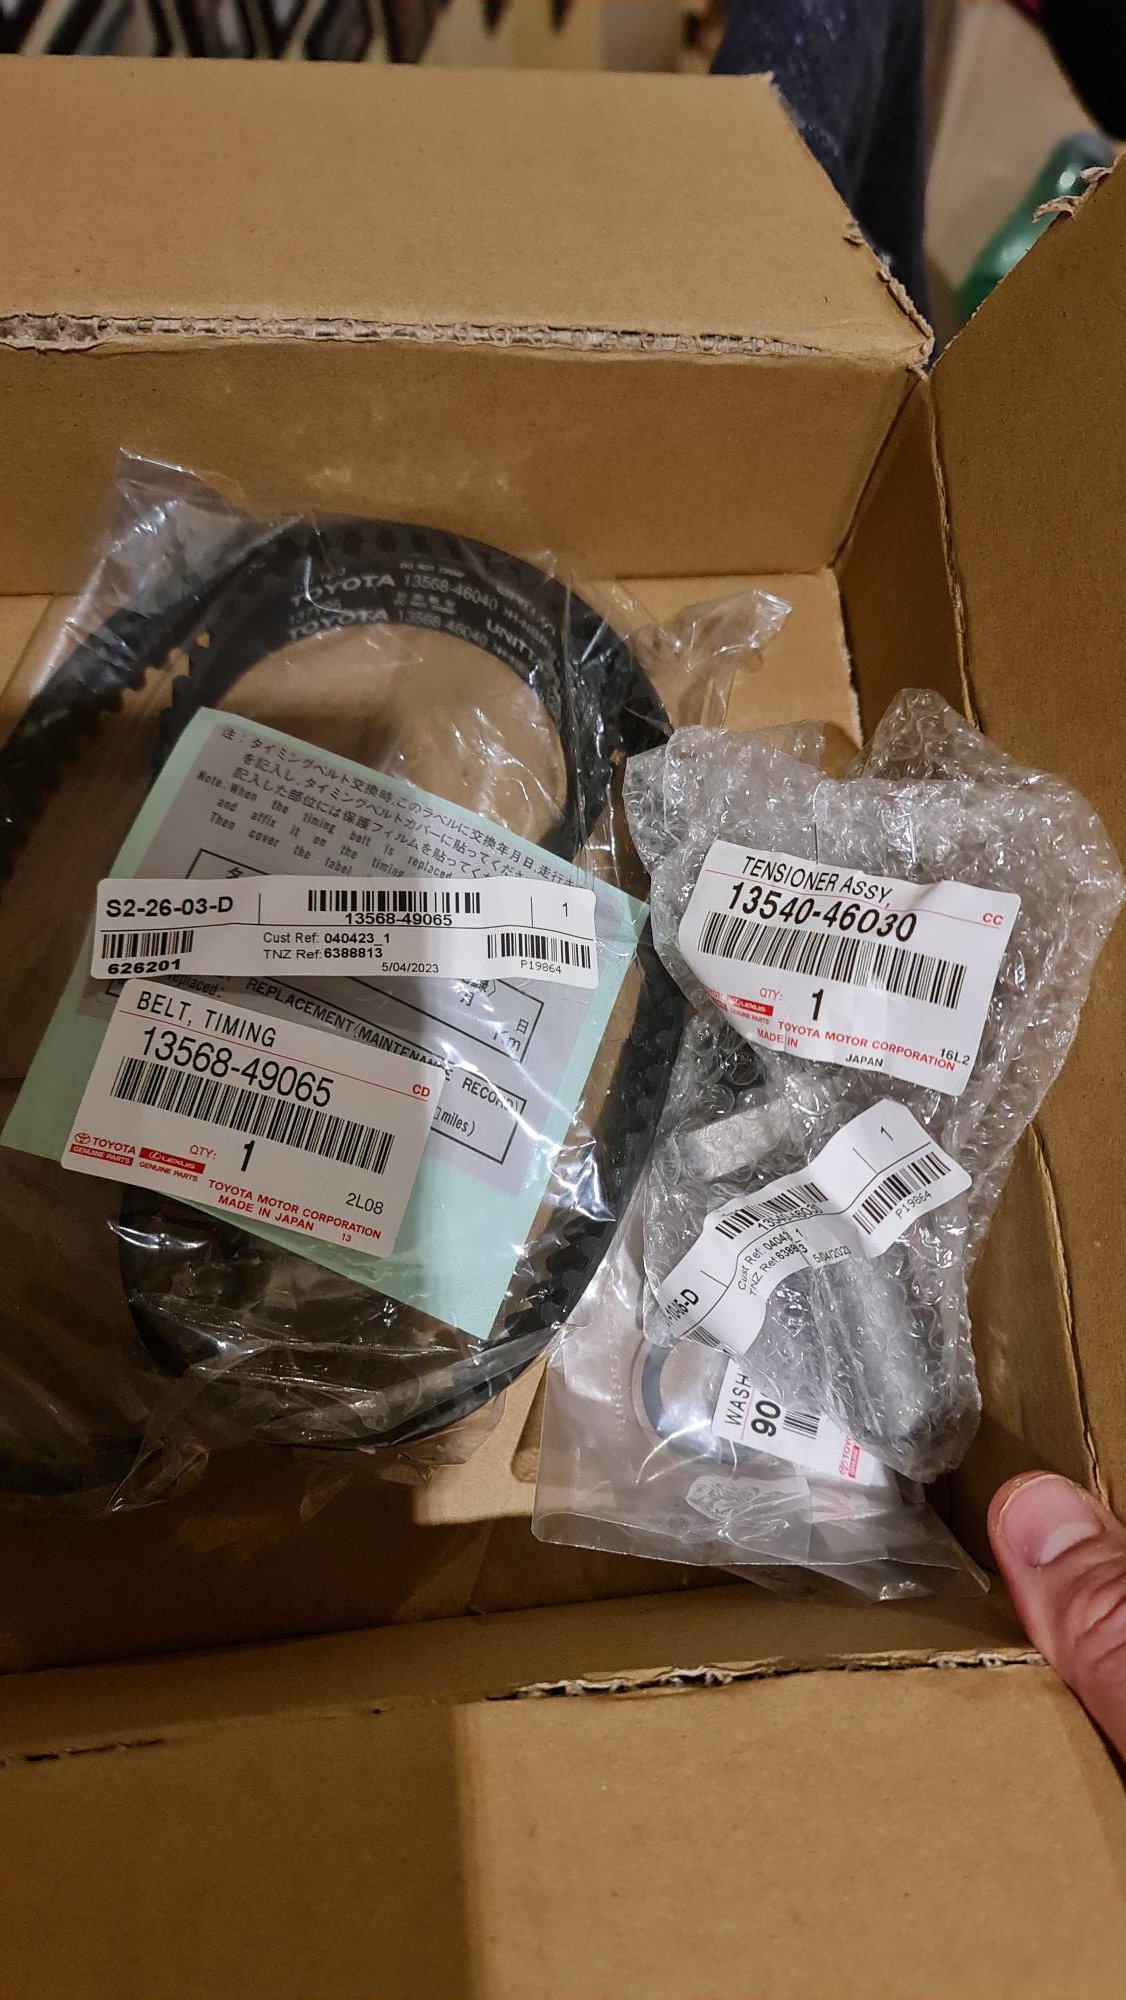
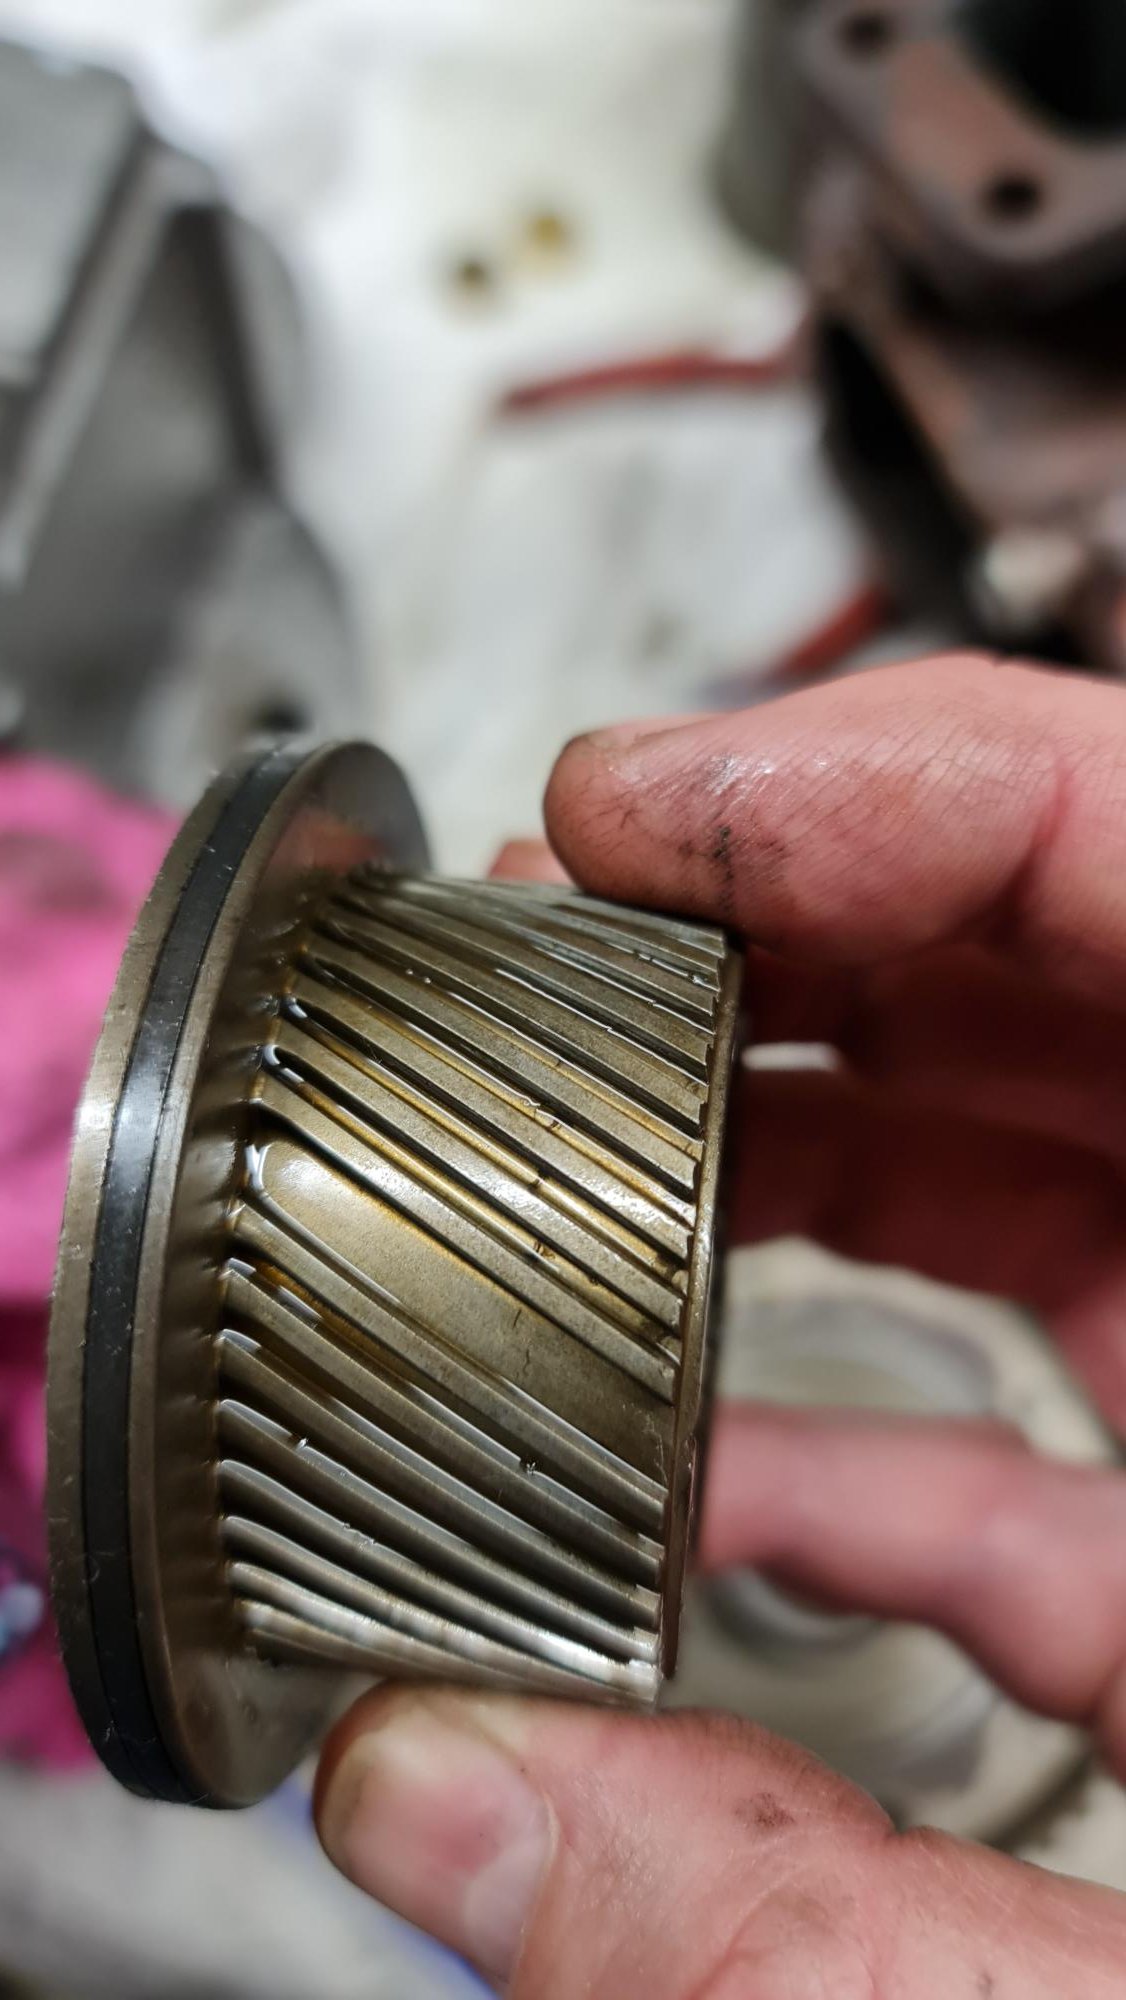
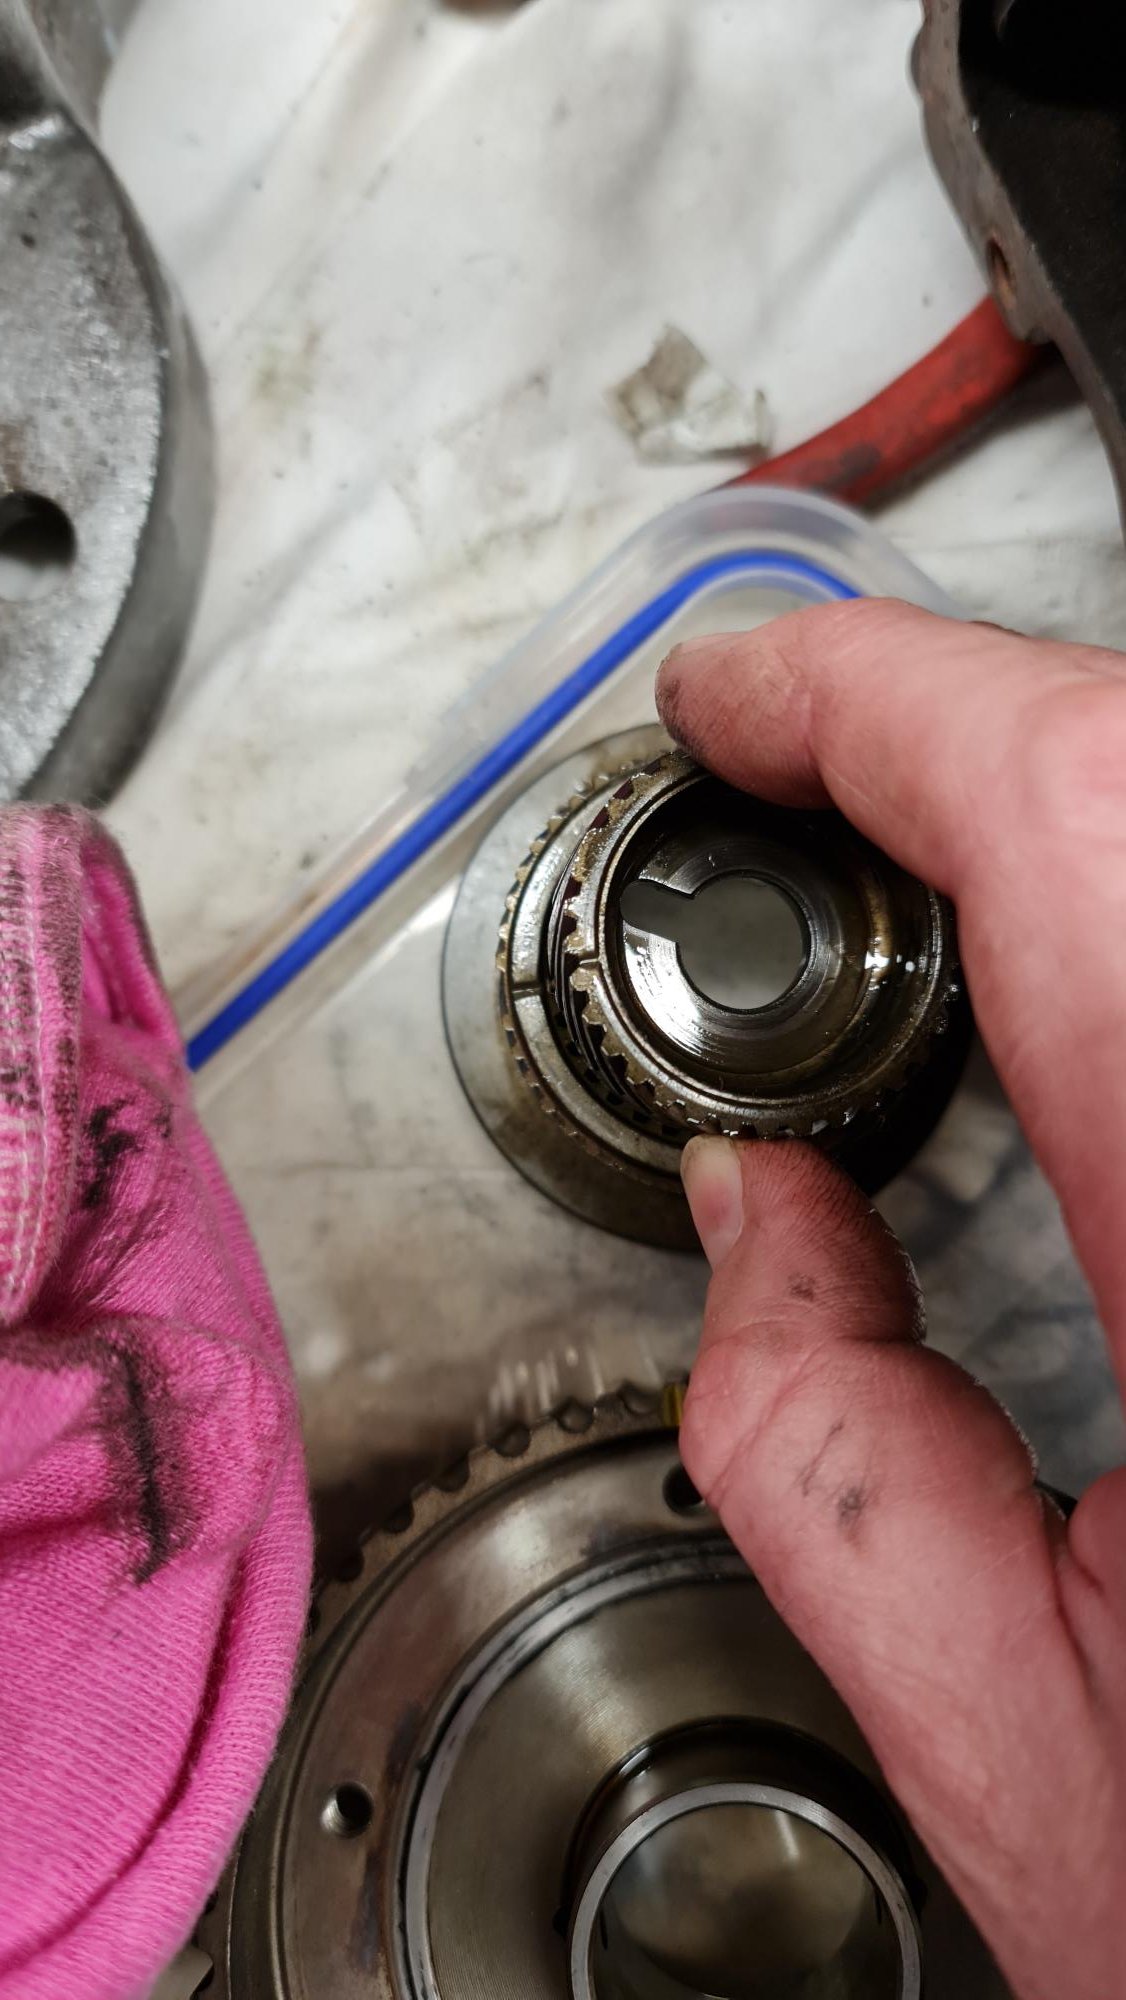
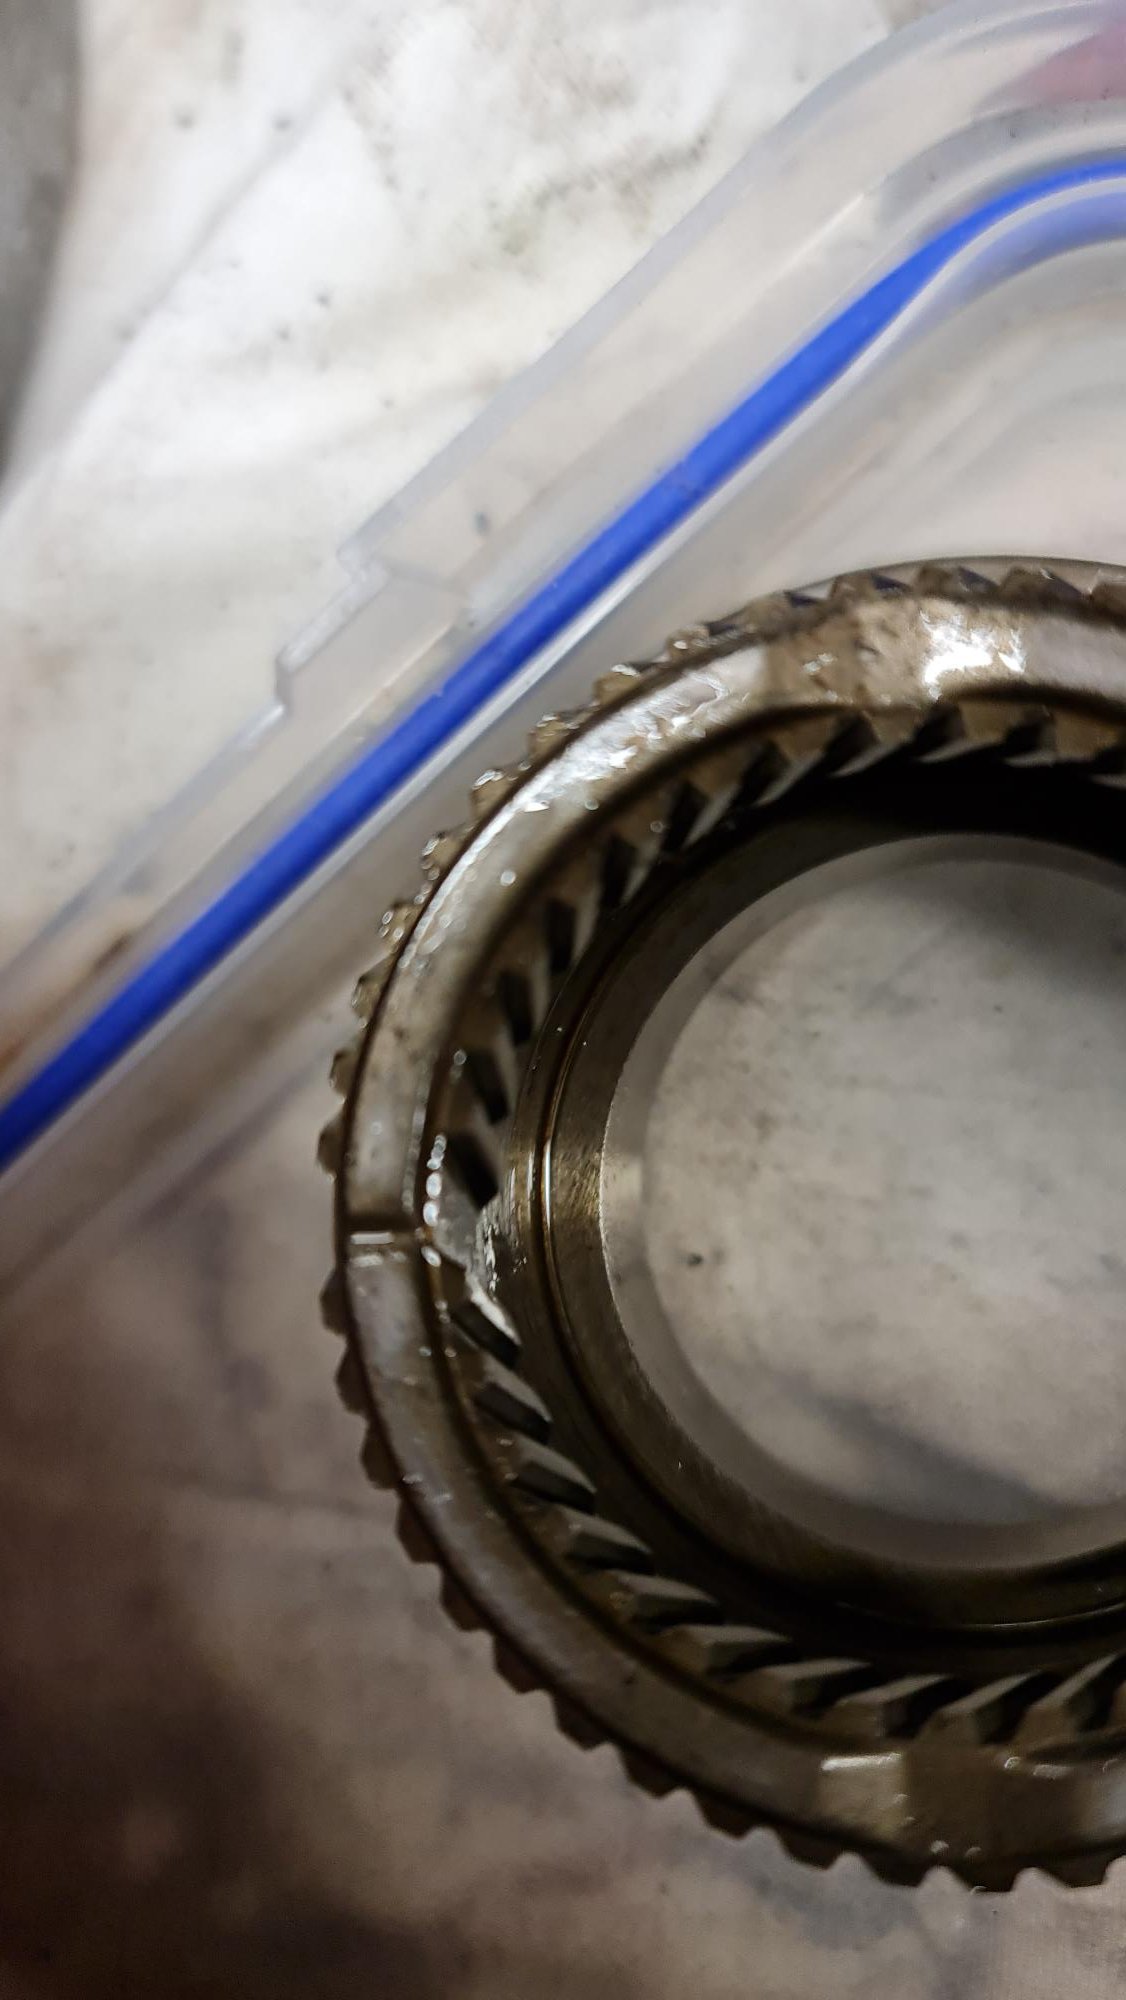
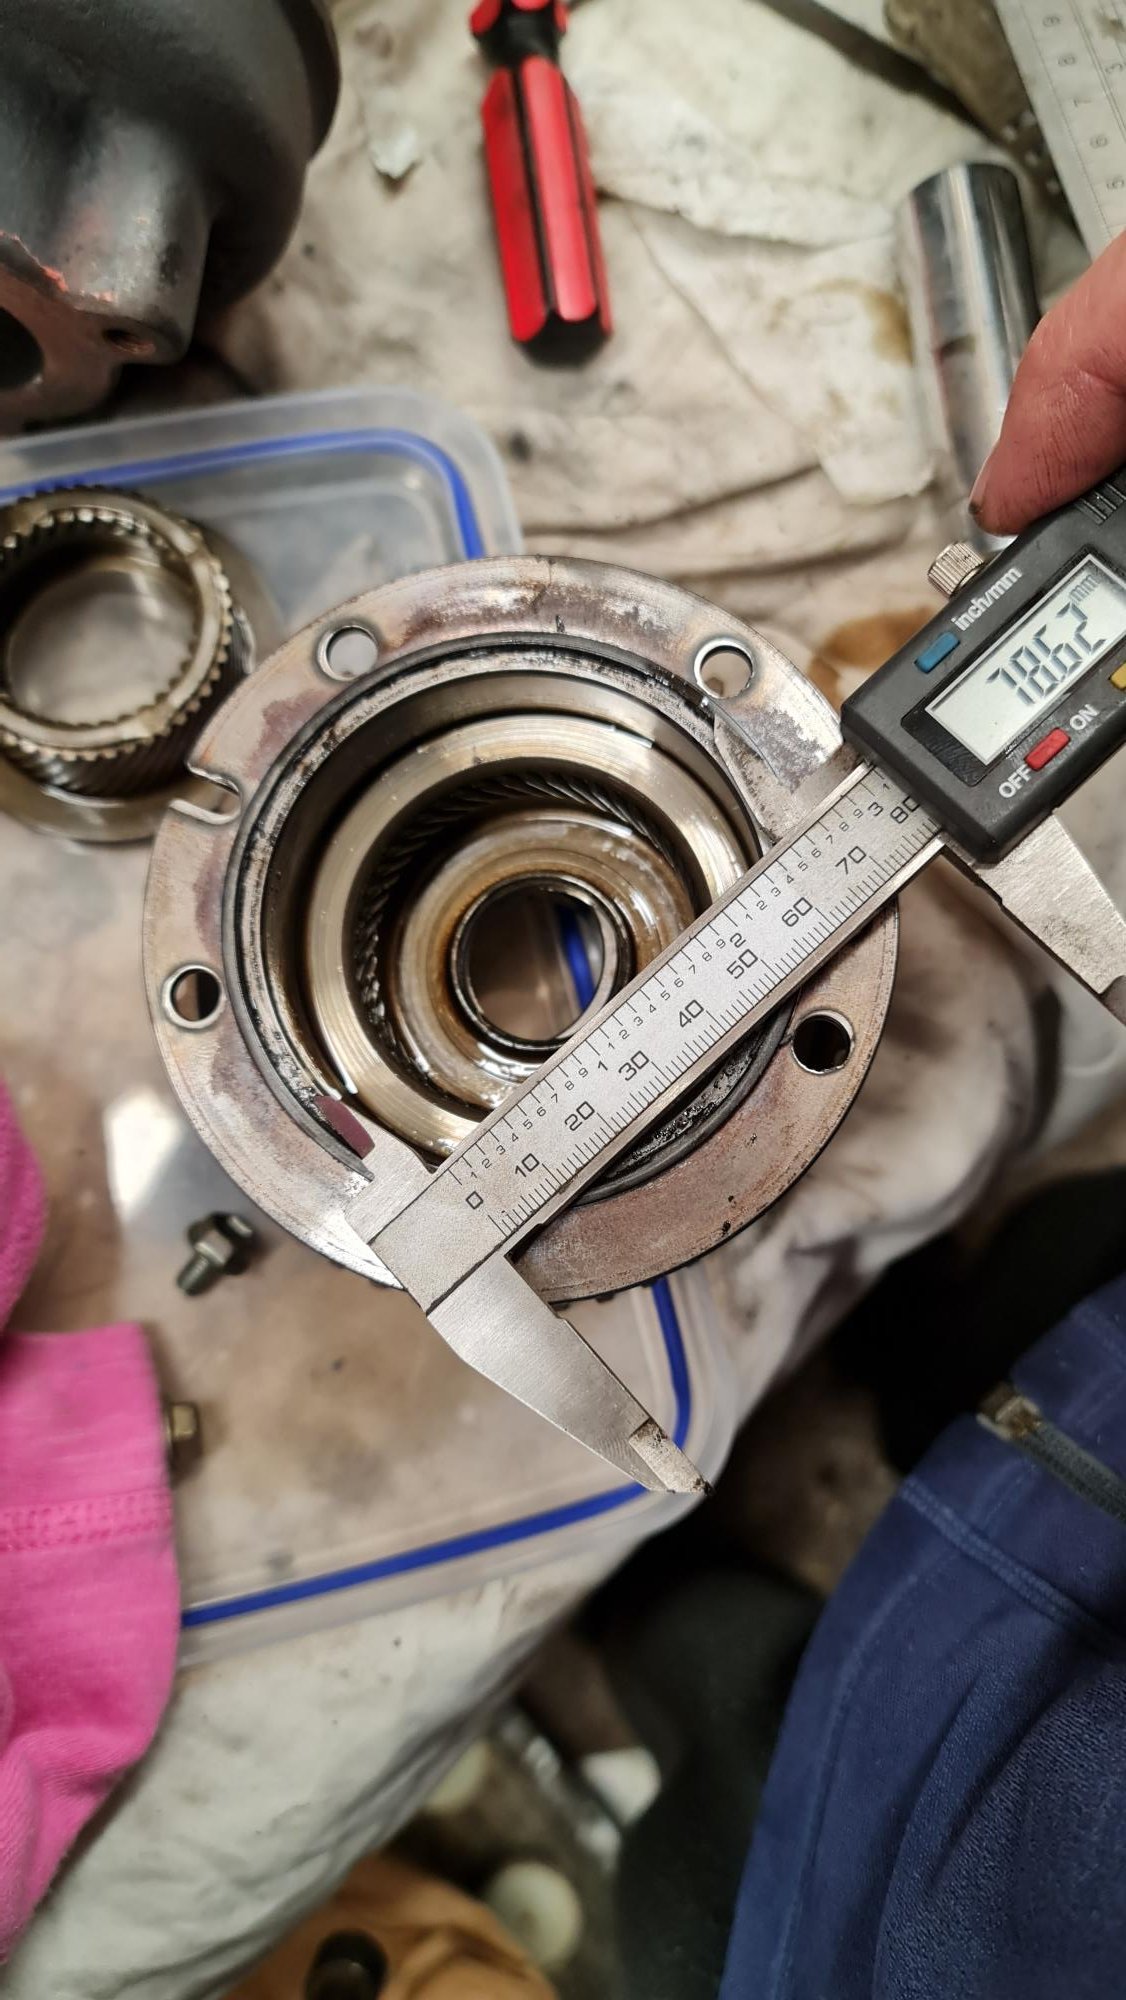
Remembered a while ago that I needed to replace the o-ring in the VVti pulley. Toyota don't sell the o-ring, only a complete pulley. I thought surely it can't be that hard to find a suitable one. There are a few people that sell nice Viton o-rings specifically for this but at $20 USD for the o-ring plus $40 to $160 postage (wtf 165??) I wanted to try source locally. Golbey's in Aus sell one, but didn't specify if Viton or not. I asked and they confirmed it is only Nitrile, which isn't really suitable since it appear to only handle 100deg C. When Viton is 200ish. Went to one of the local o-ring places, bought one that looked like it would work. Turned out to be slightly too thick. Then I found Seal Innovations' website has a search function where you can specify the ID and the width/thickness of the o-ring, plus the material. Found one that I thought would be perfect but it is out of stock, a week later they said it was now in the country but still being processed then it'll be sent to Wellington. Long story short I picked it up yesterday and it looks to be a perfect fit. That held me up for about 3 weeks...I really should have looked into it earlier. Here is the very perished and flat o-ring: VVti pulley has locating grooves for all three gears, plus a match mark so is simple enough to put back together, just remember to mark the timing beforehand.
-
Got the long block back a while ago.
-
I wonder if some periodic water injection would help?
-
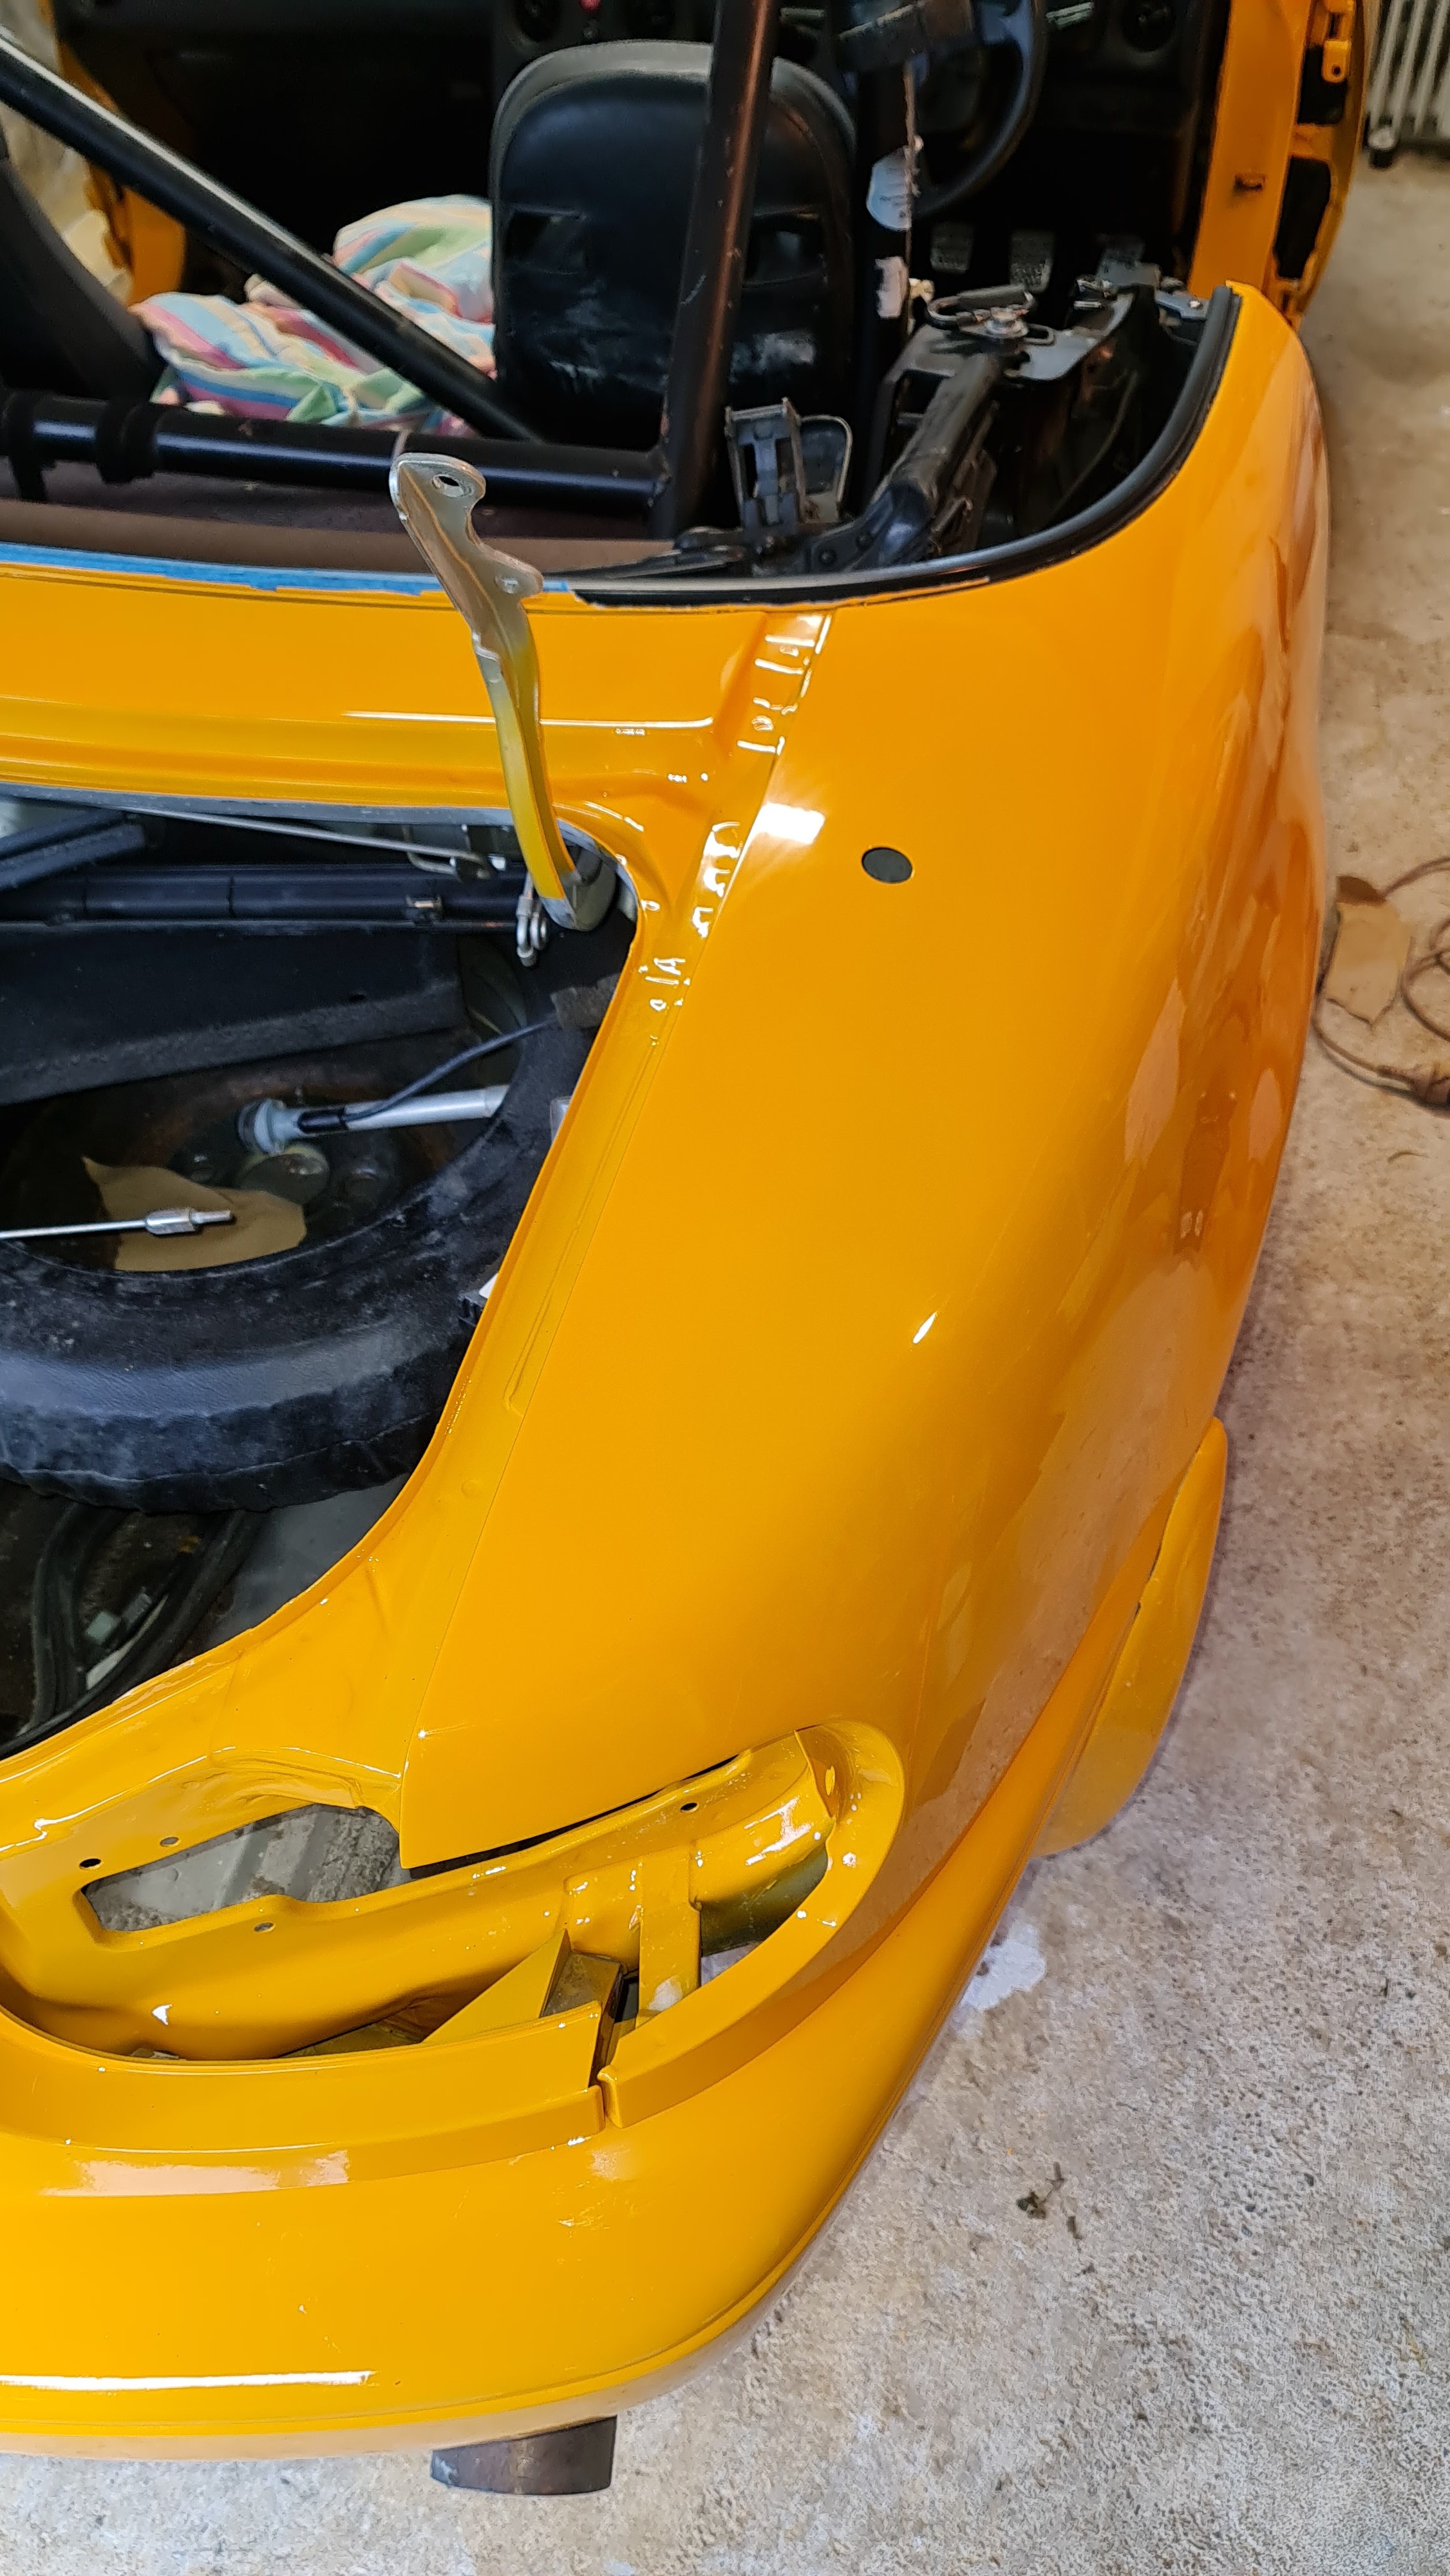
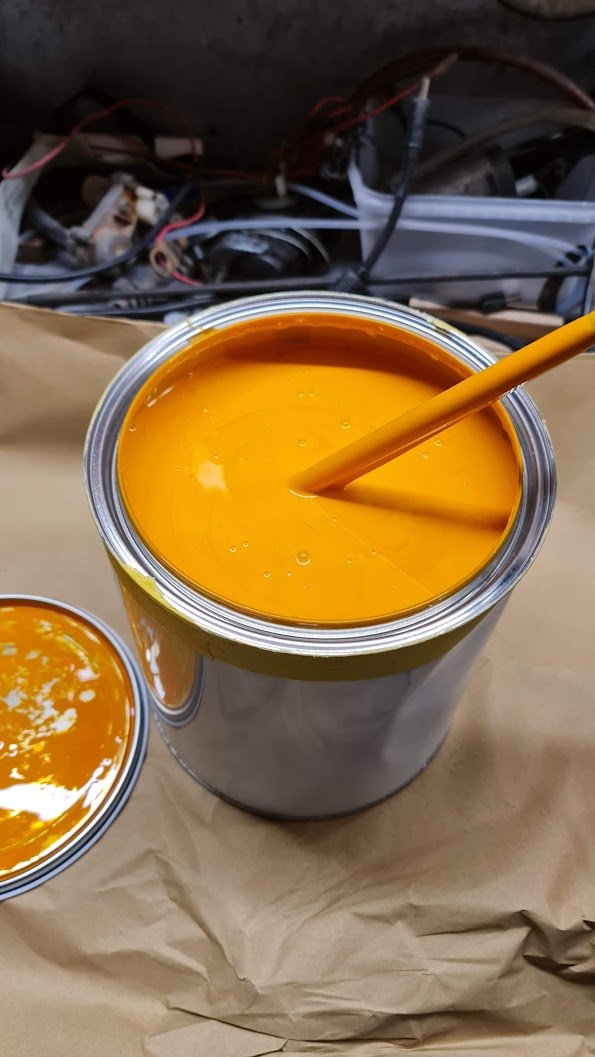
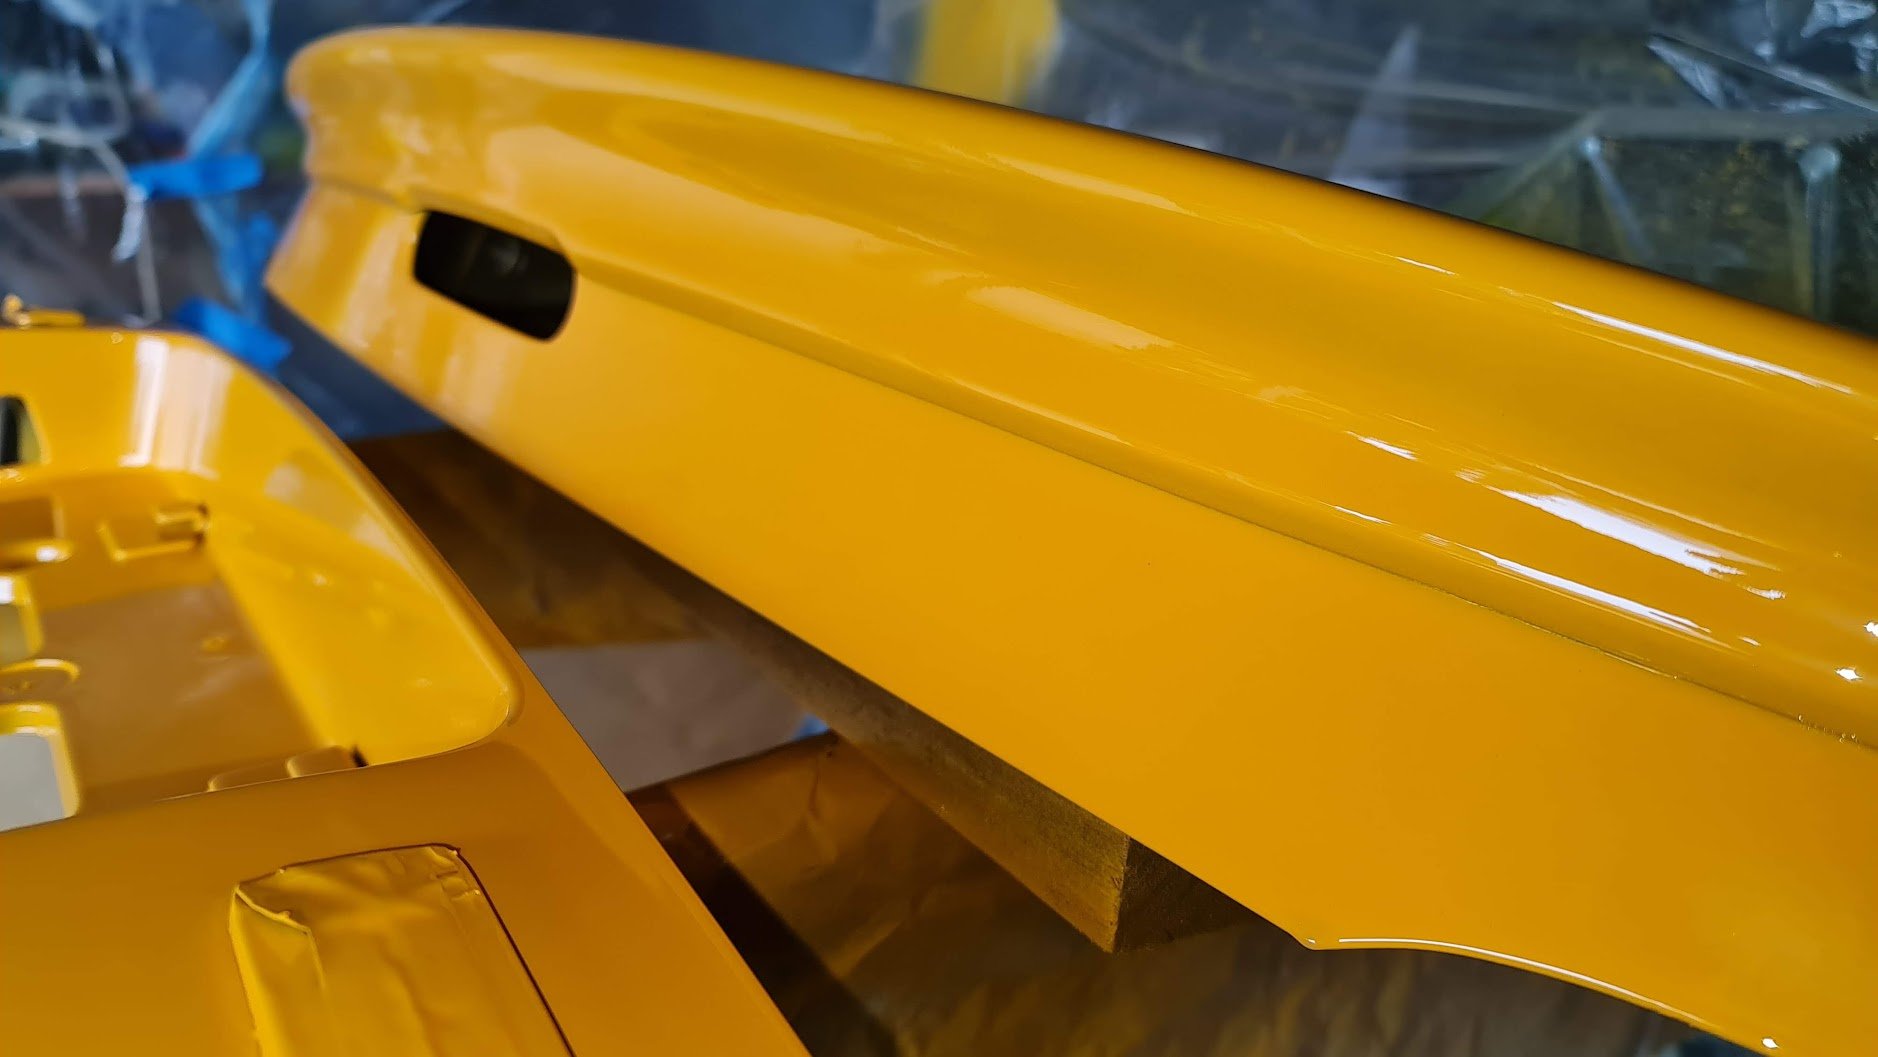
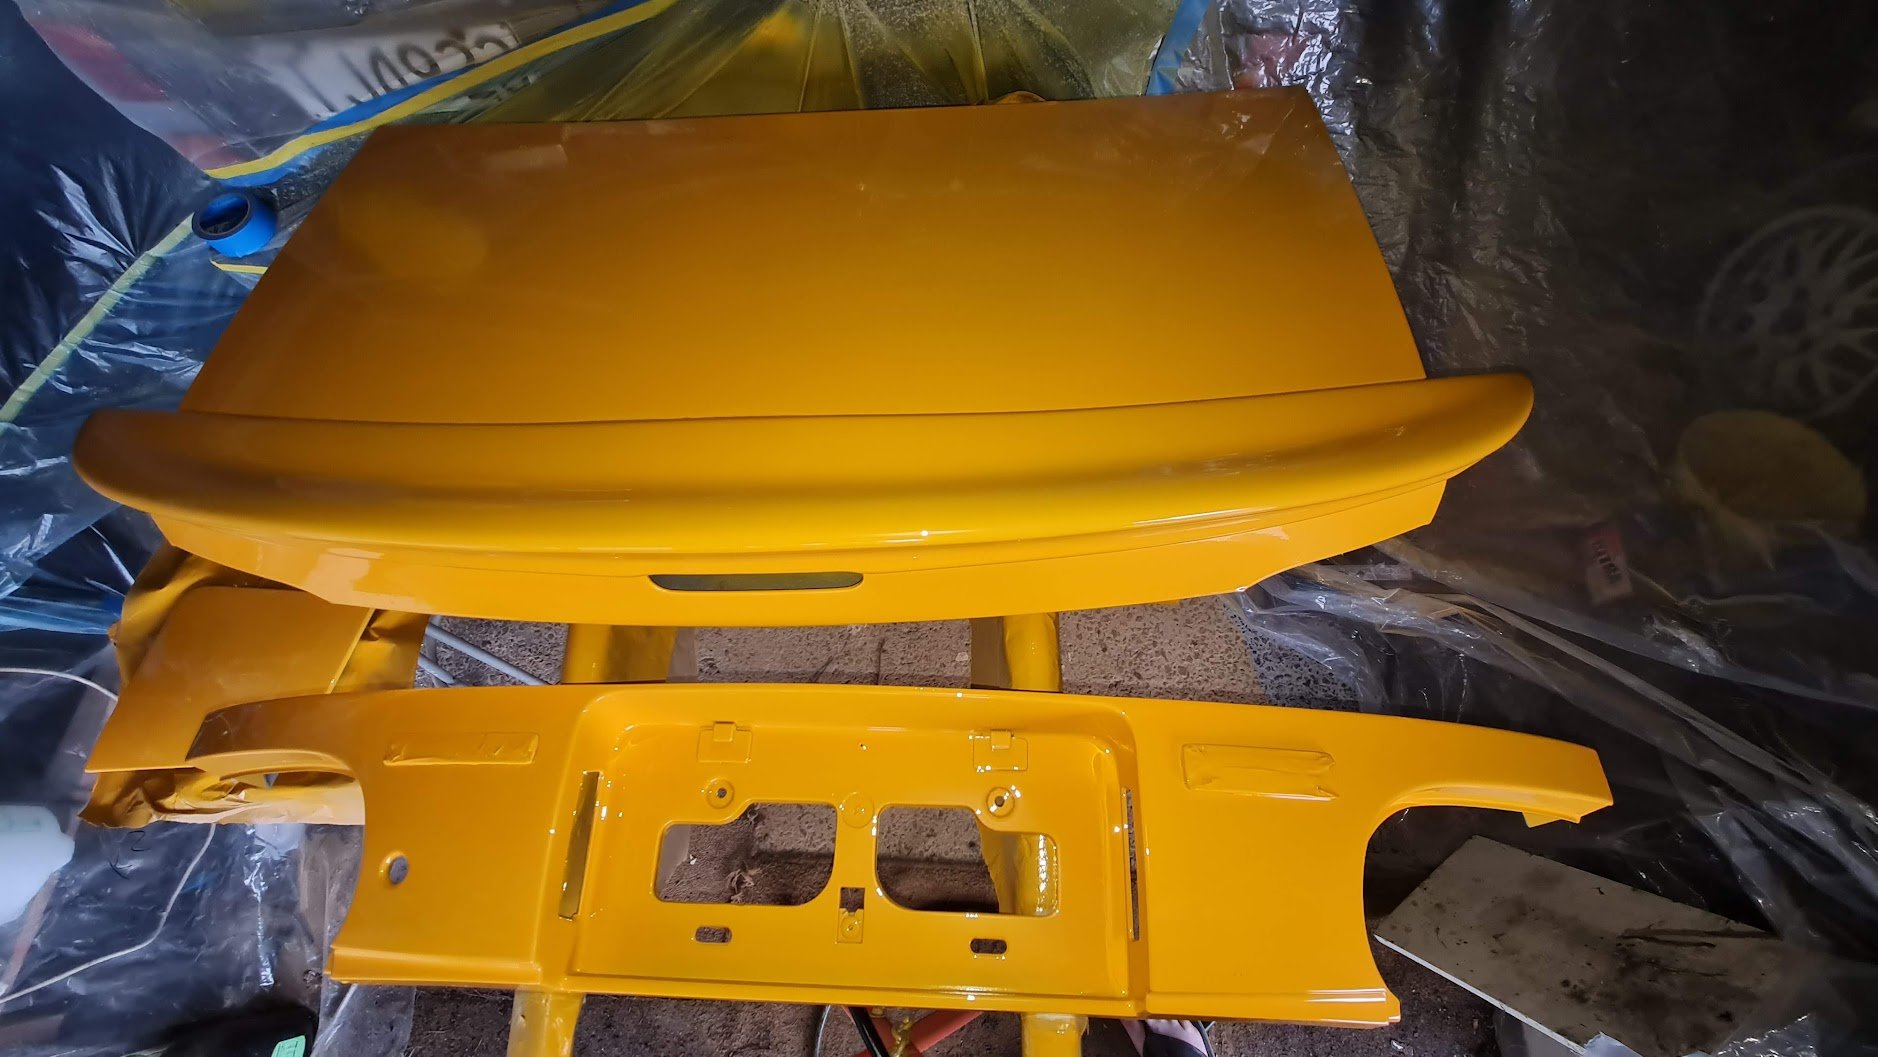
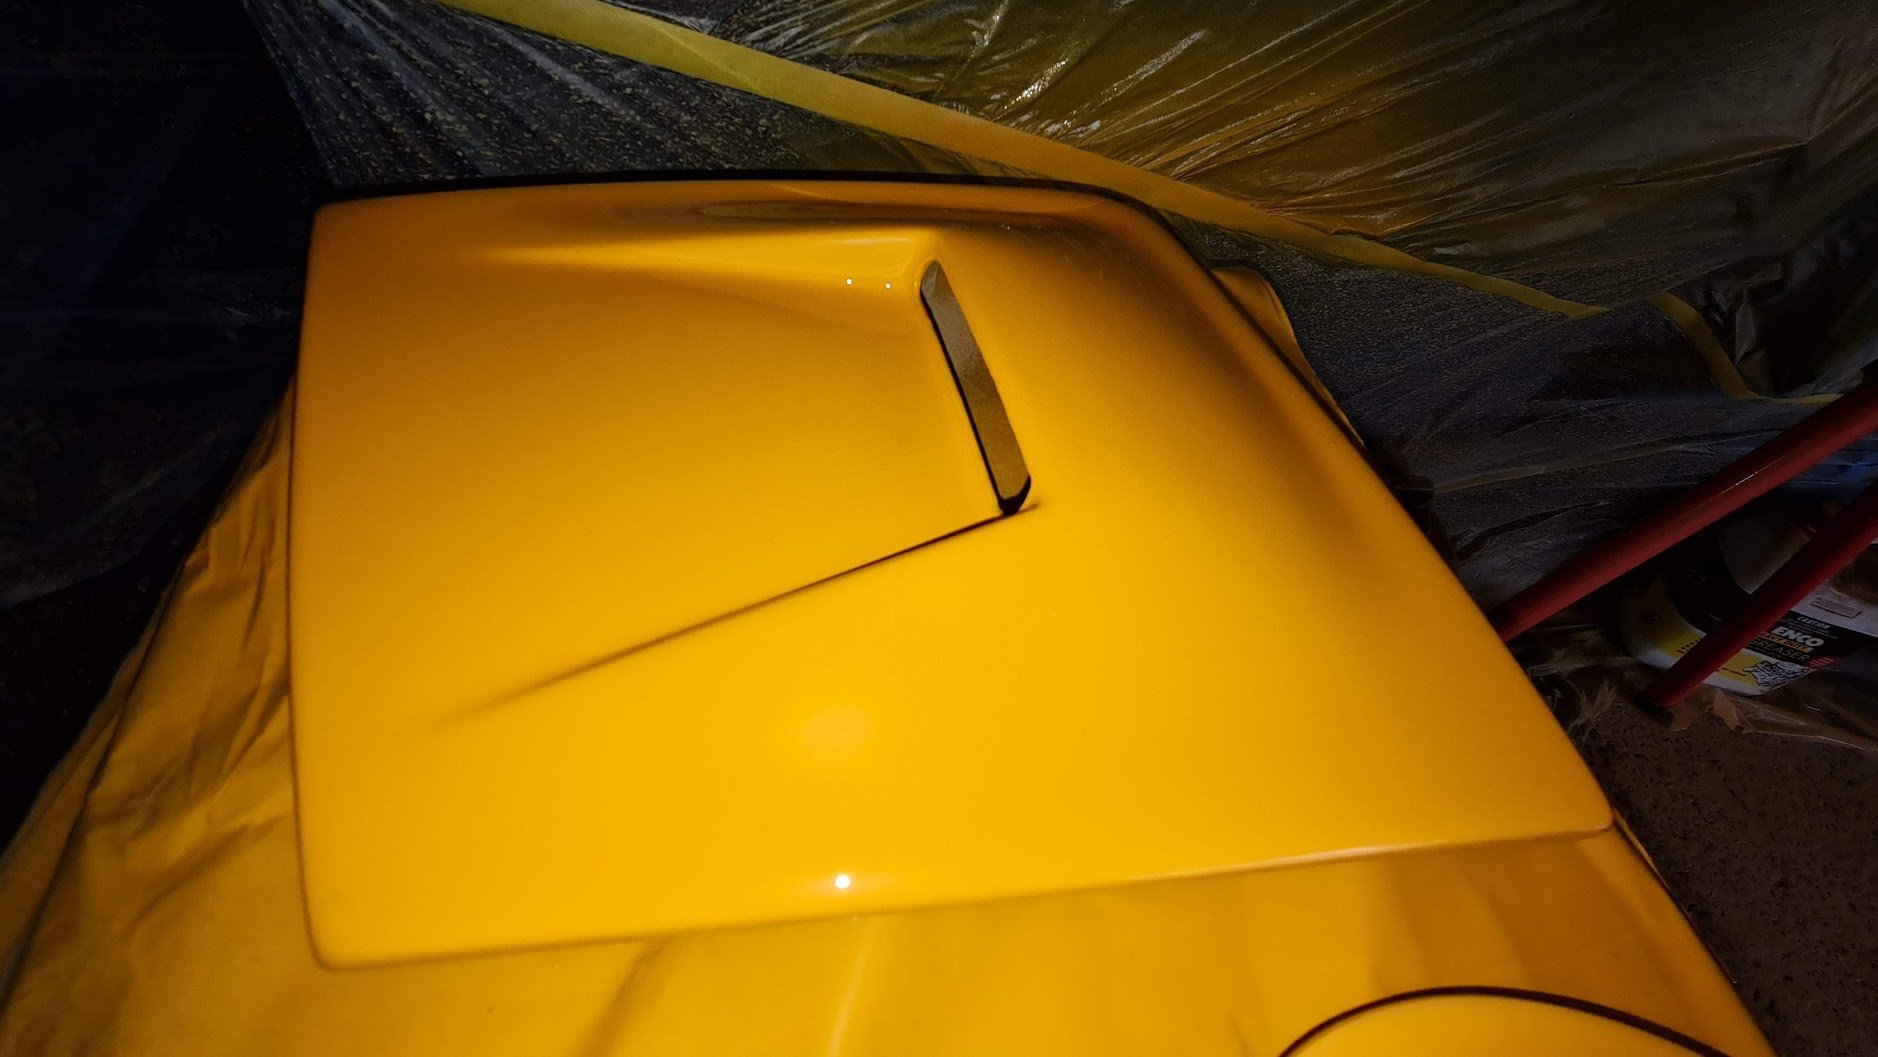
It's yellow! came out pretty good for my first time painting with 2k clear. On the day I had issues with the clear coat and it ended up quite orange peely. When I did the tests a few posts back it came out nice and flat, I think it must have been the temperature on the day. So I've waited a while and tested wet sanding and it's coming out great. Just an extra step I wouldnt have had to do if the clear went on better. Oh well I'll see how I go when I paint the doors and see if it comes out better. Really happy with the colour, it looks a bit more orange in photos.
- 165 replies
-
- 13
-

-

-
Thanks man, good advice. They look super easy to assemble due to the match marks, but I think I know which part you mean (the smallest centre one) that can be put in backwards? Don't suppose you have a source for the correct o-ring maybe? I've been to the local o-ring supplier and I did buy two that were closest but I don't think they are going to work now. One is Viton but slightly too thick, it needs to be worked/stretch like all of those rebuild videos do, it then fits the groove but sits too high with not enough room to compress/expand. The other fits perfectly but is Nitrile so rated to only 100 degrees. So not really good enough. Shipping is insane from overseas for the ones listed on Amazon etc. Like $40 shipping for one o-ring!? Goleby's in Aus have a listing but it doesn't say if it is Viton, so I've messaged them to see. Hopefully that isn't as ridiculous for shipping.
-
Haha I think that will be an even harder task to get registered again! I wonder how it ended up like that?
-
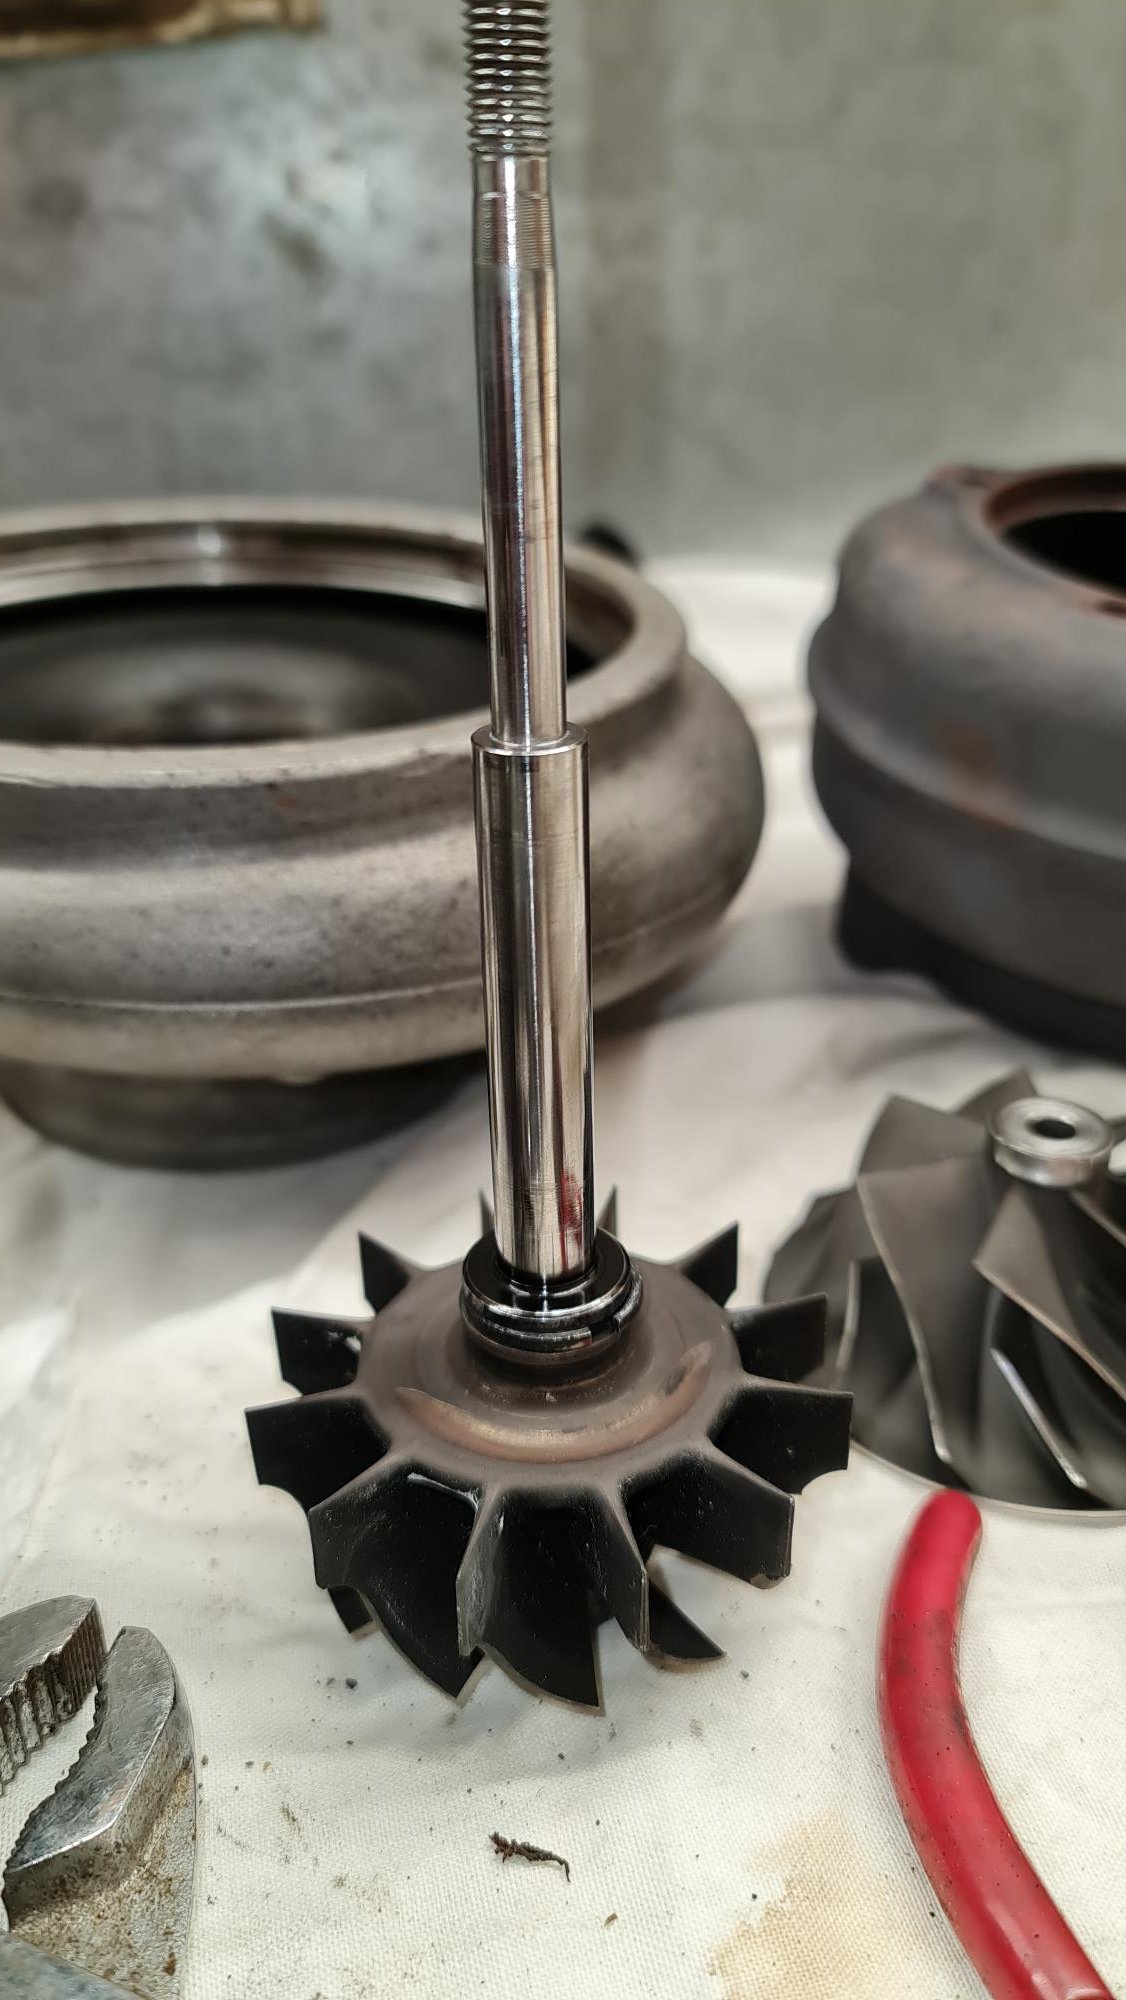
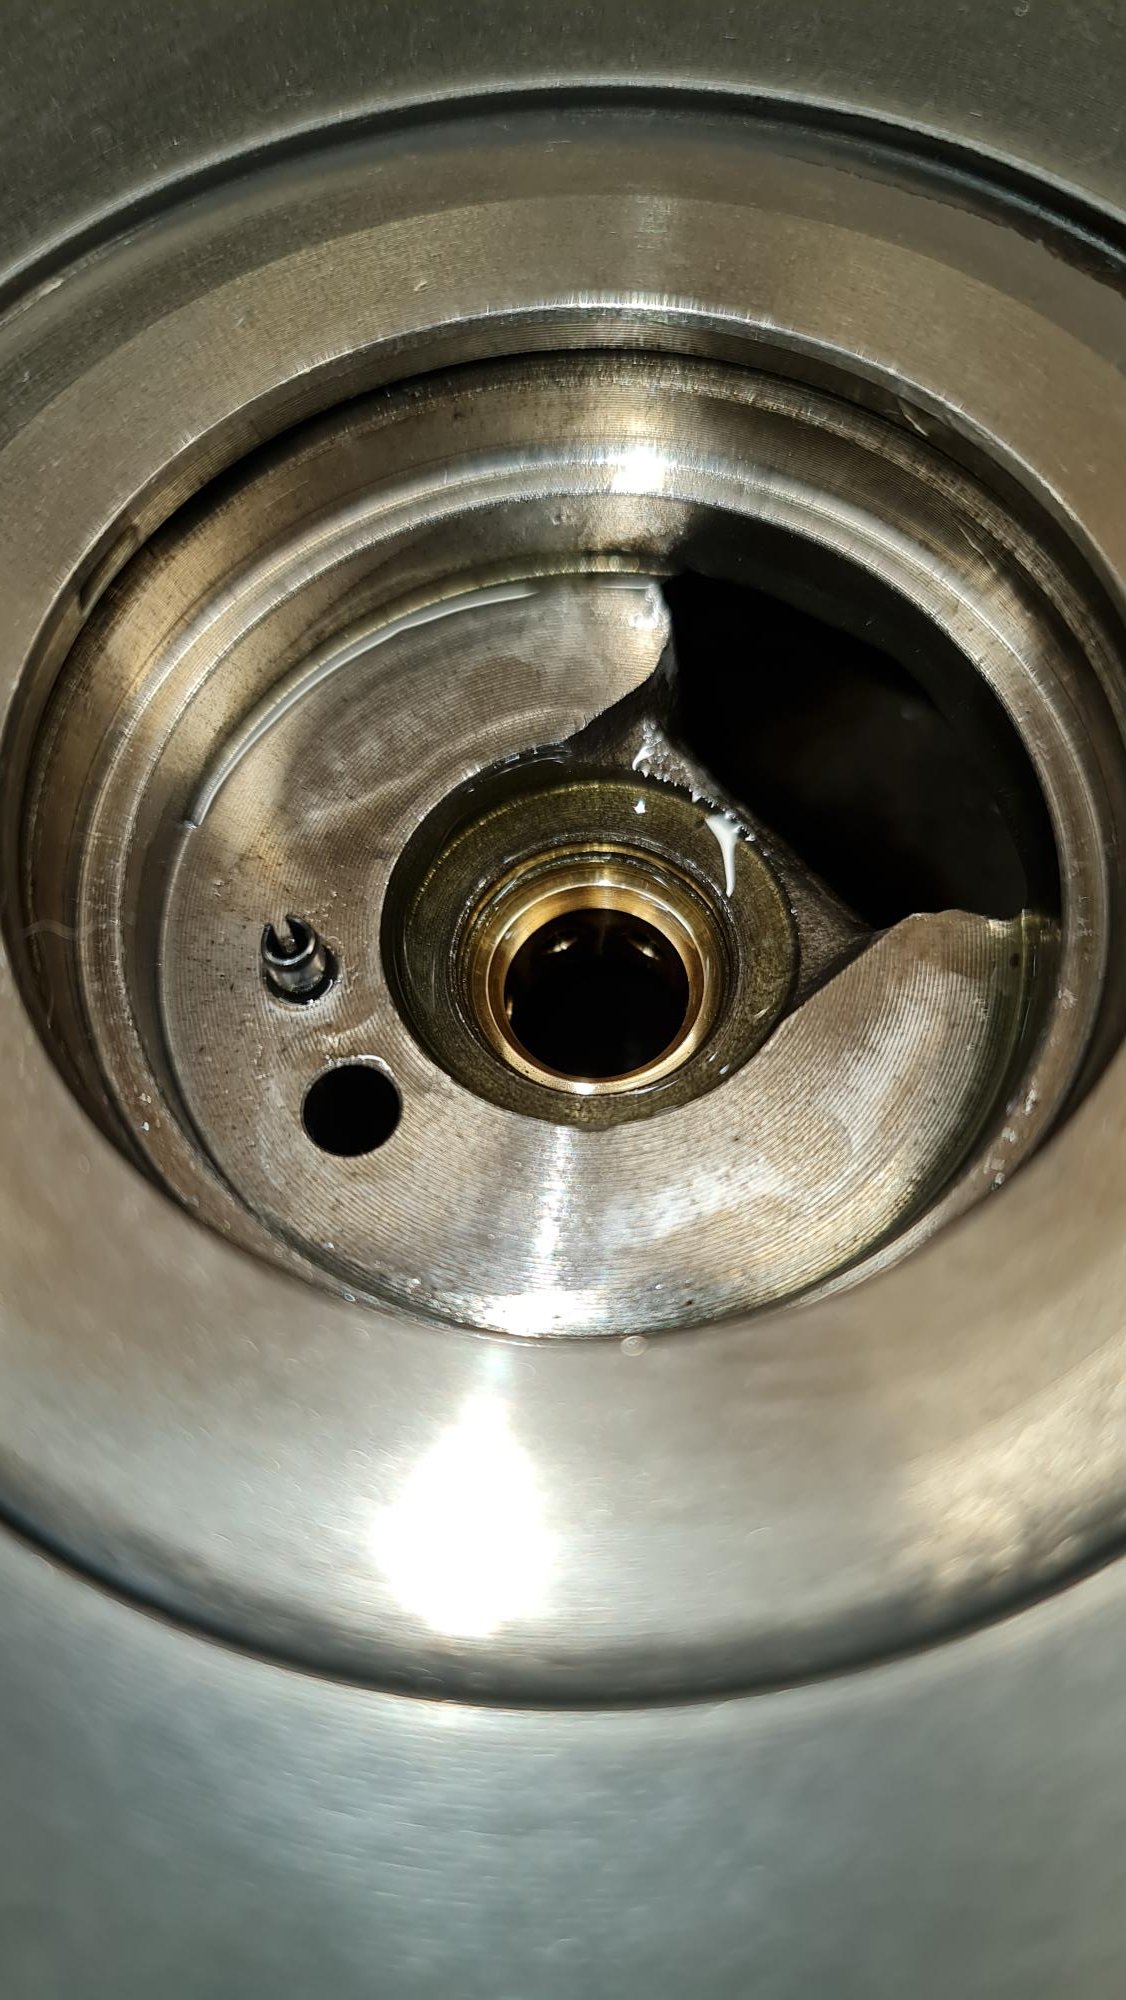
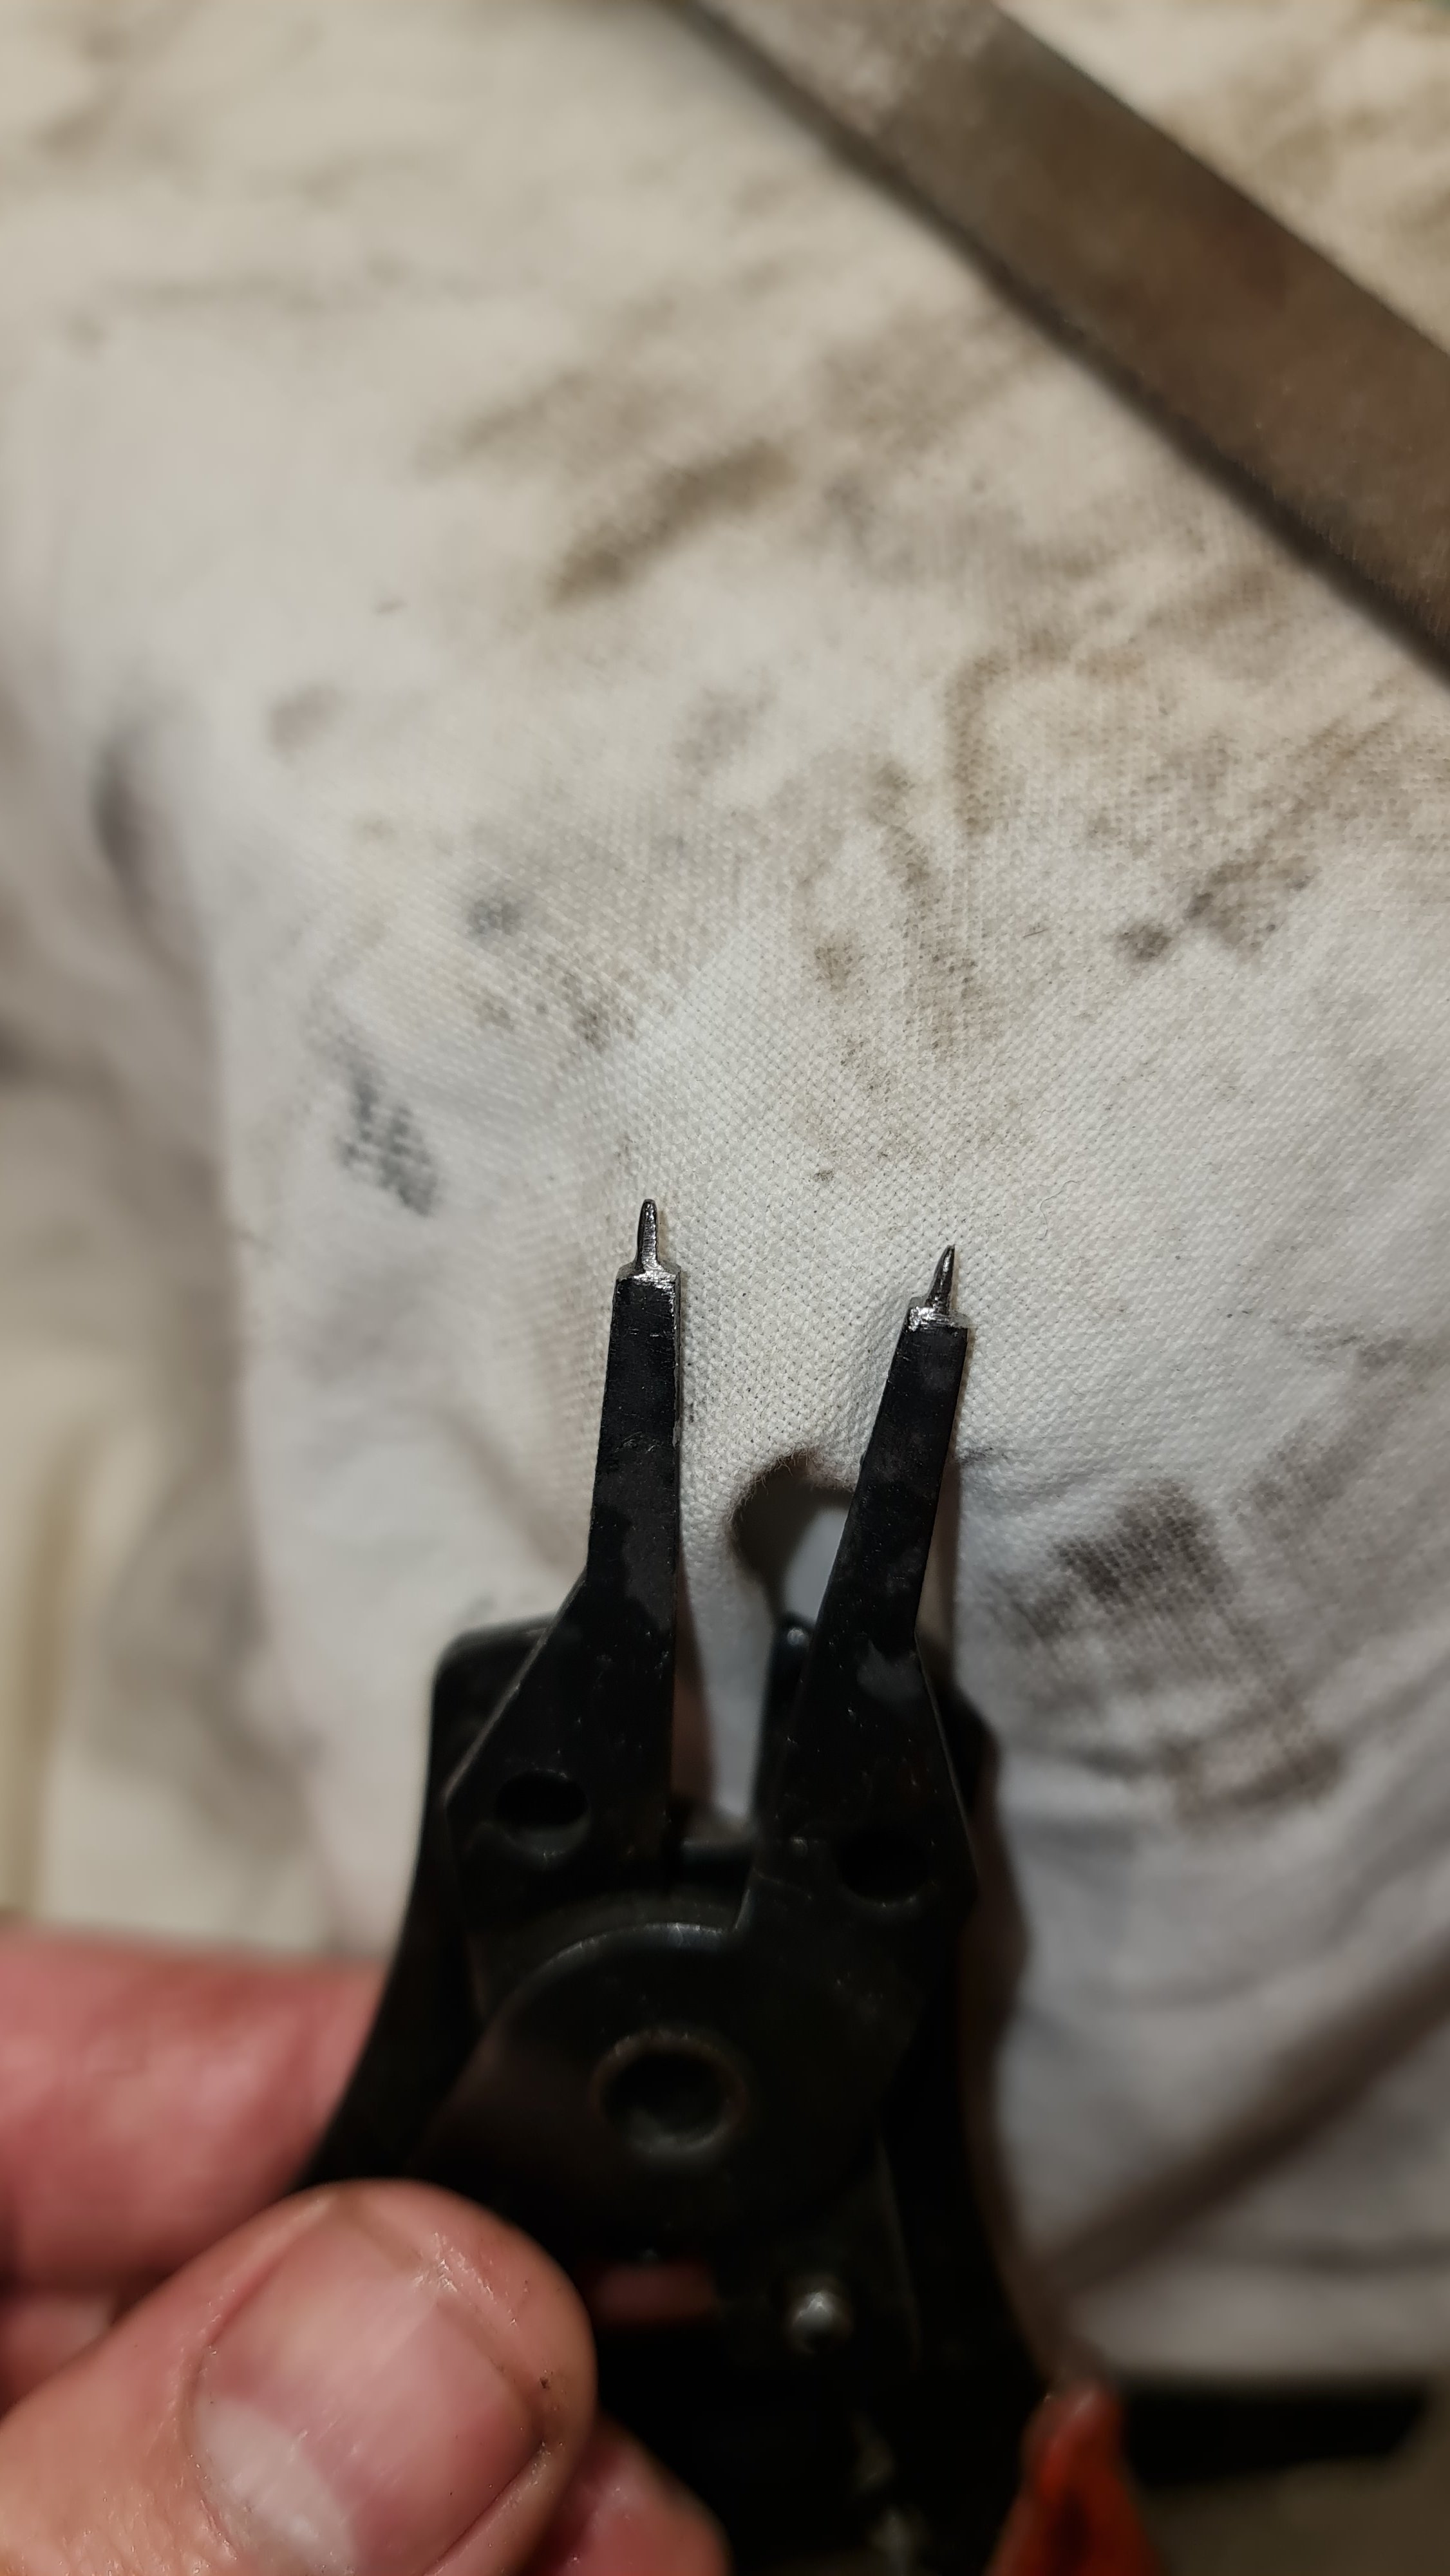
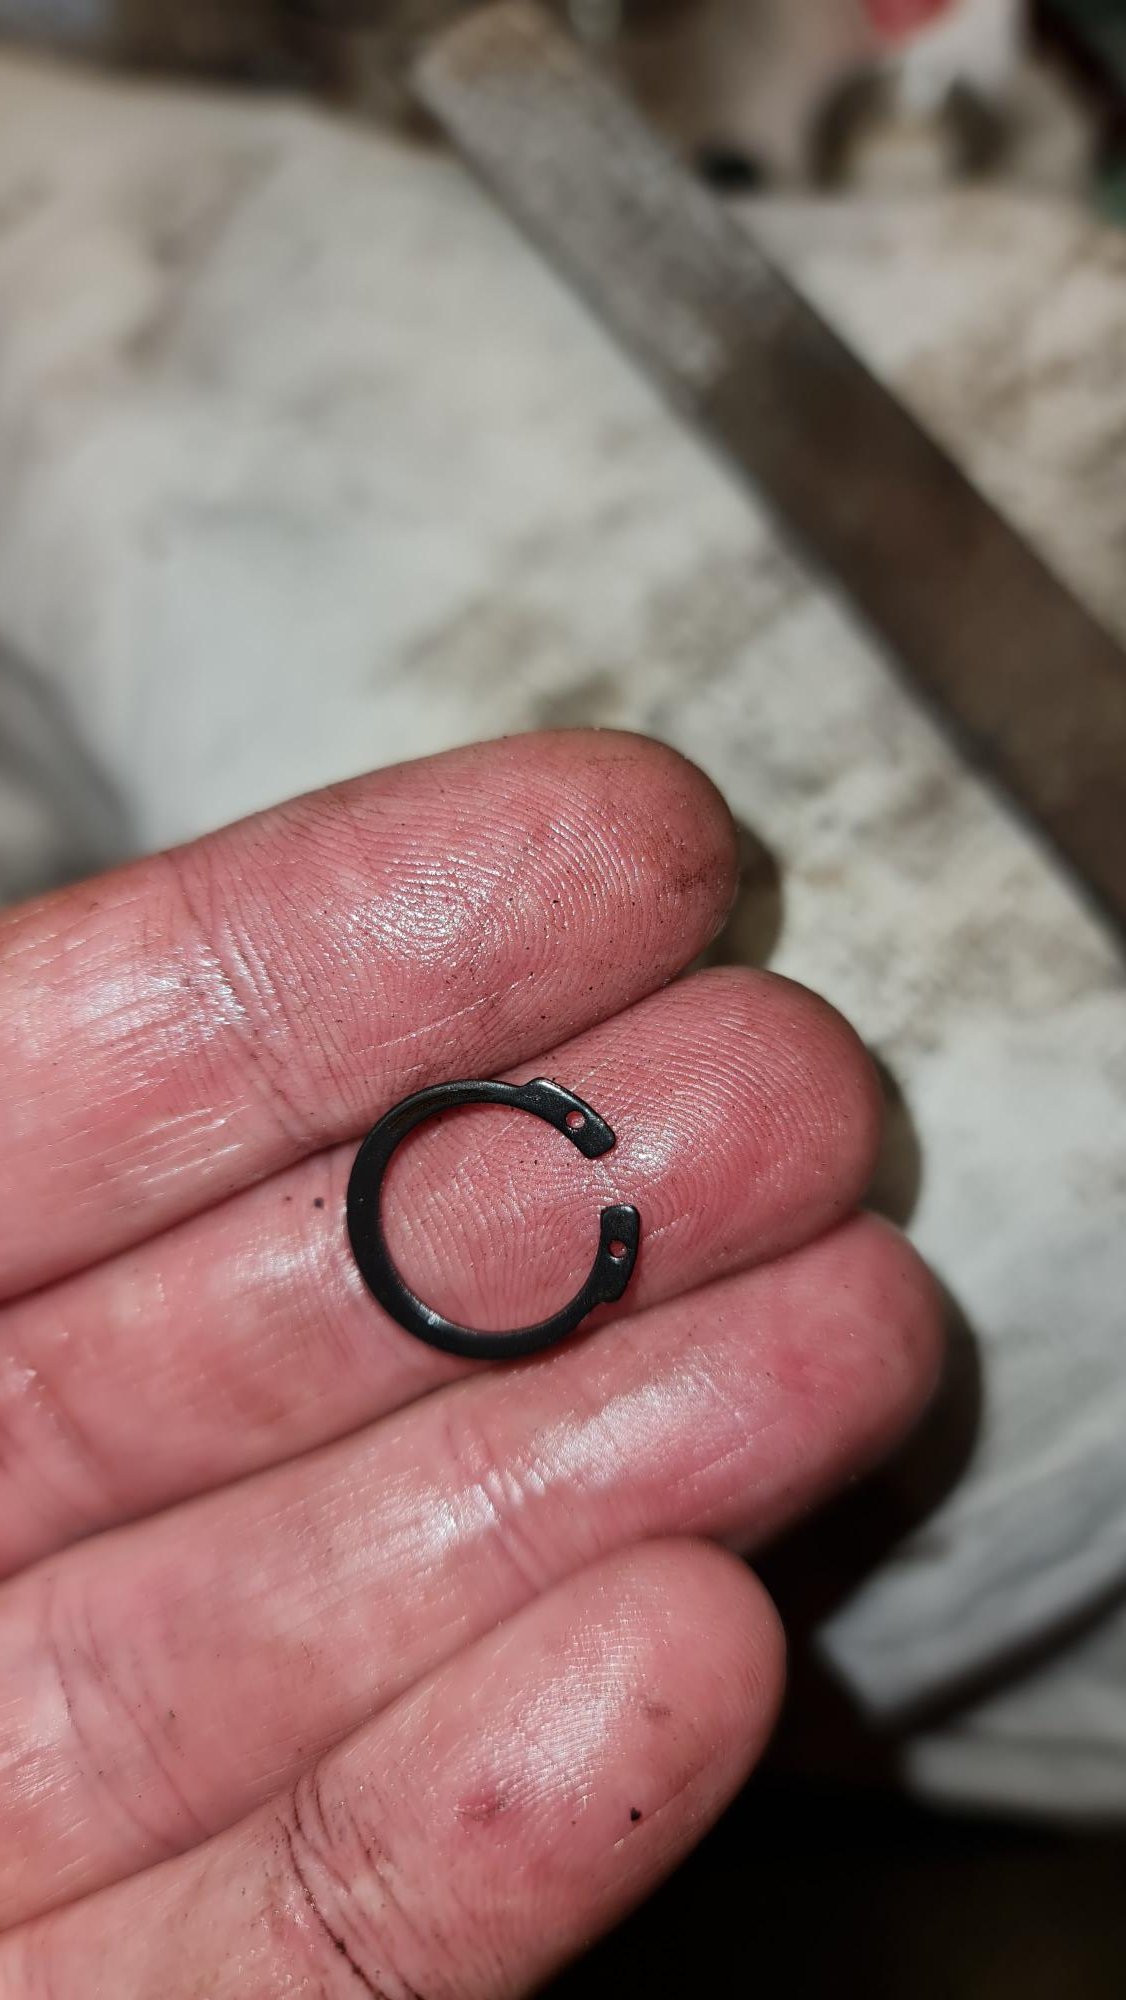
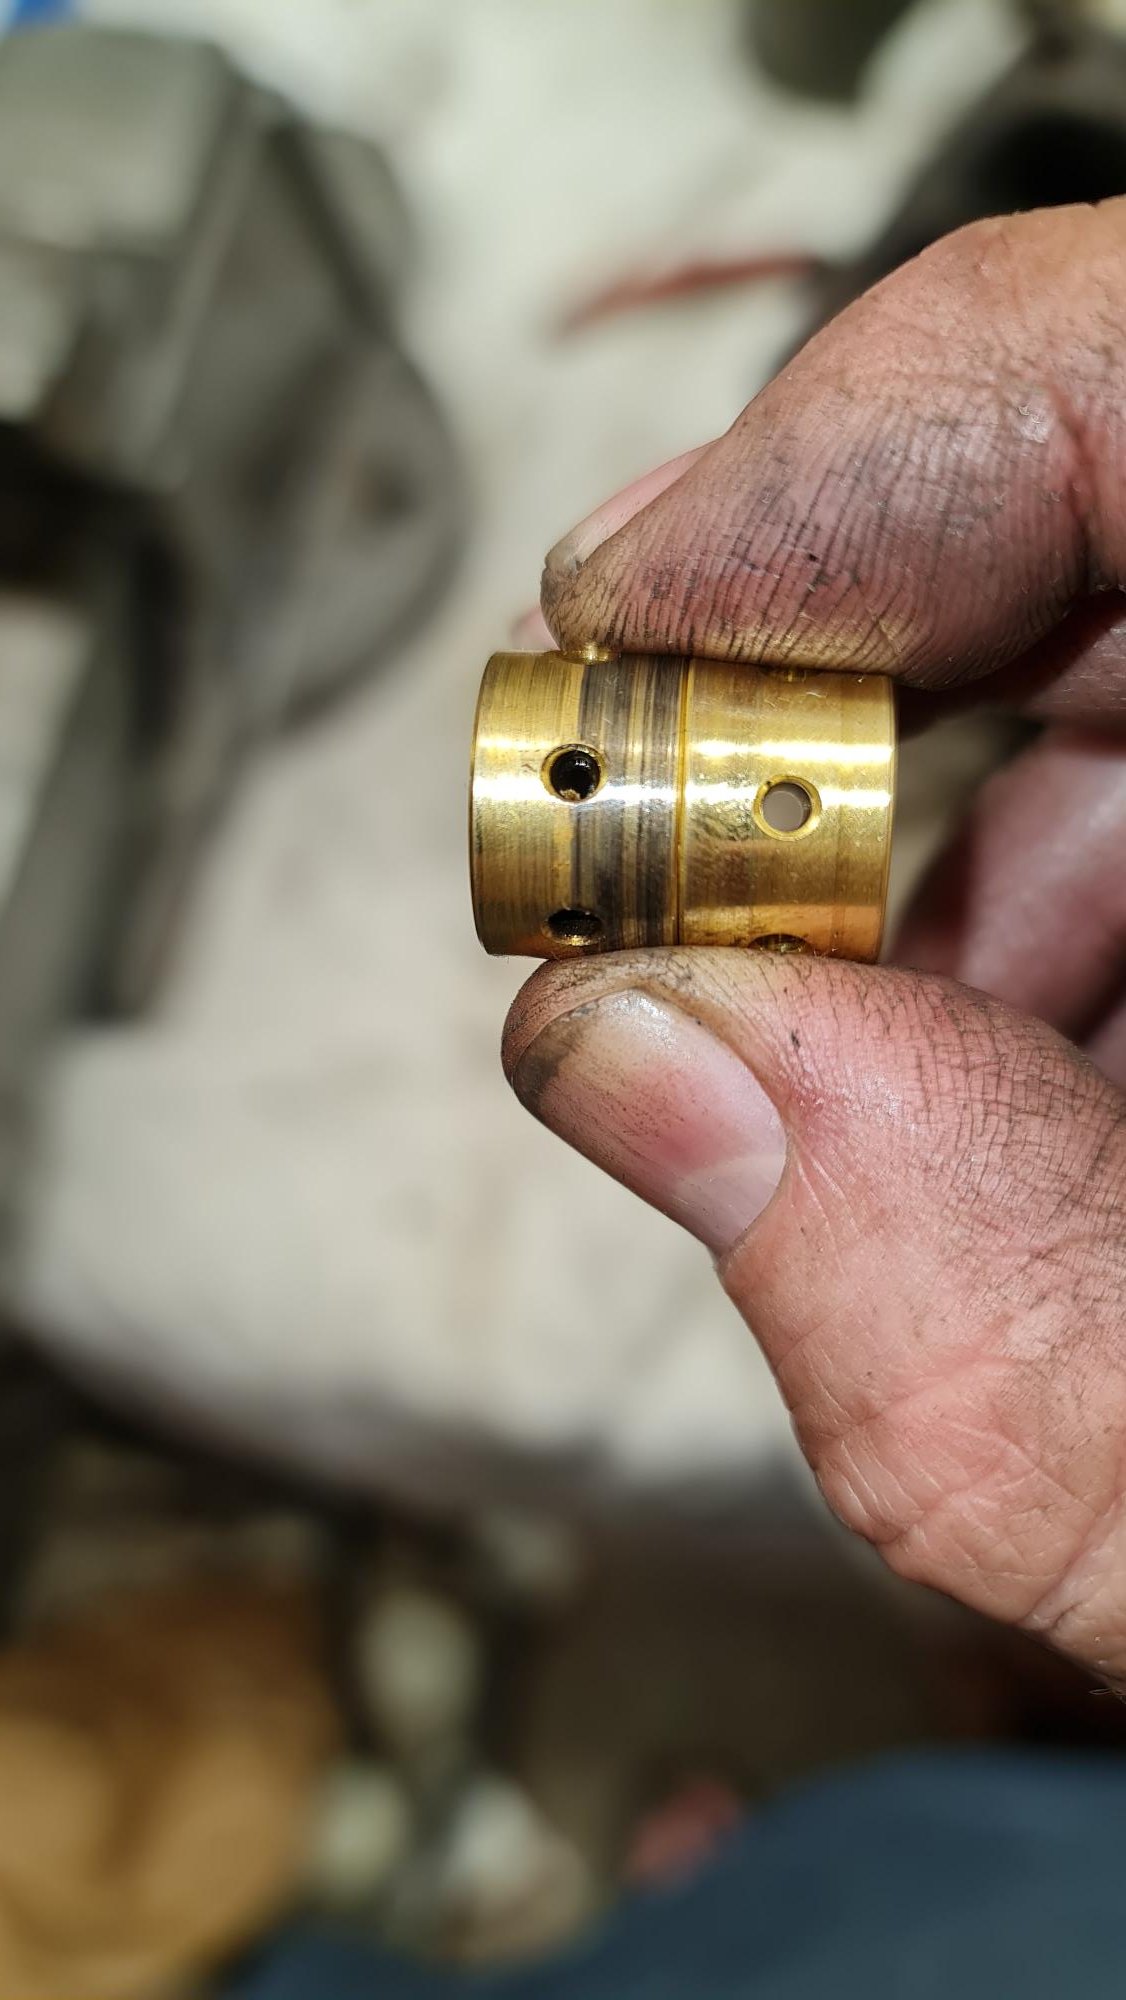
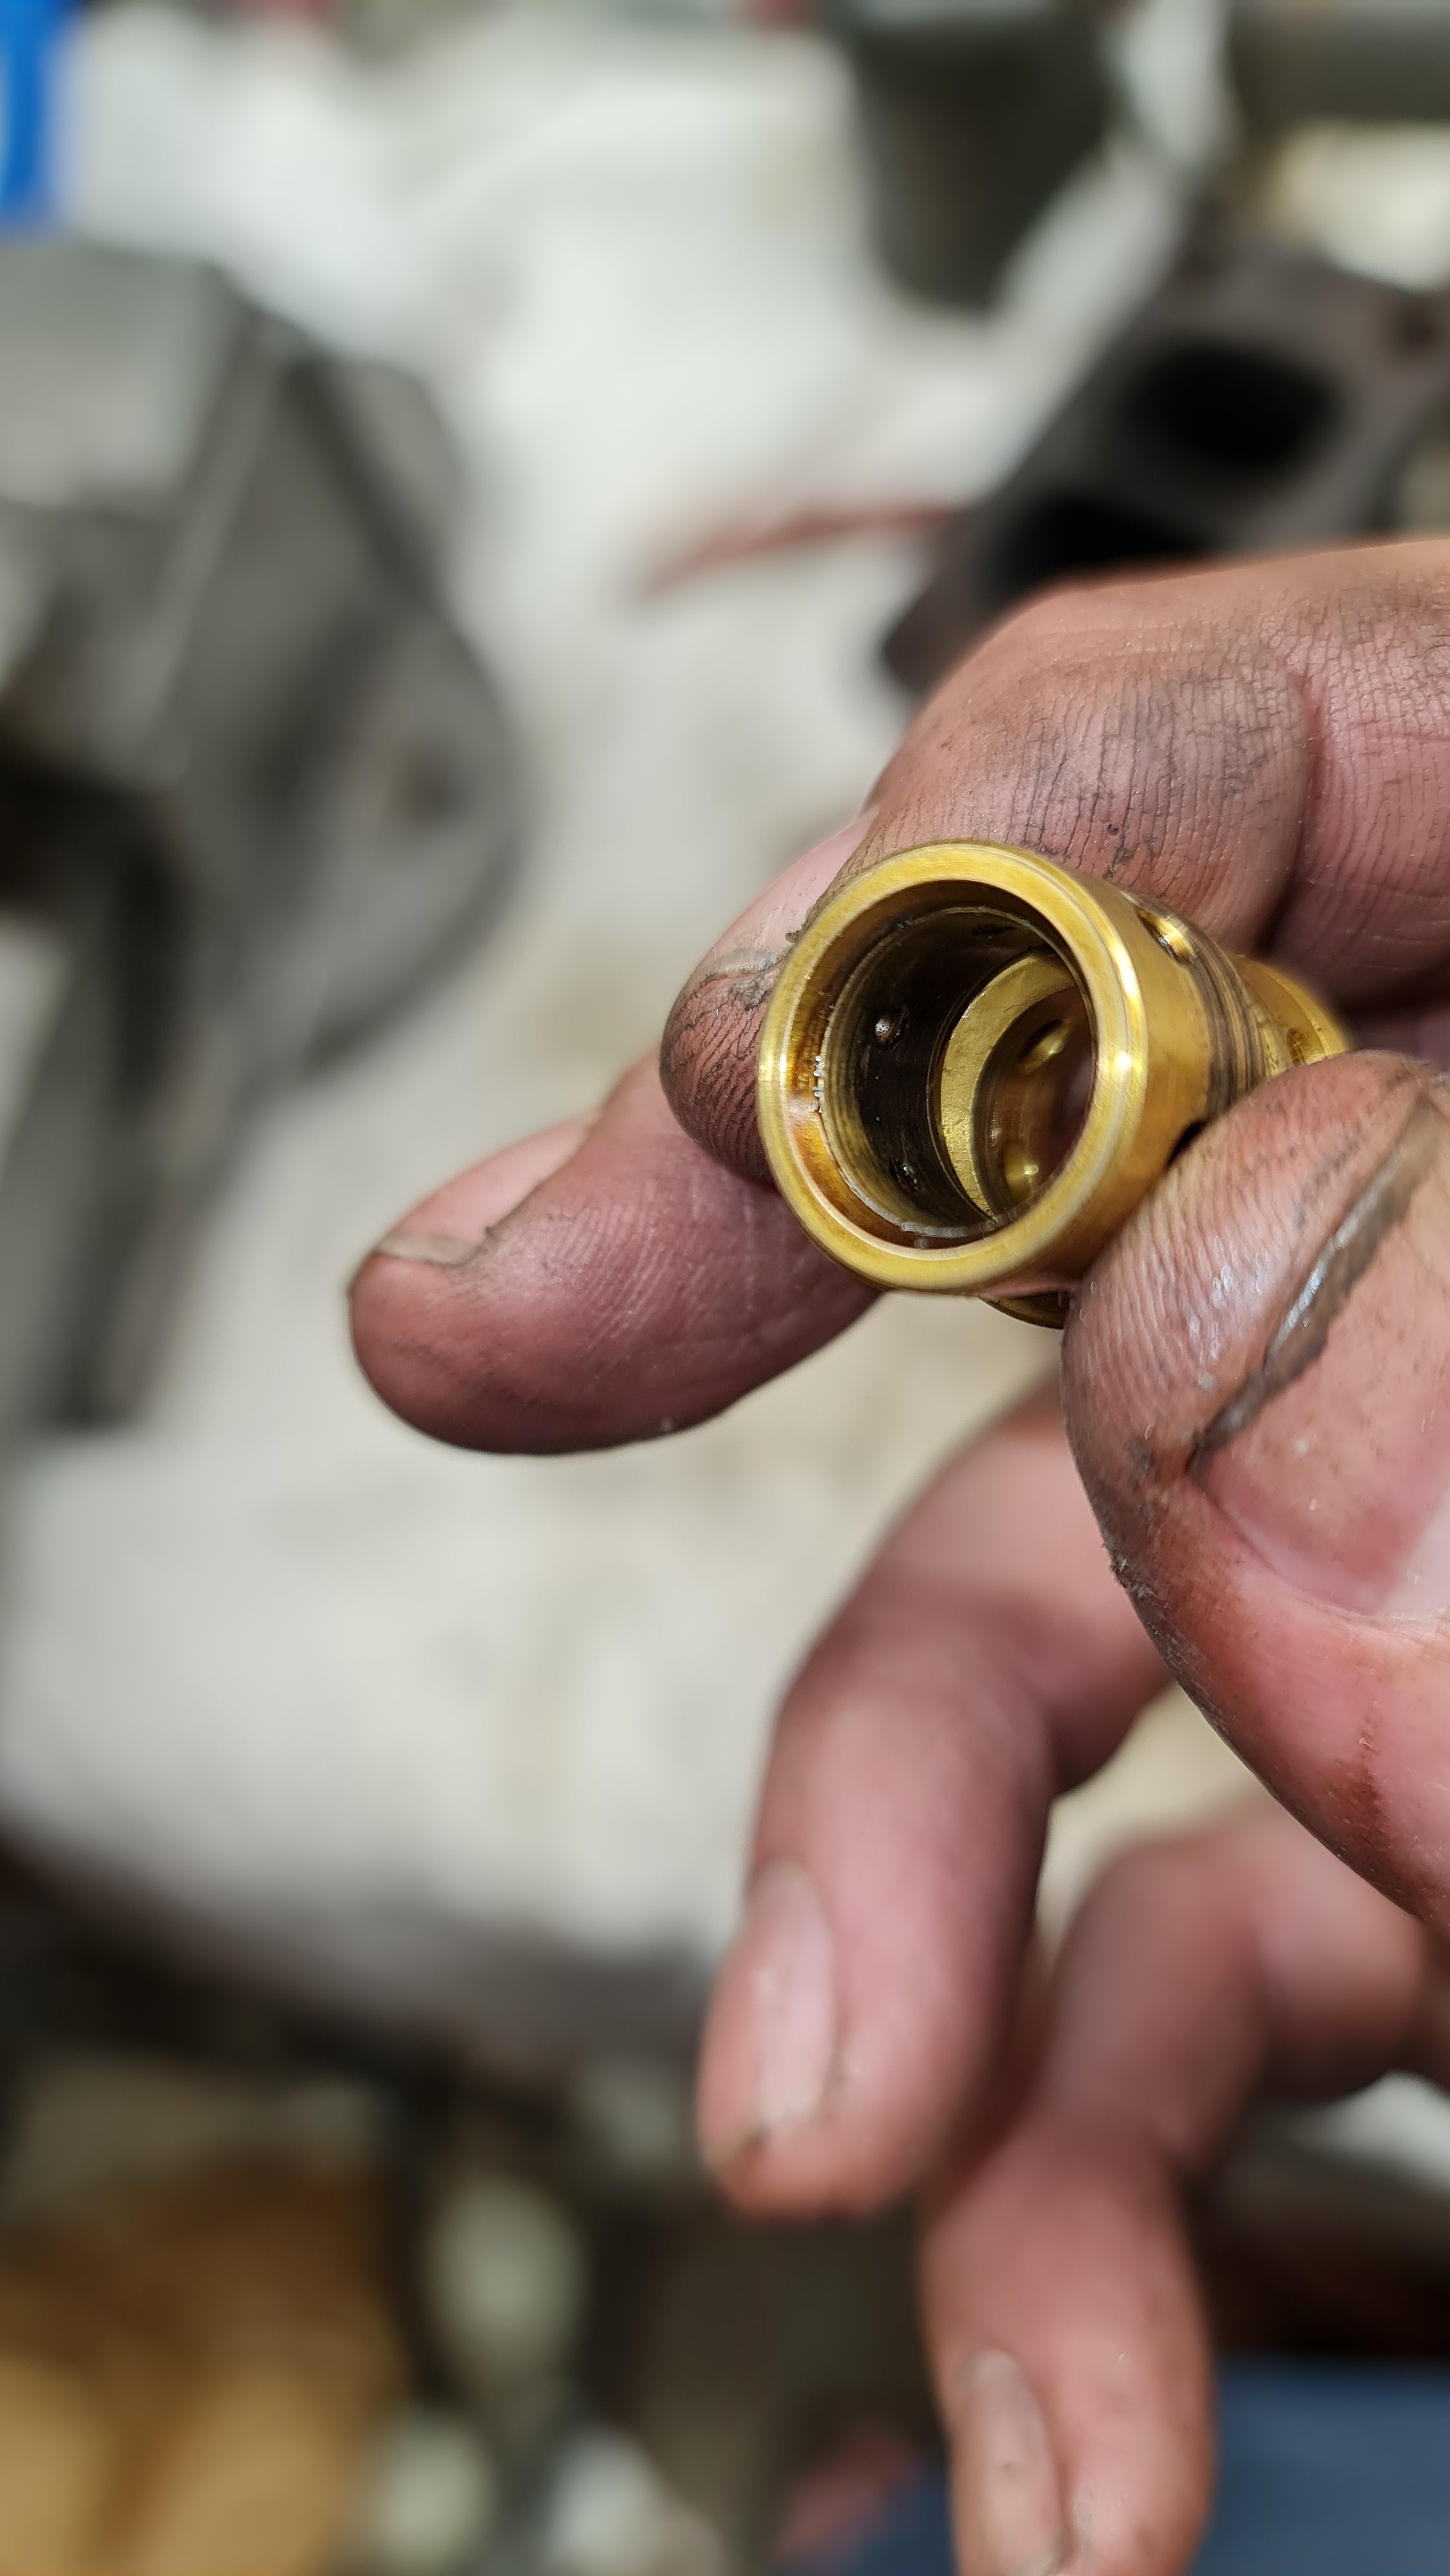
The short block is back together, I didn't do it myself because I didn't want it to be my first diy rebuild and stuff it up. Those 1jz's are going for $10k these days?! Plus $2k worth of pistons etc etc. I will save the diy build practice for the 4wd lancer thing. I dropped off some ARP head studs, the head has been skimmed and need some work on the exhaust valve side plus getting new stem seals. In the mean time I found that the HX35 had some play, not too bad but since it was on the bench I decided to get a rebuild kit. The journal bearing on the exhaust side has taken a beating and the compressor side seems fine. I can feel the play with the exh side on on the shaft while the comp side seems ok. It kind of looks like the exh end one got hot, I did find that the seals right next to it were a pretty tight fit, i.e. the ones already in there. When I replaced them I made sure they weren't as tight. These little buggers are a pain, had to file down these to make them fit New bearing in: Polished shaft: Back together, really had to fight the dinner plate sized c-clip that holds the comp cover on, that thing wants to decapitate you: Next will be to take apart the VVti pulley since it is leaking. Toyota officially says don't rebuild it, but plenty of people have, and those people keep the exact o-ring type a secret so they can charge $20 for an o-ring and a million dollars postage. I will try the local place. Made some timing markings with a scribe thing.
- 419 replies
-
- 10
-
-
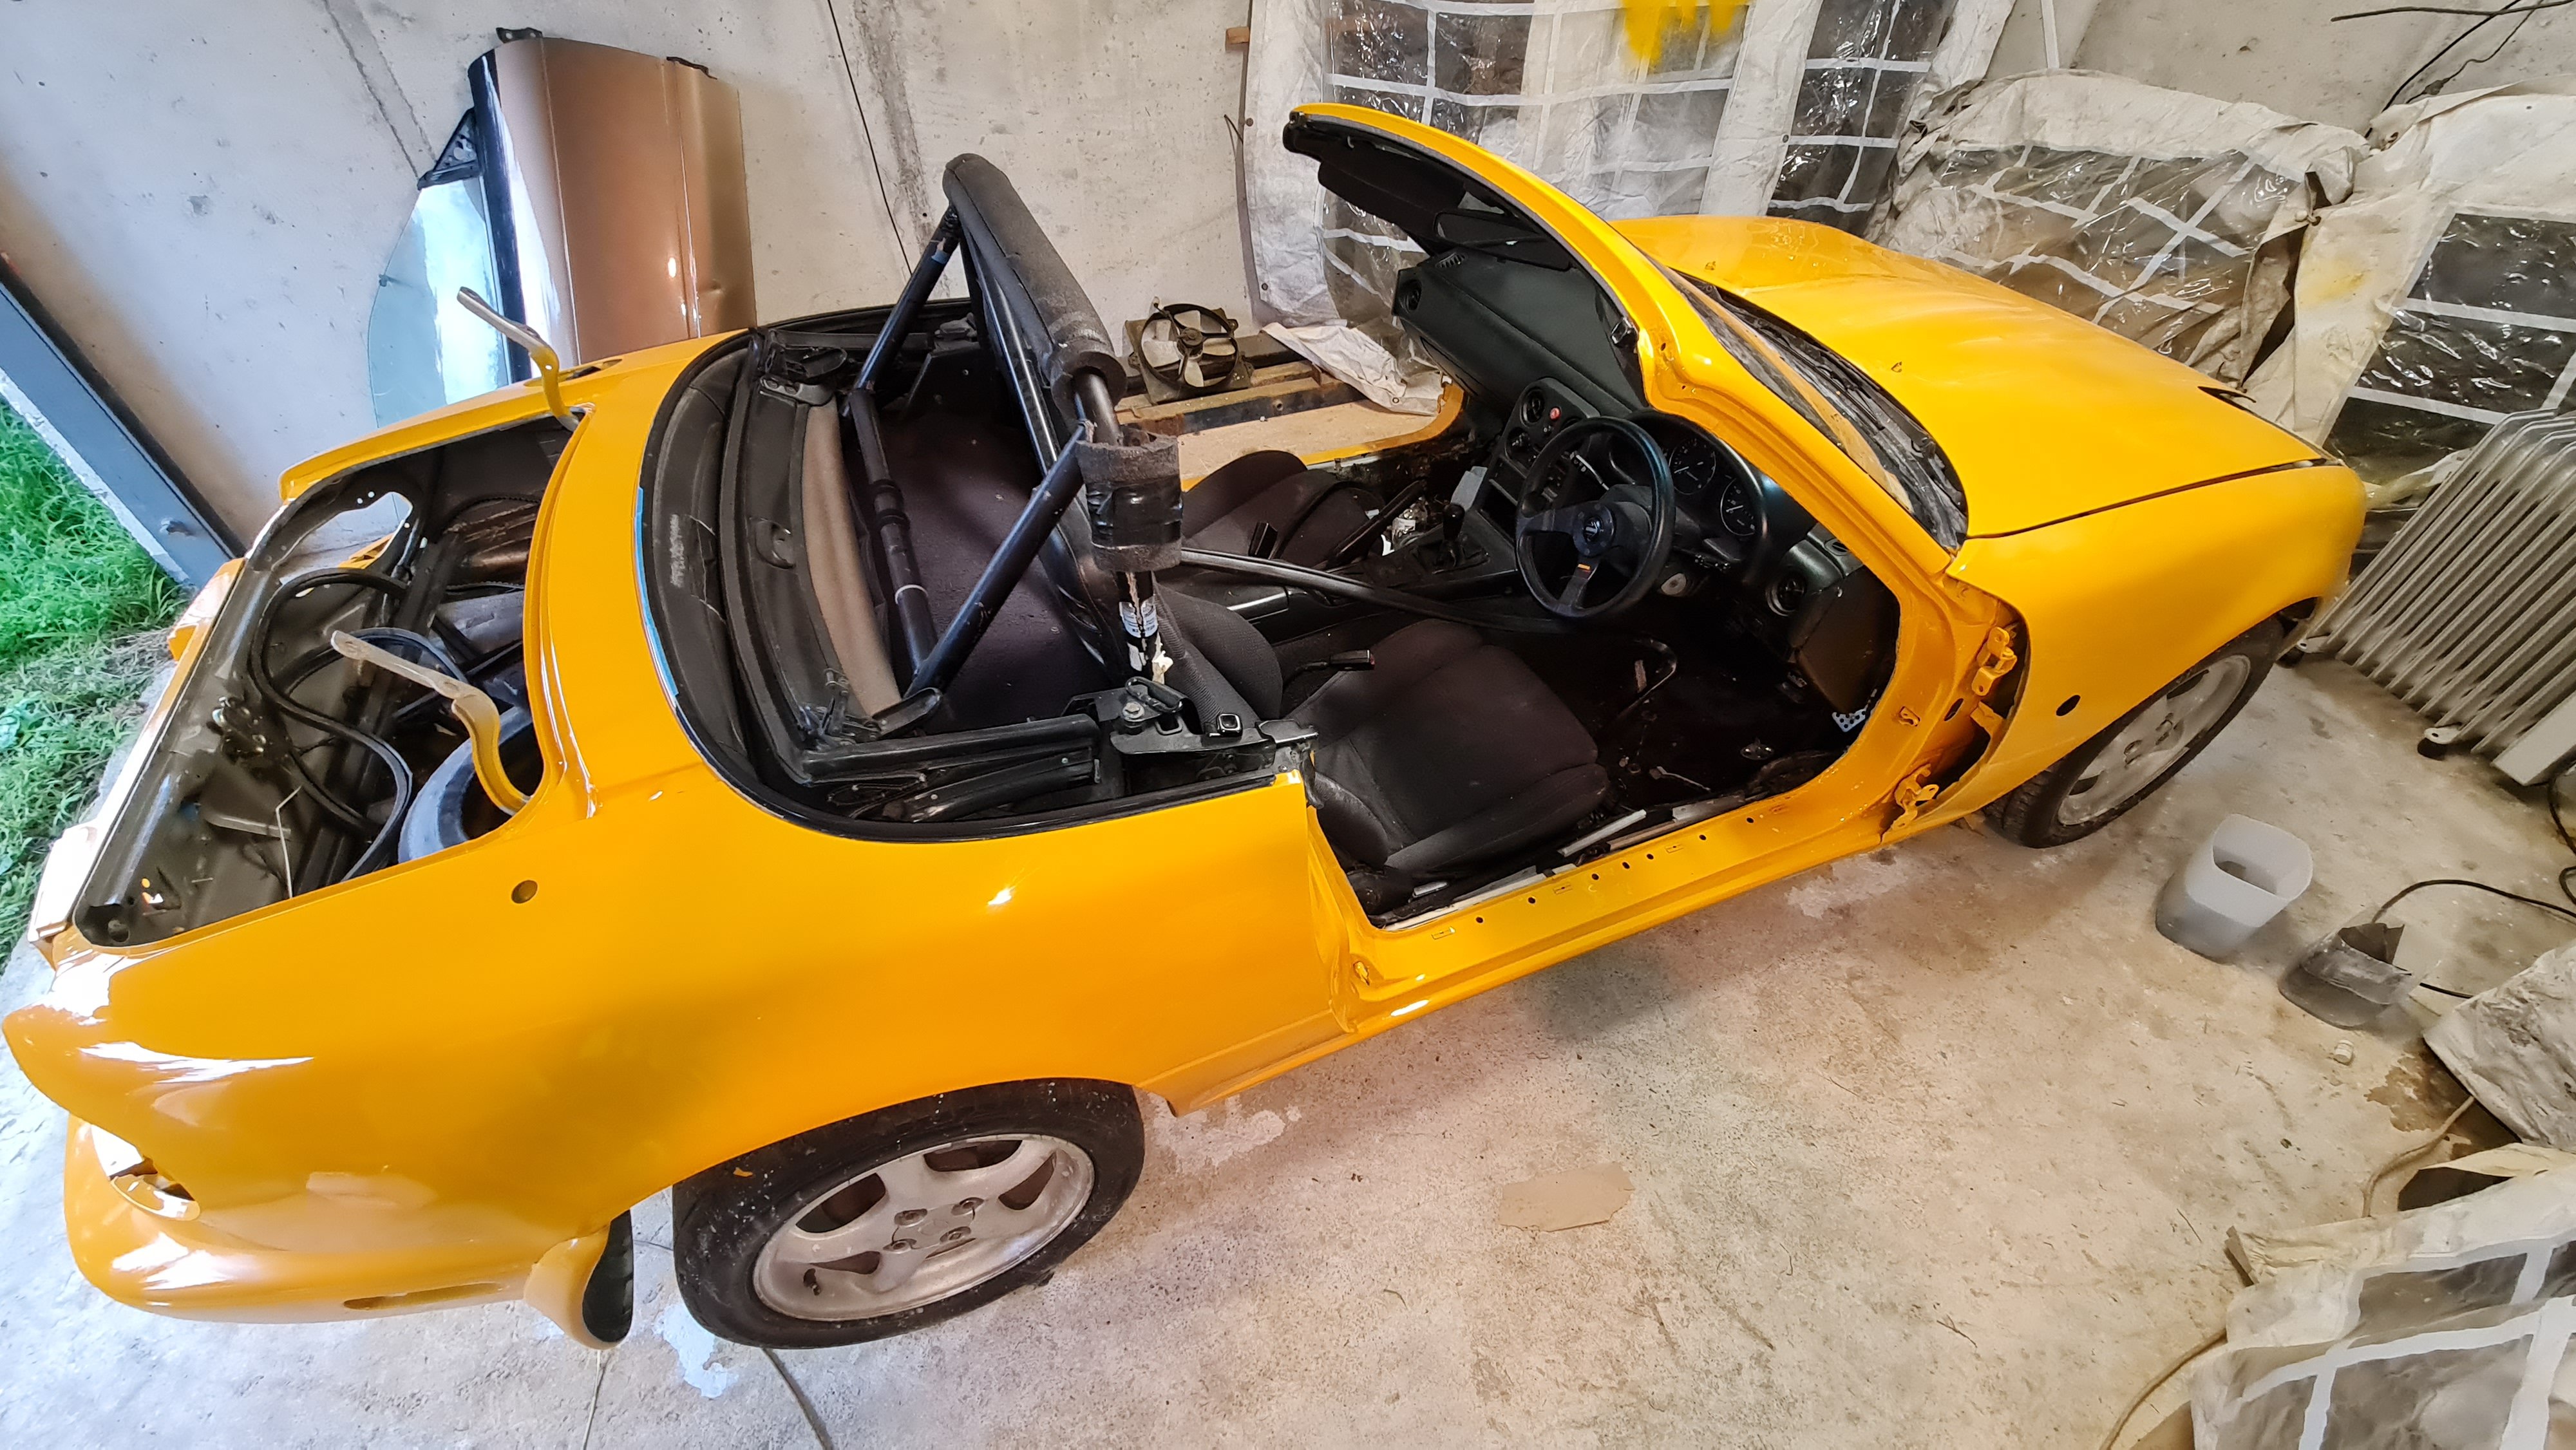
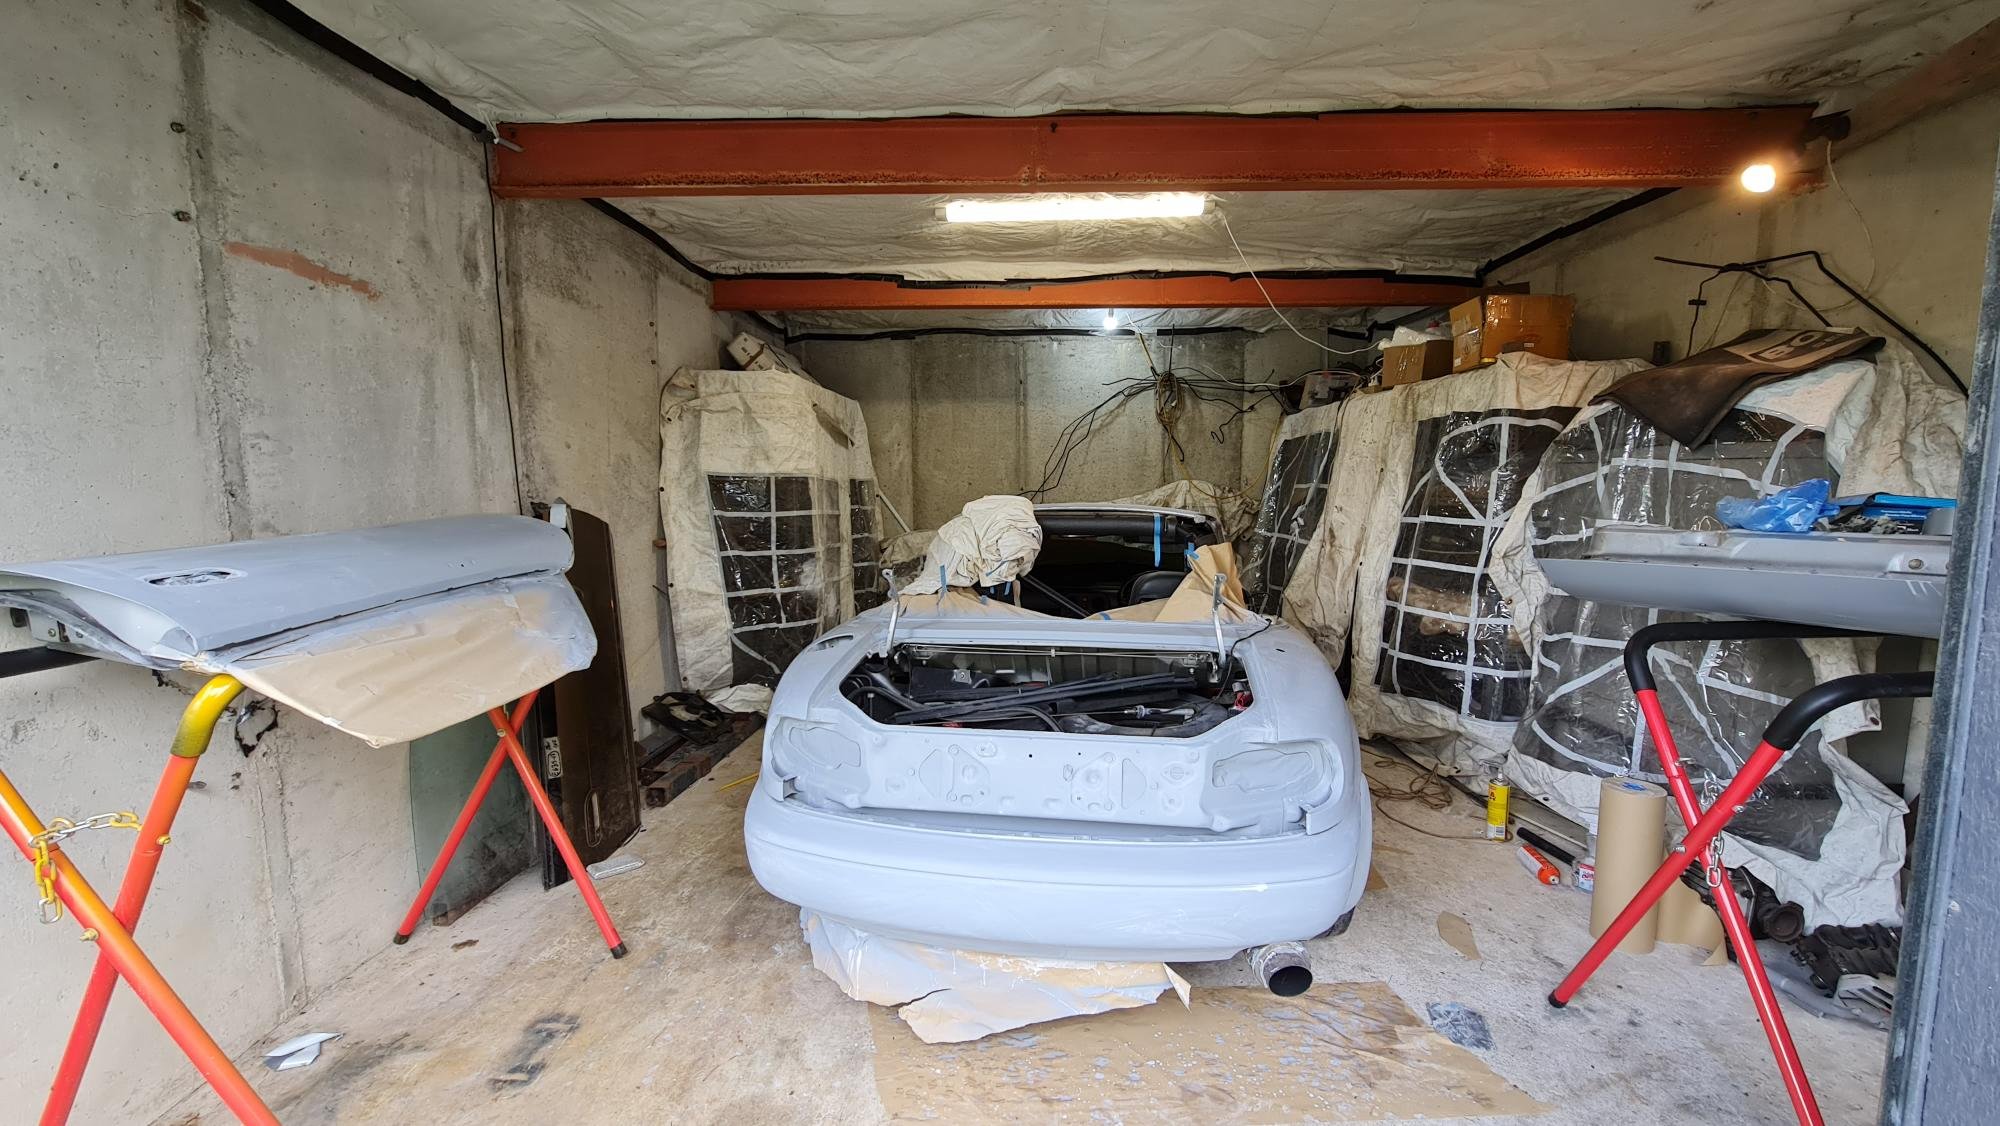
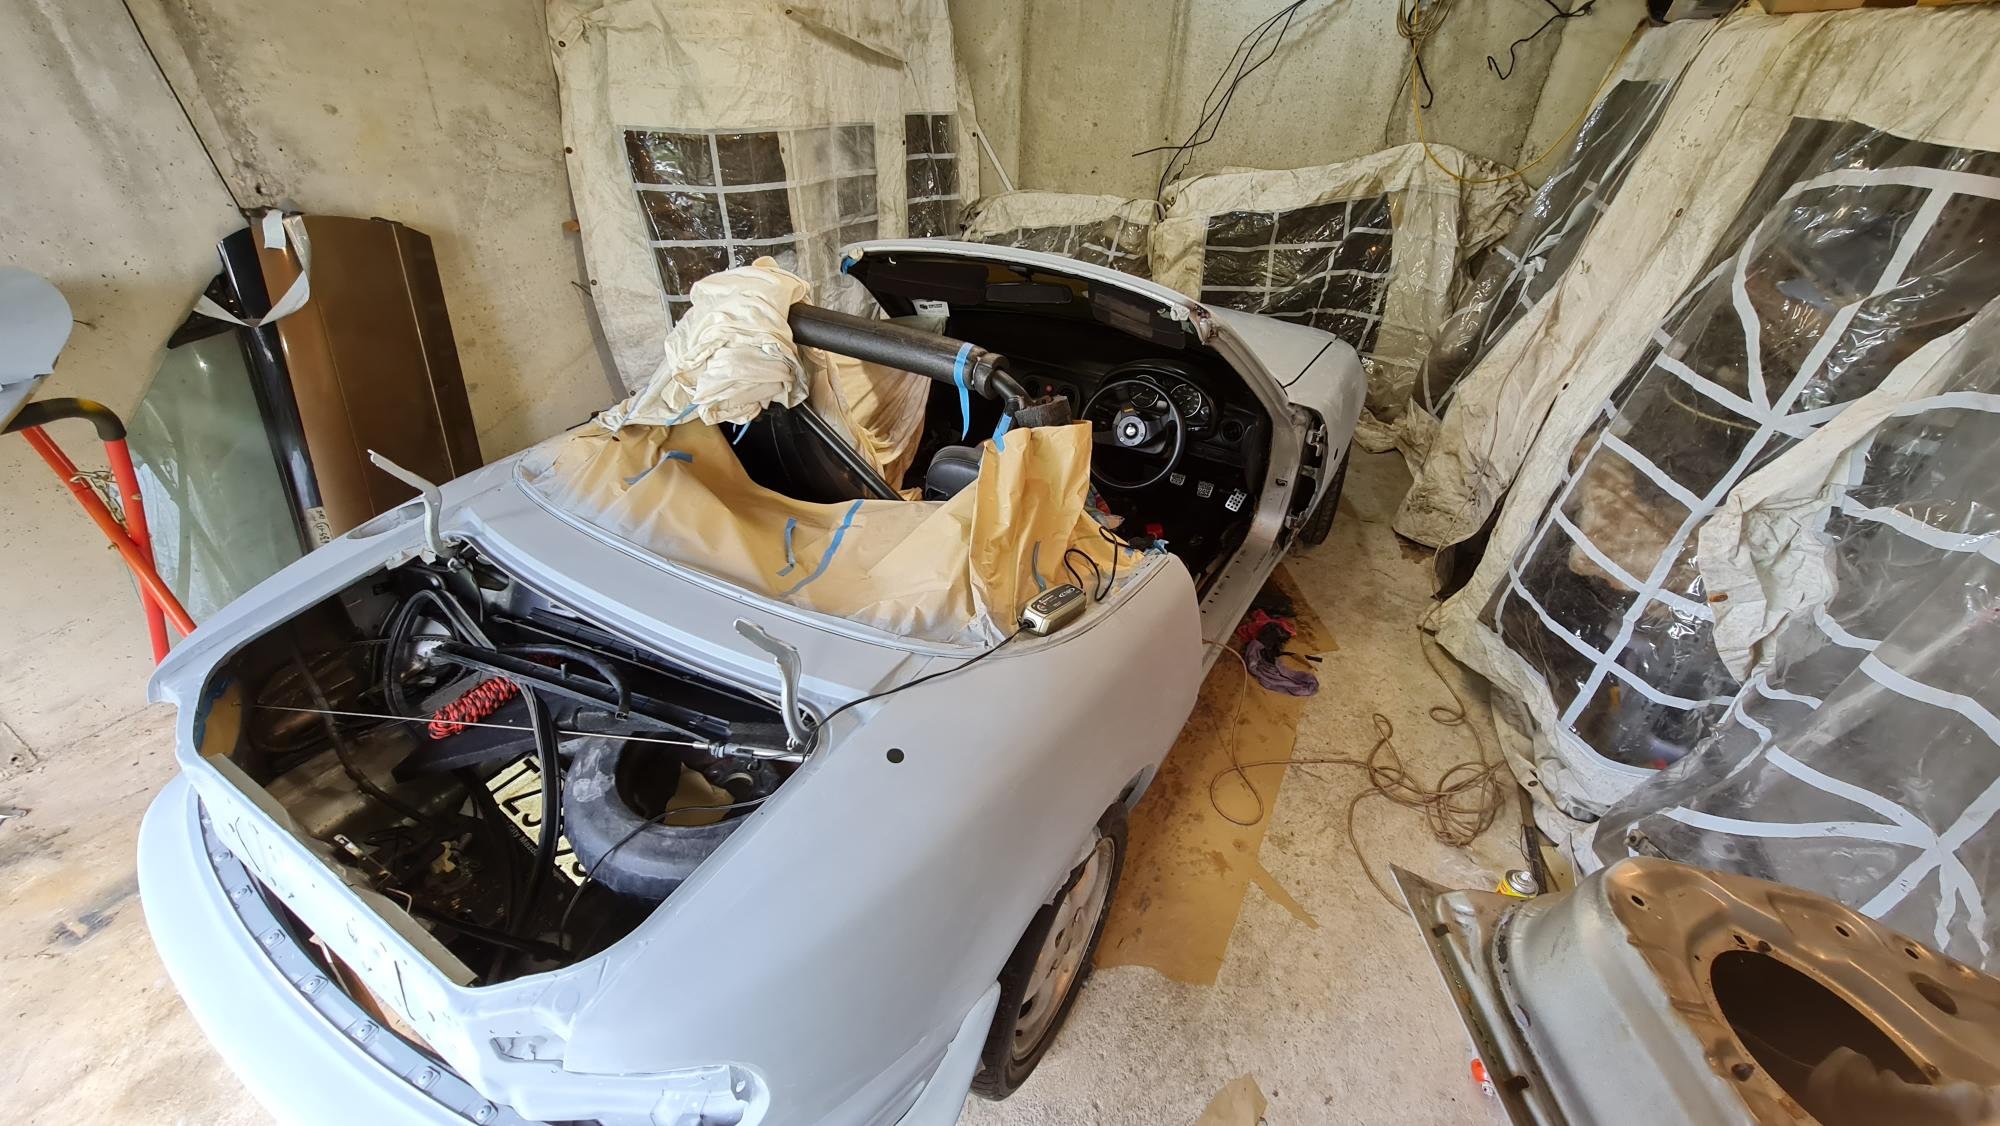
Time man, is it even real? Like, how do months disappear? Anyway, I semi turned this power less garage into a sort-of-paint-booth by adding lighting and covering stuff with the remains of an old marque. I originally started covering the ceiling during the GIB crisis of 2022, now it just looks like I am a redneck. I think the body is ready for some colour, it took ages to sand the door jams and to remove all of the latches/trim/etc. Not sure when I'll do it, I do have some leave coming up for the kids school holidays but it'll probably all disappear again. Door jams I'll paint the doors separately after sanding the inside bits. Not really enough room to do them at the same time as the body. Next I need to mask again since most of the masking tape has aged and dried out. It'll be done one day. My main reason for not getting this done yet is I spent the time on cars to sell and down size. So I got the FWD lancer donor car road legal and sold that before Xmas, then I got the Safari wof'd (rust work etc) in order to daily that instead of the Celica. Then I sold the Celica. Man I don't like selling cars, so many annoying people to deal with. But that's 2 cars off my plate and a bit of money back, plus I have the Safari to get me to work.
- 165 replies
-
- 13
-
-
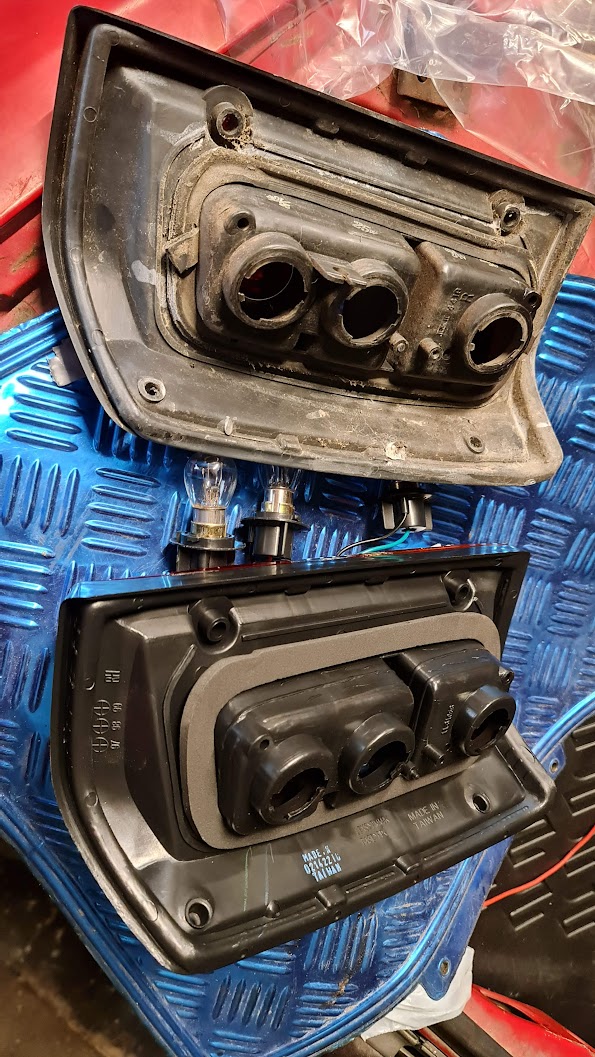
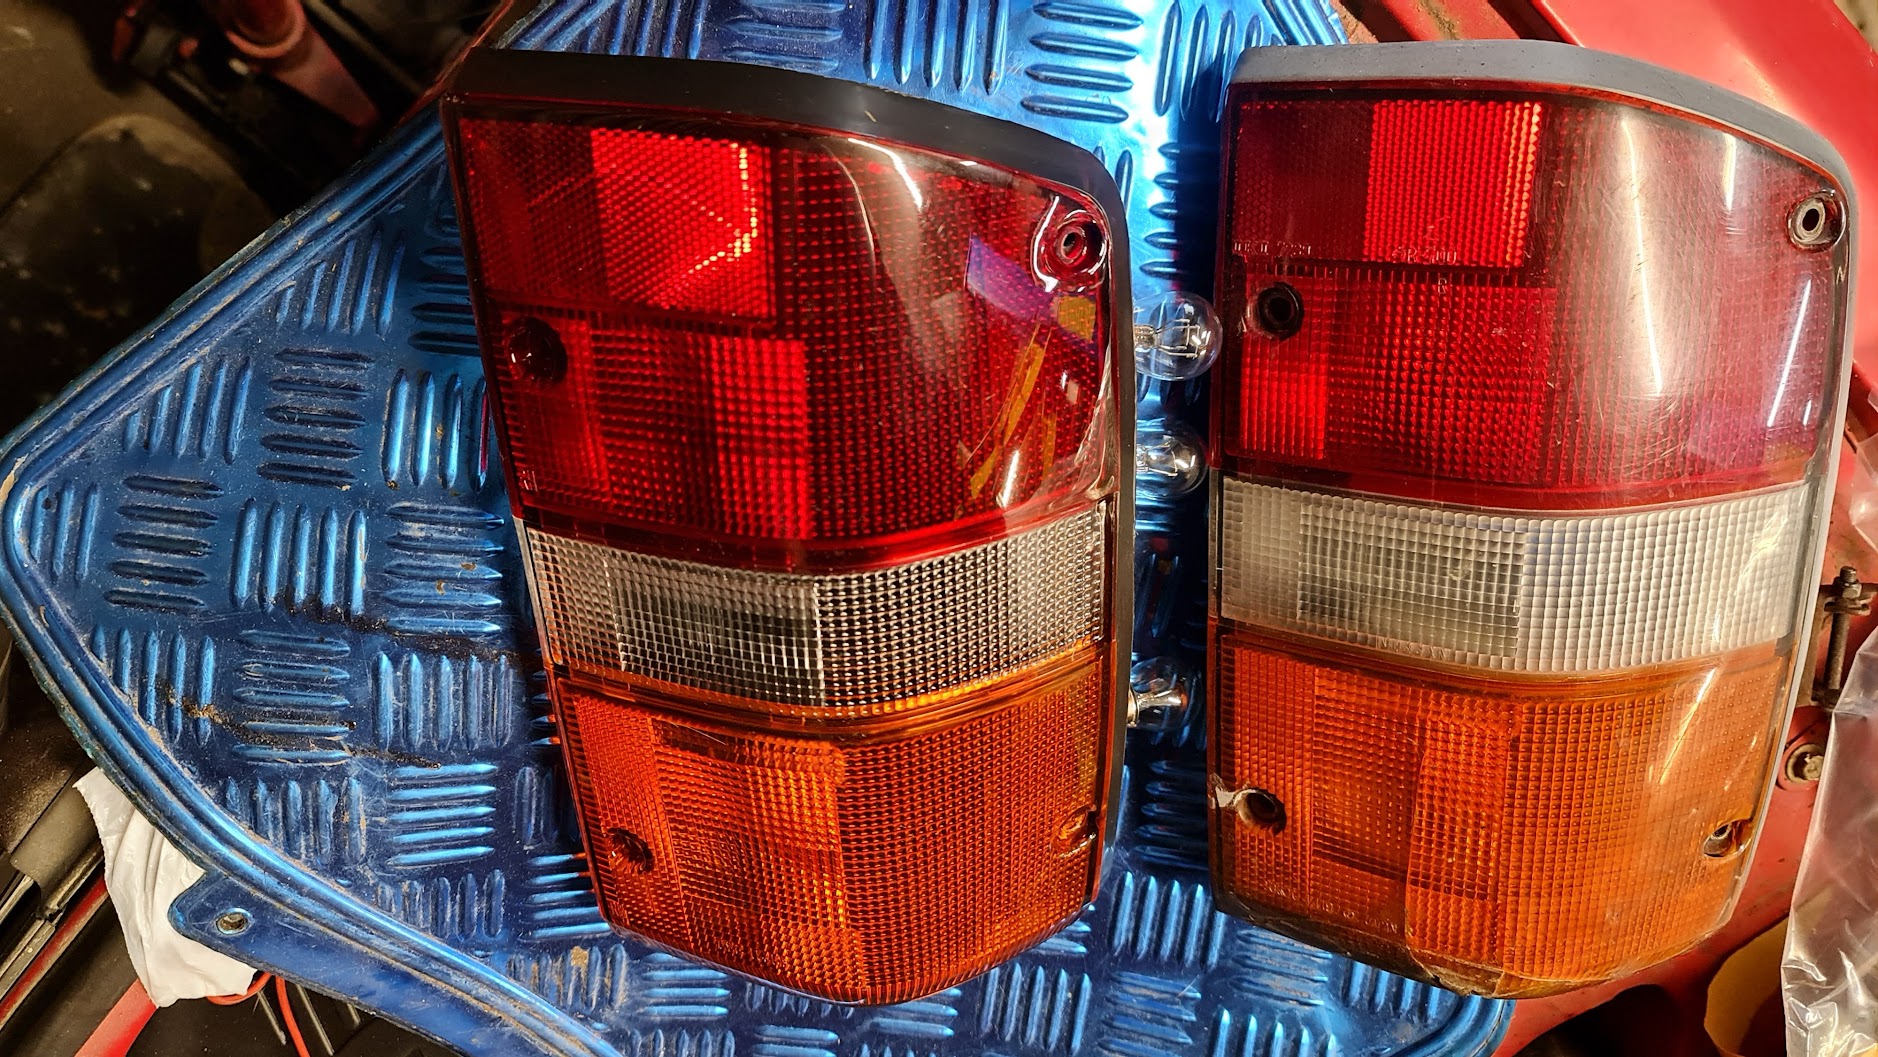
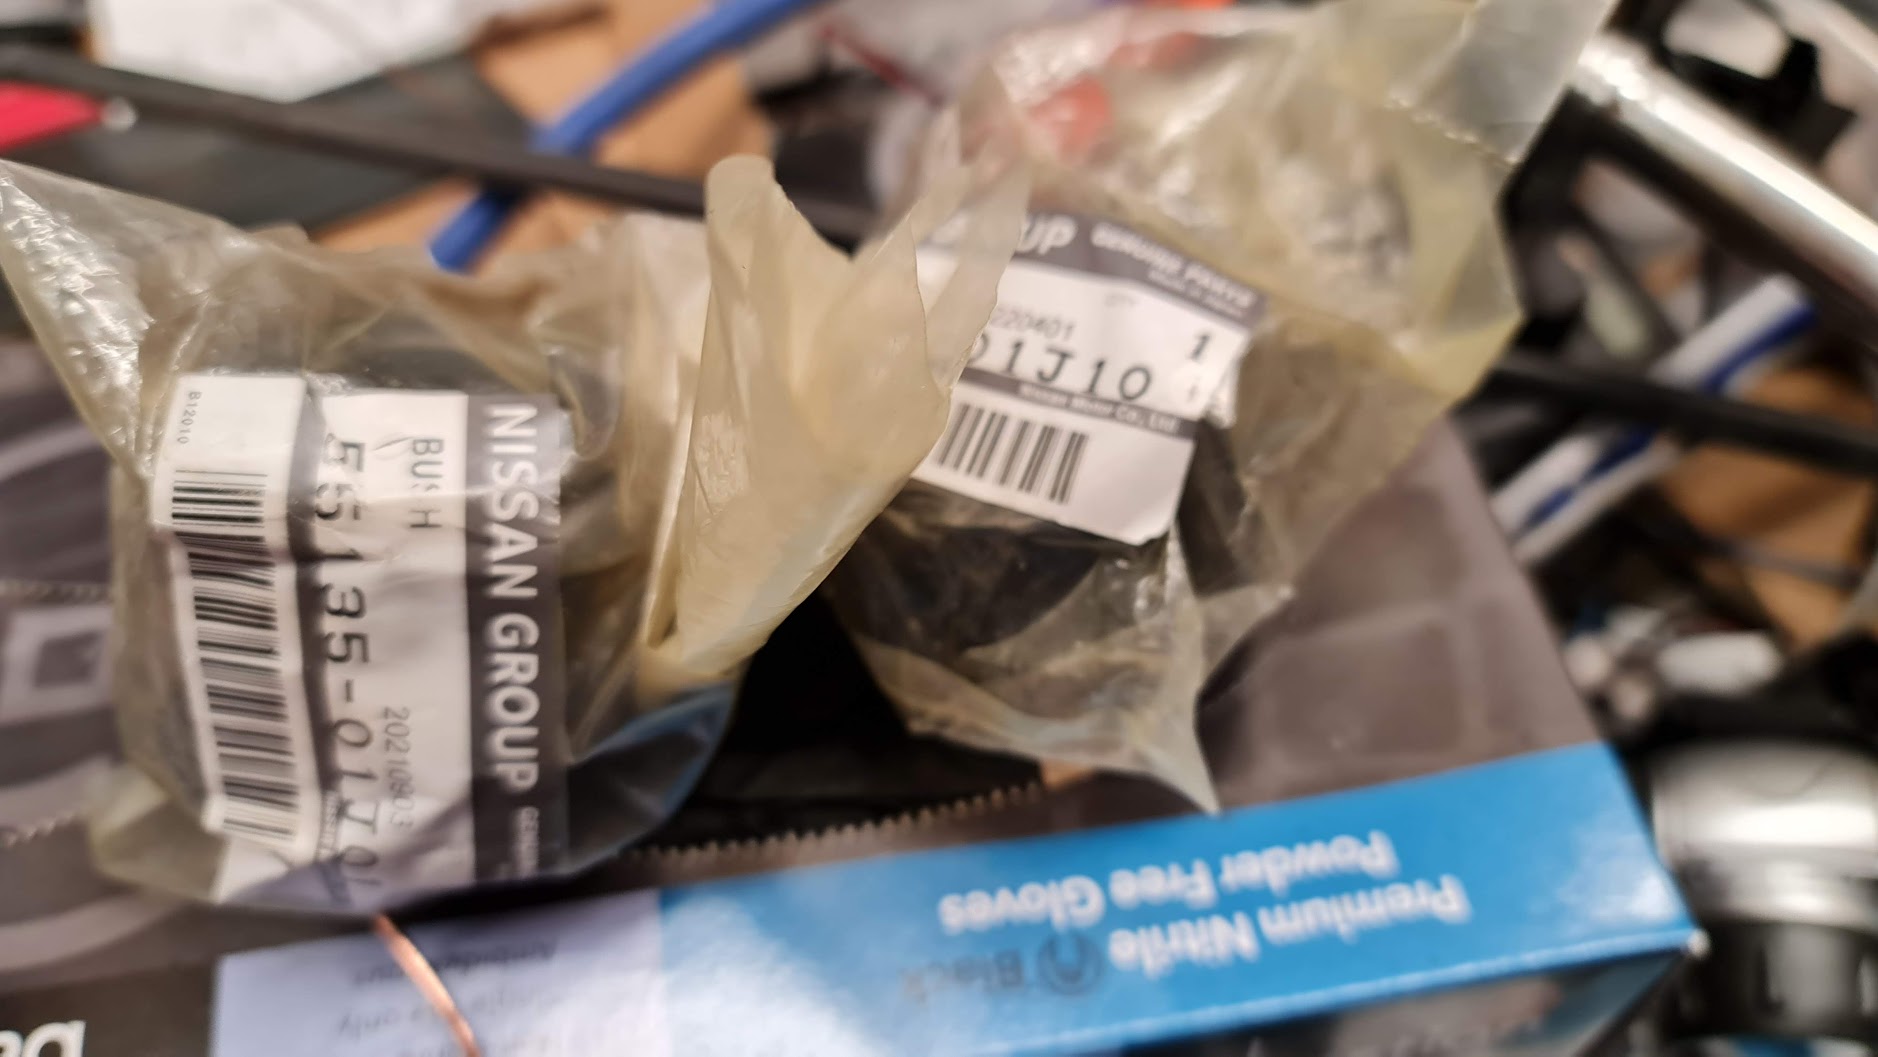
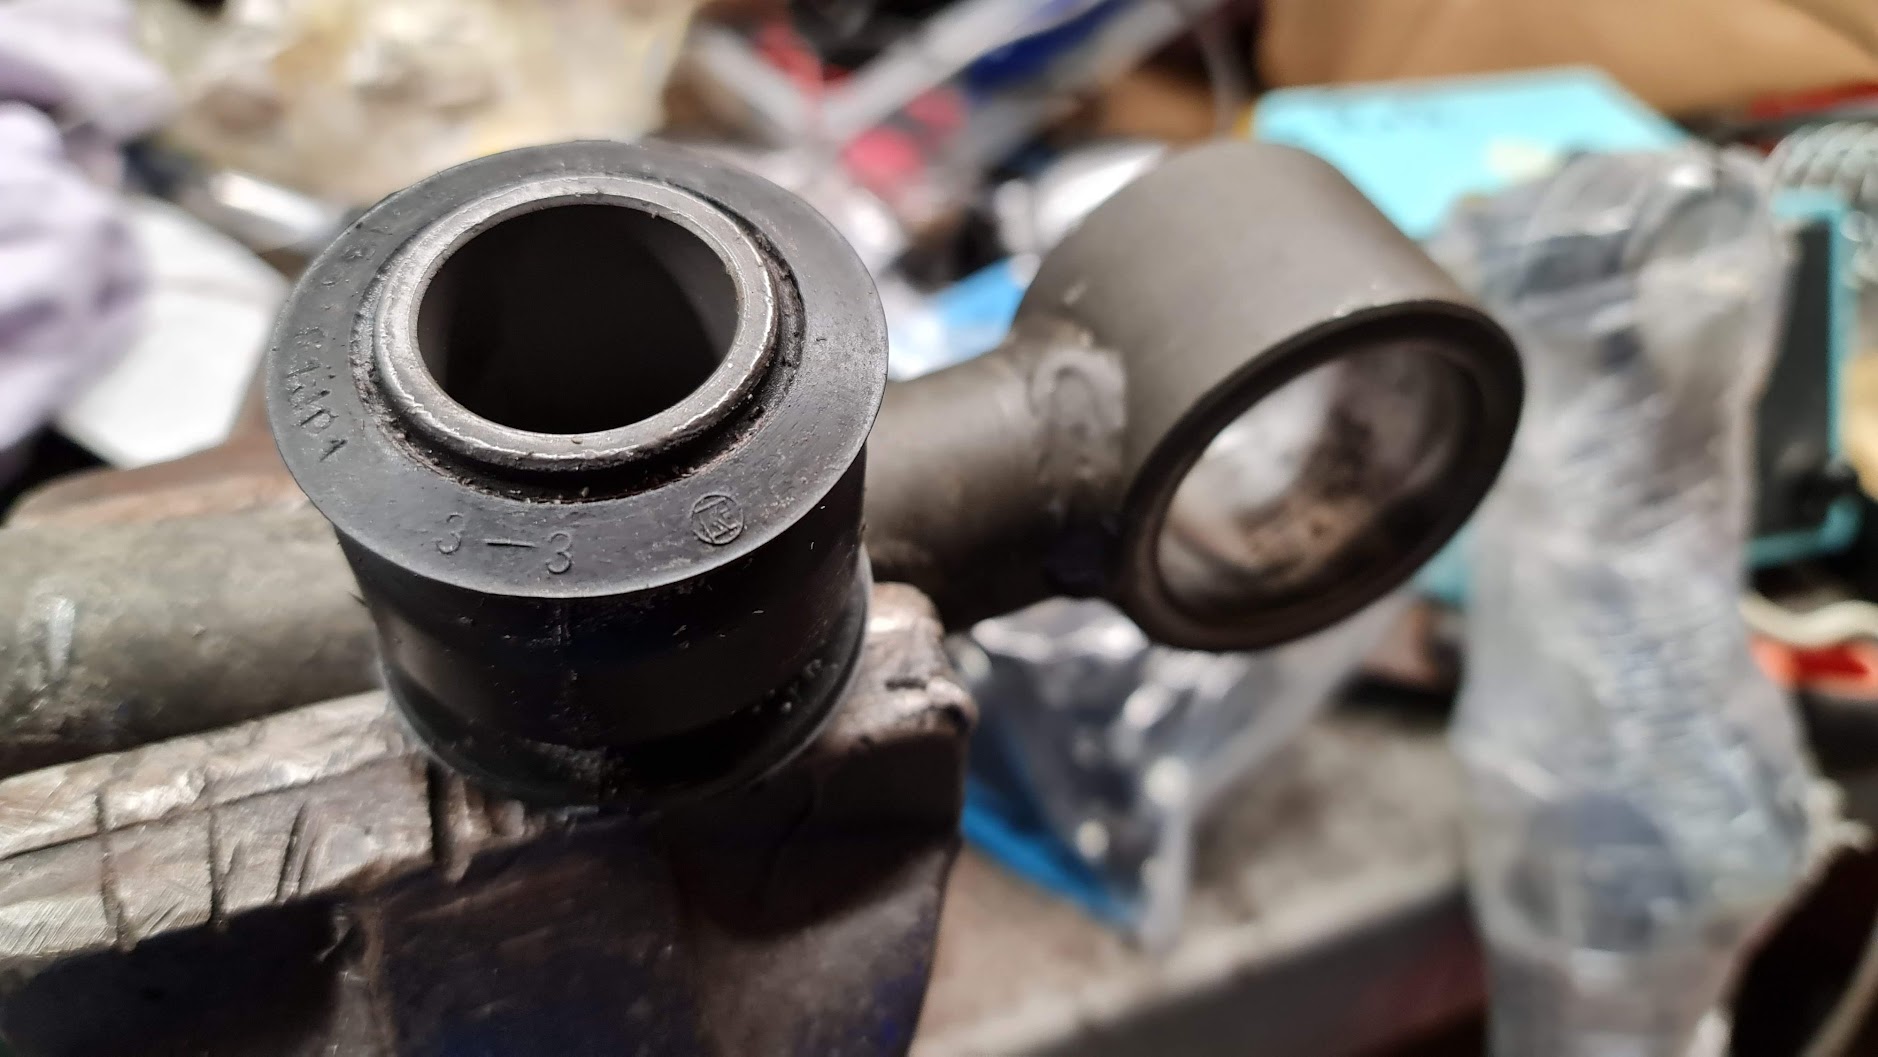
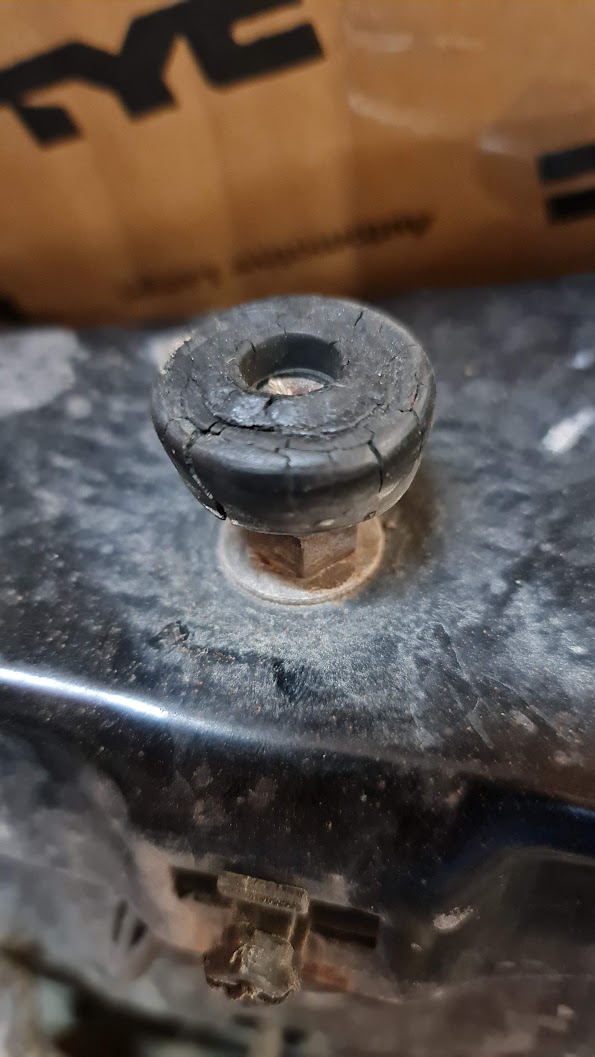
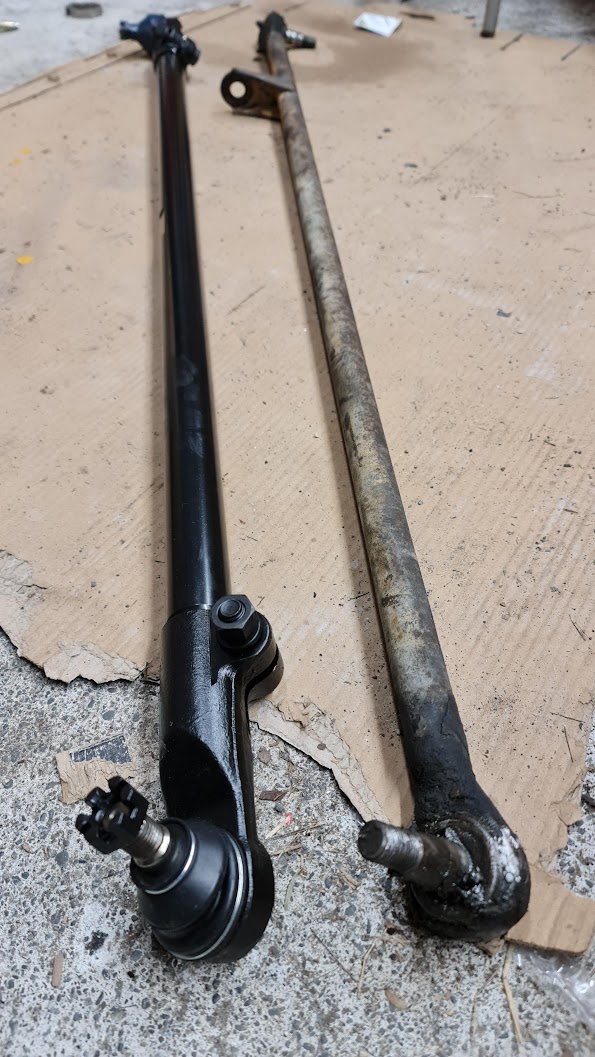
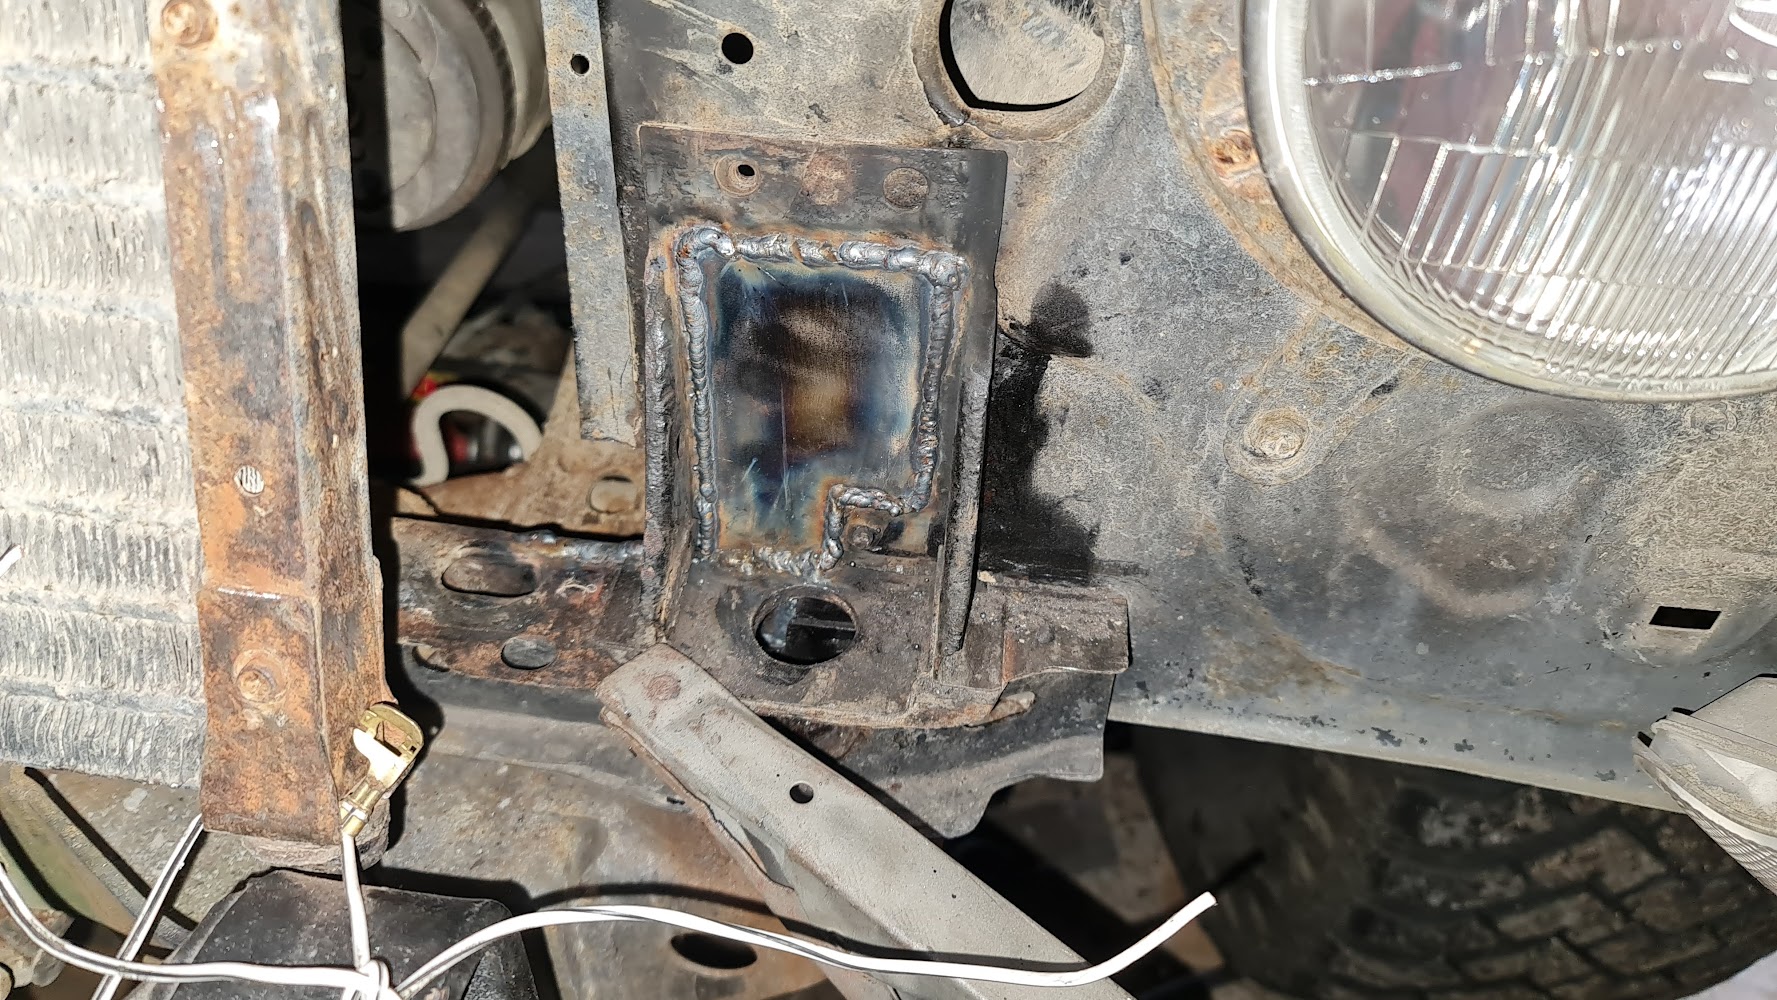
Man, I must have had this a decade now? Failed recent WOF on a few things. Front Panhard rod play, it's an aftermarket adjustable 'Toughdog' brand one and was a little worried about sourcing bushes. But thankfully I found that they use Nissan genuine ones, which multiple sources say are the best anyway. Pushed them out with a combination of using the vice and some bashing: While ordering parts I finally replaced the bonnet stopper jobbies. This one was... New ones look nice, no photo though. Also the drag link had play in it, it's the factory one which is not rebuildable (well economically anyway). So replaced it with an upgraded heavy duty chromoly one with replaceable ends: The rear brake light has had a crack in it for as long as I can remember, wof man didn't like it. So bought a new one. It's so clean and not sun faded! The main wof fail was rust hidden behind the radiator, it's likely been like that for all 10 years. It took a wof inspector who's knows the problem area to actually find it. It honestly took about 10 minutes trying to find it myself, it's that difficult to see. Real pain in the ass to fix but go it done. I missed the 28 days because I injured my back (unrelated) then got covid (probably also unrelated). Only photo I can find, which is actually the front where I reinforced it, not the prettiest but it's solid. The bad bit was behind this on the other side in a tight spot. That wire is just a 'zip tie' holding the A/C condenser out of the way. So ended up getting another wof check at the same place, all passed but now noted that the radius arm bushes need doing soon. Old cars man...
-
I like this, jumping right in there firewall cutting and all. I've never driven the 2.5 but the 3.5 is such a good engine, always surprises me how it can haul a reasonably big car along. What does an '08 GS350 weigh? Googles...apparently 1700kg-ish! Man, remove about 800 of those and you're onto a winner!
-
Fck yeah those brakes looks good!
-
Cheers! The boring out of the flange isn't making it any bigger it is just removing the internal weld. The welds make it a smaller opening than the ports in the head. The mitsi manifold spacing should work with the mx5 flange/port spacing. I haven't gone any further on this yet, other projects taking up any time I have. I doubt the bolt holes will work but it's an interesting though, it might be possible to redrill it. But my plan has always been to cut of the Mitsi flange and weld on the Mazda one. I am yet to confirm clearance, I think I will end up cutting the bottom section up to have it point more towards the rear of the car as it currently points straight down (which could still work but not ideal).
-
Yellow base coat is 1k, I was surprised at first. I went back to the supplier and they said it's normal. So just went with it.
-
14 months since I started sanding this thing... wife was taking kids away for an afternoon so planned to put some paint on the boot lid and some other bits that were ready. Mostly to test out the paint and make sure I wasn't going to end up with reactions etc. Better this than on the whole car. I've never painted 2k clear so needed to test how much to put on and mixture etc etc. Of course the weather was terrible so I couldn't even move it to the space I have mostly ready to paint in. Thought bugger it and made a booth of out plastic sheets in the gap between the back of the Safari and the garage door. So I could keep the fumes out of the house (bedrooms above garage). And couldn't move Safari out into the rain because I am working on a few spots of rust. Mixed paint. Didn't take photo's during, but here is the final product. Some bits got into the paint but should wet sand out hopefully. Got some runs, but only where the clear has accumulated at the edges in a few spots. But good practice for the rest of the car. Very happy with the colour, its exactly what I wanted, a very rich sort of burnt yellow rather than a pale yellow. Clear is still drying, I didn't realise it takes 24hrs! I guess thats why they have paint booth ovens. Can't wait to do the whole car, needs more sanding though.
- 165 replies
-
- 18
-
-
Awesome stuff, have you played around with the Autotune option at all? I was planning on trying that out on my mx5/speeduino/itb thing but its been about 14months since I started a 'quick respray' for it.
-
Super cool that it's on the road now! How have you found the ITB tuning with the Speeduino based ECU? Did the wof guy mention the head/ITB's?
-
Also regarding the supercharger, they are not very good. They make about 100kw - 110kw at the wheels on a good day. They are just too asthmatic and produce lots of heat. There is/was a reputable tuner in NZ called Andre Simon I remember talking to him about an S/C aw11 he was working on. I think it made about 115kw at the wheels with lots of playing around. This from the guy who was world famous for his tuning. Don't get me wrong, the 4agze is a very fun engine. I had a later MAP sensored one (from an ae101) in my old AE86. That had a 11psi pulley, front mount intercooler etc etc, great fun but probably only made 100kw at the wheels, great torquey fun but once I went turbo it was like night and day. Even a worn out oil burning thrown together stock ecu big port 4agze with a worn out t25g made 125kw at the wheels without even trying (10psi trailing off to something lower because it was stuffed)
-
I've had several 4agze turbo's, 200kw at the wheels will be a piece of cake. I've had: 4agze big port, 8:1, completely stock internally including cams. Link ECU, t28 turbo. That made 150kw atw limited by 365cc injectors. Boost was something like 15psi from memory. 4agze small port Stock internally. Bluetop cams. 8.9:1. Link ECU and TD05 16G, 510cc injectors. That made 220kw atw on about 20psi. Super responsive too. I've had other set ups like a big T04e turbo one and stock 4agze ecu's (AFM and MAP). But those two were the main ones. The main weakness is draining oil from the head back to the sump. All 16v's suffer from this if racing it with constant high revs. I made baffles, huge external oil drains, completely rebuilt etc etc. They all did it, fwd and rwd etc etc. I think the best solution is a restrictor in the feed into the head.
-
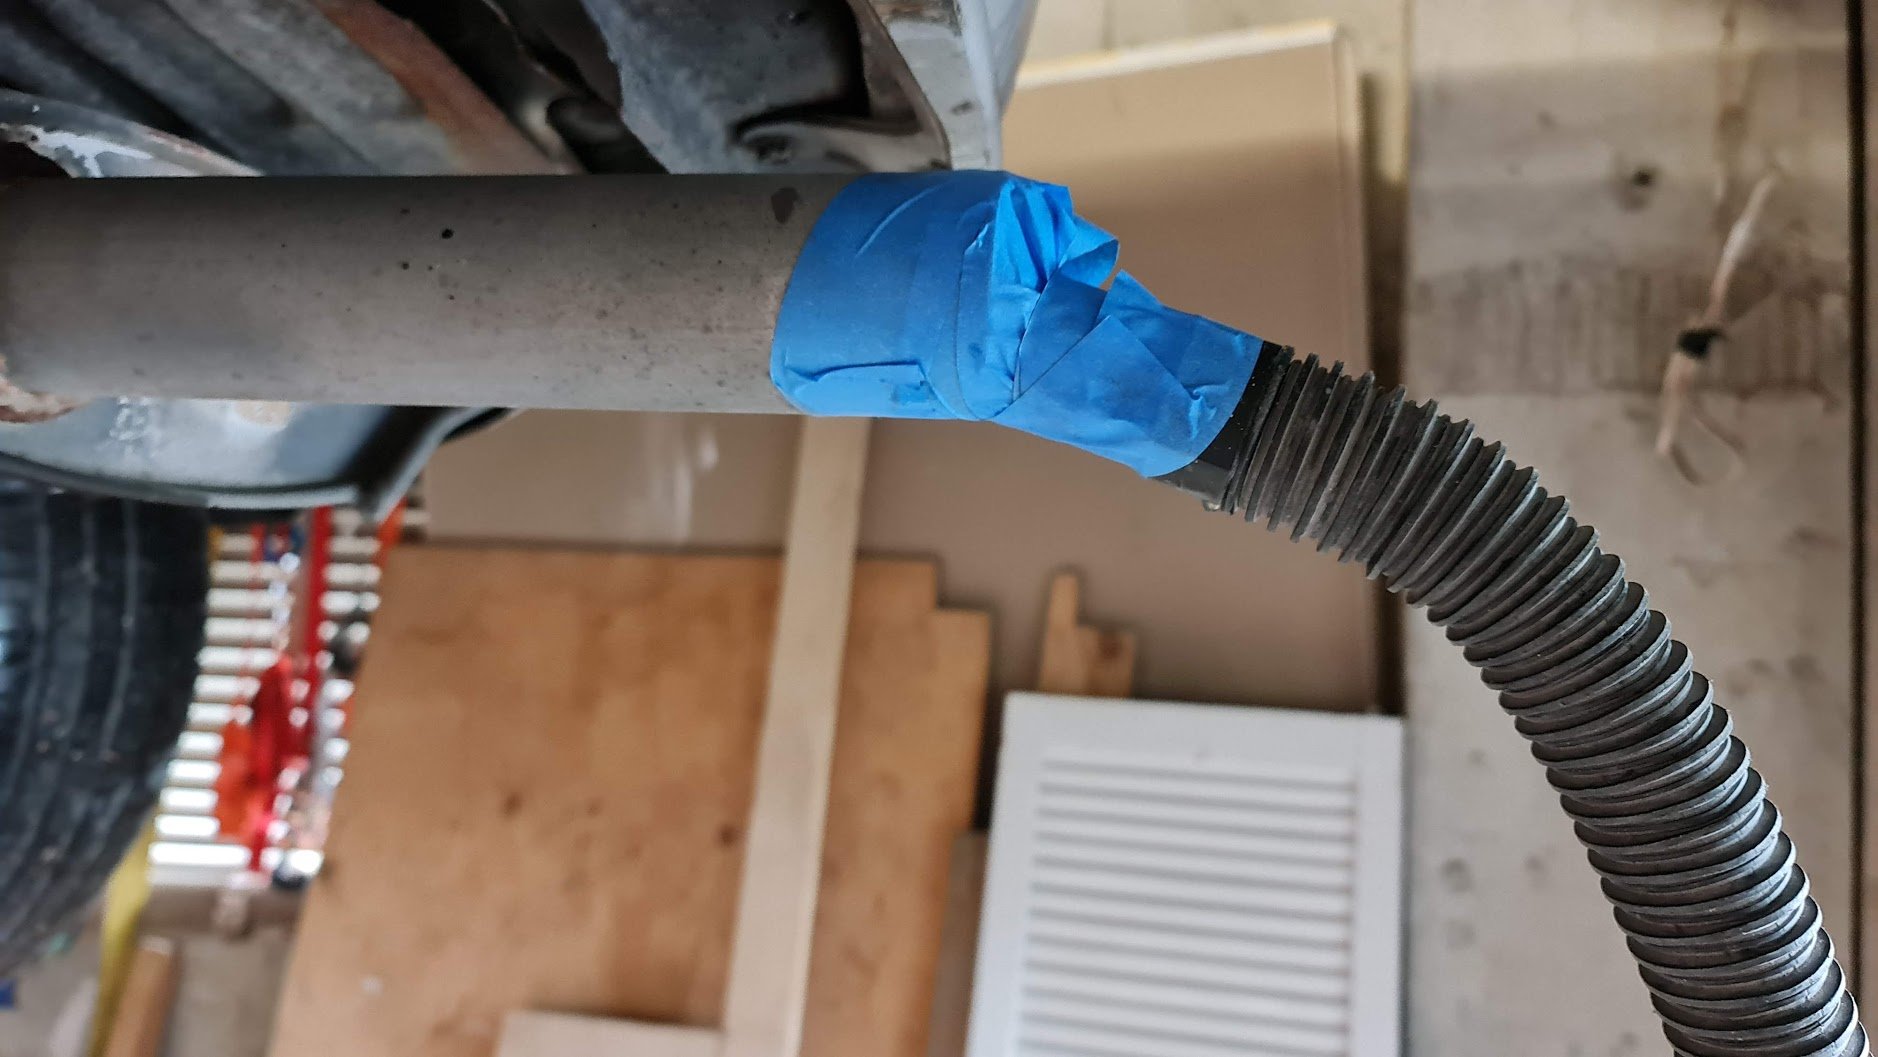
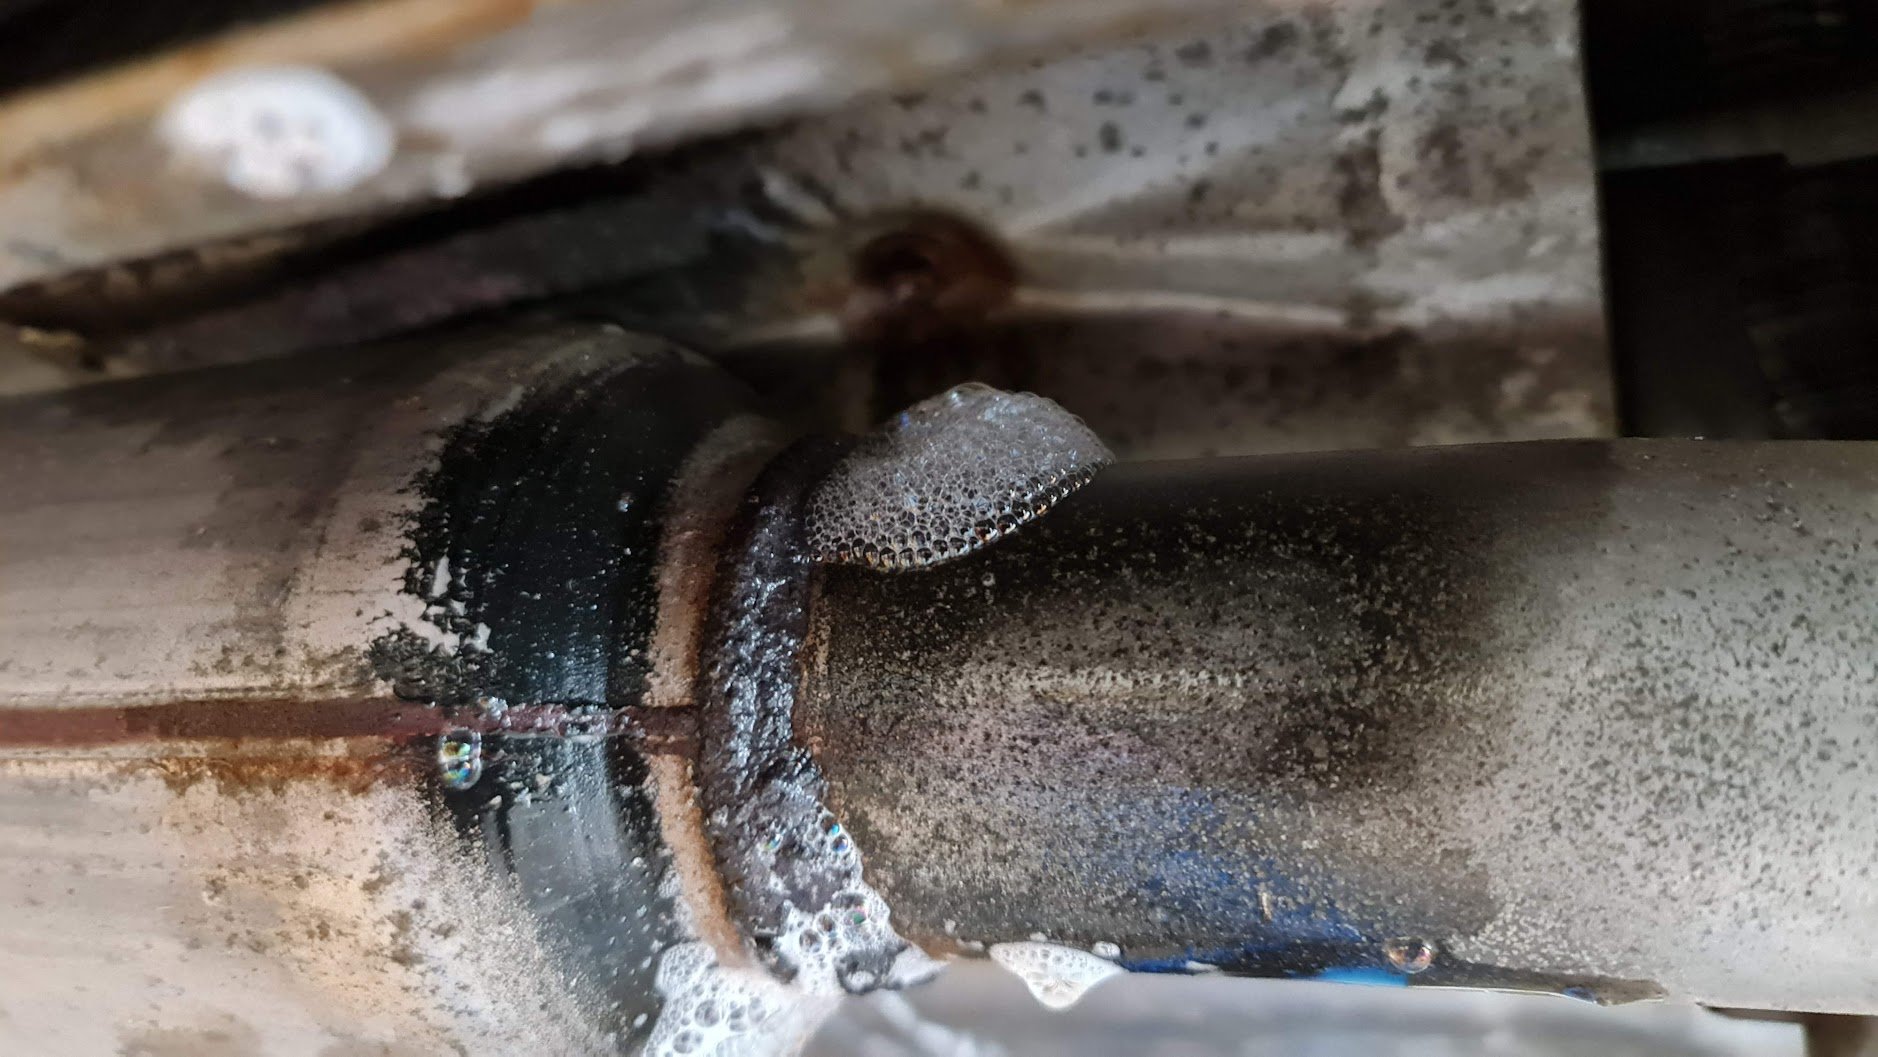
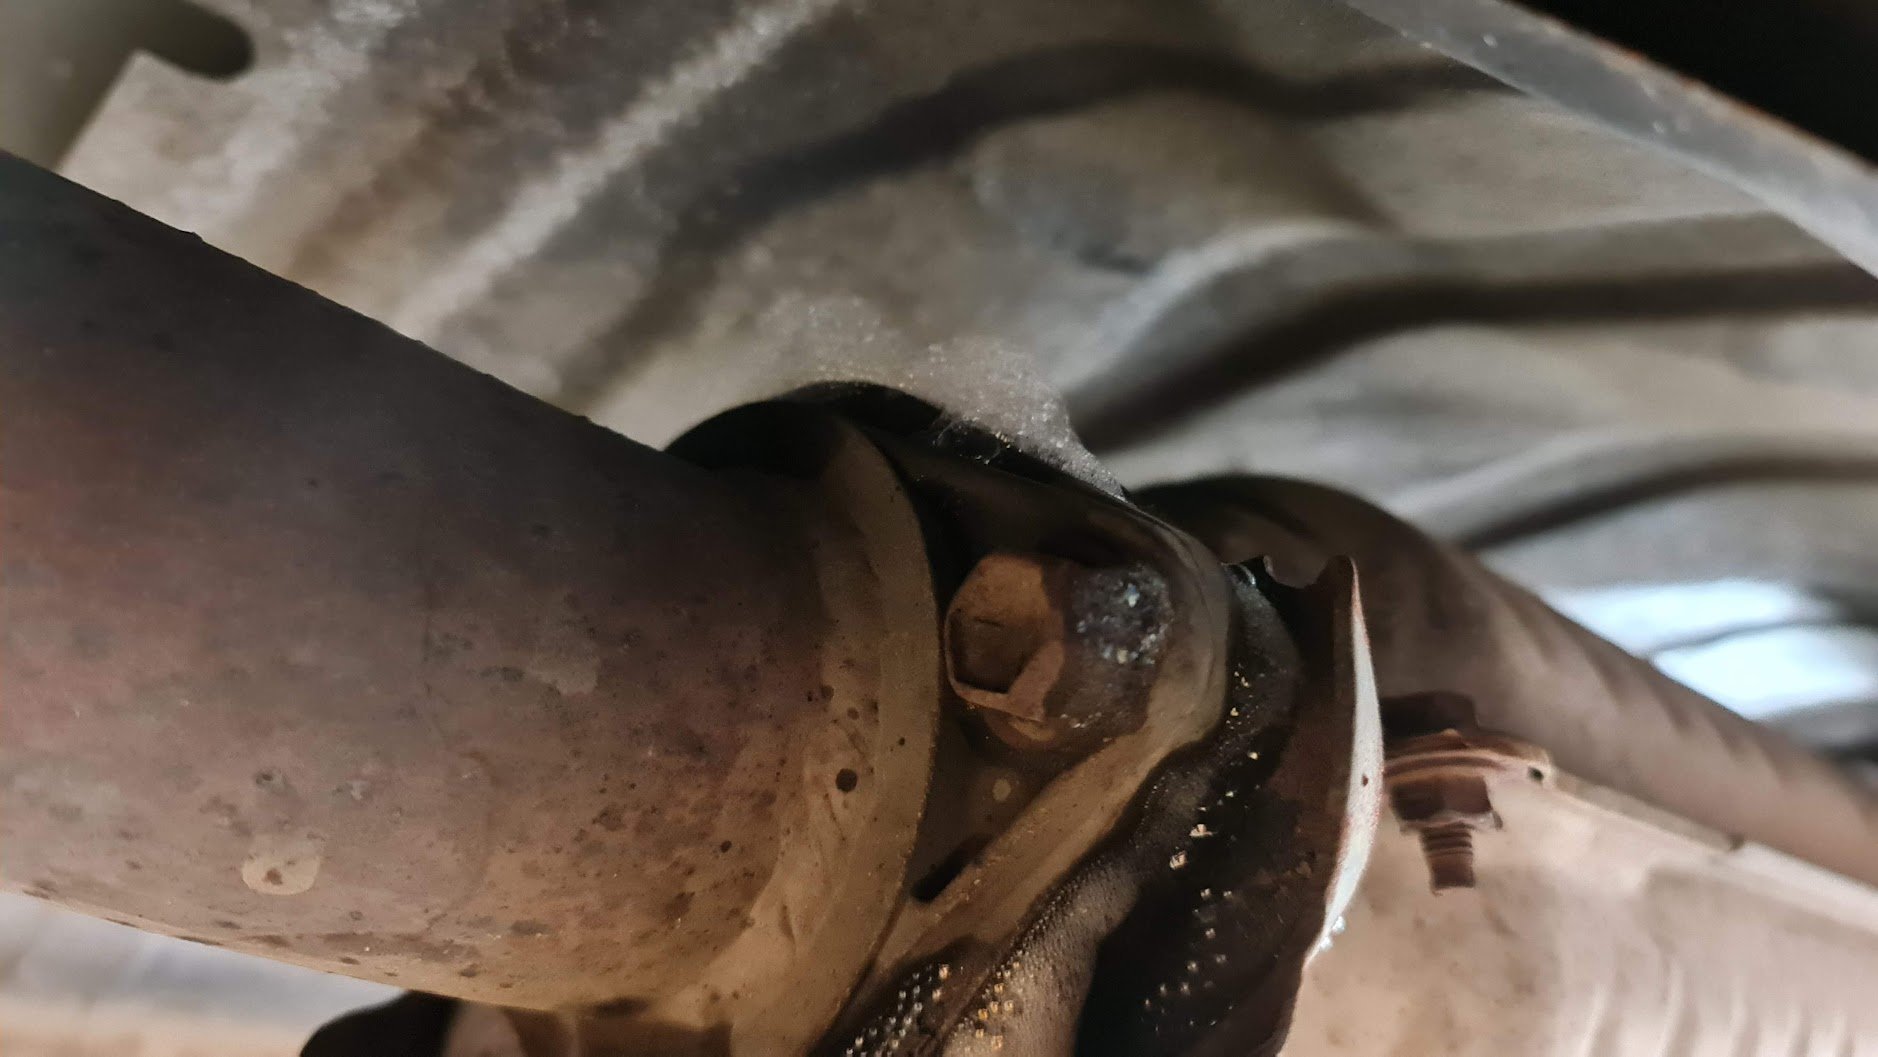
 Not really 'built' but it worked well. I needed to find an exhaust leak, so I taped the vacuum cleaner hose onto the exhaust tip and put it into reverse flow so it would blow into the exhaust. Then sprayed soapy water onto exhaust and found a couple of places. Looks stupid but it works.


.jpg.076165fc33e30284b1218f143ee7fbea.jpg)