yoeddynz
-
Posts
19,547 -
Joined
-
Last visited
-
Days Won
159
Content Type
Forums
Downloads
Events
Gallery
Everything posted by yoeddynz
-
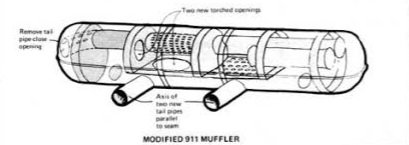
Sadly that won't be the case. The two outlets will go into a porsche style width ways mounted silencer assembly. Something sort of like this.. I think there will be too much chance of residual exhaust gases within the casing mucking up the reading. My plan is to have the sensor positioned somewhere on one of the secondaries just before it goes into silencer.

-
@NickJ Two sensors and a switch that can swap the controller between them
-
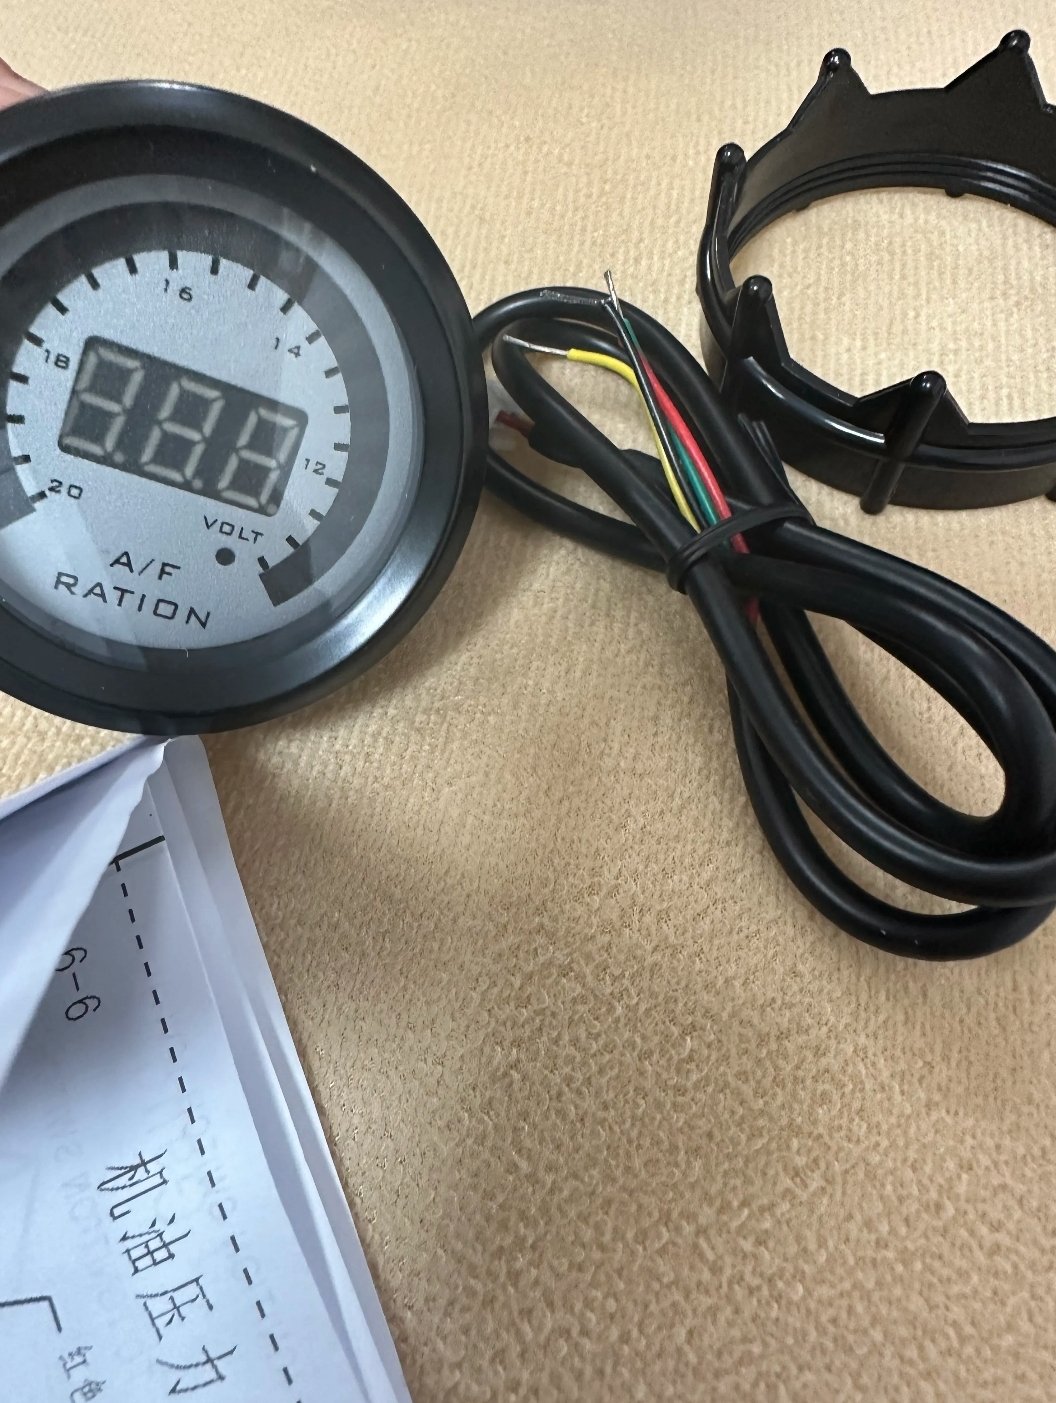
Just planning ahead for the fuel injection o2 sensor stuff on my flat six. This time I'm going to use a 14 point 7 controller. Probably a sparten 2. Looks good and from all accounts it shits on innovate products (which I had a fair few issues with on my V6) I'm undecided as to whether I fit just one sensor (and associated controller) to one bank. Did this with the V6 and it seemed fine. I figure if I make sure my injectors are all matched and my cylinders heads/valves I know are in good condition then there really shouldn't be a difference between the banks on a system that's fed air equally by a single central mounted plenum. Or stump up double the costs and run two sensors... the megasquirt 3 will handle two (or more if using canbus) but I don't think I'll gain much, if any, extra efficiency. Just info. Plus I'd have to run two 52mm gauges if I want that info on the dash. Speaking of gauges.. I'm wondering if any wideband afr gauge will work with spartan. I'll ask them but does anyone here know. I presume those gauges just take a 0-5 volt signal? Also, whilst looking on Ali I found this. It's a 'ration' gauge...
-
 @BlownCorona I can confirm that @Sparkynz bought some new plugs and she's told me it's now running like a sewing machine.
 -
Random slightly cool stuff you built but not worth its own thread, thread
yoeddynz replied to h4nd's topic in Other Projects
Given the air pollution in Oxford City when I lived there, which seemed way worse when I last visited, I'm not surprised. I think you were only allowed to burn smokeless fuel there (not wood). Is that the same in most cities there? -
Random slightly cool stuff you built but not worth its own thread, thread
yoeddynz replied to h4nd's topic in Other Projects
Cheers for the offer - but enjoying burning lots of wood right now. I'd have to suss out a separate spot for one in the future though! Then collect more oil/service more of the locals cars. -
Random slightly cool stuff you built but not worth its own thread, thread
yoeddynz replied to h4nd's topic in Other Projects
What sort of flow rate/mils per hour do these things use? -
Random slightly cool stuff you built but not worth its own thread, thread
yoeddynz replied to h4nd's topic in Other Projects
That looks similar to the one that iirc @avengertiger was going to build - using some big discs off a truck (or drums..i cant remember) Yeah- damn they can go hard! What's the smoke output like? Fairly clean once up to speed? Our current woodfire likes to leave little spots of creosote over the yellow car if its burning sappy pine/wind is blowing the wrong way. -
It's just sitting there in the field with another. I'm going to pop in sometime and have a yarn with the resident Barry there.
-
Random slightly cool stuff you built but not worth its own thread, thread
yoeddynz replied to h4nd's topic in Other Projects
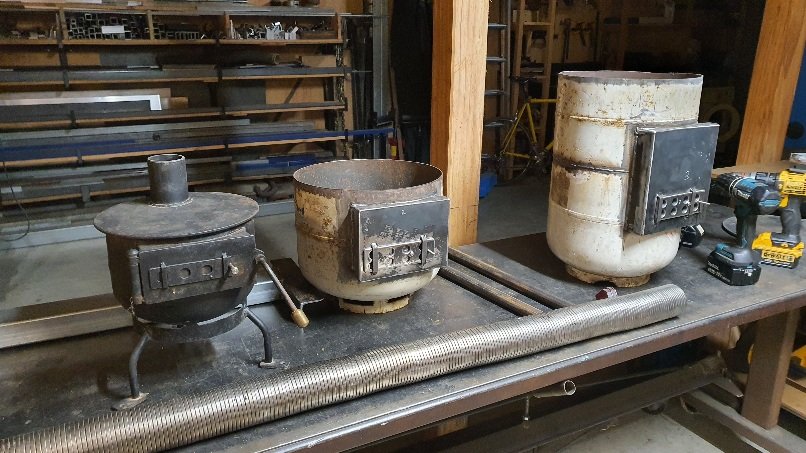
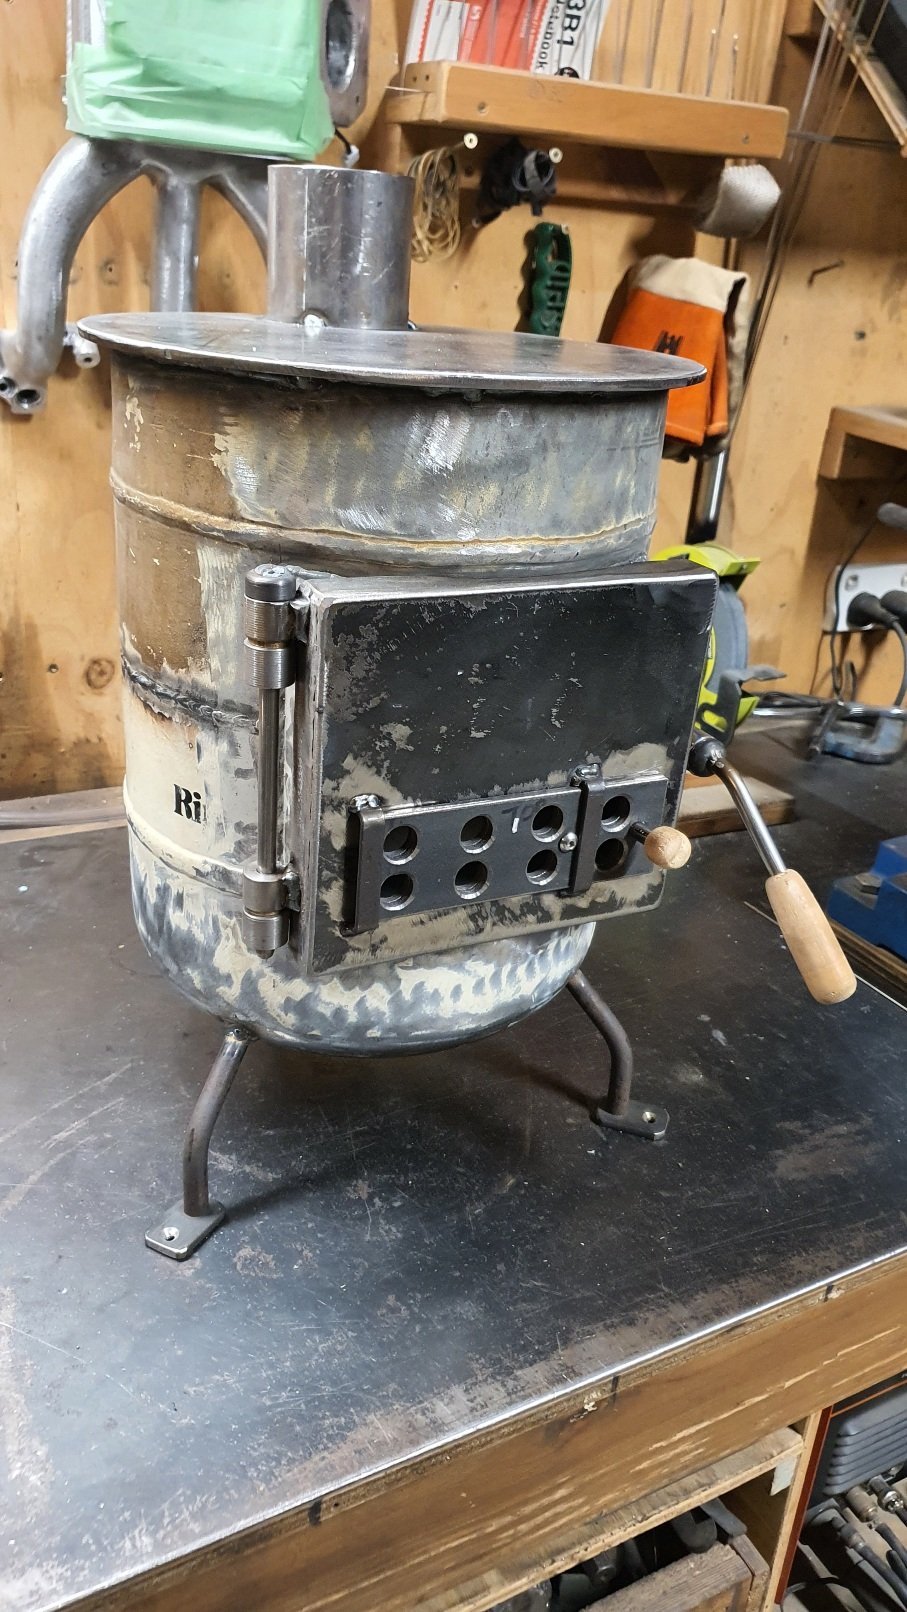
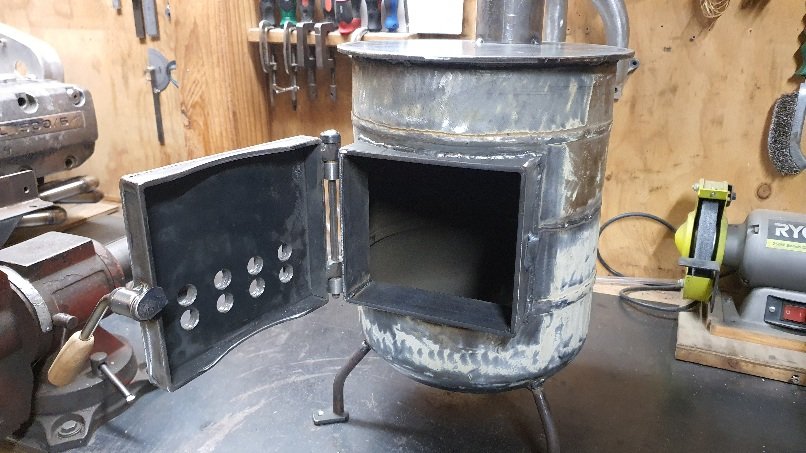
Oh yeah. Winter is coming. Every bloody year I intend to build a load of burners to sell and always end up being in a rush to get some built to order as it gets cold. Got three on the build right now. Finished one in a hurry this evening so tomorrow I can burn the paint off and then paint it. Customer is taking it away on Friday. The little one on the left I just popped in for the photo. It's one we use in our van.
-
K-Trips 1982 Holden Commodore VH Discussion
yoeddynz replied to KKtrips's topic in Project Discussion
some of us just have cats. and cats enough for me. -
Oh I just thought you could have two...
-
https://www.trademe.co.nz/a/motors/cars/austin/7/listing/4124638685
-
K-Trips 1982 Holden Commodore VH Discussion
yoeddynz replied to KKtrips's topic in Project Discussion
Probably because @Sanfiddy keeps buying them and stashing them away. -
K-Trips 1982 Holden Commodore VH Discussion
yoeddynz replied to KKtrips's topic in Project Discussion
Congrats kk. Super clean (and rare too - I've not spotted any commodores on the road round these parts for ages now even though they used to be everywhere) -
wow- what a fucking rollercoaster this has been ! But it's looking pretty sweet man.
-
Dude who's into sw20s (like Roman was), likes graphs and now 2grs. Plus looks not unlike Dave (with glasses) Your doppelganger?
-
Discuss here about Yoeddynz's little Imp project...
yoeddynz replied to yoeddynz's topic in Project Discussion
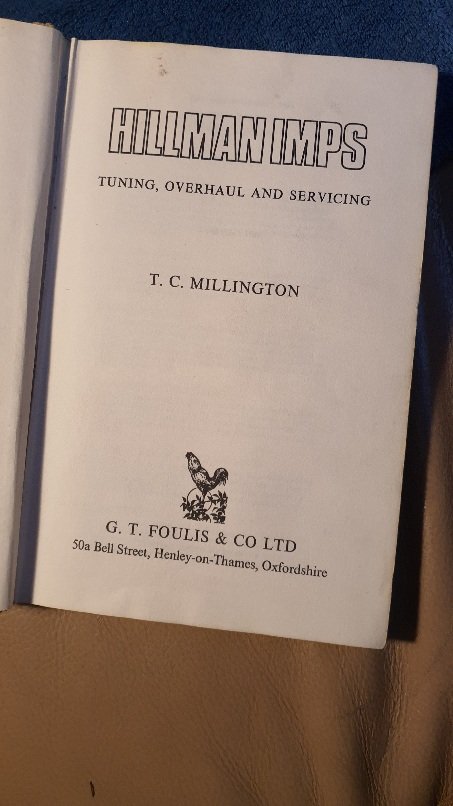
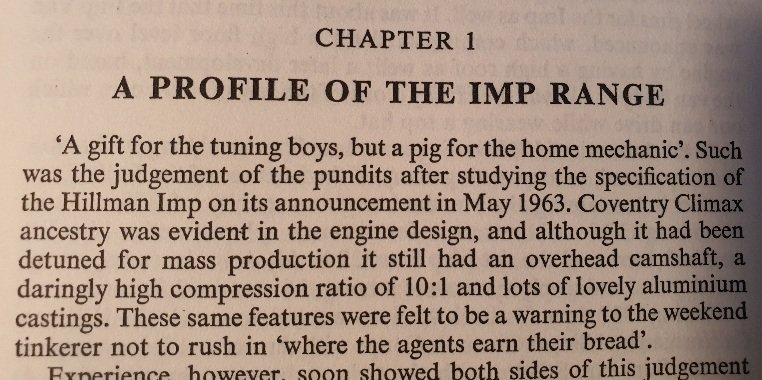
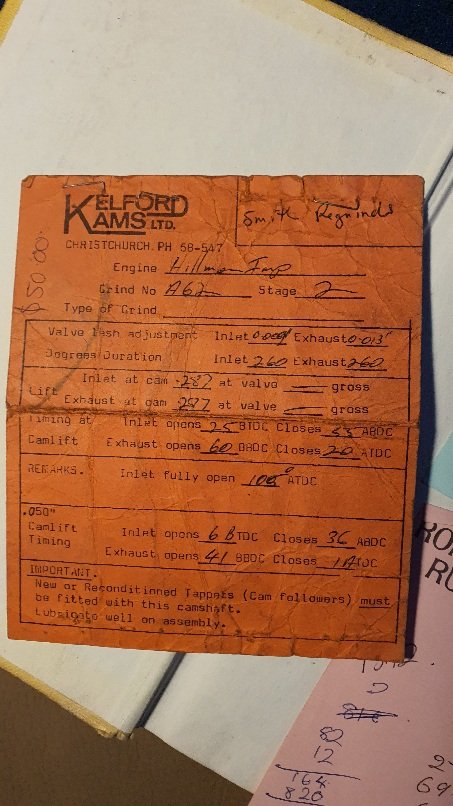
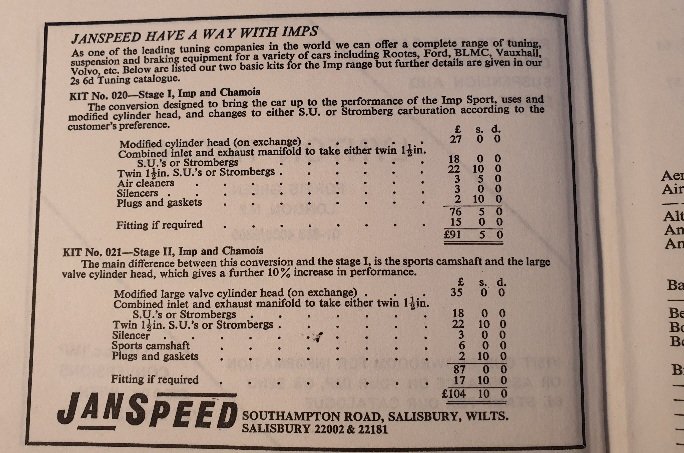
Thanks so much to @governorsam! The books arrived. An old Kelford camshaft sheet hidden inside. The phone number and $50 for a grind dates it back. The first paragraph in the book.. Advert at the back of the book.. Cheers Sam!
-
Clean it up and braze a new bit of steel in place to drill and tap. Doesn't need to be pretty.
-
Discuss here about Yoeddynz's little Imp project...
yoeddynz replied to yoeddynz's topic in Project Discussion
Done- cheers! -
Discuss here about Yoeddynz's little Imp project...
yoeddynz replied to yoeddynz's topic in Project Discussion
Yes please. I've got a haynes manual already but a spare would be handy. Don't think I've got the Millington book. That would be a good read. -
Discuss here about Yoeddynz's little Imp project...
yoeddynz replied to yoeddynz's topic in Project Discussion
Yeah the imp corners very well considering its a 60s almost cheapest shopping car at the time, on its bone stock suspension and bushes but for the makita one way springs. Rides well too all things considered - but there's no way to hide a short wheel base, short travel, 750kg car on lumpy roads at speed or if there's a strong side wind added! -
Discuss here about Yoeddynz's little Imp project...
yoeddynz replied to yoeddynz's topic in Project Discussion
Thanks man. Yes-I do like a bit of sweeping and tidying. To me it's still a bit messy. I like the idea of a future bench build with cupboards to hide the stuff below the bench. Also going to paint the walls some nice bright colours to help brighten the place up. But finish this engine first.. I promise -
Discuss here about Yoeddynz's little Imp project...
yoeddynz replied to yoeddynz's topic in Project Discussion
Cheers Jeff.


.jpg.f184f7cee850da69989ef56a0ac4afef.jpg)