


yoeddynz
-
Posts
19,469 -
Joined
-
Last visited
-
Days Won
158
Everything posted by yoeddynz
-
It is a lovely colour I must agree
-
I'm just going to put this here...
-
It's Italian isn't it. Yes - I can certainly point you in a direction away from me... If you do happen to get it, not saying you will, but if you do I'll pop over for a look/laugh.
-
Yes @downtime I believe we all at oldschool want to see @ThePog get his car back
-
Yeah that's a no go on imps unless one was to change the outer joints from hooke joints to cvs - which would be quite a ballache. The imp driveshafts failing point is the small diameter along the length and they twist. A problem that was solved with the larger 1" diameter imp sport shafts. They are hard to find at sensible prices though. I'll be joining my scooby shafts into the imp shaft as close to the uni joint as I can and run a sleeve on top as well, so increasing the diameter. I don't think either Damian or I will have issues with failure given the fairly modest power we are expecting * *and then he goes fitting a supercharger (a Bart-charger)
-
I'll be interested to see what he says because I'm planning on doing similar between my scooby and imp shafts.
-
Good boy.
-
I think the answer is simple...... If it works for Jay and his RC10- @Valiant would agree.

-
Not sure. He posted it up on the nz impers facebook group ages back. I don't know if he's got any further than sitting it on a bit of wood and taking a photo. But yeah- lots of room. Looks like some sort of quad bike diff in front? How do leafs go in reverse- I presume the motor just runs in reverse? Set that up and then just stash 386 of these in any available space about the Imp you can... ETC ETC...
-
Nissan leaf engine in an NZ imp...
-

Yoeddynzs 1965 Hillman Imp. Chasing Flappy whirrs
yoeddynz replied to yoeddynz's topic in Projects and Build Ups
Since the last update there has been some progress. Its good when I get stuck in on a particular part but often I end up doing a little bit here on one thing and then a bit on something else and find I often finish up without feeling like there's been any real progress. But I think this is just the nature of this sort of build. The hardest parts are done and while I feel like I'm nearing the end of the 'project tunnel' there is still a load of small bits to do. I think I'll do the white board thing. Write down all the jobs remaining and start sussing out a plan of attack. Or put the kettle on and watch cat videos on instagram instead. But hey- progress is progress no matter how small. Plus Hannah is going to leave me alone for 3 weeks while she takes off to the UK to see her family. So apart from having to feed our cat child I'll pretty much be a free man and can spend as much time as I want working on the engine. Or watching more cat vids and riding my bikes. Anyway. Oil filler. I drilled holes, tapped holes and mounted the base part in place.. I cut a 45 degree angle on two bits of tube, welded them and created the horizontal part.. Then drilled and tapped the flanges for the upright. I have left the final height decision for now. It'll be better to decide on that when the engine is sitting in place. My gut feeling is that I'll have the cap set a lot lower because there's plenty of room to get a oil bottle/funnel in there for filling. I have marked a line on the upright so you can get an idea of where the oil height sits... I have a couple of nifty/silly ideas for the filler tube upright and checking the oil level. I'll play around with those ideas later on when the engine is in place and I've completed more of the harder jobs - like driveshafts and gear shift rod etc. It'll be a treat. Next thing is to finish the top two water pipes that leave the heads. I had already made the front one some time ago and was about to start the rear one yesterday when I spotted an error I had made. The front pipe I had cobbled together and bolted in place.. Which pushes into the head as such... But I discovered when I looked into the hole that the land within the bore only goes in 10mm before it opens right out. I thought it was a longer land and as it is now the position of my pipe sits when bolted in place has the O-ring sitting right on the very edge - not in the middle. You can see where the factory pipes placed the O-ring in the middle with a visible mark evident here... I could easily move the bracket or weld up and re-drill the hole. Its only out by 3mm. But I'm not very happy with the look of the pipe - which I had made up out of bits of the thin old steel pipes. It's quite visible right there on display on the top of the engine even when the inlet and alternator are plonked in place.. Potential corrosion points too. I was going to paint them black but I think I'll make new stainless ones - easy now I have some proper stainless bends. Another thing I had done to the engine a while back was to cut a load of the castings down, including removal of most the original engine mounts. It really cleaned the look of the engine up. Last night I realised I could removed some more ugly. The little tube fittings left over from the exhaust air injection emissions system. You can see them here next to the inlet ports.. They pull out, sealed by o-rings. The holes left go down through the end of the heads and feed into passage ways that feed into the exhaust ports. None of this system is needed and its just extra mess. I have a couple of ideas on how I could seal up the holes neatly. One idea involves tapping out the holes with a suitable tap and screwing in some bungs and this meant opening up the magical workshop portal... into the world of stuff that I really don't like to have out cluttering up the workshop.. I have this old barry spec set of little drawers that my uncle gave me filled with all sorts of specialist taps... This one, a BSB (British standard brass) looks ideal. But before I start making more mess with taps and machining up plugs I have another idea that will probably turn out neater. Speaking of trying to make things neater. The original paint on the engine is pretty shot. I was thinking of getting it vapour blasted but I reckon the bare alloy finish left will just end up flashing off with corrosion in time - especially in the Imp where the low pressure zone tends to pull dust and moisture in over the rear mounted engine. Plus I'm a bit wary about the idea of anyone going near the engine with blasting equipment, leaving sand everywhere. I think painting the block might be a better idea. A light grey similar to the original colour. More to think about anyway.- 120 replies
-
- 48
-

-

-
DABUZZ'Z 1971 MAZDA CAPELLA RE + New 74 RX4
yoeddynz replied to dabuzz's topic in Project Discussion
This is exactly why I made sure I laid down a shit paint job on my Imp - so I don't become too precious about it, can't park it anywhere and end up having to sell it for 100k plus -
Good point!
-
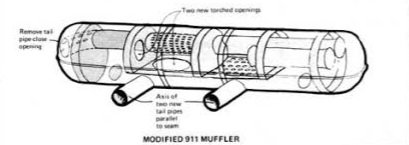
Sadly that won't be the case. The two outlets will go into a porsche style width ways mounted silencer assembly. Something sort of like this.. I think there will be too much chance of residual exhaust gases within the casing mucking up the reading. My plan is to have the sensor positioned somewhere on one of the secondaries just before it goes into silencer.
-
@NickJ Two sensors and a switch that can swap the controller between them
-
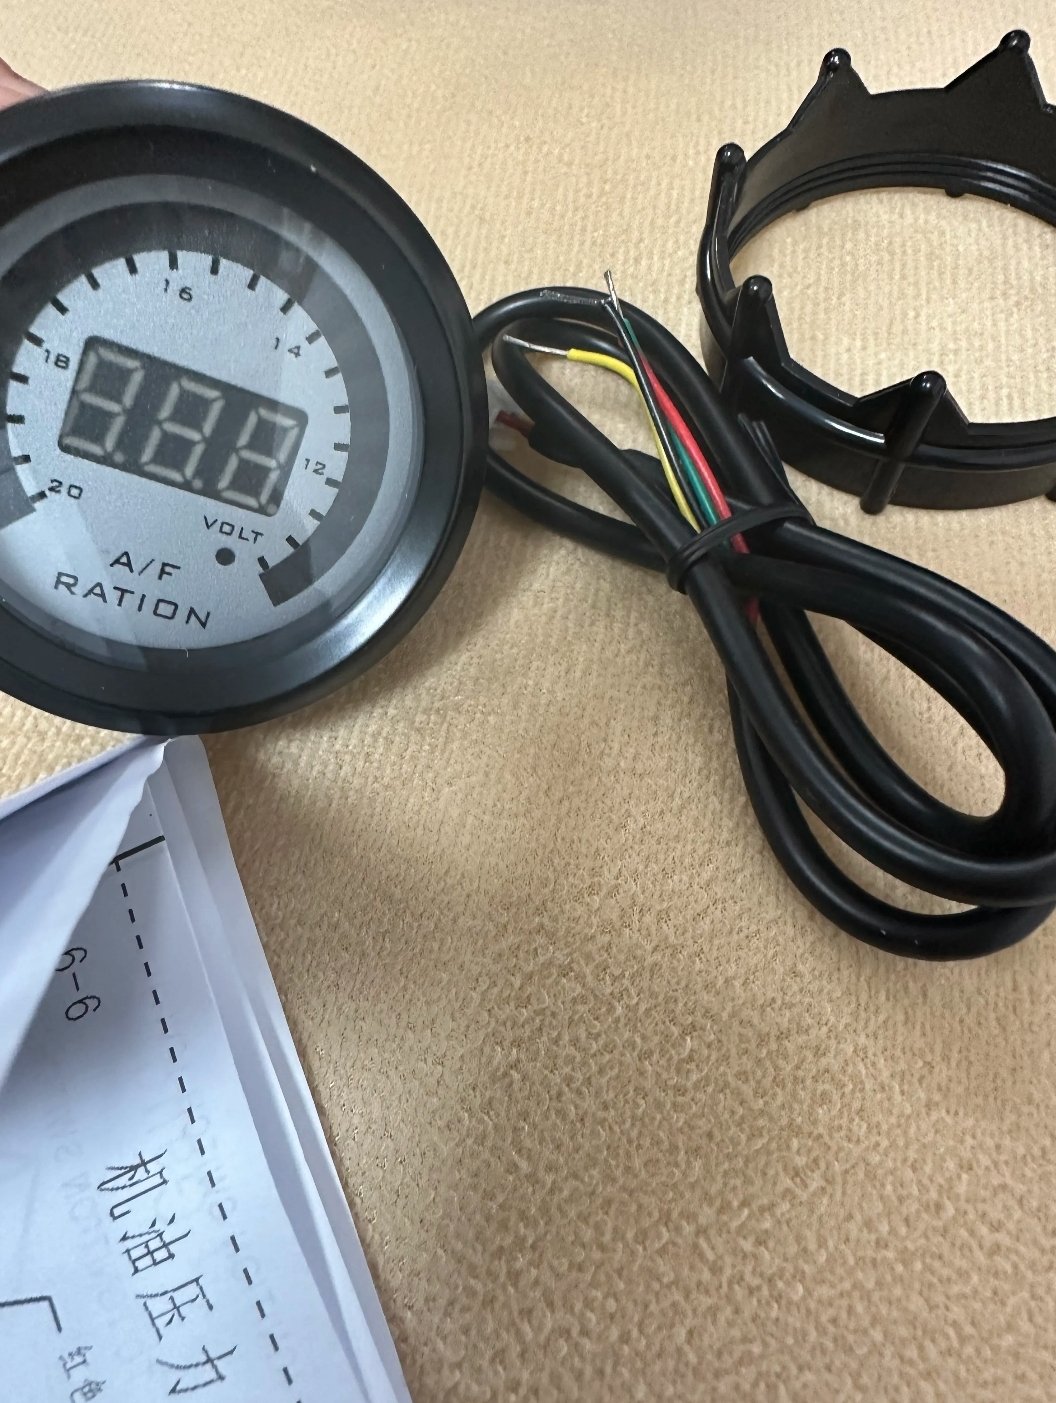
Just planning ahead for the fuel injection o2 sensor stuff on my flat six. This time I'm going to use a 14 point 7 controller. Probably a sparten 2. Looks good and from all accounts it shits on innovate products (which I had a fair few issues with on my V6) I'm undecided as to whether I fit just one sensor (and associated controller) to one bank. Did this with the V6 and it seemed fine. I figure if I make sure my injectors are all matched and my cylinders heads/valves I know are in good condition then there really shouldn't be a difference between the banks on a system that's fed air equally by a single central mounted plenum. Or stump up double the costs and run two sensors... the megasquirt 3 will handle two (or more if using canbus) but I don't think I'll gain much, if any, extra efficiency. Just info. Plus I'd have to run two 52mm gauges if I want that info on the dash. Speaking of gauges.. I'm wondering if any wideband afr gauge will work with spartan. I'll ask them but does anyone here know. I presume those gauges just take a 0-5 volt signal? Also, whilst looking on Ali I found this. It's a 'ration' gauge...
-
@BlownCorona I can confirm that @Sparkynz bought some new plugs and she's told me it's now running like a sewing machine.
-
Random slightly cool stuff you built but not worth its own thread, thread
yoeddynz replied to h4nd's topic in Other Projects
Given the air pollution in Oxford City when I lived there, which seemed way worse when I last visited, I'm not surprised. I think you were only allowed to burn smokeless fuel there (not wood). Is that the same in most cities there? -
Random slightly cool stuff you built but not worth its own thread, thread
yoeddynz replied to h4nd's topic in Other Projects
Cheers for the offer - but enjoying burning lots of wood right now. I'd have to suss out a separate spot for one in the future though! Then collect more oil/service more of the locals cars. -
Random slightly cool stuff you built but not worth its own thread, thread
yoeddynz replied to h4nd's topic in Other Projects
What sort of flow rate/mils per hour do these things use? -
Random slightly cool stuff you built but not worth its own thread, thread
yoeddynz replied to h4nd's topic in Other Projects
That looks similar to the one that iirc @avengertiger was going to build - using some big discs off a truck (or drums..i cant remember) Yeah- damn they can go hard! What's the smoke output like? Fairly clean once up to speed? Our current woodfire likes to leave little spots of creosote over the yellow car if its burning sappy pine/wind is blowing the wrong way. -
It's just sitting there in the field with another. I'm going to pop in sometime and have a yarn with the resident Barry there.
-
Random slightly cool stuff you built but not worth its own thread, thread
yoeddynz replied to h4nd's topic in Other Projects
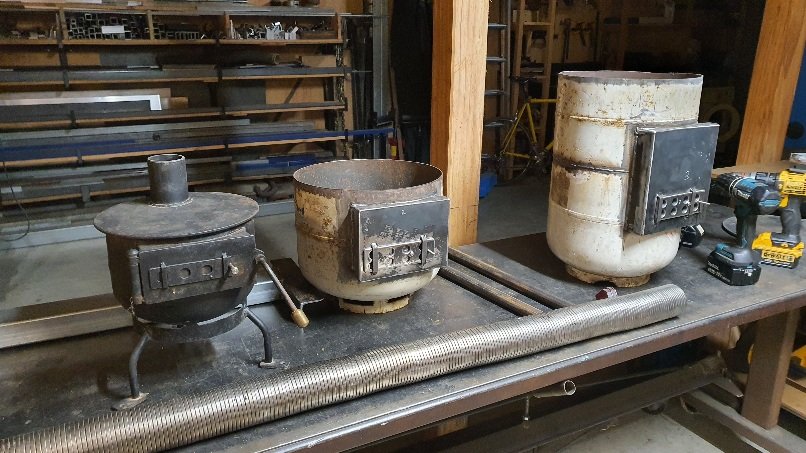
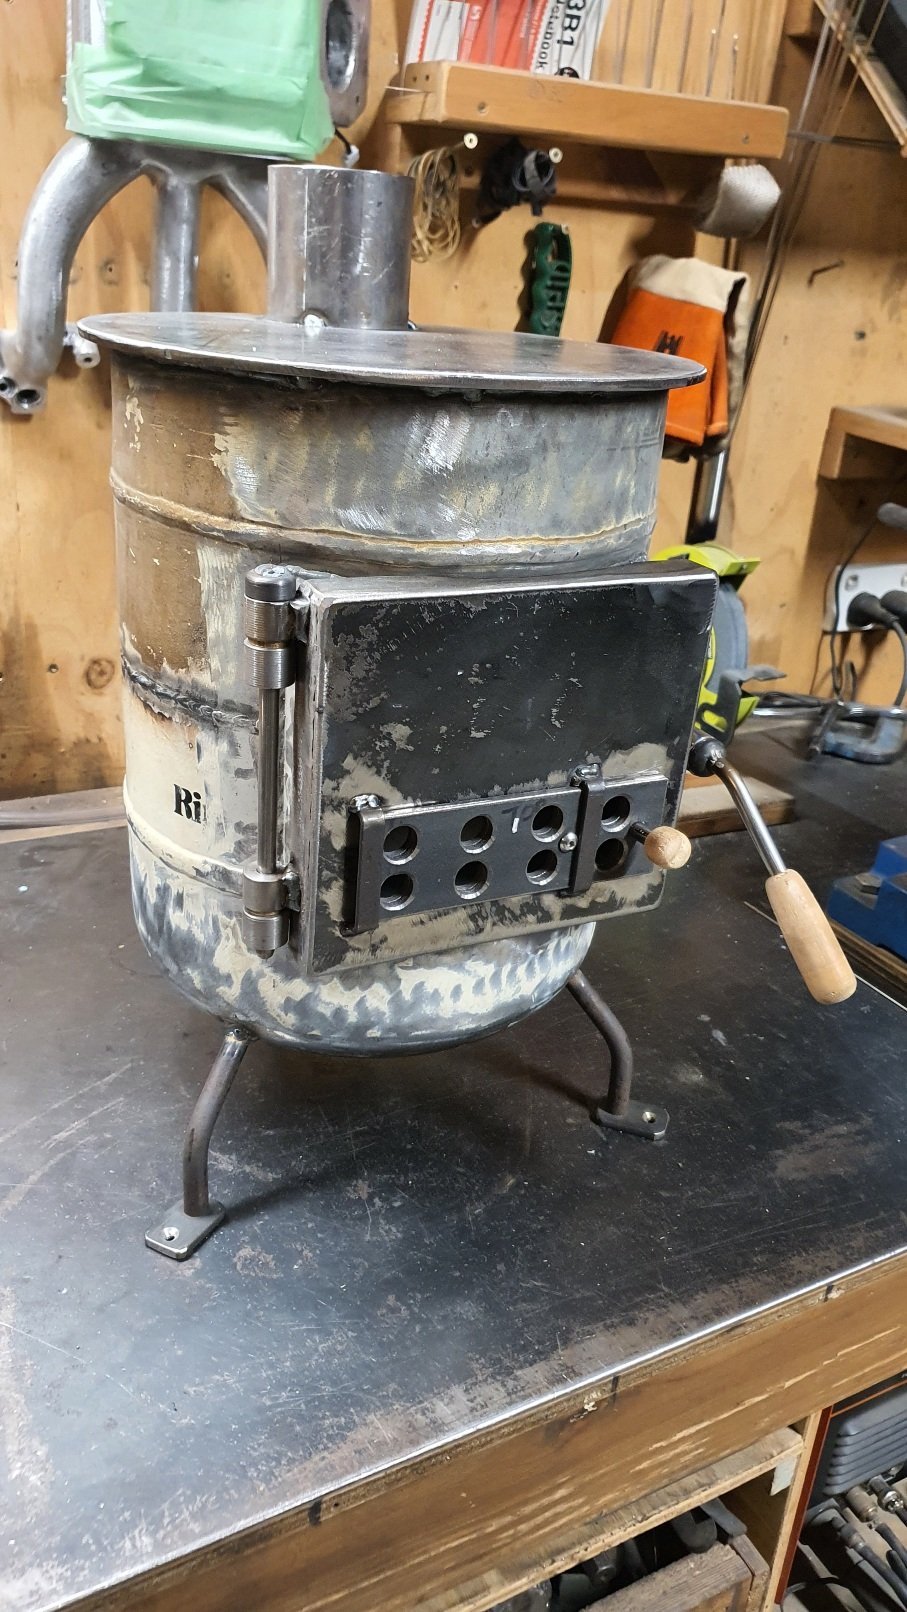
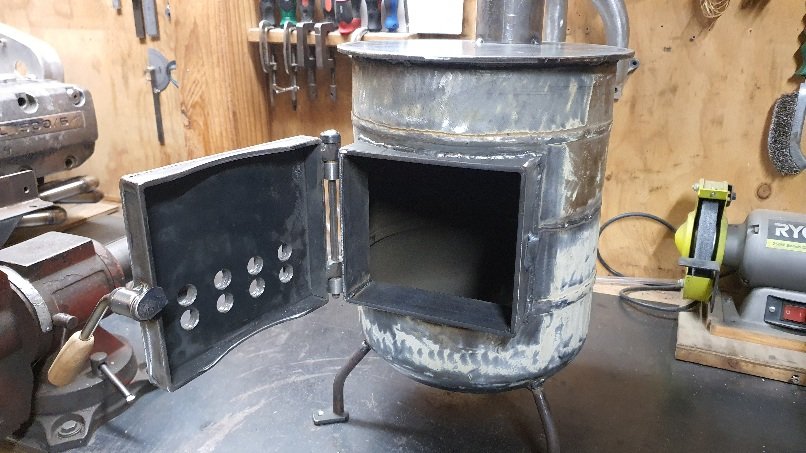
Oh yeah. Winter is coming. Every bloody year I intend to build a load of burners to sell and always end up being in a rush to get some built to order as it gets cold. Got three on the build right now. Finished one in a hurry this evening so tomorrow I can burn the paint off and then paint it. Customer is taking it away on Friday. The little one on the left I just popped in for the photo. It's one we use in our van.
-
K-Trips 1982 Holden Commodore VH Discussion
yoeddynz replied to KKtrips's topic in Project Discussion
some of us just have cats. and cats enough for me.


.jpg.f184f7cee850da69989ef56a0ac4afef.jpg)