RXFORD
-
Posts
1,196 -
Joined
-
Last visited
-
Days Won
1
Content Type
Forums
Downloads
Events
Gallery
Everything posted by RXFORD
-
What diam wire are you running in mig? Getting doors off yahoo shipped over would be an expensive exercise. Surely a local shop could do some corner patches for ya to save the hassle of importing shit thats probably just as bad?
-
Go round to a few old panel shops that have been around for ages and see if they have an older Car-O-Liner Mark4 setup that they might not use anymore. That would be the ultimate setup to use. You might get lucky and be able to snag one with measuring gear for a few grand as most smash repair shops have upgraded to speed-benches/digital gear. Or you might be able to make this work... https://www.facebook.com/share/1A3VN7fsgK/

- 1 reply
-
- 2
-

-
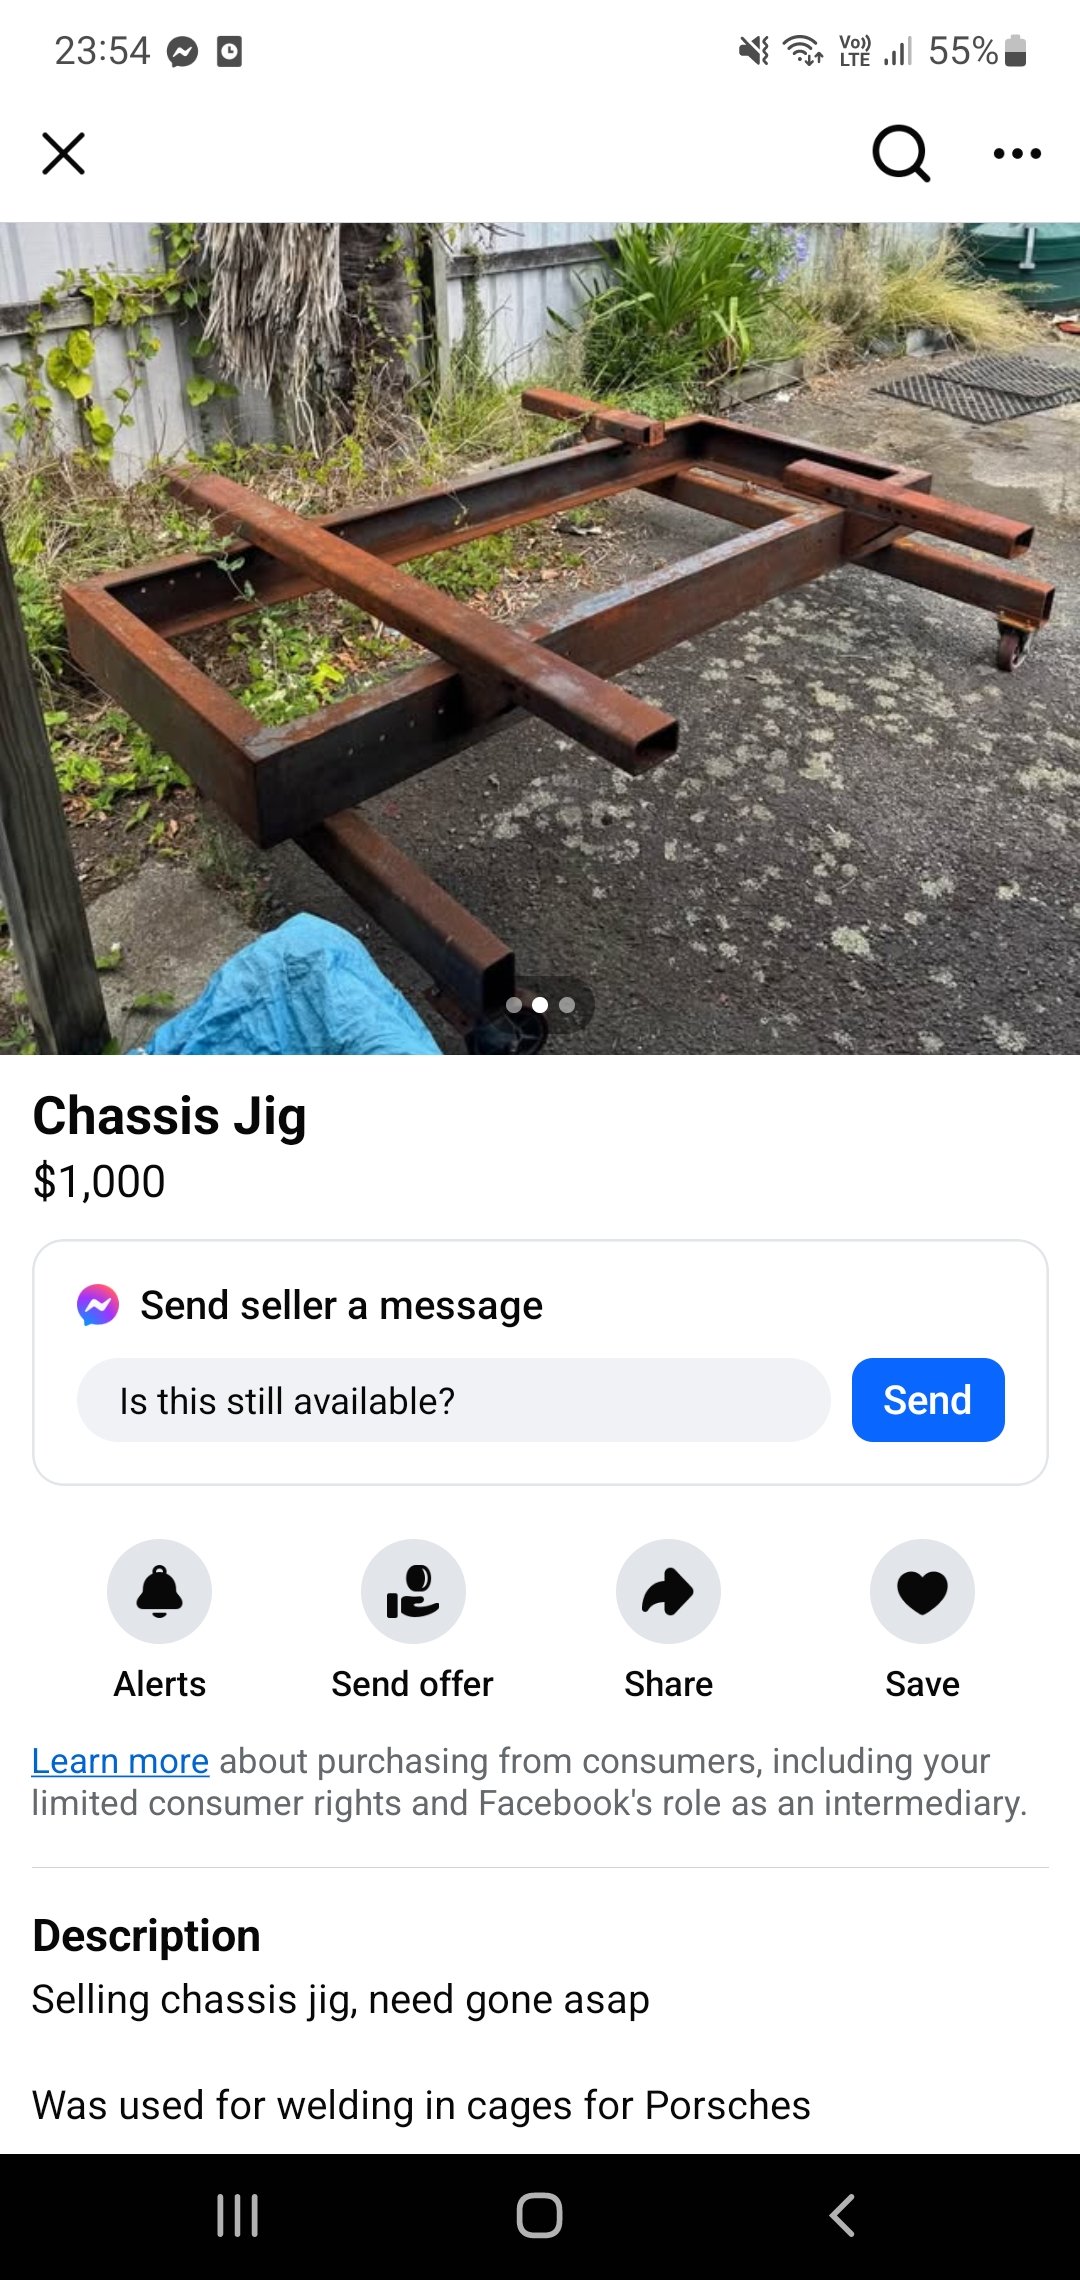
I can't see why there would be any issues with extending the front subframe legs as long as the material isn't a fancy high strength steel and you match material thickness with suitable gussets/fishplates. It may be something you need to start mocking up and tack togethor, then take to your certifier or send pics to Lvvta to make recommendations on. Its just going to be hard for them to ok something unless you do a super detailed 3d model. Same again for your plan for the rear mounts to the chassis. As long as the area where the stud is gets strengthened well so the load is spread to avoid cracking then it should be fine. The shock towers will definitely need reinforcing to be suitable for a coilover strut. Adding a 'strut brace' would help too whether its fixed in place or removeable.
-
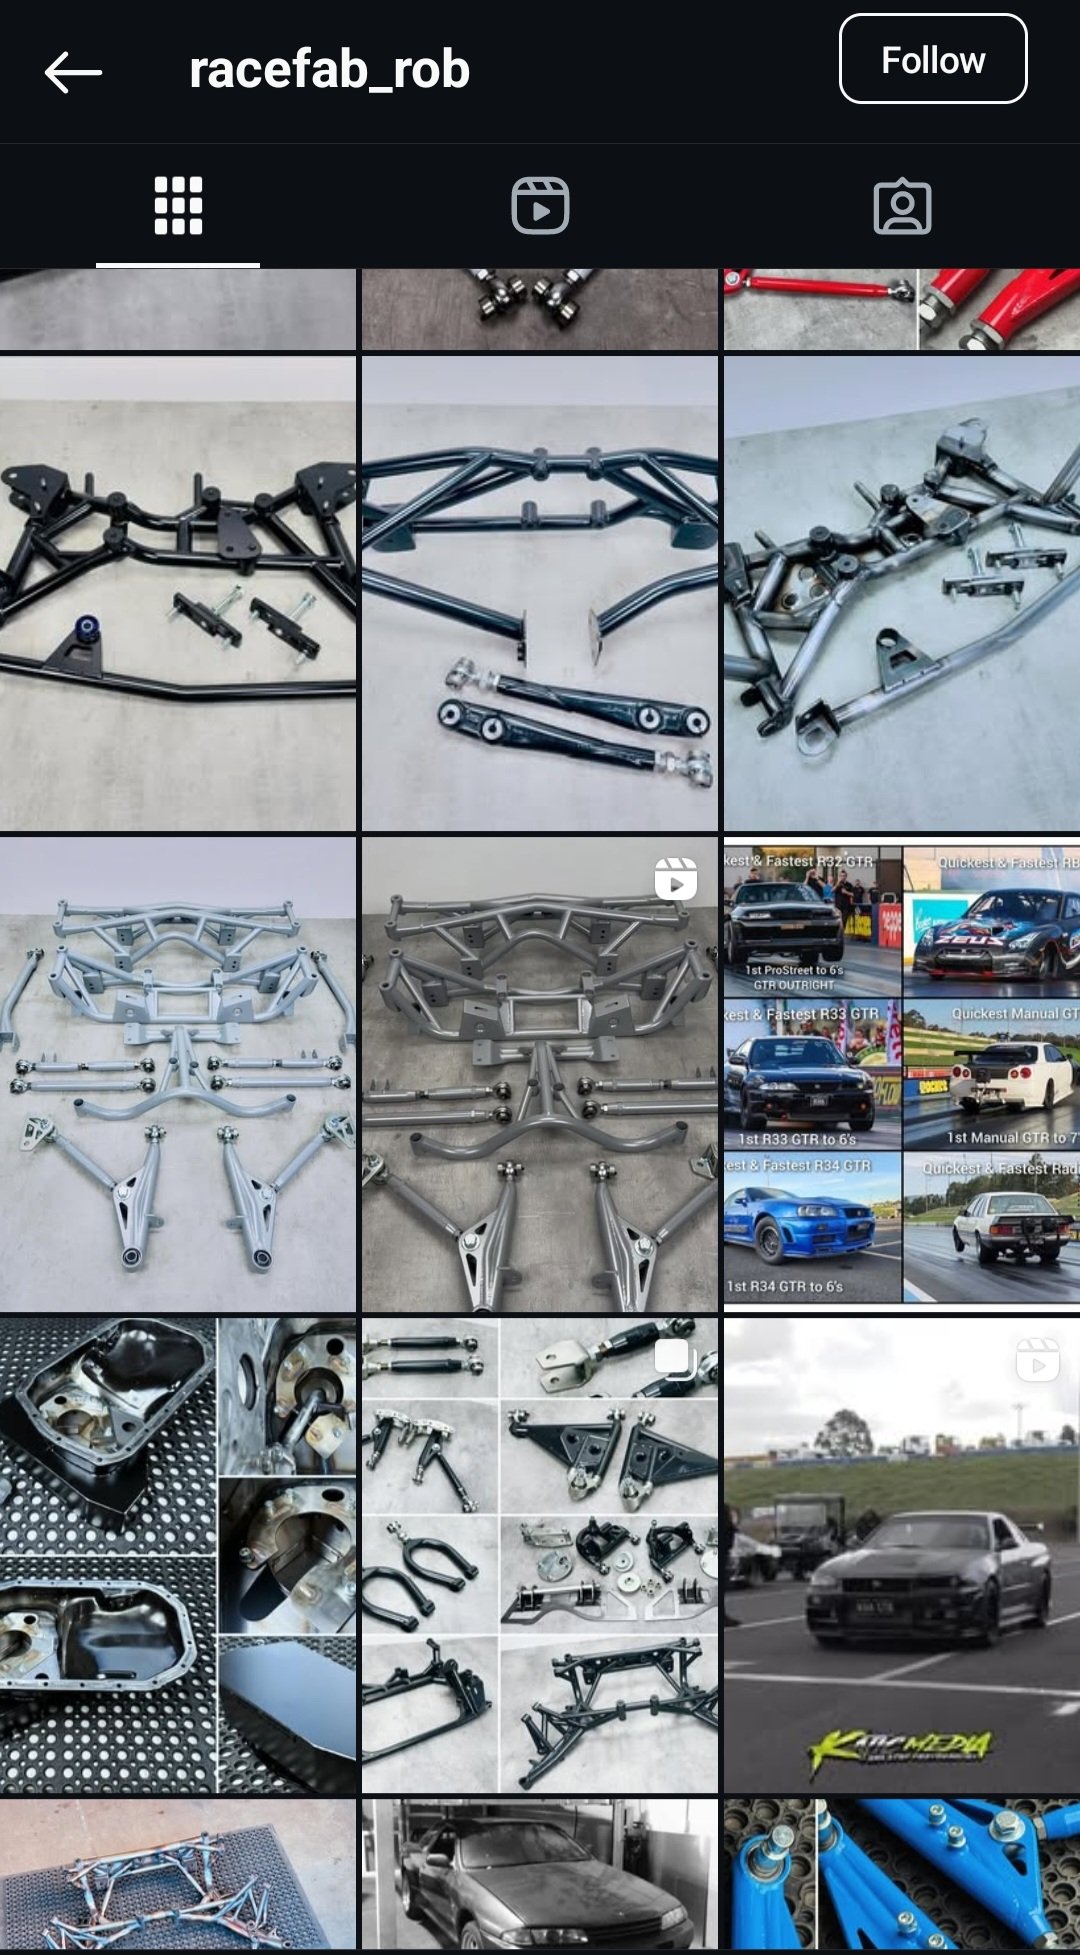
If you have a reasonable budget for this conversion, another option might be to have a chat with Rob at RaceFab down in Chch. He makes pretty wizzbang tubular/moly subframes and I'm sure he would have an s13 jig that could be tweaked to suit the z31 pickup points if you sent him a z31 jig to measure. This way it would make for a 'bolt-in' setup.
-
Ok, so I have a similar project and after many discussions with Clint, I was educated on the fact that your Gvm is dictated by what Landata has your vehicle on file for. (In my case its the Import Document as its not complied yet) That means if you plan to build a vehicle to carry a decent weight, you have to start off with something that has the highest gvm up to 3500kg possible. In my case I have to be careful because my gvm isn't all thay great, and after adding a heavier motor, rear axle, wheels, tray etc than stock, I'm decreasing the load weight and still have to be able to have 5 or 6 passengers at 80kg to keep all my seats. Not sure what vehicle you had in mind, but it would have to be something that still has at least 900kg of spare load mass ontop of your tare weight to stay within your gvm.
-
I'm assuming you are hoping to keep it on a wof?
-
What decides the 3.5ton total weight?
-

18th New Year Jap Oldschool Meet - 19 Jan 2025 Auckland
RXFORD replied to AE25's topic in Upper North Island Region
Agreed, didn't even bring my van carb to the event. -
I Agree with Harry, don't get involved in lead work unless you are proficient in it and the paintshop you plan to use is confident in your process. Alot of paintshops won't warranty lead work if they didn't do it or its not factory. Just let the bodyshop decide how they will fill the deeper seam sections, that way if it fails its on them.
-
Using 5mm or 6mm flat will be heaaaaaps thick enough for cert. 12mm is crazy talk. At the end of the day, the seat bases will likely only be a couple bits of 1mm - 1.6mm sheet spotwelded togethor so not exactly bomb proof. Unstressed seat mountings are fine having 4x 8mm or 5/16" fasteners, but if it has a seatbelt mount built into it you my have to step them up depending on where the seatbelt is mounted. Maybe you could mock something up quickly from sheetmetal and we could visualise it better.
-
Please 7m swap it.
-
Caught up with @Dudley who brought his bugeye kp60 down from Whangarei. And had a yarn with @Lukel200 and @kp60nick who had the Logo and L200 there. Got sunburnt to fuck but was a good day.
- 178 replies
-
- 16
-
-
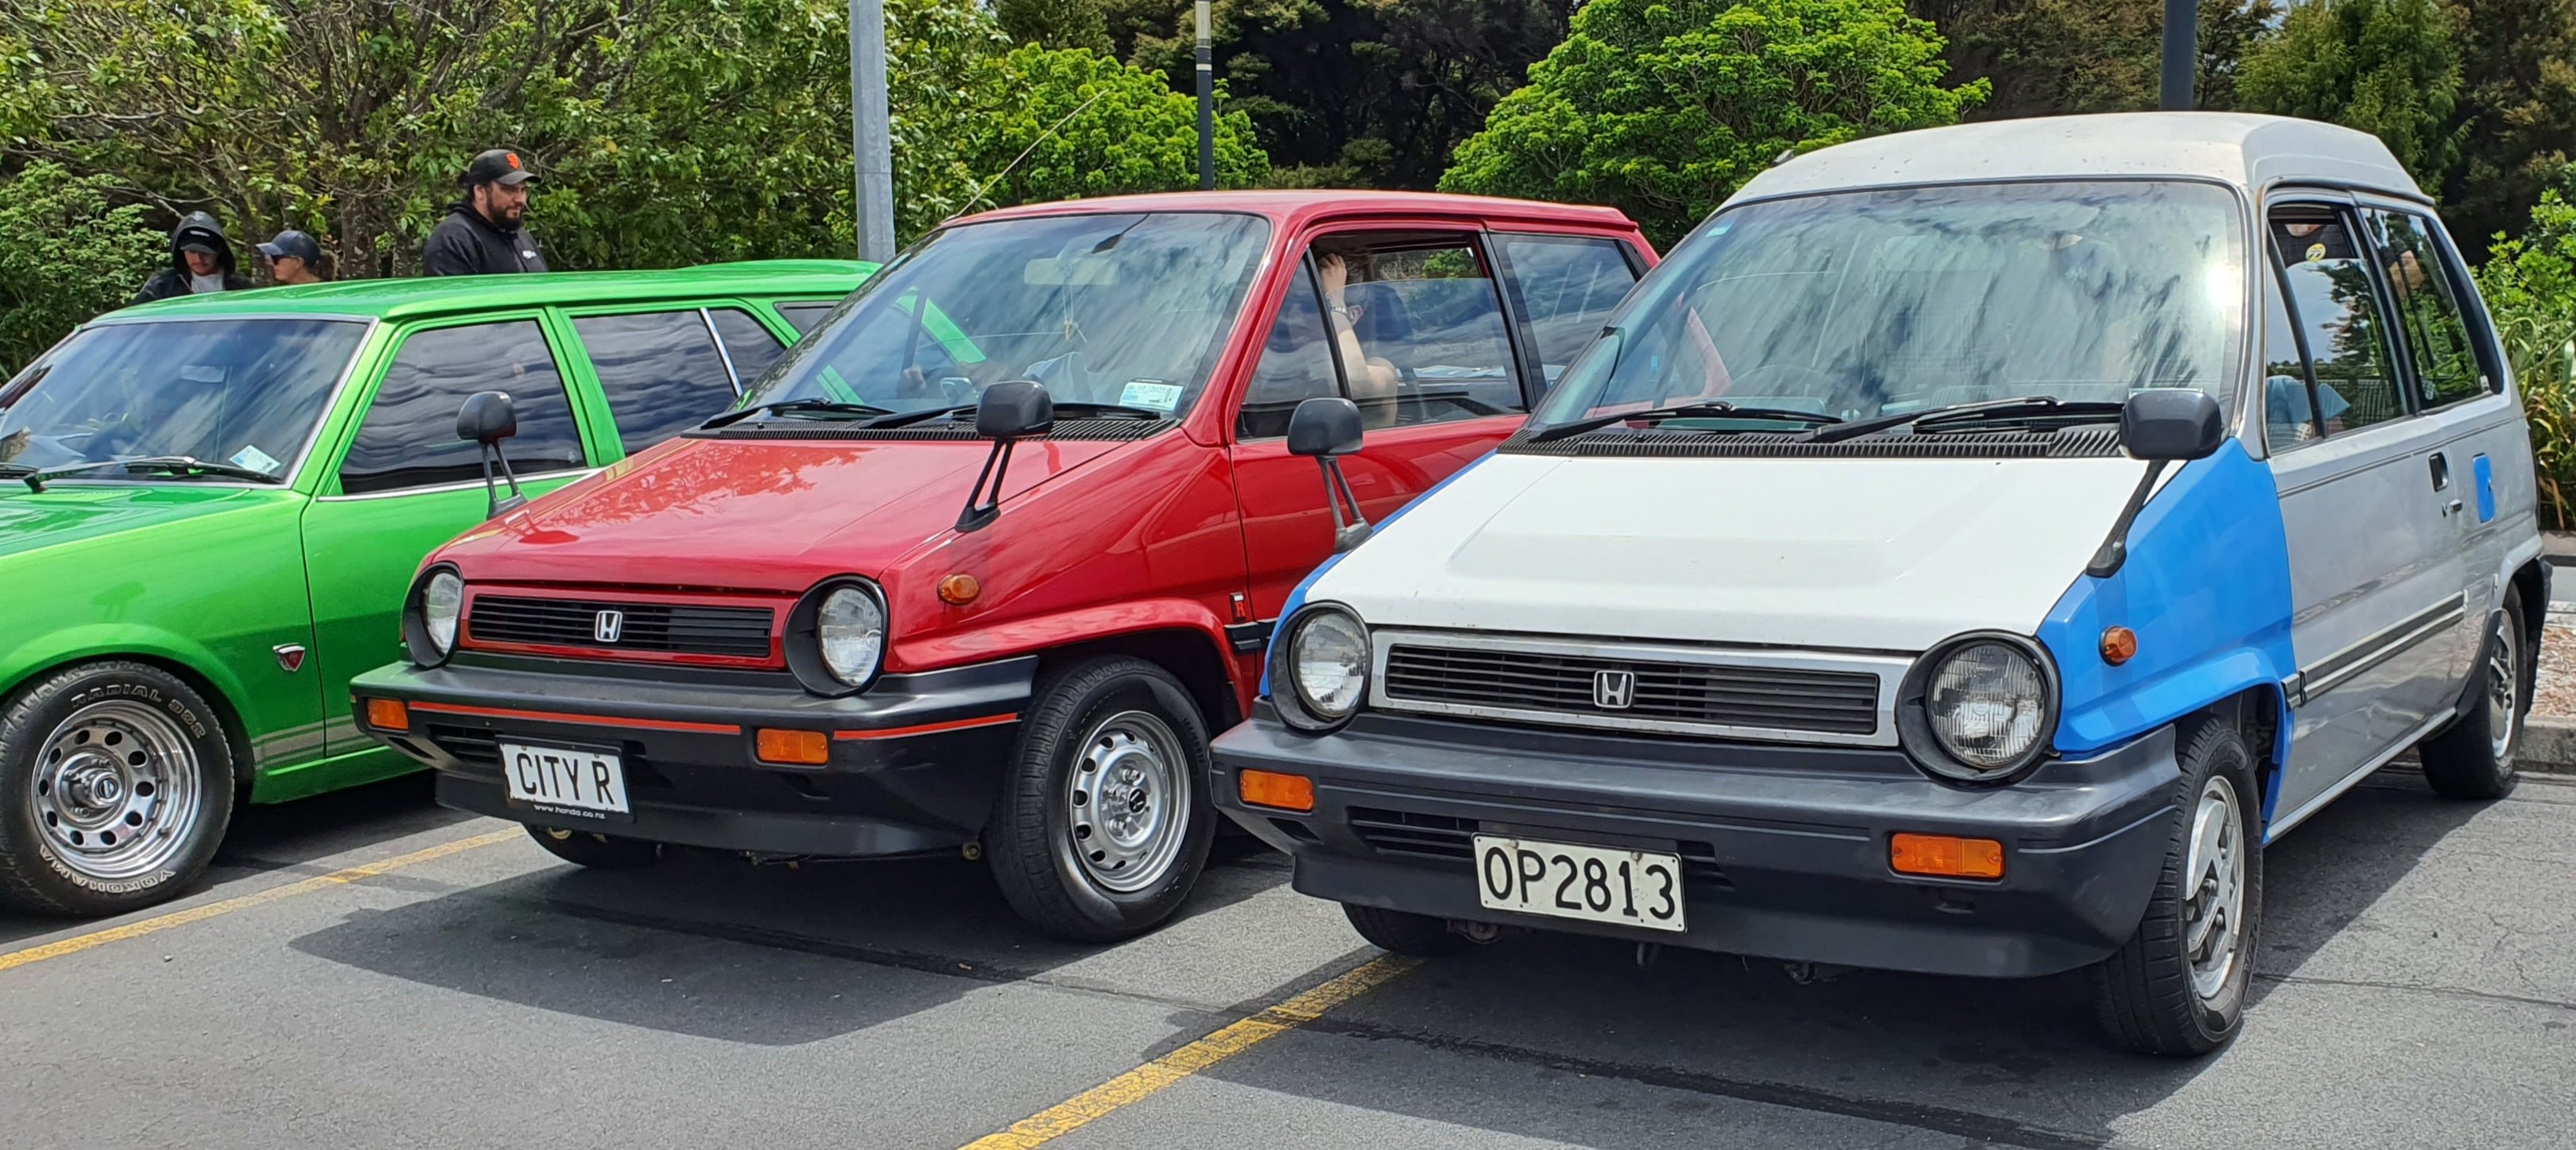
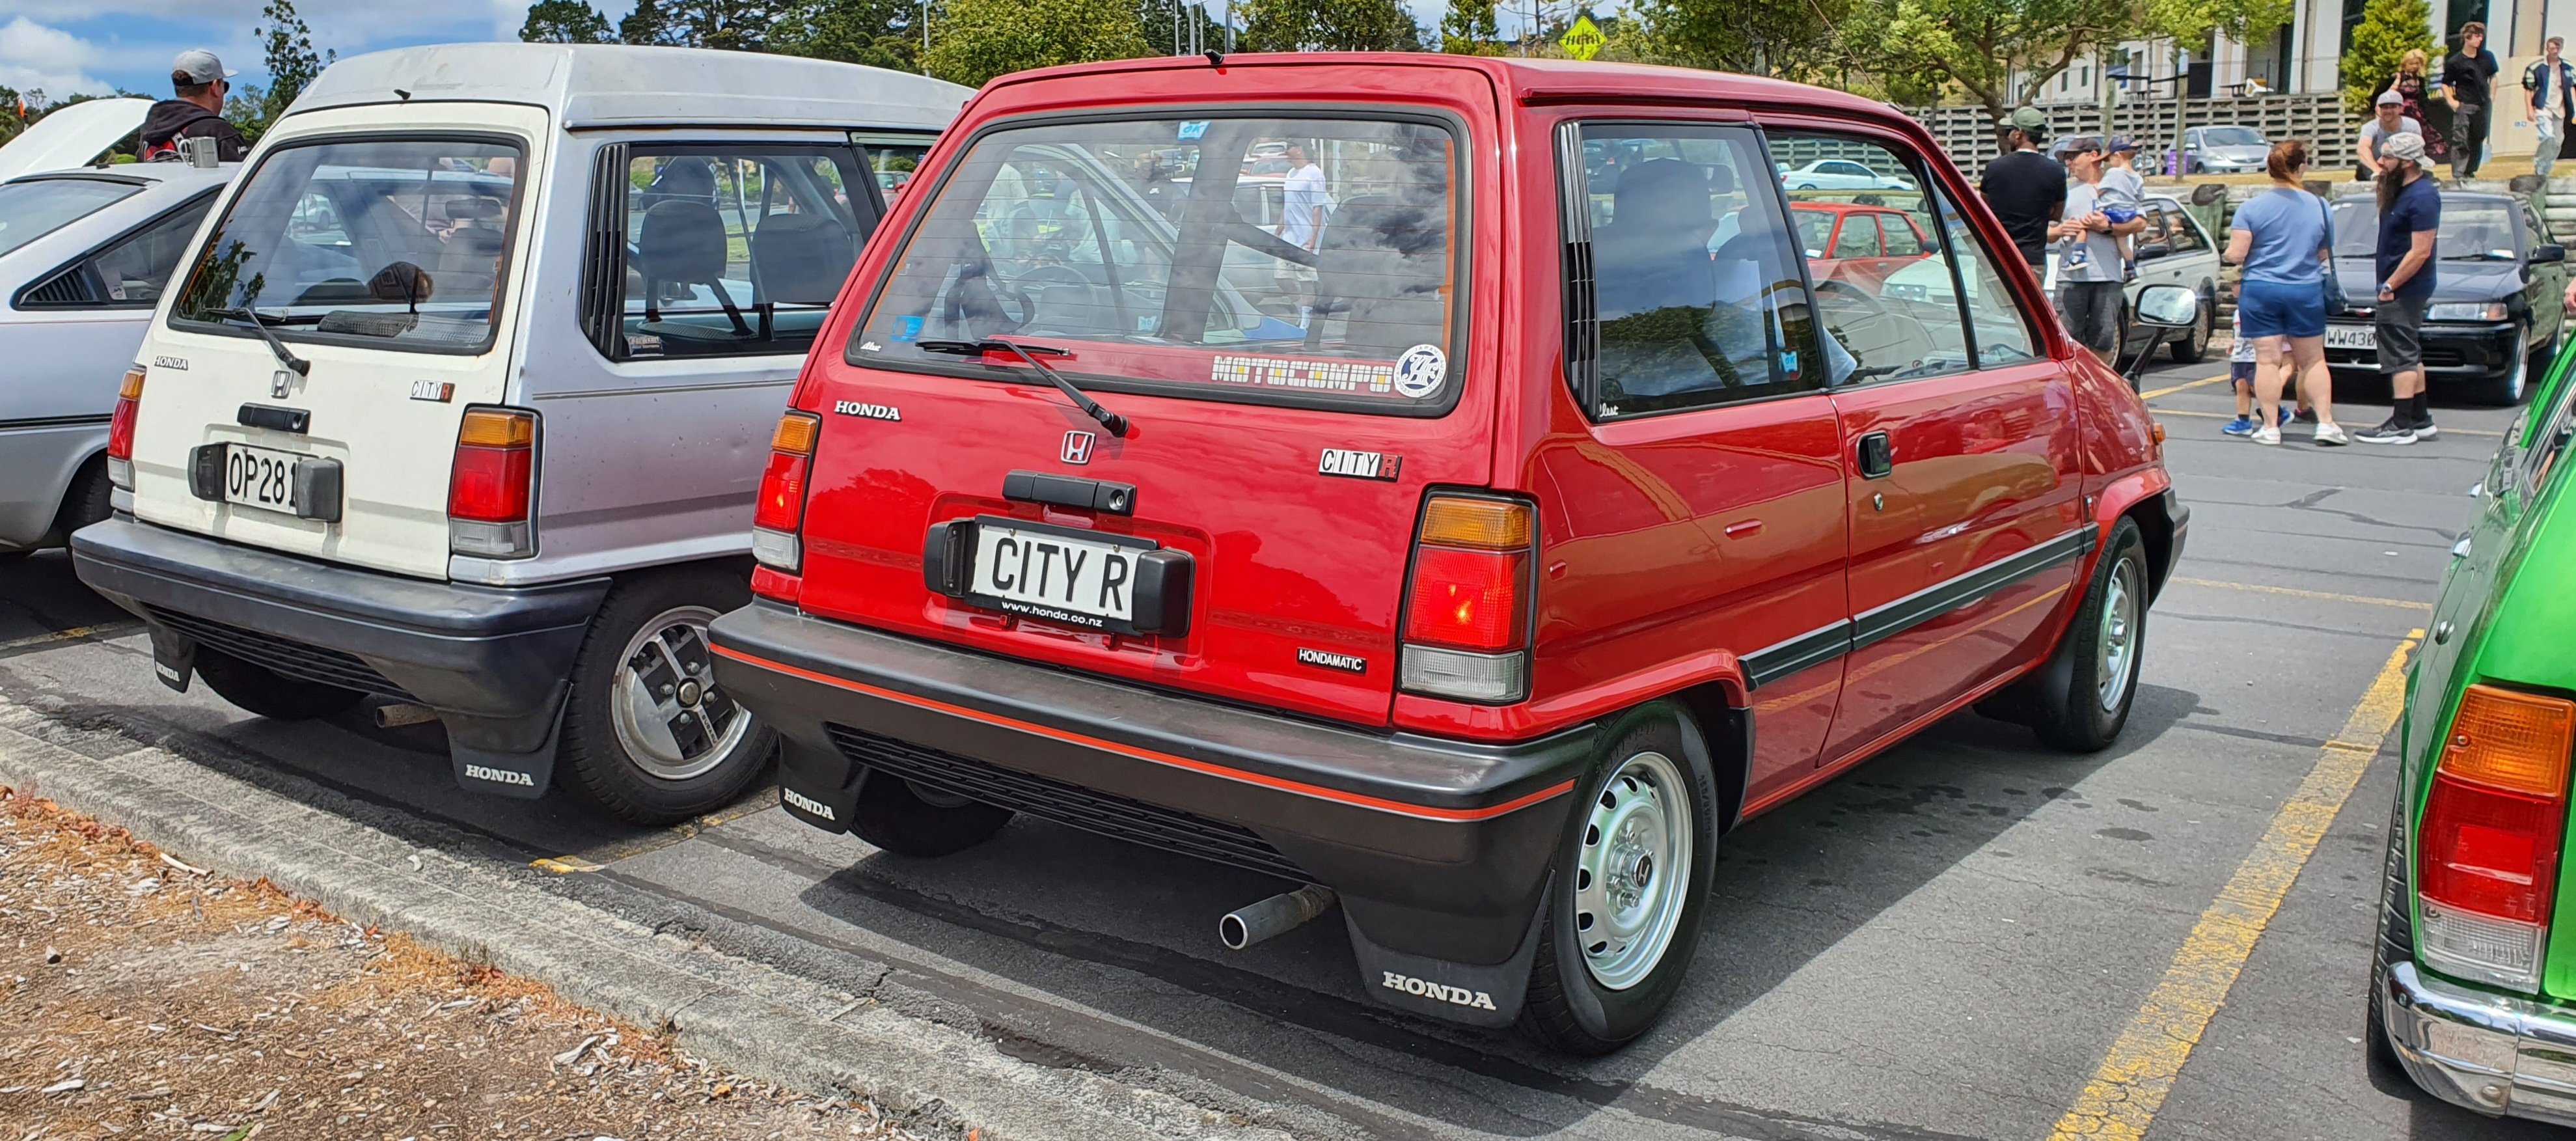
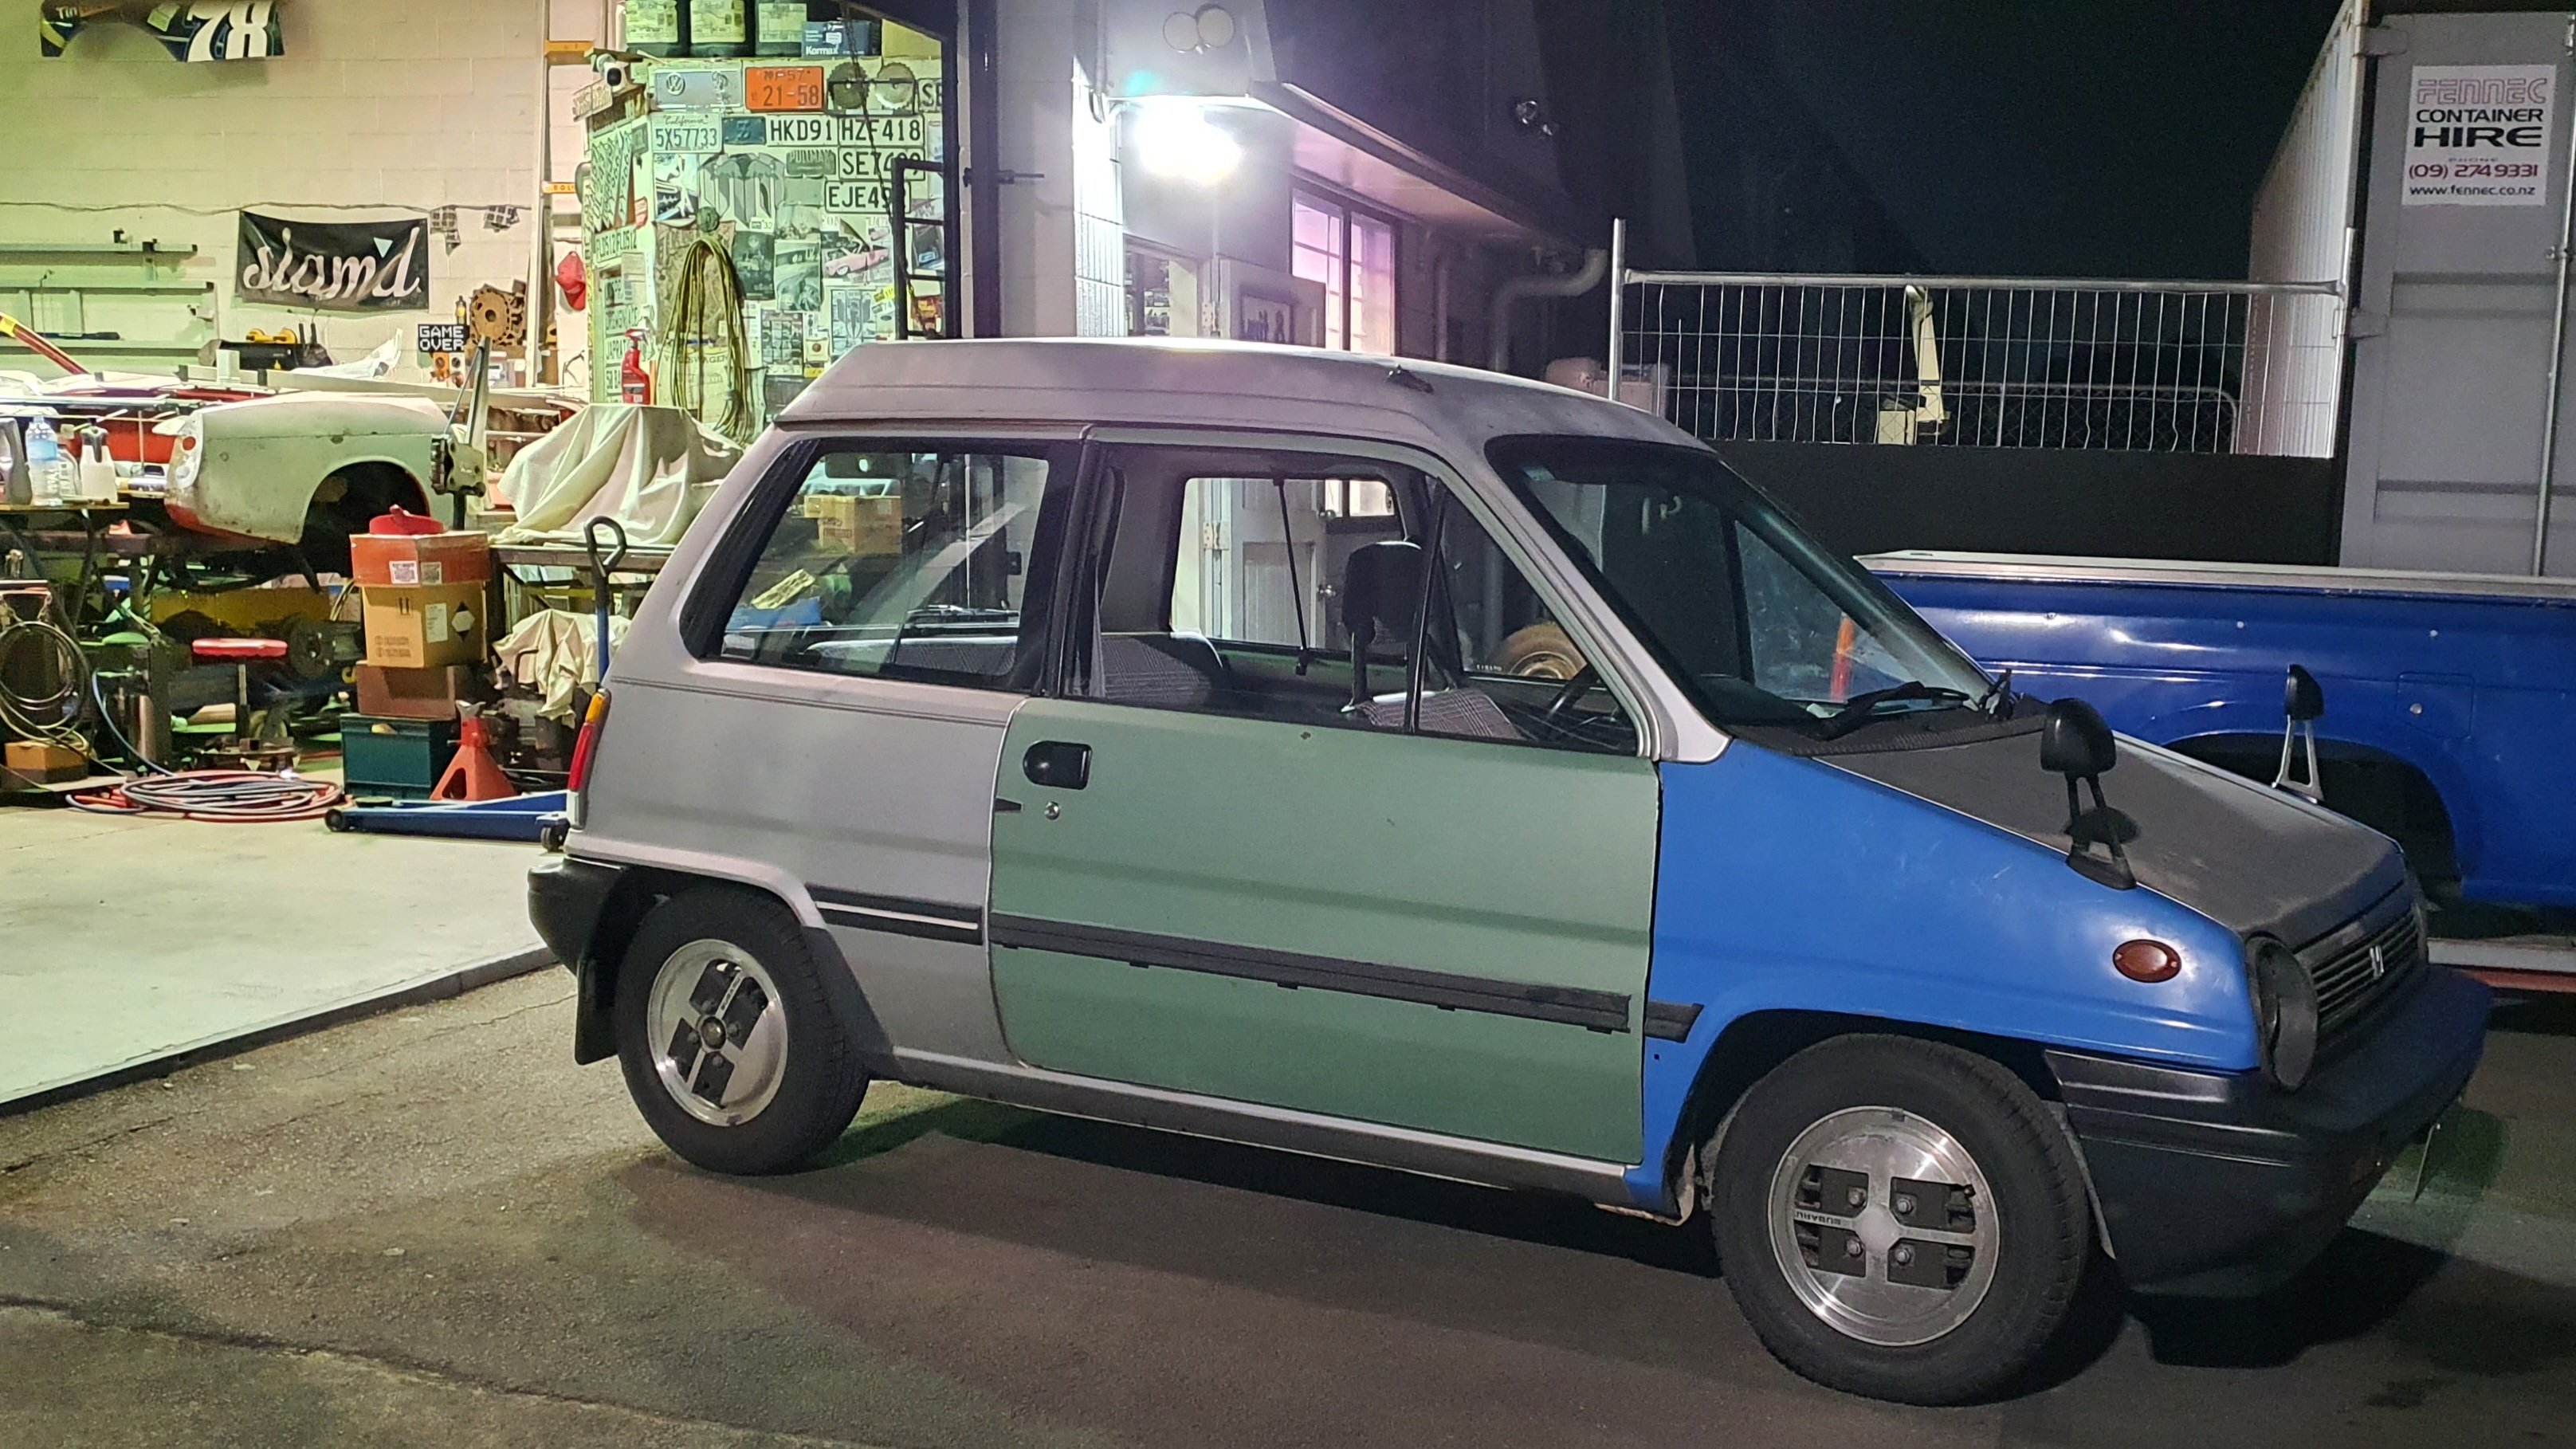
Got there a bit late, but mate it to the event. First time I had actually driven it properly was pulling out of my driveway headed for the meet. The thing cruised mint, no temp issues, no weird noises or smells so that was a relief. It is a bit smokey so I suspect rings or valve stem seals are a bit tired. These cars are only a 5-digit odometer and I'm Pretty sure is been around a couple of times Prakash parked up with me in his mint CityR and got some snaps. People were buzzing out about the high-roof. It definitely got a bit of attention.
- 178 replies
-
- 13
-
-
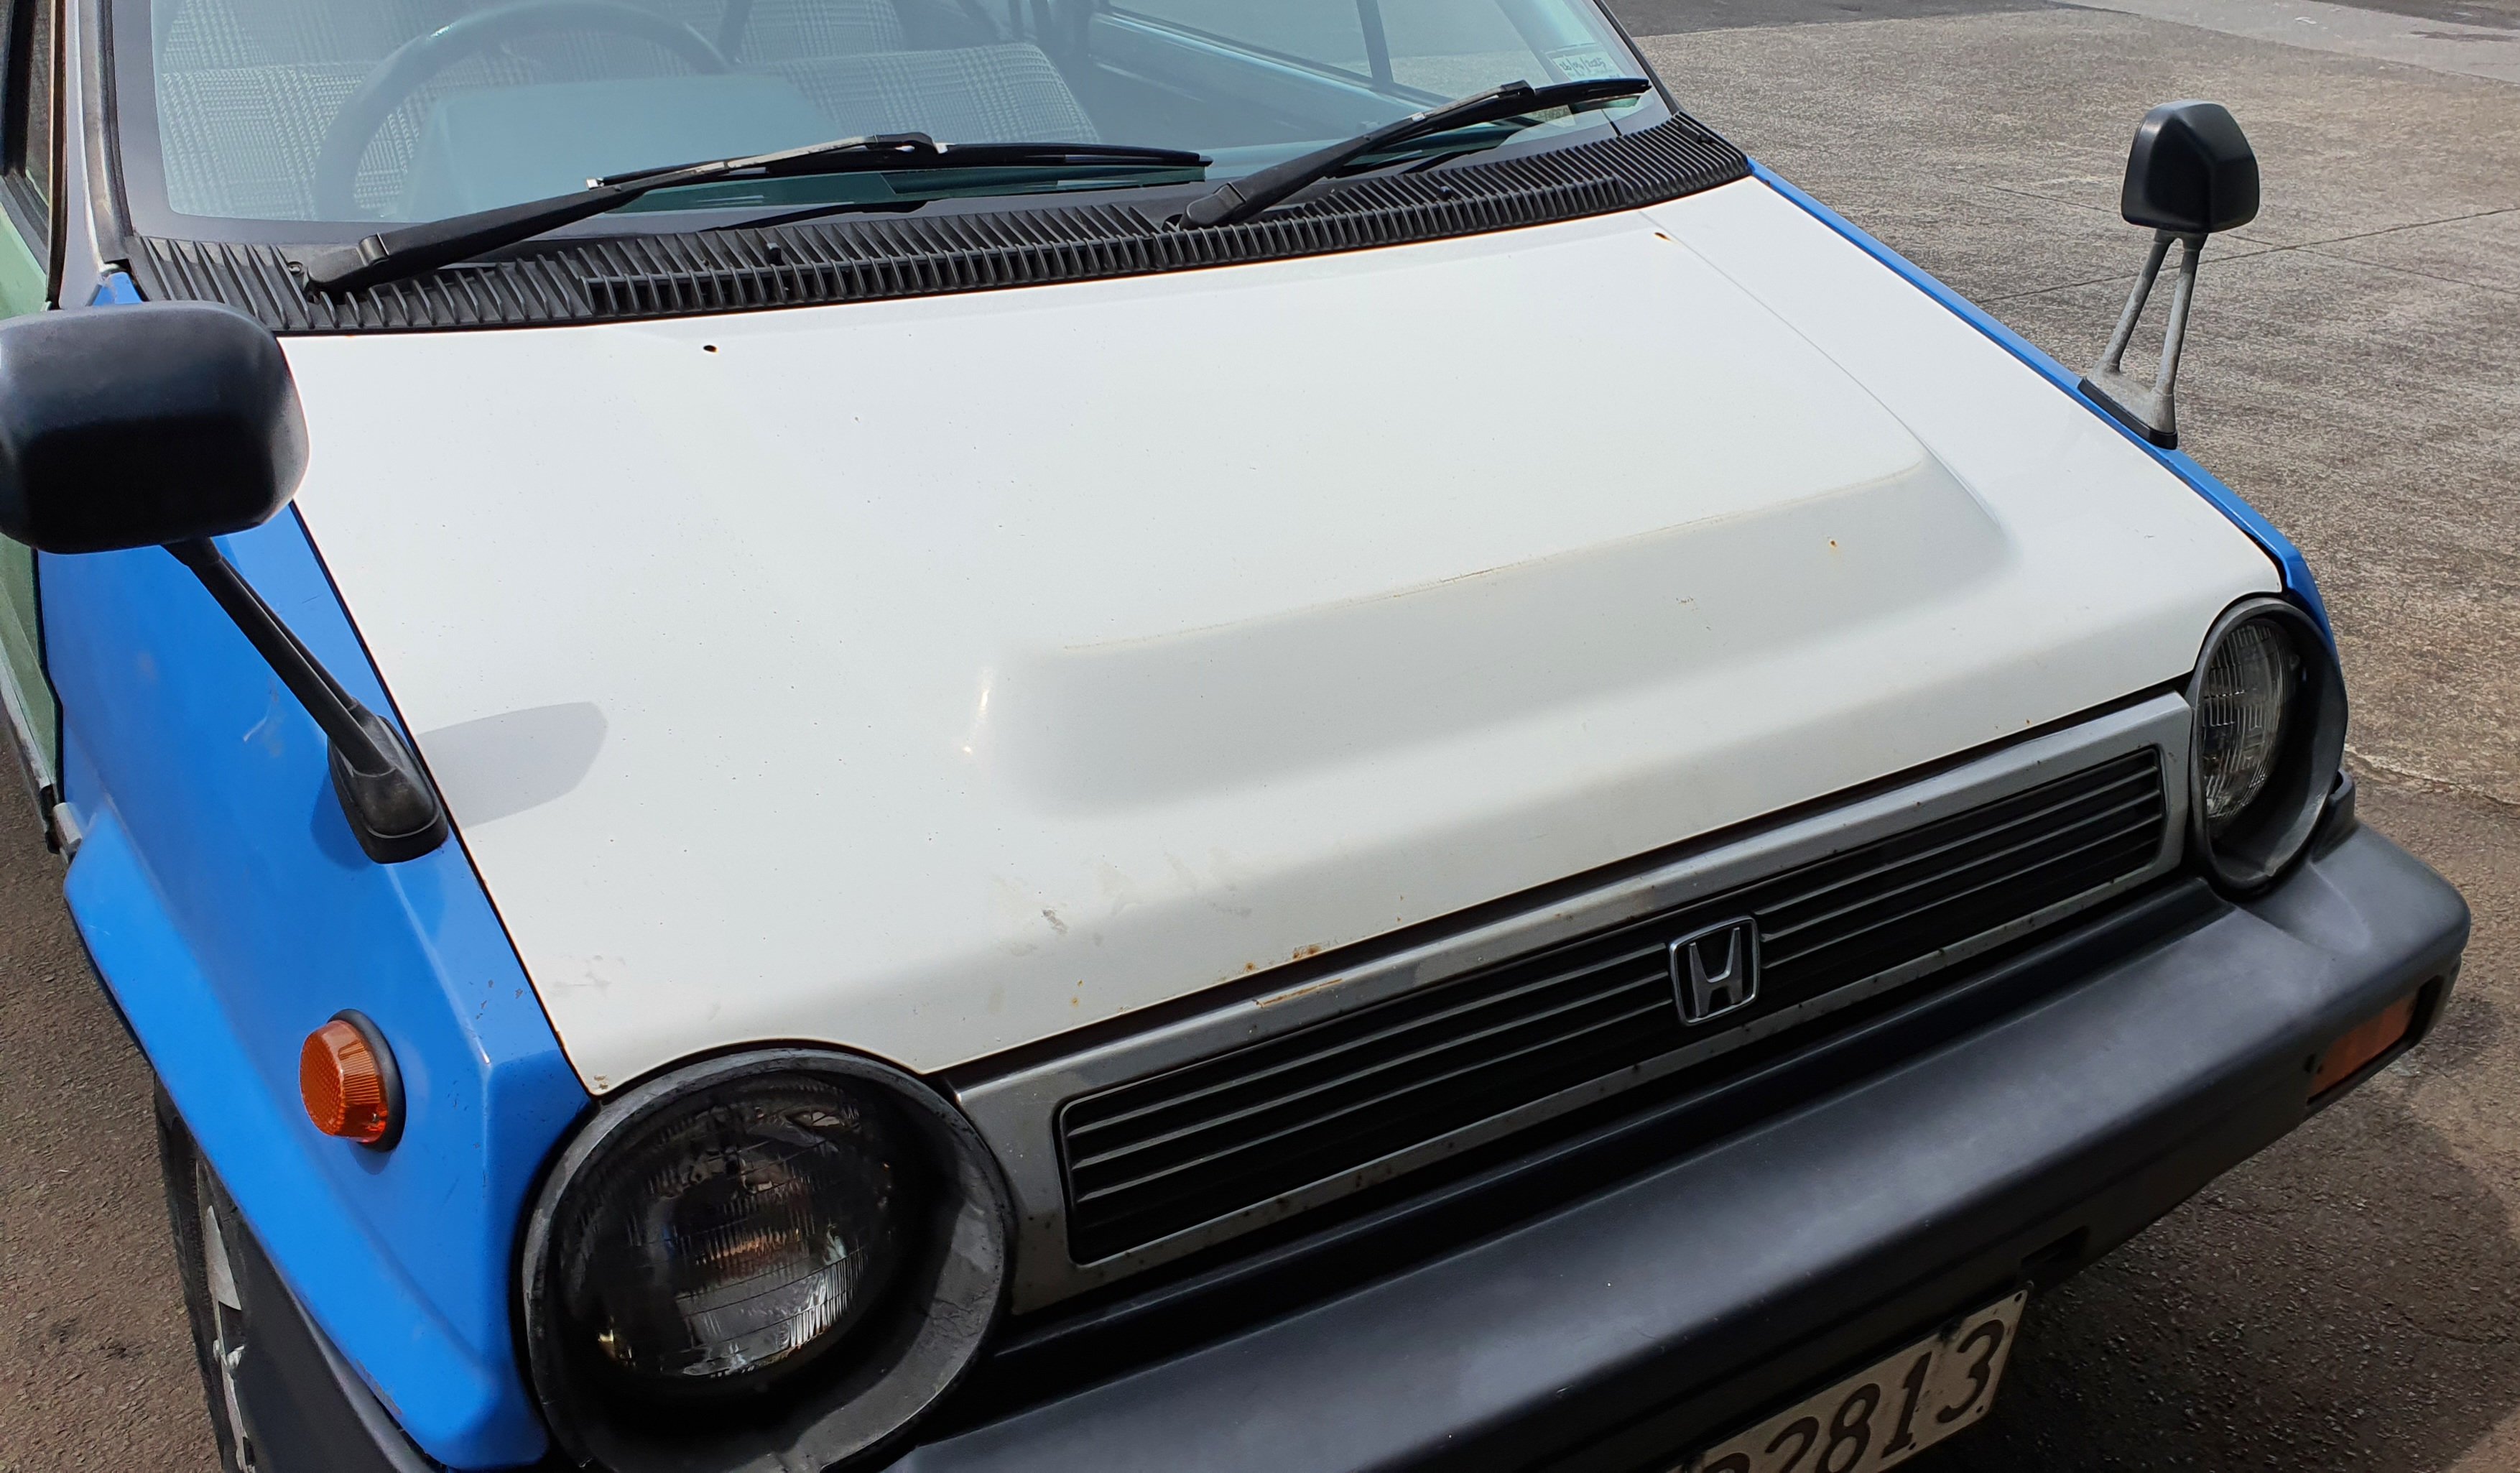
Sun morning of the 18th New Years Jap Oldschool Meet I came in early and finished off a few minor things and got some tools and shit loaded up. While waiting for my folks to show up who were taking the Cordia to the event I decided to fit the Turbo2 bulged bonnet. For whatever reason the latch didn't want to play ball, so I pissed about for way too long on it before finally hitting the road. Bonmet still needs some aligning but it latches ok for the time being.
-
Needed to ditch the nosebleed height but adjustables are a mission for another day. Concluding my Sat thrash, I finished up in the early hours of Sunday morning doing this neat lowering trick I learnt from @cletus. Nothing crazy, just closes the gap up between tyre and guard.
- 178 replies
-
- 13
-
-
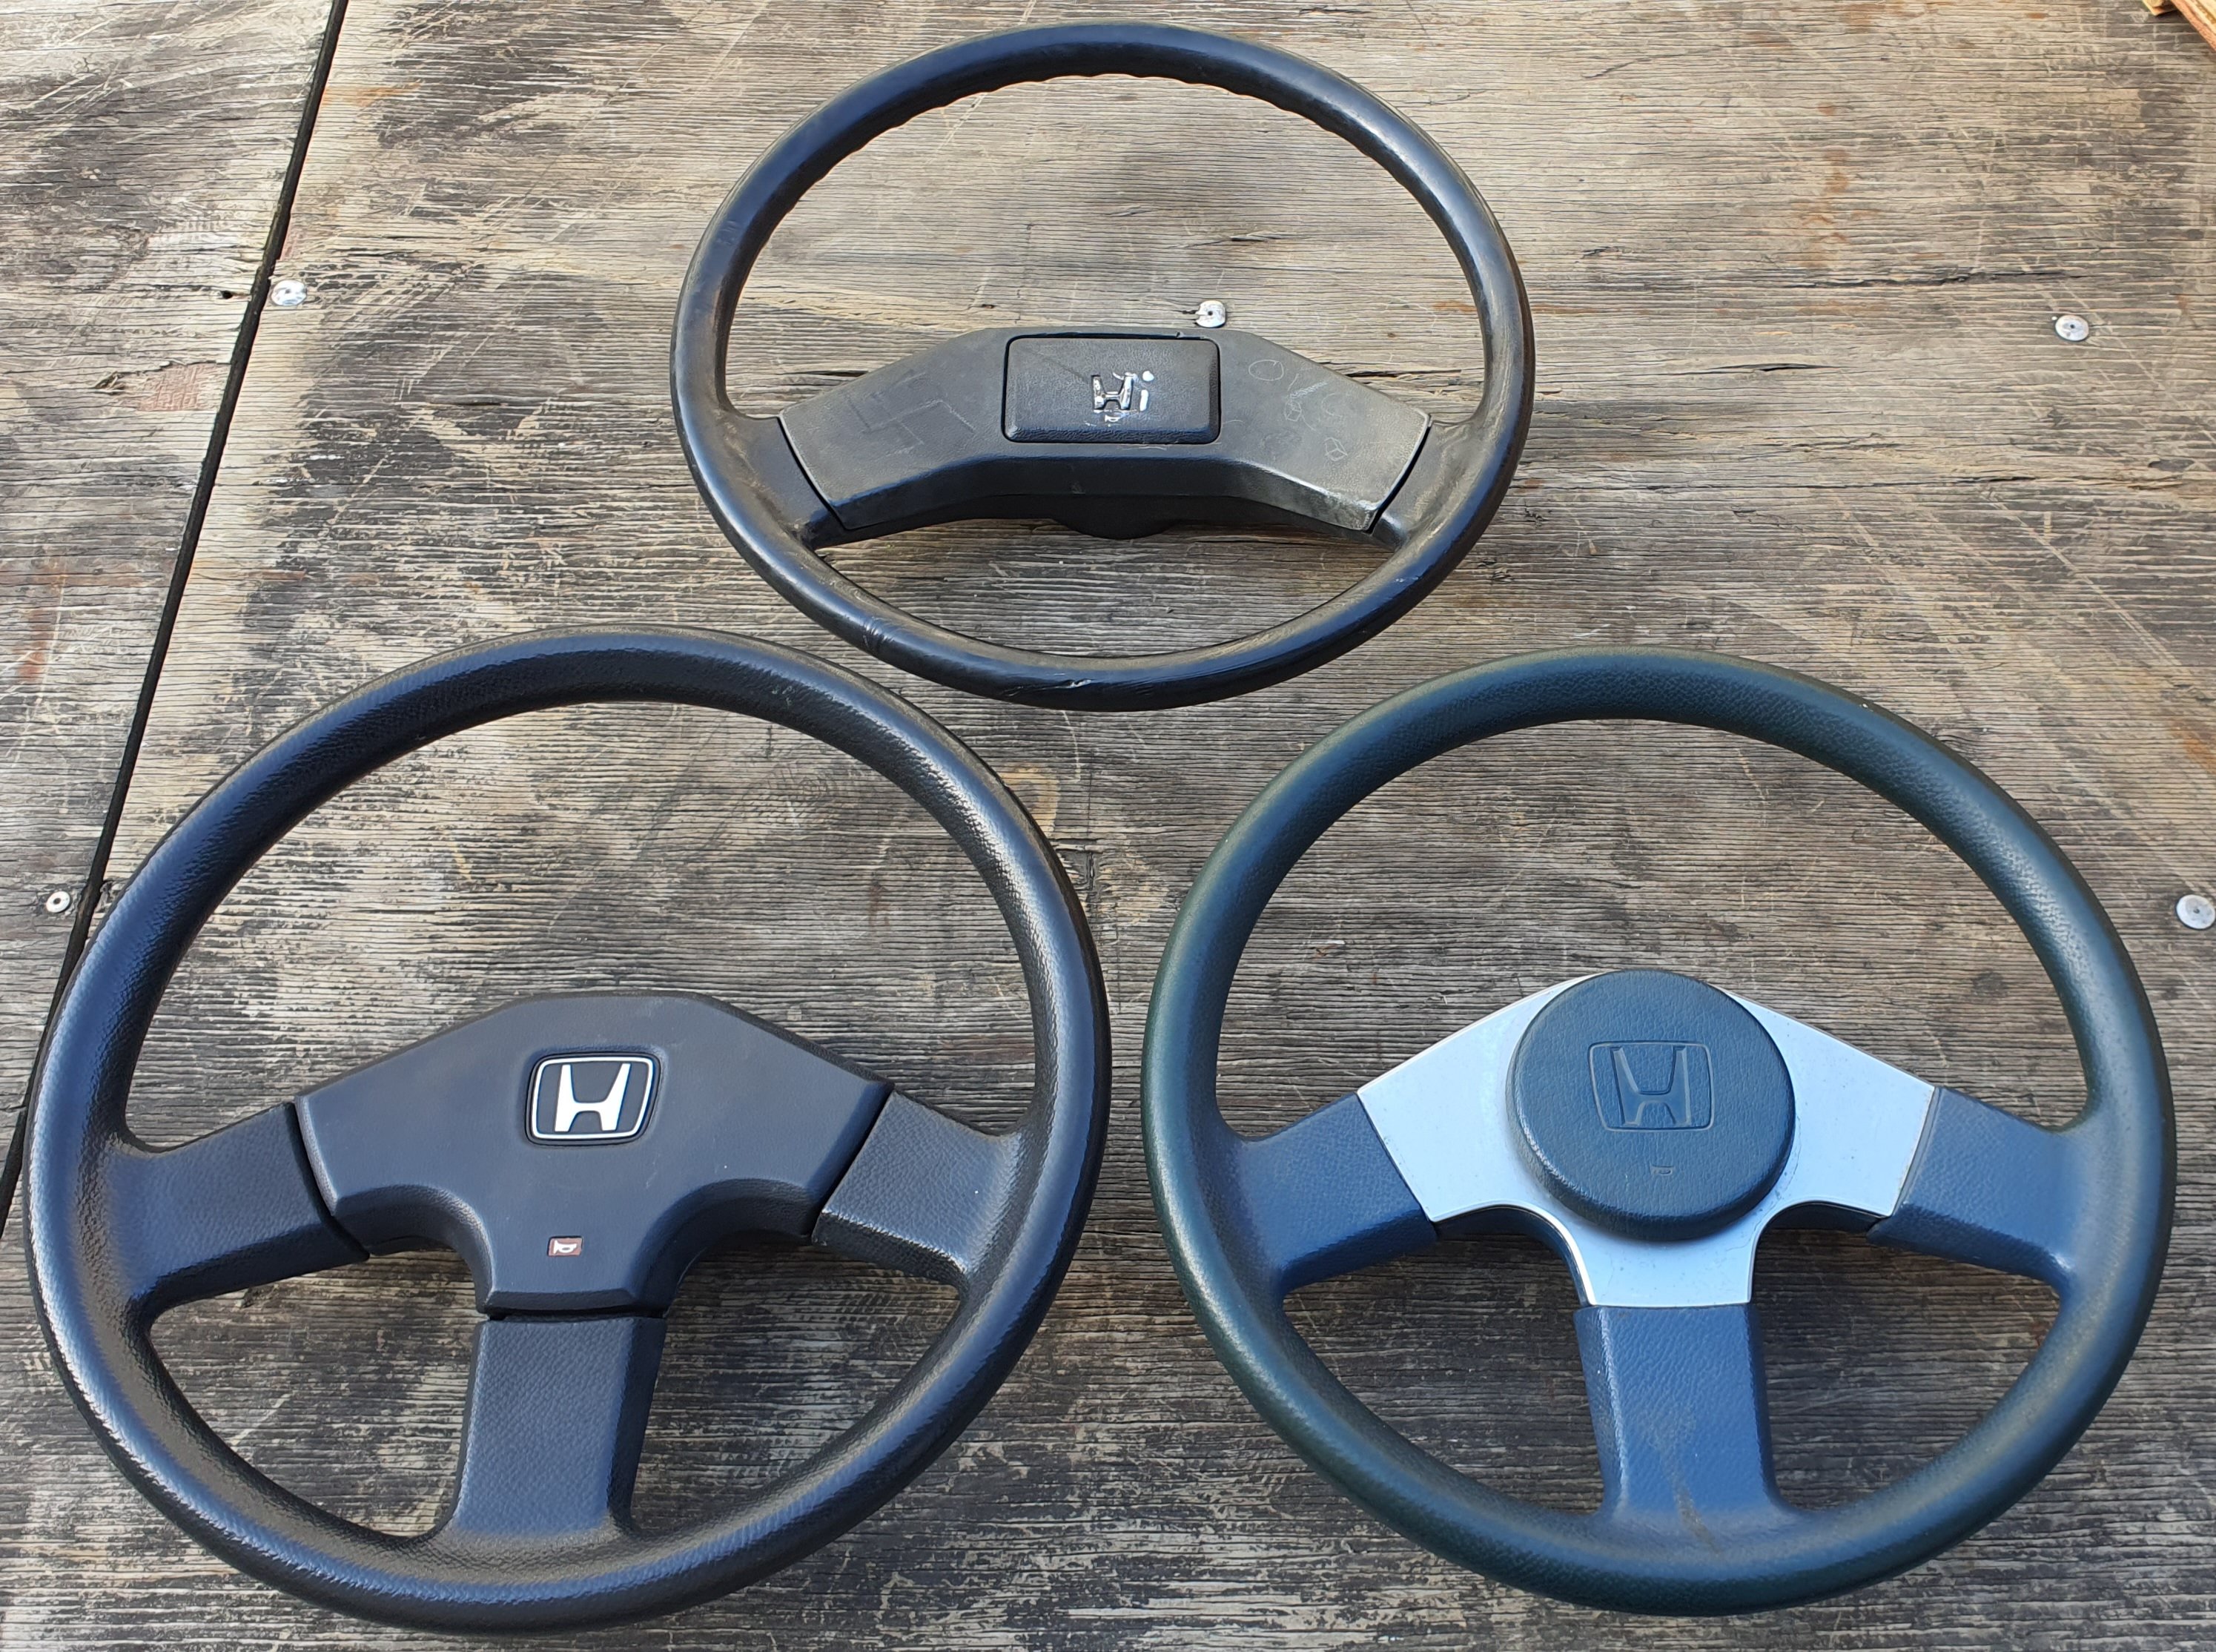
Theres a few stock steering wheel options for the Citys. Top one is standard CityR/CityE and they are a bit boring. I had a Turbo1/Cabriolet wheel (bottom left) and also a the more desireable Turbo2 wheel in my stash but ultimately I'd like to go away from the blue interior, so decided to go with the T1/Cabrio wheel.
-
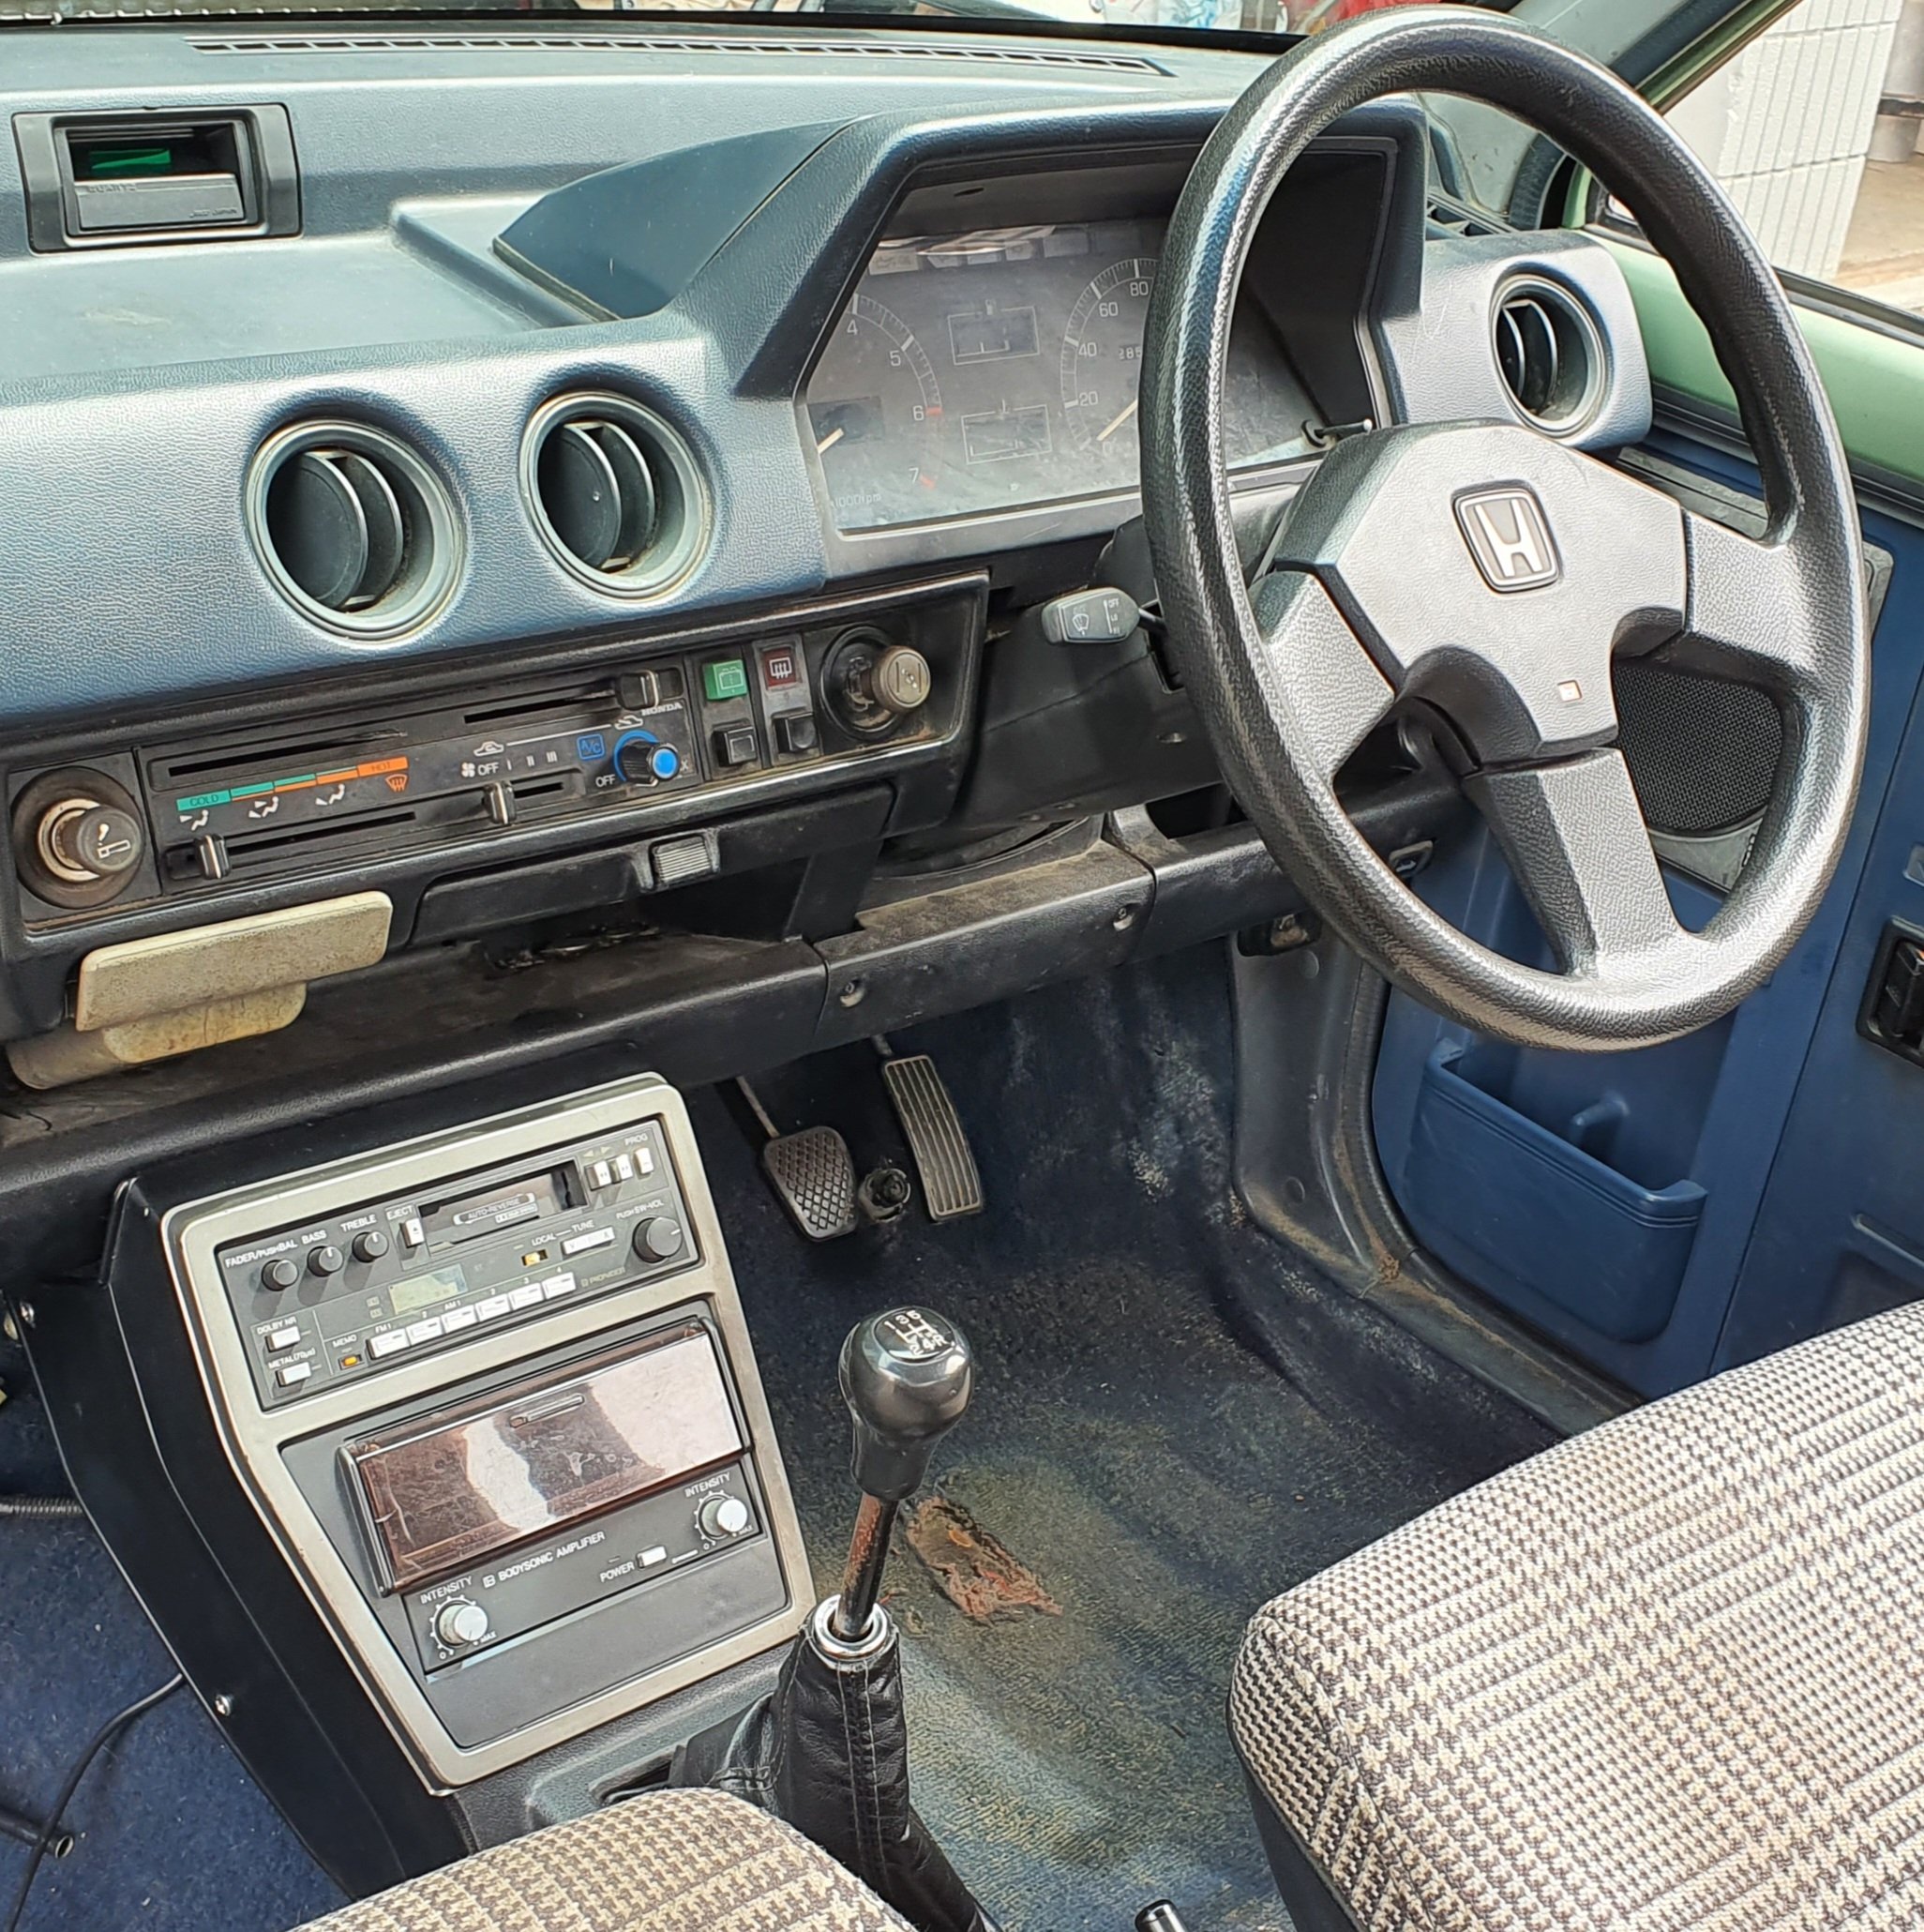
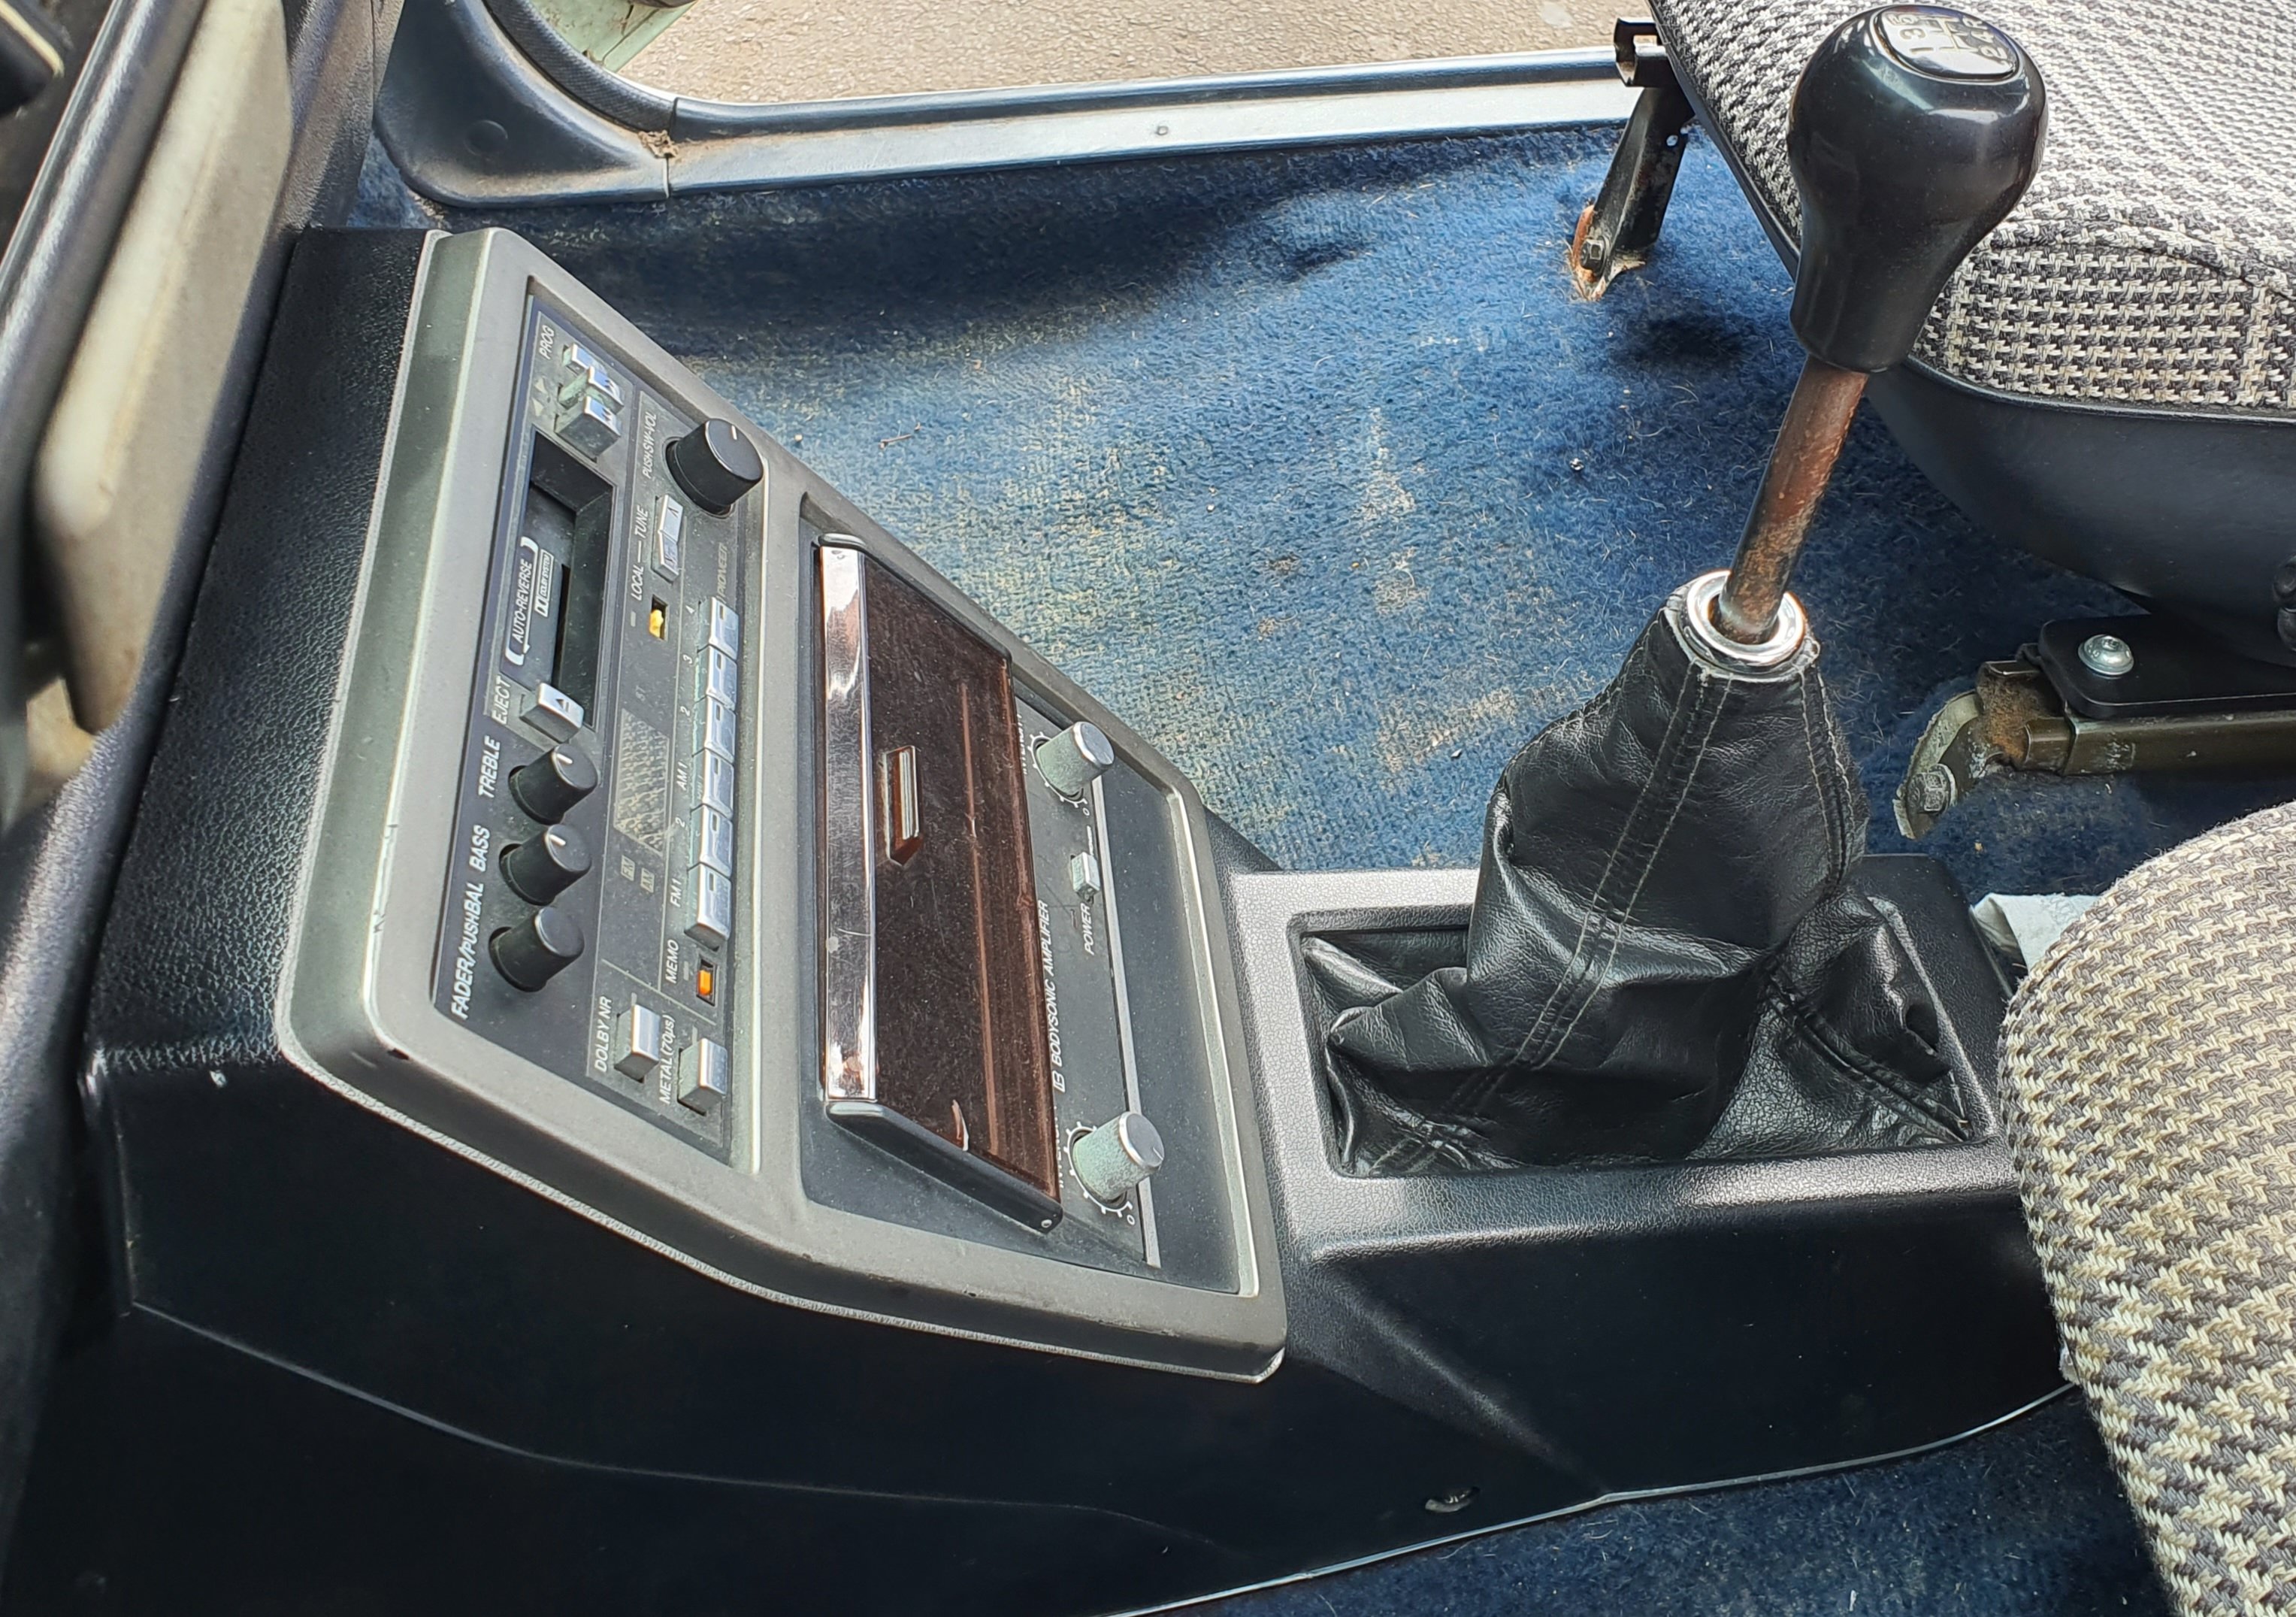
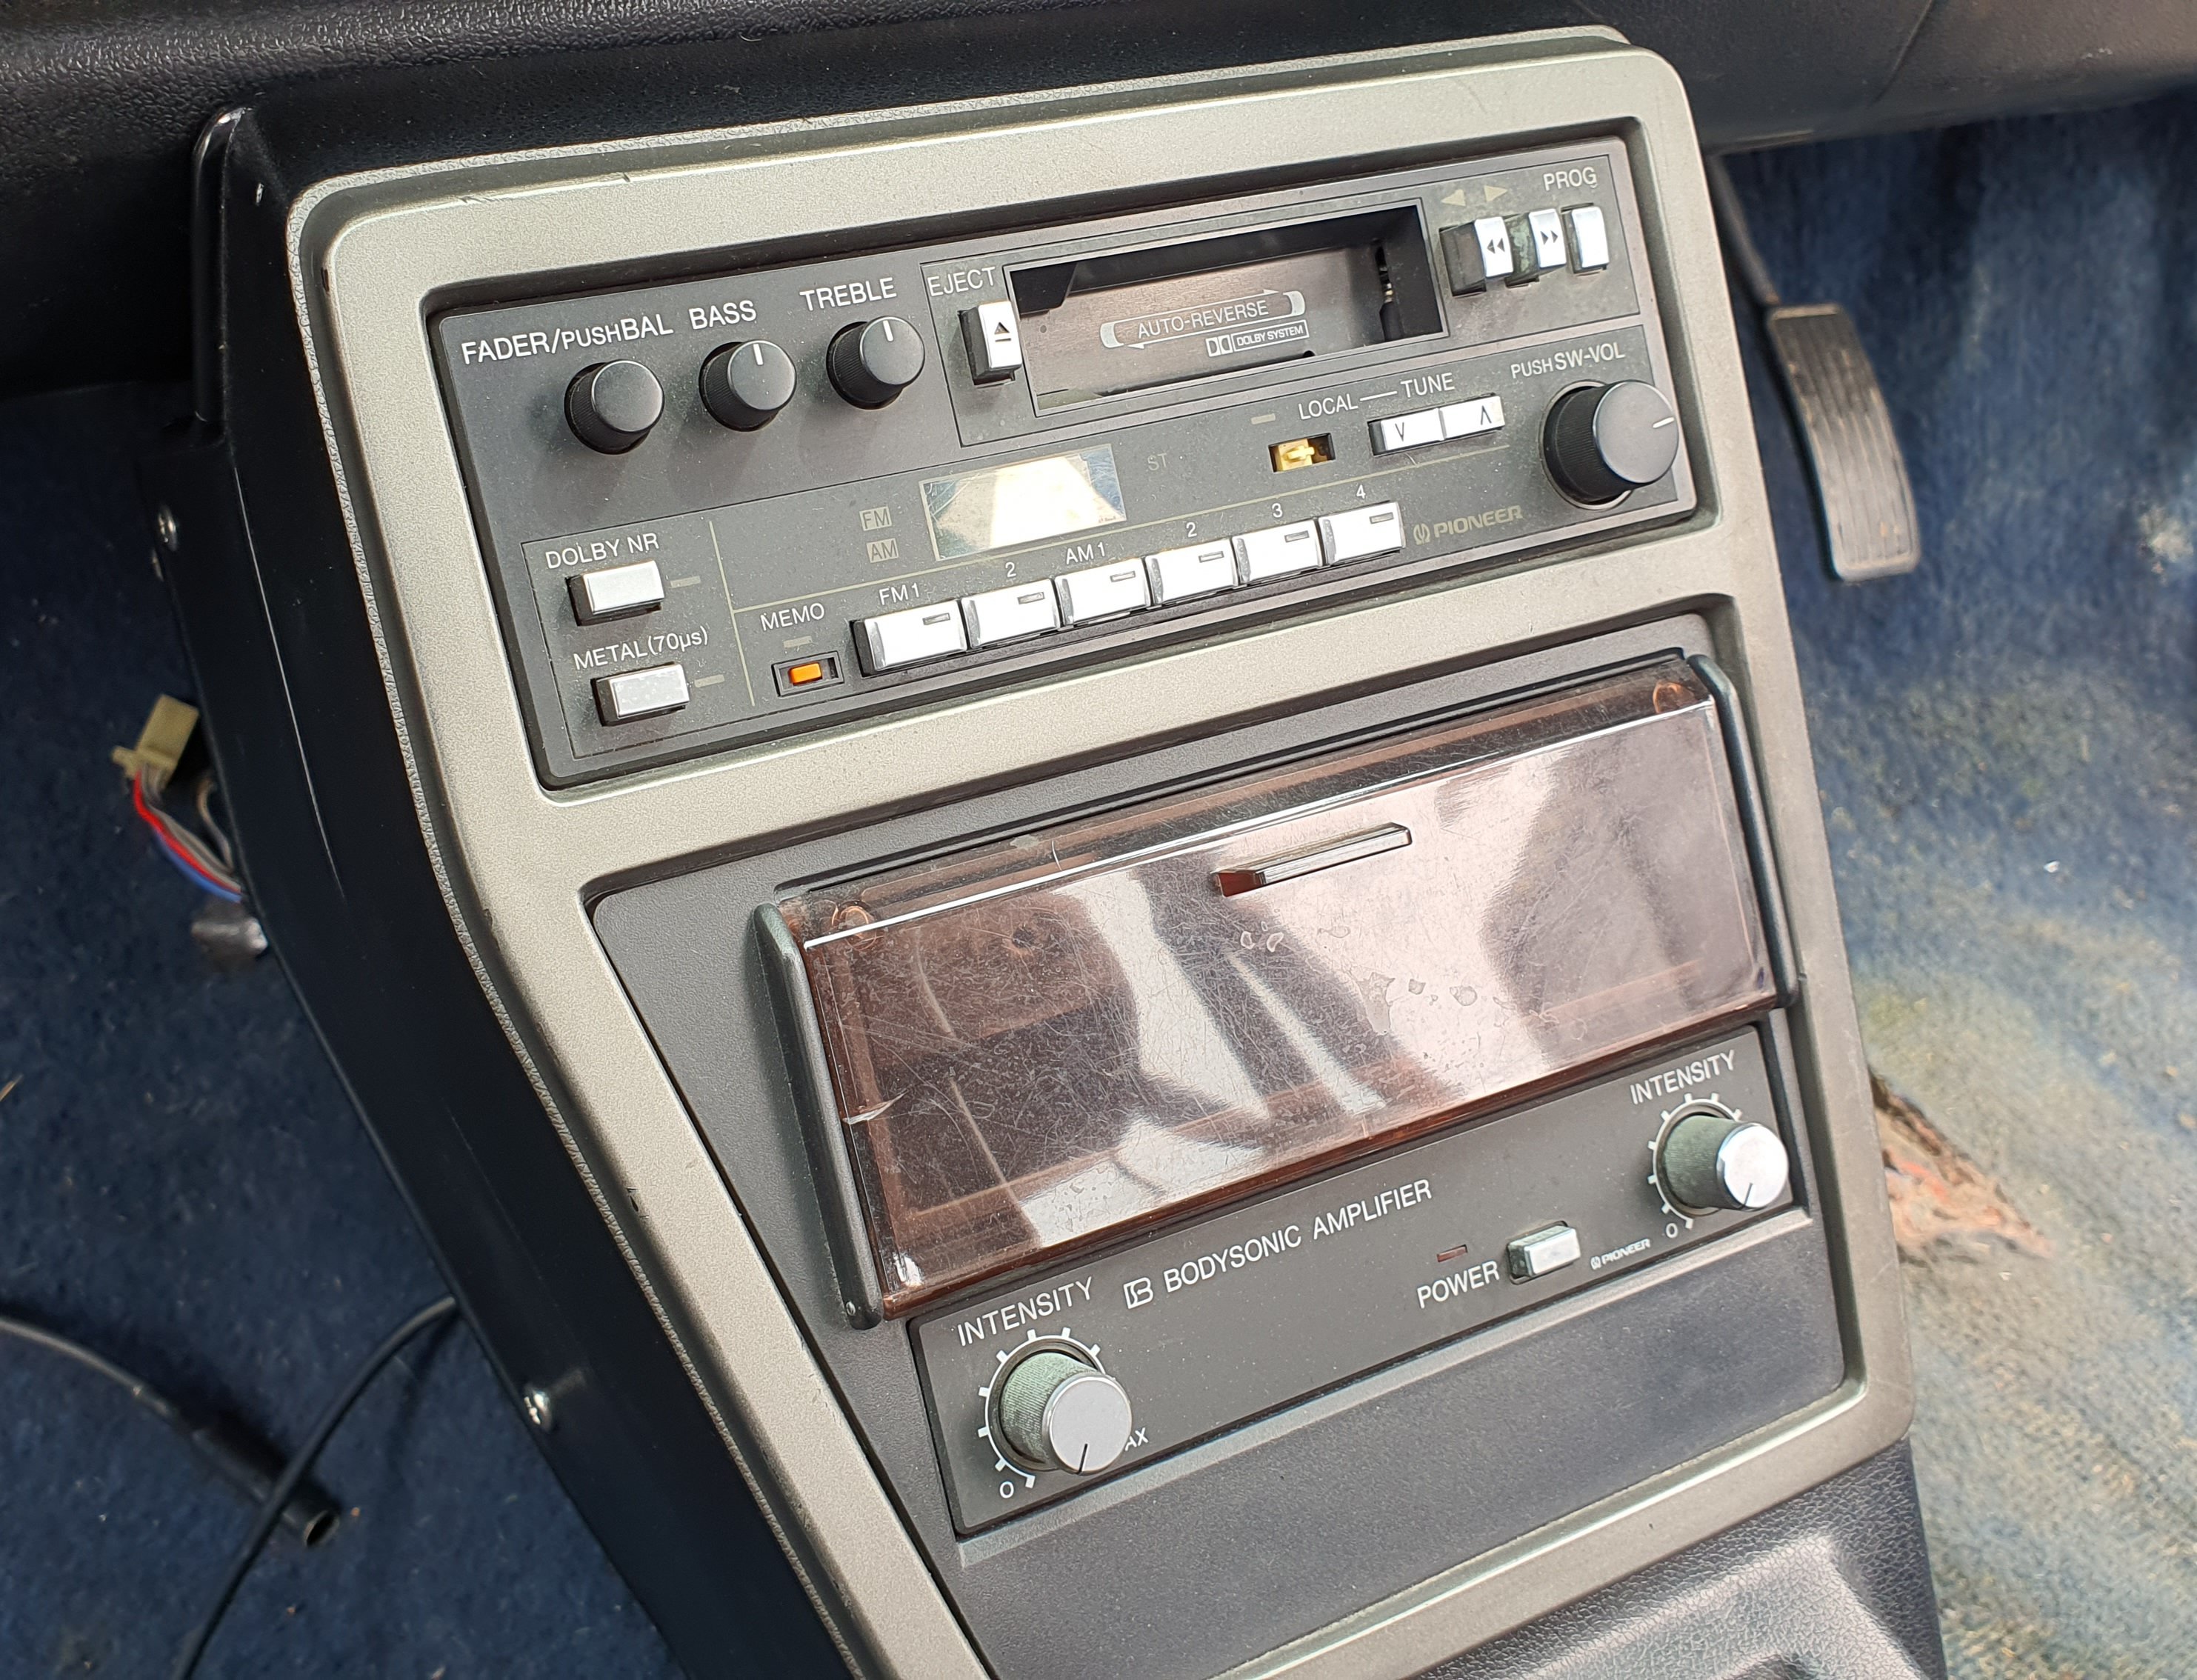
By far the coolest thing I have for it so far is this centre console setup. The consoles themselves are not too hard to get, but the original Cassette deck and Bodysonic controller with storage insert that doesn't have a broken lid are ultra rare having only been an option for a couple of models and and expensive one back then. The were made by Pioneer specifically for the City. I snagged this setup complete off Yahoo in Japan. Its not wired in yet, but I'l be getting onto that soon.
- 178 replies
-
- 12
-
-
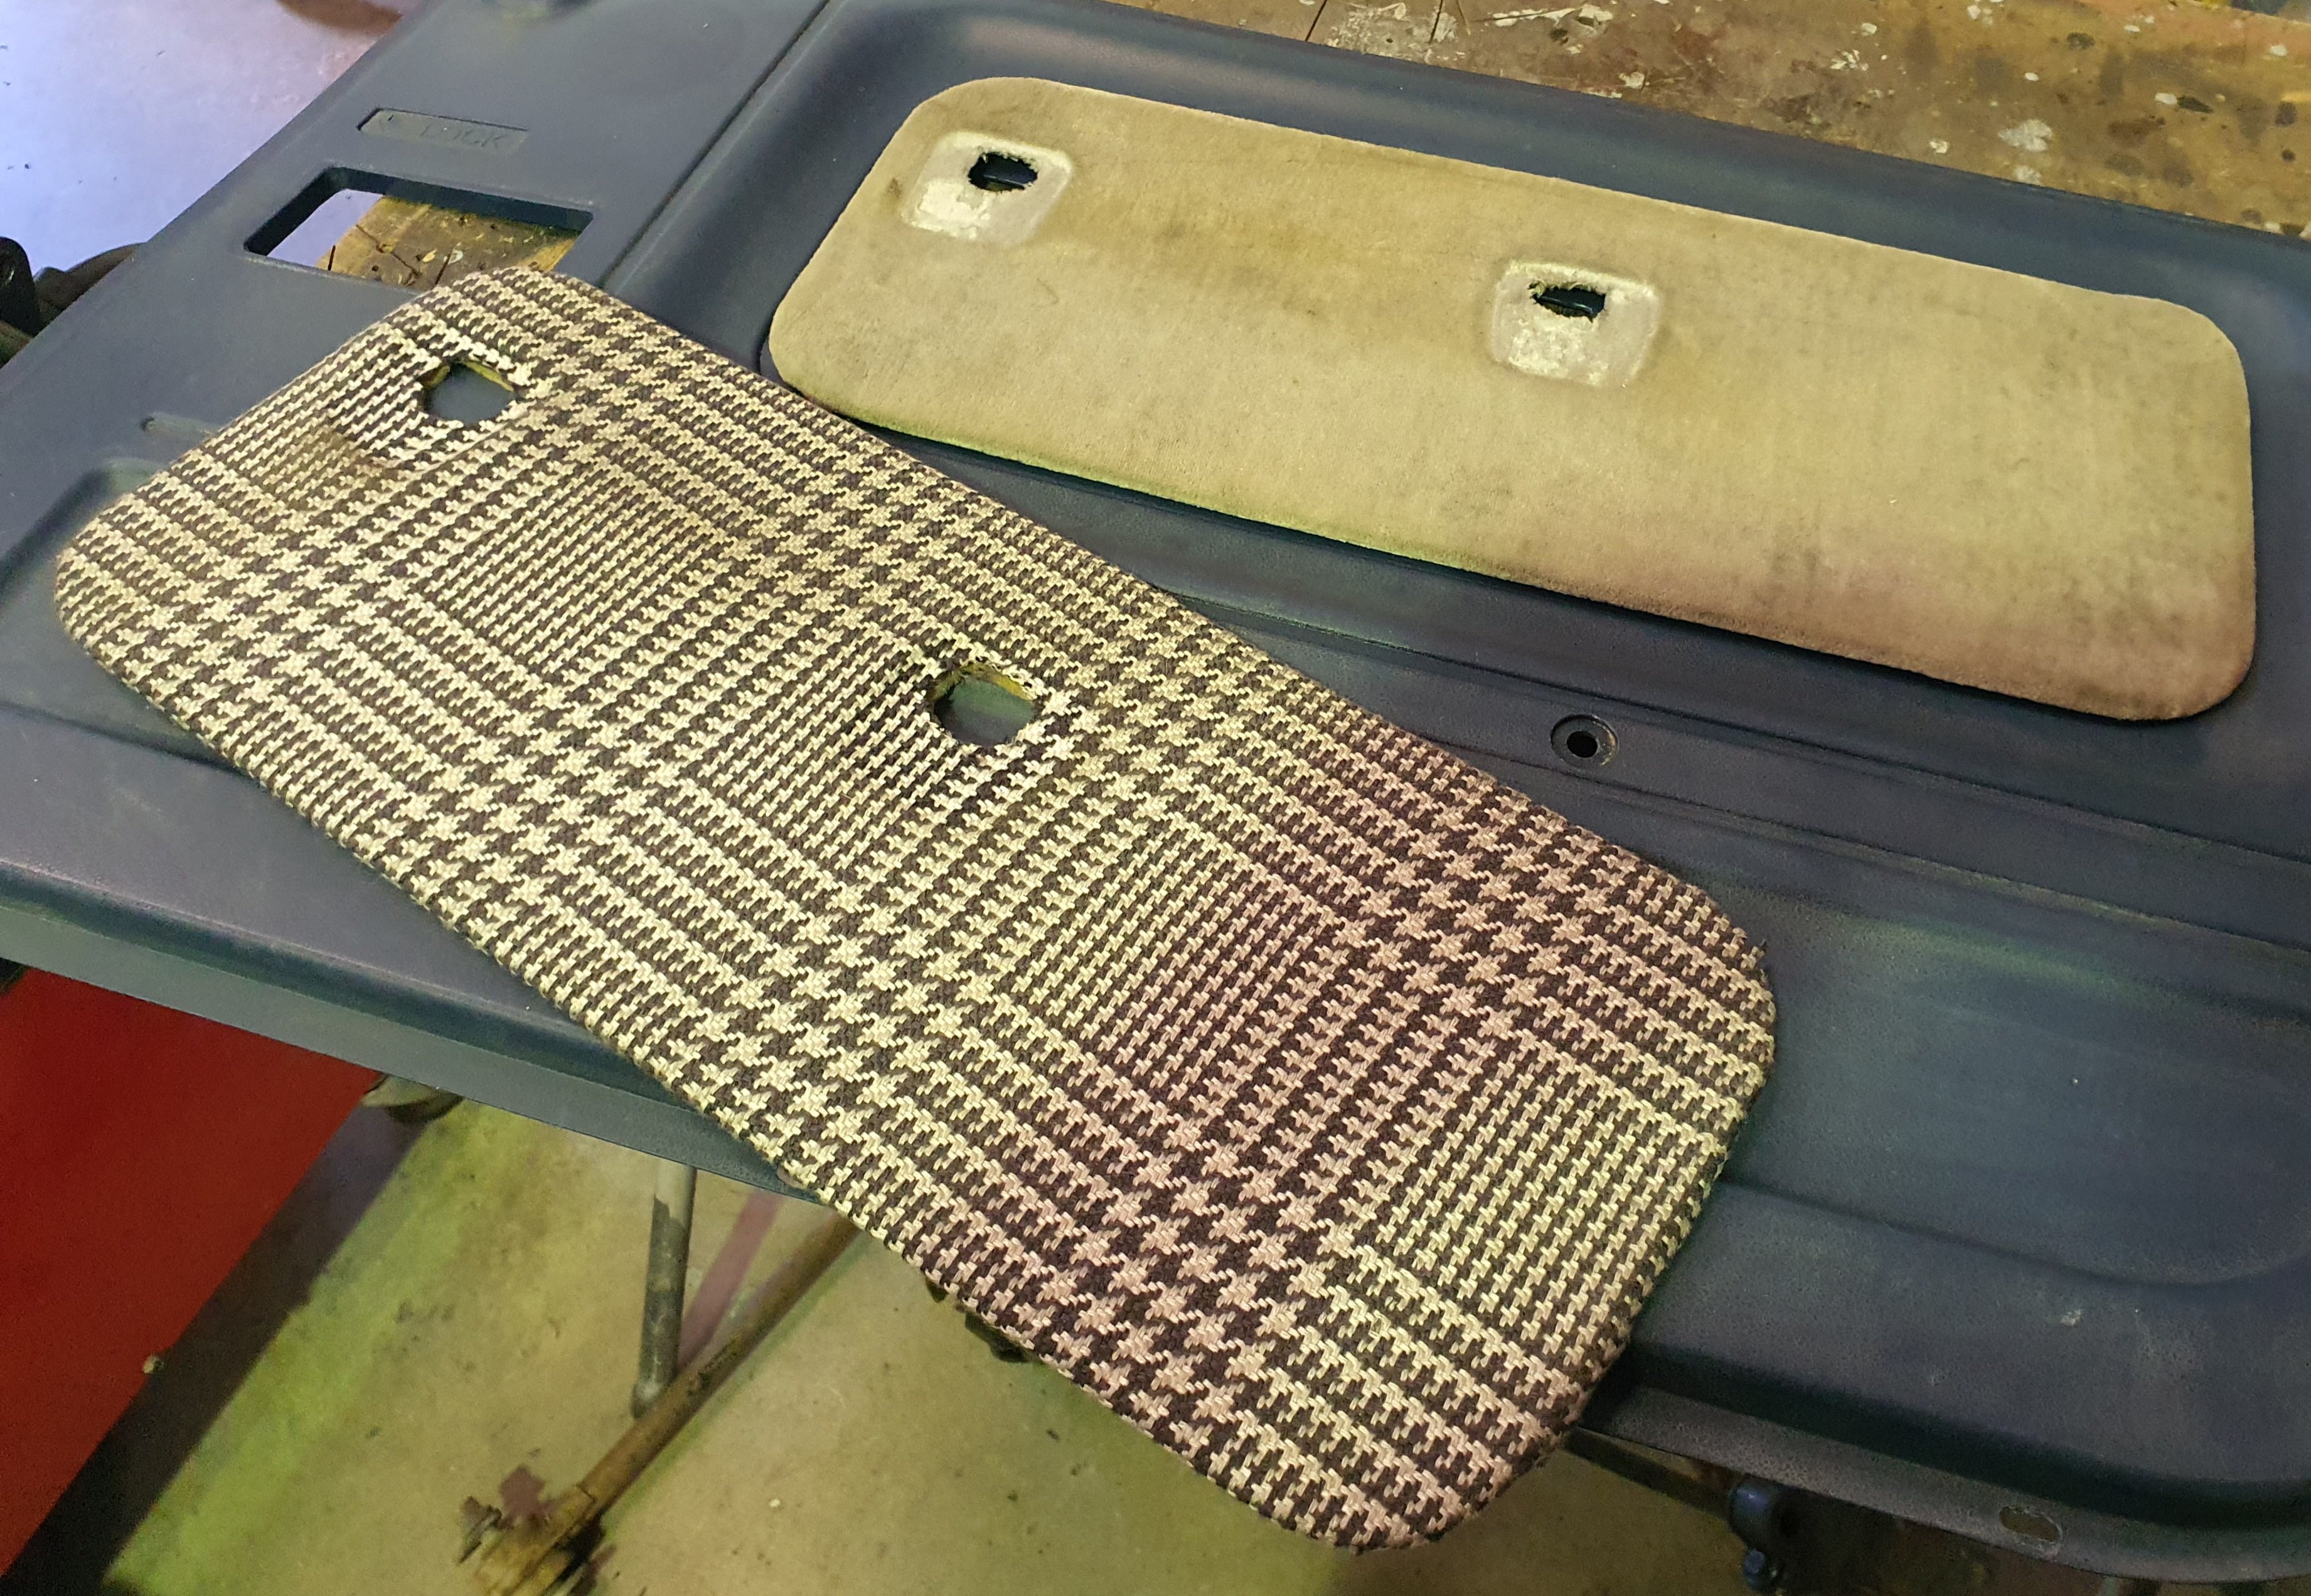
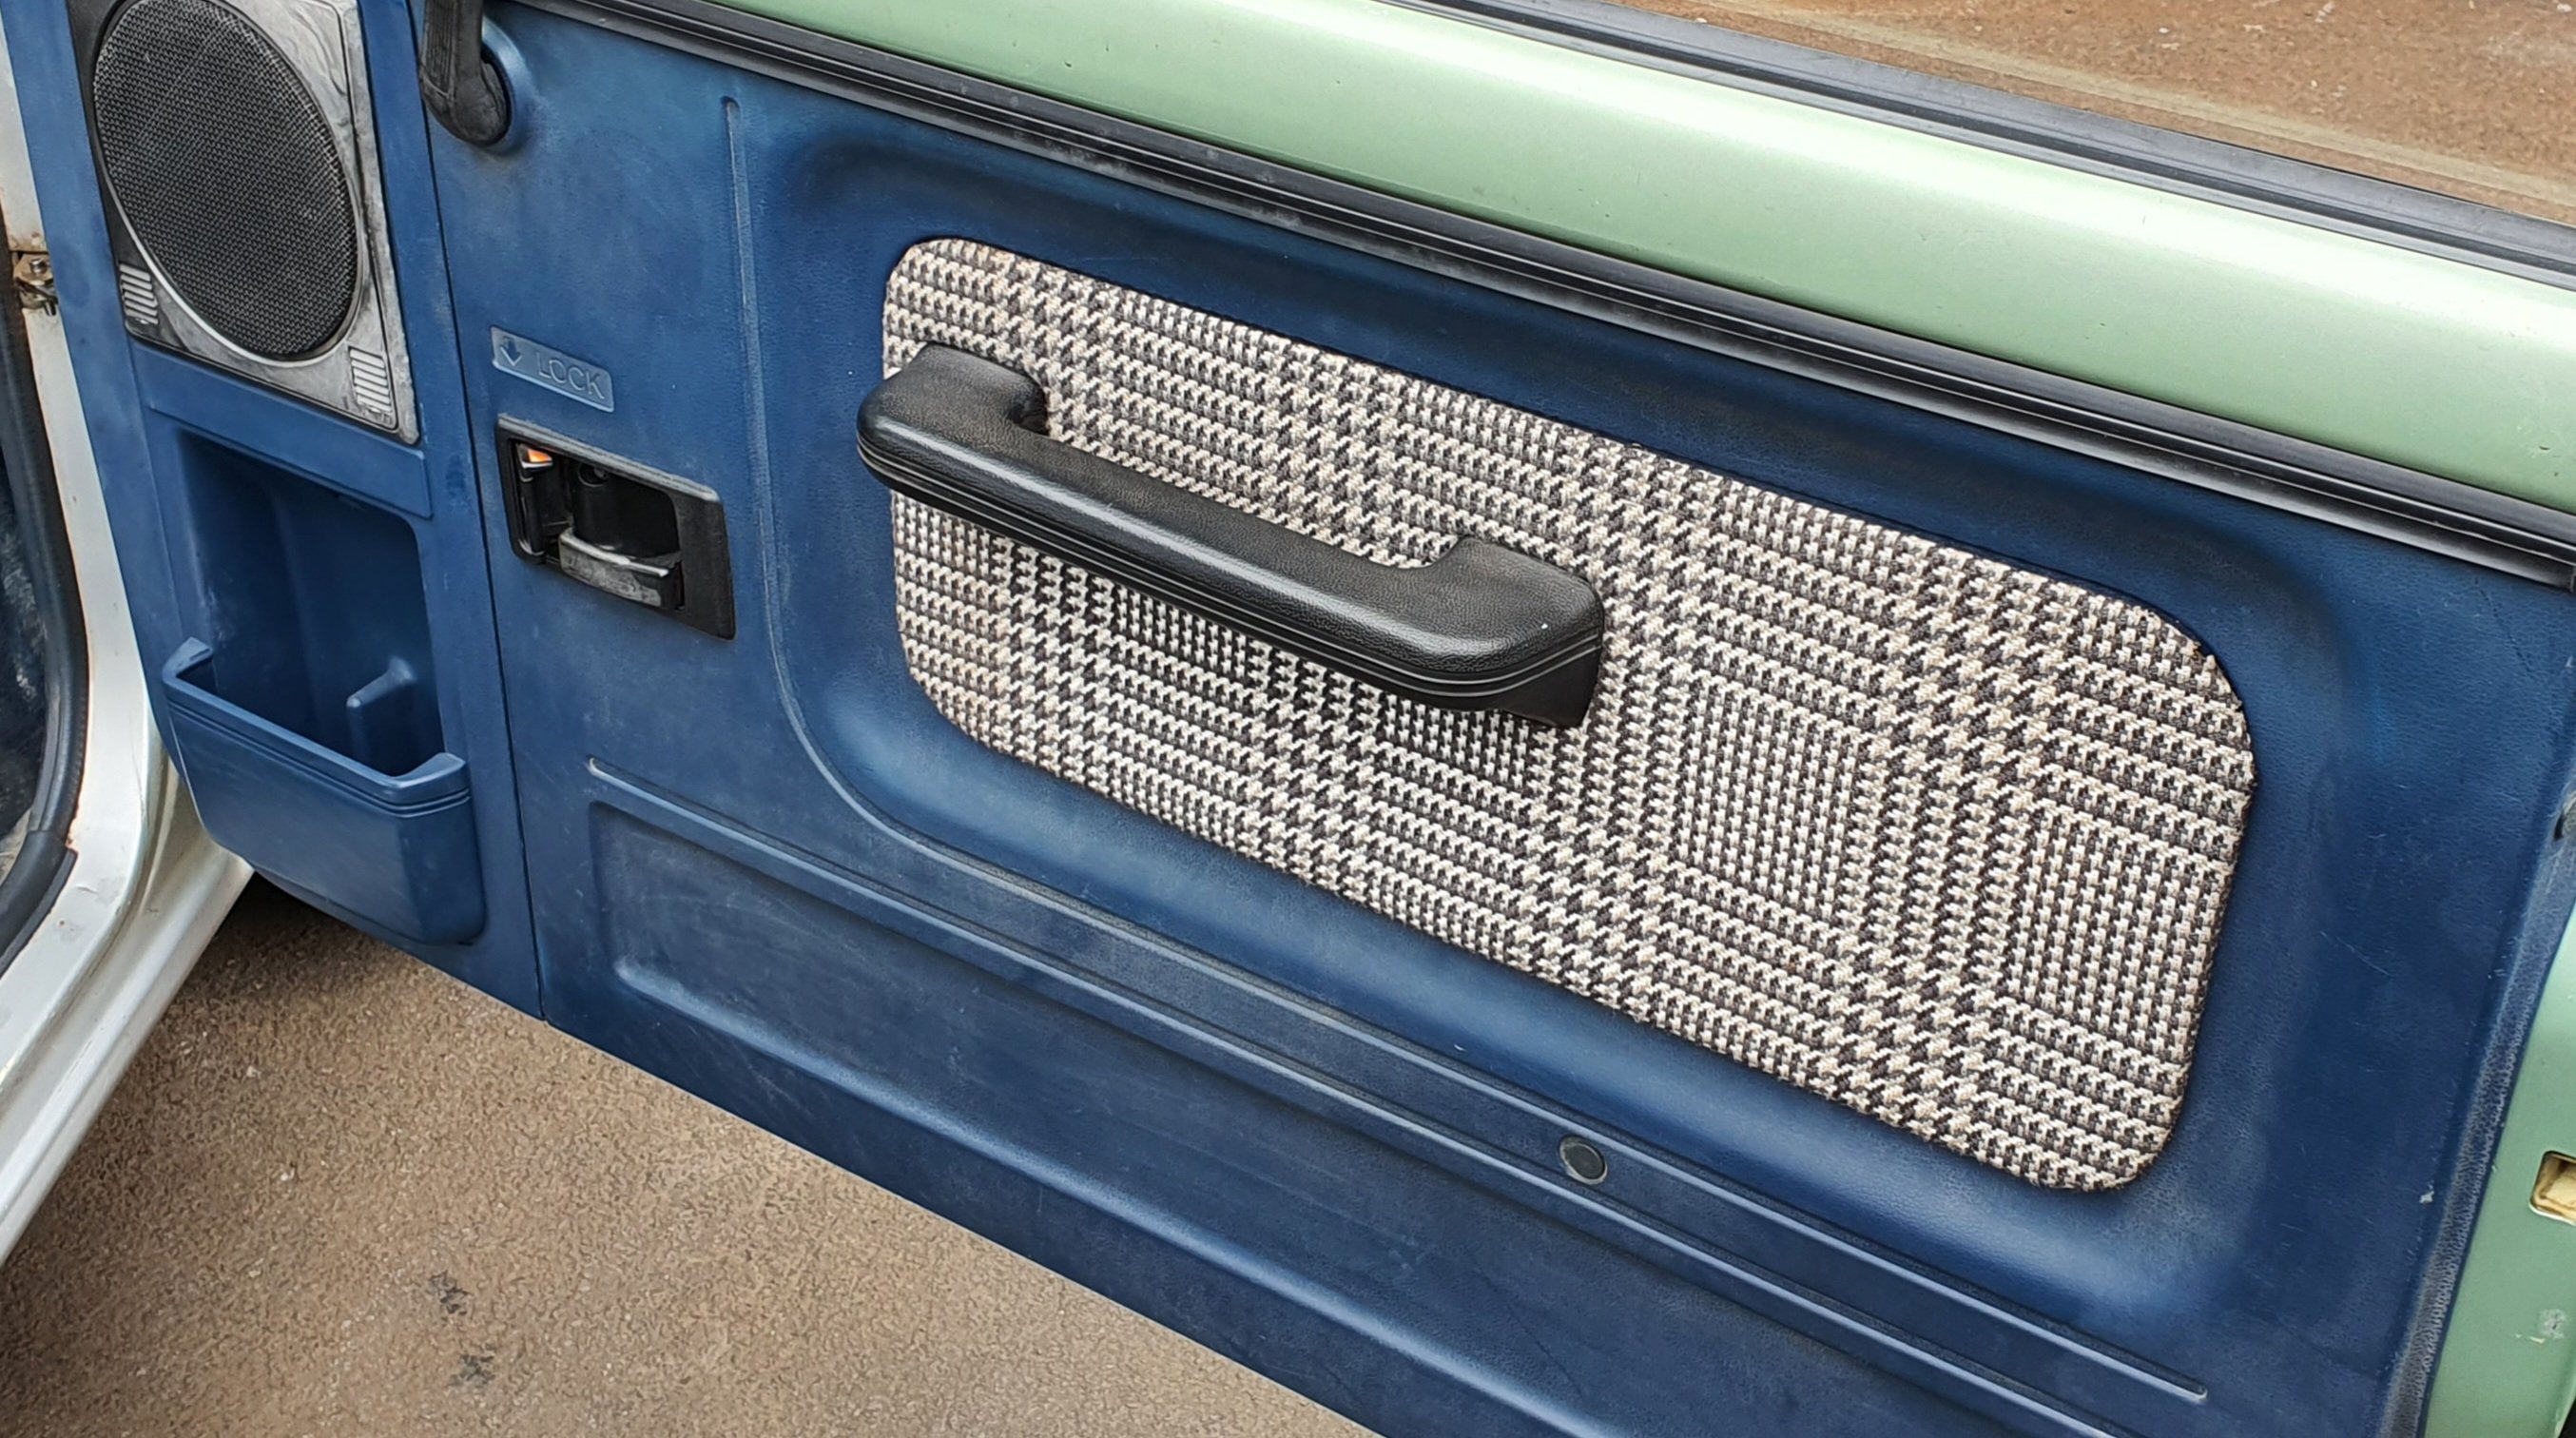
Majority of Citys have a plain plastic inner door panel. The Cabriolet and Turbo2 have insert the break up the pov spec. I had some Turbo2 panels with the plain white insert, but managed to score a pair of Cabrio inserts from a fella wrecking one. Got them swapped over and the panels refitted to doors. Heaps more betterer.
-
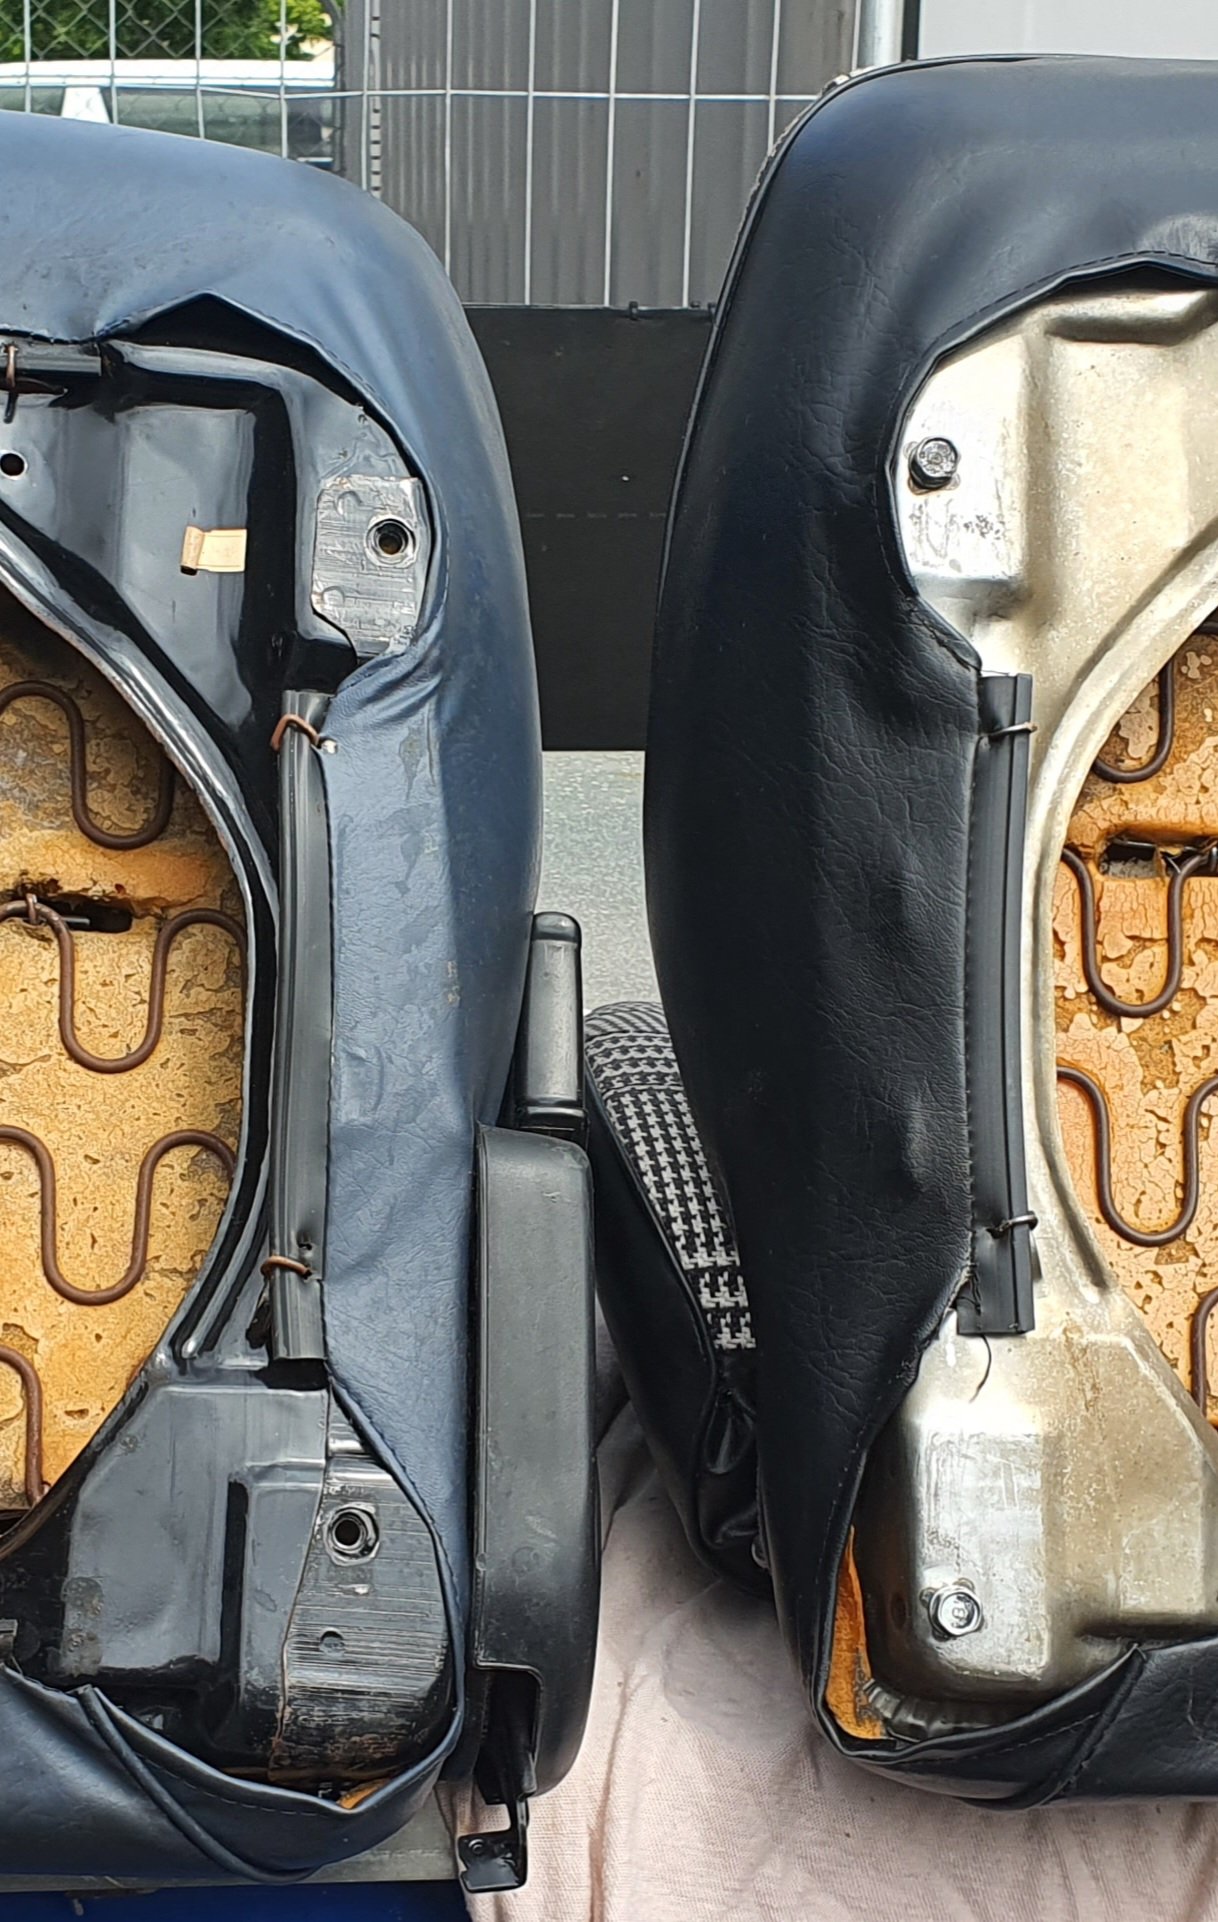
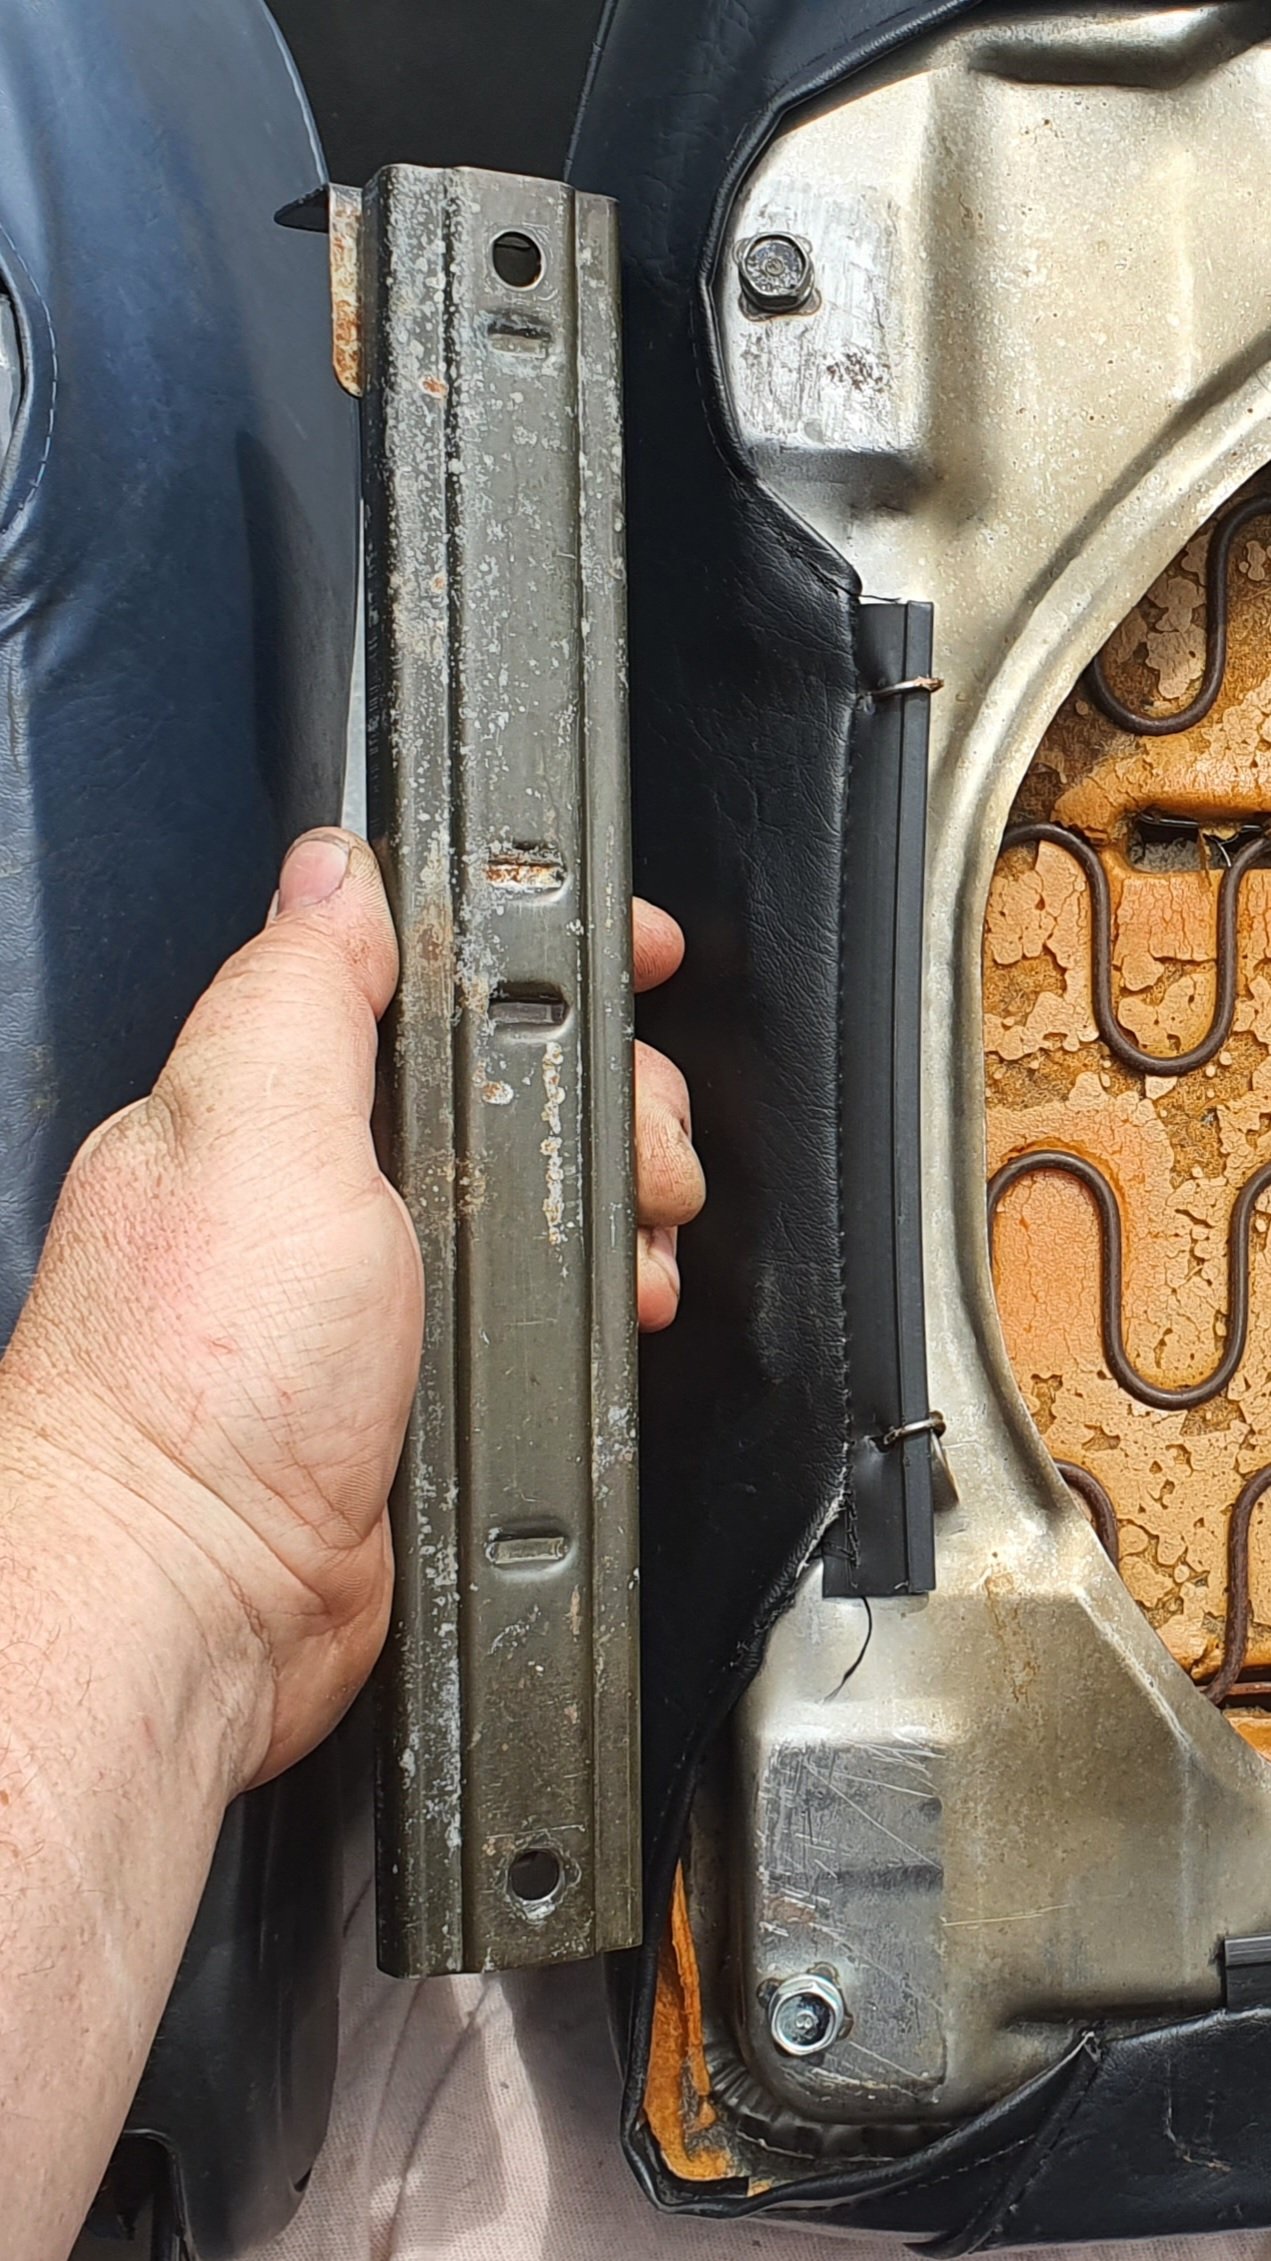
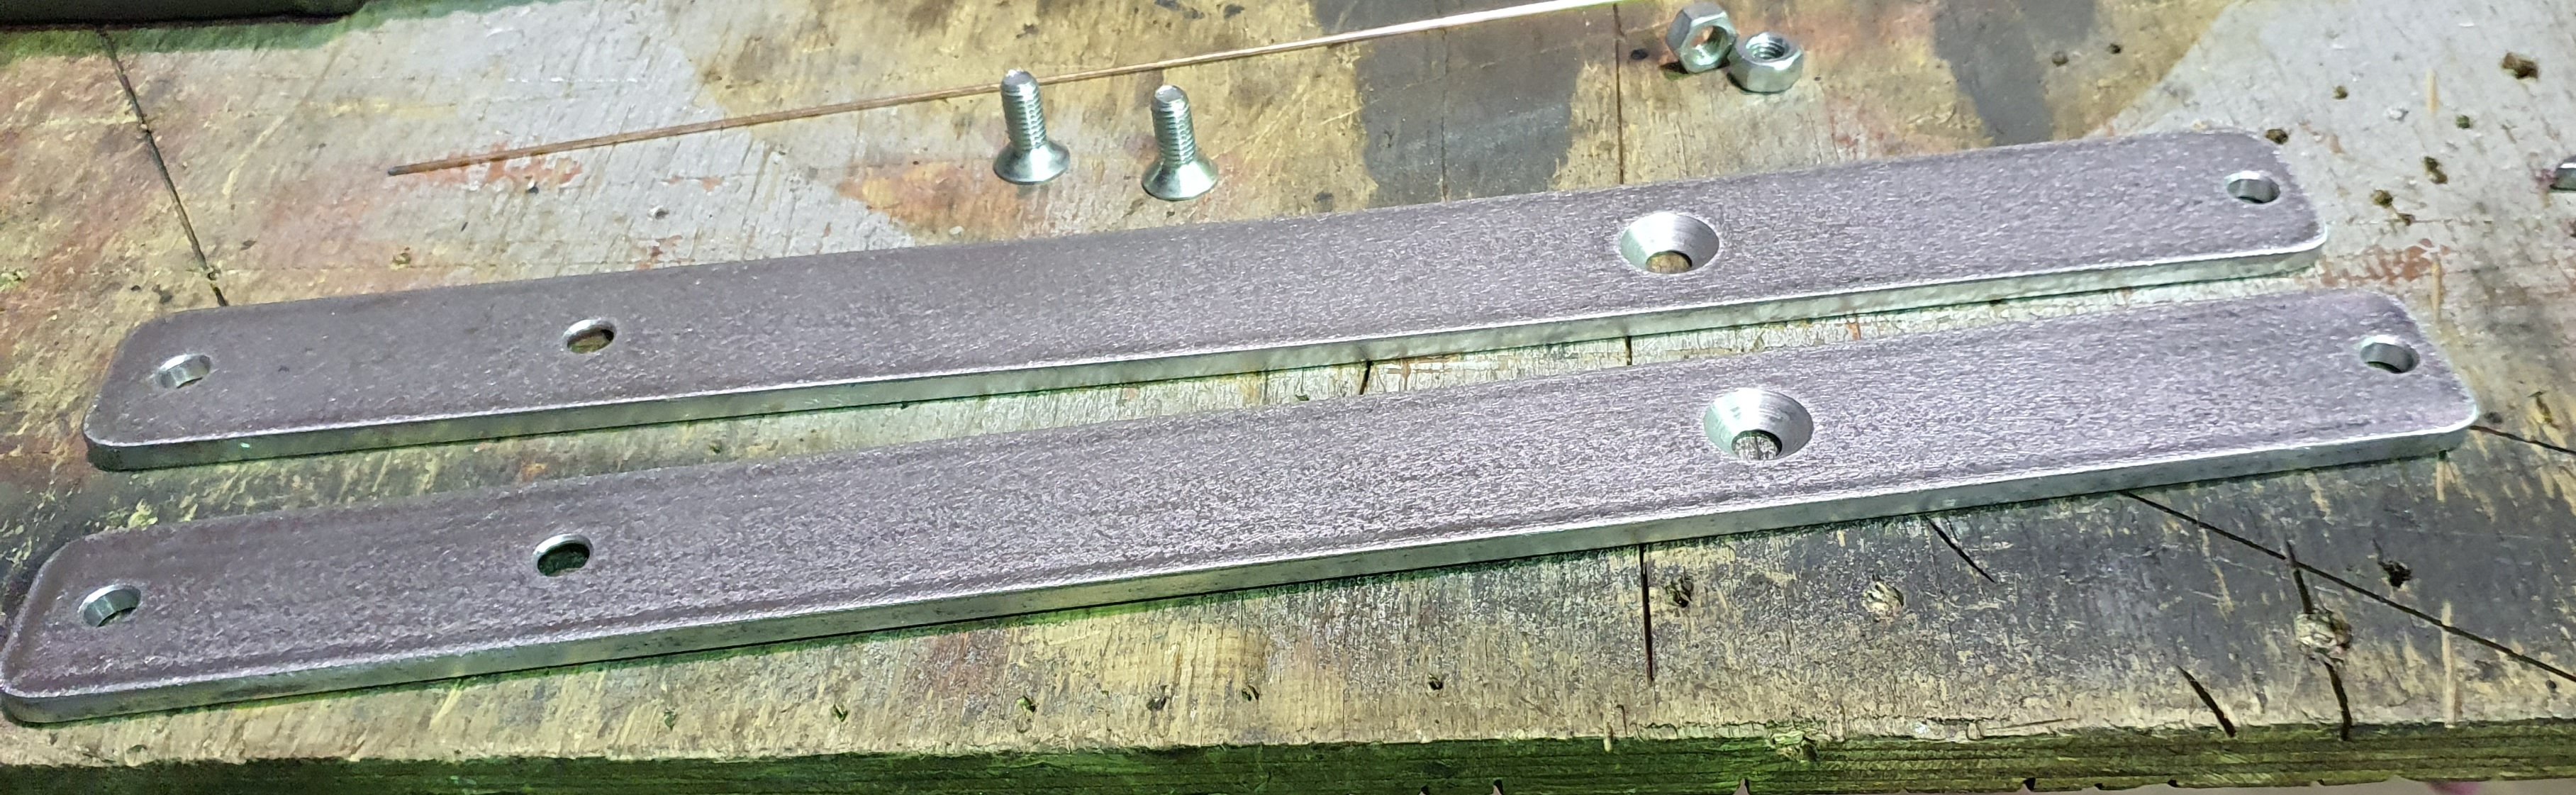
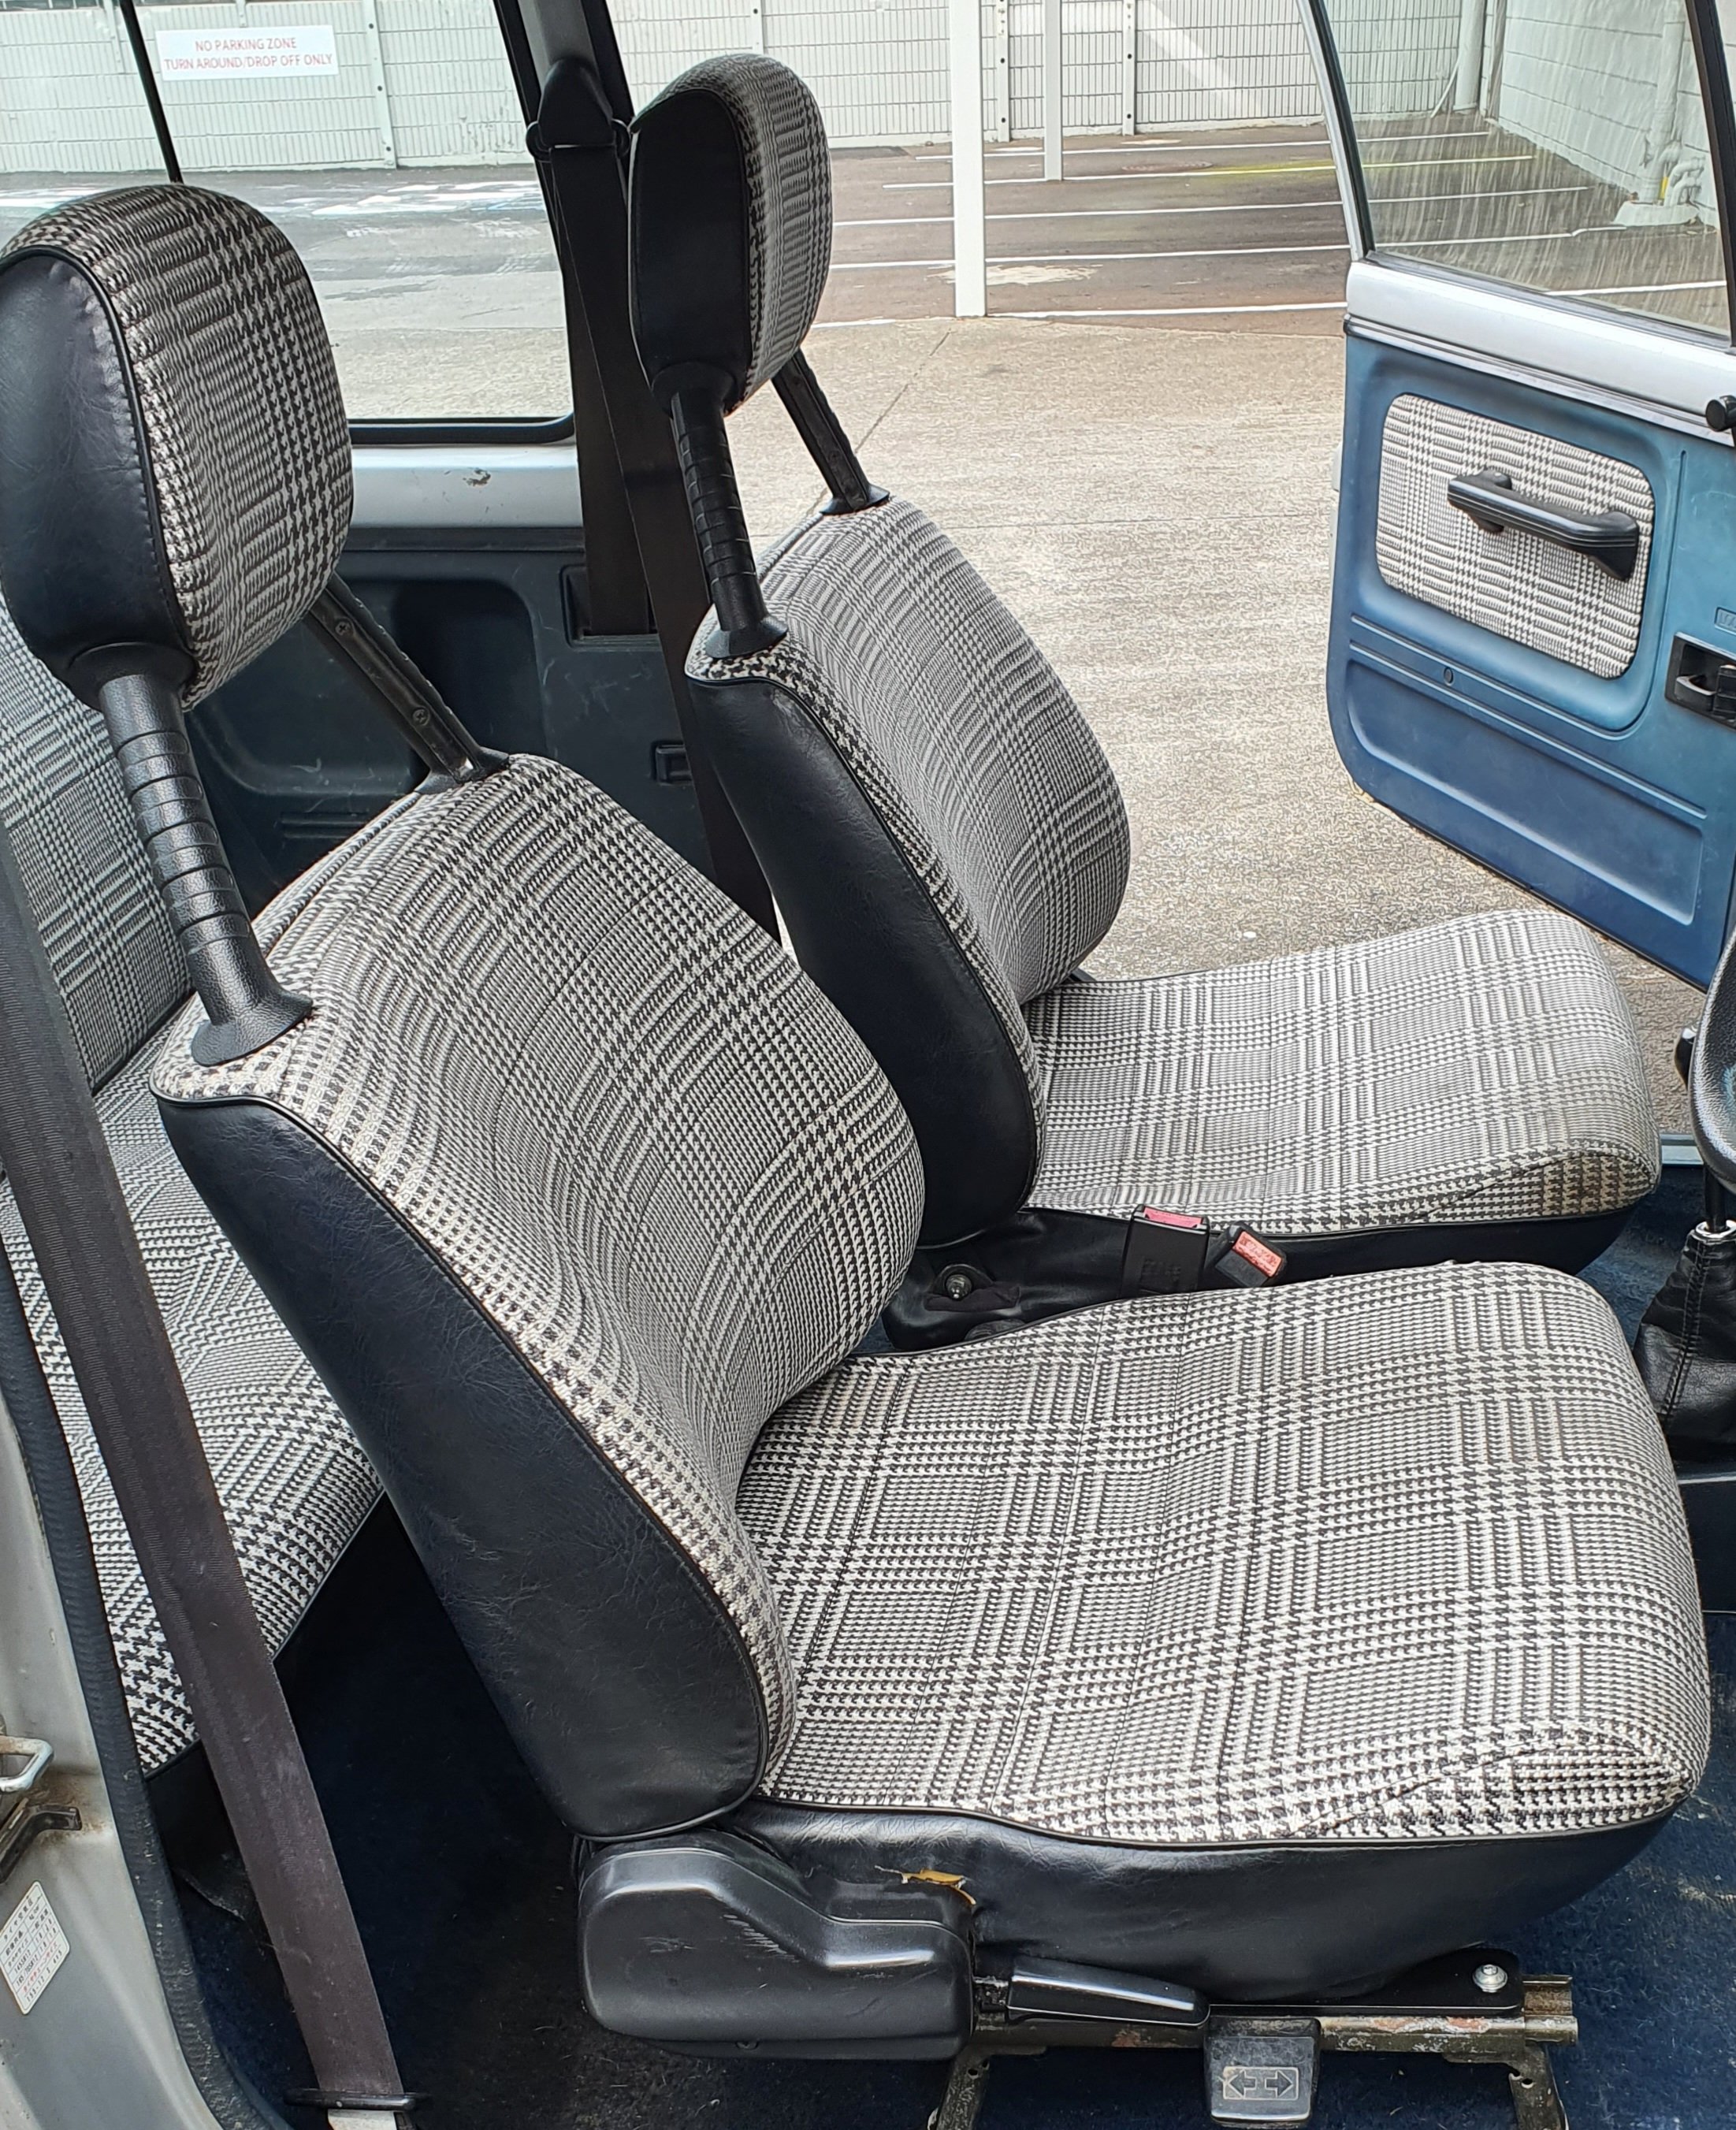
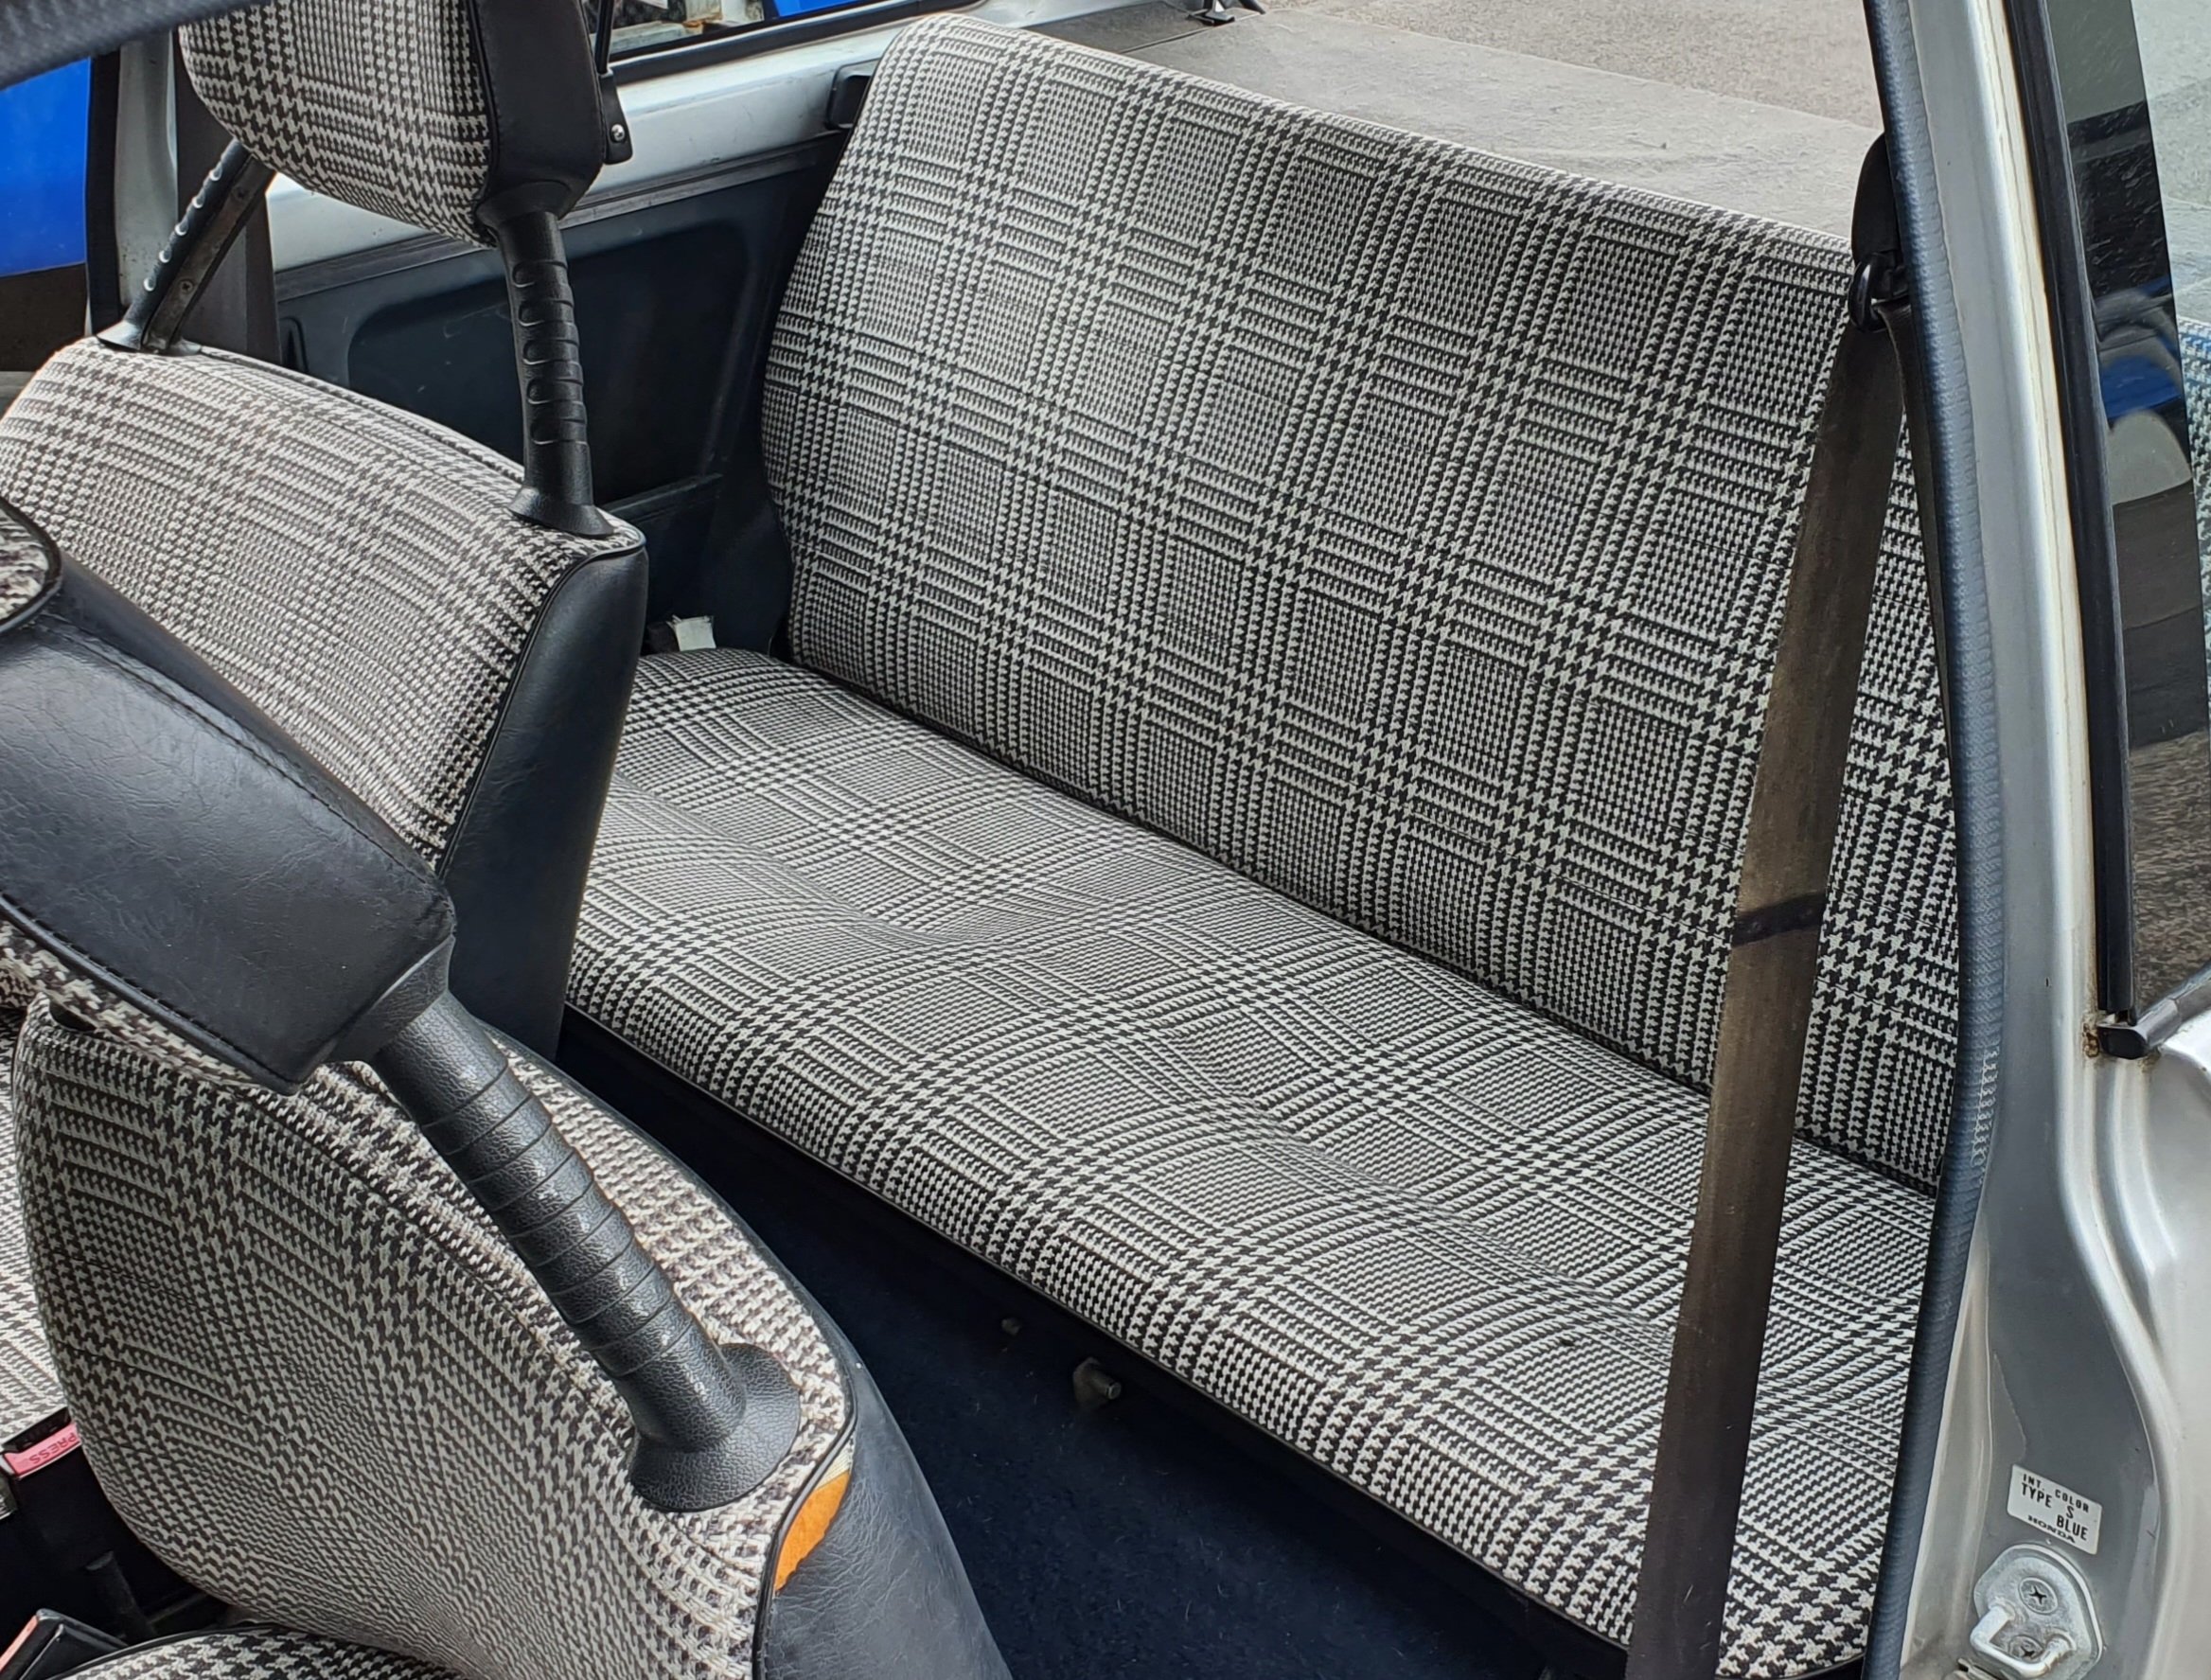
Something I didn't anticipate was the Houndstooth seats having a different rear captive nut location and I never got rails with them and of course the stock manhattan rails were shorter between centres. Its about 40mm furthur back. Fuck knows why Honda did this, maybe its a year thing. I checked the rails in the blue car but they didn't work either. I figured I'd adapt them, but only had enough material to do one side. Seeing as I'm a fatty, I decided to kick the drivers seat back a bit so factored that into my adaptors. The passengers I just drilled the seat base and put a nut on the back for now. I'l revisit this soon as seats need to come back out to be steam cleaned.
-
I had been on the hunt for a set of Houndstooth pattern seats for a while. They were only offered in the CityU, which was a oddball sub-model, and the Cabriolet, which had a different headrest. @Pininfarina /Coby from Wellington listed his old CityU for sale a number of years ago and I managed to work a deal for the seats with him before he sold it and I've had them stashed since. They are not in perfect condition, but are perfect for the era. I'm stoked with them.
-
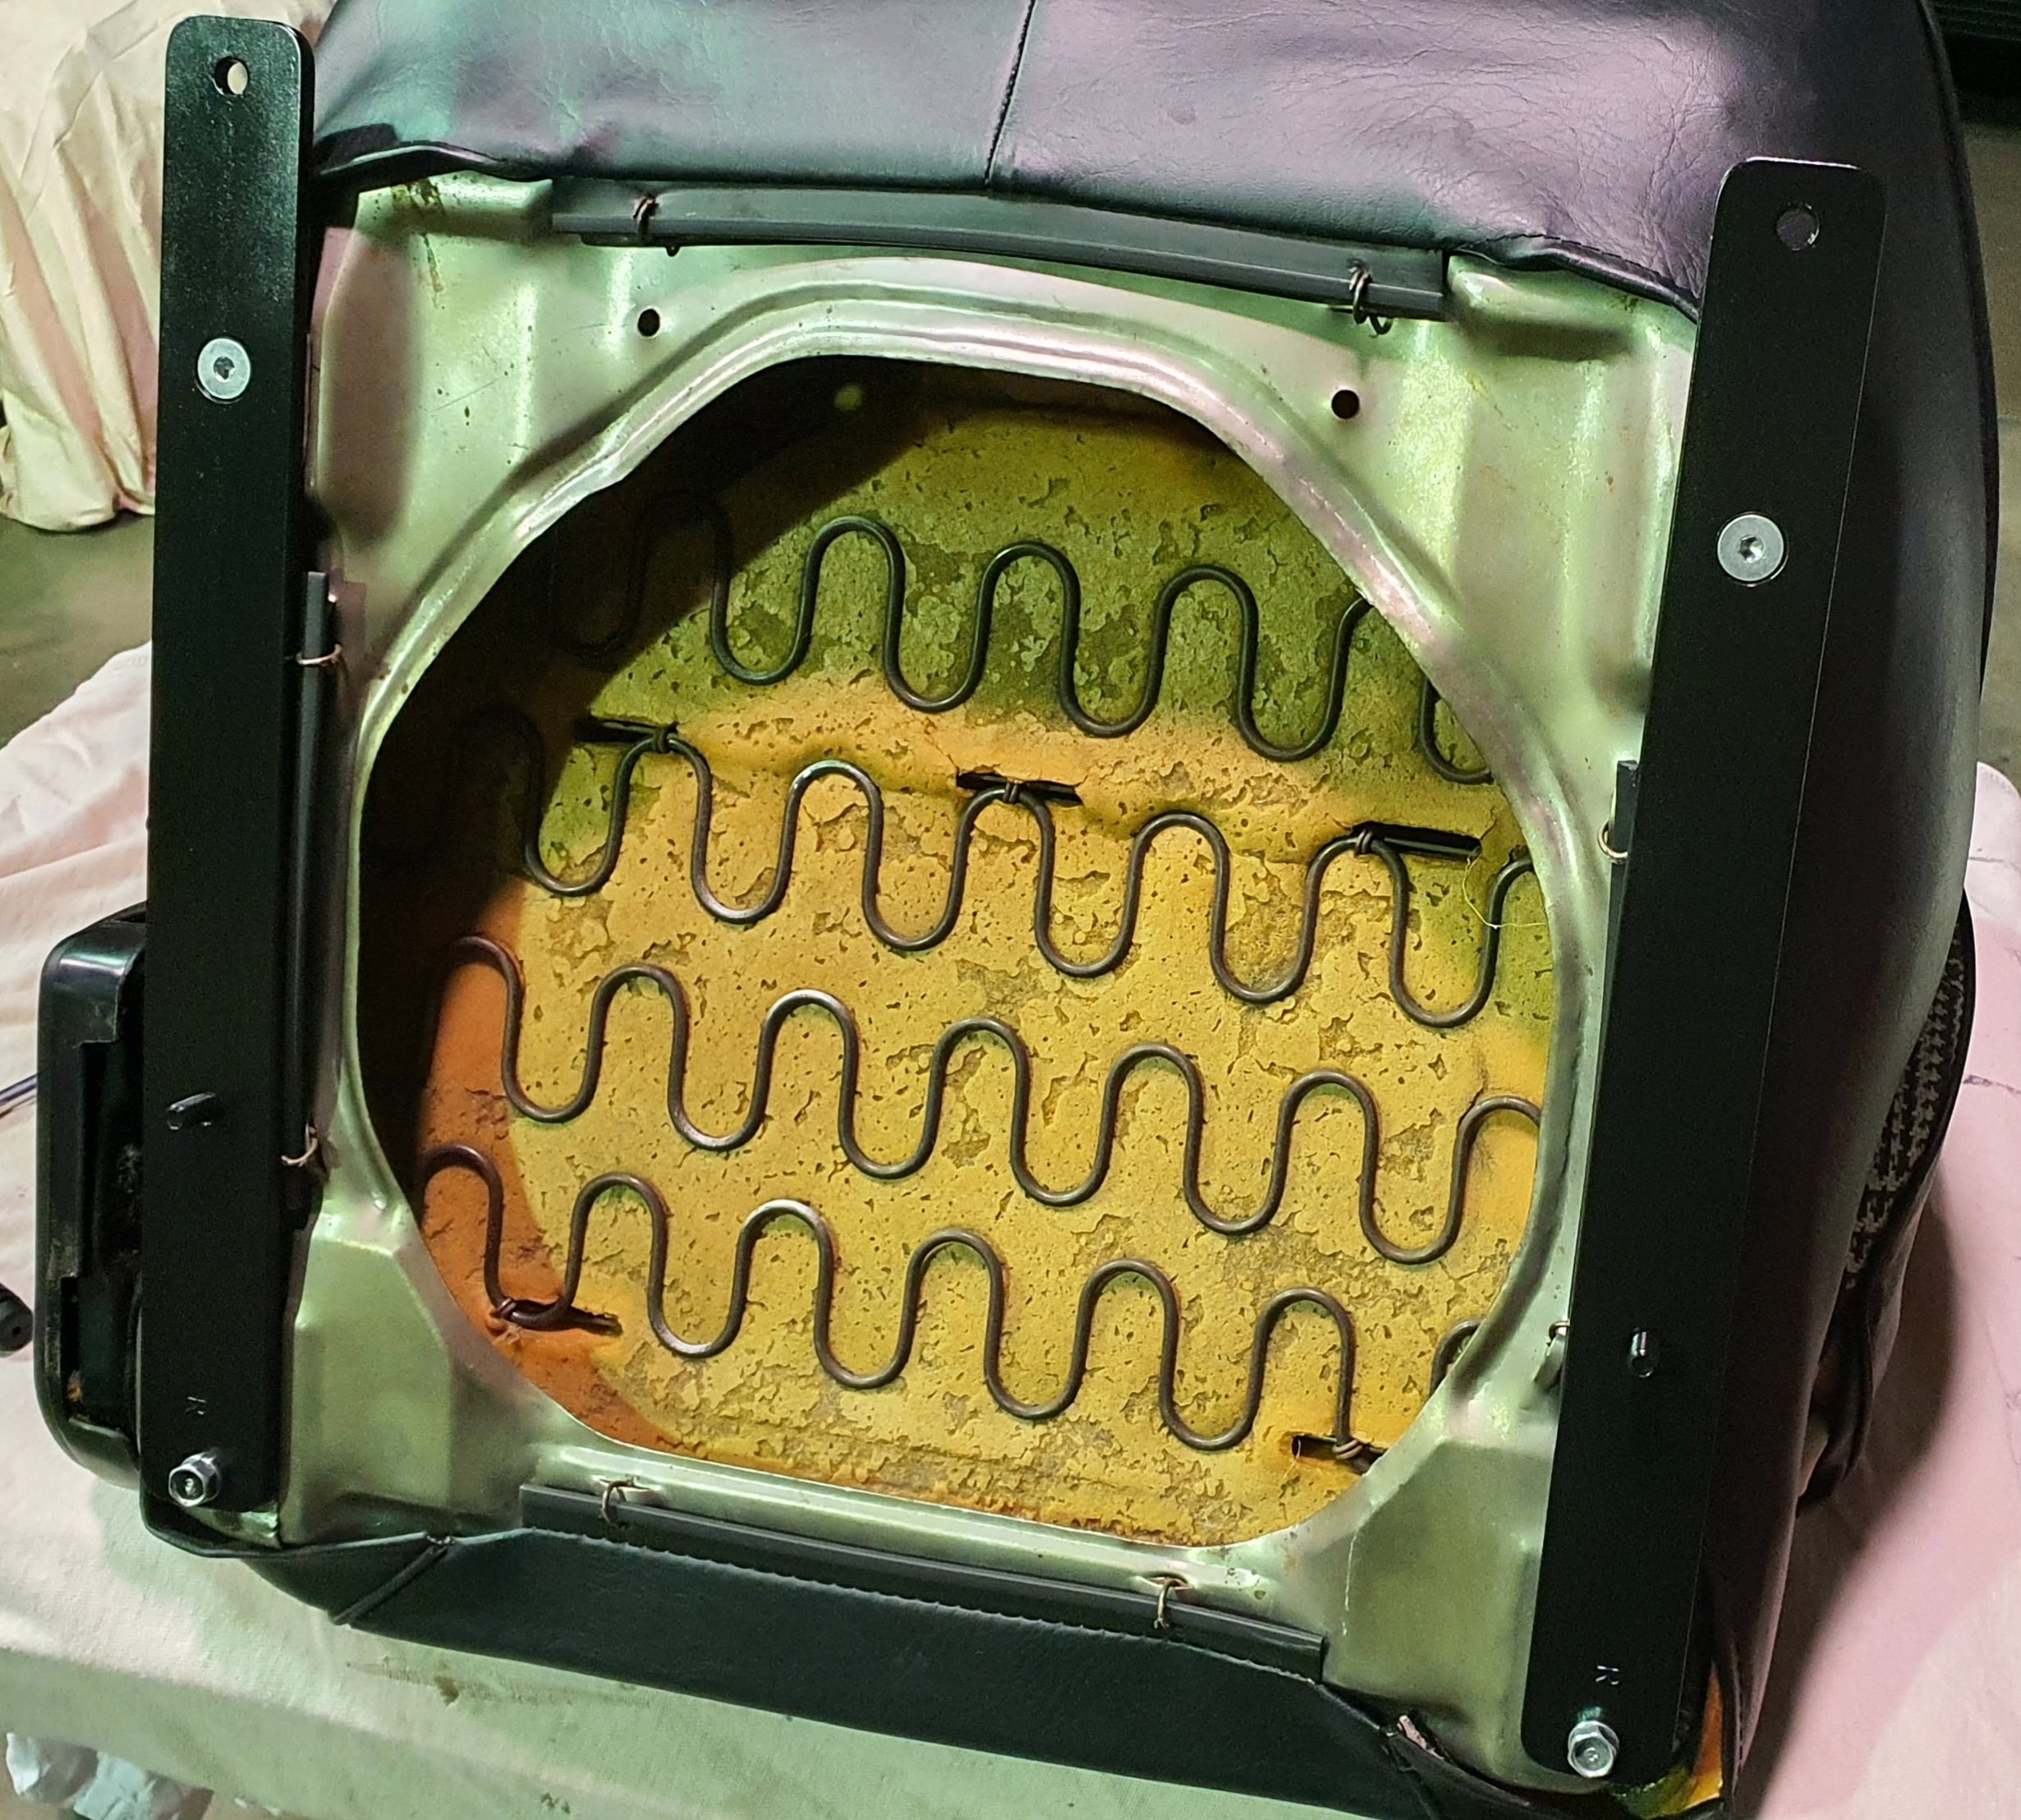
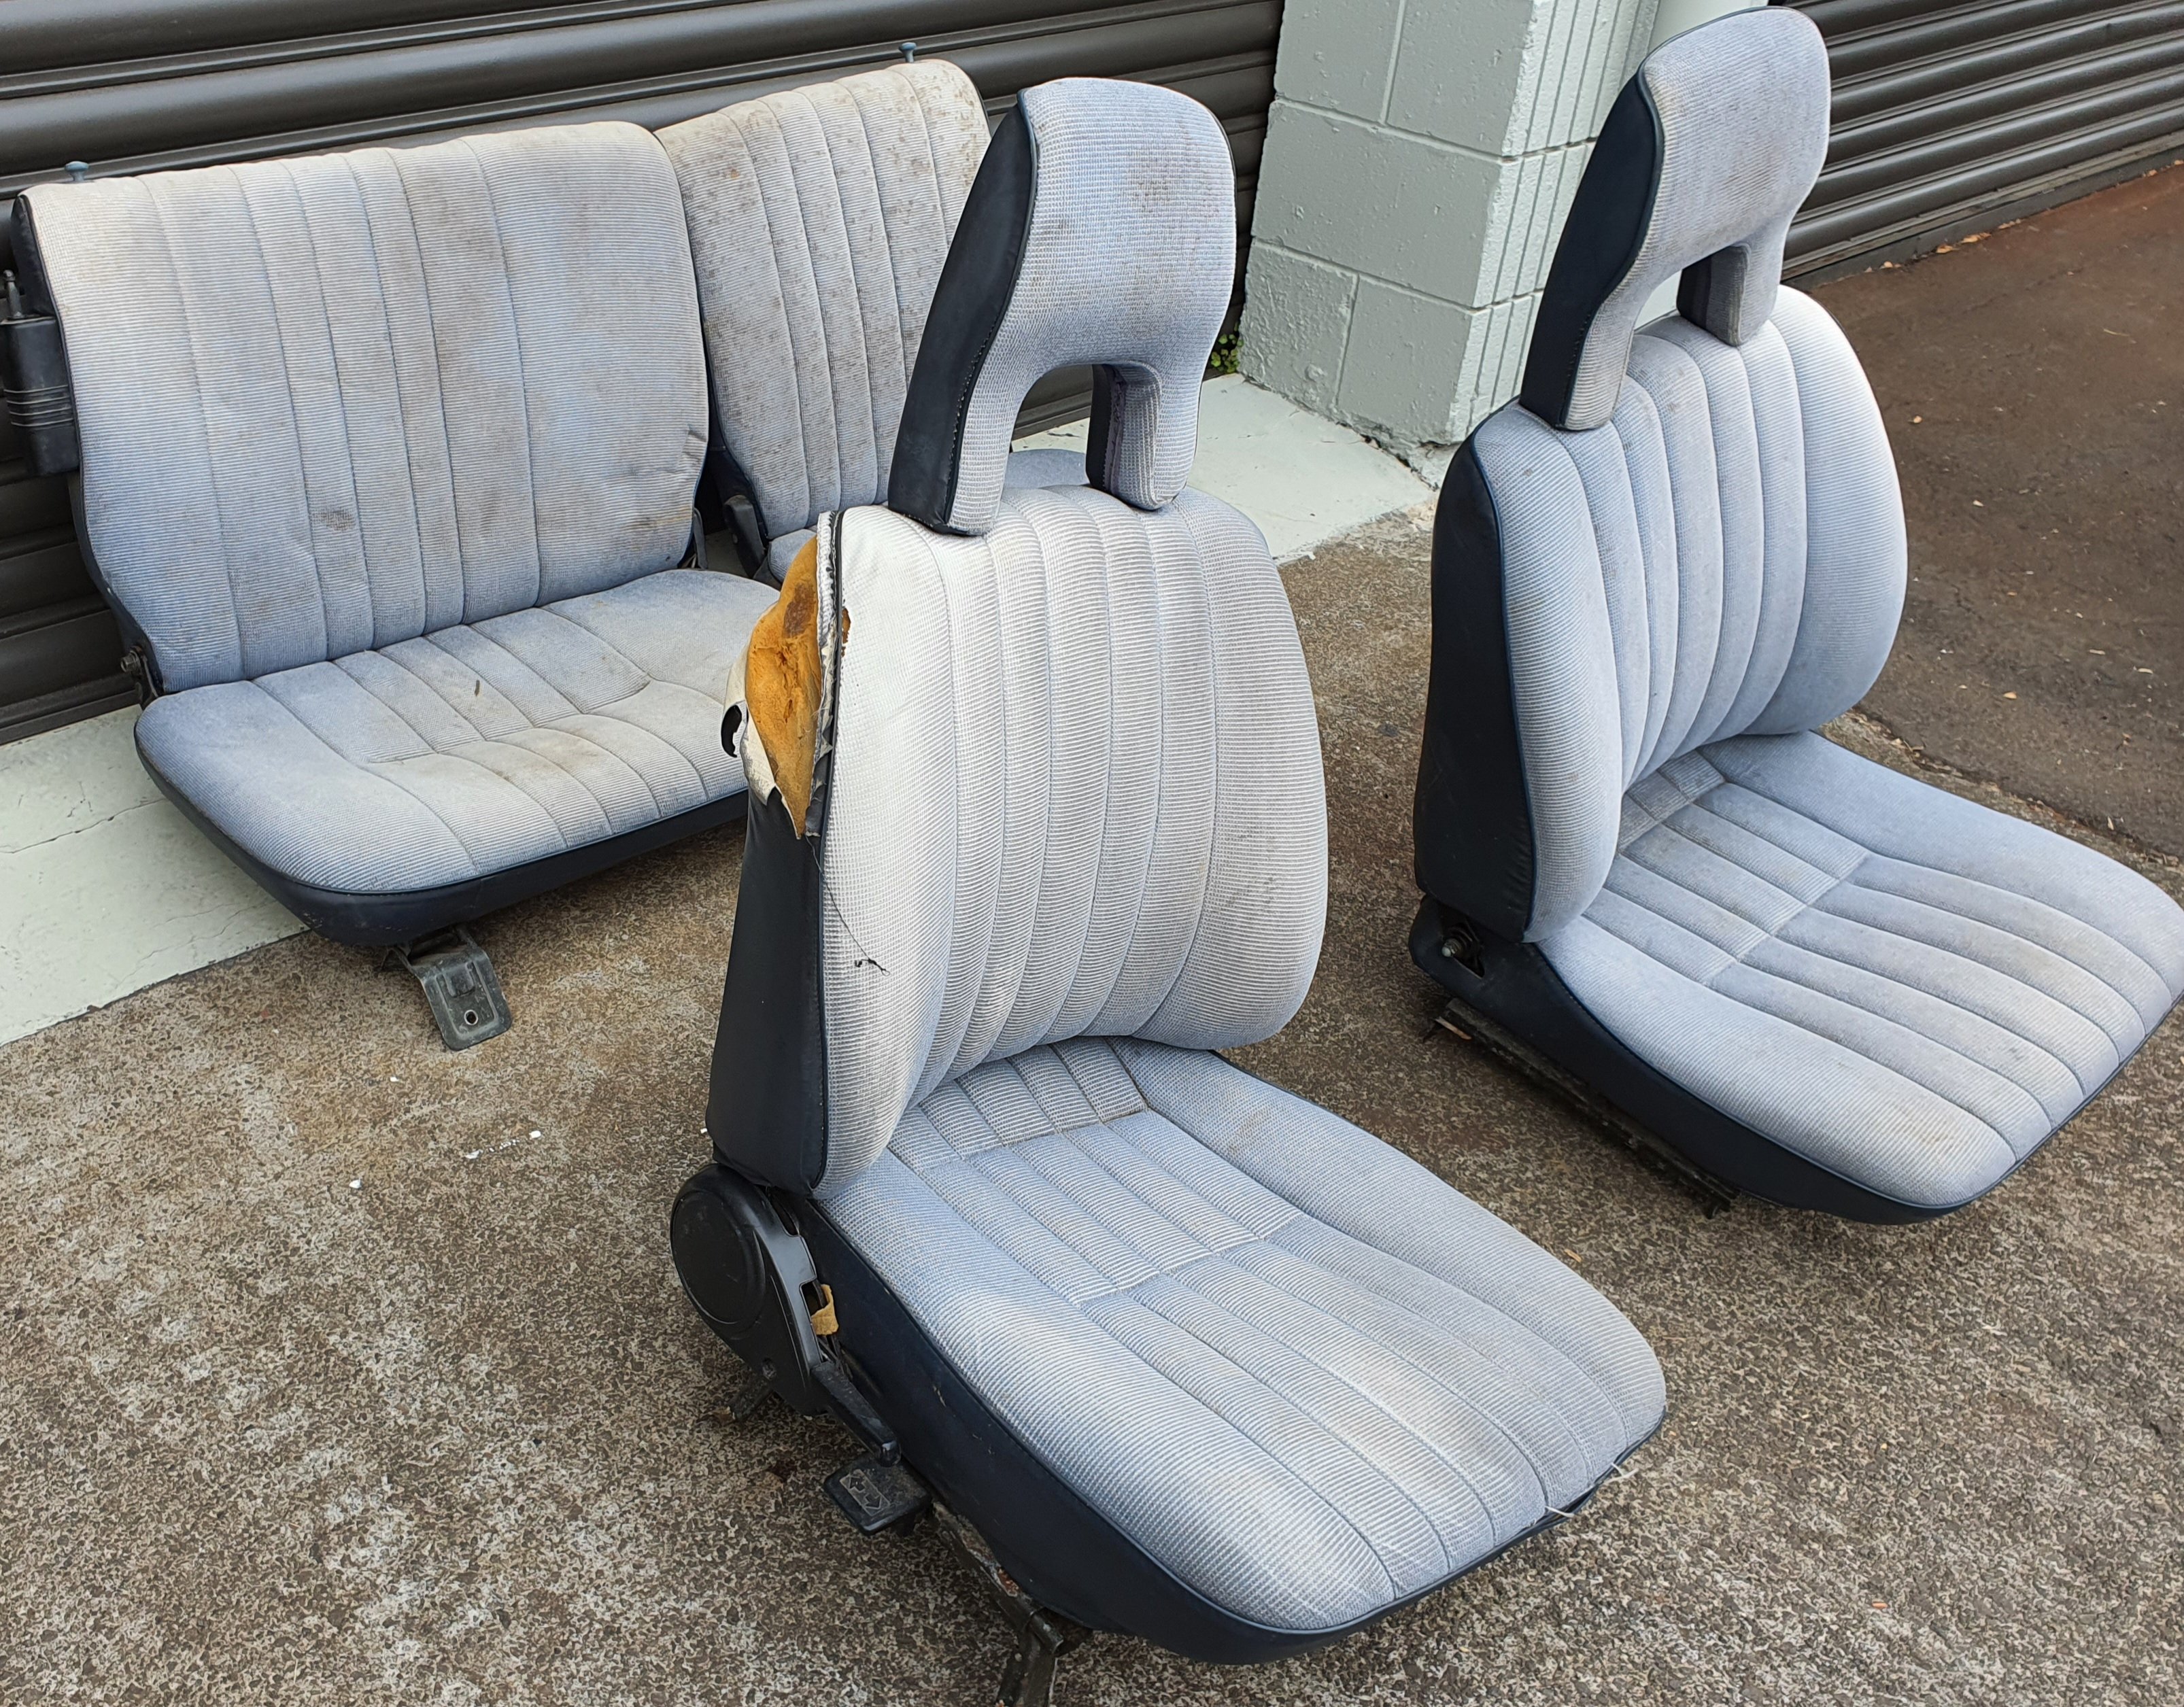
The original seats were a bit boring, not to mention faded and tatty.
-
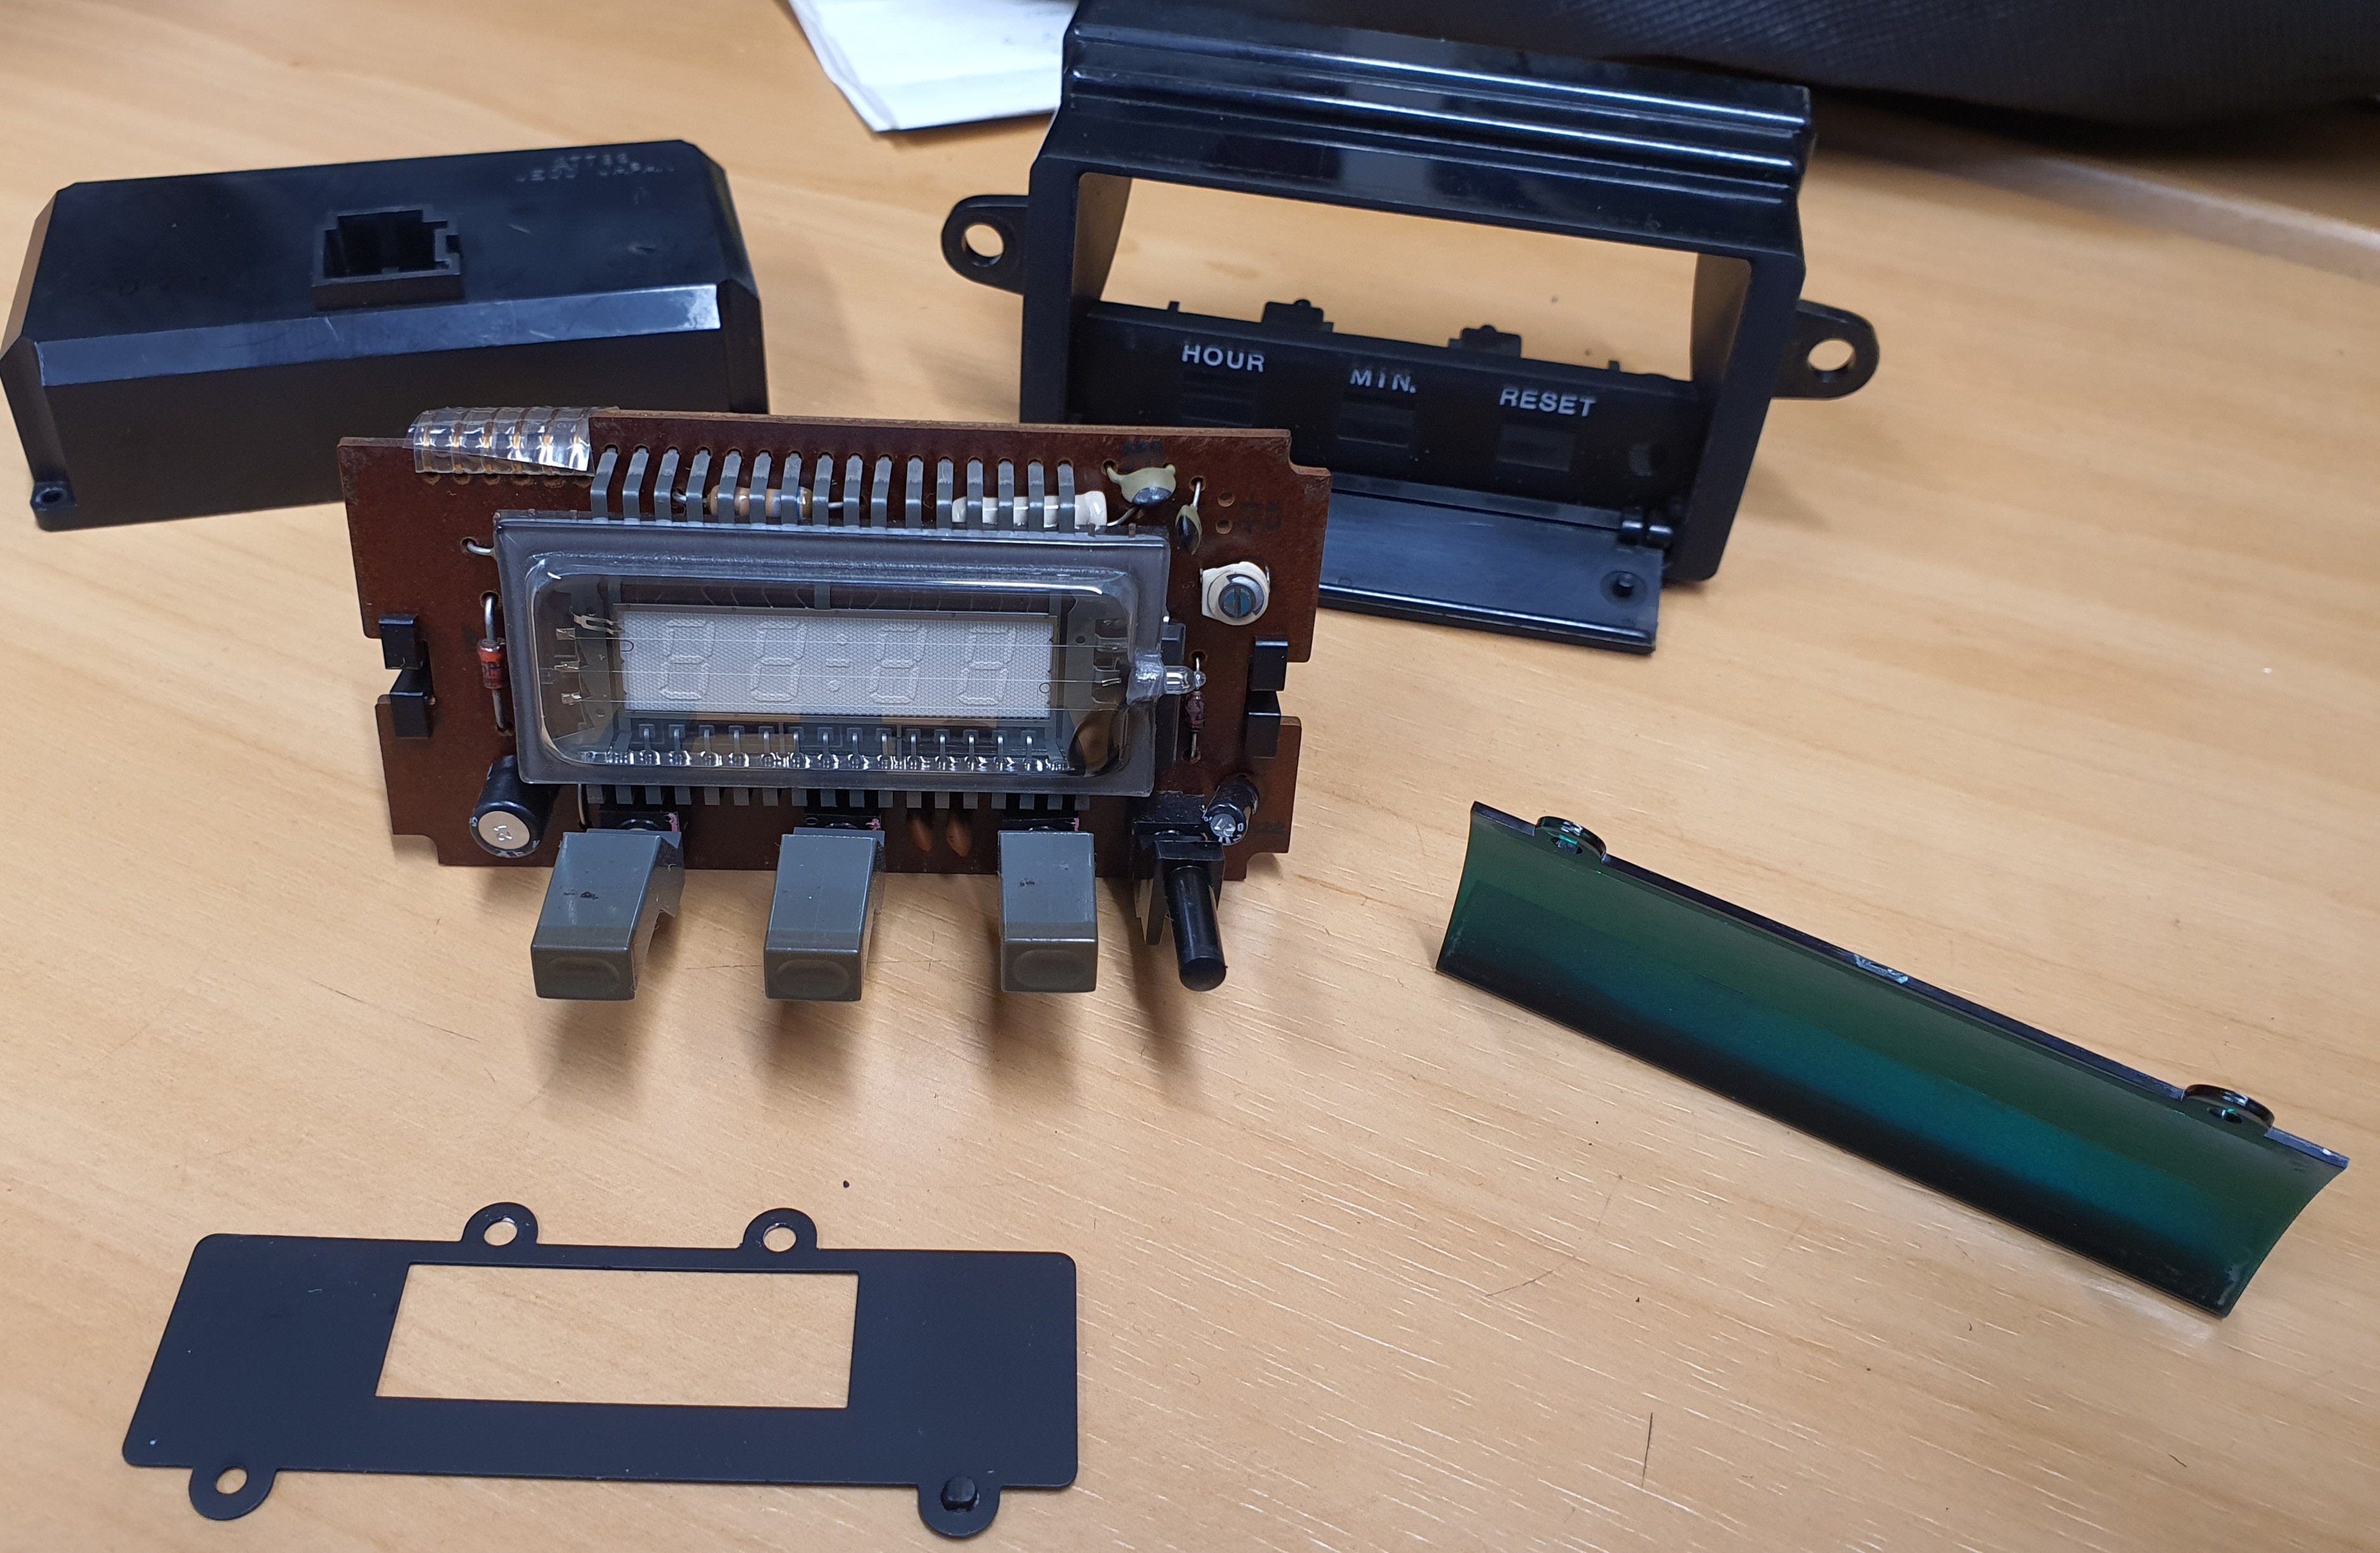
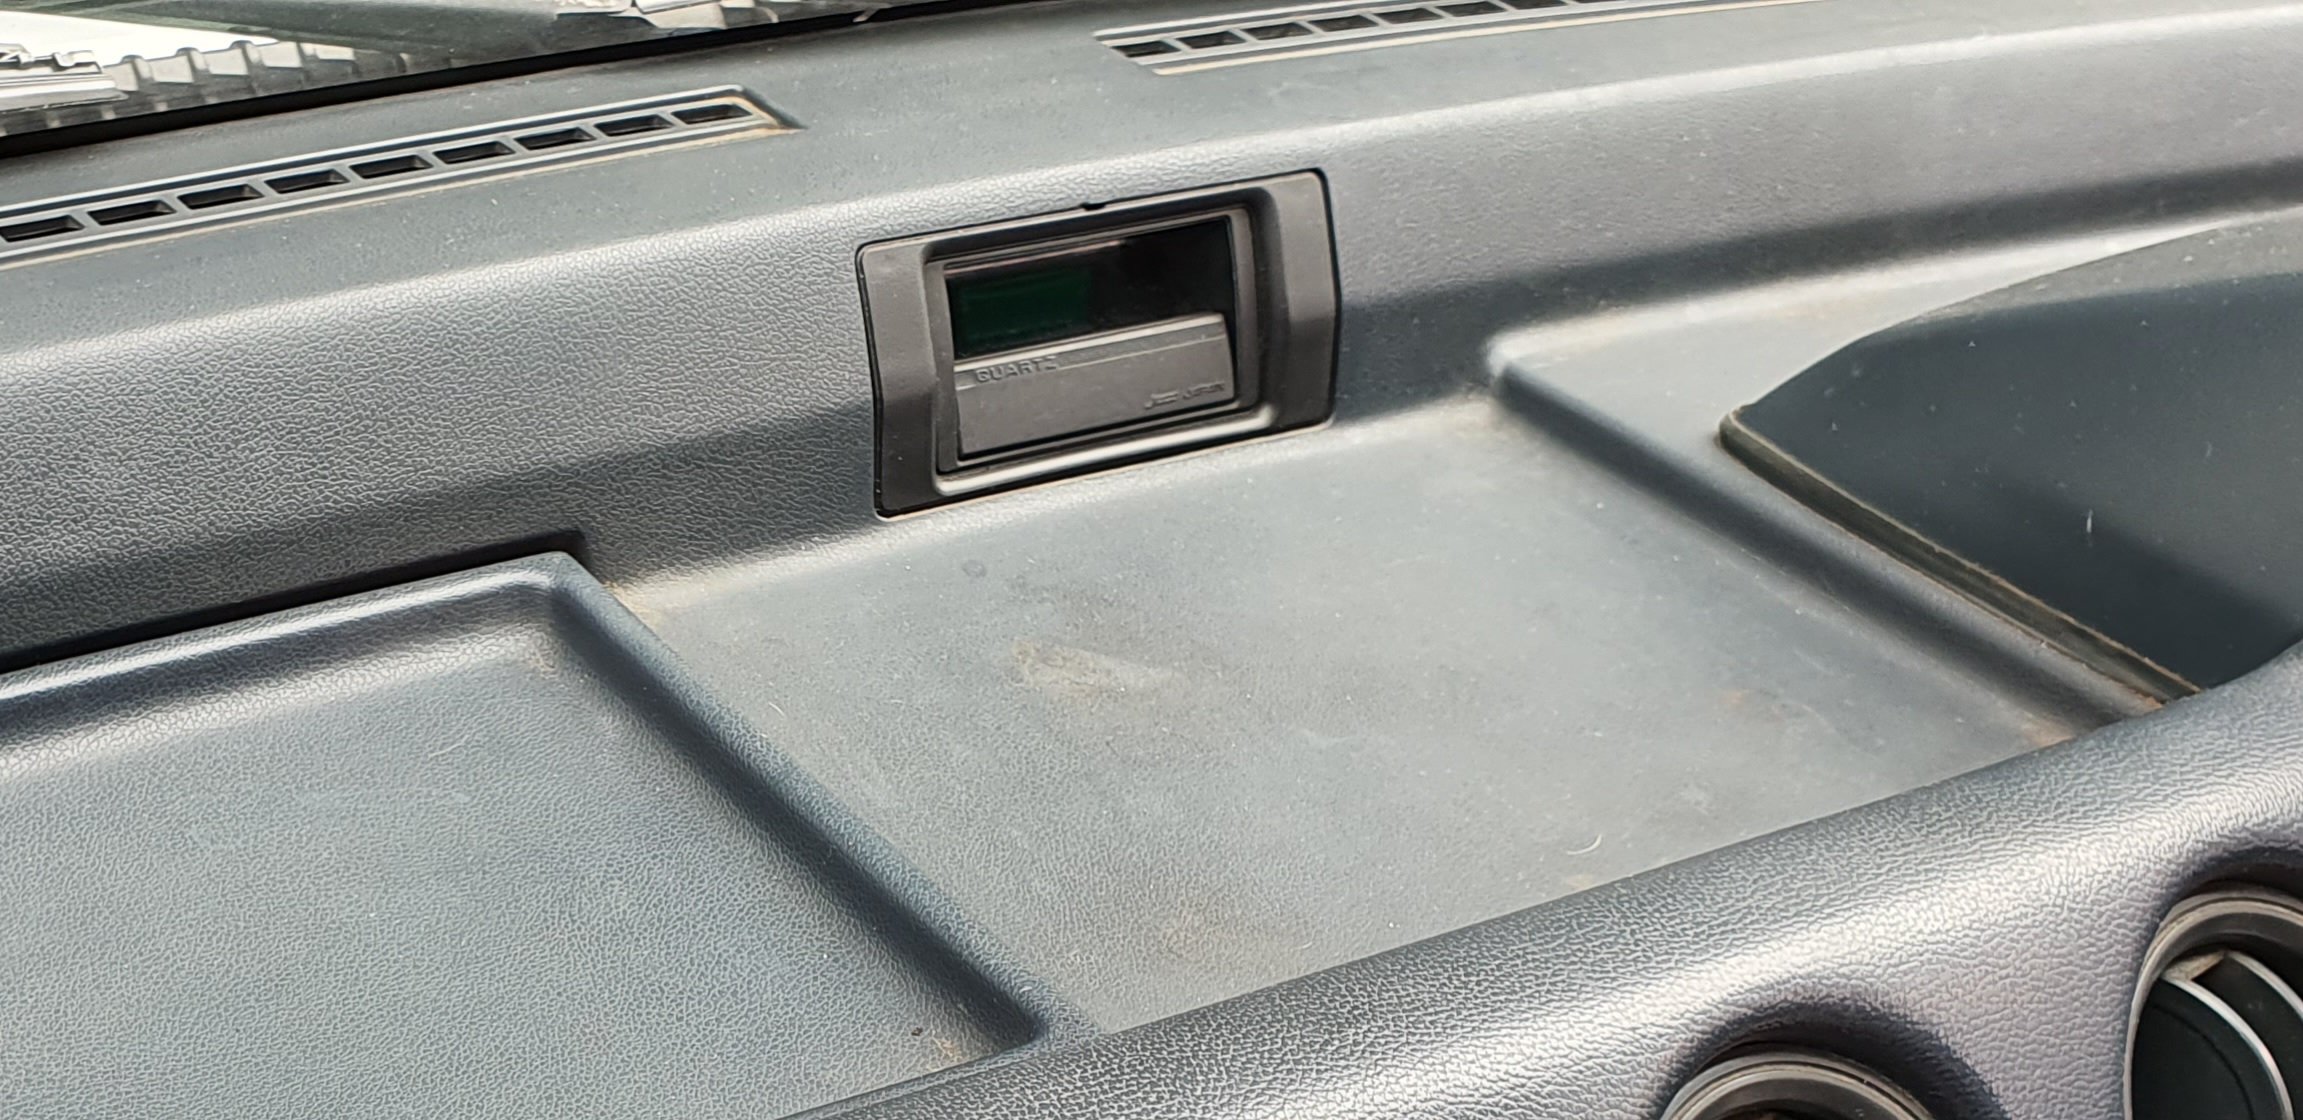
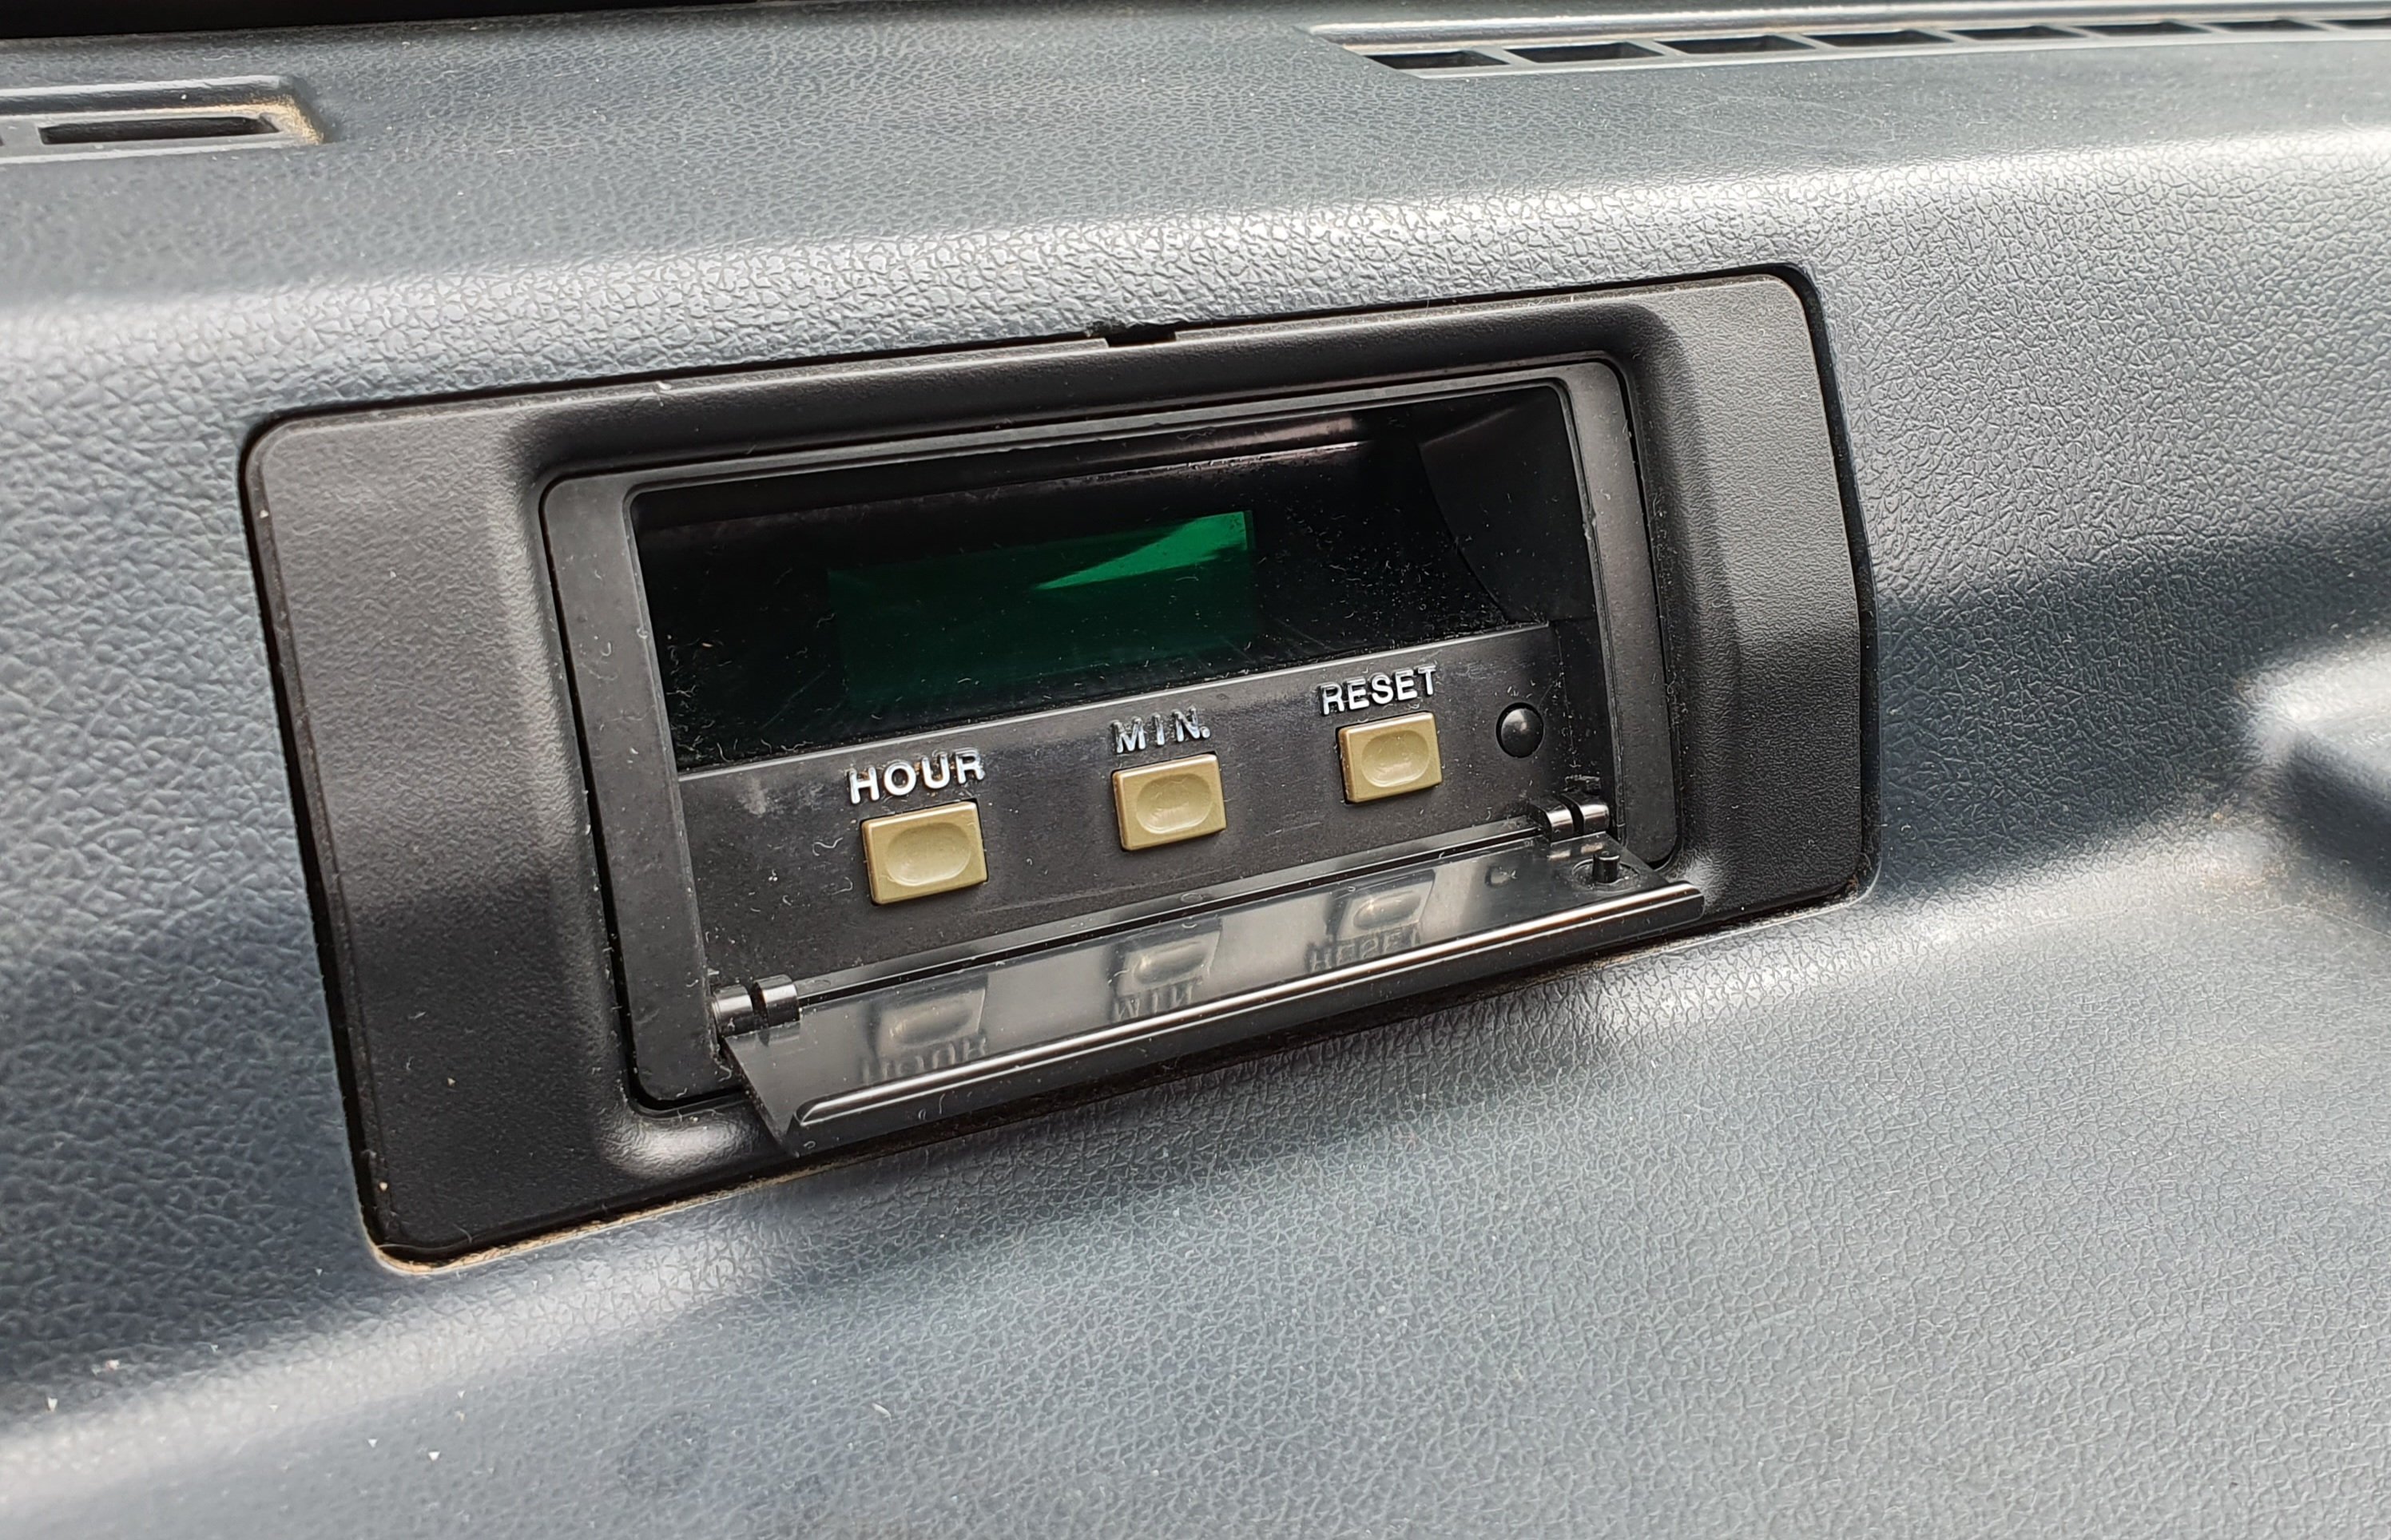
Continuing on with last Saturdays jobs... Quartz/Digital clocks are a popular accessory to have in these cars and fetch decent money for what they are. The manhattan just had a blanking plate, but luckily the blue car had a clock in it. The green tinted lens was a bit faded, so I pulled the clock apart gave it a clean, and wet sanded/polished the lens. The bonus is the looms pre-wired for the clocks so it was a simple swap.
-
Congrats!
-
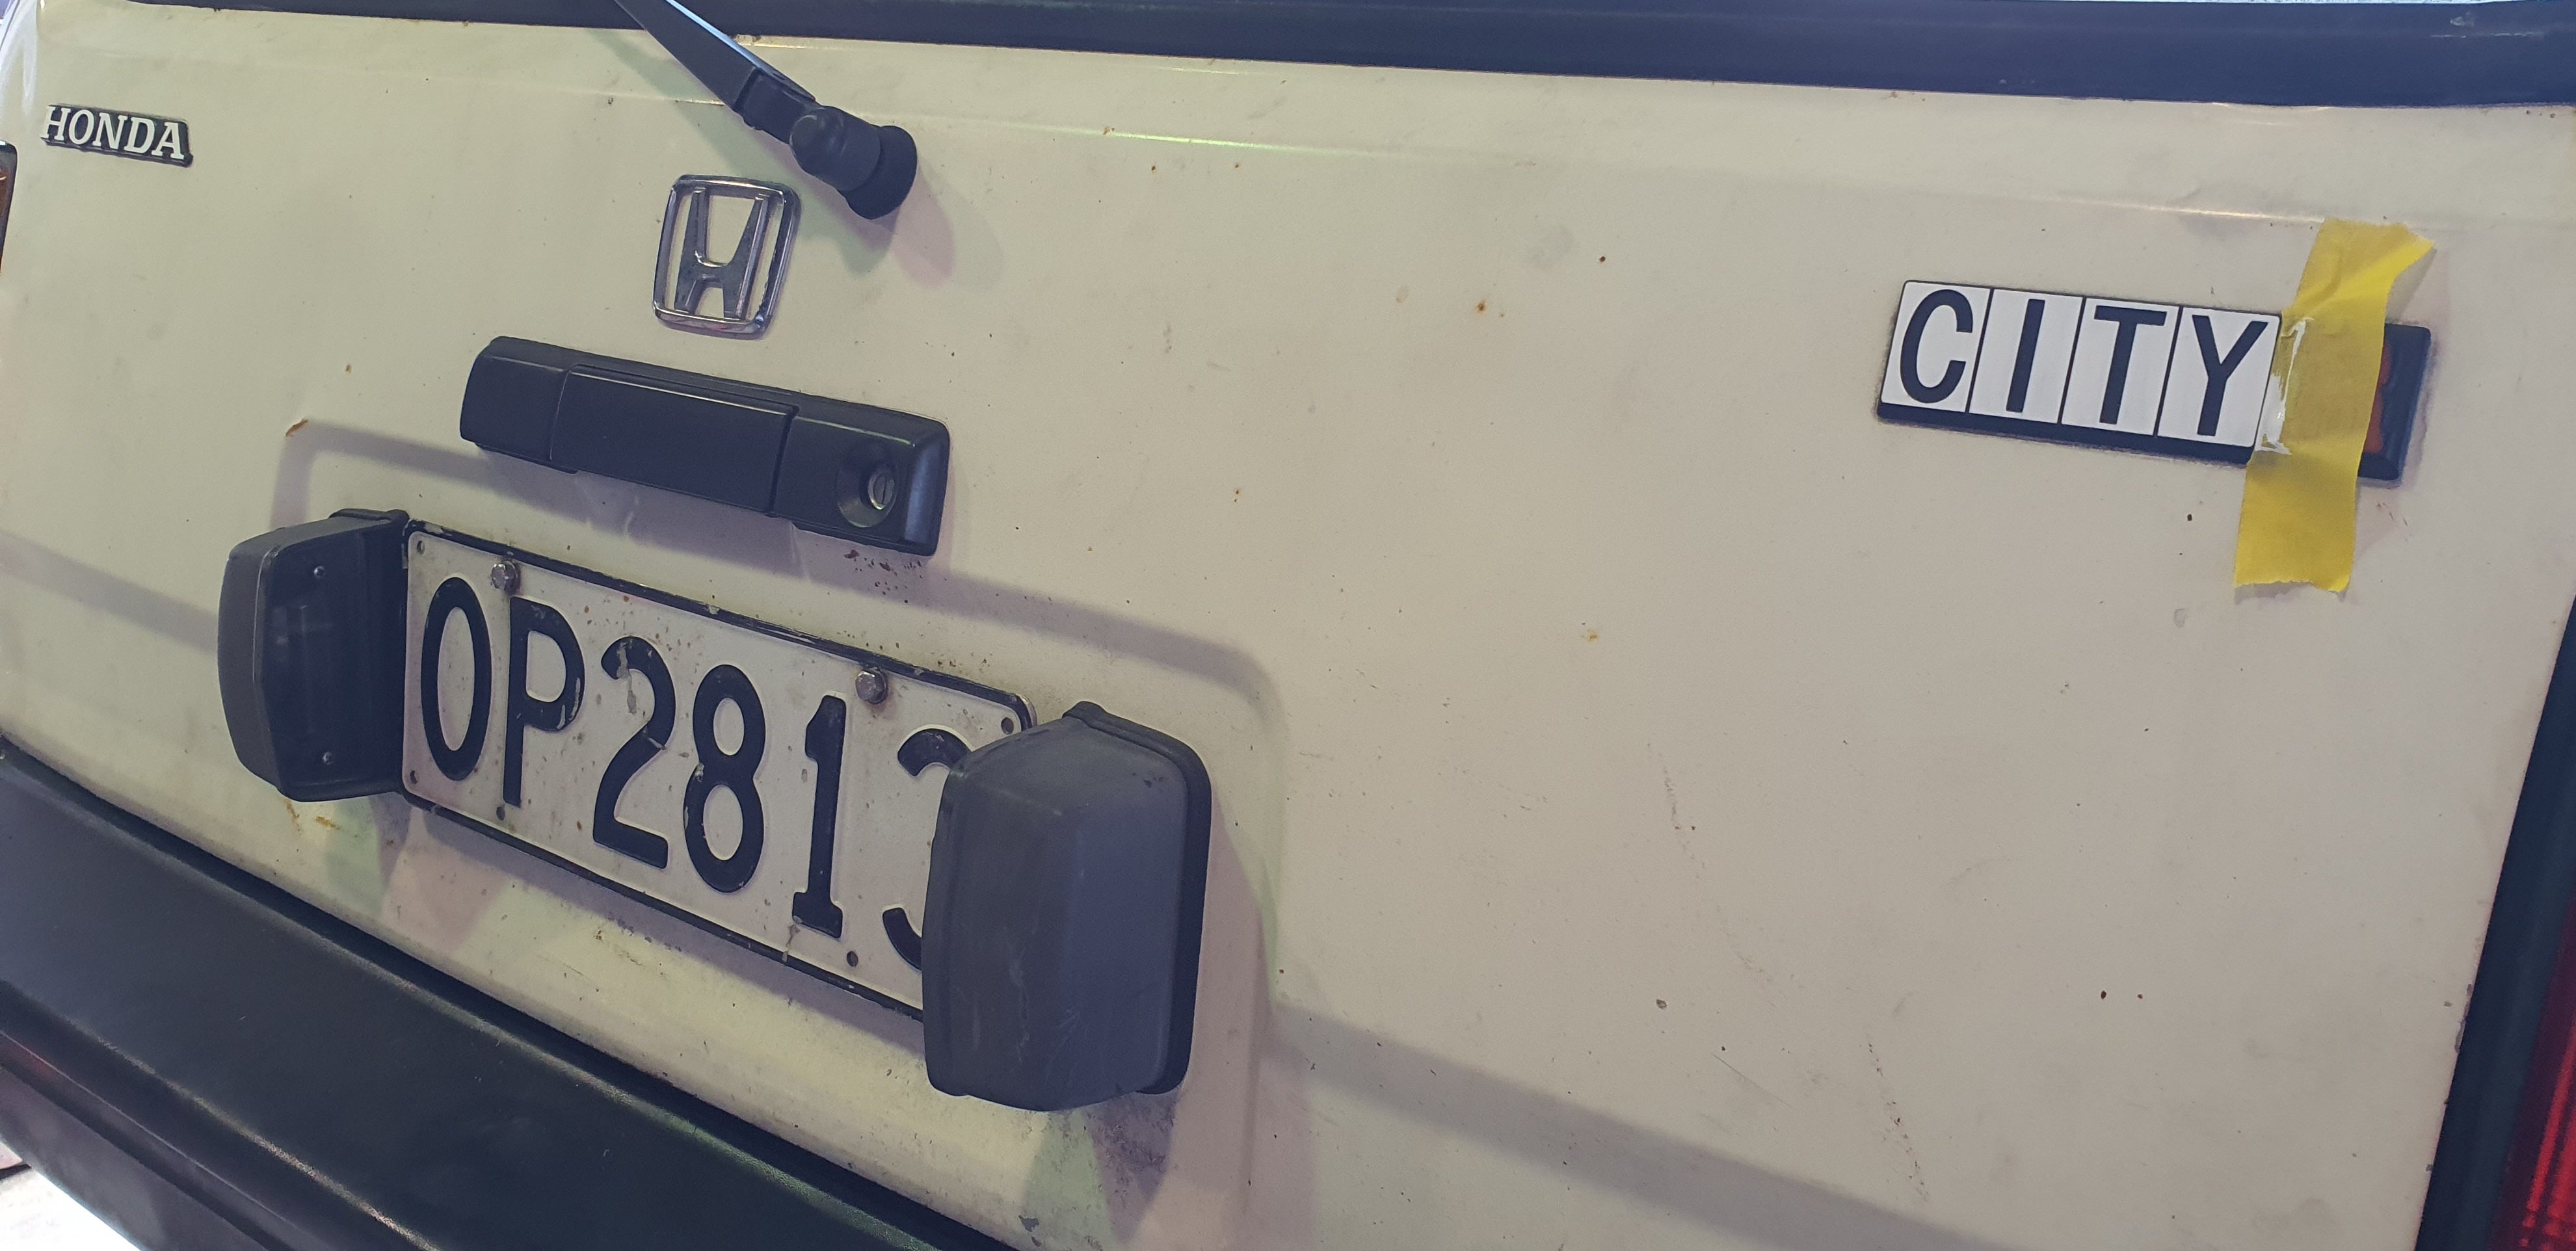
Fitted some fresh double sided tape to the 'H' emblem and 'R' badge and refitted to hatch, then touched up the white on the 'Honda' and 'City' badges. Plus taped on these little door buffer things that the blue car had. I'm guessing they are to stop the paint hitting a wall.