Lord Gruntfuttock
-
Posts
16,185 -
Joined
-
Last visited
-
Days Won
52
Content Type
Forums
Downloads
Events
Gallery
Everything posted by Lord Gruntfuttock
-
 Reason I got it out is I won a record on the radio, so keen to get my beer crate of albums out. I've ordered a new stylus for $30 and looking fwd to traumatising the kids with arcane music and the rituals in playing it... I've even got the smoked glass doors somewhere I think. Be good to refit them and experience the satisfying magnetic closing 'clunk' again...
-
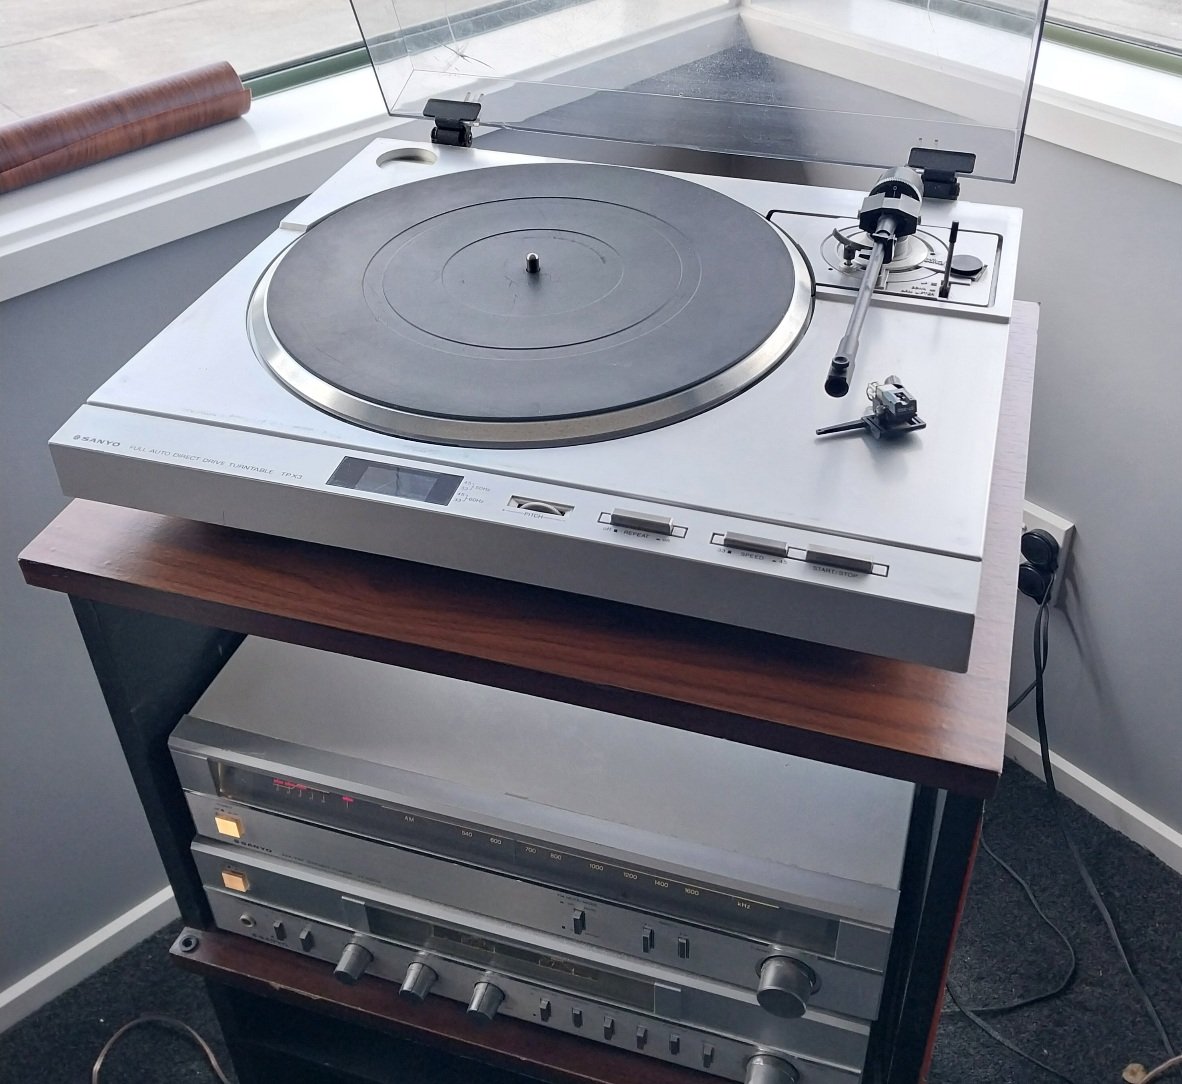
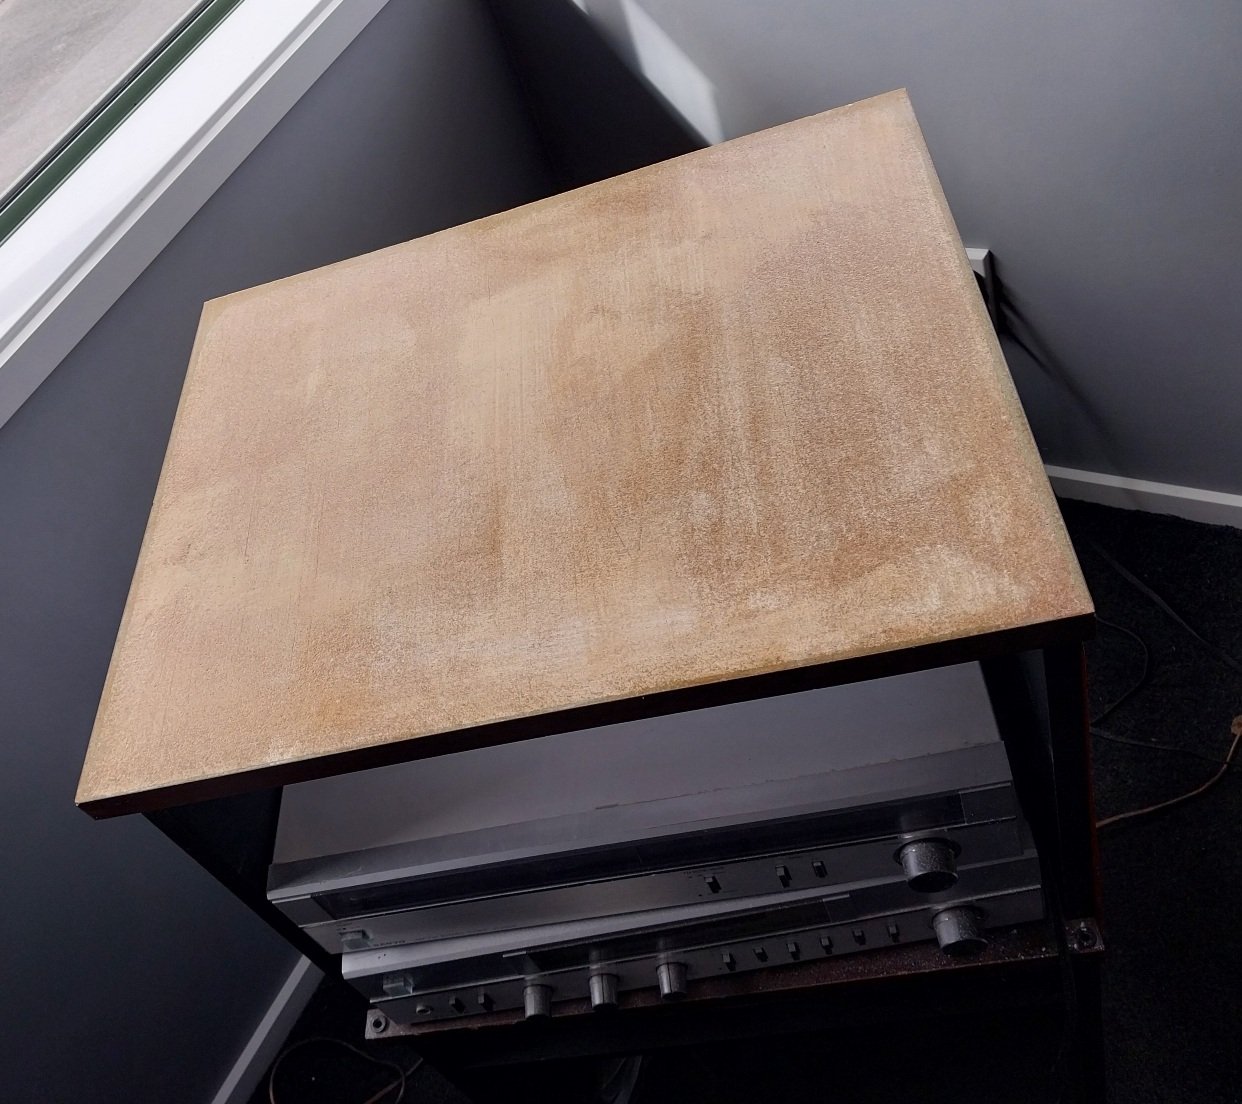
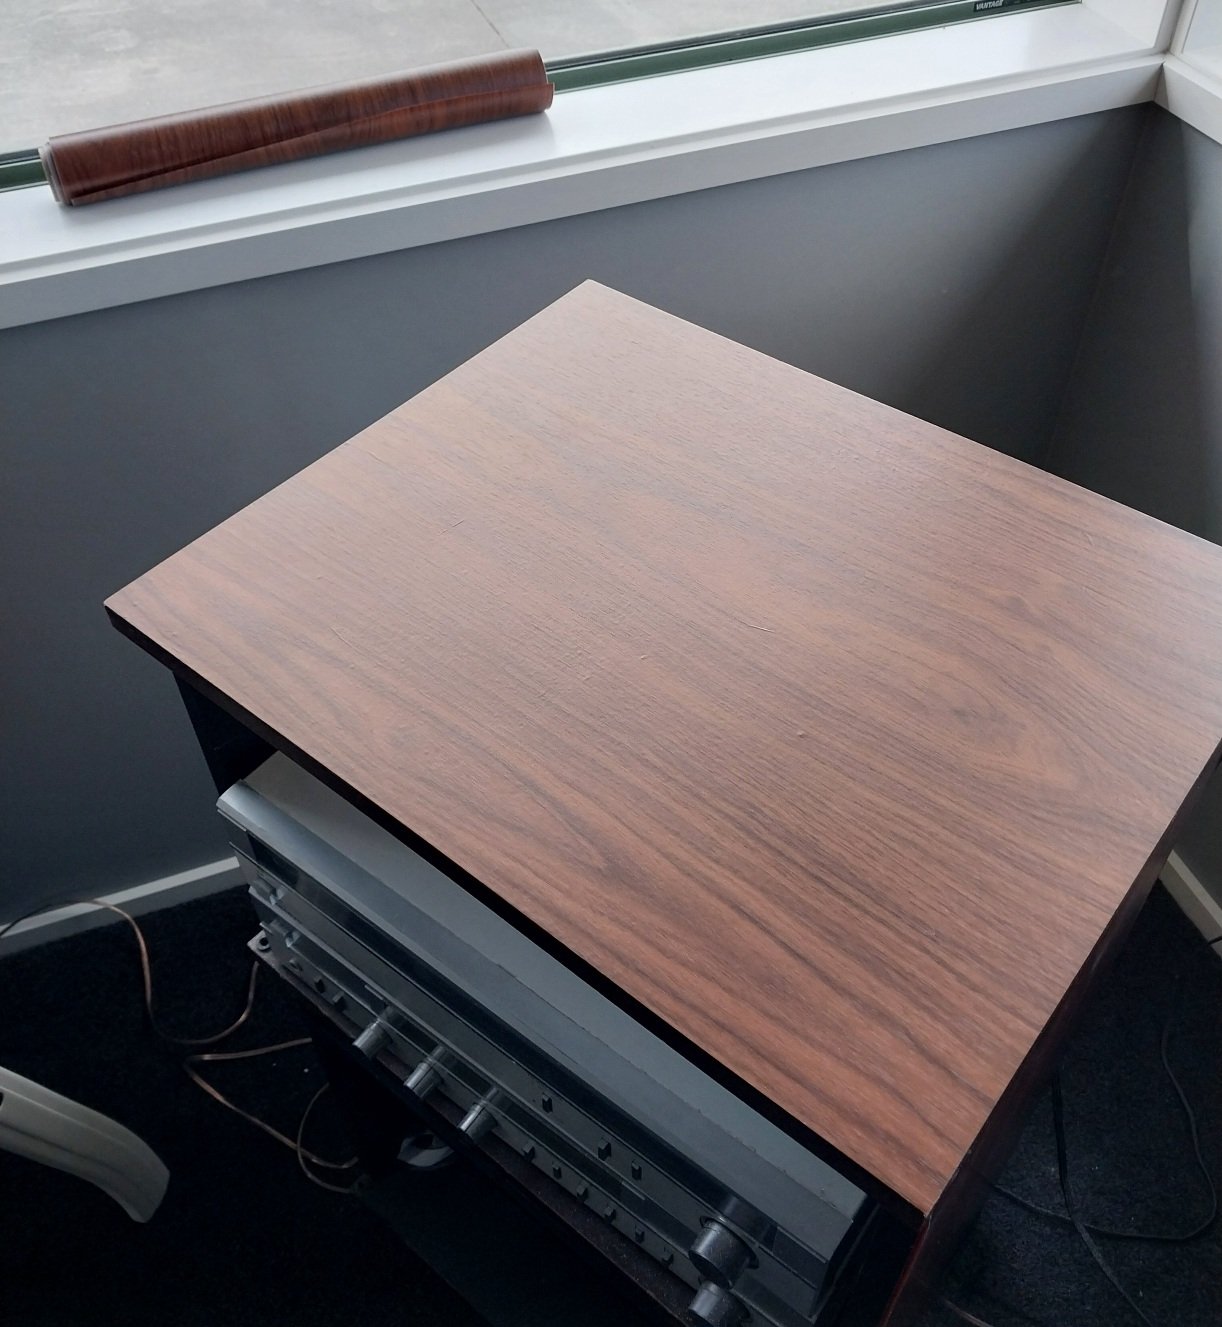
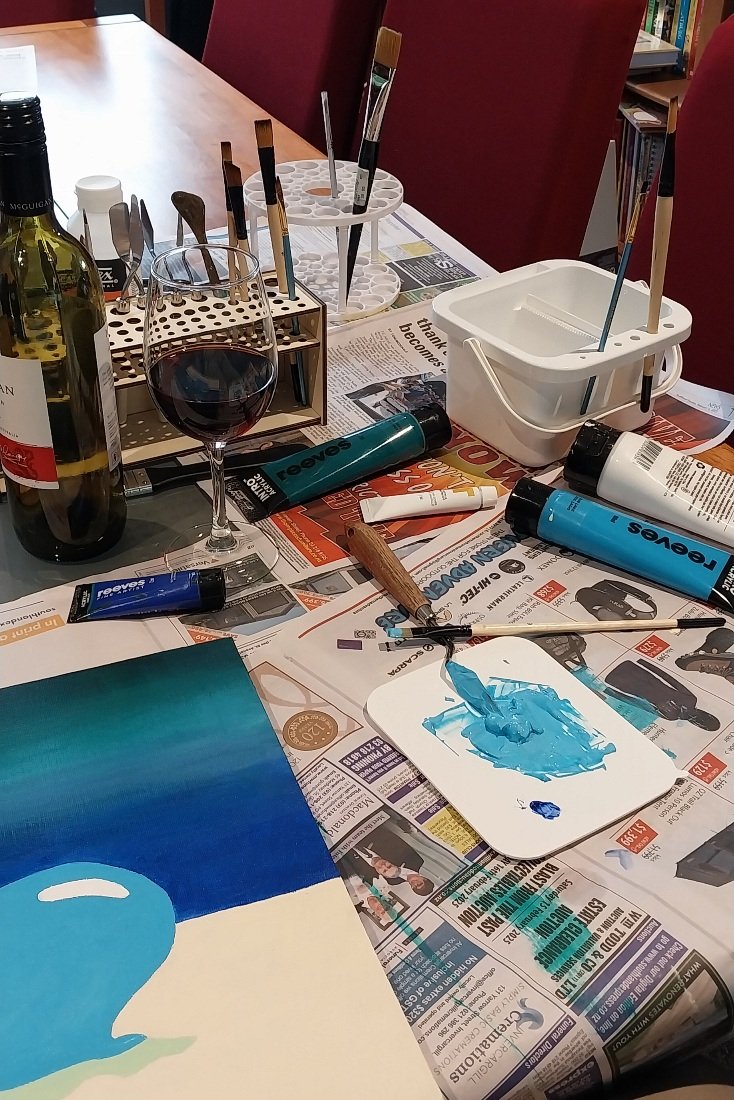
Dug out my old Sanyo stereo system, circa 1981. Tape deck is koozed but rest of it makes a great sound. The cabinet however looked terrible, all the lamination had peeled in the sun. I pulled the entire top off, discovered it had a rough finish so smeared on some filler, sanded, brushed on some varnish and sanded again before applying some Temu woodgrain vinyl and trimming with a scalpel. Looks much better...
-
Which was east of Britain. Must have used the German description...?
-
Have you considered recreating the western front in your garage...?
-
That's brilliant. Question from a numpty. Can you simulate dents like you'd get on a working truck? I'm imagining using heat to create a lifelike fold in panels/bent grills etc. But sounds risky/easy to fuck up...
-
Scale model pest...
-
Greatest scene in cinematic history...
-
HANG IT IN THE LOUVRE...
-
I've been creating...
-
Hope she made ring-ding-ding noises...
-
Lifeless, Leaky, Leyland...
-
Isn't there like a page on the NZ police website where you can check if it comes up as reported stolen? Pretty sure I used that once trying to re-register a bike, just saved a screenshot of the 'this vehicle has not been reported as stolen'...?
-
Intrigued by the Ukrainian model page. little plastic men and trucks, not blonde booby ones...
-
Best plugs I've found are soft cotton type ones. Don't suffer the discomfort of foam ones under the helmet...
-
3 parts boiled linseed oil, 1 part mineral spirits, and you can add some WD40 to reduce the shine a bit. * I think. Seen a video referencing his recipe somewhere...
-
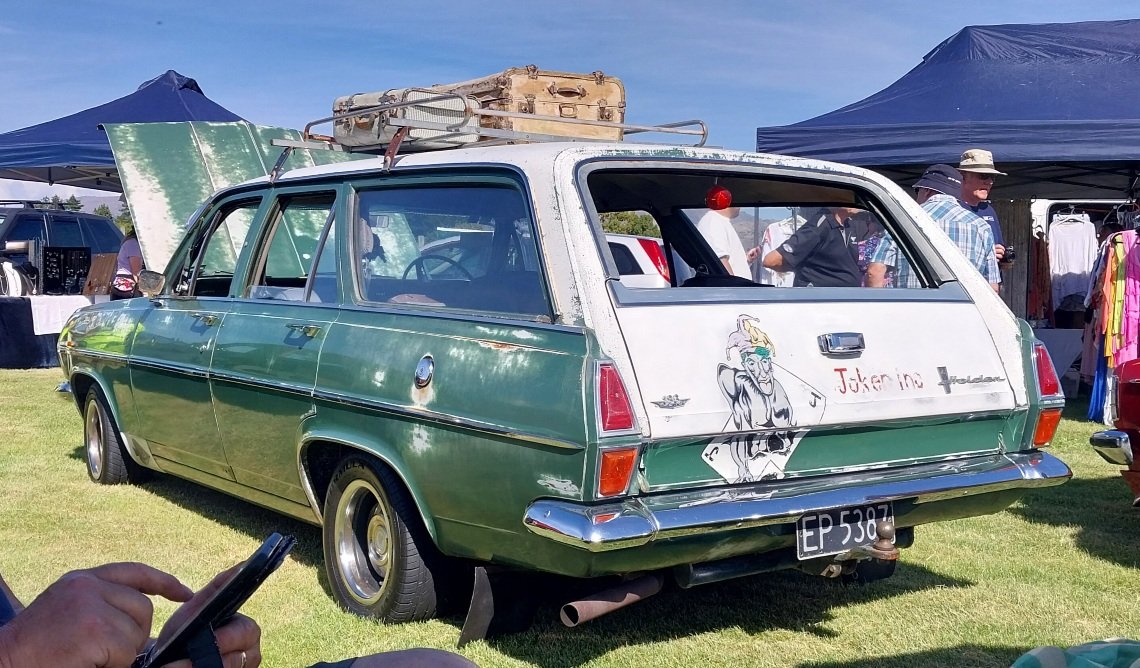
I was parked beside this at Cromwell car show. I asked if it was clear coated as it looked great, but owner just said he'd only cut and polished it. They lived in Alexandra tho so very dry climate, not the same corrosion issues as most of NZ...
-
Not to mention zee uniforms on der baddies...
-
It worked. Discovered my dusty old practice amp is an Ashton too... It made noise, and the tuner worked, if a little rudimentary... But the action needed sorting, and I wasn't happy with the flimsy screws into plastic holding the unit to the body. There's a bit of extra tension with the bendy surround mod, so I drilled out and used 3mm black machine screws. Much more secure... The new nut was way too high, so pulled it and sanded similarly to the saddle, supposed to have roughly 1/2mm clearance at the first fret. Before/after pics... And all done, re-strung and whole thing looks much better, and seems playable, now just down to the operator...
-
^ That's pretty wood... Guitar renovation 2, parts arrived. Installing where the existing tuner hole was meant it wasn't in the flattest part of the body, so I disassembeled the EQ unit to get the faceplate off, and bent it up after softening in hot water to get the required 'S' shape... And the combined connector/strap button needed installed. I wasn't happy with the exposed wiring so added a bit of heat shrink... Then just fished the wires through, the connector and a braided piezo pickup you install under the saddle, through a 2.5mm hole near the bass string. This means the saddle must be trimmed around 2mm, I just sanded this down on a flat surface. It's definitely real bone... Then threw some old strings on to check operation...
-
I've got a Spice girls sticker on my old one...
-
Guitar renovation. Last century I used to play a bit, completely hopeless now but wanting to try again I attempted to set up my crappy old acoustic properly, got all enthusiastic and shouted it a new bridge, saddle etc but the truss rod thread stripped just as I was getting it right, so I swore a bit - and have been looking out for a decent'ish used one since. Saw this advertised at a charity shop, Ashton D25, scratched, rusty, 2 strings so grabbed it as a cheap project... [Reviews state the D25 is a 'cheap, nice sounding full-sized beginner/muckaround guitar' so perfect for my needs] I re-strung it to check things and apart from needing some new parts it actually played OK, neck was straight, strings at good playing height etc, so I ordered a bunch of bits from Aliexpress, then stripped it right down and gave it a good clean. Can't do much about the giant scratch on the body but might try to hide it later... The Ali machine heads fitted perfectly, sort of wished I'd got the black option now though for full blackout look, but they look far better than the grotty old ones... And the new bone nut and saddle looked to be well made. The plastic ones were worn out, (nut had actually crumbled at the 6th string and I'd filed a temporary notch to test it) also got some fancy bridge pins... Biggest issue was the cheap in-built tuner, that was missing the battery holder clip. I bodged it up and it still worked but the cover/clips are always going missing and are unobtainable, so bought a combined tuner/equalizer/pickup unit to turn it into an electro-acoustic... This is still on the way, so I gambled that the online templates will match what I actually get, and cut the hole while I had it apart... Hopefully this arrives in the next few days and I can see how things go together, bit of wiring/fettling to do when I get it. It won't be fancy, but I should have a useable geetar for around $100 all up...
-
SO WHAT'S UNDER THE FLAP...?
-
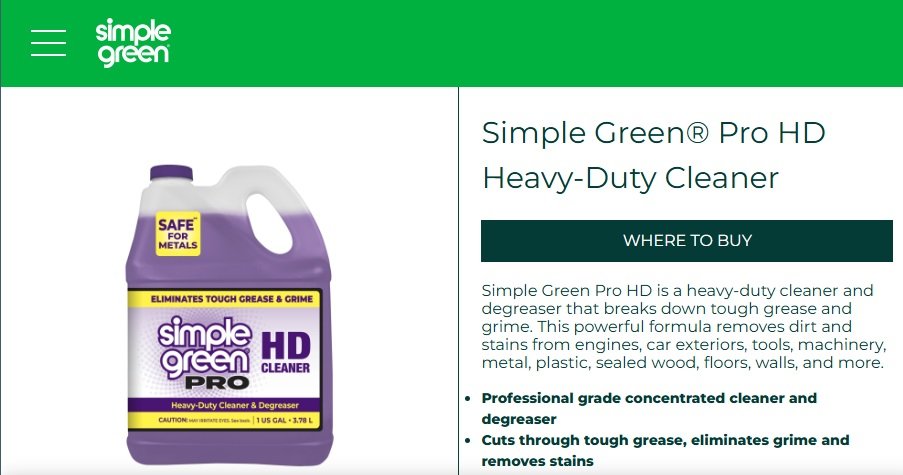
Assume the purple HD pro is this stuff from the SG website? Struggling to find it in NZ, the only purple stuff seems to be antibacterial. Any clues as to where to get it @tortron? If too hard I'll just carry on with normal simple green and/or dishwashing detergent...
-
I bought a 6.5 litre one off Ali, sized to fit bike carbs, love using it. I did wonder about just buying transducers and making my own up from a suitably sized stainless bath/basket setup. Wouldn't be hard to do...