johnny.race
-
Posts
730 -
Joined
-
Last visited
Everything posted by johnny.race
-
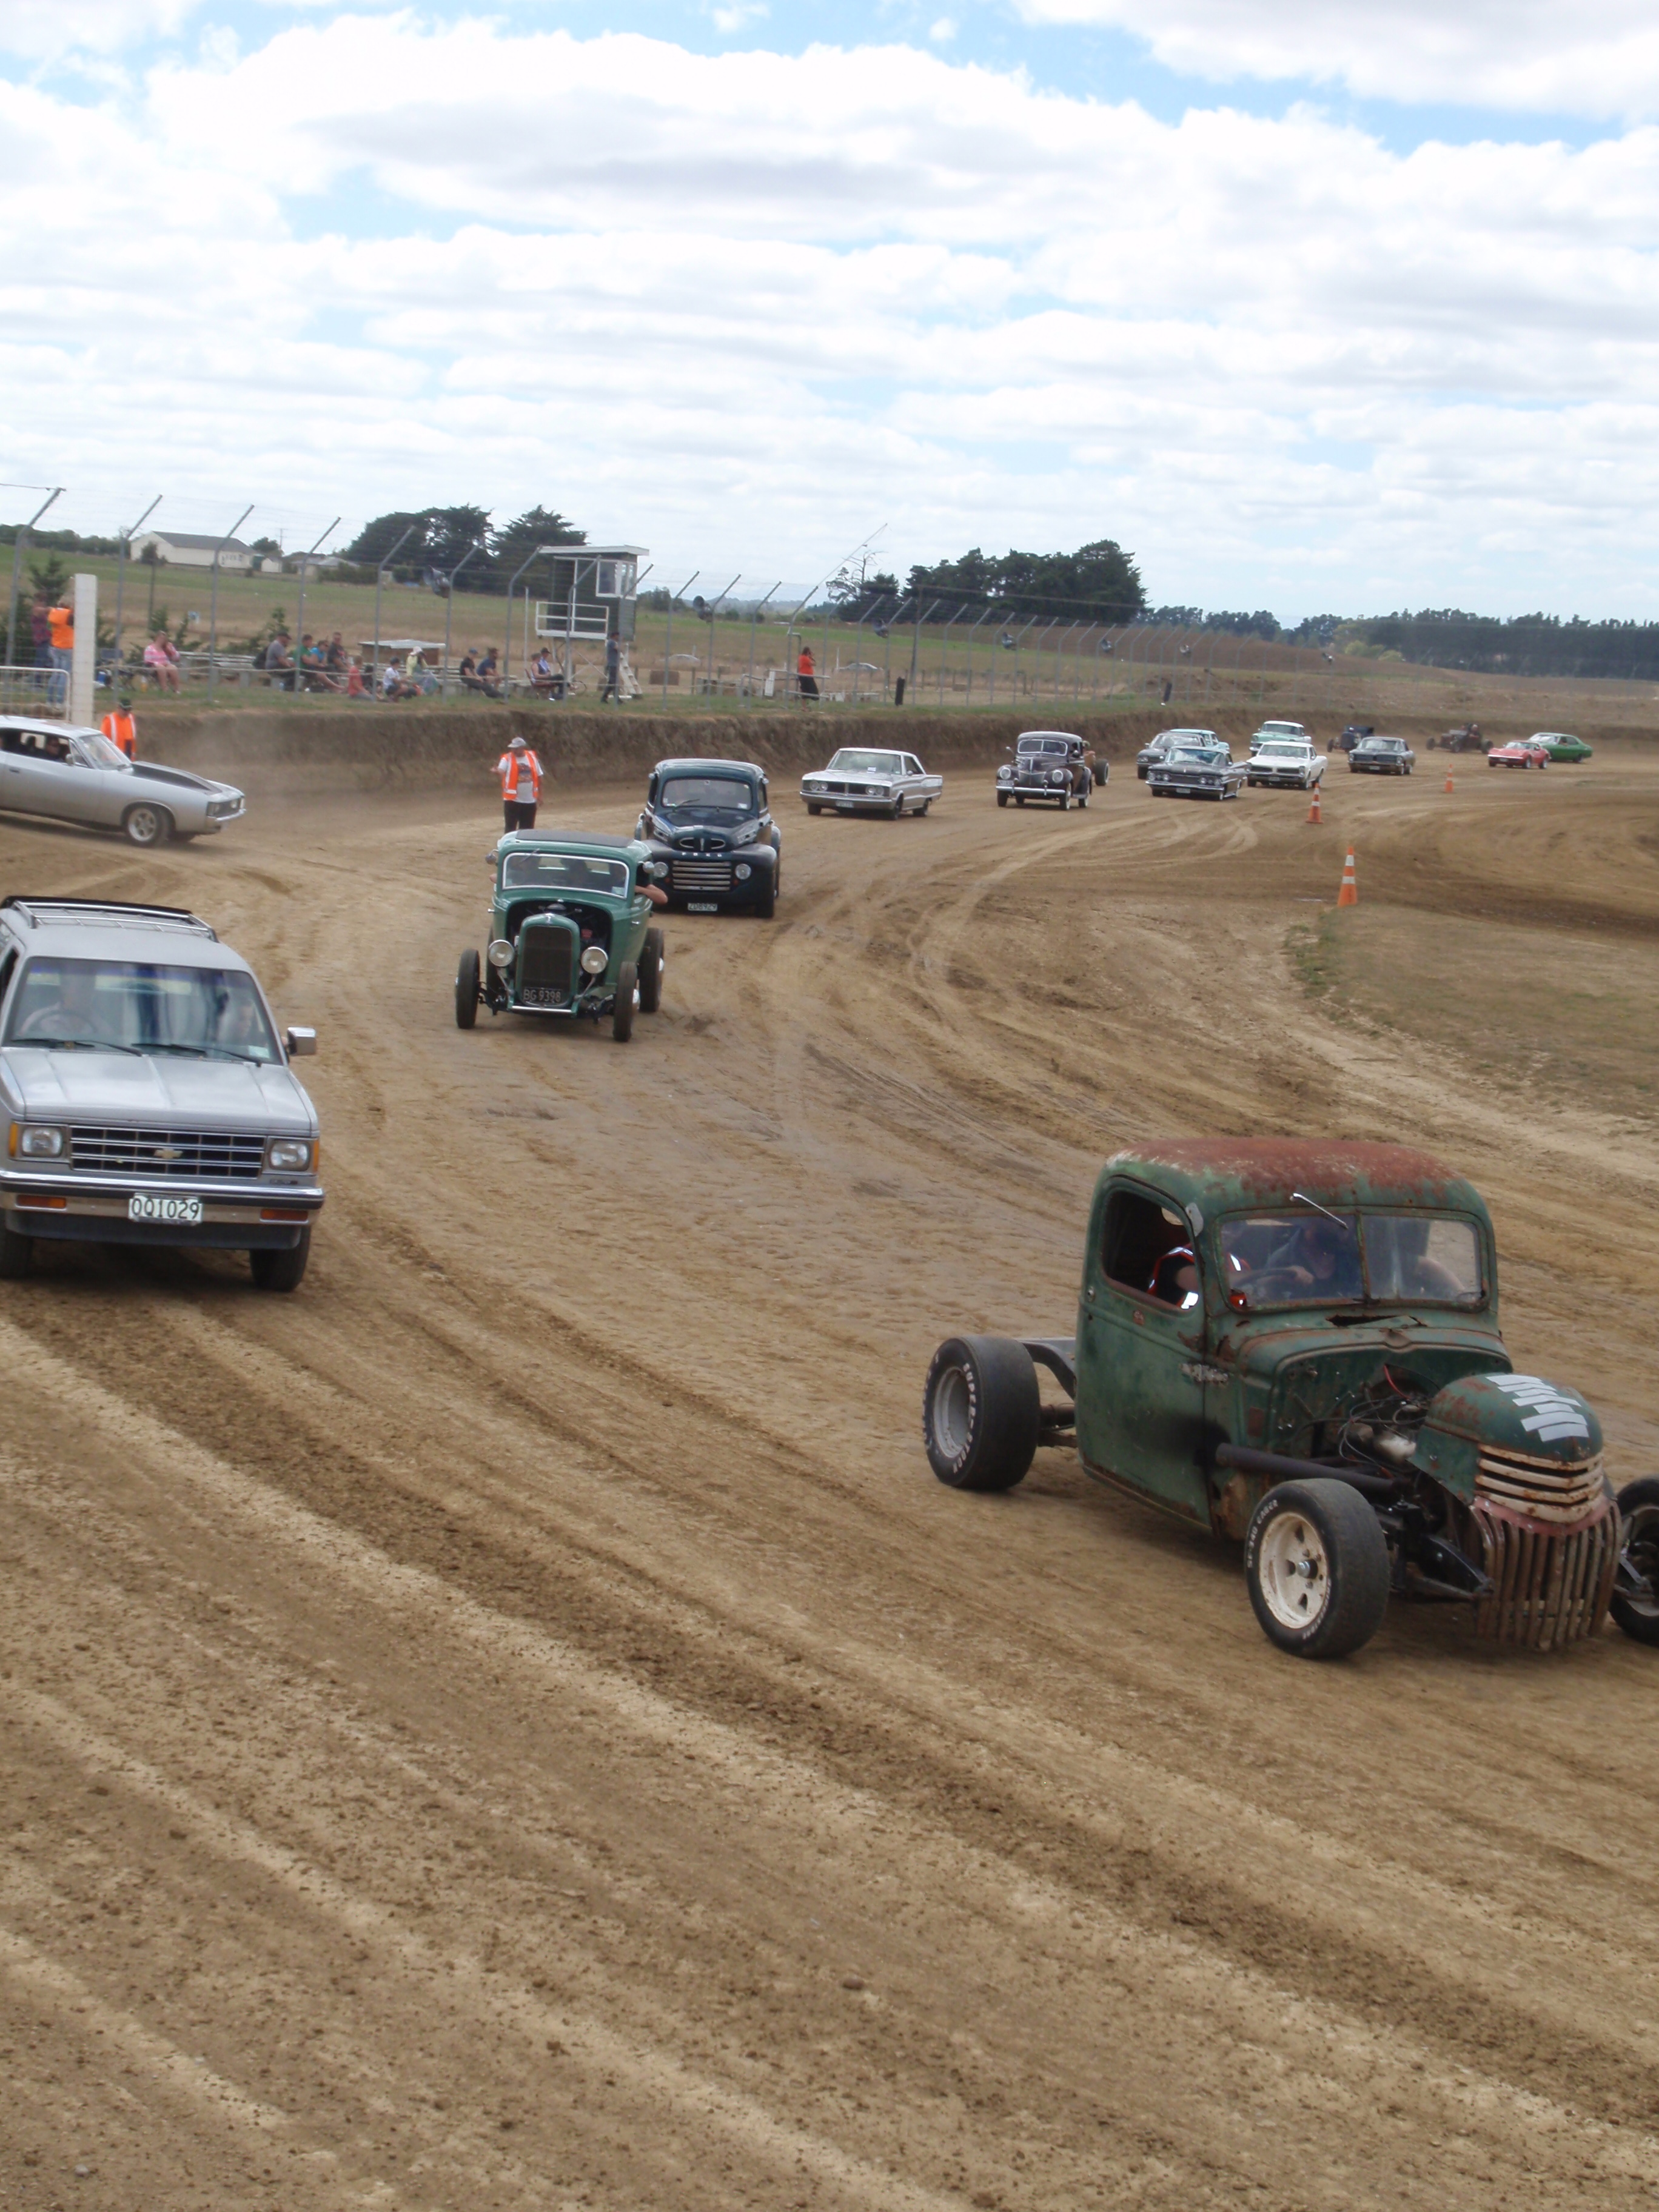
I think its going to end up sorta resembling and doing what Mr J. Potter's example gets up to as seen below. An eXcellent example on mintness! Ratrod, hotrod, POS or whatever you choose to call them - they are much fun to beat on, can turn their hand to near anything automotive and, last but not least - look and sound the part for not alot of $. This pic was taken 4 years ago up at Bulls at Harrisville.

-
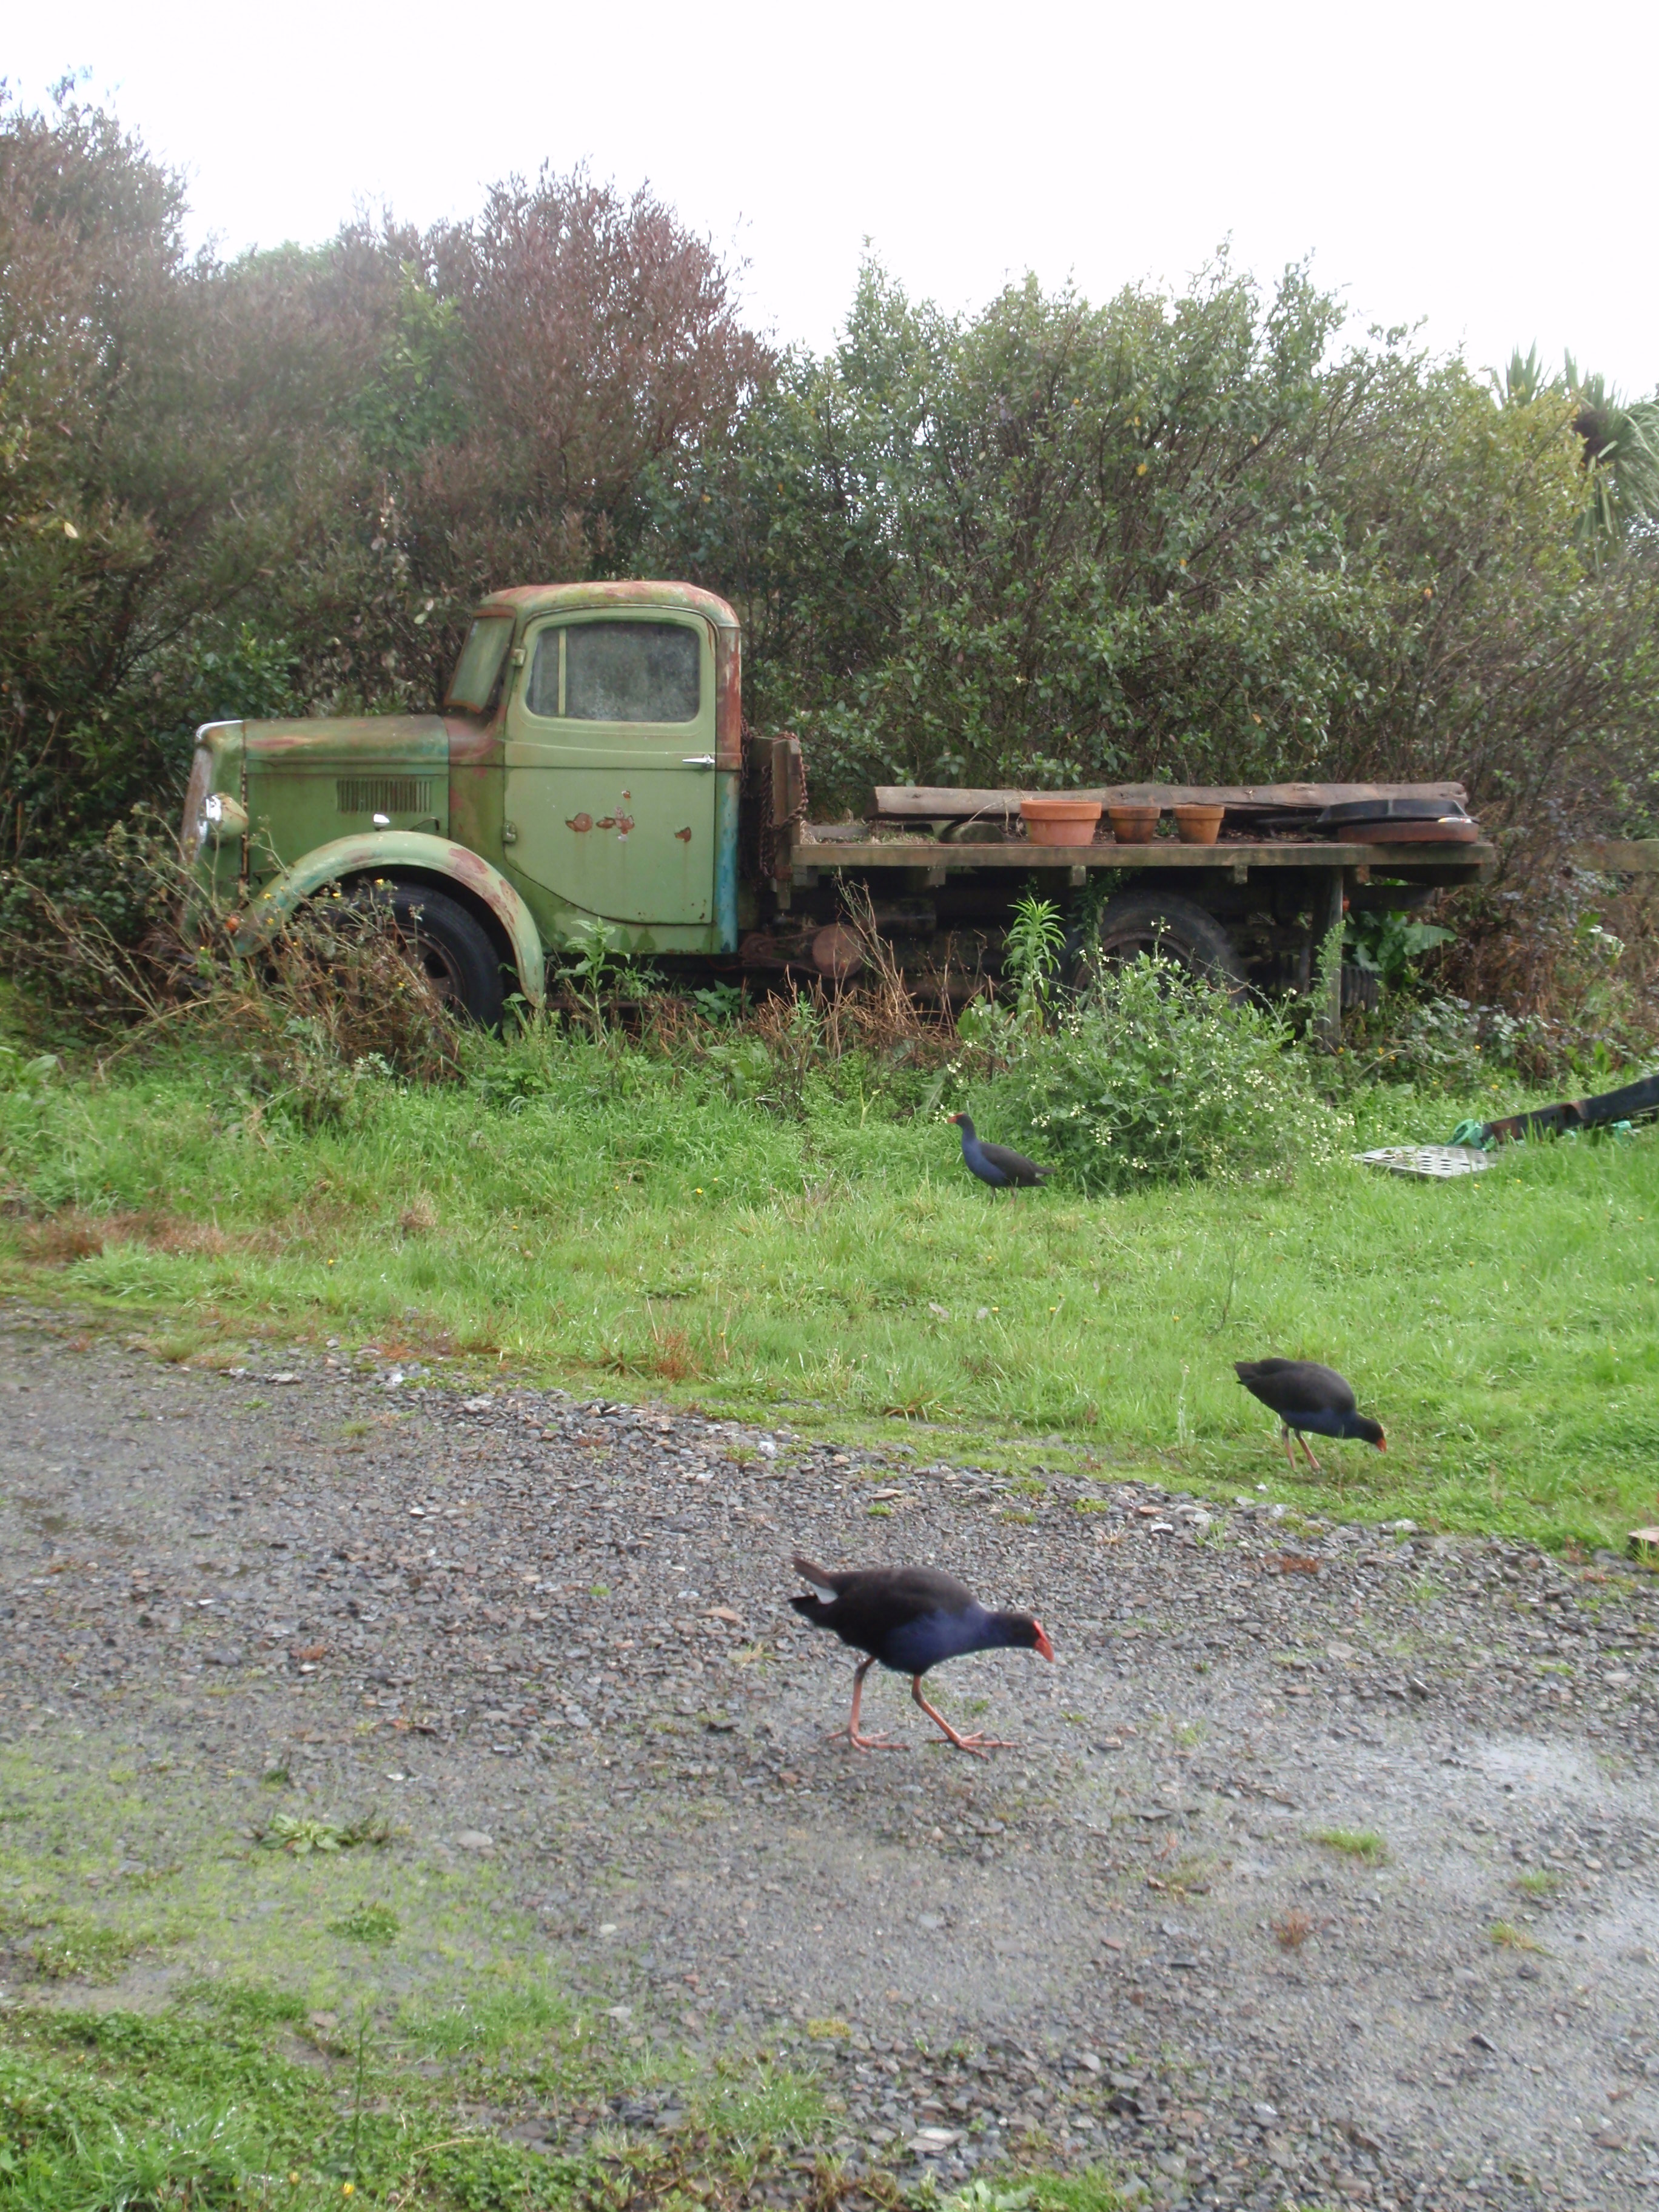
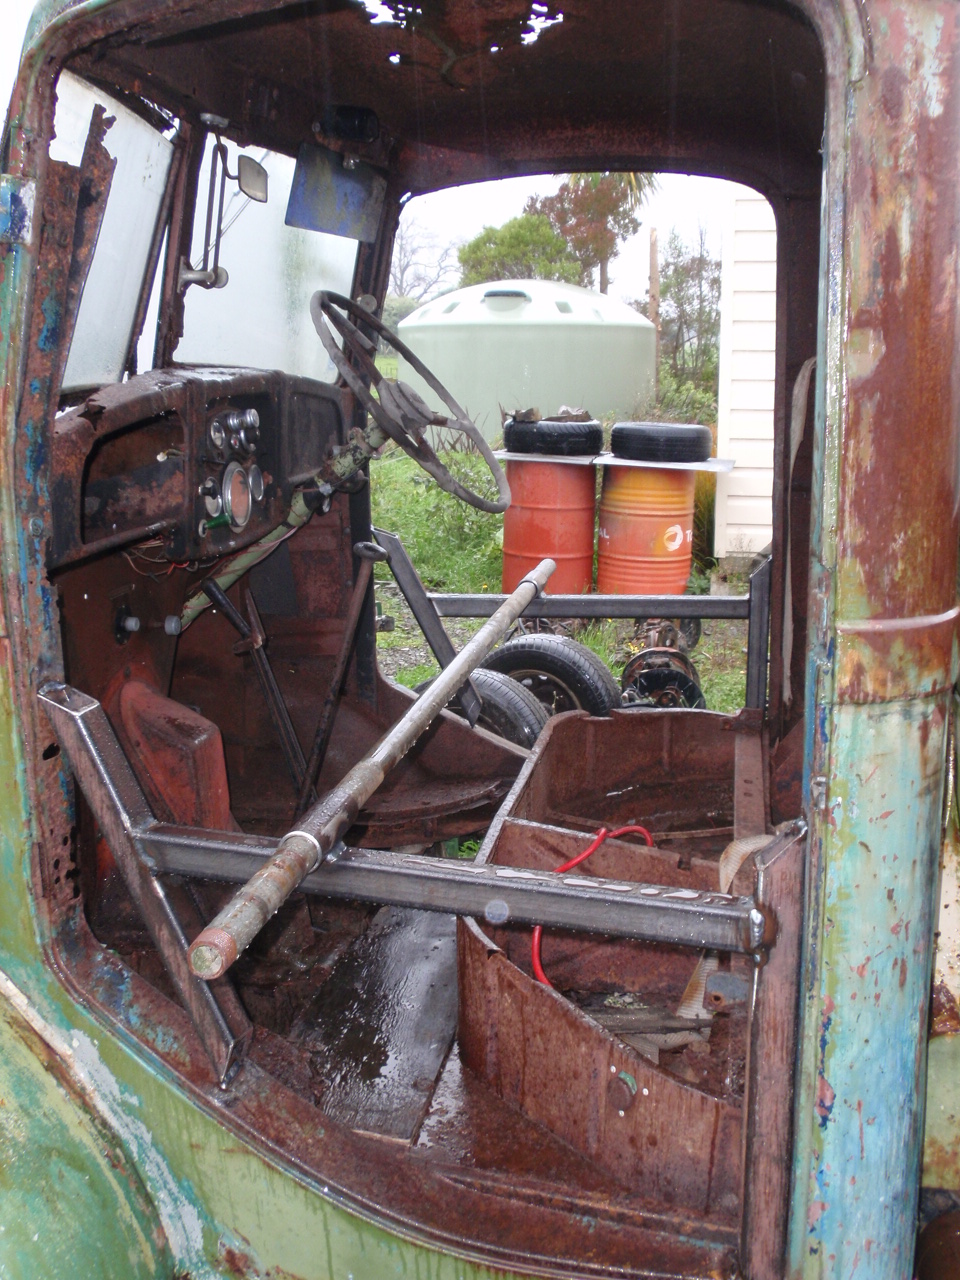
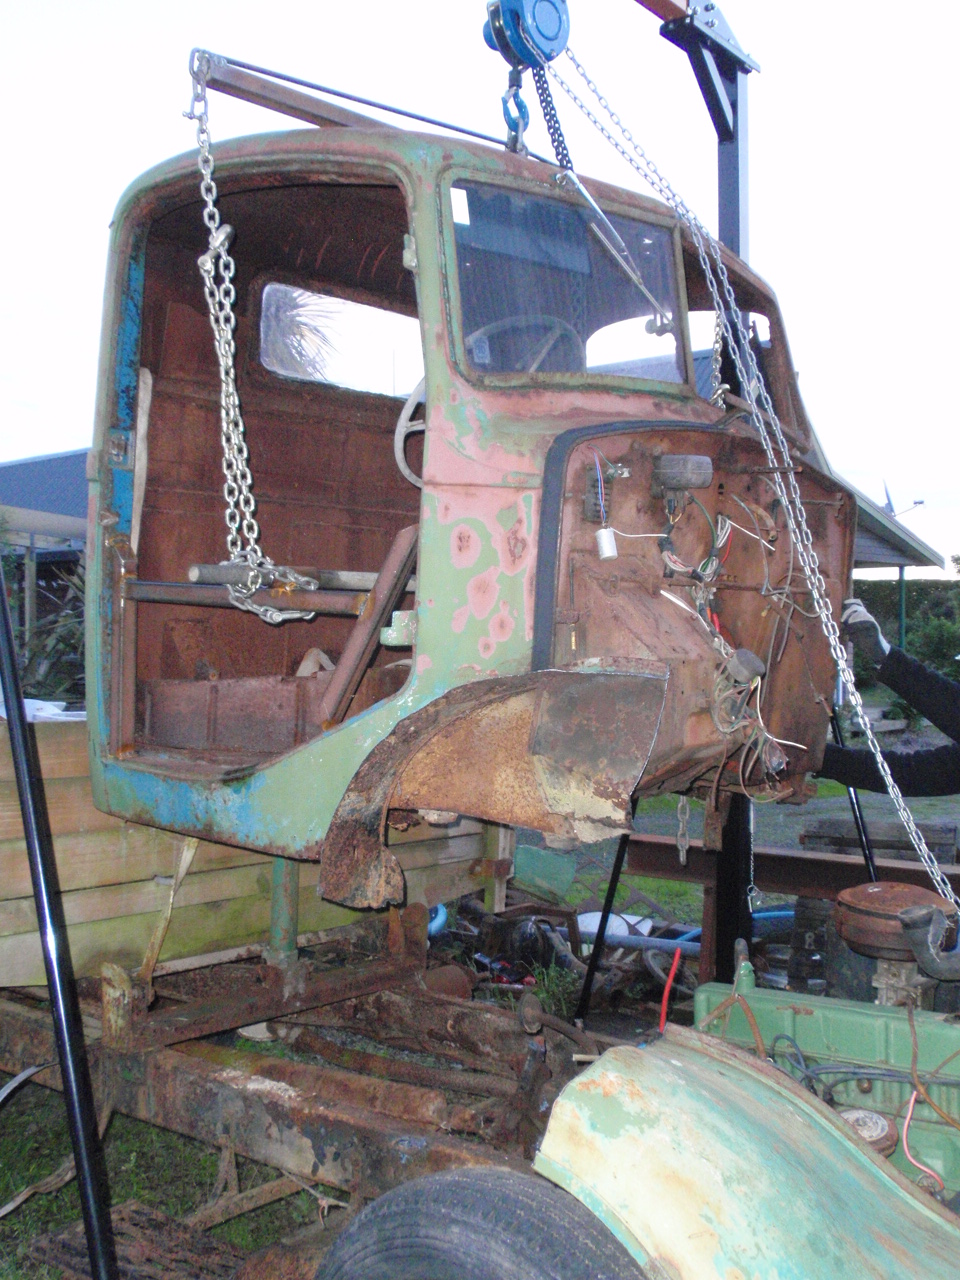
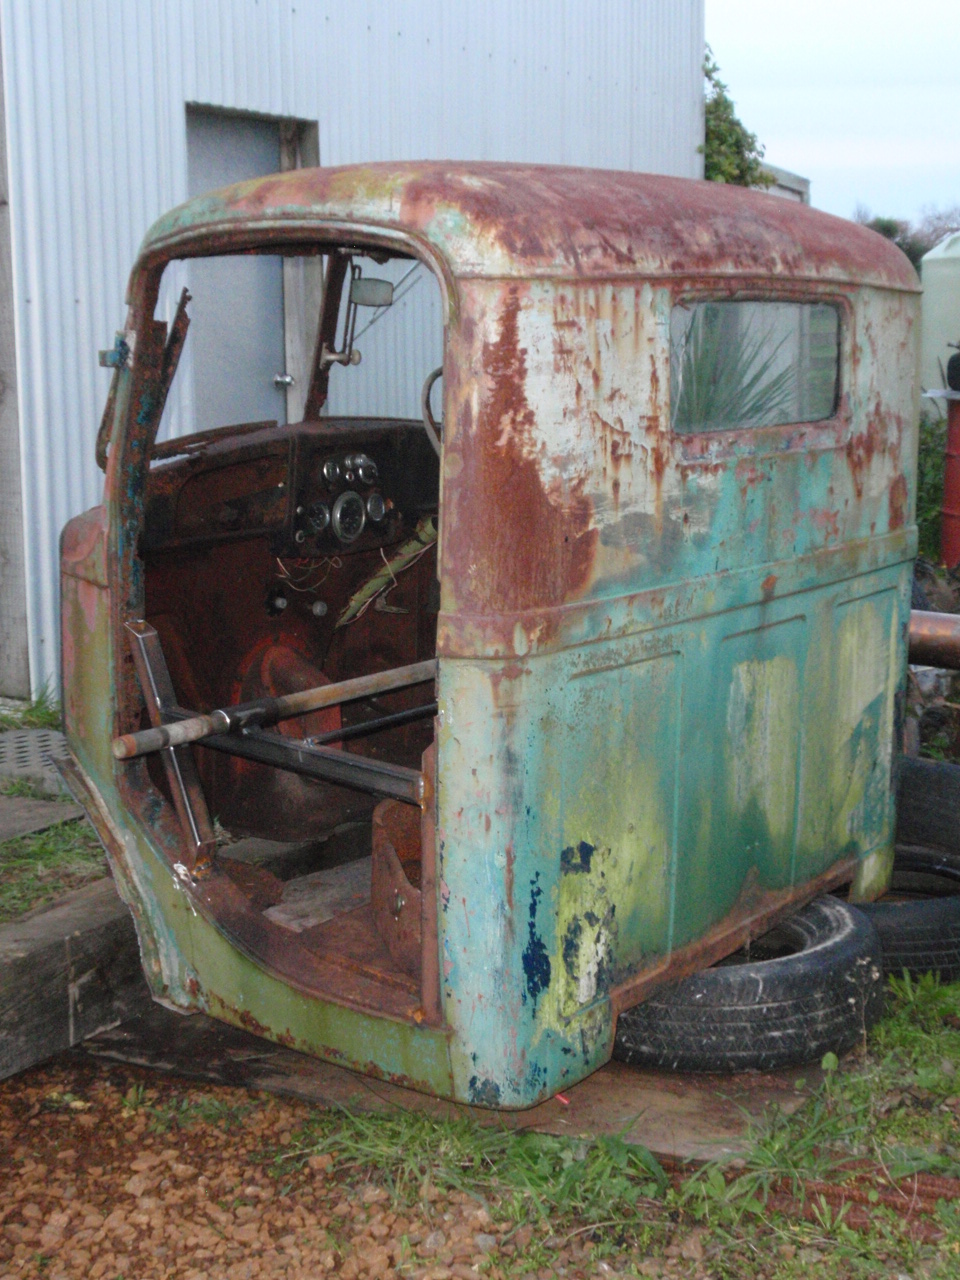
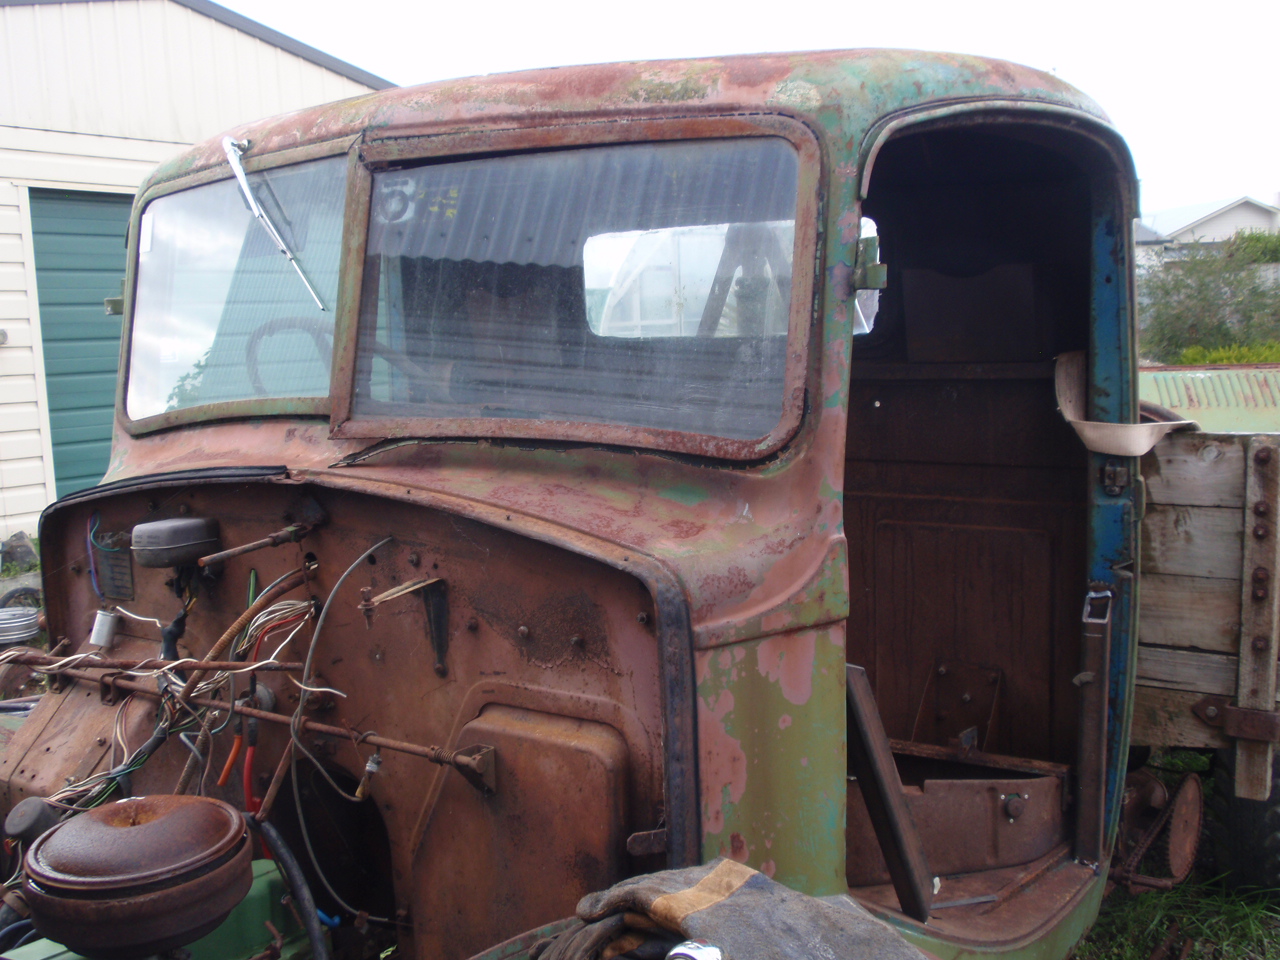
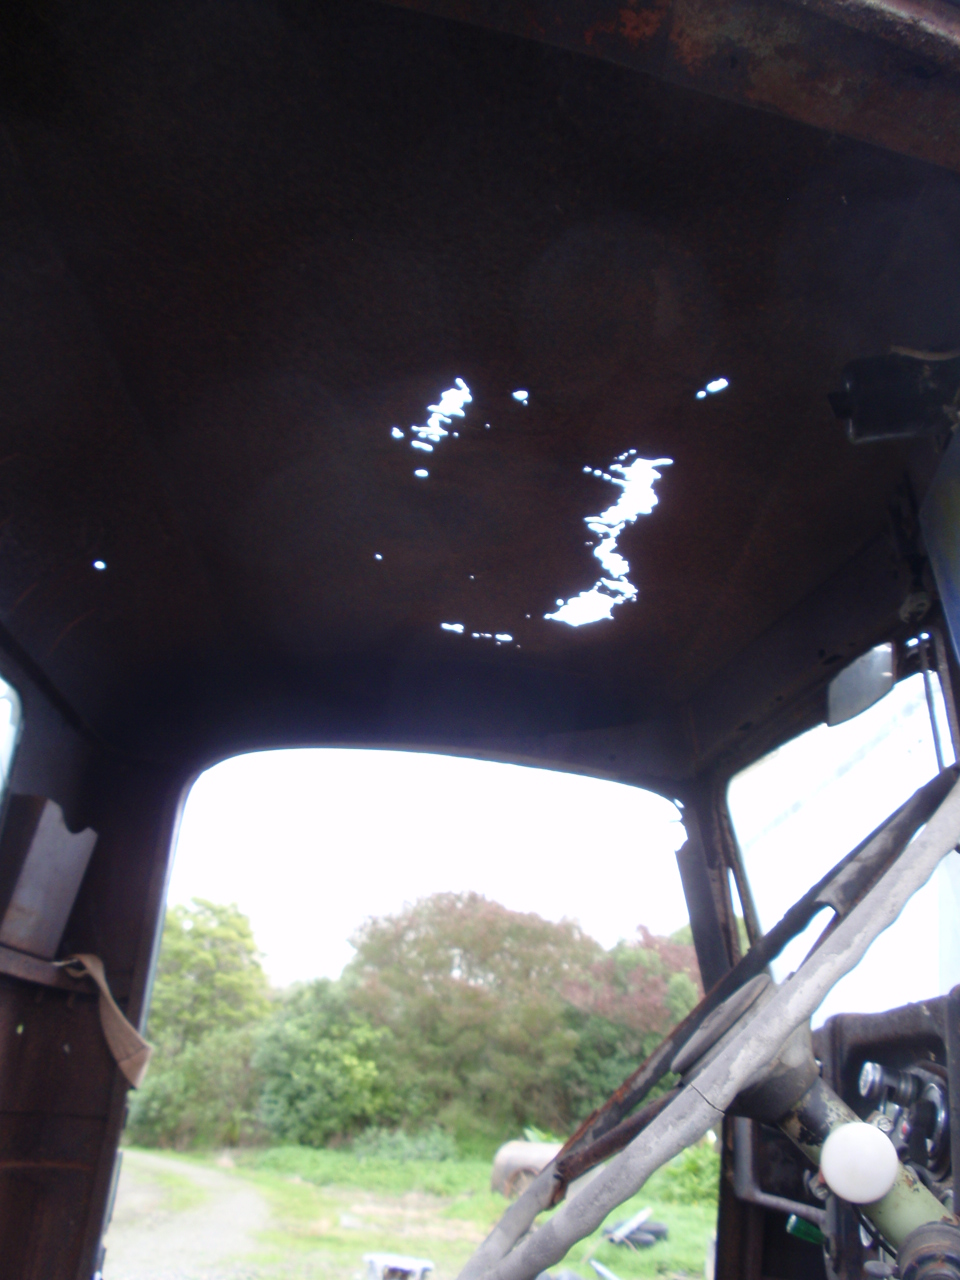
Life has not been easy for this dude. He has been mine since Mar 2011. I brought it to stick in the garden and look cool. It/he came from off a farm up in the HB where he had been sitting under a row of tree's. He was not running then and never has since I have owned it. He has been shot at and been home to every creepy crawly thing you find in a rural setting. During the weekend just gone, he was separated from his chassis (probably for the first time in his life) I noticed this morning he was sitting forlornly in front of the shed, drenched stripped and probably feeling very sorry for himself. Probably wondering is this what becomes of old trucks. I stopped and talked to him. I told him I knew how he must have been feeling. I told him that by the nights fall ... he would be inside a dry shed. Its my guess that its been decades since he has slept inside somewhere. I told him I had organised some muscle to come home and help the oldman shift him into his new home. I told him he'd never get wet again unless it was on purpose and that he would be loved. I further went on to tell him that he would be looked at heaps by different peeps... both lovers and haters. That his paint job would remain as it is now. That he would get a Big Block. That its possible that he might find himself among shine, bling and bright color in the future - but that not to worry. He'd still feel cool. He didn't say anything but I know he heard and understood. Dry out bro and revel in the knowledge that life for you has changed irrevocably. Churr.
- 63 replies
-
- 12
-

-

-
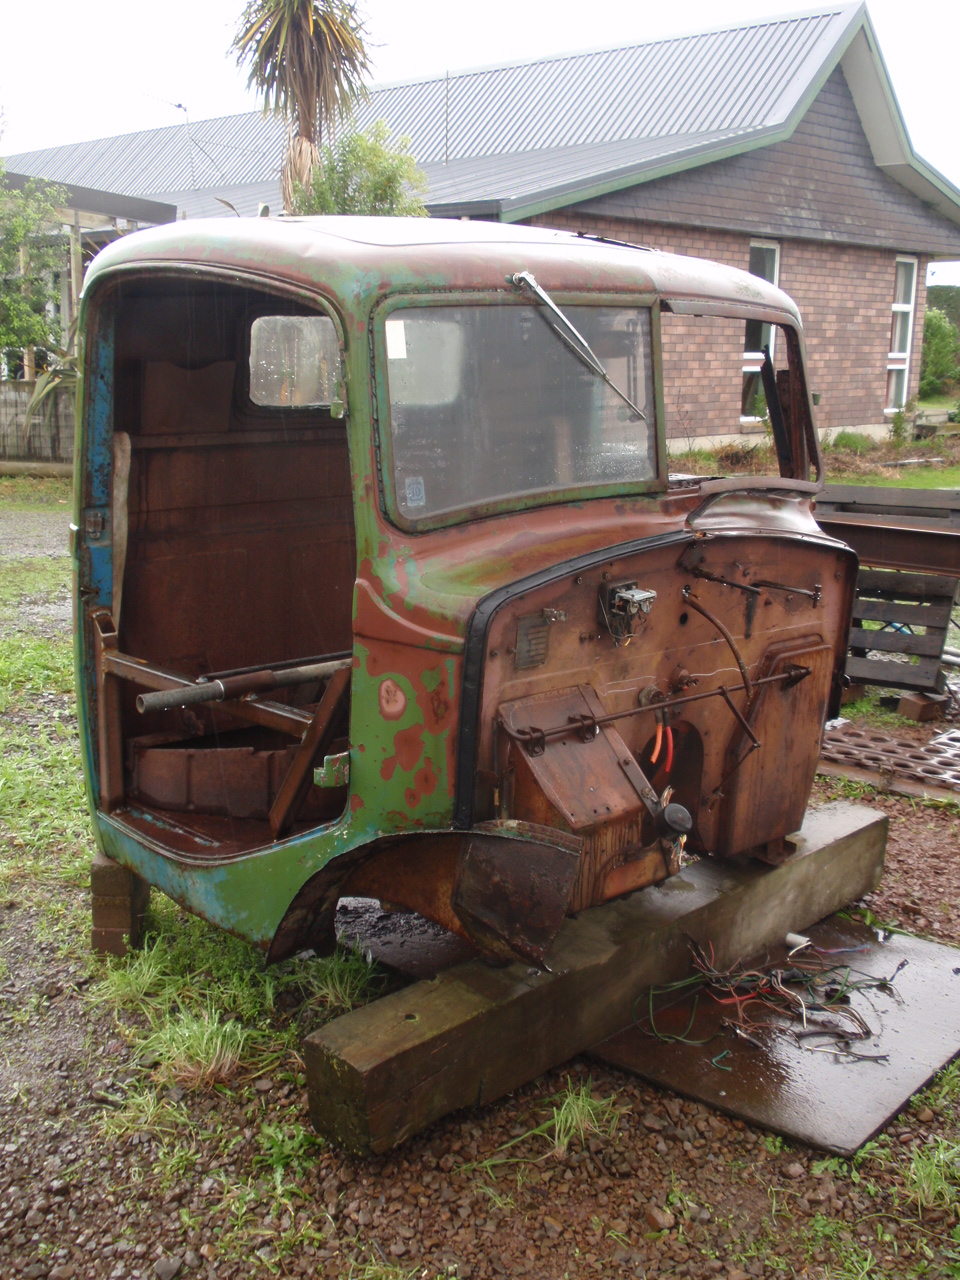
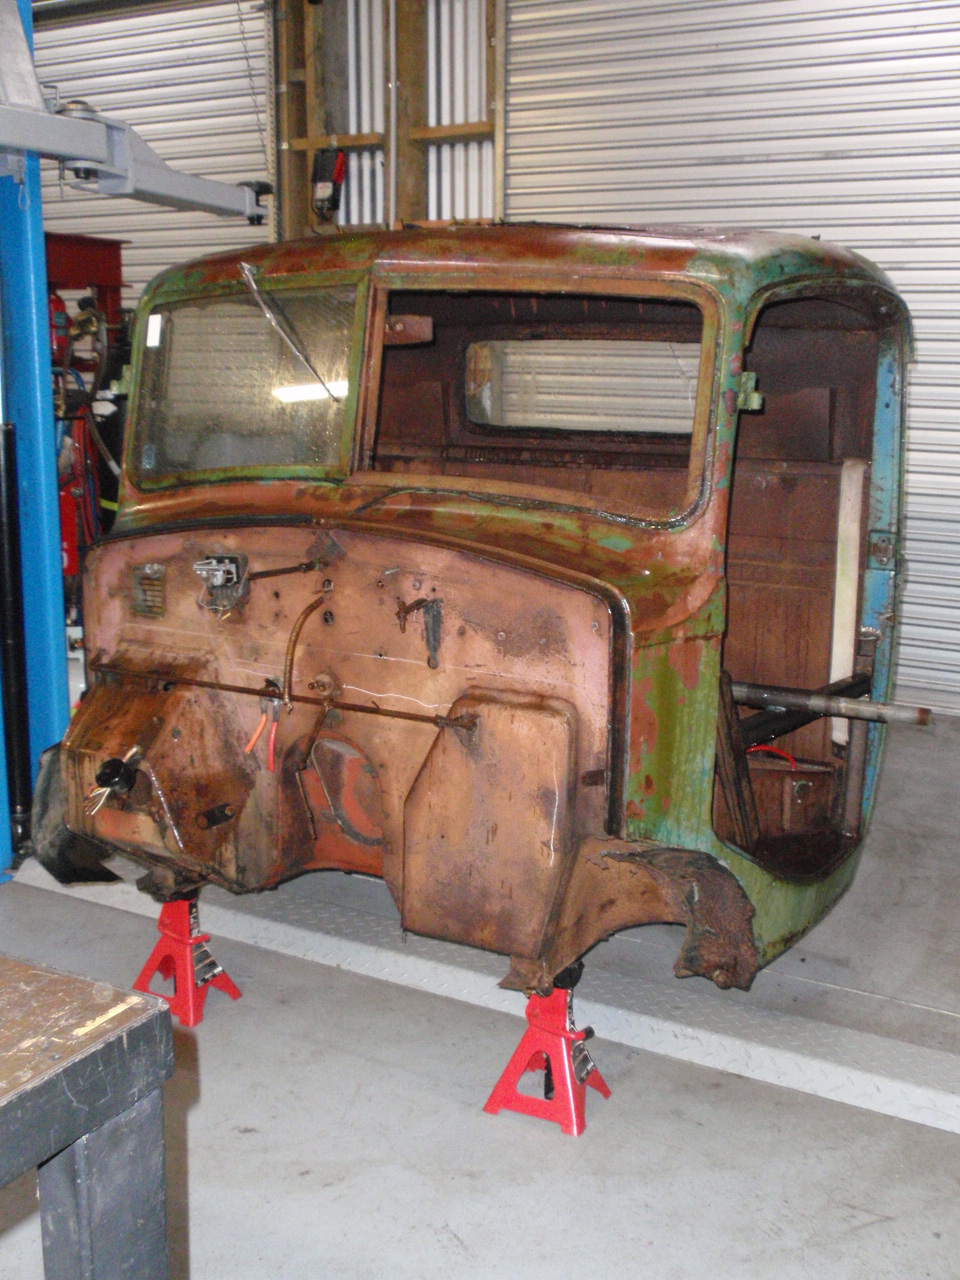
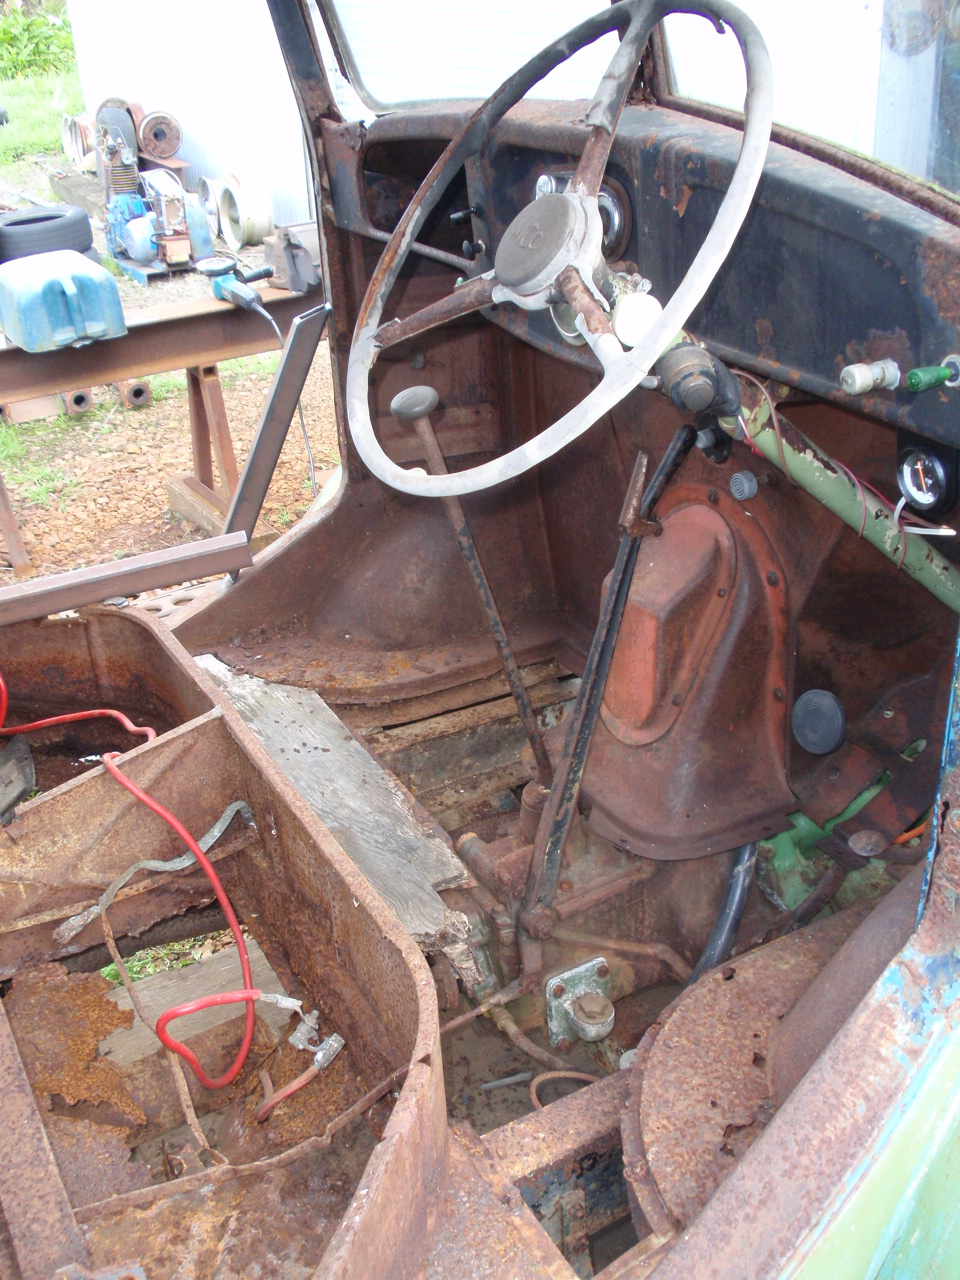
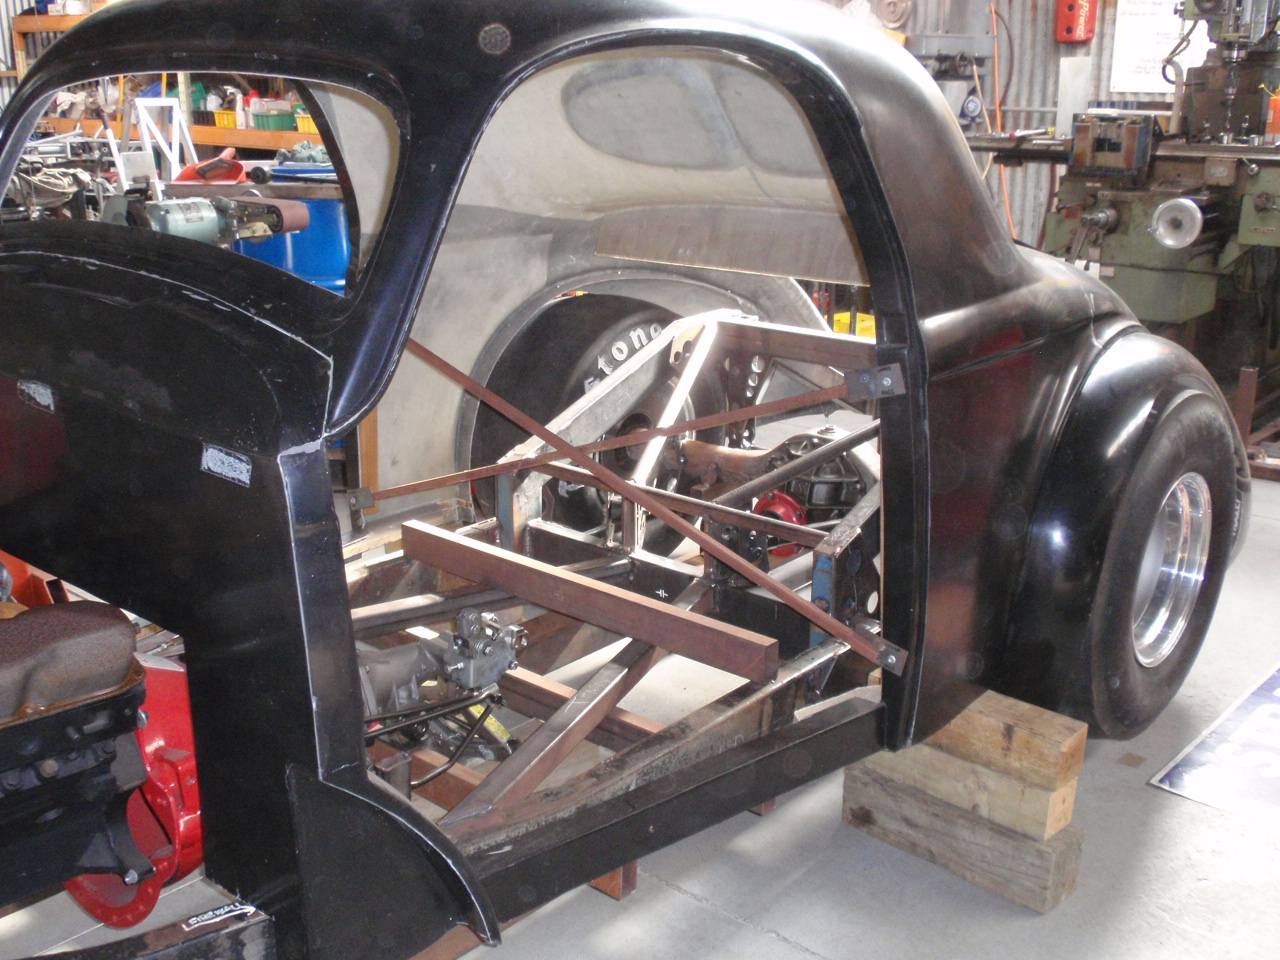
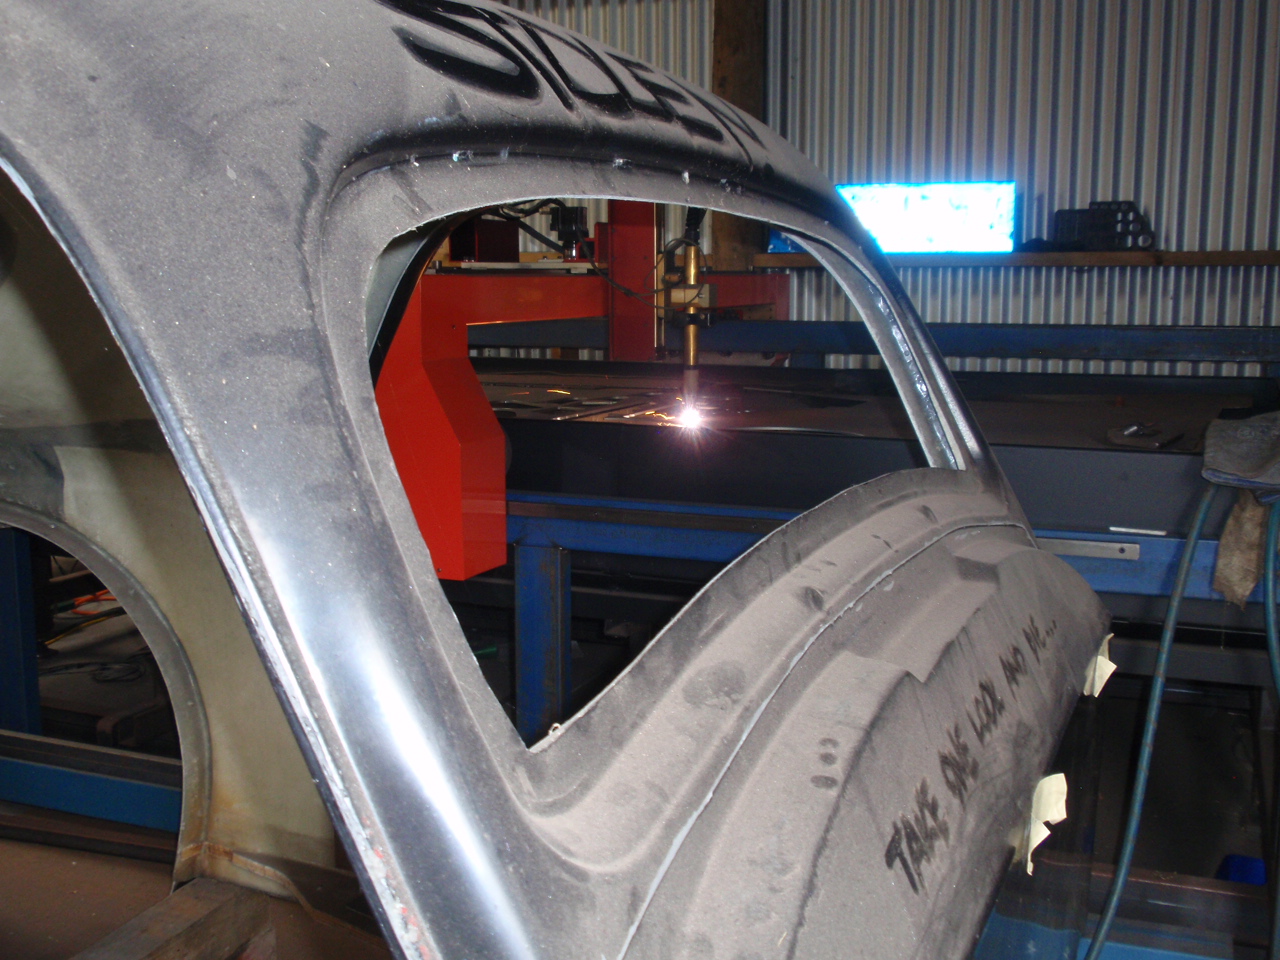
Put a bar through the middle for mounting to a rotisserie sometime in the future. Used it to lift the cab from off the chassis. Brought the gantry from out of the shed and did the deed. There are mills, welders and all sorts of stuff in the shed but the gantry trumps them all in my books. Fuck engine cranes - get a gantry. Deed done. I need to have a think about things now. I like the looks of Coles Rat but I need to remember what this little venture started out as being for - paddock racing/skids and shit. Room inside for race space and the wearing of crash helmets is a must have. Nasty chops look uber cool but leave no room for jounce. Hmmm. Any of you guys know Jeff (PN/Tok) who has that Jailbar Ruffy? Races it at places like that Outlaw Track up in Bulls doing 'Day in the Dirt' type stuff. I want this to be doing the same sorta thing - ratty and fit for purpose. Anyway - cab is off. Going to cut stuff out of it until i can get it sitting where I want it to sit behind that Wedgy.
-
Farrk! that's cool! Where is your mate from? Up @Gasser's way somewhere? Did it come from (was it Wilf or Alf's or something?) place? Do you reckon he'd be into catching up with a gc like me so I could have a sqizz at this masterpiece, sometime?
-
Fuck! I need a chopper?? I was going to use my gantry dRAT!
-
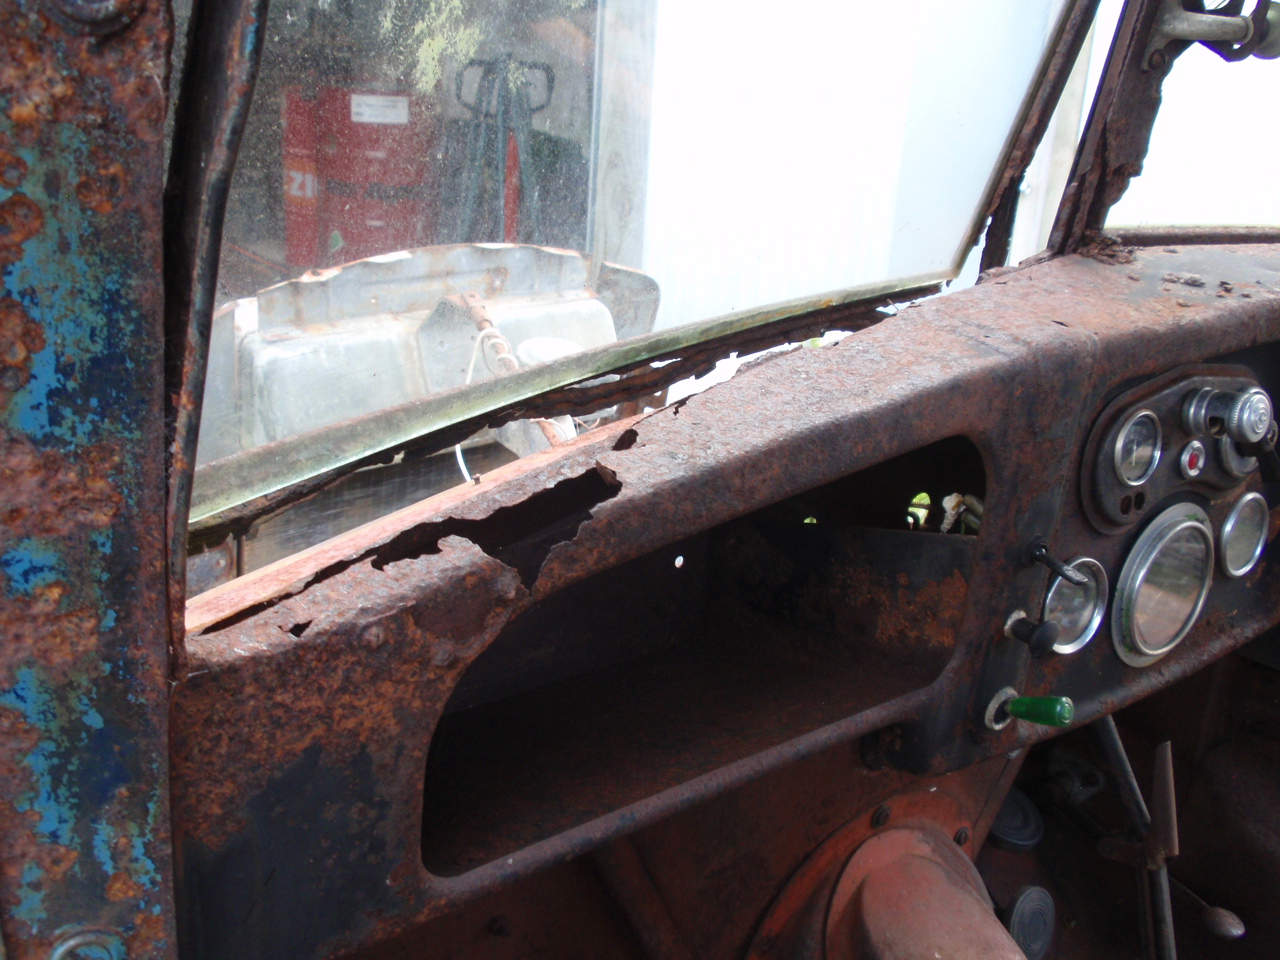
Going to remove this cab from its chassis. Its slightly rusty. Am scared it might collapse when trying to lift it off, due to some of the cab structure being compromised by the odd hole. Cool shit though, aye?
-
Mate, I know its been years, but when you built your glide and you removed the OEM bell portion from the case, you said you had to trim some part up or something. I take it you were grinding using an angle grinder. But finishing it ... how was that done. Milled? Could you explain the process you go through removing the OEM bell in readiness for a JW bell. Ta.
-
The only reference i could find re having shield was using one if a certain clearance distance could not be met. Even though I would meet the distance requirement, I was going to utilize a shield/skid plate arrangement under the cell in any case. I thought this was just good practice and it added some confidence that my ching ching fuel cell was protected from road debris. No, what i am asking about is the requirement to have the boot as a sealed compartment. I wonder if you have to?
-
So whats the go on an LVV having to have a boot floor? I am wanting to install a (proper) plastic fuel cell into a LVV and have been reading my Hobby Car Book. I understand the fixing/attachment, and clearance ... line routing requirements but can't see anywhere where it says I have to have a boot floor or something under it. I looked in the body section of the book also and didn't see anything there either. Just the necessity to ensure the passenger compartment was sealed from the tank etc. So do you have to have a boot floor in ya hotrod? Fuck that sounds bogan aye ... but do you?
-

Johnny.race's Gasser that wont shine Discussion
johnny.race replied to JoKer's topic in Project Discussion
Yeah you remember right, Surfs have angled top bars and straight bottom ones. They employ a panhard rod. I just copied what I saw Toyota had done when I was removing the bush ends. And on my car, I measured that at 50mm suspension movement up or down from planned ride height, the bar will limit lateral movement to no more than 1.8mm. I drew it up on CAD and had a look. The center to center length of the bar is 700mm and its level. But all this aside ... you can see just by looking at a triangulated 4 link setup employing any end joint that uses something made from compressible material - there is going to be sideways movement at some point. I reckon anyway. -
Johnny.race's Gasser that wont shine Discussion
johnny.race replied to JoKer's topic in Project Discussion
Yeah, I reckon it was going to move bro. The bushes are recycled from off a Surf's bum setup. They cost nothing. But they are are big, they are rubber and when push comes to shove, I reckon there will be wriggle room for sideways movement. The other thing I thought about too was that I couldn't get the recommended 40 - 45 Degree angle on those top arms so thought fuck it. Run a rod and make sure that if there was some - I could control it. I still have not unpicked the diff from the chassis bench so don't know if there is going to be any binding but I reckon there won't be any. Have to see. -
Johnny.race's Gasser that wont shine Discussion
johnny.race replied to JoKer's topic in Project Discussion
Anyone know where a AE92 rear caliper sits OEM? Like is it towards the front, rear or sitting on top or something. -
Johnny's bigblockpoweredstickcarthatdontshine
johnny.race replied to johnny.race's topic in Projects and Build Ups
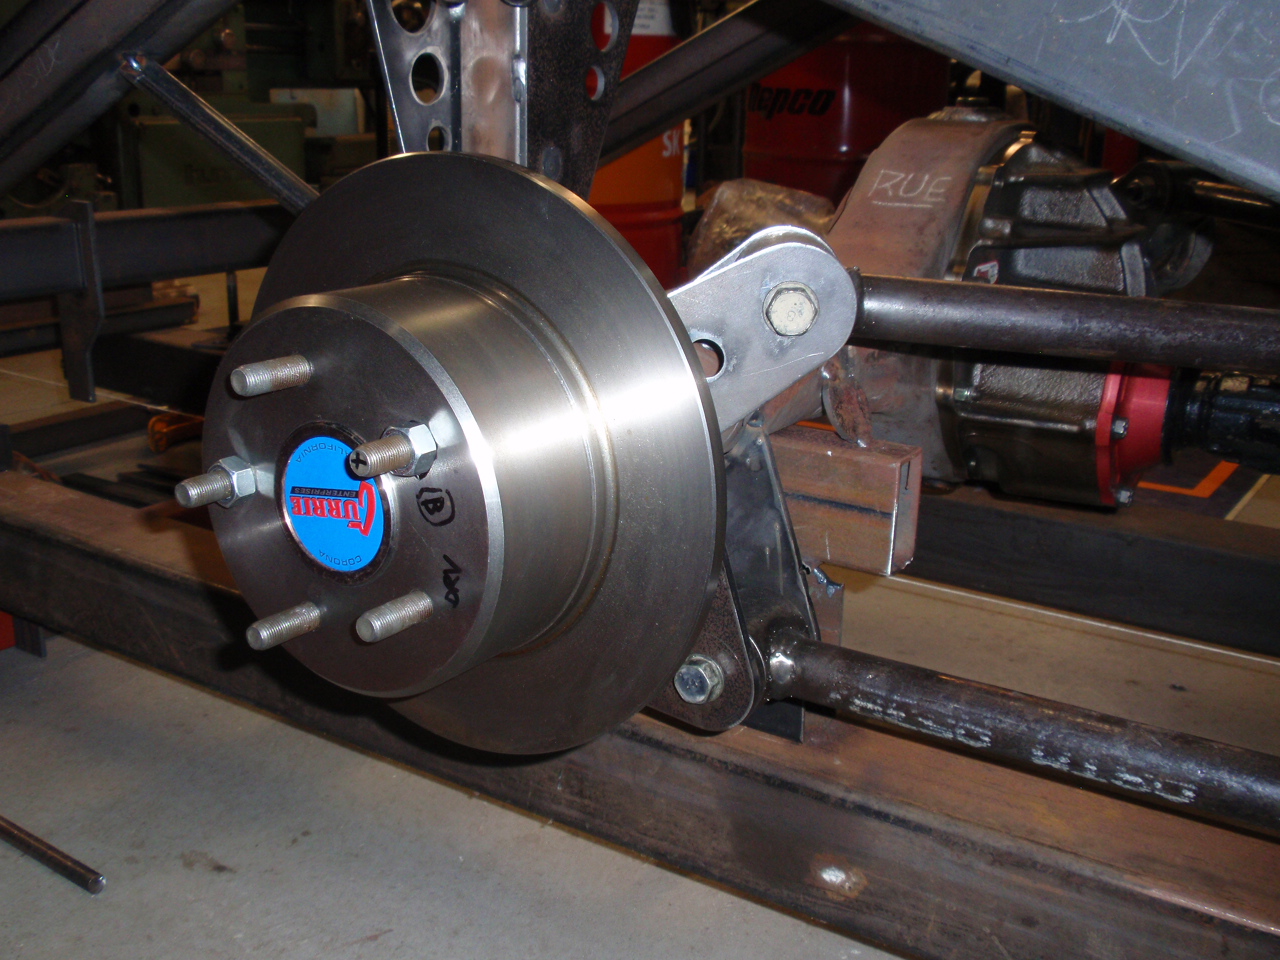
Praying Mantis Finished these. Hope those AE92 Calipers fit without hitting the top arm. Initial look/see indicates it might be close. Big bum. Everything seems to fit ok but its early daze, lol! Fuck, I hope I don't come across something that fucking daze's me out, haha! Ride the Serpent Reached milestone. Now need to do some measuring, visualizing and planning re how to go about future stages. Happy with stuff though.
- 18 replies
-
- 21
-
-
Right, got it. Thanks dudes.
-
Does anyone know if you can get upgraded from stock, brake pads for rear calipers on a AE92 FXGT. Ta.
-
Johnny's bigblockpoweredstickcarthatdontshine
johnny.race replied to johnny.race's topic in Projects and Build Ups
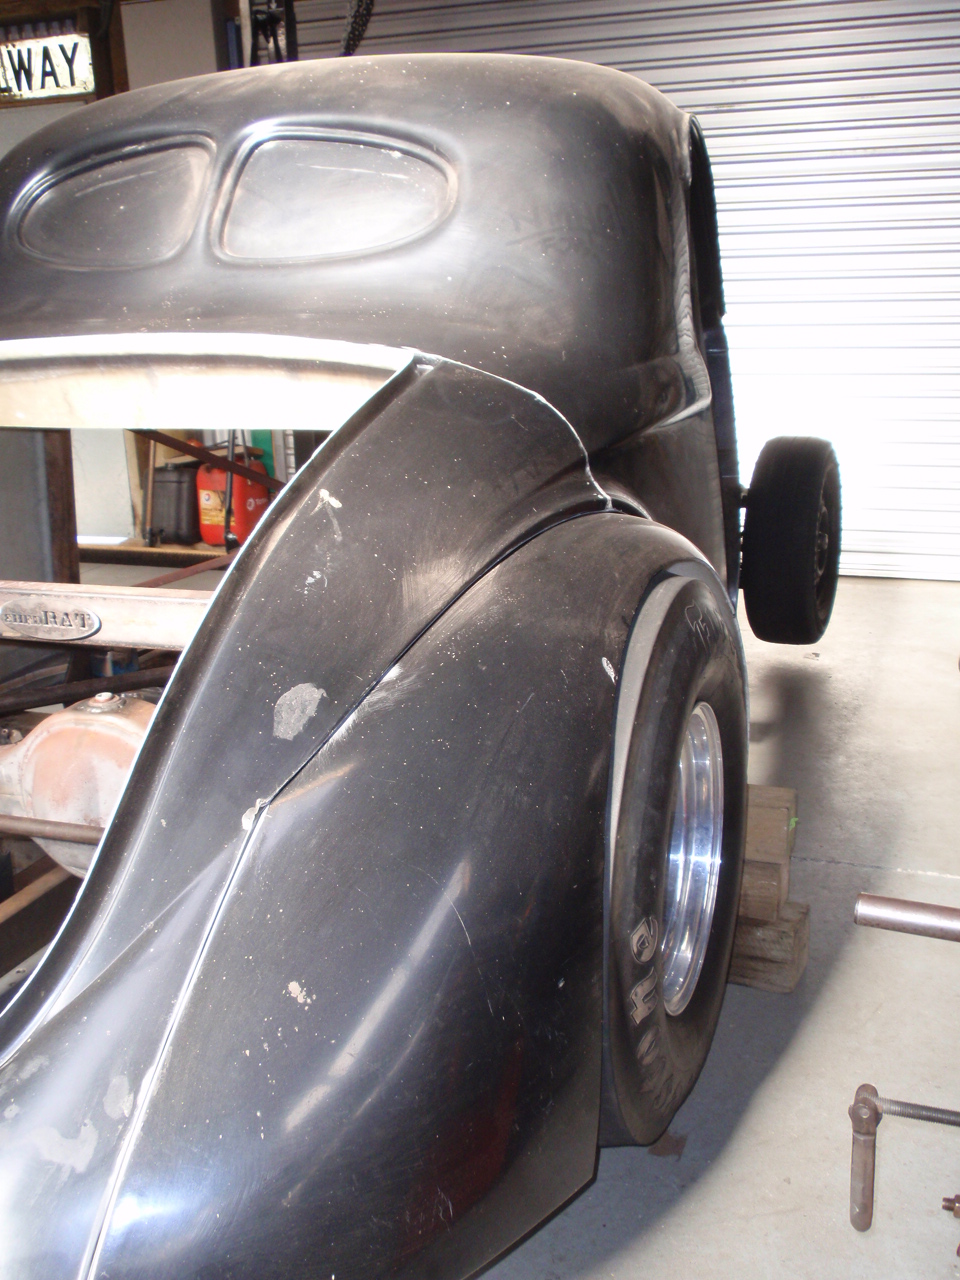
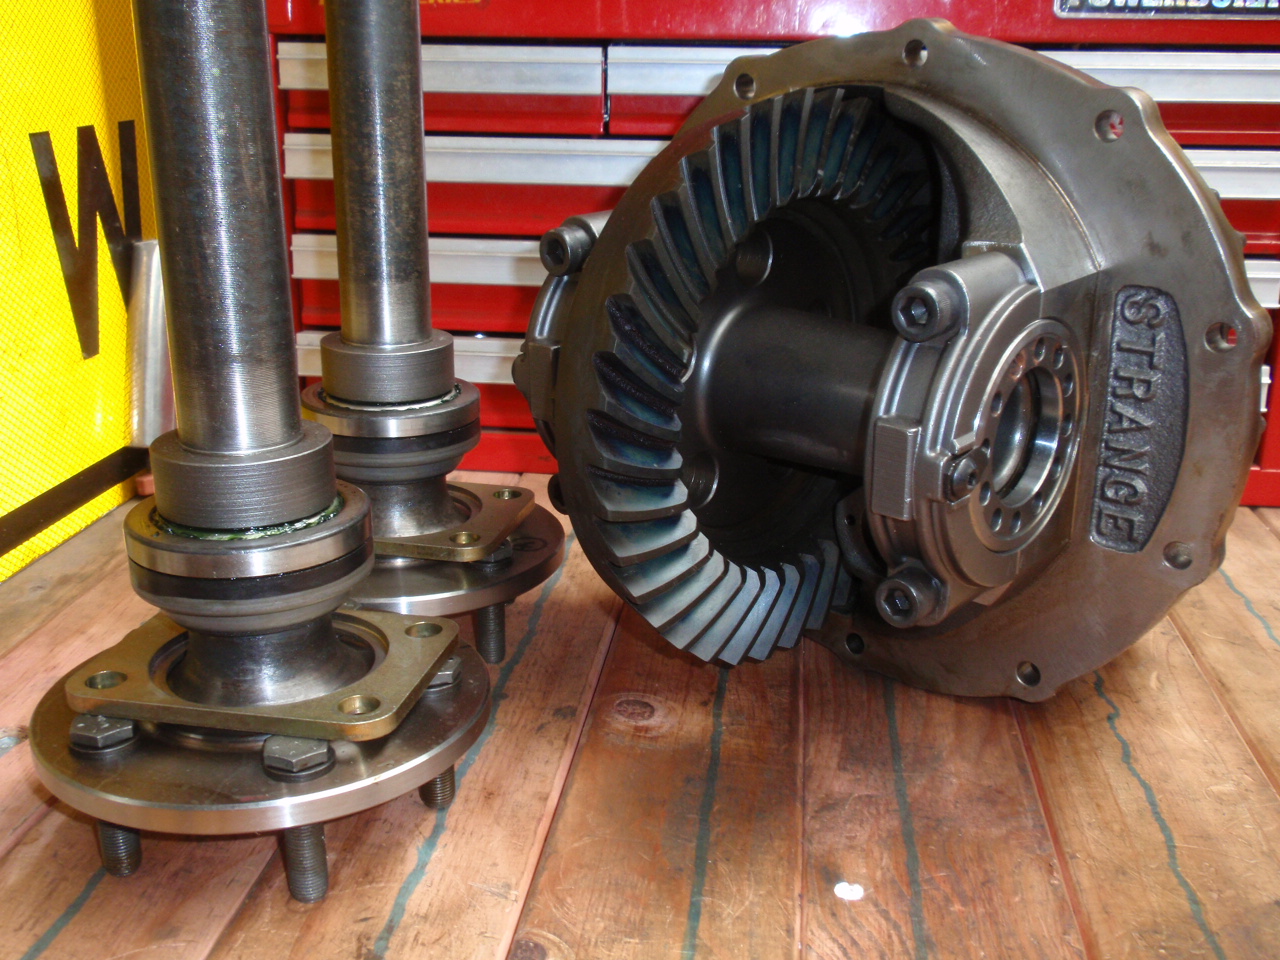
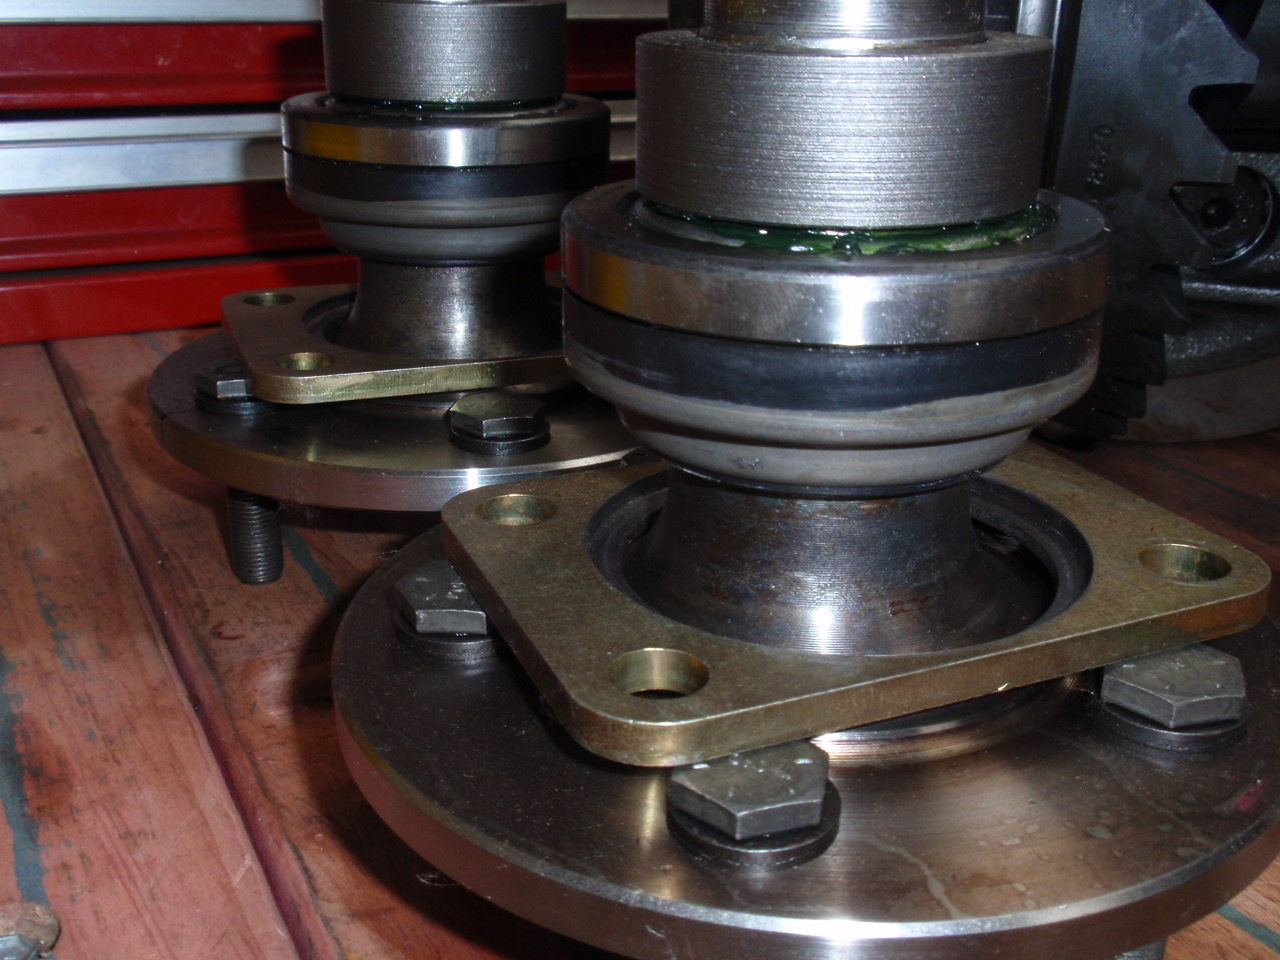
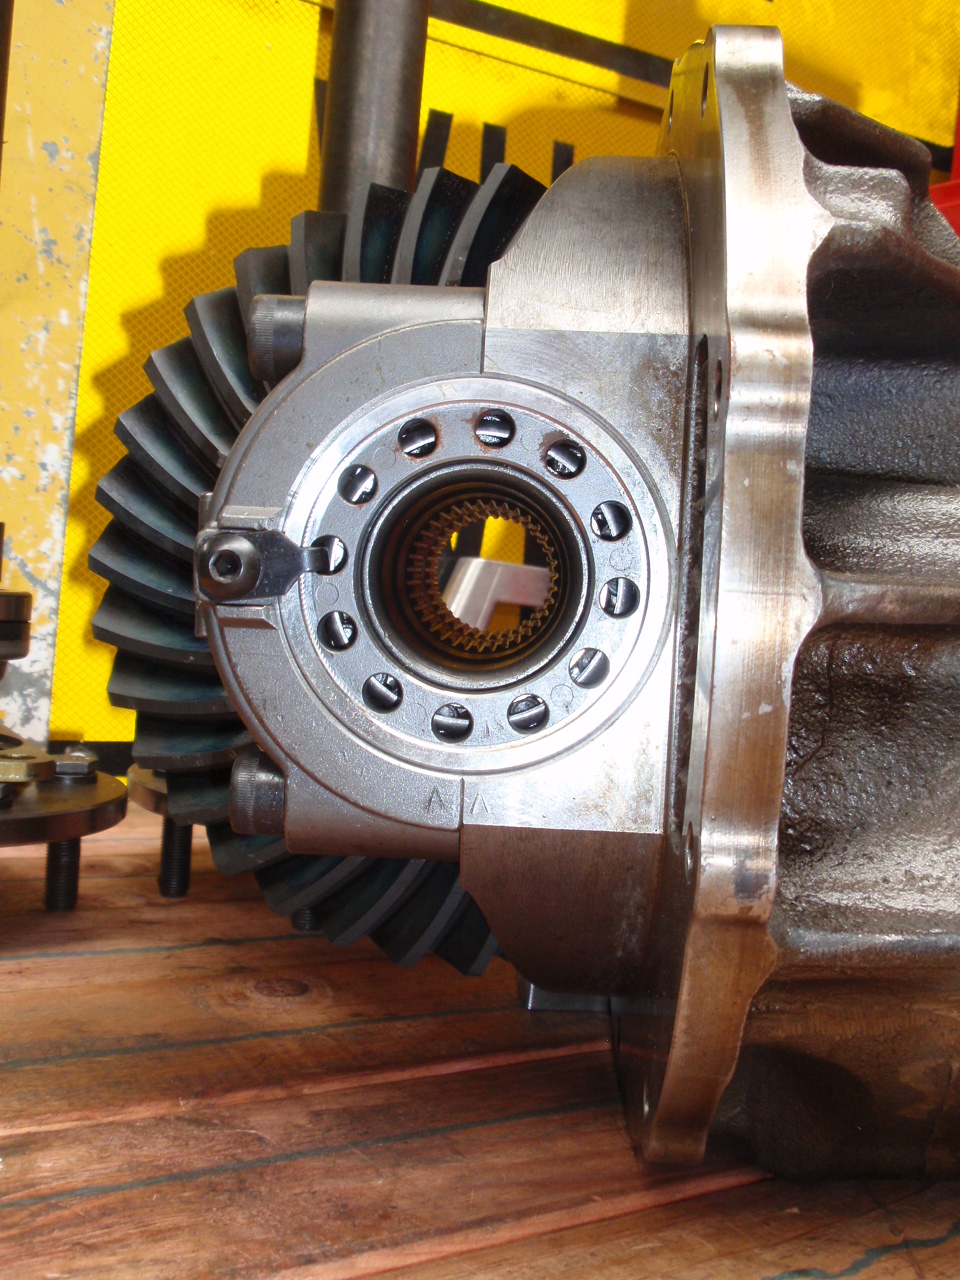
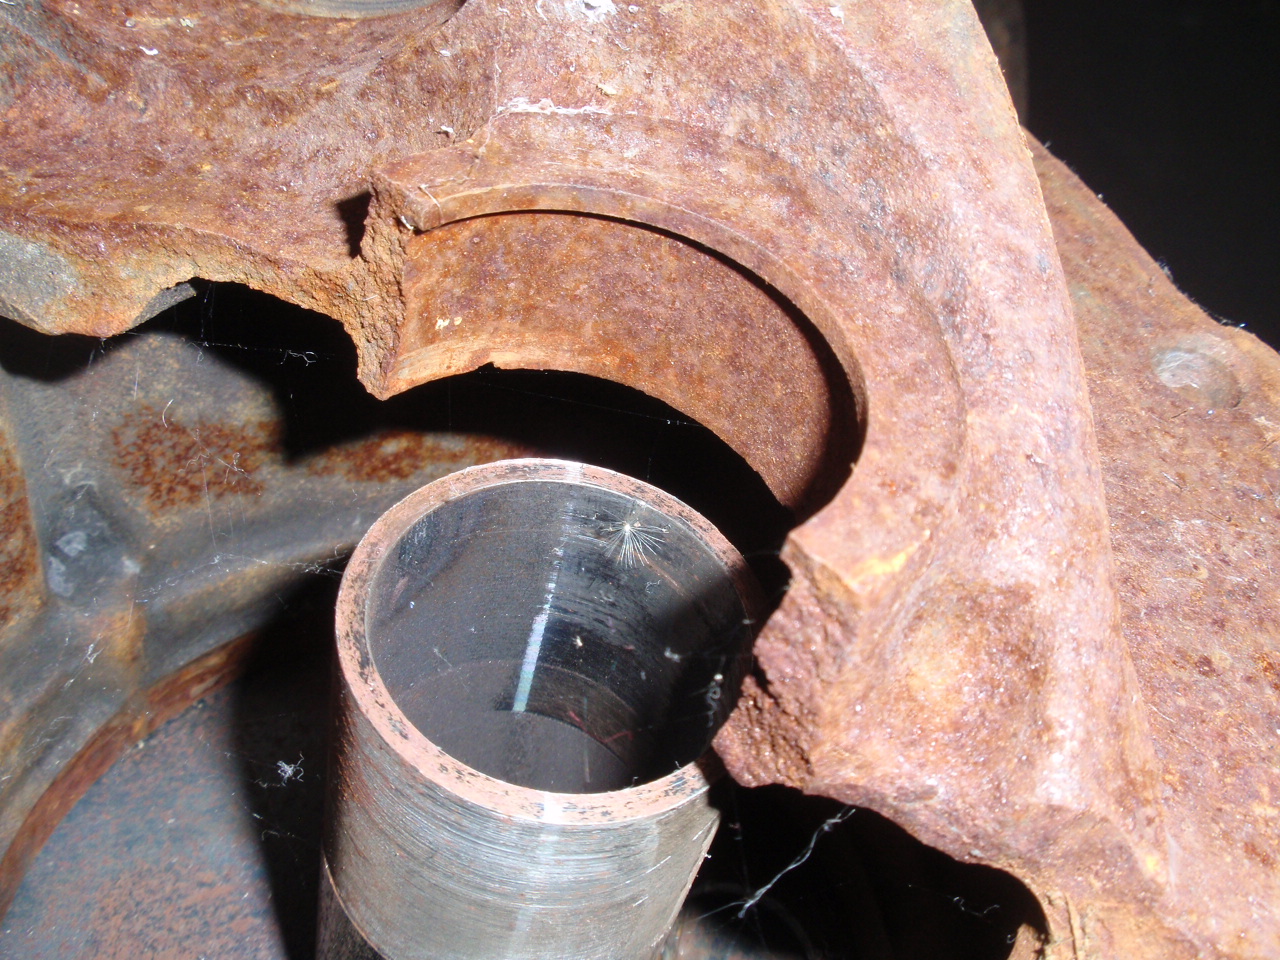
The plan after the K members are fitted is to assemble the diff enuff in order to fit wheels to the rear. After this the body is going to be fitted over the chassis in order to measure for the outer sill rails, position fuel tank, rear bumper fit up, and to position the engine. Then the body will come off. The fitting of the body will represent a milestone for me. I pulled out the diff bits and pieces today in readiness for fit up. I like this shit. This is not the head I will be tooling around the street with. If you are into 9"'s then the following will mean something to you. If you aren't then its just blurb. Anyway; Strange Pro Nod iron 3.250 Case, Strange 35 Spline Spool, Daytona Pinion Support, Richmond 5.14:1 Ring, 1350 UJ. Timkin Set20, HD Retainers, Currie Ent. There is a reason you run the 3.250 Case or bigger. Check out the size of the pinion support. This is the head casing I use for aligning diff's to gearbox. It came out of a bro's 9 sec car. It let go after years of being behind a trans brake. It took everything else out with it too. Not fit for use anymore but ok for alignment jigging. Check out the size of the OEM pinion support compared to the race spec one above. Alot of dudes swear by the 9" while others swear at them, lol! Bought some of those blank rotors from off TM. Drilled them to suit the axles I am using. They are dognuts on the same spec as 90's/00's Commodores. Plan on using these in conjunction with FXGT AE92 rear calipers so I can utilize the handbrake feature..
- 18 replies
-
- 12
-
-

-
Johnny's bigblockpoweredstickcarthatdontshine
johnny.race replied to johnny.race's topic in Projects and Build Ups
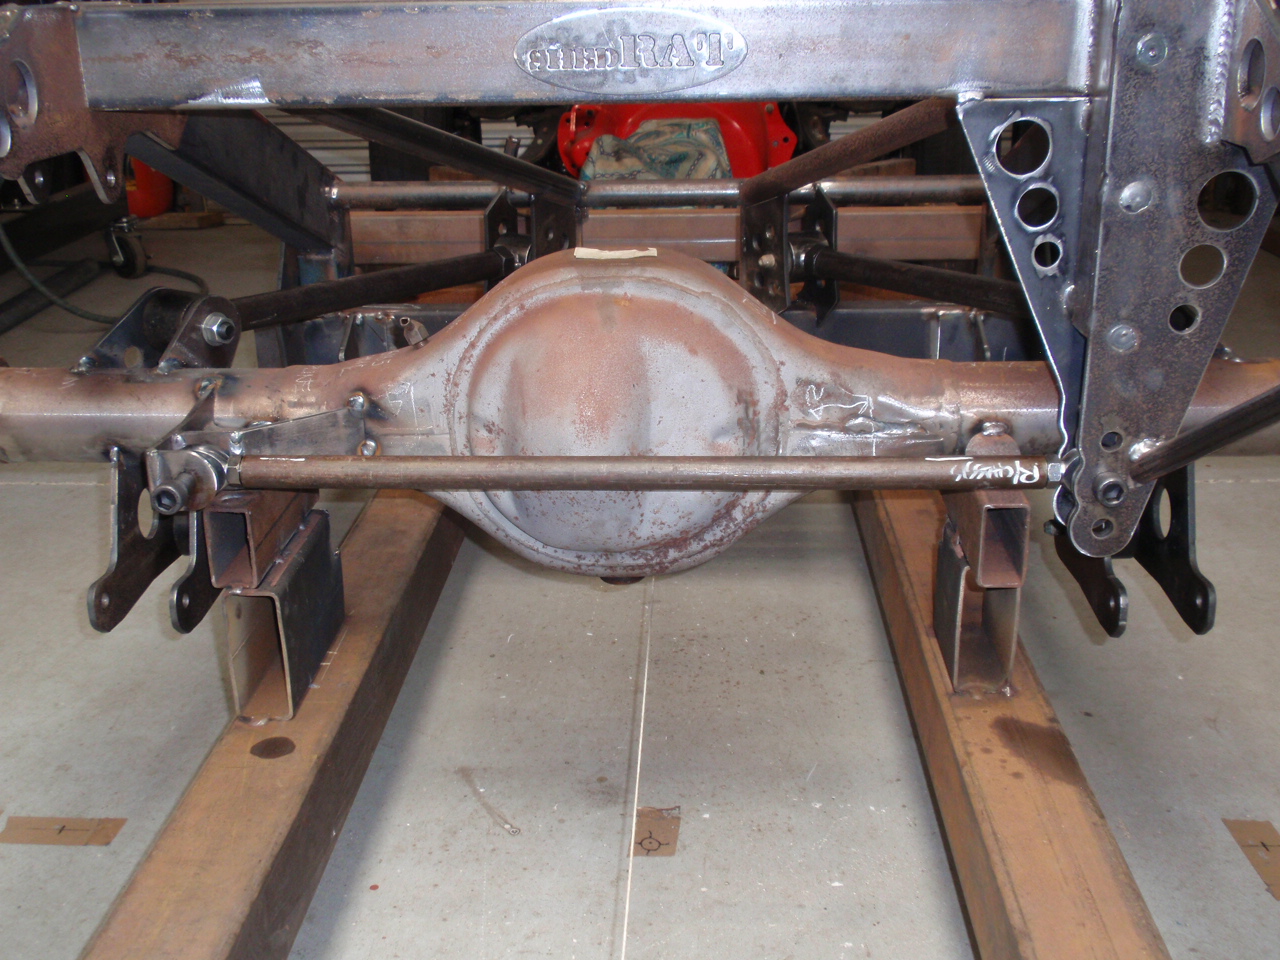
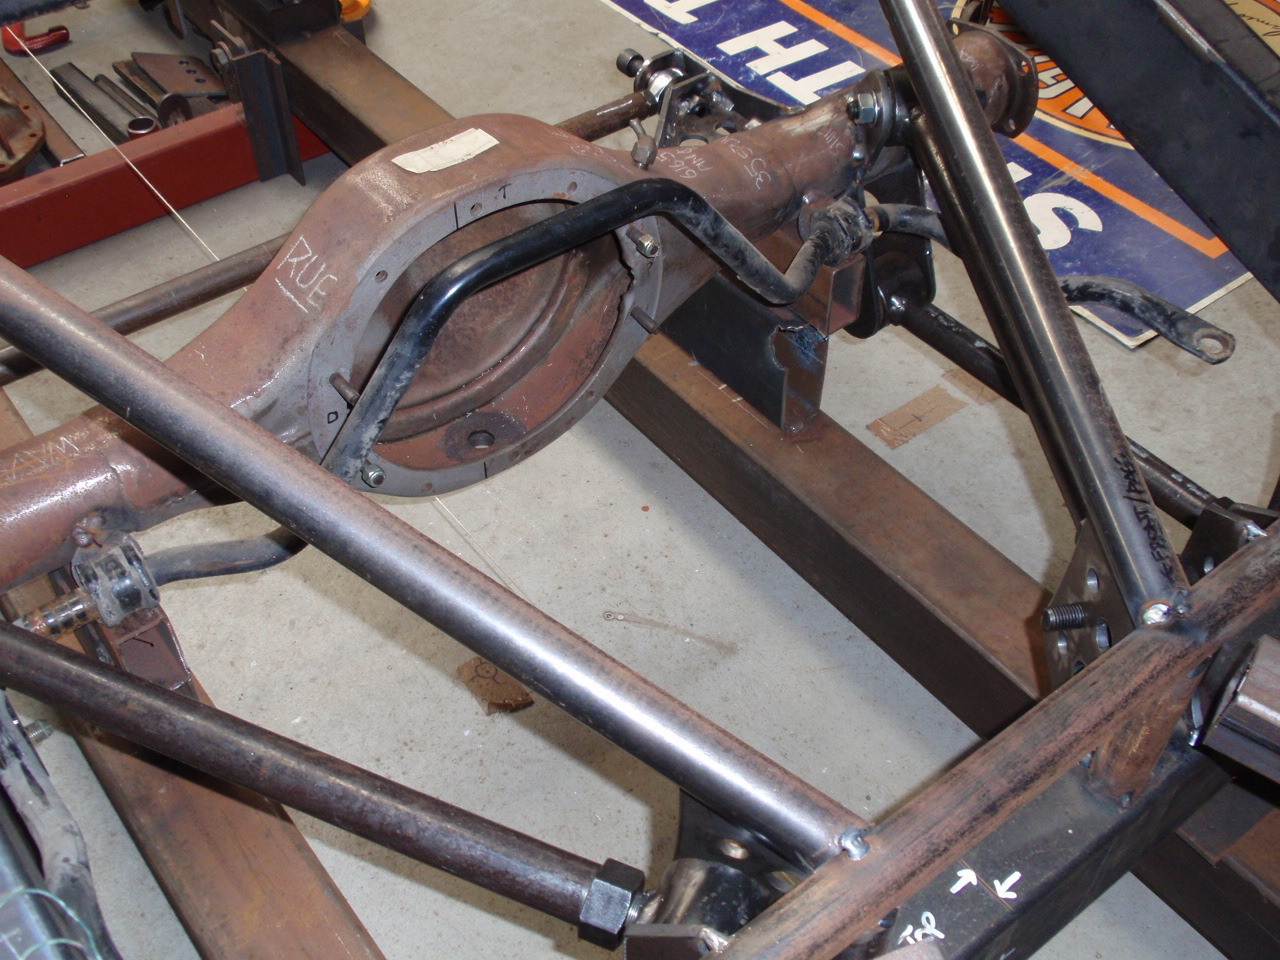
Made this for the diff end. It turned out alright. It positions the bar parallel and level to the axle center line. There is a fair bit of work hanging these things where you want them to hang. Got a sway bar from of an AU Coon' (I think it was) It looks like it might fit like a bought one. I am going to fit a head and axles into the diff soon. I might revisit this sway bar fit up once the head is in place in order to see if there is room. Next thing to fit are a couple of chassis K members. These will allow the gearbox cross member to be attached to something once final engine position is determined. I am working towards fitting the body soon. This will allow final engine position to be determined.
-
Nothing to do with your car but that is a beautiful pic - the one that says Gizzy are dots in the distance. We are truly blessed in this country for landscape.
-
Johnny's bigblockpoweredstickcarthatdontshine
johnny.race replied to johnny.race's topic in Projects and Build Ups
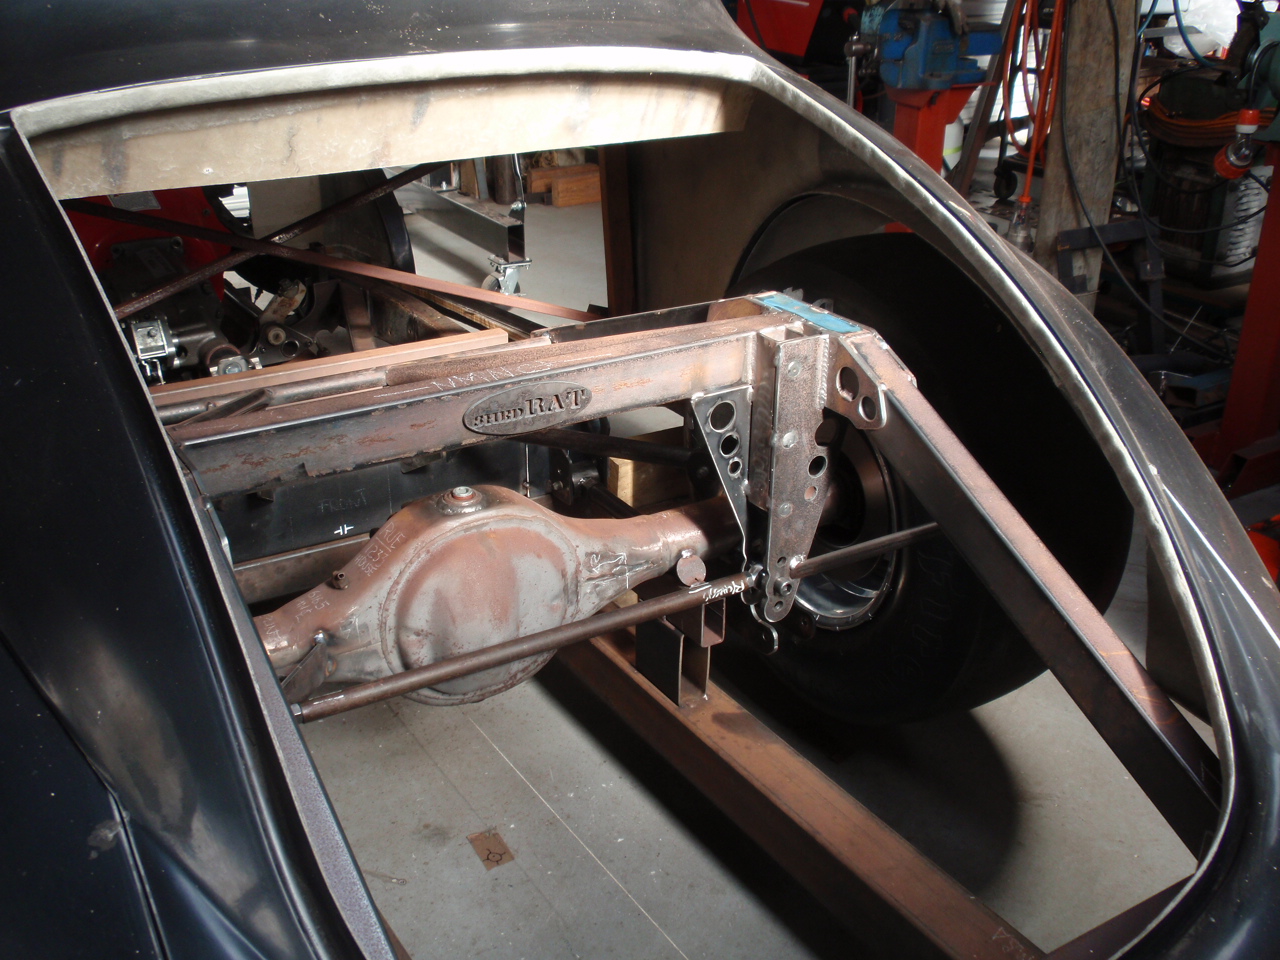
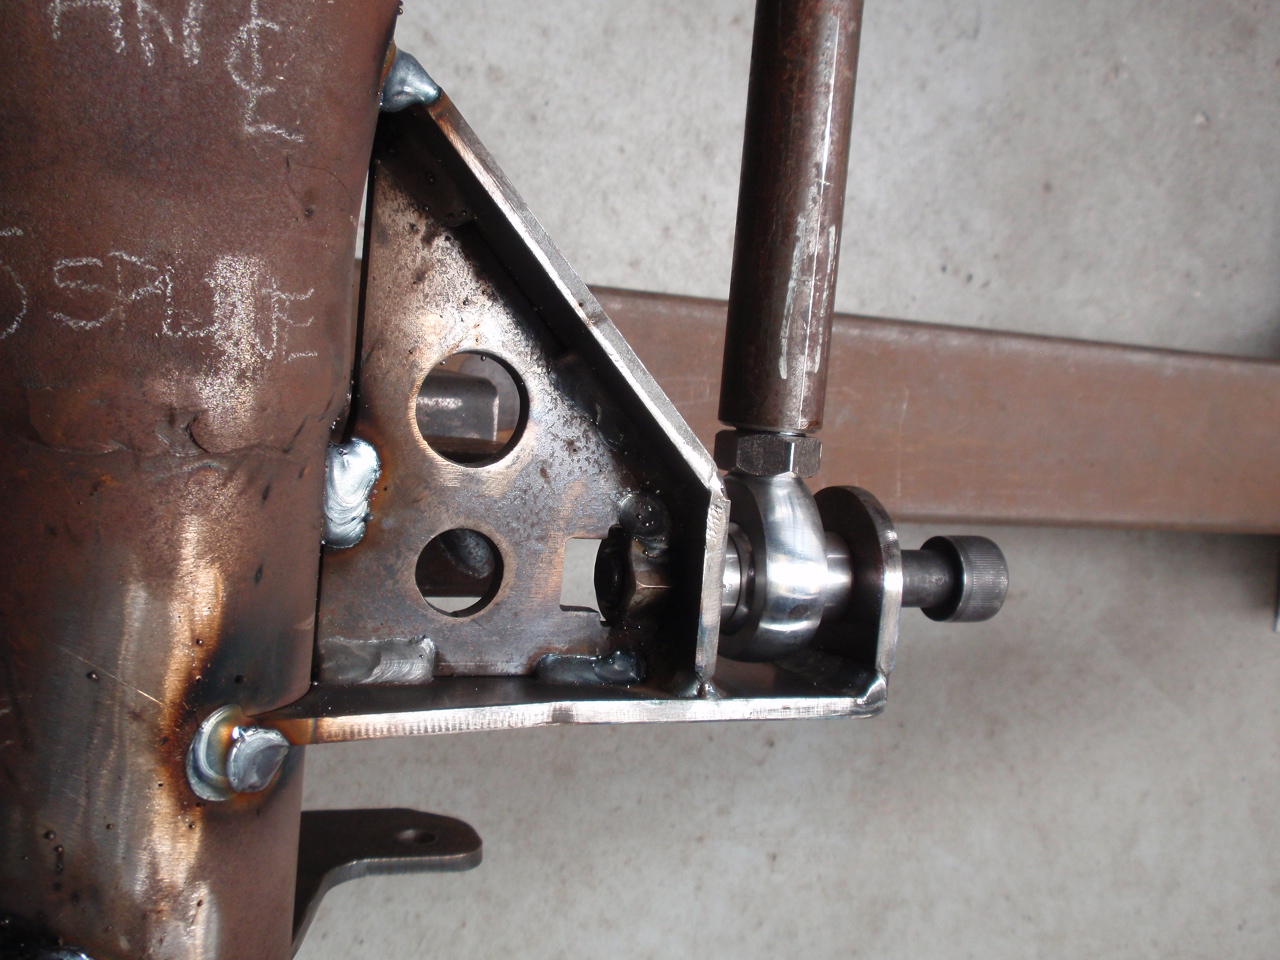
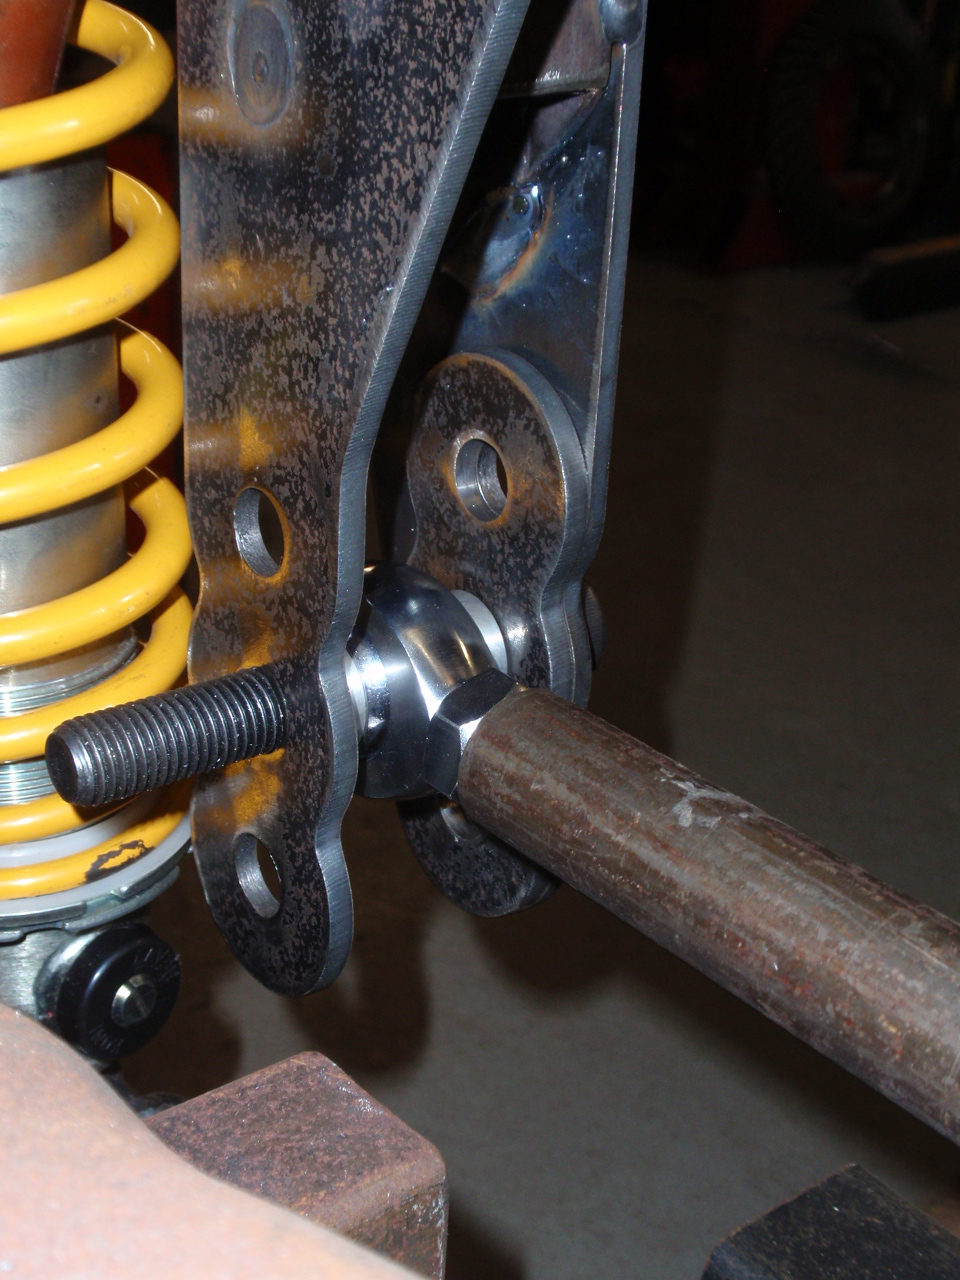
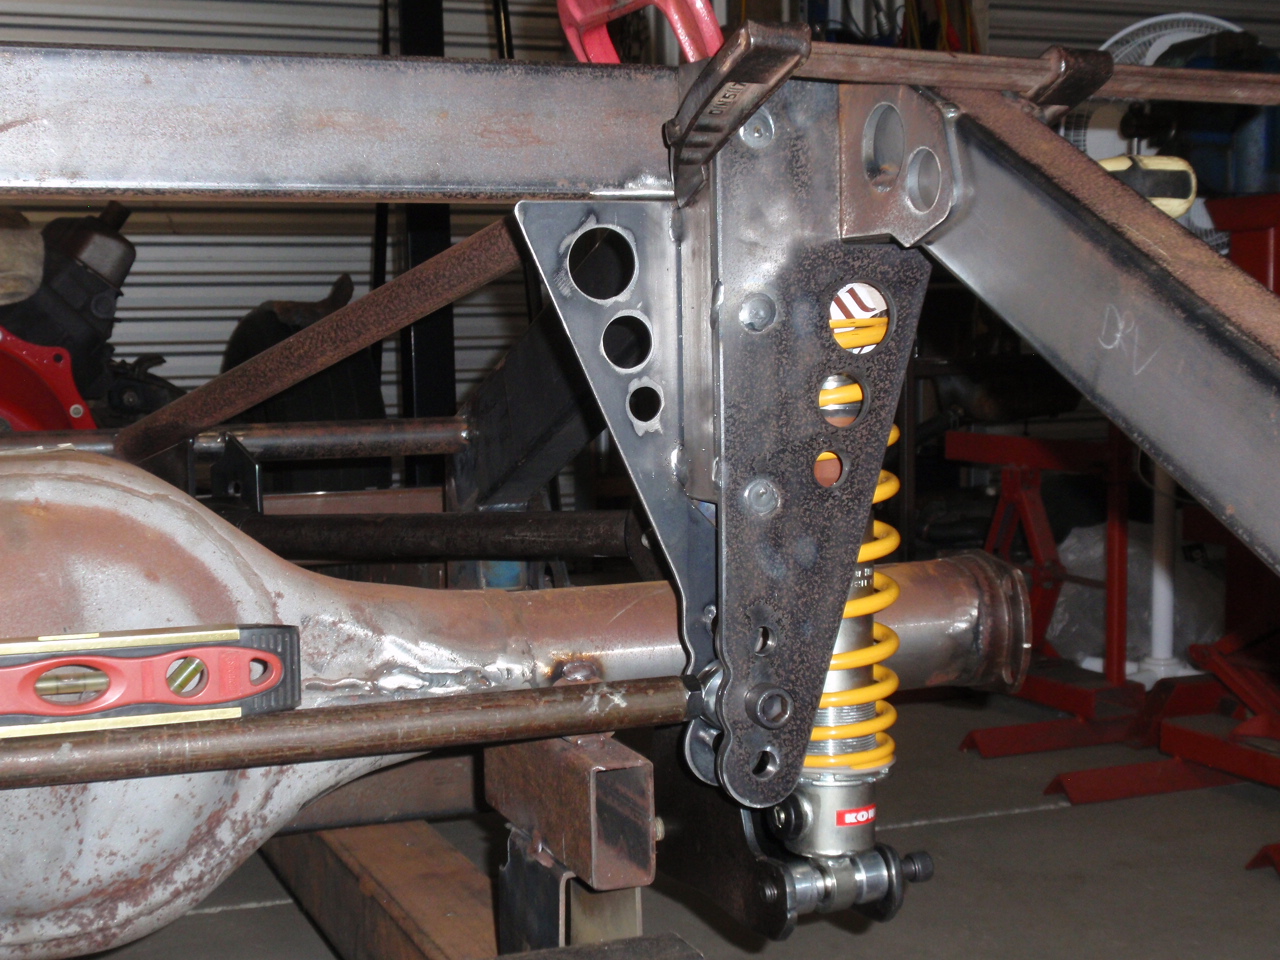
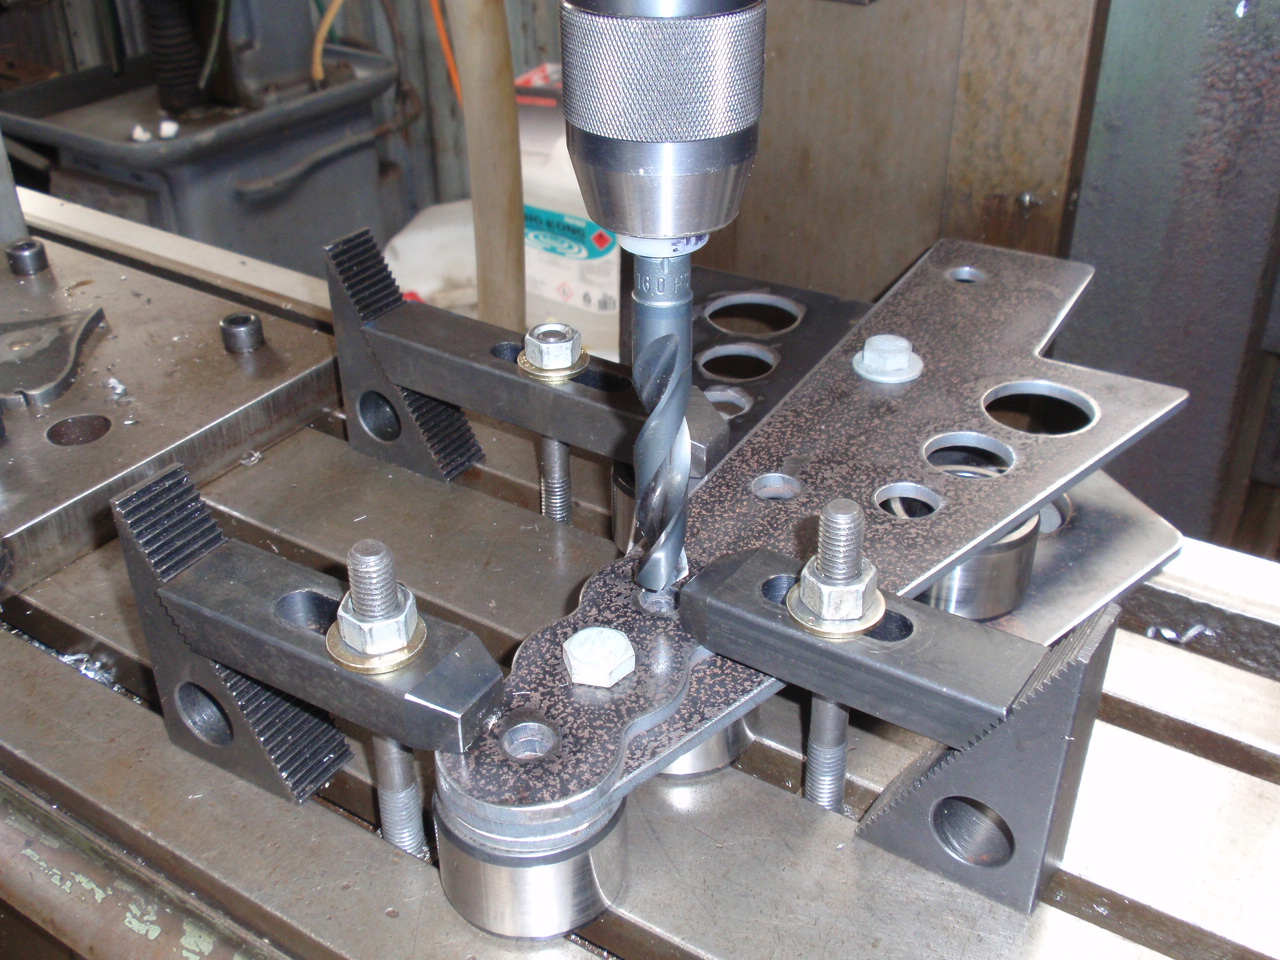
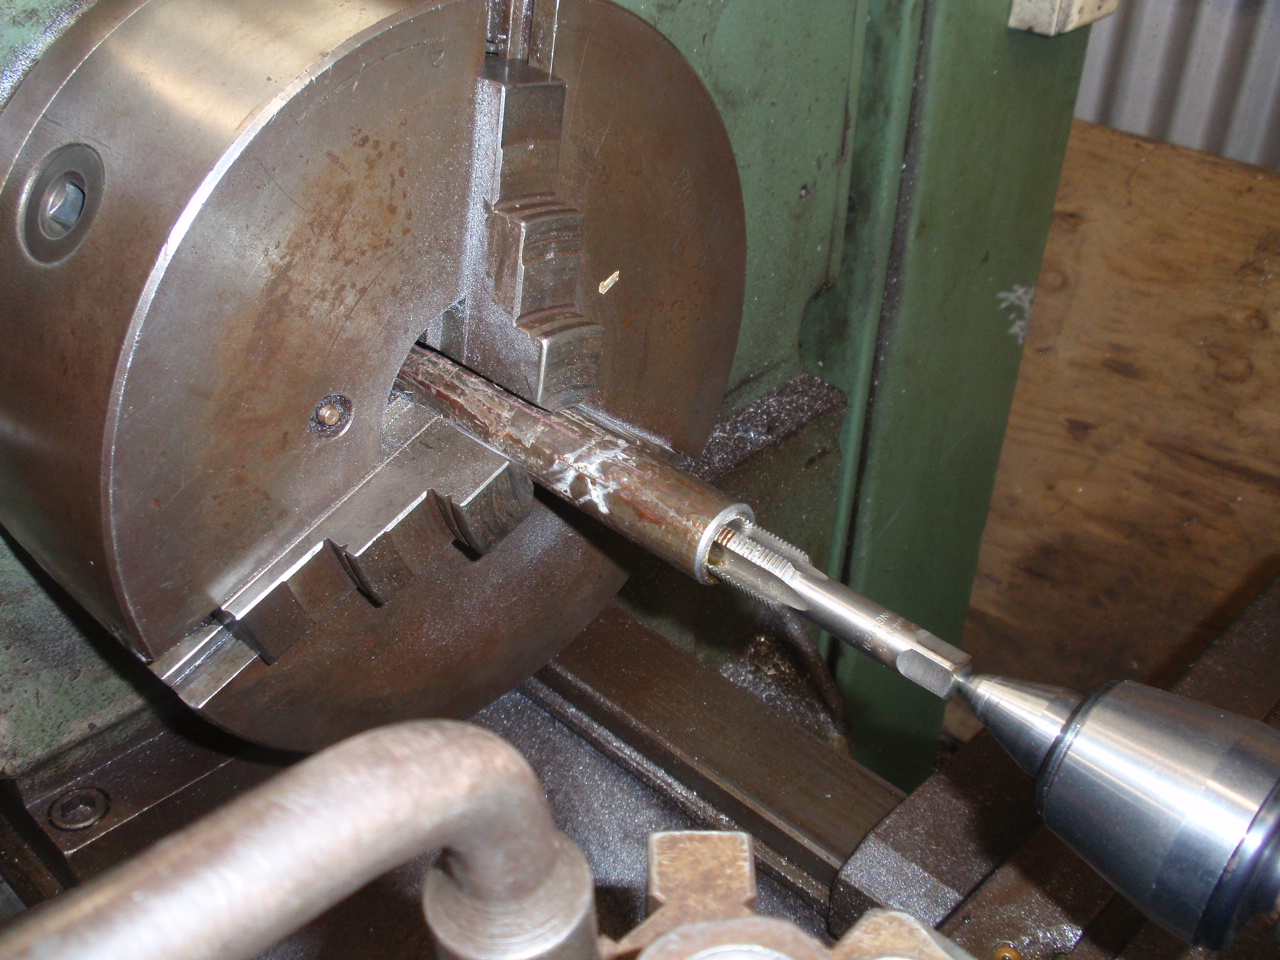
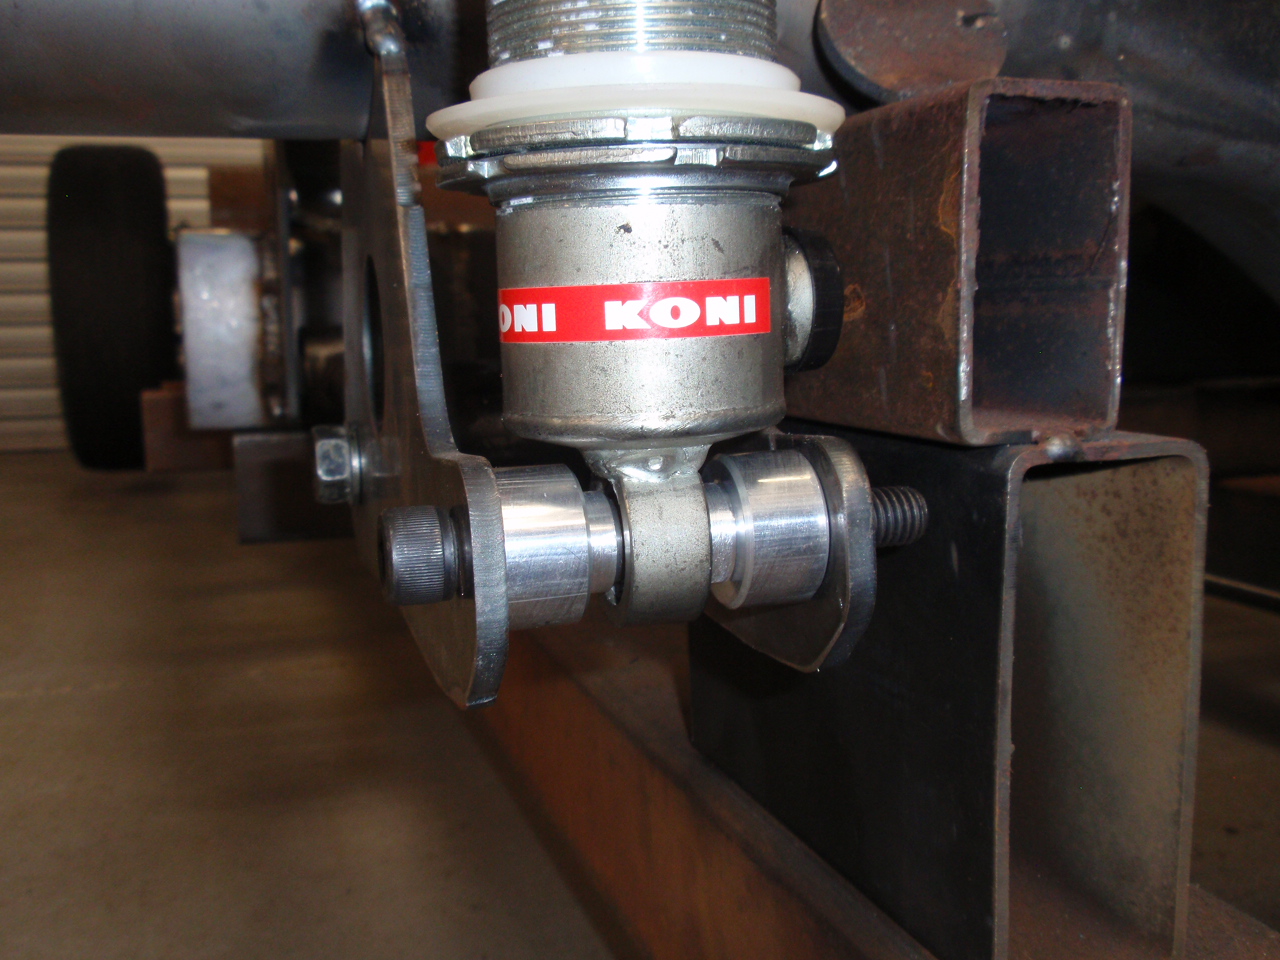
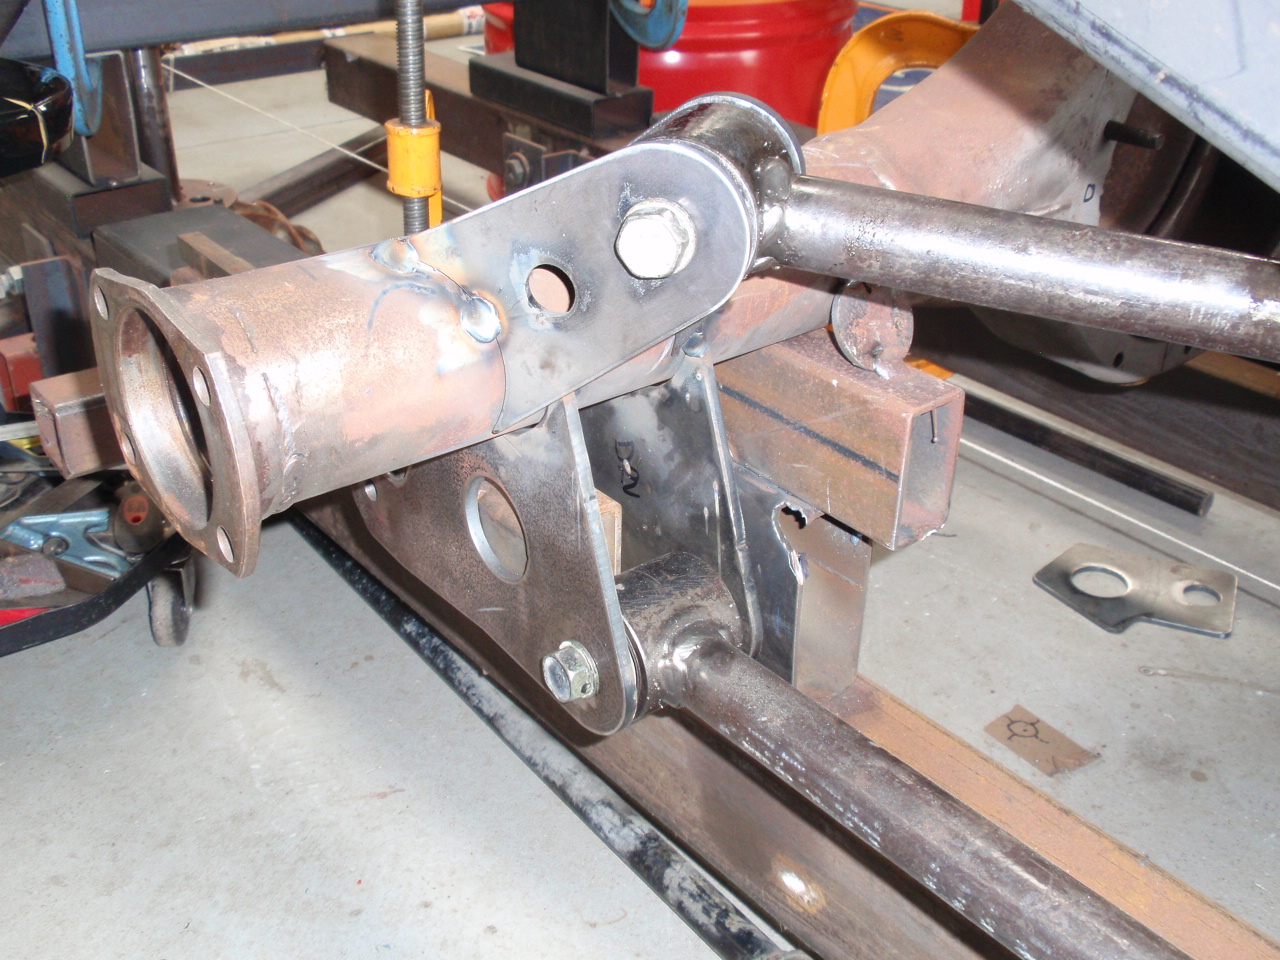
Located and measured up where I wanted the chassis end of the bar to sit. I ended up with it sitting aligned to the axles. Drew it up and cut it out. I blow undersized holes through using plasma but finish them to size on the mill. Want your panhard bar running parallel to the diff and at axle height, but you have big chassis kickup in the arse of your car? Then you end up making big arse brackets like these. They turned out alright but they are imposing. I built in plenty of gusset in order to brace against the direction the force is going to come. Not in the pic - but i intend to run a piece of small diameter pipe to gusset/brace the rear facing face of the bracket to the chassis. Triangulate. I included a 5mm spacer plate in order to tighten everything up. I used a 50mm x 50mm piece of box as part of the panhard bracket hanging off the chassis. The cross section width of the 3/4" rod end is 45mm. Turned up spacers to center the shocks. Direct threaded the panhard bar to take the rod end. Need to do the diff end next.
- 18 replies
-
- 11
-
-
-
See that's the thing about today's suck hole world - the mindset drummed into us is to 'throw it away and buy another one' when its worn out. Cunts laugh at you wanting to fix up and continue using old gear. Fcuking consumer world. I laugh my arse off seeing late model shitters starting to come into the yard. Each one of them represents someone having paid a small fortune for the turkey and then it broke. They couldn't fix it themselves and neither would the insurance company because it cost too much. Lol! Get a dirty old LN106 and never pay anyone to fix it up for ya because they are simple and don't break that easy. Good for picking up scrap iron too ... Fucking luxers - Look the business, is the business :))
-
Johnny's bigblockpoweredstickcarthatdontshine
johnny.race replied to johnny.race's topic in Projects and Build Ups
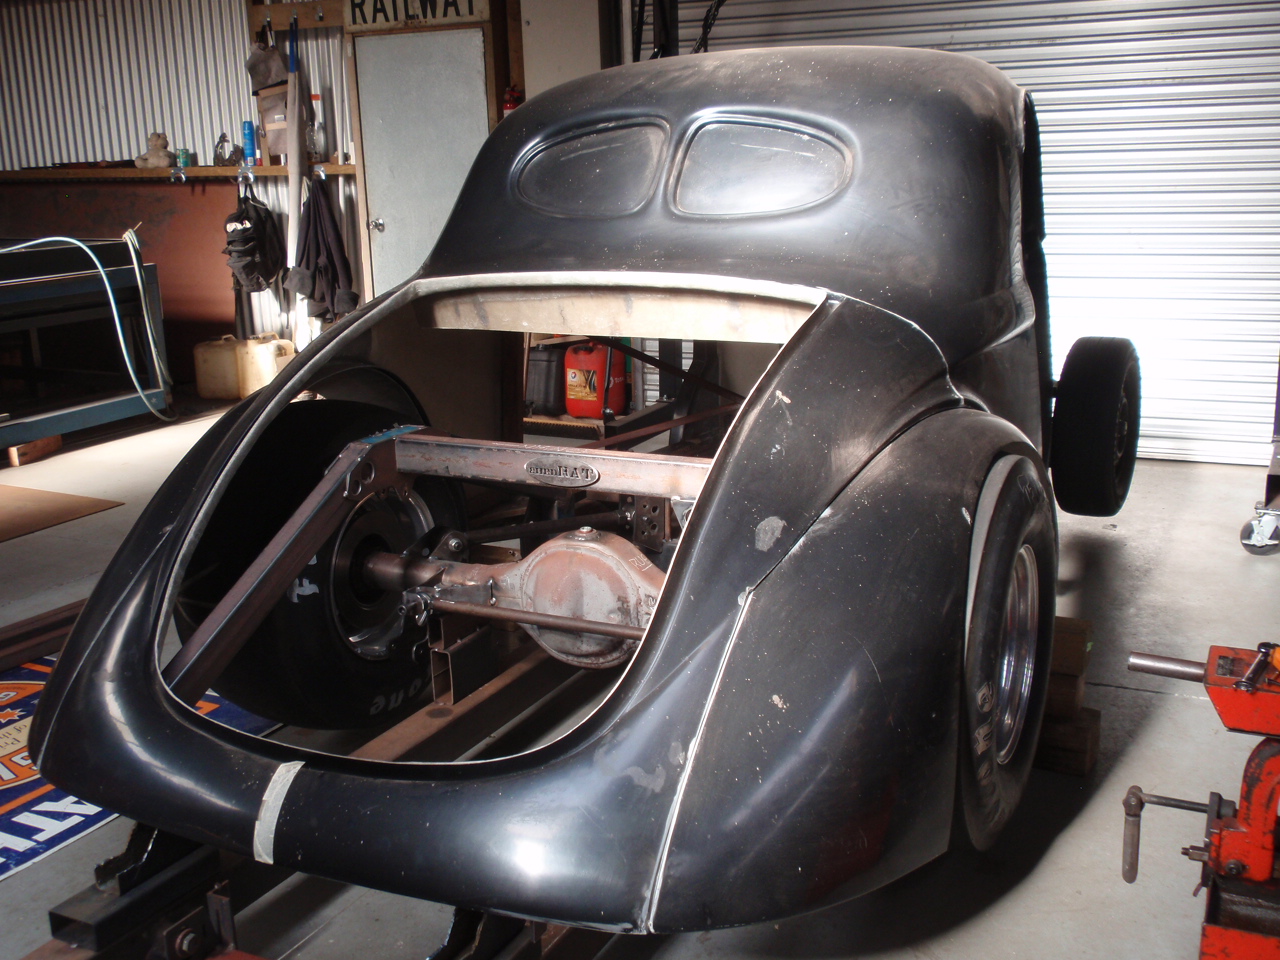
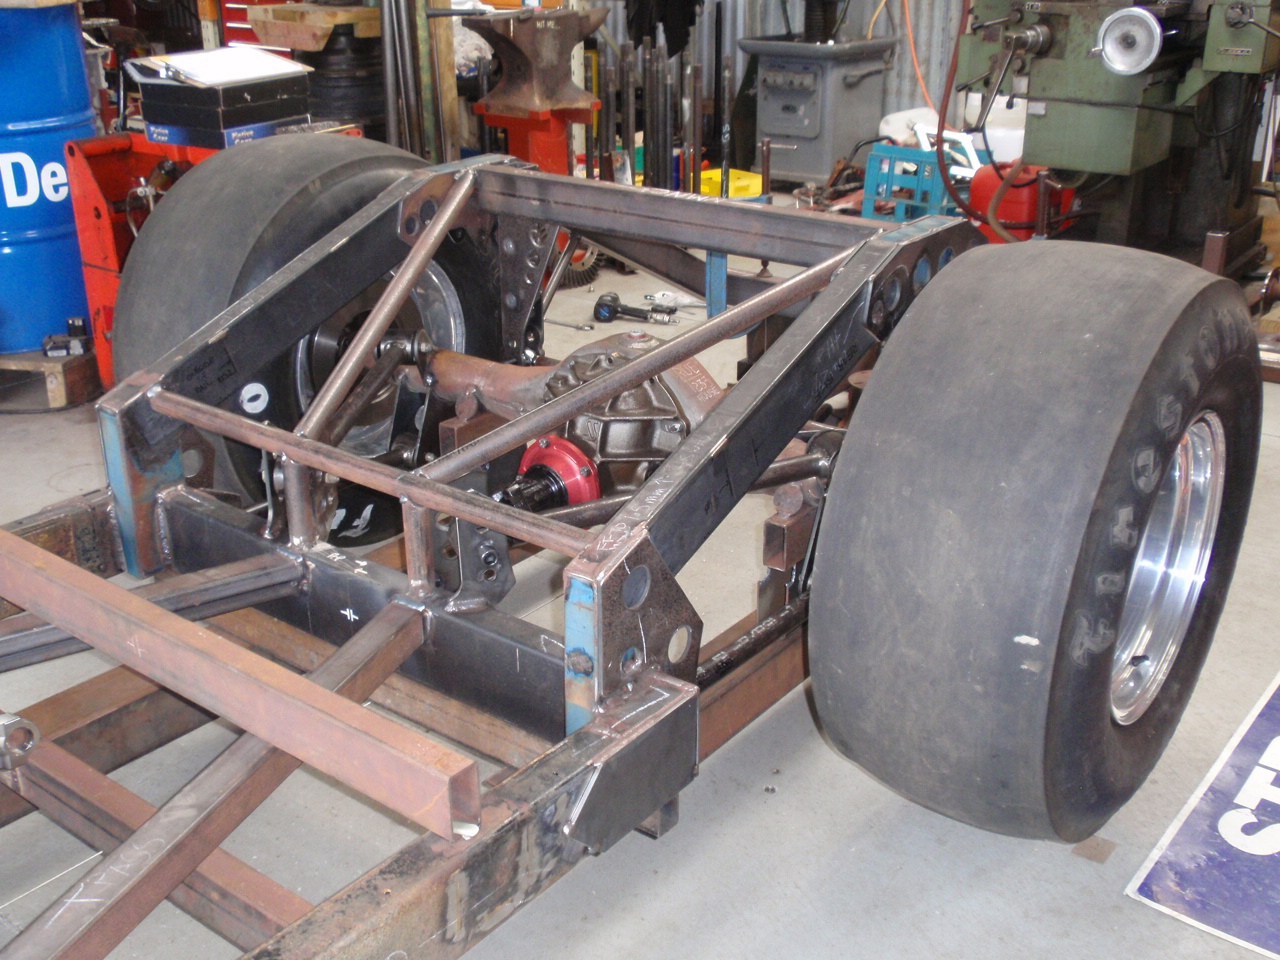
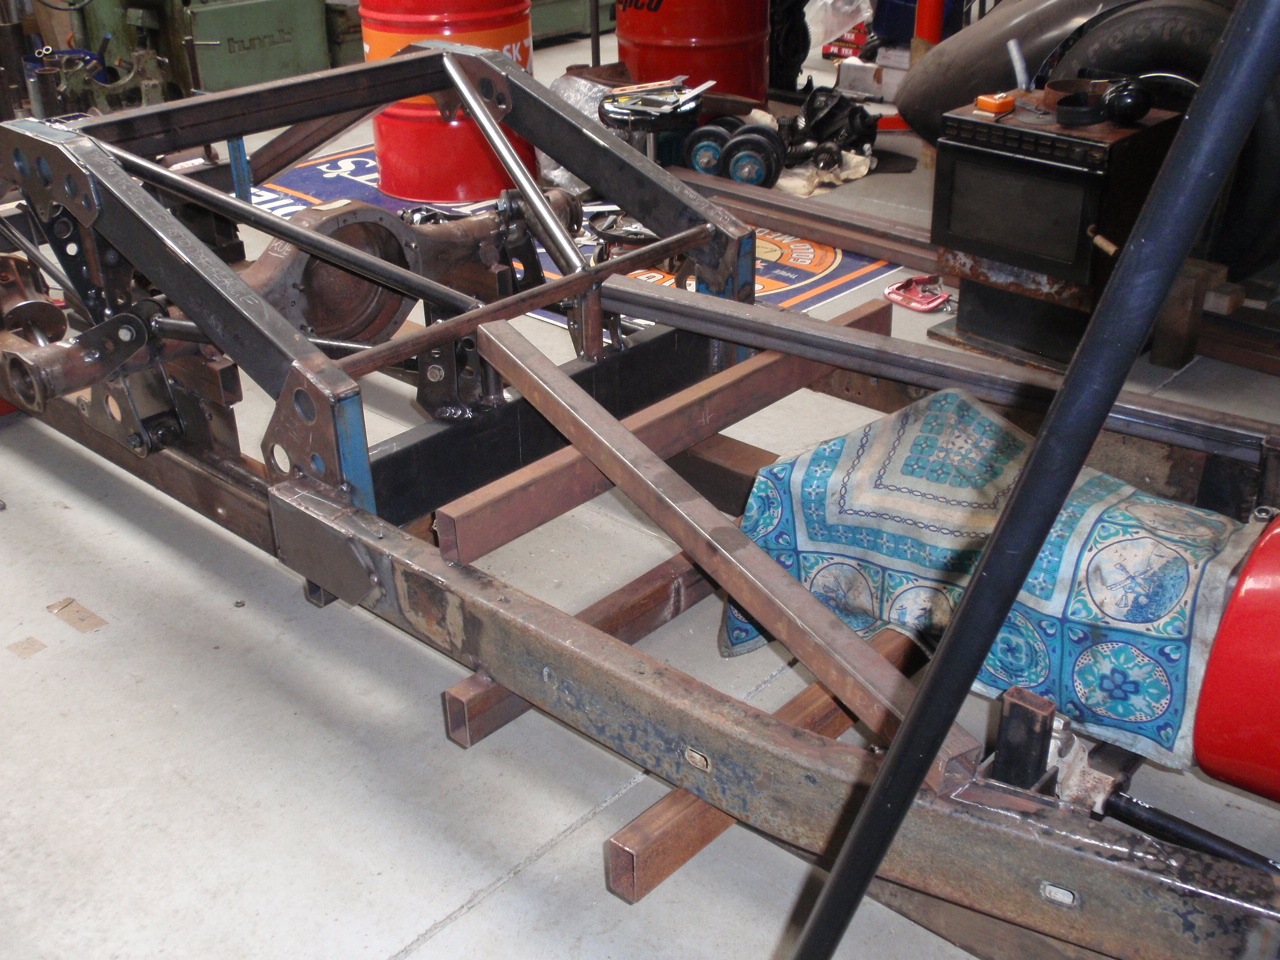
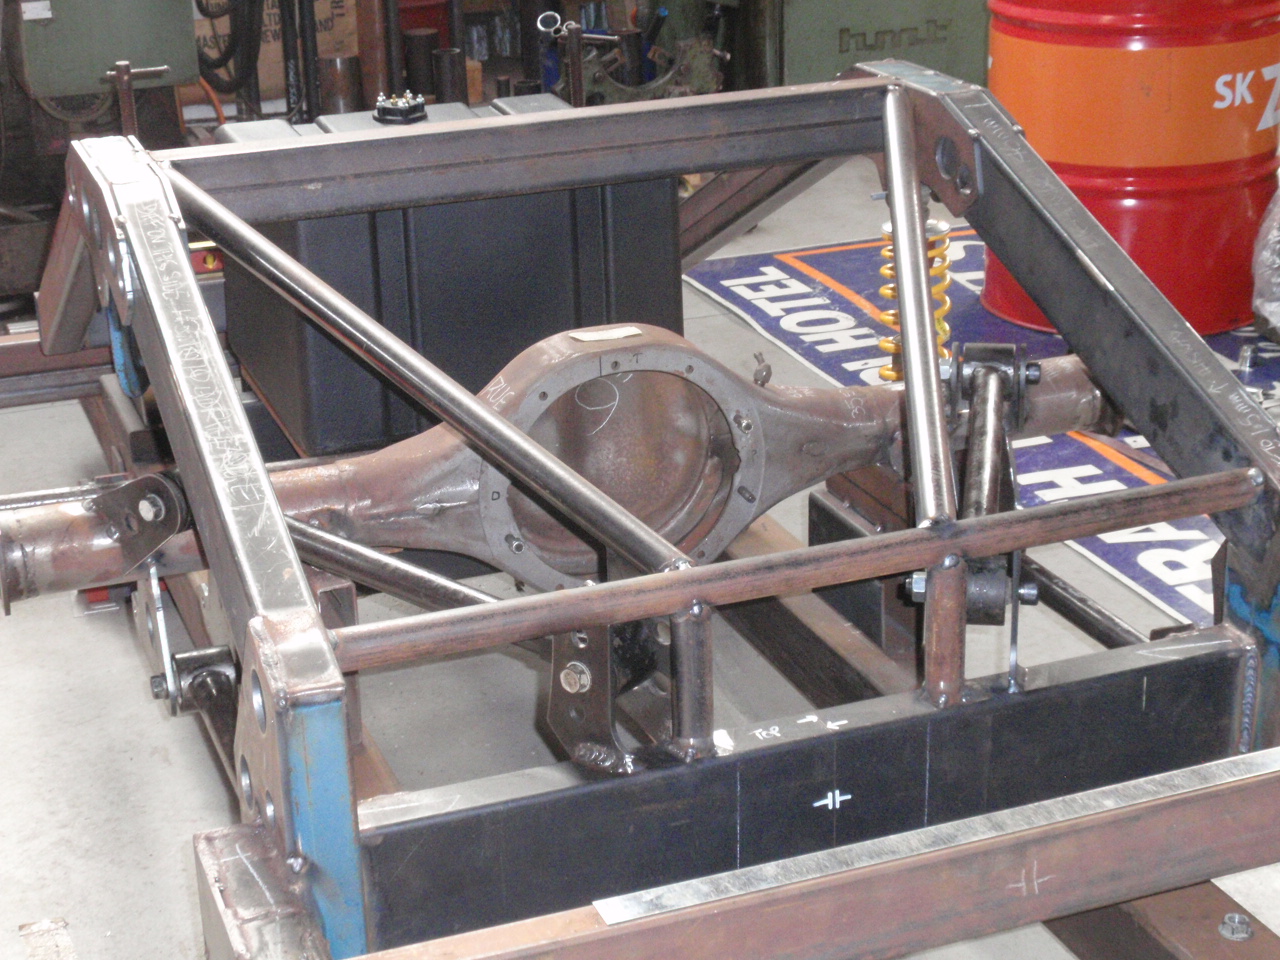
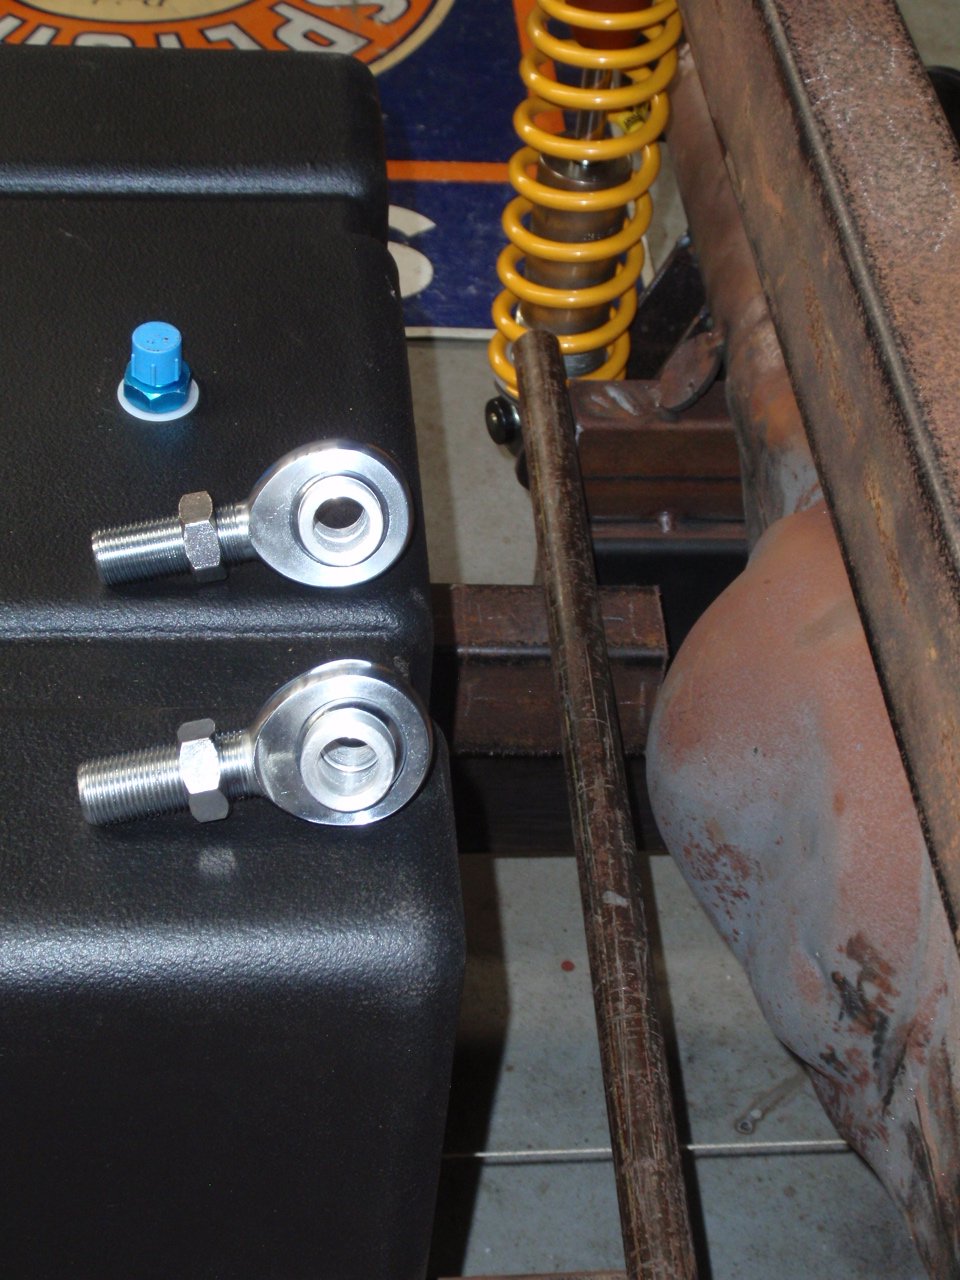
Finished the 4 link setup. Finished the main parts anyway. Still have to do a myriad of little stuff in support like spacers and drilling the inspection holes in the bars to satisfy cert requirements etc. It took me near a couple of days getting the last bar plates to mirror the other side. Fuckin did it though. What a pain. Parallel 4 links are way easier to get right. These fuckers though ... I put a level over both the tops and both bottom bars to see how close everything ended up. Used a machinists level. The bottom pair came in dognuts' on. The top ones a little out but fuck all. Lifted one side of the level a mil or less and it was smack on. So swapped the level for a normal one and you could not tell the difference, lol. Good enuff. I am please with how these turned out. The geometry for this set of bars is pretty on the money also. I used CAD to draw everything out and gave enough holes to give me a couple of IC's below, on and above the neutral line. At (planned) ride height both top and bottom bars sit level to the earth with an IC that meets at infinity. So I should be able to ball park where a short wheelbase BB car likes to sit. Next step is to locate then fab the panhard bar. Lateral location is important to me (lol) so much so i have forsaken using freebie Toyota Surf suspension bushing ends and elected to go with something less compromising in the form of CMrod ends. Using 3/4" rod ends in conjunction with some Schedule 160 Line Pipe. Not quite sure on where/how its all going to fit in there. Need to make sure there is room for the gasoline tank in there somewhere also. Next task after the panhard bar is gasoline tank installation. This can be a place where i can get into trouble too. The bum shape on a Willys goes freaky shallow/low real quick and my tank is tallish. I want it low but not low low so it looks like a drop tank. All good shit for BB 4BBL cars that are built for economy and grocery shopping.
-
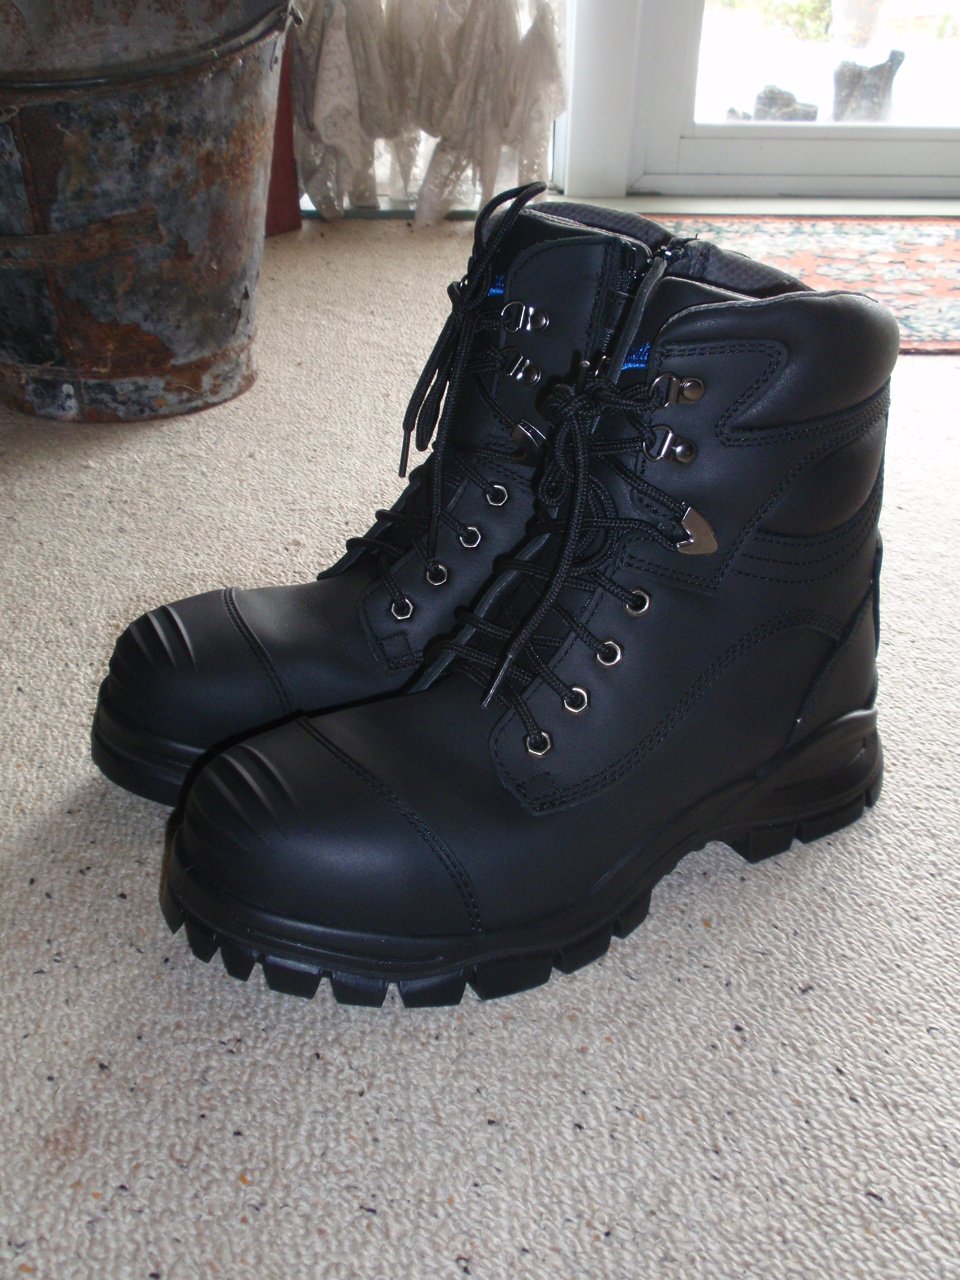
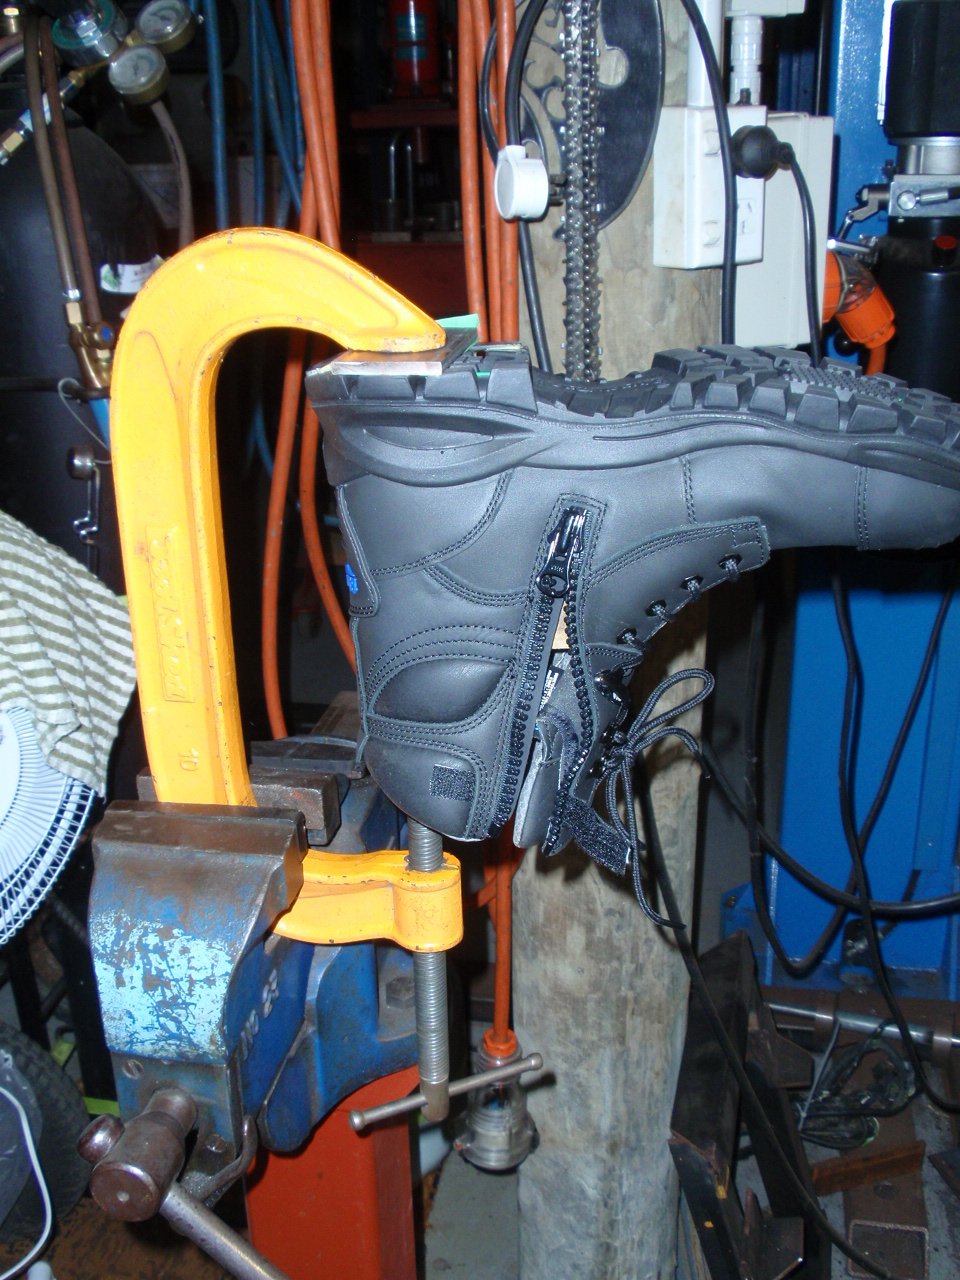
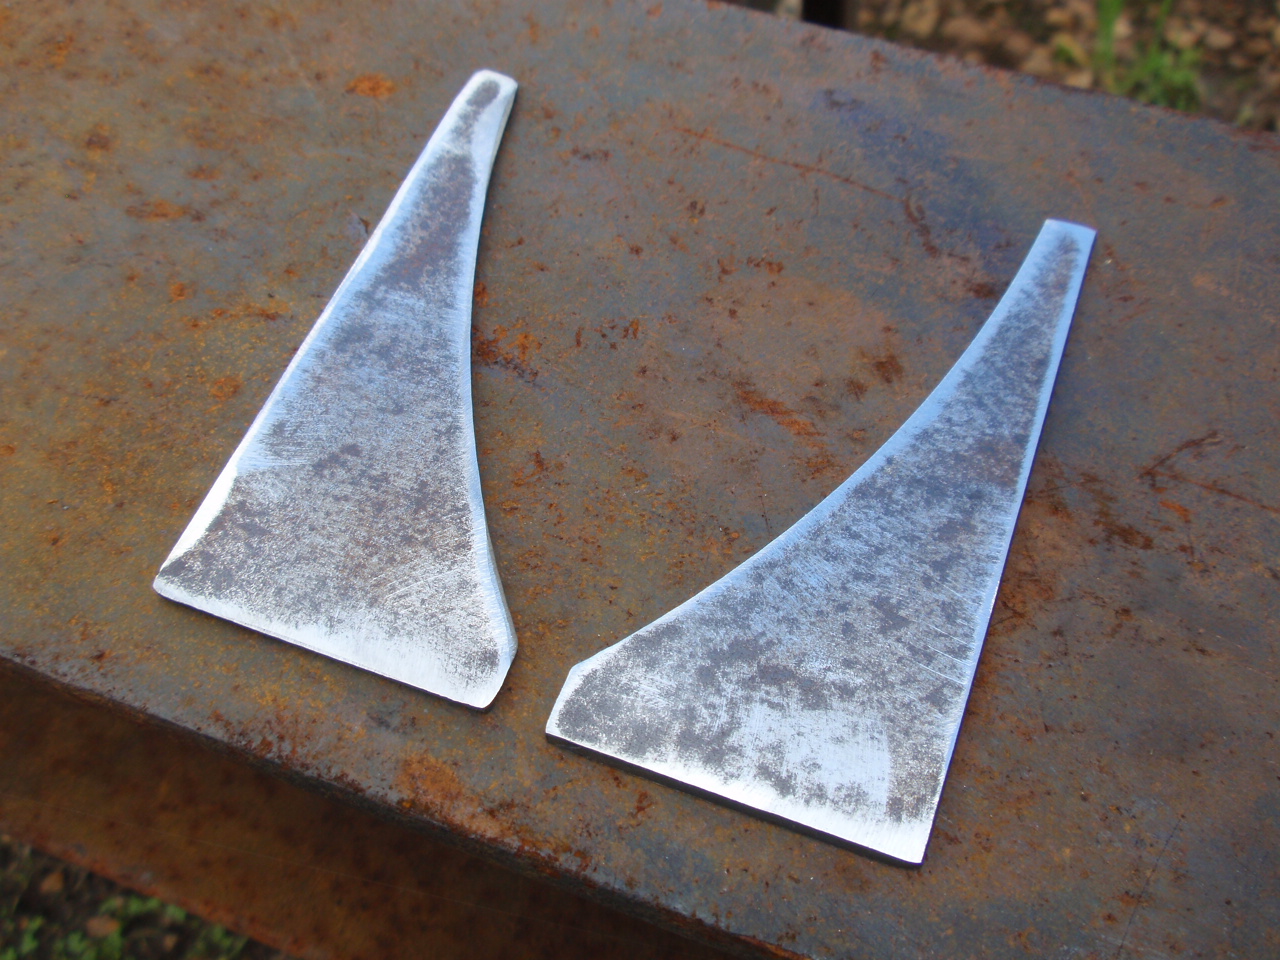
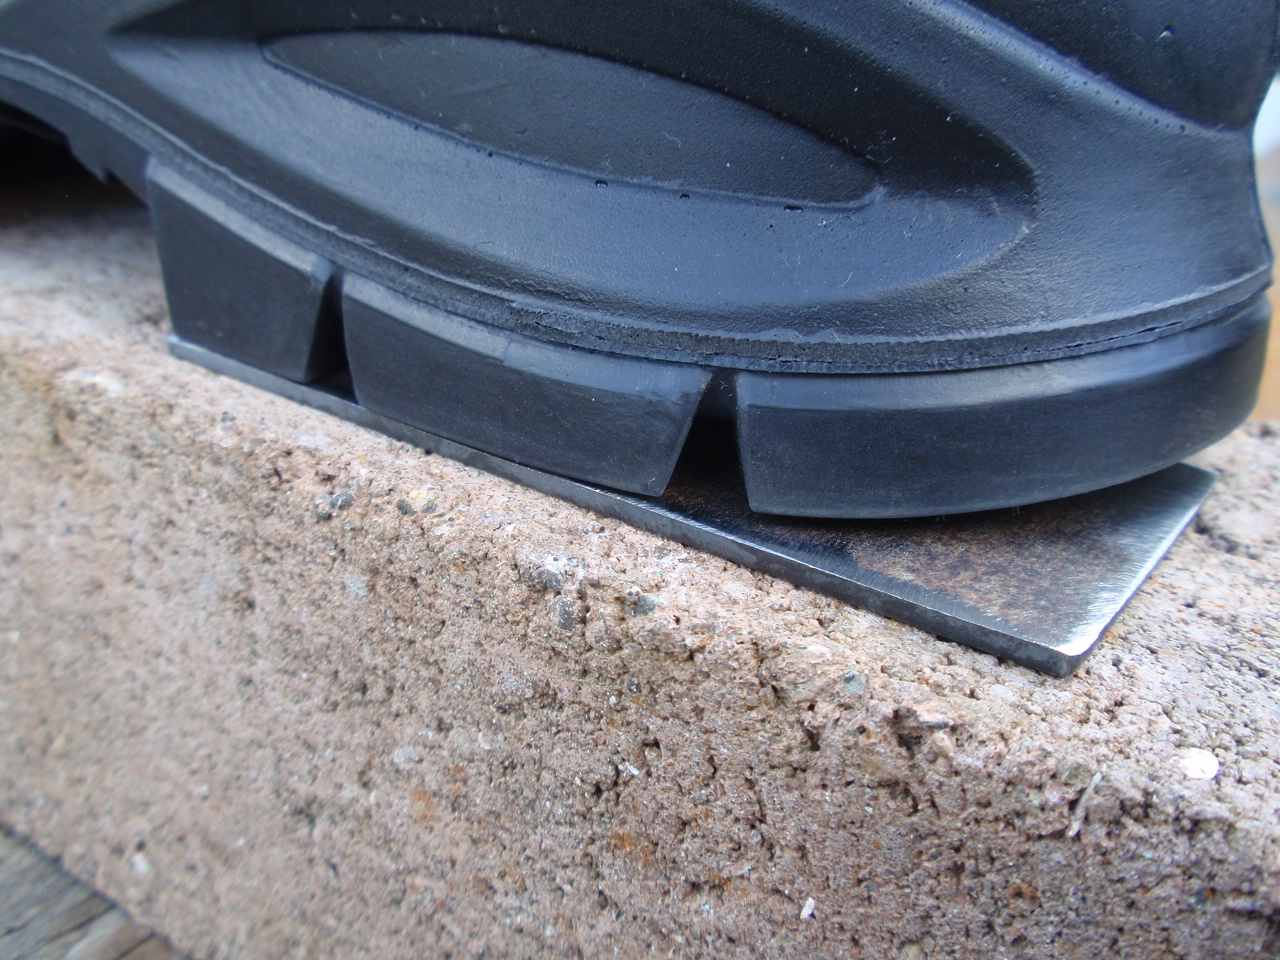
I got myself some new work boots the other week. My old ones were years old and had worn out soles. I wear (I must walk fucked) out the outside heel on my shoes/boots. My boots had got to the point of wear where it was becoming uncomfortable on some surfaces. I work for myself so have no employer to buy my footwear for me. I am a tight cunt with old school values too. I got to thinking that my new boots would eventually meet the same fate as my old ones ie. by being worn out on the outter heel region. I decided I needed to do something about this. so i rang a couple of cobblers in town and asked them about having metal heel plates fitted to my new boots. One of them laughed down the phone outright and said no one did that sort of stuff anymore. The other said yeah he might have something in the draws but would have to look and couldn't give me (even) a ball park cost. Fuck'em I thought. I can build the arse ends of cars from scratch - Da fuk am i asking these cunts for?? The pics show what I did. I used Gorilla glue and some 2 or 3mm scrap plate. They work beauty. Comfy as. The sound they make on the concrete floor reminds me of listening to my oldman walk when I was a nipper. Also the sound the old school Snr NCO's used to make when they drilled us on the parade ground when I was a young man. The tools stand to attention when i walk into the shed now, lol! But seriously, there are no noticeable traction issues apparent yet. There is plenty of rubber, so yeah. I didn't bother getting my old boots resoled, they were scuffed, leaky fuckers ... and this mod? The cost of some gorilla glue and a little time. I love shed life.
-
Johnny's bigblockpoweredstickcarthatdontshine
johnny.race replied to johnny.race's topic in Projects and Build Ups
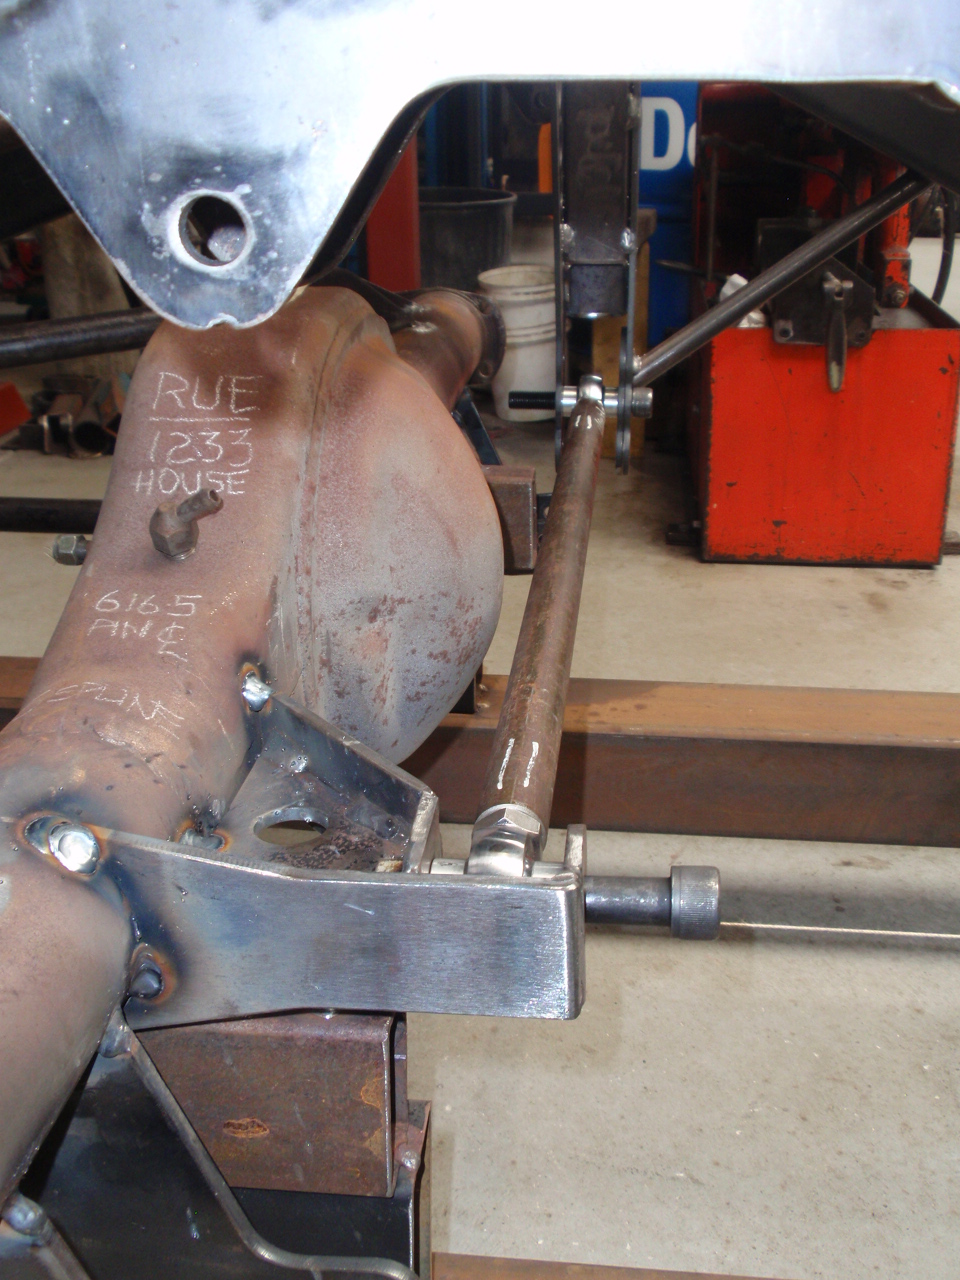
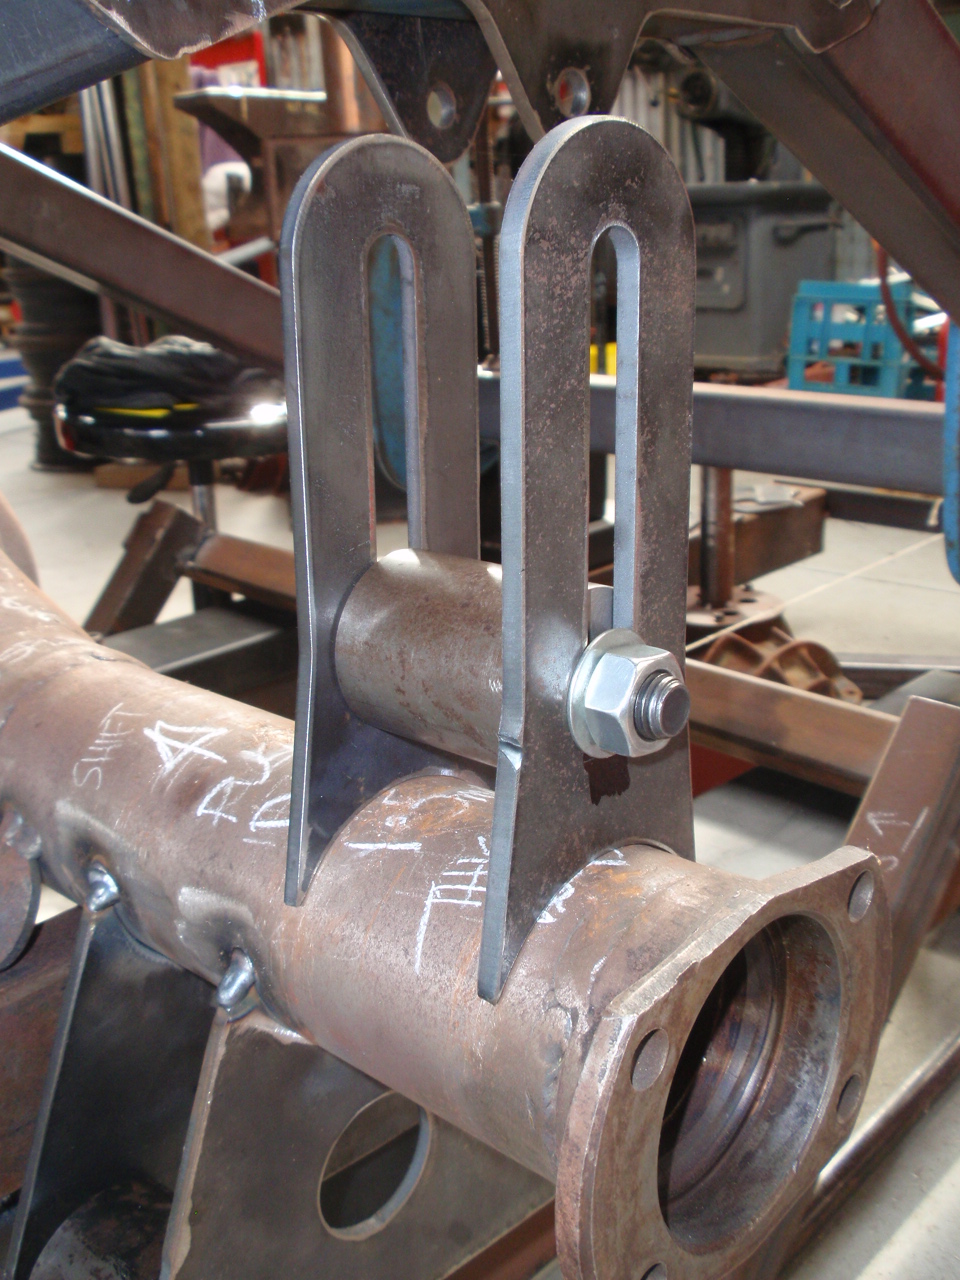
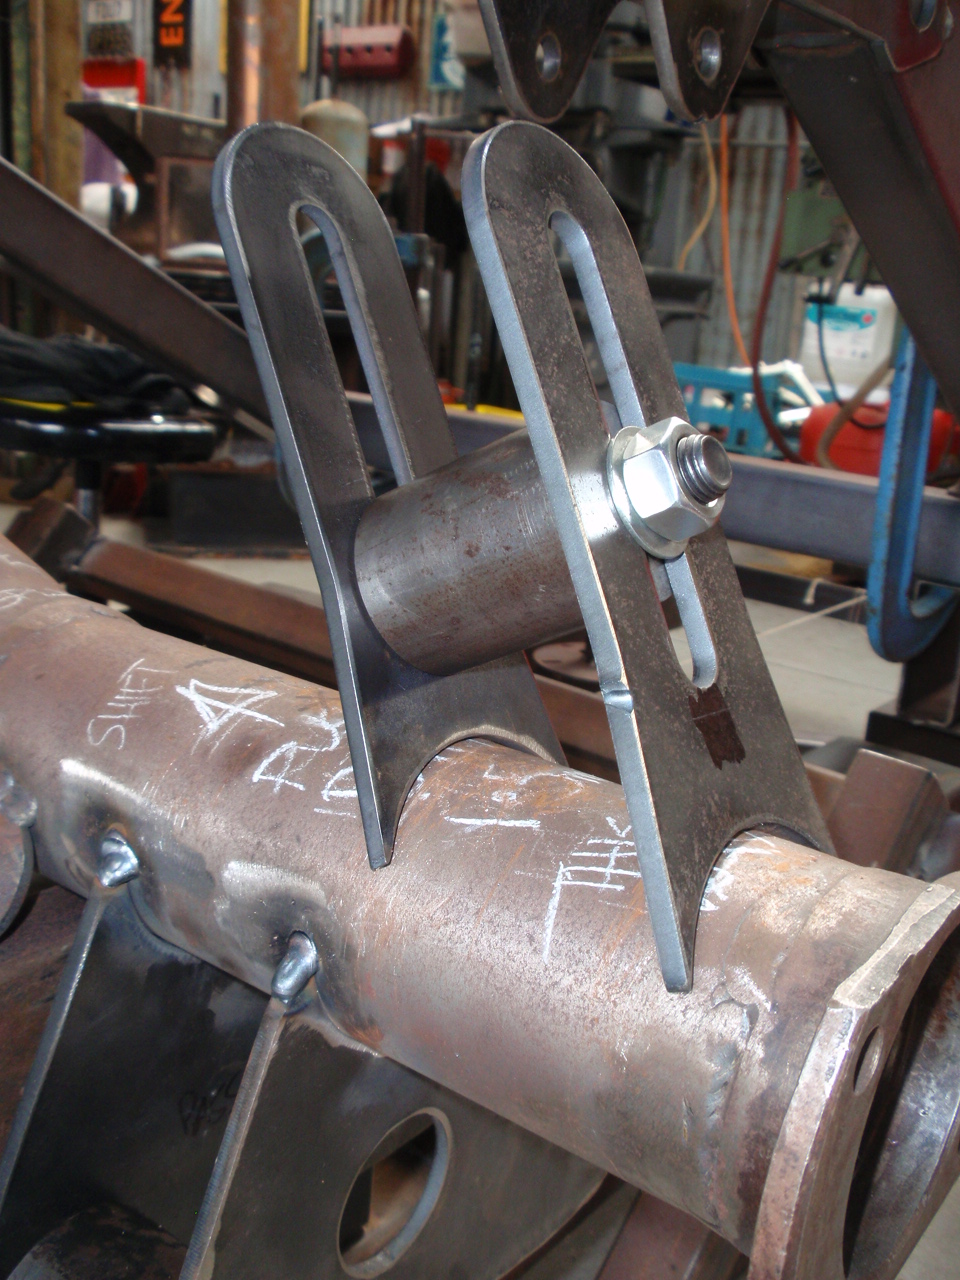
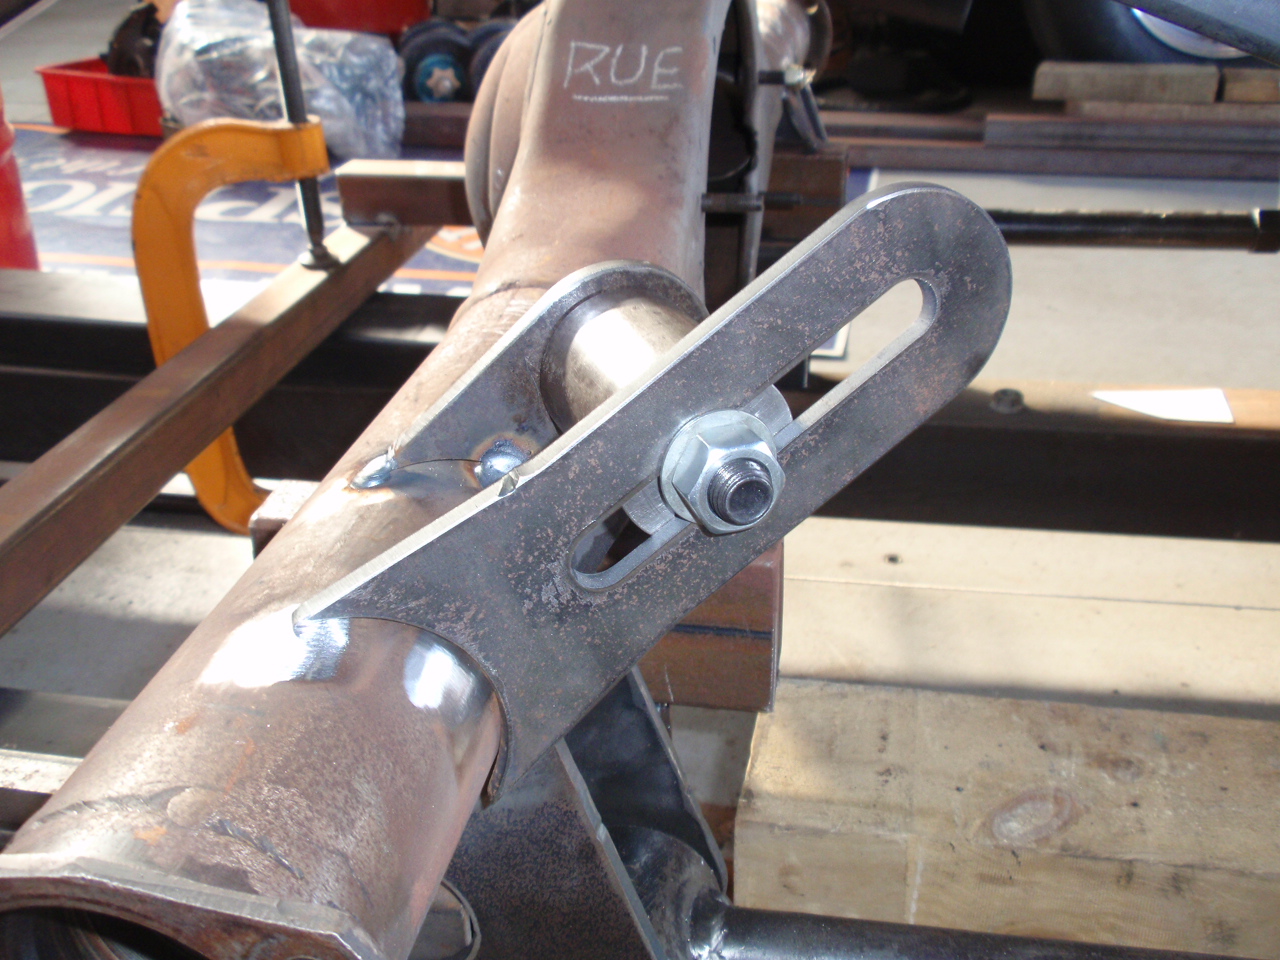
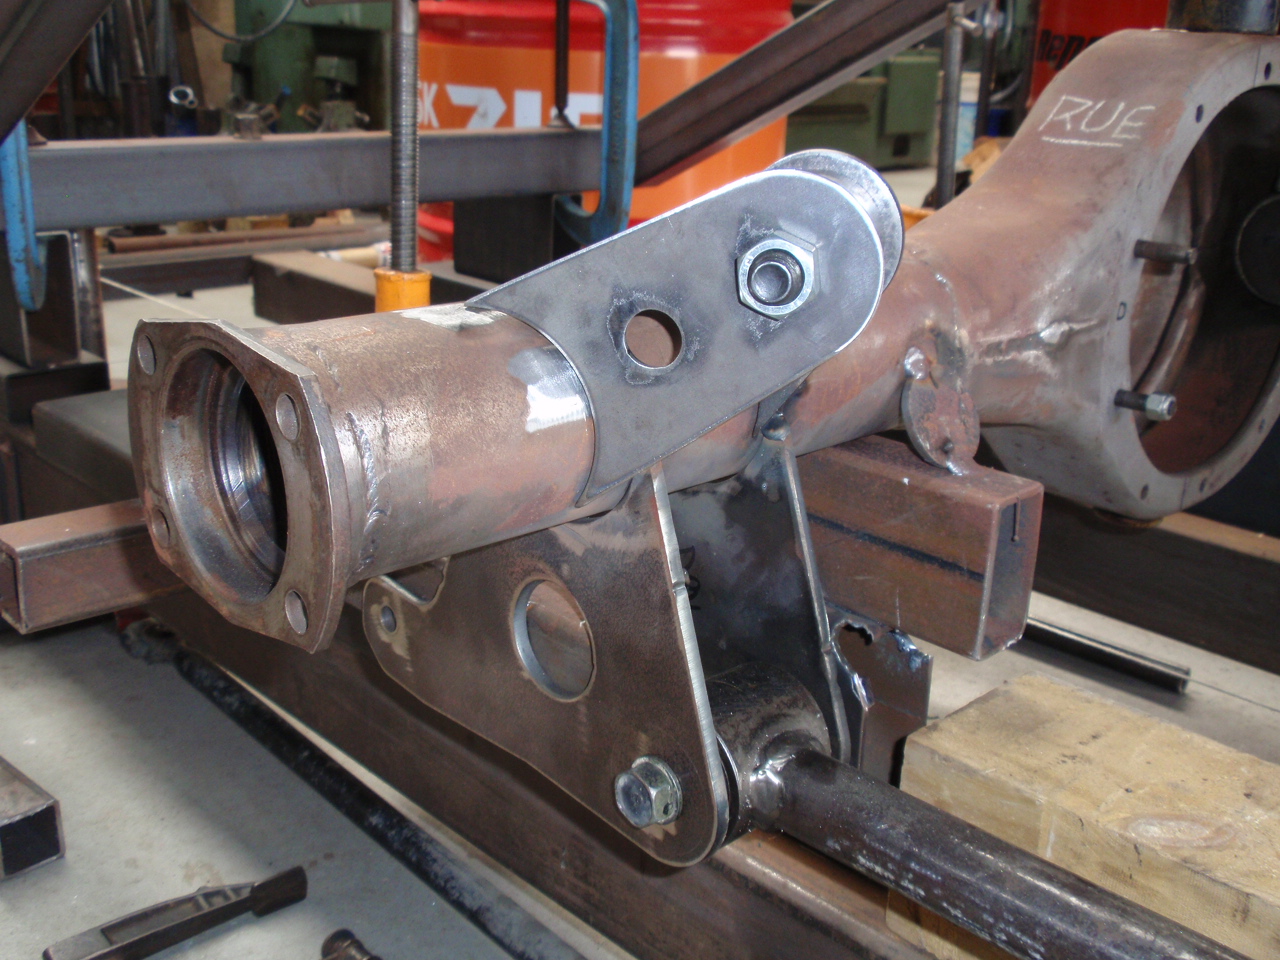
Started on the top bars. Have noticed that 90% of fabbed triangulated 4 links out there are set up opposite to the way I am doing mine. The bars are closer together at the diff end and spread out on the chassis end. Mine is opposite, hmmm. Fuck, hope they work this way also, lol. Spent a bit of time trying to nut out how to go about doing the top bars without going through the balls aching process of making bracket after bracket until something eventually fits. Came up with this. This can virtually replicate any position you want to hang a bar off a diff and then be measured in order to make the final bracket. The piece of turned bright round (the rusty bright round, lol!) is the same width as the rod end bush I am using. Bracket in use. New bracket measured, made and in place. Sometimes I am sooo fucking clever!! Bar made and fitted at diff end. Sounds easy and quick ... but its not. That or i am freaky sloww. Probably the later. Anyway - progress.
- 18 replies
-
- 21
-
-
Did anyone ever see the car though ... at a show or somewhere?
-
This is fucking cool shit you are up to. Good luck with it all.