Sunbeam
-
Posts
964 -
Joined
-
Last visited
-
Days Won
1
Everything posted by Sunbeam
-
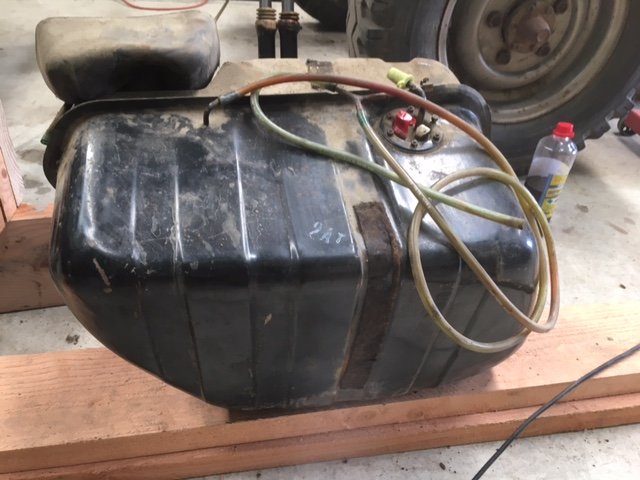
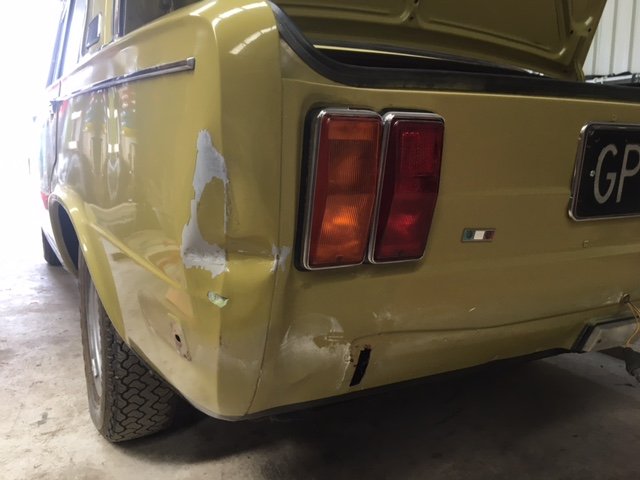
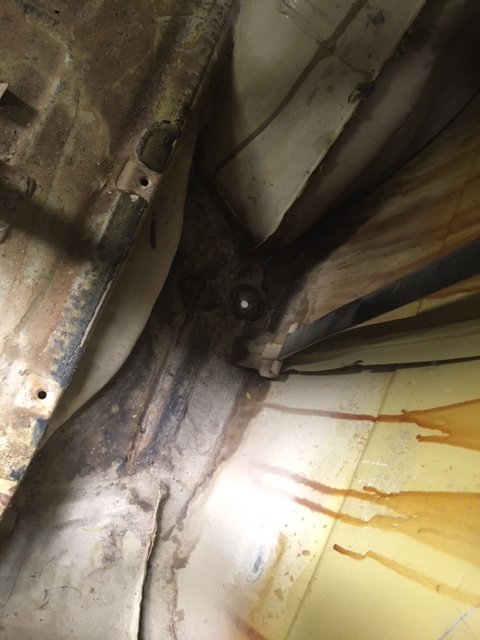
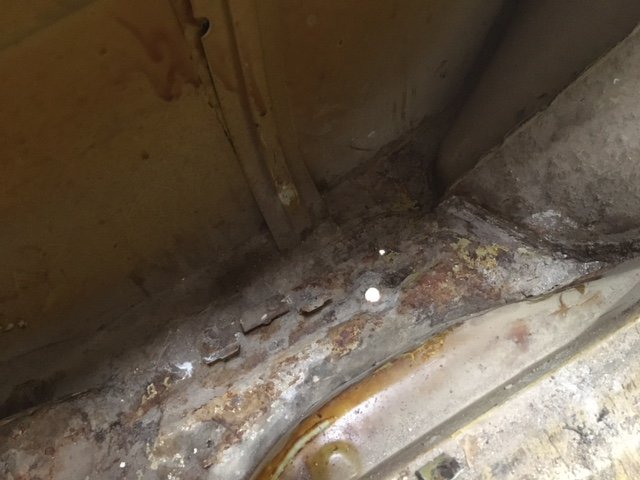
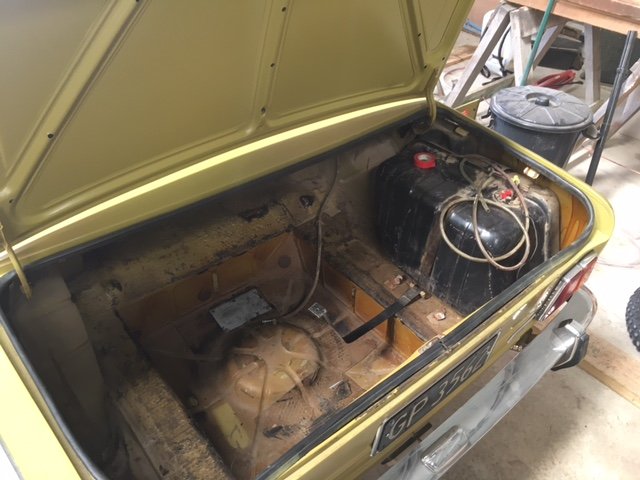
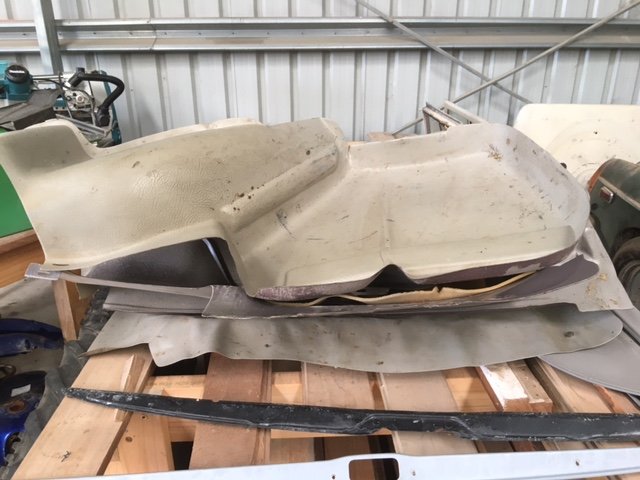
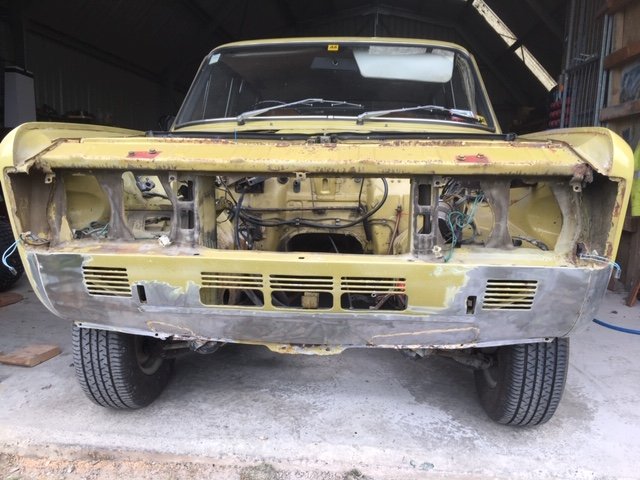
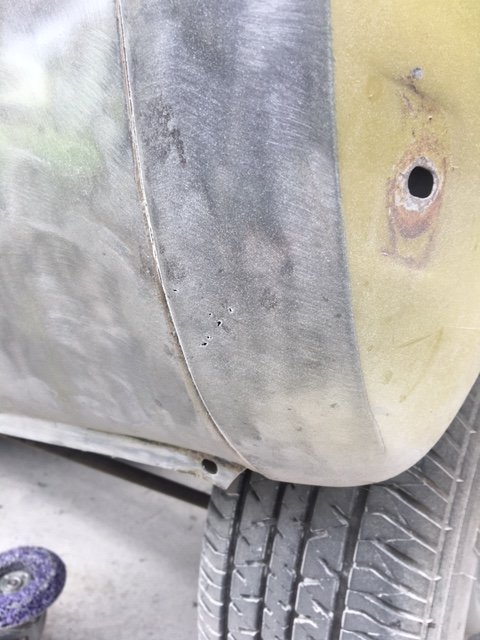
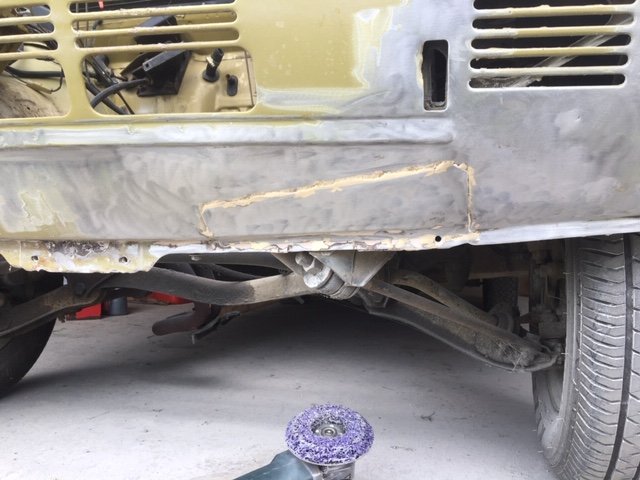
Happy new year. 2021 shall be the year of the Fiat. A strategy has been mapped out with the ministry of finance to get this thing back on the road. I have lined up a semi retired panel beater who happens to actually like cars to fix this thing for me. No, I do not feel like a failure... In preparation I needed to remove the rear bumper which necessitates removal of the boot lining and fuel tank. The boot lining is not too bad except for the left side panel which is wedged in quite tight. I can see why it’s cracked, somebody has had it out before me to graft in a high stop light, daisy chained from the left brake light. If I ever feel inclined, the cracks should be an easy enough fix with some fibreglass. Inside the boot isn’t bad. I vacuumed out all the crud and there is just a small rust hole in the left side, bottom of the rear guard. Wheel well is all good. There is a lot of cavity wax inside it, which I’m not sure is factory, but certainly beneficial. Tank out is easy, then the bumper is even easier, and there we have it, bare bum. Bonus, tank looks pretty mint too, although starting to smell a bit stale with the bulk of the remaining petrol in there being upwards of 5 years old.. Bring it on! Can’t wait.

- 126 replies
-
- 11
-

-

Tomble's 1983 Starion GSR-X fumbling / hand-holding / discussion
Sunbeam replied to tomble's topic in Project Discussion
I drained 30 litres of that crap out of my Landy. The old girl still ran on it! I’ve been mixing it with fresh gas and running it in the ride-on. The stench is everywhere now. -
Me and strip disc vs front panel. Yuck.
-
Proof that aluminium alloys do rust.
-
The great thing about a project like this is that you can just work on it when you feel like it, or like today when I had outdoor plans, but it’s drizzling. I have saved the left hand bulkhead outrigger by just patching the front face. It’s weird how the front face rotted out, but the bottom is sound. Inside the box section was packed full of dry mud. Not the tidiest patch, but it’s not exactly in the public eye. I also made a new brace for it. Again, very strange how a piece of angle, with no real rust trapping properties just rusted in half in the middle.
- 27 replies
-
- 5
-
-
- land rover
- 109
- (and 1 more)
-
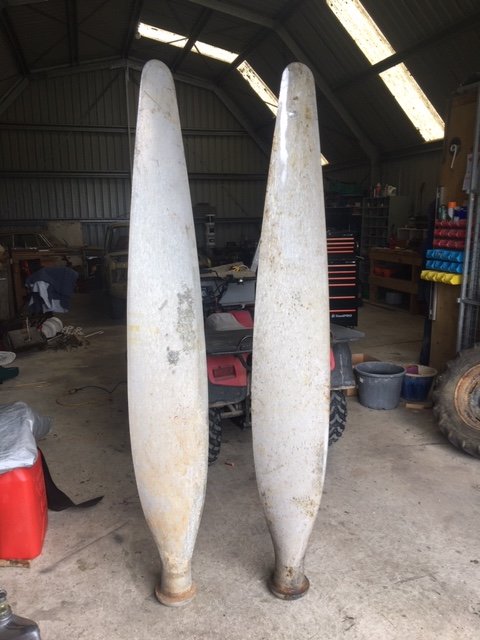
Blades are solid, there is a slight hollow in the round bit at the root. Some numbers, mostly indexing marks for setting up in the hub and some other numbers that are meaningless without the right book probably. I’m 99% sure they’re off one of these: Which makes them old school.
-
My buddy on the coast spotted these when the owner dropped in for a WOF on his way to the scrappies. It turns out the hoarder owner of this treasure had finally decided that a couple of decades of storing these was enough and it was time for a purge. Best mate #1 rightly judged that these would be right up my alley. I am in the process of finding out what aircraft they came off. For reference, each blade is 2.05 metres tall, so not off a Piper Cub then.... Plans are a good bling up and park at least one in the front entrance of my house where other types of folk might put a hat rack.
- 9 replies
-
- 17
-
-
Hurhur. Missed the turbo bit...have to read from the beginning again!
-
Why is 9.5:1 too high compression? Seems quite mild.
-
I approve of your tow vehicle
-
Hard to get the fuelling spot on without a boost compensated fuel pump, so will always be a compromise.
-
Yoeddynz's 1985 Hino N0915 housetruck build.
Sunbeam replied to yoeddynz's topic in Project Discussion
Detroit powered TM? But seriously, I saw a Nissan Condor the other day, 7 metre flat deck, nice and low to the ground, might have been one of those small wheel jobbies I think. I’ve seen some Mitsi/Fuso trucks that are long and low too, often not big $. -
Yoeddynz's 1985 Hino N0915 housetruck build.
Sunbeam replied to yoeddynz's topic in Project Discussion
RL Beddy -
I think it’s great you’re letting it wear it’s past with pride. I do enjoy a slightly wrinkly Land Rover
-
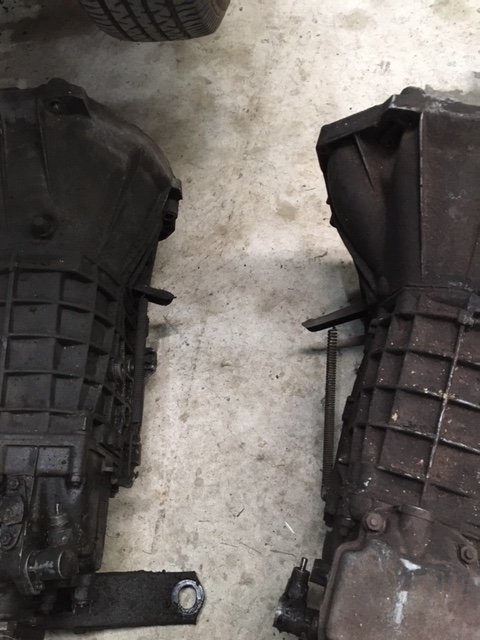
Cleaning up some tools today, I couldn’t resist playing compare the gearbox. 4 speed on the left, 5 on the right. Speedo drives are on opposite sides, and clutch mechanisms are also reversed, but that’s just a bell housing swap away from happiness. I did notice something a bit off about the crossmember still attached to the 4 speeder... look at the left of the pic... it’s bent! Further investigation revealed a corresponding ding in the chassis, so that will need fixing too.
-
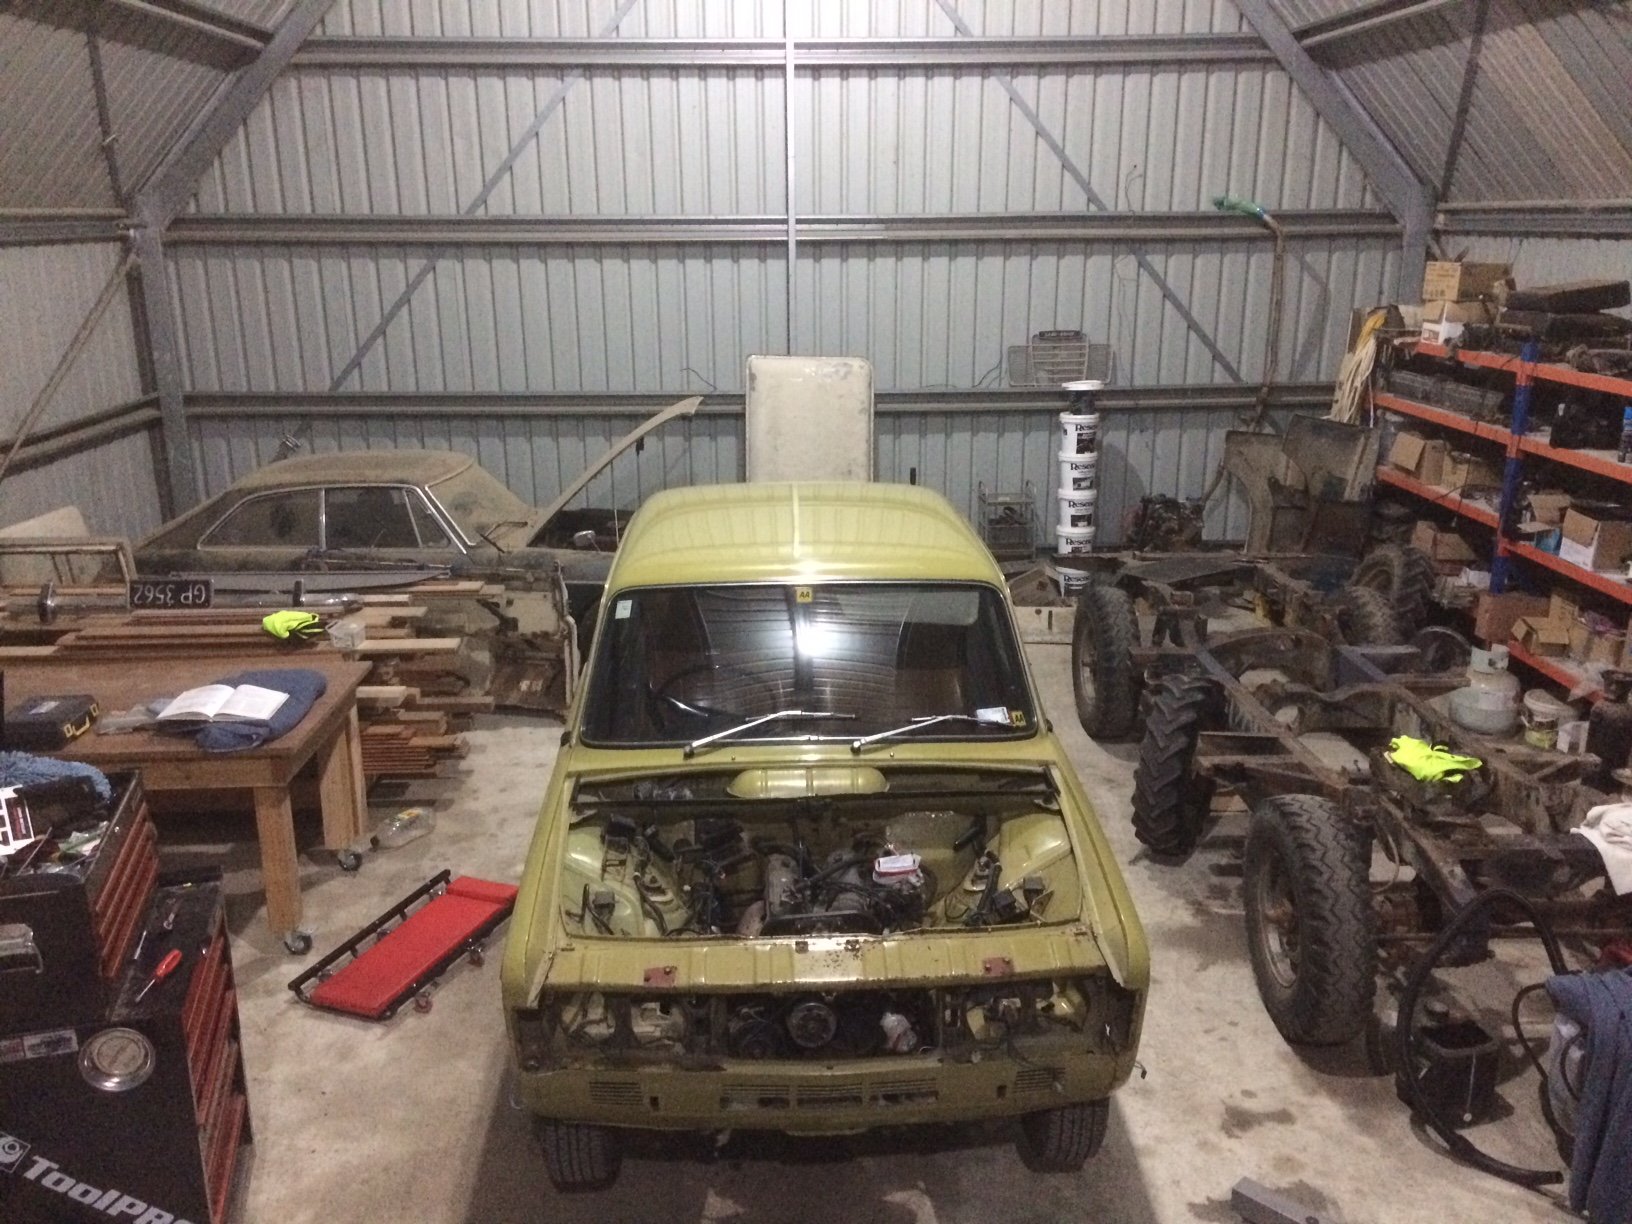
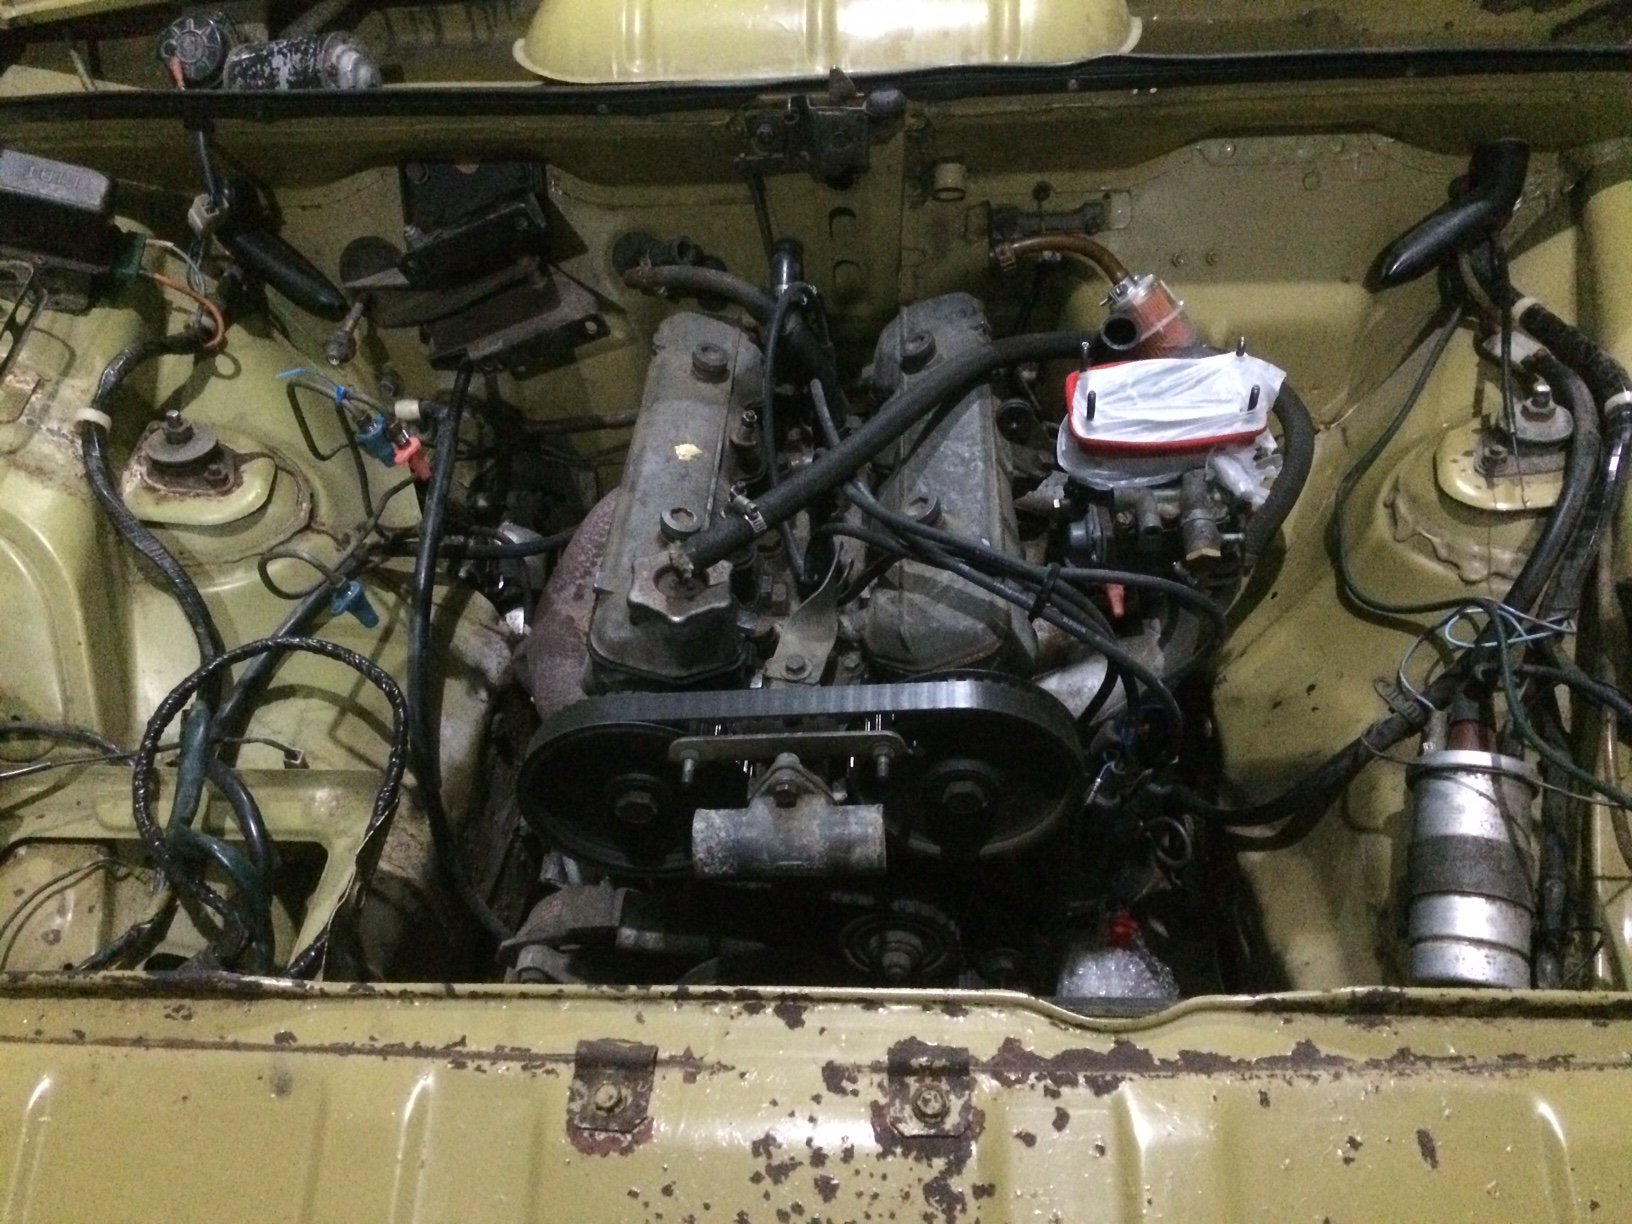
Progress. The driveshaft was the first thing to come out. I managed to achieve this without compressing the donut. The UJ’s are good, the hanger bearing itself is good, but the rubber support is chooched. Once the driveshaft is out, it becomes very obvious how to get the gear stick out. 4x 10mm nuts, and it drops out underneath the car. The exhaust downpipe bolts came out willingly (phew) and then by a series of contortions I got the starter motor bolts out. I don’t know if the starter is supposed to be able to come out of the engine bay at this point but I certainly couldn’t. Next was the lower flywheel cover and the two bottom bellhousing bolts (easy as), and then I wrangled the clutch cable out before psyching myself up for the top bellhousing bolts. I’m glad there are only 2 up there. I couldn’t find the right spanner angle to get them from the top, so I took @azzurro‘s advice and used all my half inch extensions and universal joint with tape on it and you can just get to them from underneath. One of the trickier operations was releasing the speedo cable. I couldn’t unscrew the cable because I physically couldn’t get my fingers on it, so I undid the nut and wangled the whole speedo drive out. Lucky the gearbox is light, since I’m working alone lying on the floor, so it was fairly simple to pop it off and onto the floor. The engine came out next, I cannot believe how little clearance there is. With the fan clutch touching the slam panel, there is maybe an inch between the clutch and the firewall. I think I’m going to lose the fan clutch as it’s quite noisy. Other observations are...it’s filthy. No oil drips but lots of seeps, from both engine and box. Also, I will need a new gearbox mount, and I’ll get a new hanger bearing for the driveshaft.
-
What manual is that? It looks much better than my Autobooks one
-
The manual only mentions removing the stick and its base, and I think I figured out how it comes out now. I wonder if a giant hose clamp would have enough grunt to squash the Guibo
-
Today I calmly removed the cables from the starter motor, after first removing the oil filter for some better access. The master cylinder and booster are off (master is suspect), and fuel lines disconnected, and exhaust collector bolts have been cracked/now soaking in 5.56. please enjoy an elevated photograph of the whole collection. This pic is extra special since it was taken after sundown, it proves that after a year without, I finally have light in the shed. The neighbour came over with his tractor today, and we attached the approved work platform (wink) and I was hoisted up to replace the 3 blown incandescent 150w bulbs with 30watt Philips LED high lumen bulbs. They work very well. Anyway, this is where I finished: Next step is to dive underneath and attempt to undo the driveshaft doughnut, unhook speedo, clutch cable etc. Not looking forward to it particularly since it’s British car spec filth down there. I’ve heard you need some sort of strap tool to undo the doughnut, but unconfirmed. Also need to puzzle out how to get the gear lever assembly out, as it’s not 100% obvious once the shift rod is unbolted. Hopefully I’ll get to it on the weekend, since I actually have work tomorrow and Friday. Let’s see if I still remember how...
-
Yes. Is it even in the same city as you yet?
-
Ok, I’m sick of watching this thing rust in my shed. I have started to prep the engine for removal, then I rage quit when trying to undo the starter motor cable and went inside. It’s only 4 degrees outside and I’m not as hard as I used to be. BTW, to anyone who has done this before, will the engine and box come out as one unit? Quite a short engine bay.. @azzurro can you comment?
-
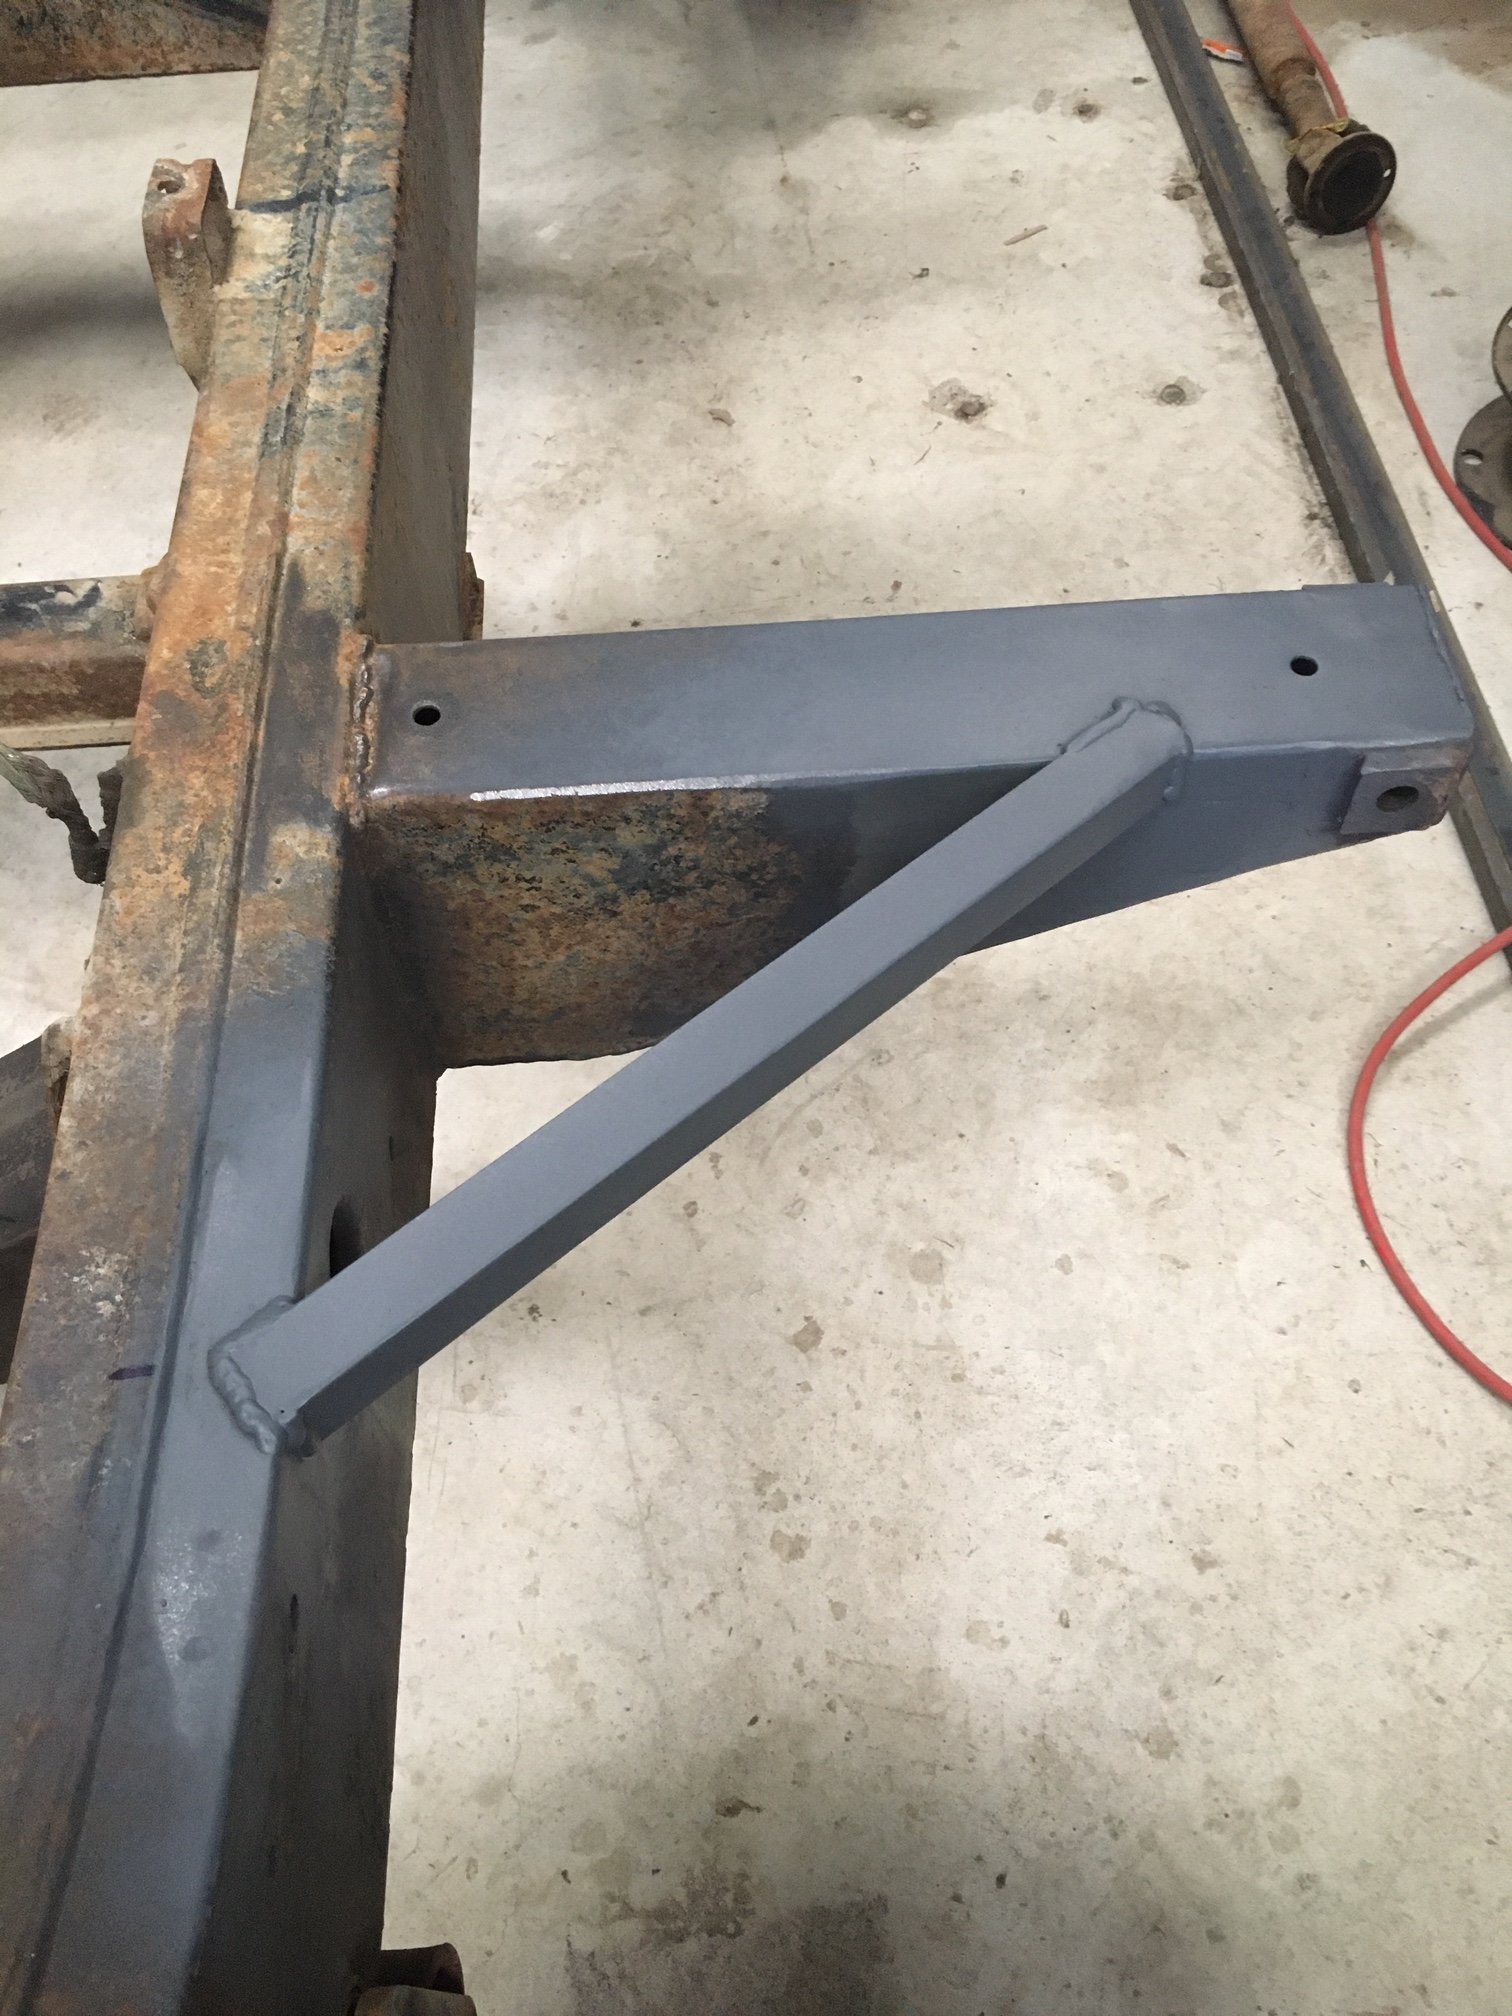
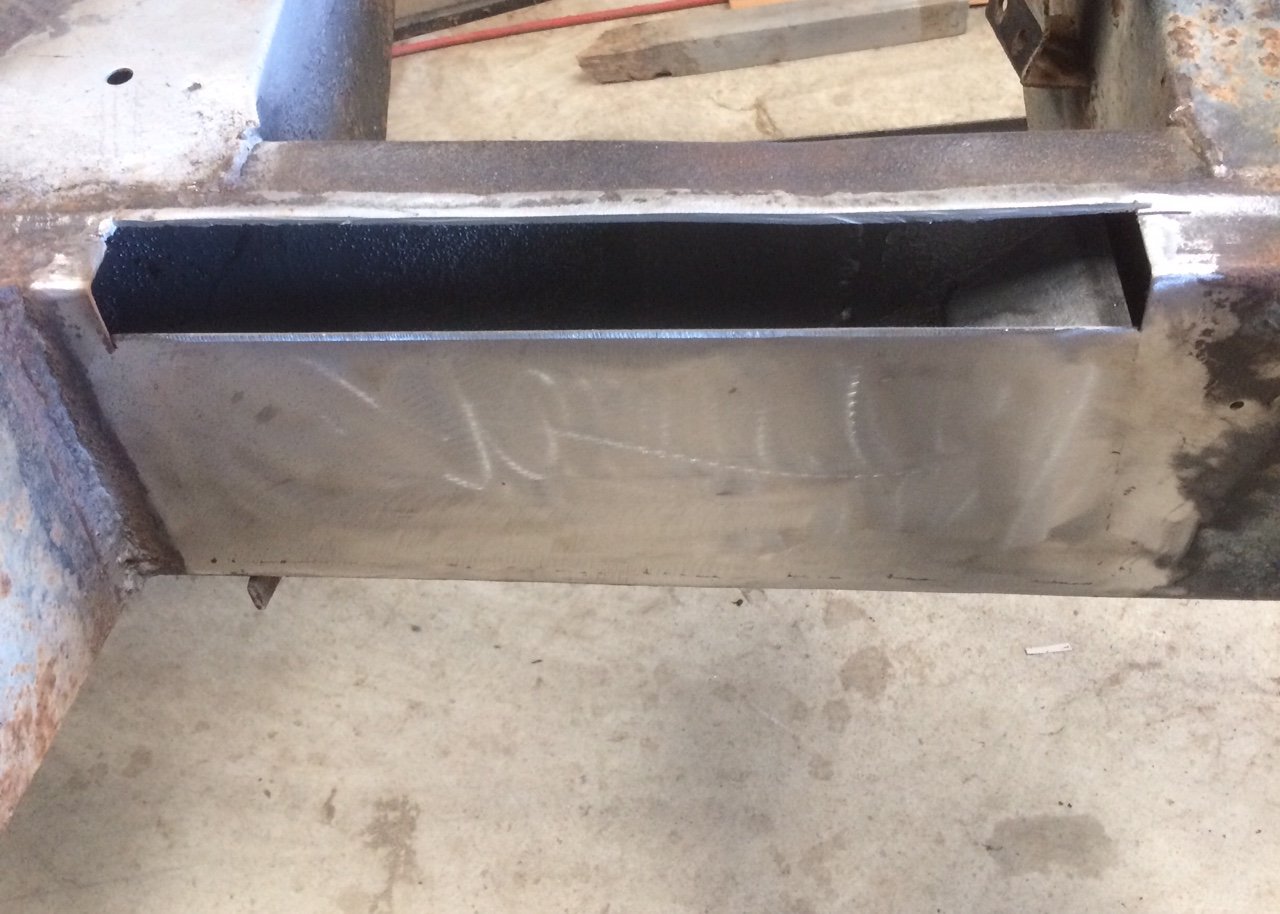
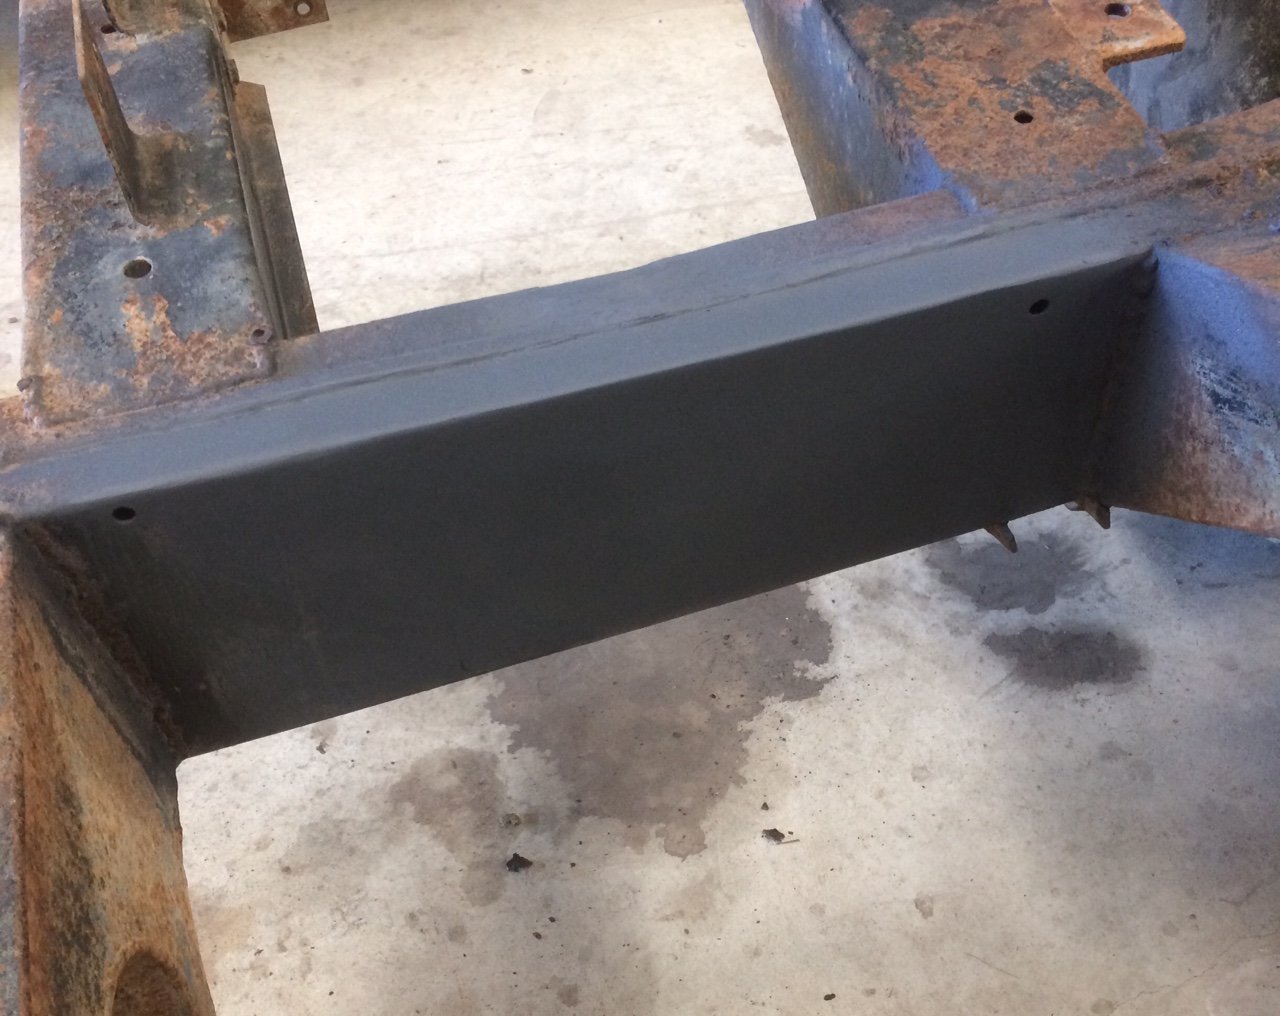
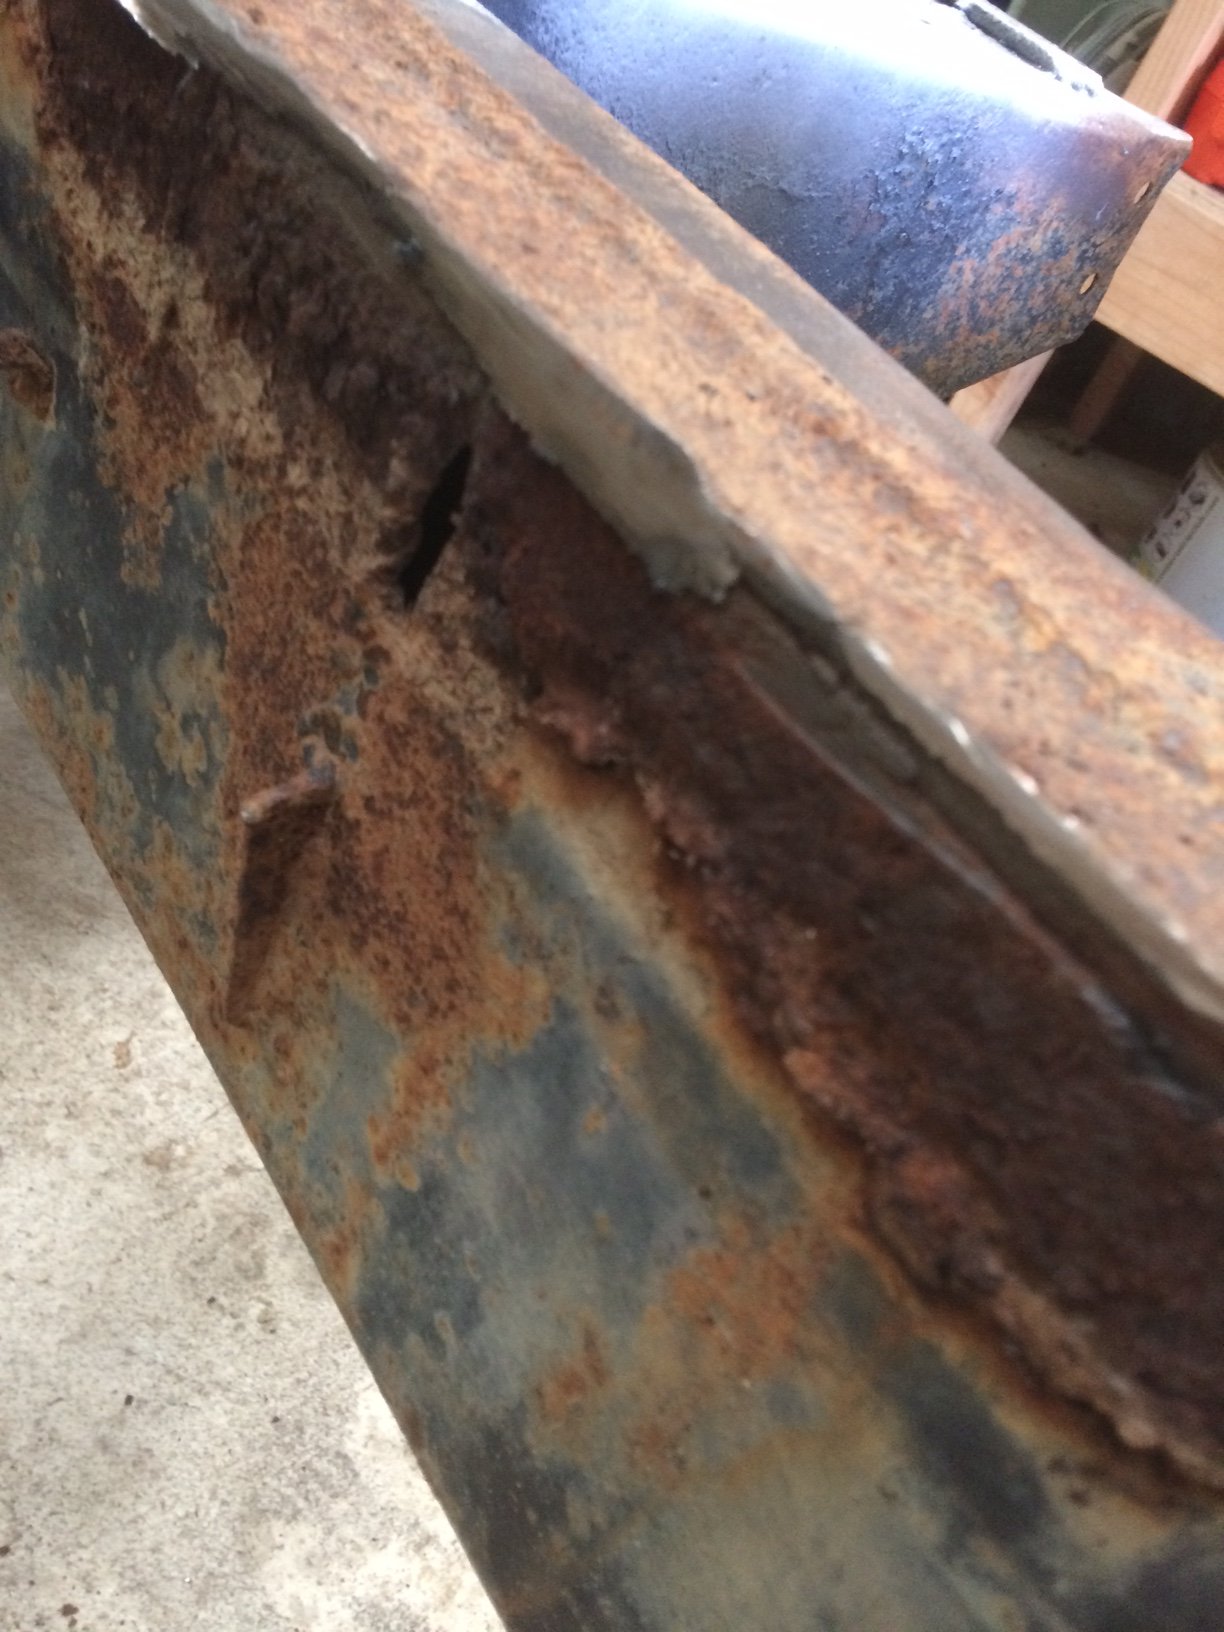
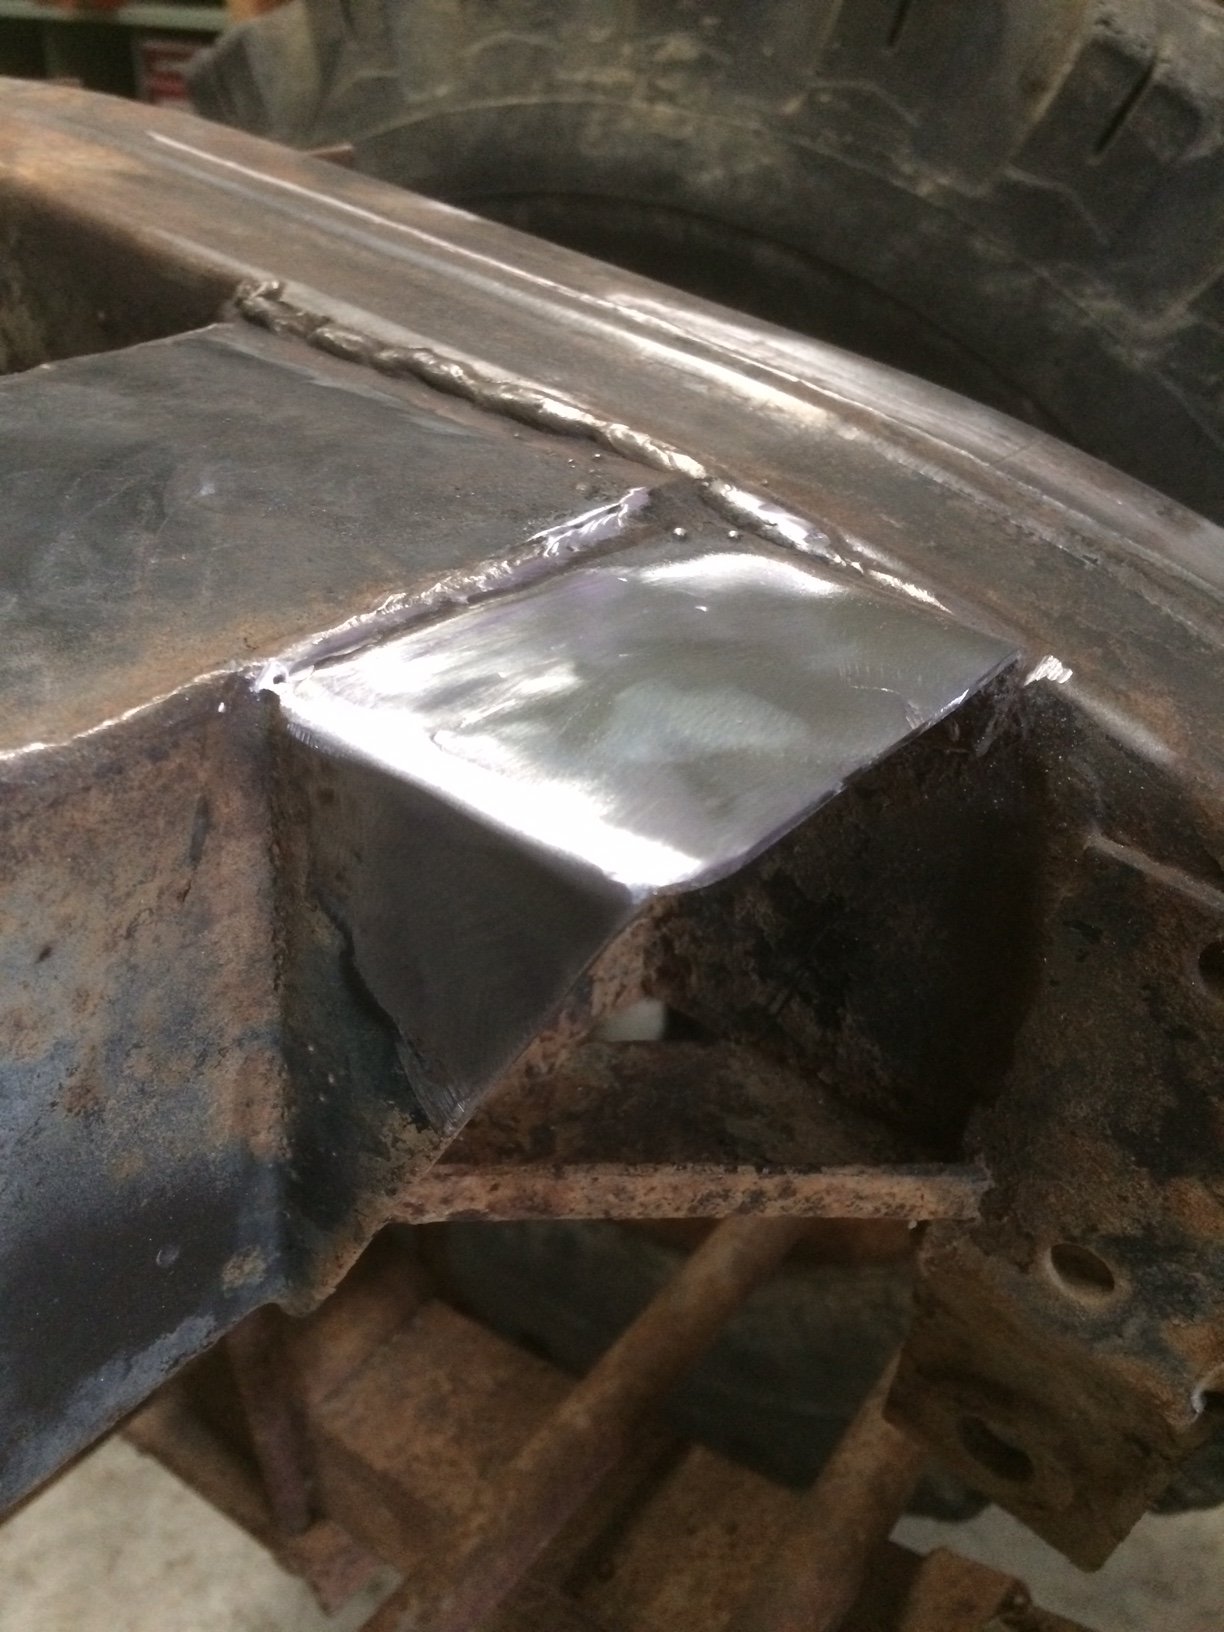
It’s been a couple of months since I posted any bad welding, but rest assured, dear readers, I’m still plugging away. The flaky area just aft of the cab where the LPG tank mounts were are nearly done. Just one more angle patch required. Right side done Left side almost done Also, I got brave and tackled the front chassis ends. I had chopped the ends out because of their similarity to weet bix, and then I found the inboard side of the left leg just above the spring hanger was also crispy. Fixed that first, and then got the insides full of rust converter and after that had dried, liberally baptised as far as I could reach with fish oil. Hopefully this will slow down the rust inside so it lasts another 50 years. Then I capped the ends. It looks much better now.
- 27 replies
-
- 10
-
-
- land rover
- 109
- (and 1 more)
-
SHHHHIIIIIIIIIT!!!!!!! I can’t even blame someone else. I currently have a low wellbeing score.
-
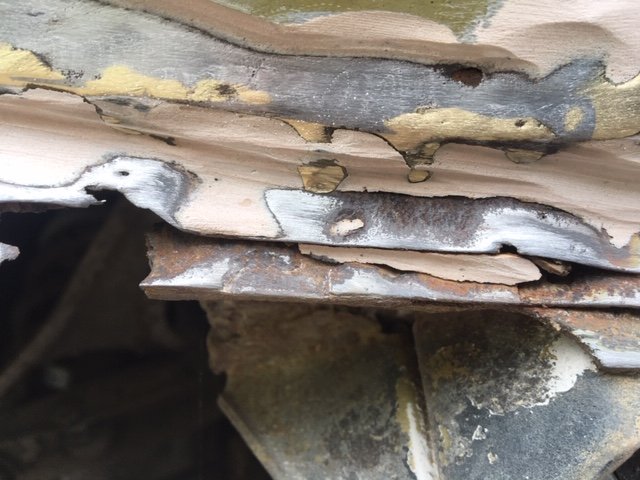
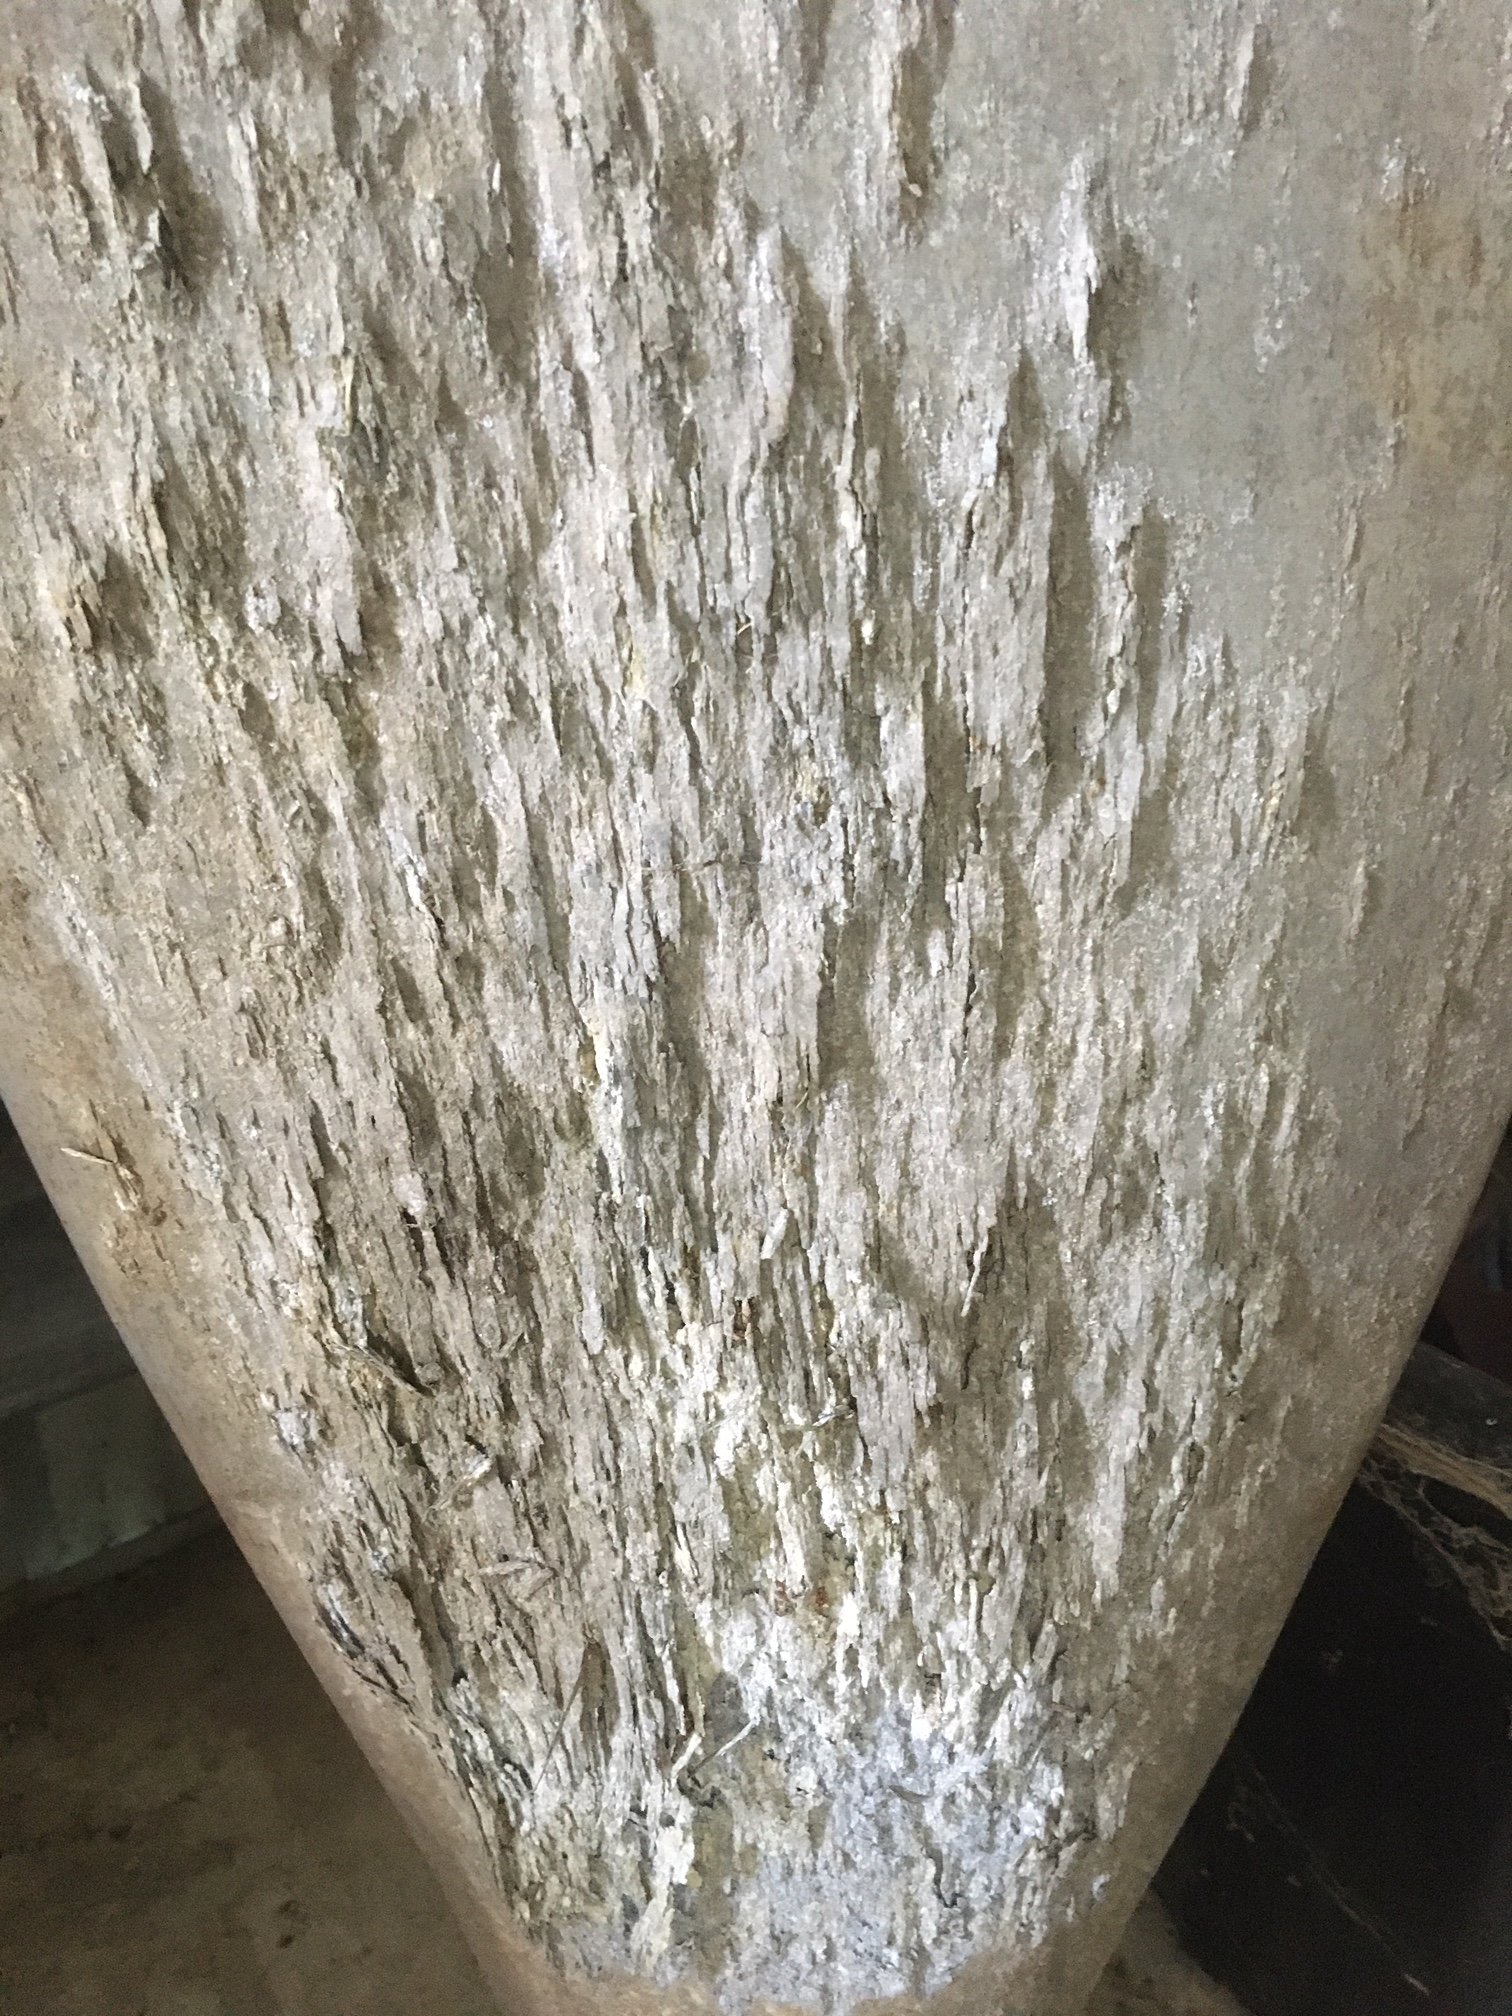
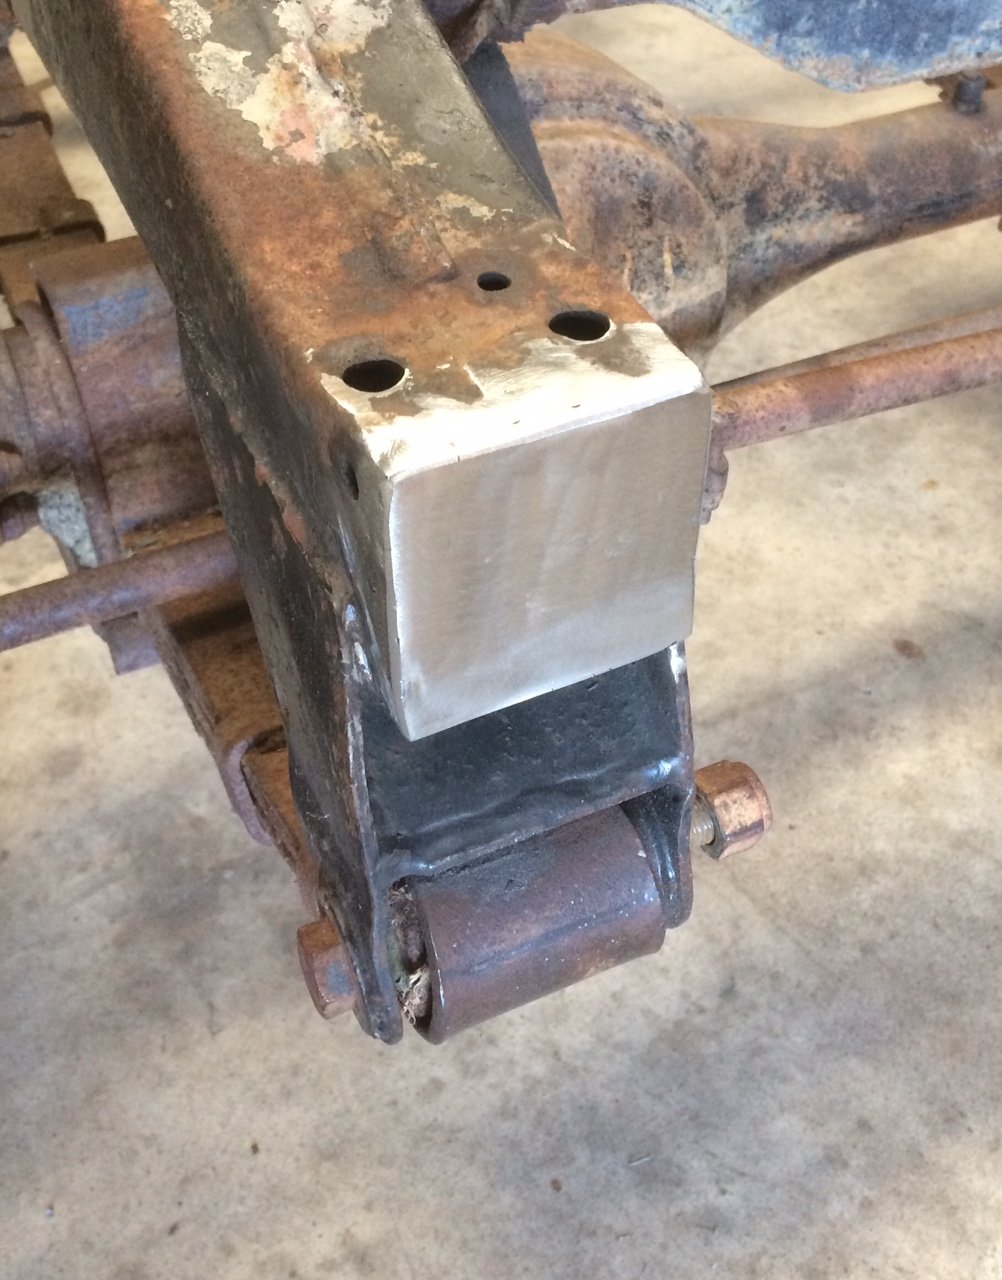
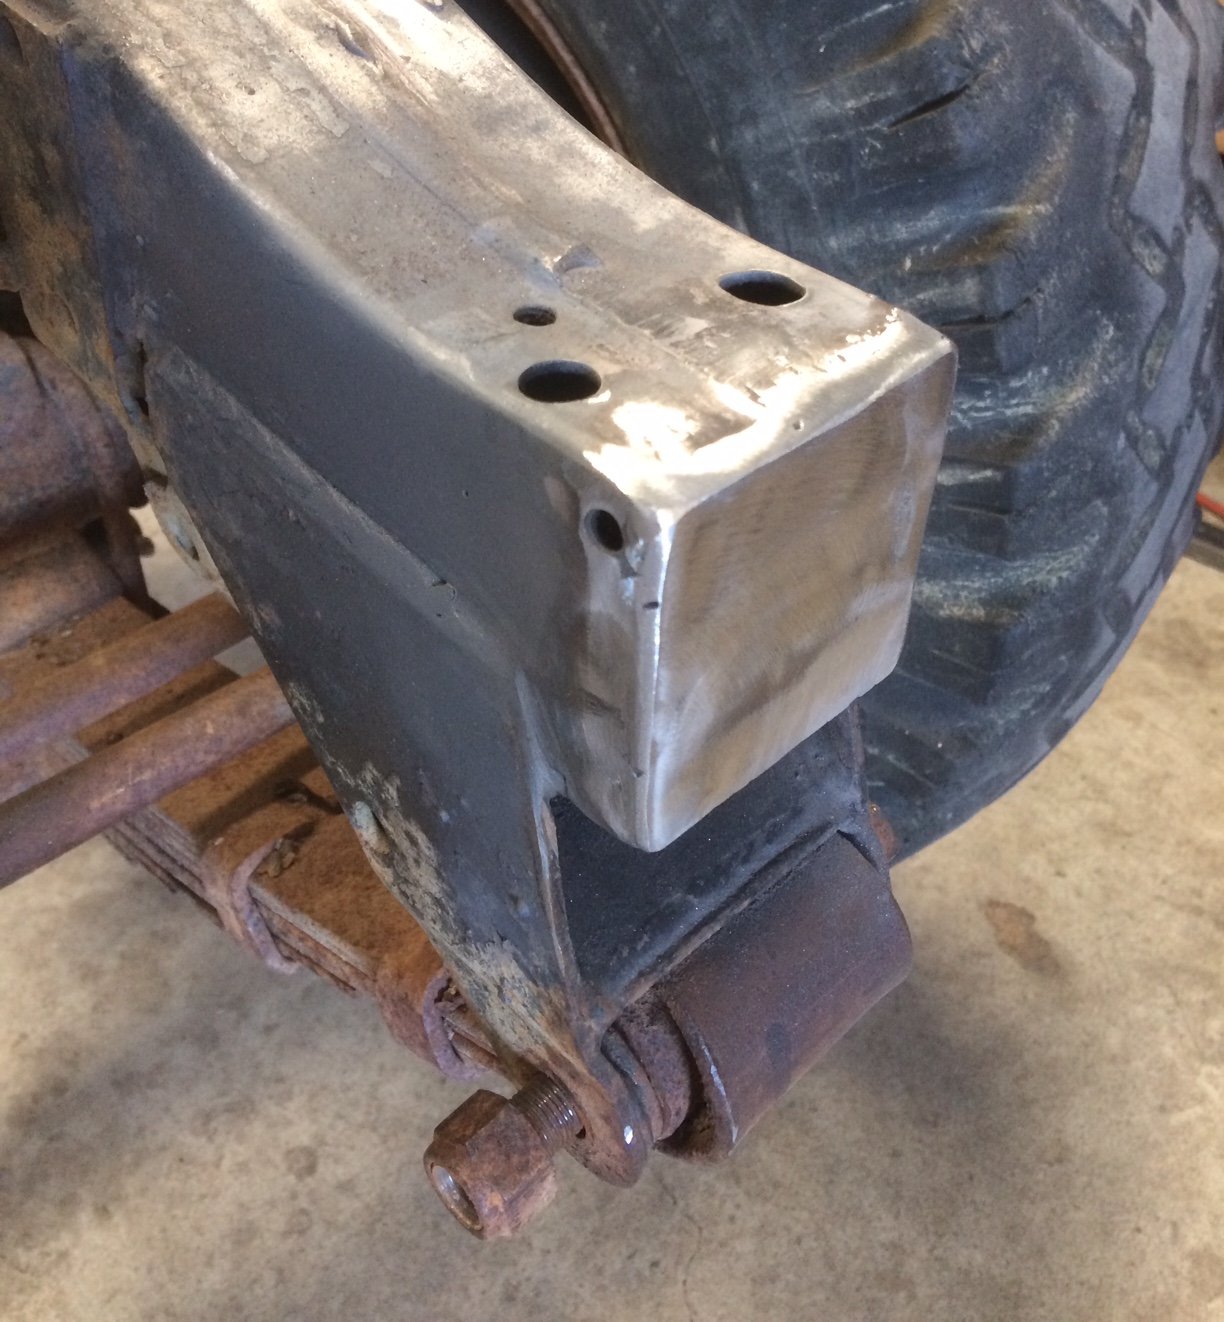
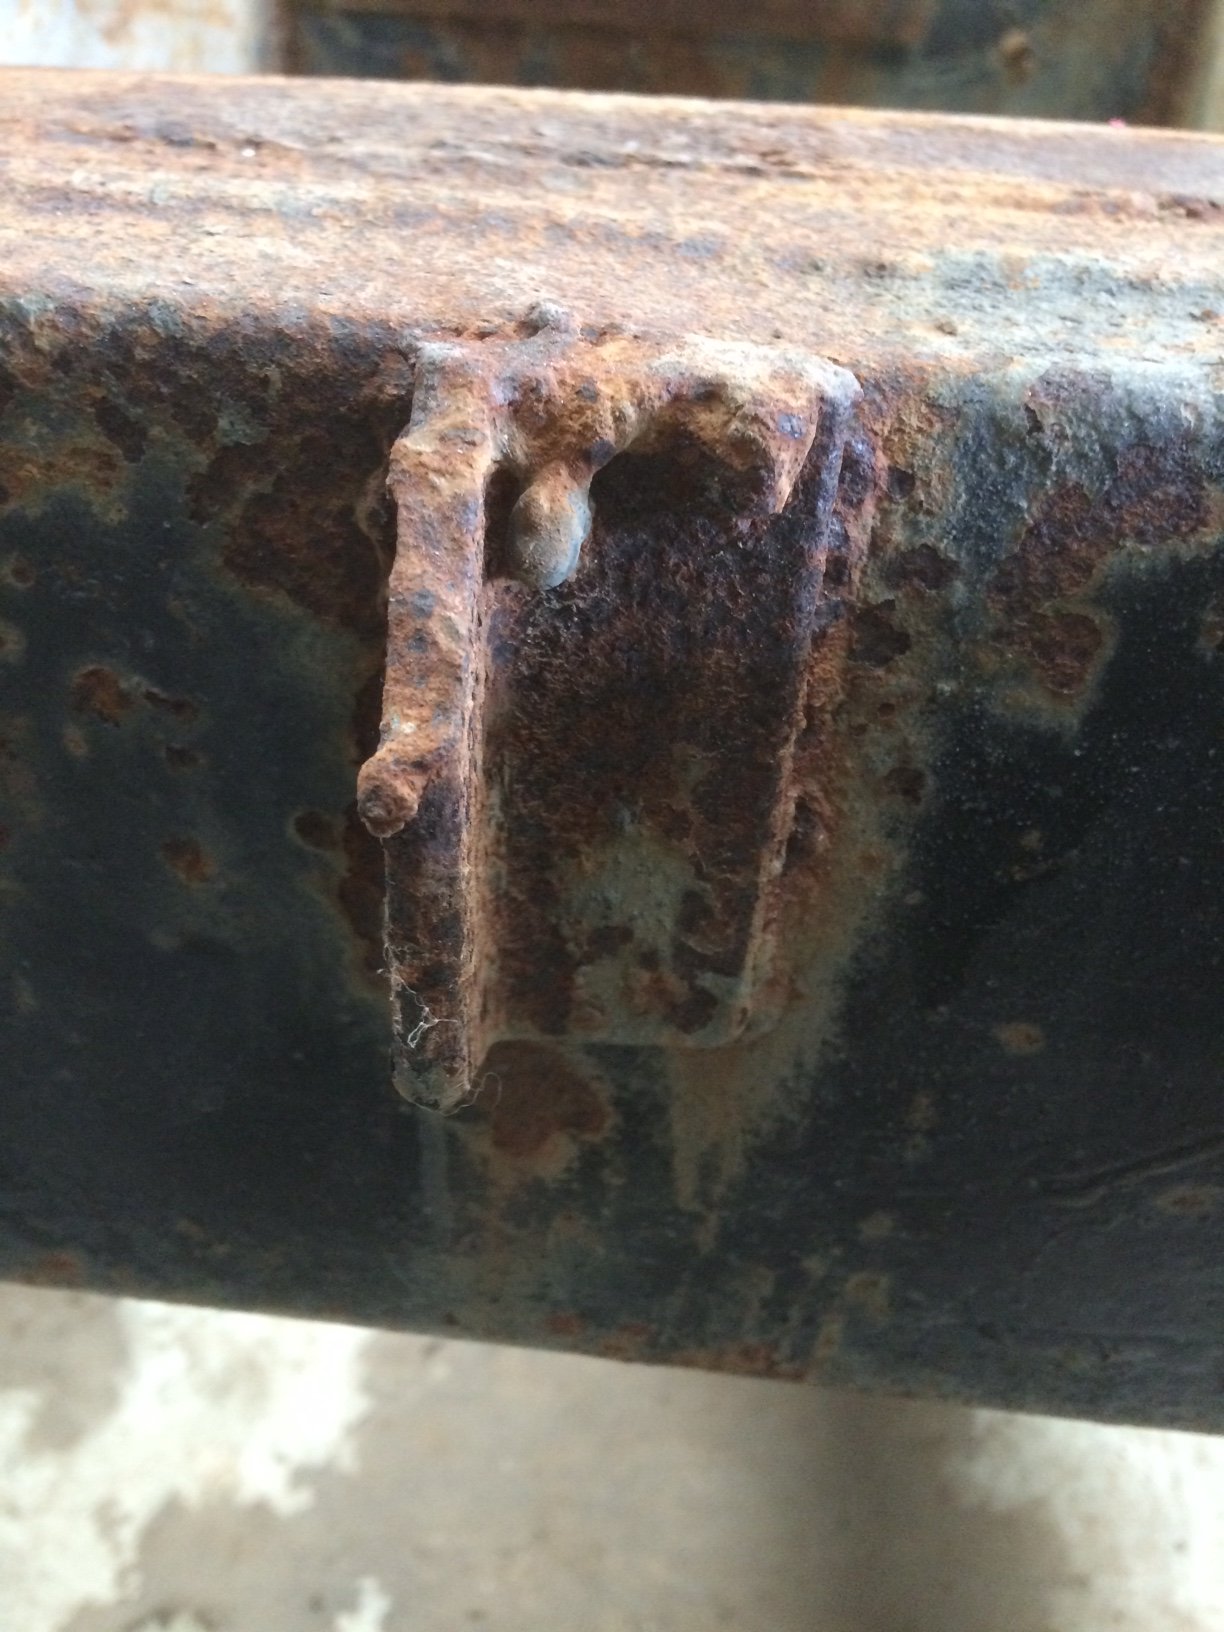
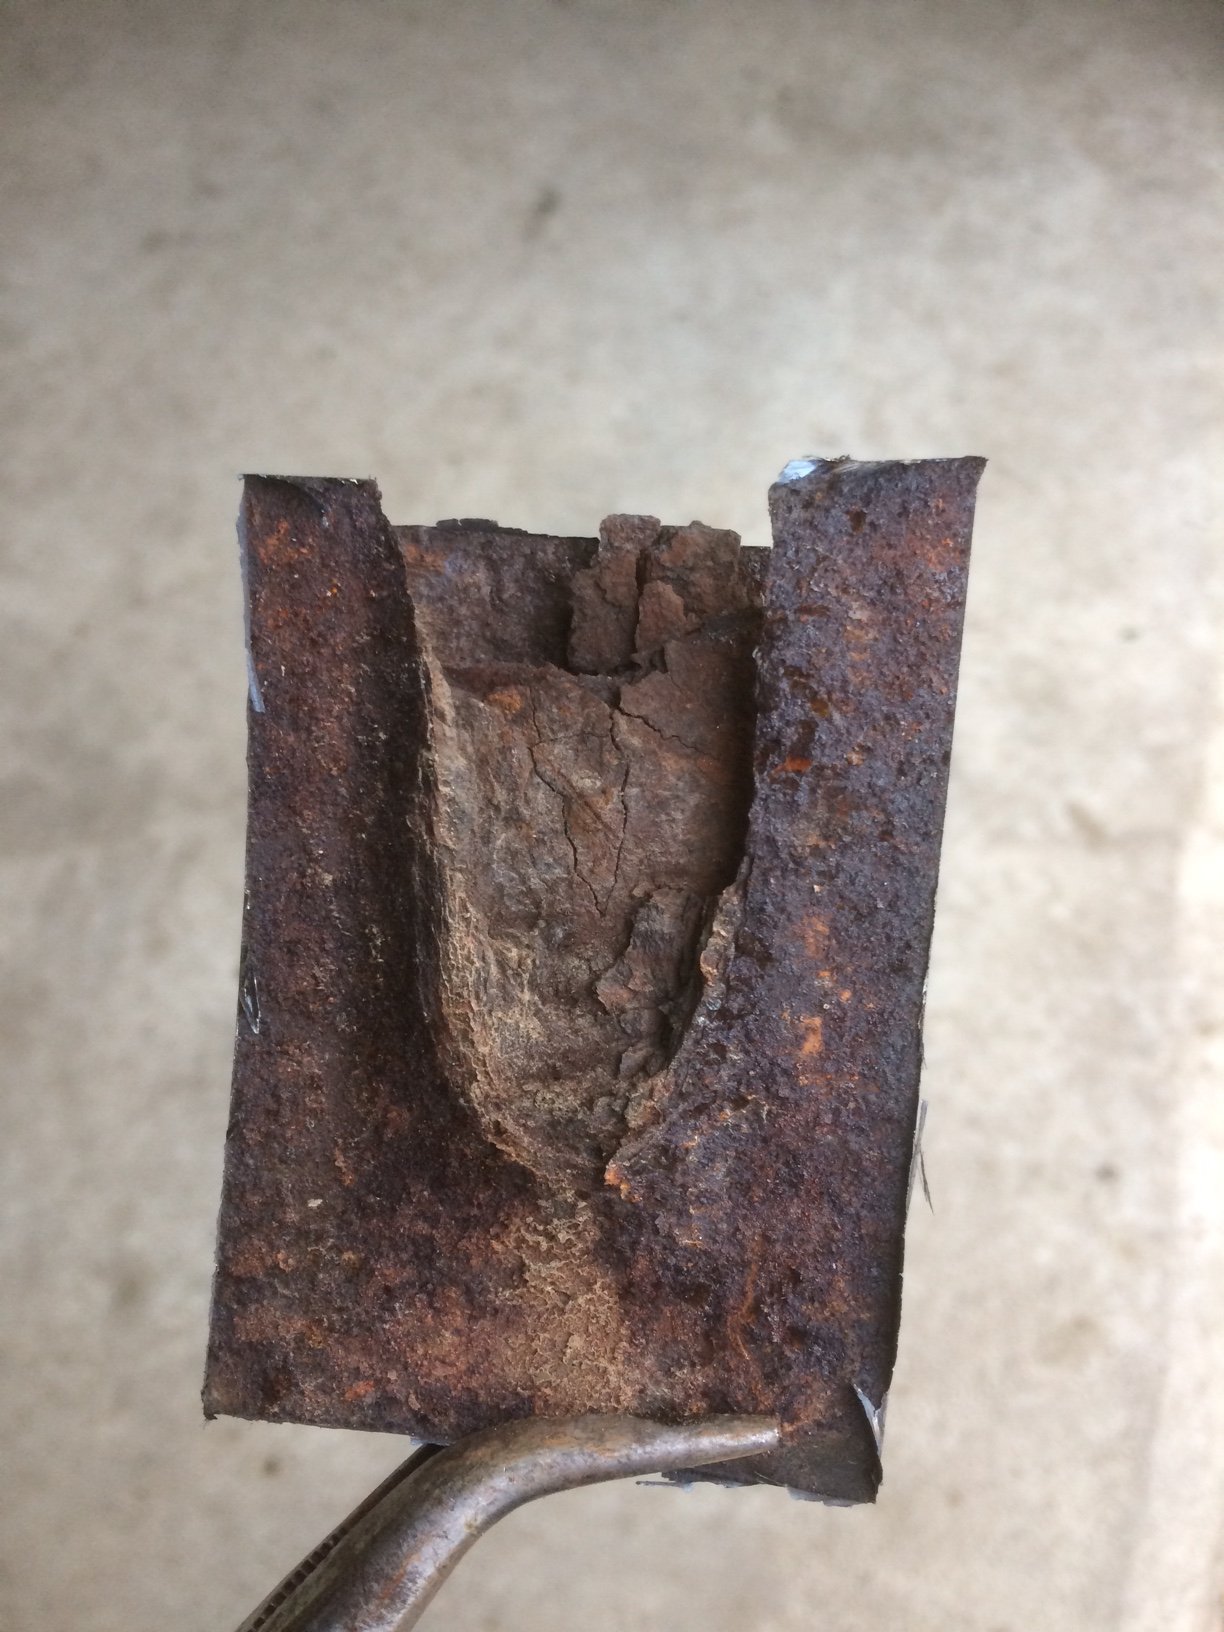
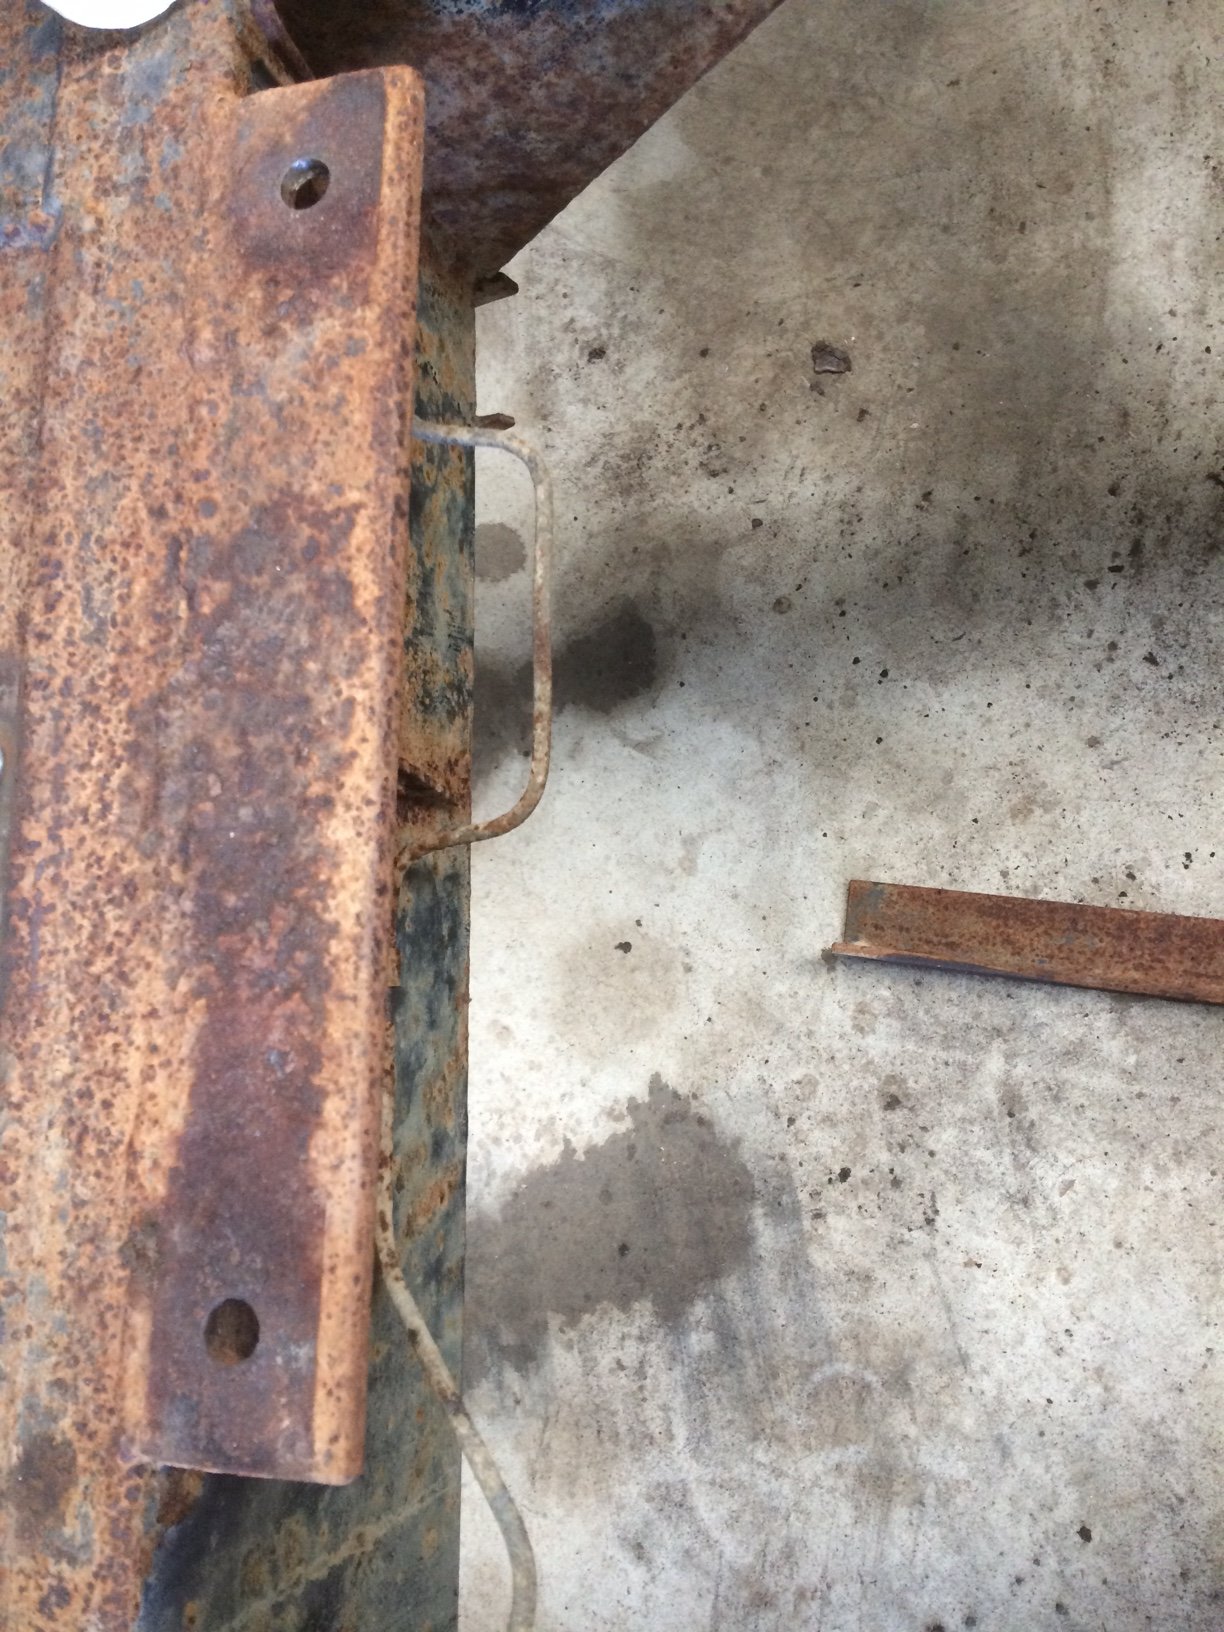
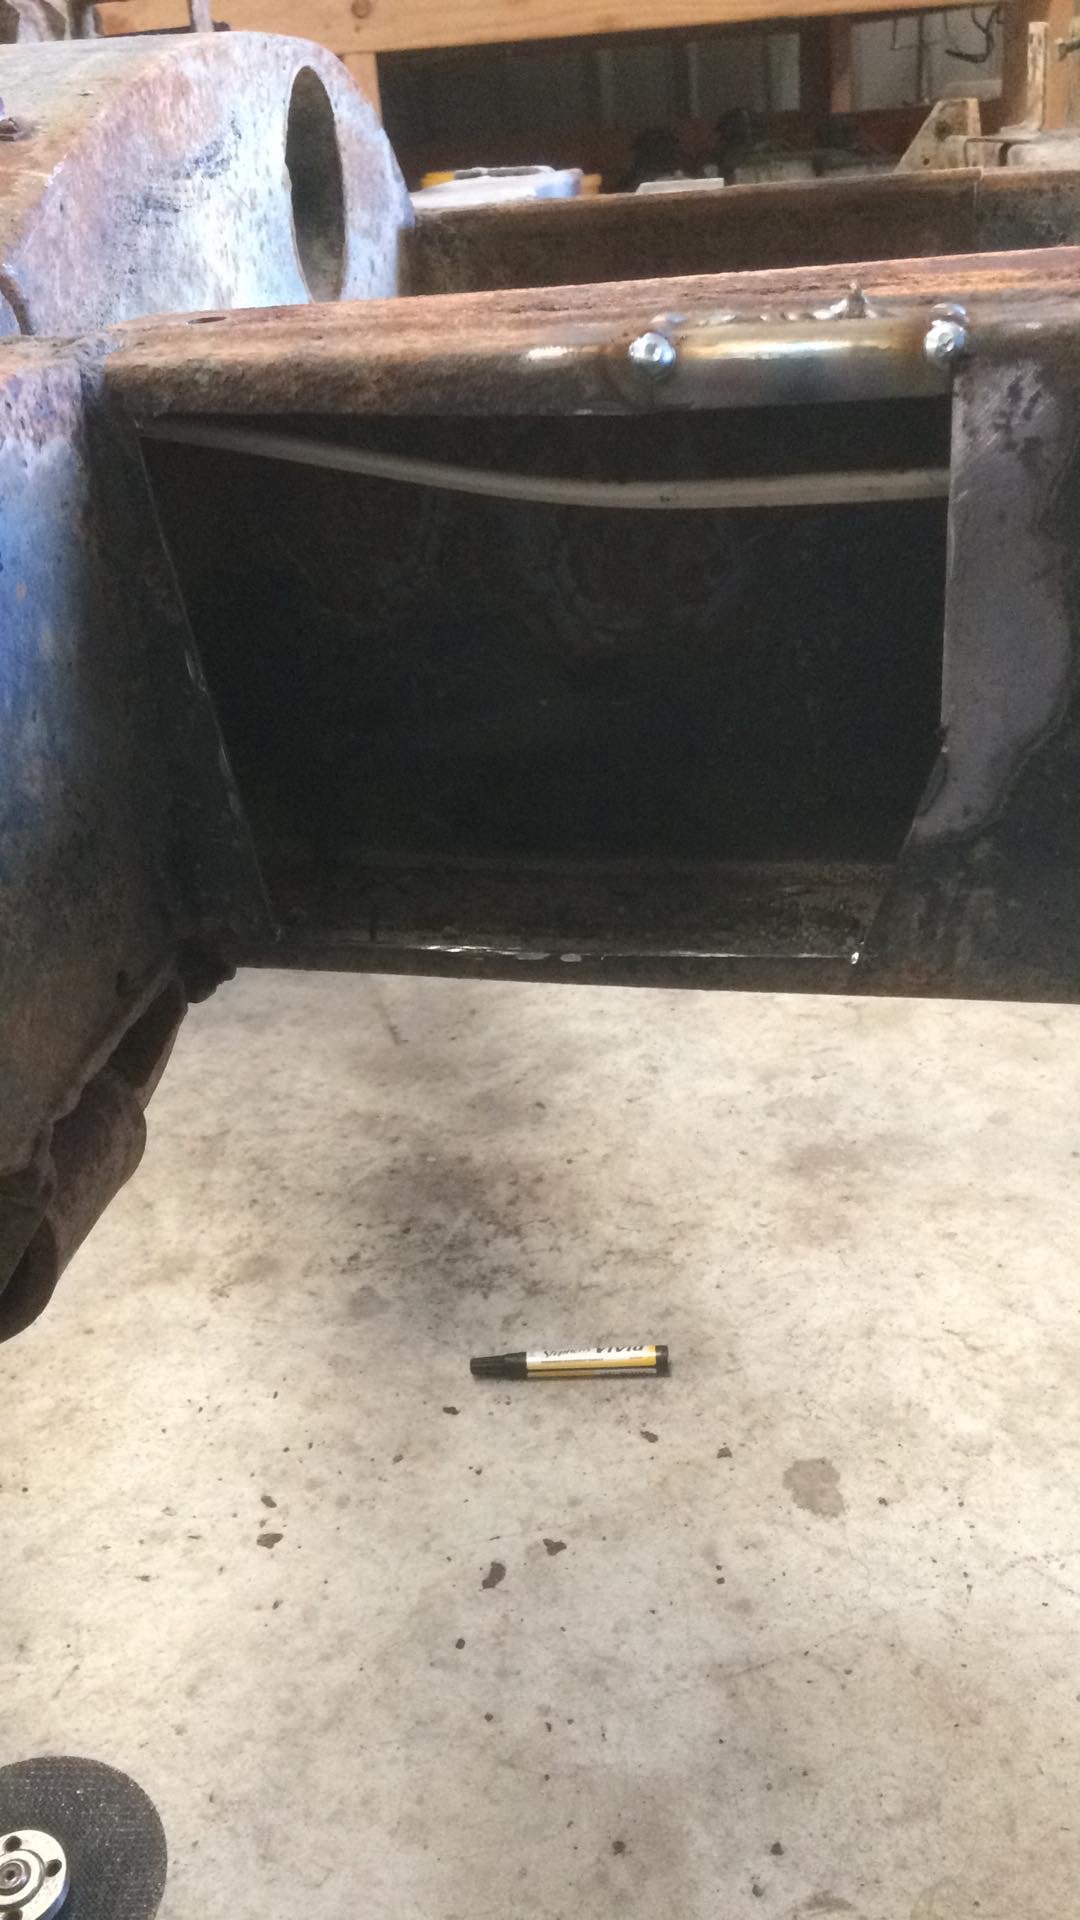
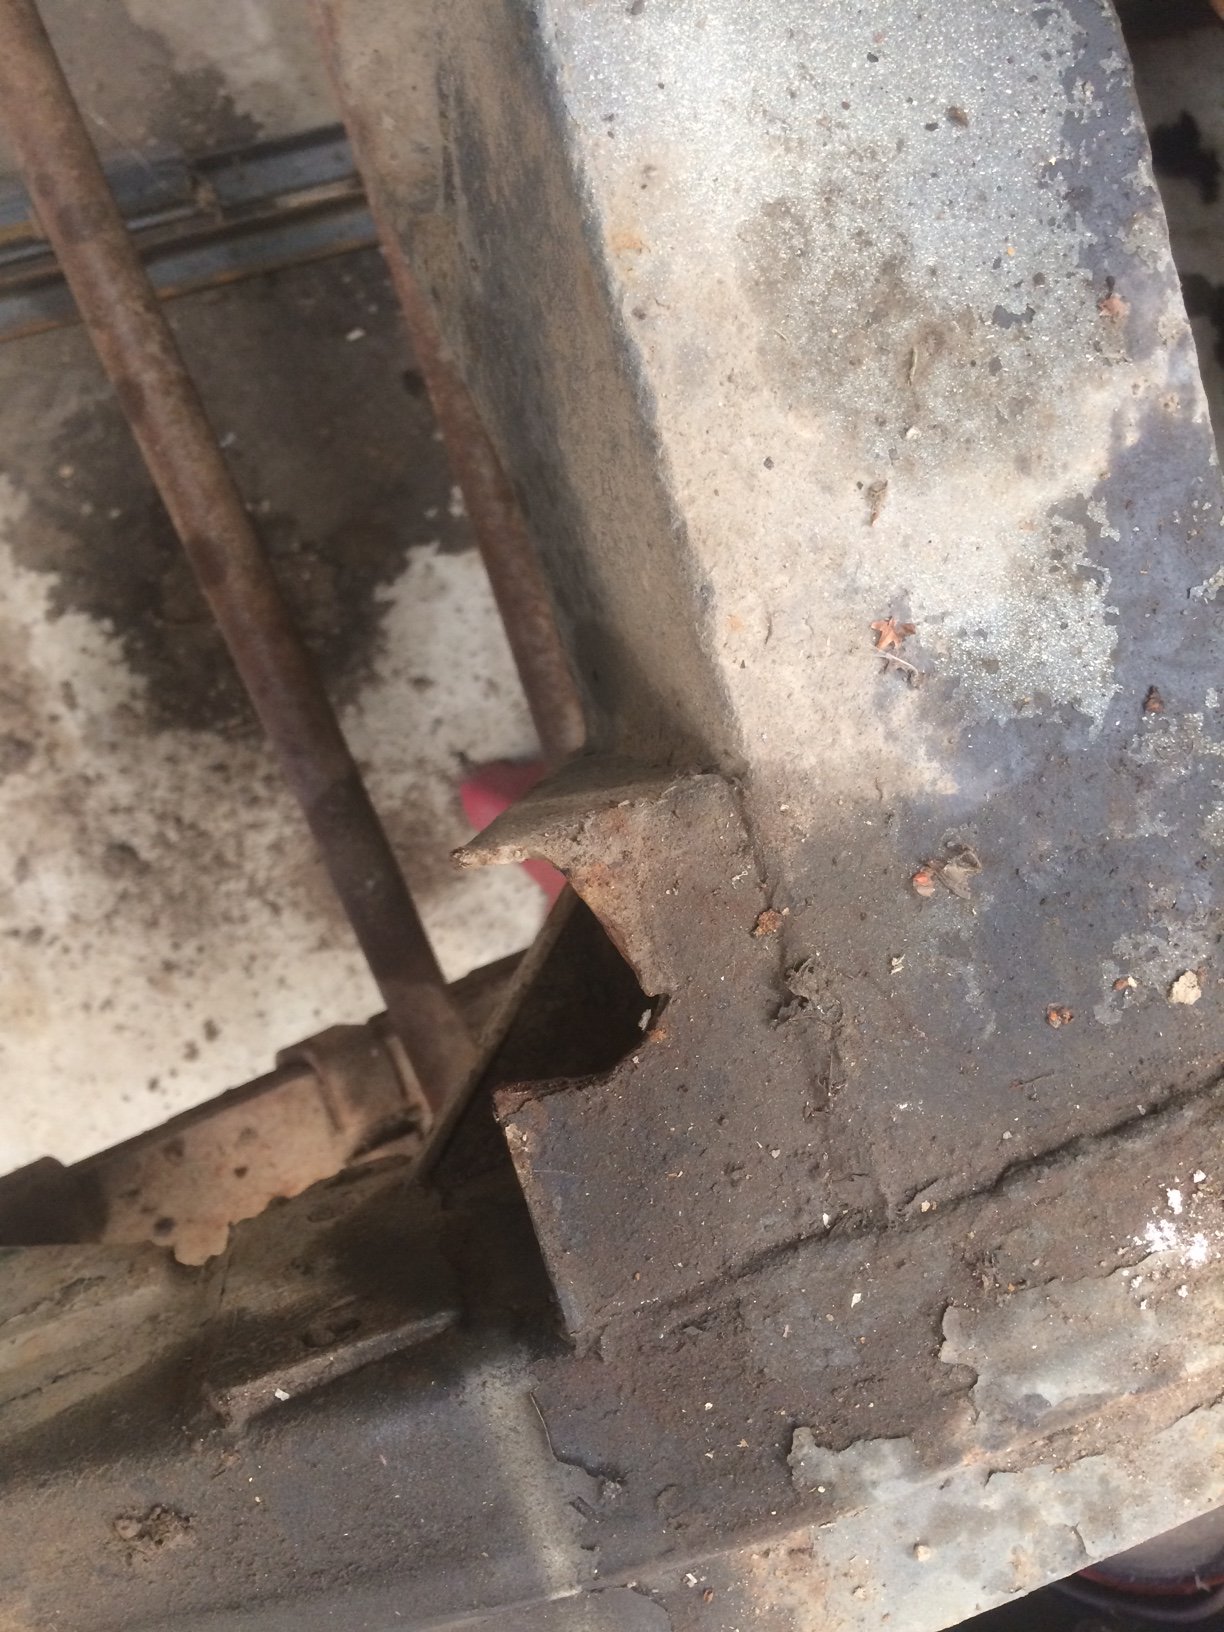
I have decided to start removing all the bracketry from the chassis that doesn’t belong. I’m doing this for several reasons, firstly because it looks untidy, and probably more importantly I think they are all hiding bad rust. Most of these tabs and brackets were only welded along one edge with probably no prep, and certainly no protection applied afterwards. Here is a random something on the outside of the chassis just behind the cab. which looks like this on the backside...Oh dear. As I suspected, massive rust heave between layers. By the time I cut out all the rusted and dented bits, I now have quite a large hole to fill up. I already let a small patch in where the rot went around the corner onto the top section of the chassis. Then I cut the LPG tank mounts off. They are made of 6mm angle, and again only welded along the top. To reveal more goodies A hole and nice flaky Weetbix. Same on both sides. It took a fair bit of careful cutting to get through these without taking away any of the original chassis steel. The rot will need to be cut out around the corner because the tank brackets trapped a lot of crap and rust has eaten into the top of the chassis. I might need to get some big rhs offcuts to cut up for patches, because I have tried and failed to put a tight enough radius in 2.5mm sheet to match the chassis profile.
- 27 replies
-
- 2
-
-
- land rover
- 109
- (and 1 more)
-
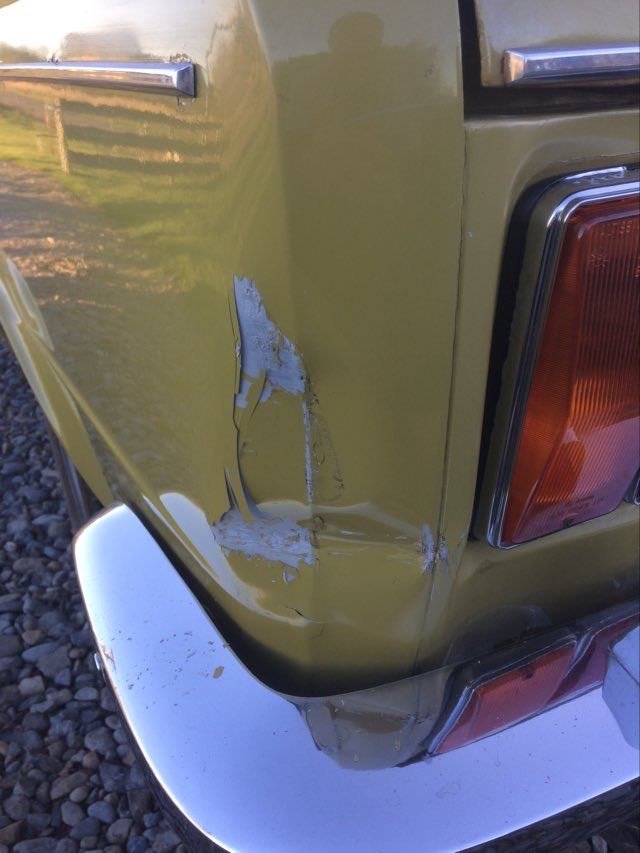
Practicing some more welding. Before: After: Right now I’m keen on investing in some flap discs to make a final finish, as I’m a bit chicken about going too far with the grinder. Also built up the end of the triangular gusset with weld as there was a chunk missing. That went fairly well and you almost can’t tell. Now I have to drill an oval hole to finish it. The bit you’re looking at is the left side radiator panel mount, which was torn out when it got crashed into a fence or something.
- 27 replies
-
- 5
-
-
- land rover
- 109
- (and 1 more)