a.craw4d
-
Posts
4,085 -
Joined
-
Last visited
Everything posted by a.craw4d
-
You're welcome. What can possibly go wrong? (Enter drunk antics with a motorized shopping trolley). Lol at the potato sack race suits, Also get one of those kids helmets that look like a water melon. Other option is dress them as Randy Campbell.
-
That's cool mate, good job. Make some smaller scale one's for the kids and go on a family ride. All with matt black helmets of course. Would be lol and get so much attention.
-
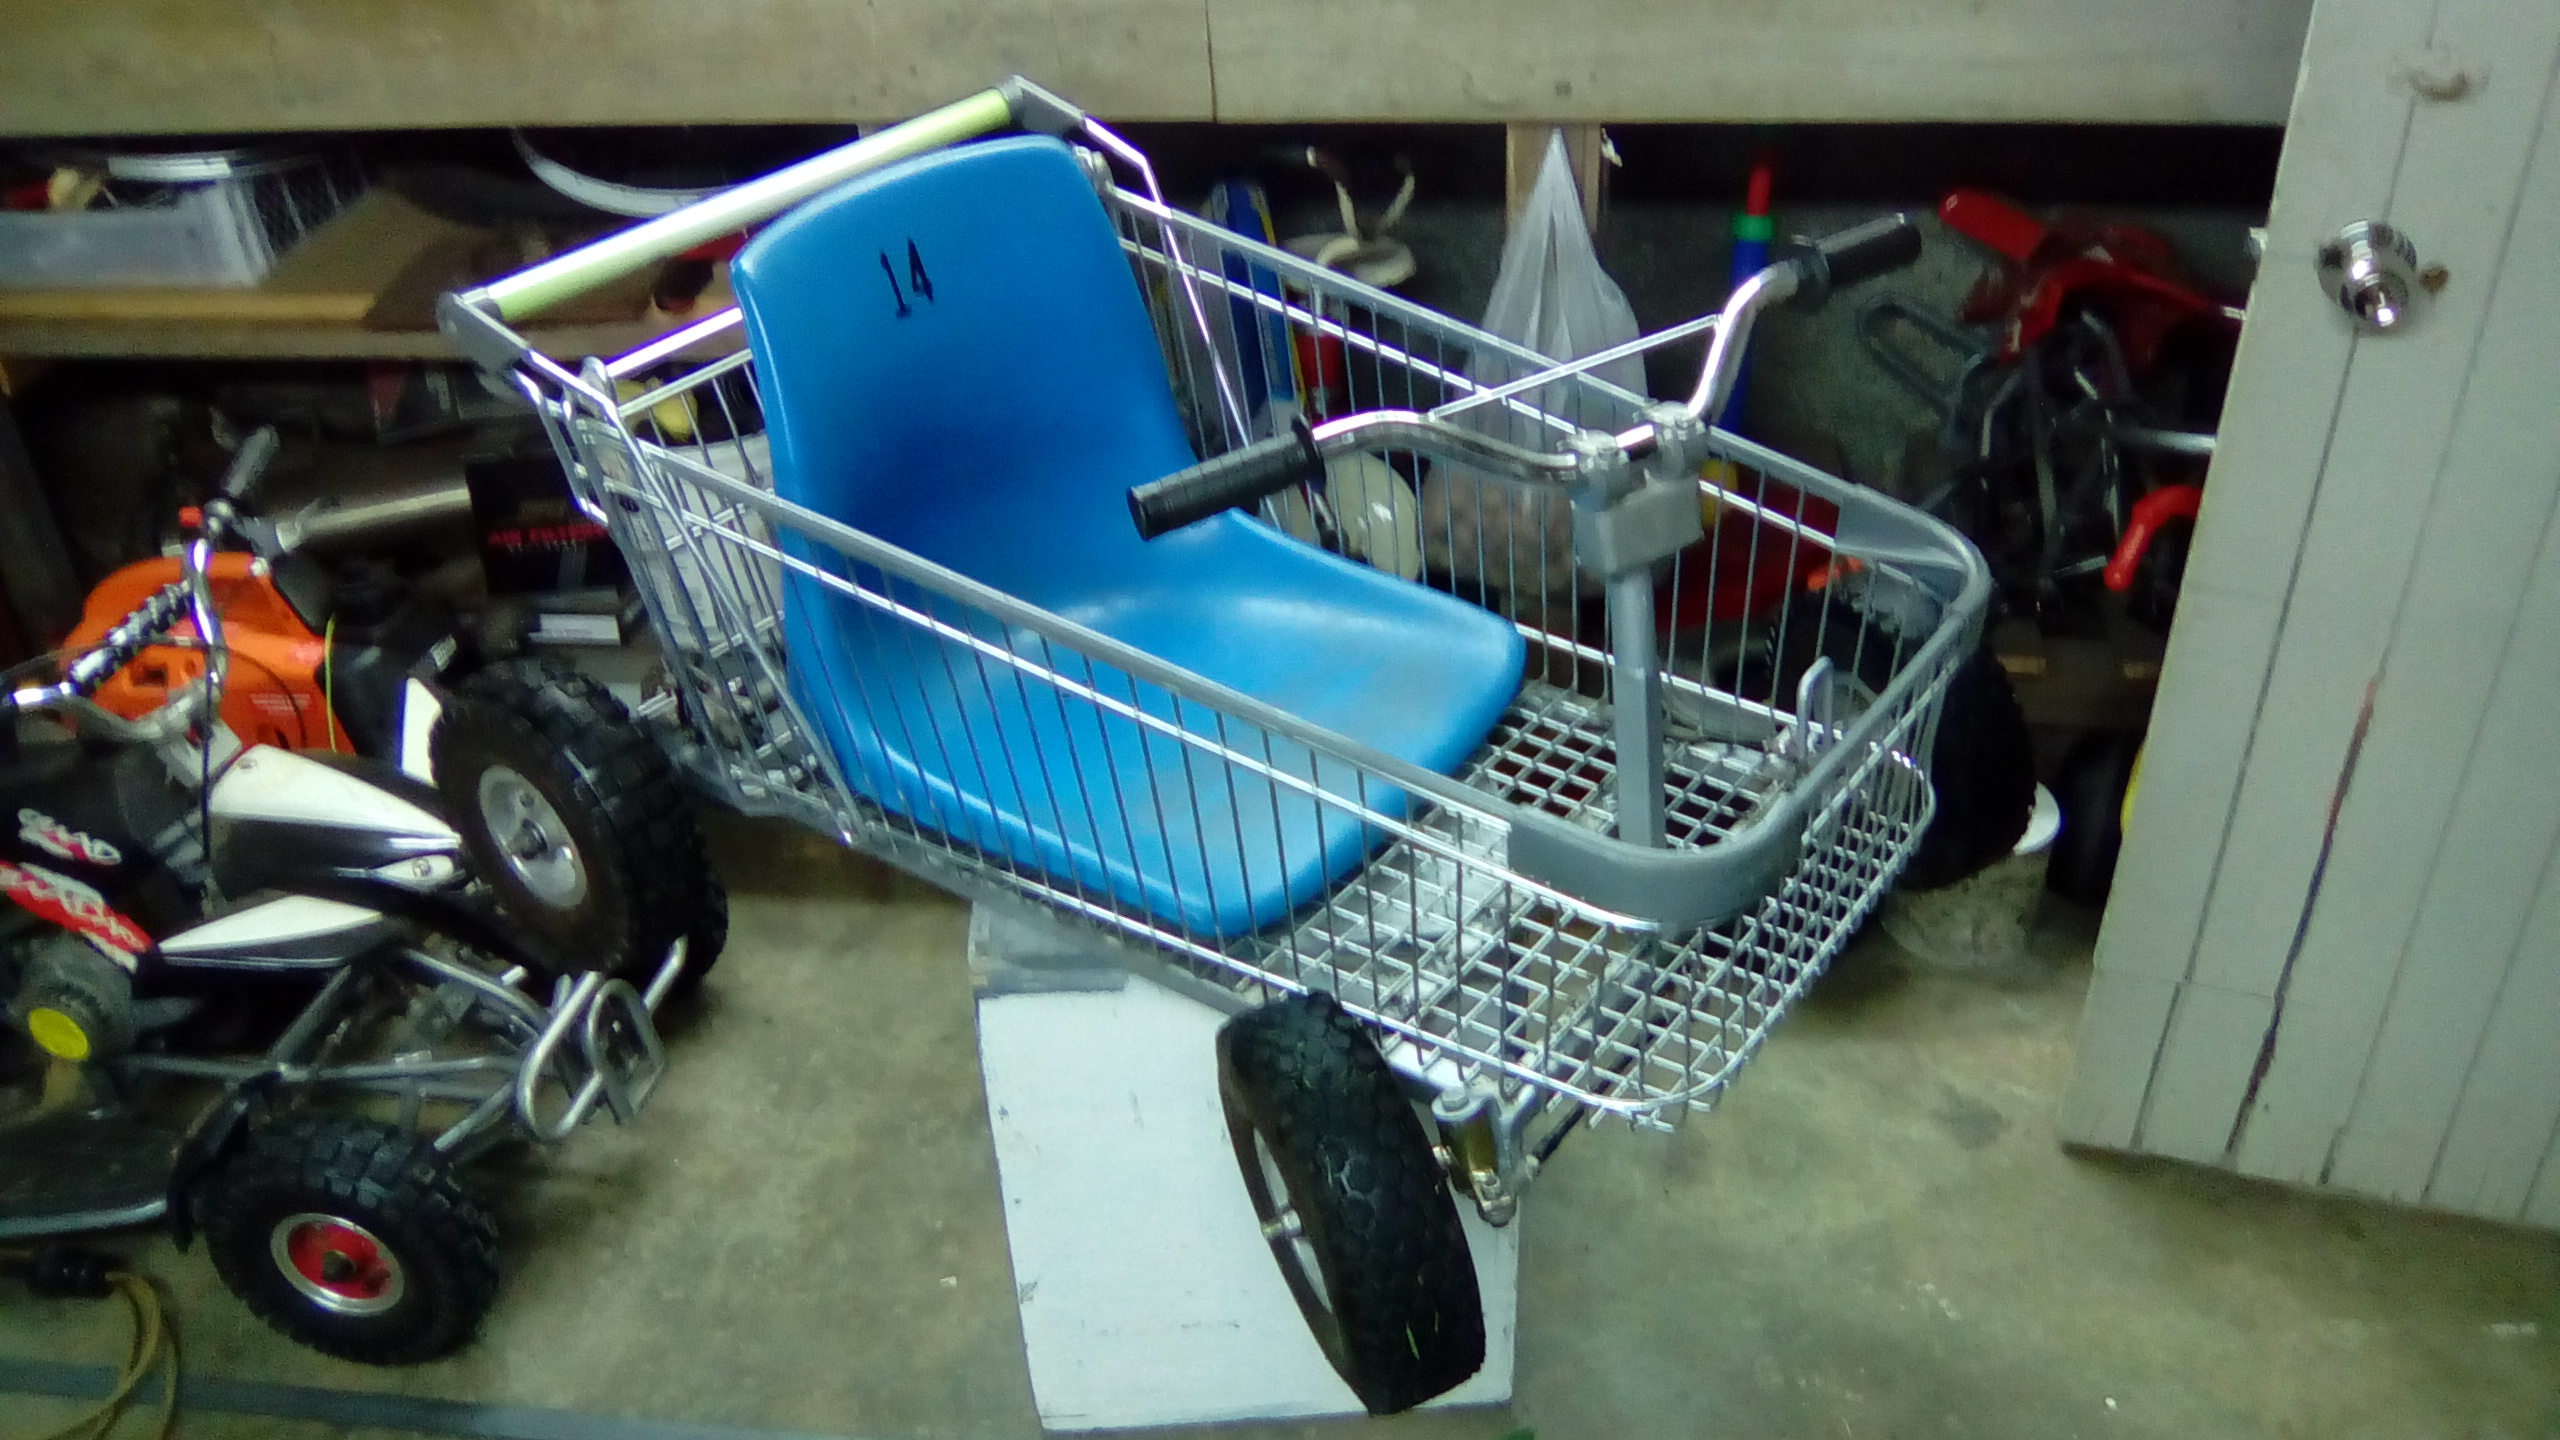
Thanks mate. Yeah I googled shopping trolley go karts before I started this and there were some very average looking ones. The best looking seemed to be set up more like a bar stool racer, with the motor inside the basket part and the seat on top of it. I wanted it to look as much like a shopping trolley as I could so kept the wheel base snug. Also since it's for the kids they can easily sit inside the basket. I'm a small person and can fit comfortable without the seat. Next time you're at the supermarket, jump in one to see There is an older build thread on here with the bar stool type setup but most of the pics are now gone.
-
Pictureless update. On the noise issue I was mucking around with a piece of tube in the workshop with little miss 3. She found a small pipe with dry mud stuck up it so got a screwdriver and started cleaning it out. It's good when she's occupied. Anyway I blocked one end and drilled a few holes in an attempt to make a silencer. Half hour later I get it done, start the kart and jam it in to test. Quietens it down a little, that'll do. Miss 3 has her piece cleaned out by this stage and says "try mine daddy". Turns out her idea worked much better. Lesson learnt- Keep it simple.
-
Might do something about that if it becomes an issue, That has been shortened about 150mm. The accelerator cable is quite short so need to work out a linkage of some sort to the pedal. In the mean time a spare bike brake lever fits on the end, stick my thumb through the handle bar hole and I have a hand throttle so long as I keep my hand by my side and steer 1 handed. Kids aren't keen to drive like this which is fair enough, move your hand the wrong way and it starts revving. So I had a hoon with the kids trying to chase on foot, can get up a fair amount of speed in the back yard, managed to spin out = happy Dad Couple of little problems; 1 It is quite loud. 2 It needs a chain gaurd so it doesn't flick oily shit up my back.
-
While on the search for a fuel tank I remembered the old Briggs from my rotary hoe so stole the tank from that. At this stage I got distracted by Chris's thread on rust removal in a fuel tank. I derusted the inside of the tank, the lid, an old spanner I dug up and a few other useless things because it was fun . Got back on track and welded the tank bracket on. My boy wanted to fit it all so let him go to town on it. He fitted the exhaust, motor and tank all himself :). It took a while to track down an 8mm chain link but found one and chucked it on when he was at school. Put some old gas in it and it actually started too, sitting in it using two hands to pull the throttle cable it easily moved me across the lawn so everythings going well so far.

-
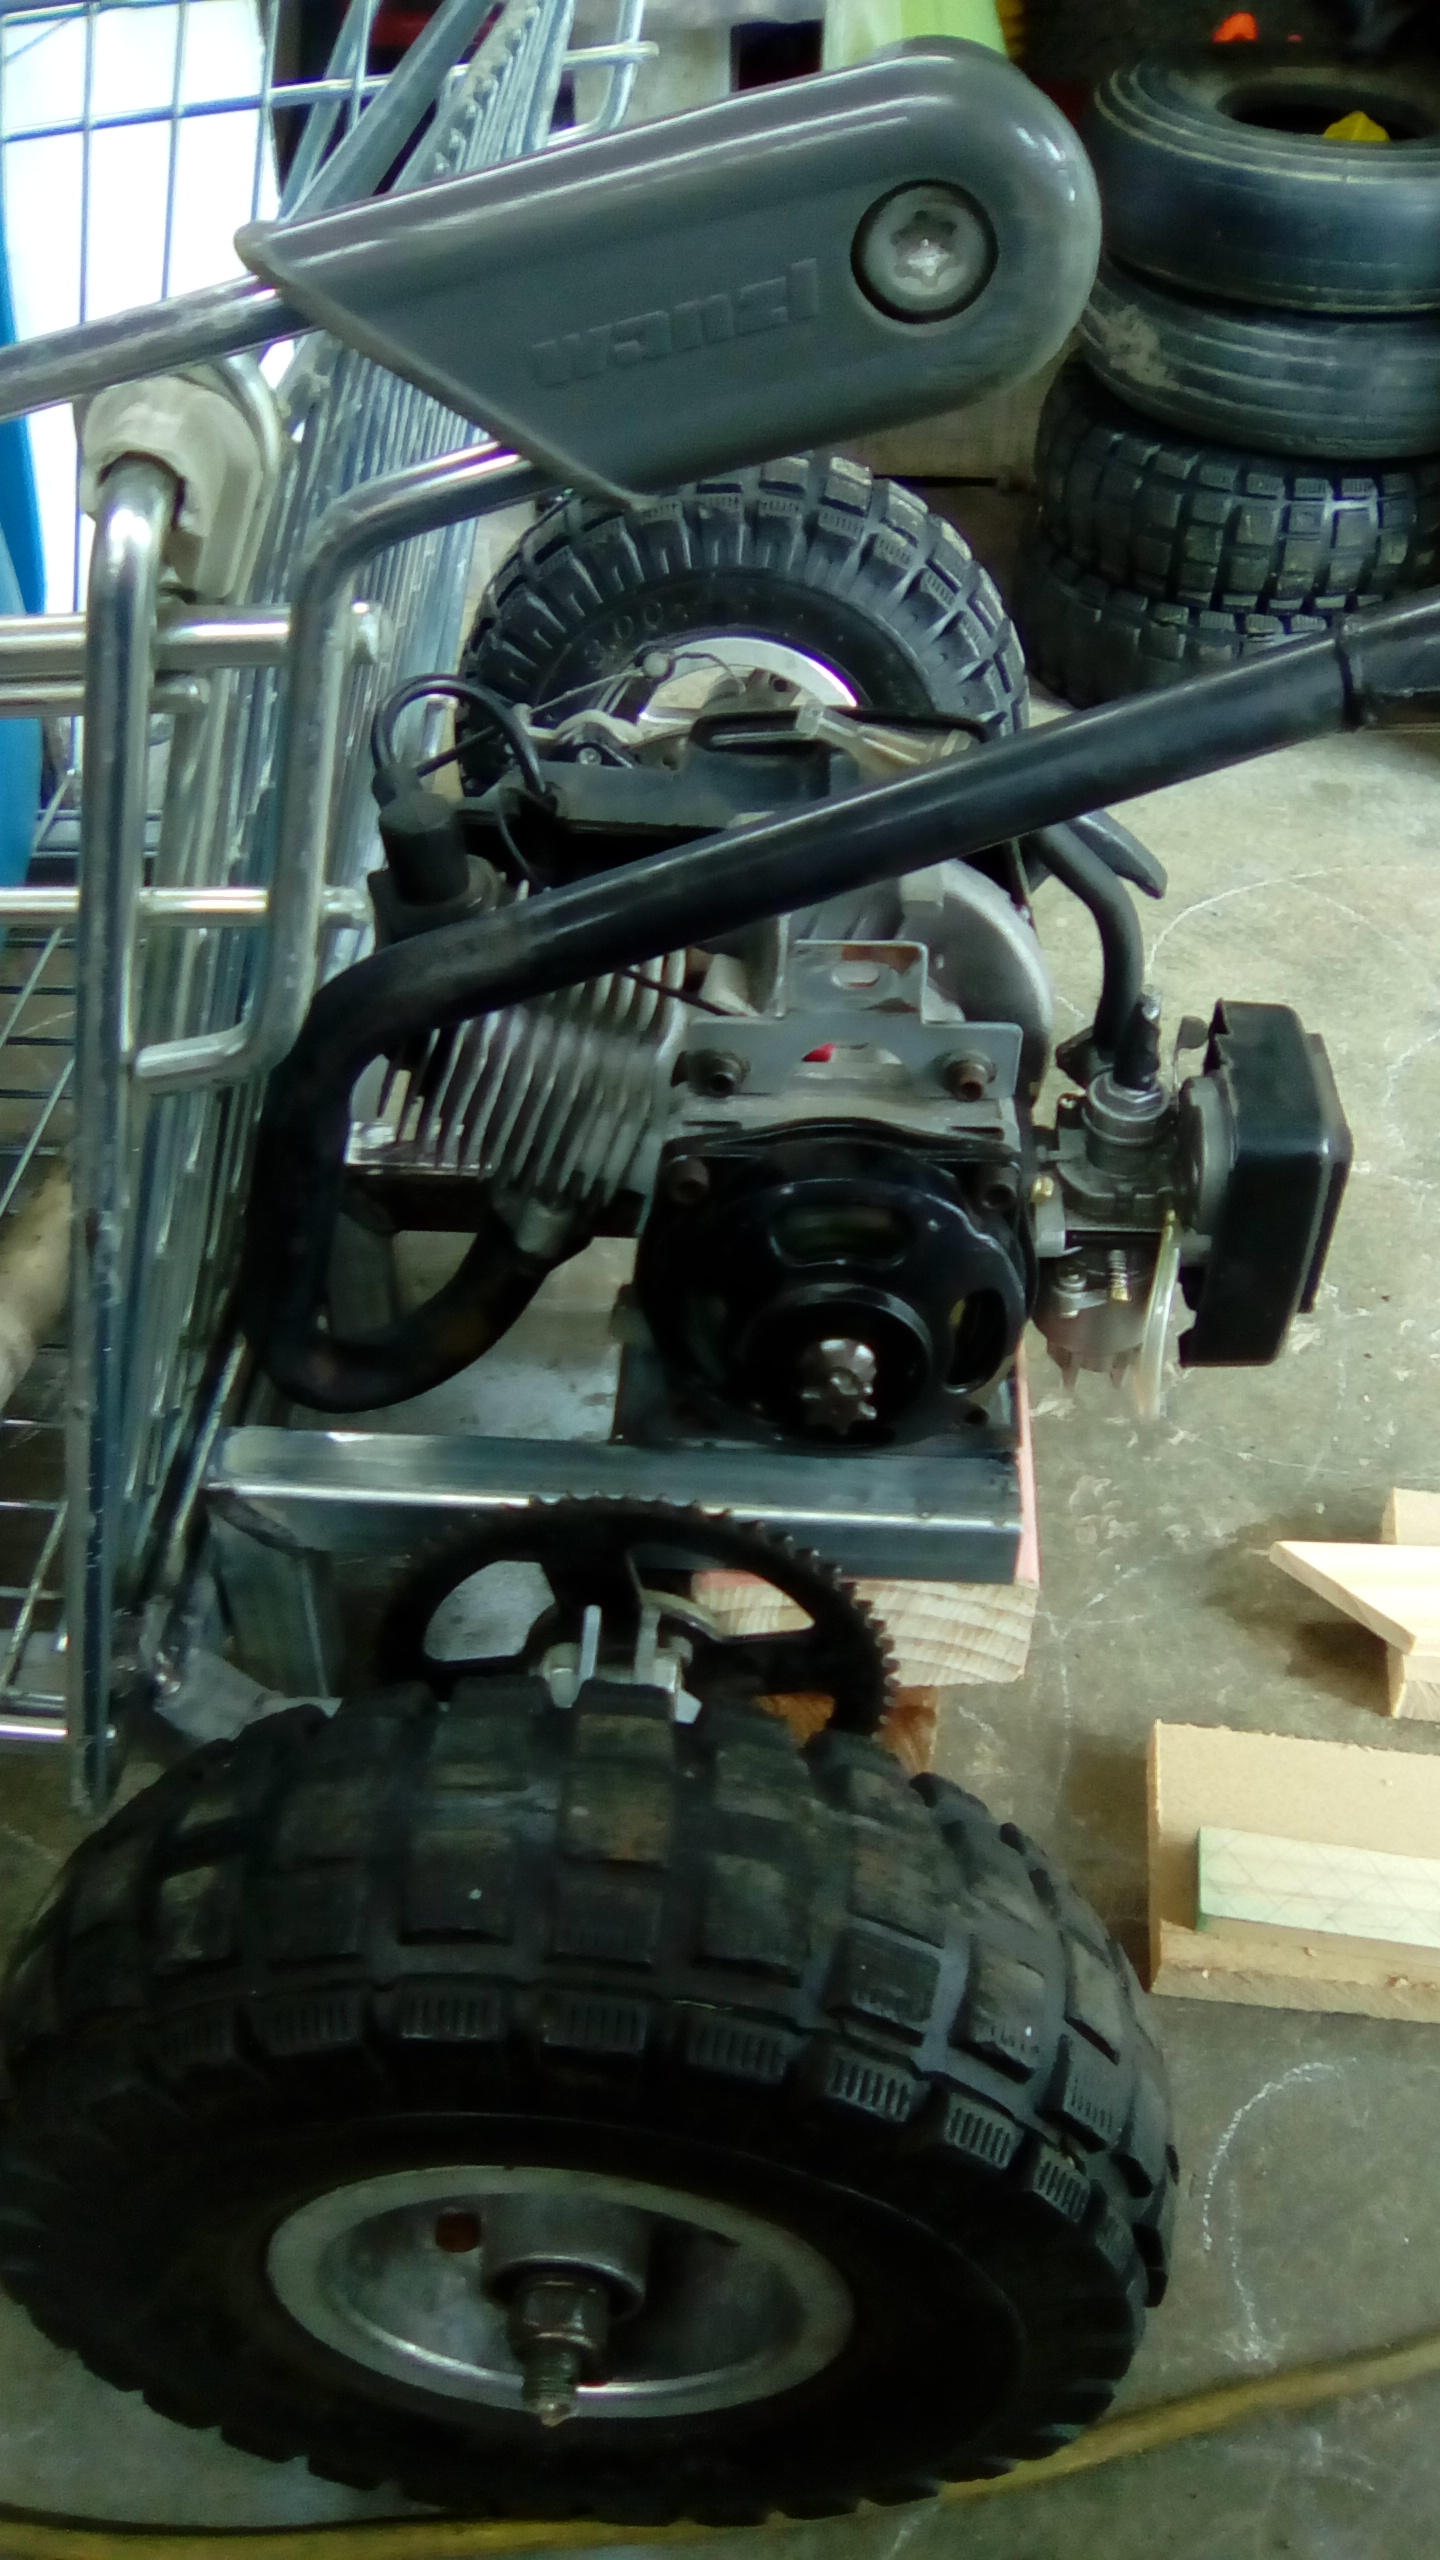
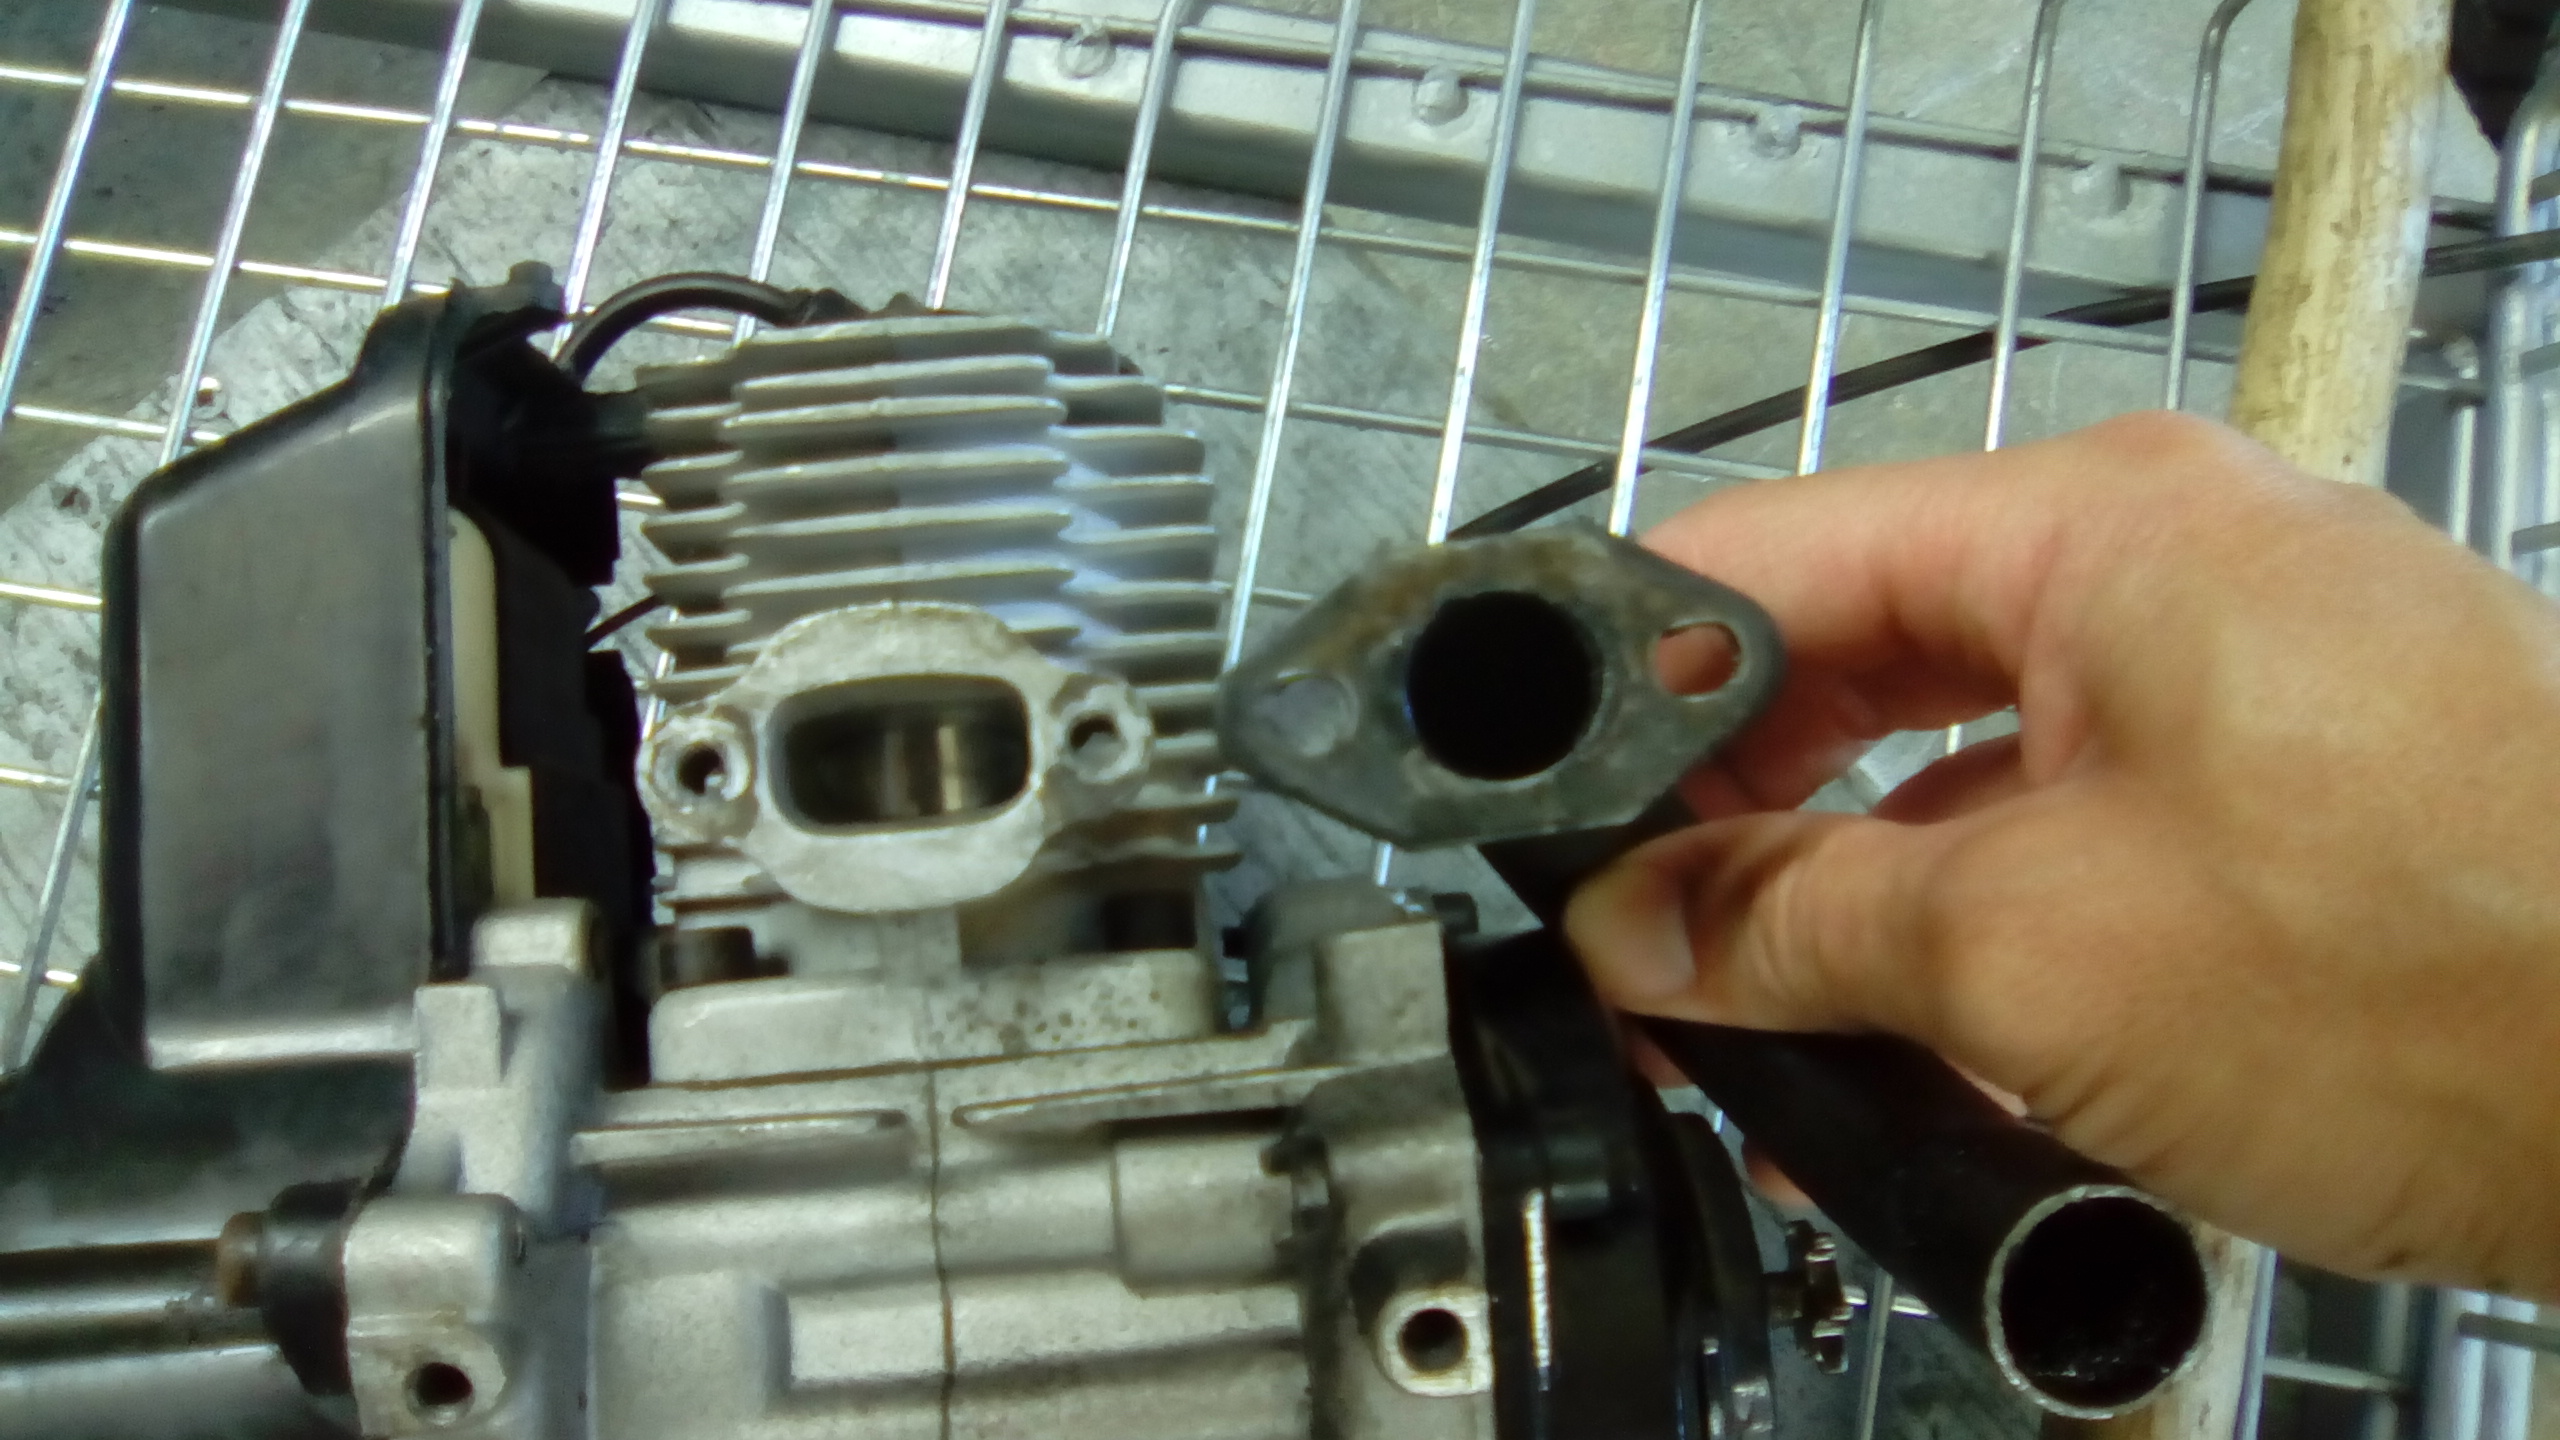
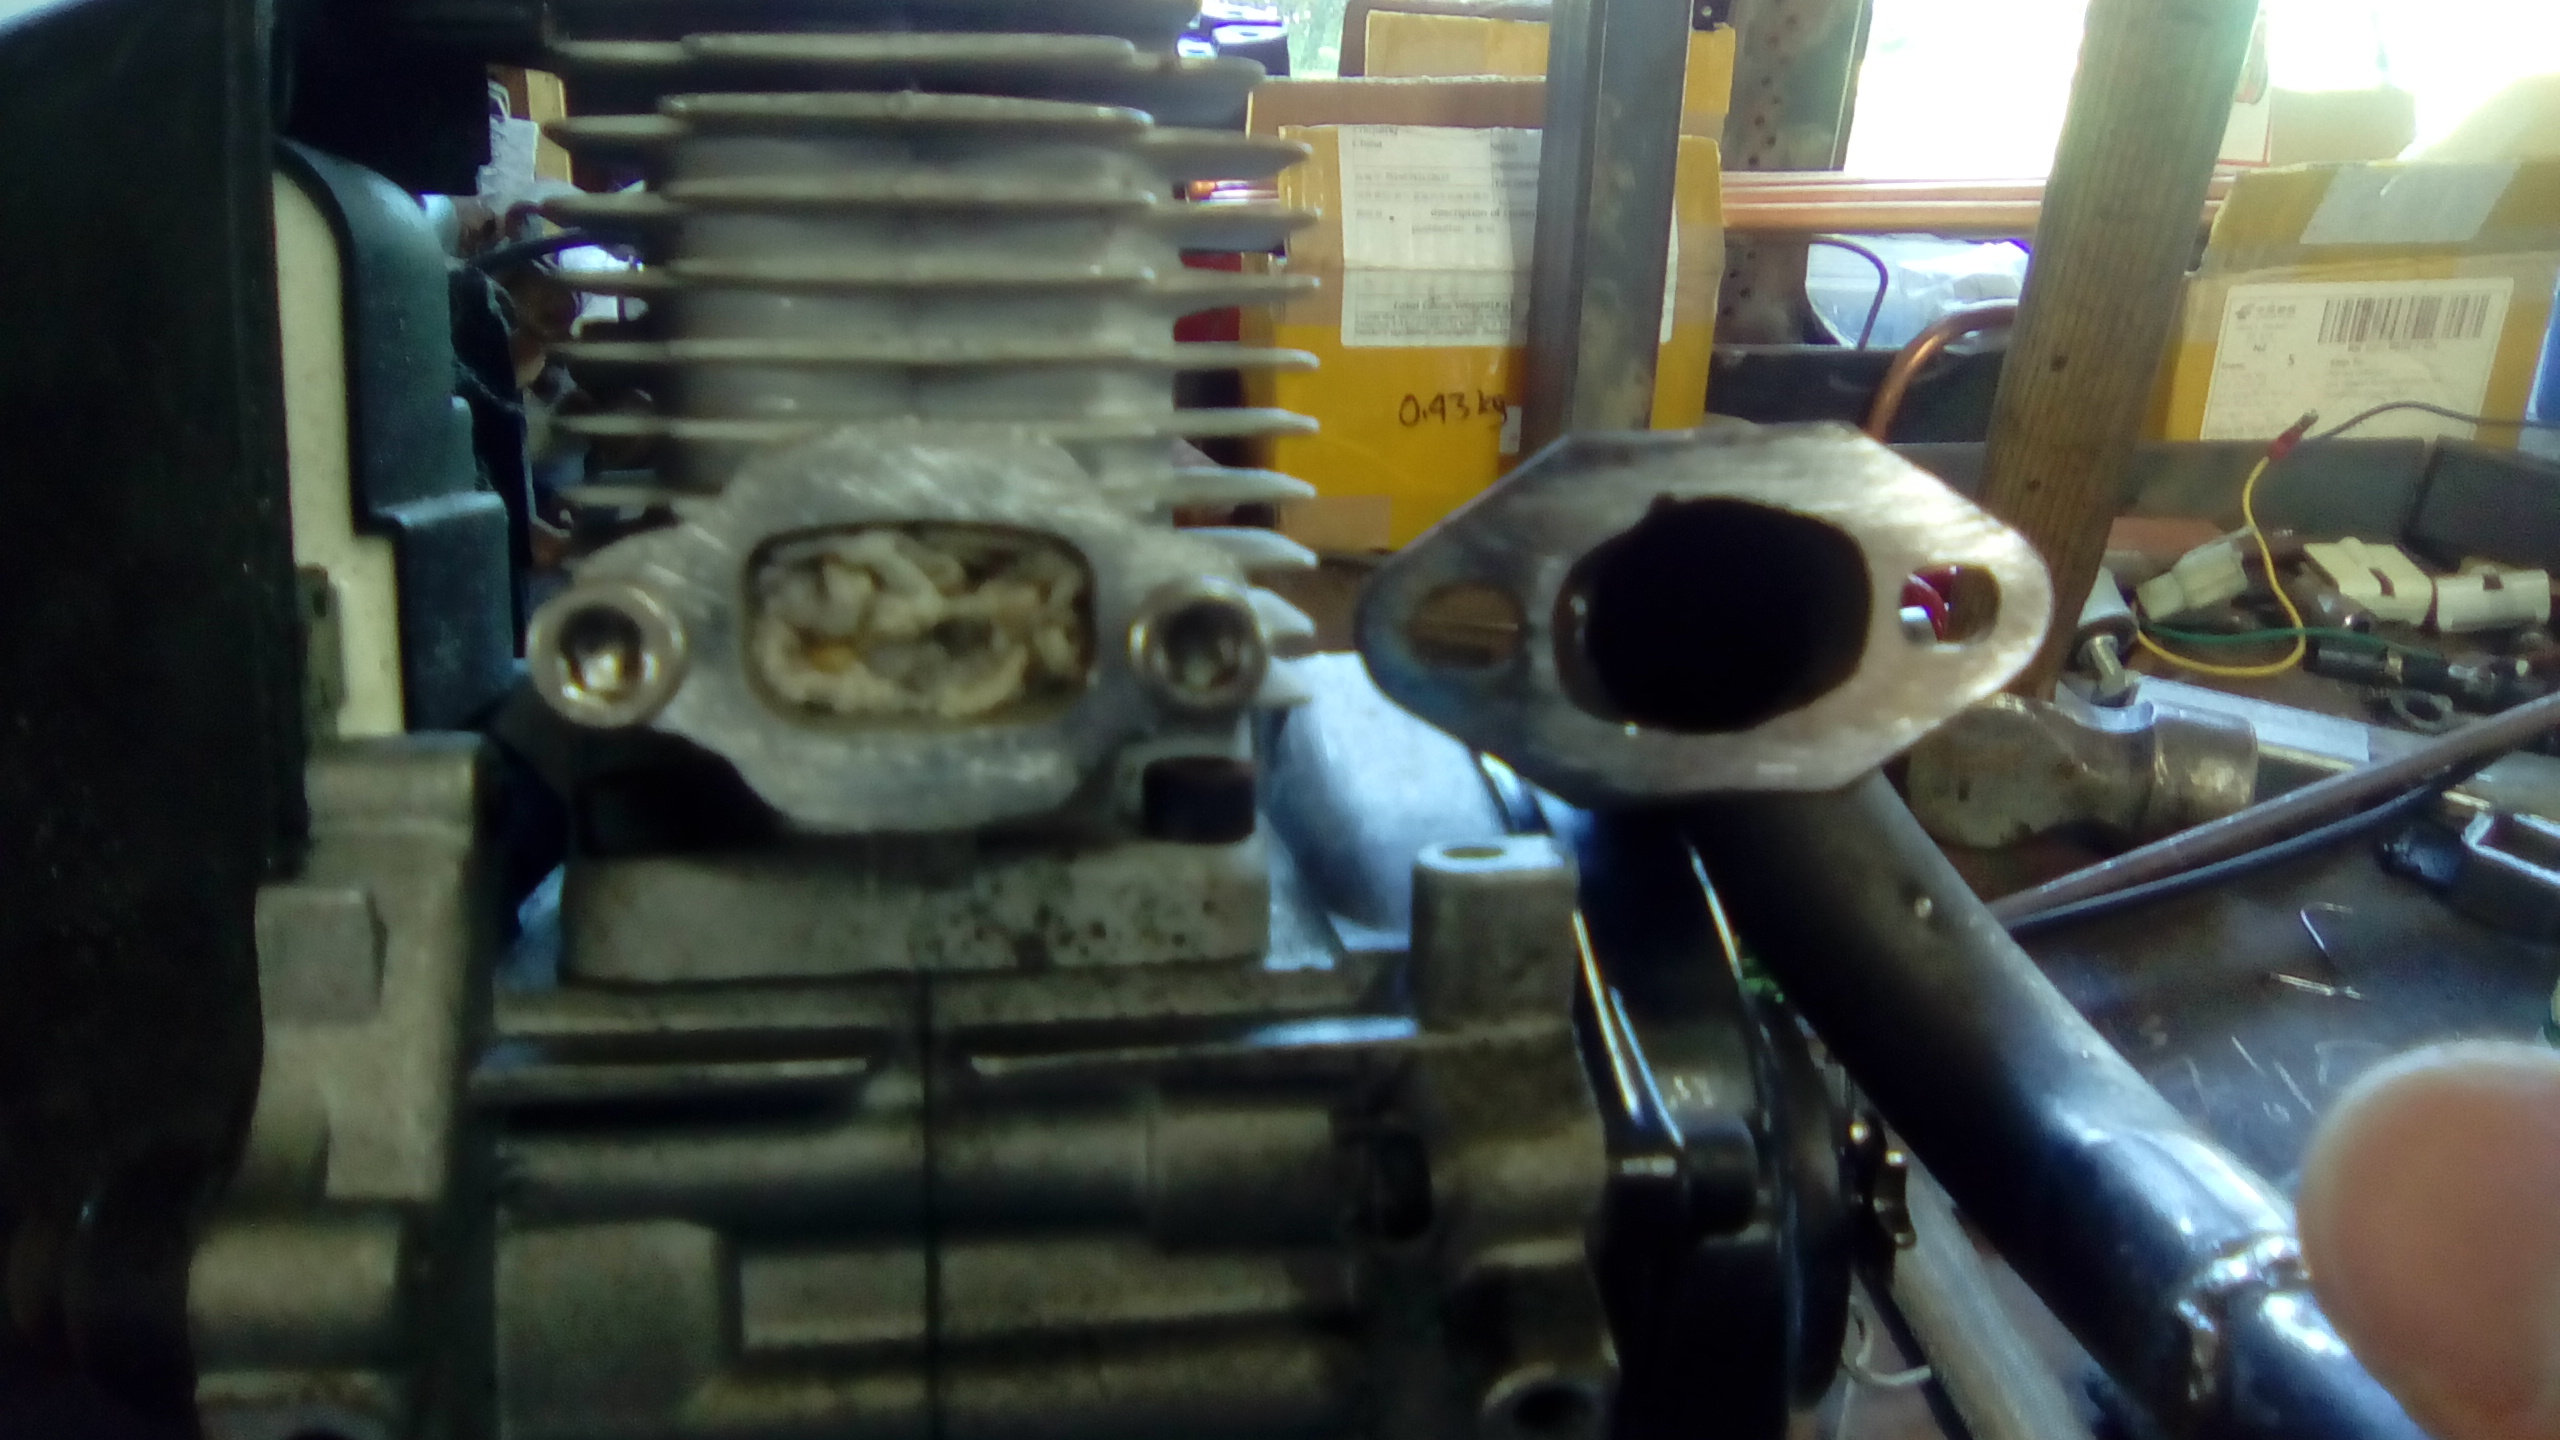
So after a lot of down hill testing while the kids were in bed I thought it was time to focus and chuck the motor on. After thinking how I'd mount the motor out back I was having trouble working out how I'd brace the mount as the axil was right in the way. I finally decided to dig out the motor to see what I was working with. Oh that's right, it's the size and weight of a jandle. More than strong enough. Next up the exhaust had a big bow in the flange where it bolts to the motor, had no gasket material so pulled it off to file it flat and found this. Bit more manual die grinding with a file. While I was at it I cut the tiny little exhaust tip off and replaced it with a piece matching the rest of the pipe. Don't know if 2 smokes like this or not but the boy racer urges were in charge at that point.
-
Ha I had to google what that was. Ackerman angles seem to be good enough for me. I went with aggressive castor based on other go kart builds as it lifts the inside rear wheel. My quad has none so when you turn, the rear wheels are still firmly planted and just keep pushing you straight. Anyway this is getting too technical for a shopping trolley. Needs to go, stop, do skids and blow smoke.
-
The castor REALLY helps with turning, Am learning lots from this build and am going to modify the front of my quad so it doesn't have a 6m turning circle.
-
Thanks mate. Yeah with limited scrap steel laying around I got creative with 8mm round bar and one of the suspension brackets off the donor quad frame. Also cable operated disc so nothing high tech about it
-
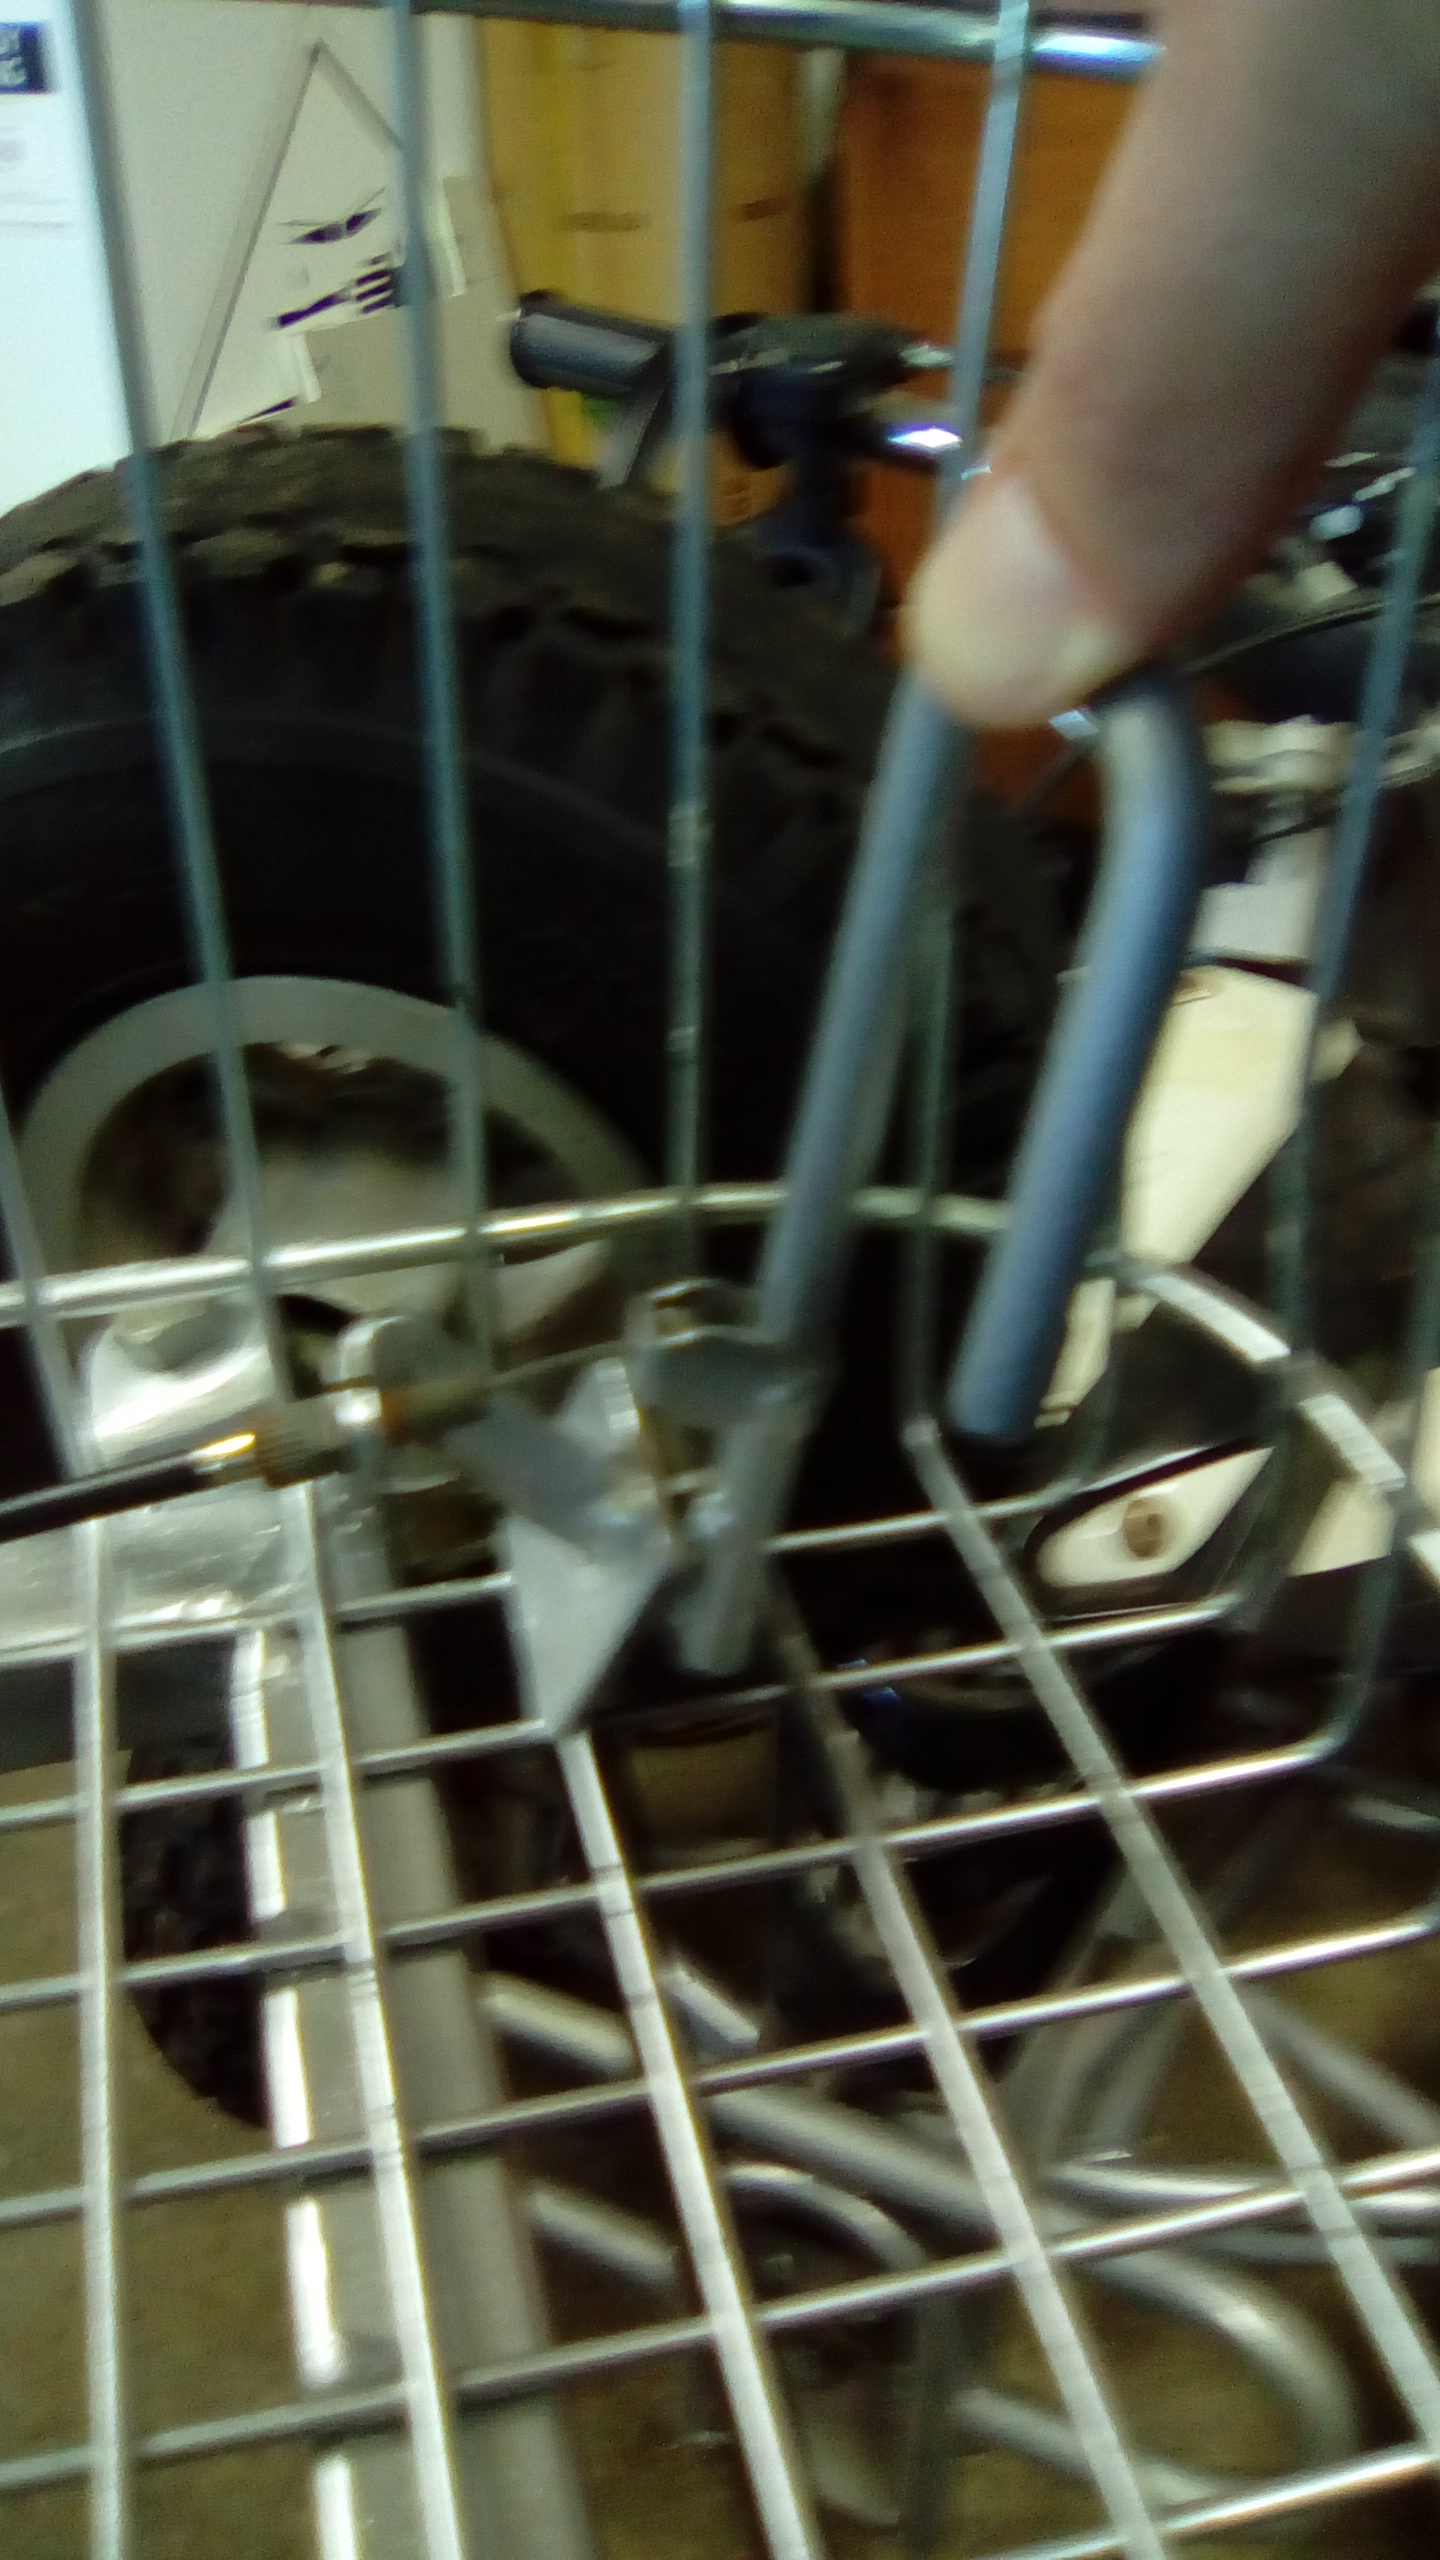
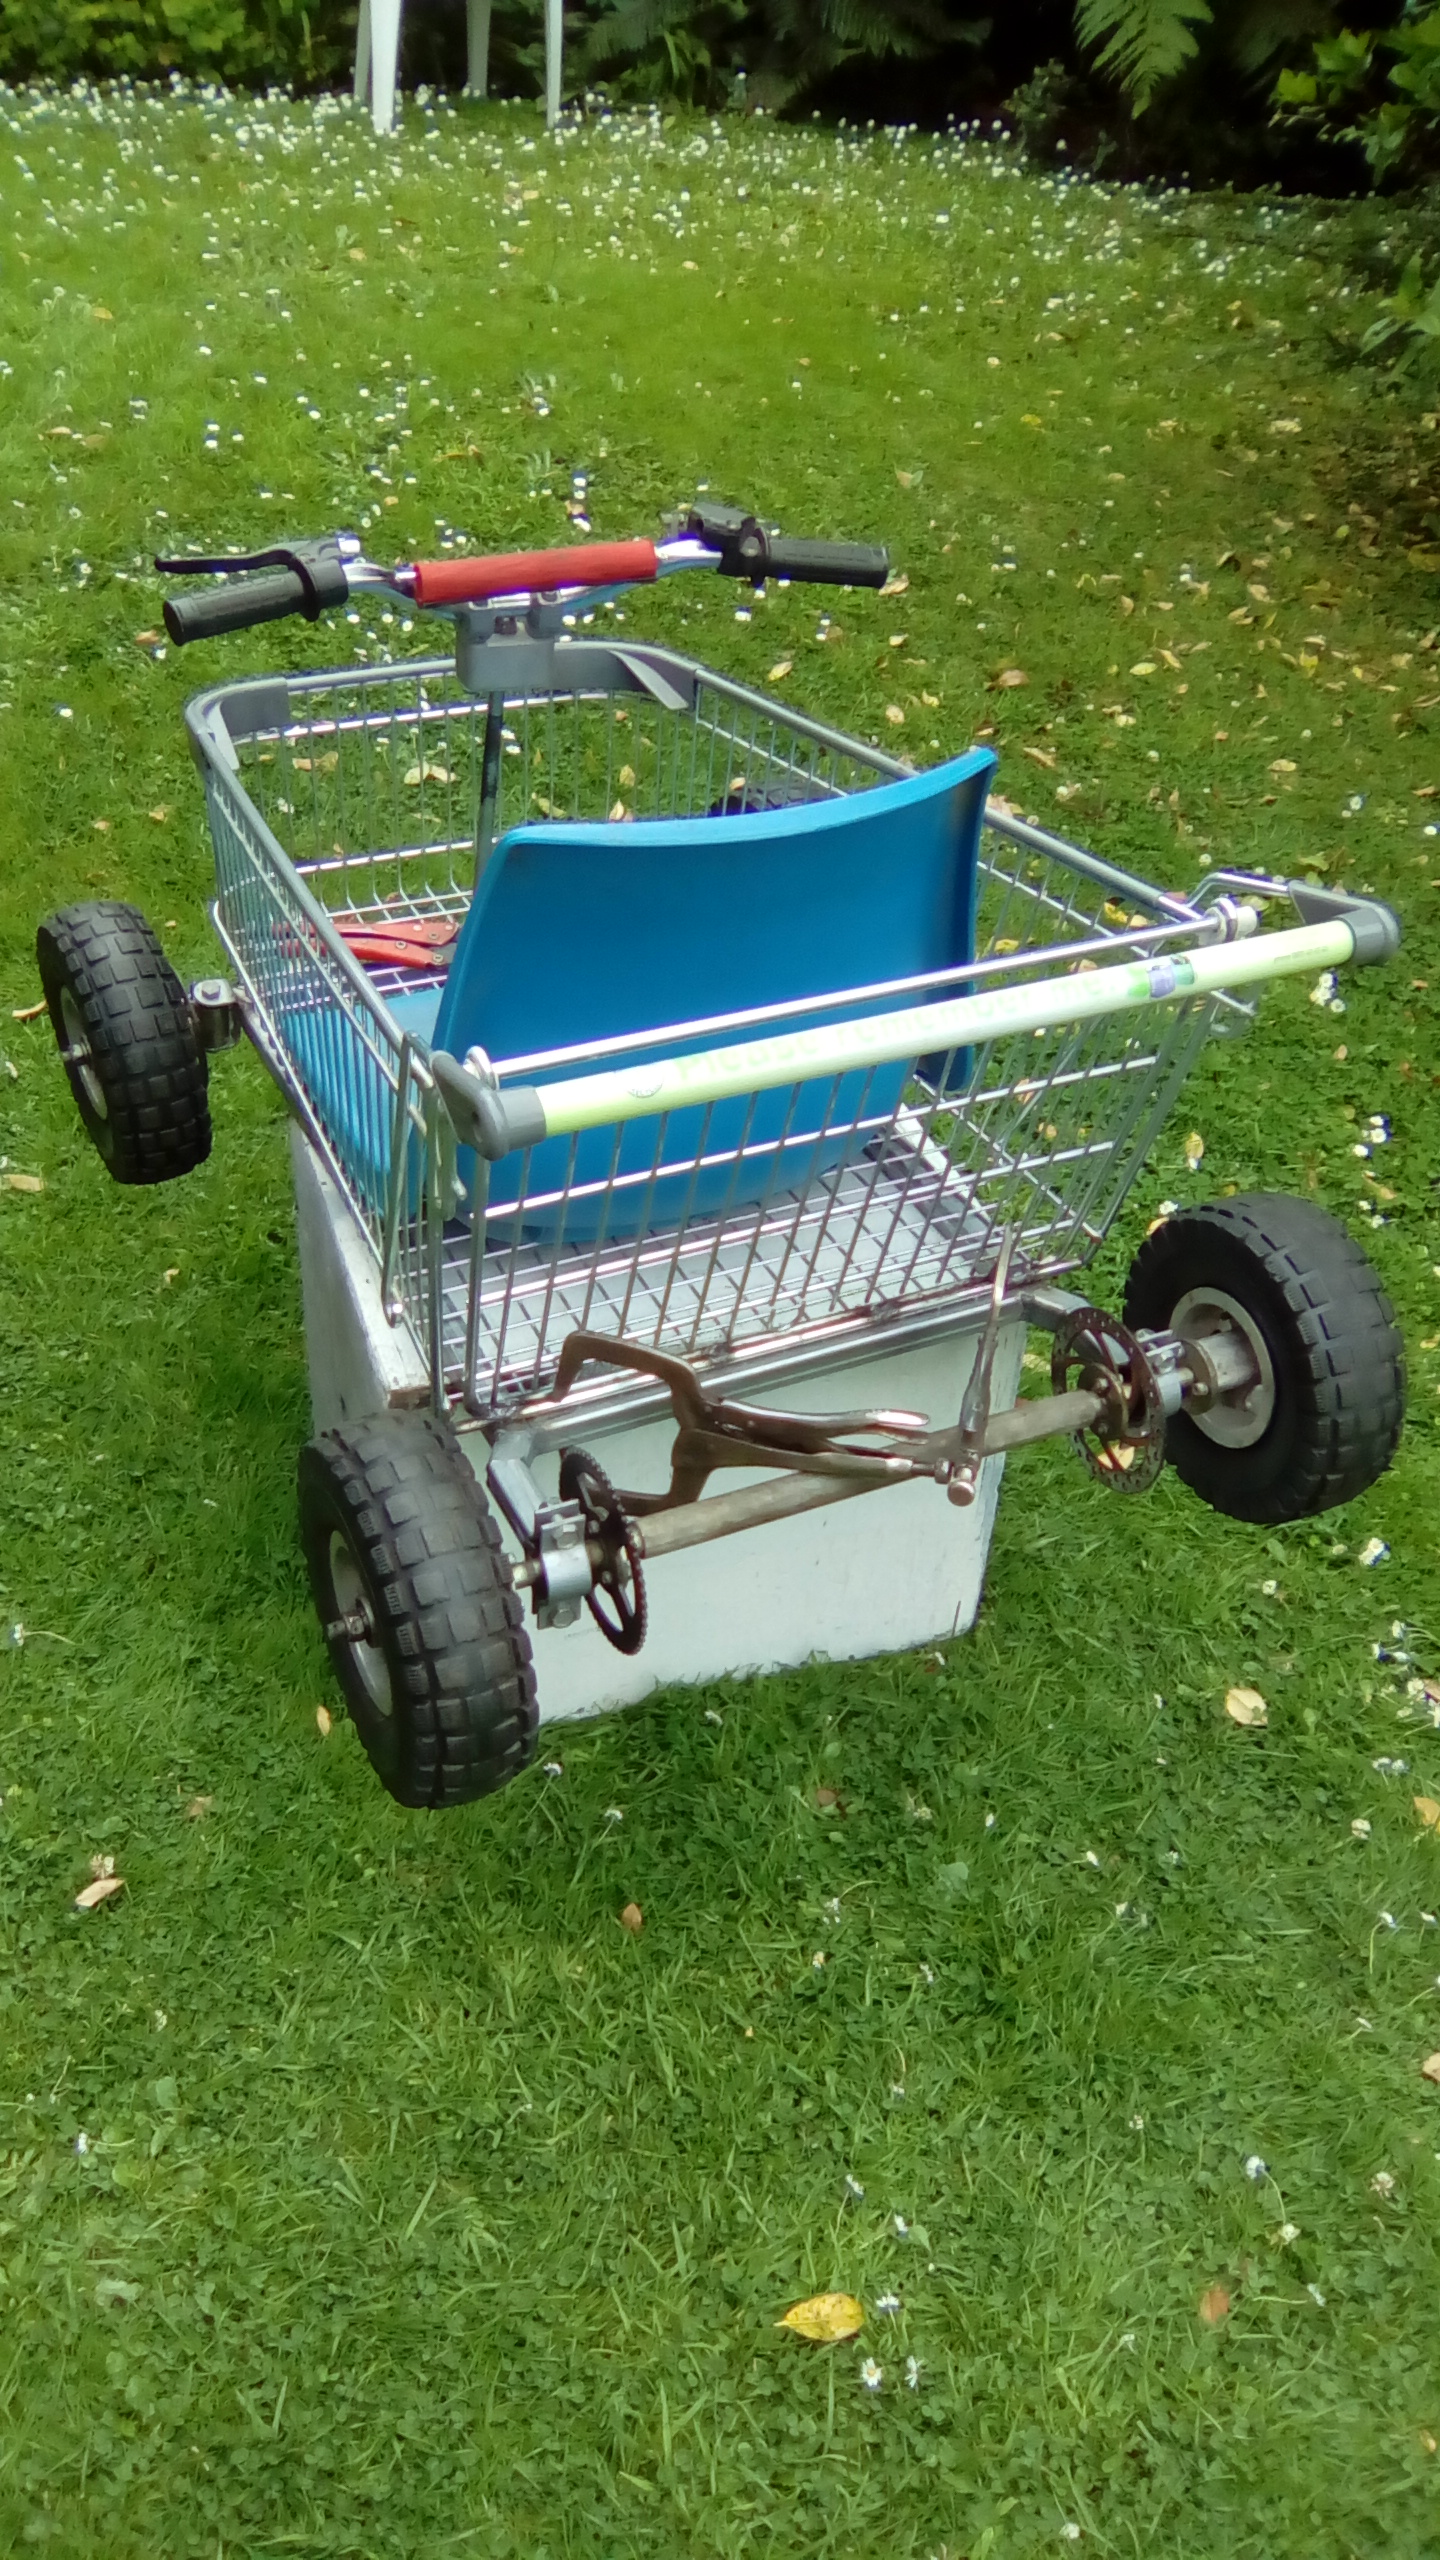
So I welded the basket on so it took up less space in the workshop. Had a play around with some spare bike parts and scrap steel and came up with this simple foot brake setup. Sorry for the shit pic but hope you can make sense of it. Originally tacked the pedal in and tested it in the back yard, Tightened up the cable, tested again then proceeded to forget it was only tacked in place. Cue 11pm test down a step Dunedin street with hard / slippery rear tyres. Luckily I chickened out of doing the whole street length and tried pulling into the driveway sideways to wash off some speed. Once in the drive the tacks broke and the letter box stopped me. I avoided certain death and just smashed my knees into the handle bars. Letter box and trolley survived unscathed.
-
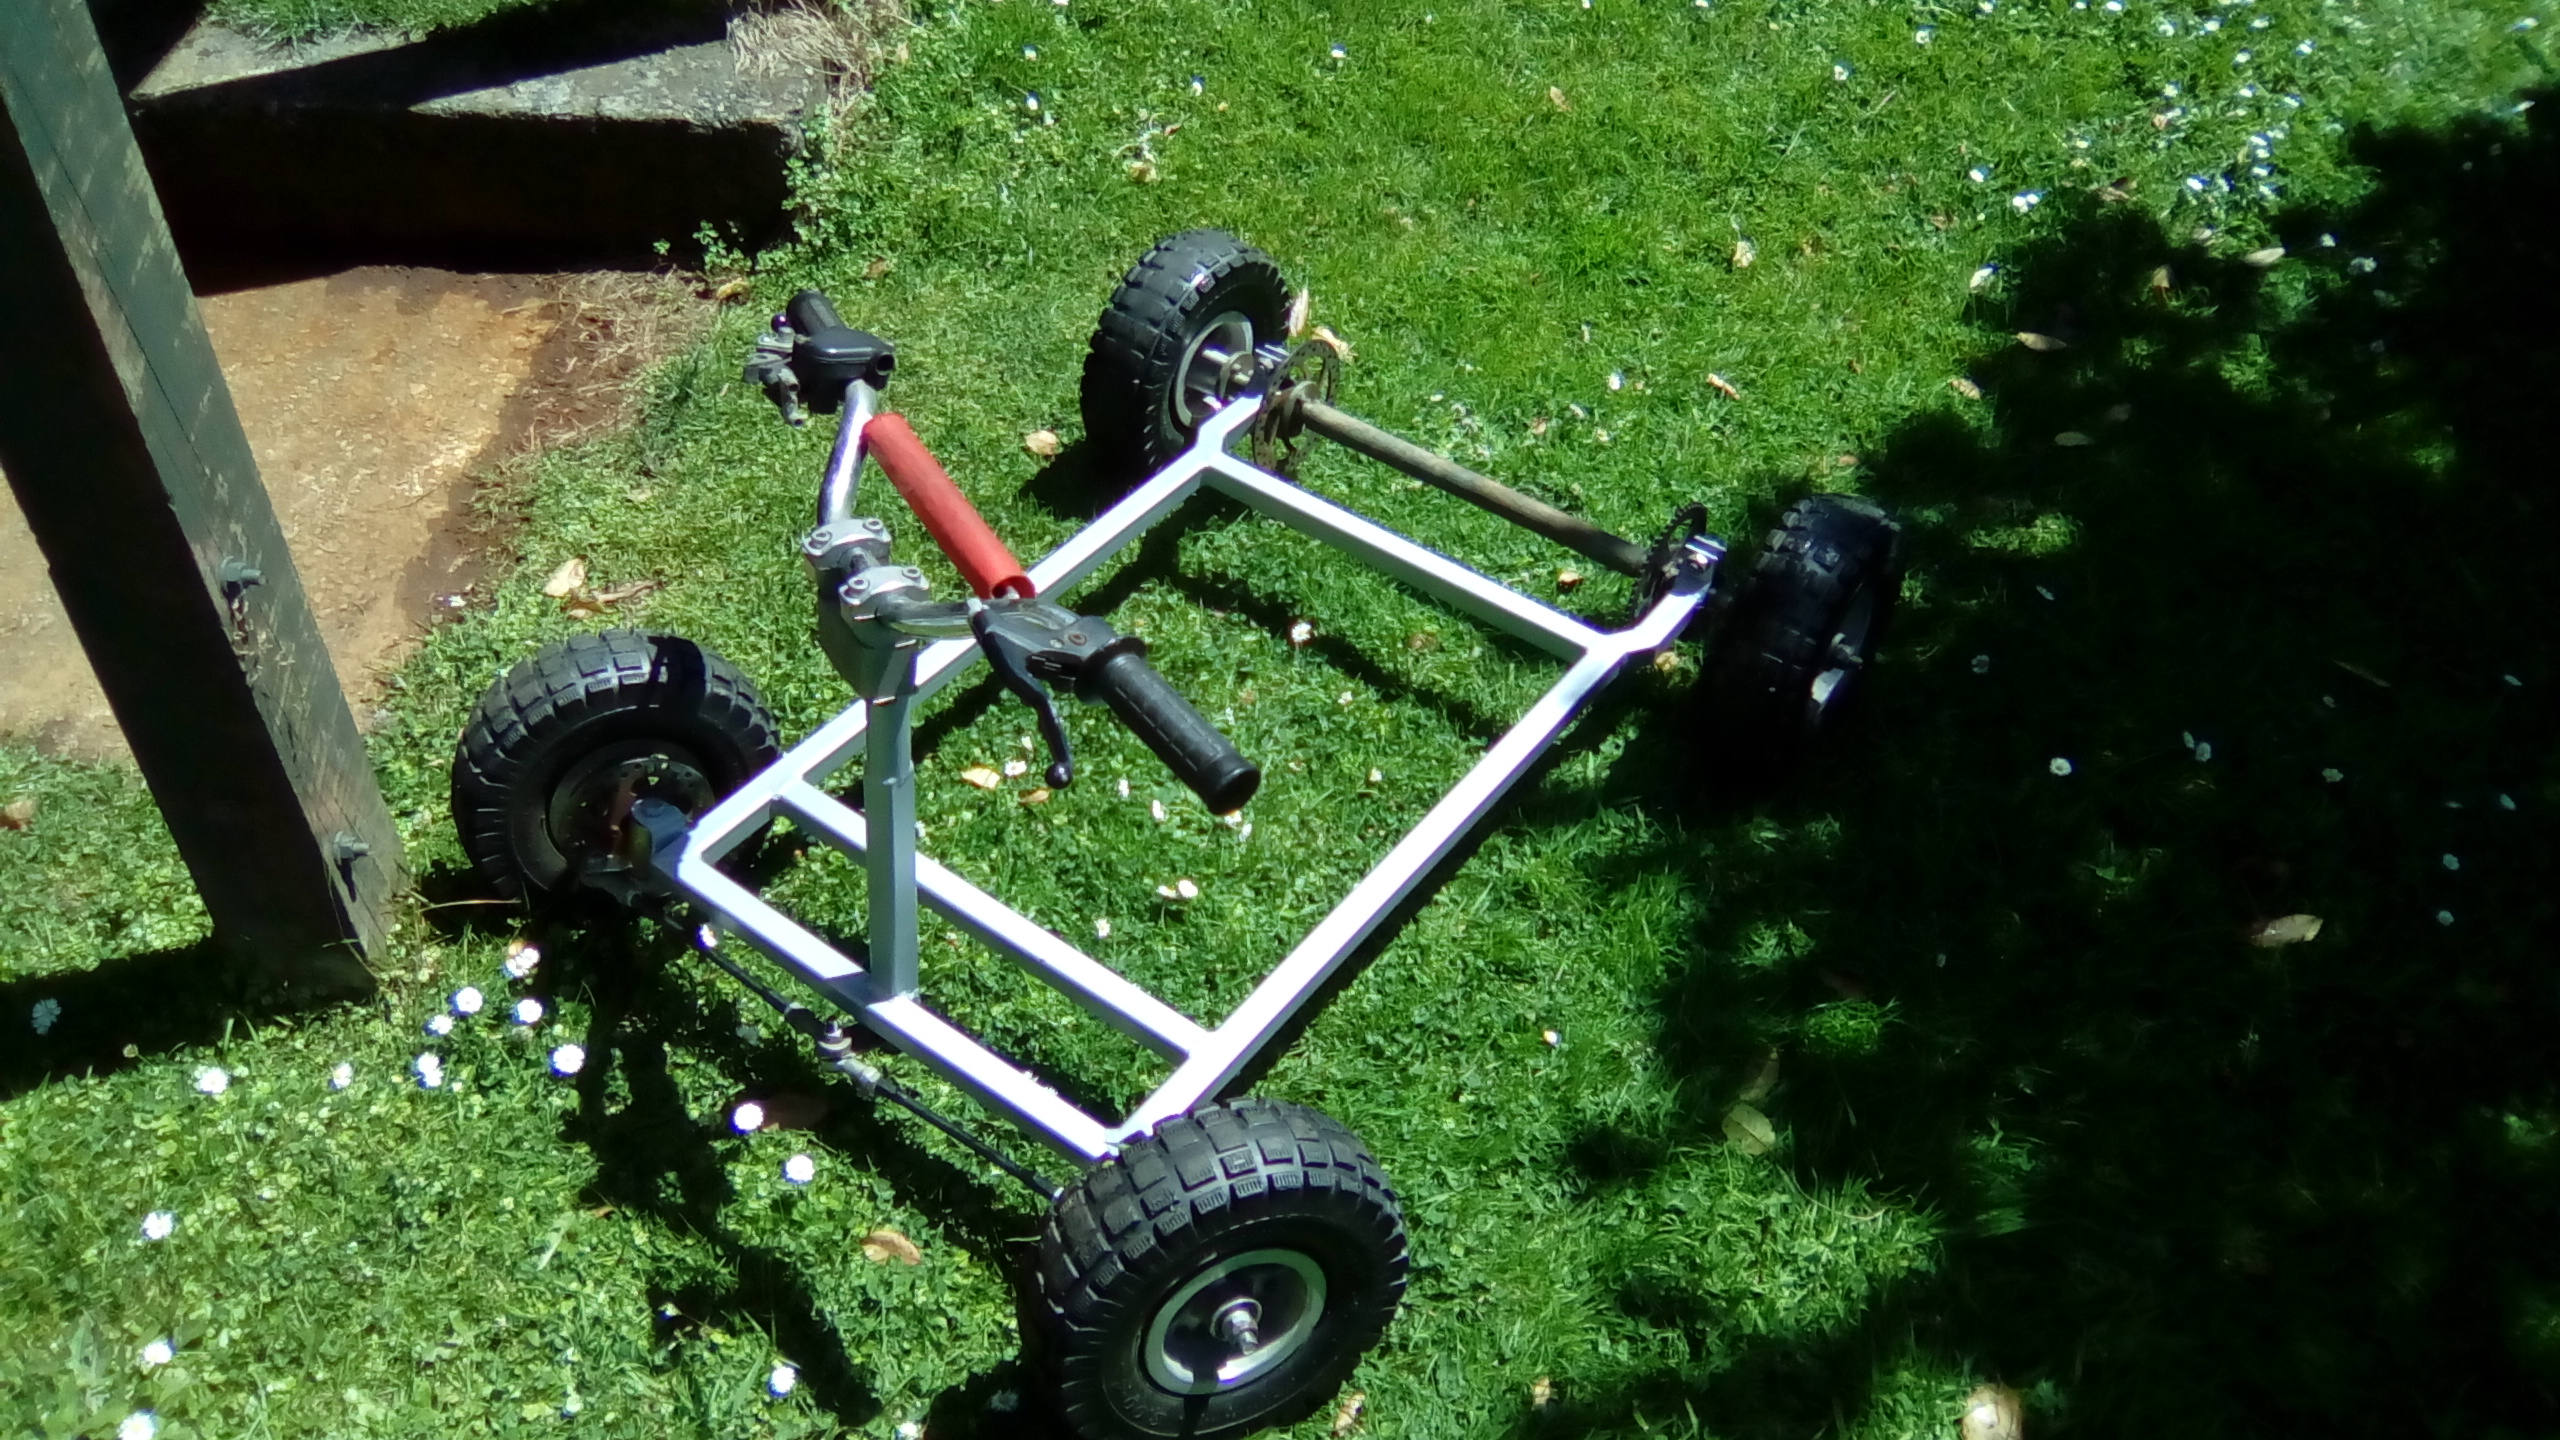
Big thanks to Joe and Bart for some better tyres and to Carl the OS courier for personal flying some down to me. Fitted the best to the front and left the old hard ones on the back for better skids, for now. Anyway the front inside tyre now rubs and locks up on full lock, will sort that later if it doesn't sort itself. (That's my mini quad in the background, similar to the donor for this kart. The boy is planning races once finished )
-
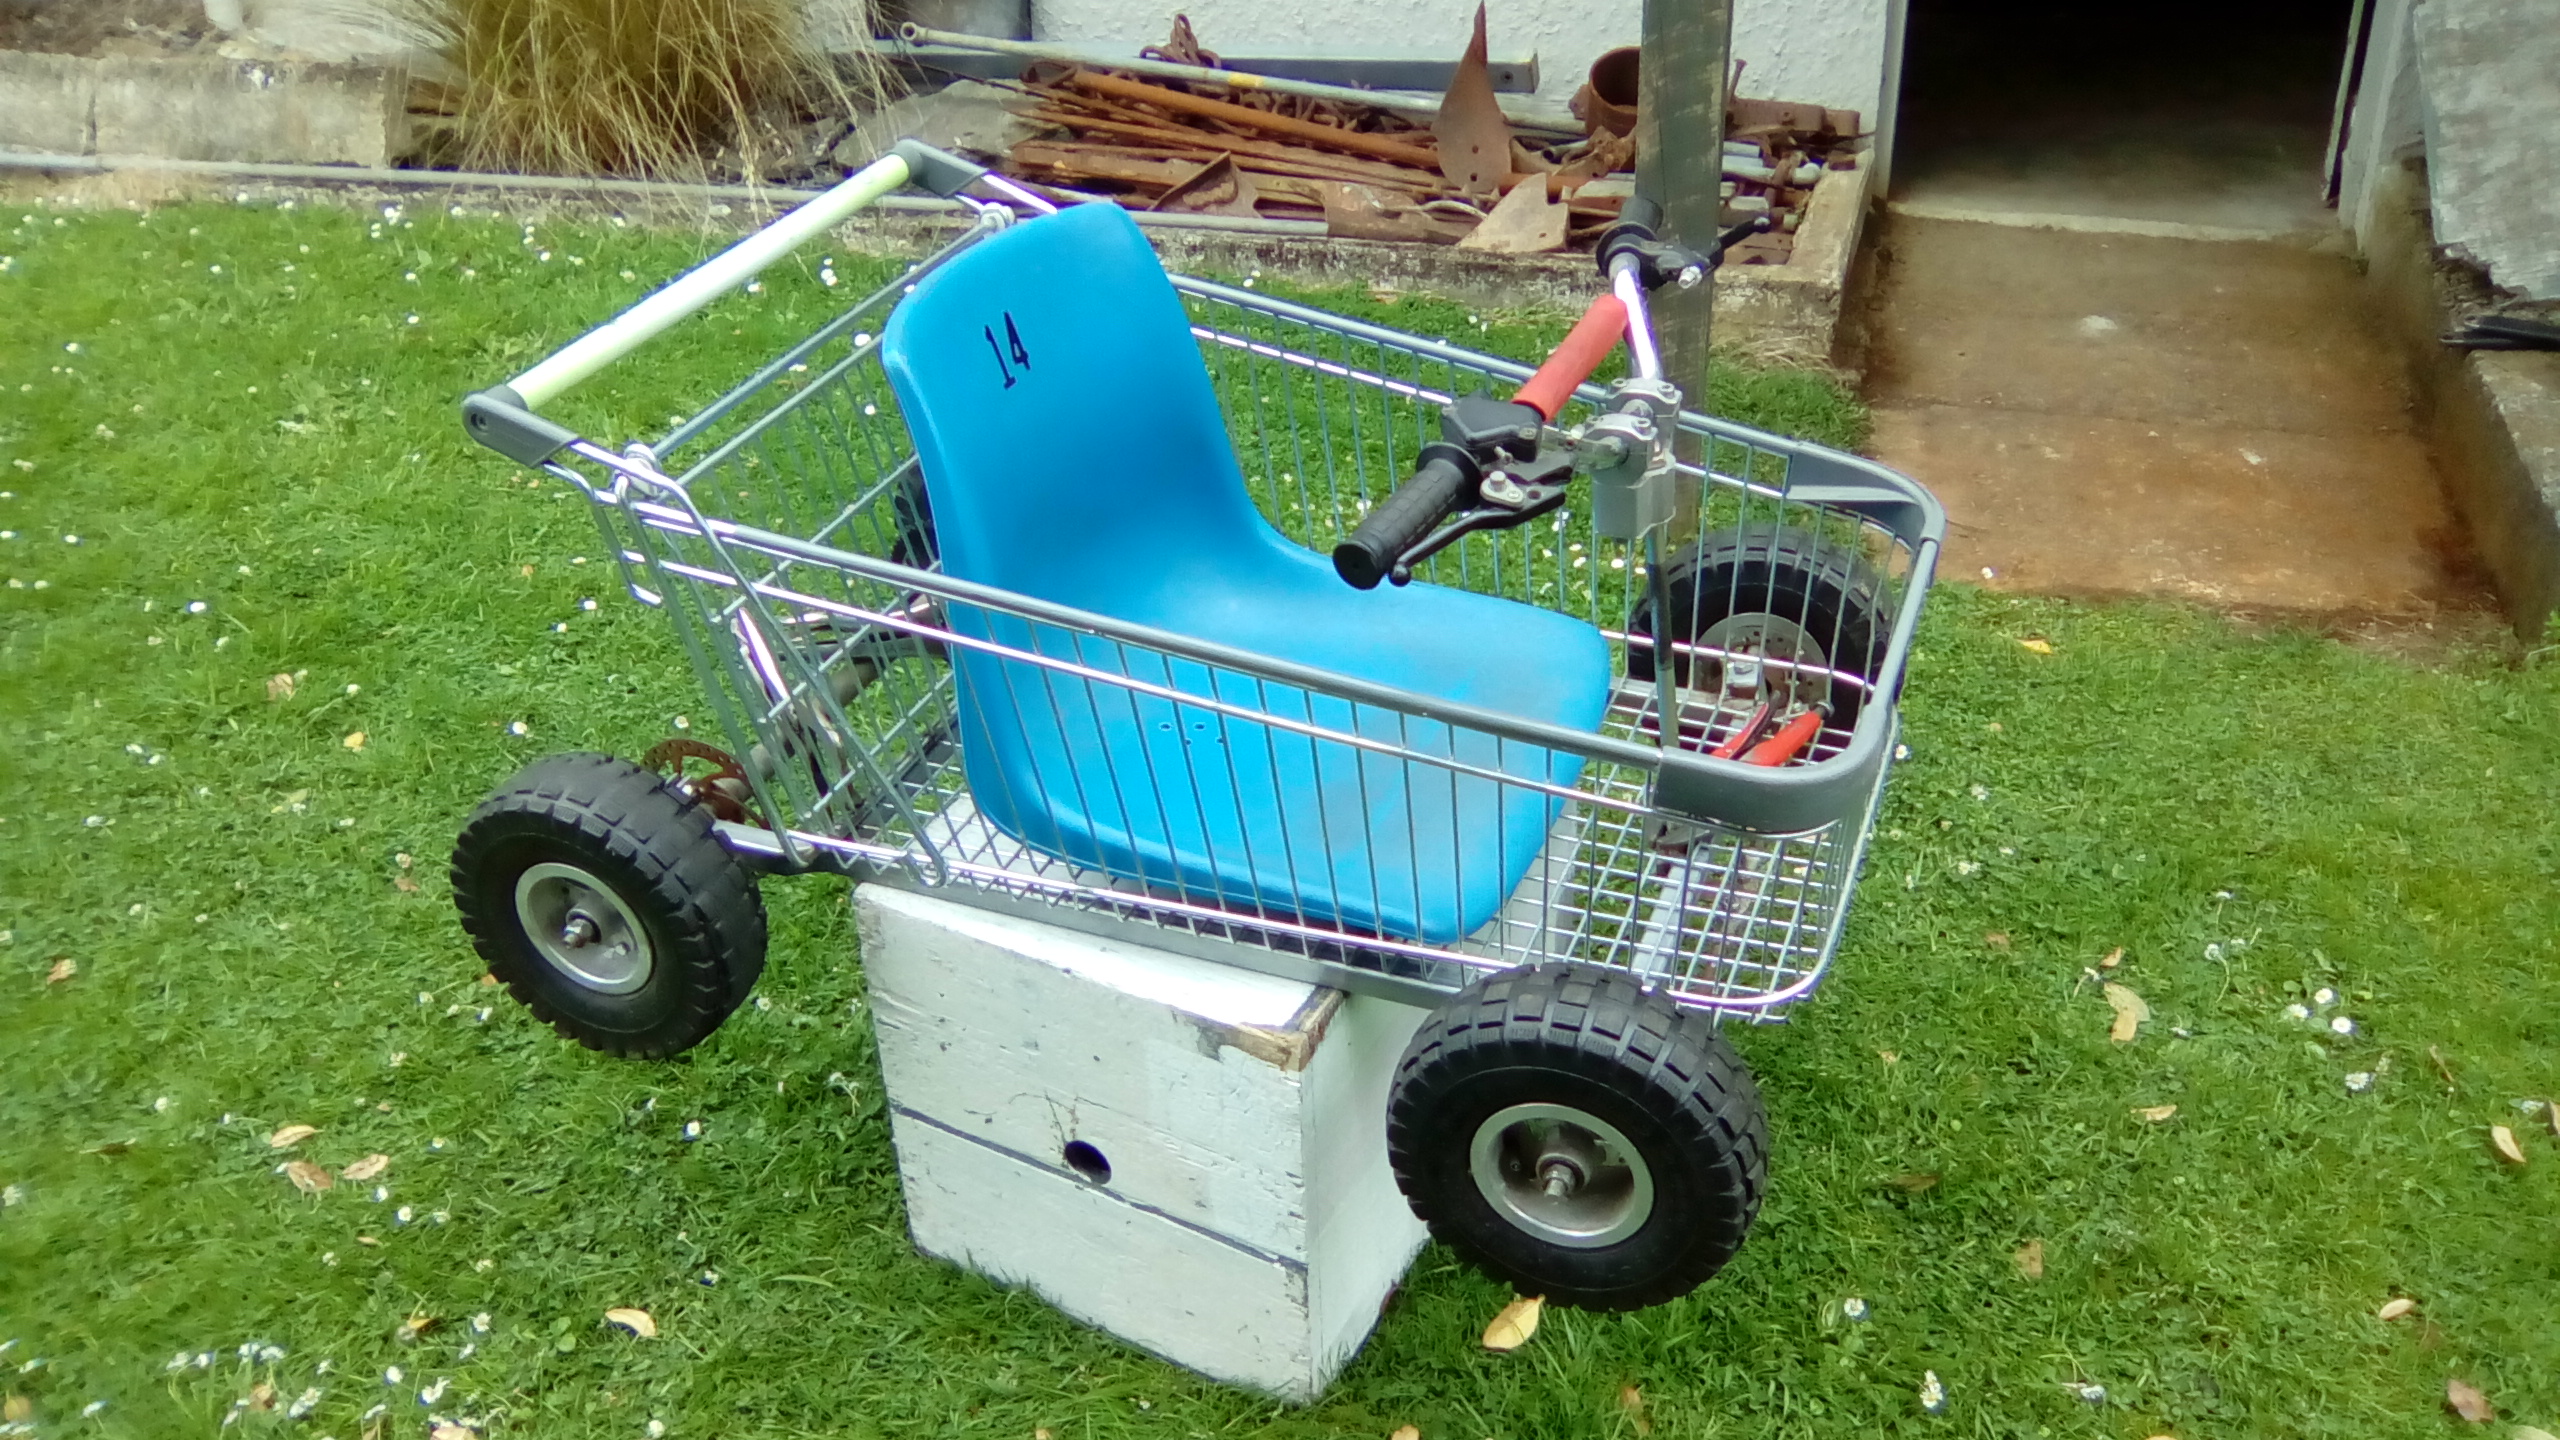
Chucked the basket on to see how it sits. That's an ex Carisbrook seat so a bit of Dunedin nostalgia right there.
-
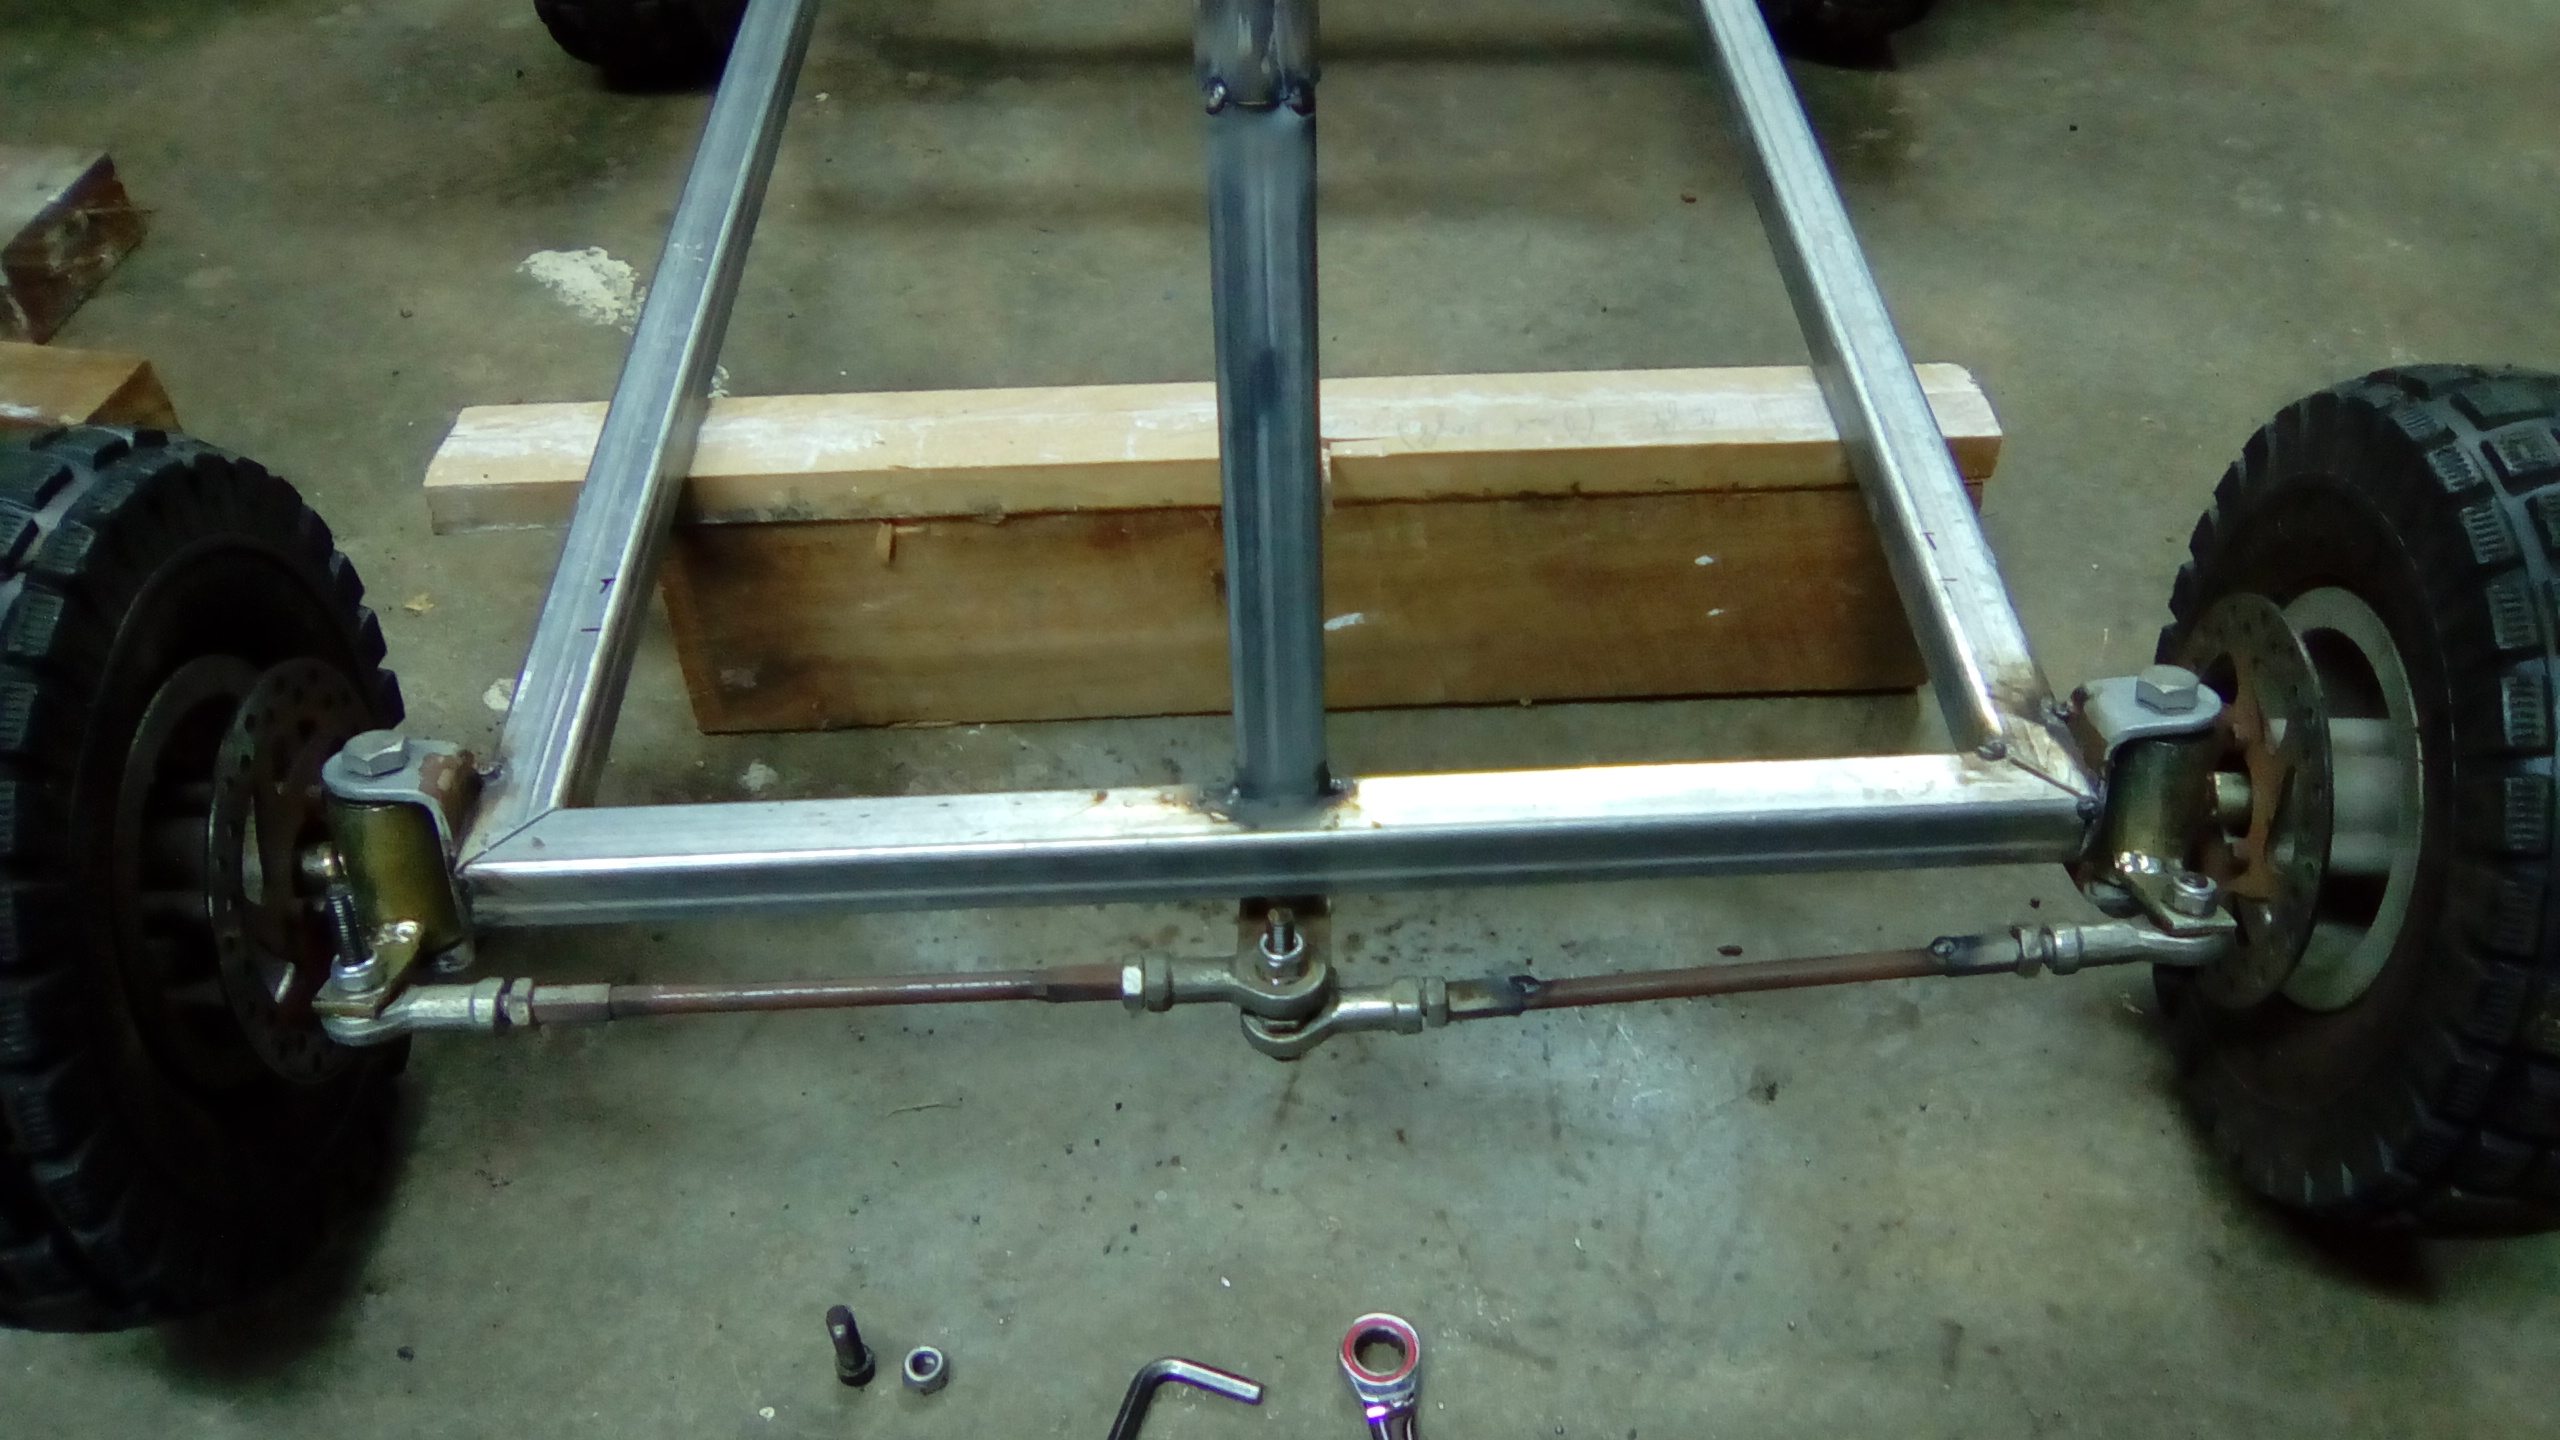
So the steering was a little off. The outside wheel was turning sharper than the inside and was just sledging (is that a word?) And not turning very well. So I cut down the center steering bracket to a single mounting point instead of two. Works a treat now, inside wheel turns sharper as it should.
-
No flash roll bar like yours but full side intrusion cage. And a handy handle for pushing so little miss 3 can learn the whole steering around obstacles concept.
-
The rear axil needed widening by about 250mm so cut it and pressed it into a piece of pipe, Drilled a hole and plug welded each end. Came out fairly straight too so thats a win. Made a basic rectangle chassis. Chucked in an extra bar to brace the steering off, however once all welded it didn't need it. Also dialed in about 15 degrees of castor to aid turning and skids with the solid rear axil. I tested it down hill a couple times like this and seemed to work well. Flat tyres and all.
-
So ages ago I picked up a cheap shitty chinese quad bike with whole 50cc 2 smoke power house. Tbh it was fairly shagged but everything was there. Tyres where hard as rock and cracked, petrol tank was broken and everything generally bent or broken. I managed so start and run it for a minute while petrol pissed out of the tank and all over the motor so that was promising / dodgy. I told my boy (then 4) that he could pull it apart and we'll build a go kart one day. So in less than a day he had the motor out, wheels off and all axils, suspension, wiring and faring fully stripped. Many months later a mate offered me an old shopping trolley that was laying around his house, mentioned it to my boy and he liked the idea so got my ass into gear and pulled all the bits out of hiding for him to set up as he saw fit to build. The mock up.
-
I know the stuff you're talking about and it's not just plain chlorine gas. That stuff was called mustard gas. Most straight gasses will give the nose a little kick though. I got a good wiff of co2 from my mig while setting it up, felt like one of the kids did the old "high speed finger up dads nose when he's not looking" trick.
-
I read one article that compared washing soda to baking soda. Said baking soda worked just a little bit slower. You can cook baking soda in the oven to make washing soda though.
-
So gave my tank 8 hours. Baking soda seems to work well. Looks amazing. Its going on a 2 smoke go kart so not bothered about sealing it. Heaps of green and brown sludge came out. A+ Would trade again.
-
Am currently using this method on a small b + s fuel tank. An old and cheap arlec battery charger hooked straight to the tank. Water and baking soda solution. Been on for an hour and just cleaned a heap of crud off the anode Very happy with it so far. Will update later.
-
Is widening the steelies so you can still rock the factory hubcaps an option?
-
Been reading a bit on spring rates lately for my silvia (s13), fairly similar weight I think. 6kg front and 4kg rear seems to be quite common for street use. As sheepers said though I think shock rates plays a very big role.
-
Air in the line?
-
Great build thread. My grand Pop used to have one of these and I remember riding in the back seat when Nan and Pop went to town. When much older I got to drive it a few times and was surprised how well it went for a 1.3 wagon. Guess you know by now but it had a foot pump beside the clutch for the windscreen washer. Keep up the good work.