kws
-
Posts
4,183 -
Joined
-
Last visited
-
Days Won
5
Content Type
Forums
Downloads
Events
Gallery
Everything posted by kws
-
Because I can't leave anything well enough alone, I wanted to do some science and see if I could make a low-cost big brake kit for the Alto. I know there are a few options from Japan, which in the big scheme of things, aren't badly priced, like the Silkroad Big Rotor kit, which takes you from 230mm to 255mm rotors, but they aren't off-the-shelf parts, and after shipping its around $500NZD for the kit. Any time I needed replacement rotors I would have to buy them from Silkroad in Japan, with the associated freight costs. There was some info online about people using the "14V" caliper brackets from a Suzuki Swift/Ignis/Kei and the rotors from the same car, which give you a 257mm rotor. So, I found a wrecker that had an HT51S first-gen Swift in stock, which after checking the parts catalogue, had the brakes I needed. I snaffled these up; A pair of calipers with 14V brackets and a pair of used rotors. I knew off the bat that the rotors wouldn't work without some work, but the brackets should fit the standard calipers. The theory here is although it's still using the standard Alto calipers and pads, it moves the caliper further from the center, giving it more leverage on the rotor, and more stopping power. I guess more metal would also aid in cooling too. It's a shame the car lost its fancy 4-pot Blitz brake setup. That used massive 286x22mm rotors, although they don't fit under stock wheels. It's been a long month or so of not being able to drive the Alto. The last time I took it to work the steering was more murdery than usual, with the car all over the place depending on if I was on throttle or not, so something wasn't right. I got home and jacked the car up to have a look, and found the top mount on the LH front strut had a ton of play in it, so I went down a rabbit hole of throwing money at the problem. Now I'm waiting on the parts to do a full refurb of the front suspension, including new bushes, arms, shocks etc. It did happen to tick over the big 100k on that drive home though In the meantime, other than a quick jaunt out to a friend's place to help with their Alto rebuild (always handy to have a second car to know how it goes back together), it's been parked up feeling sad. So with the big brakes in hand, I jumped in, pressed the start button and nothing. It seems three weeks was a smidge too long for the ODB2 adaptor to be left in the connector and it had flattened the battery. A quick jump with my jump pack, and into the garage it went. I jacked the front corner up, and removed the wheel, exposing the cute little brakes That's the stock 230mm rotor. It's 17mm thick and has a hat height of 45.1mm. Ignore the rust, that's just buildup from sitting outside. I removed the caliper and bracket. This shows the difference in the brackets "14V" for the big rotors The stock rotors were a little stuck on, so I used the removal holes and a bolt to push it off. It's interesting to note that the removal holes are very close to the studs, this is due to the design of the hub, which unlike most, isn't a complete circular face. And with the rotor removed, this is the hub. See what I mean about the lightweight minimalist hub? The rotor dust shield is a bit of a joke too. The rotor size difference is noticeable when you put them together The problem with the big rotor, is although the thickness is the same at 17mm, the hat height is different. Instead of 45.1mm like the Alto, it uses a 49mm hat height. This pushes the face of the rotor back towards the hub by almost 5mm. I tried without any spacers behind the rotor first The 14V brackets are in the same location as the Alto brackets, so of course the rotor now hits the brackets (and dust shield). I had really hoped 3mm would be enough, and it's what a couple of people in Japan running this setup are running, but the rotor still wasn't centred in the bracket. It's probably not an issue, but I really wanted it to be centered. I stacked 5mm worth of washers behind the rotor and checked again (because 4mm spacers don't exist) Looked pretty darn good to me. The stock caliper bolts on without issue. The only real problem I have is that now the center bore of the rotor isn't on the center ring of the hub anymore, because the hub tapers from 60mm down to 54mm (so it needs a 60mm CB rotor and 54mm CB wheel... whhhhyyyy) When I did the same work to the Corolla, using 3mm spacers behind the rotors, the rotor was still hubcentric because the rotor was on the hub-centering ring as it didn't taper. It's probably OK, everything is clamped together by the wheel and nuts, but something doesn't feel right about not having the rotor hubcentric. It did look pretty good behind the wheel. You can see how far the caliper is pushed out and how much the rotor fills the wheel Stock Big Boi I've been through catalogue after catalogue and I can't find anything off the shelf that has a similar hat height, thickness and in a diameter similar to the big brakes. There was a Toyota one that was almost perfect and wouldn't need a spacer, but the CB on the rotor was only 54mm, because they don't use a stupid step-up on the hub. There are options for having the center bored out of a Toyota rotor, or another rotor machined to work, but at the end of the day I'm trying to find an off-the-shelf option that doesn't need extra work, is available locally and most importantly, is cheaper than buying a kit from Japan. The Suzuki rotor with a 5mm spacer behind it is the best option so far, but it needs to be hubcentric. I'm wondering if I could fit a 54-60mm centering ring in there, but for now, I've shelved the idea of big rotors. I have plenty of other things to sort out first. I may end up buying the bolt-on Silkroad kit, we'll see.
-

Going a full circle into a Marina again. KwS's 1973 Morris Marina Coupe.
kws replied to kws's topic in Projects and Build Ups
I feel like a WOF inspector wouldn't look kindly upon a car like the Marina failing to start, so I needed to address that. The Marina has always been a real pig to start, right from the first start (back in 2021, woah). I would need a 100% fully charged battery (on charge at least overnight), and often still needed a boost from a jump pack, and then it would turn just fast enough to start. This was a huge problem when I still ran the original mechanical fuel pump as I could not crank it long and fast enough to draw fuel and still start. The electric fuel pump helps a lot, but nothing will make it cold start when it cranks that slowly. I bought a brand-new battery for it and still had issues. I thought the battery might be faulty, so had it replaced under warranty, still had issues. I messed with grounds, adding new ones, grounding it with jumper leads, and it helped a little but still cranked slow. One thing I noticed in my efforts was that the main lead from the solenoid to the starter would get hot, indicating a huge amount of current draw. I tried shorting the solenoid terminals together, effectively bypassing it and connecting the starter directly to the battery, and it still turned slowly (all the while welding my screwdriver to the terminals). So the solenoid was fine, it had to be the starter. I had a brainwave the other day, in my spares, didn't I remember seeing a spare starter? Yes, yes I did. It looks a bit worse for wear, but other than oiling the bearings on each end and cleaning the Bendix so it returned with a snap, it worked flawlessly when given 12V. It's a 4.5" (bolt centres) Lucas M35AK (Aus local content copy). I reconnected the battery, which had been on charge for a couple of days, and this is how it cranked That was pretty good for it, often it doesn't speed up after a few turns. If I kept trying it might have started, but chances are the voltage would drop and the starter would slow down again. Removing the starter on the Marina was pretty easy. Two bolts hold it in, both accessible from up top I removed the power feed from the back, removed the two bolts holding it to the bellhousing and then realised I couldn't get the motor out. I had to also remove the bolt securing the strap for the dipstick tube I cleaned up the mounting face on the replacement starter, and the face on the bellhousing too, as this is where the starter grounds (or did, it should ground through the extra braided ground strap I added to the top bolt). I slipped the replacement starter in and bolted it into place. It could've done with a coat of black paint, but oh well, it joins the rest of the car in also needing paint. I reconnected the battery, and with no other changes at all, this is how it cranked It cranks like a new car! Well, an old new car anyway. The Bendix kicks in and out nicely and it cranks so fast. It would've started right then, but with 2+ year old fuel in the tank, that's lost all its octane, it's pretty grumpy to start at the moment, but despite having to crank it a few times to get it to start, the starter never slowed down. It's also interesting to note that the feed wires are no longer noticeably warm to the touch after cranking. Draining the tank and giving it a belly of fresh fuel should make a big difference to how reliably it starts now. Maybe, just maybe, we might be at a point where it'll start each time when cold. I was meant to be sound deadening the car ready for the new carpet to go down, but having come down with the man flu, replacing the starter was all I could muster. As a laugh, here is the old starter when being given 12V. The beeping is from the "1200amp" fully charged jump pack warning it's drawing too much current, and the squealing noise is probably from failing bearings in the starter. The starter is noticeably harder to spin by hand than the replacement.- 80 replies
-
- 22
-

-
I have plastic sheeting but in this case all the holes in the shell behind the door cards have been sealed off with tape. I forgot to tape off the holes in the A pillar too, but that'll happen when they come off next
-
Going a full circle into a Marina again. KwS's 1973 Morris Marina Coupe.
kws replied to kws's topic in Projects and Build Ups
Amongst all the other cars that have had their time in the garage the past couple of months, the Marina hasn't been forgotten about. This is the culmination of a couple of months worth of work on the Marina. Like usual, motivation has been hard to dredge up for this car, as I know I'm getting closer and closer to the WOF check, which is hella daunting. The "for WOF" list is getting real short now. One of the major things I need to sort out before a WOF check was the rear half of the exhaust, which had suffered from sitting for a while and ended up with a large hole just after the hump over the axle. This blew out to be a large hole after the first time I started the engine One problem I knew about with it, was that someone had been here before and the exhaust was all one piece welded from front to back, making it a lot harder to work with (normally broken into two sections before and after the mid-muffler So I started by jacking the car up on one side and placing it on stands. Not my favourite angle, I had to get it pretty high to clear everything, and couldn't put stands under the axle as it needed to hang down I hosed everything in WD40 and gave the threads a wire brush, to make my life easier A ratcheting spanner really helped on the mid-hanger Once the hanger was disconnected, since the rear hanger hasn't been fitted in a long time (since I welded the rear valance) the rear of the exhaust just dropped down The front manifold joint was easier to get off than I thought, I just had to be patient and keep the threads lubricated and they came off without any damage. Since that was the only other thing holding the exhaust in place (there is meant to be a hanger up the front too, but that's long gone), the whole exhaust was now wrangled from its home. Much swearing ensued. I picked this New Old Stock rear muffler section up off TradeMe a while ago. Compared to the old rear section, this has the correct extra muffler, and is longer Ideally, you'd just undo the clamp on the outlet of the mid muffler and swap the pipes over, but some muppet had welded the pipe into the muffler, on both sides >_< The plan was to cut the pipe close to the muffler and then clamp the new pipe onto it, but there wasn't enough space for a clamp before the pipe started to turn up for the hump over the axle. So I cut the pipe further along, planning to weld the new pipe to the old one I got it all nicely lined up, tacked it in place And then a quick trial fit showed that as hard as it was to get the old pipe out, getting the new one in and above the axle, all one piece, was impossible, no matter how much a swore at it. So I cut the welds and started again. Look, I know it's not pretty, nor does it work perfectly, but it's only temporary and will be sorted later. The long term plan is a new slightly bigger exhaust to allow the engine to breathe better when the twin carbs are fitted... Using some scrap steel and my rollers, I made a tube that could act as a sleeve over the pipes In hindsight, I shouldn't have welded the sleeve shut On the plus side, it did allow me to get the exhaust back into the car The muffler fits nicely, almost like it's meant to be there (it is). I bent up some scrap steel to make a bracket for the rear hanger strap to bolt to (the previous pipe had it welded to the pipe) The length is legit too, didn't even realise that it was short before. It barely cleared the valance Some exhaust paste and a couple of clamps had everything snugged up into place After starting the car and running it to get some heat in the exhaust, yes, the sleeve leaks a little at the bottom, but it's better than a gaping hole in the pipe that it had before. I'll call it a sacrificial failure for the WOF man; that and the handbrake which could do with some more adjustment. Next on my whiteboard of things to do, was to make some door cards so that I wasn't just left with big gaping holes in the doors and the potential for sharp bits. I also wanted to make some A-pillar covers, and remake the parcel shelf trim too since that was broken. Before getting too carried away with my new jigsaw, I started by replacing the exterior handles with a pair of new old stock ones I picked up a while ago. Since the barrel and mech on the back of the new handles were different, I swapped these from the old handles. It was pretty easy to do, remove the C clips, remove the single screw, remove the mechanism and barrels, swap them over, tension the spring and then refit the screw and C clips. Done. One thing I did that was a little more complex was rekeying the new barrels to match my old keys, as the new barrels were in much better condition. I was slightly amused by the passengers handle, which had a very DIY fix at home point Yes, that's a big old rusty nail. In its defence, it worked fine when removed! I did have to pull the nail out to remove the handle though, it wouldn't fit through the hole in the door otherwise. The new handles look and feel lush. I ordered some new gaskets to go behind them too Now, back to that jigsaw. I will admit, I have zero experience working with wood, and don't particularly enjoy it, but here we are. I had one home-made door card from the previous owner, the other door never had a door card on it. This door card was manky AF, with mould on the back of it. It was useful for one thing only, a template. I used MDF as that's what was available locally, in the right thickness, and is easy to work with. I know, if it gets wet it'll soak it up like nothing else, but the plan is to seal the back of it somehow (paint?) and then the front will be trimmed in vinyl. All holes in the doors are sealed with tape. Using the template door card, I traced around it and all the various holes I needed to make and then cut it out A couple of trims and test fits had it fitting reasonably well I haven't quite decided what the final fixing method will be, but in the meantime just to secure them I reused the screw holes the previous owner had made in the door shell The handle looks pretty grotty (both do) but that's after a thorough cleaning with Simple Green, so I might have to dye it. With one door card working well, I used that to make a copy for the other side. The RH side has not had a door card since I've had the car, and probably a few years before that too. The next job for the whizzy blade of missing fingers, was to chop some of the offcuts up and make covers for the base of the A pillars, to close them in. I started with some CAD on the back of a cereal box, clamped two pieces of wood together with a couple of screws through where the clips go, and cut them out The first one went in easily, with minimal trimming If it seemed too easy, it's because it was. Of course they aren't the same on both sides, I forgot about the darn bonnet release bracket It was right in the middle of my new trim. So out came the CAD template, and using some scissors and a screwdriver, I located it and cut a slot to slip over the bracket I'll give the pillar a squirt of black paint when I take this off again later to trim it in vinyl, but for now, the plan worked perfectly It's been a long time since the car has looked this complete The final part I needed was the parcel shelf trim. This piece came with the car, but in two of three pieces, so it needed some creative work in order to make a good template. This is far from perfect, The RH side needs more trimming, but for now it's there, and tidies it up a bit All of these parts will eventually be trimmed in some tan vinyl I have ready to go, but that will happen once the car is on the road and becomes a rolling project. The last couple of things to do before the WOF are to sound-deaden the floors so I can fit this A brand new custom-made fitted carpet set. That will allow me to finally bolt both front seats in once and for all, and fit the new seatbelts I had made. Once that's done, and I fix a couple of small things like the coolant leak it's developed, I'll cross everything and take it in for a WOF. A terrifying prospect after all the years it's been off the road (30 years next year, over half its life) and the work I've done to get to this point.- 80 replies
-
- 28
-
-
Rhyscar's Subaru Type RA of teenage dreams... where less is more
kws replied to Rhyscar's topic in Other Projects
Oh 100% it's down to owners. There was a point they were a dime a dozen in NZ and were thrashed with very little care, but who knows what they were treated like in Japan before import. Looking at my history, I've owned 8 Subarus; two had rebuilds before me, one had a rebuild after me, two were scrapped, two were all good and one I don't know. -
Rhyscar's Subaru Type RA of teenage dreams... where less is more
kws replied to Rhyscar's topic in Other Projects
That's applicable to a lot of cars these days tbh. I miss the days of the JDM 280hp gentlemen agreement, now it's a race to make faster and faster cars that you just can't use on the road. I have a real love/hate relationship with Subarus. Owned a few, love driving them, but owning them scares me due to the ever-looming unreliability. My STI Type R was a beast. -
Not gonna lie, I adored (and regret selling) my B18CR ITR with a turbo kit on it. That thing was awesome to drive, shame I was too young to respect it and got rid of it before I died in it.

-
Tomble's adorable go cart / distraction / Alto Works
kws replied to tomble's topic in Other Projects
oh god, old mate moved onto a Mazda after the Alto -
I wouldn't bother with Armstrong, they'll have no interest in fixing something old (or new for that matter, they're shite). Theres a couple of local Landy facebook groups, no luck with them?
-
Yeah nah, you guys that have to deal with salted roads can keep that shit, ain't want any of that Its no wonder modern cars are disposable over there My 50-year-old Marina looks better than that, let alone any of my newer cars.
-
Thankfully my worst one, pictured above, looks fine after I hit it with the wire brush on the drill. Its a bit pitted and the nut would be fun to remove, but they'd be dicks to say its compromised. I hate to have to damage the Nismo shock to remove it, if it was that bad. Id probably just chop the mount into bits until i can cut the nut off.
-
Yeah it seems like a real dumb design, the cowling is almost designed to funnel water right over top of the mounts and then there are no drain holes or anything to let it out. Wouldnt be surprised if a few models around that time had the same issue. I had heard rumours that WOF inspectors had been instructed to check the strut tops. Will be interesting to see if they remove the covers to check them or not.
-
In my quest to not spend any money and do nothing on the Leaf, I spent money and did stuff on the Leaf. Yeah. In my defence, part of it is maintenance, and part of it is stuff I had in the garage already. A local EV part supplier was having a sale on a "Leaf Bundle" so I decided to grab one. It included a cabin filter, two front strut caps, and a LeLink OBD2 dongle for Leafspy. The strut caps were pretty easy. I removed the two covers on the cowl Which gives access to the strut tops. One of mine was in good shape but drowning in water, so I dried it out, buzzed the rust on the top with a wire brush, coated it in WD40 and fitted the cap The caps are nicely shaped and 3D printed, designed to snap into the lugs in the center of the top mount. They completely cover the whole top mount, so there is little chance of water pouring into them The other side was a bit crustier, so I dried it out and gave it a good scrub with a wire brush, before again soaking it in WD40 and capping it off. Next, since the bonnet was open, I moved on to fitting some LEDs. On this car, the low beam is some fancy and really good at night LED setup, which is very crisp white. Nissan paired these up with normal yellow park light bulbs I had some T10 LEDs already, so popped the big cap off the side of the lamp Which gives access to the park light bulb holder This rotates counterclockwise to remove the holder and bulb The bulb then just pulls out. After test fitting and checking the polarity of the LED was correct, it was refitted The results are rather obvious. They blend in with the low beam LEDs much better In theory, they should use a little less power too. So, you know, savings. Eco. The interior was treated to some LEDs too, for more eco-savings The one in the boot didn't miss out either Serial killer cold white, of course, for maximum SPACE AGE feels (not just because that's what I happen to have). Moving along, next up was to set up the LeLink adaptor and fiddle with Leafspy Pro. So my SOH is 71.56%, a bit lower than the 75% I was hoping it was, but shouldn't be an issue. The battery seems to be pretty well balanced too, with a low voltage differential of 17mV. Obviously previous owners haven't done a lot of quick charging either, as in 108,000km it's done 173 of those. The other thing I wanted Leafspy for was to convert the language in the dash display to English from Japanese. The media unit was already converted by the previous owner. A quick and easy change in the advanced settings and everything was in English. Very easy to do, and almost worth the cost of the Pro app alone. People charge $80 for this service. Finally, I had a nice replacement cabin filter that needed to find its way into the dash. This was a real pain in the bum, to be honest. I had seen a couple of videos about replacing them, so wanted to try the through-the-glovebox option first. There is a little door at the back of the glovebox, that is removed with a gentle tug With it removed, you can access the filter cover. This doesn't line up with the opening you just created, it is further back in the dash There is a clip on the top which I lifted to remove the cover With the cover removed, I grabbed the filter and started to manhandle it out of its home. It liked its home, it really didn't want to be removed. It turns out, that the filter is much bigger than the opening, and needs to be crushed to fit through it. I got the filter half way out, but then the glovebox was in the way. Only one thing to do then. Remove all these screws Remove this panel by popping it free and wiggling it out towards the rear of the car. The fusebox lives here btw. This might even be an optional step, I'm not sure. And then with some wiggling and jiggling from both ends of the glovebox, pop the clips free and remove it. Dont forget to unplug the glovebox light from the top, if fitted This gives ample room to access the half-removed filter Once removed, this is the front door to its house The new filter goes in the same way the old one came out, with brute force. You kinda squish each end to fit it in and then it pops out to fill the cavity inside the box The cover then pops back into place The old filter wasn't too bad, based on service stickers, it looks like it was replaced a couple of years ago, but it did have a kind of earthy musty smell which I'm glad to get rid of Refit the glovebox, and all the screws, and you're done. So far I've been really enjoying the little Leaf. It's a funny little appliance. It can be fast, faster than people expect, but it also likes to be driven around sedately without a care in the world. The Bose audio is great, nice and clear with some punch from the sub in the boot. Bluetooth works well, as do the steering wheel controls. The media interface is looking a bit dated these days, and I'd love an Android Auto option, but from Googling, it looks like hard work. The heated steering wheel is LUSH. I've never had it before, thought it was a naff idea, but it's already won me over. Heated seats, not so much. They're VERY good and get real toasty, but I can't get over the feeling you just wet yourself and you are sitting in a "warm" seat. I'll keep trying it, as it's more efficient than running the heater over winter. Speaking of, I tried the climate timer out before work this morning. Set to 21c, which might be a bit low (it was on 24c but I thought I knew better), but it's quite nice getting into a car that's not cold inside. I didn't need to run the heater this morning because the interior was already up to temp, and the glass didn't fog up as bad. This is another thing I'll play with and see what my best options are. I bought a Type 2 to Type 1 adaptor so I could take advantage of being able to charge my car at work. Seems to work well, nothing like having a full tank of juice at the end of the day. Our chargers are only Type 2, hence the need to adapt it to the Type 1 Leaf. The adaptor I bought was Projecta branded, and the build quality of it is impressive. It's solid, made of nice sturdy plastics, and works with no fuss. I feel like the cheaper ones, with no branding, probably don't feel as good as this one. Other than that, I want to change the reduction gear oil shortly, so I'll need to grab some Redline D6 ATF for that, and then I'll just keep zipping around, being a pest and using all my instant torque to win traffic light drags whenever possible.
-
I do like that colour a lot. They look better in a darker colour (except black) than the lighter shades. Pricing is all over the place at the moment, mostly because half the people selling are trying to dump them before the RUC comes into effect, and the other half just want to upgrade to something newer, so it's split in the middle. Leafs (leaves?) with real bad battery SOH are a dime a dozen too, it takes a bit of work to pick through them and find one that has a good battery. Can confirm it can do Upper Hutt to Porirua and back on half a charge, even with the heater on. I can see why most Leaf owners avoid Transmission Gully though, that shit was brutal on the guess-o-meter, watching the ks drop away by the second. So far enjoying the car. It's a nice appliance. I'm driving it like a normal car currently and not really trying to hypermile, so I'm surprising a few people on the road by not being the slowest thing around. Traffic light drags are a laugh too. I do find that without the reassuring buzz of the ICE at certain RPM to judge my speed by, i find my speed tends to creep up a bit.
-
I have heard that. I love the GE8 Fit a lot, so will be interesting to see how this compares daily. Just waiting for a type 2-1 adaptor to show up and then I'll be able to leech some free power from work too Tomorrow I'll run the gauntlet of getting to work (Porirua) and back (Upper Hutt) on a single charge (should be easy)
-
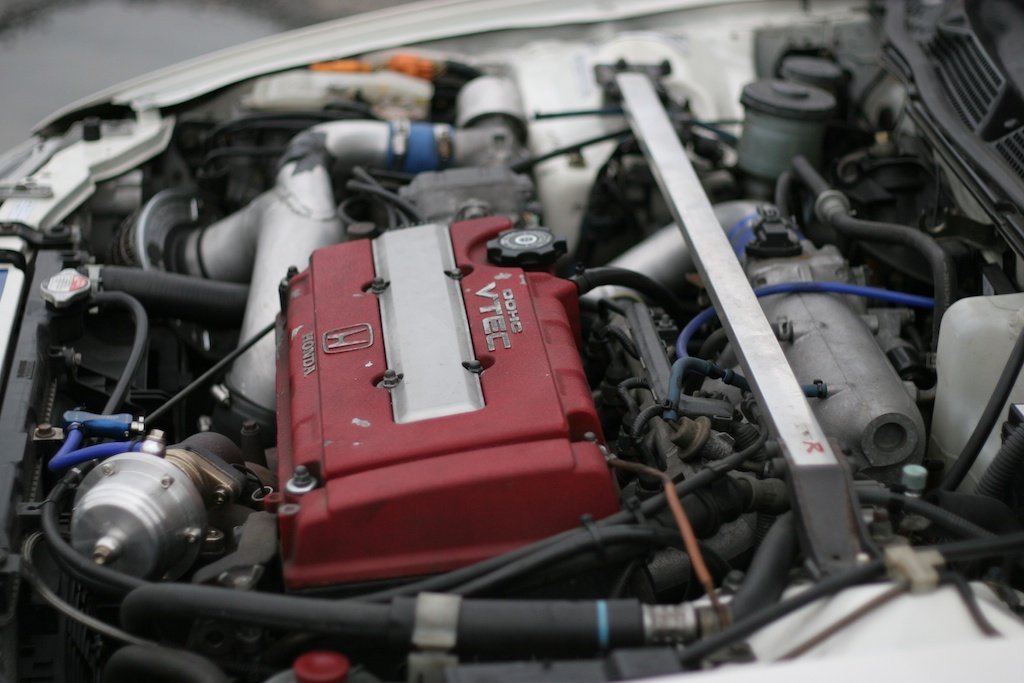
So yeah, I sold the black GD3 Fit and decided to try my hand at a different flavour of car. The Fit was a good little car and I'm glad I could save it from the neglect it had been suffering, but once it was fixed and on the road I actually found I hardly used it. I had the Alto as the fun manual car, and the GE8 Fit as the CVT daily, so the GD didn't really fit (heh) in anywhere. So I sold it. With money burning a hole in my account, the next day I went to a "local" dealer and viewed a car that I had been interested in for a while, but wasn't really sure about. A Nissan Leaf. I have never owned an EV, and the closest I have come to spending some decent time with one was when I got to borrow an evaluation EK X EV from work for a weekend, and utterly fell for the little thing. Being a Japanese Kei car, it has the same dimensions externally as my Alto, but is a full Battery Electric Vehicle. It was nippy, drove well and was a laugh to drive. It also had oodles of interior space, and with 130-140km realistic range, it was the perfect city car. Sadly I couldn't buy one of those, so settled for the next best thing (that I could afford). I've been considering a Leaf for a while. They make sense, an easy to drive, reliable and cheap to buy EV, but the cheap ones all tend to have trashed batteries with low maximum range. My commute is around 60KM round trip, so having a low range isn't a huge issue, but I also want to be able to use the car for more than just going to work and back. Currently they are a bit of a bargain as people frantically try to get rid of them before they have to pay their way with Road User Charges and the end of the free ride EVs have had approaches. When this one popped up at a dealer, advertised as having 9 bars battery (from a maximum of 12) and 110km range, I viewed it as soon as I could. It certainly looked good in the photos The pearl white is much nicer than the silver, or the typical blue they come in. Being an X trim, alloys were an option, so this is rolling on steelies and caps, with very good matching Bridgestone tyres all around. Better for ride comfort, no doubt. Details on the listing were a bit vague, it mentioned the range, and that the media system had been converted to English, but no other spec/features. My wife and I drove the 75km to the dealer and had a look. In person it also looked good, albeit damp. The dealer had recently steam cleaned the interior, and since it hadn't yet completely dried everything was a bit damp and the windscreen was dripping condensation. The test drive revealed no real issues; it drove well, felt good on the road and everything worked as it should. I decided then and there that I'd be taking it home with me. Money was exchanged, ownership was transferred and off I went. I had a few things to learn about the car, which I know now, that would've helped on the drive home. One of them was that driving in B-ECO is not as efficient as D-ECO due to a mod done to the car that I wasn't aware of. I like regen, it's novel to me, so I burnt through more battery than I probably would've otherwise by having it in that mode most of the way home. To anyone that knows Leafs, no trees were grown on my drive back. It does explain why I didn't make it home though... The battery wasn't full when I picked it up, and by the time I got to this point I was down to 30km left on the gauge and it was flashing at me, so with about 30km left until I was actually home (including crossing a hill), I thought it best to do my first quick charge. I had a Chargenet account from when I borrowed the EK X, so plugging in and chucking some juice into it was pretty painless. Going from 20-60% took 20 mins, cost less than $6, and gave me heaps of power to get home. People whinge about charging all the time, but it couldn't have been easier and the 20 mins was spent checking Facebook and laughing at cat memes. Before heading home I snapped some quick photos. The Leaf is a slightly awkward-looking car; I'd never say it looked good or cool, it kinda just is what it is. It's inoffensive. Under the bonnet is the powerhouse, or something It's a bigger/longer car than you expect. Over half a meter longer than the GE8 Fit and slightly wider. It does mean the boot is a decent size, and there is plenty of leg room though. A decent family car. Being a 2014 Series 1.5, it has the much nicer black interior (earlier cars had a tan interior that always seemed to look dirty). So now that it's home, what have I ended up with? A 2014 Nissan Leaf in X trim It's pretty well optioned for an X; Cruise Control Climate and Charge timers Automatic LED Low beam headlights Touchscreen Navigation (in English with NZ maps) Bluetooth audio Bose 7 speaker audio 360 degree camera Automatic climate control Heated steering wheel, front and rear seats Heatpump heater and AC Side and curtain airbags And a parcel tray. The only options I believe its missing are alloys, fog lamps, the solar panel spoiler and leather. Fog lamps would be handy, but otherwise I'm happy without the rest. Since getting the car home I have also discovered a couple of other things. First was this little sticker, which I thought was someone trolling me But it turns out NISMO did actually offer a couple of tuning upgrades for the AZE0, https://www.nismo.co.jp/news_list/2013/news_flash/130001.html Including a "remapped" VCM I poked my head up under the dash and sure enough, the tamper label is present I had an idea that if they fitted that, what else has been done? I also found these when looking under the car NISMO shocks and springs all around. This drops the car about 30mm all around. Before anyone asks, the fronts aren't leaking, they're covered in car dealer special silicone tyre spray, along with everything else under there >_< This explains why the car handles pretty well, I presumed it was just the low center of gravity from the battery weight, but now I know it's really a finely honed racecar. The remapped VCM seems to make quite a difference in driving. When in B mode, it's now "NISMO" mode as that's when most of the changes have been done. The throttle is more responsive, to the point where when it's not in ECO mode the throttle is quite twitchy, but the pickup is impressive. B-ECO mode dials it down a bit, but still has more responses on tap than in D, at the expense of economy. Apparently the regen has been retuned too, increasing the maximum regen, I don't have anything to compare that to but it regens pretty hard. Trust me to unintentionally buy something unusual. So far I'm quite enjoying zipping around in it, and will be replacing the GE8 Fit as the daily for a while to see how it goes. Don't expect a lot of updates from this car, I don't intend to be doing much to it. Unless you start messing with swapping motors, batteries and inverters, there isn't a lot of scope for modifications. I will also make this clear; I did not buy this to save the planet, fix climate change or be some eco warrior. I bought this because I want to play with something different and see what an alternate power source is like to use.
- 94 replies
-
- 15
-
-

-
Instead of making a new thread each time I buy a less interesting to most, but could be interesting to others, car, I'm going to revive this thread and throw them in here.
-
In the early R06A engines like in my Alto, the crank thrust bearing issue is well known. I decided to preemptively replace mine. From 2016 to around 2019, when they changed to the Type 2 cars (which basically just incorporated all the changes made through the production of the Type 1 cars), the crank thrust bearings have an issue where the metal was too soft, and the bearings could wear prematurely. The issue is so prevalent that Suzuki Japan issued a warranty extension/recall in Japan for it, extending the warranty to 10 years/200,000km. Unfortunately this doesn't carry over to imports in NZ, and I've also seen reports that getting Suzuki to actually cover the work means waiting until the engine is basically toast from the bearings failing. Their "solution" is to replace the crank, block and bearings; a full rebuild. My friend Tom @tomble with the blue HA36S, who unfortunately had an engine whoopsie on track earlier in the year, happened to order a spare pair of thrust bearings with his order of bits to rebuild his engine. Knowing my car was in the VIN range of affected cars, I obtained the bearings from him, intending to replace them before things went bad. I was doing this preventitively, not because I knew mine were stuffed, keep that in mind. I had been ignoring the niggle at the back of my mind knowing my car could be affected by it. The usual indication that the bearings are starting to fail is a knocking when engaging and disengaging the clutch, as the force of the clutch causes the crank to move due to excessive runout. My car was what I would consider quiet, for what it is. No noises out of the ordinary, but the other day when I drove the car to work my Android Auto was a bit slow to connect and the first couple of minutes of my drive had no music... and what happens when there is no music, you hear EVERYTHING. At one point, I thought I heard a slight tapping when coming on and off the clutch in traffic. It was quiet, and I couldn't be sure I wasn't just hearing things, my car does buzz and vibrate a bit at low RPM due to the inserts in the rear mount... That day after work I picked the bearings up from Tom. I couldn't risk it. Last night, after work, I put the car up on stands and set about replacing the bearings. Unfortunately they are inside the engine, so not a "simple" task, but overall very doable in a garage on stands, with standard tools (with the exception of a torque wrench and angle gauge, both of which are easy to obtain). The biggest issue is that the sump needs to be removed. To do so, the front pipe of the exhaust needs to also be removed, so there is space for the sump. My bolts were a bit rusty, so with a lack of fire-making abilities, I aimed the heat gun at them on full blast and got them as hot as I could (pretty hot, really). With a crack, the bolts came free. I completely removed it, but I guess you could probably just drop it down and leave it hanging if your rear bolts were unable to be removed I also drained the oil and removed the filter. I did this with an engine that had sat overnight, so as much oil would be in the sump as possible, so I wouldn't have it dripping on me when the sump was off. Next, I removed all the sump bolts and tried to get the sump off. The sump is sealed on with goop, and I battled for a very long time trying to break the seal. In the end, and I wouldn't recommend it if you have other options, I used a claw hammer to pry it free. It worked well with no damage, but you could easily break the sump if you aren't careful. There were two points on the front edge of the sump that were perfect to pry from With the sump off, I had access to the guts. It was very oily, so photos will be limited, but I removed the cap in question (second from the flywheel). With the cap removed you can see the bearings. Thankfully both of mine were still in place; when they get bad one, or both, can slip out and drop into the sump leaving the crank free to move back and forth. The bearings are curved and wrap around the top of the crank, one on each side of the main bearing cap. Using a pick to carefully push on the end of the bearing, you rotate the bearing around the crank so you can slide it out Well, it appears I was on borrowed time This is what the bearings should look like; the old ones are the inside pair There was no sign of any metal in the oil, or in the bottom of the sump, so I guess it's just been slowly grinding itself away over 100,000km. The new bearings (and the "good" old bearing) measure 2.5mm, the bad bearing? It's lost almost half a mm of metal You can tell if they are the original bearings (or at least not countermeasure parts), as the markings on the back will be different to the new countermeasure parts Old New Thankfully the crank bearing itself looked great, plenty more track days left in it The crank also appeared to be in good shape. The "bad" side had some slight ridges in it, but was smooth and still looked polished (some looked really chewed up when the bearing failed) I cleaned and lubricated the new bearings, slipped them into place on the crank, and reinstalled the bearing cap. Of note, was that before I removed the old bearings I could move the crank back and forth in the block by hand a small but noticeable amount. Now, I can't. The bolts are stretch bolts, which means they stretch when torqued correctly. Normally you would consider them one-time use, and replace them, but since I would be waiting over a month for a pair of new bolts from Japan, I looked for an alternative. According to the workshop manual, there is a spec that allows the bolts to be reused. You measure the thickness of the bolt at two specific places along its length; A, where the bolt would thin when stretched, and B, where the bolt should be original thickness. Subtract C from D, and that leaves you with a value that needs to be less than the 0.12mm limit. My calipers wont be amazingly accurate, they're ancient and weren't that expensive in the first place, but the main thing is that regardless of what the reading is, the value still needs to be consistent and less than 0.12mm. Because I didn't want to be left with no bolts that are in reusable tolerance once I pull the bearing cap off, if mine were over tolerance, Tom was kind enough to supply me with his old bearing bolts, since he used all new ones in his rebuild. I went through every bolt and measured them All of them were within tolerance, some more so than others, so I picked the three best ones and knew I could at least rely on them if mine were no good. I checked the two bolts from my engine, and one was 0.10mm, which is closer to the limit than I liked, so I swapped that for one of Tom's bolts and reused the other. Using my torque wrench and angle gauge I started torquing the bolts up. The spec is 30nm to seat the cap/bearing, undo it to zero, and then 20nm, before turning to 45 degrees and then a further 50 degrees. Both bolts torqued up fine, and the first one went to the two angles fine. Unfortunately when doing the first 45 degree angle on the second bolt the little lever that holds the angle gauge in place slipped, so I lost the accuracy of how far I had gone. I ended up removing this bolt and replacing it with another of Tom's bolts, which went fine this time. The sump was pretty clean after draining the left over oil out of it, so I scraped all the old sealant off and cleaned the inside with brake clean I then cleaned the sealing surface on the engine block, which is super fun upside down under the car. Permatex Ultimate Grey seemed to be a good replacement for the Threebond called for in the manual, so I slathered some of that on the sump and fitted it to the engine The bolts need to be fitted in a crisscross pattern from inside out, and were the perfect chance to use my little 1/4" torque wrench as their torque is quite low. The sealant needs overnight to cure, so I finished by installing the exhaust front pipe I wanted to make it as obvious as possible that the engine had no oil in it overnight Today after work, the sealant was cured, so I filled the engine with oil and fired it up. After a quick check that nothing was leaking, everything looked and sounded fine. It appears I dodged a bullet this time. I took the car for a drive, and it was noticeably quieter. I didn't think it was particularly loud beforehand, but there is less "mechanical" noise from the engine now. The two main noises that seem to be gone are the knocking/clunking when I back up my driveway from a stop when cold. I attributed this to the gearbox, as I had to slip the clutch a bit and it wasn't too happy doing it. Now that noise appears to be gone. The other noise was at high RPM, off boost, particularly when decelerating, the car would have a kind of buzzy tapping noise. It wasn't a bad noise, but it was there. This also seems to be gone. Over all the whole engine just seems quieter. I guess the bearing failure was more obvious than I thought. It's a good timely reminder that anyone with a Type 1 Alto (Works, RS, NA or Lapin), Wagon R, Hustler, or Jimny with the R06A engine is on borrowed time with their bearings unless they have been changed. Some of them go fine for many thousands of KM, and some don't last to 50,000km. My car has had a very hard life, and at 100,000km the bearings were stuffed and probably had one more trackday in them before it fell to bits. I'm very happy to know they have been done now, and extremely relieved to have caught that before it wore further and grenaded the engine.
- 81 replies
-
- 24
-
-
-
glue some sandpaper to it, she'll be right But it's true, you can never really account for the "human" factor/stupidity.
-
One must ask, how old was said failed tyre, and how old is the tyre you fitted that was in storage?
-
I had to disconnect the ibs sensor in my 650i or it would drain the battery for fun... "Intelligent"
-
Speeduino is very flexible, so sensors won't be an issue as long as you can work out the calibration of them, and most trigger patterns are supported now. Its basically just a cheaper, more frequently updated, Megasquirt these days. Cool project, looking forward to seeing more progress
-
Another thing I had been wanting for a while but was hesitant to buy due to cost finally came on sale, so I snapped it up. Since my car was a track toy in Japan it came with some goodies still attached, one of which was the Cusco front swaybar. This apparently takes the swaybar from the standard 18mm up to 20mm, which Cusco claims is "ratio with standard 138%", whatever that means. Either way, it's stiffer. The bar is so dirty it's hard to see, but it's definitely thicc and blue. I suspect this, along with my blown rear shocks and wrong rear springs, worked together to cause the handling at the last track to day just be straight up hostile. The car would not rotate, it was all over the place, and really wanted to push on in corners. Since I've fixed the shocks and springs now, the one thing left to do to balance the handling was to fit a rear swaybar. The car originally had one when it was in Japan, but it went missing at some point before I got it (likely before it left Japan). The Alto Works apparently has a standard rear swaybar integrated into the rear beam, but I haven't seen how big this is, I suspect tiny. I've been watching the auctions for ages now trying to catch a bargain on a used bar, since they weren't cheap new. I had no luck, but by chance I was having a nosy over on RHDJapan and noticed the exact bar I was looking for was on sale, so jumped at the chance. So, here is my new Cusco 16mm rear swaybar. It's both easy to fit and a real pain. The bolts that hold the end plates to the rear beam have to go under the lower spring pads. Trying to lever the pad up with a trim tool with one hand, whilst using the other hand to push the bolt through, is not my idea of fun It also makes it hard to get the hex key into the bolt to stop it from turning as you tighten the nut. In hindsight, I would probably drop the rear shocks off and lower the rear beam until there is no pressure on the spring and just lift the pads up. I got there in the end though, and the bar fits nicely. As soon as I started the car I noticed a rather large issue; the pipe before the rear muffler was knocking on the swaybar end plate, badly. Doing some research, it seems this is a common thing and the first thing to try is flipping the exhaust hanger. I pushed the car up a ramp on one side to give me some extra clearance Mine started on the stock side, albeit it had been raised up above the normal height (possibly for clearance when the car was lowered) Zero clearance I undid the bolt holding the hanger in place and moved the hanger to the other side of the bracket. I then reinstalled the bolt down into the stock hole, which has the captive nut (the visible nut is just a locking nut the previous owner used to secure it to the upper hole, which doesn't have a captive nut) This gave me ample clearance As a bonus, the exhaust is no longer obscured behind the rear bumper As opposed to A quick drive shows that the exhaust is no longer rattling its little head off, so that's a success. I haven't had a decent chance on the twisty roads to test the new swaybar, but already the car seems to corner flatter and feels more confident in corners. I'll take it to work later in the week and hit some twisties and see how it feels. Since the car was already in the garage I took the chance to do a couple of other changes. One was to replace the rear engine mount with a newer genuine part, and a Silkroad insert. The standard Type 1 mounts are known to be softer than the later mounts, so the new part alone should help tighten it up and fitting the inserts should improve it further, without the harshness of solid mounts. New genuine mount, and inserts The inserts fill these gaps Like so. I slathered them in rubber grease and used a mallet to hammer them into the mount. The inserts are a flexible polyurethane. Interestingly the inserts stick out on both sides of the mount Here's the old mount in place. I first tried to remove the bolt that goes through the small end of the mount and soon realised that no, it doesn't fit The solution was to take the bracket off the gearbox There's a little plastic cover over the hole in the subframe the big end of the mount lives in. This is held in place with a clip on each end, obscured by the swaybar I don't know if it's because of the bigger swaybar, or if it's an issue with the stock one too, but there was no way the mount would slip out passed the bar. I ended up having to undo both swaybar links, and unbolt one end of the D bushes that mount the bar to the subframe, so I could lift the bar up high enough to slip the mount out It turns out the previous owner had given stiffening the stock mount a go at some point. He had slipped some rubber sheets into the gaps and then slathered the whole thing in.. something. Glue maybe? It didn't really help, there was heaps of movement in the mount I slipped the new improved mount in, bolted it all back into place and reinstalled the swaybar. Since the links were off, and I had new ones (because I had previously noticed that the old ones were stuffed), I replaced those too. Unfortunately the nut on one of them was stuck and someone had stripped out the hex in the balljoint (not me) So out came the spinny death wheel, which made quick work of it. And the new links went in with no issue. I did have to source a new nut from my stash though, as genuine links don't come with new nuts (!). With everything tightened up, and the wheels back on, it was test drive time. Immediately you could notice the mount was stiffer. At startup and idle there is a noticeable vibration in the cabin. Not horrible (like my Integra with solid mounts), but it's there and causes a couple of small rattles. Once the revs are above idle though, the vibration is gone, and boy does the mount make a difference. There is no backlash in the engine coming off throttle, and gear changes are even more direct (they were already bliss). Everything just feels more solid. I'll live with the vibration, it's just part of having a road going little track toy, but A+ definitely worth doing so far. Finally, one last small change. I finally got the courage to add a third stage to the boost controller. I know from information about what the previous owner did, that the car used to have three settings programmed by CADCARS on the boost controller before it was exported, "comfort mode" - 14.5psi, "circuit mode" - 18psi and "mountain pass mode" - 21psi. Stock boost is 8psi, and that could be achieved by turning the boost controller "off". I've had it set so A is stock 8psi, B is 14.5psi and C wasn't set. Since I was confident the car was happy on 14.5psi, and knowing it previously ran up to 21psi without issue (I'm not going to push it that far), I finally set C to 18psi and holy moly, I thought 14psi was fun! Accelerating through the gears to 100kph is pretty rapid, but the real fun is around town, where you can just rip around like a madman, whilst still under the speed limit. Coming out of corners, second gear, 18psi, with the LSD gripping like crazy, whilst doing 45kph, leaves you with a massive grin. AFRs seem happy, although intake temp does climb pretty quickly, indicating the little spooly boi is getting pretty close to its limits for not just making heat. Thankfully the massive Greddy intercooler recovers quickly and the temps drop back as soon as you're off boost. Right, I think that's about it for now... *opens Yahoo Auctions Japan*
- 81 replies
-
- 19
-
-
-
Tomble's adorable go cart / distraction / Alto Works
kws replied to tomble's topic in Other Projects
Good lord that gets me in the feels, little did I know the horrors happening only a couple of cars behind me. Had I known it sounded like that when running I would've recommended just giving up straight away and not trying pulling to bits in the pits like we did. That engine thought it ugga'd its last dugga that day. -
Having had the 2ZRFE (factory) in a Yaris RS, its a very uninspiring motor stock. It had a thick wad of torque in the mid range, but other than that it didn't like to rev and felt kind of flat. No doubt boost will fix it. It's getting on a bit now but i think the Mazda L series (2.0L LF-VE and the bigger 2.3L L3-VE) would be a good engine to swap into something RWD. Already comes RWD configured in the NC MX5 (2L) but the 2.3 can be converted to RWD too. I liked my NC a lot, and the engine and gearbox in it were great. Turbo kits are available, albeit expensive.