shrike
-
Posts
1,370 -
Joined
-
Last visited
Everything posted by shrike
-
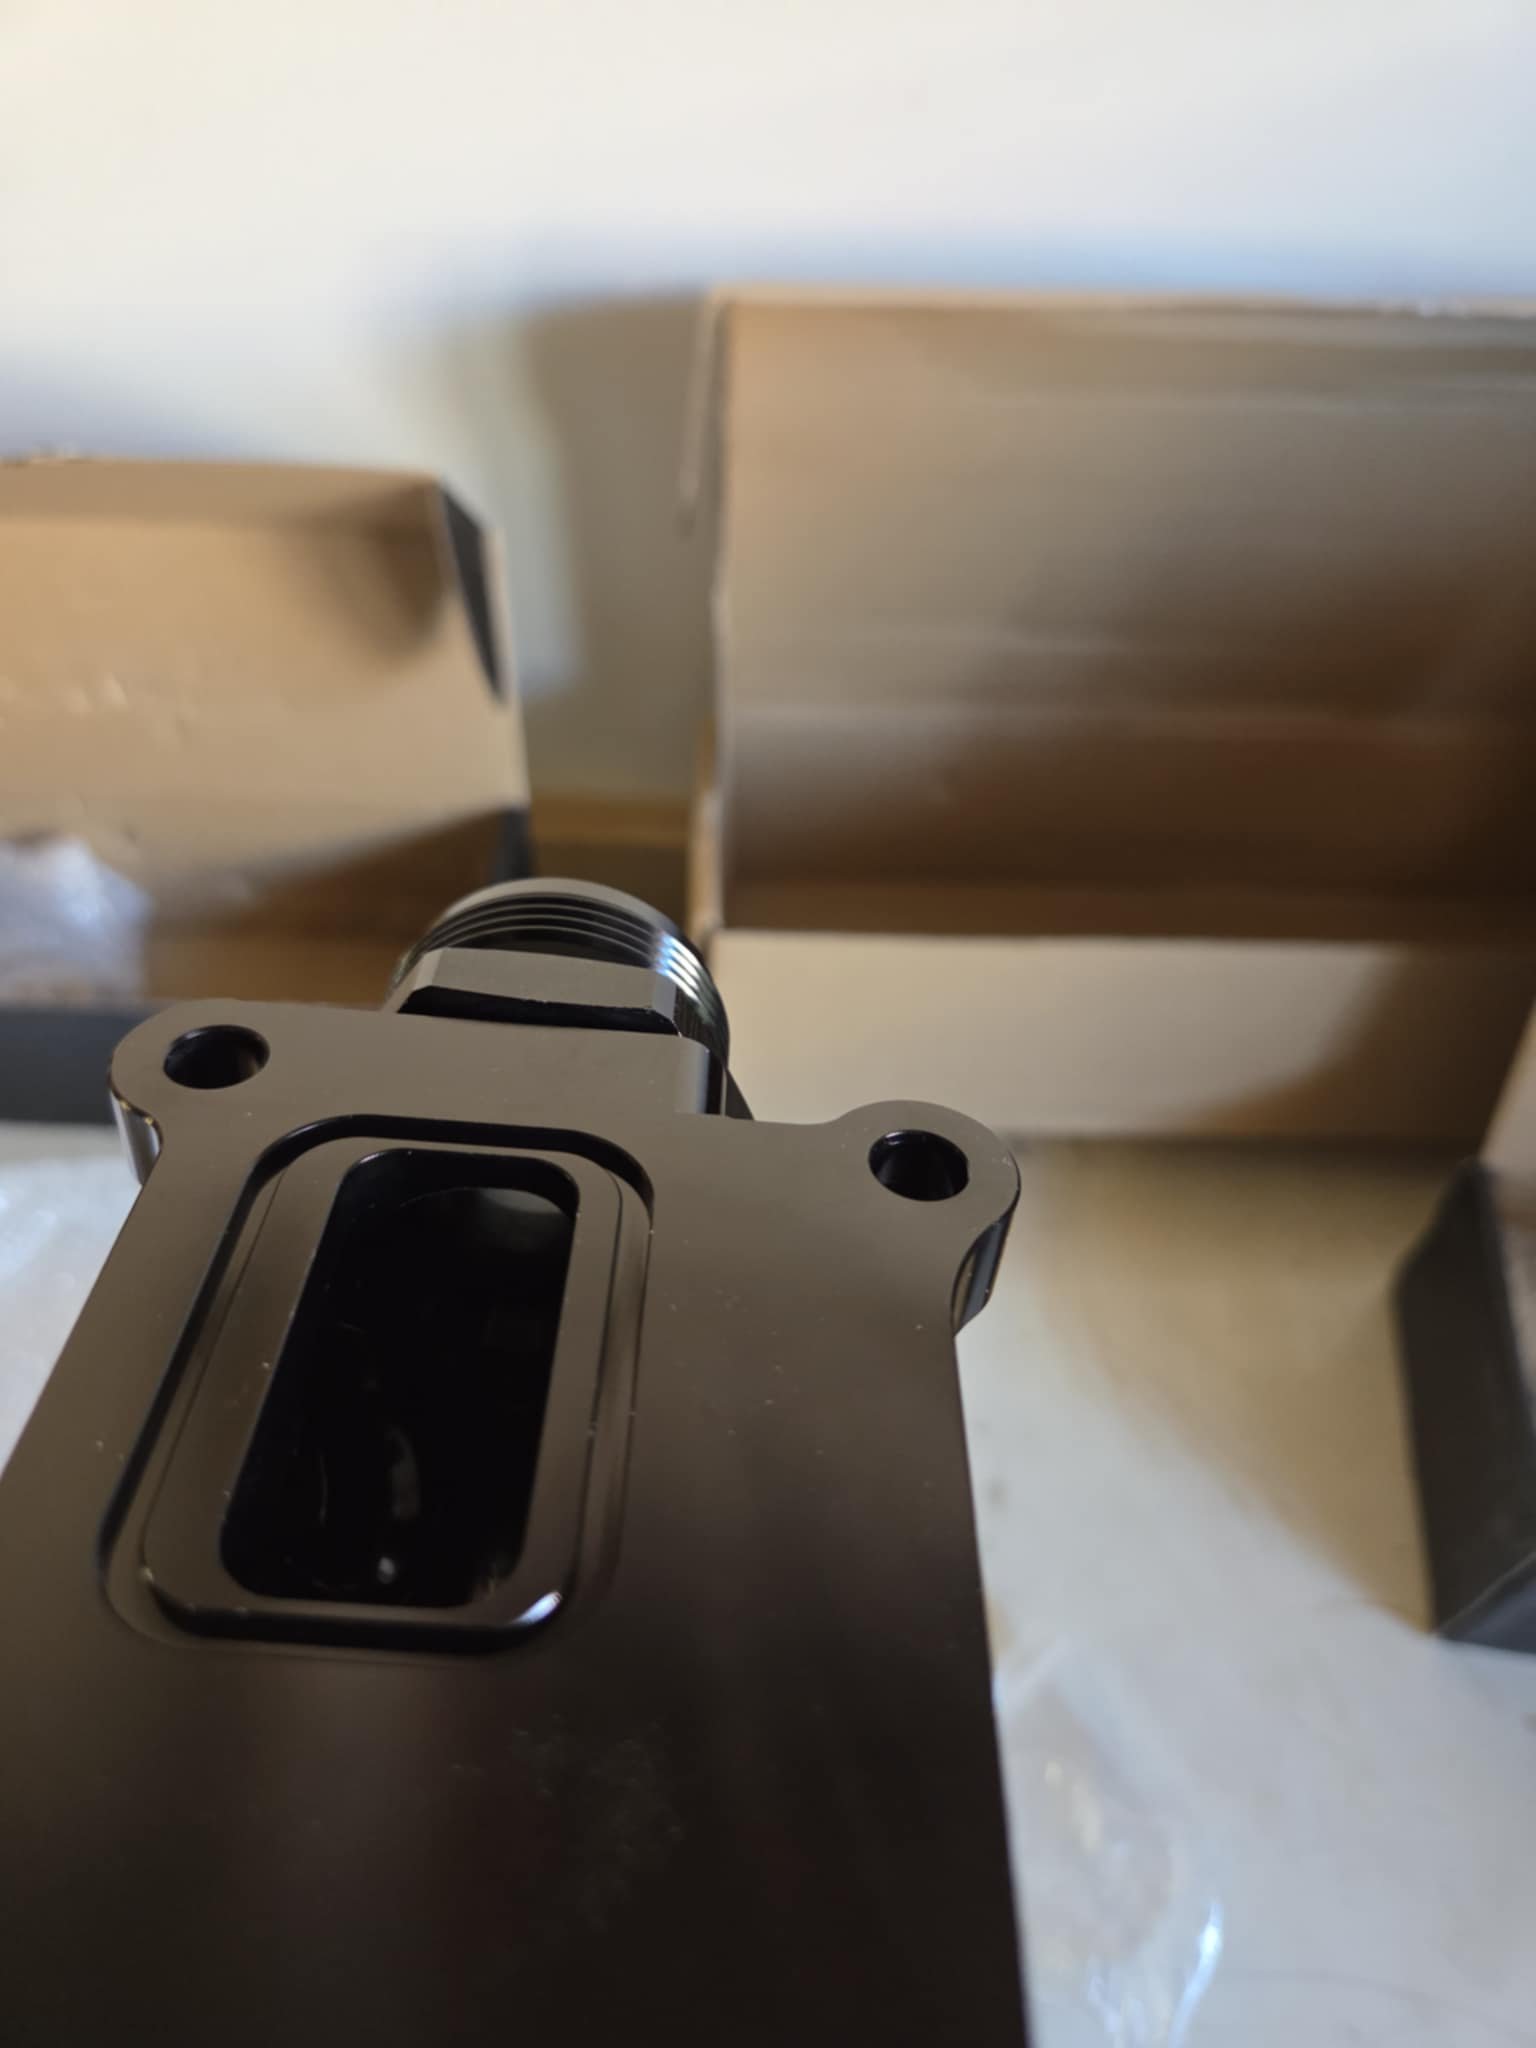
China relocation kit This is the one im getting Edit seems it uses "dowty seals" will see what its like when I get it Ill be probably be running Banjo bolts on the block adapter but will see how much clearance I need I like that the remote oil filter mount has a thermostat as ill plumb the oil cooler into it Its also got a couple of 1/8" NPT threads so I can run a 2nd Bosch sensor or something else I like Will probably use the 1/8" npt port on the block adapter for turbo oil feed (-3 or -4an tbc) Oil pressure switch has another location on the block so ill swap that with an adapter for a bosch pressure & temp sensor
-
@Rhyscarwhich Mocal kit you been looking at? HEL seem to do a few nice parts as well, ive also been looking at the Susa gear. Swaping remote filter mounts hopefully shouldn't cause to many changes? Ive heard the MRP branded kit is ok as well (not sure if Barry is still stocking tho) Also if you have a good quality sandwich plate kicking around you could get a sandwich plate cap and then use that as your remote mount (ebay example below) Sandwich plate cap Ive got a Chinese thermostatic kit on the way but im happy to do some work to make it more fit for purpose as needed, will post some pics when I get it. Seen a few people do mods for different temps as well But it should bolt on and if I have to machine it etc ive got the time. Fully understand finding time with young kits can be challenging.
-
@Rhyscarwhats the reason for the oring issue?
-

Shrikes Will it ever be finished Toyota Levin AE111 AWD
shrike replied to shrike's topic in Projects and Build Ups
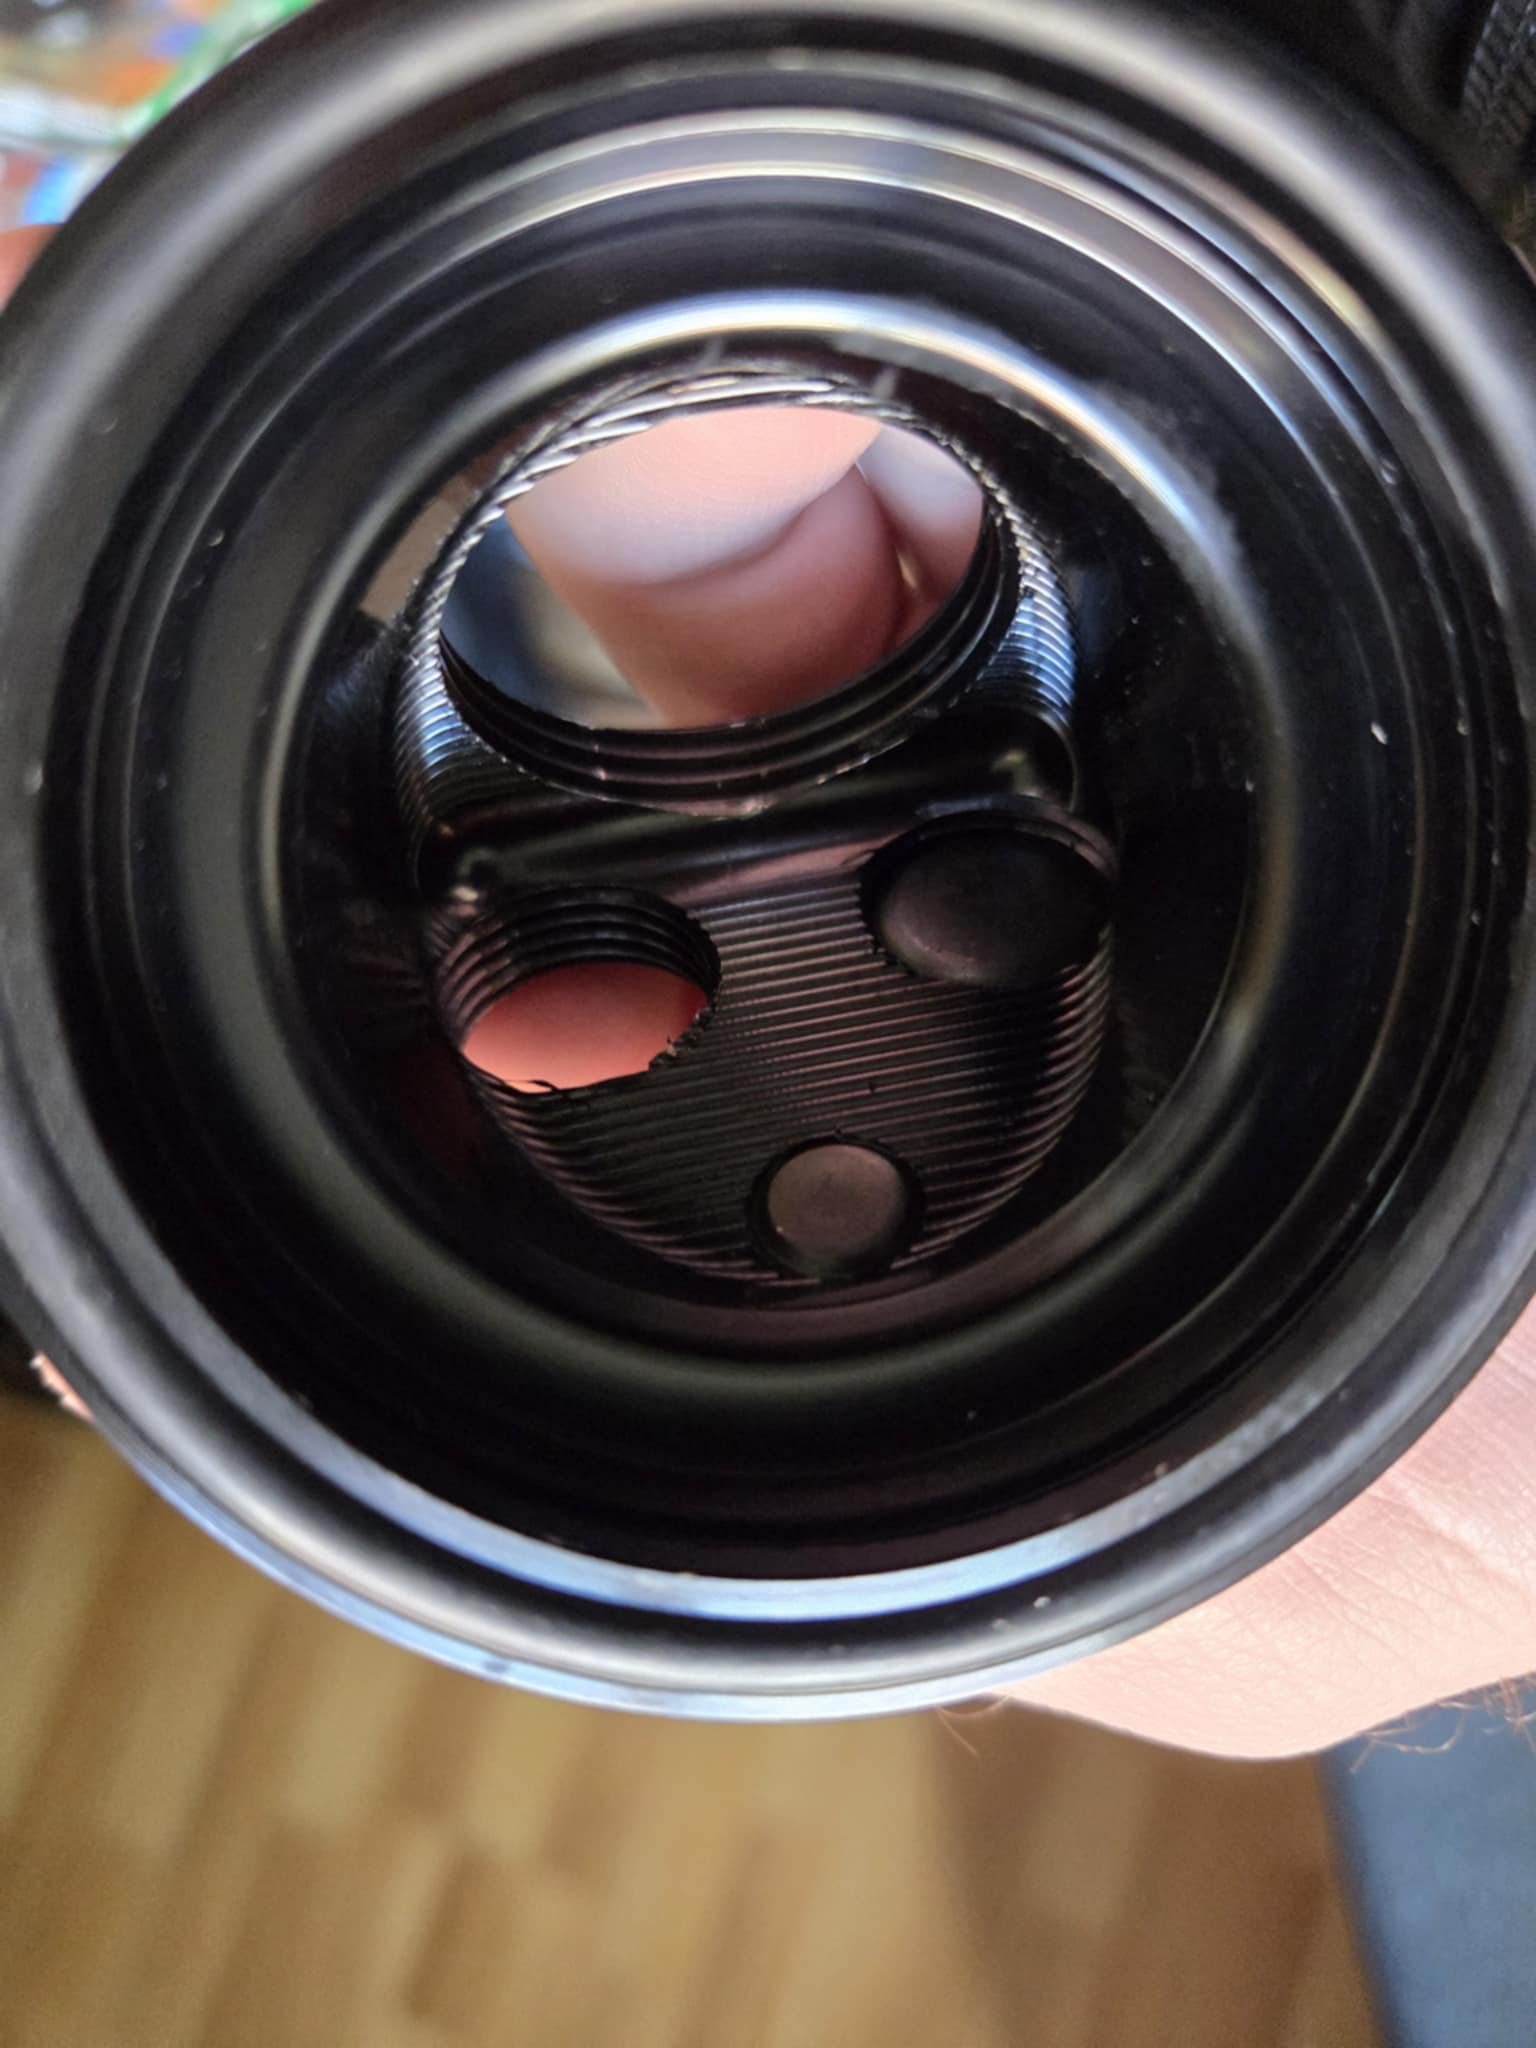
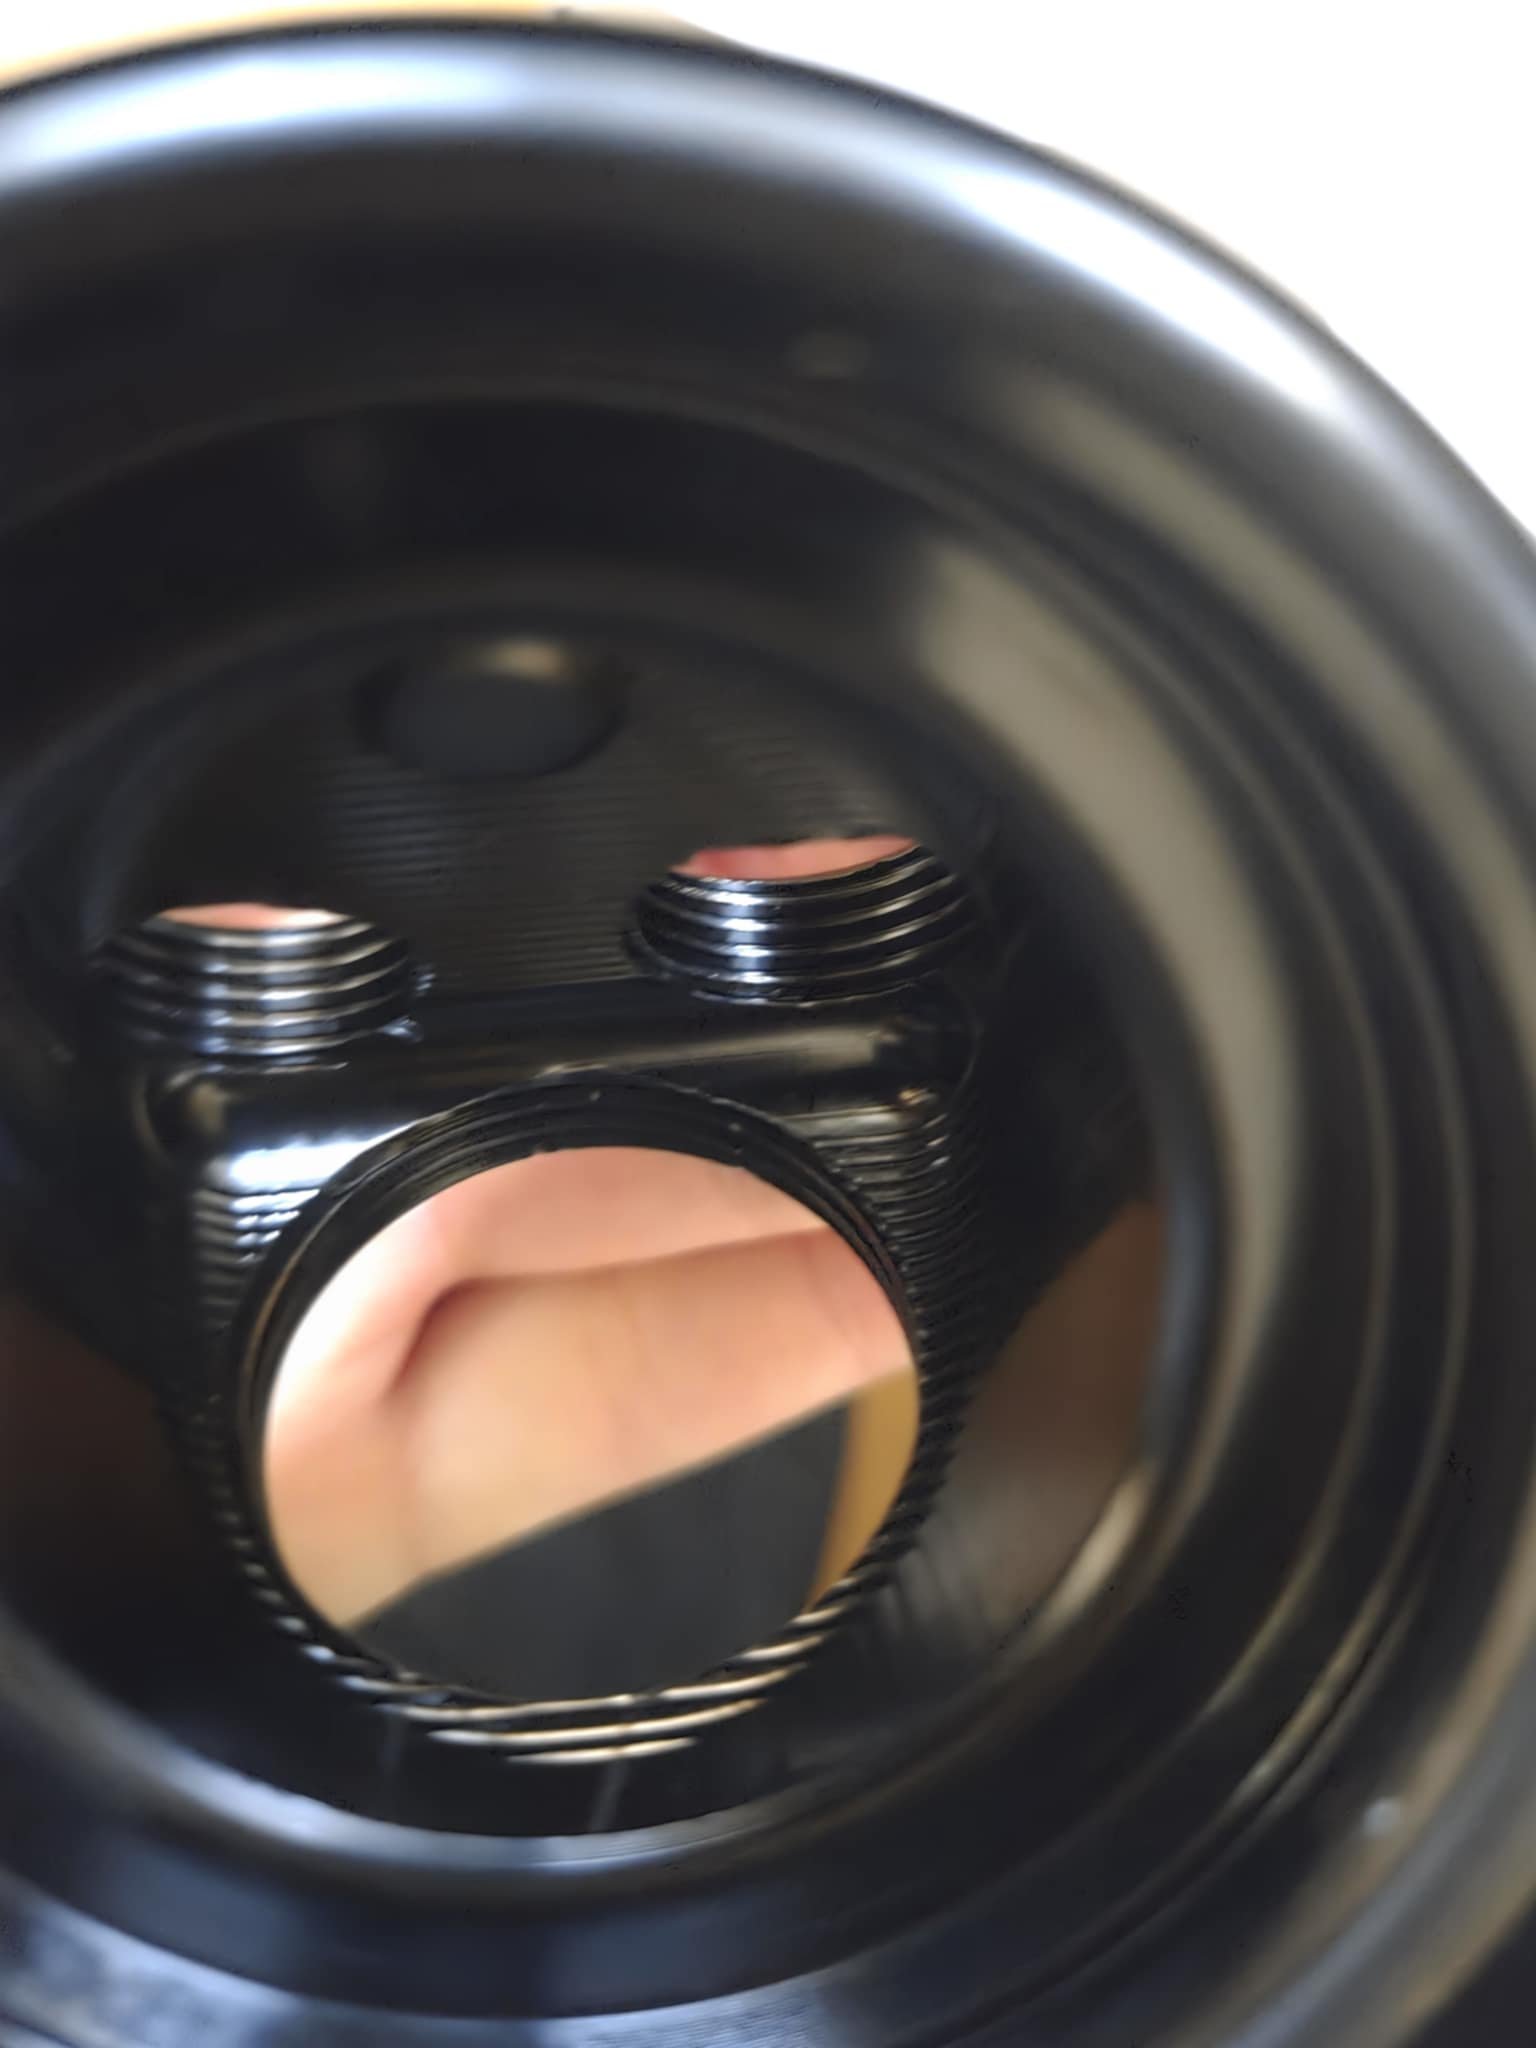
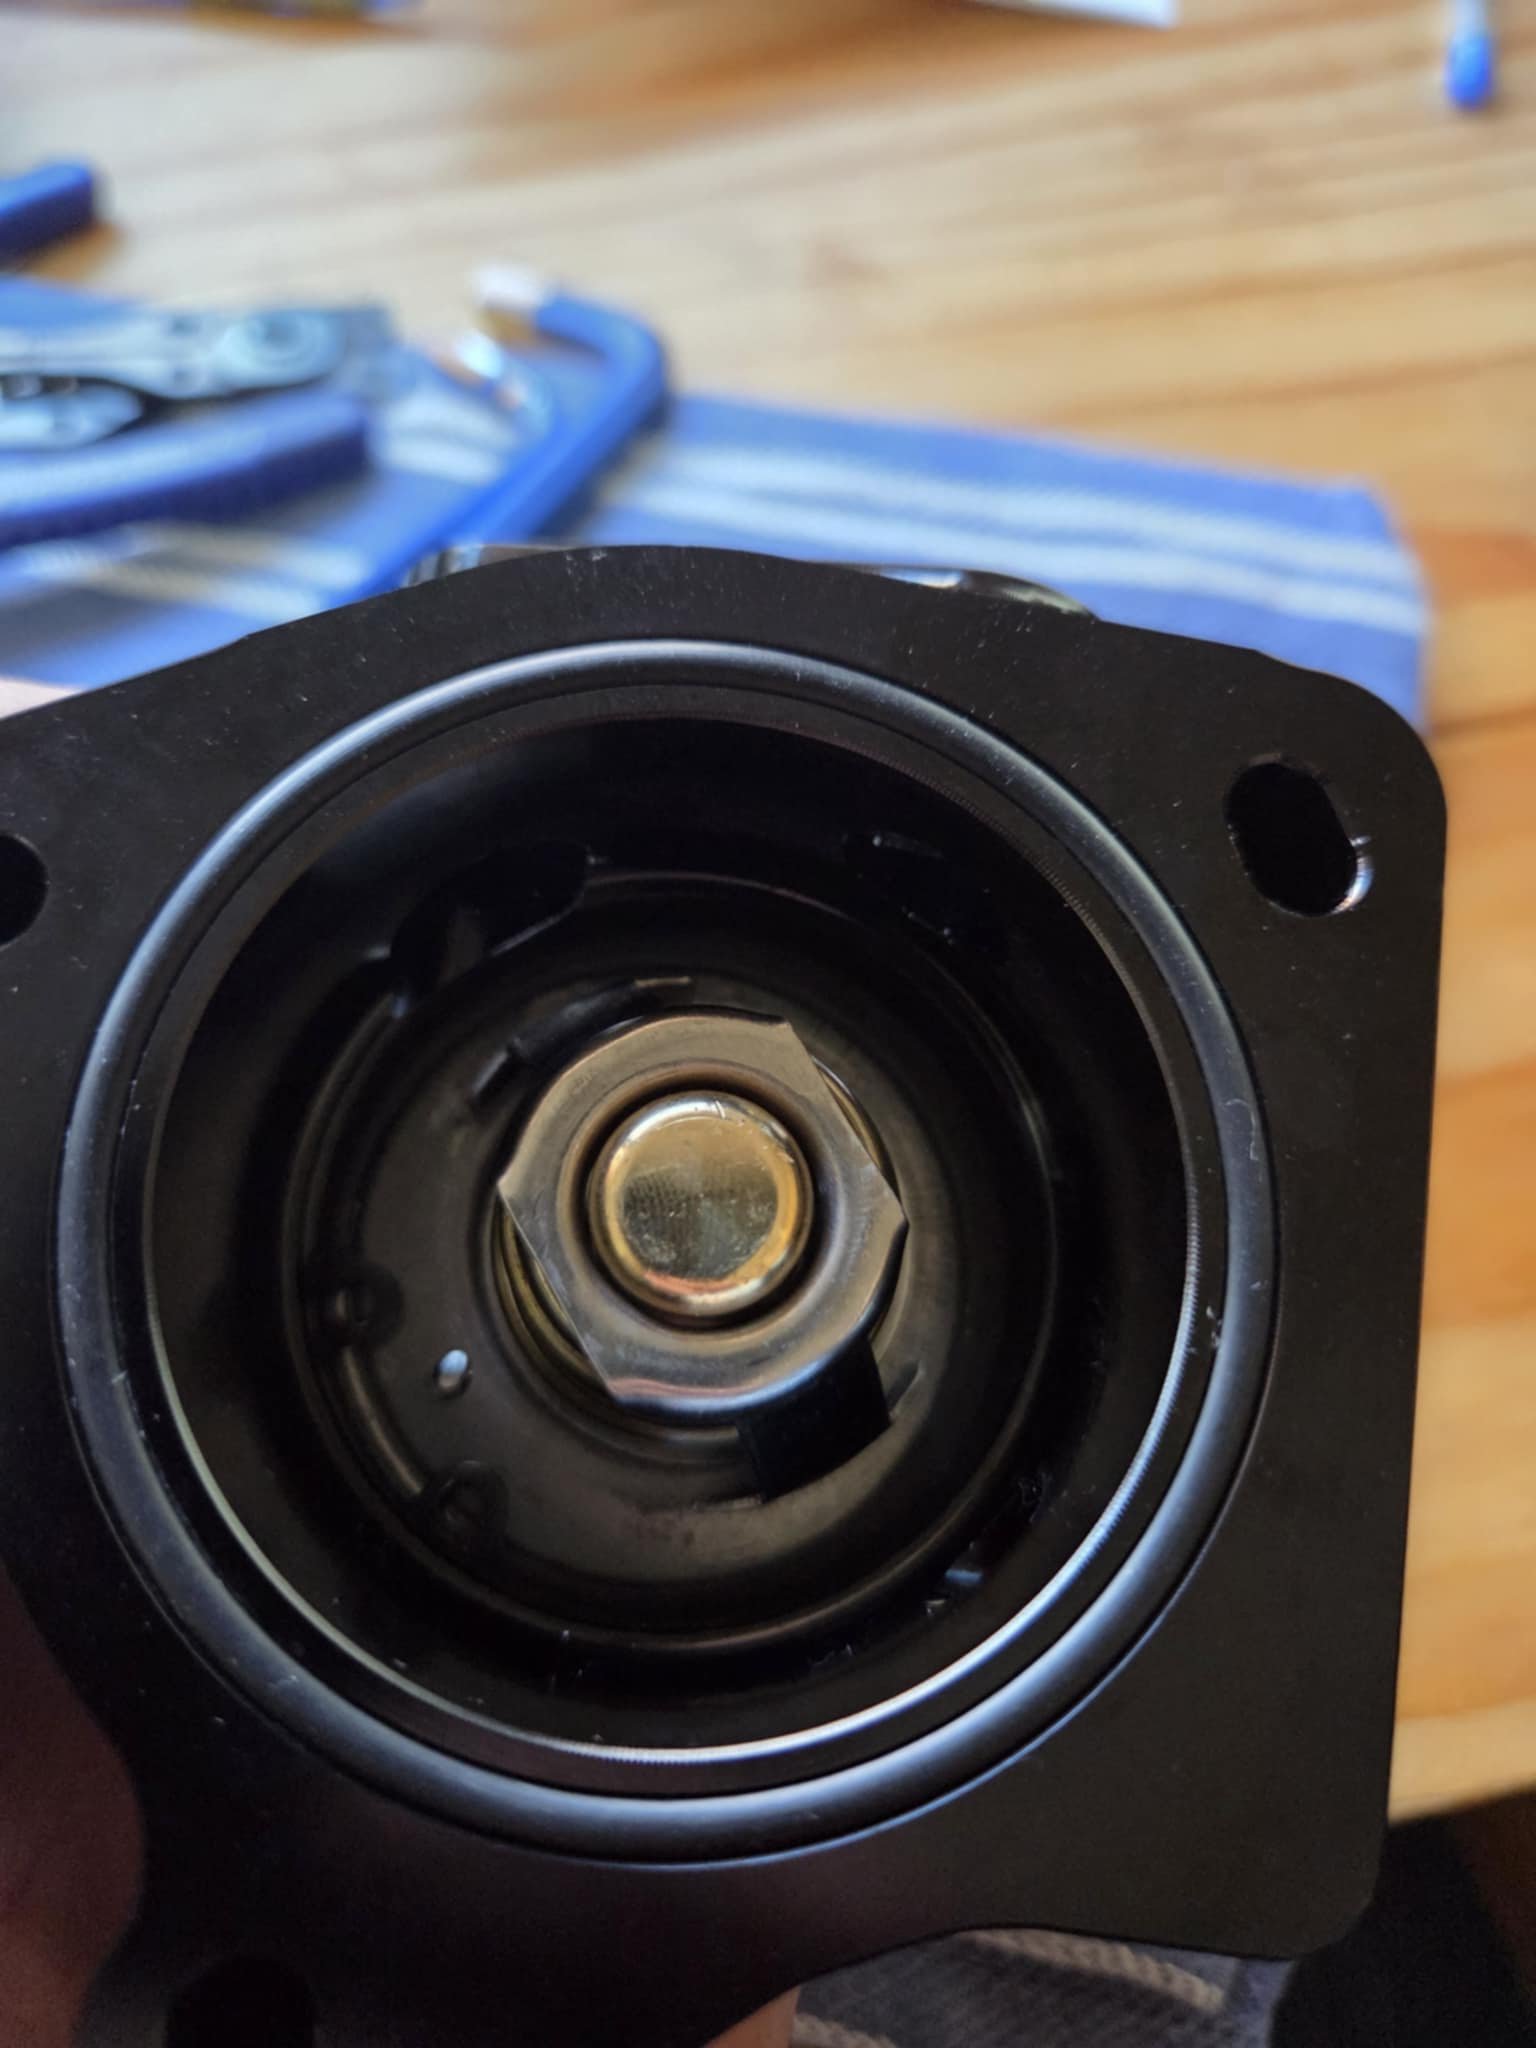
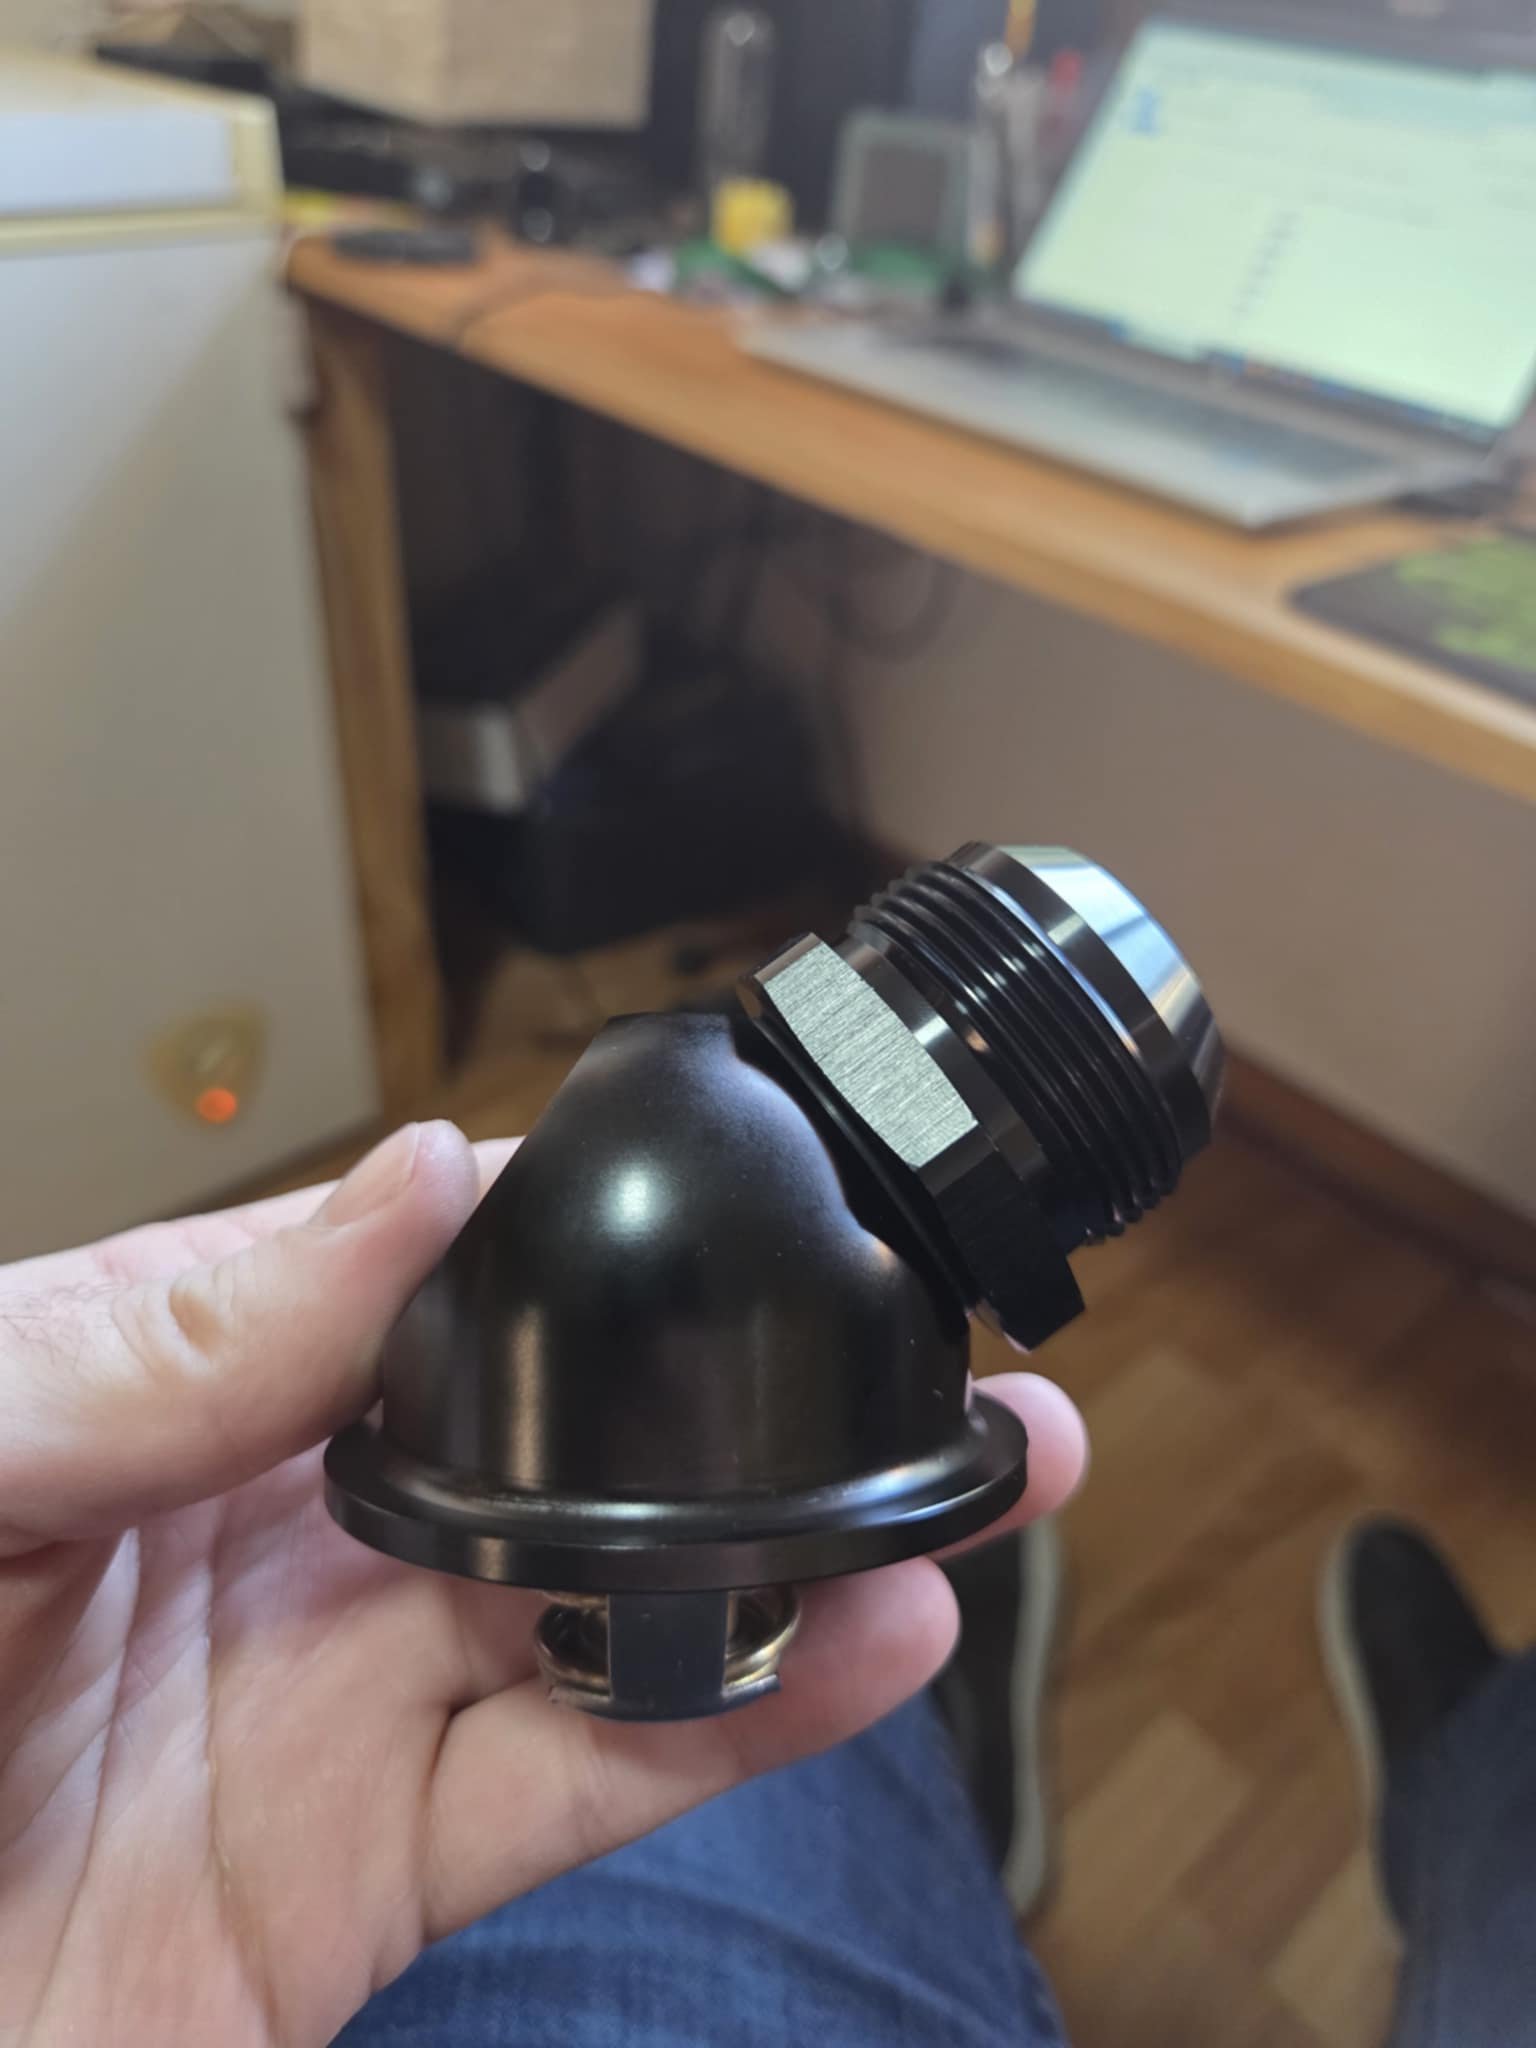
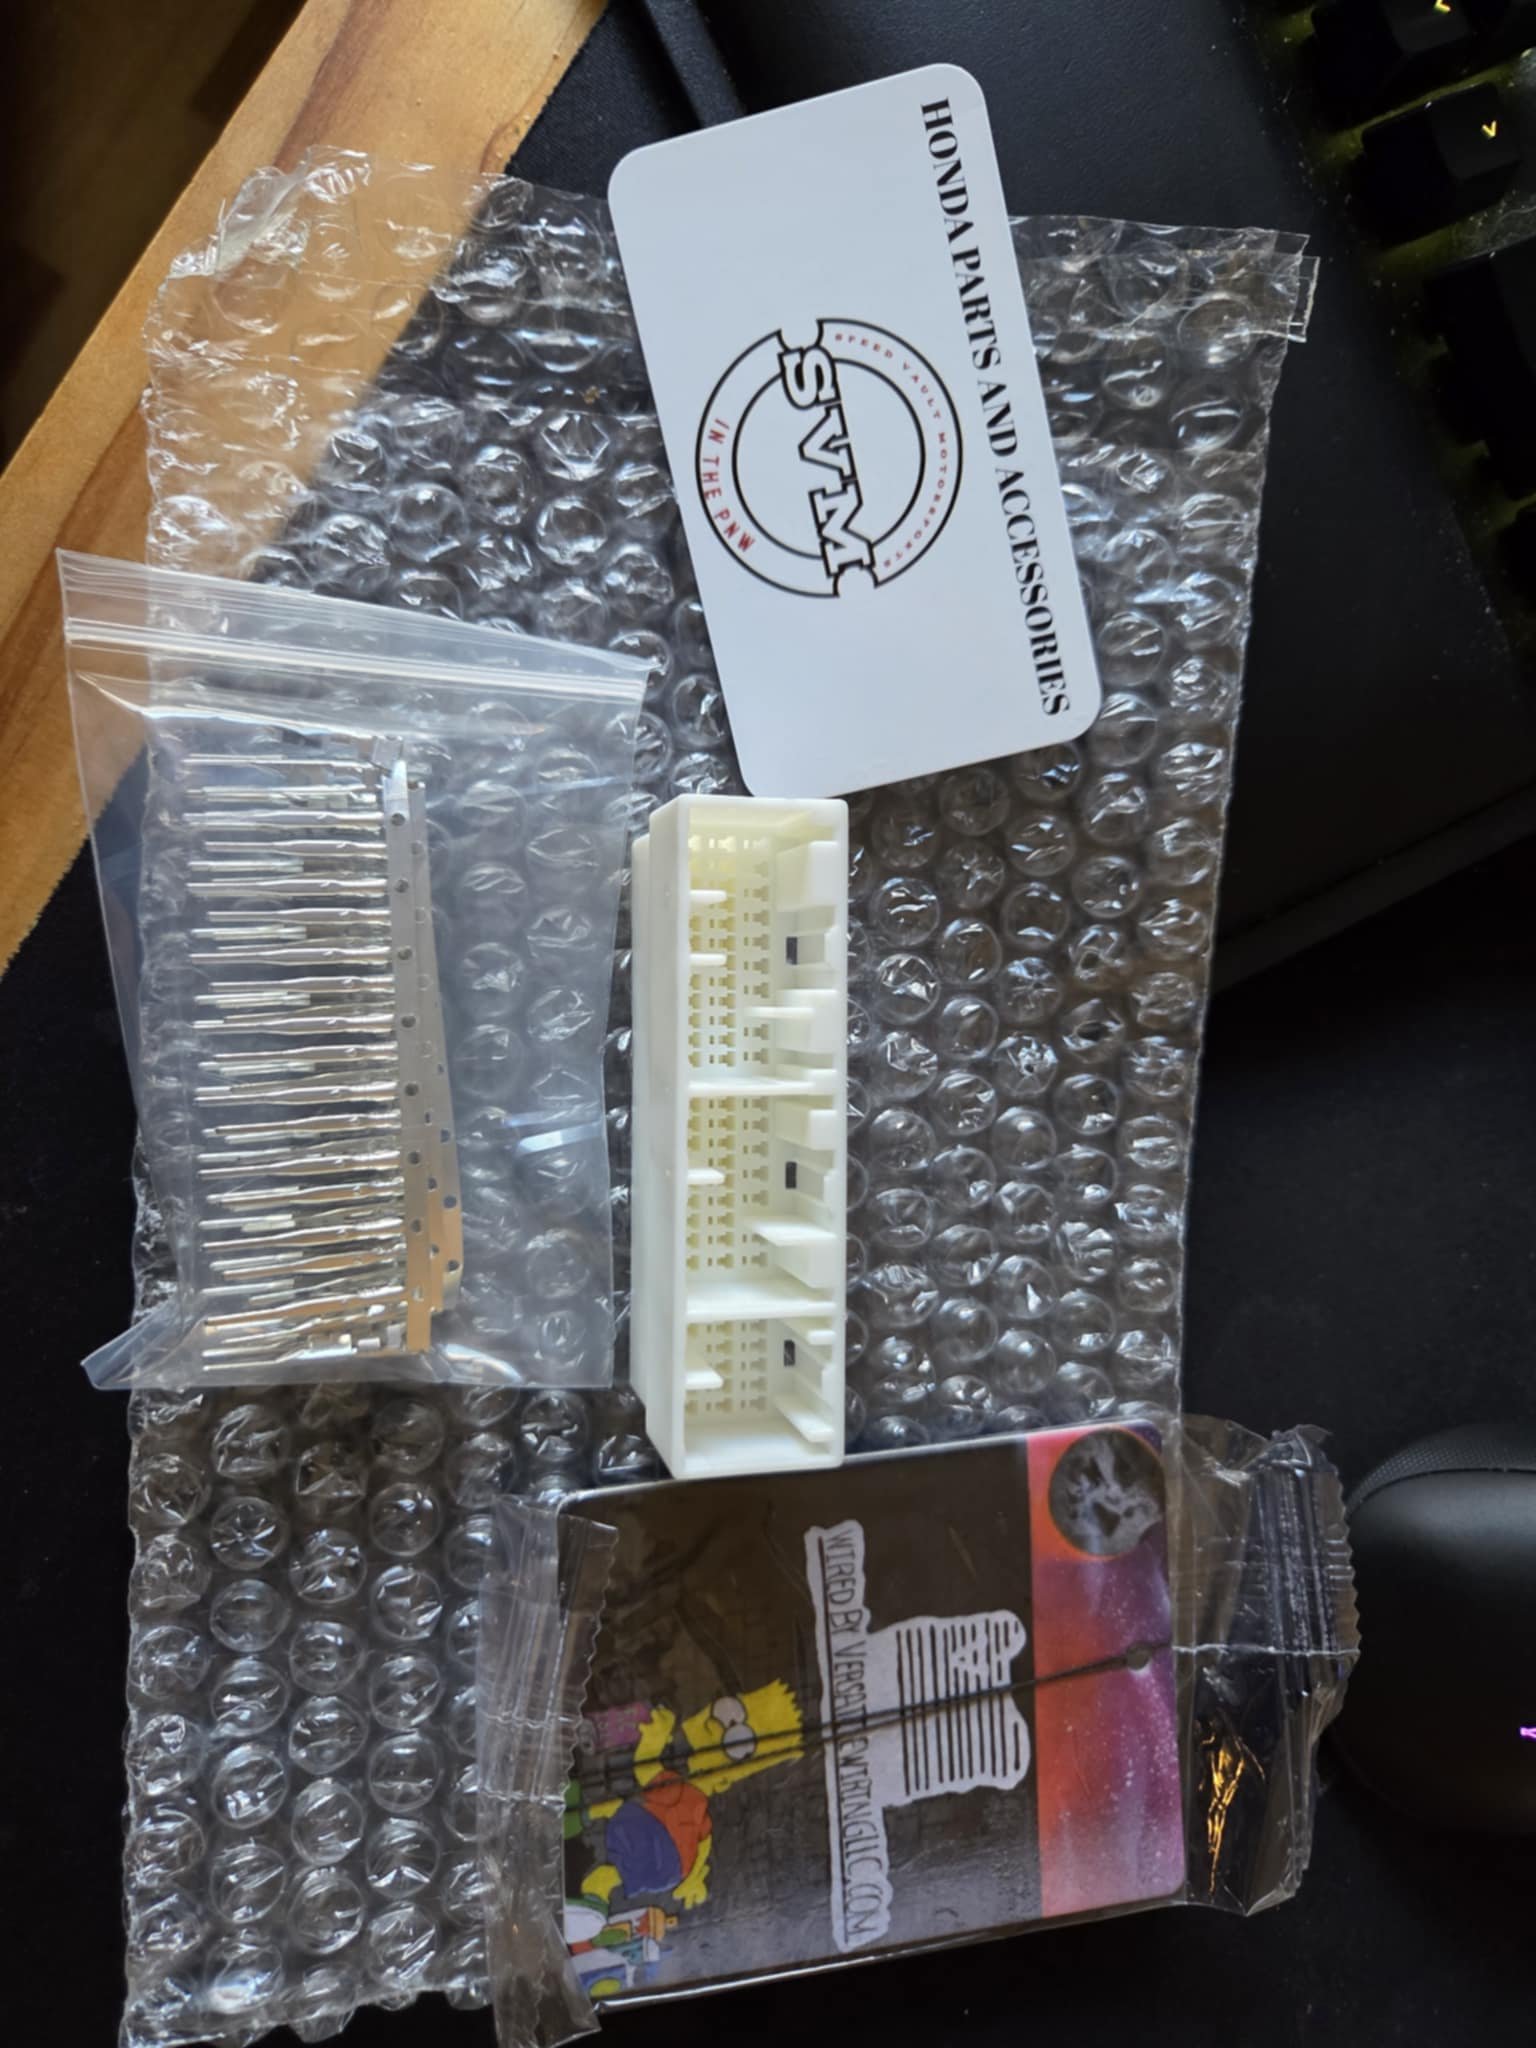
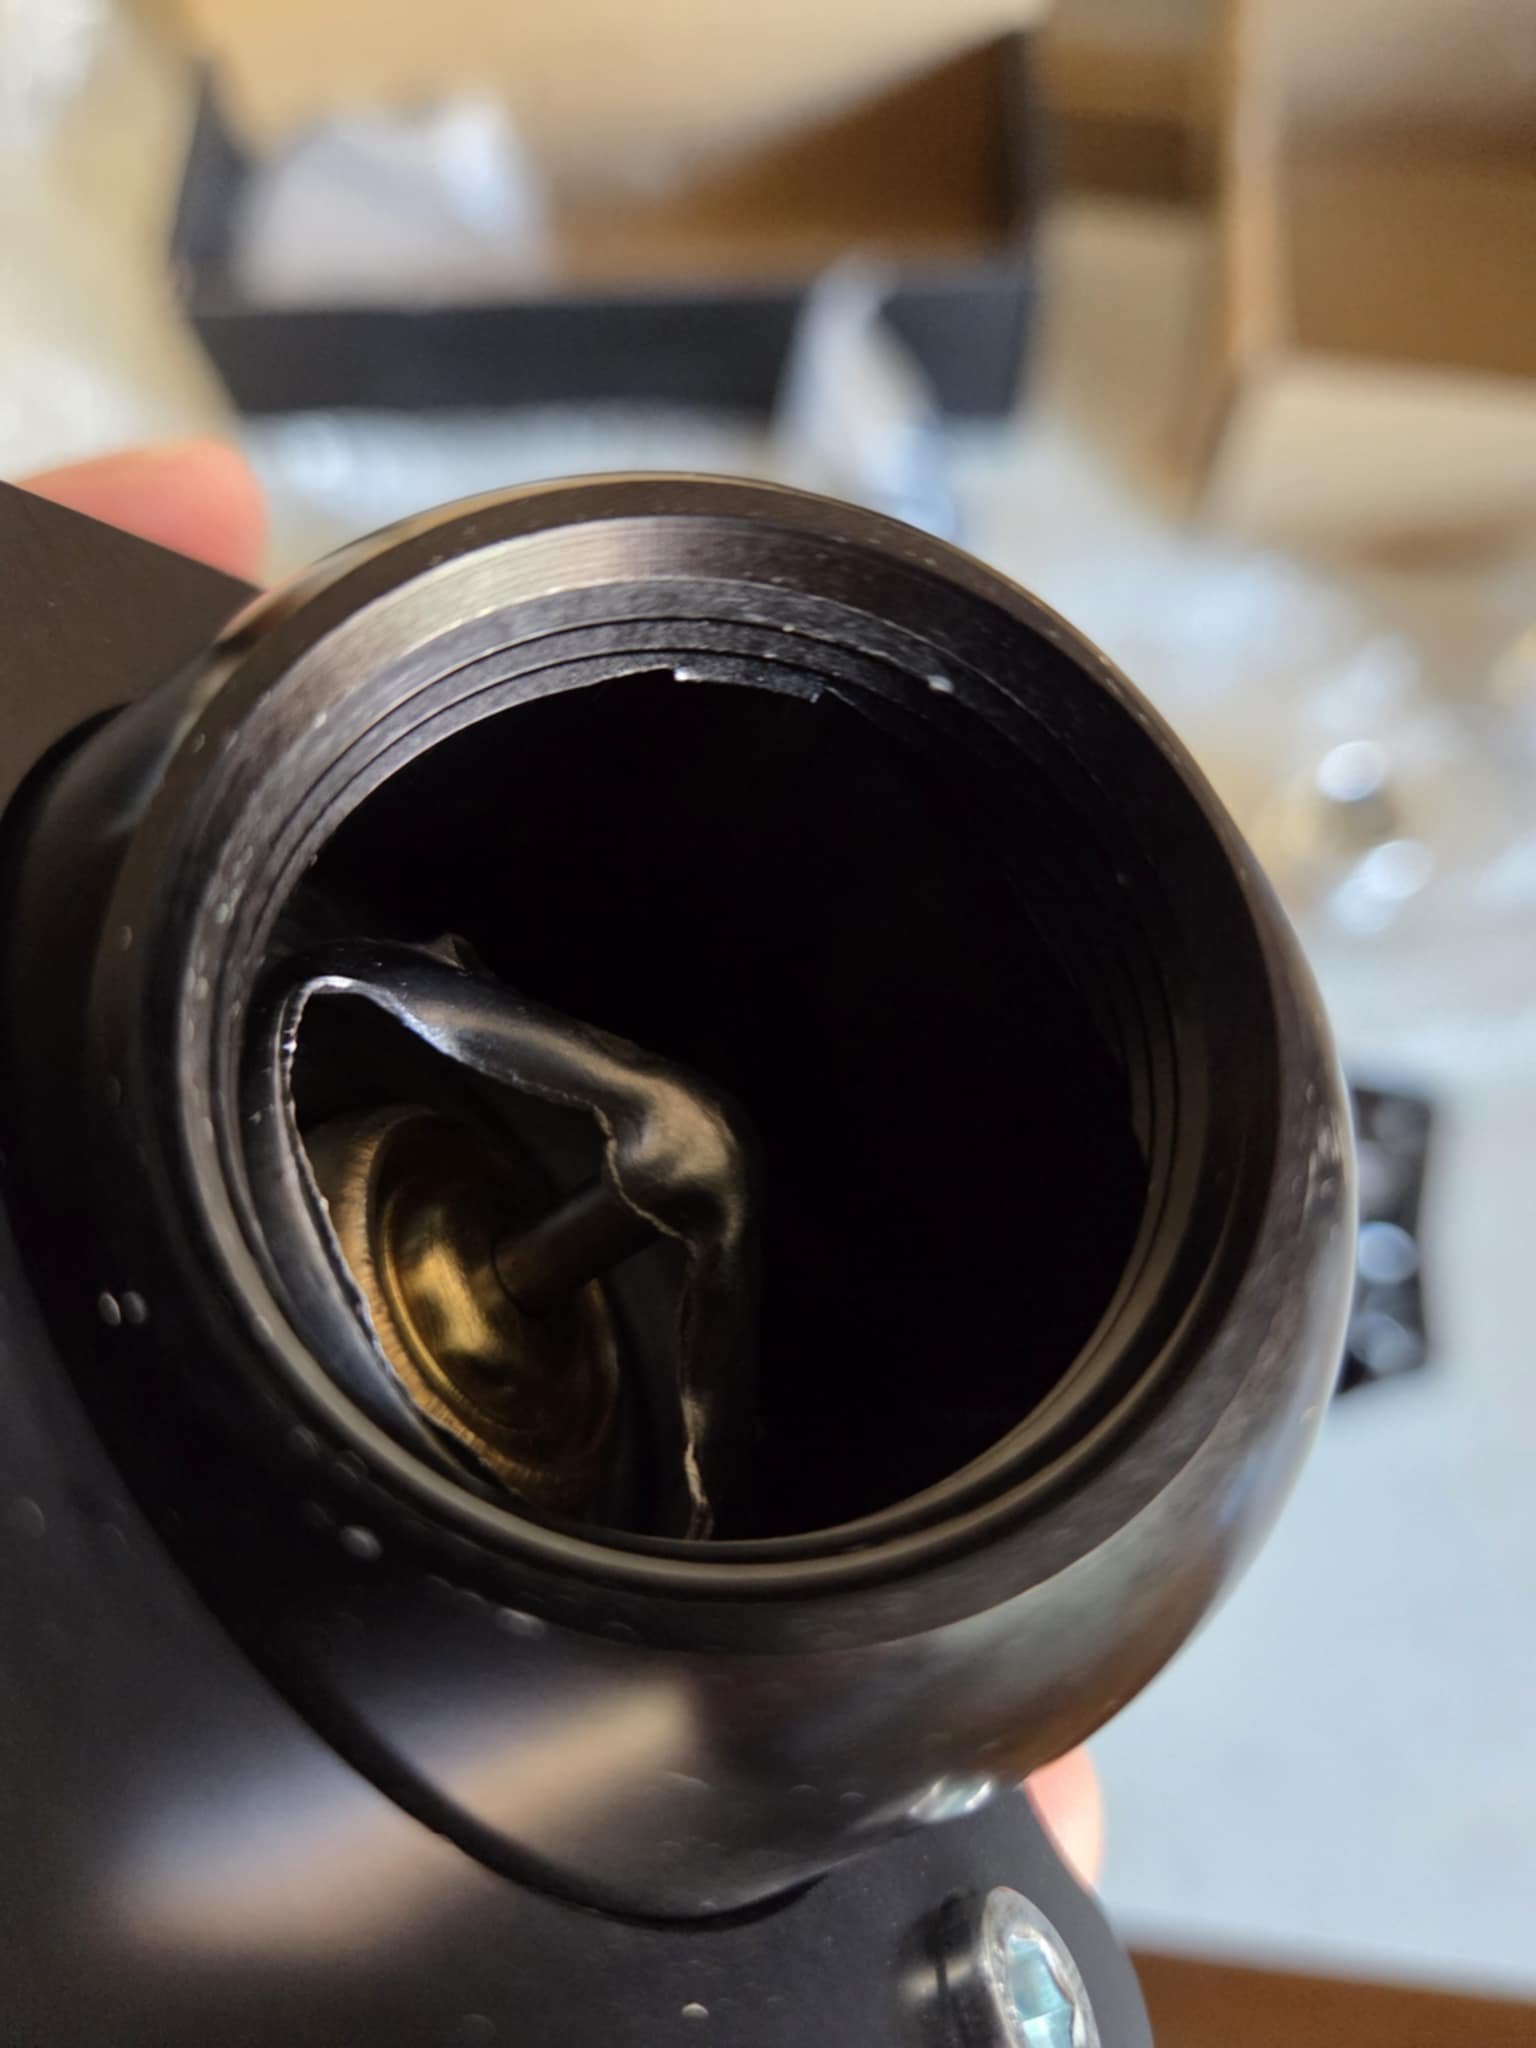
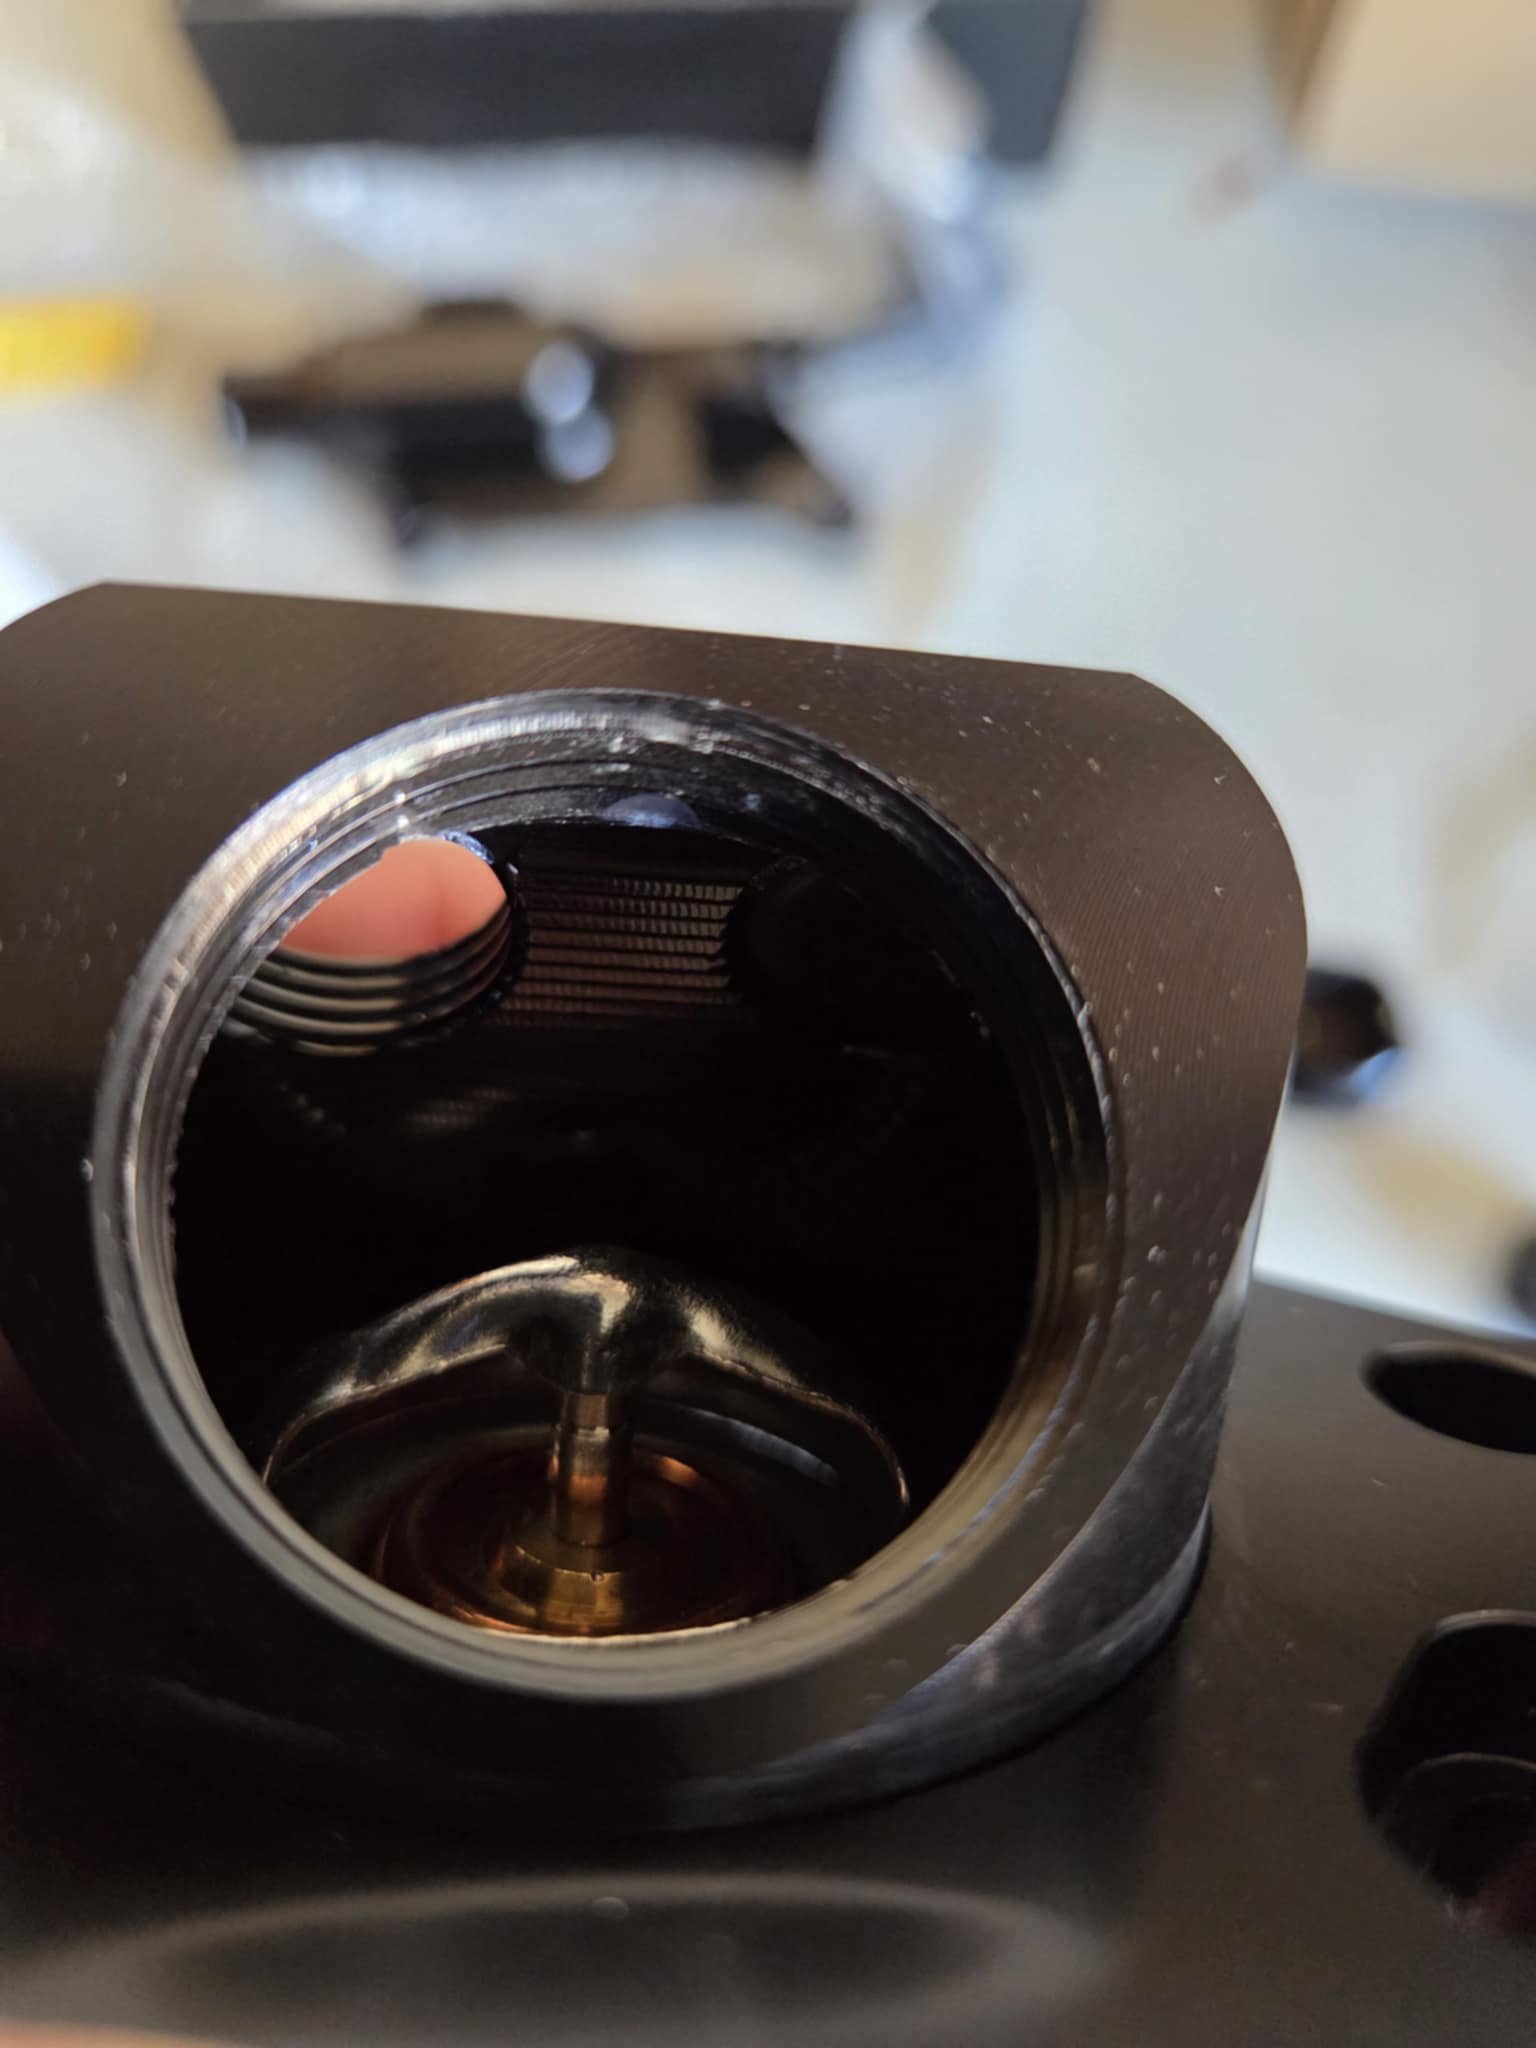
Tracked down a tap for the threads if I need to buy one 1-5/16-12 Tap but thought id have a look if I could clean it up without first Couldn't find my circlip pliers so had to do a Bunnings run This is the worse housing off the two and tbh I probably won't run it as I prefer the design of the other one better (so will go into the spares pile and probably end up on a spare K24) Ran my debur tool over it and got all the loose metal'swaf off and its all cleaned up, machining marks inside are interesting Fitting it came with threads the whole way through but my fitting doesn't, there is definitely tolerance differences so would have to shorten my ORB fittings to run them This kit came with an 82C thermostat One which ill use the wasn't as bad and I just cleaned all the loose swaf off with my debur tool and de-sharpened some edges This one also works with my ORB -16AN to -20AN fittings so happy day, it came with a 76C thermostat so I may swap them over. If I have issues with either I can go for a factory thermostat, I think the B series ones fit this housing from memory Also had my K24 ECU plug turn up from the states so I can make a patch harness if I like (god does the air-freshener stink)
-
This is the way :p
-
Shrikes Will it ever be finished Toyota Levin AE111 AWD
shrike replied to shrike's topic in Projects and Build Ups
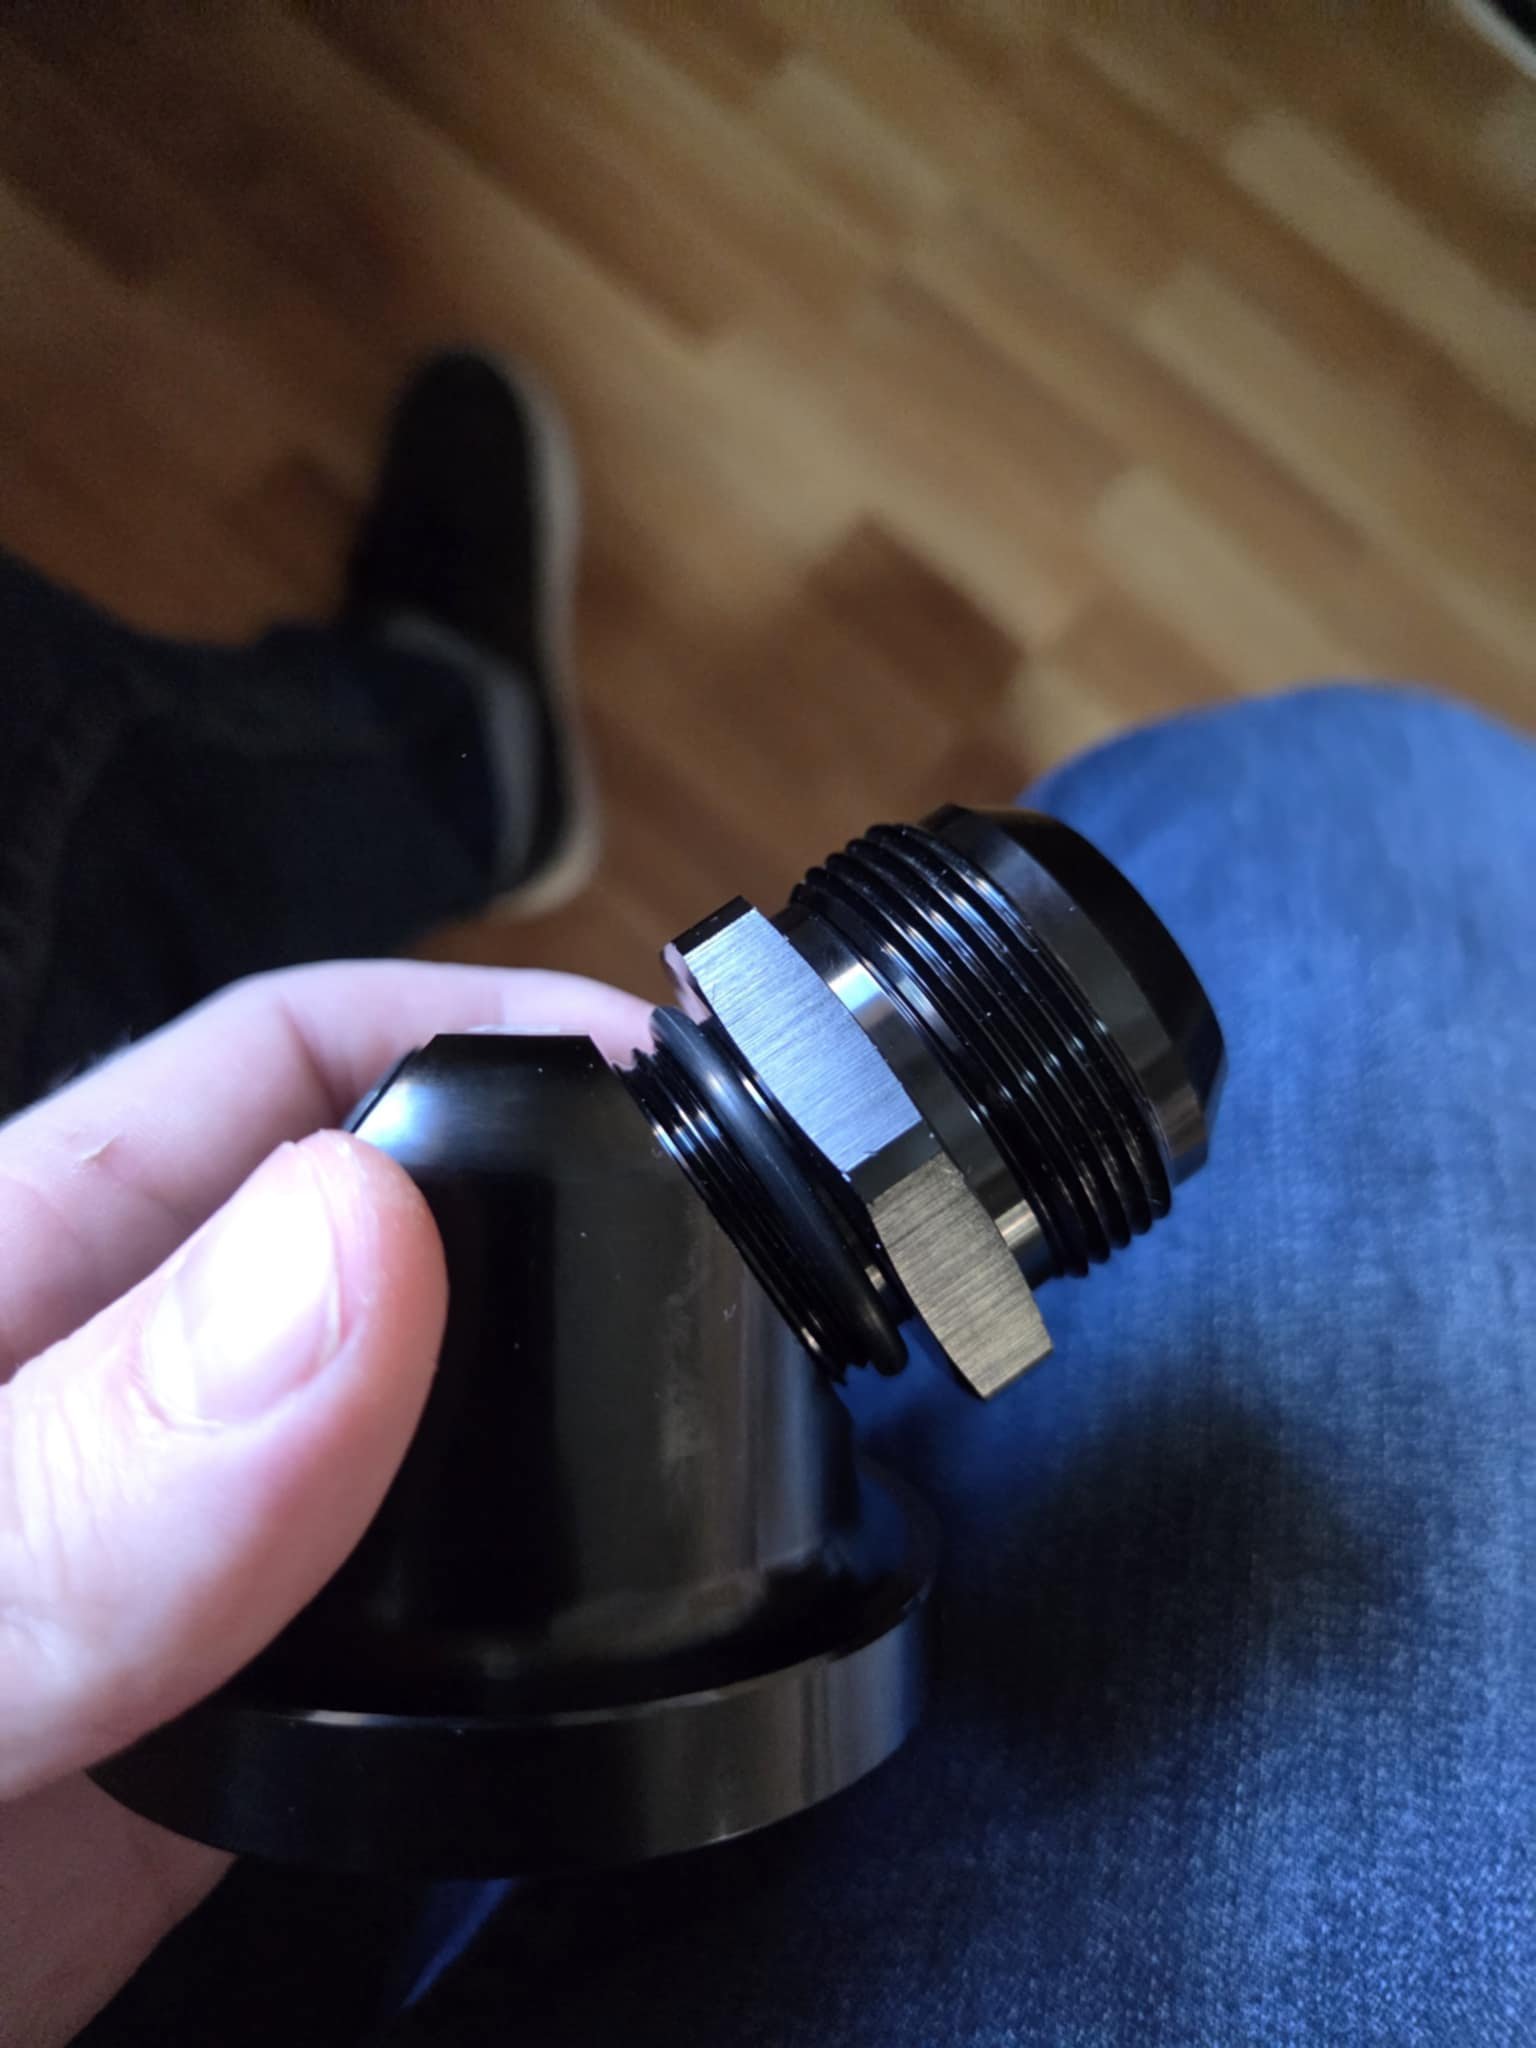
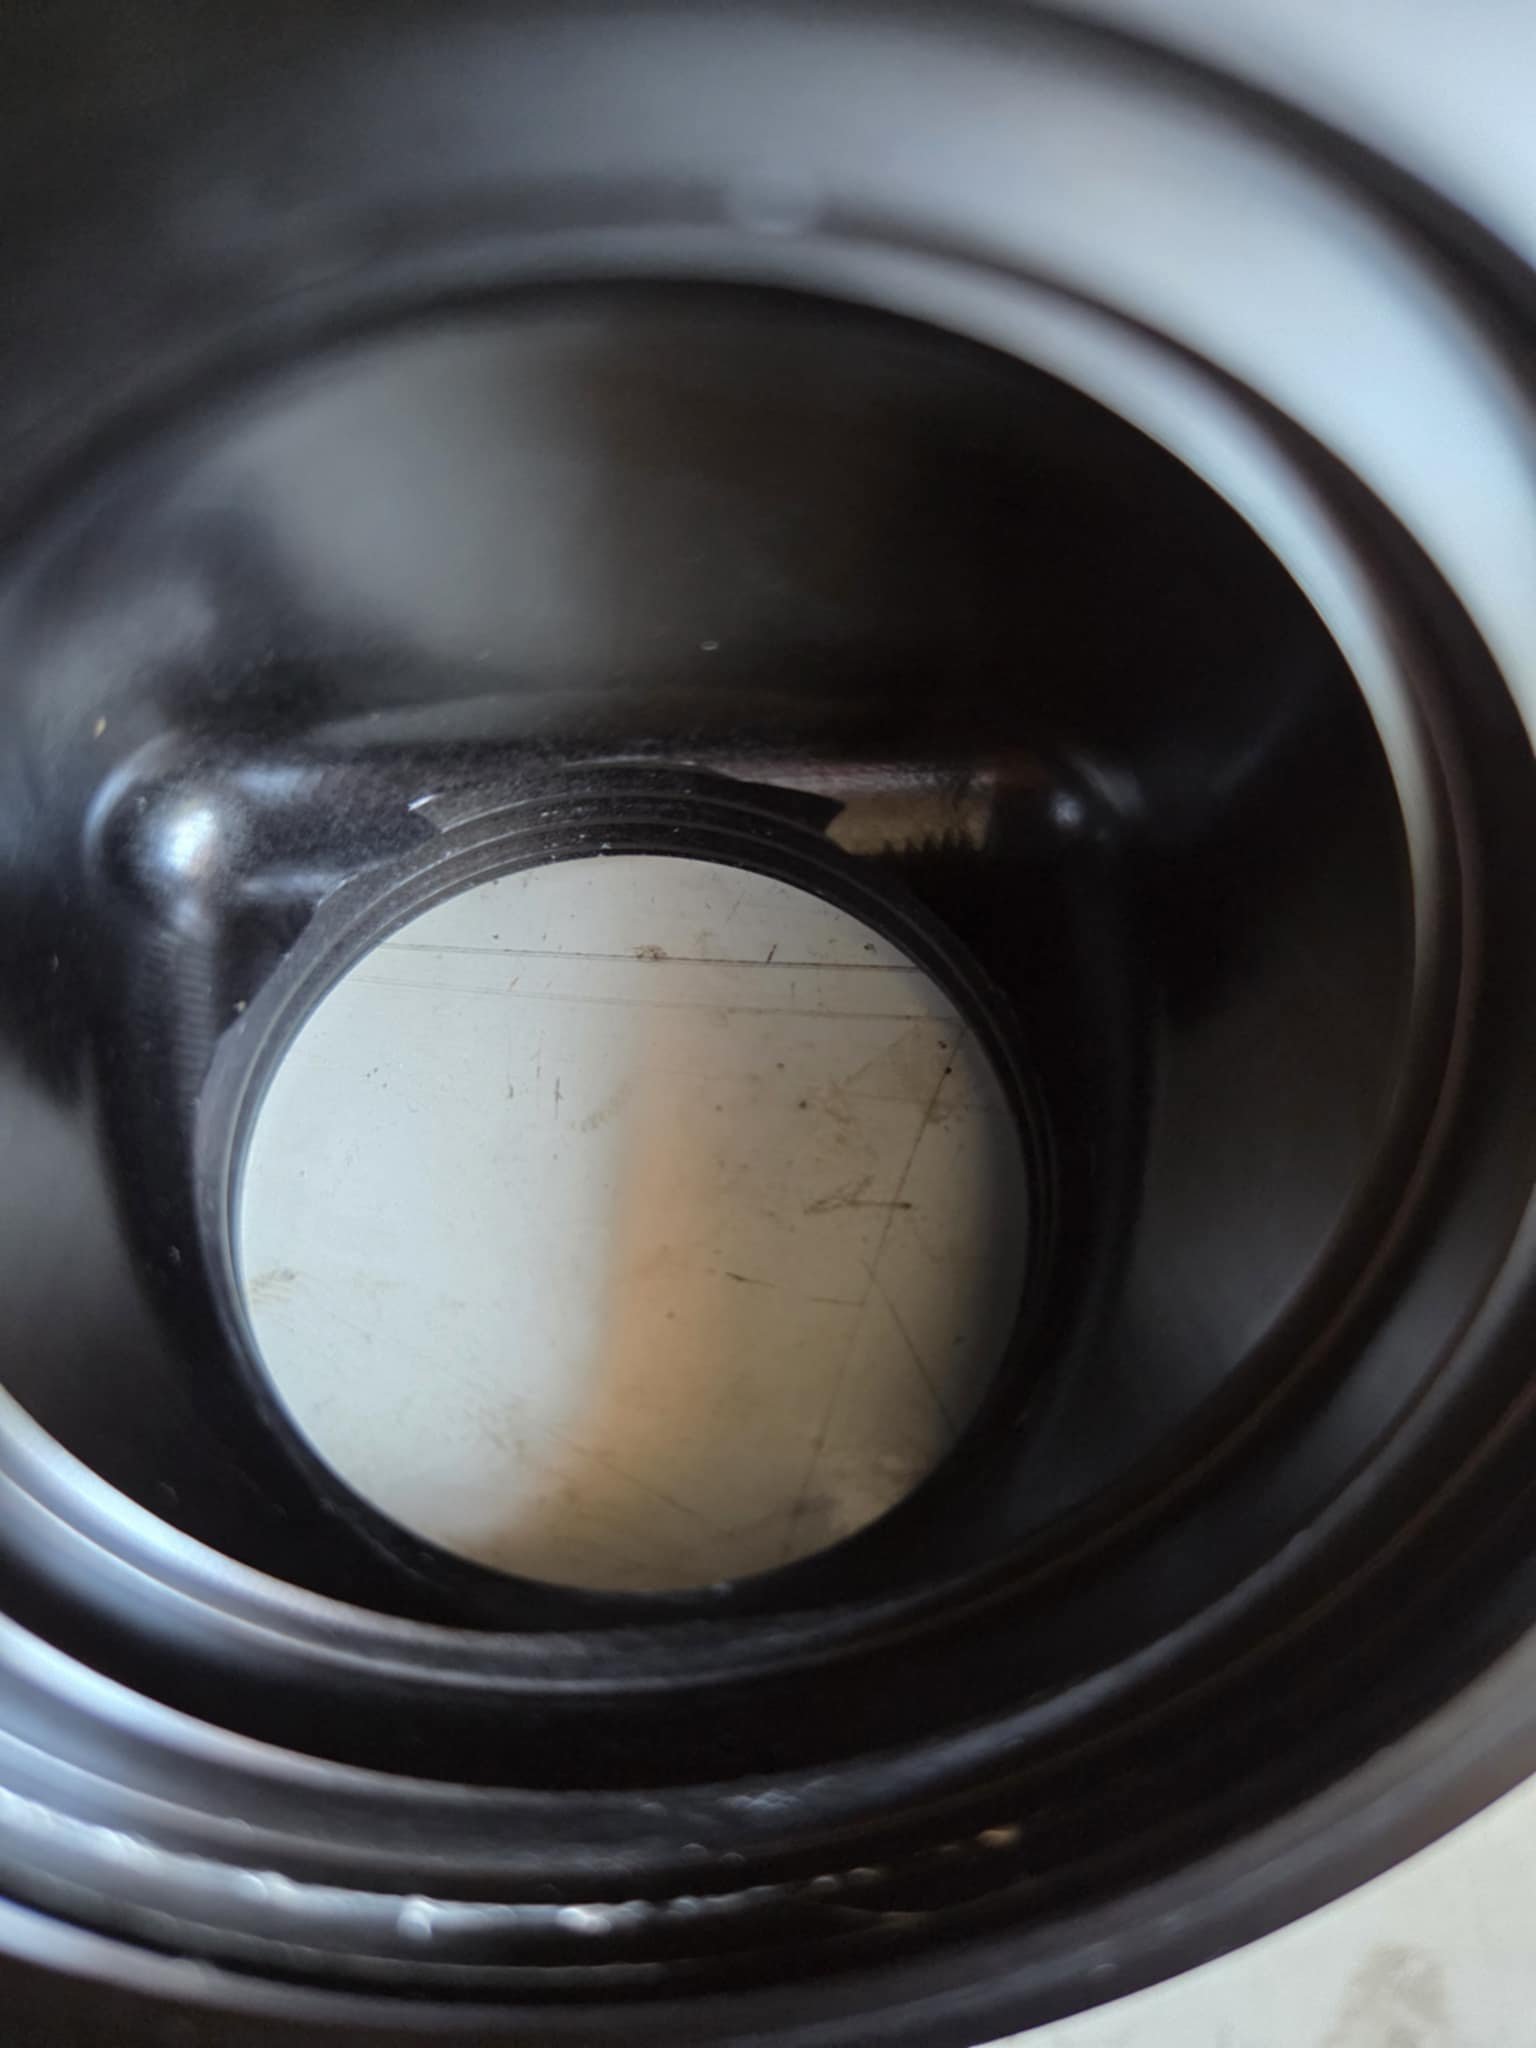
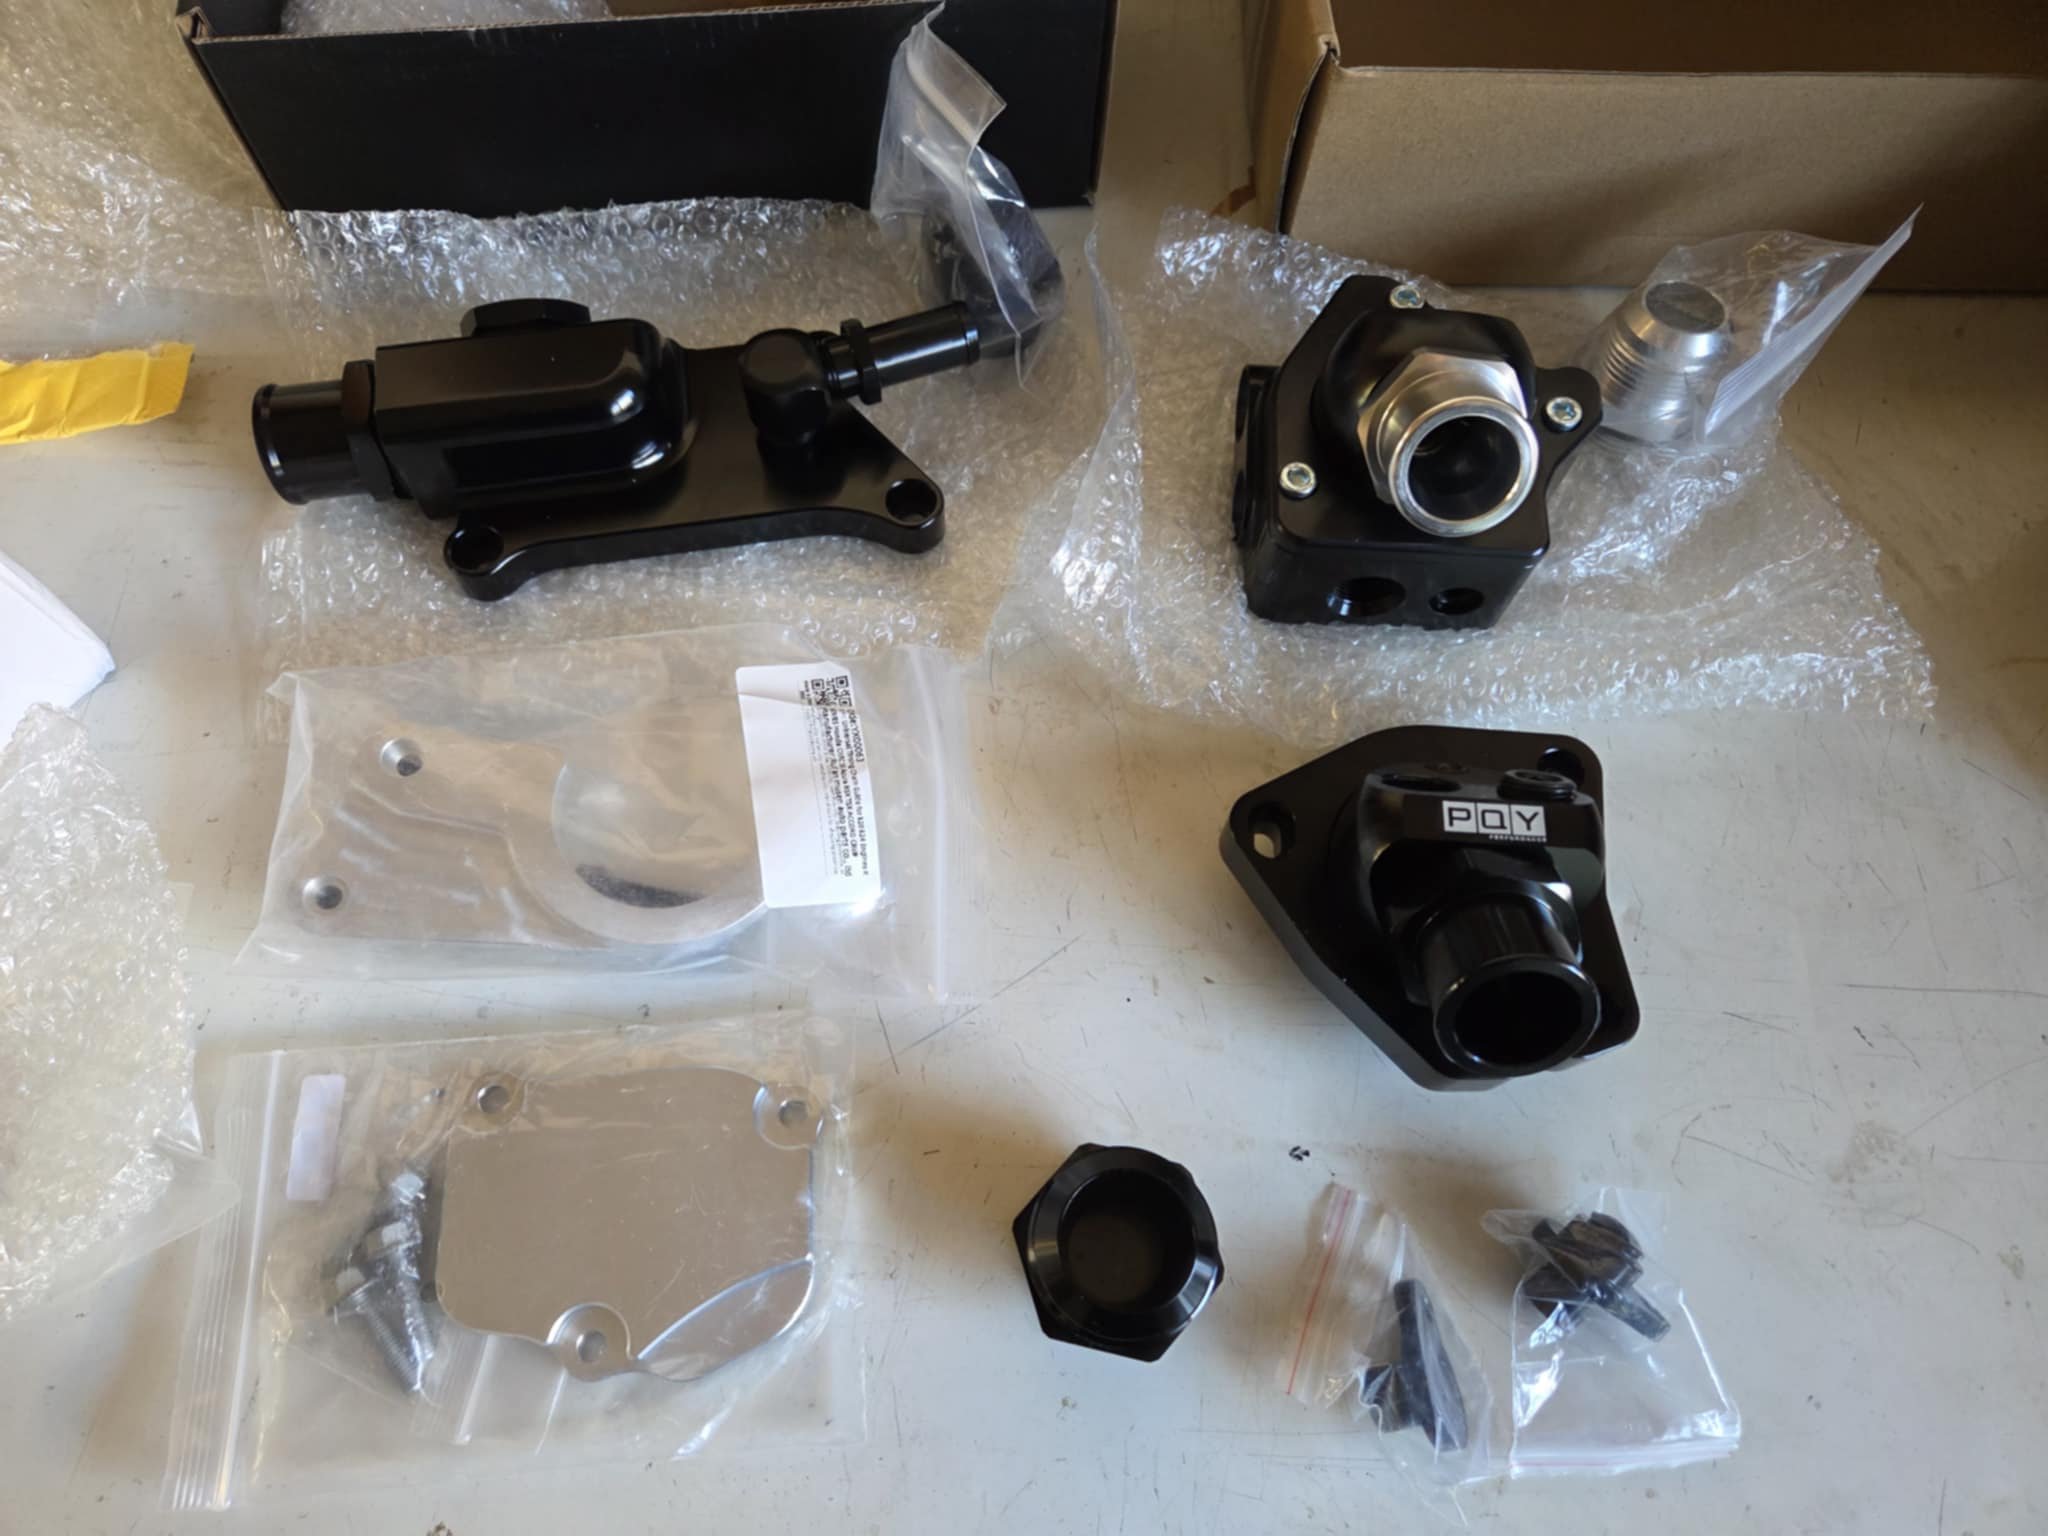
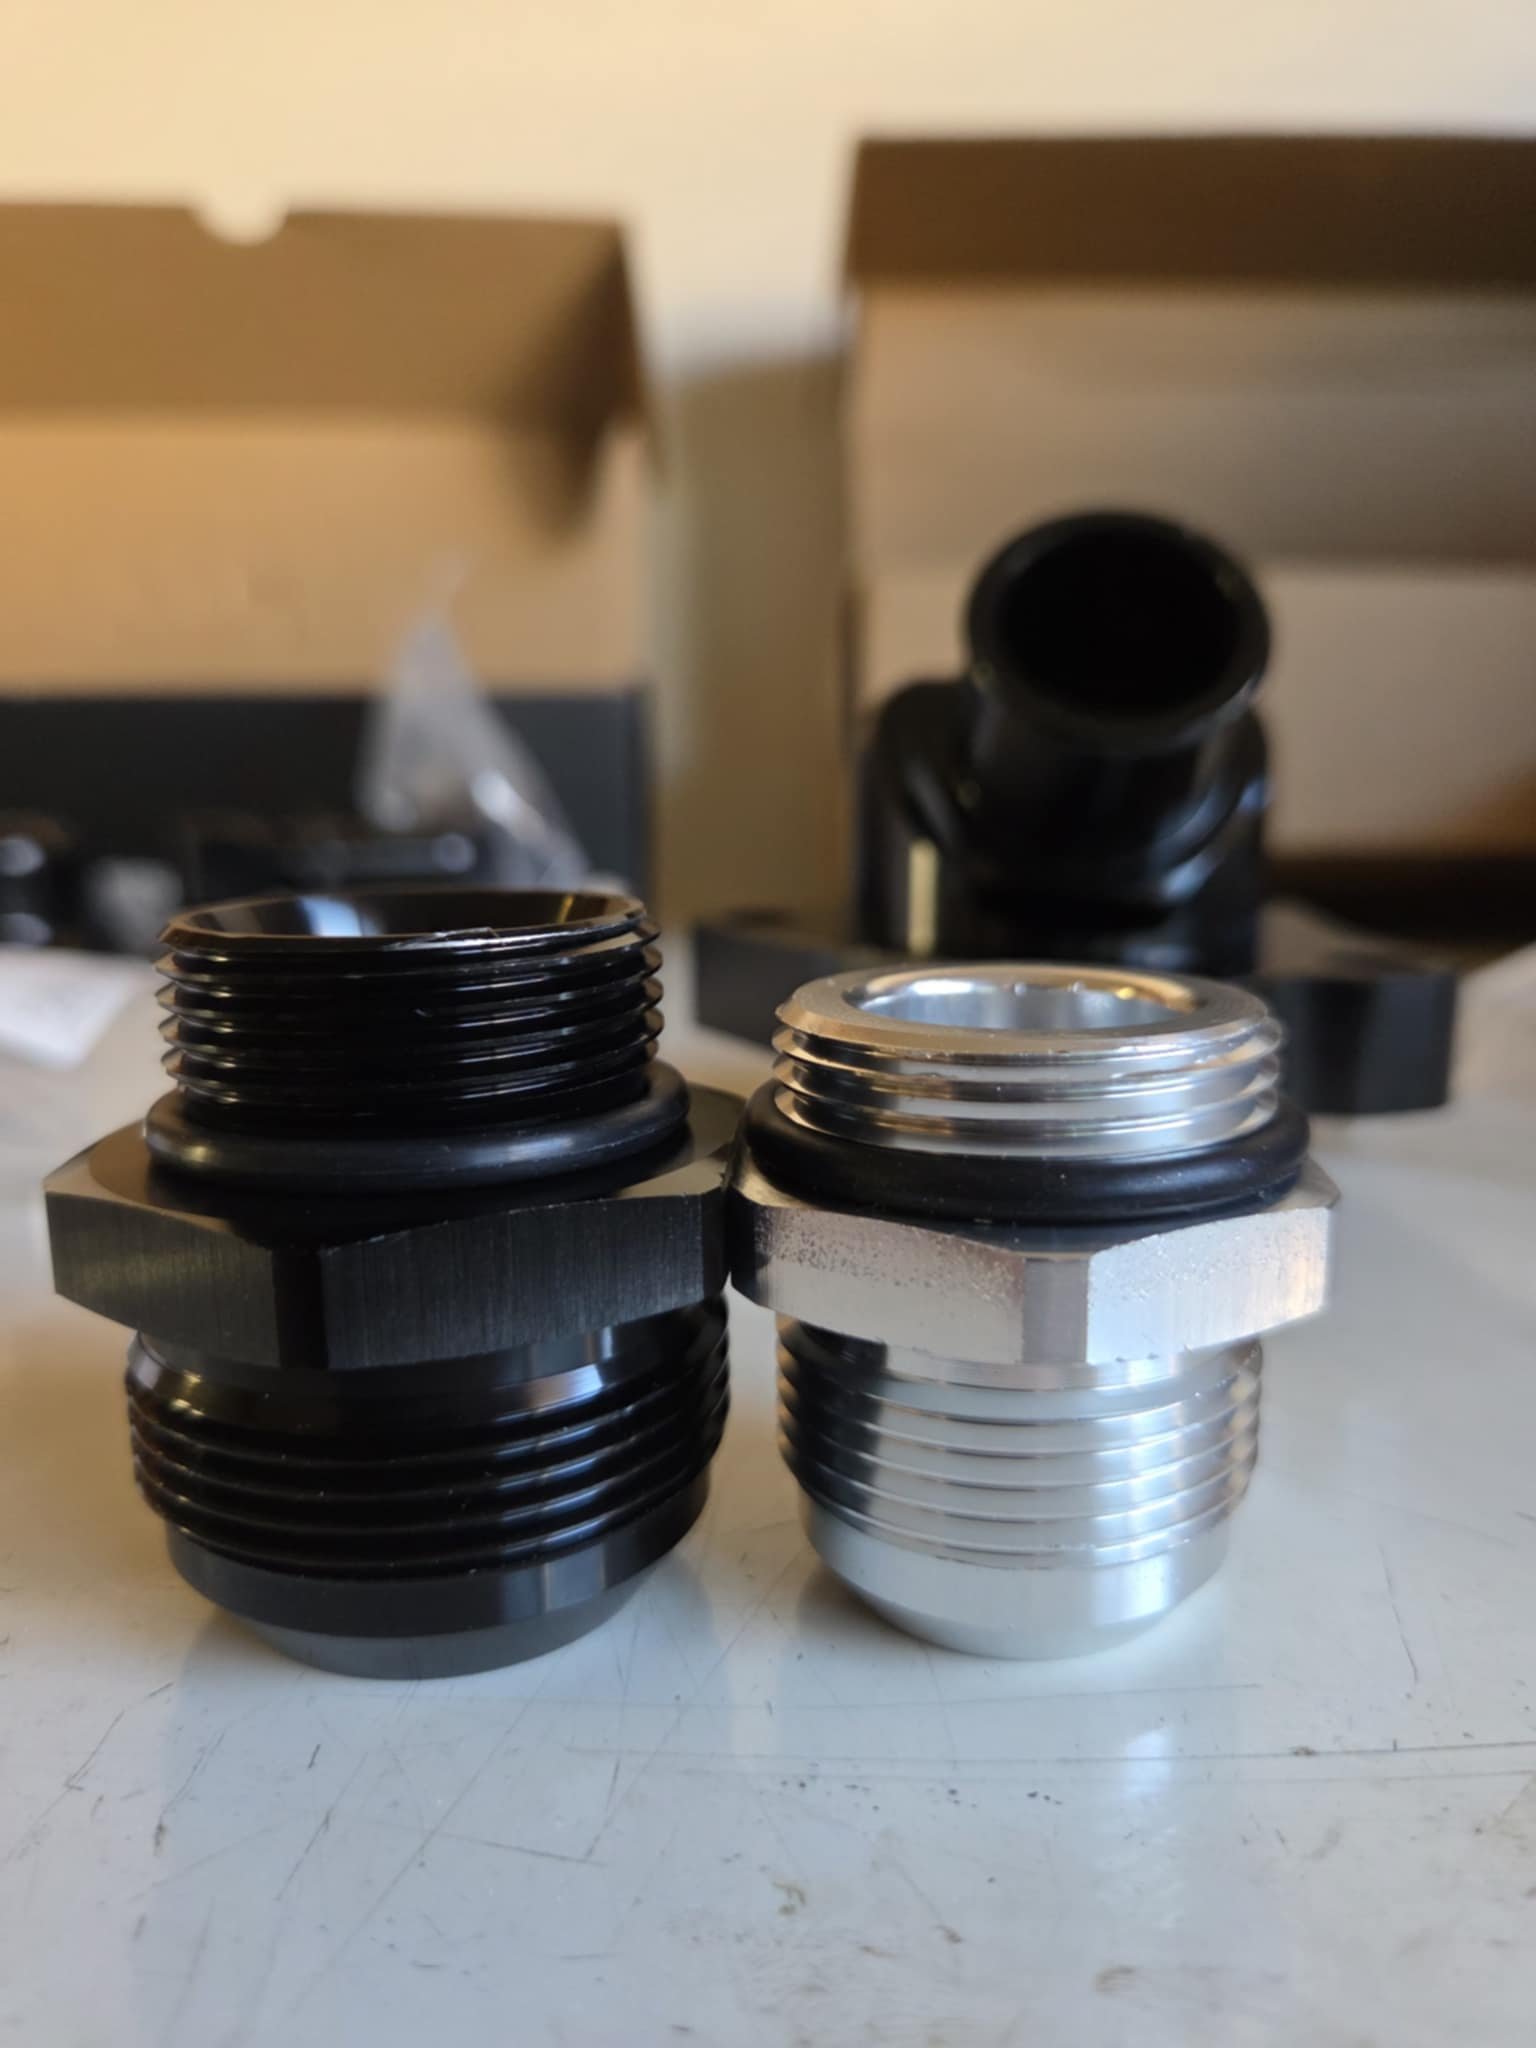
Few more parts arrived (Crush washers and seals also turned up) Timing Timing Chain Tensioner Cover and Timing chain guide look good, probably should have gotten a spare O-Ring for the cover Pretty happy with the quality of the upper coolant neck, may have to modify the Orb -16AN to -20AN adapter I have to fit but that's ok (ill probably run silicon hoses to start anyway) the Nut might be a little too big, it might be ok need to check clearance to the block when its installed EDIT: after looking at some videos it should be fine Threads on Both thermostat housings are a little rough so will need to clean them up with a 1-5/16" -12 Tap (if I can find one for reasonable pricing) or I might attempt with some thread files Also need to shorted my Orb -16AN to -20AN adapter to use with one of these as they are too long
-
Prestart/race checklists are also a good option OR RED flags that have the be removed for the bonnet to be locked? Got to walk around with the big racechecklist clip board and tick everything off Oil in engine. Check Tyres inflated. Check Fuel. Check Bonnet locked, Check etc :p
-
Ill have a turbo and exhaust pretty near my wiper motor area long term not sure I want a battery that close even with heat shielding, but does help with sizing and location placement ideas
-
Hey guys, whats the going rate for 4awg cable in NZ atm? price per M or for a roll. I am still working out how much ill need but id say id need at least 10m (may 5 of red 5 of black etc) but still working it out Just trying to decide if I buy locally or not
-
I am actually trying to save weight were I can, and long term ill be swapping anything I can to composite panels (hopefully carbon fibre) But atm ill compensate with more boost once I turbo it Cage and subframes are/will be Chomoly As I added more weight to the rear end im keen to move the battery more central, and clean bay/space is at a premium, though looking at the below pic of a factory bay I stole from the internet. I might be able to put it a small battery where the Powersteering fluid tank is, especially if I reduce the size of the washer tank (or remove it) Engine and gearbox oil coolers will be in front of the drivers guard or somewhere in that location. Haven't decided what side ill put the half rad yet but most likely itll be on the Passenger side Remind me which lithium battery you use? Ill be keen to get one as I currently don't have a battery for this car Factory battery spot is where the air intake will be going (I actually had the battery tray removed as well)
-
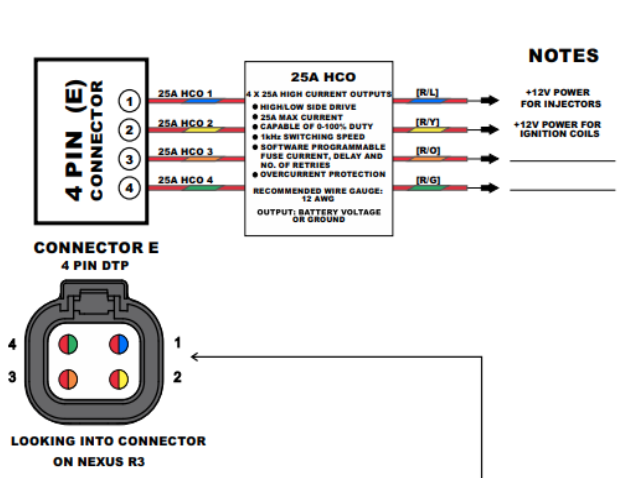
The NEXUS will be providing the power to the injectors and coils (1 and 2) 3 and 4 will run the fuel pumps Factory fuse box will manage the Rad fan and anything else that needs power the NEXUS can't handle Thanks everyone that helps
-
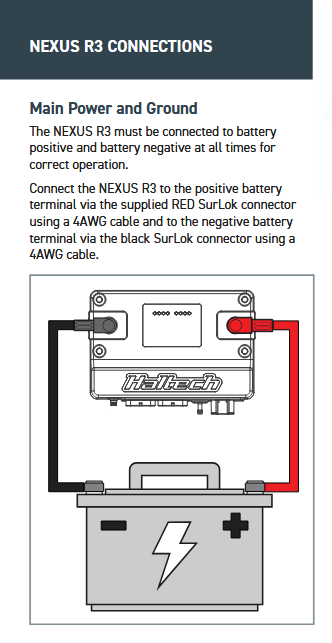
Shes still asleep but seems to be doing ok atm thankfully Good point about the battery wire sharing for the ecu, ill double check the Nexus R3 manual but from memory all it said is it needs to have both sides wired to the battery, and ive found a few people running distribution blocks etc for that Main thing for me is its all coming off the same battery terminal I can run a separate fused 4awg cable from the battery + terminal as itll be a short run, was just trying to reduce the amount of cables I run Edit: yip manual is as per below
-
If you could insulate the pin so its only ground when it's in locked position and run a wire to an LED in the dash that turns on when the pins in ie use the pinlocks as a gnd switch that could work right?
-
So as im sitting in hospital for my daughter im making wiring notes. Just thought id run it past the hivemind My battery had been relocated to the boot but I think with the cage I'll move it to be mounted behind the passenger seat. Will try reuse wire where I can I think from memory it's 0awg sized wiring already used, with Gnd bolted to Chassis via a seatbelt bolt. (I didnt install this it was done when I brought the car); Battery box also had a Kilswitch on the +side Current thought is Positive side Battery terminal to Killswitch (0awg) Killswitch to Bulkhead stud to Engine bay (0awg) Interior side of Bulkhead stud to 120amp ANL fuse then to Nexus R3 (4awg) Engine bay bulkhead stud to Engine bay fuse box (0awg) Engine bay Bulkhead stud to startermotor (I cant remember if the factory wiring is fusebox to Starter (if it is ill do that) 4awg (100amp starter) Pretty sure alternator charging was direct to the battery so ill put that back to the Bulkhead stud as well, will use biggest cable I can fit or maybe dual smaller feeds. Bulkhead studs should also allow me to jump start from Engine bay if needed etc May also run but not connect another fused 4awg run to the boot for future expansion off the battery terminal or Killswitch if there is space. Current fuel pumps won't push more then 15.5amps max so can run both 12awg outputs direct from the ecu to run them (staged) Ground side Battery Terminal to Bulkhead (0awg) Interior side Bulkhead stud to Nexus R3 (4awg) Battery terminal to Chassis (space allowing) (0awg) Engine side Bulkhead stud to Starter (4awg) Engine side Bulkhead stud to Engine (4awg) Engine side Bulkhead stud to gearbox (4awg) Engine and Starter ill probably also ground to Chassis in the bay. Coils ill ground to head, I cant remember where the fuse box is getting the ground source for the relays (need to track down wiring diagram) but if needed to ill ground it to gearbox. Reason im keeping factory fusebox (ill have spare relays) is id like to keep factory controls for headlights etc and I want to run a relay for the fan (ill also wire in redundancy) Any of this sound silly or over kill? Im not bothering with a Bulkhead connector for the ecu loom as ill make the hole big enough to pull connectors though and use a grommet. Will have the injector and coil looms as sublooms
-
Currently no factory LSD option for it and aftermarket is quite expensive but if the states start using them that may change (place in the states has plans to make/is making an LSD) There is two in a local wrecker may go have a look when I get a chance as I want to grab a crv box and axles etc anyway (maybe spare transfer case) Is a couple of these in Wreckers in NZ as well Changing diff mounts isn't a big issue but not ideal, and im not sure about the rear shafts Need to do research on if they can be modified to fit Jag axles are 28spline CV into hub 24spline cv onto axles shaft GT4 are 26spline CRV are 23 Spline The Honda guys are running them upside down Im curious on what the axles shaft diameter is
-
Anyone want to help me math (Edit Jag X type X400 rear diff may be a close rear ratio) If I swap to an auto Transfer case on the manual gearbox i could run a 35 sidewall front tyre and a 40 sidewall rear to align the difference in diff ratio? Front would be 0.4km faster then the rear at 9000rpm and 0.2km at 8000rpm and 0.1km at 3000rpm Auto Transfer Final Drive Transfer Gear Transfer Ratio Rear Diff Ratio Difference 4.389 0.393 0.904 2.928 4.566 0.1766 4.562 0.393 0.904 2.928 4.746 0.1836 4.764 0.393 0.904 2.928 4.956 0.1917 5.062 0.393 0.904 2.928 5.266 0.2037
-
Yeah I think your right, its ok there isn't any off the shelf gearset that would be low enough so id be looking custom anyway The CRV transfer case gear would probably be easier to machine so I think if I go down the CRV gearbox route thats what ill have to do, or change rear diffs There is a C4 Corvette rear diff thats close to the idea ratio haha bu im not super keen to change diffs at this stage
-
Notes for me if I need to go for a Honda CRV gearbox, Honda Axles are big enough to shorten and respline to suit GT4 CV joints Honda 5 speed CRV Half shaft 44500-SCV-A00 CRV Front Left 44306-S9A-N00 CRV Front Right 44305-S9A-N00 Can all be brought new but id probably hit a wrecker up Current rear diff is T series from what I can find I have 2 GT4 diffs and I may have an AE115 Rear diff in my spares as well T = 6.7" te71/72, ae86, ae95, many rwd corona/celica/carina, 90's 4wd wagon, gt4
-
Shrikes Will it ever be finished Toyota Levin AE111 AWD
shrike replied to shrike's topic in Projects and Build Ups
So Maintaining Momentum ordered some more parts. with some going straight to NZ (oil coolers/line) and some coming to me first for quality control/checks etc Ordered 5M of PTFE Stainless and Nylon braid hose -AN10, -AN8 & -AN6 got it from a supplier one of my clients regularly buys off so confident it should be ok. I am mainly using hard line but this should cover any hard line to fuel rail/ fuel pressure reg, Gearbox and Engine oil coolers etc 10 Row Oil cooler for the gearbox, ive got the factory one but for the price id rather get a new one installed (its -AN10 but ill adapt it down to -AN6) I may add an inline thermostat to this later 19 Row engine oil cooler, already have a Oil filter relocation and thermostatic plate etc on the way along wit some banjo to AN fittings encase I need more clearance (All -AN10) Semi scope creep as not needed to get the car going but both id rather do now A whole heap of AN fittings to add to the collection ive currently got with the car Aftermarket fuel rail encase I have issues with the factory one Aluminum crush washer kit O ring kit Aftermarket Thermostat housing & upper Coolant housing (I can use this with normal silicon hosing but allows me to go to -AN20 fittings later as I already have them) On the fence if I do the K20 oil pump now or wait till later, as I can stick with stock rev limit to get it all going. I have a Turbosmart FPR2000 so will be plumbing it up as a deadhead system similar to the below diagram (Bottom pic) Will be 5/8" Hardline from the Dual pump/fuel cell in the back to -10AN and 1.25"X3" filters (40Micron) -10AN to -8AN (Male to Male) I think ive got some fuel shut off valves so may put one in the front and one in the back -8AN 1.25 X 3.5" fuel filter (60Micron) (I have two more filters from the GSR project I had that I may reuse (one post FPR) -8AN Hose (one end will be 90degree) FPR2000 -8AN to ORB -8AN FPR2000 ORB -8AN to -8AN fitting bottom Port will return back to fuel cell via 1/2" hardline (I am hoping I can run the hardline right to the bottom of the FPR but can run a flexible braided hose if needed) Need to order a fuel flex sensor and fittings (may be a future change) but would plumb this in onto the return FPR2000 ORB -8AN to -8AN -8AN Hose with 90 on each end -8AN to 5/16" (factory fuel rail barb) I also have the gear to do a -6AN feed if I decide -8AN is overkill or want to save the hose for when I go to a different intake/dual injectors etc If factory rail doesn't work ill throw the aftermarket fuel rail onto it ORB -8AN ports and ill run a M10X1 adapter on the return side or middle port so I can have a fuel pressure sensor Will have Fuel pressure guage on the FPR and Fuel rail Will order the Haltech Nexus when I need it, im hoping for an EOFY sale coming up I brought the FPR2000 back in 2020 -
Has @Romangiven you the graphing tools so you can plot the frequencies? Fabrication/welding porn as always, keen to see the tuning results
-
Might have been where I got all the partnumbers :p
-
Yes fully aware of the K20 pump, need to use the baffle, chain and bolts etc and block a drain Oil pump needs notching as well P/Ns are Oil pump 15100-PRB-A01 Oil pump chain 13441-PCX-004 Oil Pump Chain Tensioner 13450-PNA-004 Oil pump chain guide 13460-PNC-004 Oil pump guide bolts 90004-PNA-000 (x2) Oil pump bolts 1x 95701-080-7508 1x 95701-080-5008 1x 95701-060-2508 Baffle 11221-PNC-000 Baffle Bolts 95701-060-1408 (x6) Oil return bolt 90004-PE2-005 or might be M8 x 1.25 1" bolt and washer Good call out though
-
So also to help explain how some of my scope creep happens, I've just spent the last 2hrs thinking about crush washers I have a few things that I have to use AN fittings for based on current parts acquired, as part of these fittings I have a few ORB fittings that currently have O-rings At least 5 in the fuel system So ideally I want to go to Aluminum crush washers (assuming the orb fittings don't have a seat for the o-rings) So I need some Orb -12AN, Orb -10AN, Orb -8AN for that at least And then if I end up running a gearbox oil cooler I probably need some M14x1.5 ones but -6AN should work Need to run Aluminum as the AN fittings are all Alloy So may as well buy a kit of -3AN to -16AN (10ea) as that way when I convert the cooling system to AN Ive got crush washers for the -16AN to -20AN fittings I have and spares for when I do an oil filter relocation/cooler + Turbo etc And ill probably get some spare o-rings as well encase using a crush washer isn't an option So then its the Nitrile vs Viton o-ring options ha Then its finding a good price for the above and getting it shipped to me for when I bring it over later :s I think ive landed on raceworks kits for the seals/washers at this stage All my AN fittings are Aeroflow Though I do have a selection of Aliexpress AN fittings on the way to do some quality checks on
-
Not sure if you've seen how much grinding is required to make the 2GR fit with the Transfer case I am not sure how much grinding into the block im comfortable with so will have to see how it fits to start with Honda diff ratio isn't close enough, copied from the other thread Honda AWD info "Transfer gear ratios are 0.434 for the Manual and 0.393 for the Auto, the transfer case is the same between the two (transfer gear on the diff is the same between auto and manual, difference is the gear it connects too in the transfer case I had to look up the part numbers to confirm this) Factory CRV rear diff is 2.529 Ratio (USA) for reference the rear GT4 Celica (7.1" or 6.7" T series?) diff is 2.928" Plan would be either a Transfer gear made at the correct ratio (0.3778) for the CRV box (transfer case gears are already being made commercially) Or get a Custom rear diff ring gear and Pinon made with a ratio of 2.549 Hmm seems some corvettes have a 2.59 rear diff ratio as well
-
Yes its me :p Thats a pic I haven't seem but I have seen all the MR2 (SW20) conversions so know the FWD E series at least is doable