azzurro
-
Posts
2,878 -
Joined
-
Last visited
-
Days Won
4
Everything posted by azzurro
-
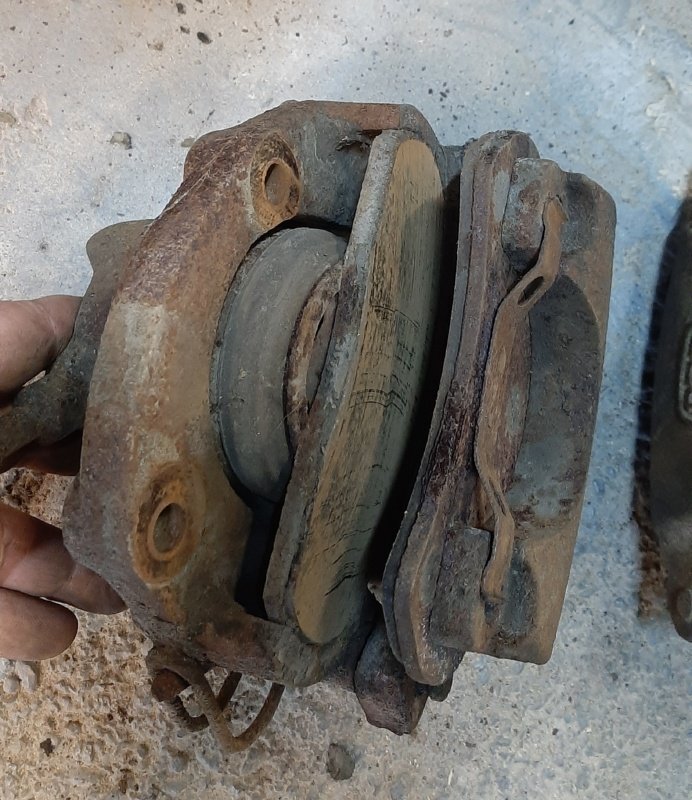
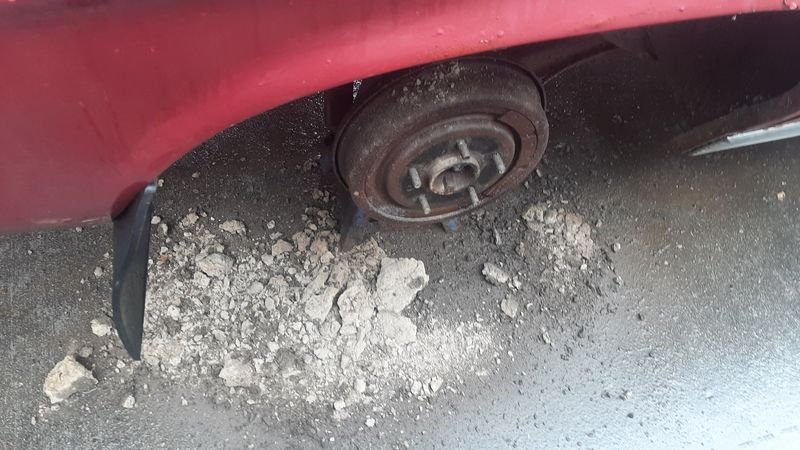
Weirdly the rotors look near new, certainly lower miles than the pads. We have master cylinder, front caliper kit, front pads, softlines and rear brake cylinders incoming. Hopefully that will be enough to get the brakes functional. Will need rear drums and shoes eventually but not for test drives on our private test track. ive been taking the PBR cast iron single piston calipers apart and the slides were all pretty seized up, and the pistons are pretty solidly in there, so ill soak them with all the other bits and try pump the pistons out with the new master when it arrives. If that doesn't work an upgrade on the calipers is probably cheaper and better than refreshing these ones
-
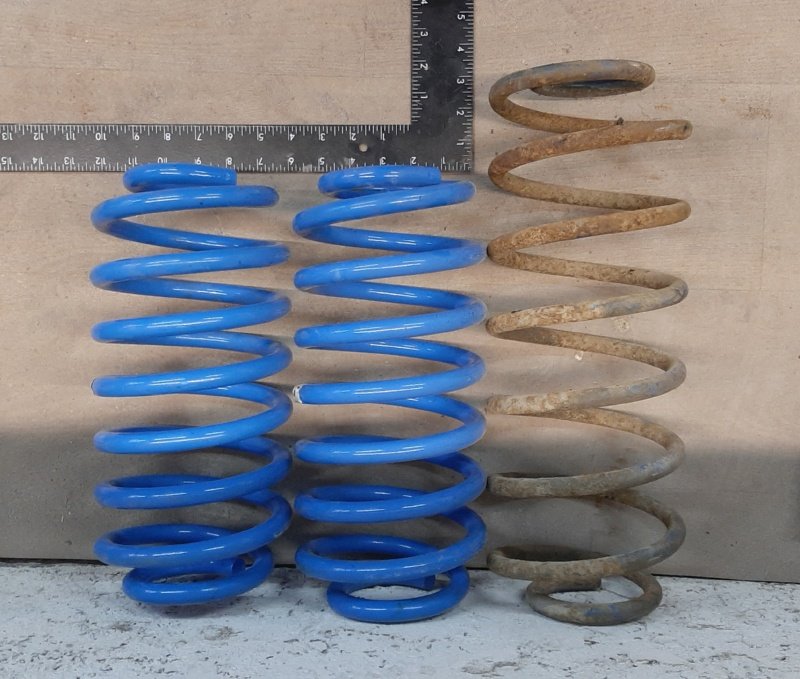
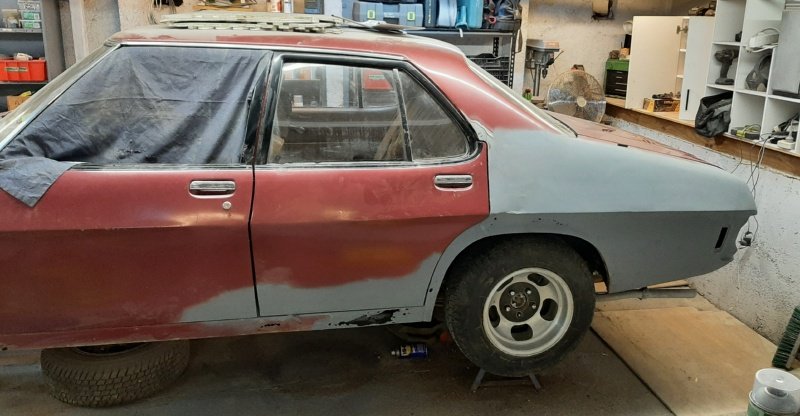
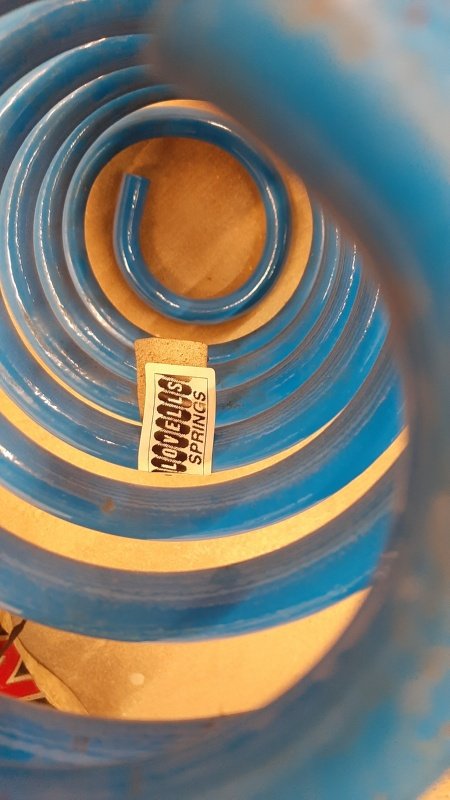
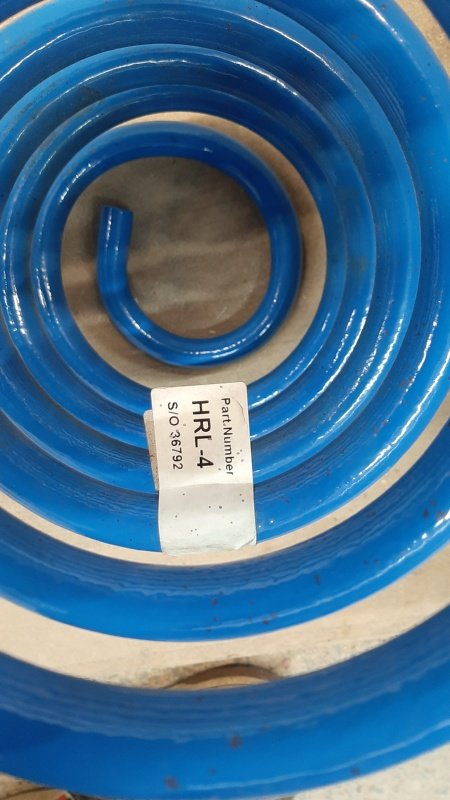
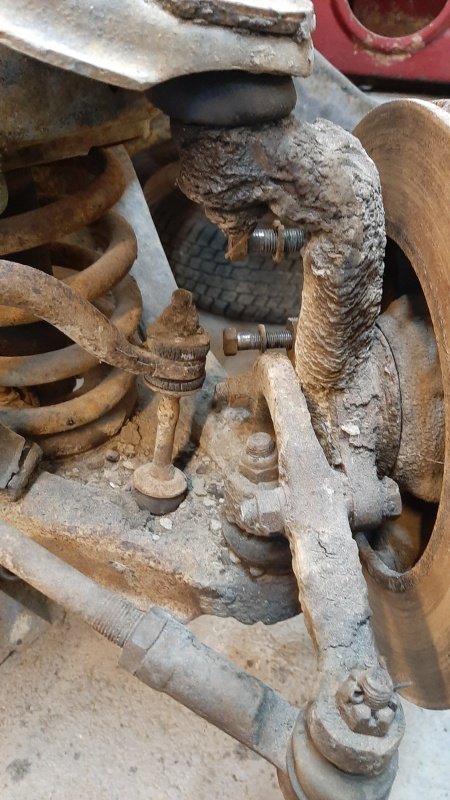
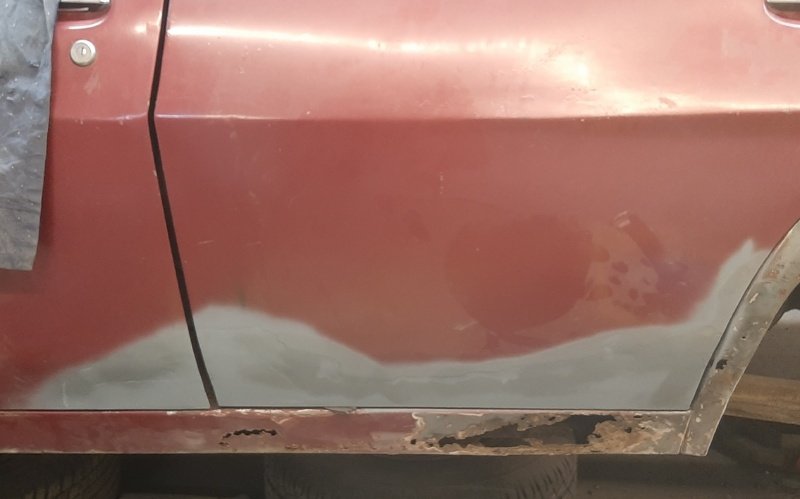
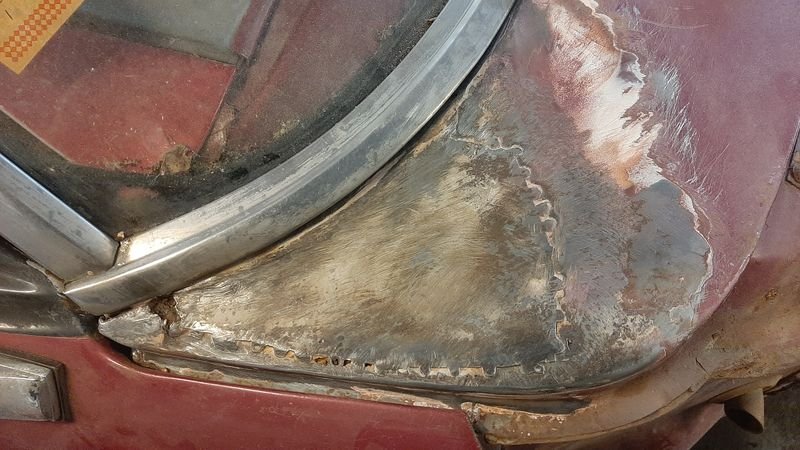
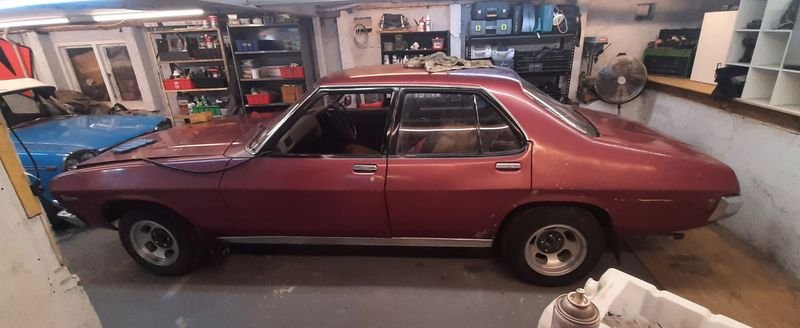
Been filling the doors and the rear of the quarter, I hate it! Time for something else. Kirsty has spent a bit of money on parts and they are on their way, so time to prep for that. First things first, lows! Picked up some rear lowering springs the other day for cheap, used but pretty much brand new, old mate couldnt get his wagon out the driveway with them, been forward and backward about 30m. They are a fair bit shorter than the existing ones but a fair bit stiffer too Dropped the rear about 40mm from where it was, and still on the jacks. Its low-er but not low, much less saggy tho. now can move to the front end to eventually get it to match. Busting this apart has been easier than it looks but not easy. Haul so far pretty sure the front calipers were sticky before it got parked up, brake pad use has been maximised but rotors look good! Shocked but not surprised face that we will be rebuilding brakes

- 29 replies
-
- 34
-

-

-

-
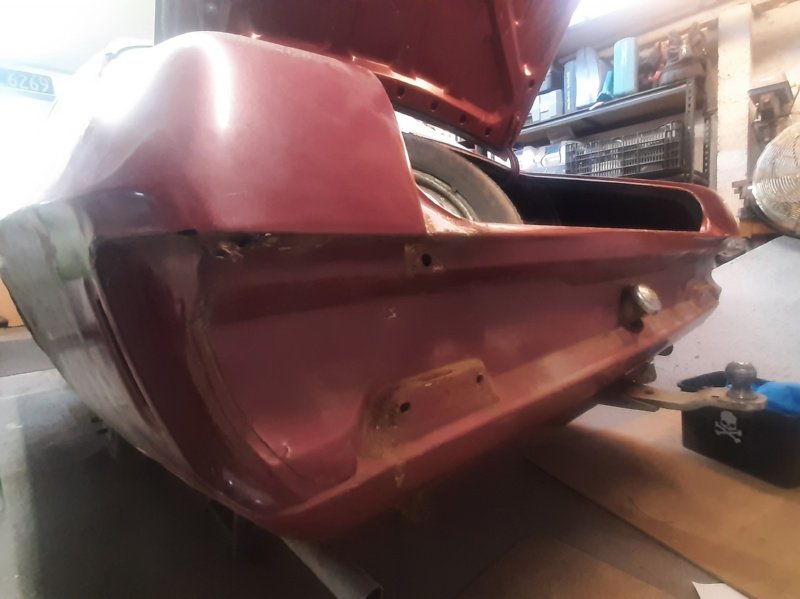
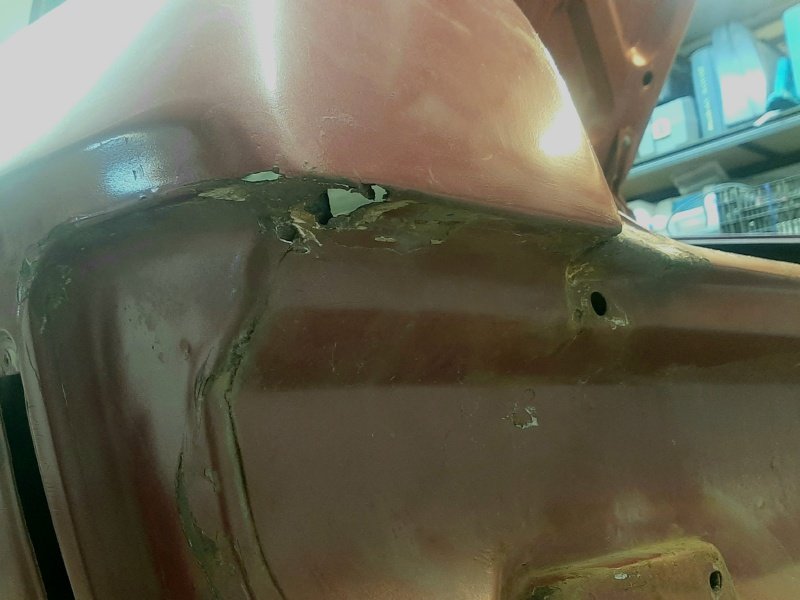
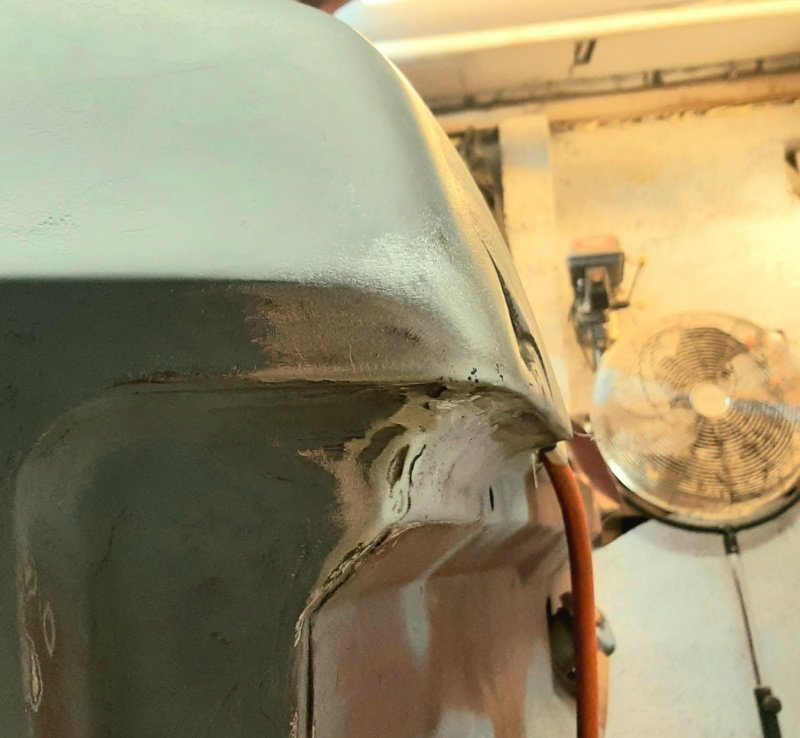
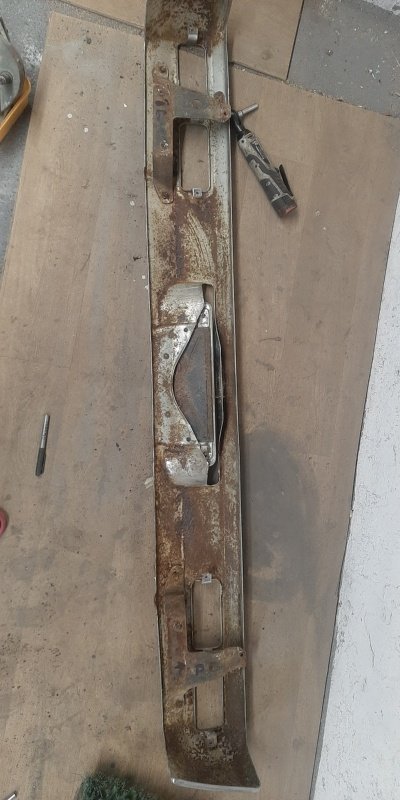
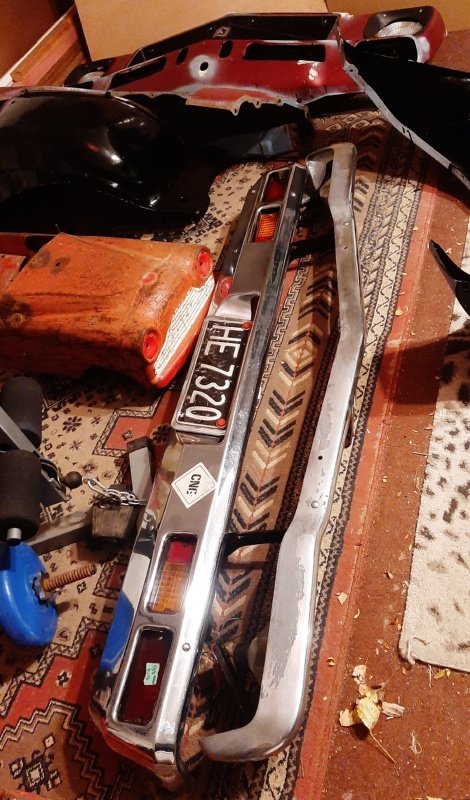
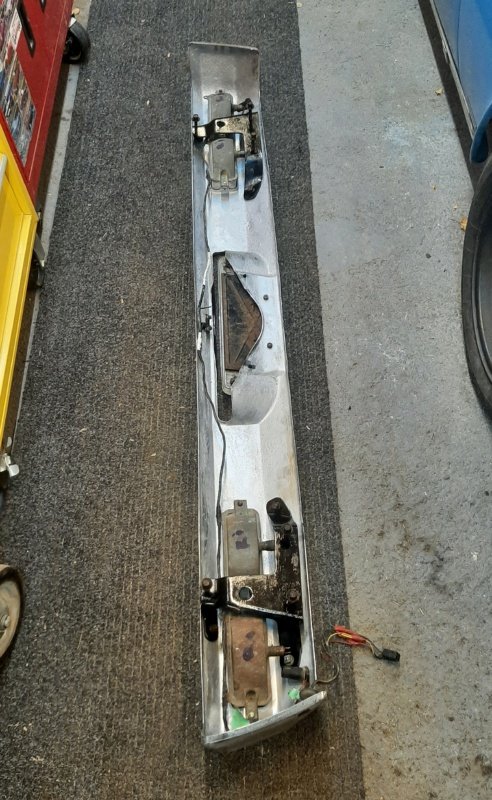
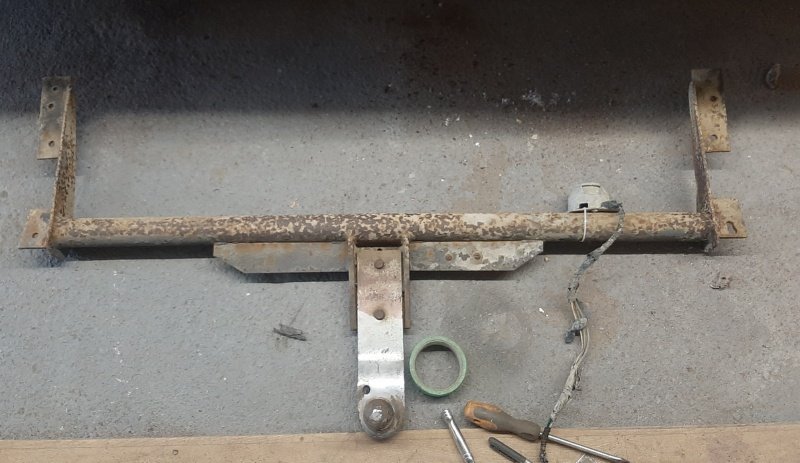
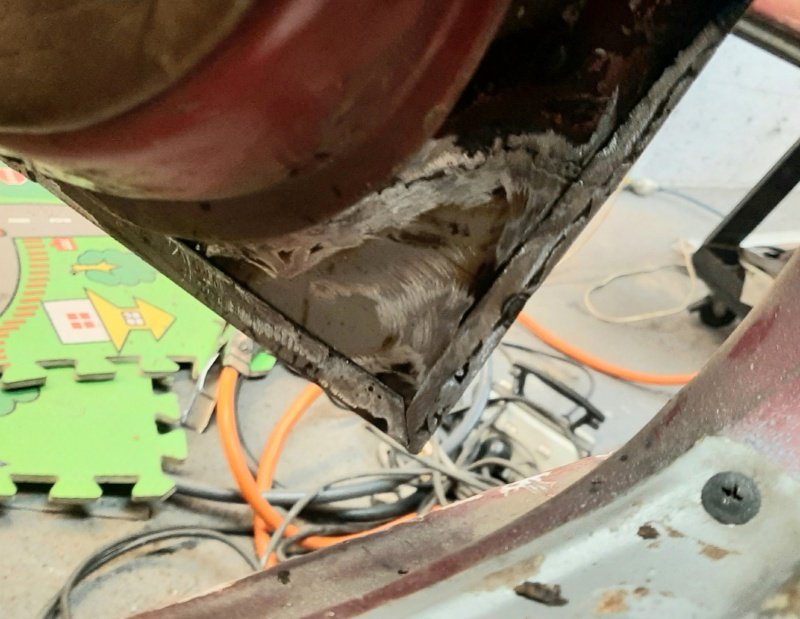
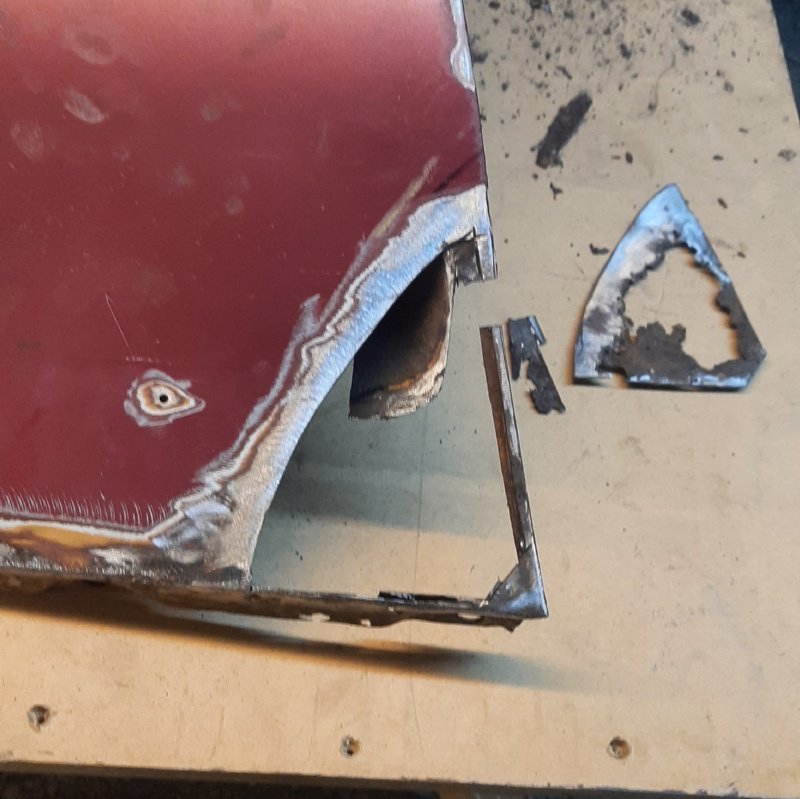
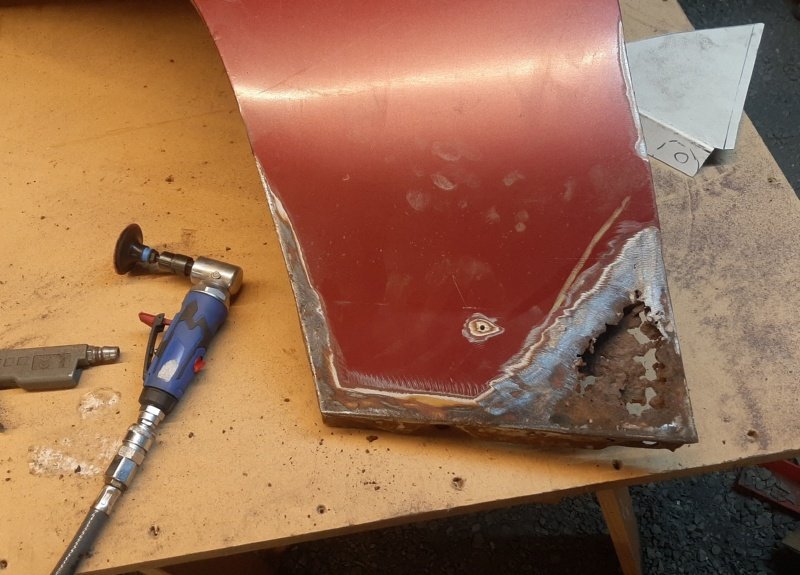
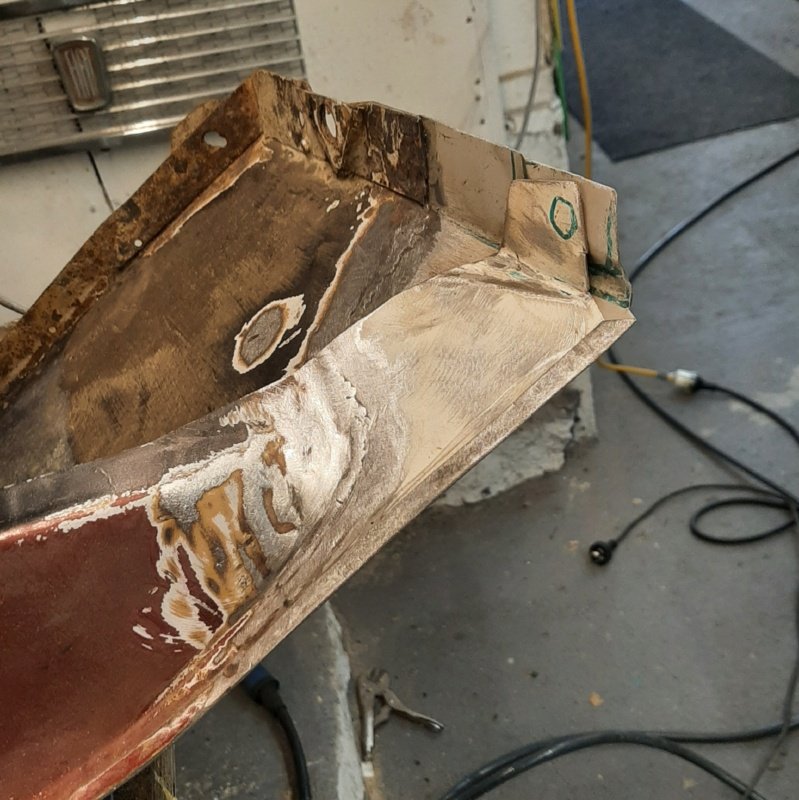
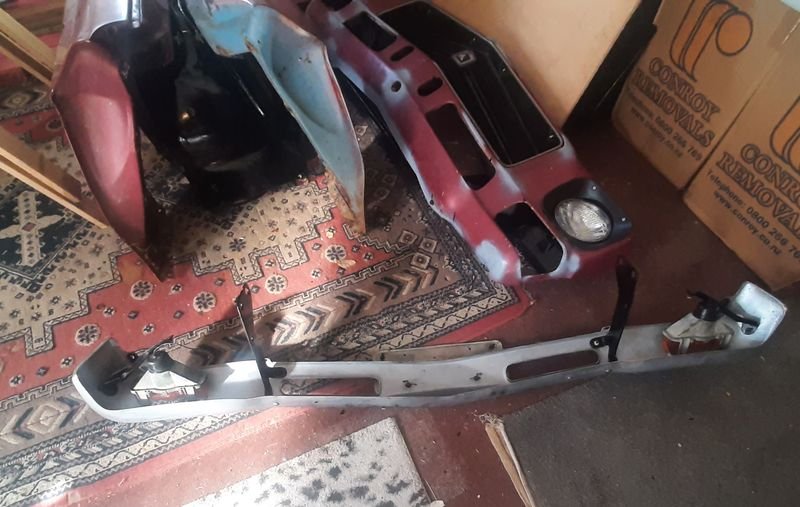
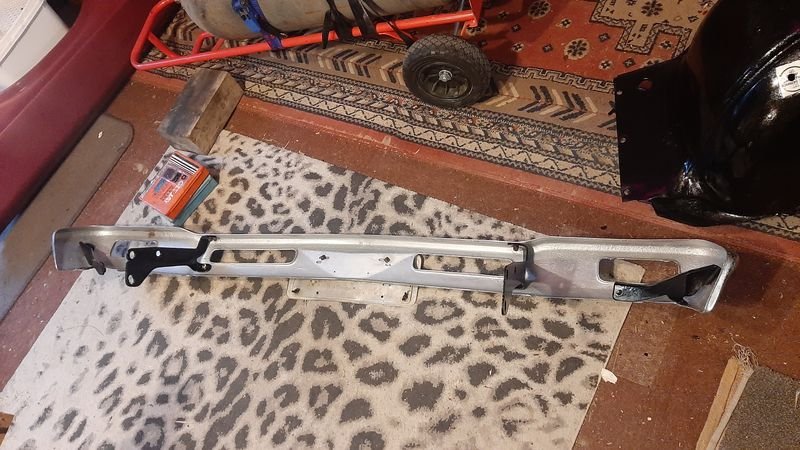
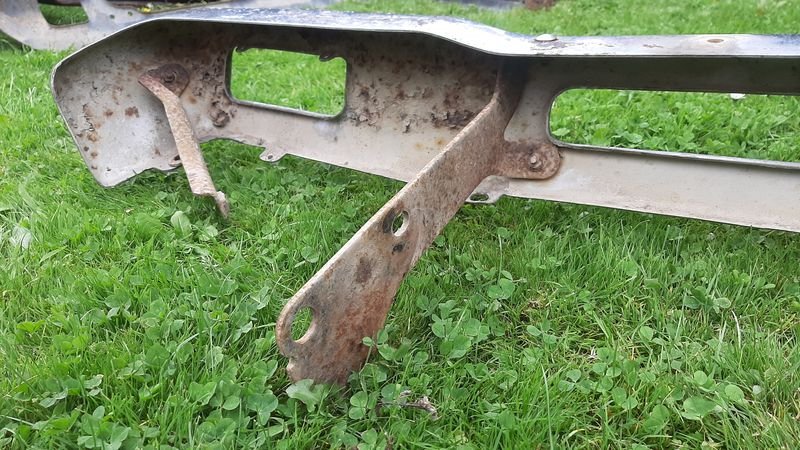
Next step around the Belmont, the rear, which looks pretty good,but does have a couple of issues i can see and maybe some i cant First take the rear bumper off And the tow bar. so we can have a look behind it all and will also be easier to drop the fuel tank. Also the bumper is a bit bent and there is a rusty hole behind it. Turns out a factory leaded seam lives there. Also a bit creased from whatever bent the bumper. Melted the lead out with a torch really dont want to sand it, but also dont need to takeout any more than i need to either. Anyway was a fiddle, but hole is gone hammer and dolly got the creases reduced too. Ill fill that massive factory divot with bog instead of lead. Bumper needed a tidy up Got the bend out in the press, fixed up the wiring that was hacked for the trailer plug, tidied the lenses, sanded and painted the brackets black and the inside Silver And placed In the pile of 'bits pretty much ready to bolt back on'
- 29 replies
-
- 30
-
-
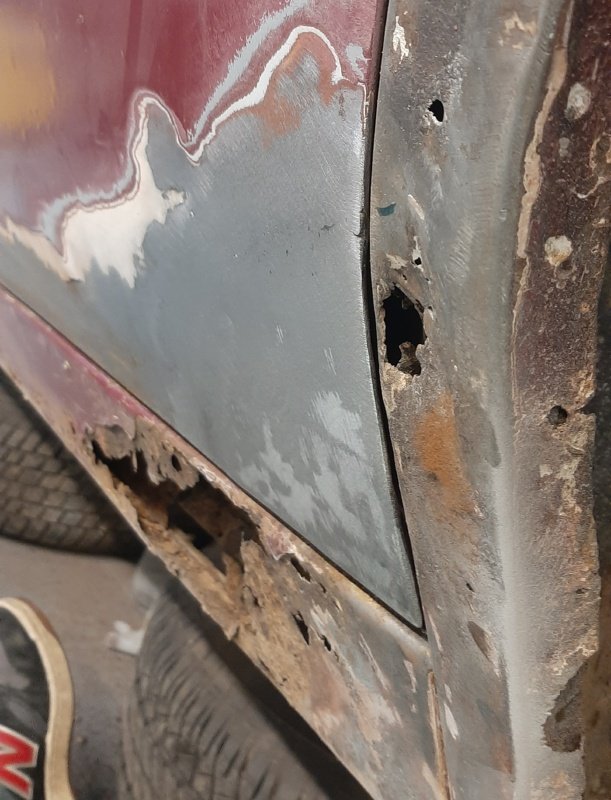
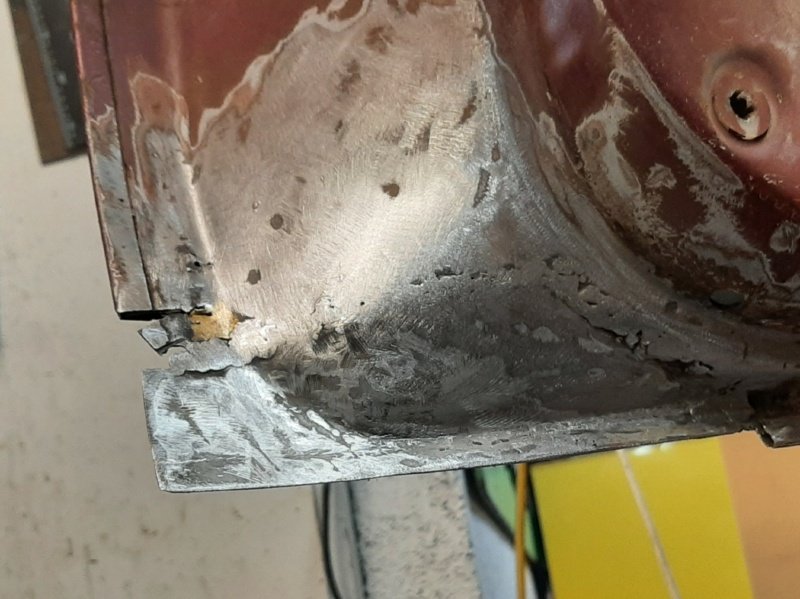
Bit more rust repair, on the passenger side doors, which are pretty good apart from the corners which have been bogged or brazed before. Starting at the rear and working my way forward Very happy with that! Leading edge of the rear door had been brazed and then rusted again Chop chop, bang bang, buzz buzz, grind grind The outside of the Inner corner was a bit tricky to get to without removing the door, but the power file and my little air wizzer got in there ok. Put a bead down the leading edge as i folded it a bit tight. Outer turned out good. Rear corner of the front door had also seen some braze Inner was the worst on this one, had to chop a lot of the outer off to get access to it, but should have cut higher as well Inner turned out pretty well I broke the golden rule (its always worse than you think, keep chopping!), I should have cut more out, i started chasing holes, and ended up putting in another patch and got impatient with the hot stick and warped the skin. Fek. Good thing the leading corner of the front door doesnt need any work. oh well, more bog for the bog gods More rust for the rust throne
- 29 replies
-
- 38
-
-
Hoa4ders worst nightmare! i had to scrap 10x of those 13x5.5 steelies when i emptied my storage unit. Could 'only' fit 3 sets of rims in the van... Ill take some pics of what ive still got. I need to sell some anyway for hq parts money
-
Totp!
-
^ on an 80s wedge, oh hell yes. Do it. Speaking of 80s, I have a set of 14x6 meshies with (hard dry) direzzas 185 55s id be happy to see used? Pics early in my 125 thread. Incl shank bolts to go with. Also have some 13s?
-
Cheers mang, these old pigs are new to me, but i know there are plenty out there that have forgotten more than ill ever know about them, and everything that could be done has been done 100 times before, so thanks for sharing your experience At the moment, the engine is the least of our worries, seems to start and run well now with the pretty minor refreshing we have done so far. Its unlikely to be driving very far any time soon. Ill certainly be grabbing those sorts of bits and pieces when they appear if i see them to build up a 'performance package'. I had a look at a couple of V* commies when i was at PaP for the booster etc you mentioned too, so thanks for that (all 3 were already gone). Commies of that era are pretty common FBMP wrecking fare in my part of the world too, so will go that route when im back home and dont need to have suspicious looking heavy meatal objects in my carryon Also, KPie isnt too fussed about going fast, this engine is also part of the cars family history (173 and 4 speed from the family torana her brother rolled), having said that, she would be happy with a V8 too, simply because "those are the ones that make that noise that i like :)". While she has good taste in cars (pink hq) and poor taste in men (me), she neither backs trailers (just nope) nor fillets fish (life long vegetarian) , but please dont let that stop you from offering your helpful advice
- 64 replies
-
- 12
-
-
-
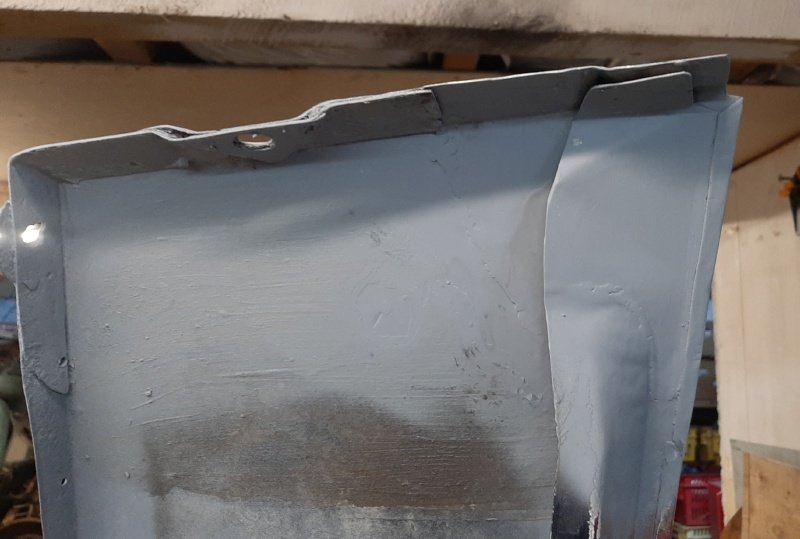
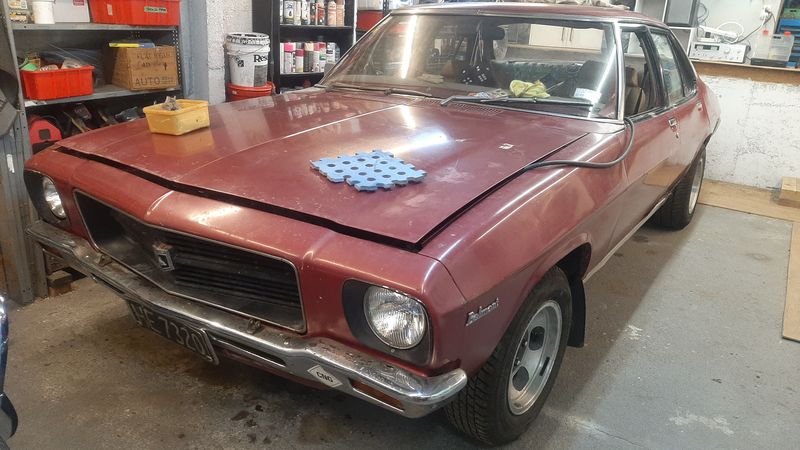
Made @nzstato come over to check out this old bus and lend me some advice on HQs specifically, and discuss the folly of old car projects in general and we have decided to press on. One bite at a time. Plan is to finish tidying the front clip so that is done and it can be reassembled and stored back on the car and it looks like a car. Brake master so it can at least stop itself as well as go. Will save a full brake overhaul till later. Will also start a big list of repair panels and random bits from aussie. Inner and outer sills ill just get folded up locally. Meanwhile, time for some diy panels using 1.0mm for the first time. Also $60 repco mini air grinder with 36 grit 3m roloc pads works pretty good! my compressor cant keep up with constant use, but its great for access and cleaning awkward areas as the small pad doesnt really catch like a grinder would, and the speed/torque is controllable which is much nicer than the all or nothing of the grinder Passenger fender, has a few bits of loose paint here and there and a few extra trim holes, otherwise excellent, only the typical rear corner mud trap rust. Made the inner brace first, Rust removed, mostly for access but trying to keep as much data to line up to as possible Ready to weld, made the drainage a bit more generous than factory Welded mostly from the inside, so i dond need to tidy the welds much So the other side that noone can see cause its behind the inner fender and up against the sill, which i will grind, look such better Then the outer, all welded in and the edge dressed over Got a bit of a hollow right where i couldnt get the dolly into, and its a bit wobbly and hand made at least up close, but pretty happy with that for panel number one, Ready for a skim of filler to smooth it off. Ill save drilling the rear bolt hole till we fit on the car and can adjust it a bit, and add a couple of tacks to lock it in its final shape and seam seal it but thats one rust free fender.
- 29 replies
-
- 50
-
-
Thanks Bart, you are right we DO deserve it. Unfortunately its a punishing drive (2 days each way) and my good lady vowed to never do it again after Nats, at least not in the the 2300 (which had a strong fuel smell inside and a loud exhaust, at least then)!
-
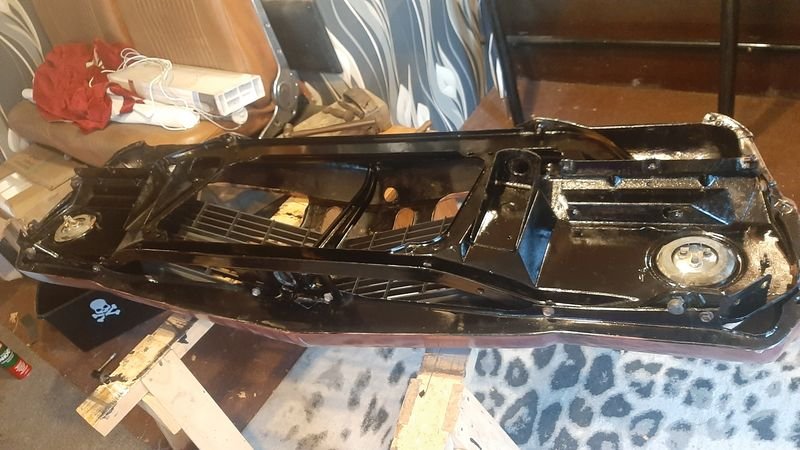
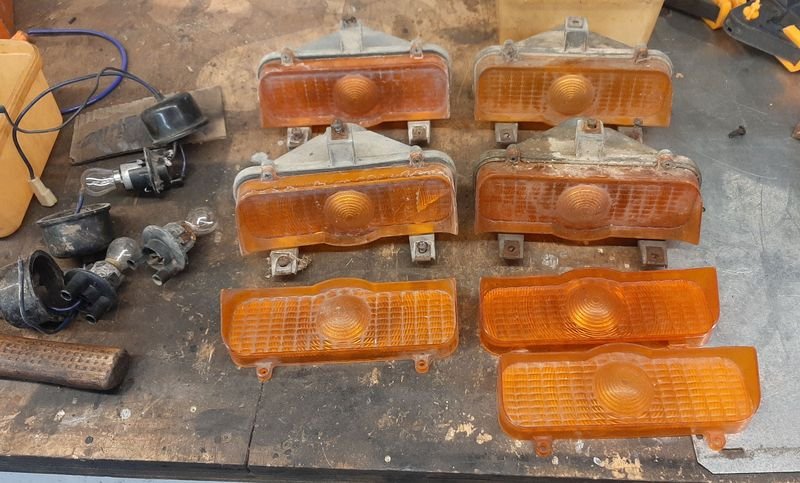
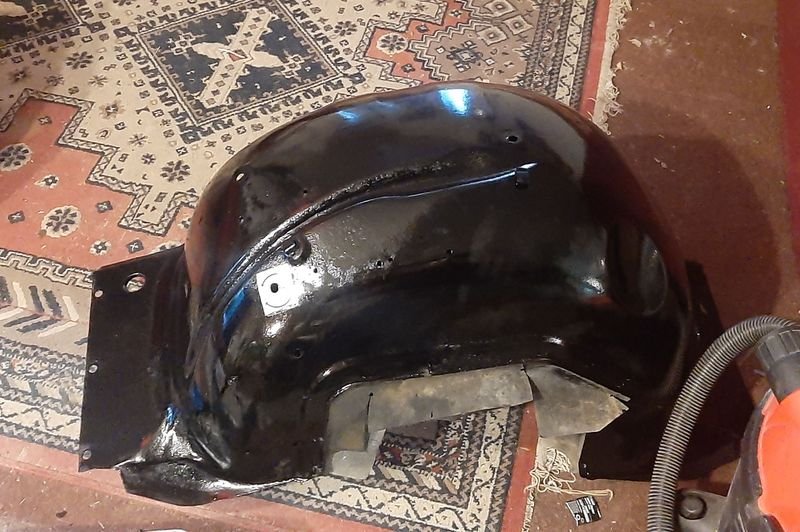
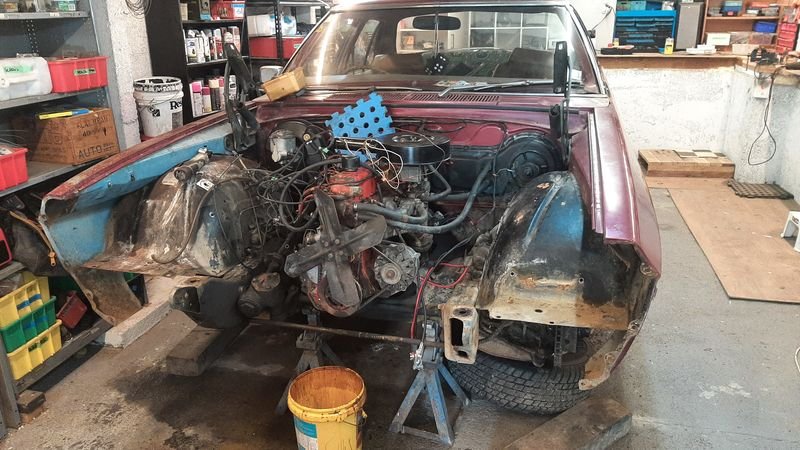
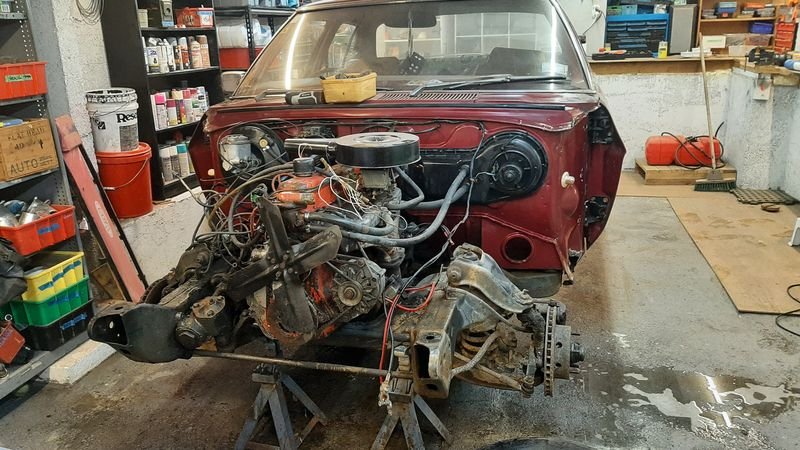
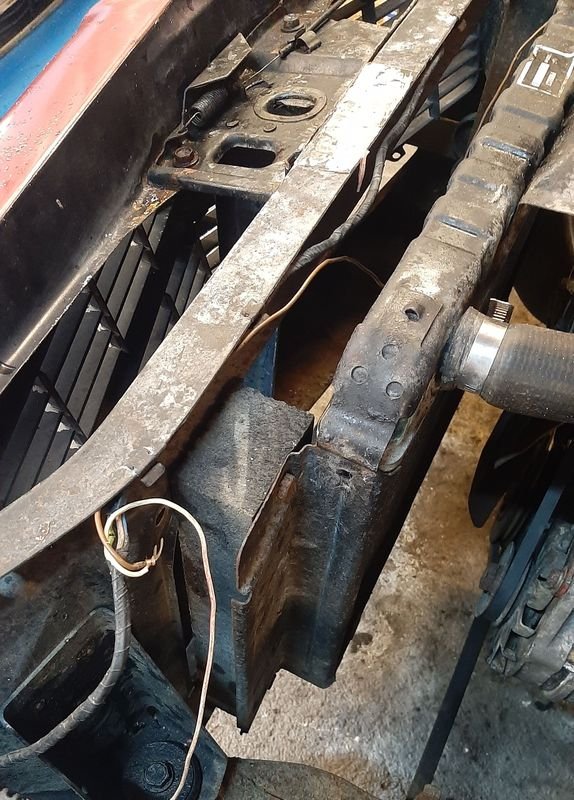
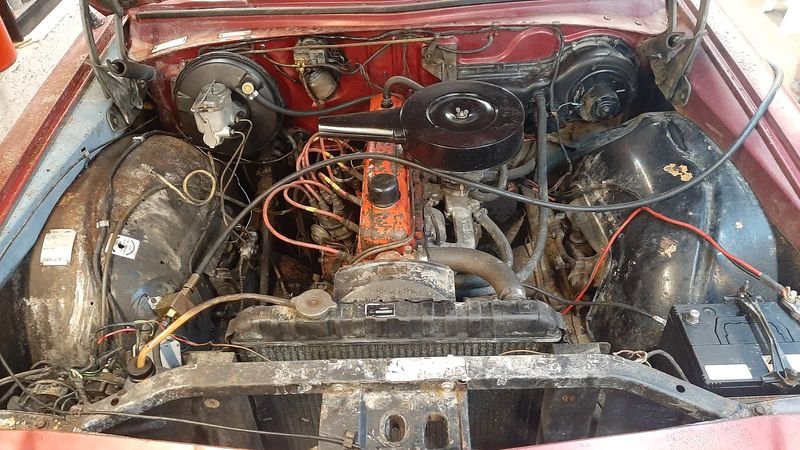
We decided to remove the front clip to tidy it up and make it easier to get to the suspension and enginey bits as well. Check out the custom radiator shims - the Torana must have a shorter engine bay. We got $50 of random 202 bits of FBMP and amongst a couple other handy bits that included a near new water pump, a much better thermostat housing and the extended fan thing. Nose cone off Note the blue inner on the drivers fender i think this was replaced post restoration as the paint is overall much worse than any other panel and seems to have been painted only once bolted on - the passenger side is also a replacement (originally a pale yellow/mustard) but was fairly obviously repainted with much more prep and attention while off the car. Other than the fender rust behind the front wheels where water and mud collects, the front clip panels are entirely rust free which is nice Fenders out Pulled everthing to bits, cleaned it, derusted, and painted Pretty pleased with that, pressed a couple of dents out with the press and it seems to sit nicer too Going through the front indicators to make at least 2 ok ones inner fenders tidied up rad support seperated from the nosecone and all bits including the lamps all cleaned, derusted, unbent, painted, threads tapped and reassembled. Nose cone has similar treatment but just knocking the cracked paint off on the outside and primed it. Looks worse at first glance, but its straight, rust free and ready to bolt back on, or for body work at some future point. Need to sort the rust at the base of fenders but all that stuff is ready to bolt back on. Because my big sheet of 0.8mm is for baby cars, I picked up some 1.0, 1.2 and 1.4mm panel steel offcuts today for $15 + GST ( https://rietveld.co.nz/ - what a treasure of a place - a true barry paradise!) so ill probably make a start on patching the bottom of the easier of the two fenders next to start to ease into it.
- 29 replies
-
- 30
-
-
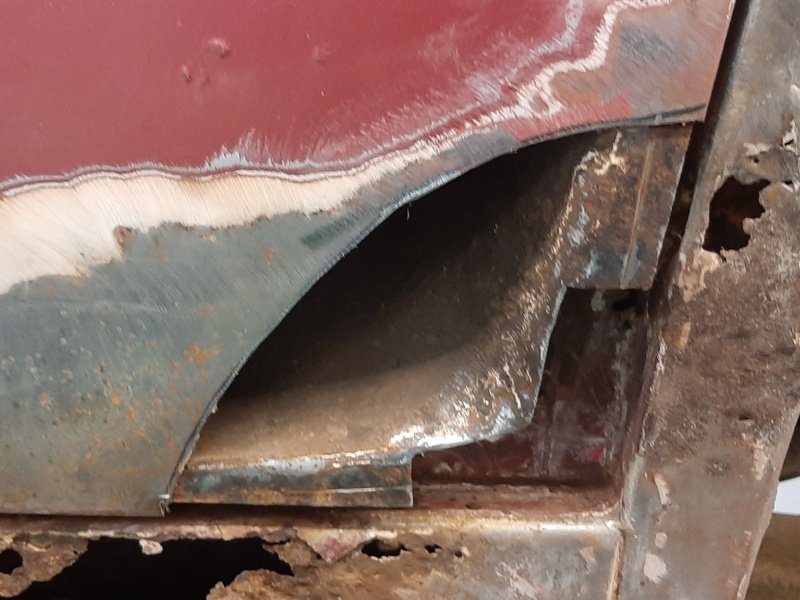
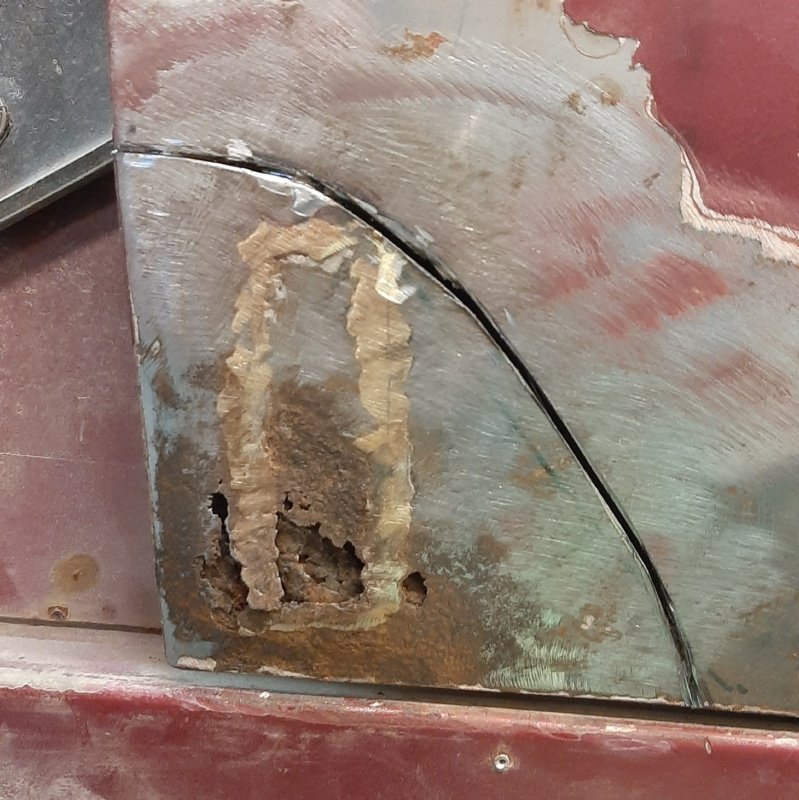
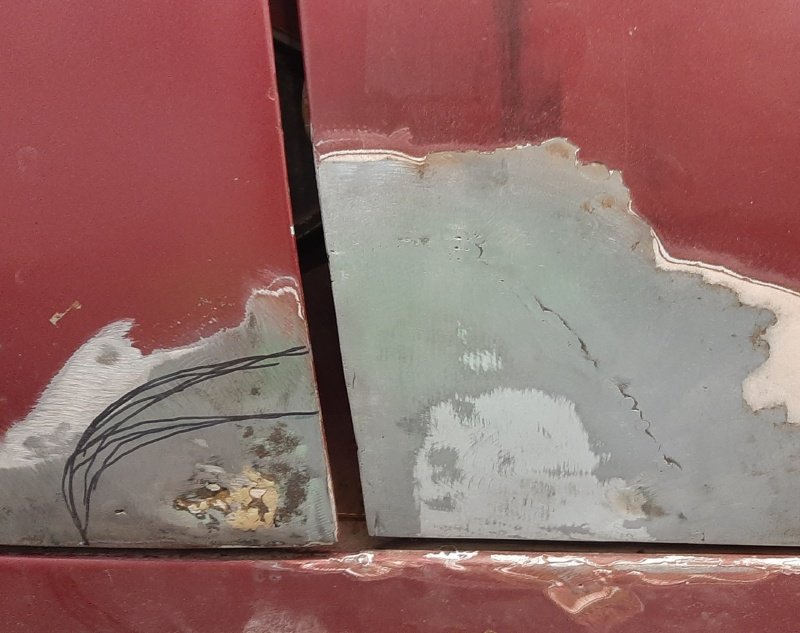
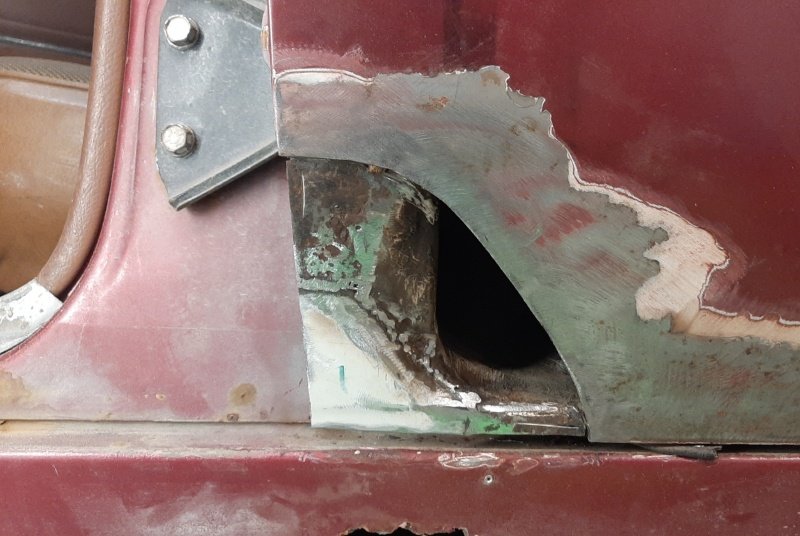
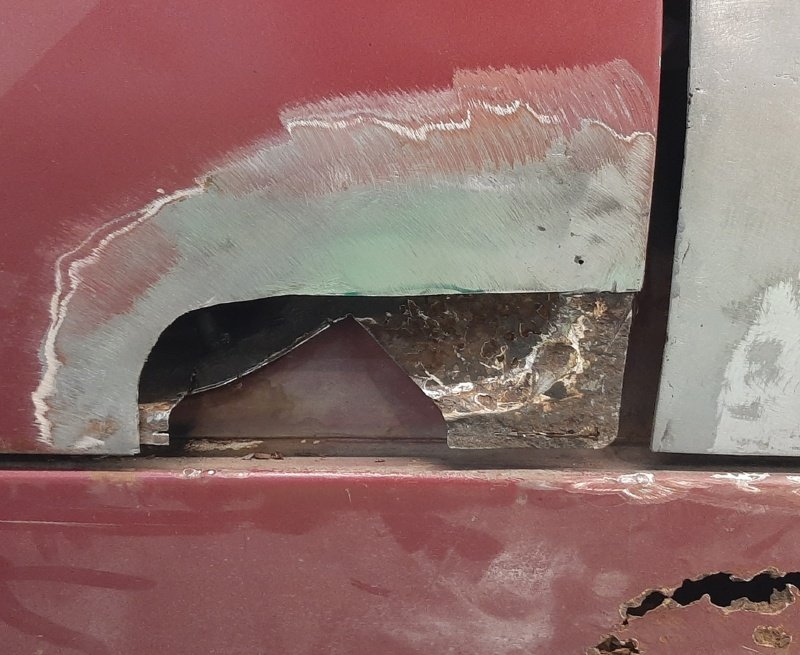
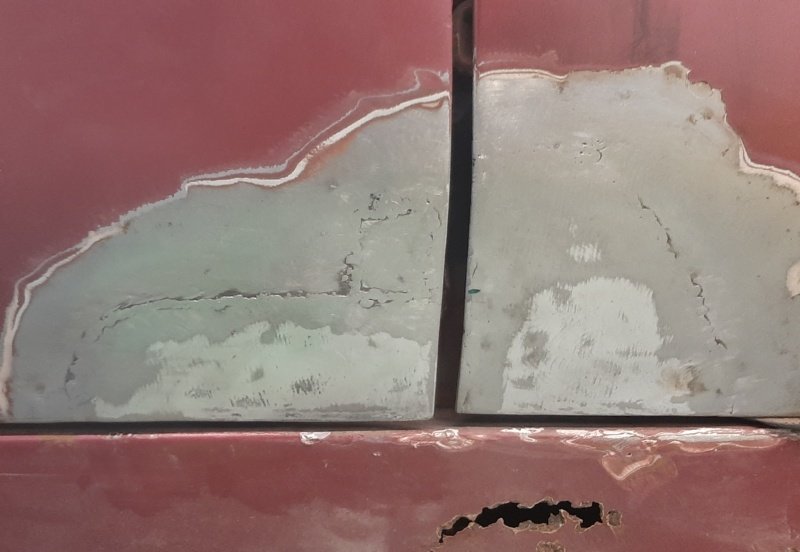
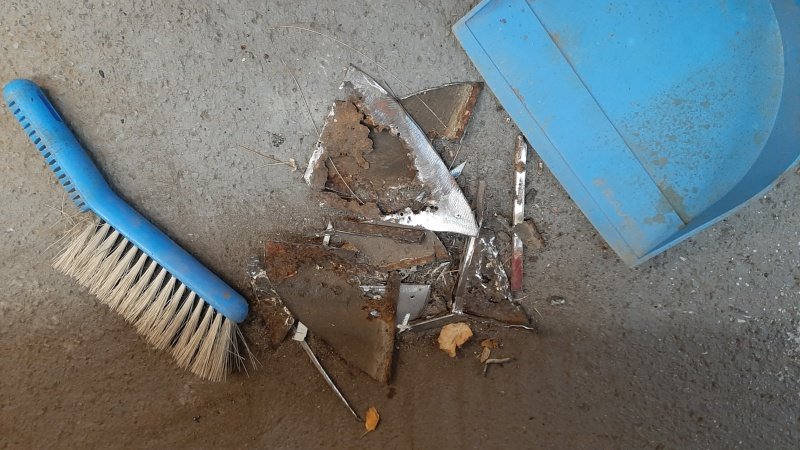
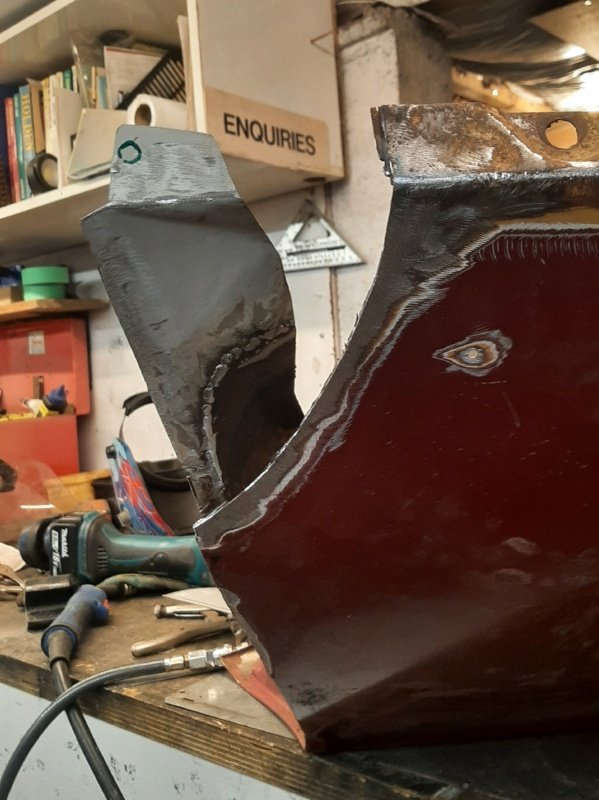
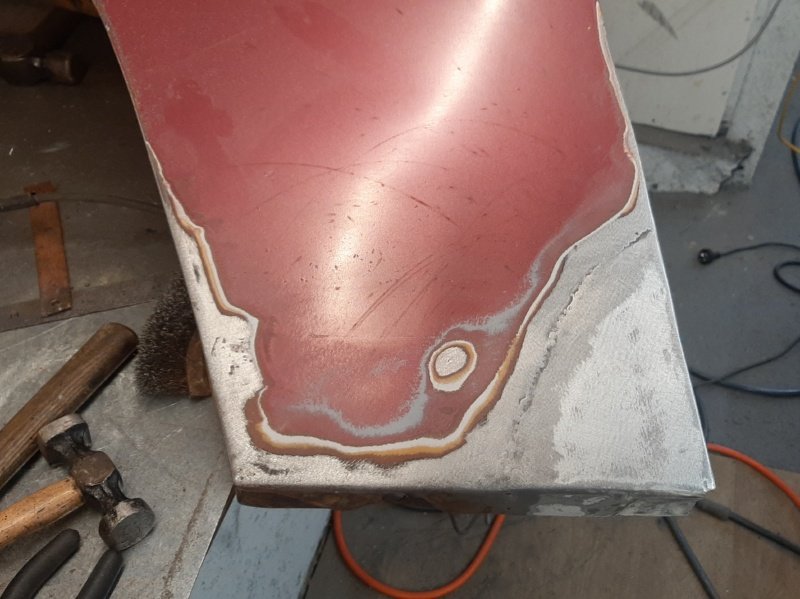
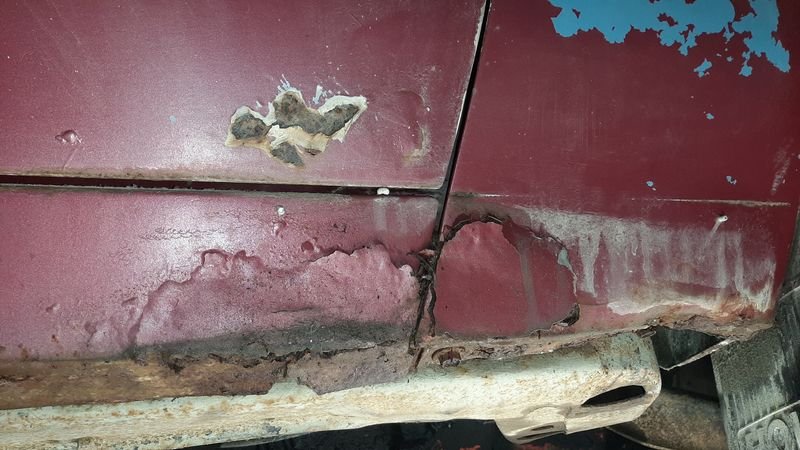
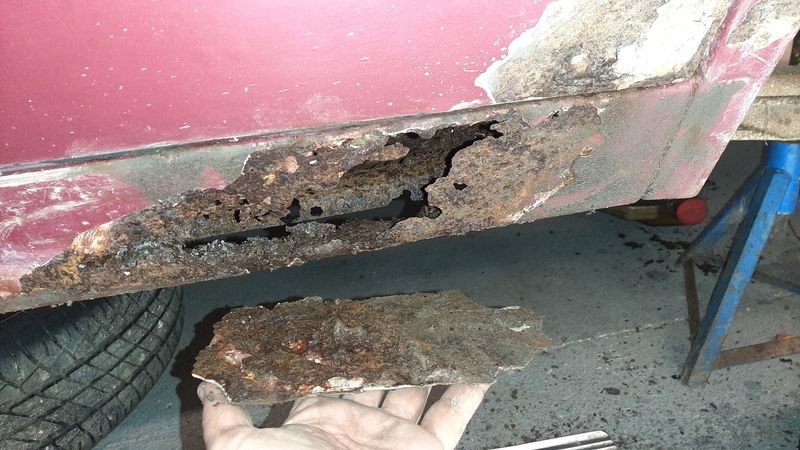
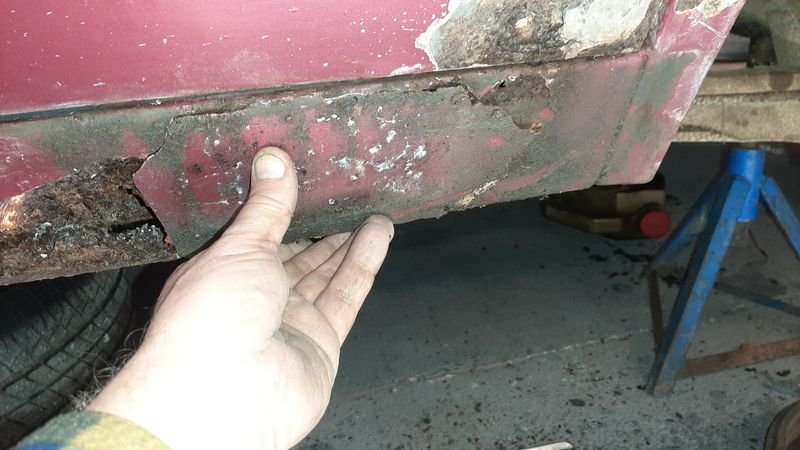
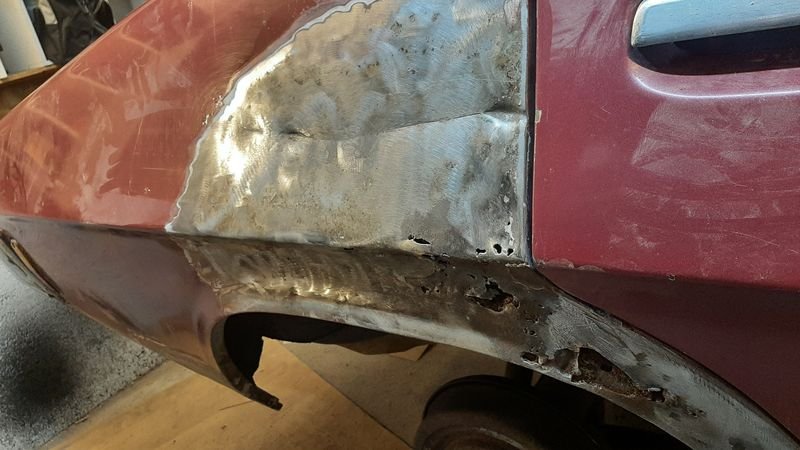
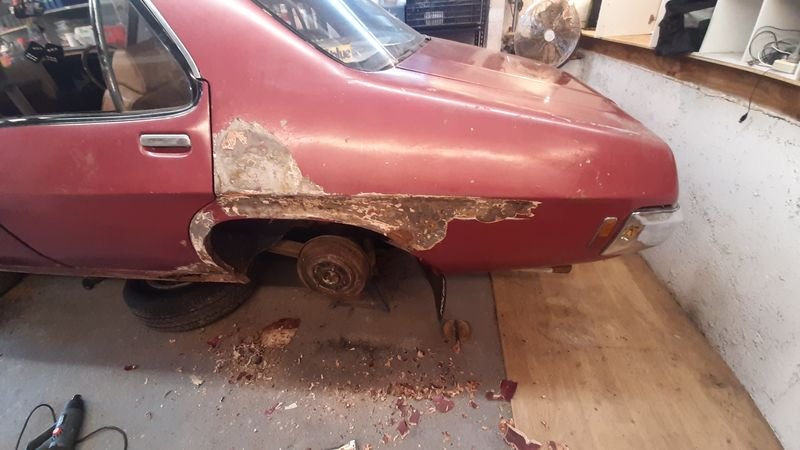
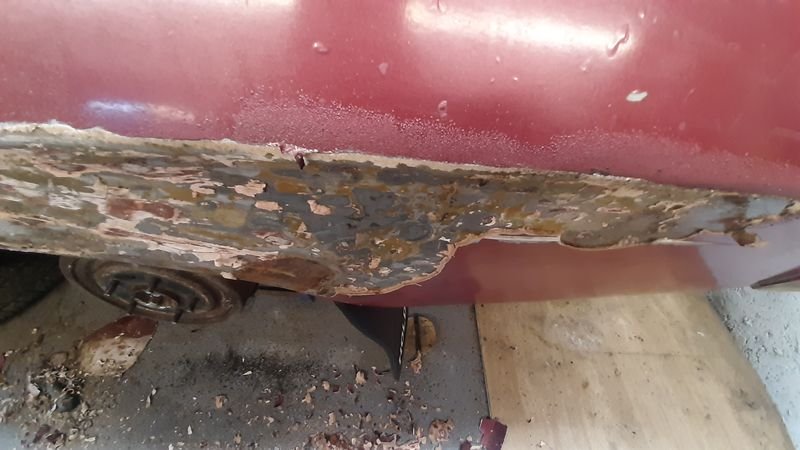
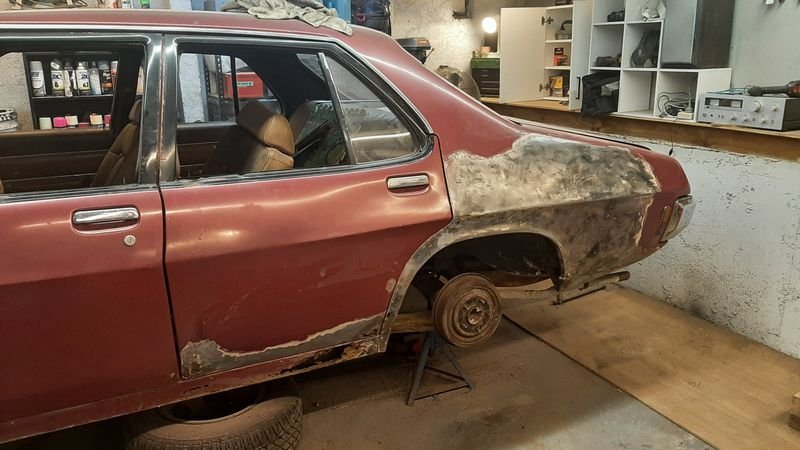
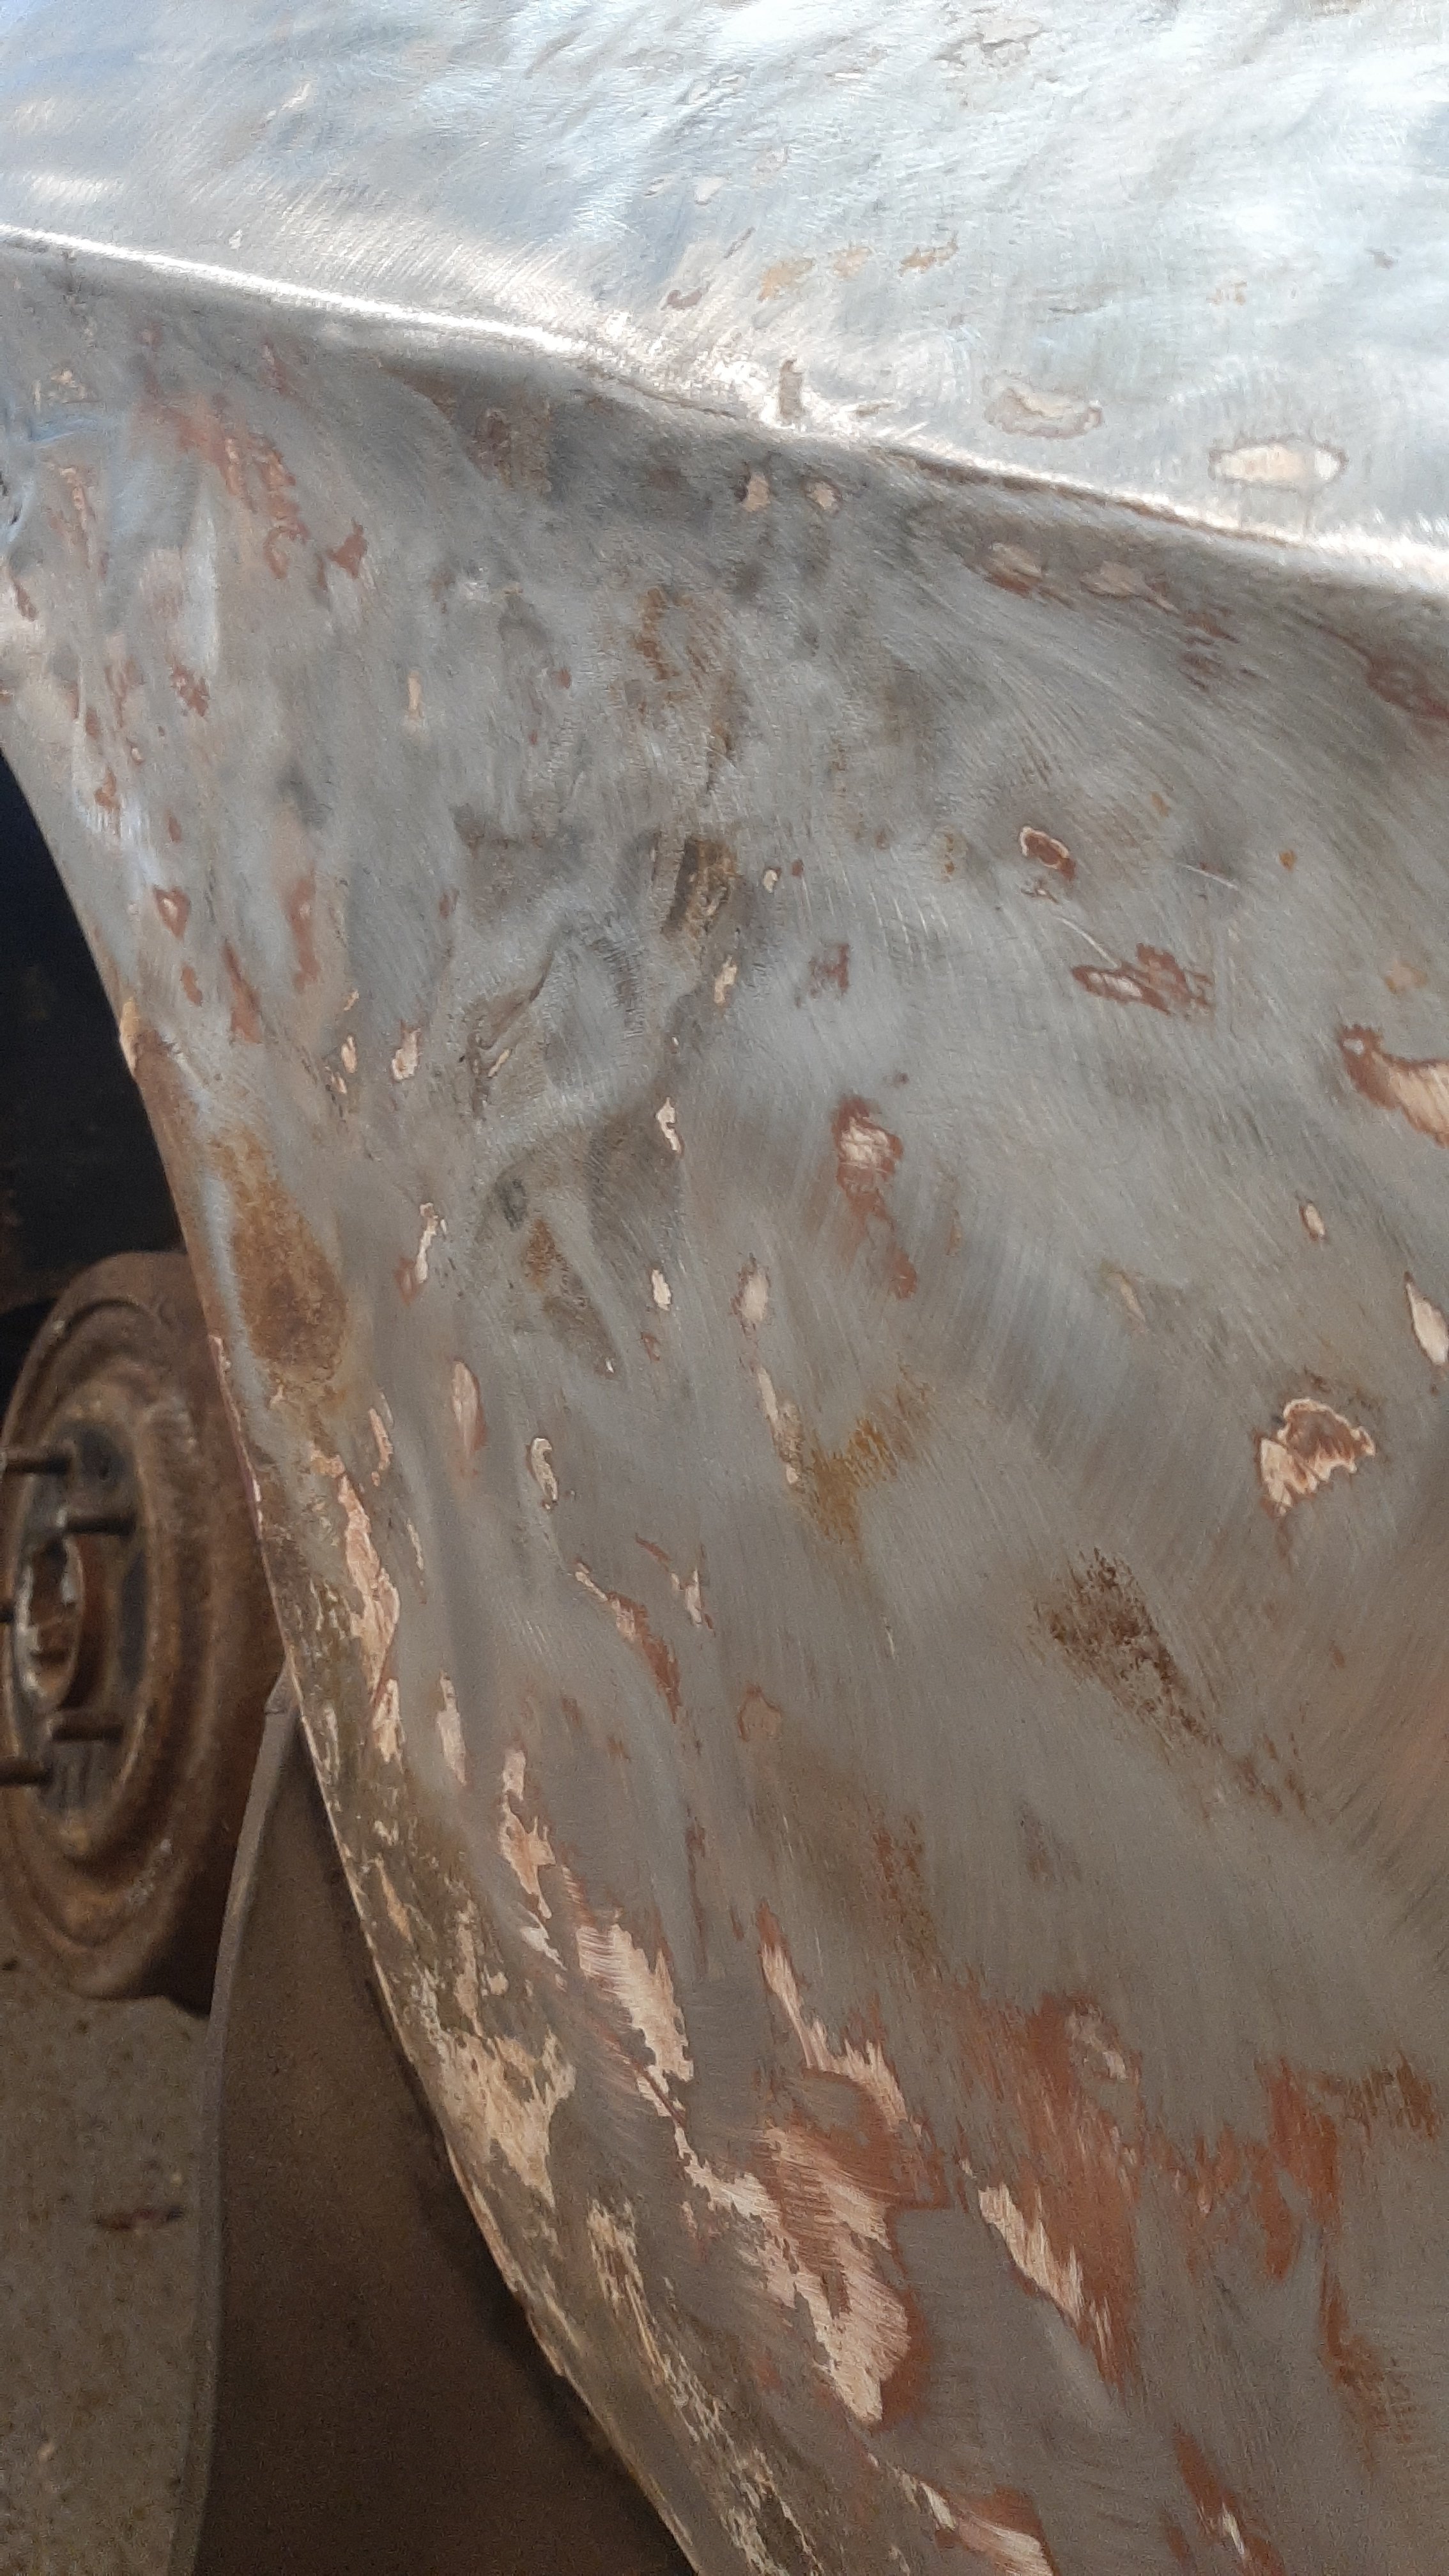
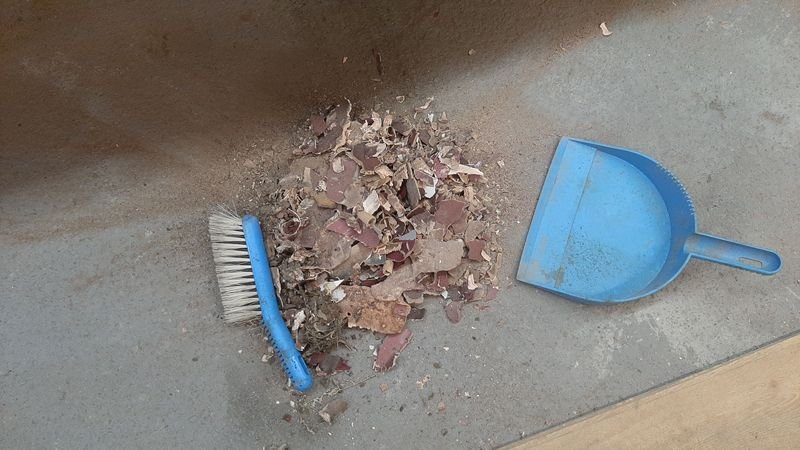
Removing the mud and giving the old girl a good bath made it look better, but also made it easier to see a fair few issues. I think this has been restored once before and there are a few rust bubbles starting and a fair bit of paint adhesion and filler cracking in all the 'usual' spots. I shouldn't have but i started to pick. The Premier sill garnish that had been riveted on this lowly Belmonts sills was holding a lot of mud so i drilled (some) of the rivets. Sucks teeth Ill think ill just put that back up there and pretend we didnt see that With the seal definitely broken i dug into all the suspect areas to see how many repair panels to put on the list . This deep crease explains the thick filler on the upper half of this quarter panel, the filler probably made the rust on the lower half worse. Removing the deep filler means the door shut looks 100x better than it did Good 5mm of filler of this too, and much the same on the other side, except that side has braze as well There were signs of lots of filler on this quarter too. It has also been (previously?) brazed some of the filler was 10mm thick Took most of it off with a heat gun, much less messy than with a whirlywoo. The panel looked like this underneath it, from a prang in the rear Spent a bit of time with some hammers and dollies and a bit of extra heat trying to shrink some spots and it is quite a lot better. Like the other side, removing the filler also significantly improved the fit of the doors to the body! So yeah, some bits are pretty much as i expected (doors) some are much much better than i feared (quarter panels, cowls) , but some i didnt even suspect, like the sills, are quite bad indeed. We will need every patch panel you can buy, which basically means its got bitten in all the usual places, but that is a nice change from not being able to buy any panels at all!
- 29 replies
-
- 26
-
-

-
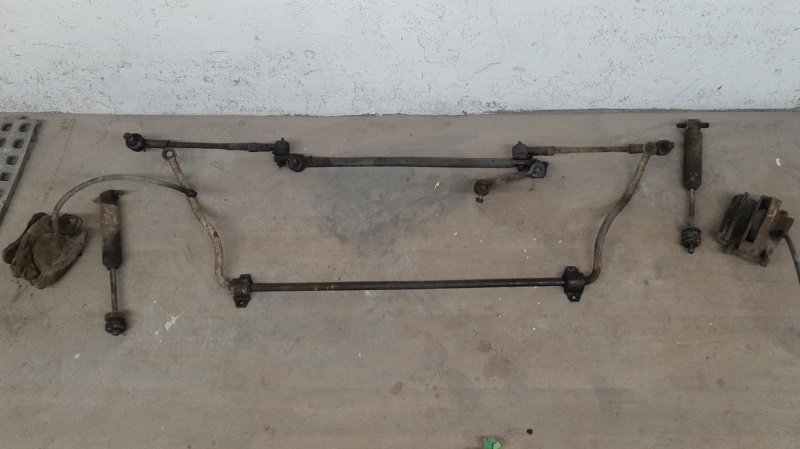
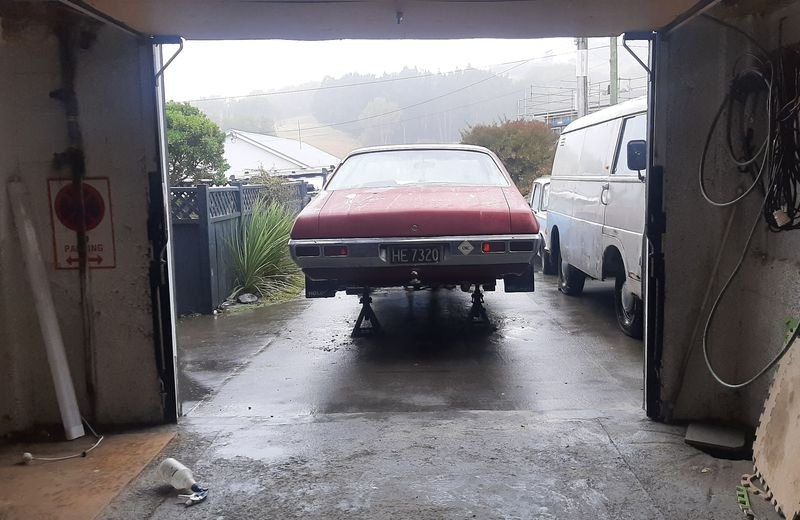
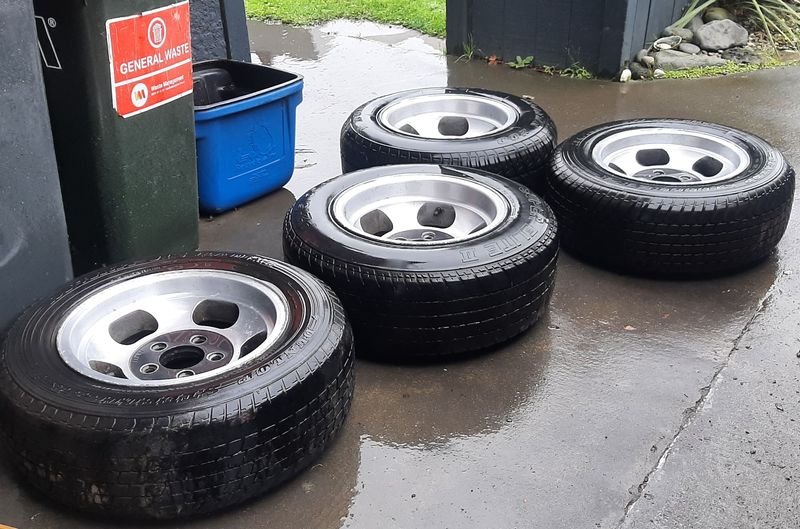
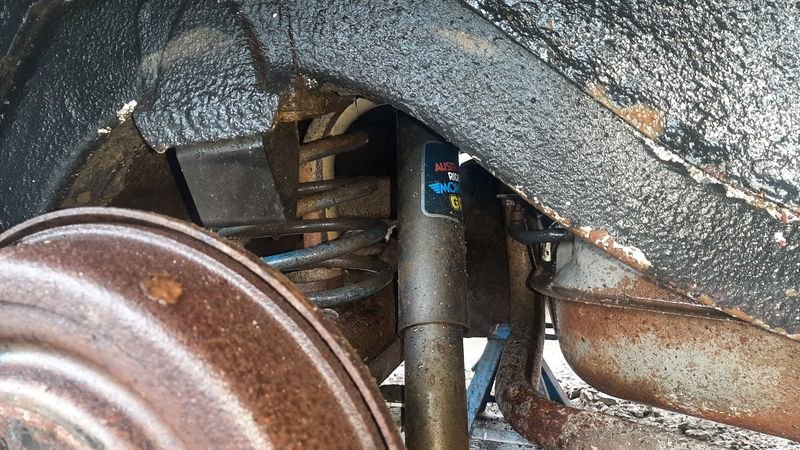
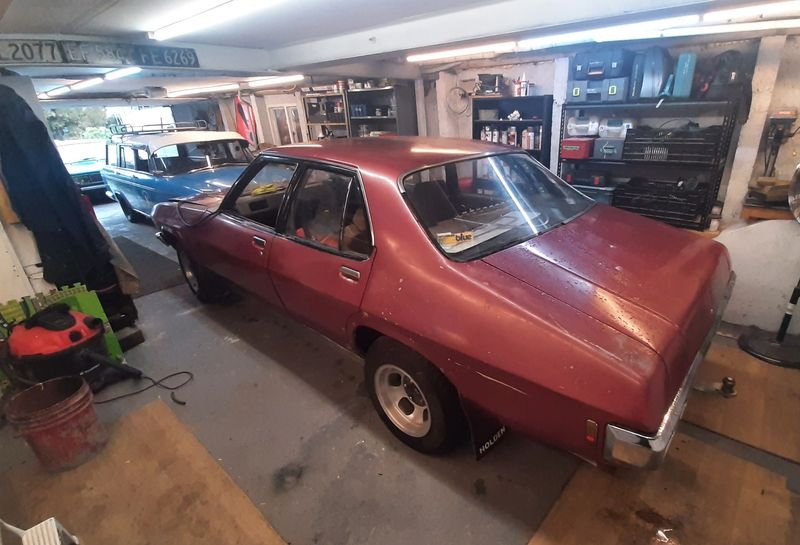
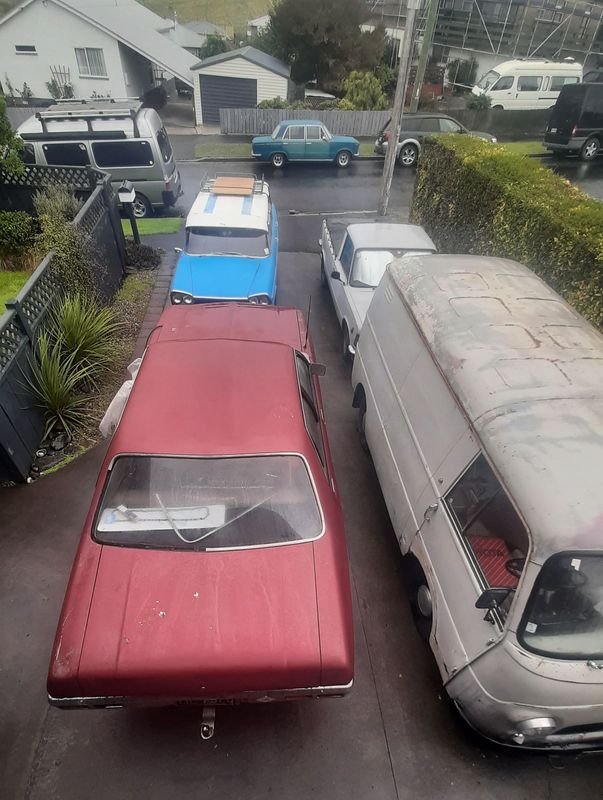
So point of having it stop is to have it driving is so it can be moved around. Driving a project is a good motivator too Point of being able to stop is to drive it outside to give it a good clean underneath, mainly so we can see whats under there and dont get filthy while working on it This car was driven a lot on wet gravel roads. There was a LOT of dirt underneath Quick tidy of the 14x7 and 14x8 Cheviots while they are off with some fine scotchbrite to get the worst of the oxidising off Some blue springs and matching blue AUSTRALIA RIDES MONROE GAS shocks in the rear. Pretty sure both he springs and the shocks are completely shagged from carrying around the LPG tank but interesting to see. This thing is an absolute whale compared to the rest of the fleet Gave it a wipe down with a waxy towel Swept out and tidied up stuff And shuffled everything back to bed
- 29 replies
-
- 33
-
-
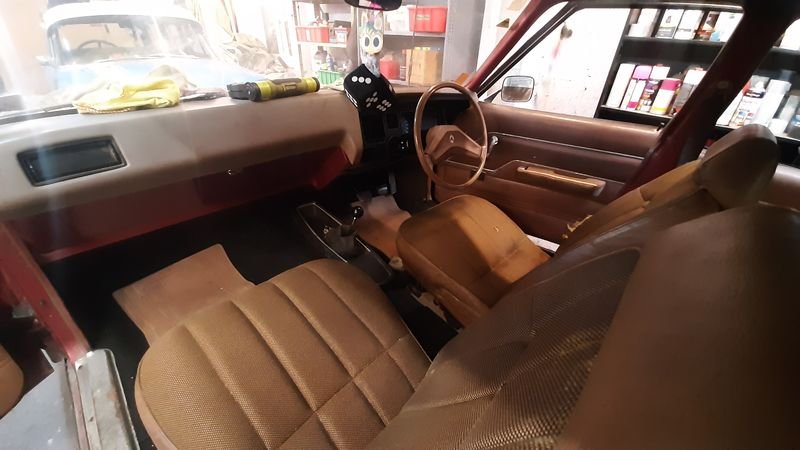
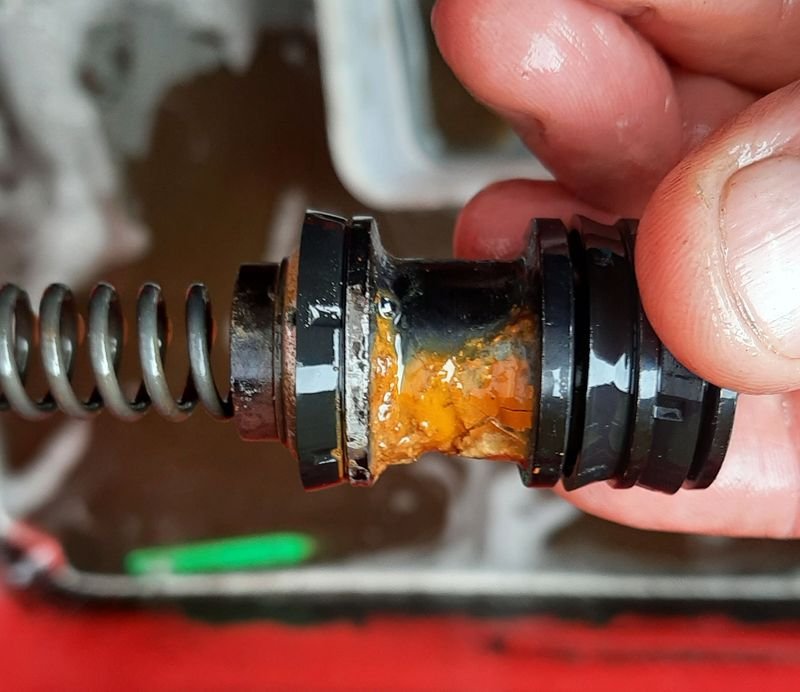
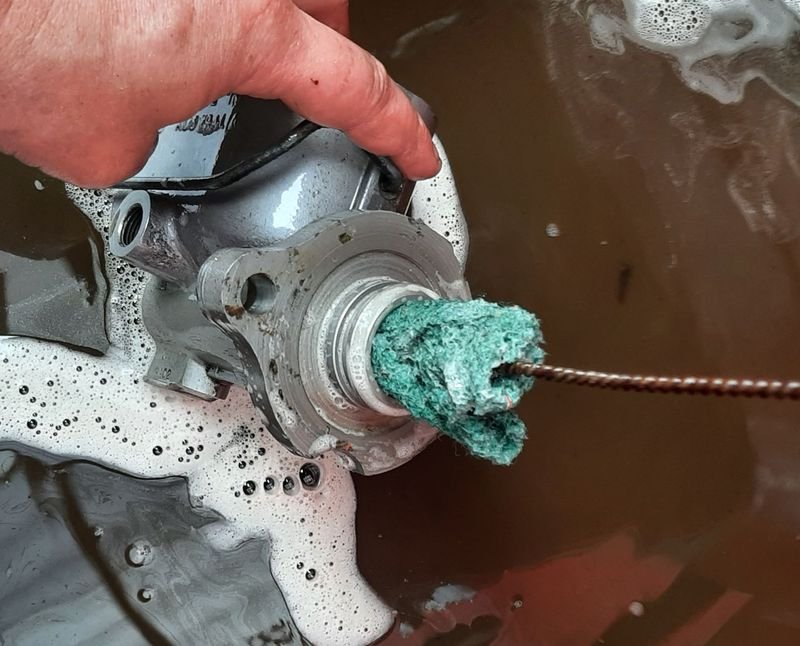
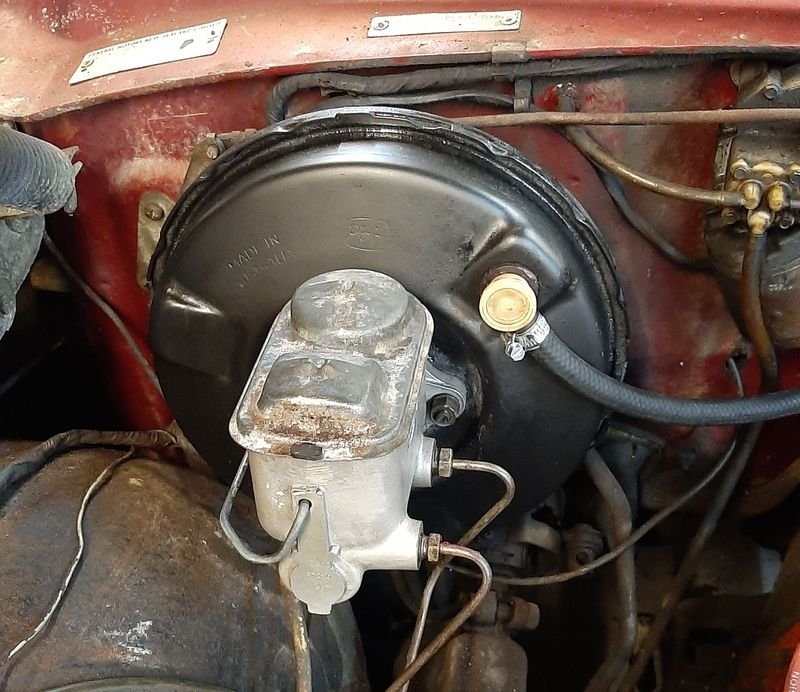
last month or so Kirsty and I have been poking away at this Got the interior back together, the Torana seats look pretty cool in brown, but there is no reclining function, they only bolt to two of the HQ factory holes and there are bits of wood under the two feet, so some factory or better seats are on the list now too. Seatbelts as well. Got it running off a boat tank off the key reliably, and next task is to make it stop so at least it can move it self around relatively safely. I like having projects be drivable, I like that they can do their main function, lots me think they are pretty much done apart from some petty technicalities. Started bleeding from the master as the pedal felt like the piston was stuck. No fluid exiting from the front port (rear brakes), rear port (front brakes) seemed fine. (Notes for later reference: PBR alloy master, cast iron front callipers, drum rear) Yep - was stuck down and full of schmoo. Got it professionally line bored Assembled it with lots of rubber grease and 'rebuilt' the brake booster Tidied up the engine bay a bit more as well Aaaaand now it leaks fluid into the booster when the pedal is pumped.. I may have assembled it wrong but i suspect one of the seals is blown/nicked or the bore is pitted somewhere (looked fine). Will need all new brakes at some point anyway so ill try to find a kit for cheap, or a new master even (seems they are around $300 from the usual places)
- 29 replies
-
- 17
-
-

Random slightly cool stuff you built but not worth its own thread, thread
azzurro replied to h4nd's topic in Other Projects
A+ job bro. Nice trailer to tow and reverse etc, one careful lady owner. Suits small cars, but allergic to FIATs. No regerts, would FIAT with this trailer again. GLWS -
I like this guys whiteboard explanation (skip to 5.42) After watching that listening to David Vizard blab on makes a bit more sense
-
getting a bunch of sizes wont be that cheap even from aliex? Even scooter jets arnt that cheap a set of jet drills and some solder would be cheaper once you know the size you need Dellorto.co.uk Carbparts.eu
-
My other old Holden story is my (step) Uncle Gary is into them, and still has a pile of them (in northland) Me and my step bro learned to drive a rusty/mostly fibreglass HR? Ute that he must have given his brother (my step dad/old man) to use in the 5 acre paddock we had out the back of the house. It was good for chucking old farm crap (rubbish, fence posts, thistle, boxthorn etc) into to take to the bonfire pile and doing donuts in the paddock that couldnt be seen from the house. The problem was, that the donuts left marks in the grass that could be seen by the old man when he went on his walks around the place, so then we couldnt do that any more. I remember getting it stuck once and not being able to rock it out of the hole it had dug (i was like 12, the only thing i new which was giving it more jandal wasn't working - what to do???) and Gary saying, ill show ya, jumping in and rowing the column change and heavy clutch between 1st and reverse like a drift car driver, SKILLZ! From what i can recall the ute disappeared when we had tidied up most of the paddock and built some fences, Uncle Gary probably grabbed it back, and probably still has it. Less classic Holden yarns The old man also had a series of new two tone (maroon upper, silver lower) V8 Calais, i think VS, VSII and then maybe a VT, before changing tack to a V8 Cherokee (in the same colour) - i think he said the Holden salesman gave him some side eye or tried to stiff him on the trade in or something, and after buying 3 new top spec cars in 5ish years told them to shove it and must have gone to the Jeep place instead. The VS was the best one (IMO 12yo opinion) still love those flat rear arches. Mum also had a first gen Opel Vectra GT at the same time, that was pretty quick too (when the old man drove it!) and had a great sporty exhaust note The 90s were a good time.
-
what im picking up is that the Holden 6 engine is the B&S of the car world. everybody has or has had one (meaning the n opinions is equal to n bellybuttons) , and they basic and reliable in the face of both benign and active neglect, but also imminently tuneable by the most barry of barries, given enough time and money, but also subject to the same 'but why would you when there are other alternatives?"
-
In high school my best mate had an hq surf wag. 202 trimatic on lpg. It was good and cool. It wasnt as good or as cool as my other mates xw wagon. 4.1, 3 on the tree on cng (all of the cng).
-
Well they are alloys, and the car came from near to Palmerston North, but i think they are Cheviots based on the centre caps, and that they dont look very much like the Wards i have on my 125. When i make a start on the brakes ill let you know but i do have some Ward centre caps (with the PALMERSTON NORTH text on them) i could use
-
tis very true, i reached, she settled
-
cheers, i been watching this meathead bogan slap together an HQ and record it on a potato, has some good tips and stuff, but i think hes secretly a bit a bit of a nerd, i reckon you might like him:
-
Regale me with your HQ related tales of triumph and woe, and ownership hints and tips here ^
-
Tell me about - how you/brother/dad/uncle/cousin/mate used to have one - why my mrs is now tougher and cooler than me - why big Australian cars with a mix of metric and imperial fasteners are better than silly little European ones that only use metric ( i had to dig out my very limited and mismatched Imperial sockets and wrenches that had been banished to the back of bottom draw of the tool box and put them right in the top bit ) - where to get new parts easily/cheaply/locally - why the second hand stuff on FBMP is outrageously priced and clearly owned by meth head bogans and how to avoid them - tips and tricks for hotting up your 173 using OEM + parts (commie inlet and exhaust manifolds? - the single stromberg and right angled log exhaust manifold offends me!)) - can you bolt a 202 to the Torana 4 speed? - where to find a nice 202. - why do i even want a 202 (re-rego mainly), the 173 is probably perfectly fine, KPie doesnt really care (unless its a v8), and it wont be the engine from the Torana any more, - where the fuck is the fill port for the CNG system on this car? (its not behind the number plate with the petrol filler)