BlownCorona
-
Posts
6,540 -
Joined
-
Last visited
-
Days Won
4
Content Type
Forums
Downloads
Events
Gallery
Everything posted by BlownCorona
-
I've gone to the same place for years, some good old boys who arnt idiots. You're not gonna pass any dodgy shit there but they arnt going to fail you for just having an old car. Hard to say how this will play out
-
Have just taken the Chevron/Lotus 7 for its first wof in ~15 years and although it went through nicely and nothing of note was picked up. they did pick up the four point harnesses and want to query land transport on monday. does anyone here know/have experience/know where to look in the virm for this situation? car was built in 88 and to my knowledge never had anything except a 4 point harness fitted. i have emailed Chevron engineering and apparently Evan is a friendly guy so i expect a response from him, but threres every chance hes gone on holidays and who knows when that response may be. have also messages the guy i bought it from to see if he has any historical pics but im pretty sure hes given me everything hes got. options seem to be; 1 Land transport say its ok and i get my wof. 2 Land transport say it needs an authority card. - not a major i guess, but does this mean only people with a MSNZ licence can drive it on the road? be a bit of a buzzkill if i cant share the fun. 3 I fit lap and diagonal belts for road use - happy to do this but dont want to stray into cert territory. 4 ????? *your option here?* 5 profit
-

BlownCoronas 1988 Lotus Seven (Chevron)
BlownCorona replied to BlownCorona's topic in Projects and Build Ups
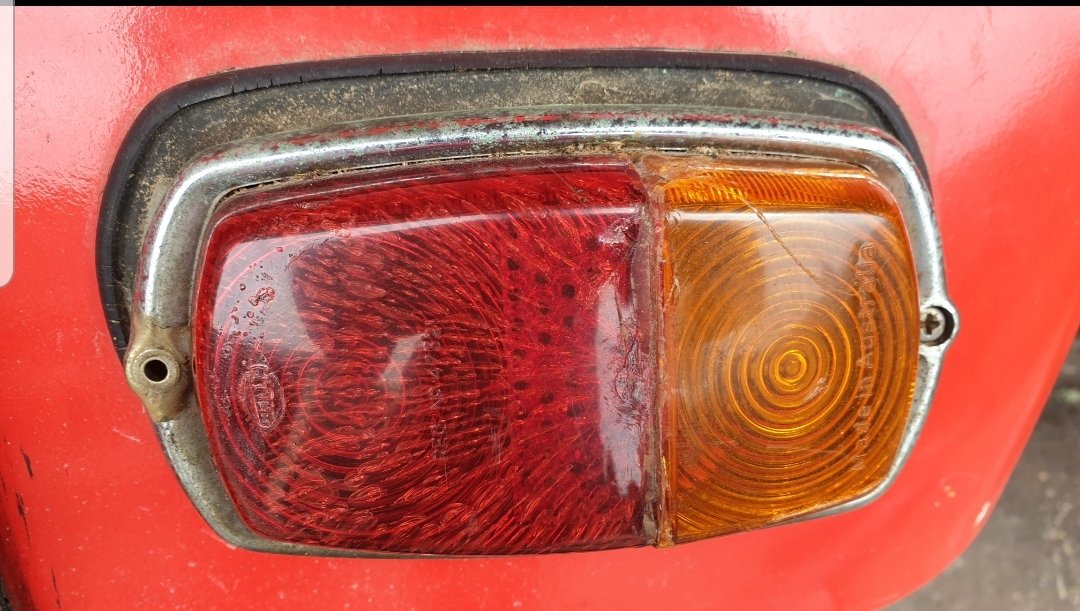
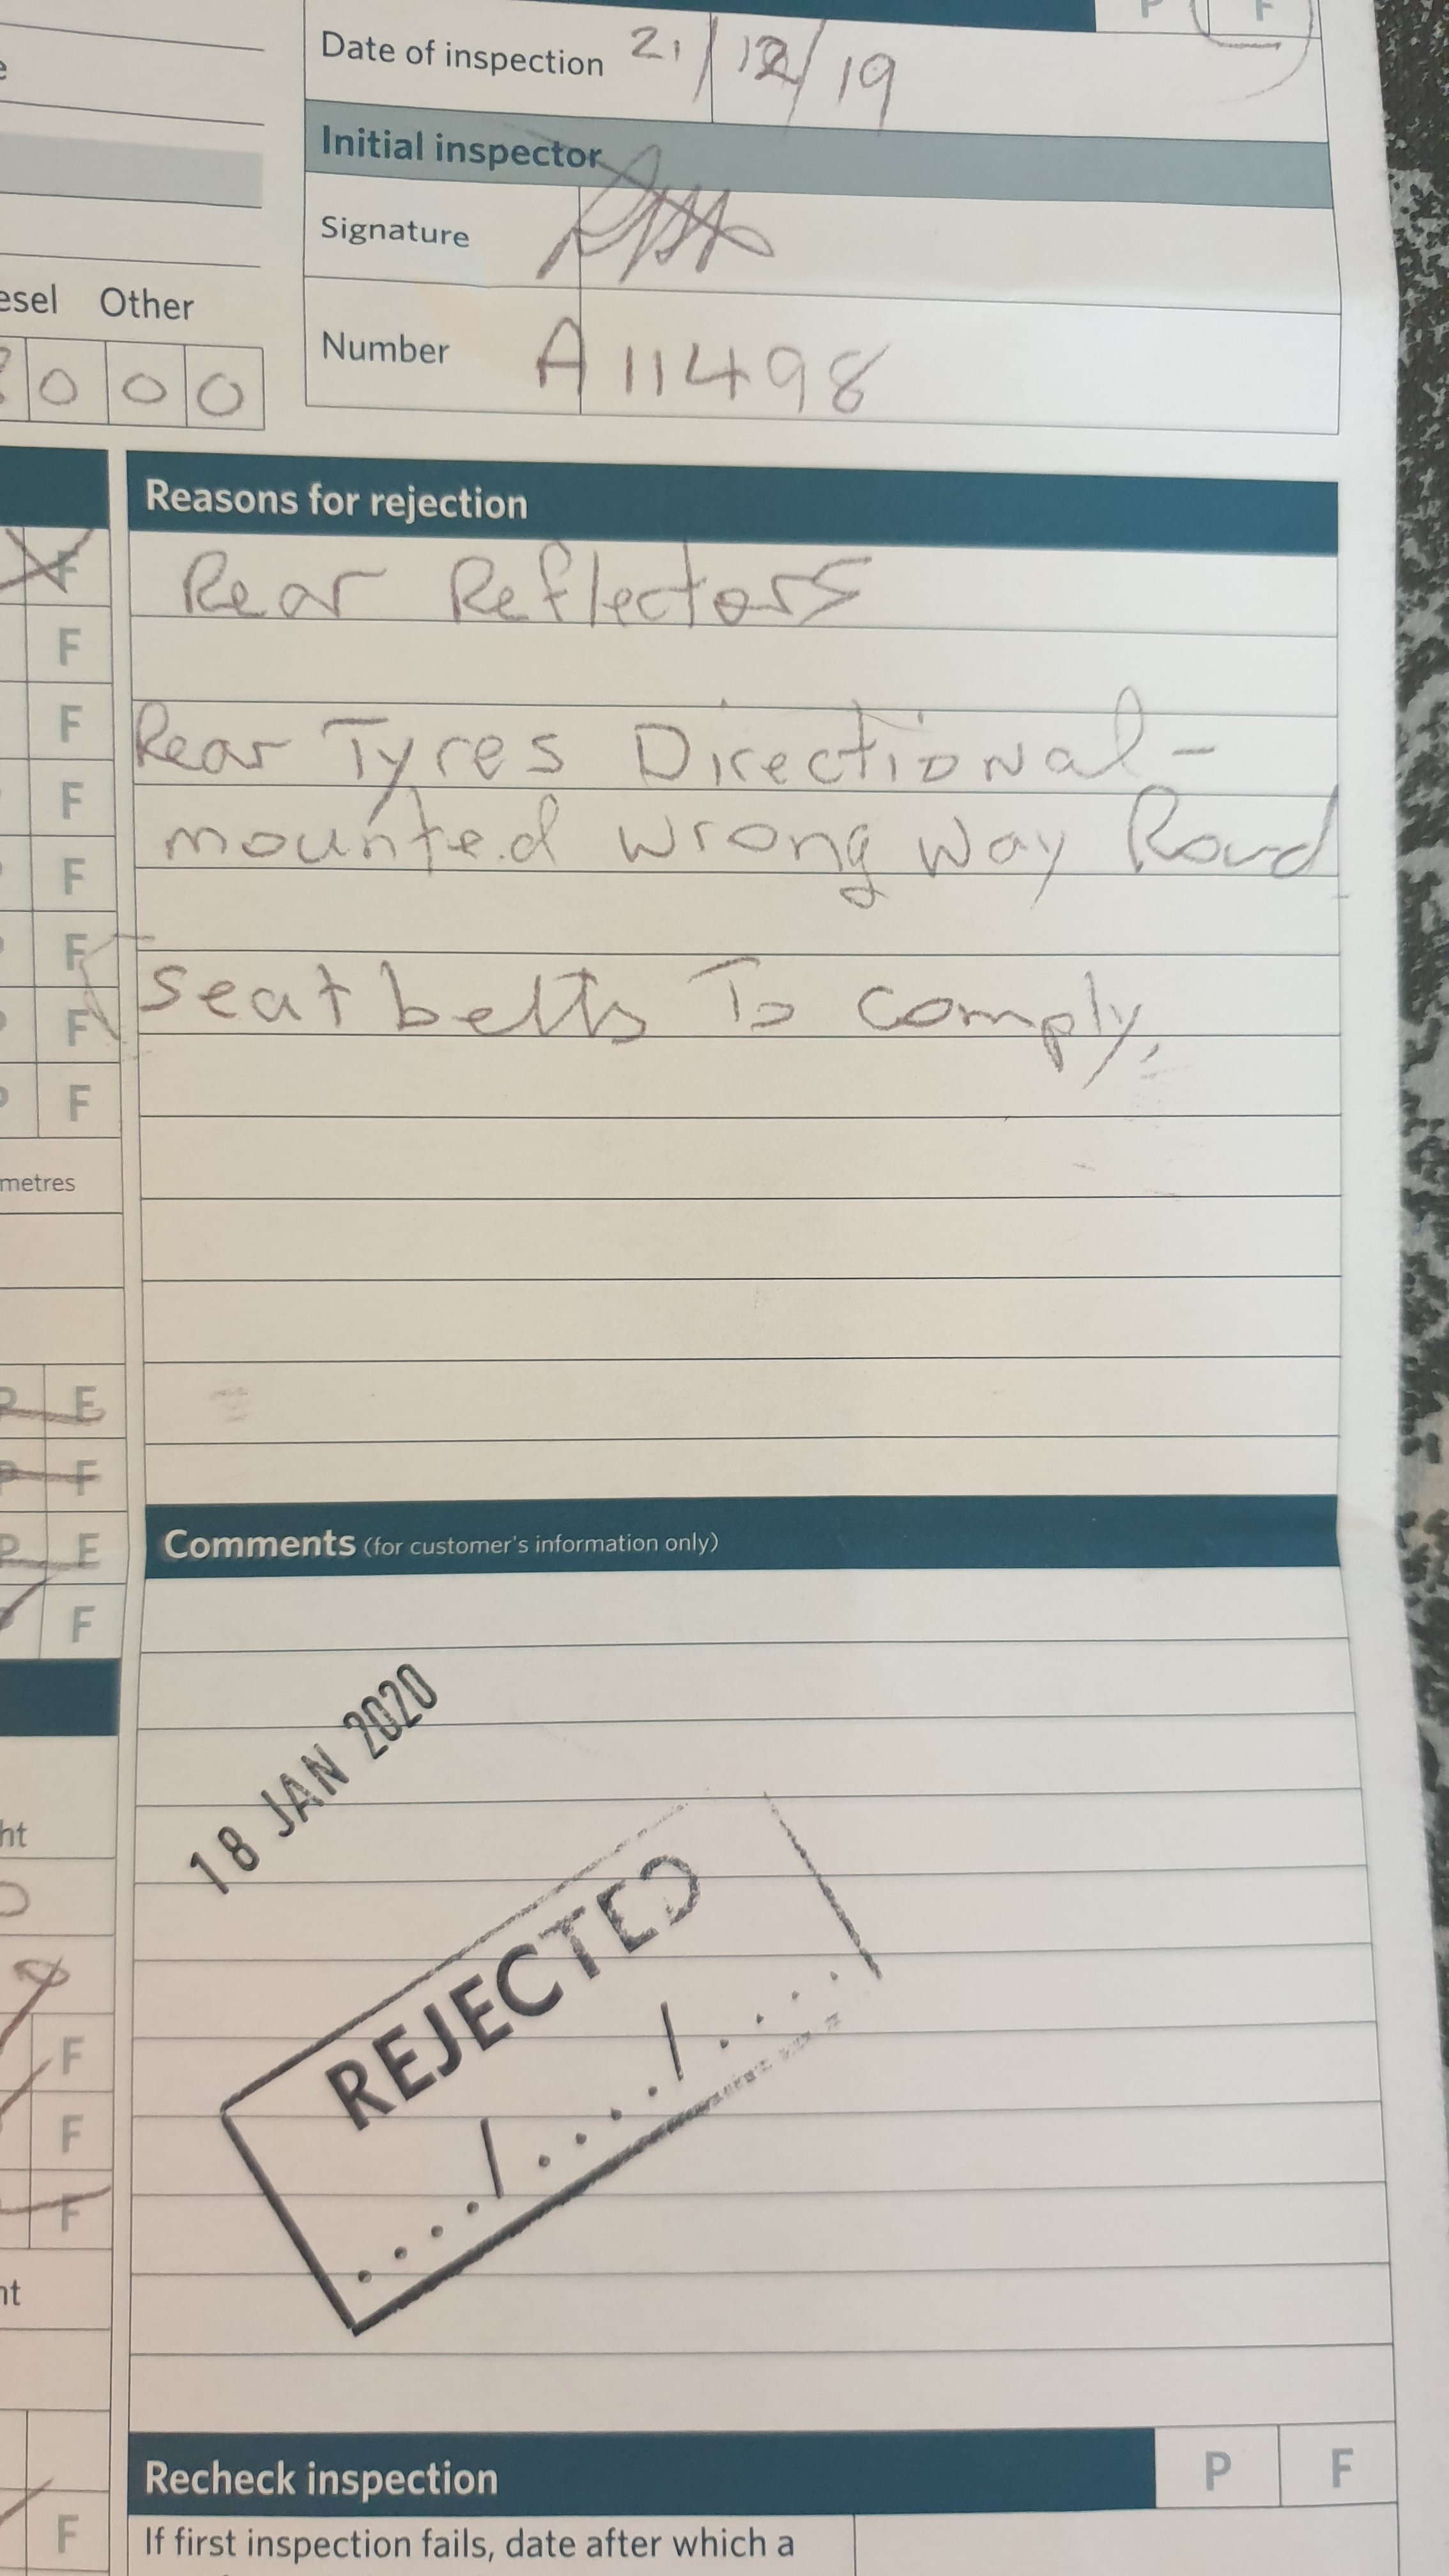
Took it for a wof this morning. Never been so stoked on a fail in my life! I was prepared for serious issues given how long this has been sitting, although I'd been over it and felt everything was good. Maybe I should just back myself more. Only failed on No rear reflectors - new tail lights don't have them and I never noticed. Rear directional tires backwards - dumbass me out the wrong wheels on the wrong side when in a hurry the other day. And the only real sticking point being the harnesses, the wof man wants to ring land transport and clarify if they are OK without an authority card as the car was built with them. Not sure how this is going to go and I'm about to post in the wof/cof/cert thread, but feel free to comment on the discussion page if you have input. I would be happy to run a lap and diagonal belt on the street and a 4 or probably 5 point harness on the track coupled with a new roll bar, but don't want to stray into cert territory. There's a slim chance land transport will give me an early Xmas present on Mondays though...
-
BlownCoronas 1988 Lotus Seven (Chevron)
BlownCorona replied to BlownCorona's topic in Projects and Build Ups
After a substantial amount of fucking around, i finally have the honda civic alloy radiator fitted. everything was close which meant everything needed pissing around with. the radiator cap isnt the highest point which may prove problematic. got around it for now by filling it with the car jacked up in the front but an inline filler may be required. (radiator has a top mount now) other than that, just tidied up and splashed some paint around and its starting to look pretty good! took it for a wof today, too bad the que was out to the road and the man had to turn me away, will reattempt on saturday morning, but i fear every idiot whose left the family car wof to the last second might fuck it for me. legal for christmas is still the goal!
- 21 replies
-
- 14
-

-
yep still got it at mine
-
twin v twin cross cart. one normal turbo feeding both engines.
-
yup they are too long for sure and the excess belt is cumbersome. sticking with race harnesses would probably see me looking at single seater harnesses or similar
-
Oh diagonal absolutely wouldn't be used for Motorsport. Even the low levels I plan on. The belts I have in it now are a normal style race harness and there's just not enough adjustment in it. So at any rate I'll have to change to something. Thanks for the input! I have plenty to think about
-
BlownCoronas 1988 Lotus Seven (Chevron)
BlownCorona replied to BlownCorona's topic in Projects and Build Ups
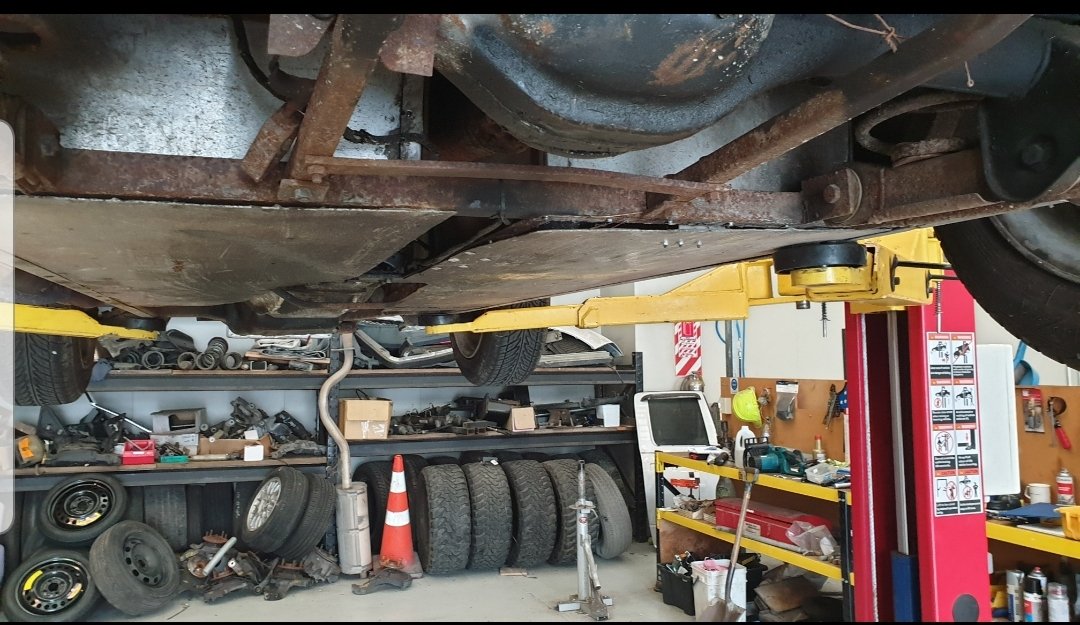
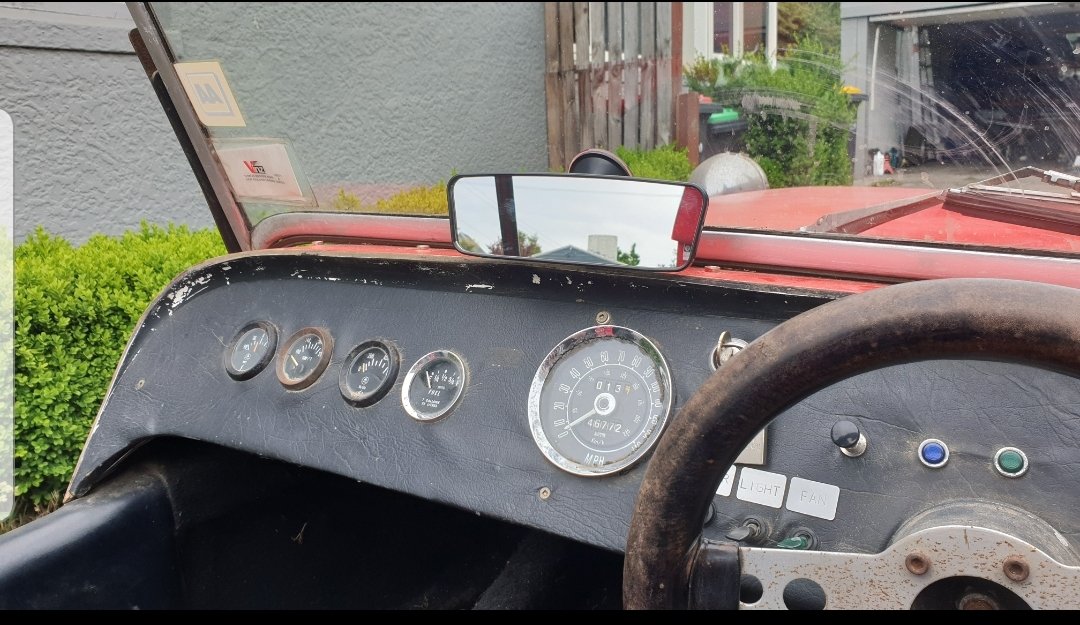
I was going to put this through for a wof this afternoon or tomorrow. Drove it in to work which was super fun, chucked it up on the hoist at lunch time and replaced several of the rivets that hold the floor panel on. The wind somewhat came out of my sails when looking just how scummy it was under there, no actual rust. But heaps of flaking paint and surface shit. I'd rather spend a day with a wire brush, some rust converted and a few cans of black paint, than ask a wof guy to ignore the shittest looking undercarriage he'll see all month. Also the radiator bottom tank is pretty hammered, looks like someone jacked it up at the front and hooked it. The cheapo half radiator civic ones everyone uses look to be a perfect fit, and will likly help with the overheating I experienced on the way home. Looks pretty yuck in the radiator and I'm picking its pretty blocked up, and that the thermostat is pretty similar, so a good flush out and a thick civic alloy rad should sus it. Also noticed the bush's on the rear shocks are done, will whip the shocks out and see if they are OK, and maybe just re bush them. Fronts seem OK, they are nice spax damper adjustable units, but are probably still too stiff for such a light car? On a more positive note, I discovered driving without mirrors is scarey as fuck, and found supercheap have these awesome little rear veiw mirrors on a suction cup! Very pleased with it. I'm also strongly considering changing the belts to normal lap and diagonal for street use, as cool as race harnesses are, they suck for street use, and probably arnt legal without an authority card, We'll see though. Maybe some dot rated clubman style harnesses with the standard belt clip, could be a good middle ground. But god damn is it fun to drive
-
Heaps of knock offs around, be careful and buy from a reputable source.
-
BlownCoronas 1988 Lotus Seven (Chevron)
BlownCorona replied to BlownCorona's topic in Projects and Build Ups
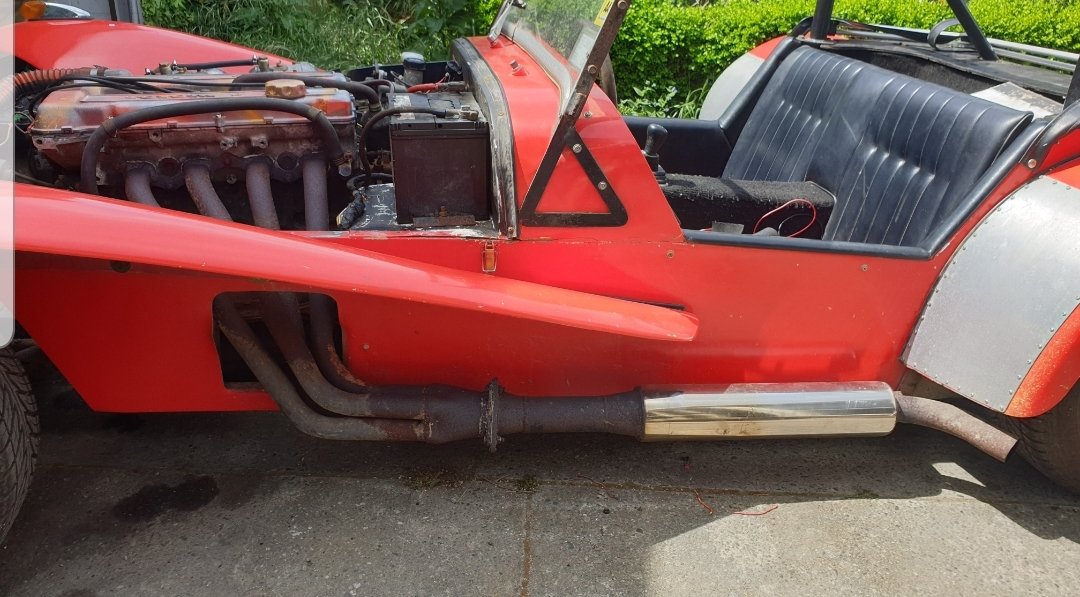
New tail lights fitted, no dramas, all working now. Decided I'd let my daughter paint one of my spare cam covers. Turned out pretty cool in the end. Quite pleased and looks a million times better than what was there. The pretty cool looking headers will get a tidy up and probably heat wrapped at some point.
- 21 replies
-
- 16
-
-
weekend car? you better believe im driving this thing to work every chance i get
-
you have no idea how much this is true, i dont want another major project, it can get made safe and legal and sent. hoping that air filters dont upset the sound too much, but i suppose they are required though. have to figure out what to buy and what works with the really nice cast trumpets it has
-
That's great info cheers! There's every possibility that I'll need to do that in the future. It stops petty great for an unboosted system. Front brakes will lockup if you try to, but great pedal feel so you won't do it accidently
-
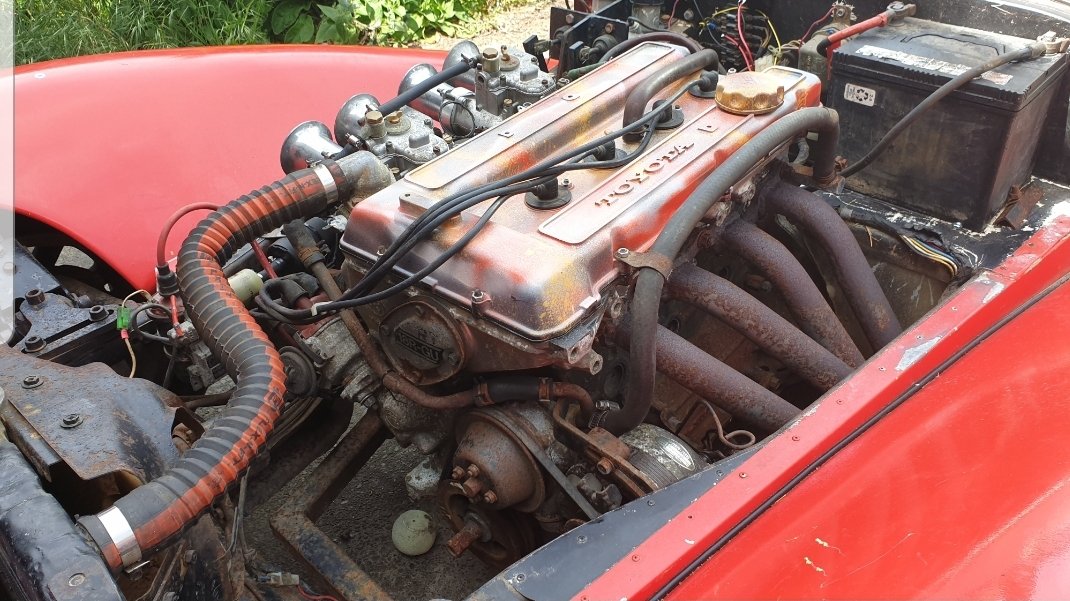
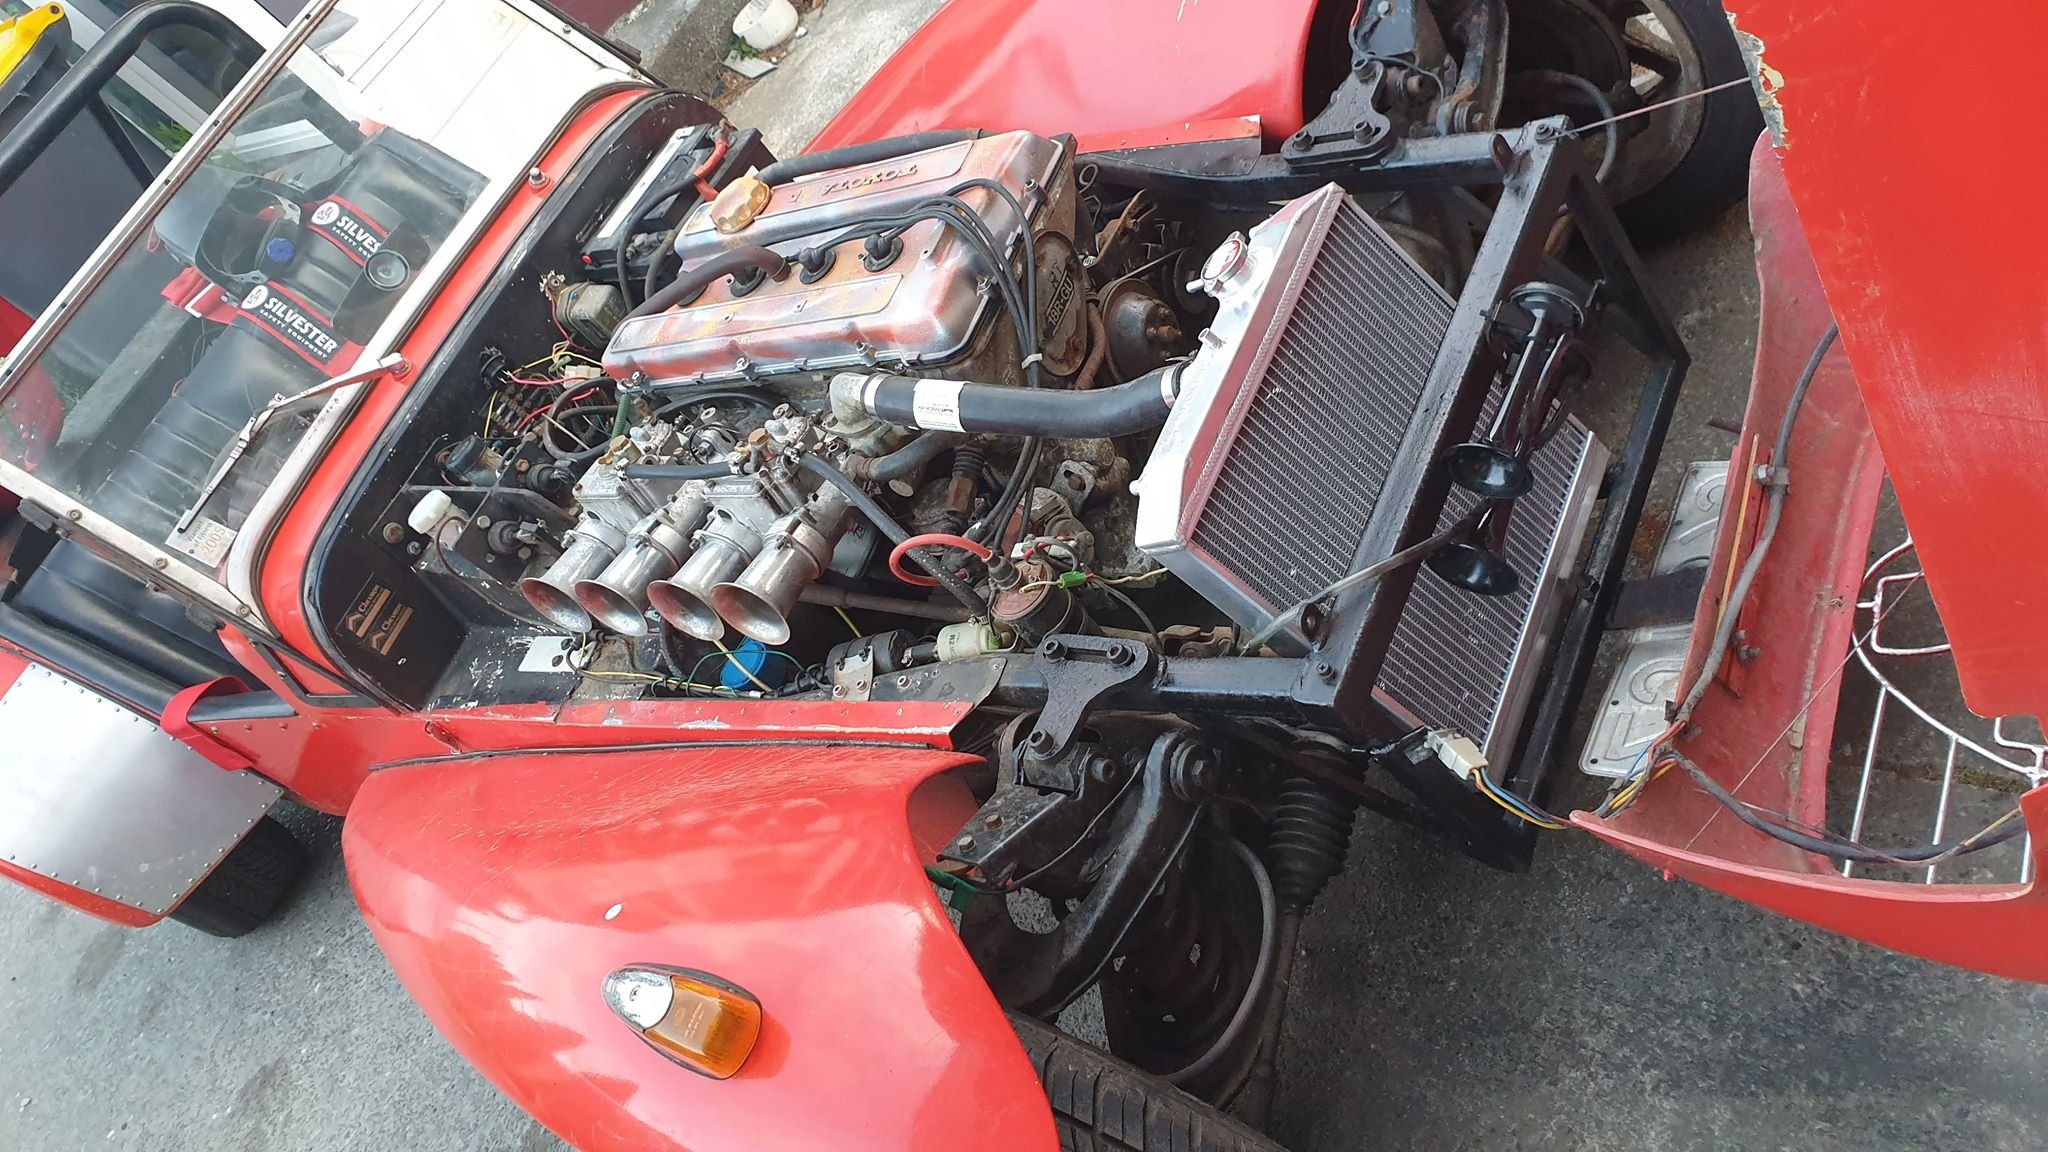
Yes, Viva front end with I'm told Victor disk brakes. I'm very new to British stuff though. Has an LJ Torana rear end which is awesomely oversized. The engine looks yuck at the moment but will post some pics once a it's been cleaned up and had some paint thrown around.
-
BlownCoronas 1988 Lotus Seven (Chevron)
BlownCorona replied to BlownCorona's topic in Projects and Build Ups
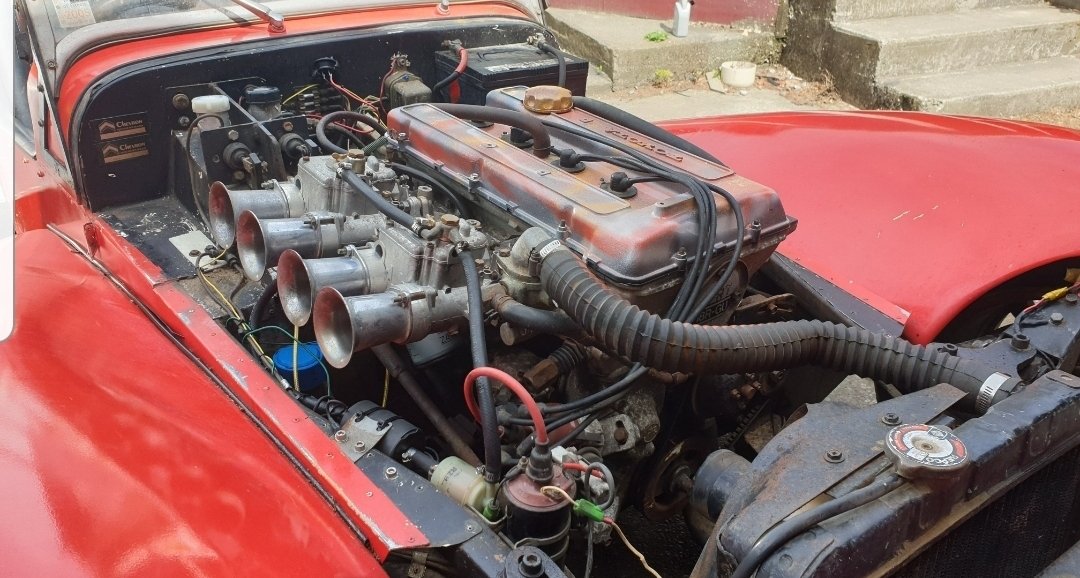
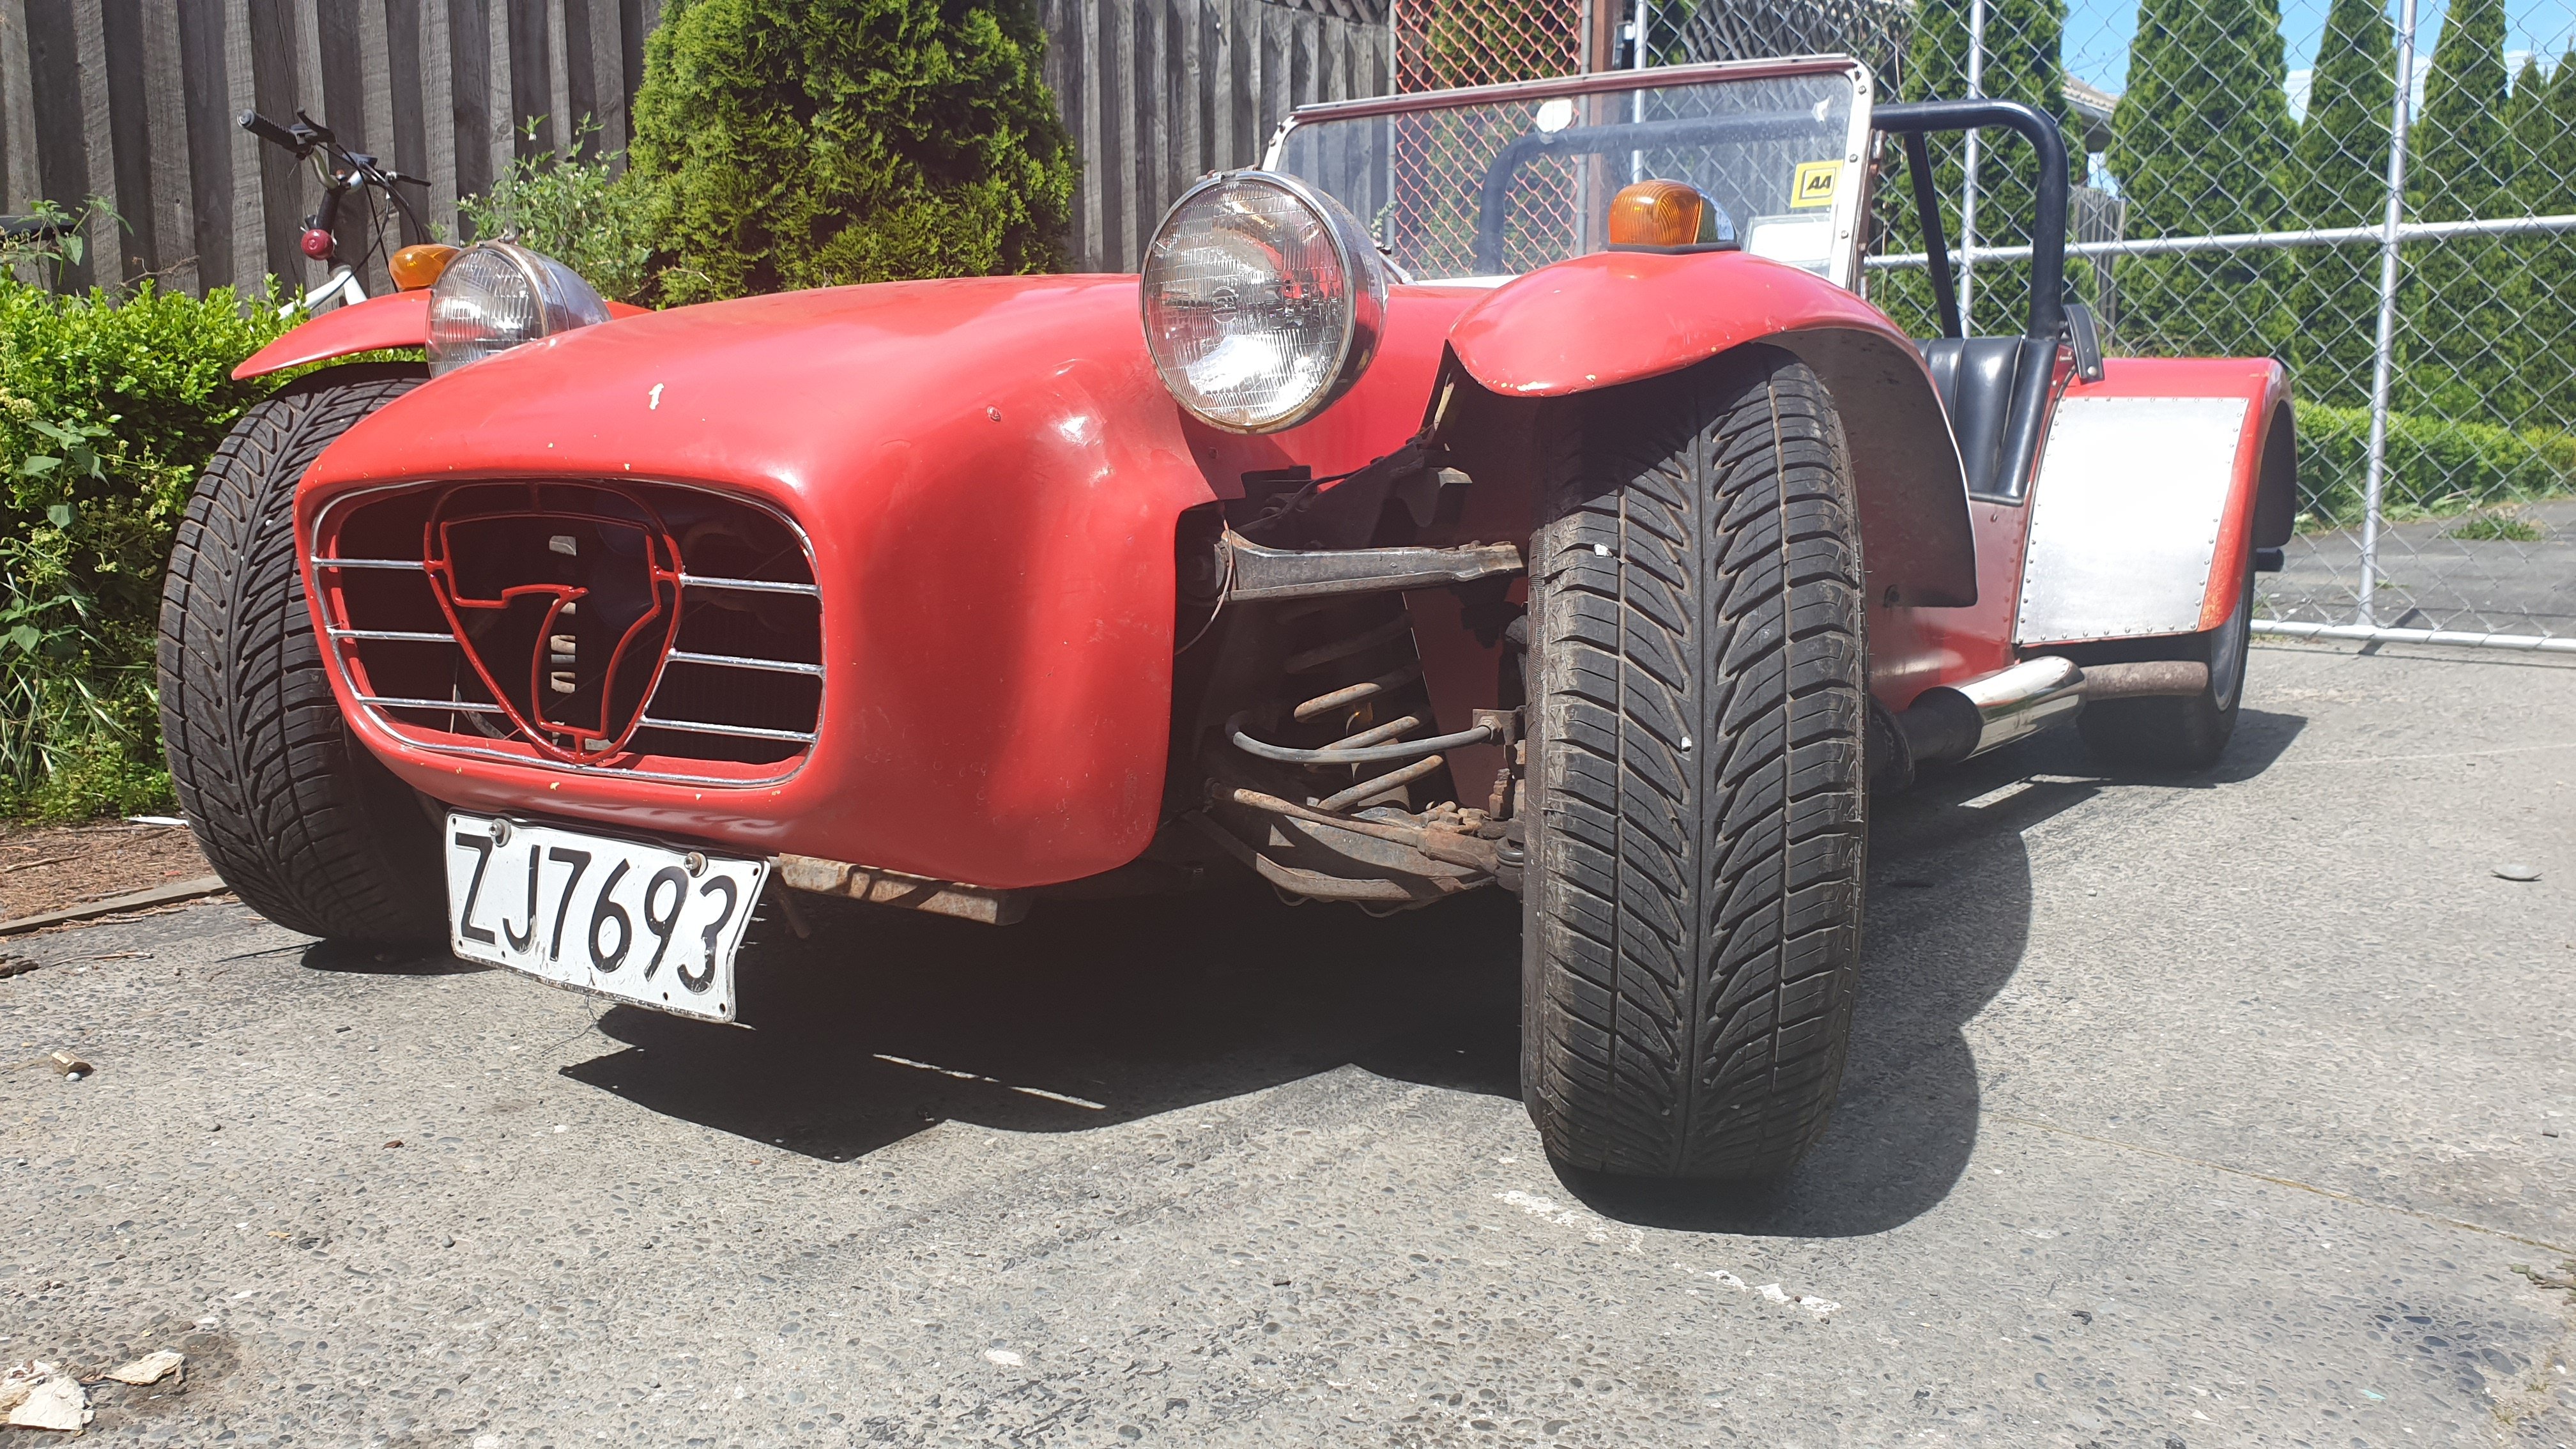
threw the seal kit into the carbs and no more leaks and no more lean spitting. (also put new O rings in the soft mount kit) went for a drive around the block and it cruised great but any time you tried to accelerate quickly it would hit the wall hard and sound like a rev limiter. not something you could drive through. clearly a major issue in the carb setup. Luckily i took photos off all the jets and tubes while i was rekitting them. Went inside for a coffee and looked up some suggested specs. found all the jets to be similar enough to the suggested specs that they were probably within tune, except for the venturi chokes, the were 30mm and suggested was around 35mm. Included with the car was a set of 34mm chokes, im not sure why the 30s were swapped in but i doubt it ever drove well. fitted the 34mms and it woke right up! still not perfect, but it runs pretty bloody strong! comes on cam (i heavily suspect its hiding something fun under the cam cover) pretty hard and sounds like the apocalypse at about 5000rpm. wof very soon and then ill have to try get some video. only new photo i have is of the grill i had a play around with painting. quite like it.
- 21 replies
-
- 21
-
-
BlownCoronas 1988 Lotus Seven (Chevron)
BlownCorona replied to BlownCorona's topic in Projects and Build Ups
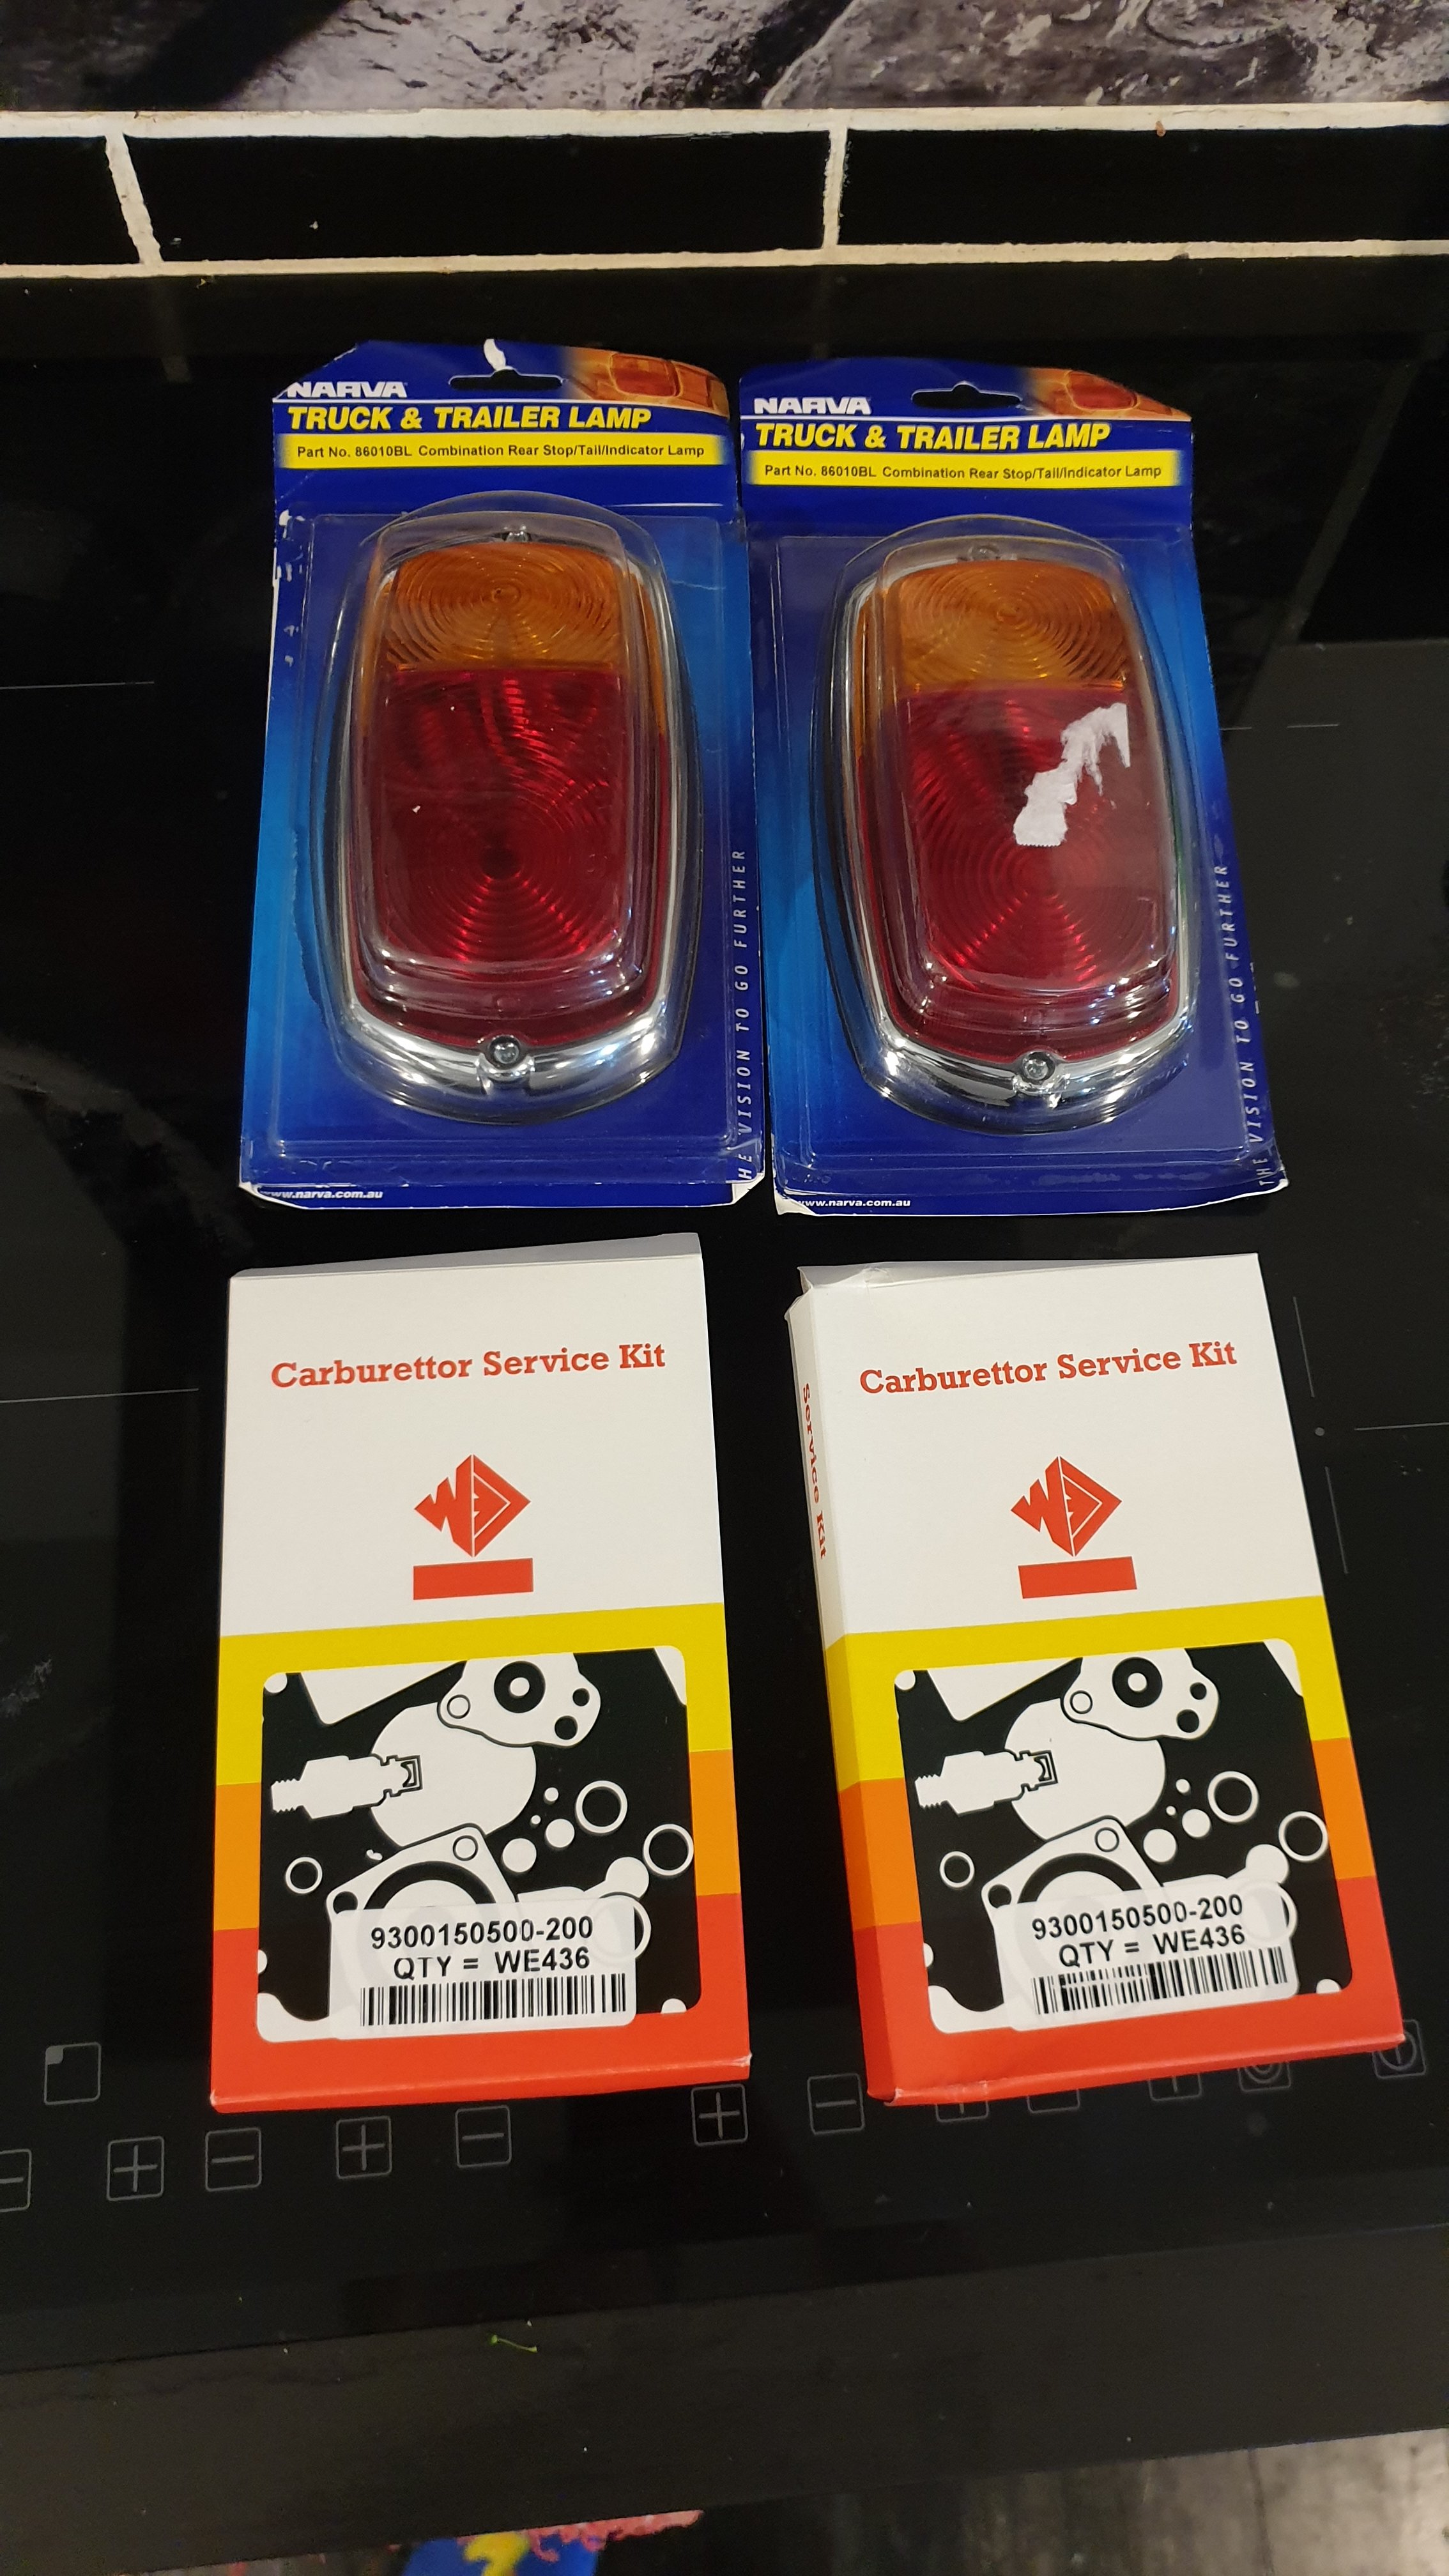
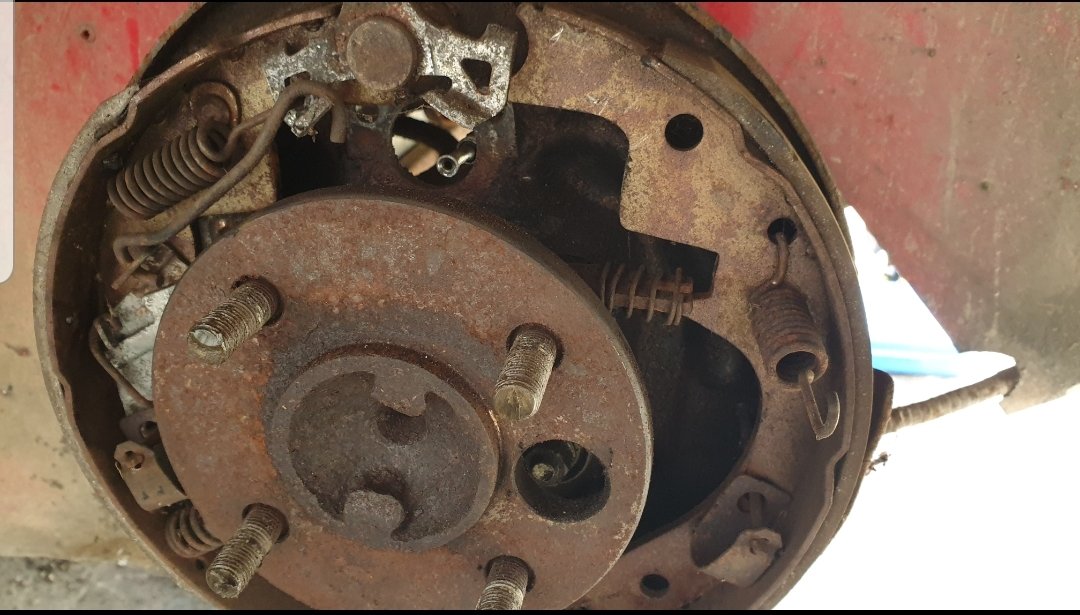
New wheel cylinders and the rear brakes are mint. Robbed the headlights out of the mx5 for this, still sealed globes so will order in some semi sealed units at some point. Tail lights and carb kits showed up too, so that should get it 99% over the line.
-
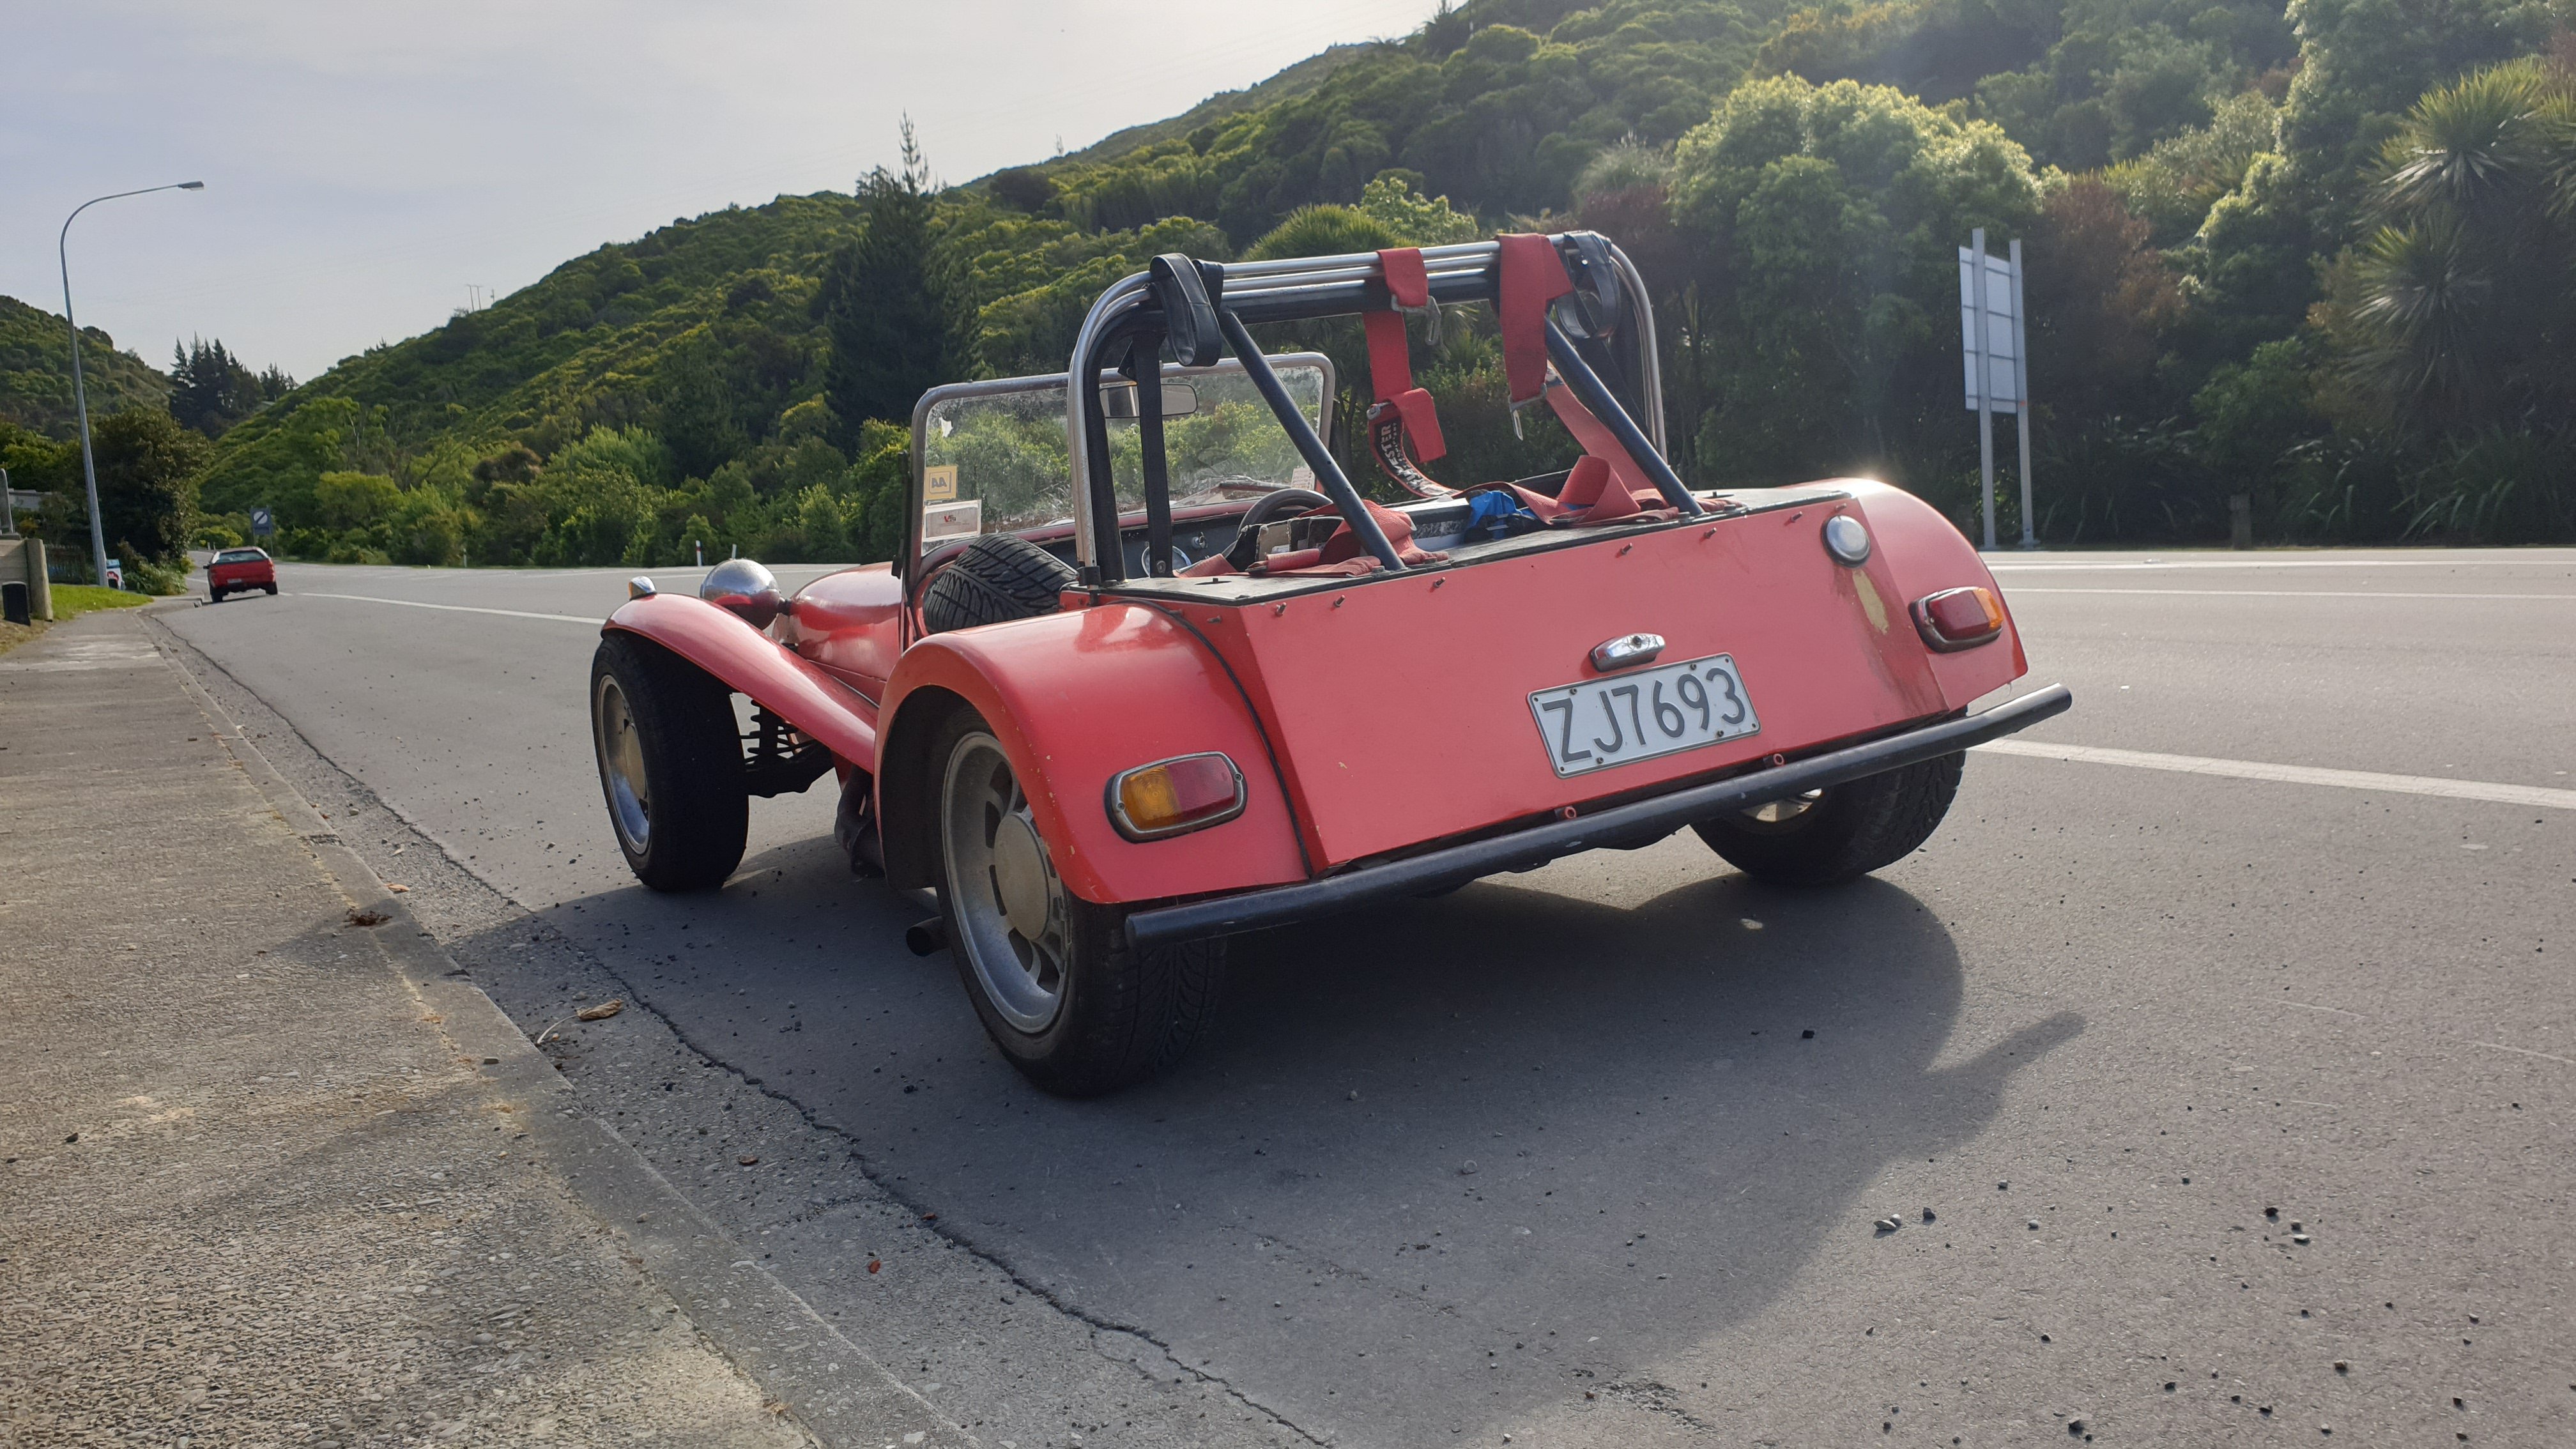
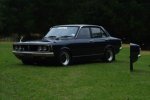
wow you finally got one. sick they look so crazy with no front grille, like you forgot to take protective shipping wrapping off. any mods planned or keeping it stock?
-
i may take you up on that offer when it comes time to build one. the boot in the chevron is actually behind the rear seats and the gas tank is where your rear stays go, my rear stays (and seat belts) bolt onto the very rear most lateral bar. and im not too sure whats underneath that. hopefully its a strong area. itll need some investigation.
-
I'd be real keen on some photos of your setup. The cars not log booked and I'm not too interested in entering anything bigger than sprints.
-
BlownCoronas 1988 Lotus Seven (Chevron)
BlownCorona replied to BlownCorona's topic in Projects and Build Ups
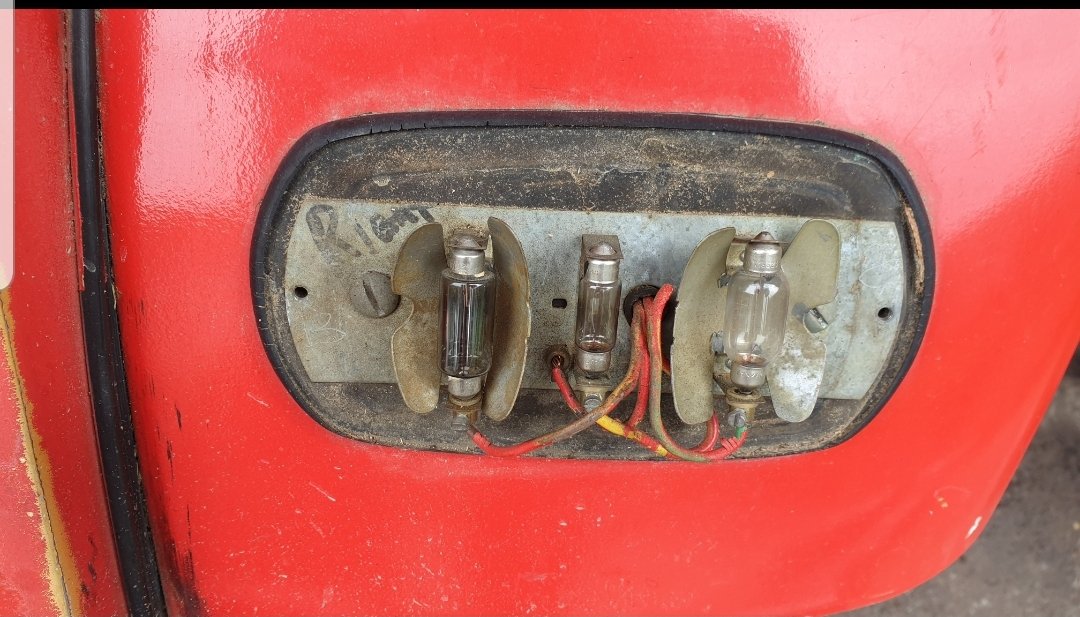
Continuing through the list of wof things that done work. A new front right indicator bulb has the right hand side indicators working, wired in series maybe? Possibly the stalk switch just needed cycling to get the switch to work. Adjustment on the brake light switch has them working too. The horn stated working out of the blue, I suspect a similar issue to the indicators with some switch cycling magic. Still no tail lights though (have headlights Park/hi/lo) , however since one the the light units is cracked alot, and since they use weird festoon bulbs and since the identical unit is available new, using bayonet standard bulbs for like $40. I'll order up some new tail lights and if they still don't work, trace the wiring back. So apparently its true that this does have a Holden Torana (9"?) diff and brakes, and thankfully I only needed to remove one spring and nudge a pad sideways to get the slave cylinders out. There is fluid right up to the cylinder but zero movement. I can't budge the pistons on either side (should I be able to?) and I doubt they are costly so new items will go back in. I also have it fresh oil this weekend and had a look at the spark plugs, turns out they were mx5 plugs, so treated it to a set of correct plugs. There appears to be a weep still from the sump plug, I thought the lack of copper washer was to blame but put a new one on and still possibly a minor weep. Couldn't see any cracks and it wasn't threaded, perhaps I should have used a fibre washer? Things still to buy for a wof are some new headlights, the ones in it are sealed units and half blown or cracked lenses, hopefully I can get some H4 replacement units. I'll also need two new / good second hand quality harnesses. If anyone has any out of date but good/unused belts kicking around? Track day legal would probably be a must too, which I think is 5 years out of date? Else I'm just gonna end up paying twice. I'm also keen to make a 'track spec' roll bar. The stock unit is bolted on and would be okay for street use, plus works with the roof, but with a helmet and new regulations at ruapuna requiring 50mm head clearance probably won't be allowed. I also probably won't be able to full cage it easily so passengers will be a no go, fine by me. And means I can possibly run a foward running roll bar strut down to the chassis in the passengers foot well. I'll need to speak to someone who knows what they are talking about, but a hot swappable street / track roll bar would be ideal. Id also like to remake the OG roll bar to modern standards and ditch the crush bent tube, even if it is about 5mm thick.
-
There's a rotary powered on trademe, super cool. Not cheap though! Ever since I did a little work on some formula ford's I though a high revving rotary would be awesome in a FF or lotus 7.
-
BlownCoronas 1988 Lotus Seven (Chevron)
BlownCorona replied to BlownCorona's topic in Projects and Build Ups
Discussion thread here. Pulled the carbs off last night to check a few things before I order some rebuild kits. The head has been ported so that's pretty cool. Didn't take any pics cause I was enjoying myself and forgot. -
Discuss here, Make sure I don't completely dissemble this one so I can actually drive it this summer...
-
Yeah will start a discussion thread, or feel free to make one and start nagging! Dunno about the difference between screw and normal pd blowers, but I'm reasonably committed to the sc12 since I bought the lotus and I'm now super broke haha.
.jpeg.f26df3008a11542cb8f0723eb60fa8f4.jpeg)