Taistorm
-
Posts
2,100 -
Joined
-
Last visited
-
Days Won
2
Everything posted by Taistorm
-
Sweet base though! There's like next to none in nz so good to see some more rolling about.
-
I have some Phils Rotary repro Mazda 1000 front guards and floor pans. Was told they would also suit sedan initially but they don't. The ute guards have a different shape at the front due to the corner lamps and floor is different. If you're interested in buying I can't send through some more details.
-
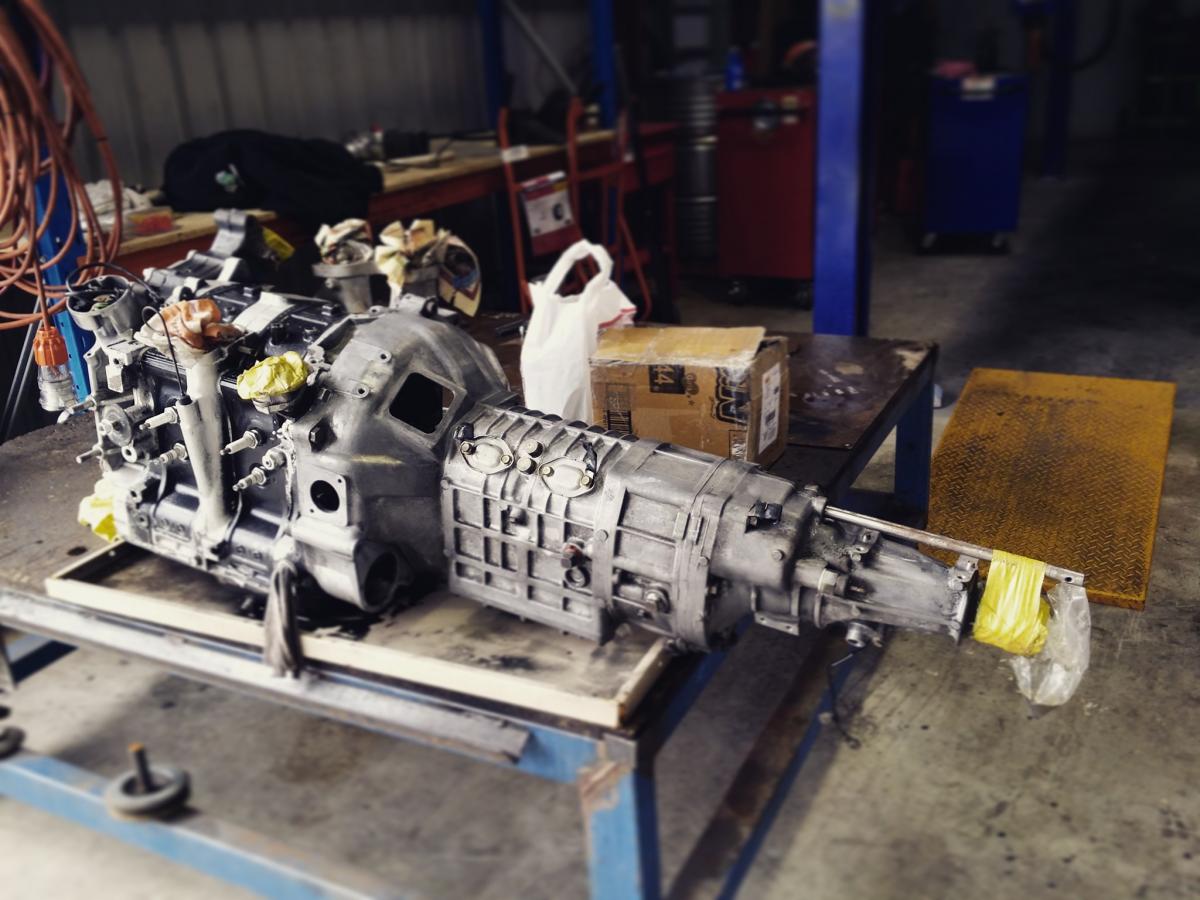
Spent half the day following up from yesterday with the help of my mrs and Alan from MotorElite. Continued stripping back the transmission and cleaning up/scuffing back the engine and intake manifold. And an action shot of the man himself. And here's where we're at.. Crap lighting and phone pic but we've left the lettering on the side of the housings with a brushed finish and yet to throw some wrinkle paint on the housings but damn it's looking good! Cheers, Tai
-
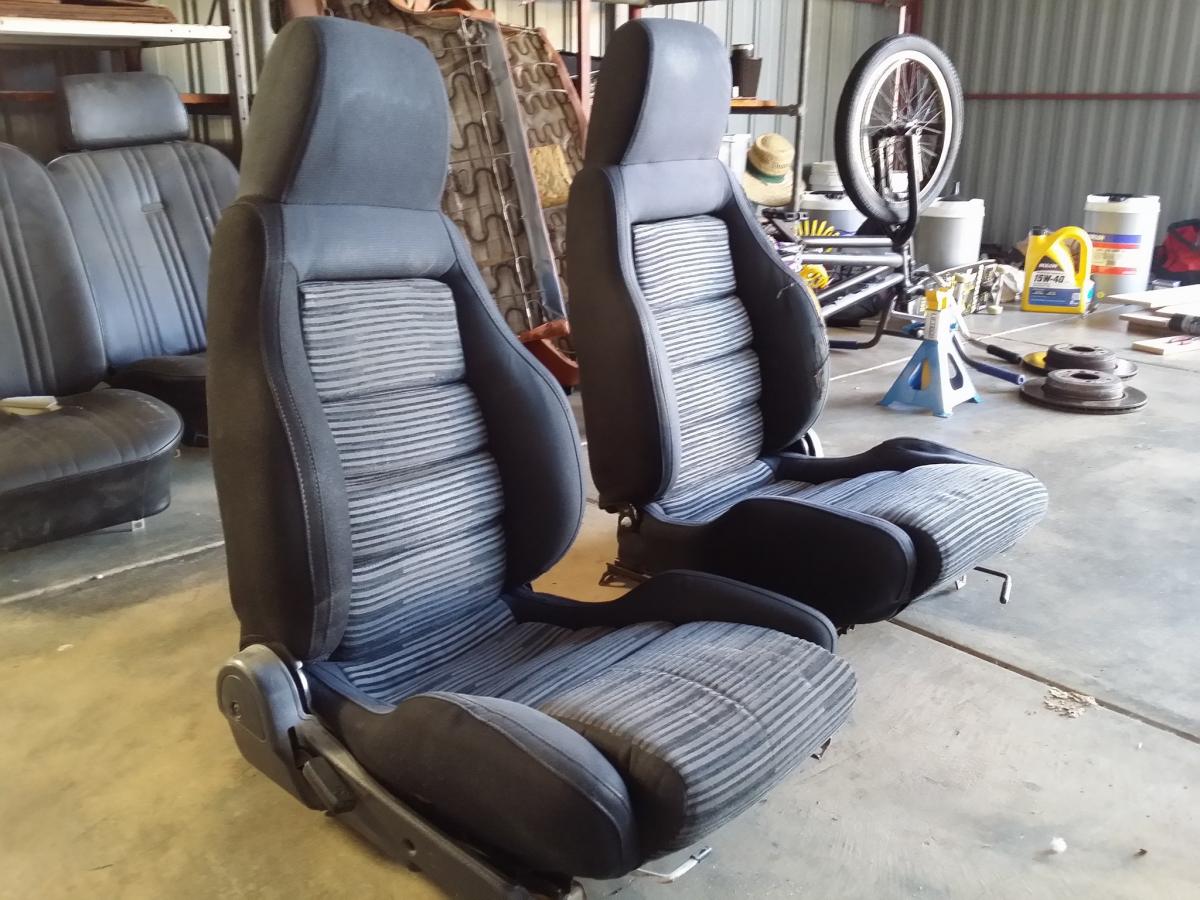
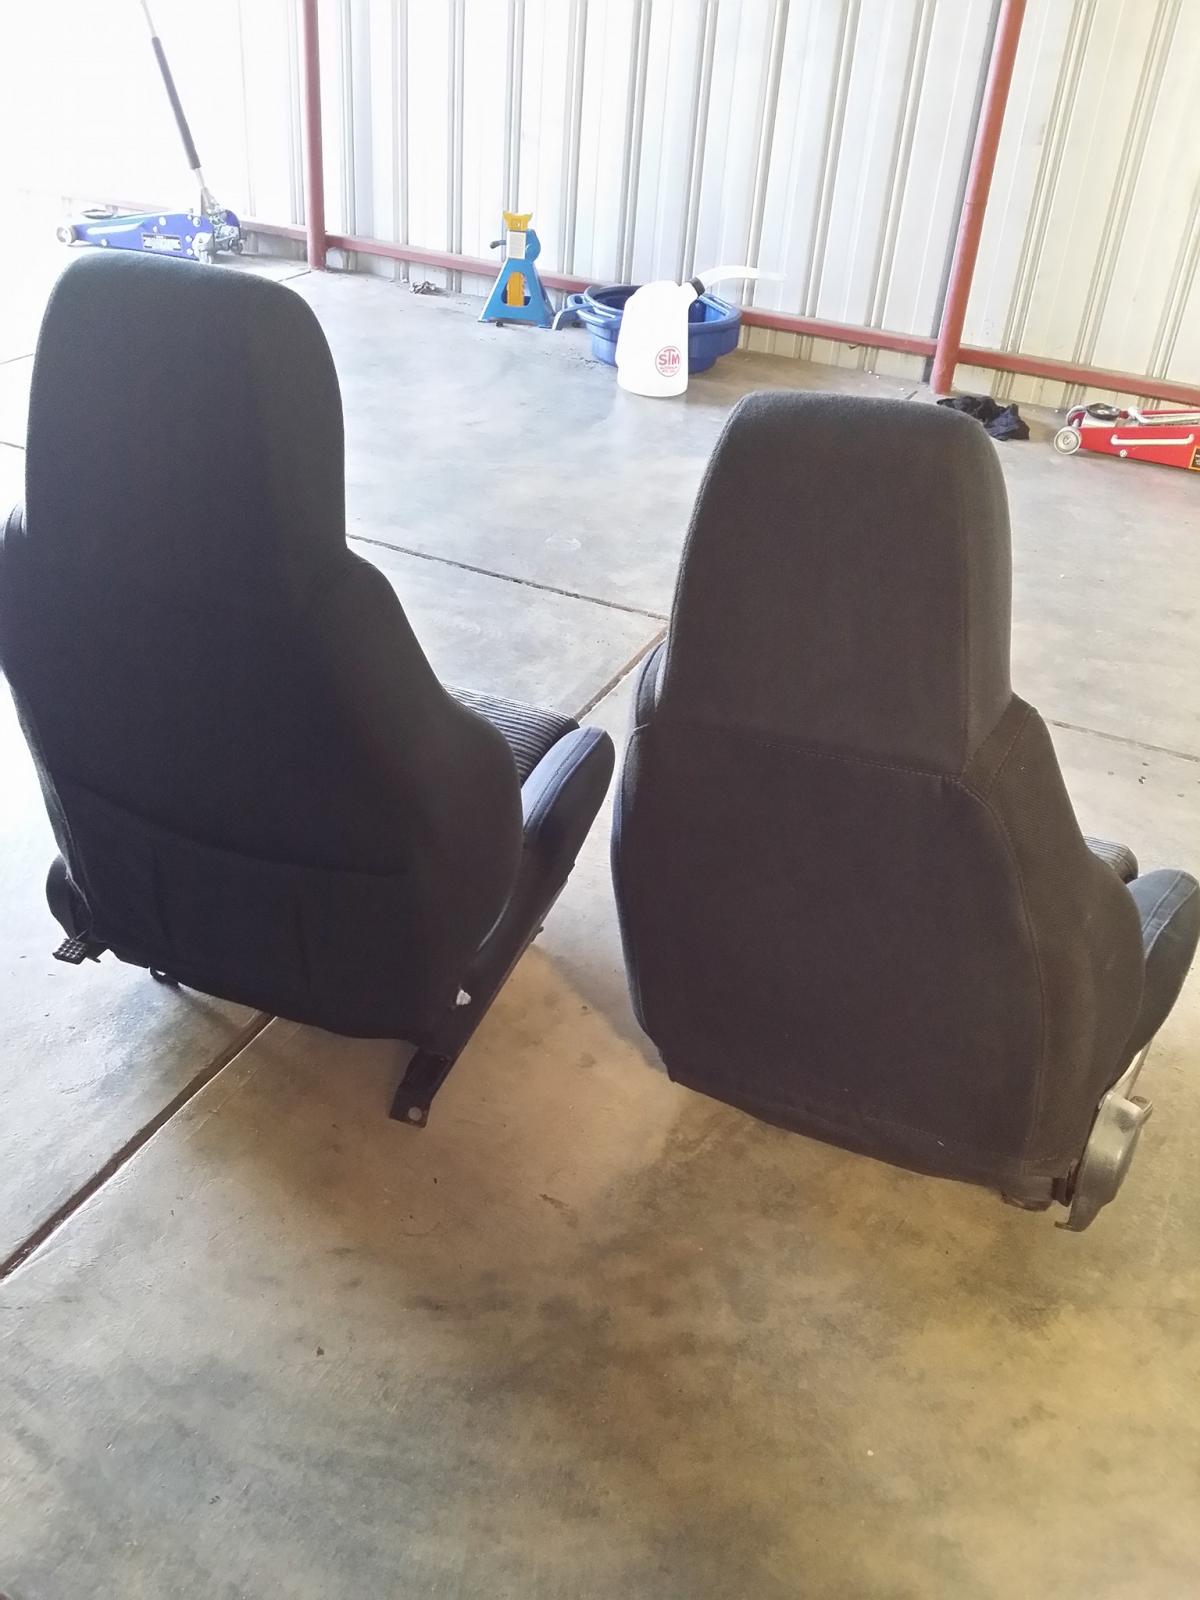
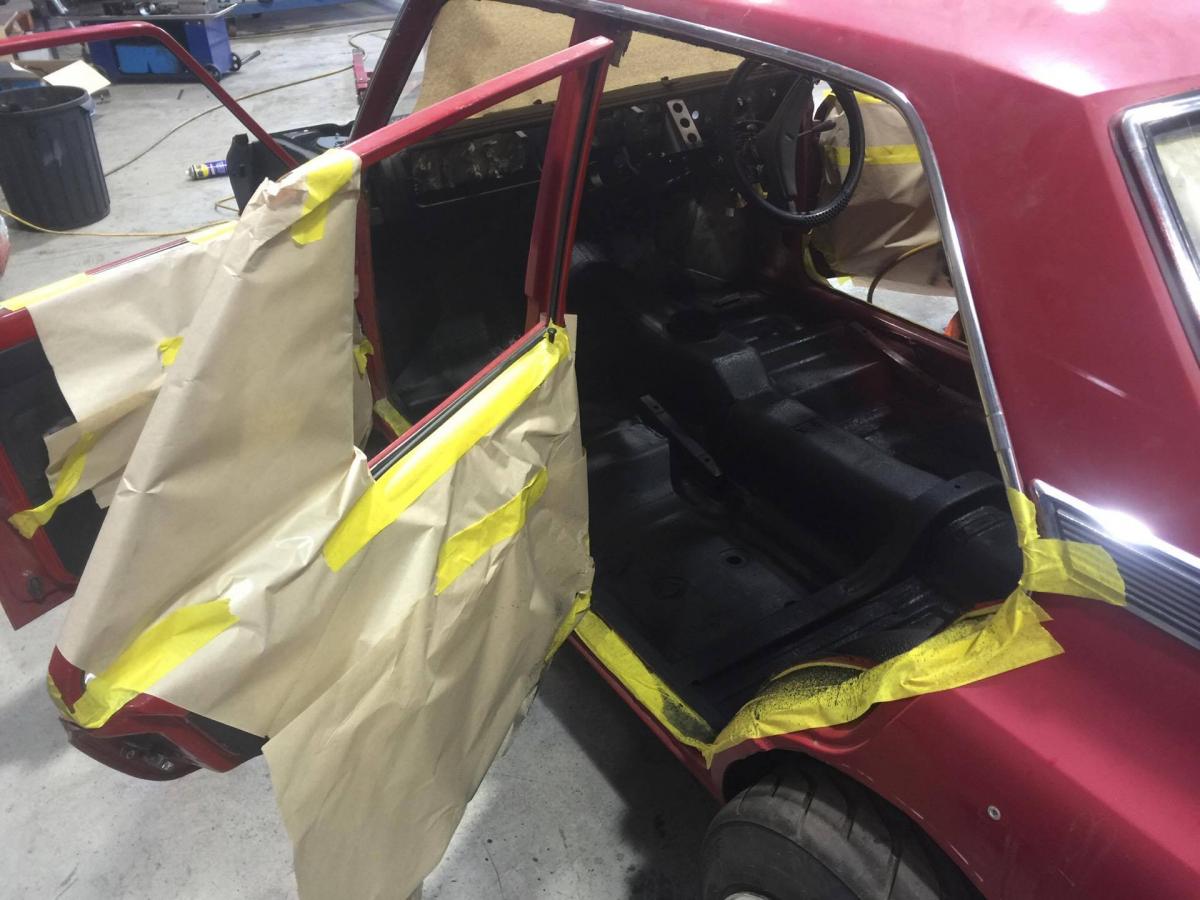
Brought the seats down to check sizing/clearance and it looks like it will work! I really forget how small the 1300 is because these seats really arent that big but they only barely fit! They're pretty snug with the widened trans tunnel and don't look too out of place. Will have a play around with the mountings and get them sitting nicely soon. When they get retrimmed I might get old mate to bring the side cushions in slightly as well for better fitment. Also began stripping the engine and transmission back to detail and tidy up. The engine was painted in basic silver/black combo when it was built about a year and a half ago but it has just been sitting since so has gathered some dust and i'm wanting to go down a different path in terms of colour. The transmission had a good thick layer of grime on it so spent about 3 hours attacking it with degreaser, waterblaster, scotchbrite pads and wire wheel diegrinder but shit is caked on pretty hard so gonna spend half the day tomorrow attacking it and hopefully throw some paint on. Here's a shameless instagram filtered pic for good measure.. Cheers Tai

-
More of this?
-
Cheers guys. The boys at Motorelite have done a top job on the little Mazda! Should be pretty clean once it's all sorted bar the exterior as that probably wont get painted til next year some time.
-
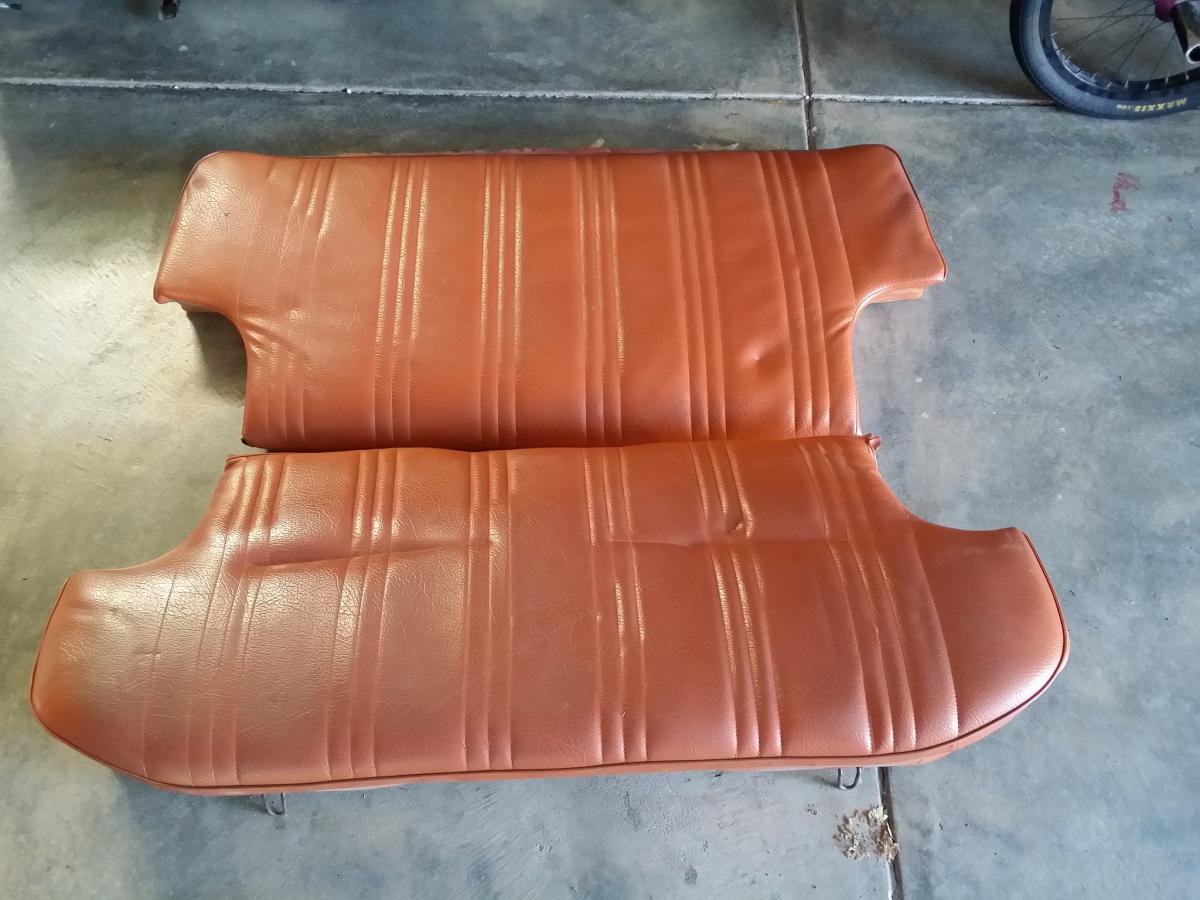
Here are the rears. Cheers Tai
-
Got me some seats today which are out of a s4 FC RX7 as far as i've been told. Overall condition is OK, passenger seat has a tear up the side and also the base cushion needs to rebolstered. Not bad though for $100 including rails. Overall dimensions are very close to the originals so should fit in alright with slight modification to the rails. couldn't go any wider (not that I want to) otherwise it will foul with the custom, wider transmission tunnel. The seats will be retrimmed in the same style as the seats I recently sold (early datsun style, black vinyl with polished buttons). I had also picked up some rear seats a while back from Tristan to replace the rear seats that were stolen when the car was at the old shop, these will be retrimmed to match the fronts as well.
-
Steering setup now back together and finished. Checking clearances and everything is good! Much chur. Steering column will be coming back out and Sam is coming in to paint the engine bay this weekend. I'll be striping the engine back and painting/detailing it this weekend as well. Cheers for looking. Tai
-
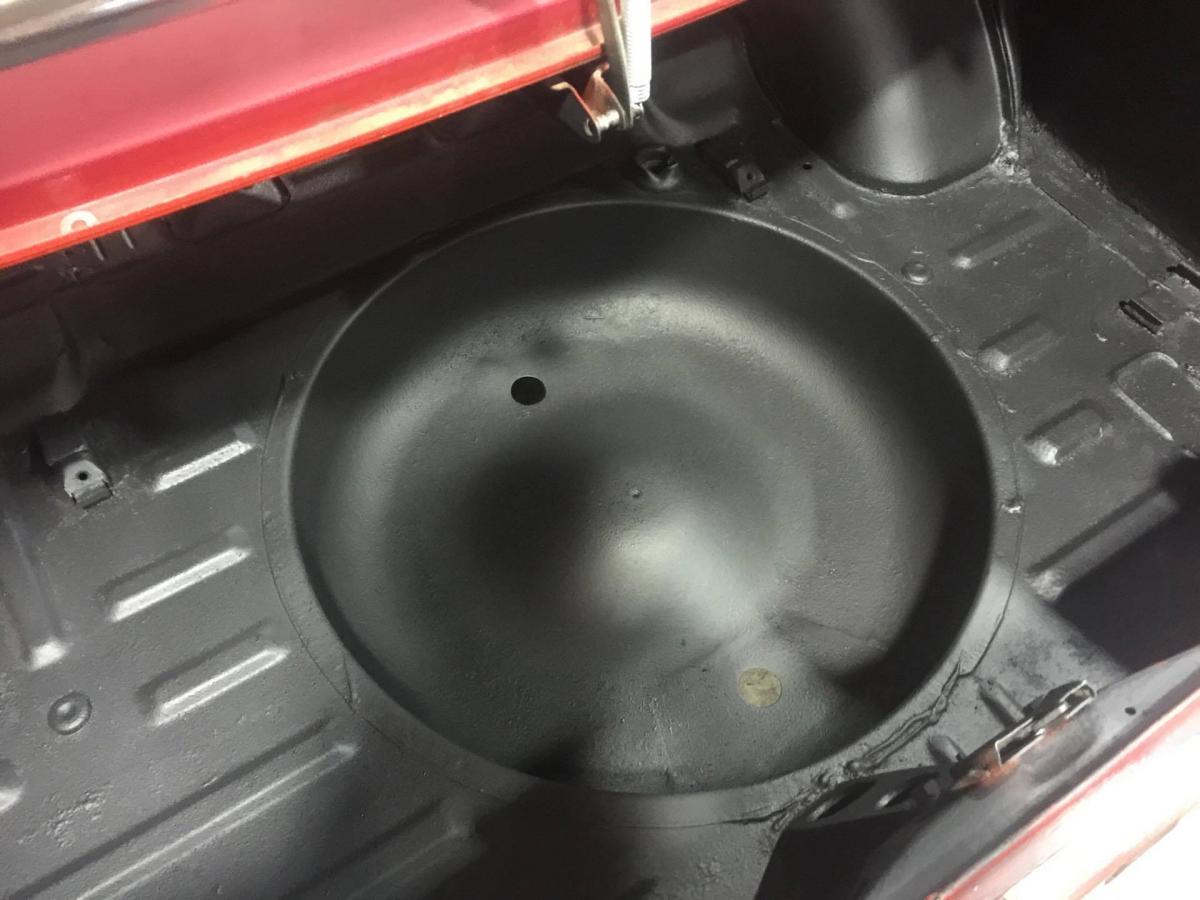
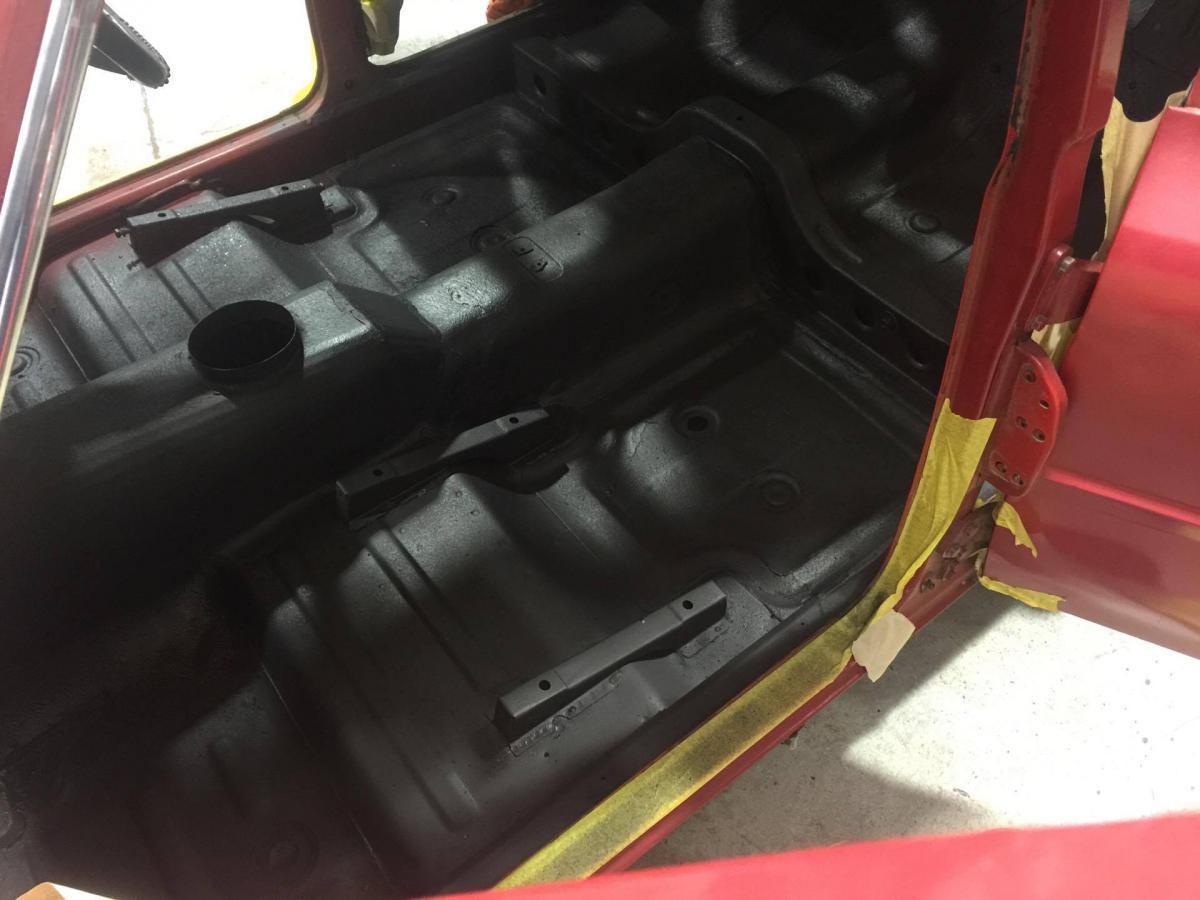
Undersealed the inside floor and boot. Didn't go too hard case as this will all be covered with carpet and shit later but it's awesome having it all tidied up.
-
Etch primer laid out. More to come soon. Chur Tai
-
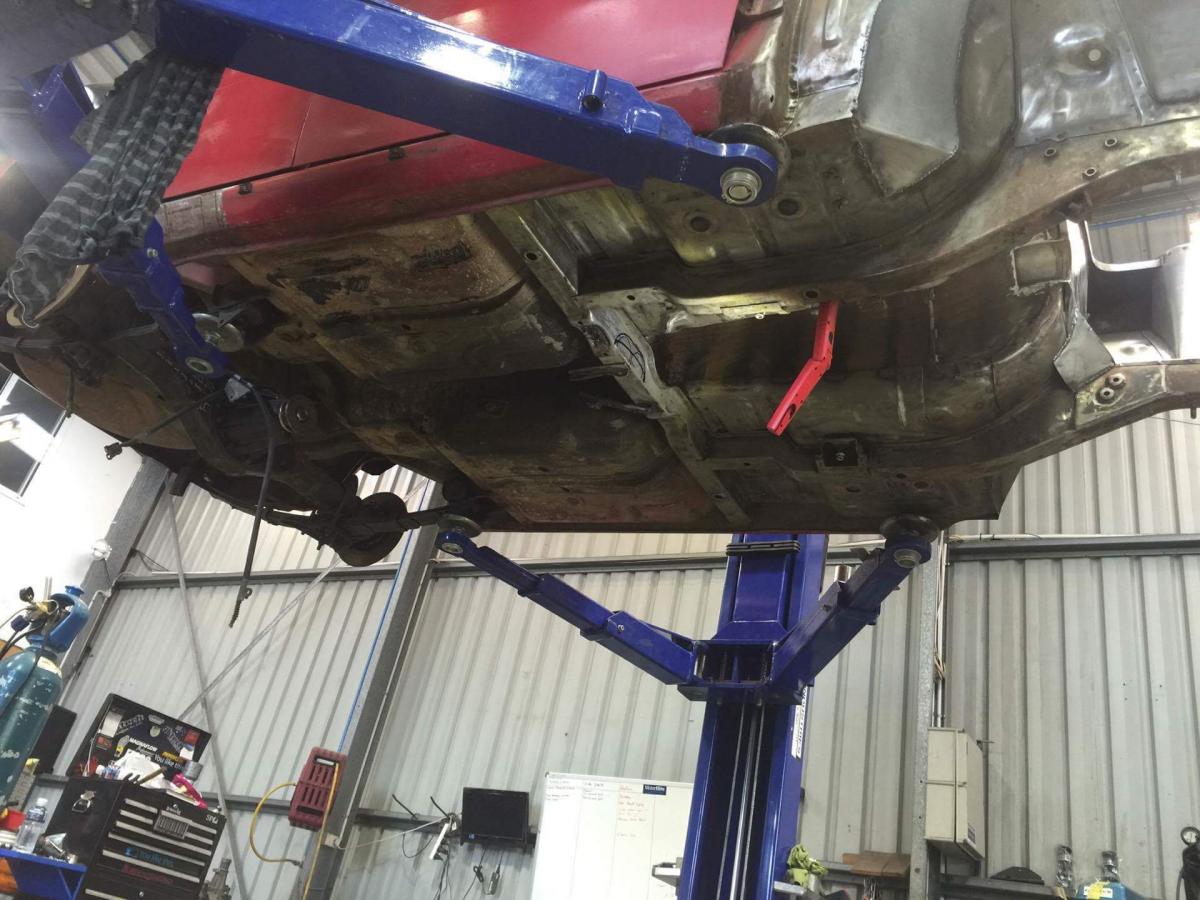
Rust be gone! Undercarriage is now 100% rust free. Feels good brah.
-
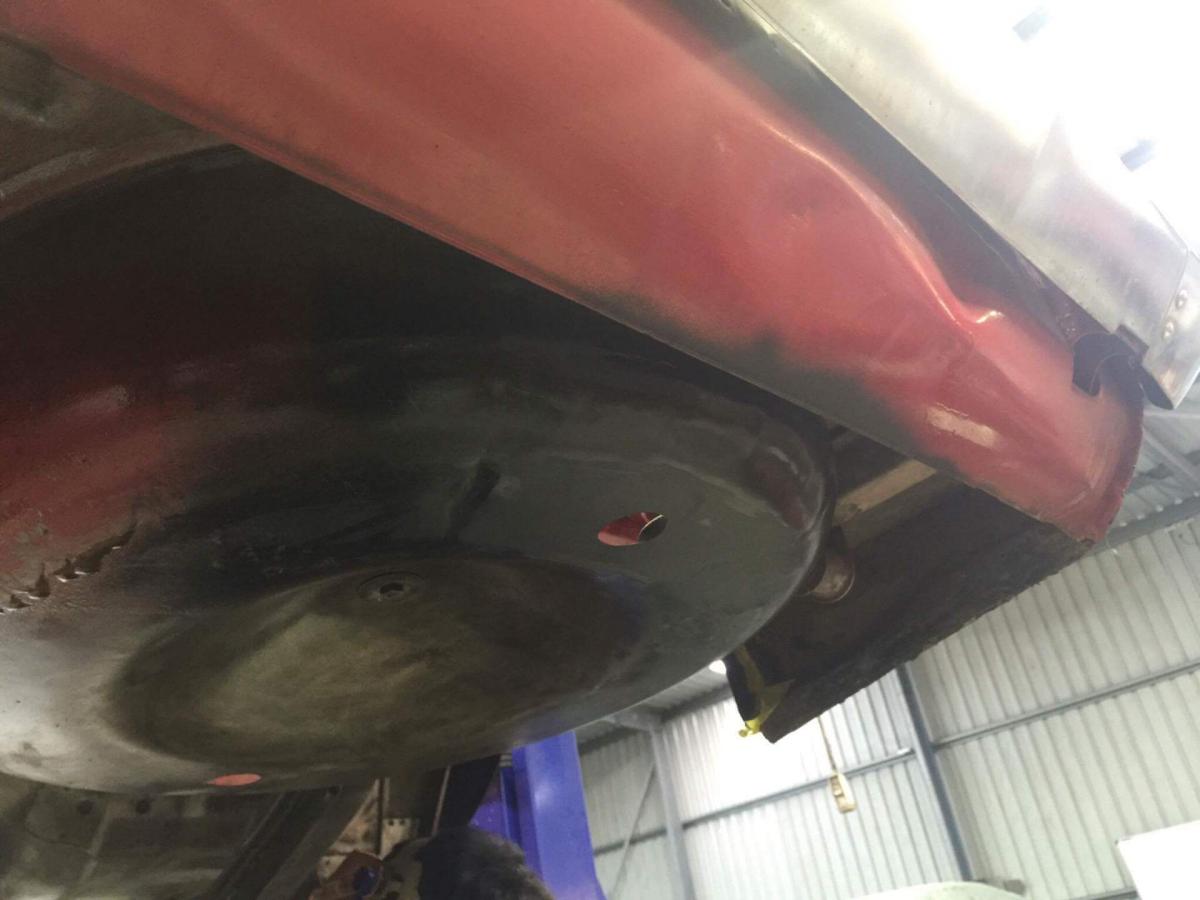
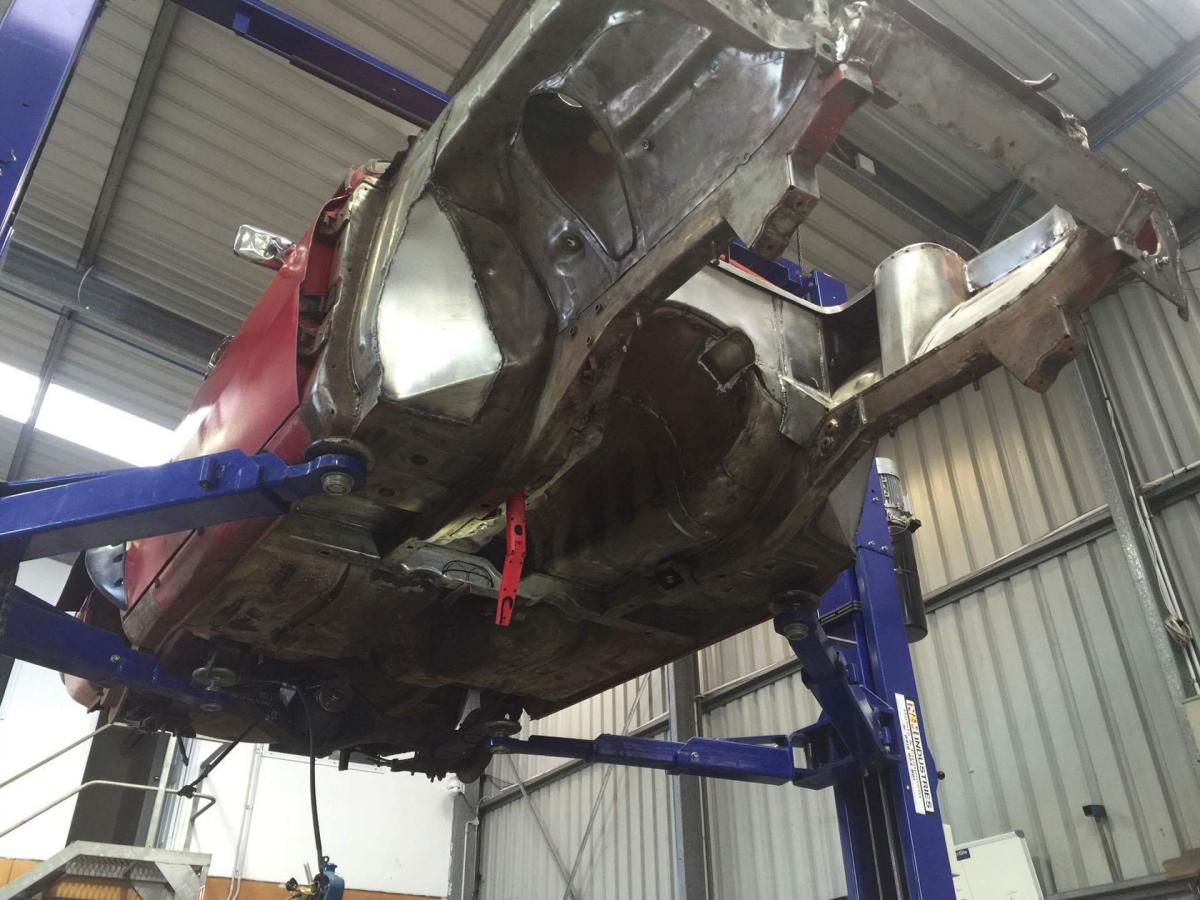
Here's a notch taken out of the chassis rail/crossmember to assist with exhaust clearance. And a small amount of rust at the back of the r/h sill/inner rear wheel arch. And another small amount of rust in the spare wheel well. Picture of the stripped back under carriage. We will be plating up the rust, etch priming, seam seal, primer, underseal and throw on some satin black to tidy things up. Hopefully will have it all done by next weekend but will see how things go. Cheers Tai
-
More progress on the 1300... It's now sitting in etch primer and awaiting seam sealer, filler primer and then top coats. Sorry about spamming up with boring pics but everyone loves pics haha.
-
Some pics of the under carriage... Probably going to just strip back the whole under carriage, treat and underseal then paint the original red. Luckily tax return is due here in Aus so will cash out on the Mazda. Cheers, Tai
-
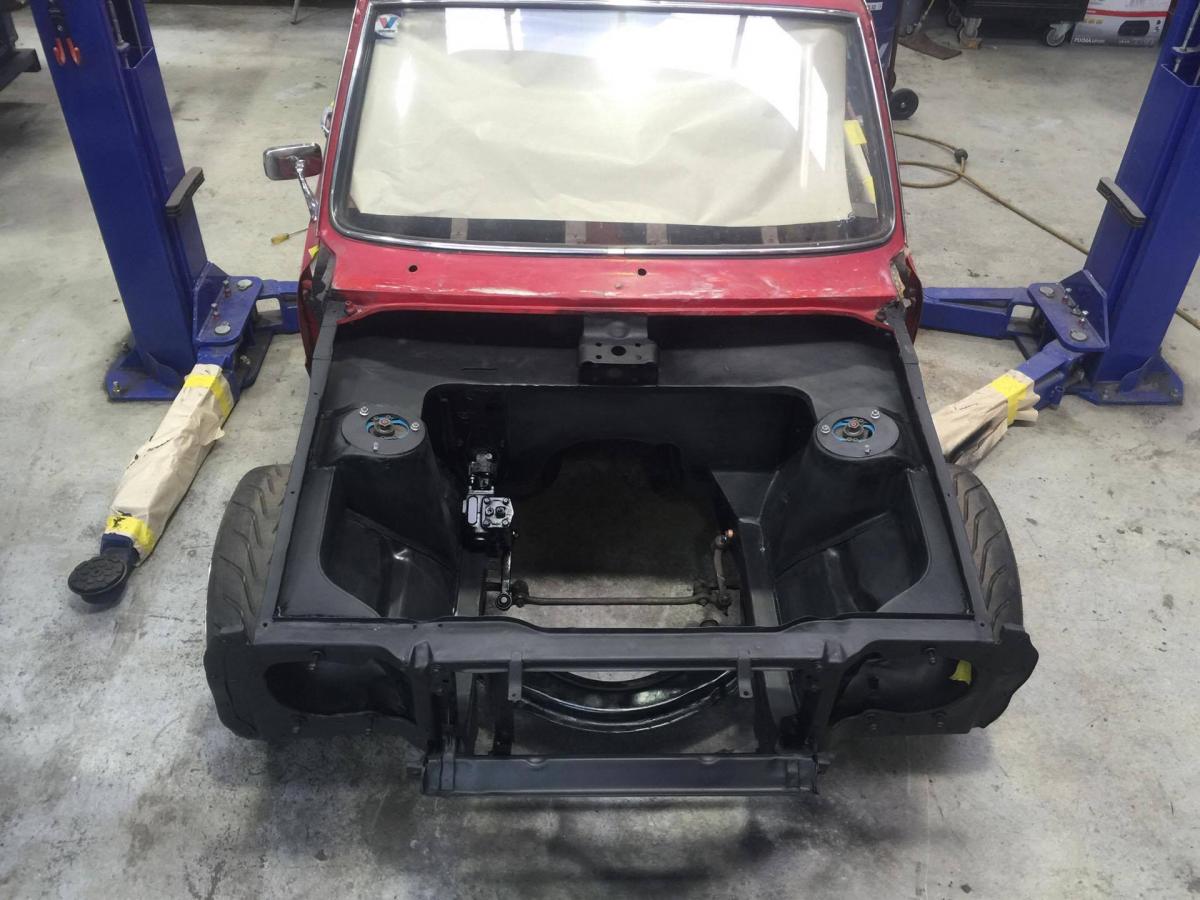
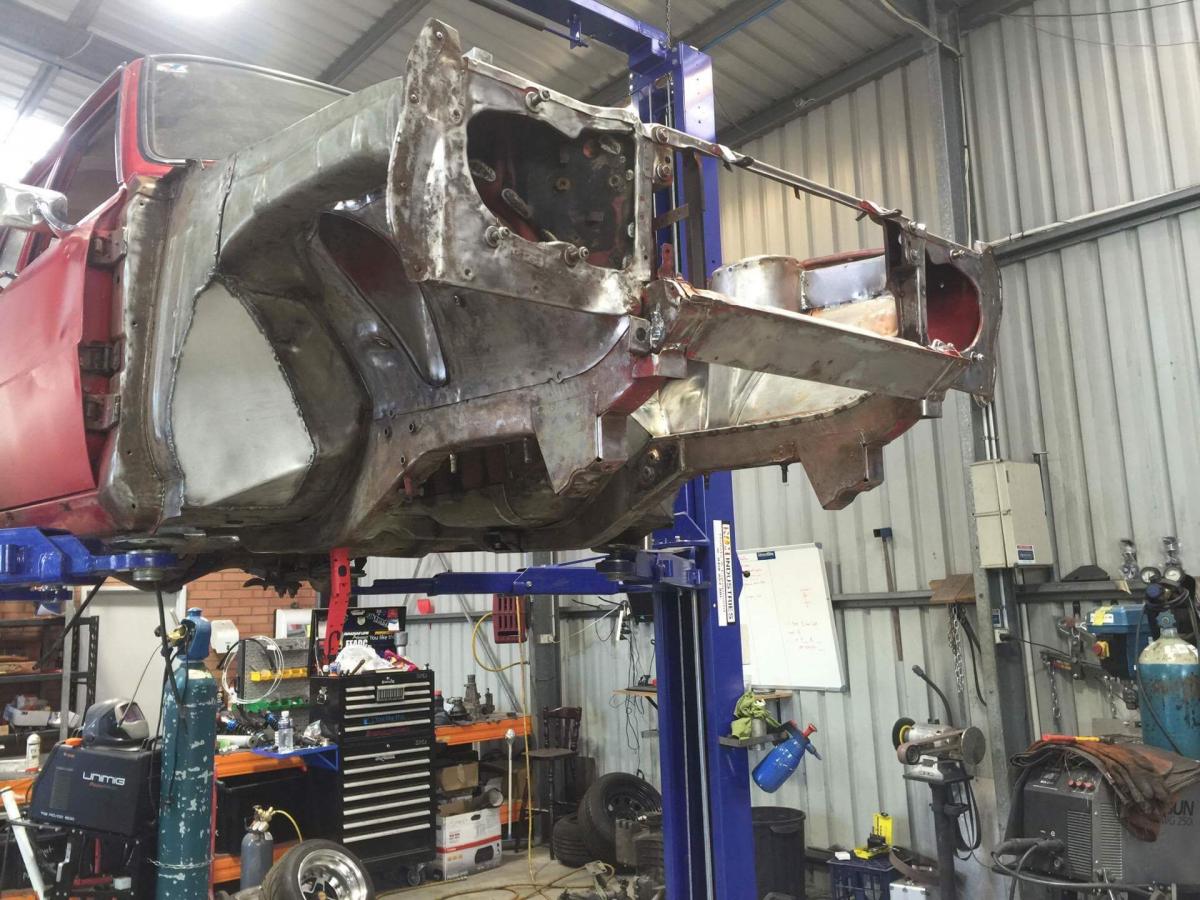
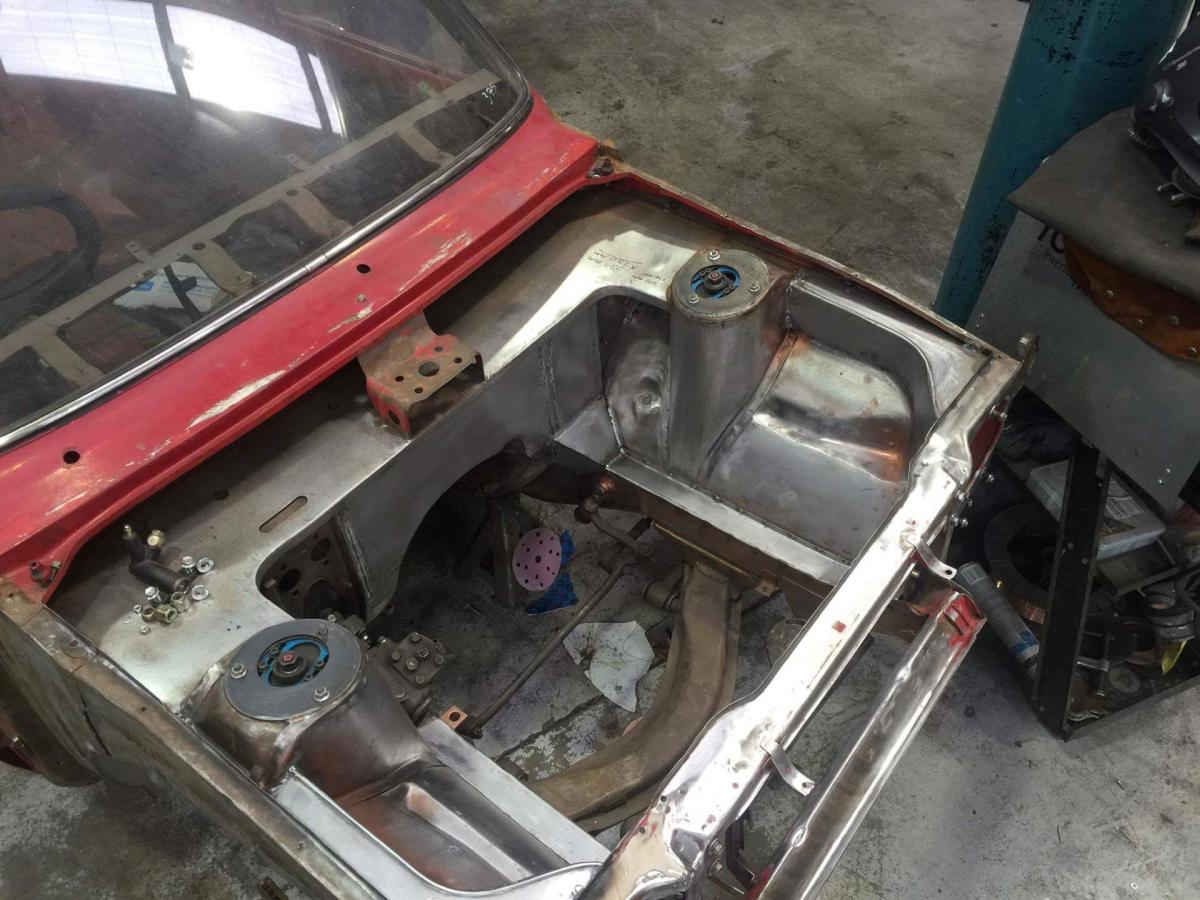
More fab work... Top engine bay channels/rails(?) have been plated up to delete the factory 'creases' and reinforce it further. Chassis rail gusset had been capped off and bay and underside from the rear of the transmission forward has been stripped. Will be in primer/filler primer tomorrow hopefully
-
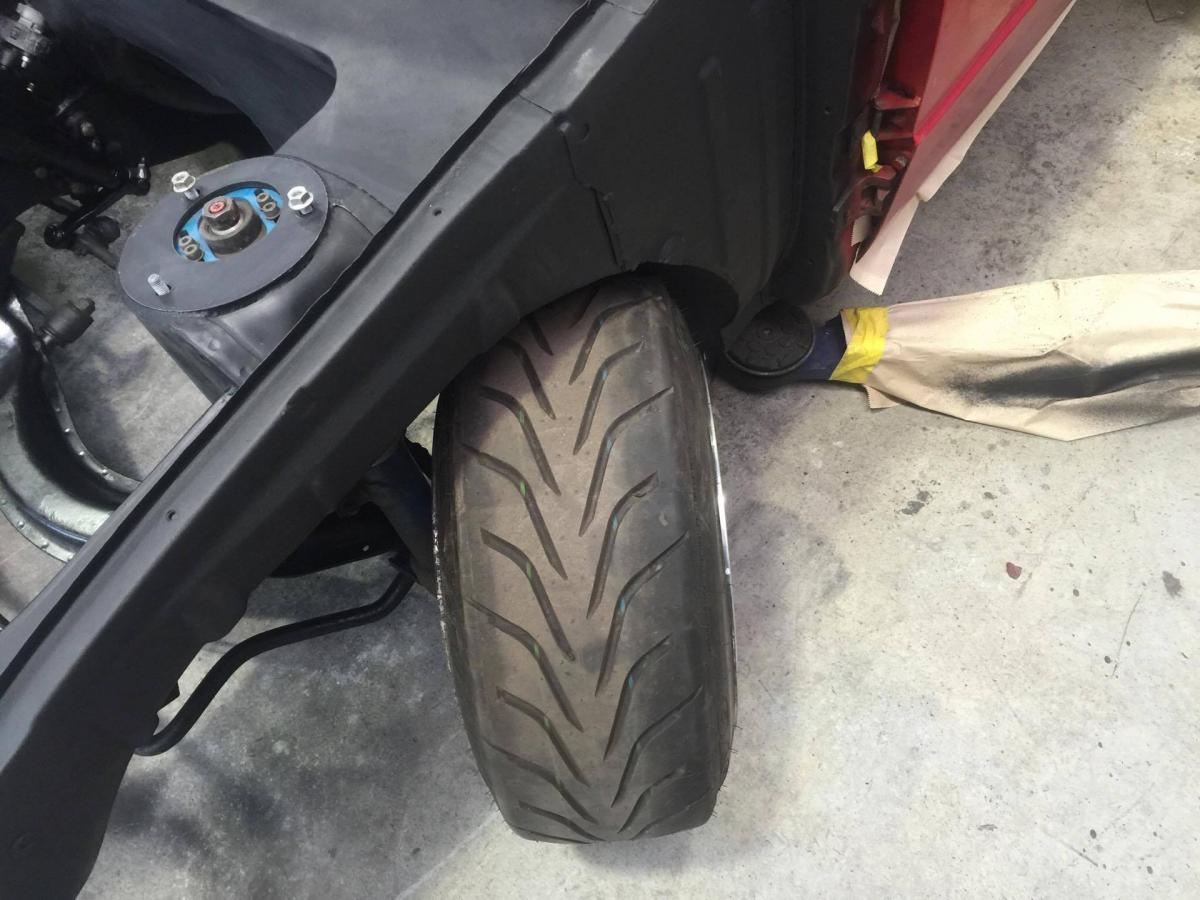
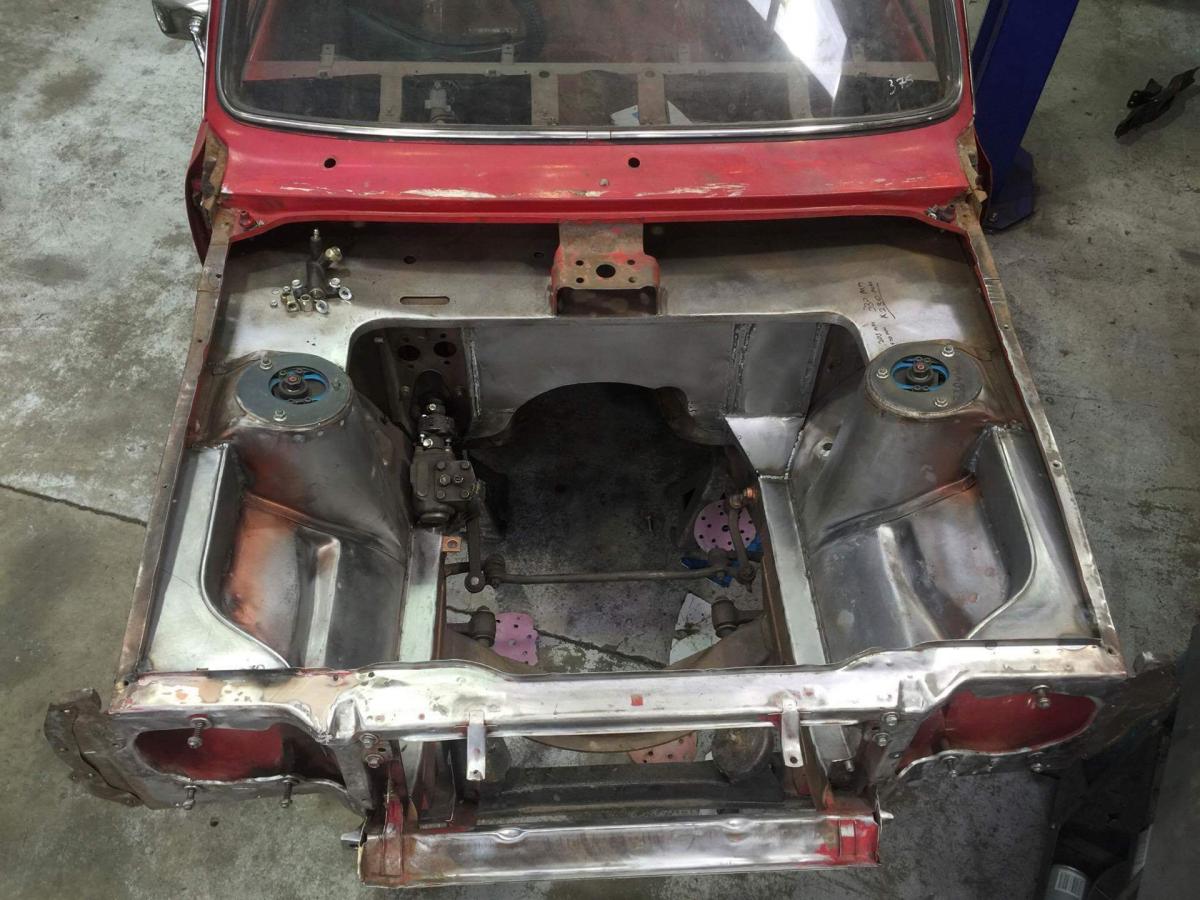
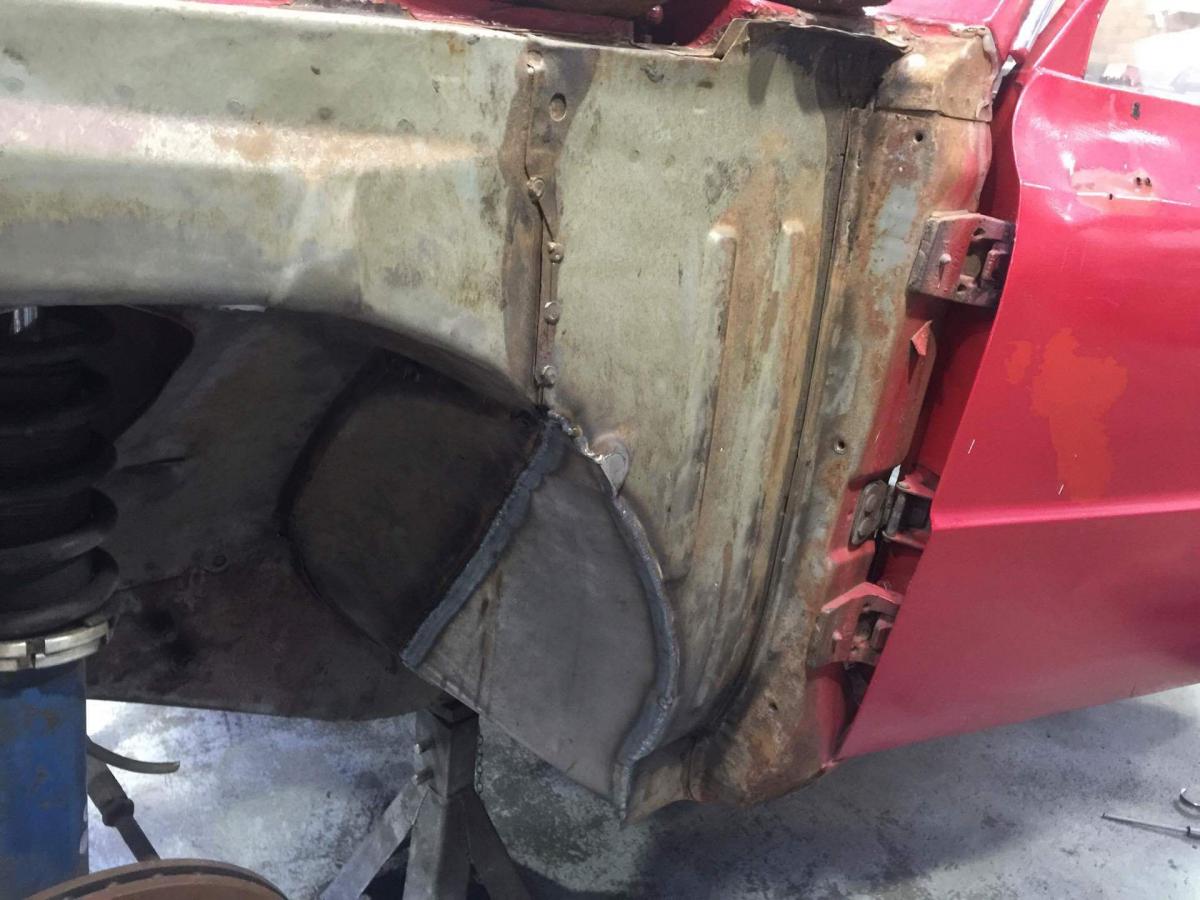
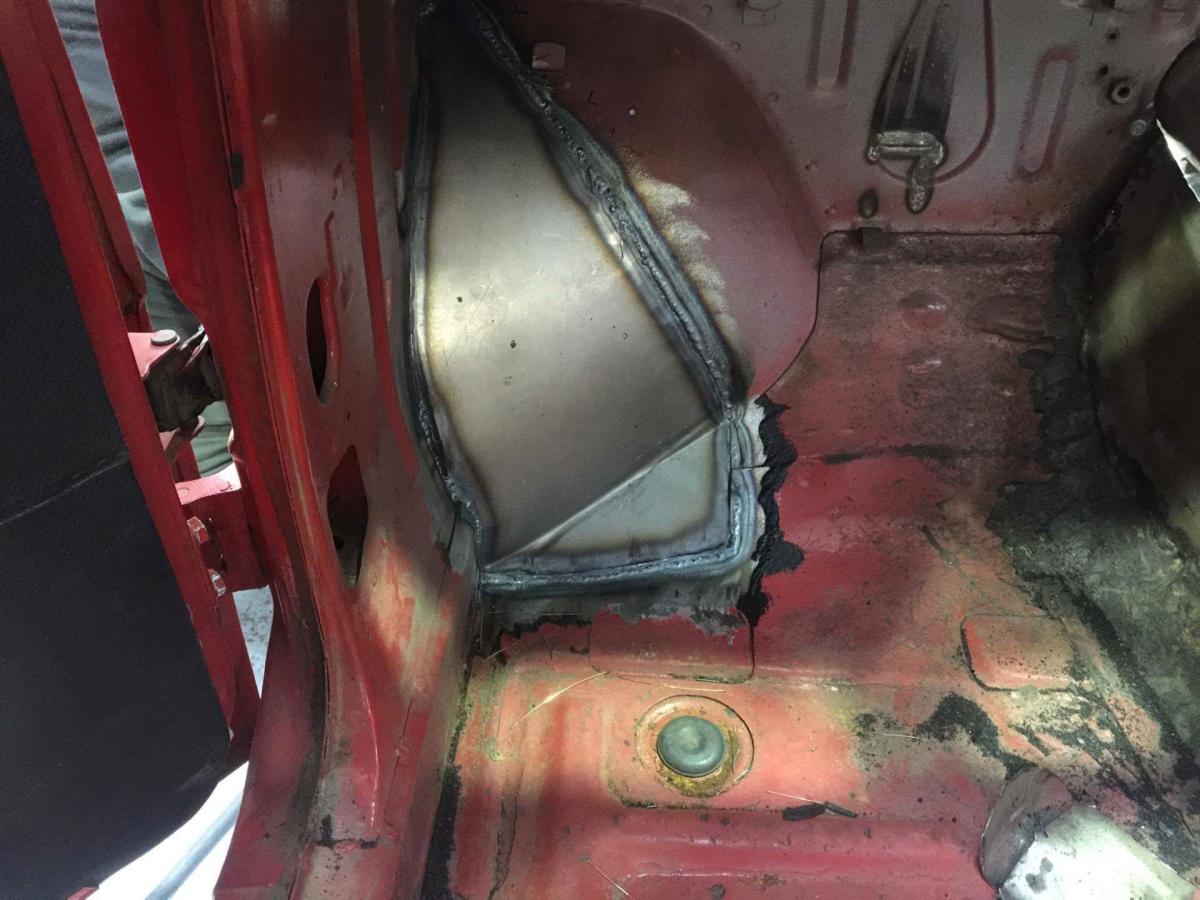
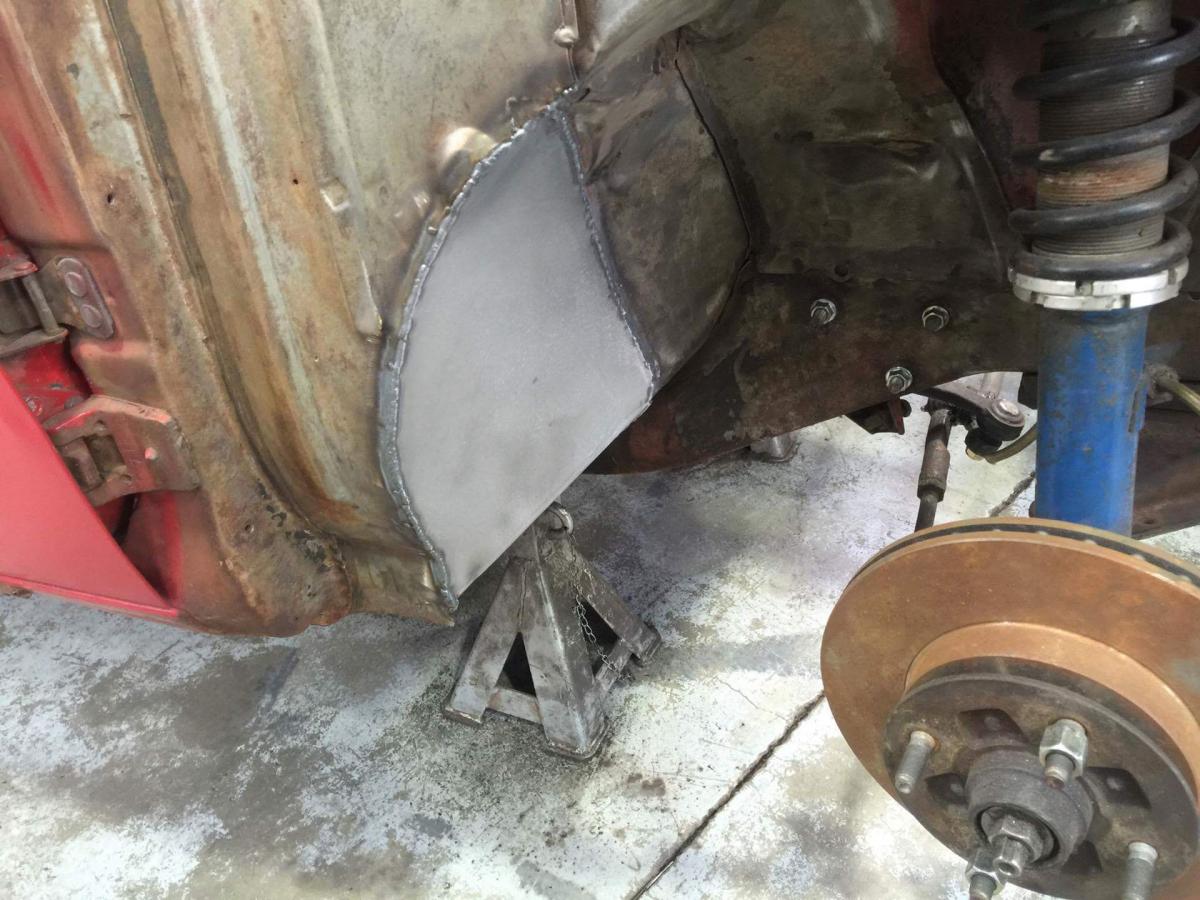
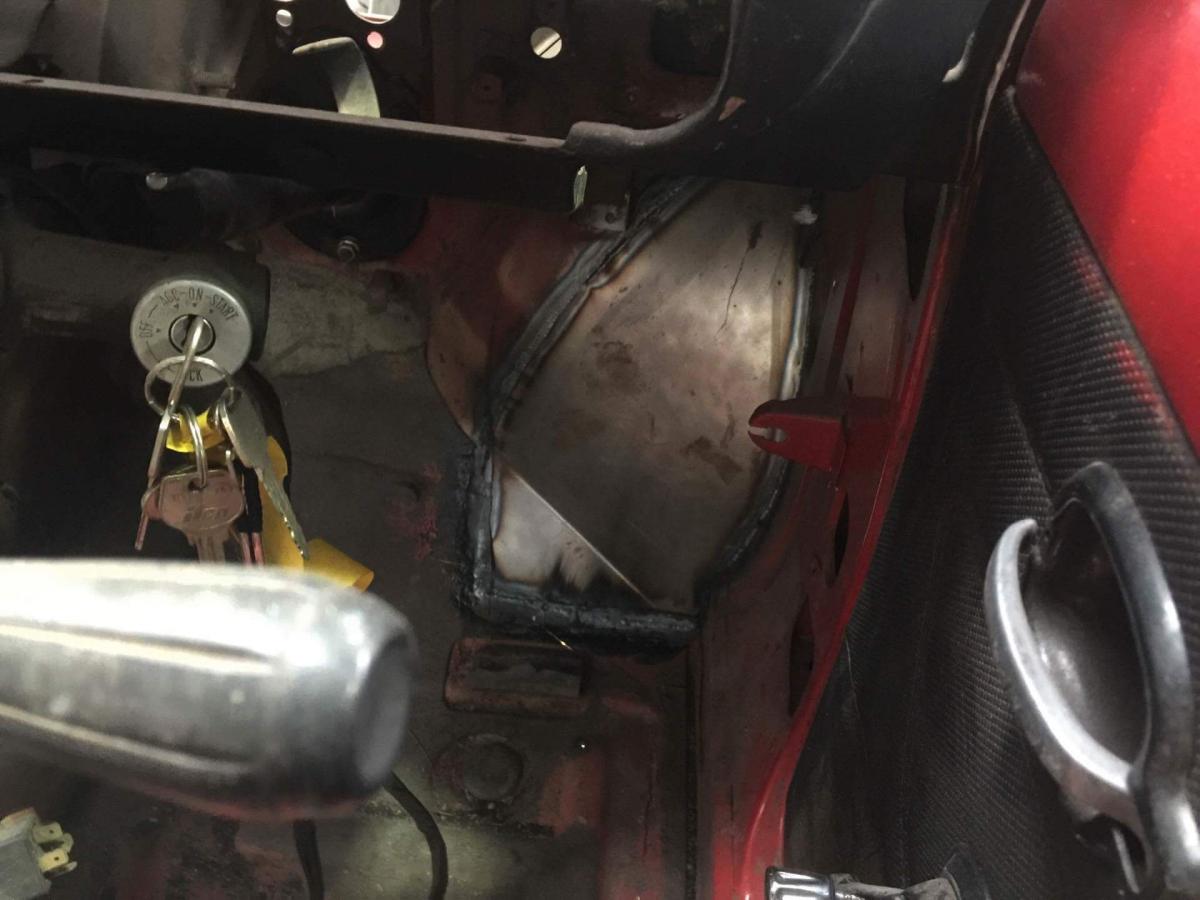
Scratch the above with the inner guard work. GC Alan of Motorelite just sent some snaps as he's changed the guard work. Looks a lot better with new setup and more room for the pedal assembly (running the original clutch and brake pedals but and fd accelerator pedal) but still allows wheel clearance. Here's some pics of each side...
-
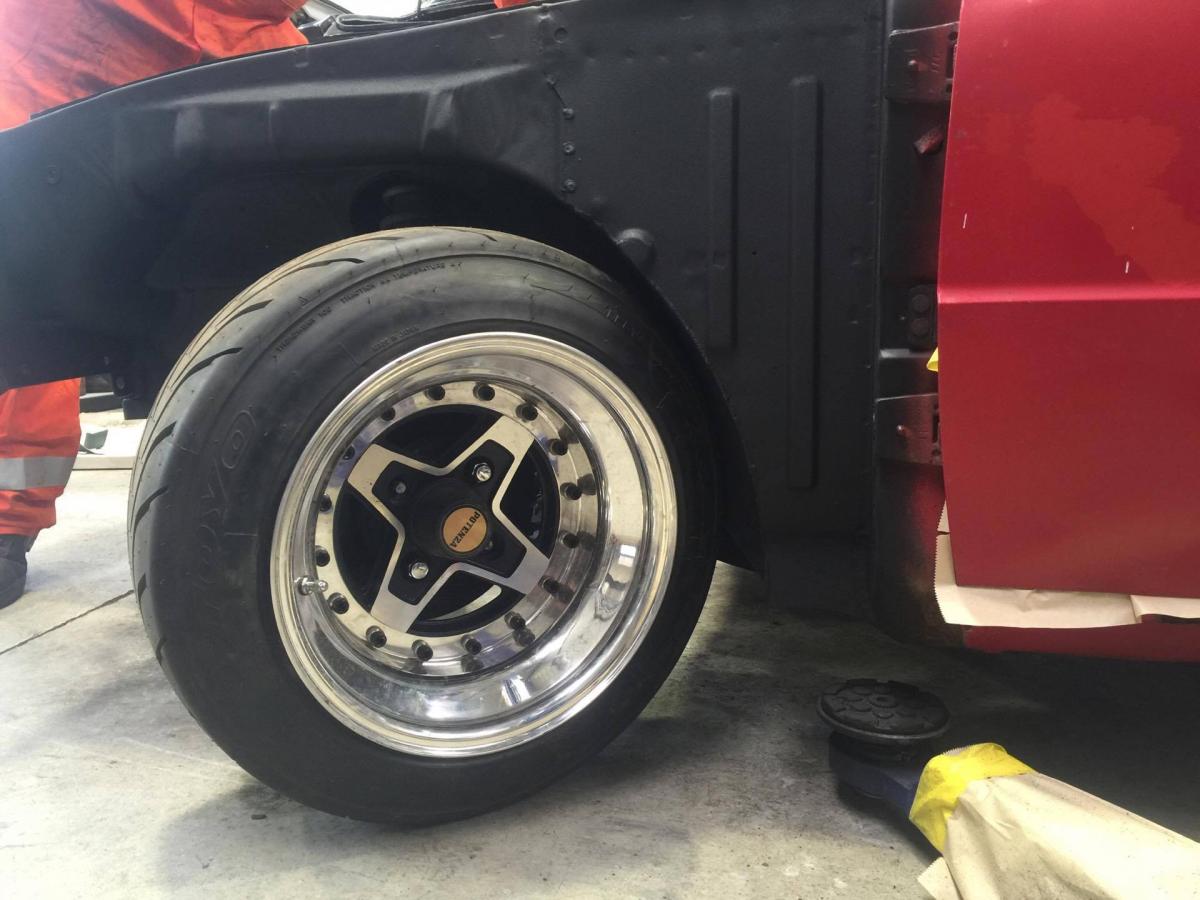
Hoping to have it in primer or potentially painted by next weekend (fingers crossed), then we're onto assembly! Here's a picture of the wheels for good measure. Tai.
-
Went and checked up on the progress on the old Mazda. Here's how it's currently sitting.. More fab work has been carried out in the engine bay and front inner wheel wells for clearance and to tidy up the bay in prep for paint. The chassis rails have been capped off and the firewall/trans tunnel has been smoothed out. More plates will be welded in across the top side sections to tidy things up and further reinforce it.
-
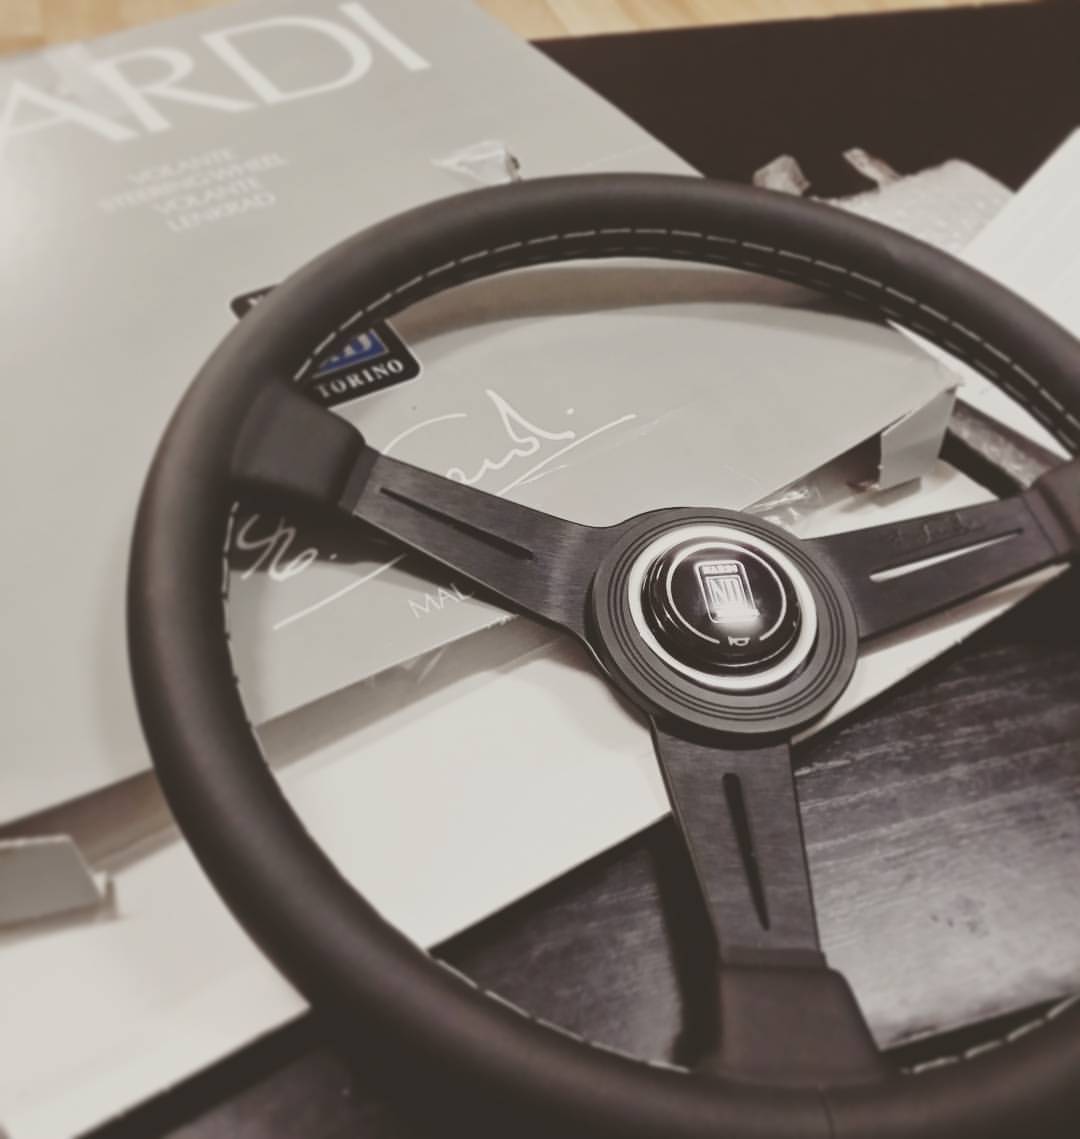
Hey everyone, Long time no update. Not much has happened with the 1300 for a while. Was out of work for a bit and had other shit to sort out but now we're all back on track. More fabrication work has been carried out on it, mainly some more work on the engine bay in preparation for paint and some other bits and pieces that i'll update you guys on shortly. I've also picked up some mint Japanese spec R100 lenses which will get sussed and fitted down the track. Last night I sold those Datsun style seats, I realised that they really are too small and will be uncomfortable as fuck I drive the vehicle for more than 30mins so decided to part ways. Got back what I had paid for them though so that worked out well, they will now find their way into a 240z. Now i'm on the look out for some older Recaro LX/LR seats ("fish net" style), strayans want drug money for them so instead i'm looking to source some out of NZ, if anyone has some up for grabs please let me know and how much you're after! Don't have to be mint as I will be re trimming them to the same style as the Datsun seats. Also my mrs has been too good to me and sussed me a genuine Nardi Classic steering wheel for my birthday. Just need to sort out a boss kit then can fit it all up. Should look the part I reckon!! Cheers Tai
-
I brought some carpet from Autodec for my old Vauxhall Shuvit. Fitment was horrendous as well. Had to trim shit loads of it and fuck around for ages and it still fitted up poorly. Boot carpet was mint though..
-
Im pretty sure with NZ based models the tachos only came out optional for the GLX's but the Panthers and Turbo II's had them.
-
The 4g11/12s maybe underpowered as fuck but they can take an absolute beating. I thrashed the shit out of my old hori'd out matte black hatchy for a good 3years straight with no problems at all and it still ran like clockwork!
-
One of the few classic Jappa car shows around these ways, it's still a growing scene but hoping more similar events take place in the near future. Cheers for looking, Tai