~Slideways~
-
Posts
1513 -
Joined
-
Last visited
Everything posted by ~Slideways~
-
The Mitsi 4g pick a part options could be pretty good. Maybe a 2.4 turbo 4g64 block and a mivec head if I can find one? Maybe a 4g63 turbo from a dead Airtrek, they always seems to get scrapped due to auto failures. Maybe a 1.8 with mivec head? I'd love to make it looks like an evo 5 but it's tempting to keep it looking like a boring Lancer too... I wonder what kind of brakes could fit under 15's and 4x100 wheels?
-
Hello, I have a new project that I am doing research on. I've always wanted an Evo 5 or 6 but they are now stupid money. But I have just bought a very tired 1998 Lancer MX. Which is the weird parts bin model that has 4wd, a 4g15 and an auto. Plus it's wofd and regd. There is a hefty leak from somewhere around the transfer case though. I mainly wanted it because it's got the 4wd floor pan. Some parts number searches tell me the rear diff and axles share the same model number of the evo5. The hub end will be different because drum brakes a 4 stud. But it's a good start. I know the subframes are different, being all steel and possible suspension mounting points but I wouldn't think Mitsi would change the chassis mount points...maybe. I want to build a FrankenEvo of sorts. I've found a 5 speed from an 4wd mirage but this will be for the same 1.5L so not much use for a 4g63 if I were to swap it. I'm notnsure if any 4g will fit, surely there will be mount differences, but hopefully this won't be hard to get around. Does anyone have knowledge of what gearbox options there are, do they all fit any 4G engine (gsr/evo 4 onwards)? I'm sure I will have to match up ratios with gbox, transfer and rear diff. Can any of the current auto parts be used with another gearbox? Am I right in thinking the manual gbox for the 1.5L is not going to be very strong even though it seems like it'll fit a 4g93 etc? Kind of strange that its 4x100, but good since I have some wheels from other cars. Could maybe swap to 4x114.3 too (EDIT: meant to say 5x114.3). Any info or feedback would be great, cheers.
-

-

The Dutch, Scottish, & Indian people megathread (Driving economically)
~Slideways~ replied to Roman's topic in Tech Talk
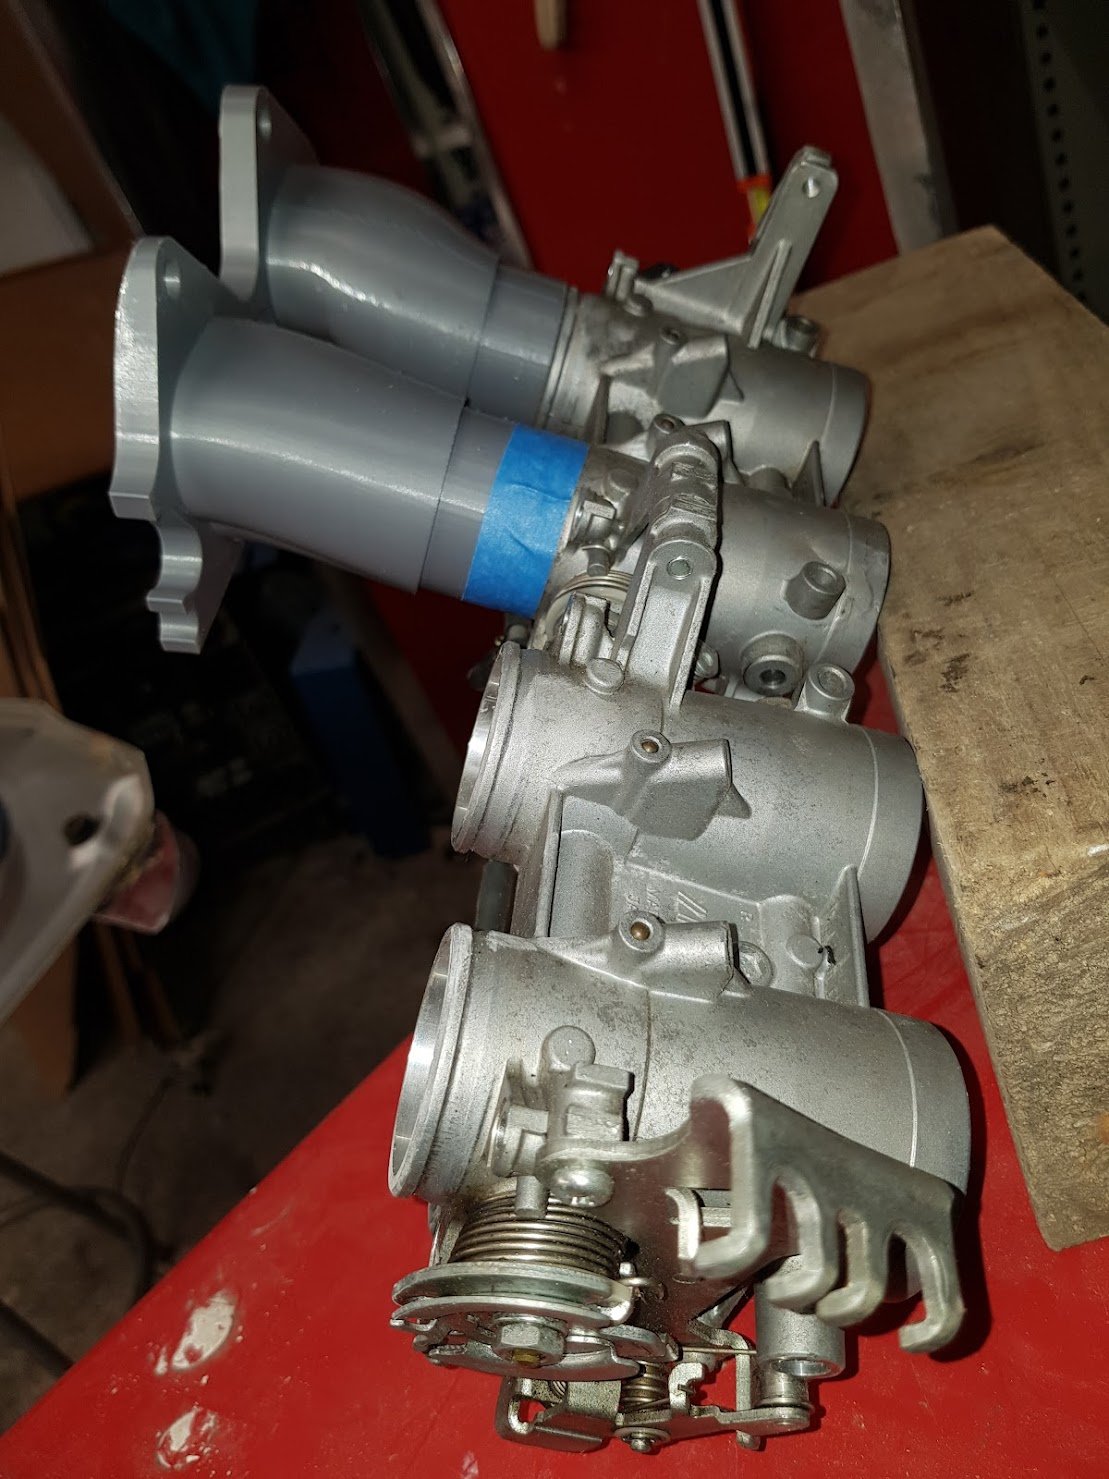
My bike ITB's actually did have a DBW set up but it was on the 2nd set of throttles which simple don't seal like the 'real' set do. Yep there is, he's got a build thread too. Really cool swap, I reckon it'd need a cert simply because it looks like a different engine though. Probably the same with ITB's too unless you have a real lenient wof place. -
The Dutch, Scottish, & Indian people megathread (Driving economically)
~Slideways~ replied to Roman's topic in Tech Talk
I've been wondering about this recently, the cost of ecu + tune versus fuel saving based on the 30 year old tech/tune (no oxygen sensor and basic AFM, non-variable TPS etc). I'll hopefully be back to dailying my 1.6 MX5 within the next few months after I paint it. But the funny thing is its worse on fuel than my 2L 3sge Celica (St202 with acis, which seems to work pretty well) for the same drive. I thought maybe it was just because of the way I drove the MX5, but a work mate here has had a few and he reckons they are all surprisingly thirsty. I have a Speeduino to go in, whether I do that with the stock intake or with ITB's I'm not sure. It would be interesting to see what sort of fuel economy increase I could get. They have a lowish 9.4:1 compression ratio so it would be worth shaving the head too. -
Thanks man, although I've ordered a Mellow one from Aliexpress already, should hopefully be good. This one: https://www.aliexpress.com/item/33035870412.html?spm=a2g0o.order_detail.0.0.622cf19cELrdsv I reckon the NA8 would definitely need some bigger ITB's, maybe from a 1000cc bike but the idea is the same. I was tempted to put a 1.8 in mine but I like the way the 1.6 revs (its probably just the smaller flywheel to be honest but....).
-
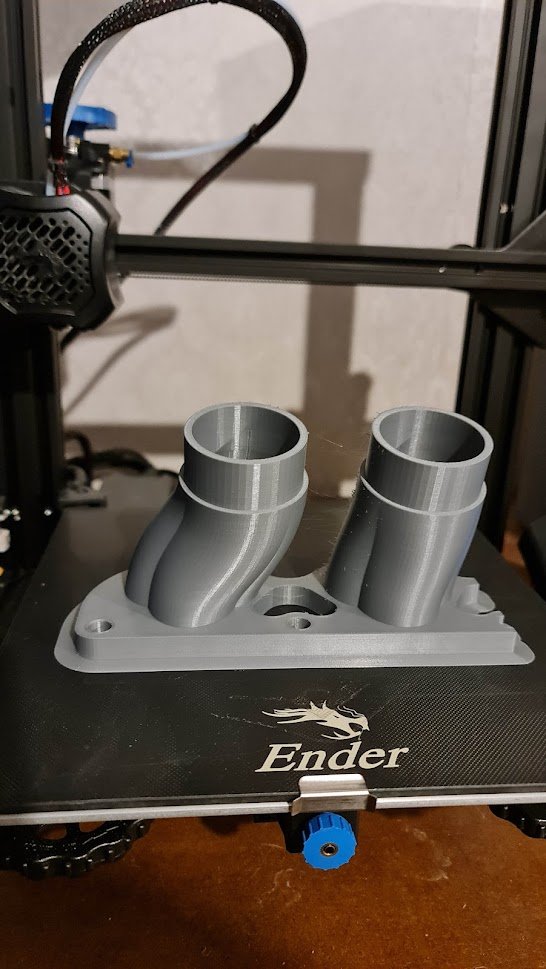
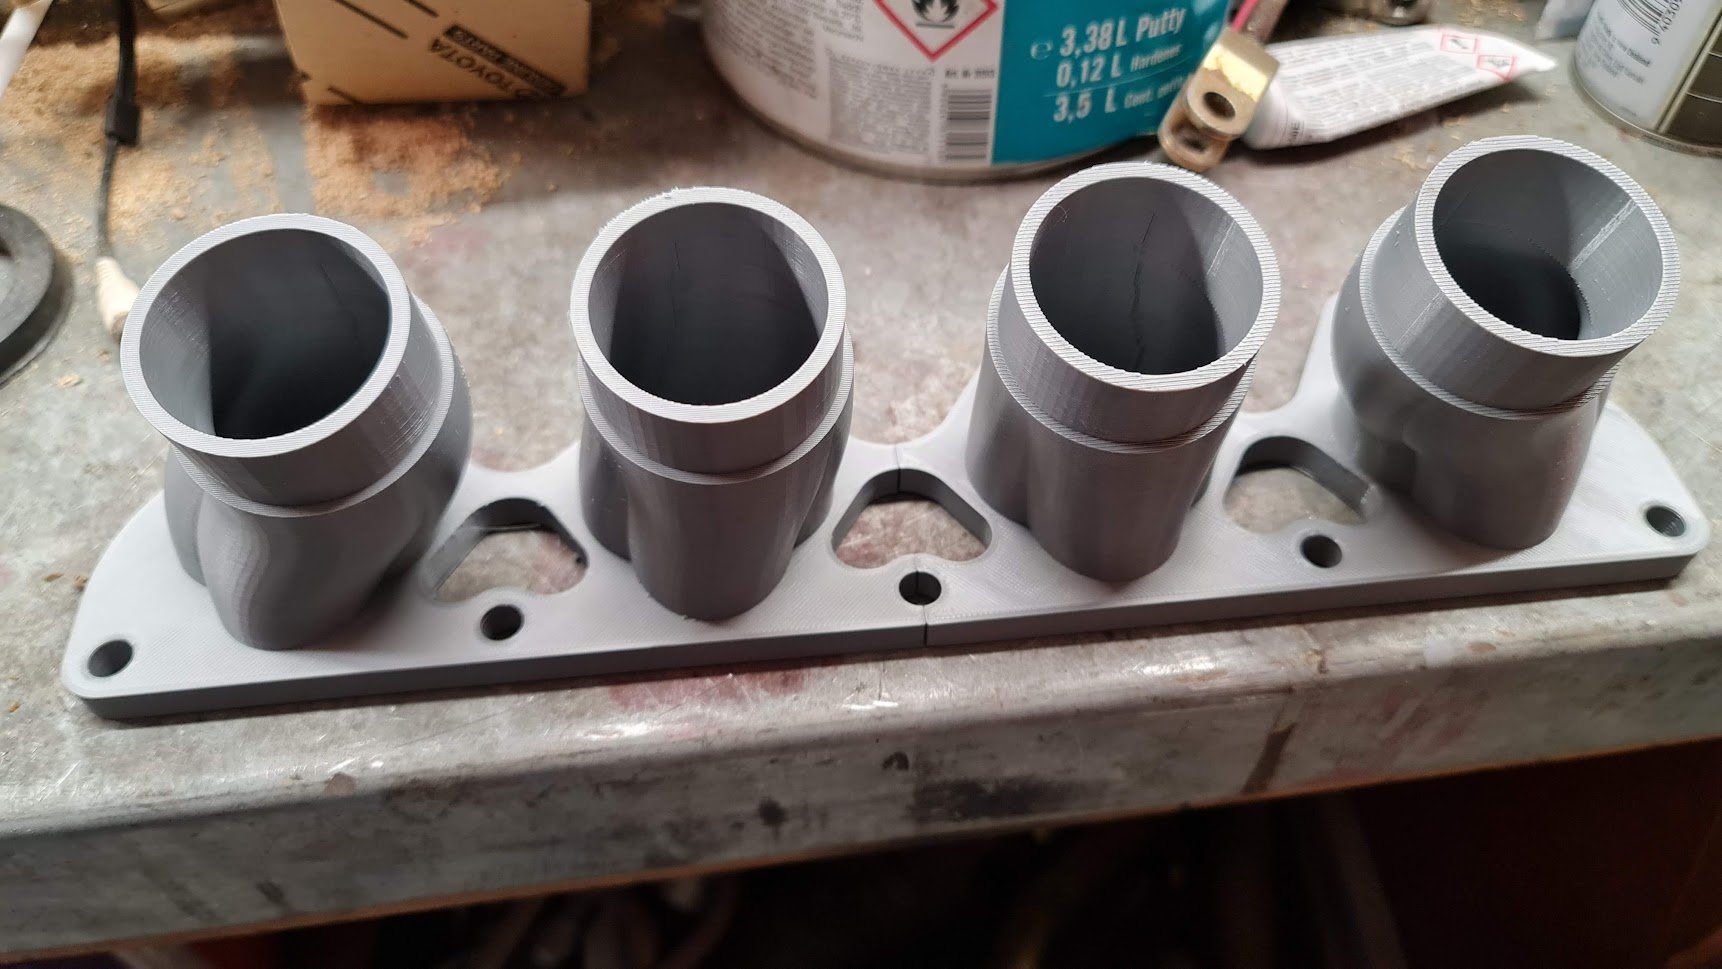
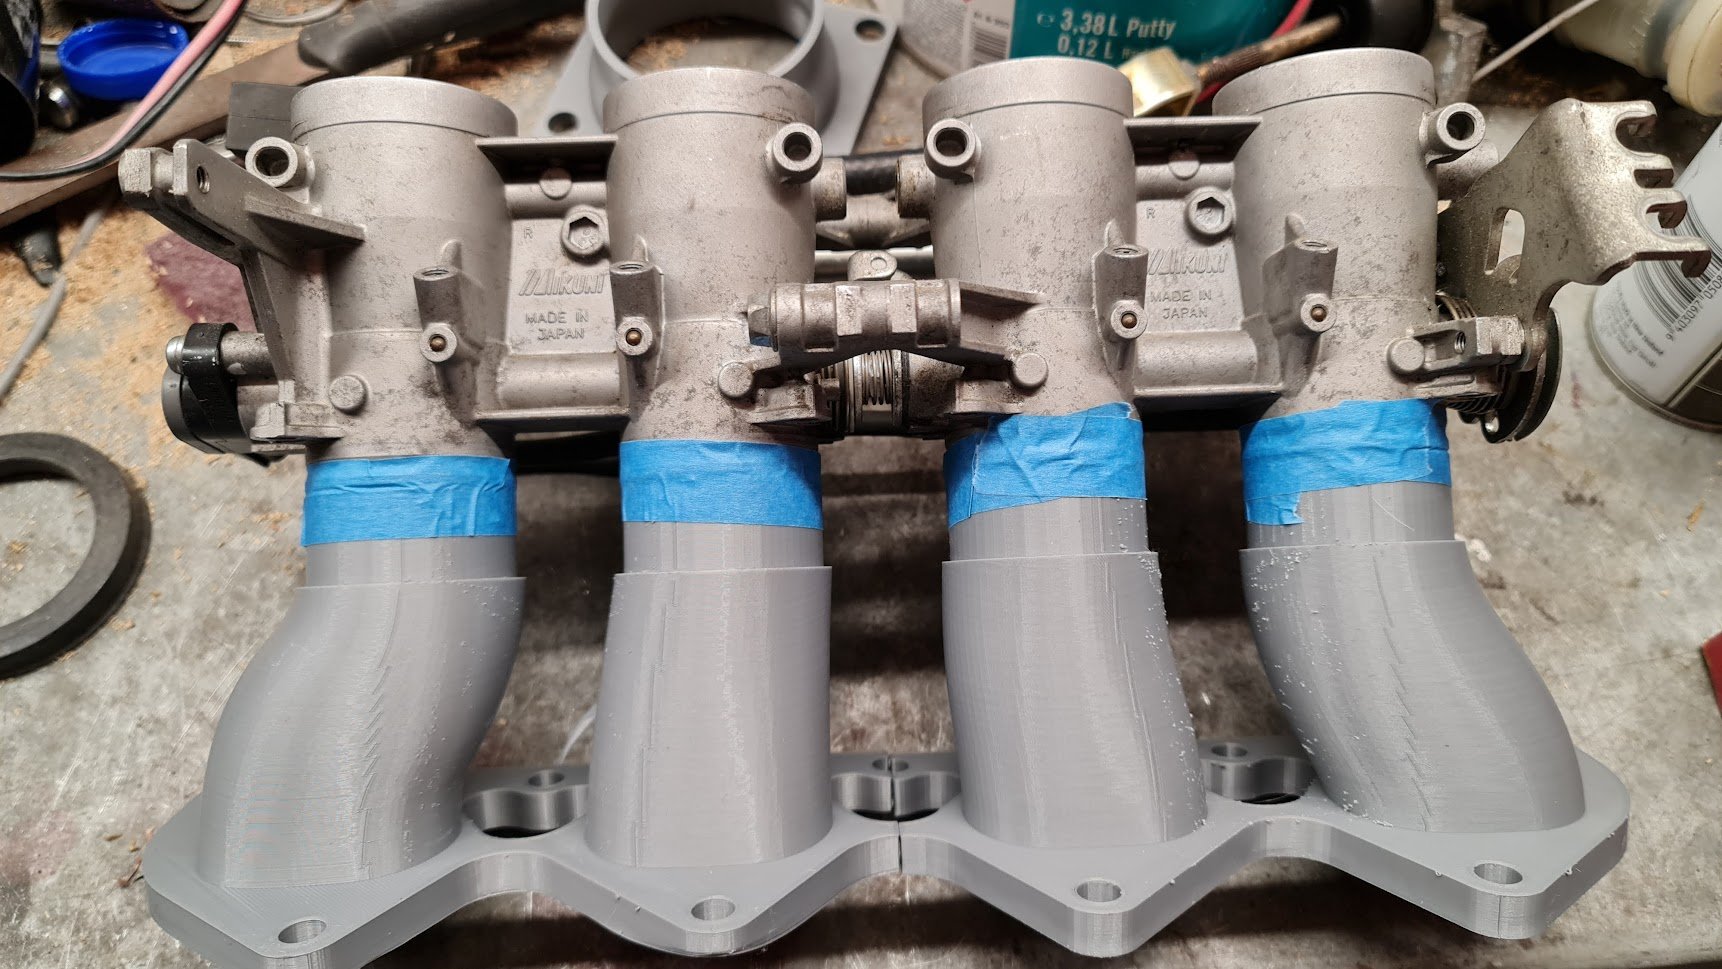
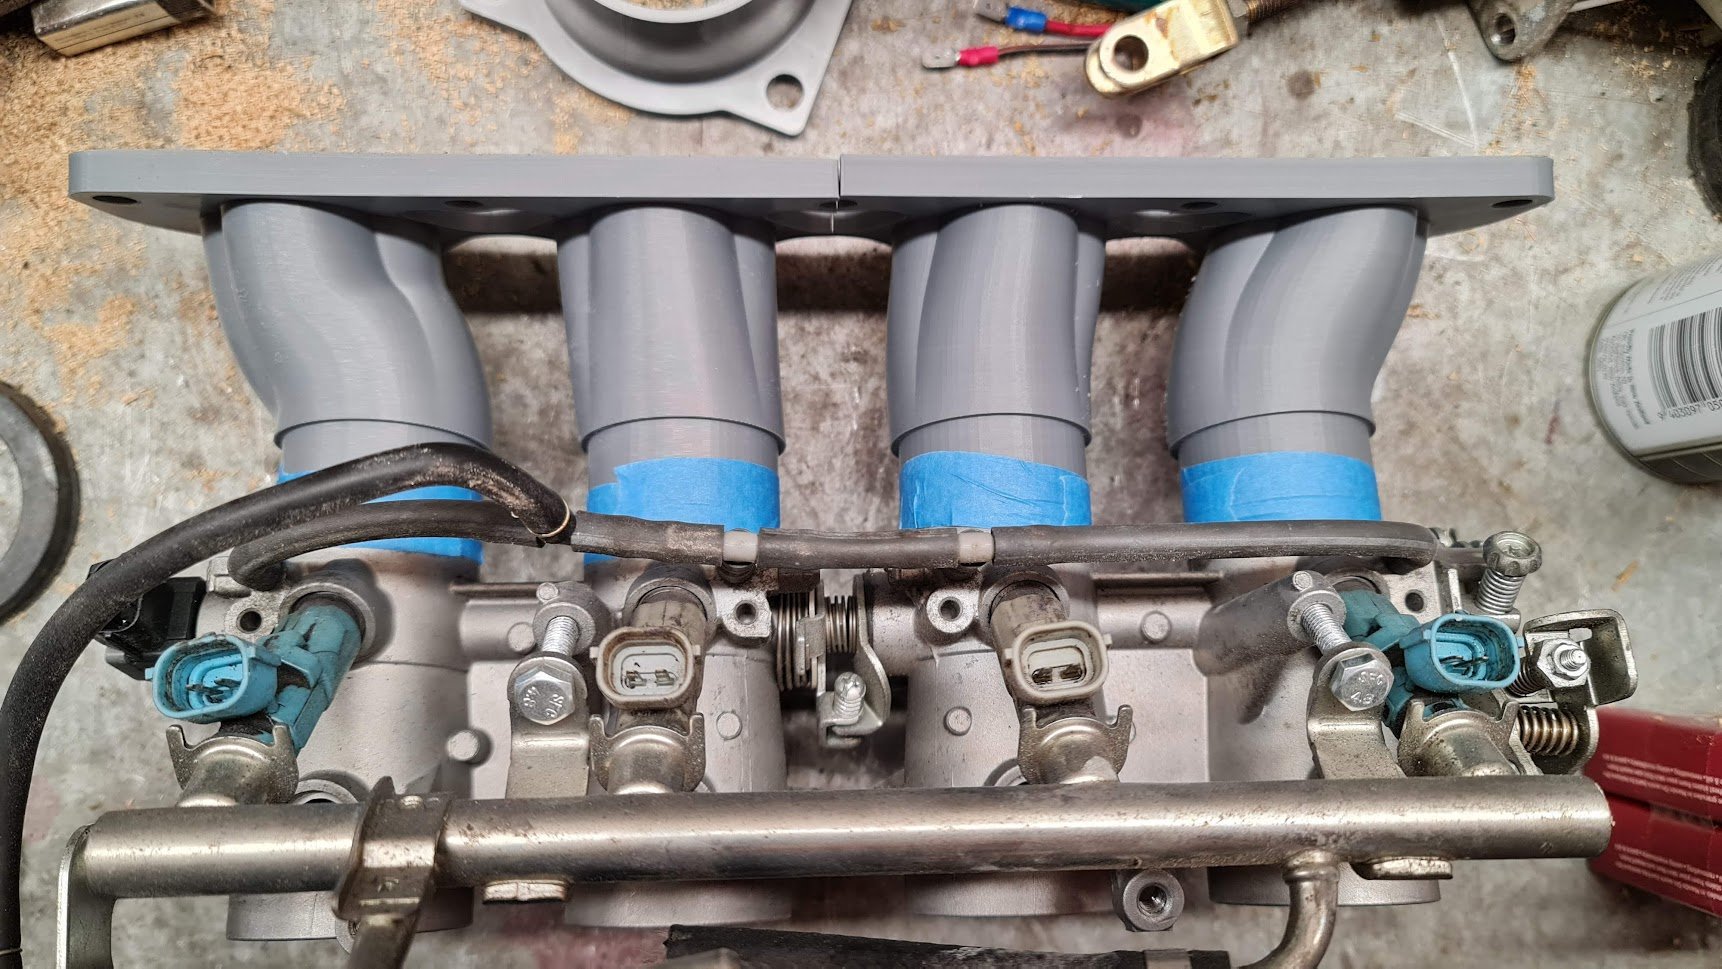
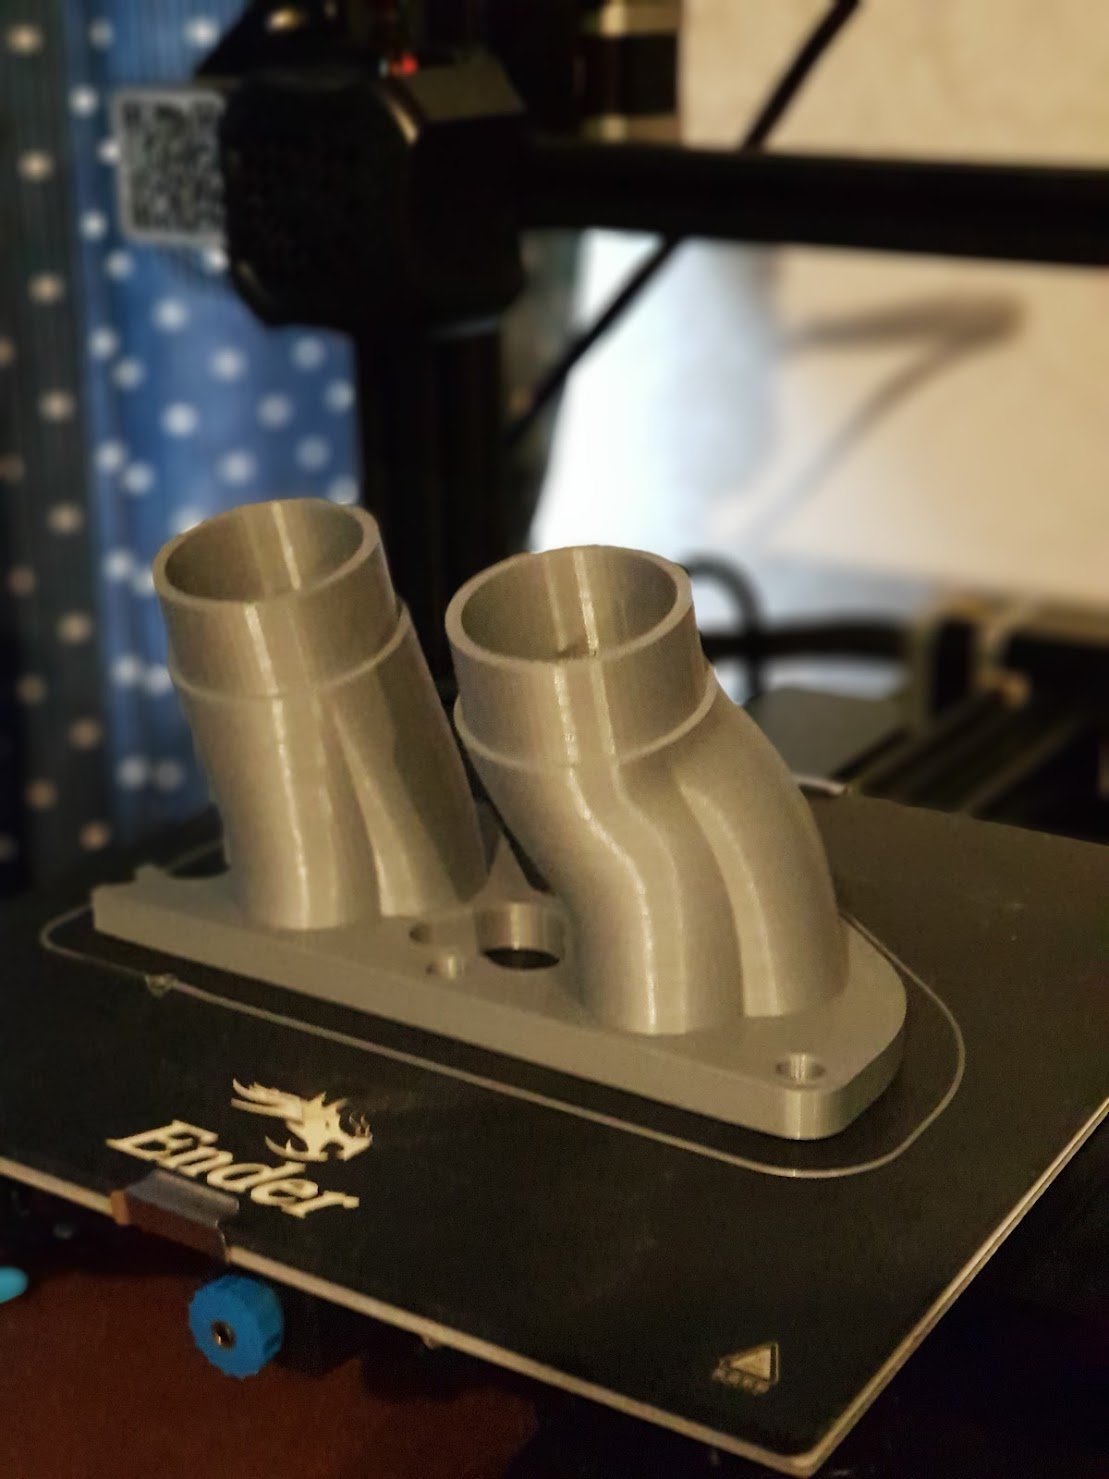
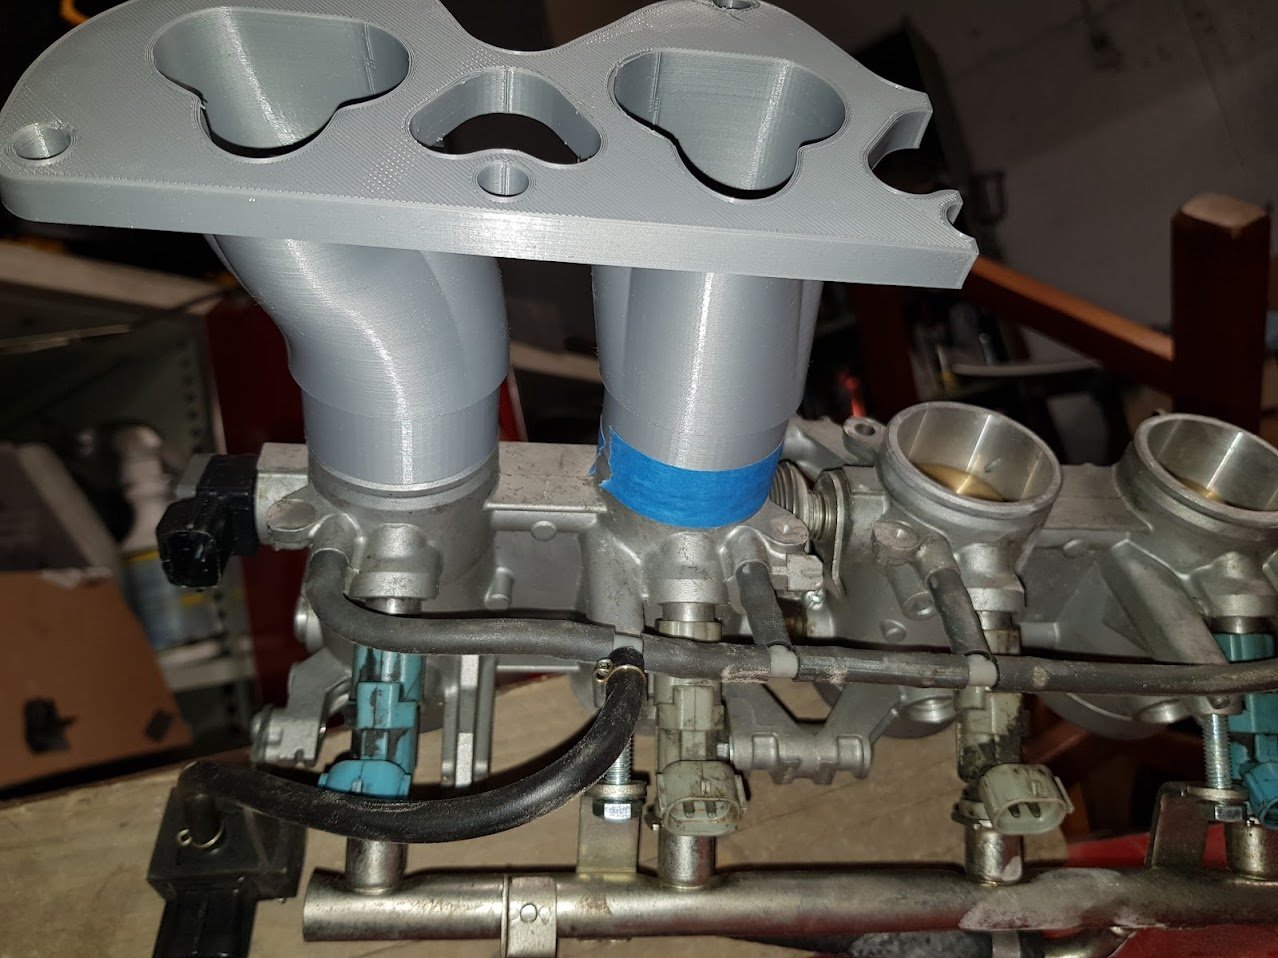
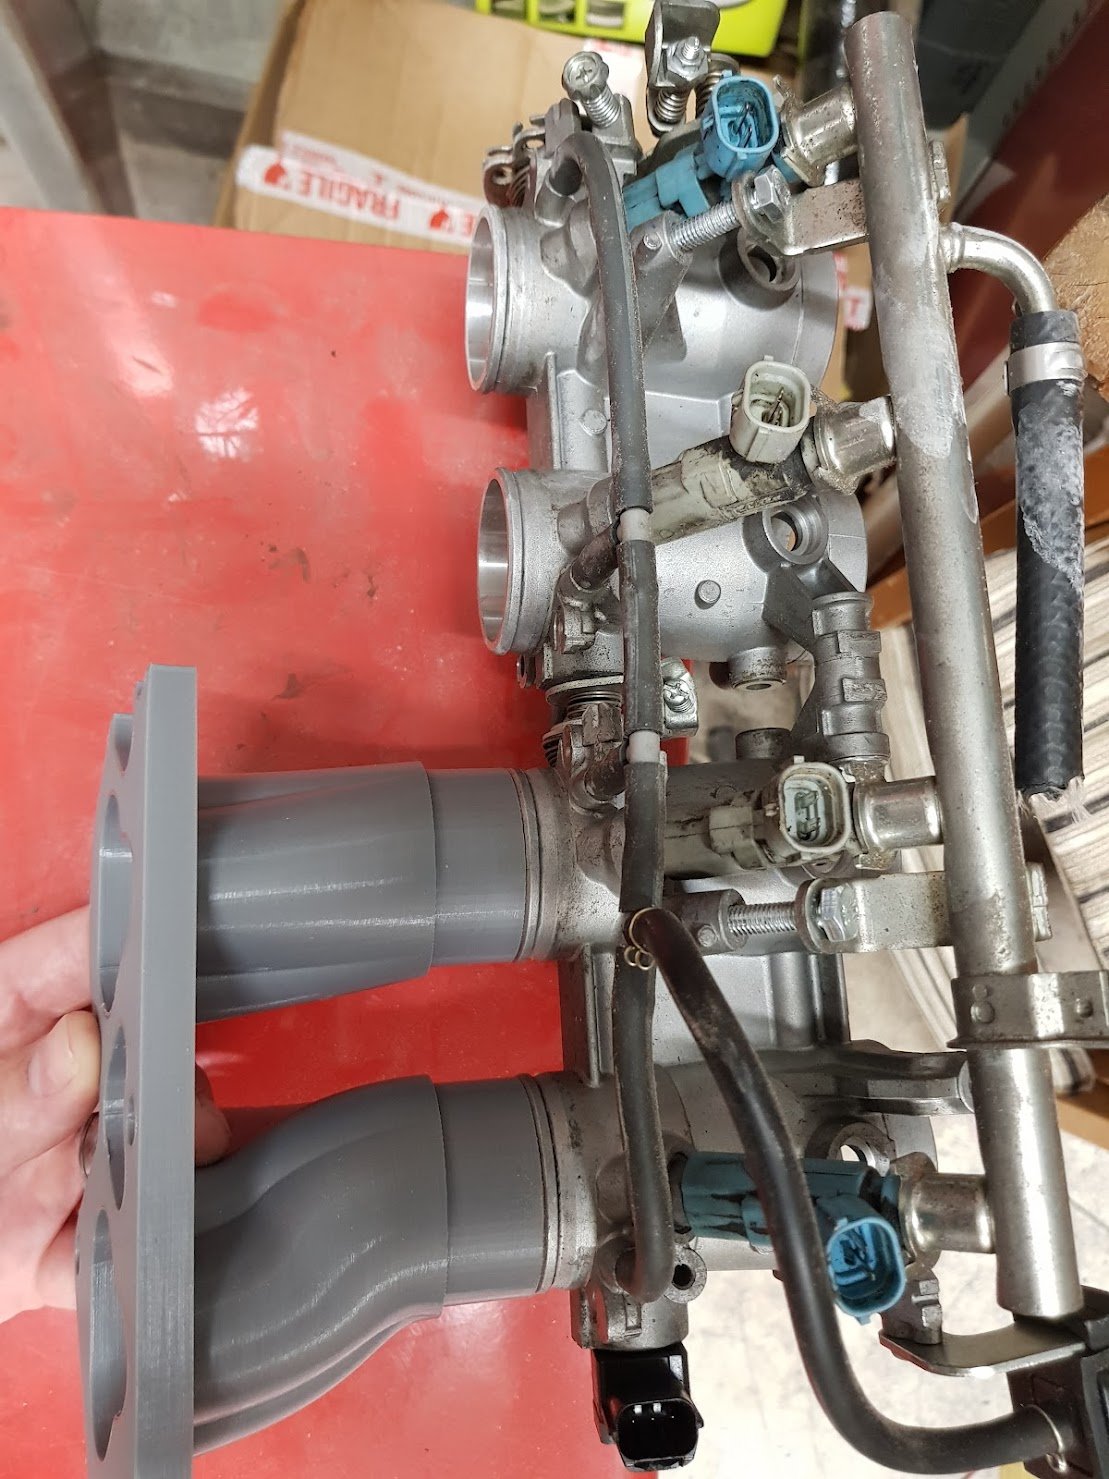
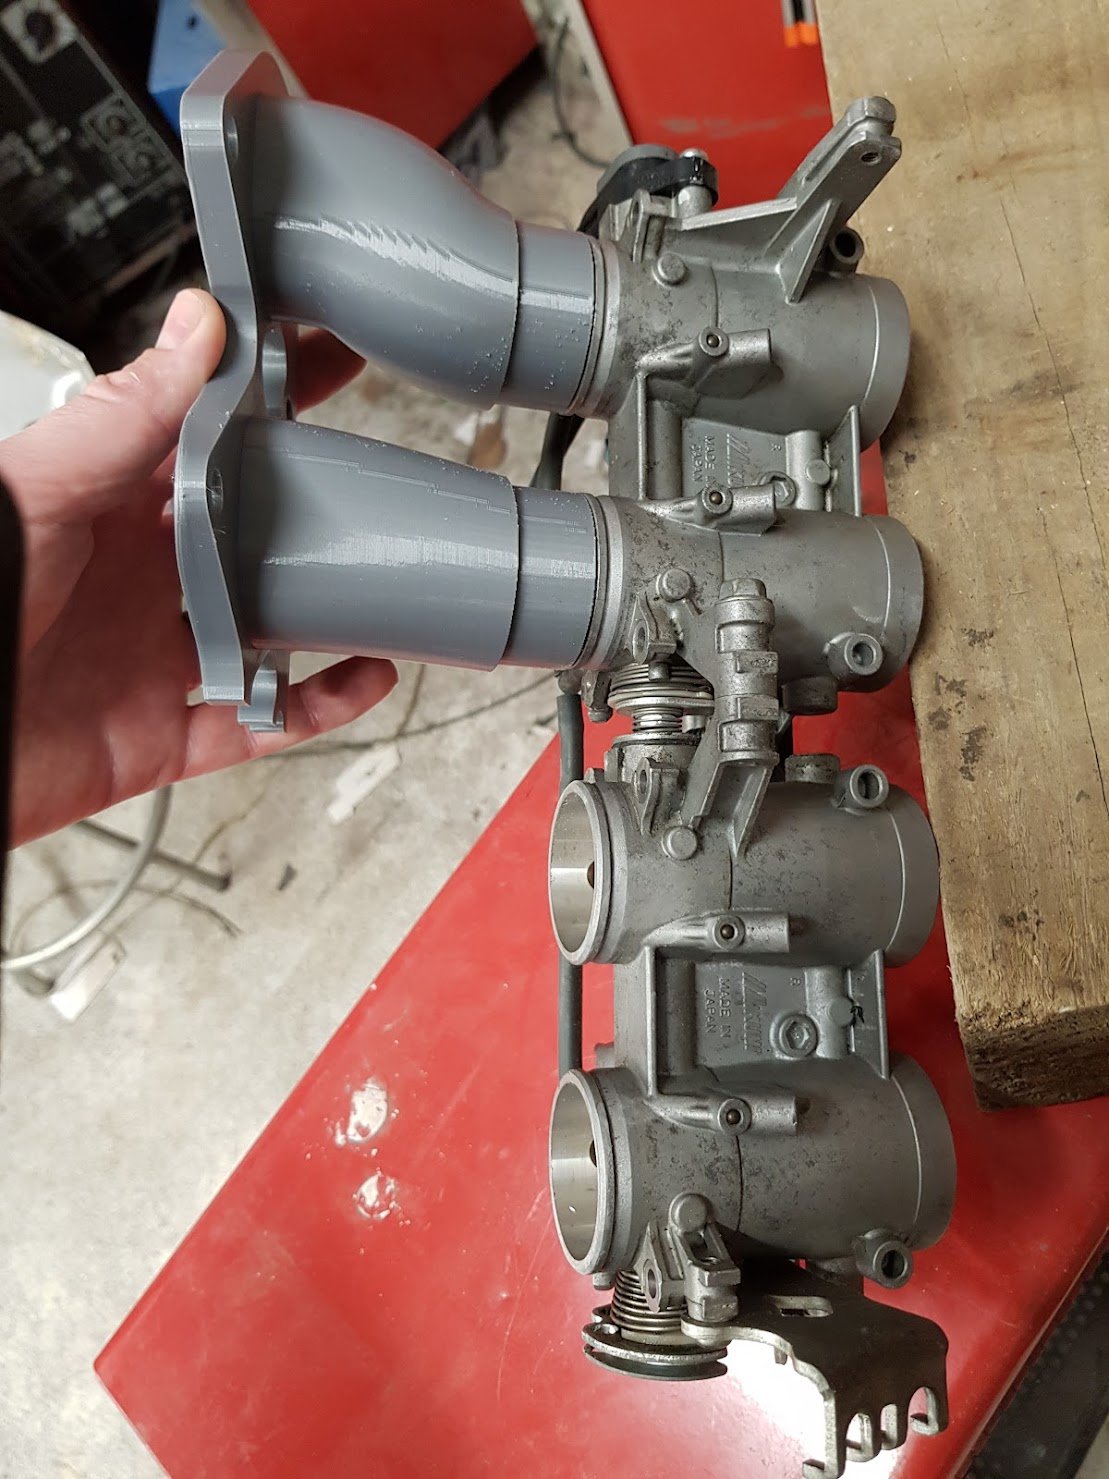
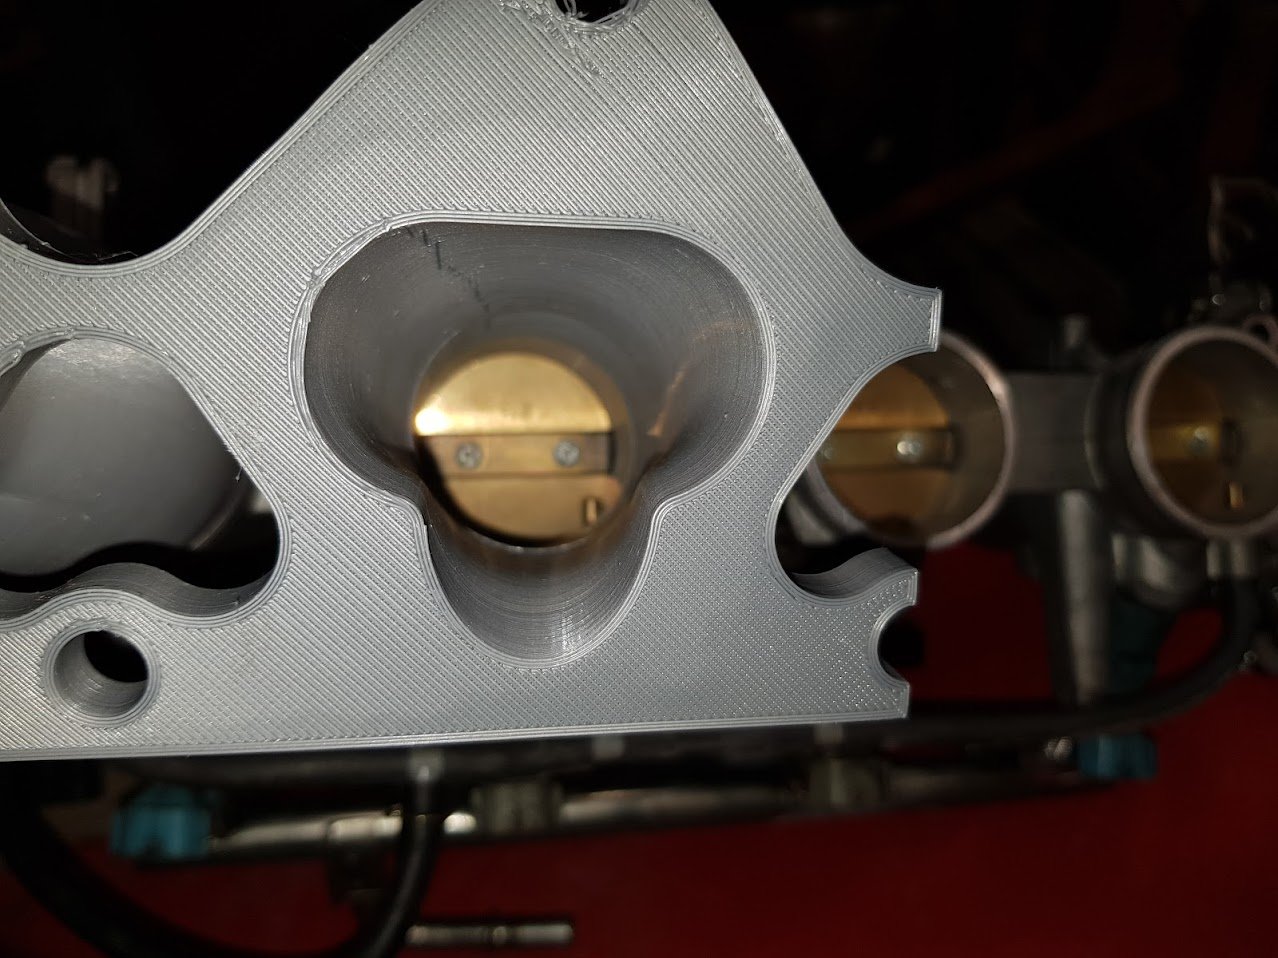
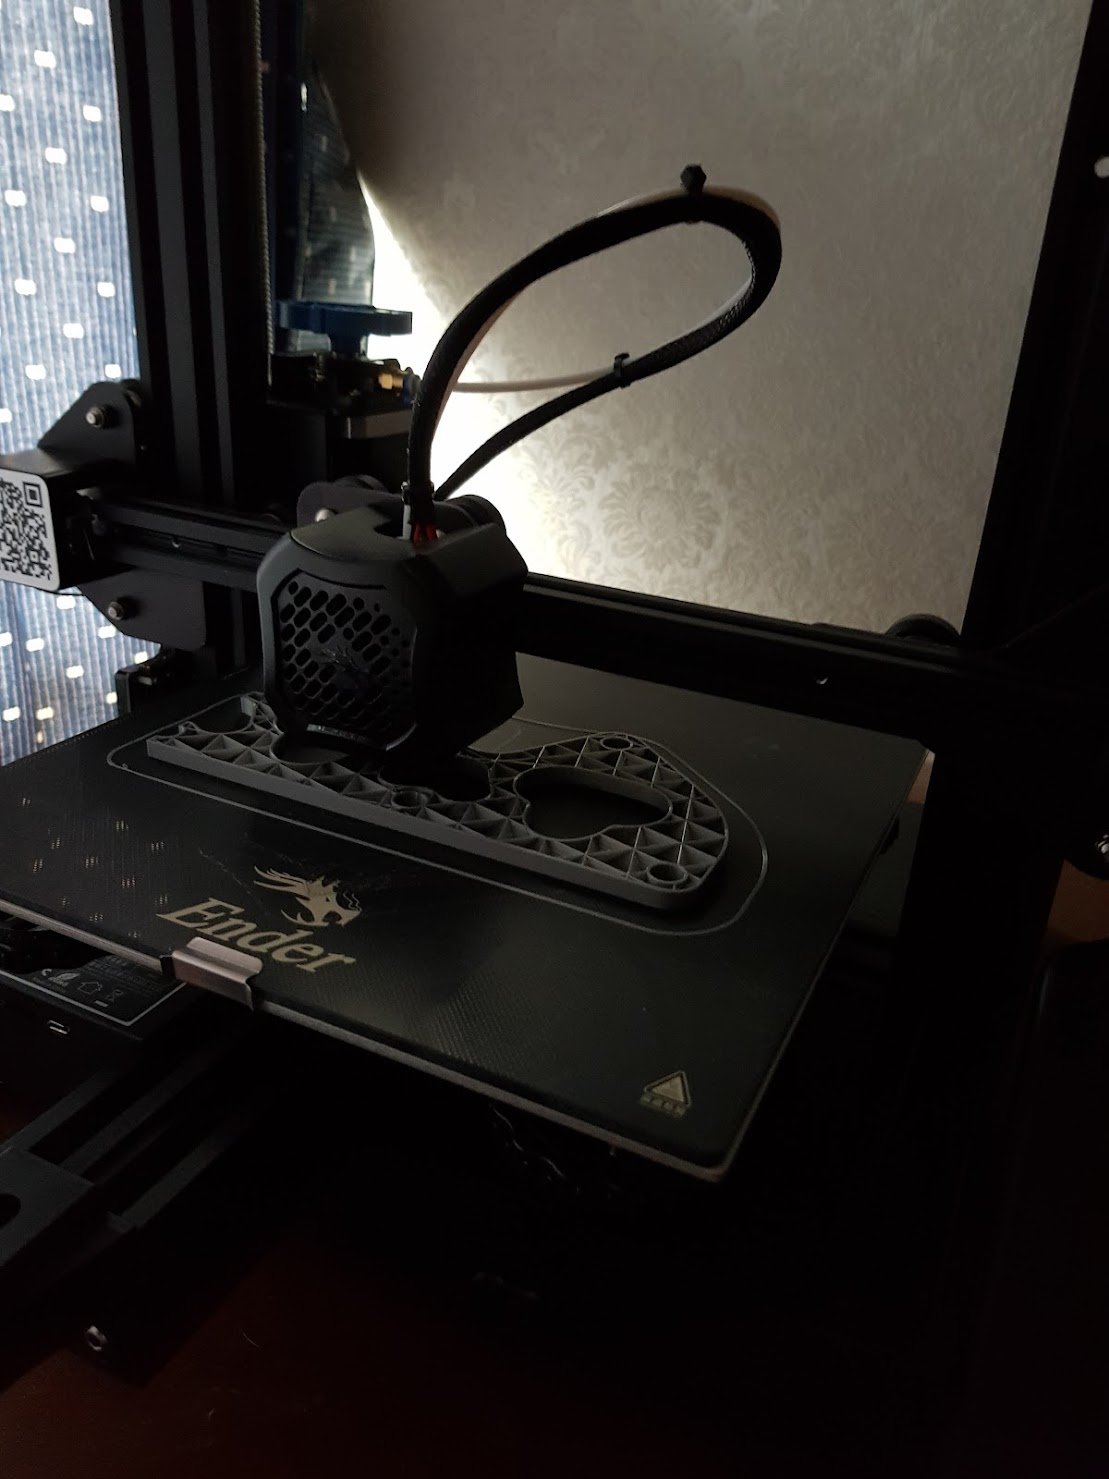
Finished modelling the other side of the intake adapter thing and printed with a finer quality, took over 24hrs to print! Also added an adhesion layer to help with lifting around the edges which worked great. Easily removed afterwards too. Got some strange stringing/hairy bits but only on the middle two faces, not sure why. Internally its perfectly smooth. Both together to make the complete manifold, you can see the print quality difference: Lines up nicely with the ITB's Looking at getting an all metal hot end for the printer and a hardened steel tip so I can try print it with Carbon Fibre Nylon filamnet. Trying to decide which filament to use, there are quite a few variations to look, I guess what ever handles the heat best.
-
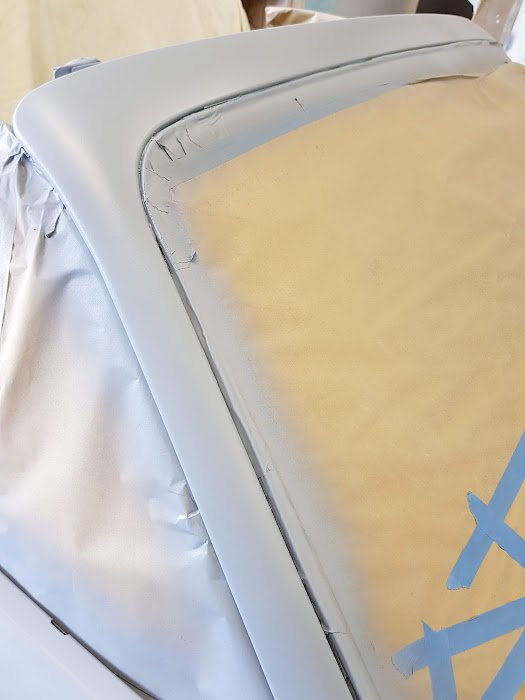
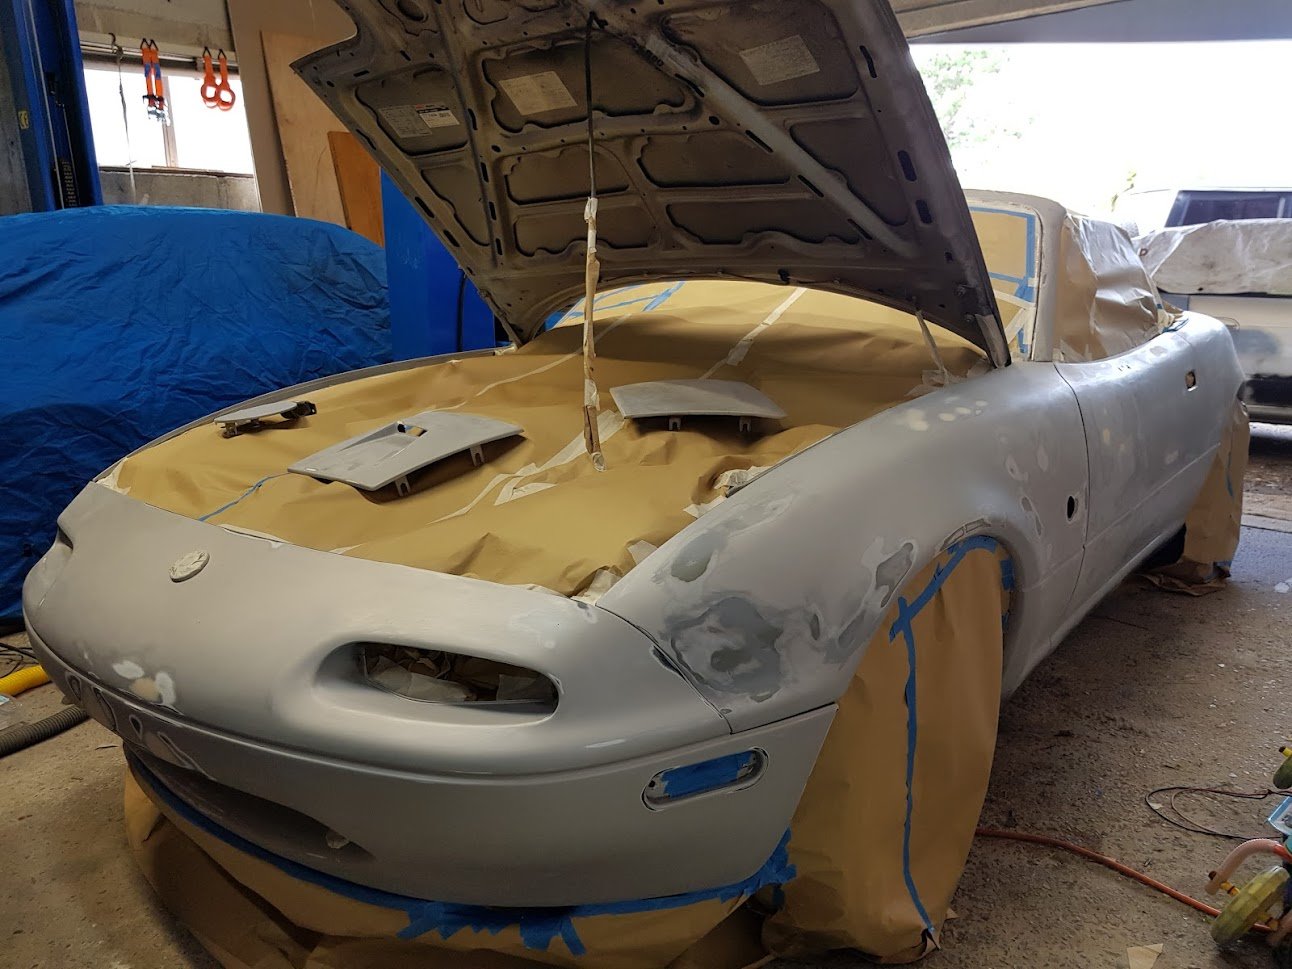
Put some high build primer on it:
-
Don't jinx me man!
-
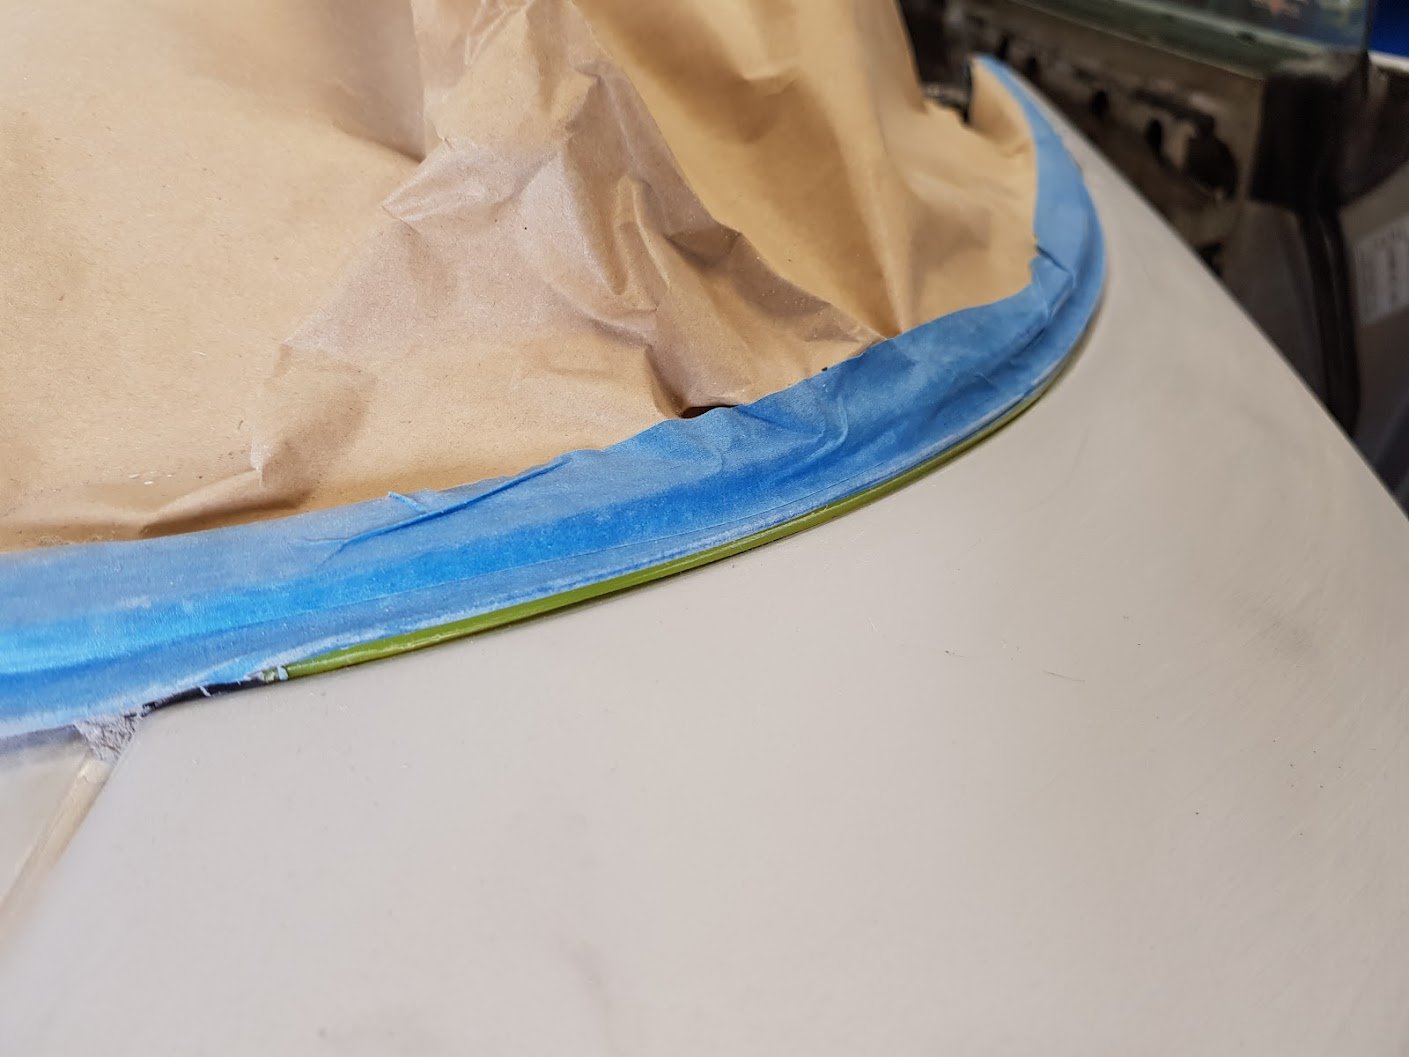
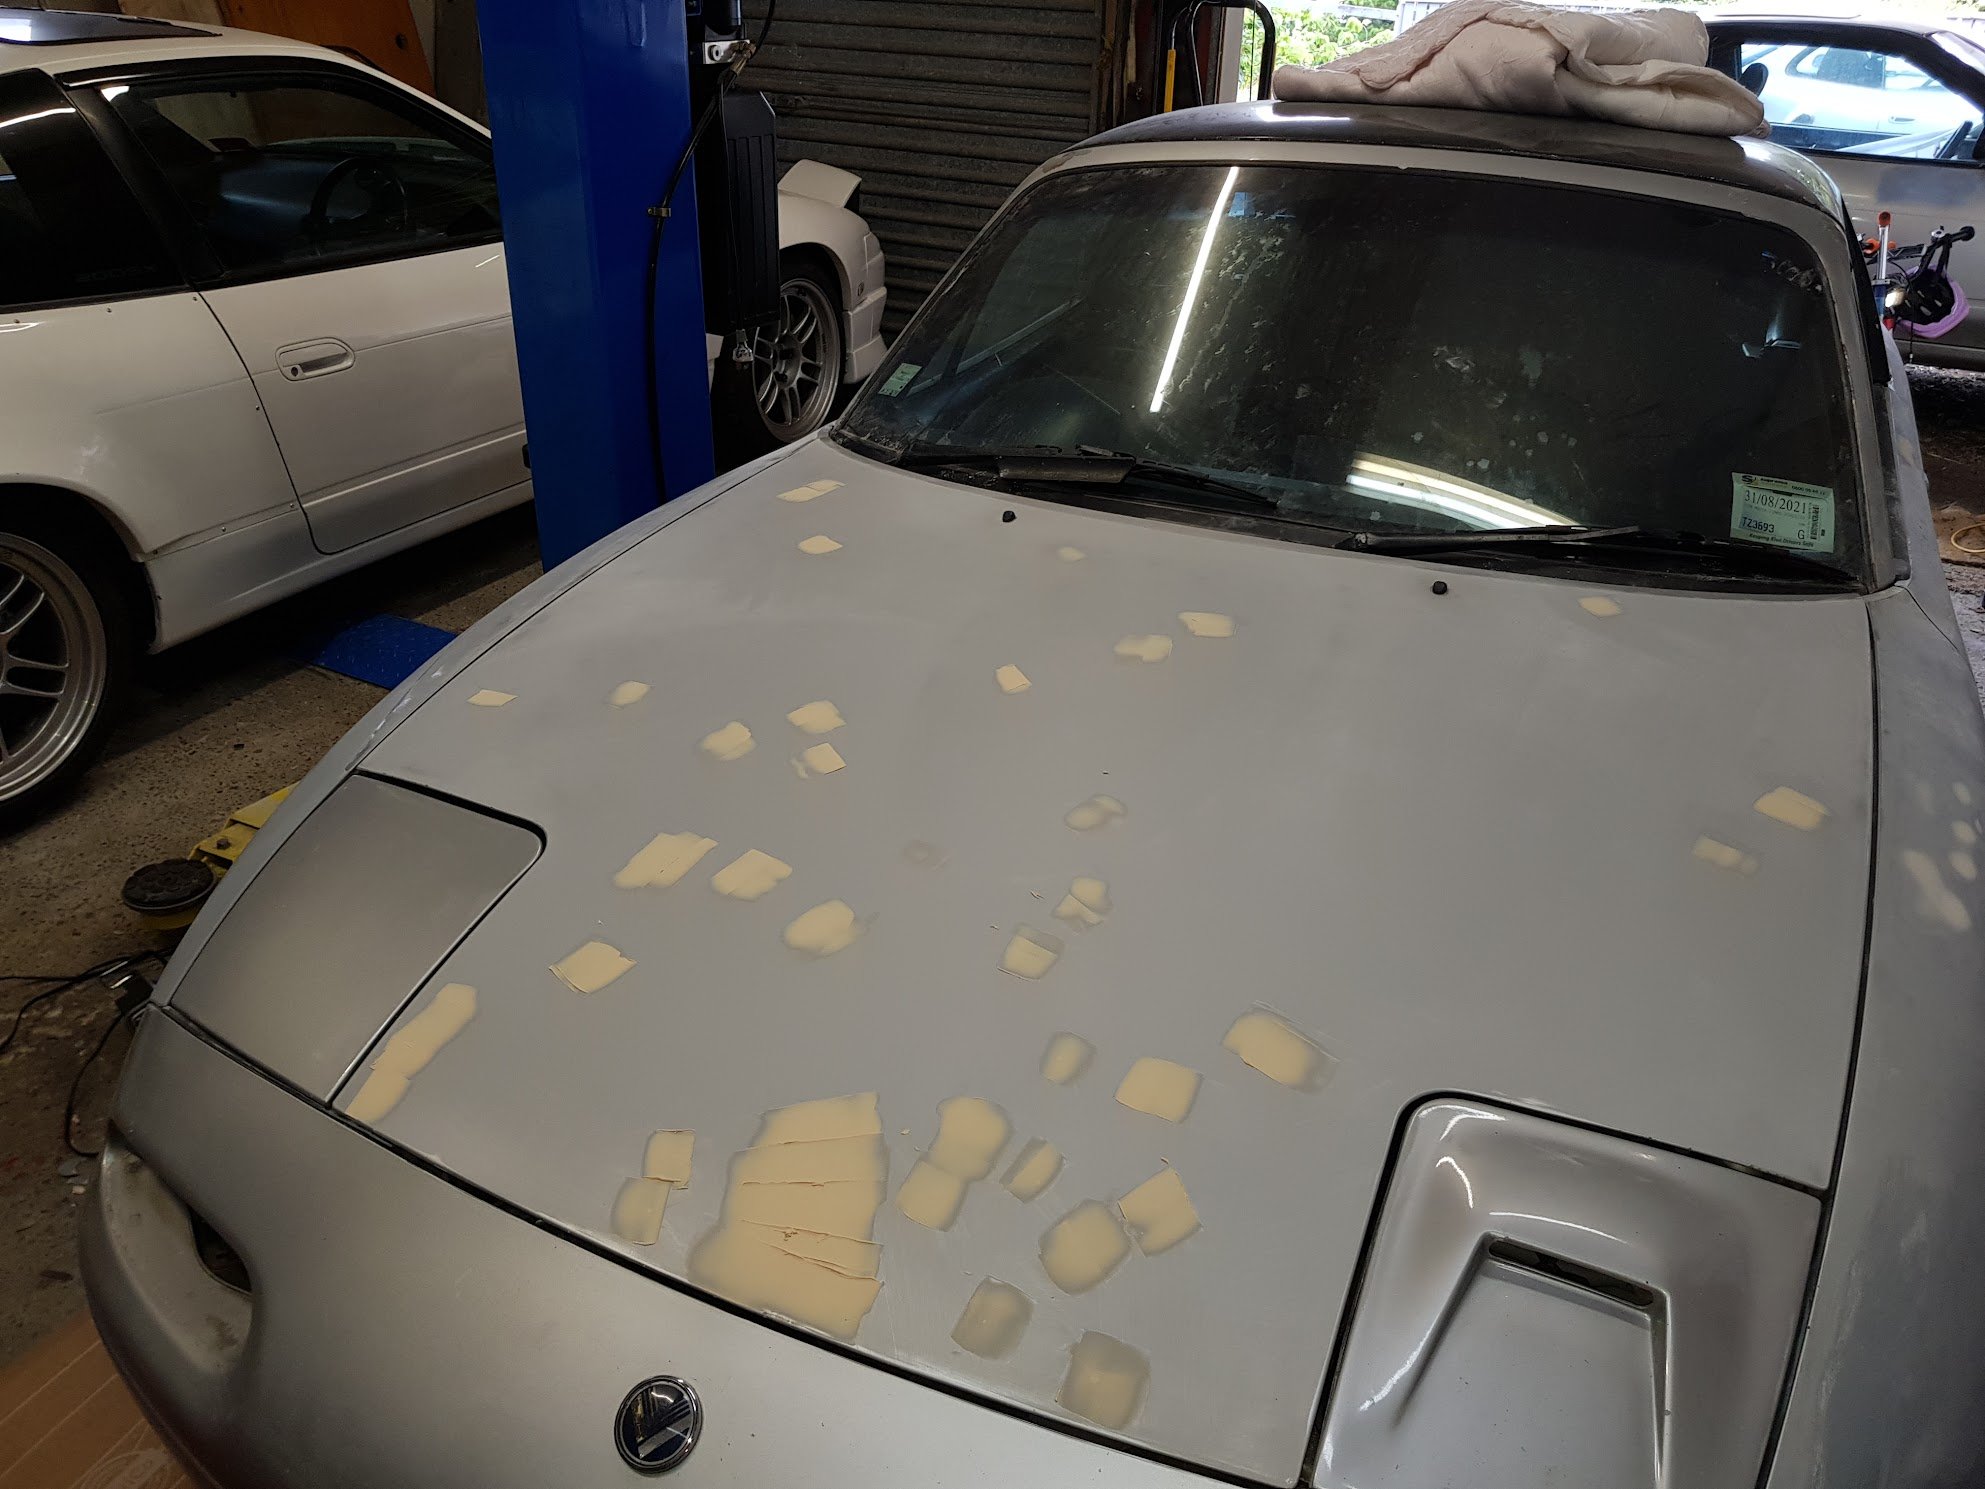
Man how does masking take SO long? It's like a black hole, there's hours in this!
-
Any updates on this?
-
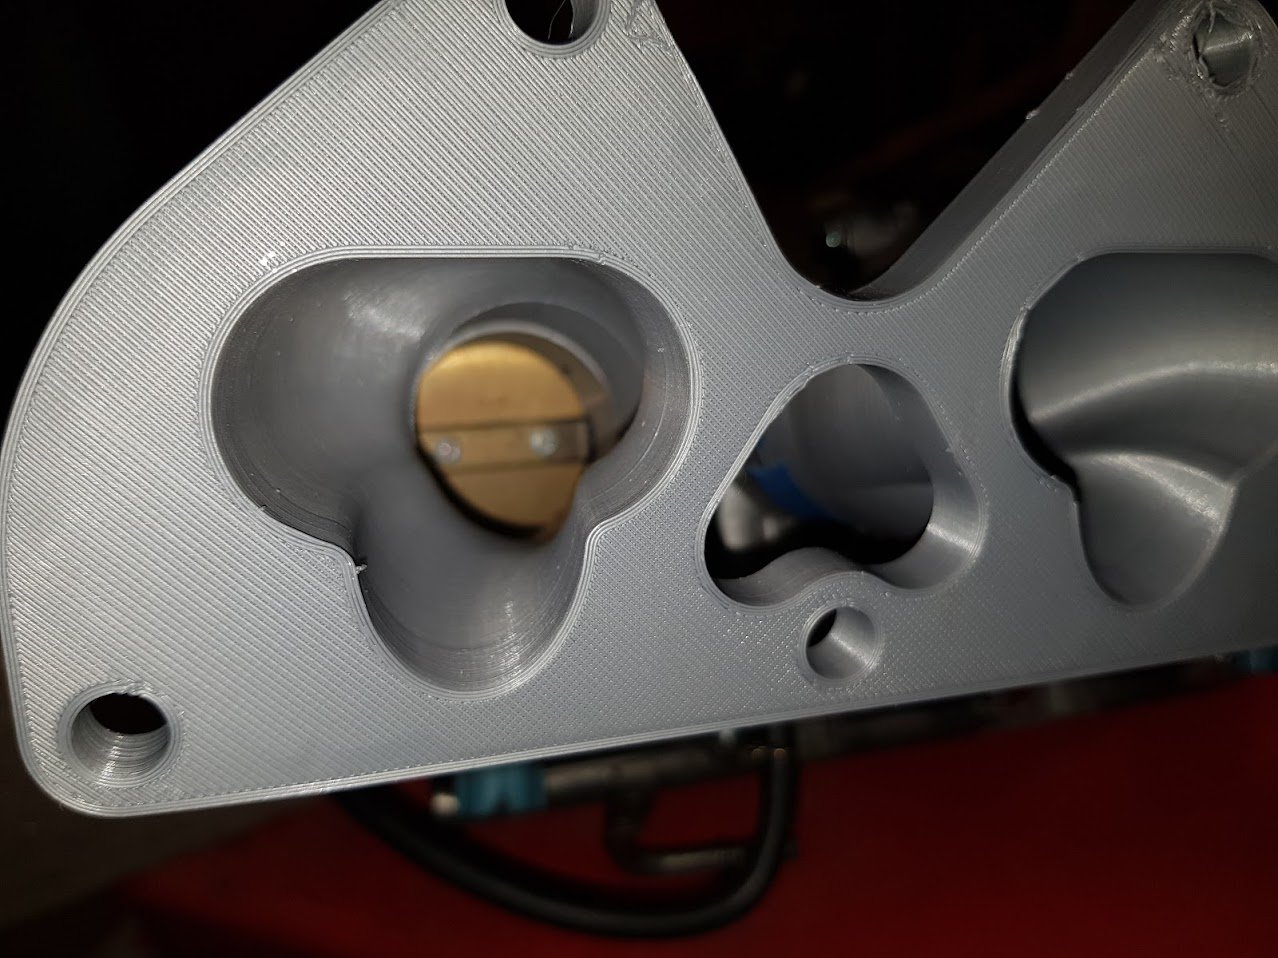
Tried again and got this about 12 hours later: Sweet! A couple of problems with the print quality and lifting but good enough for a test fit and to see it I need to change the angles etc. It lines up with the ITB ports perfectly! Fck yeah!
- 156 replies
-
- 32
-

-

-
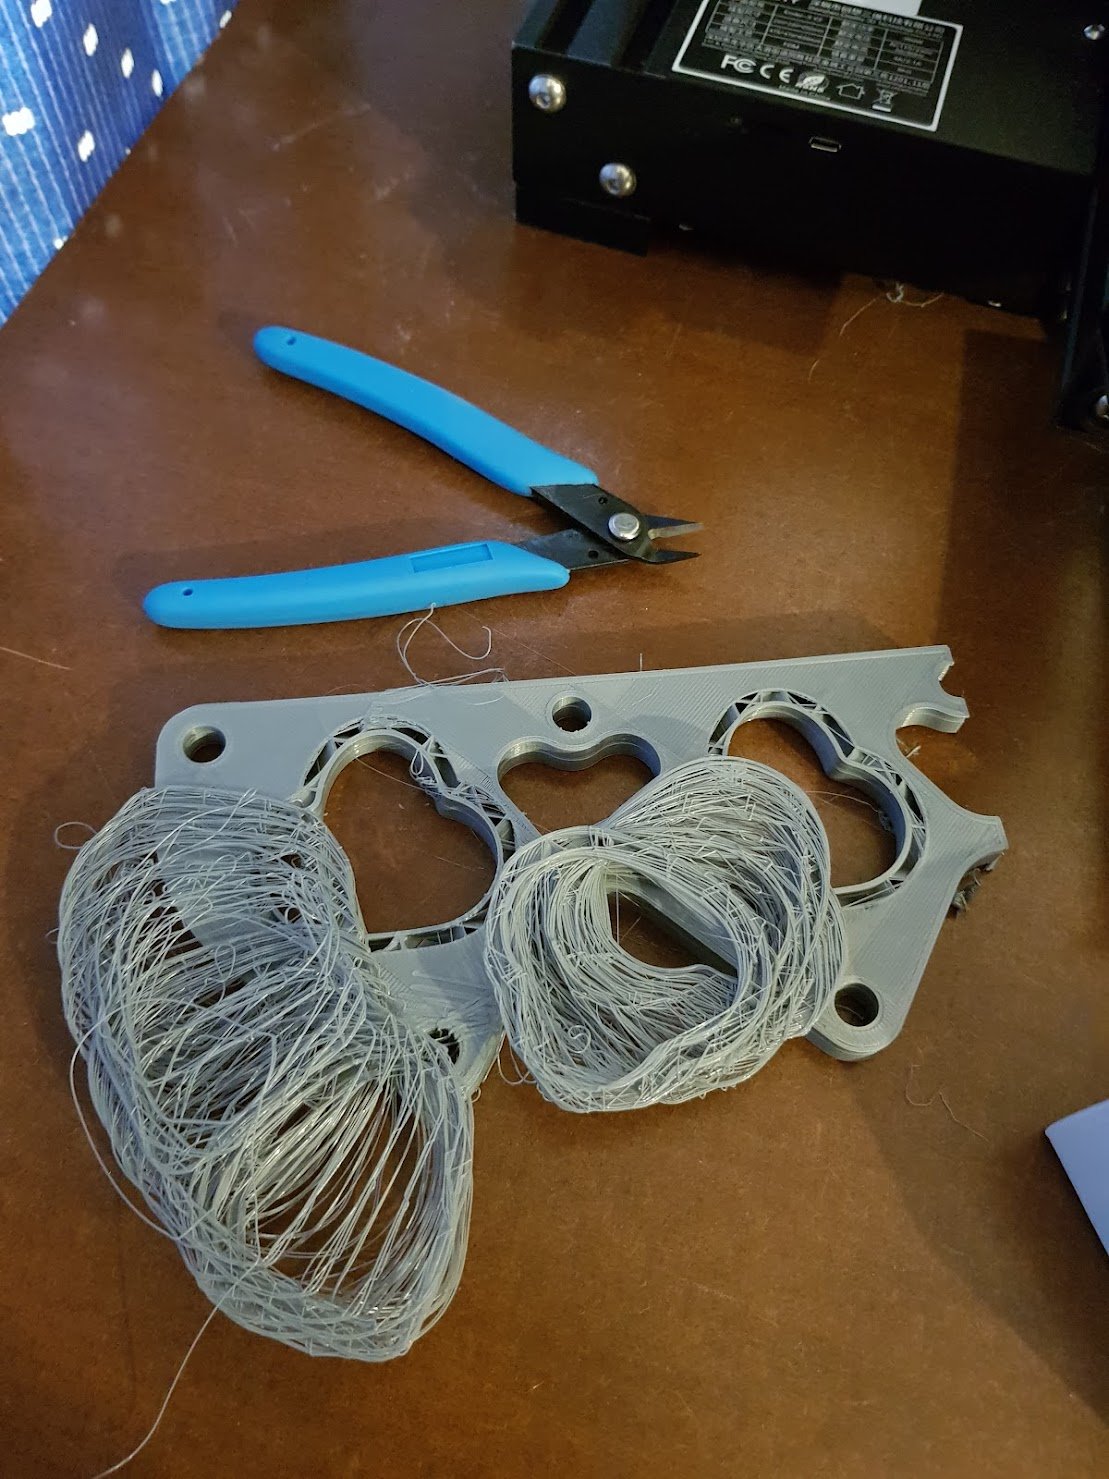
Back to 3d modelling, Fusion 360 is great but man I was pulling my hair out a bit with stuff just not doing what it was supposed to, it's totally the software and not me being a novice... I have some screenshots of the modelling but on the other computer. Here are some photo's of the finished test print (one half of the manifold). First test print a couple of hours in: Storm happens and takes out power to 3500 houses, so my print stopped. Just left it and when power came back on a few hours later it said it stopped unexpectedly and do I want to continue the job? I thought, why not give it a go its only a test print. The first problem was the head had melted a blob where is stopped so I snipped it off and then it moved to the outer edge and just started printing again! Came back a while later to this lol
-
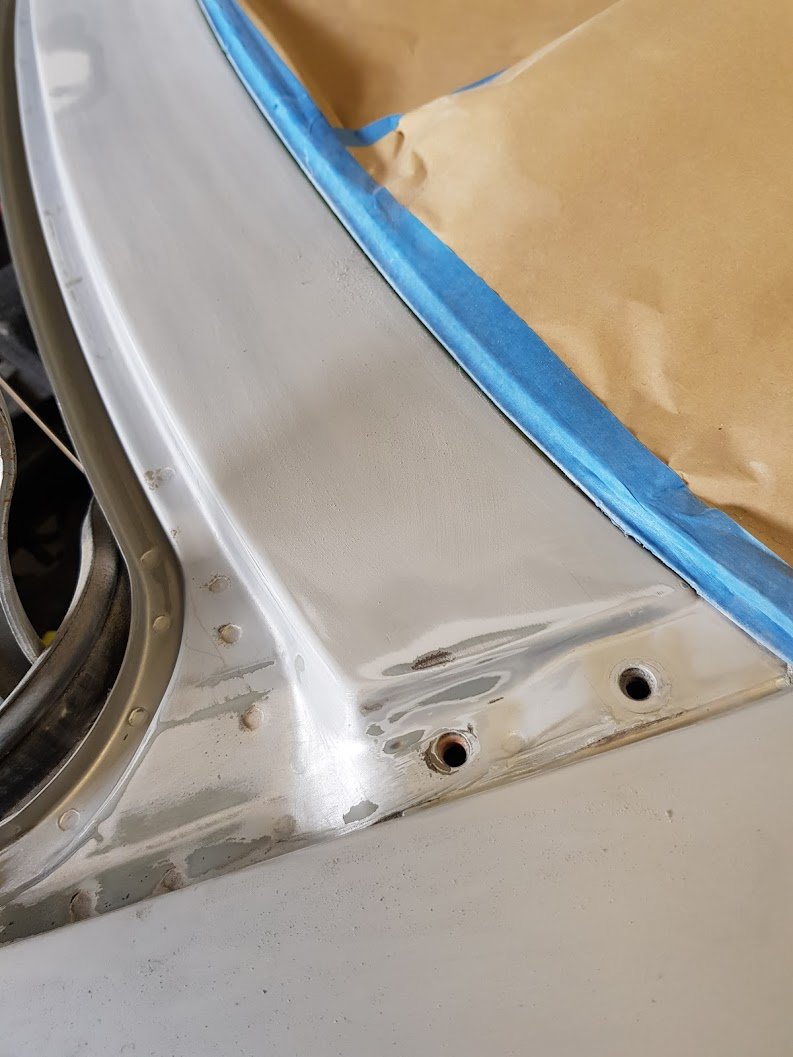
Pulling more bits off: It's all of the details that take so much time, the sanding just never ends. Lifted up this bit of trim with some weedeater line underneath to keep the gap.
-
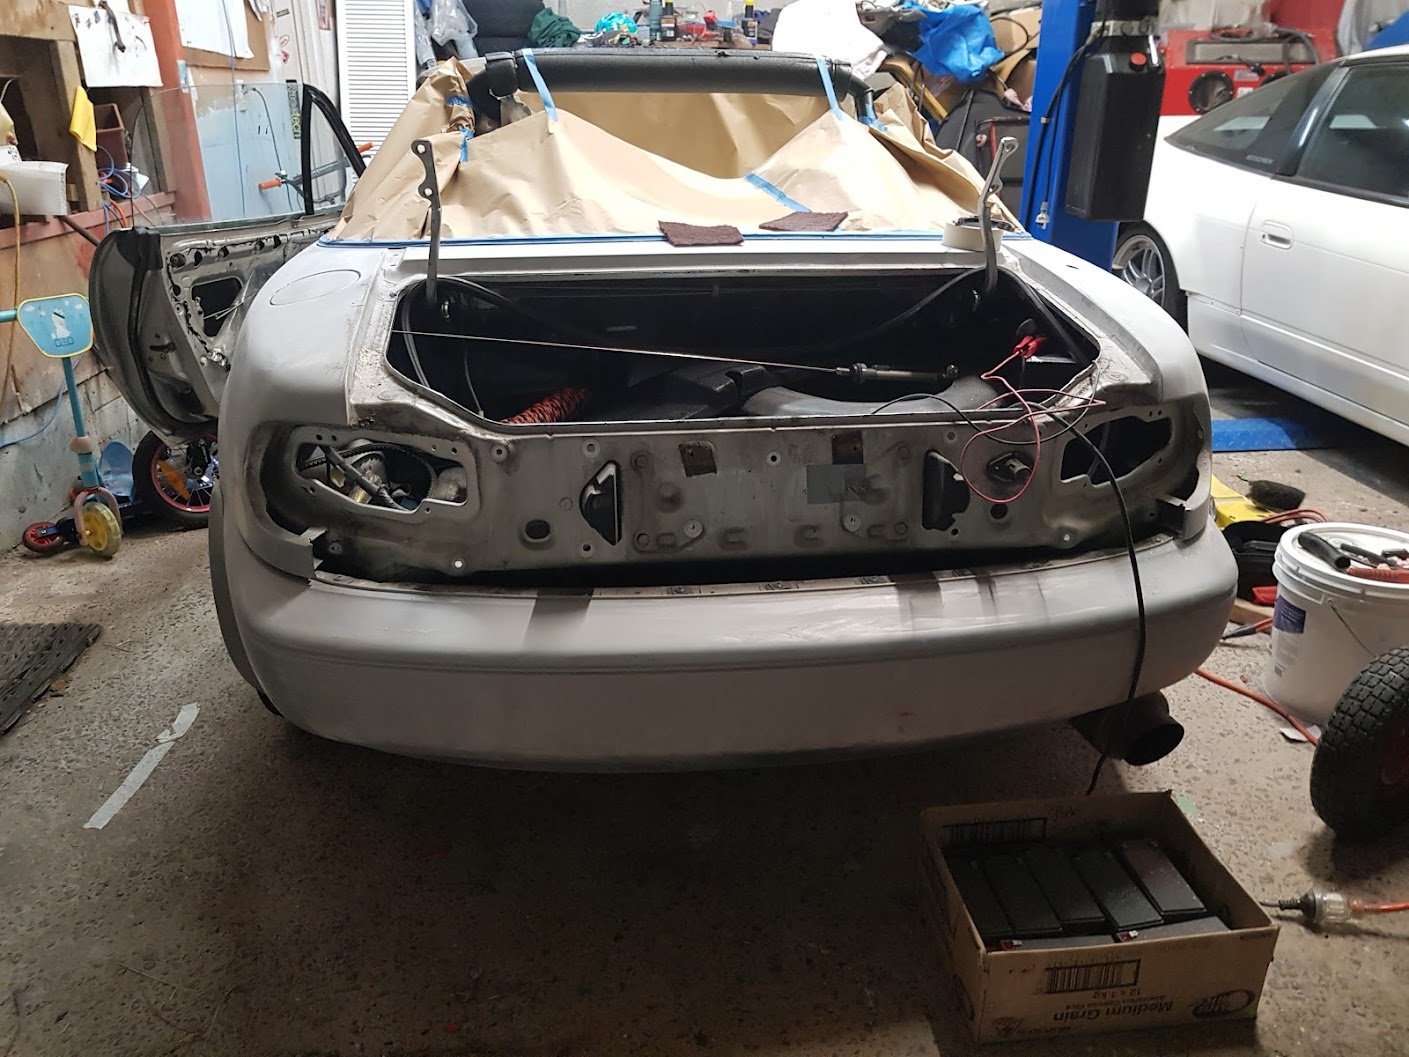
Had some time to do more on this, removed trim and lights and more sanding/filling. Got my 7 year old to help with the tool kit he got for Xmas which was cool. Slowly getting there, thought I'd be here 3 months ago
-
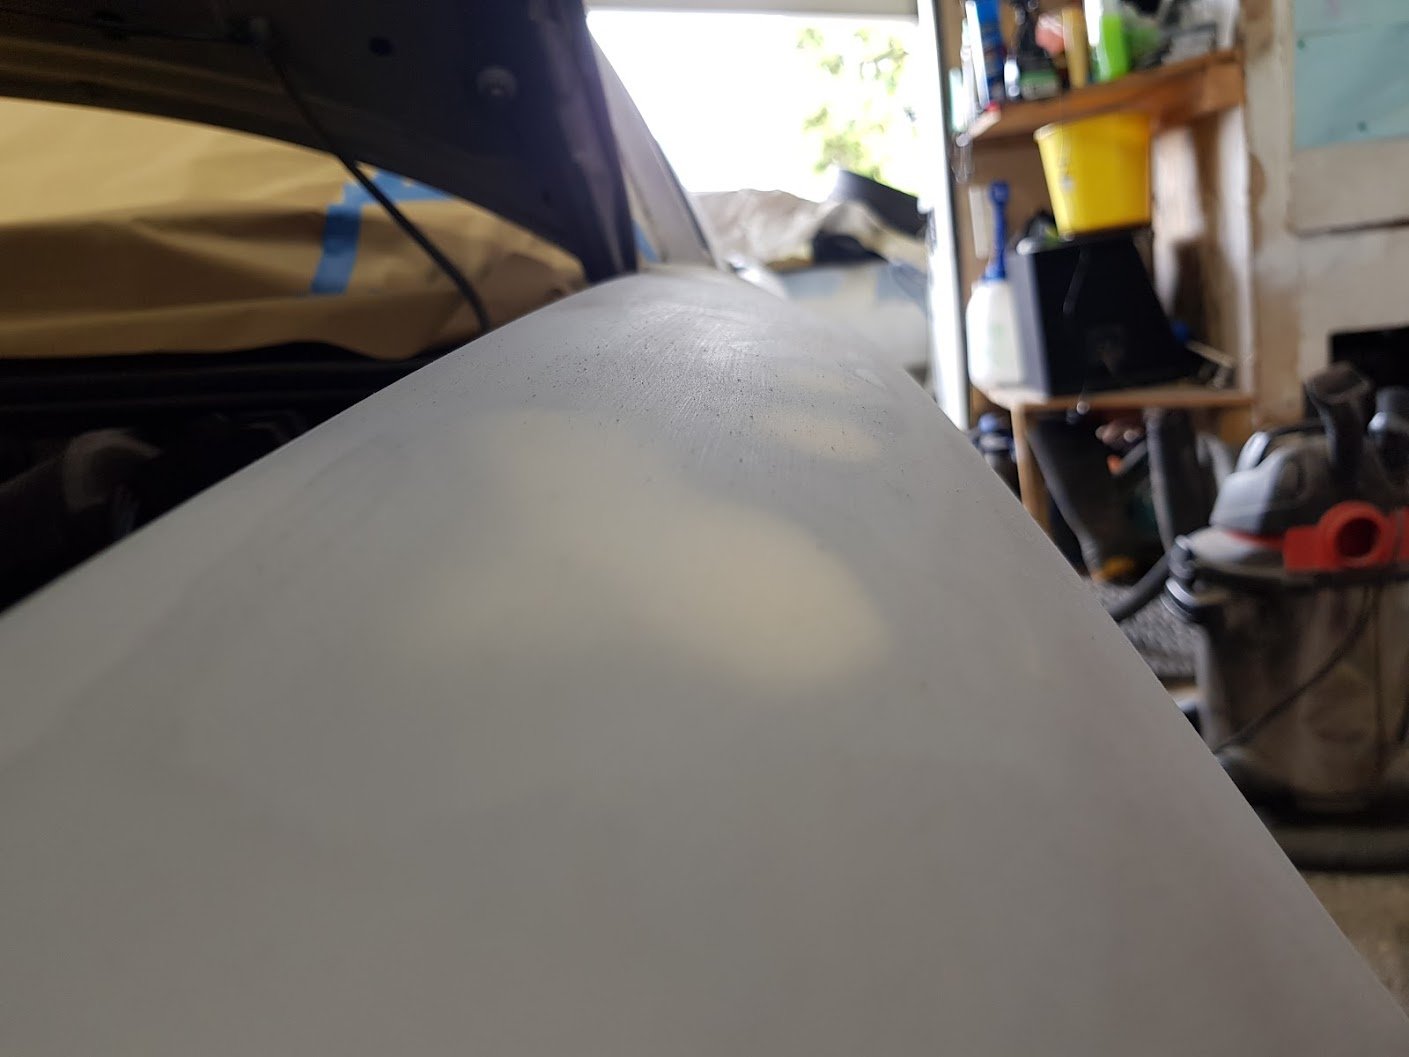
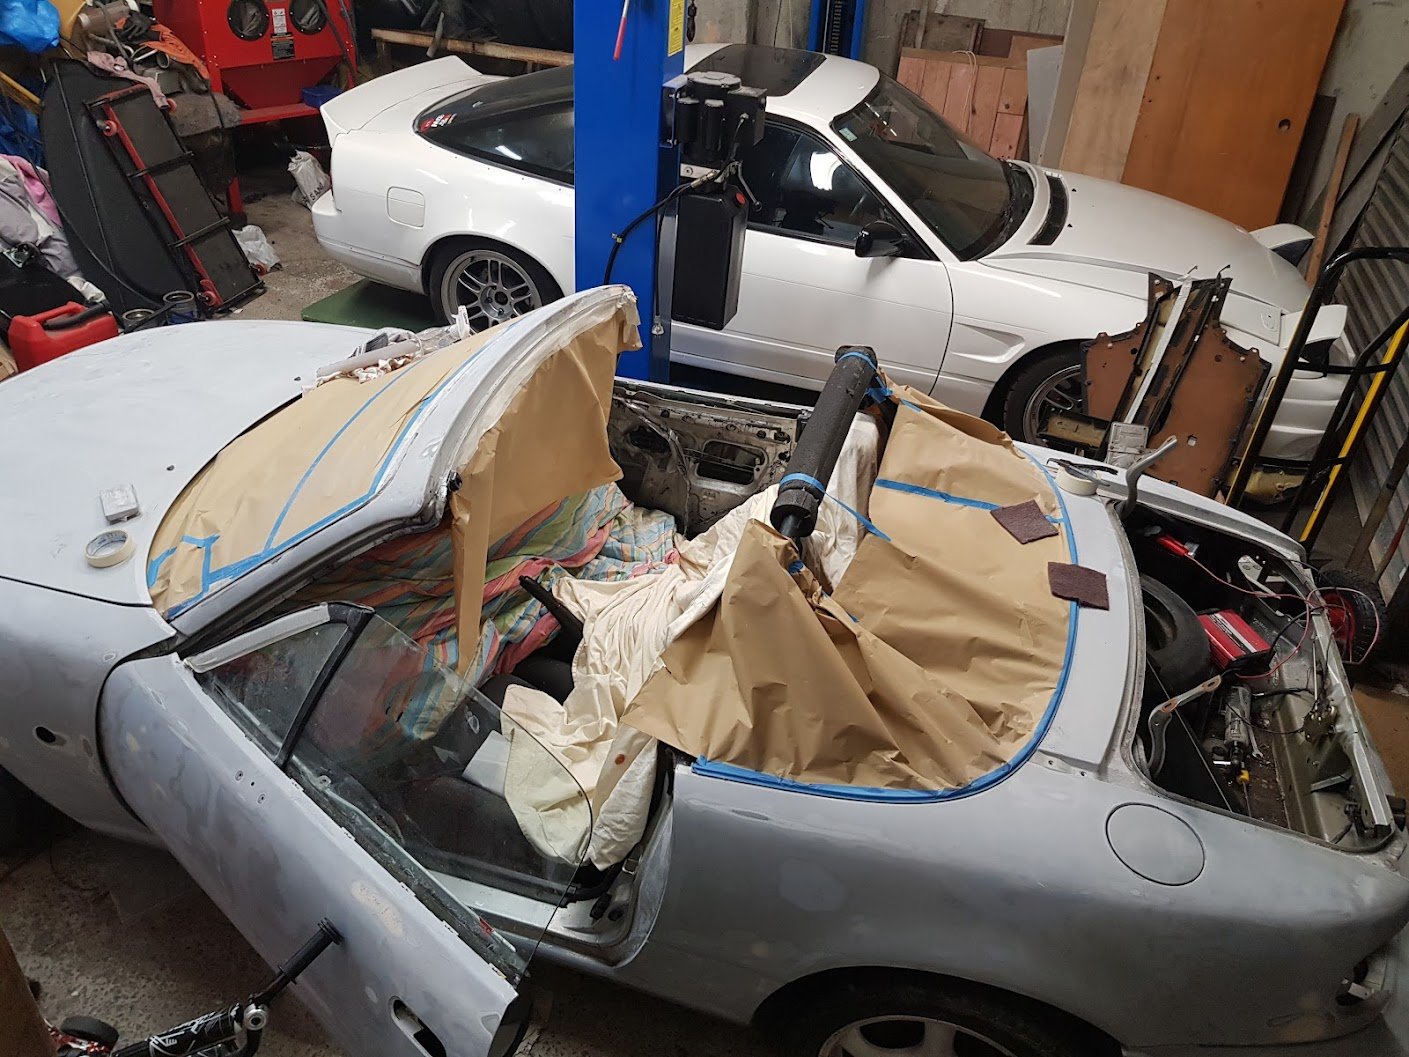
Thought the bonnet was straight
-
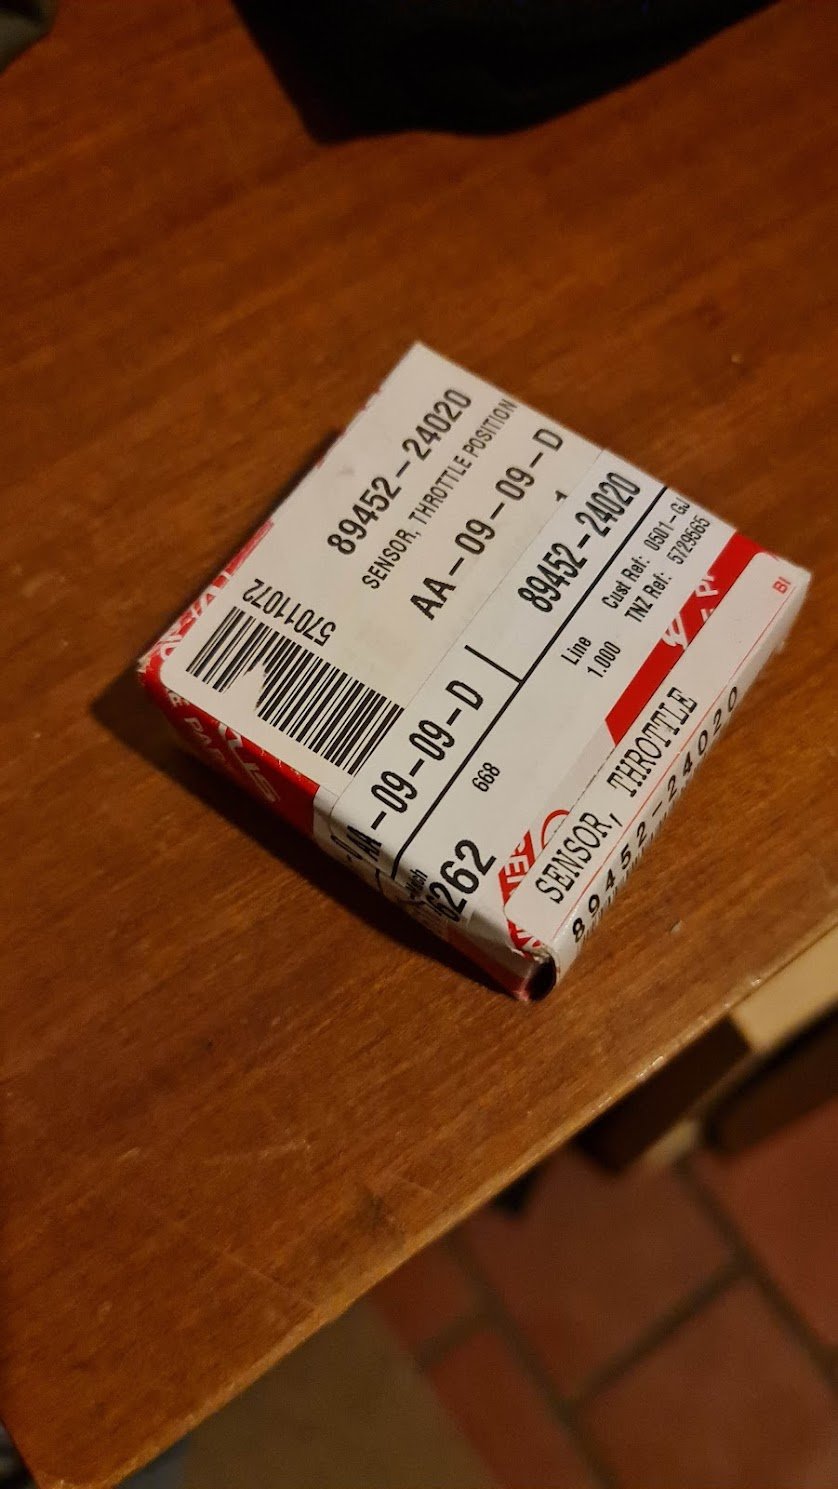
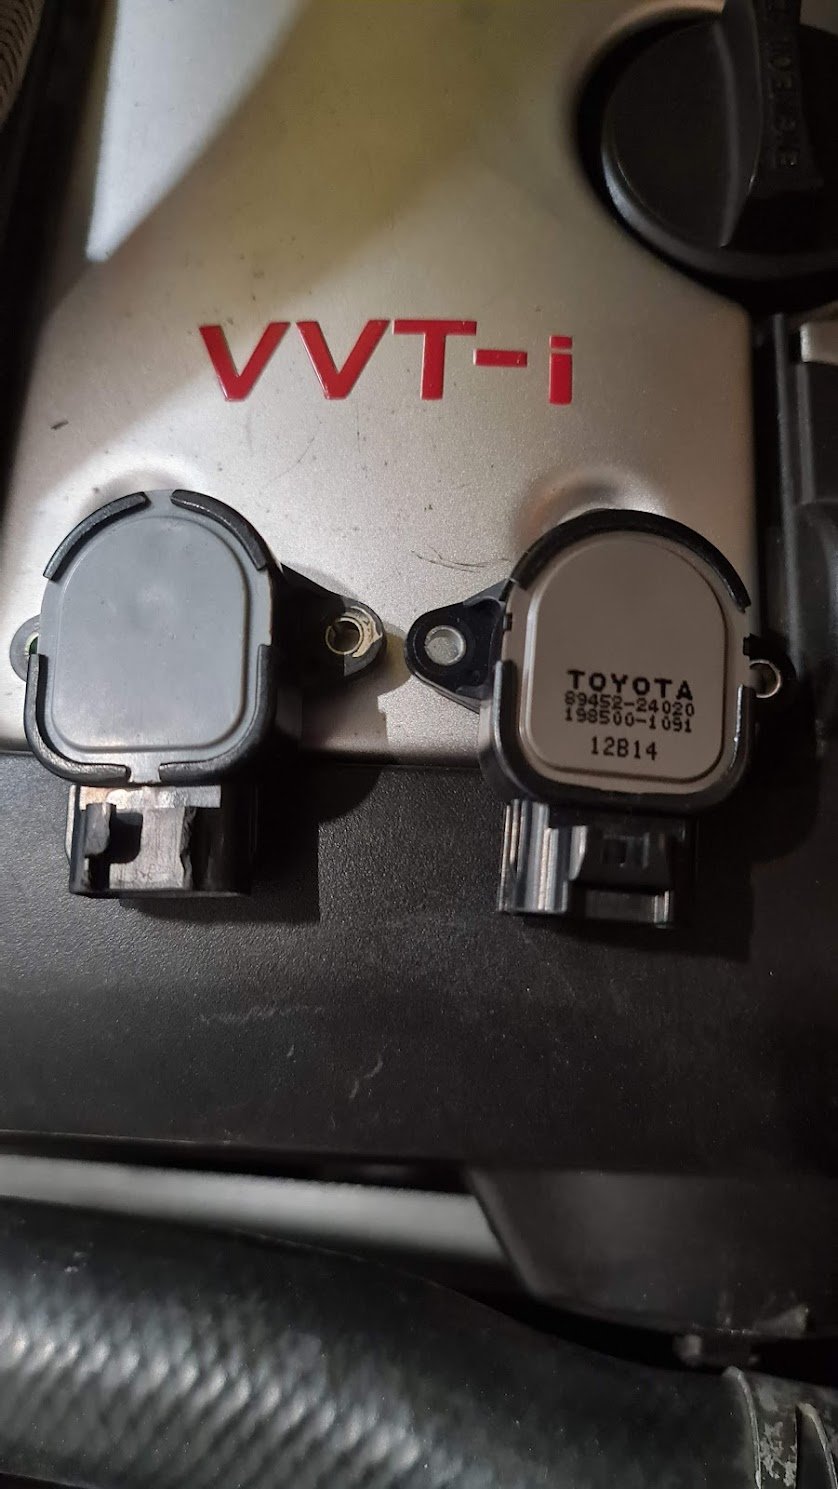
Bought new genuine Toyota TPS. The one that came off doesn't have any markings which is interesting. Old on left and new on the right: Put it on and drove it to work which is about 40min, trying to make it misfire, was perfect the whole drive. Thought it was solved. Drove it home and it misfired twice. Same behaviour. I guess I can cross it off the list though?
-
Here it is again around 6.7% Not sure it's enough to cause the misfiring but it does seem to be around where I've been experiencing the problem. Doesn't explain why when it's misfiring it still does it with more rpm and no load, but stops as soon as it drops to idle.
-
Hmm interesting, looking at the TPS log it sometimes does this around 7% throttle. But only sometimes. It seems to be around 7% throttle, which is probably around where it would be to maintain speed at 50kph. It's only a 0.2% fluctuation, but anywhere else it's rock solid. You can see I changed to just above 8% and it's a straight unfluctuating line. I tried a few times and sometimes it's accurate but when it fluctuates it stays like that. This is without the engine running. A new TPS is quite expensive because it's unique to this cable throttle vvti motor. Still available though.
-
Love driving this thing, work commute: EDIT: photo taken from my desk so excuse the zoomed in blurriness
- 396 replies
-
- 12
-
-
Came out pretty good, not perfect but much better than it was, difficult to paint on the hoist but it's wof'd again.
-
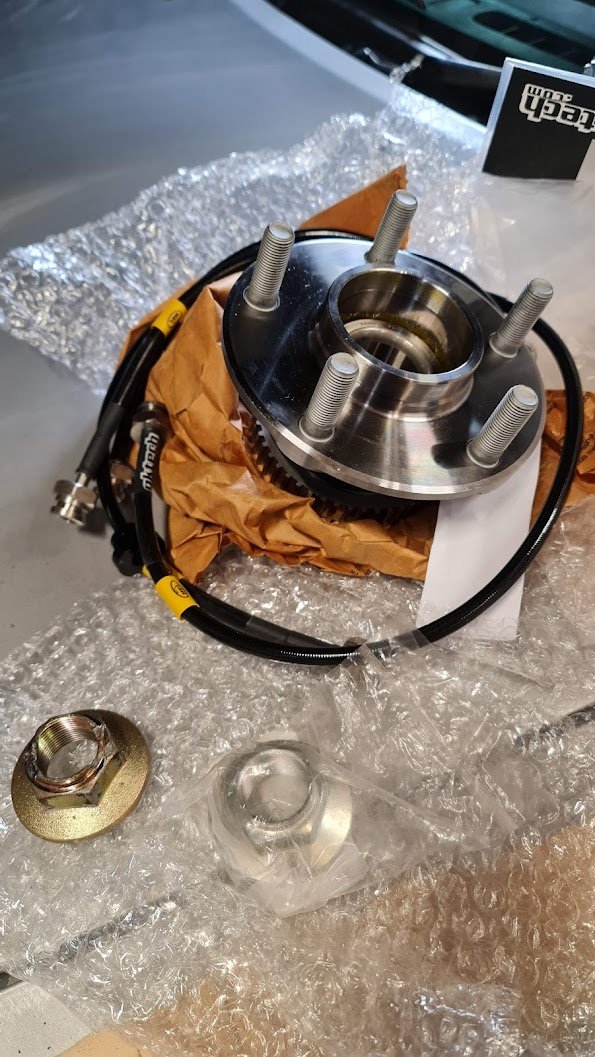
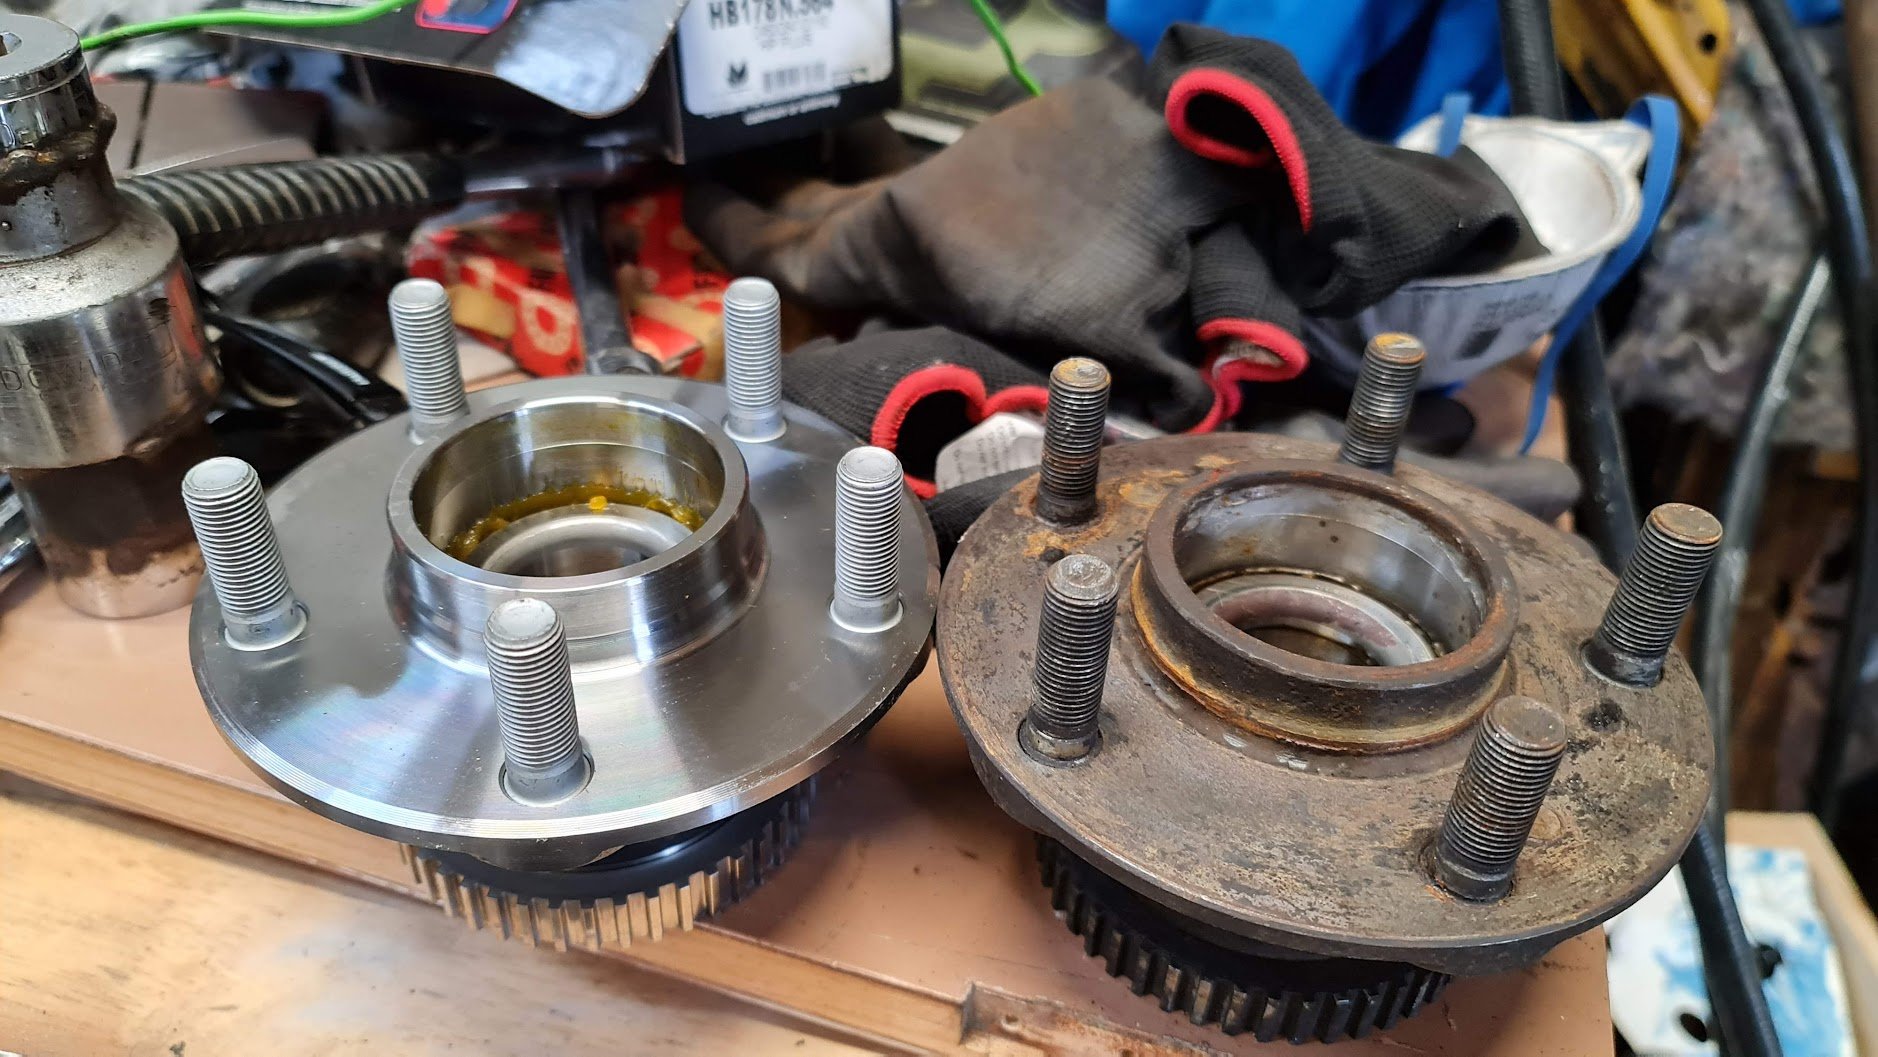
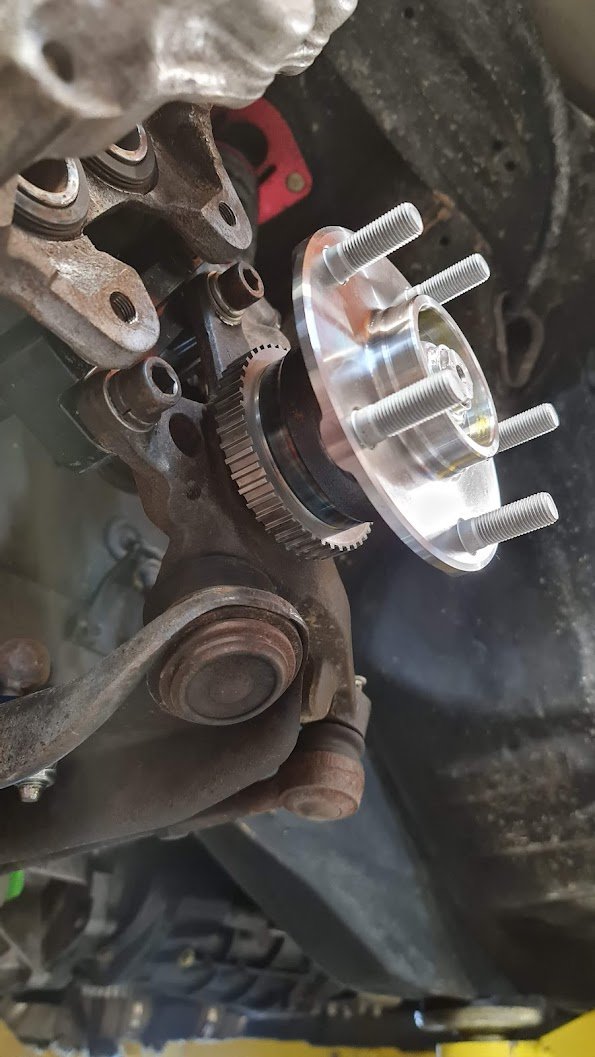
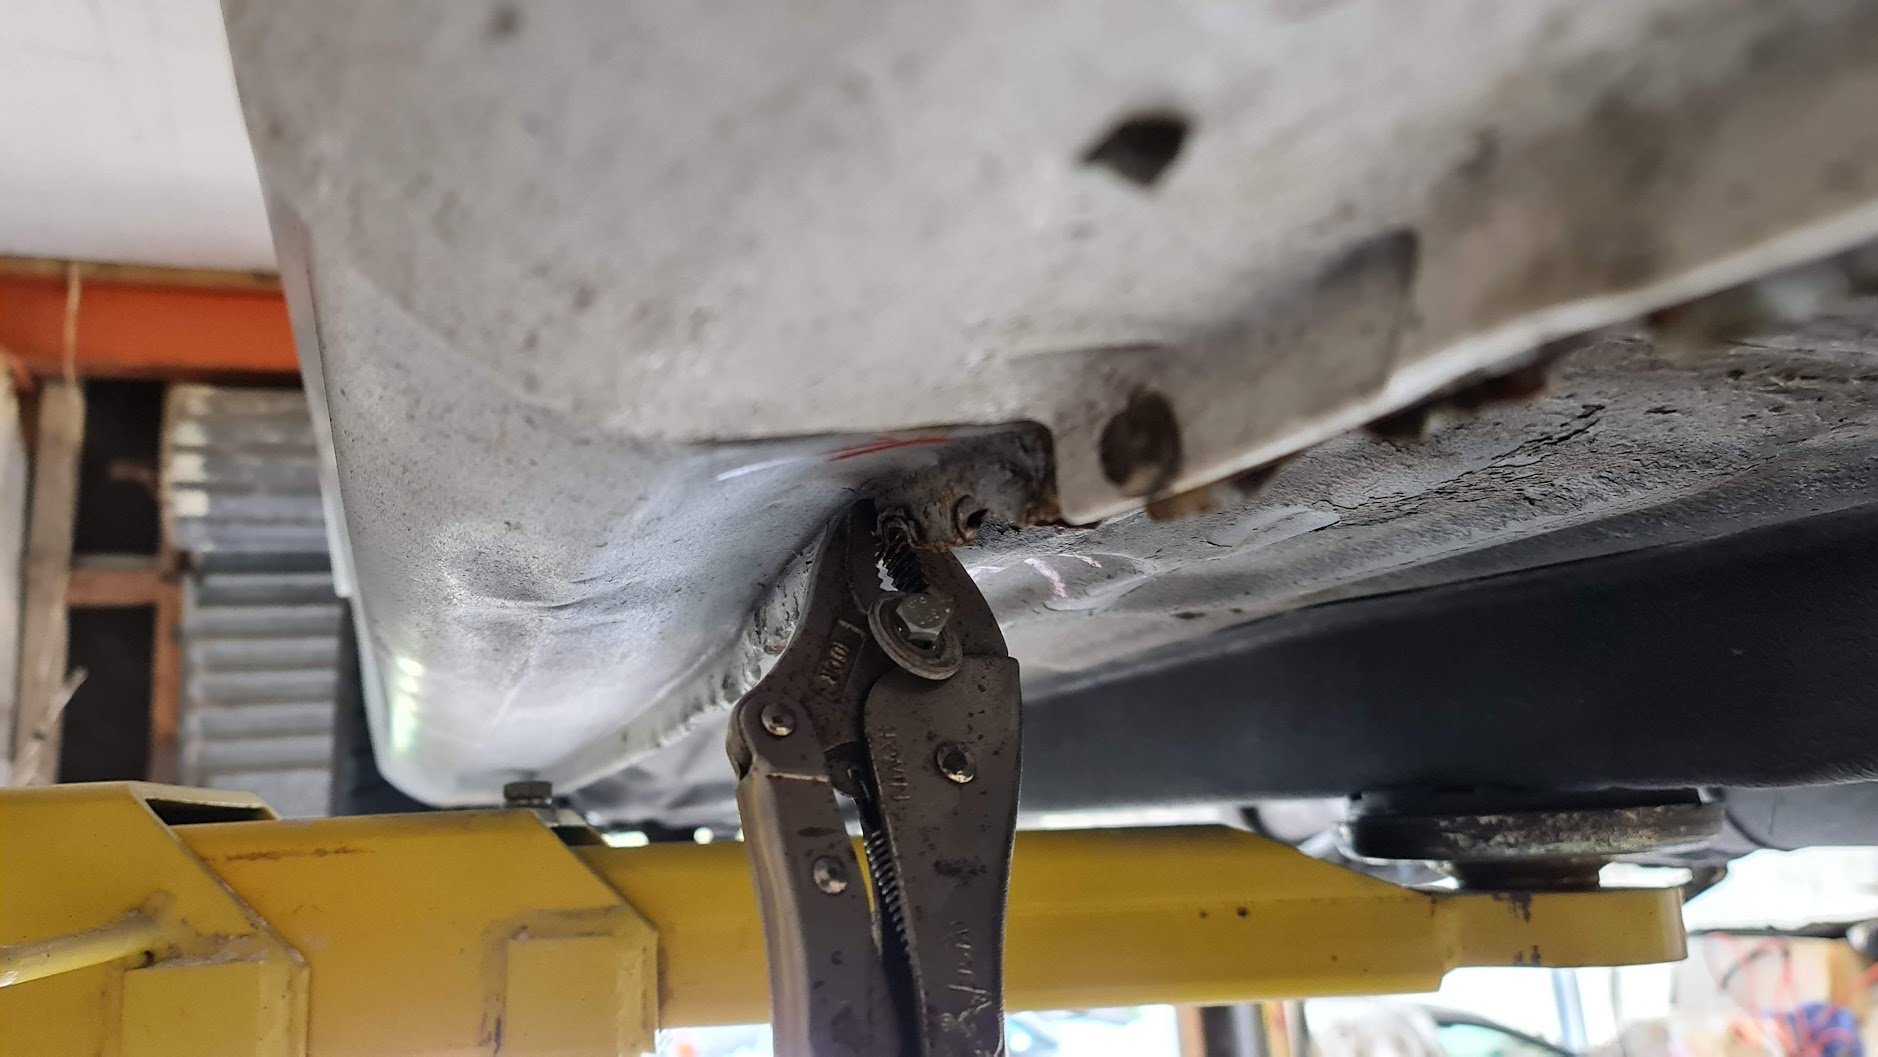
Man, so busy... wish I had more time to work on my cars. Anyway, recently failed wof on bad FL wheel bearing, rub mark on FR brake hose and the sill is push up on the jacking point. Weirdly I cannot see how the hose could have rubbed at all, I get the feeling it's been like that the whole time. It's on the inside/chassis side, even pushing it by hand I can't get it to touch...weird. Here's a blurry photo, the red part there. And the wheel bearing was definitely stuffed, I had noticed a noise recently when turning right so that explains it. They are S14 hubs with the bigger spindle, which also means the bearings are not replaceable like S13 ones. You probably could figure something out but I just bought a genuine Nissan hub. Mmmmm genuine shiny oily paper wrapped hub.... Also got some GKtech braided brake lines, have installed the fronts. Yet to bleed as its up on the hoist while I work on pulling the sill back again. Will be interesting to see if I can feel any pedal difference going from normal soft lines. Ugly sill, to be honest I am pretty certain it has been like this for a long time: I have got it back to really good condition again, haven't got any photo's. I need to primer and paint it too.
- 396 replies
-
- 11
-
-
Good advice, maybe I can weld on some strengthening bits.
-
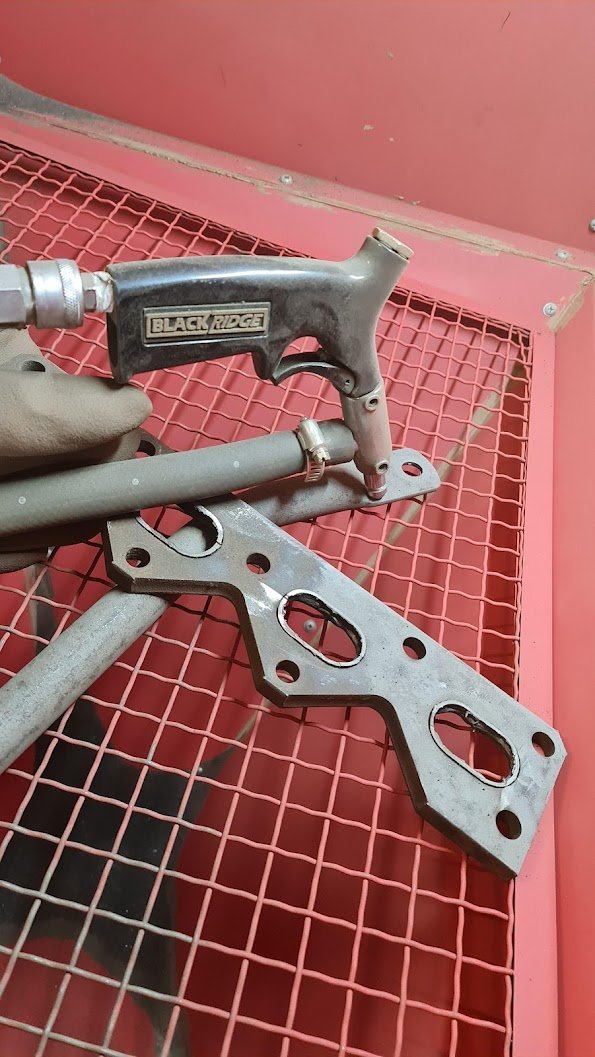
Oh hey 2-months-ago-me. Buy one of these from Supercheap Auto, pretty good bang for buck without having to change anything else: https://www.supercheapauto.co.nz/p/blackridge-blackridge-air-sand-blast-gun-kit/340382.html#q=sandblasting&lang=en_NZ
-
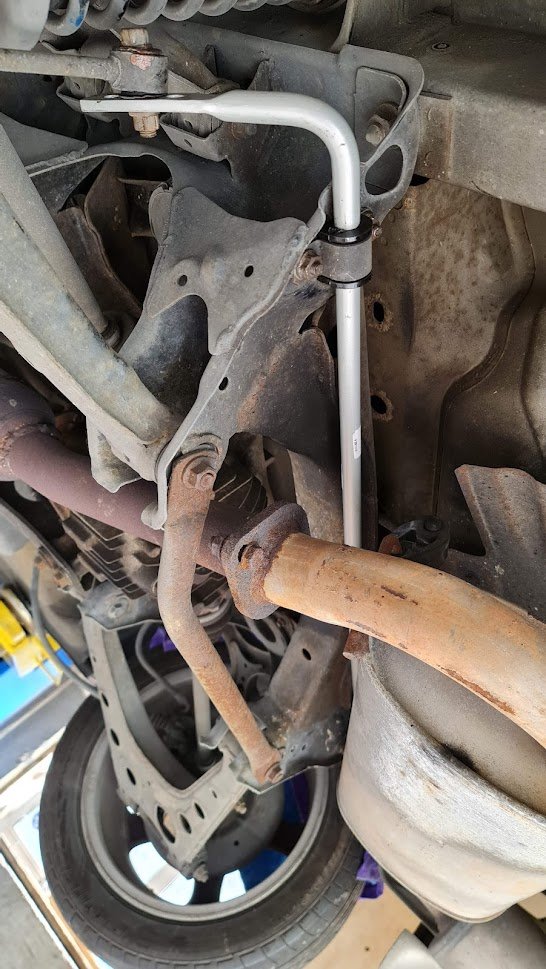
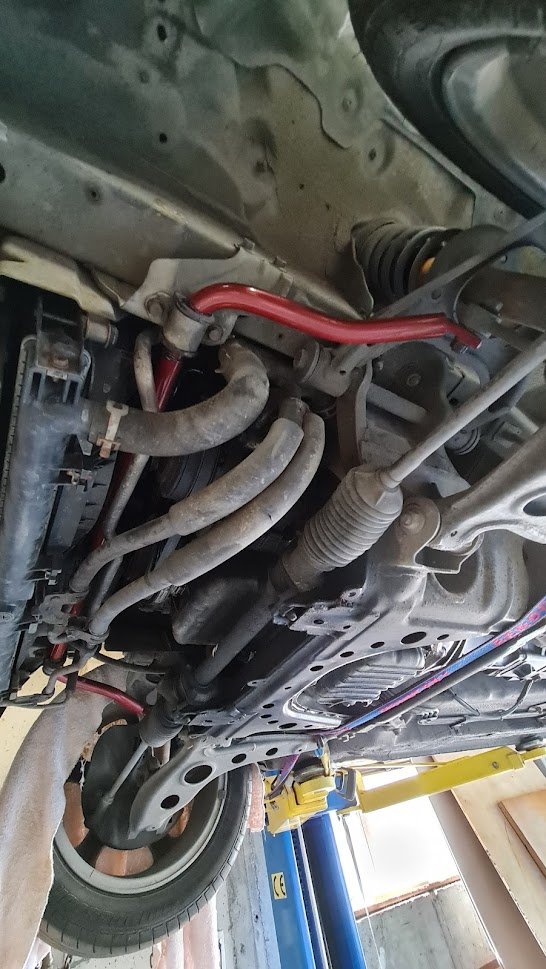
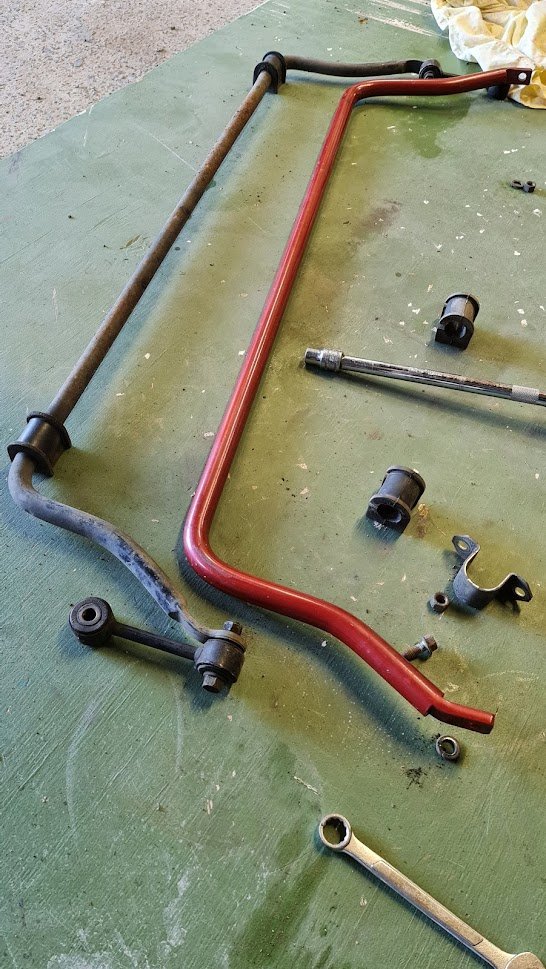
Again I should be sanding but I put some bigger sway bars on front and back instead. Whiteline rear, need to change the links because they don't quite line up right as you can see in the photo. Should be a big upgrade from the pencil thin factory sway bar: I've removed that rusty lower brace to sandblast and paint. Bought a new sand blasting gun, its just a SCA 'Black ridge' jobby but the reviews were good and the design looked better. I definitely rate this highly for the money! Waaaay better than the Machinery Warehouse gun that came with my cabinet. And the front is something or other brand, much heavier and thicker: Should do some sanding now but my kids want to play with water pistols so I'll do that. EDIT: meant to say how easy it was to install on both ends, easiest I've ever done. Nothing gets the in the way at all. I remember doing the rear sway bar on my old ae92 Trueno and it was a bastard of a time.


.jpg.7a0ba1a70eb01aabb337eec9a7d314fc.jpg)