-
Posts
19,452 -
Joined
-
Last visited
-
Days Won
158
Everything posted by yoeddynz
-
Yeah but what about the up coming LD28T and manual box swap it'll be getting?
-
Where's the project thread on the XJS?....
-
They have to grow the plants first to collect the pigments needed.
-
Nah. That's what I'd expect and get from the paint shops in Nelson/tasman. Go somewhere else but let them know why so they might learn from it and sort their shit out.
-
+11 for pastel yellow
-

Discuss here about Yoeddynz's little Imp project...
yoeddynz replied to yoeddynz's topic in Project Discussion
Looks like it's a simple enough conversion if using the engine and transmission as is. -

Discuss here about Yoeddynz's little Imp project...
yoeddynz replied to yoeddynz's topic in Project Discussion
But yeah.. Its been done before.. -

Discuss here about Yoeddynz's little Imp project...
yoeddynz replied to yoeddynz's topic in Project Discussion
Just turn the engine upside down and inside out and it's sorted. -

Discuss here about Yoeddynz's little Imp project...
yoeddynz replied to yoeddynz's topic in Project Discussion
Mum is doing pretty good really. There's sort of a relief for her, and us, in that dad's not suffering anymore. His body was just breaking down. All natural and to be expected but still hard to watch. Seeing your own dad in a body that is a shell of what it once was. But hey.. If we don't die some other way then this is the way it is. Mum is 79, ten years younger and very very active. Stuff like she did a 16km walk along the river just to get out of the house when she was recovering from covid. Always up at 5.30 am to go for a walk. Sadly for mum she also lost her favourite cat, Amelia, 15 years old, this week just gone. She used to sit with dad on his chair when he did the 'silver surfing thing'. Mum has still got 2 cats and a dog to keep her company, plus lots of good friends. @GregT you messaged me ages ago about how you knew my parents because of the Birman cats they imported and bred from. Dad loved cats. His gp surgery was attached to the house and right up to the age of 81!!! when he retired he was still bringing patients through to the house to show them various cats or kittens. Super cool oldschool doctor. Not in it for the money but a doctor because he genuinely cared about people (they were/are pretty broke) Dad used to walk his little silver tabby, Tinny, around the streets of Wellington when he worked as a house surgeon at Wellington hospital, where he met mum who was a nurse there. Eccentric even back then Hmmmm - I wonder where I get my traits from -

Discuss here about Yoeddynz's little Imp project...
yoeddynz replied to yoeddynz's topic in Project Discussion
Thanks fellas. @Sunbeam yeah- grill your parents for historical info while you still can. @GregT Its a neat article- the letter my great grand father had written was interesting.. but a bit too long to have put up on what really is a thread about an Imp. I was was just quite pleasantly shocked at what stuff I'd been finding out. Just wish I'd asked more when I could. I'd like to find out more about Argyll motors. From what I know it was a interesting setup- quite advanced with beautiful buildings and a great attitude towards the workers conditions at the time. But sadly didn't prove profitable enough over time. Argyll made some nice looking trucks too. -

Discuss here about Yoeddynz's little Imp project...
yoeddynz replied to yoeddynz's topic in Project Discussion
Thanks igor -

Discuss here about Yoeddynz's little Imp project...
yoeddynz replied to yoeddynz's topic in Project Discussion
Cheers mr flash. Its nice hearing that from a super hero -

Discuss here about Yoeddynz's little Imp project...
yoeddynz replied to yoeddynz's topic in Project Discussion
Cheers stu. Oh imagine the wonders of cnc... I'll sing out if I need something for sure. Ullrich aluminum are robbing buggers. One next purchase I need to make is a load of stainless bend for the exhaust. Looks like aliexpress can't be beat for price. The prices over had, at 'trade', from various nz places are a joke. I'm still undecided on 28mm or the stock 25mm diameter but I'll need maybe 20 of these... -

Discuss here about Yoeddynz's little Imp project...
yoeddynz replied to yoeddynz's topic in Project Discussion
Thanks guys. Spend more time getting to know the history from your parents before the memories fade. I wish I had done more of this with dad. -

Yoeddynzs 1965 Hillman Imp. Chasing Flappy whirrs
yoeddynz replied to yoeddynz's topic in Projects and Build Ups
Ok so I'm going split this next update up into a couple of posts spread apart because there's just too much to put up. First off - the project and general life stuff was sort of put on hold for a while because sadly my Dad died about 3 weeks ago. I've been a bit over the place dealing with stuff and family things. I have not said anything about it except to a few friends but I wanted to mention it here now, not because I'm looking for sympathy but just to say what a cool old fella Dad was and in his memory I could pop up a few things I have learned over time more recently about the engineering history that's in my blood. Some of it is pretty neat I reckon and I thought I'd pop it up here. My great grandfather, Alex Davidson and my grandfather, James Davidson, both worked at Argyll works in Scotland. Dad had written a letter to the NZ vintage car magazine, Beaded wheels, a few years ago about this along with some letters from Alex about his time at Argyll. I won't post it all up but here's the letter from my dad. My great uncle Alexander Davidson was also an apprentice at Argyll but left after qualifying in his trade to join the Royal airforce. He went on to become Air vice marshell, served in both wars and eventually became director general of organisation. This was a pretty cool thing to find out. I have done some digging and found out more about him here.. https://www.rafweb.org/Biographies/Davidson_AP.htm So in the last 2 months, going back and forth to see dad, finding out a few more bits of info about his past and dealing with his eventual downturn in health I have to say that other things like work, social outings, this project etc have been last on my mind. But I'm back into it. I had always wished that Dad might have got to go for a drive in the imp with the flat six but that just wasn't to be. Such is life. But at least he knew I was doing the project and he had knew full well that one of his sons was following in the Davidson footsteps of being a total engineer/petrol head Dad was a good dude. I miss him and its a case of the the often heard thing - I wish I had spent more time with him and gained more insight into his past. He was also very athletic. Must be where I got it from.. Its also neat that I have fallen for a wee Scottish car after all those years (although Dads last cars, and those of his Brother Jim who was a motor engineer, have mainly been Datsuns - but hey, there's a connection there too) Here's dad in the last imp outing he had.. Yeah. So that happened. Back into it now, along with catching up on a huge list of (very patient) customers jobs. Now where was I ? Inlet stuff. I had some nice runners set up with some injectors. They looked like this when on the engine.. Now a while ago the very kind Chris @chris r sent me this package of delights. I'd only asked for an old Honda throttle body but look what I got... Wow. The random framed cat picture was really the icing on the cake! As for the super charger pulley, well I'm not sure what he might have been hinting at there. Anyway- now I had a 55mm throttle body that was just a bit more in butterfly surface area than the original twin honda items and was pretty compact. It would possibly sit about here, where I had roughly planned (because I was sort of making this up as I went along, with a few sketches that you might get to see later)... inlet pointing this way? maybe? not sure... Now I had to start building the inlet runners towards the centre and make some flanges to join to a plenum. I welded some bits of 3mm alloy plate cut roughly to size. On the inside too. Awkward getting in there at the right angle. Guess where I touched the tungsten.. Now this plate was some random plate we got from a friend who imports all sorts of engineering stuff and timber, old caravan bases etc from Germany. Much of it comes from scrap a scrap metal dealer there because its amazing what they scrap there that is still of good value here. I have used some of it for a few jobs here and there but shouldn't really have used it on this because its a very very hard alloy and it cracks quite easily. I welded the bits in and even though I had pre-heated the inlets to reduce localised stress one of the weld zones still cracked. Suspect the wrong filler used too. Mostly I weld 5000 series and use appropriate rods but this is probably 7000. Silly me. You'll see that this created a bit of extra work later on for me. Anyway- I sorted the crack out and continued on. Cut the bit down.. Milled it square in the jig I still had left set up on the mill so everything with the inlet runners/plenum build that has to be will be square and parallel.. then I cut some flanges out (6mm thick normal, not poncy, alloy) Drilled them in pairs, spot facing and tapping bits as I went.. I'd bought a load of shiny stainless dome head socket screws and it was playtime assembling things at the bench.. Nice place to be for me at this time. Focus on something and enjoy the ambience. Fire going, music playing and many cups of coffee etc... So now I had some flanges that matched I welded one half of each onto the runners... Great!!! I'm getting somewhere. Bolted the runners up and had a look. Oh curse word!!!! What have I done here? Some things not right. I'd gone and forgotten that the runners are offset to each other by about 15mm or thereabouts. I could try and work around it when I make the plenum but it'll just get messy and not look right. So I had to cut some little bits of alloy up... welded them in place.. ...and accepted the fact that the bolts are not symmetrical at each end any more. But they are still pretty shiny s/s bolts so there. Then I cut some alloy up in the table saw and milled them out like this... The reason why will become known next time I post. So that throttle body. Well it turns out that facing it sideways wasn't the neatest way I do it. I was going to have to use a very tight alloy bend to make it work and the TB would have sat at a really awkward angle in two planes. Also, a big also... the engine would not have been symmetrical ! I sussed out a neater way to place it that will also allow for a nicer path of flexible pipe to feed it from the remote filter. Now I had a plan I could make more things. I cut a out a bit of that aforementioned 3mm plate and made a rectangular hole in it, a bit larger in surface area than the 55mm TB. I then cut some lobster sections from some 60mm tube and pieced together a transitional bit of tubework that would connect the round hole to the rectangle hole from underneath. This is to allow the runners to draw their required air from the centre, evenly like with no favouritism. Well it works like this in my brain so I'm running with it. I put the 4 jaw chuck onto the lathe and I threw a chunky bit of 8mm plate into it. Drilled a big hole and bored it out to suit the TB.. Drilled and tapped some holes and cut it closer to the shape of the TB flange. It will eventually be welded onto the pipe.. Then I had a sleepless night thinking about that 3mm plate. Will it crack down the line?.. as yet, until the engine is run up to temp over a few cycles I won't no how much it might expand and will there be enough heat soak and flexibility with what I am building to allow for expansion. Phew ! Yep - some thinking gets done about this as I try to sleep. It played on my mind. So in order to sleep easier I bought some bog standard softer 3mm plate and this happened.. Cleaned up and re-welded onto the new bit of plate.. And that is about where I am up to with the inlet so far. I'm pretty happy with the progress given some mistakes etc. In other Imp news.. I finally got my new screen in place! Its been 5 months since I last drove the car, which was when a stone had decided to leave someone's tyre and make a bid for my cars interior. 5 months is the longest I've not driven the car since getting it on the road. But hey, it was safely stashed away in a very dry garage over a wet winter and I've had plenty of other things to do. Screen fitted , a quick test drive to the beach. Its so fun to drive. I'd forgotten how nice it was. Time for a warrant of fitness test. But I first had to sort out a number plate light. One that was hidden away and reliable. I made use of a couple of neat little sealed leds, 10mm in diameter, and placed them in some alloy. This was bolted to a stainless mount that I glued to the inside of the fibreglass engine cover. I ran the wires up the edge of the lid to hide them as best I could. Pics.. Finished the wiring yesterday morning in the comfort of the new garage. Very handy.. Took it for a wof and its now legal again Hopefully back soon with more updates. Alex- 120 replies
-
- 72
-

-

-

-
Great progress! I think your dad needs to start a project thread on that car he's built! I hope you've showed him the wonders of oldschool.
-
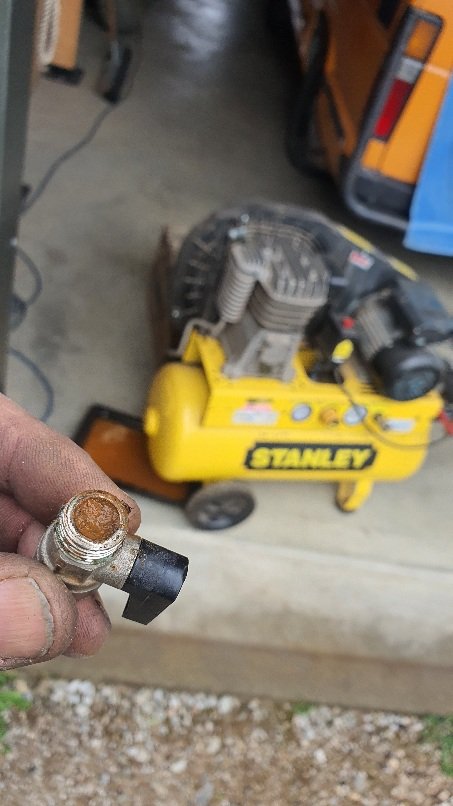
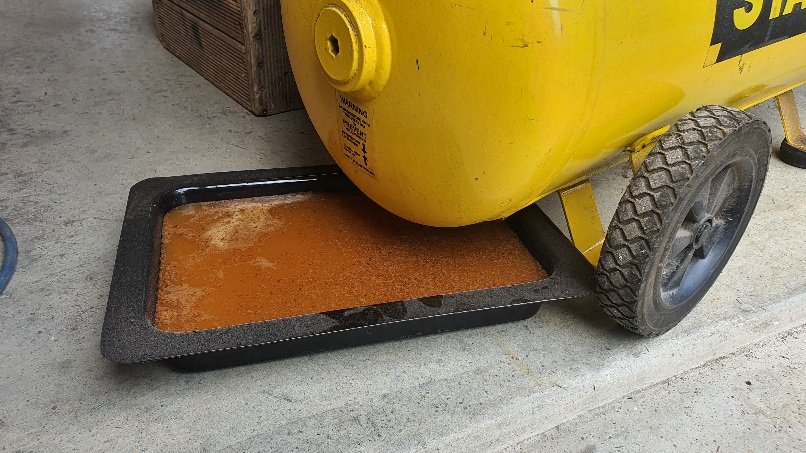
Oh yeah whilst on the subject of looking after your tools.. Always make sure to drain your compressor regularly.. Whoops.. My bad. Has anyone ever put tank seal in there compressor tank to stave off/fix corrosion? I'm thinking I could pour some into mine on a hot day and seal what I'm now picturing is a moonscape of a tank floor.
-
Can you run brake and fuel lines inside the cabin?
-
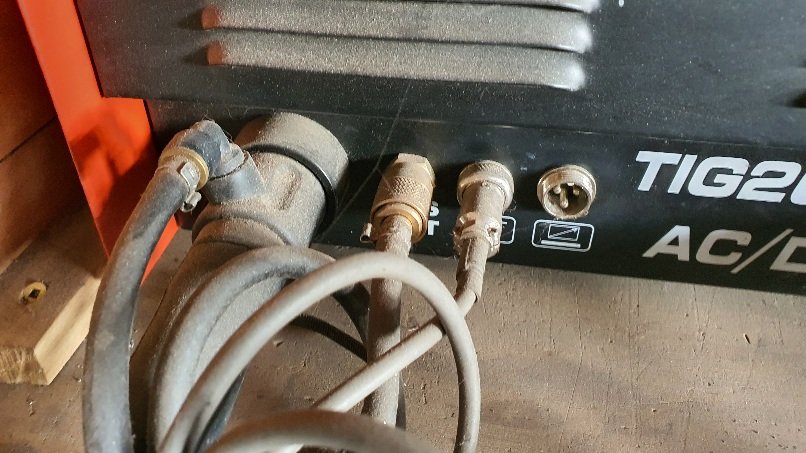
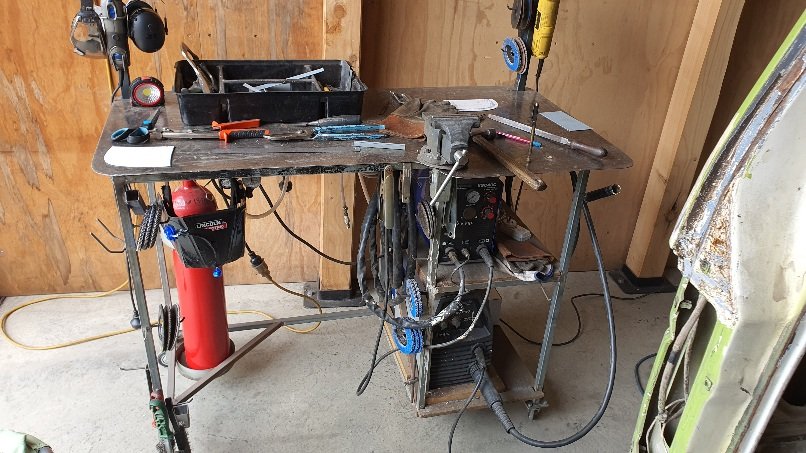
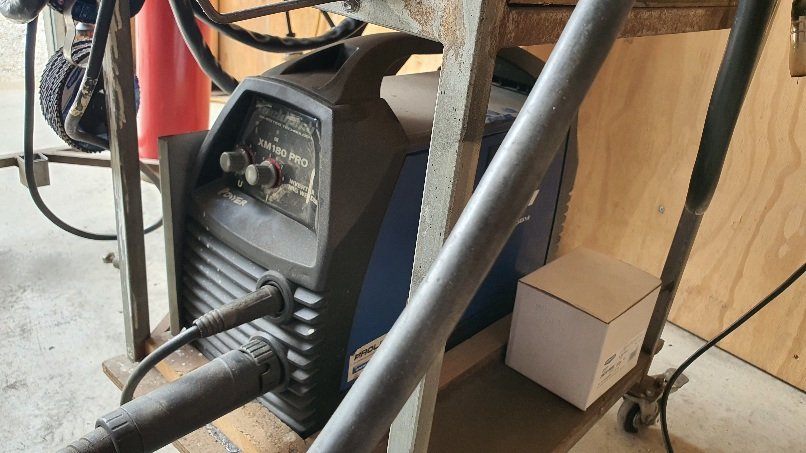
Your welder looks very similar to my Jasic (good old welders) so here's a pick of my set up that might help you?
-
Same here. I bought a 5kg bottle 10 years ago for about $250 and I get it refilled by the fire extinguisher place. 11 years ago the refill was about $35 Its now about $45~50... Apparently/maybe Co2 is less common these days/climate change is a hoax But yeah. I've used argoshield plenty in the past but fuck that cost for mig welding when half the time the welds are probably ground back on car restos or if it's a trailer build then c02 shielded welds are fine. Mig welder I use is a 180amp weldtech invertor from proline also 11 years ago. Goes well.
-
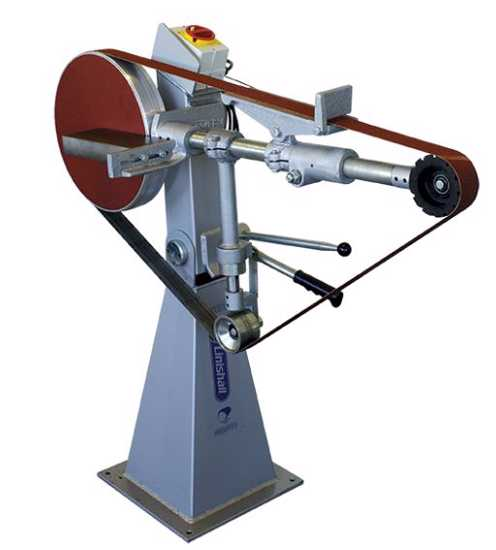
Not bad those for the money but the wheels are quite big in diameter and awkwardly shrouded which limits your ability to grind tight places and small items.
-
The ones I used often from way back when are a kiwi made linishall. Design had not changed in years. Rugged and they work really well, plus the long belt lasts a long time - important in a busy engineering workshop. Also good that you can stand right next to it and not be bending your back which is handy when you might have 100 items that all need a skim. But fucking expensive!!! * so I'm collecting the bits to fabricate my own because I miss not having one about.. https://nzsafetyblackwoods.co.nz/en/linishall-wright-linishing-machine-038-each--03054296 *like 5 k11s worth
-

Discuss here about Yoeddynz's little Imp project...
yoeddynz replied to yoeddynz's topic in Project Discussion
Man if I had attempted to tig weld those bits it would have turned into an abortion. My tig skills on small steel/stainless work is still not very flash. I'm glad that when the time comes to weld my exhaust manifold at least it'll be hidden from view -

Discuss here about Yoeddynz's little Imp project...
yoeddynz replied to yoeddynz's topic in Project Discussion
Cheerz fullas. I'm happy to entertain. Yes - Baart @RUNAMUCK would no doubt want to see a Holly and a supercharger


