Truenotch
-
Posts
10,924 -
Joined
-
Last visited
-
Days Won
6
Content Type
Forums
Downloads
Events
Gallery
Everything posted by Truenotch
-
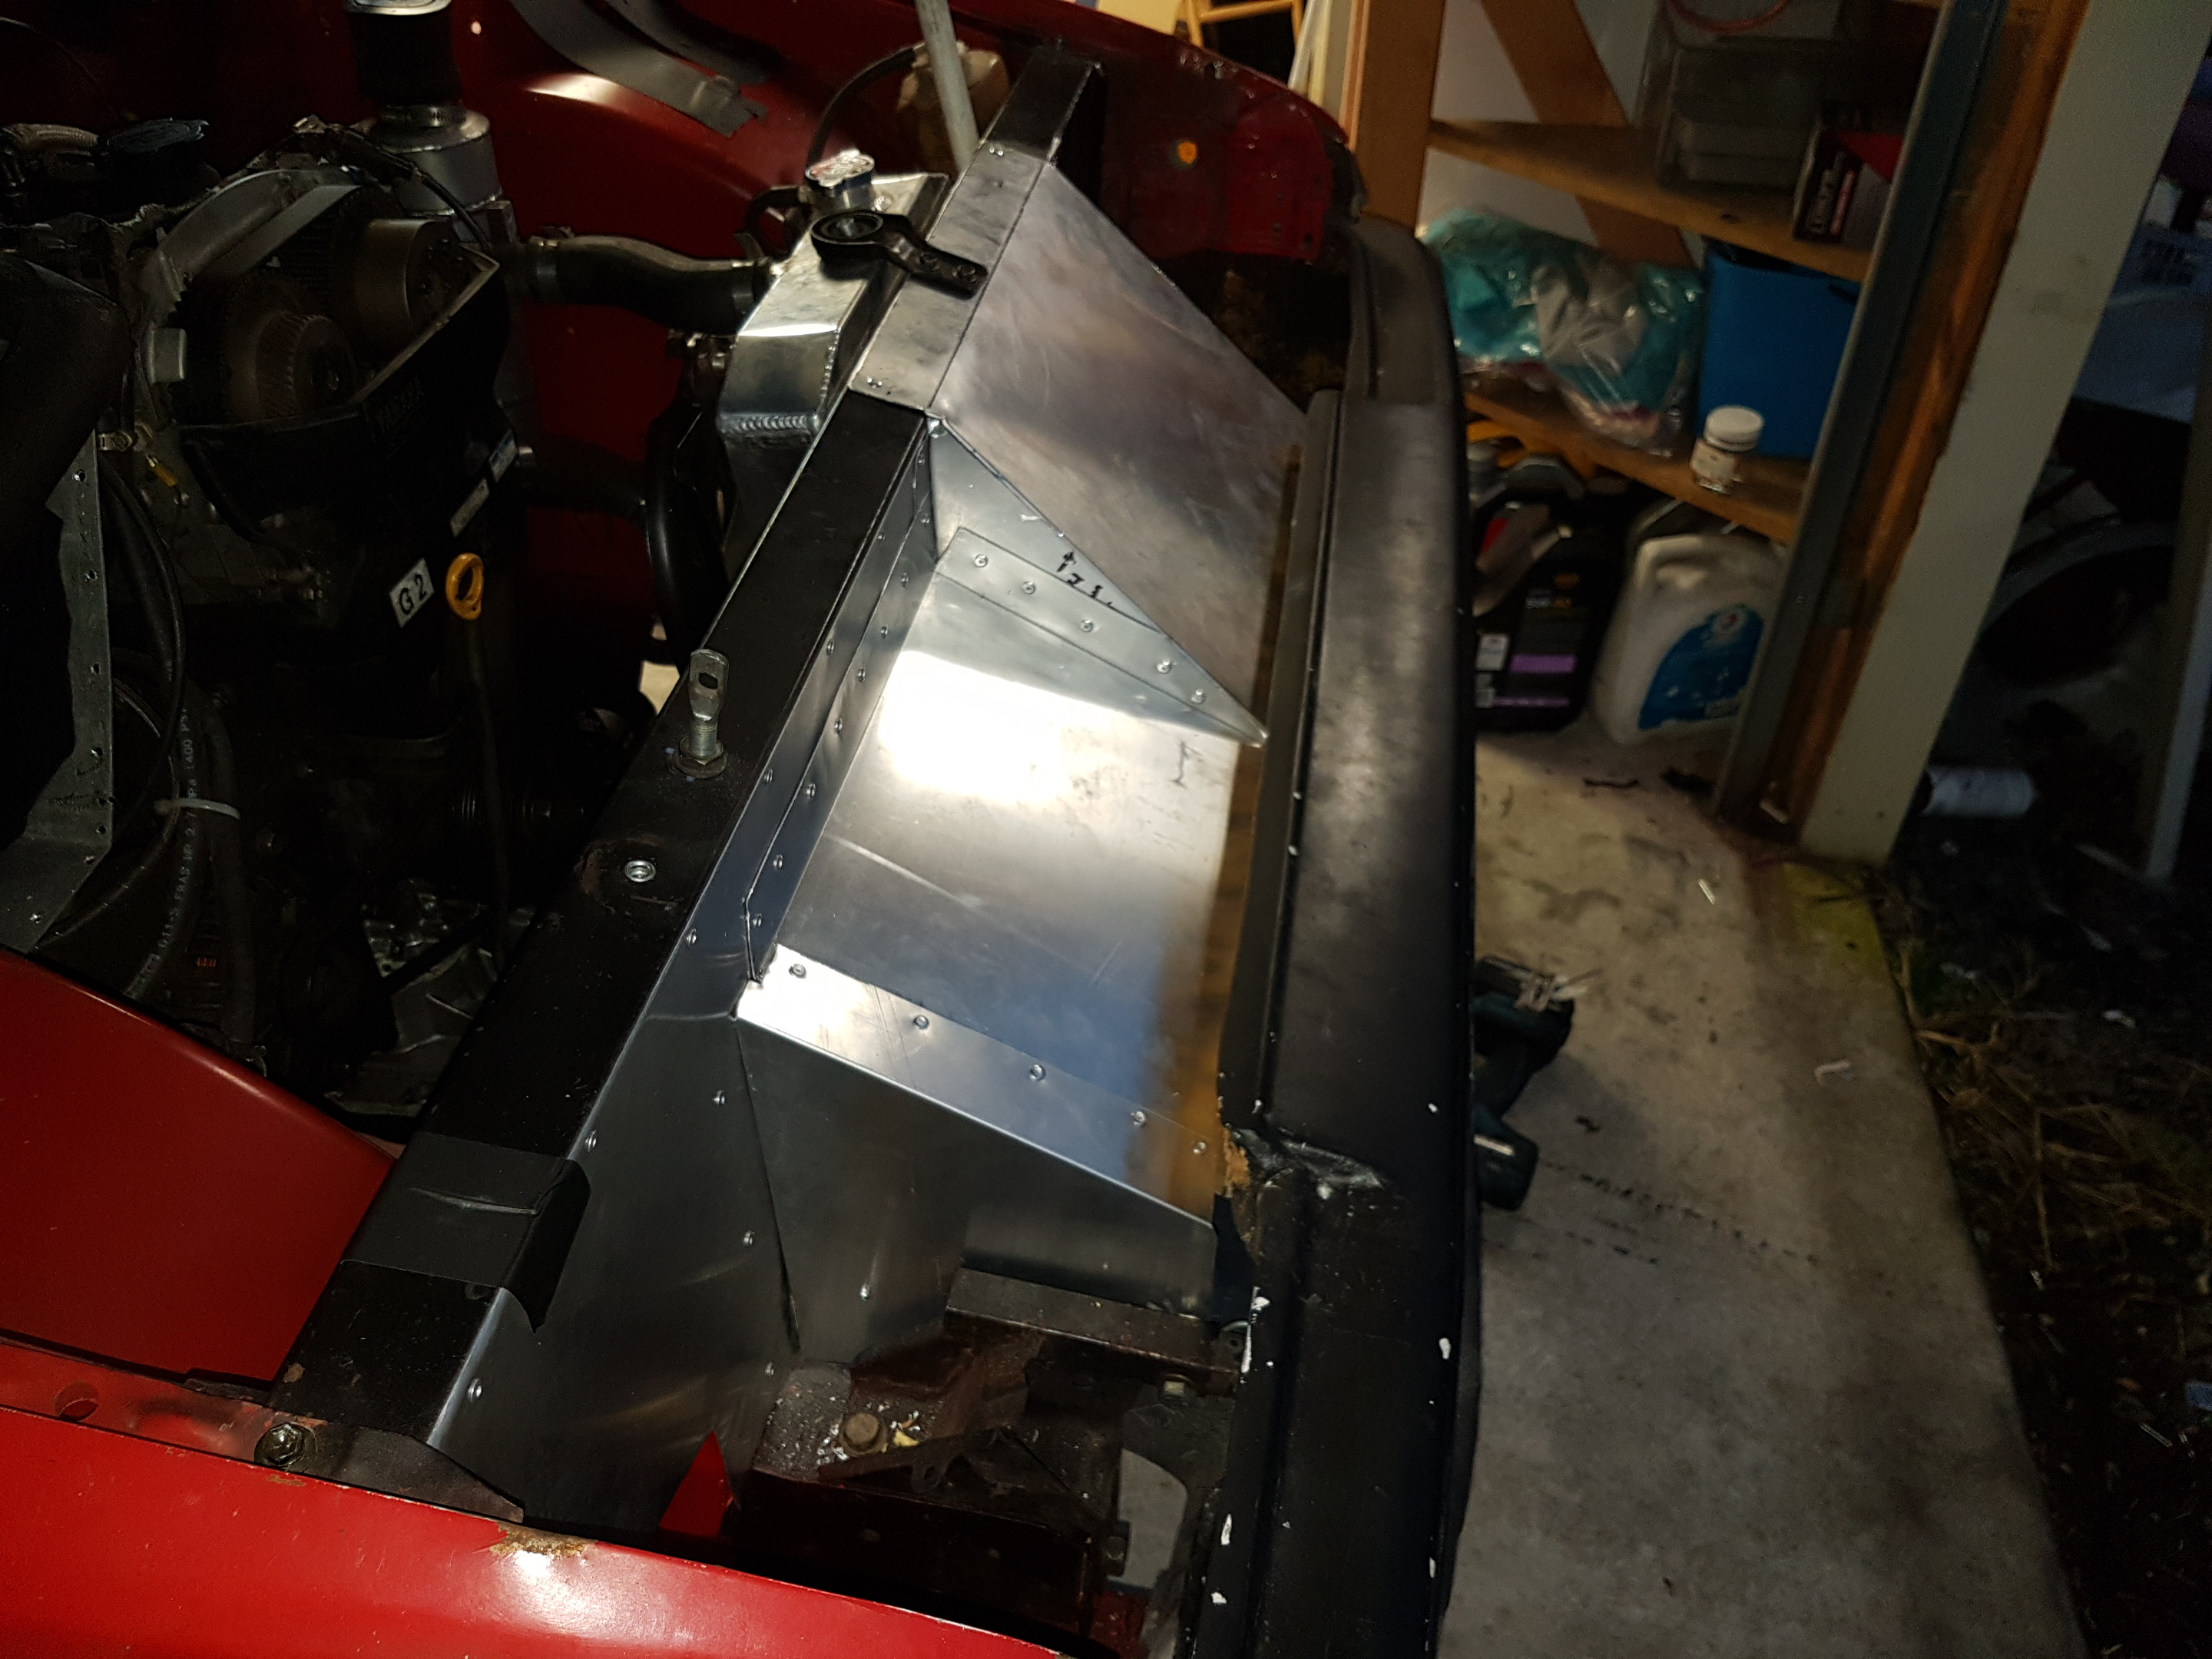
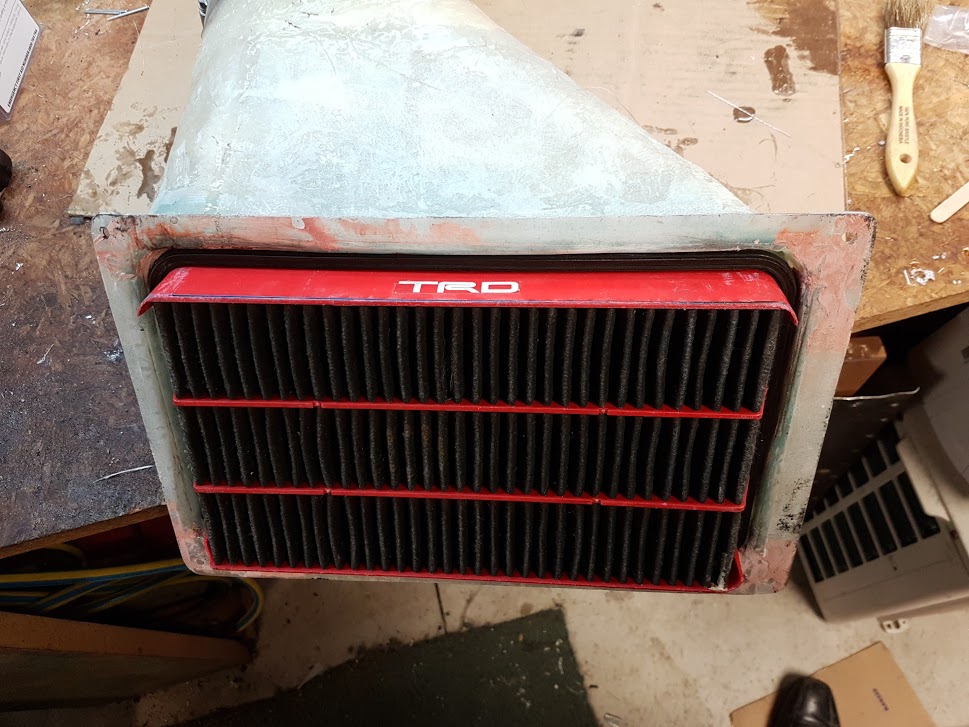
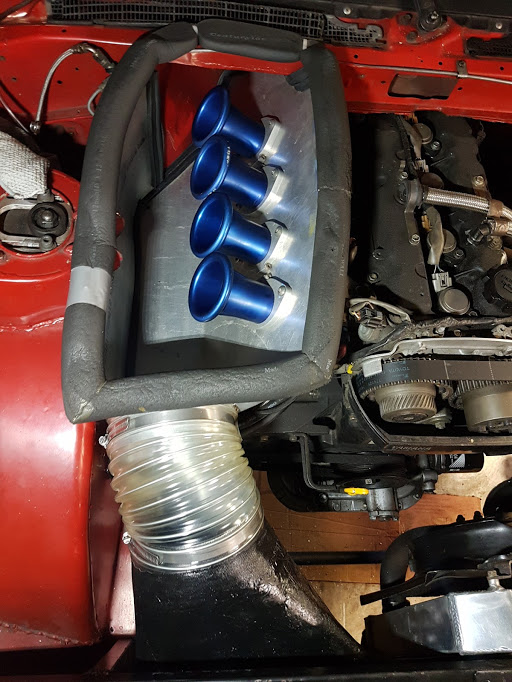
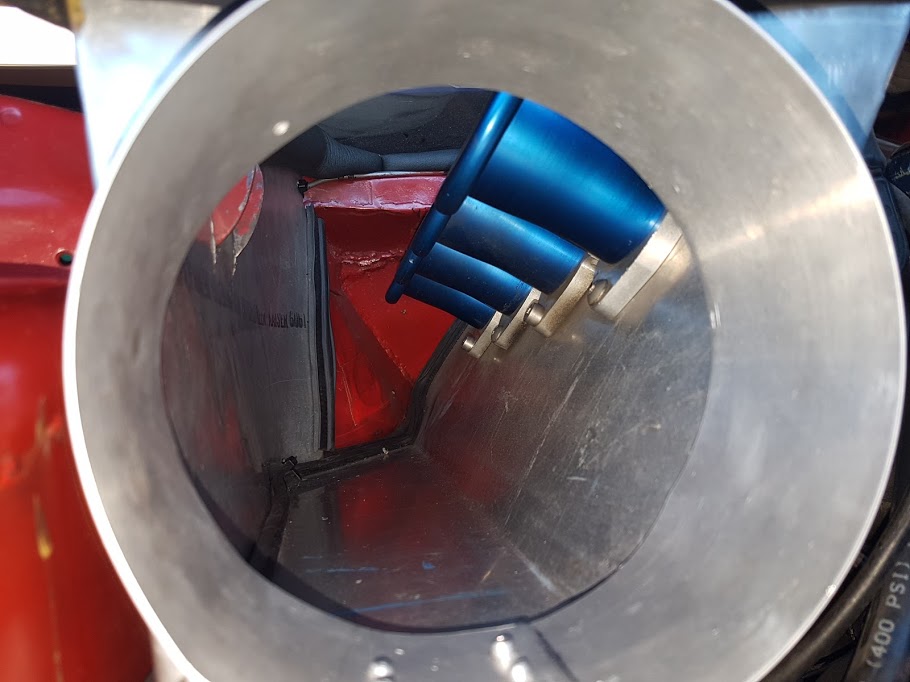
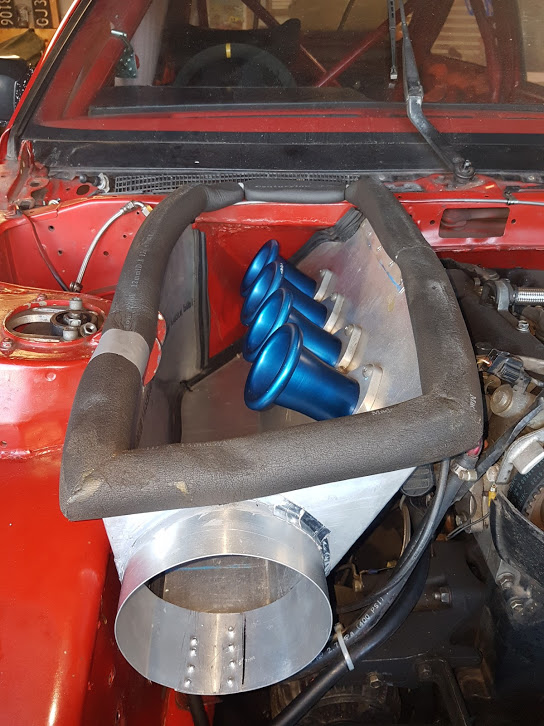
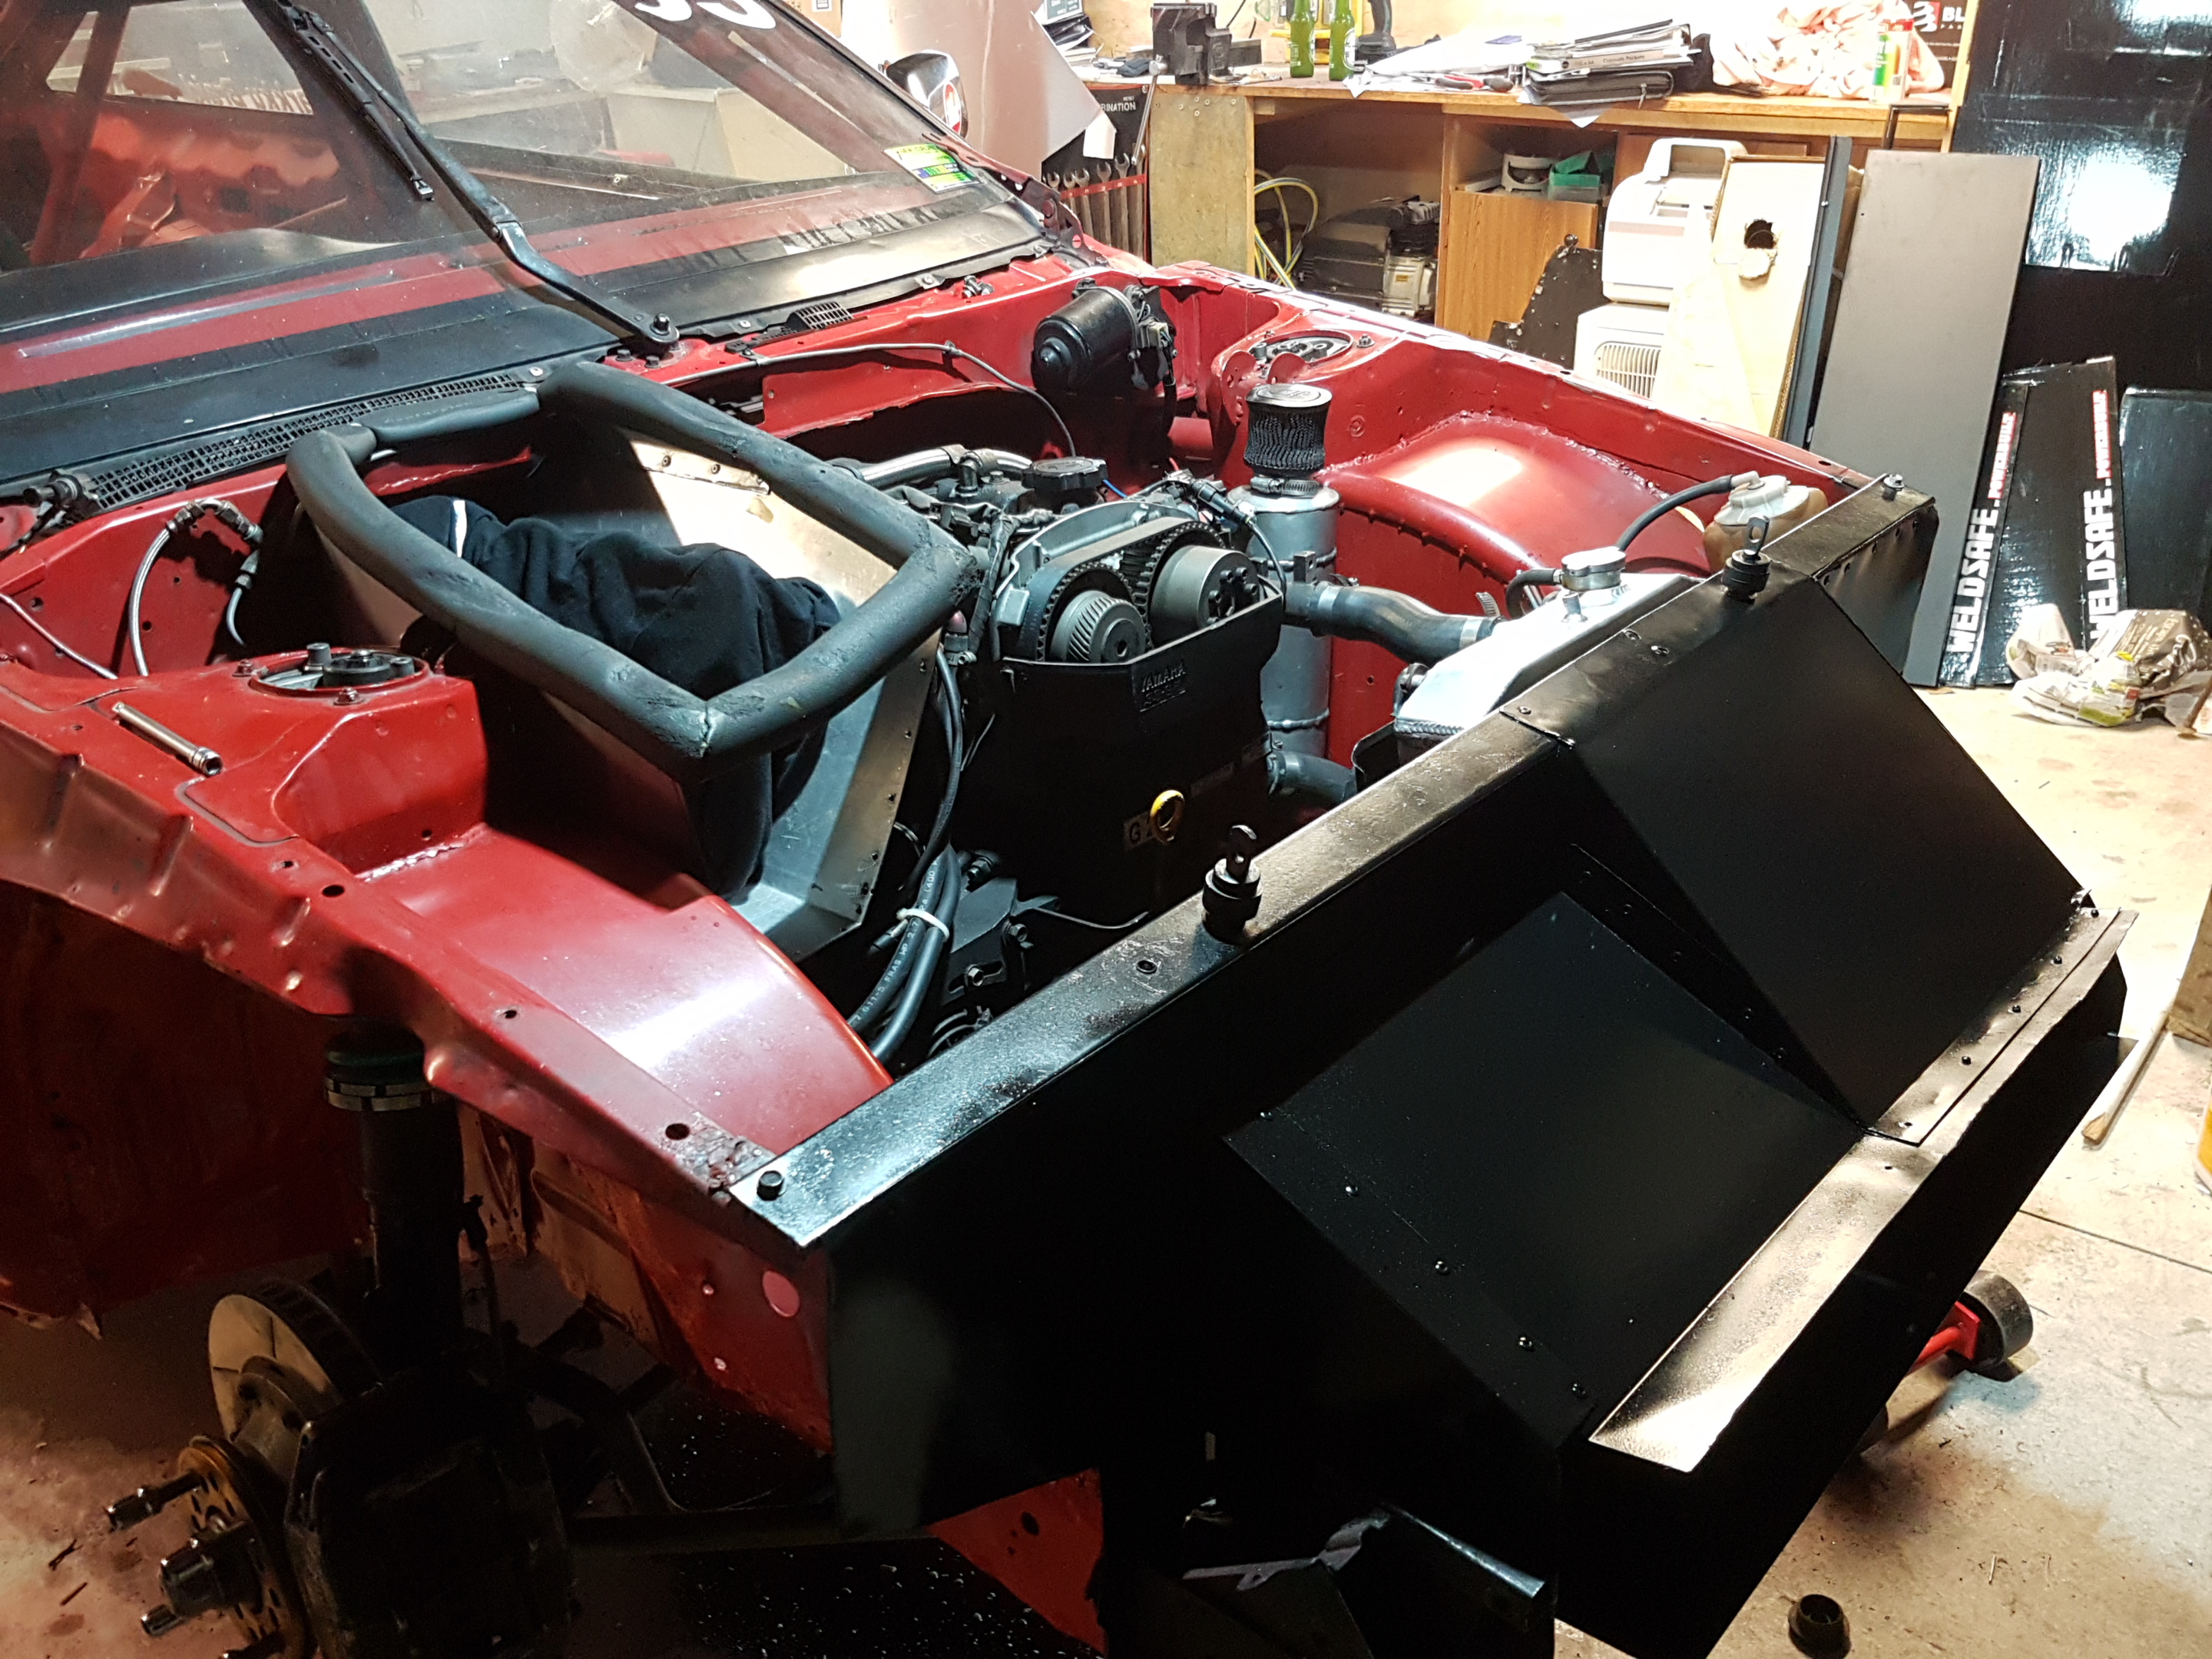
Jason managed to turn my "buck" (read: bucket and piece of wood) into a part that will hold the filter and funnel air towards the air box. the filter fits like a glove! Test fitted with some big hose: Gave it a wash and a paint. I didn't want to sand it too much because I hate fibreglass dust and don't have any masks at home, so it can stay rough . The setup has turned out good enough for now. I'll re-visit everything next time the engine comes out.

- 225 replies
-
- 18
-

-

Truenotch's BEAMS AE86 racecar discussion
Truenotch replied to Truenotch's topic in Project Discussion
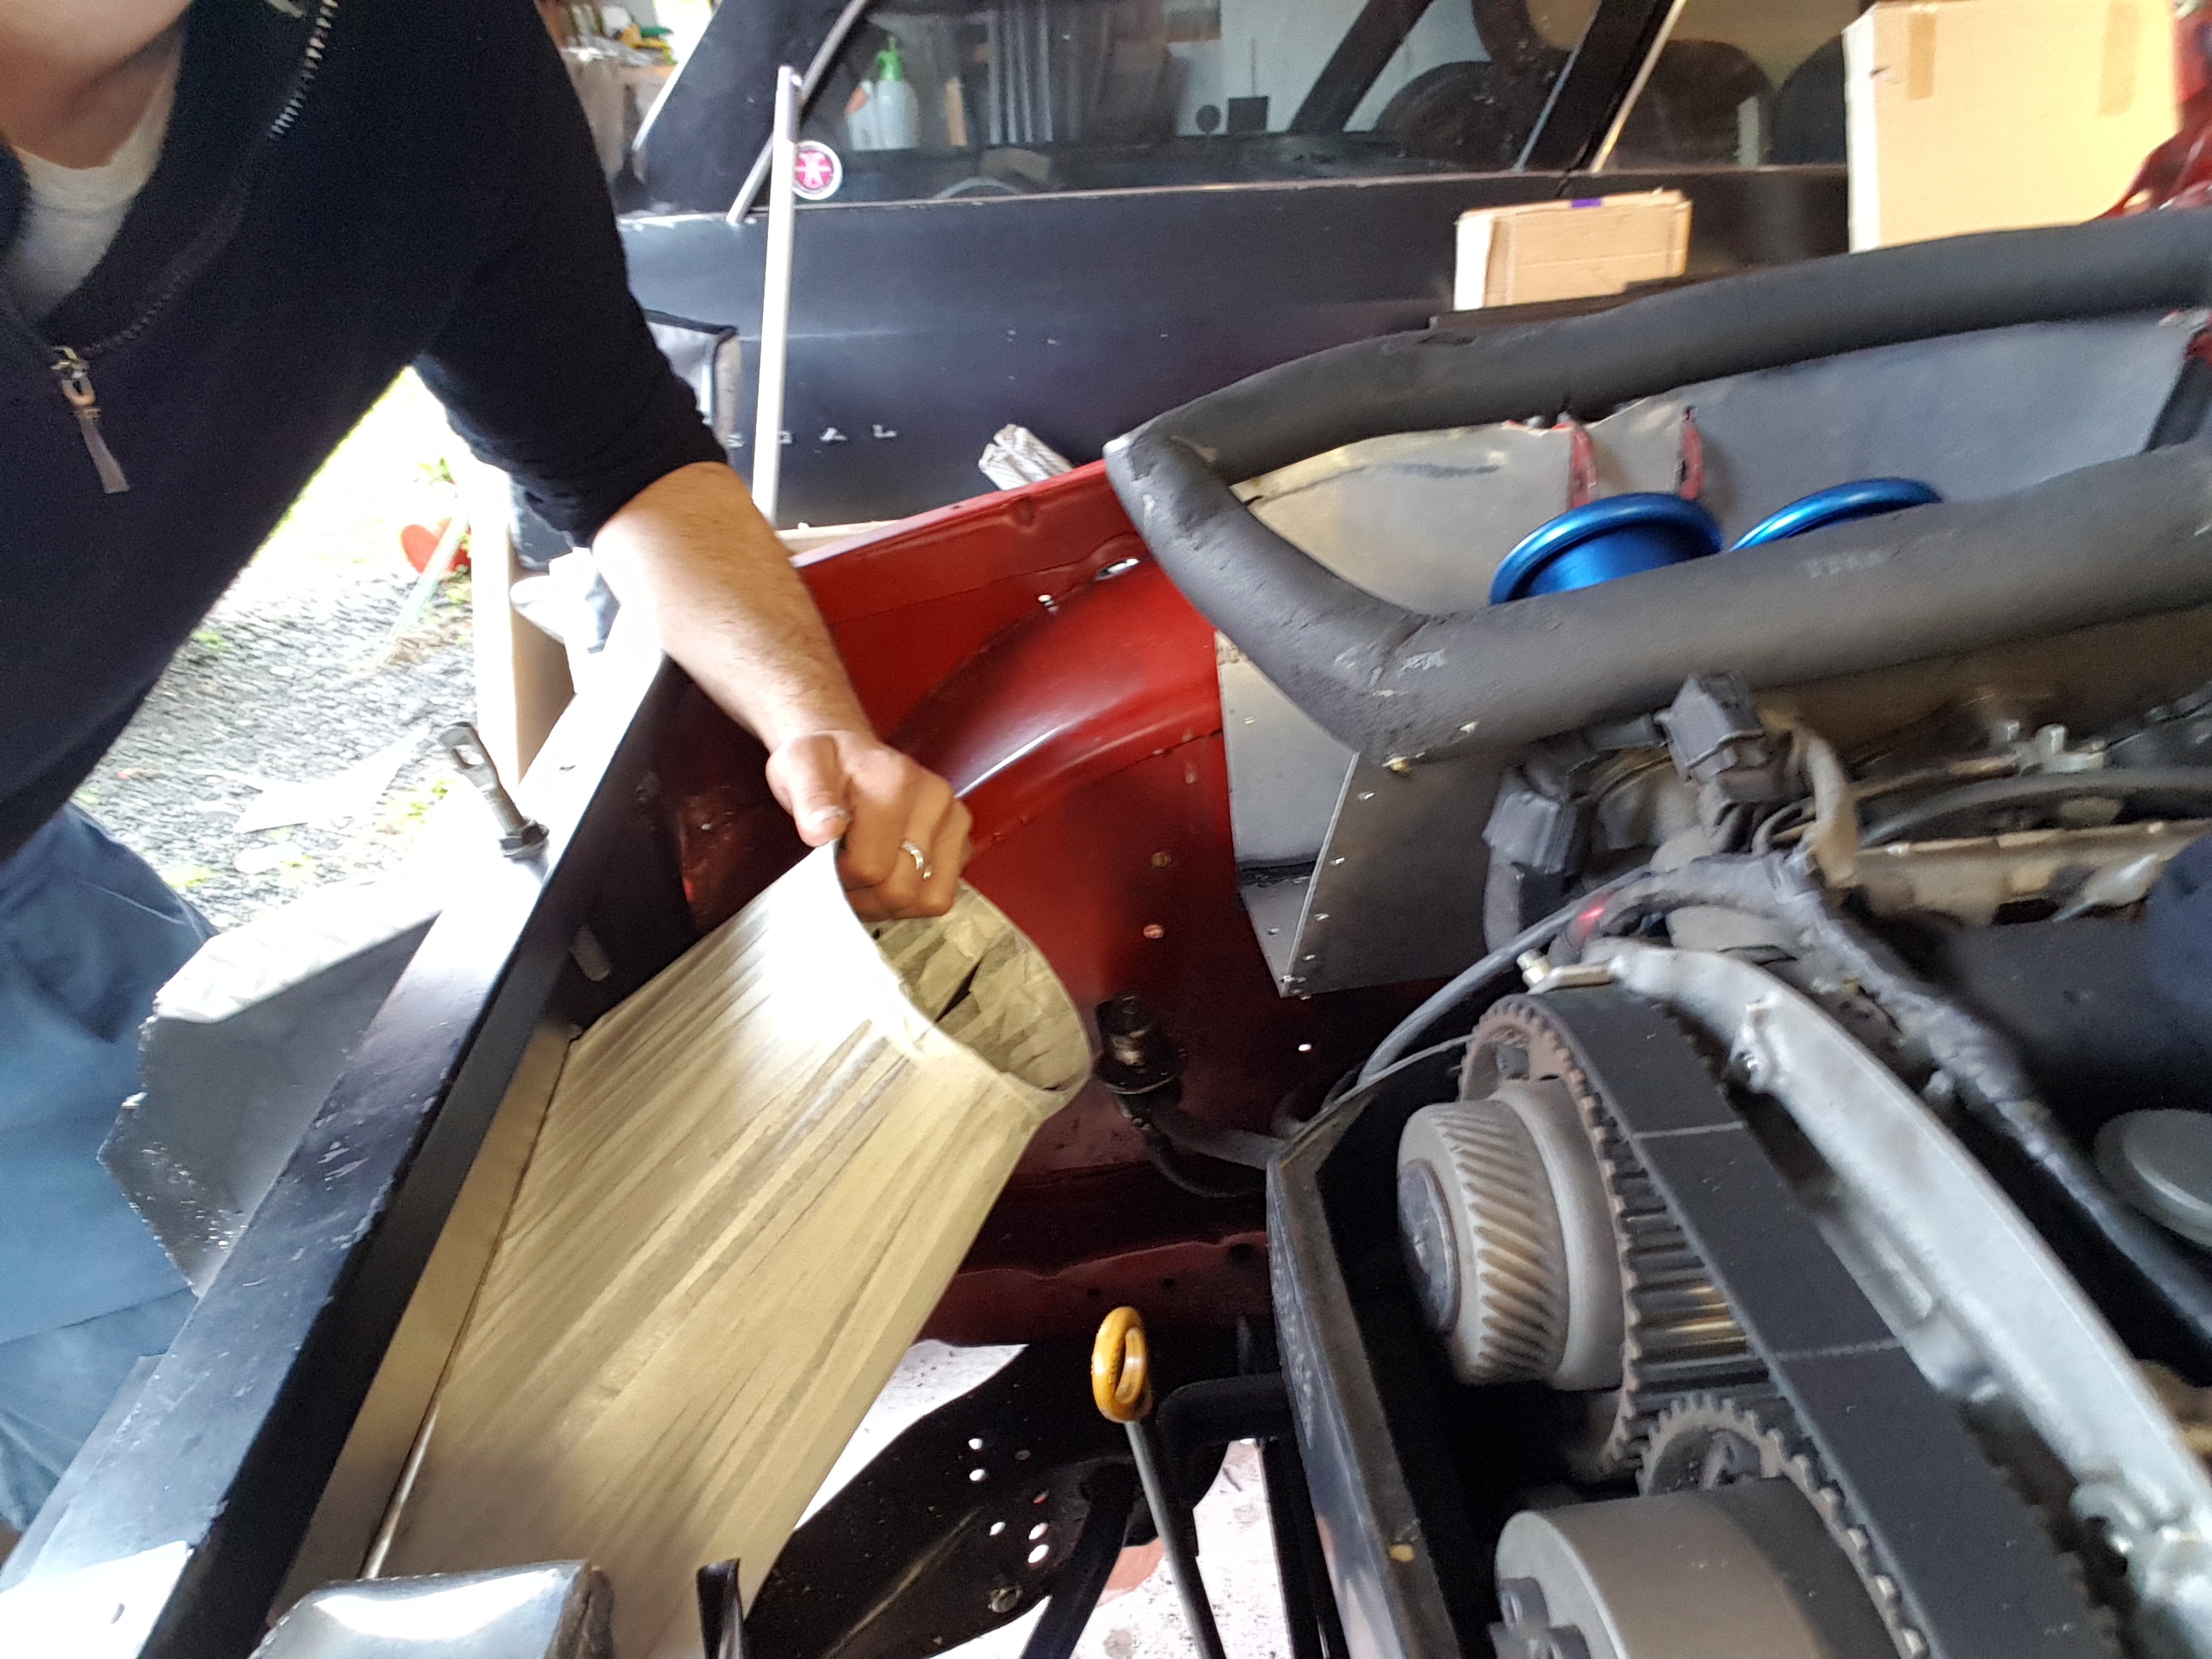
I mainly did the ducting to clean up the airflow in the front of the car. It's a job I always planned on doing but never got around to. The bonnet has been flapping around at high speed and I really hate that. I'd also been planning on adding an air filter, going to a bigger diameter inlet pipe and forcing more cold air into the box, so it kinda does all of those jobs. That said, on very hot days the coolant temp will rise to ~100° and I suspect it starts to lose horsepower when it's in that temp range, so I'm kinda working on both issues. As far as weight goes, the whole shebang weighs bugger all, so that shouldn't worry you too much, although it hardly seems worth it for the Civic if you're not having cooling issues. -
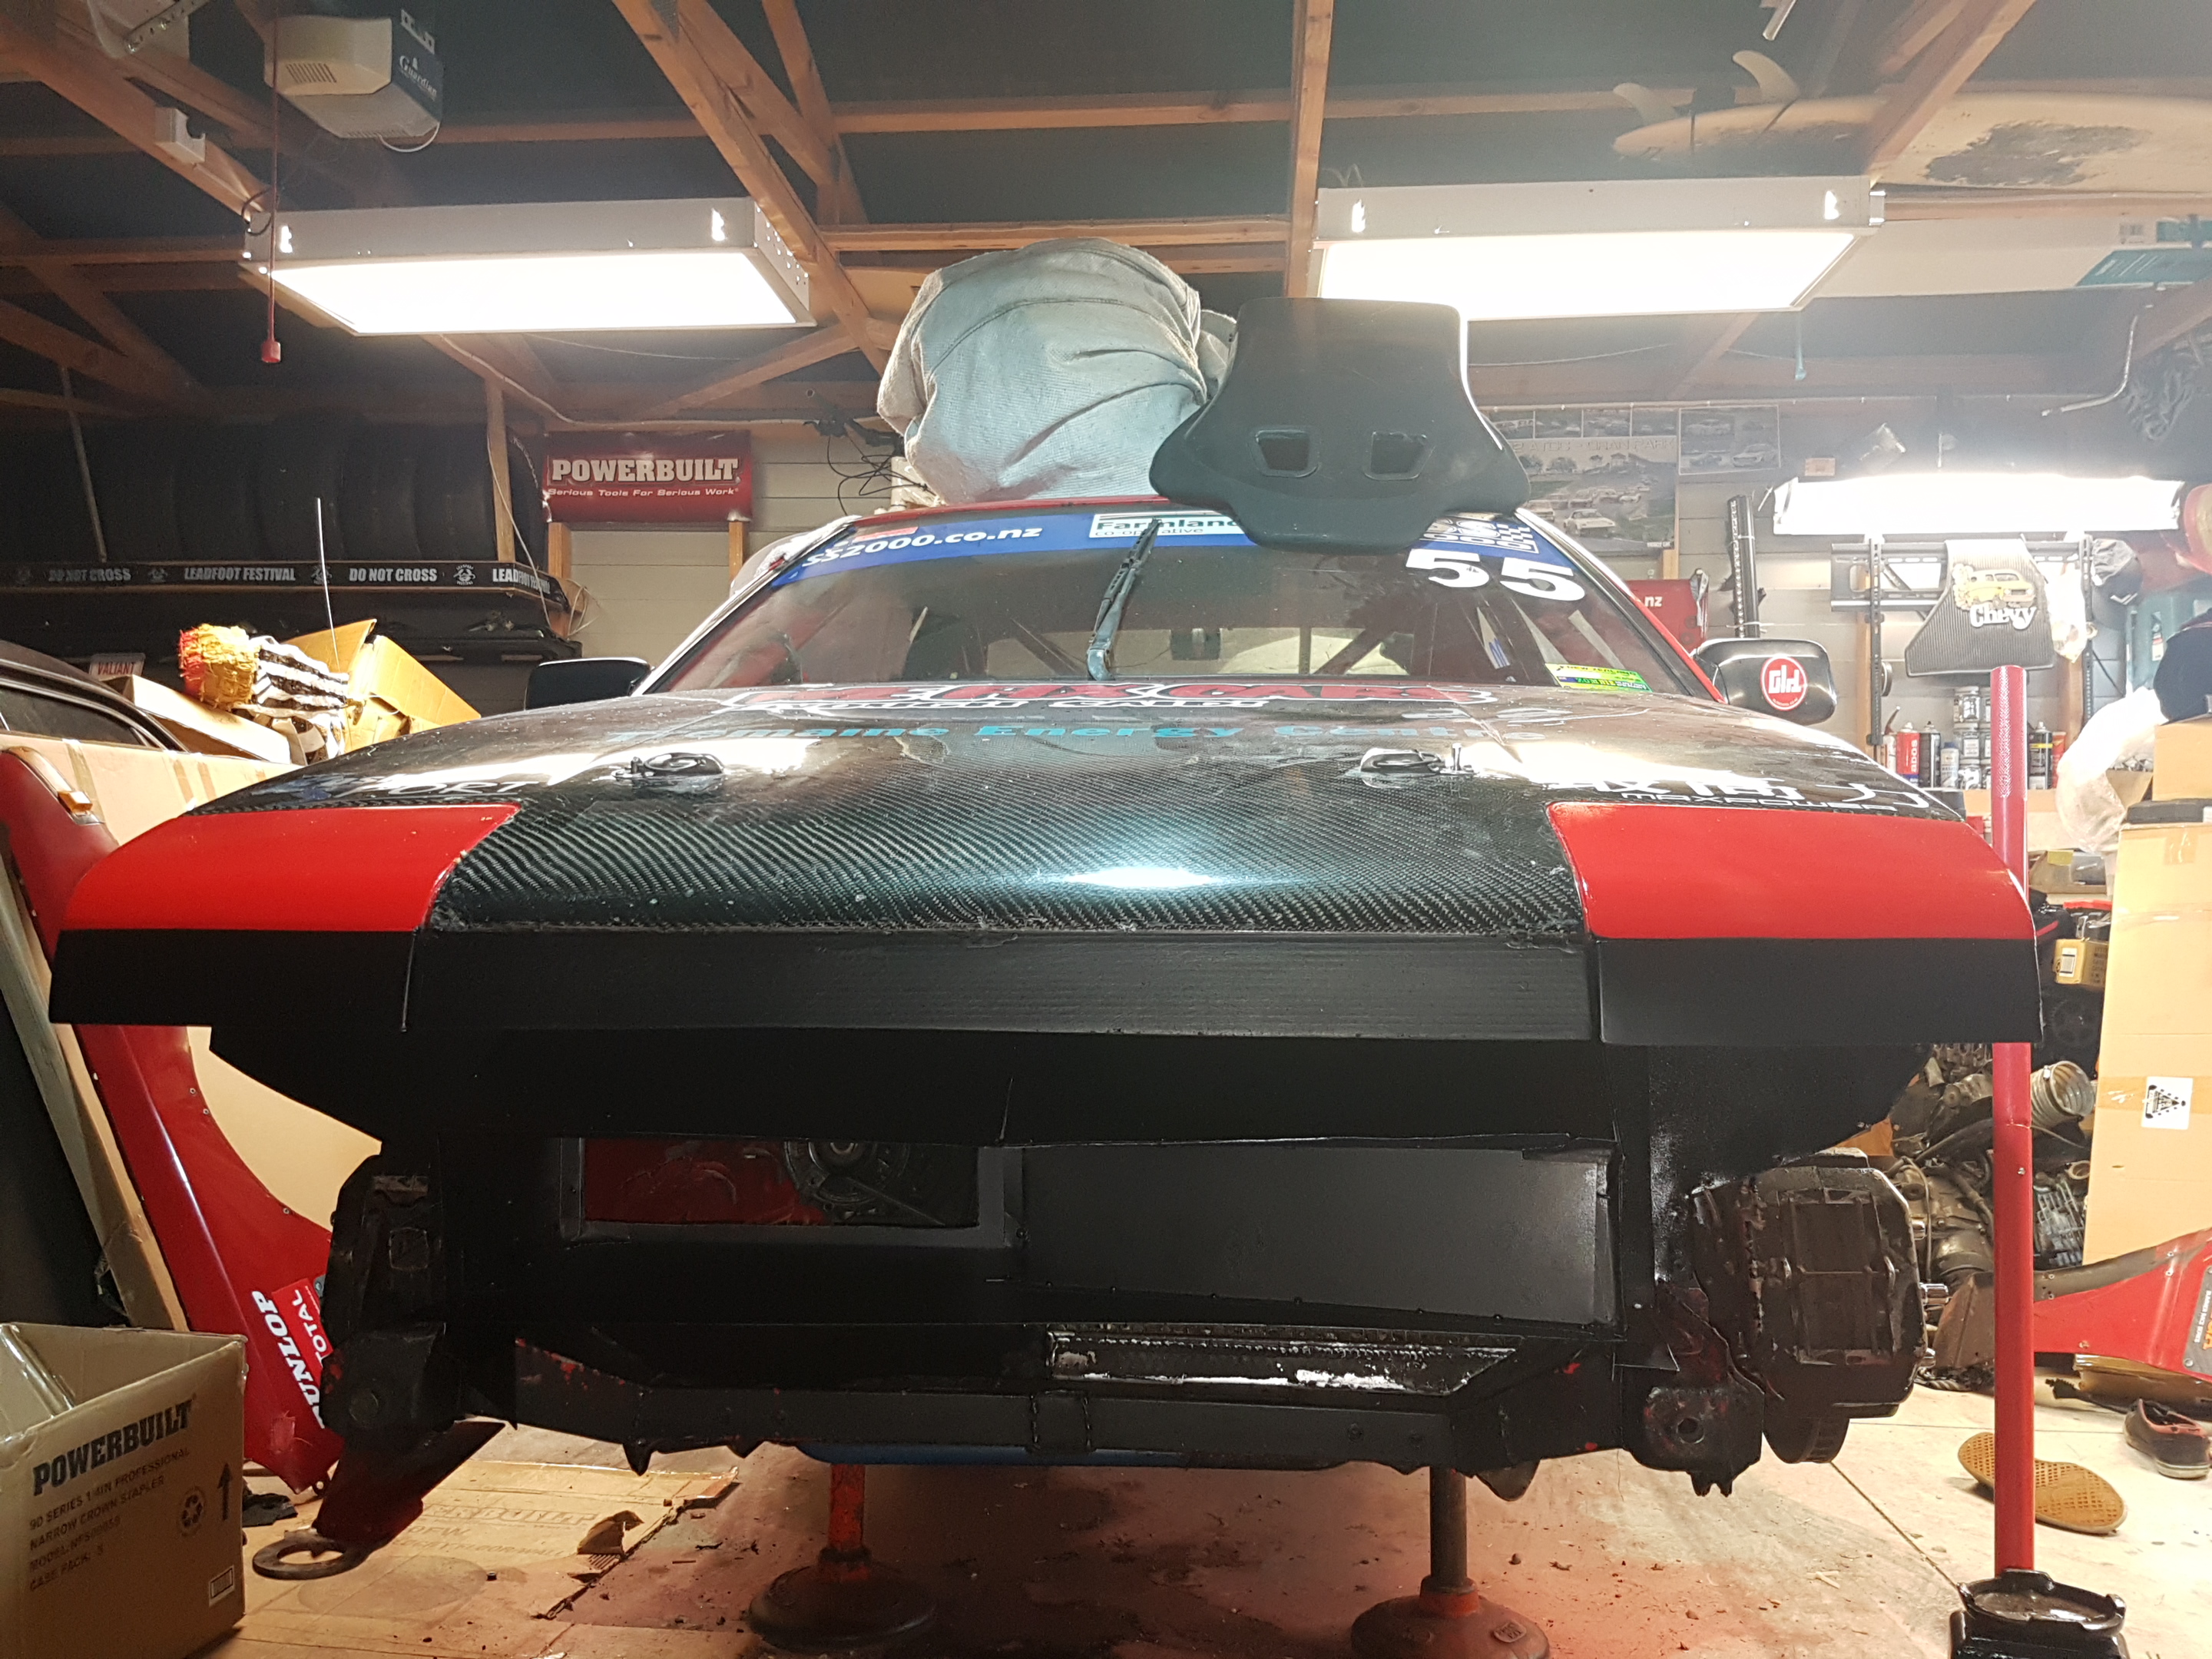
Here's the "temporary" 150mm inlet that's made from 1mm aluminium and rivets. This will stay in there until I can be bothered remaking the whole front plate and collar from 2mm so it can be welded. And the bonnet is now a blank canvas:
- 225 replies
-
- 12
-
-
That noise comes from a well tuned set of pipes. It will have a good set of headers and a merge or crossover pipe so you hear both banks in harmony. This car is a V8 but gets the same kind of howl: Although all this is irrelevant to this thread because hopefully this motor will end up in a boat with zoomies.
-
Bit of black paint for the ducting. The fibreglass piece should be done this week, then there's only a couple of jobs to do before going racing!
-
Watch this if you've got half an hour spare (you do). He explains the theory fairly well.
-
@Firetruck is right - as the high pressure pulses expand into the collector/megaphone area they slow down and create a vacuum which helps to draw exhaust gasses out of other cylinders. At the same time there is a sound wave that bounces back in the other direction towards the valve. This is also known as a mindfuck.
-
This rules. Definitely keep it K.
-
And a few pics from Round 3:
-
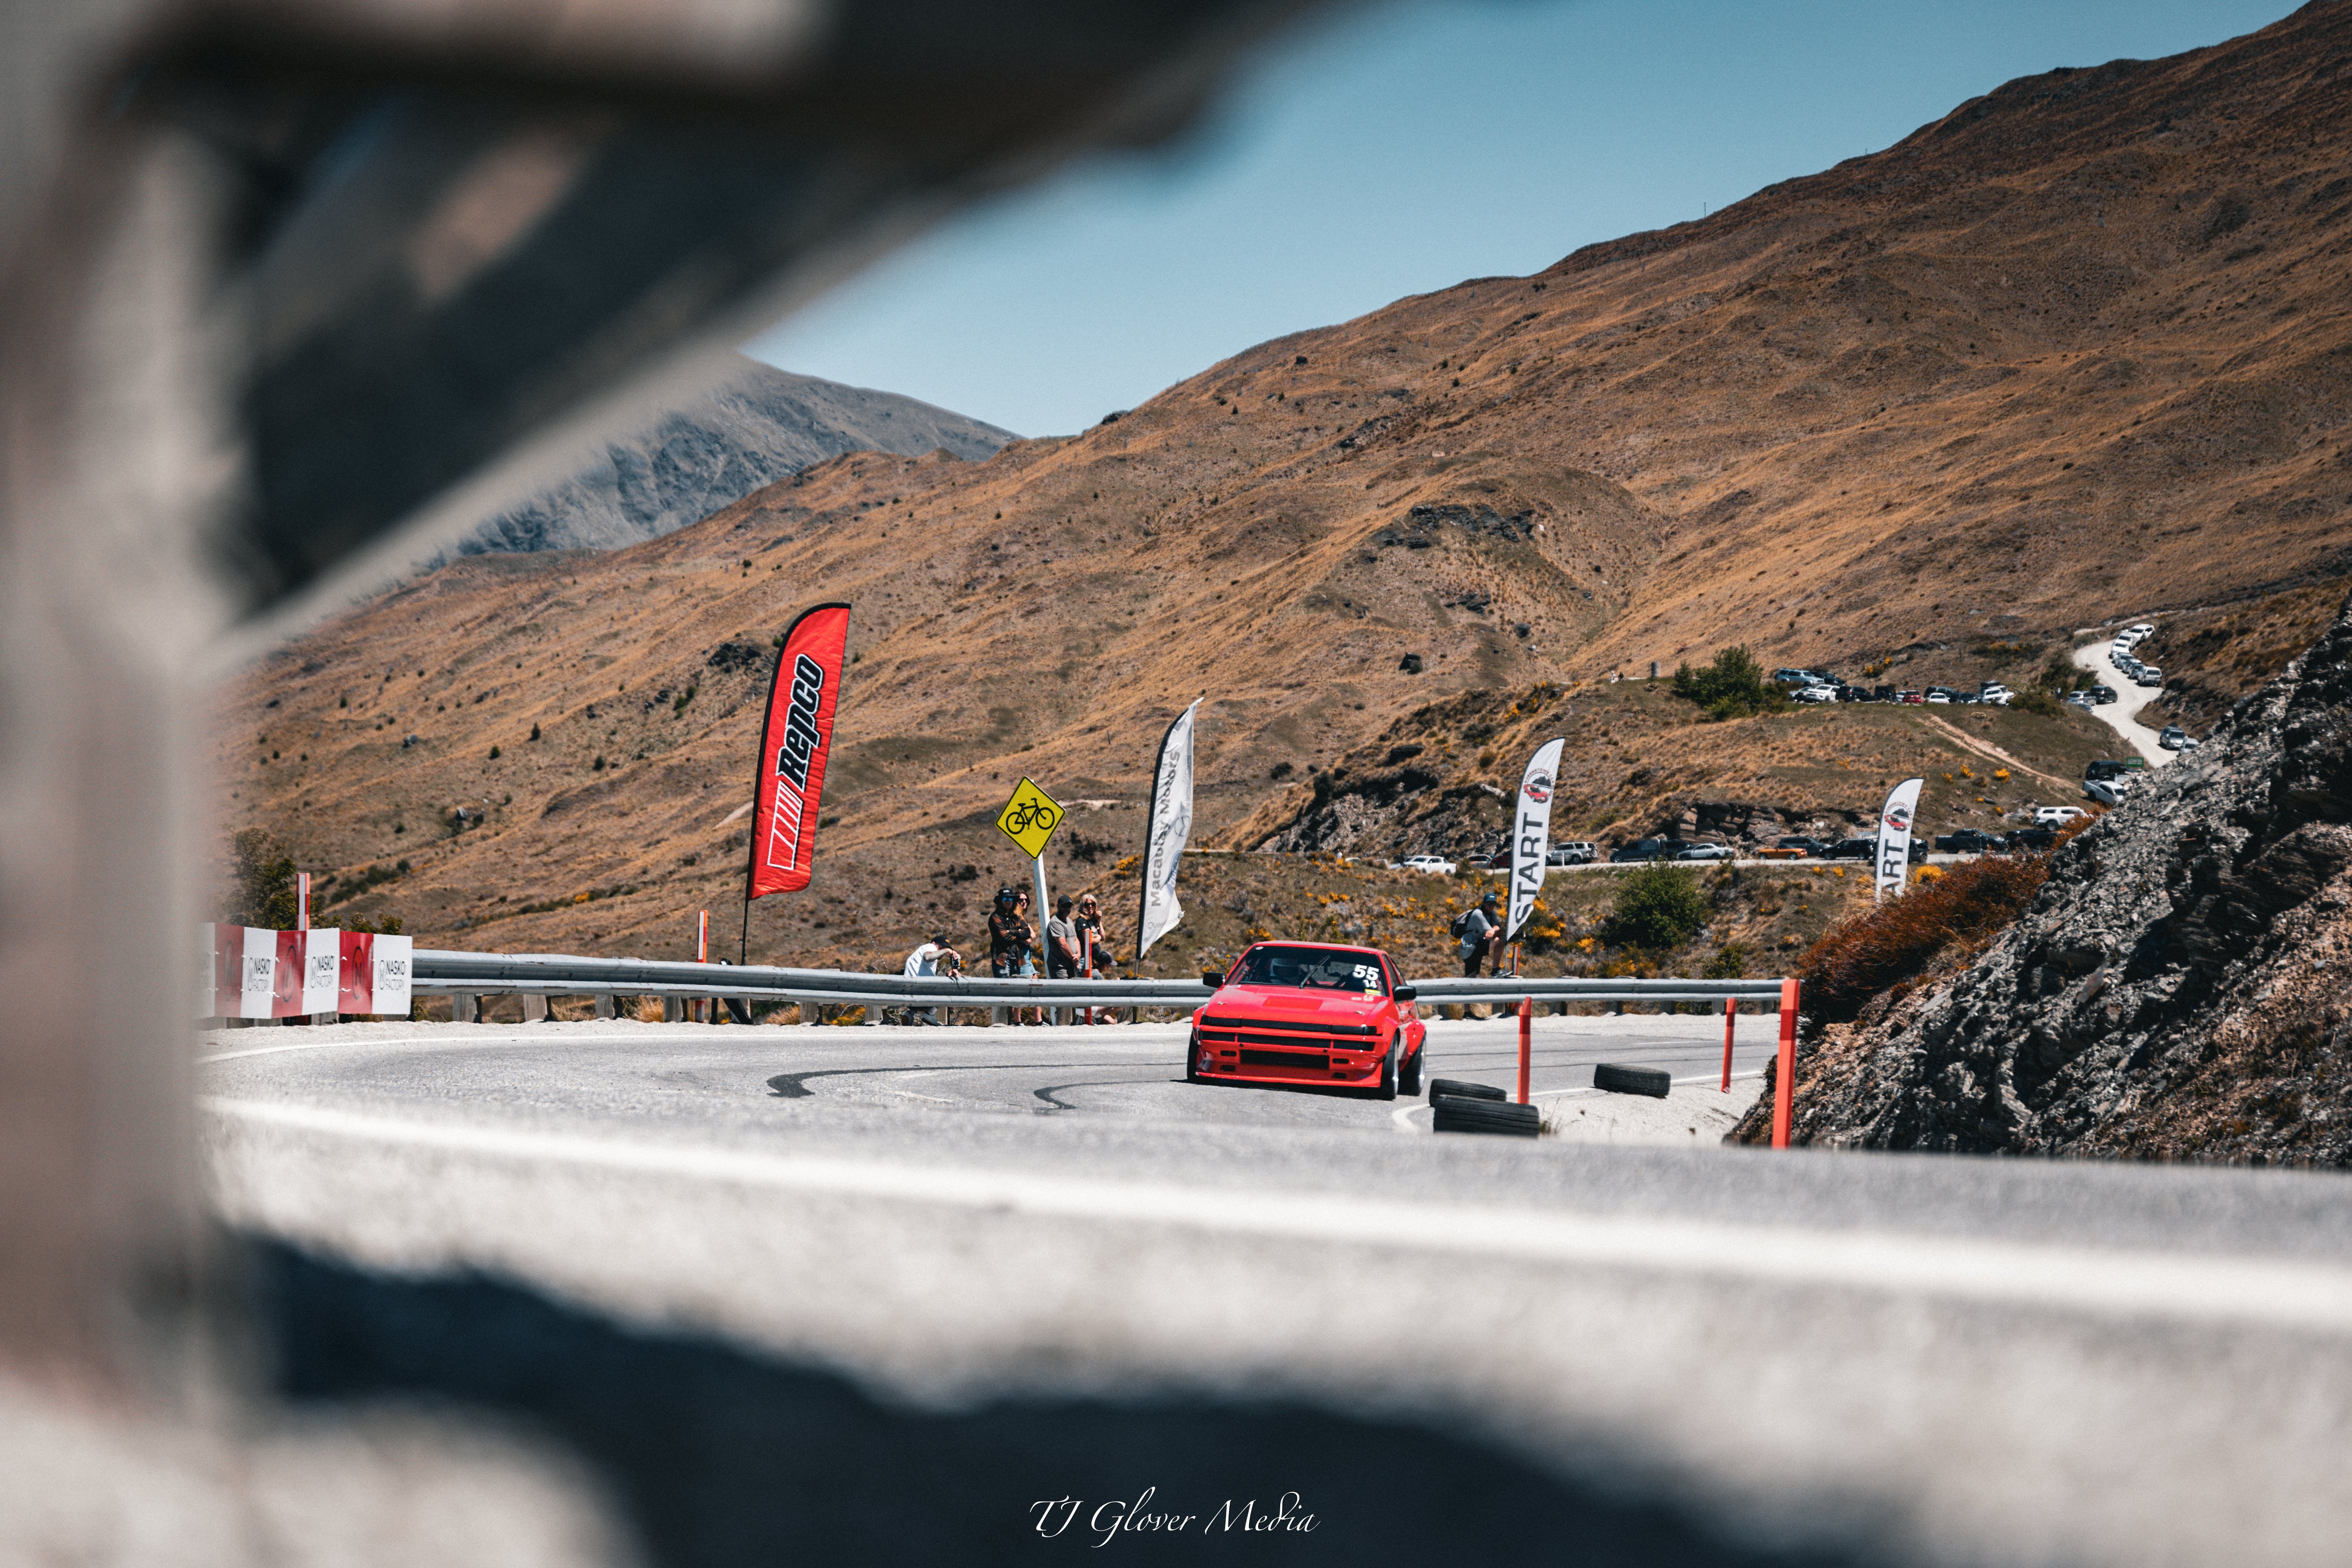
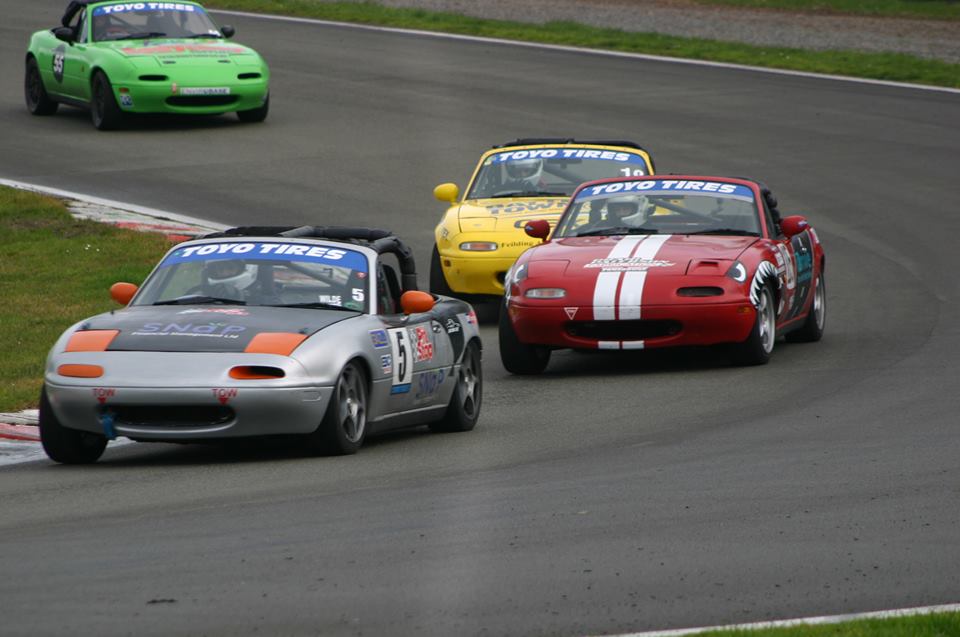
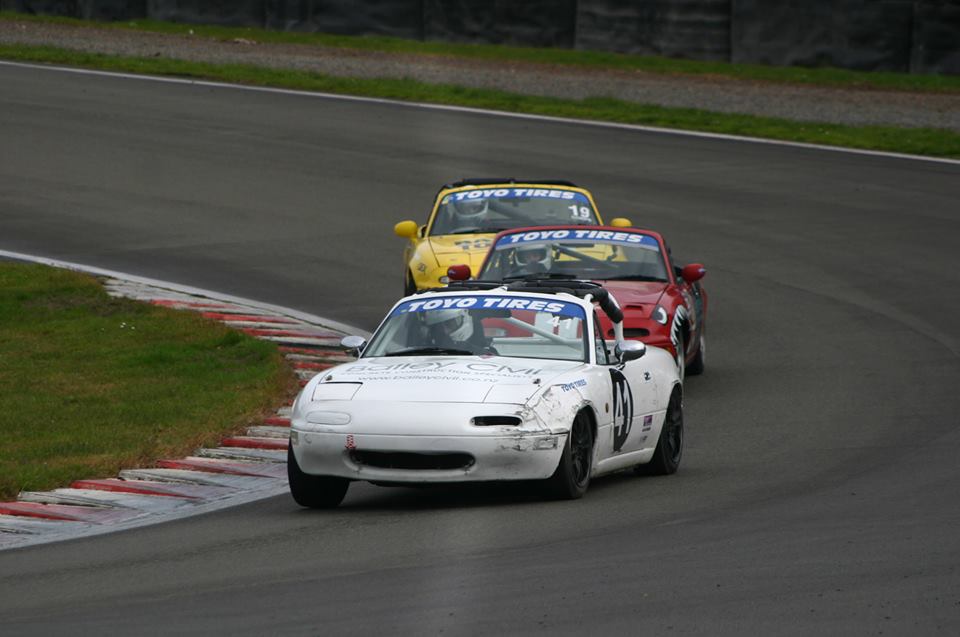
Round 3 took place on August 6th and the new spring rates were proving to be working! I qualified a second faster than any lap from Round 1 or Round 2 with a 1:24.3 which put me in 4th - not bad. The front two guys qualified at a blistering 1:23.3 and 1:23.5! Madness. Race 1 came around it was GREASY. I started 4th and jumped up to 2nd on the start but ended up slipping back to 5th after running wide and getting wheel spin on the exit of the last corner. Not to worry though, two people fell of ahead of me so I still came home in 3rd. Spin: Full race: I also managed to stuff up when trying to record the other two races... So this is the only race on camera. So the setup is getting better! I'm planning to run my AE86 at the next round, so probably won't be campaigning the MX5 at the final.
-
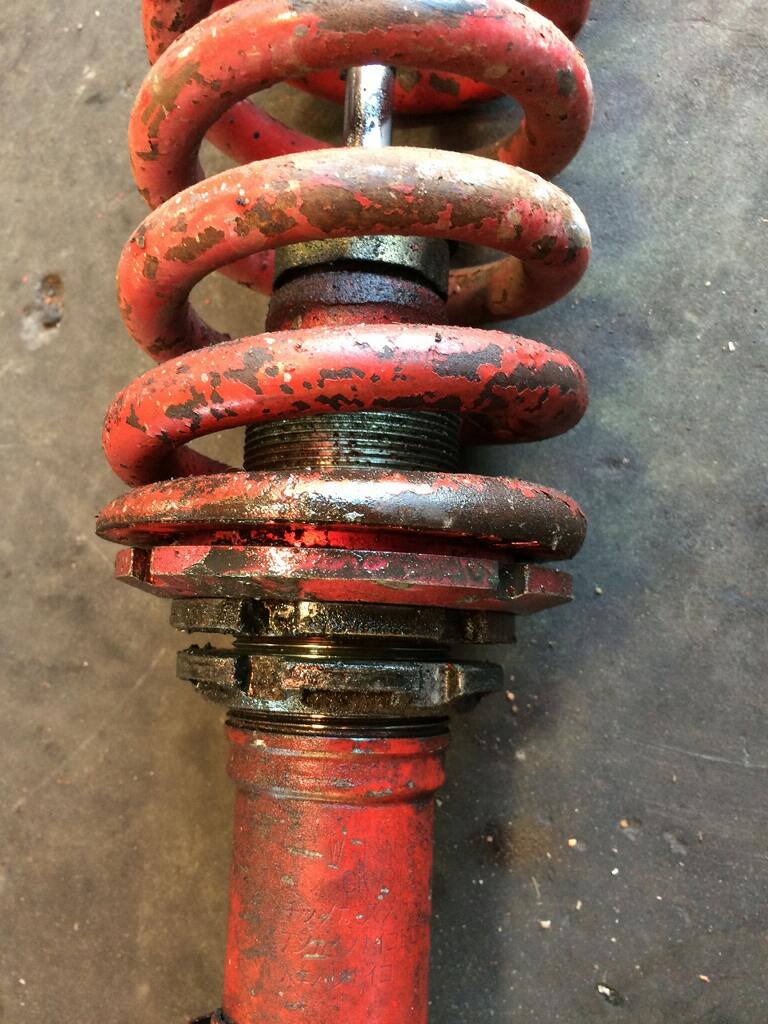
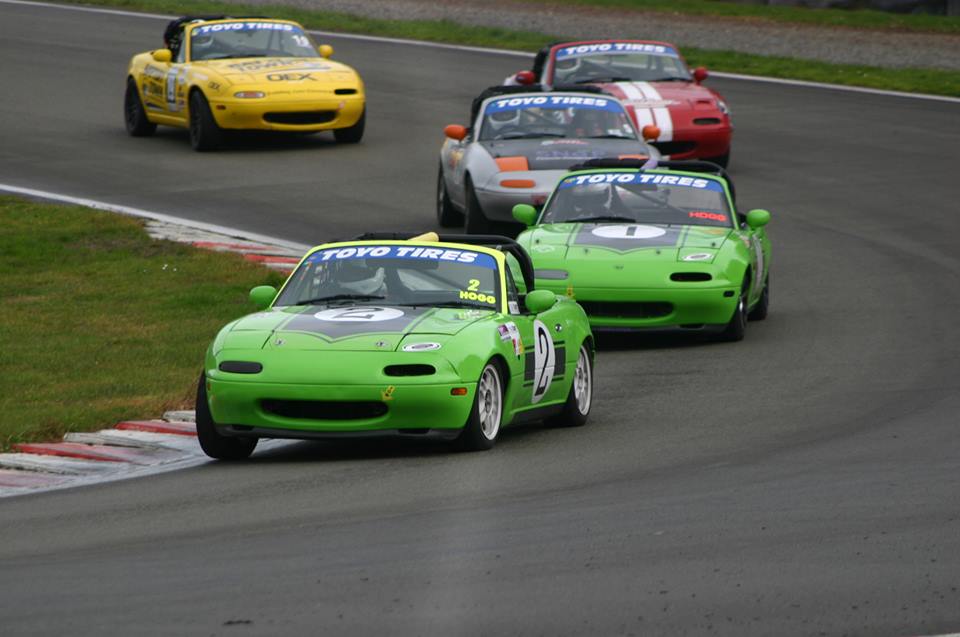
Because of that it got brand new suspension for round 2. We had to replace the springs too as the previous setup wasn't going to work with the new Bilsteins and the desired ride height. That left the question of spring rates. I prefer my car to be a bit harder in the rear than most, so am running 400lb in the rear and we chose the same spring rate as everyone else for the front - 550lb. Looks good with a bit more slam: Got it to the race meeting and had a bit of action: This one was totally my fault. It's been a while and I'm a bit rusty - didn't expect Derek to be in my blind spot. Jumped for 6th to 2nd at the start of this race, but didn't finish there. Good close racing though! The car felt much better than the previous round, but still not completely right. It felt too soft and roley in the front, so my theory was to go harder in the front. A bit of research showed that the Spec Miata class in the USA runs 700lb in the front and the same tyres as us. So we landed on 670lb as a rate to test (12kg).
-
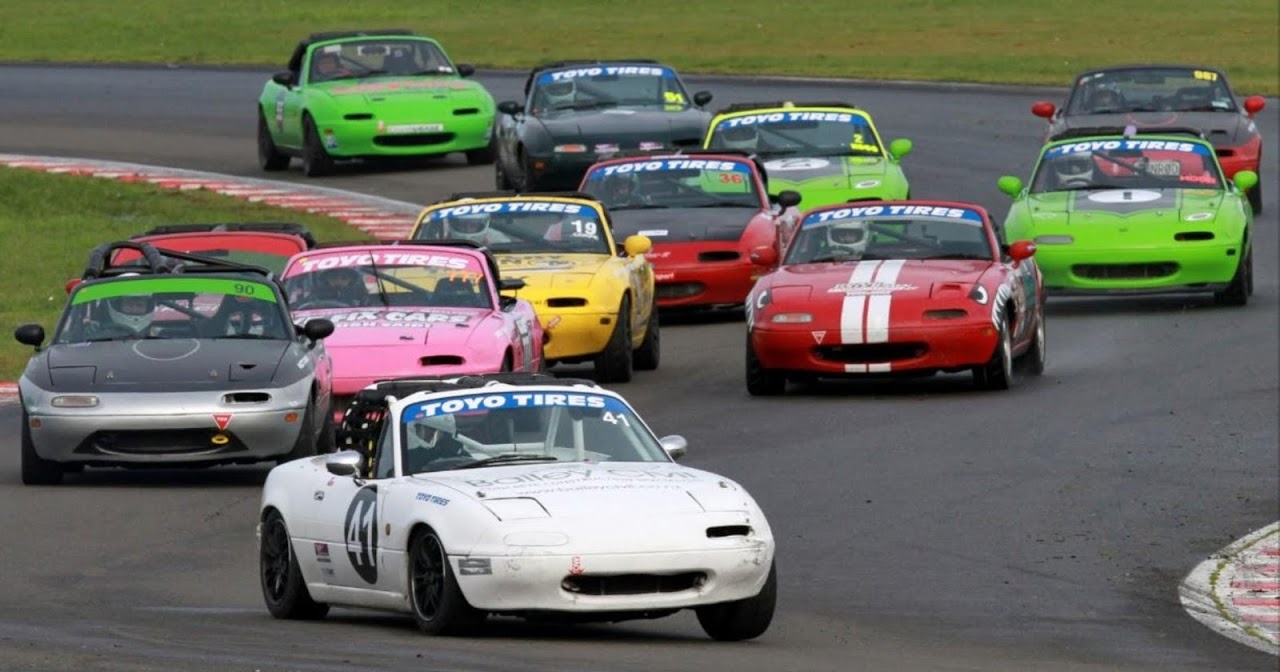
I've been back in this thing for the last 3 rounds of Winter racing at Manfeild. The competition has really heated up! The current top guys have been doing 1:23's and the new lap record is a 1:23.3 - that's over a second faster than my previous lap record! We're running on the new Toyo R888R tyres and they appear to be a lot faster. Most cars have had their engines refreshed too. I jumped in for round one and went ok, but the car didn't feel right. It was pushy in the mid corner. Turns out the left front shock was toast! Despite that I still managed to get down into the low 1:25's and was mid pack. We've had a decent turnout this year, with 13 cars at each round so far. Bit of footage:
-
Truenotch's BEAMS AE86 racecar discussion
Truenotch replied to Truenotch's topic in Project Discussion
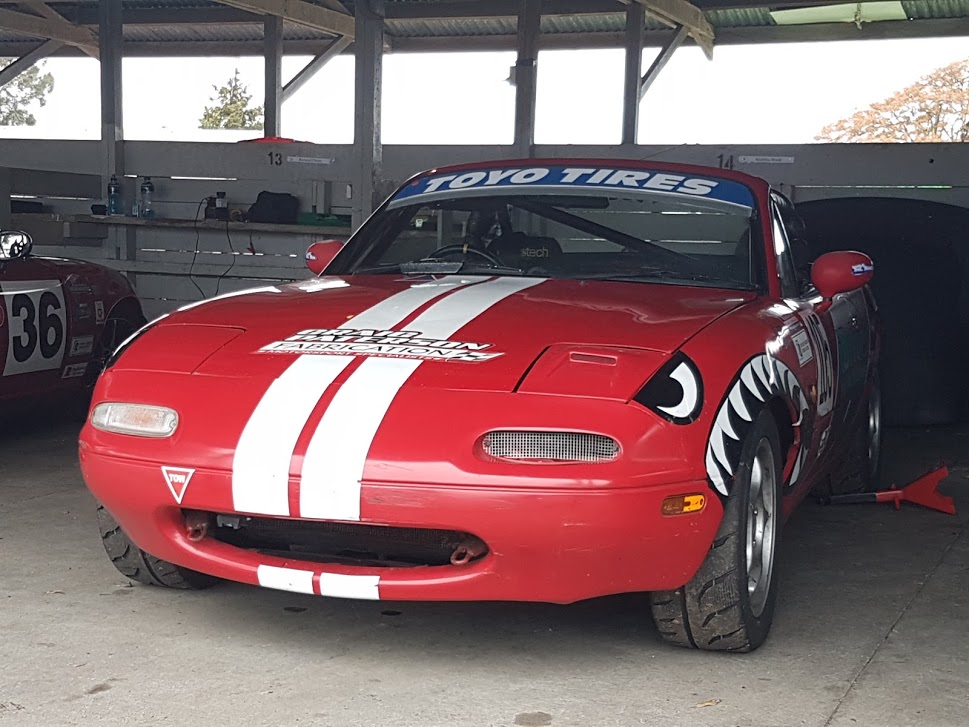
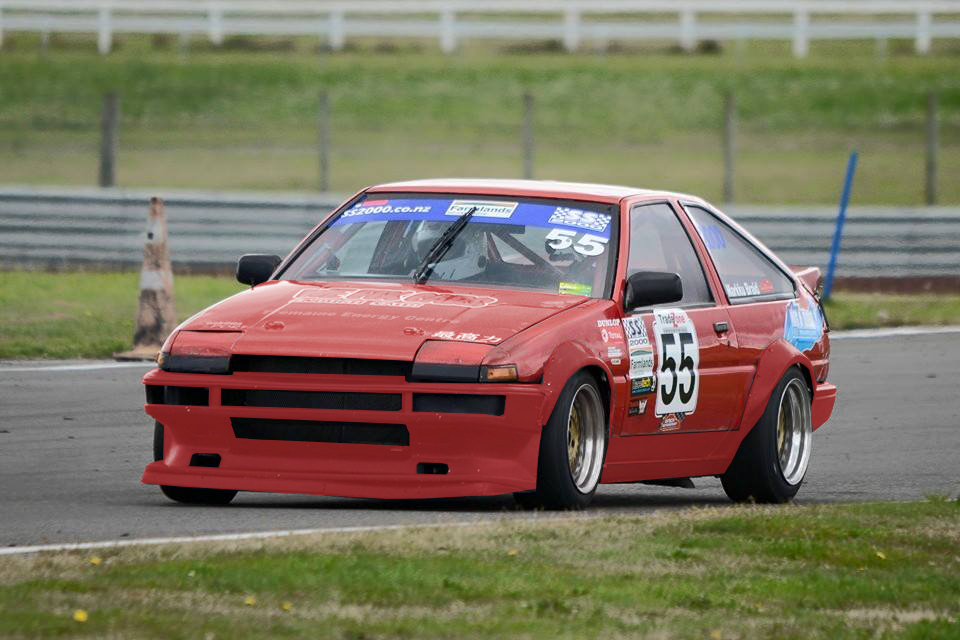
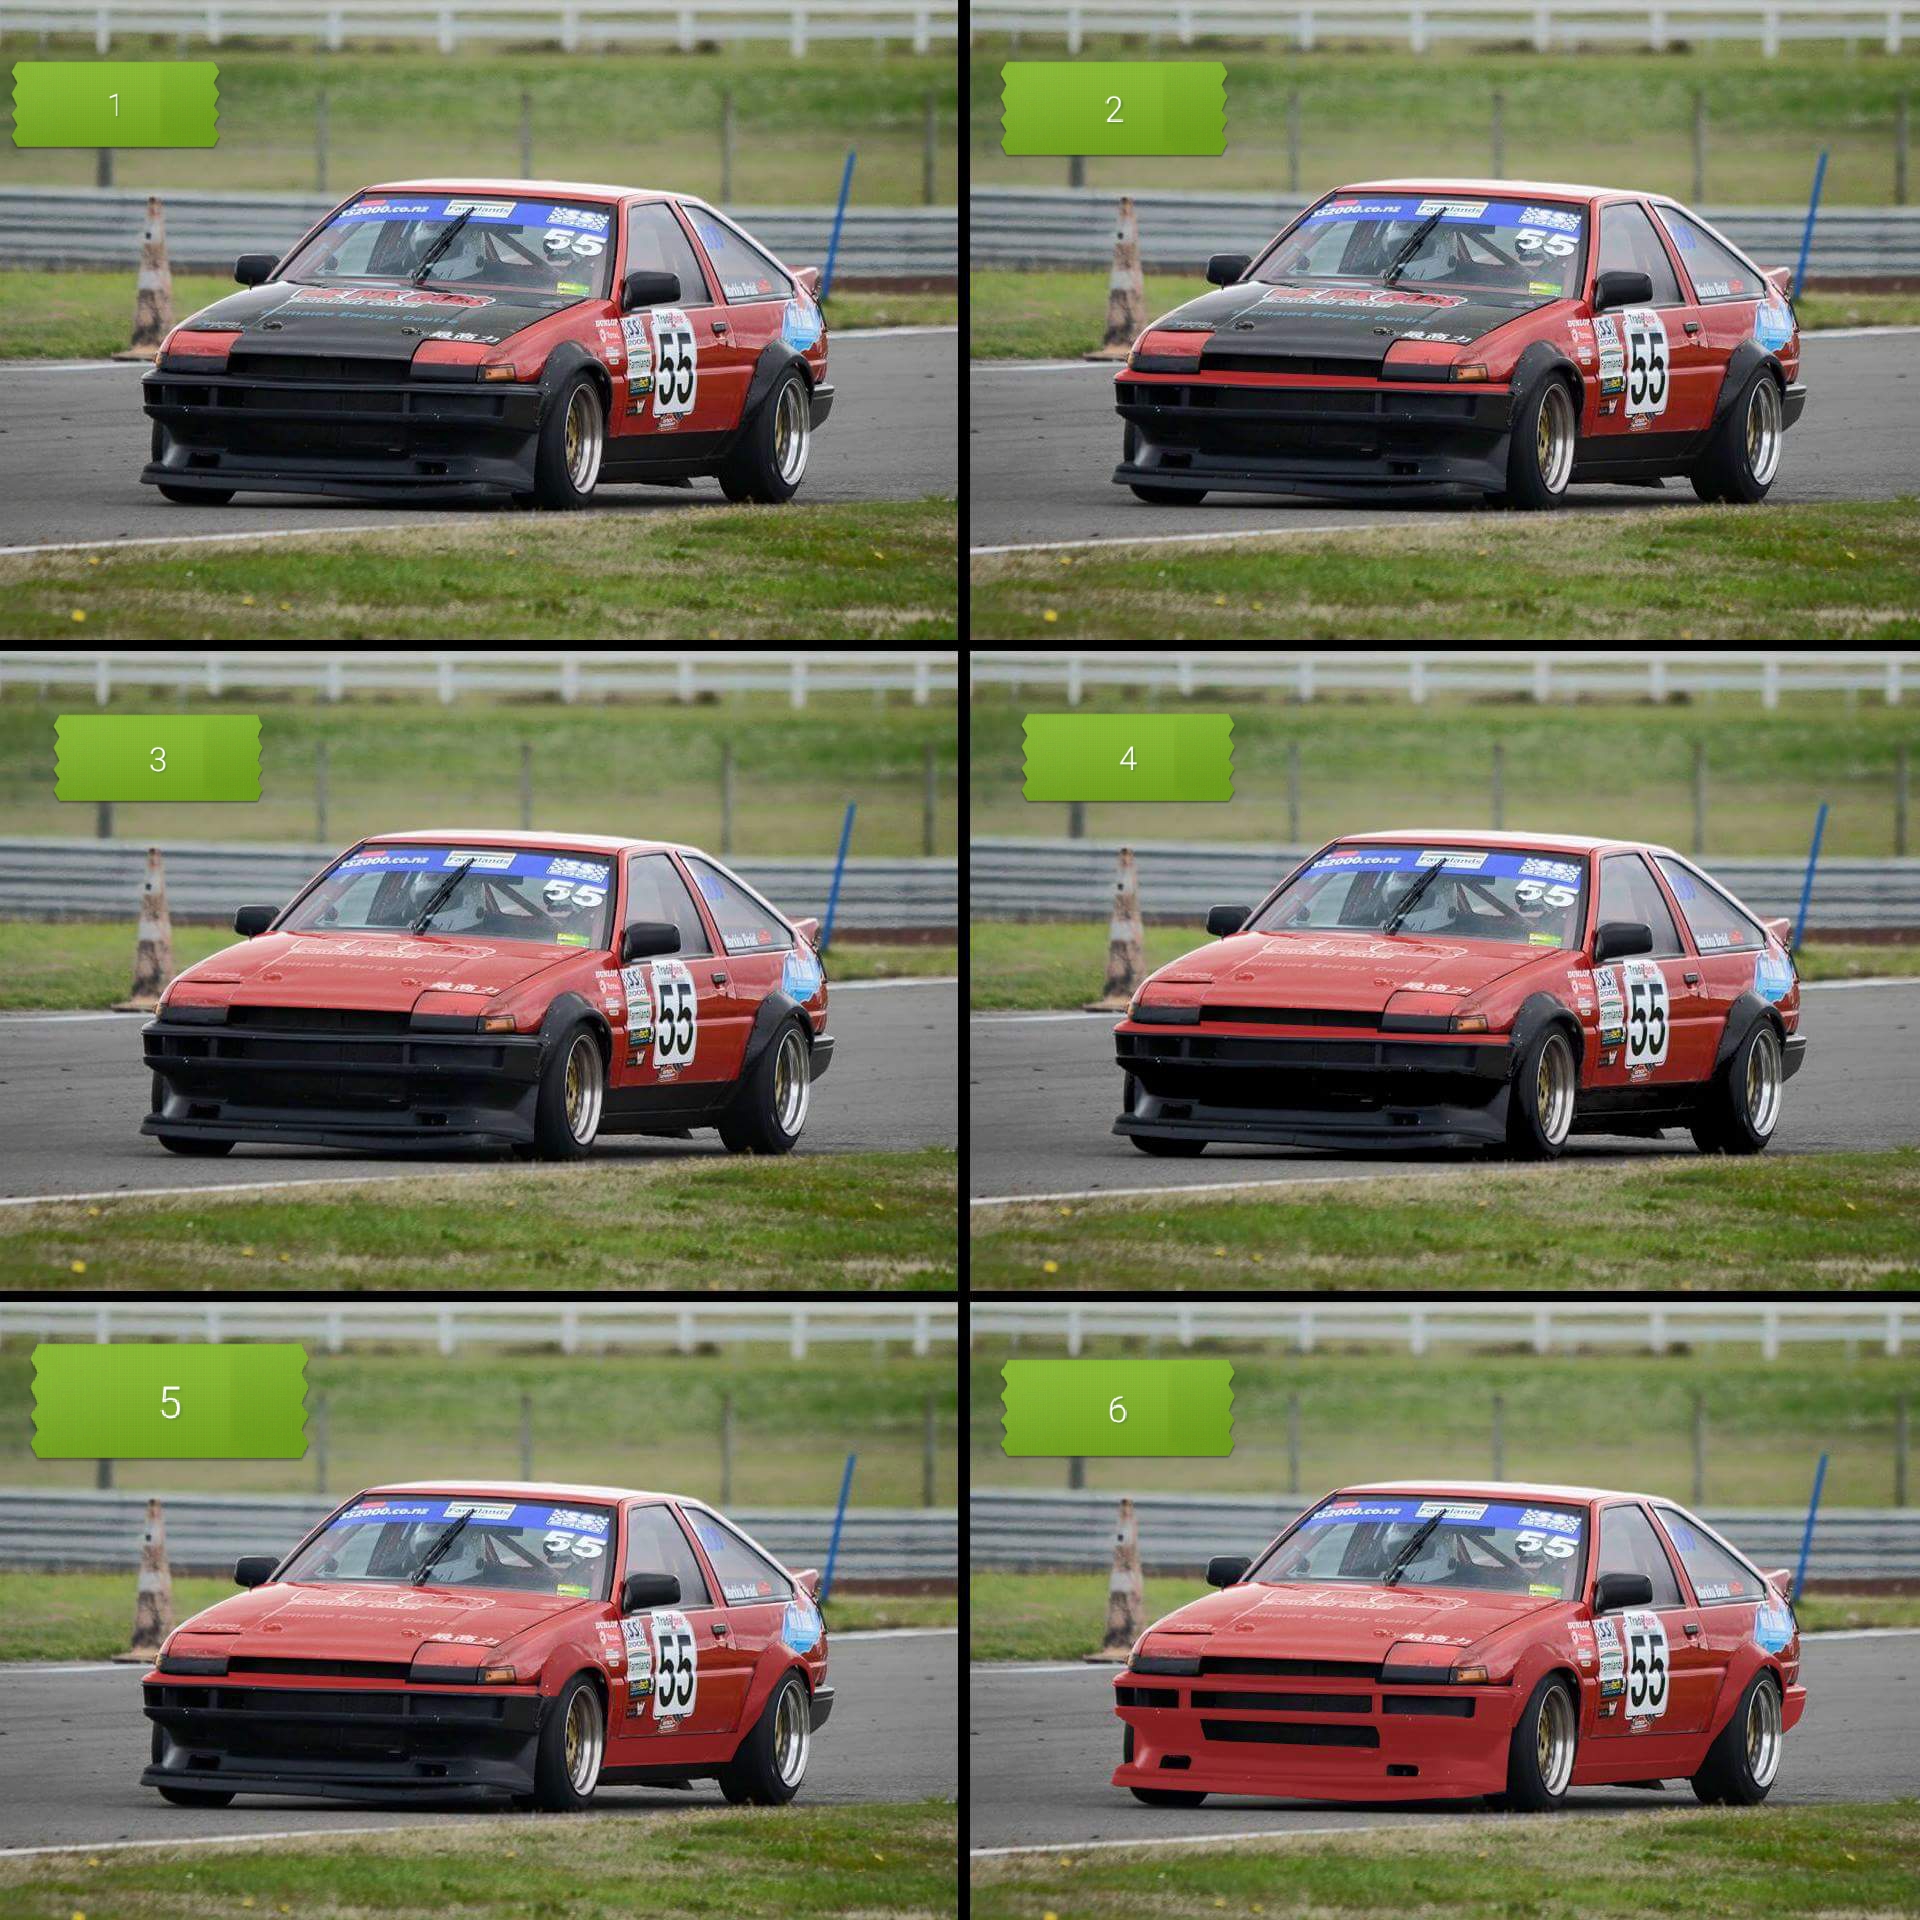
The idea of going all red is growing on me for this reason:
-
Truenotch's BEAMS AE86 racecar discussion
Truenotch replied to Truenotch's topic in Project Discussion
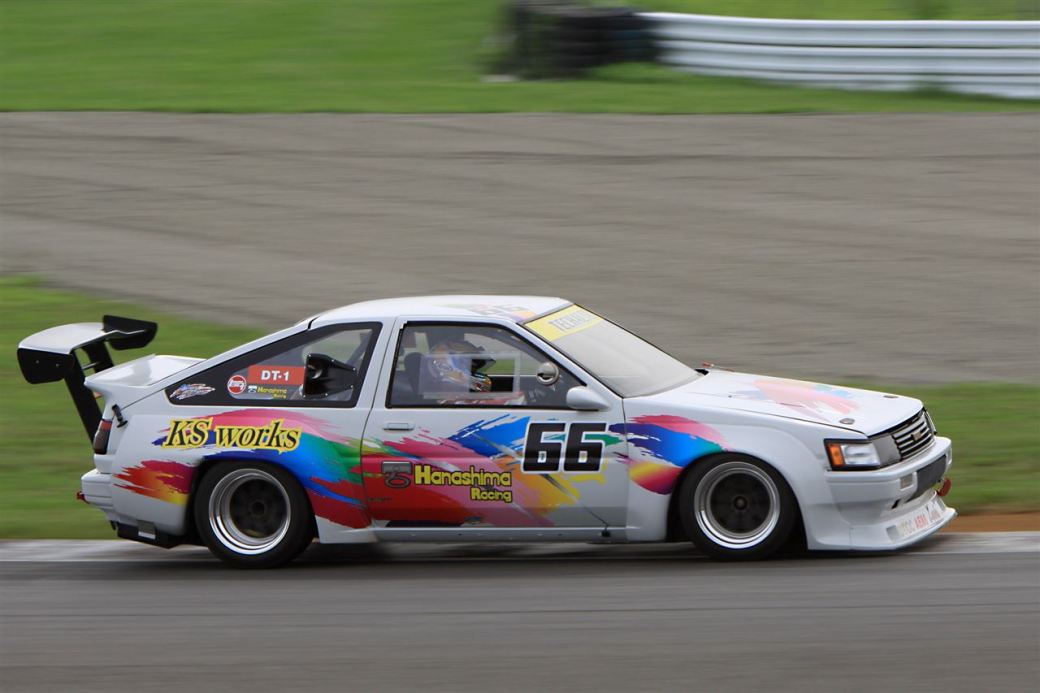
Rainbow AE86?
-
Truenotch's BEAMS AE86 racecar discussion
Truenotch replied to Truenotch's topic in Project Discussion
I could do the reverse of this quite easily... Hmm. KY - a proper colour scheme might happen but I really struggle with the idea of changing it too much. Even painting the flares and/or bumper red is a challenging concept (AE86 bumpers should be black, you know?). -
I'm thinking about making a change to the paint scheme. Which one do you like the most? Post your opinion here:
-
Almost finished the aluminium work now.
-
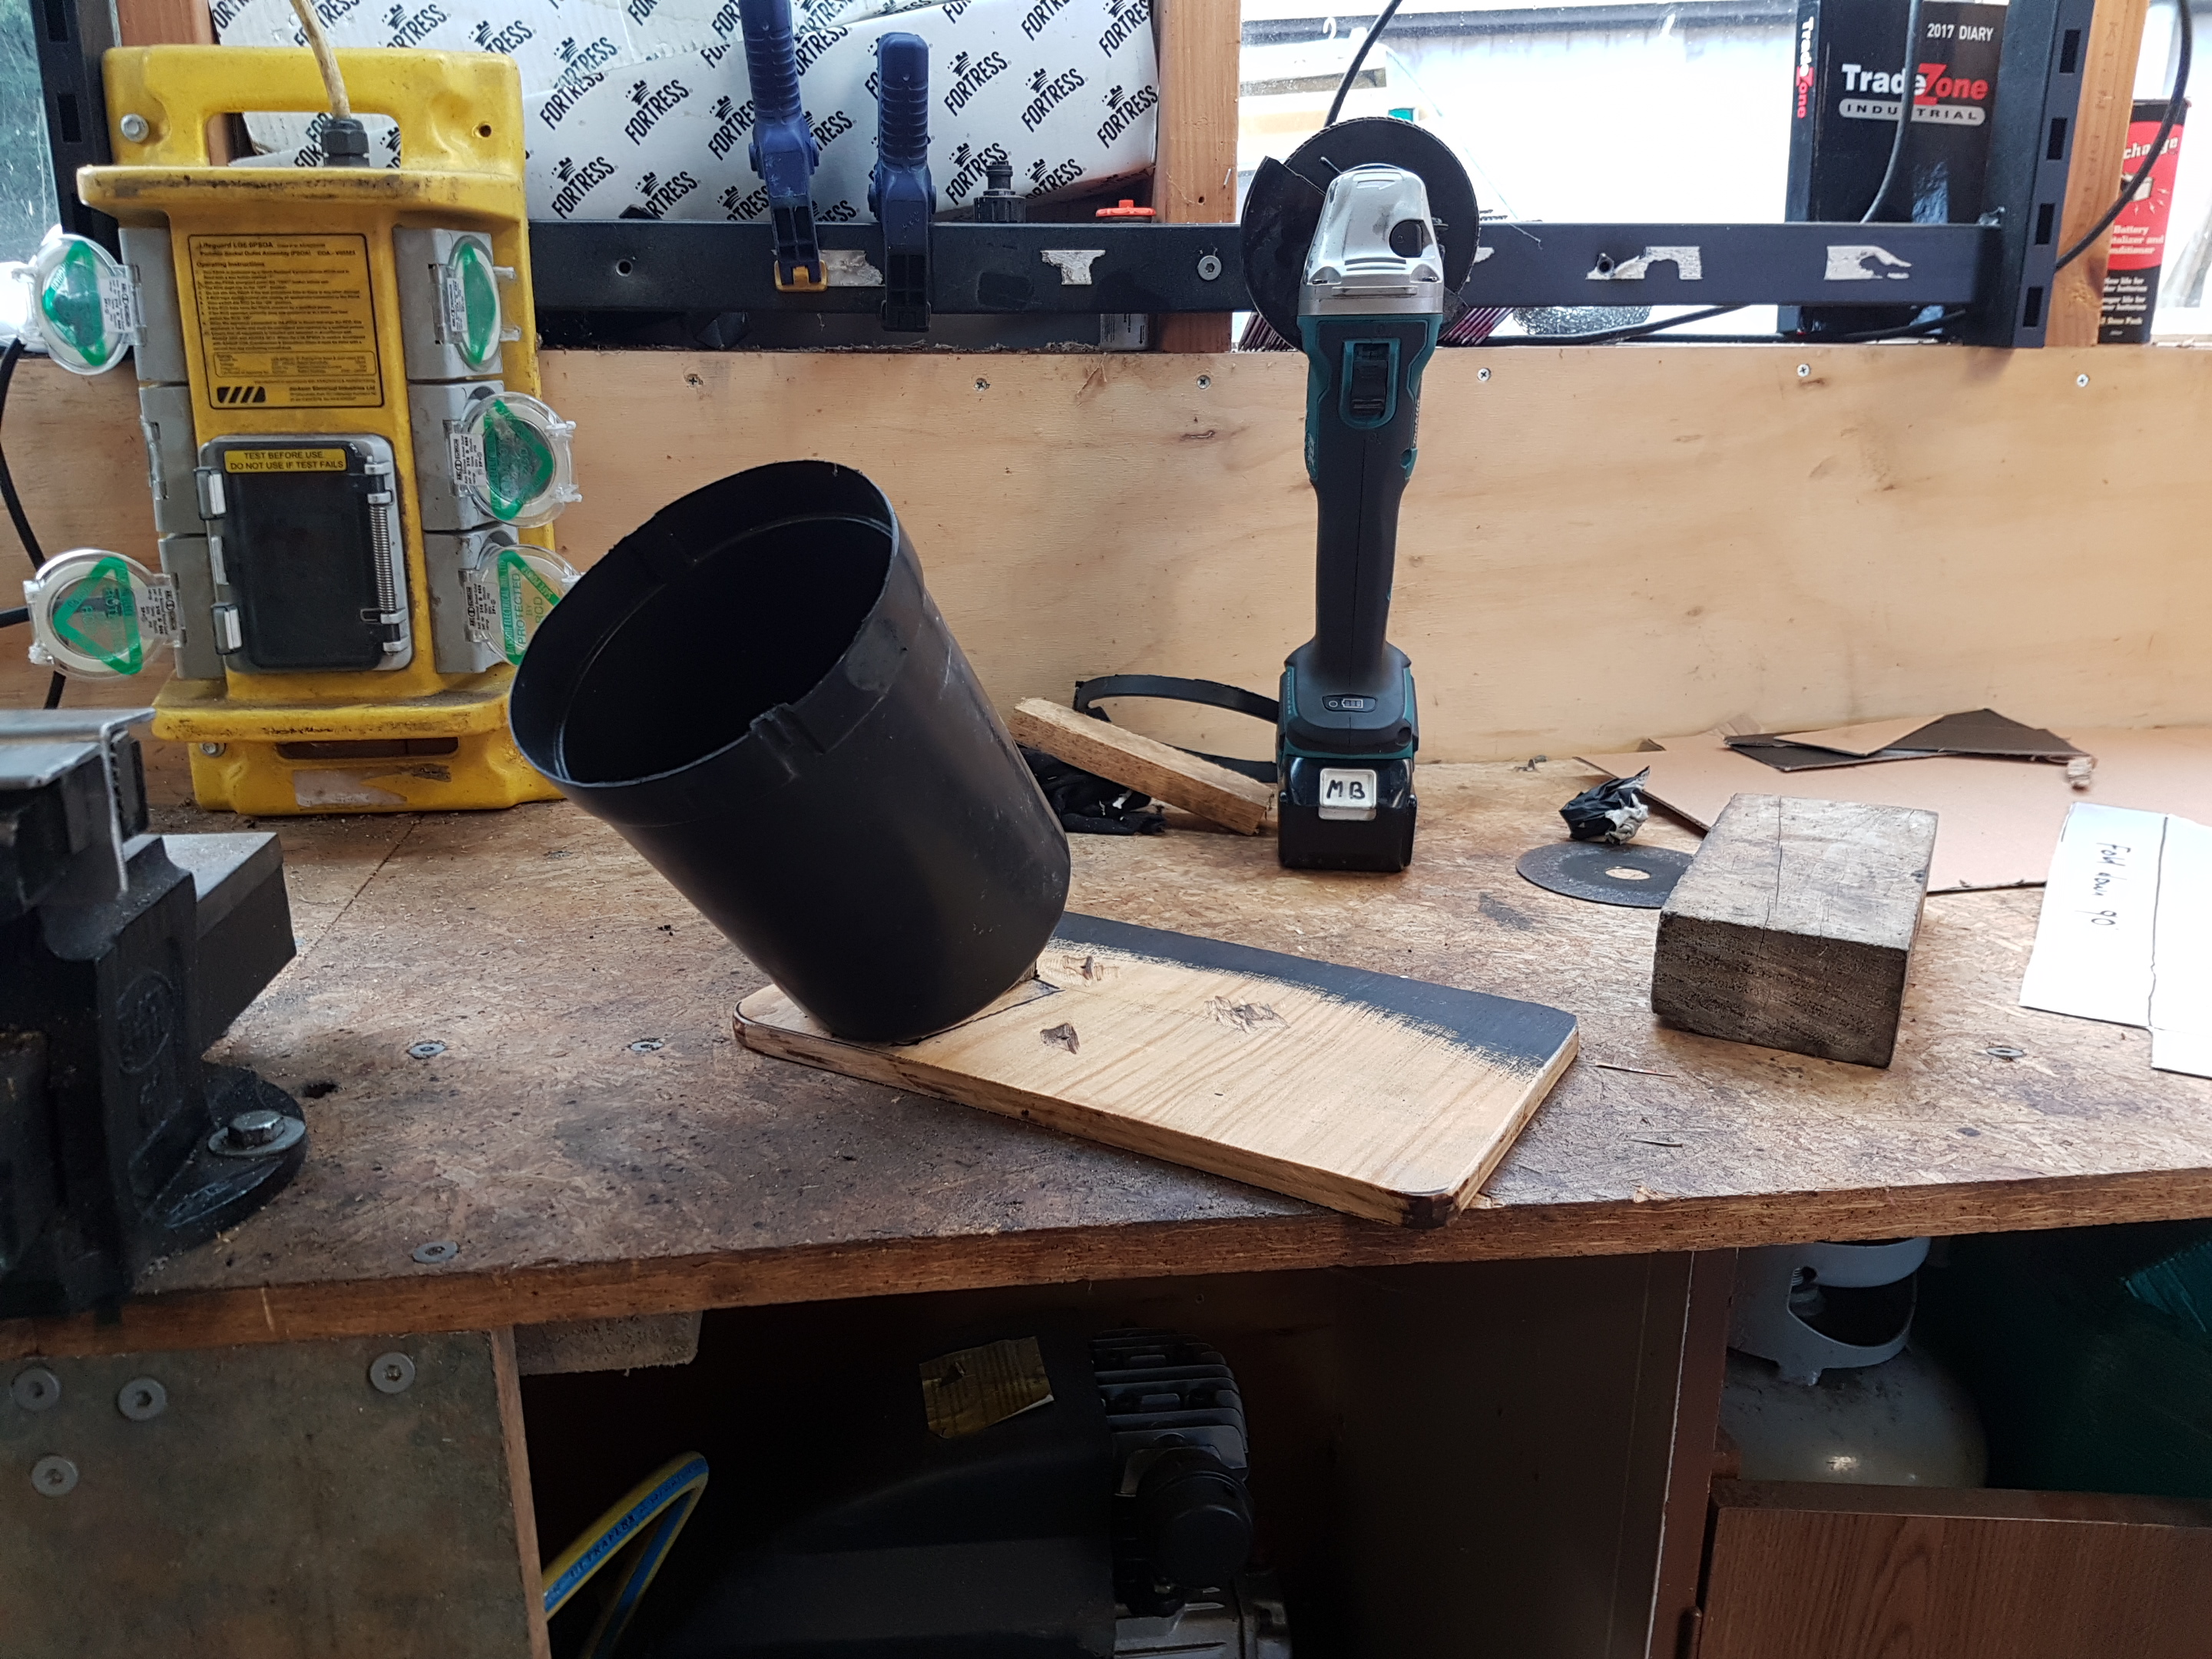
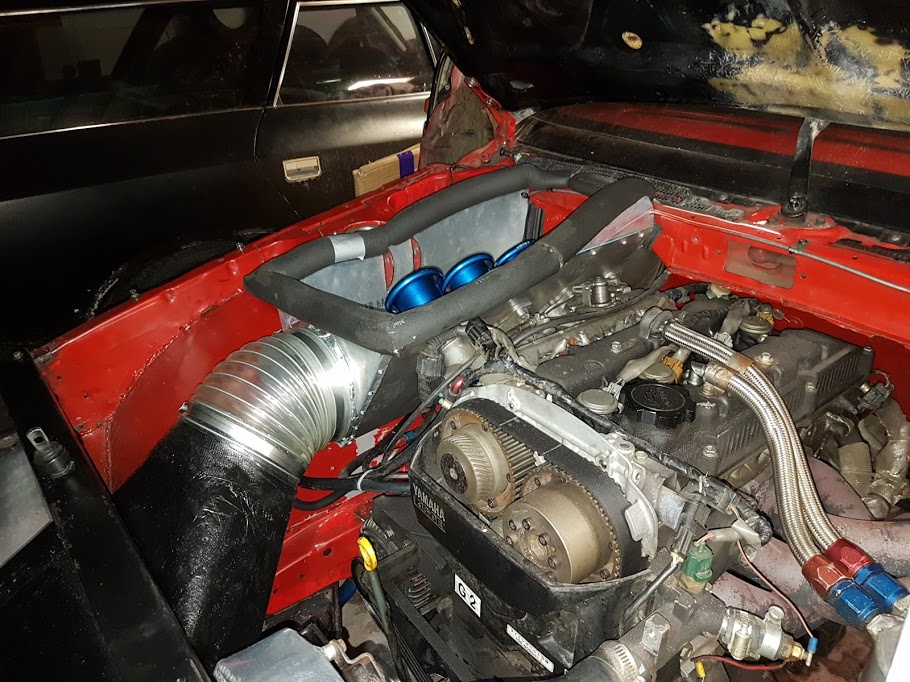
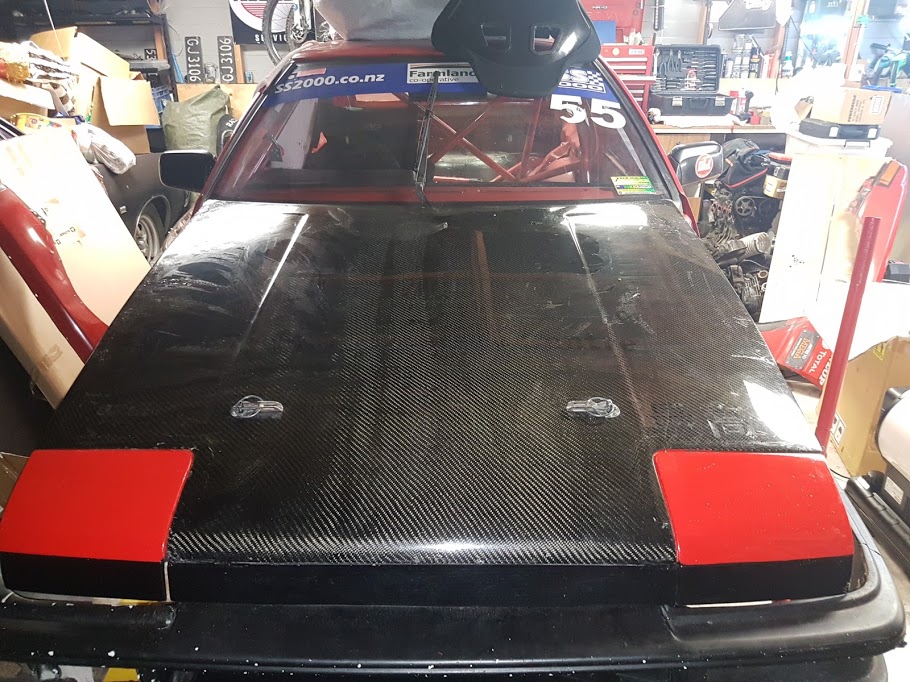
More jobs done. This random looking combo will turn into a duct to feed the air box. It will get cheese cloth draped over it to make a shape like this, then will be coated with resin and chop strand to create the part. Then it'll fit here with a short length of 6" hose and a flange on the air box inlet. Did a bit more folding too. The radiator and inlet ducting it almost finished. Still needs the endplate done for the filter end. Gave it a test fit with the guards on. Still need to trim the new part on the bonnet.
- 225 replies
-
- 11
-
-
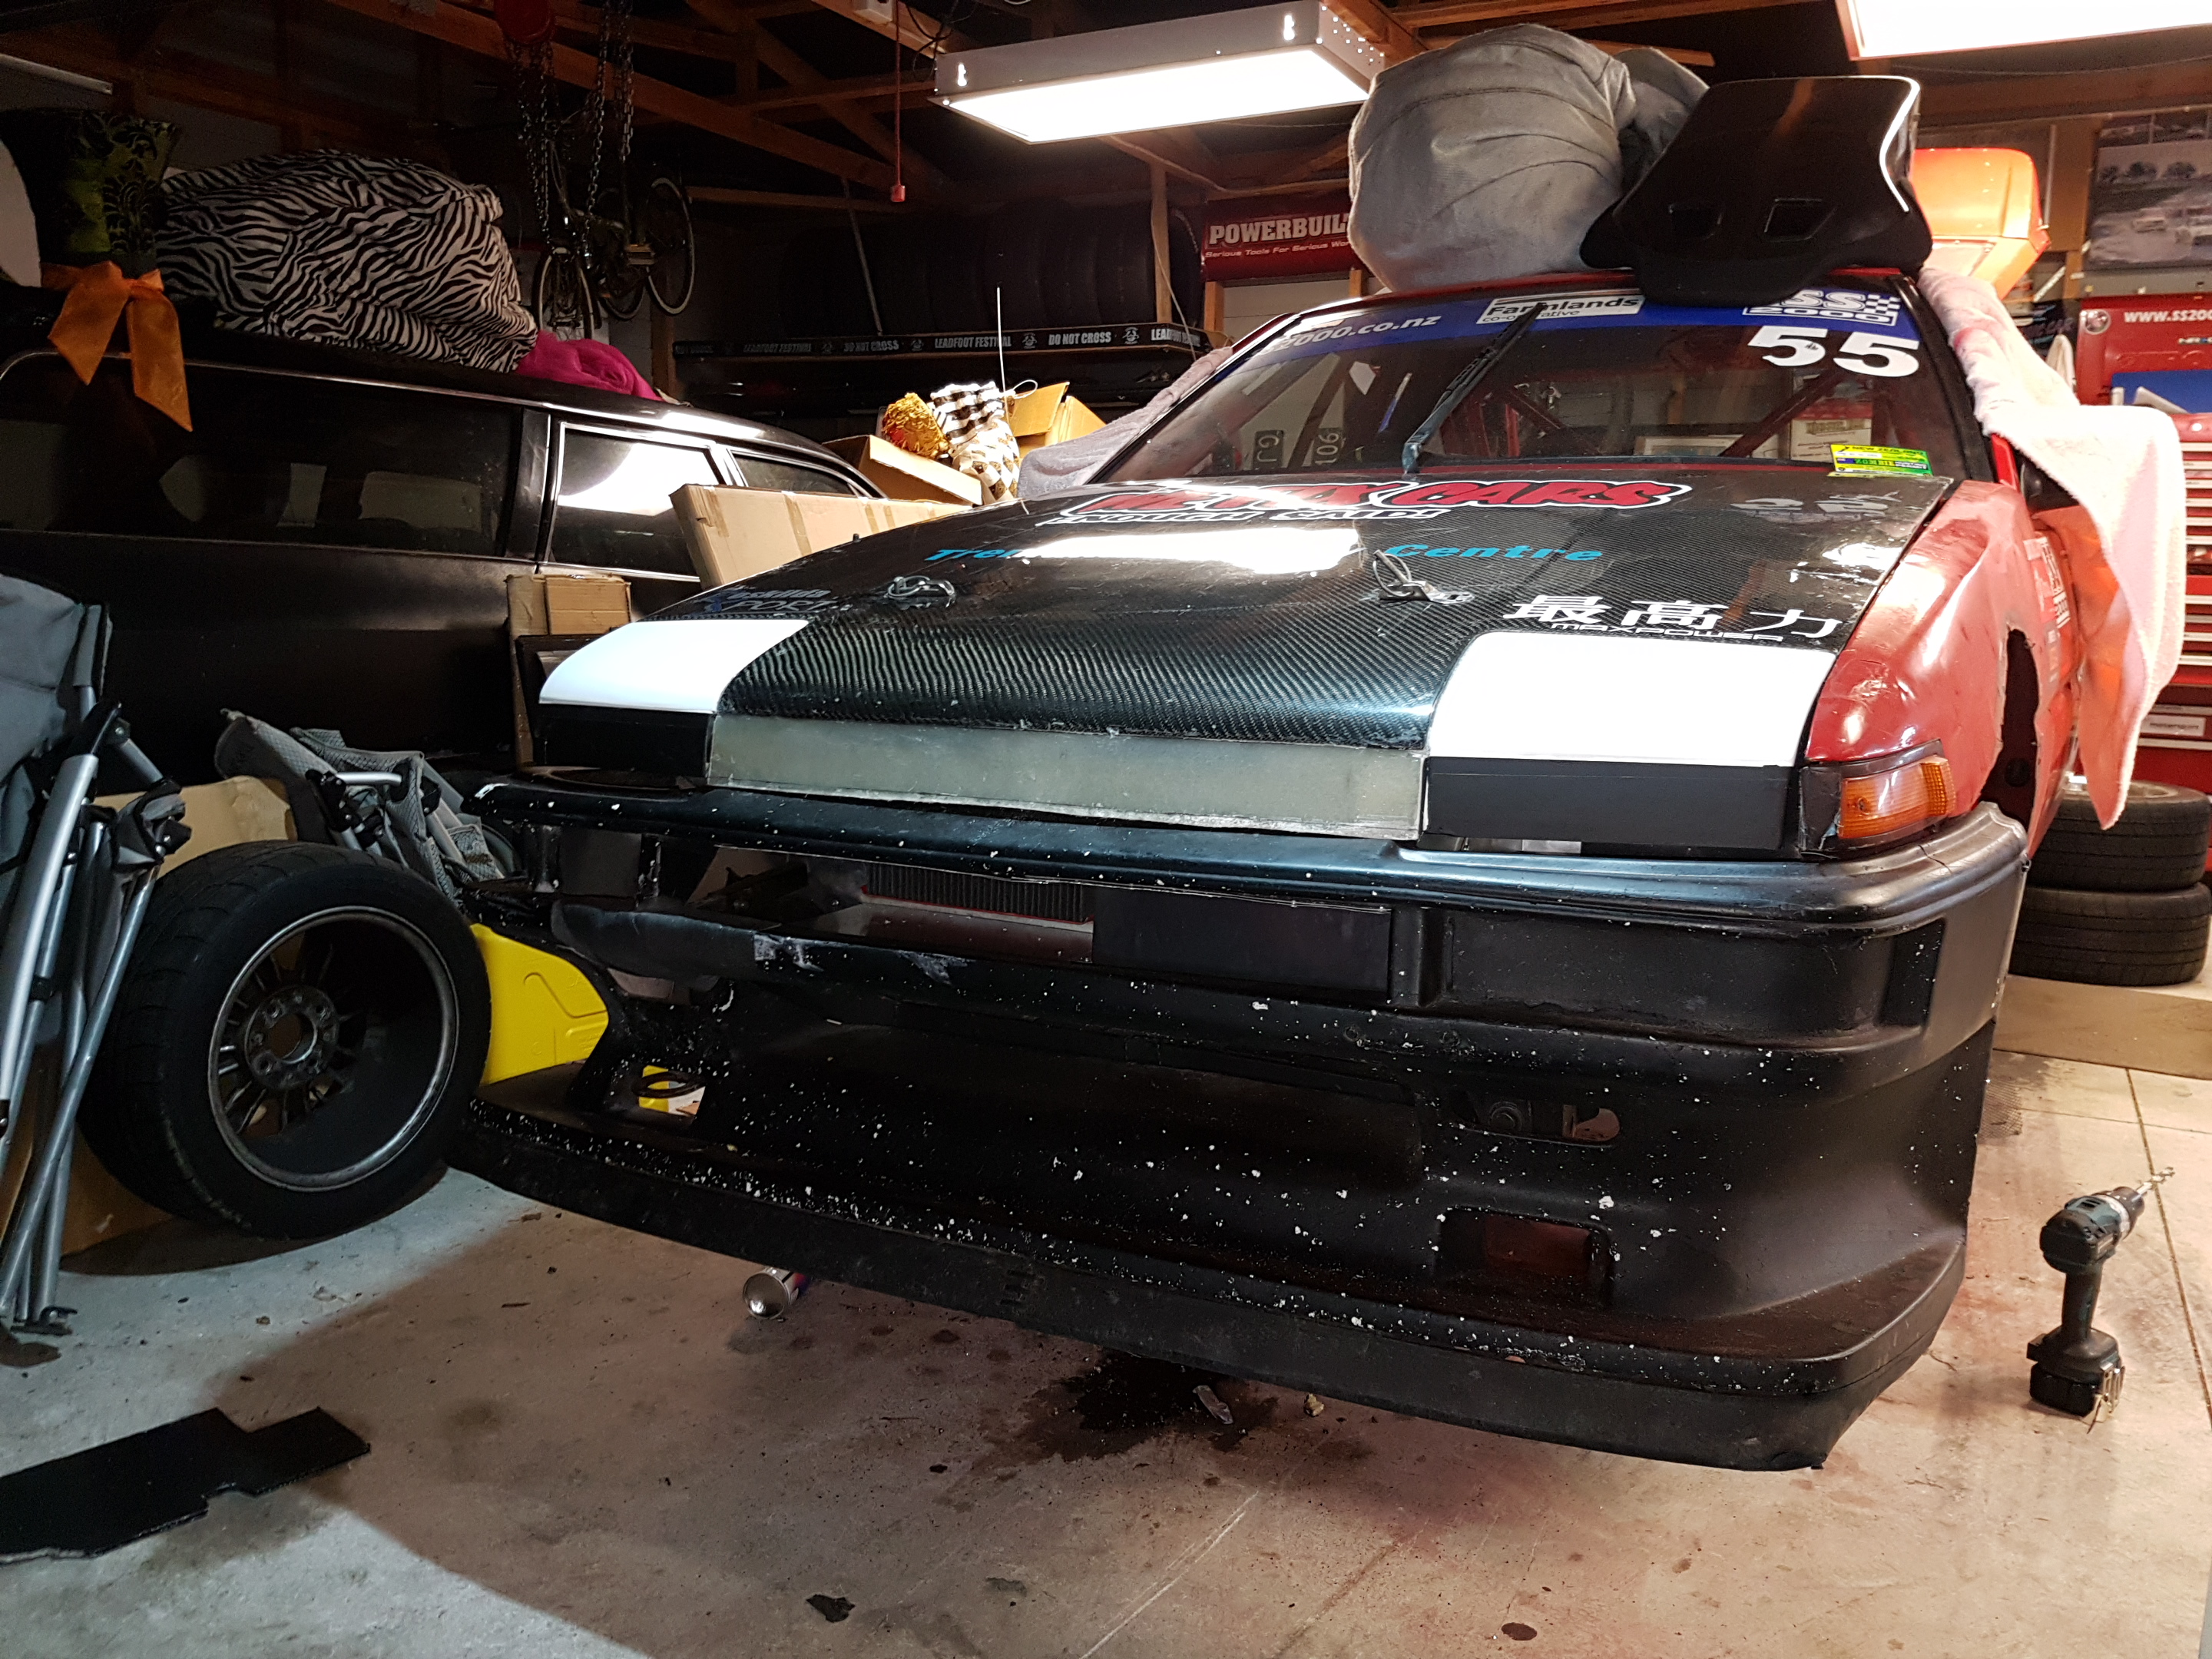
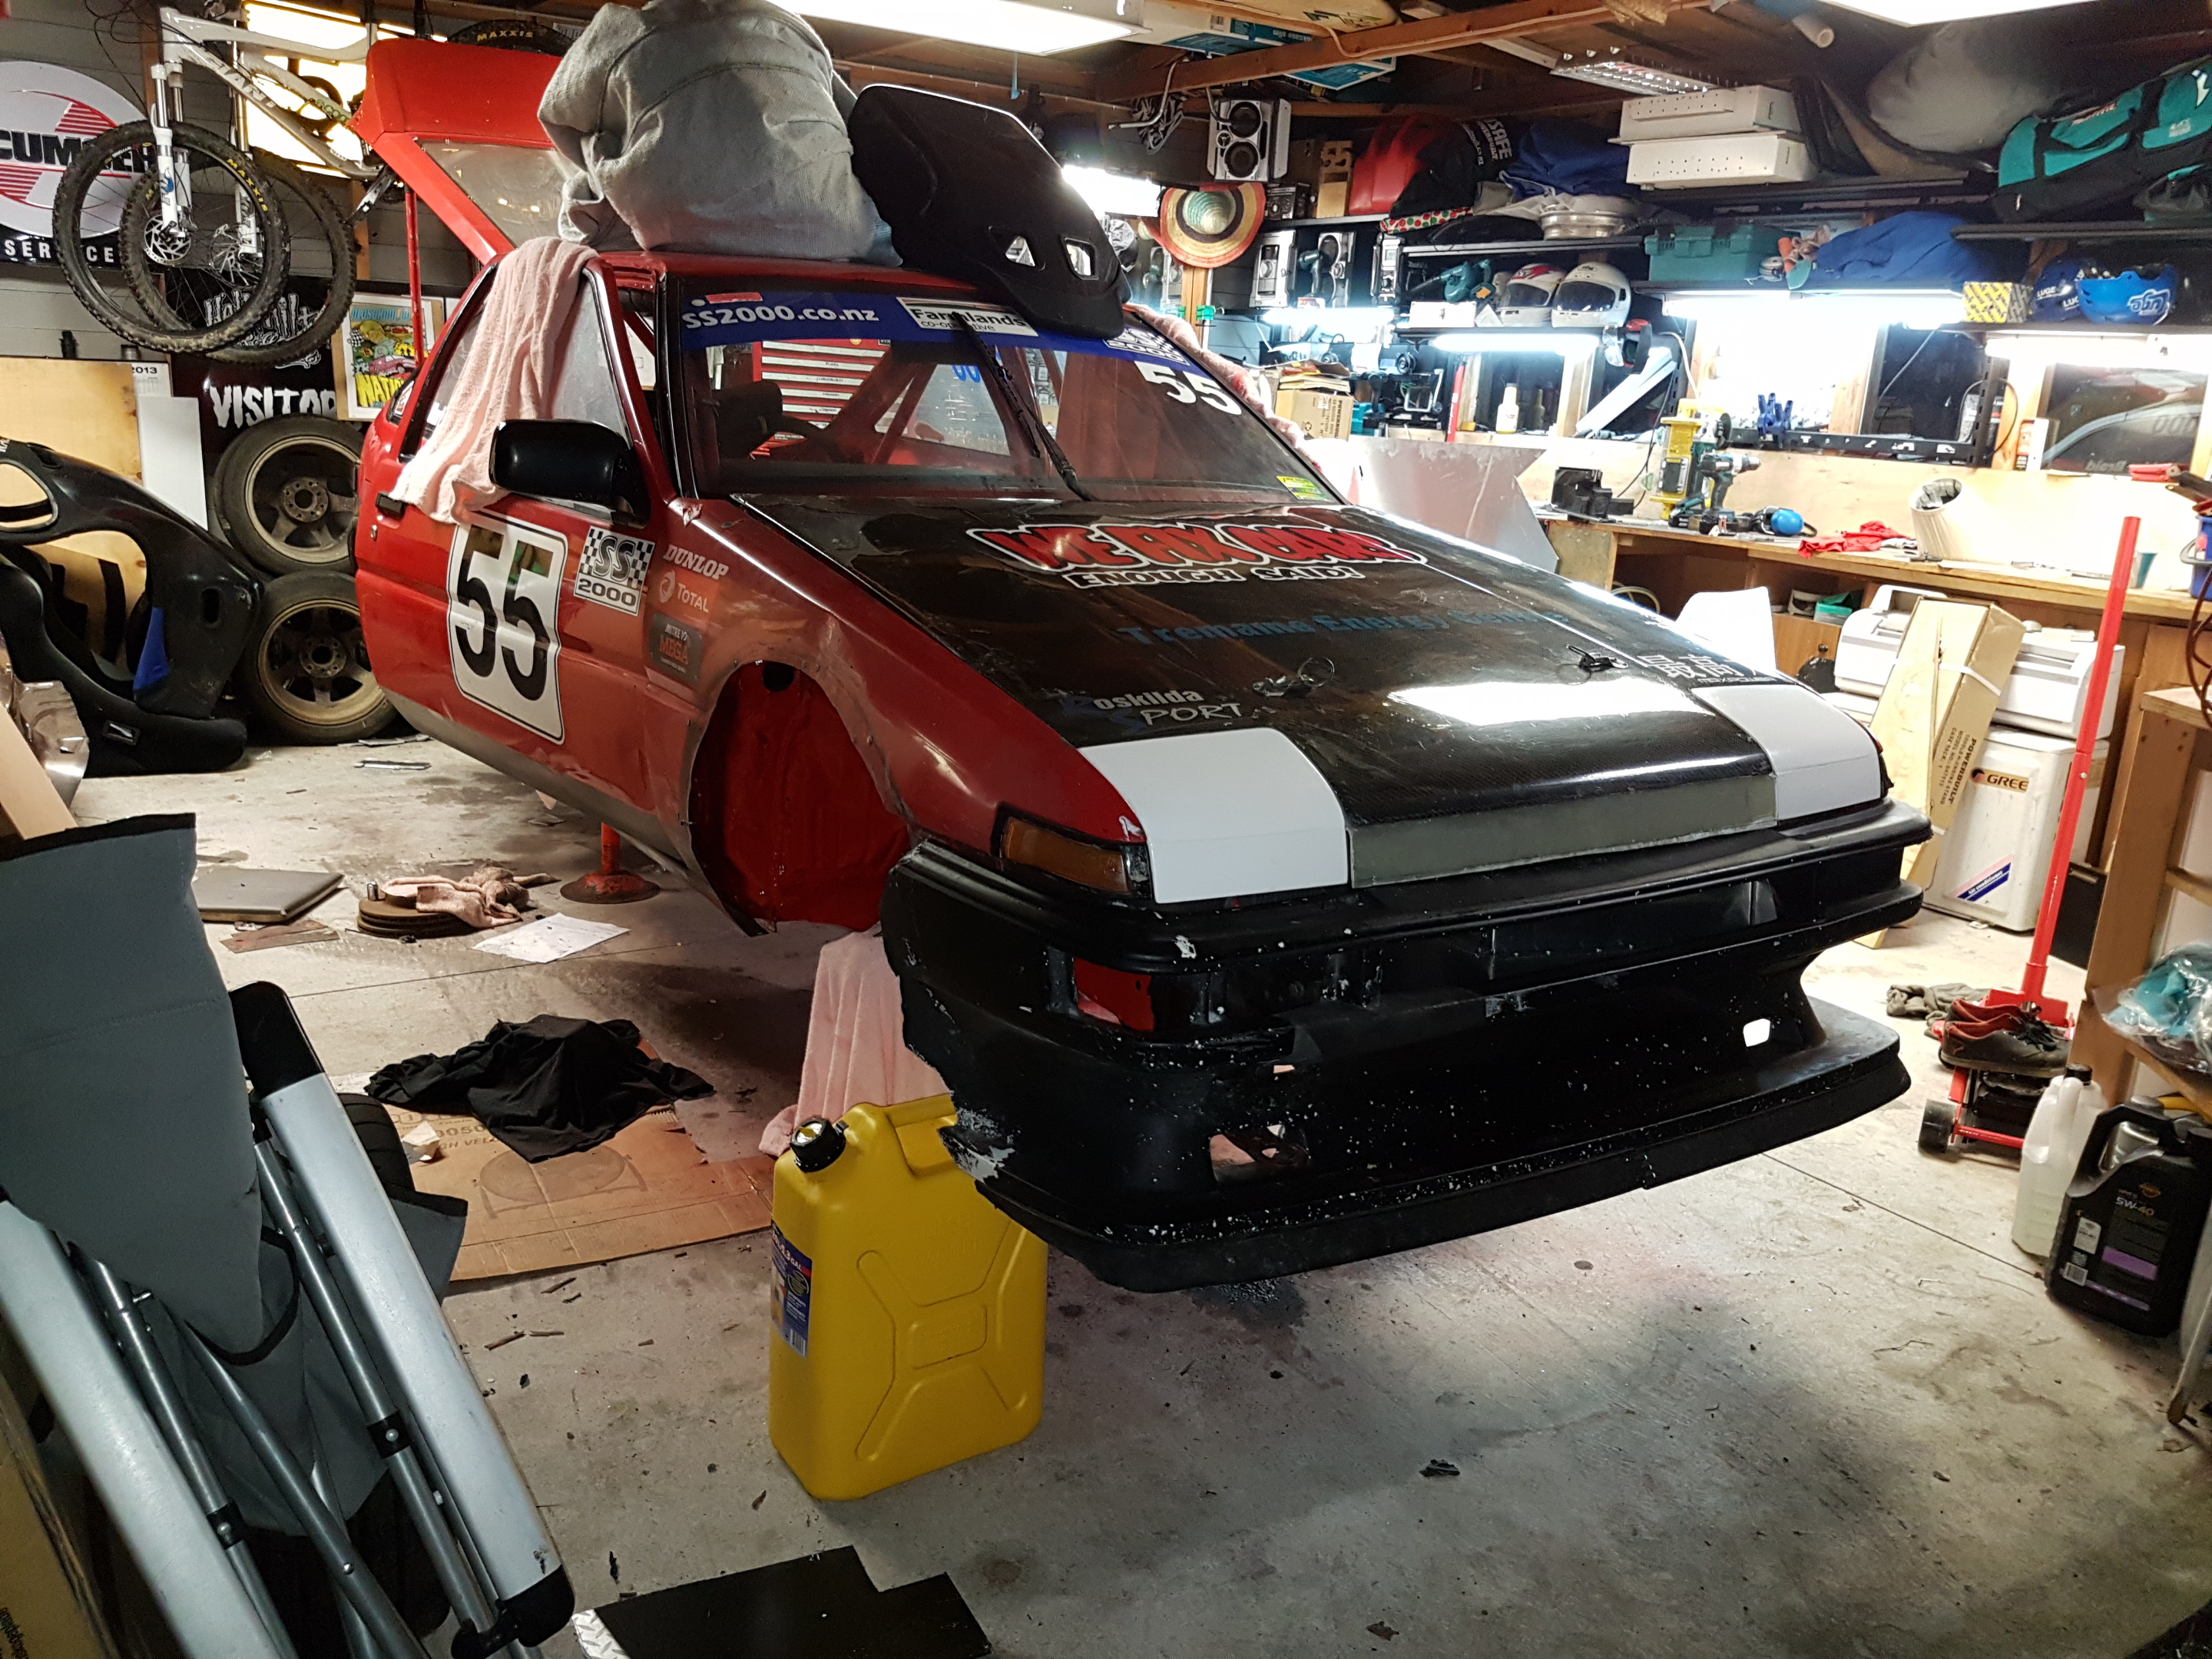
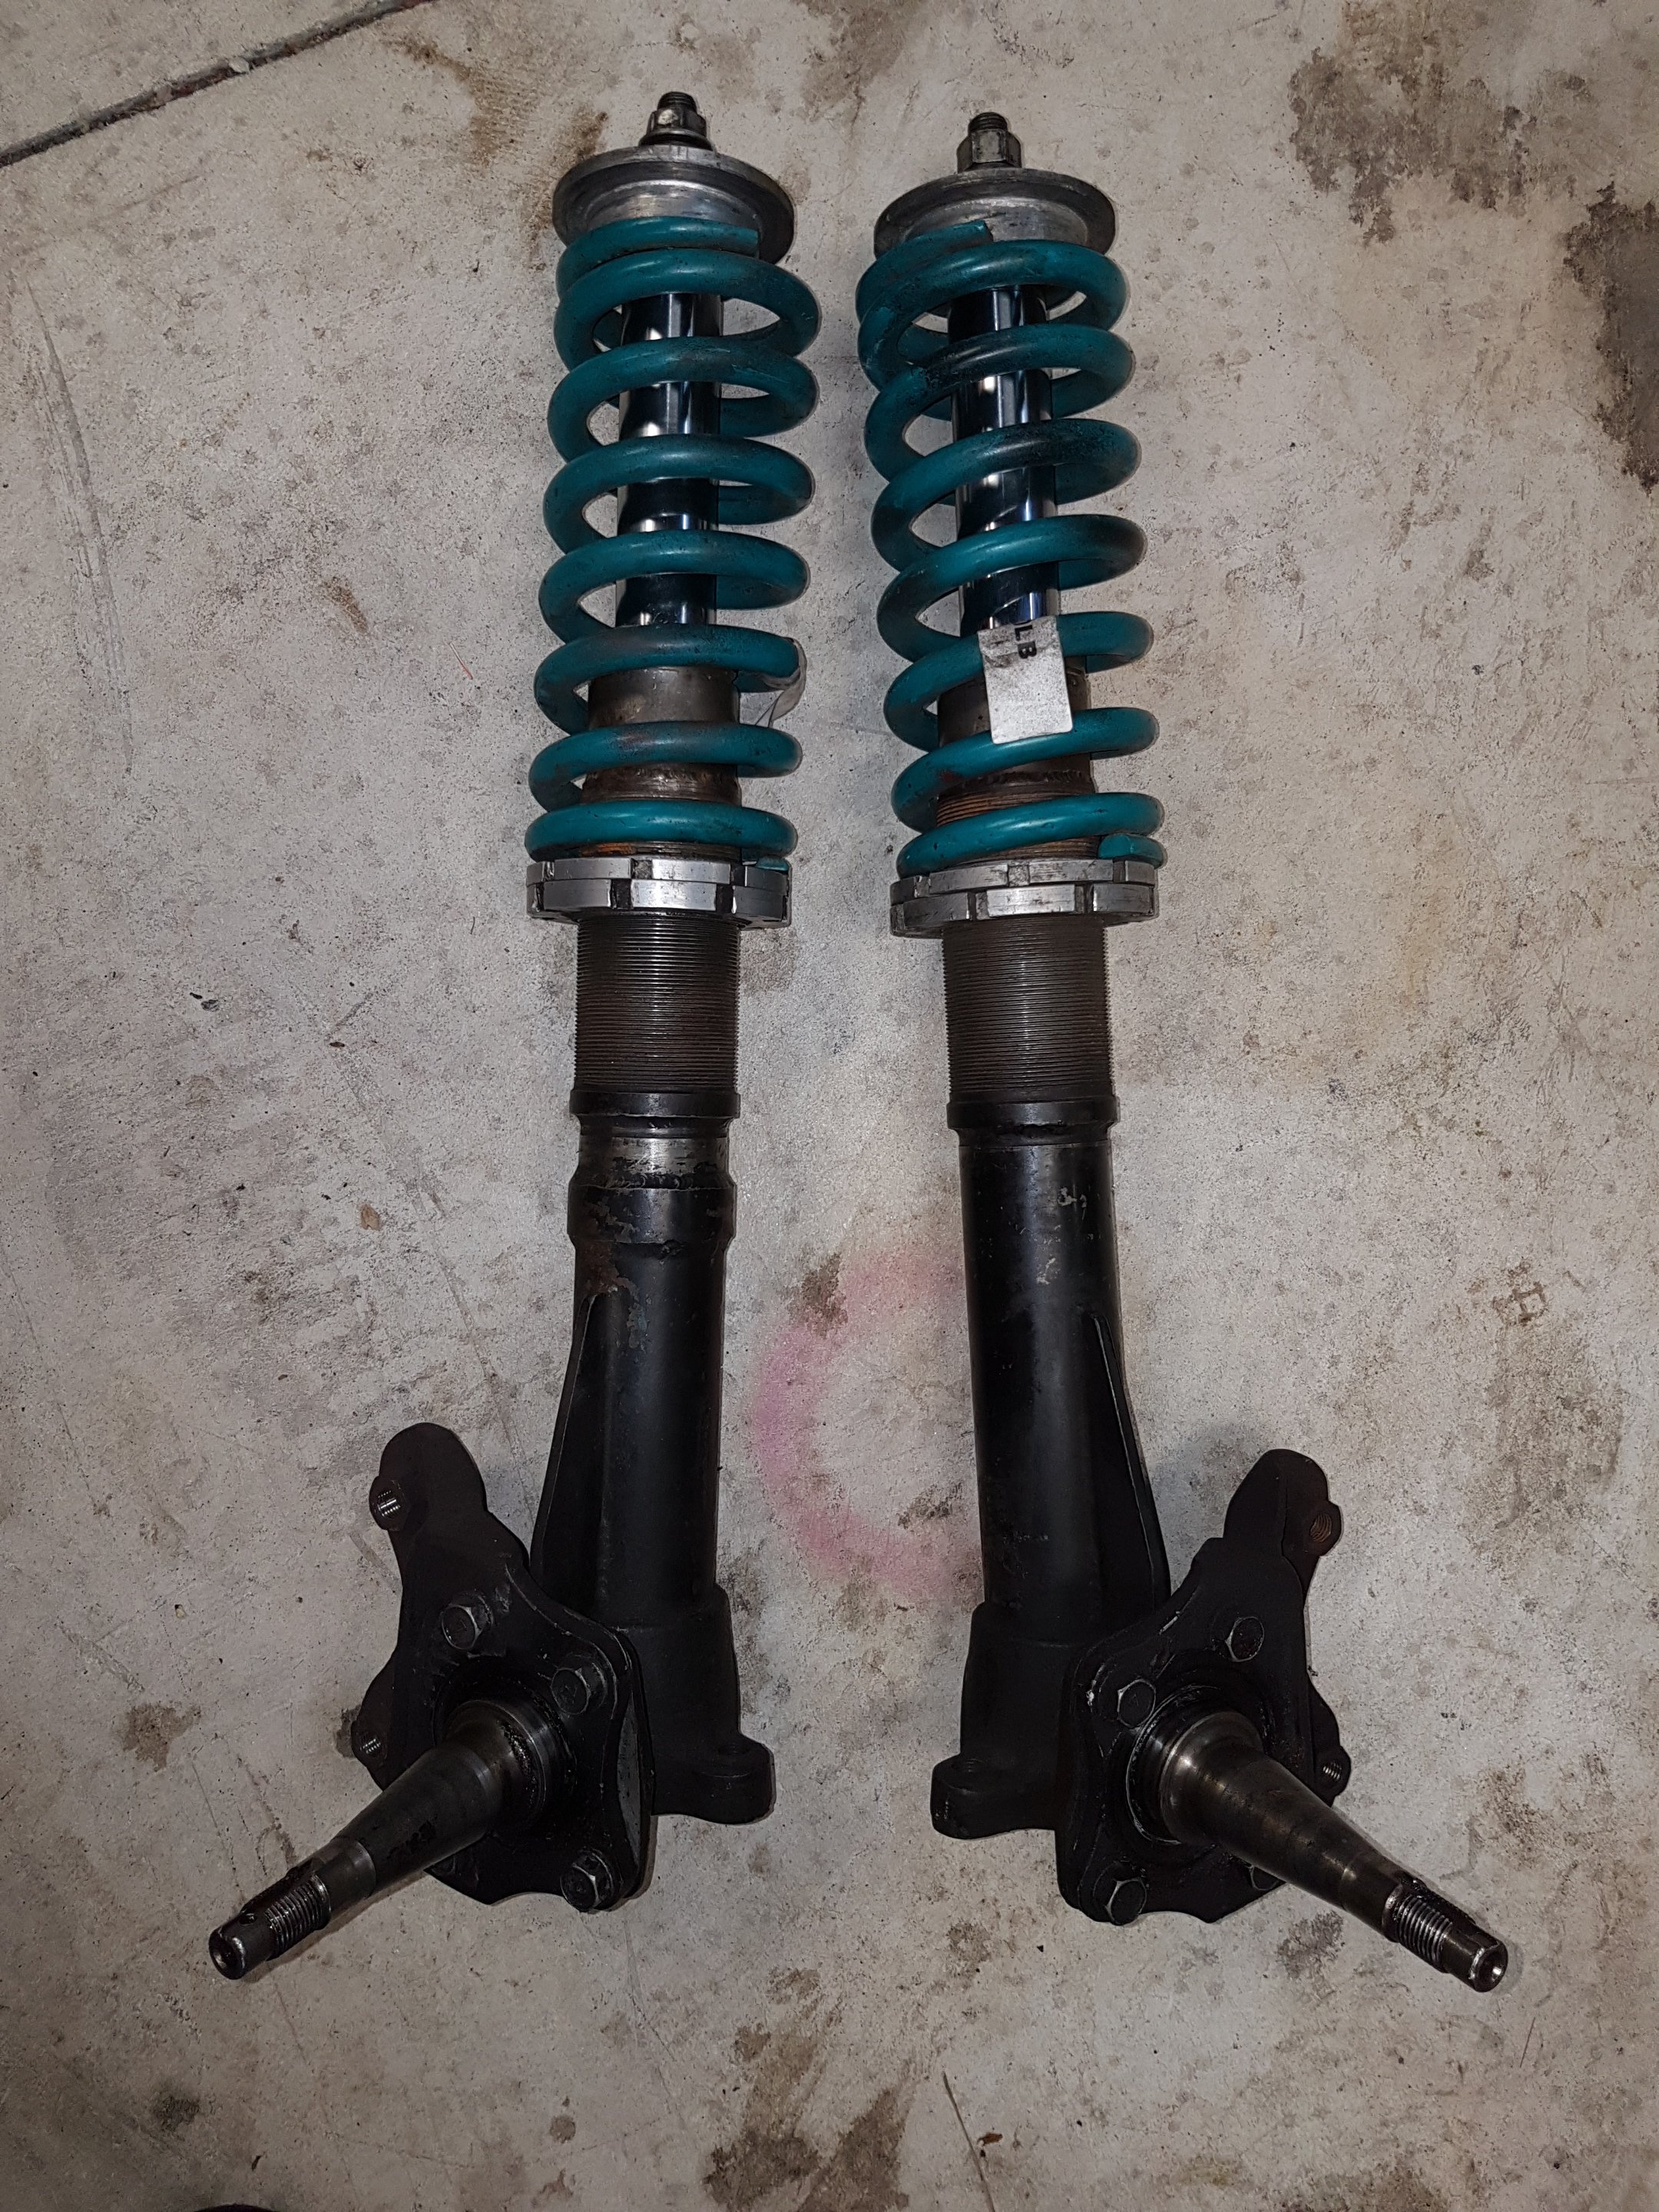
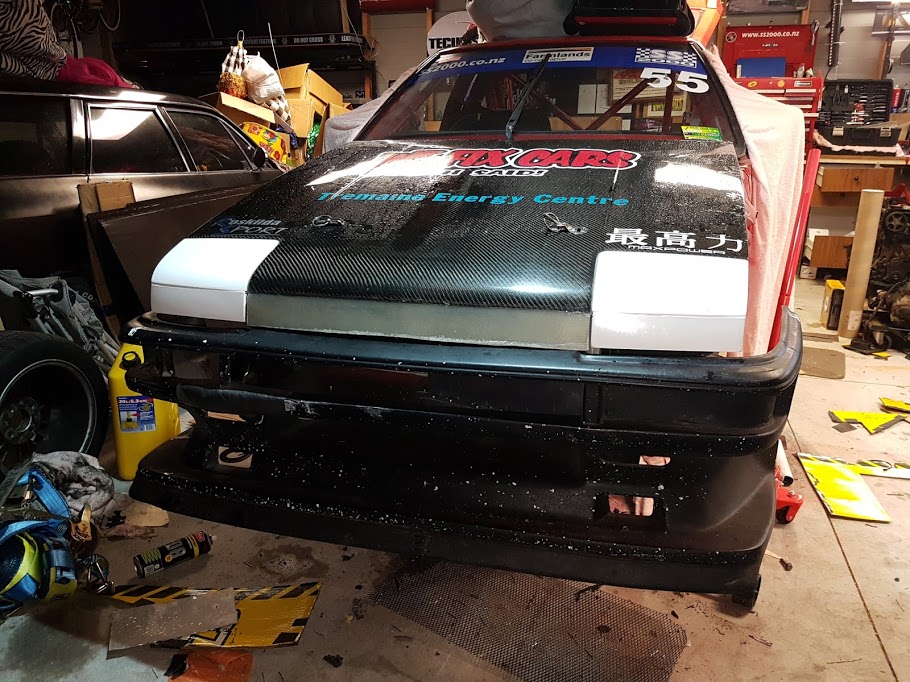
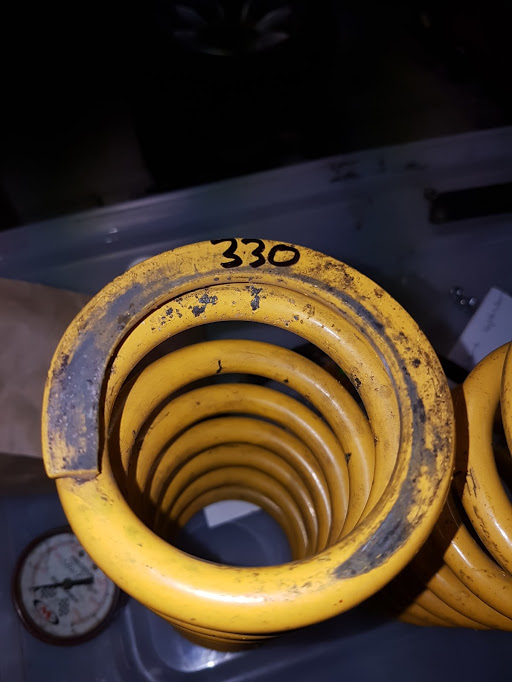
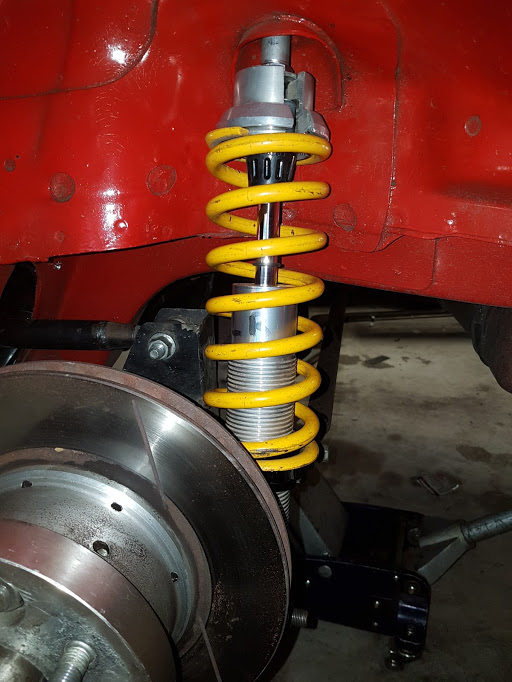
It's nice to keep making progress on this. I got the bonnet back today. Jason left a bunch of extra glass on the new part in the middle so I can trim it to suit my bumper. Jason is a clever dude and has lots of experience with fibreglass. He's keen to do more custom jobs on the side, so sing out if you need any fibreglass work done! Gave it a test fit and it needs about 8mm lopped off so it'll line up properly. It's hard to visualise without paint, but it should end up looking quite good and will be a shitload more aerodynamic. This is the car that gave me the idea: I also picked up my freshly rebuilt front shocks today and reinstalled them. The wheel arch area looks a lot better with fresh paint! Also got the rear springs back from getting the rate checked. They came back at 330lb - I always thought they were 280lb. So I reinstalled the rear shocks. The rear end is good to go now.
-
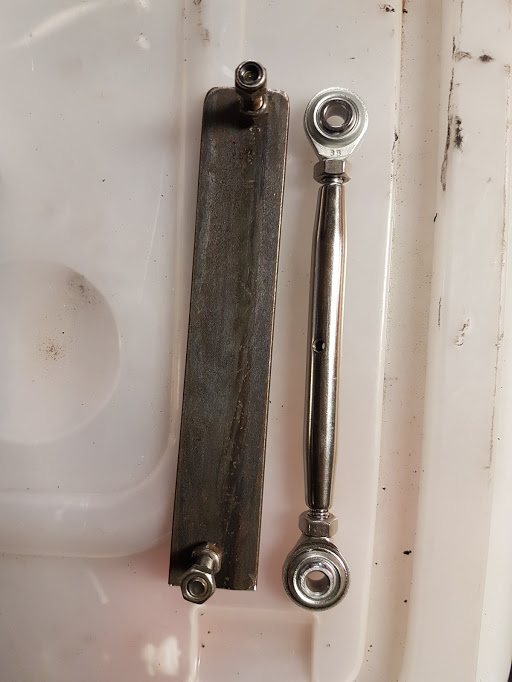
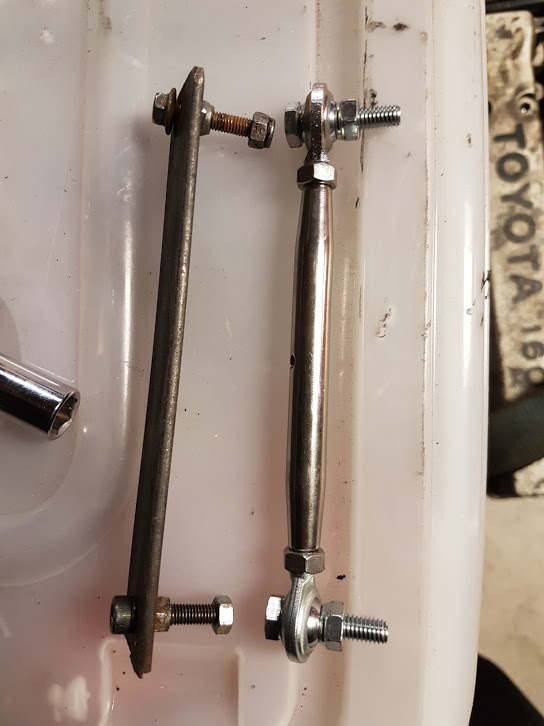
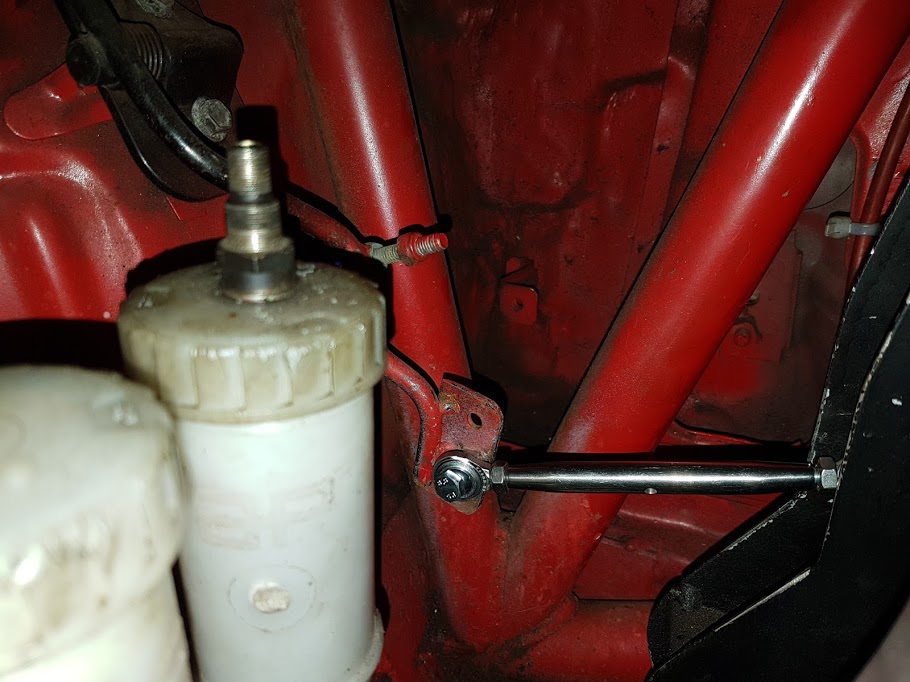
Another small job ticked off tonight. At the last race meeting I had a bit of a moment under brakes where my foot slipped off the brakes while trying to heal-toe into the far corner at Taupo (turn 11). This meant I didn't show down enough for the corner and sent me sailing off into the gravel trap. I went to stab the throttle to get it out of the gravel and couldn't find the pedal! Turns out the linkage between my pedal and the original throttle lever had broken, so the pedal was just flopping around in the breeze. I'm pretty sure the linkage breaking is what caused my foot to slip of the brake (that's the story I'm sticking to anyway...). Between races I had to figure out a quick solution - the item on the left is the result. It's made from a piece of 3mm plate that was a special service tool donated by the Coleman race team. The linkage on the right is the new one I made up today. It's a stainless turn buckle with left and right hand threads for easy adjustment. I found it at the fastener shop and bought a couple of Teflon lined rose joints to slot in there. And in place... Man footwells get dirty!
-
More from the fibreglass man. I don't need this opening anymore, so might as well block it off:
-
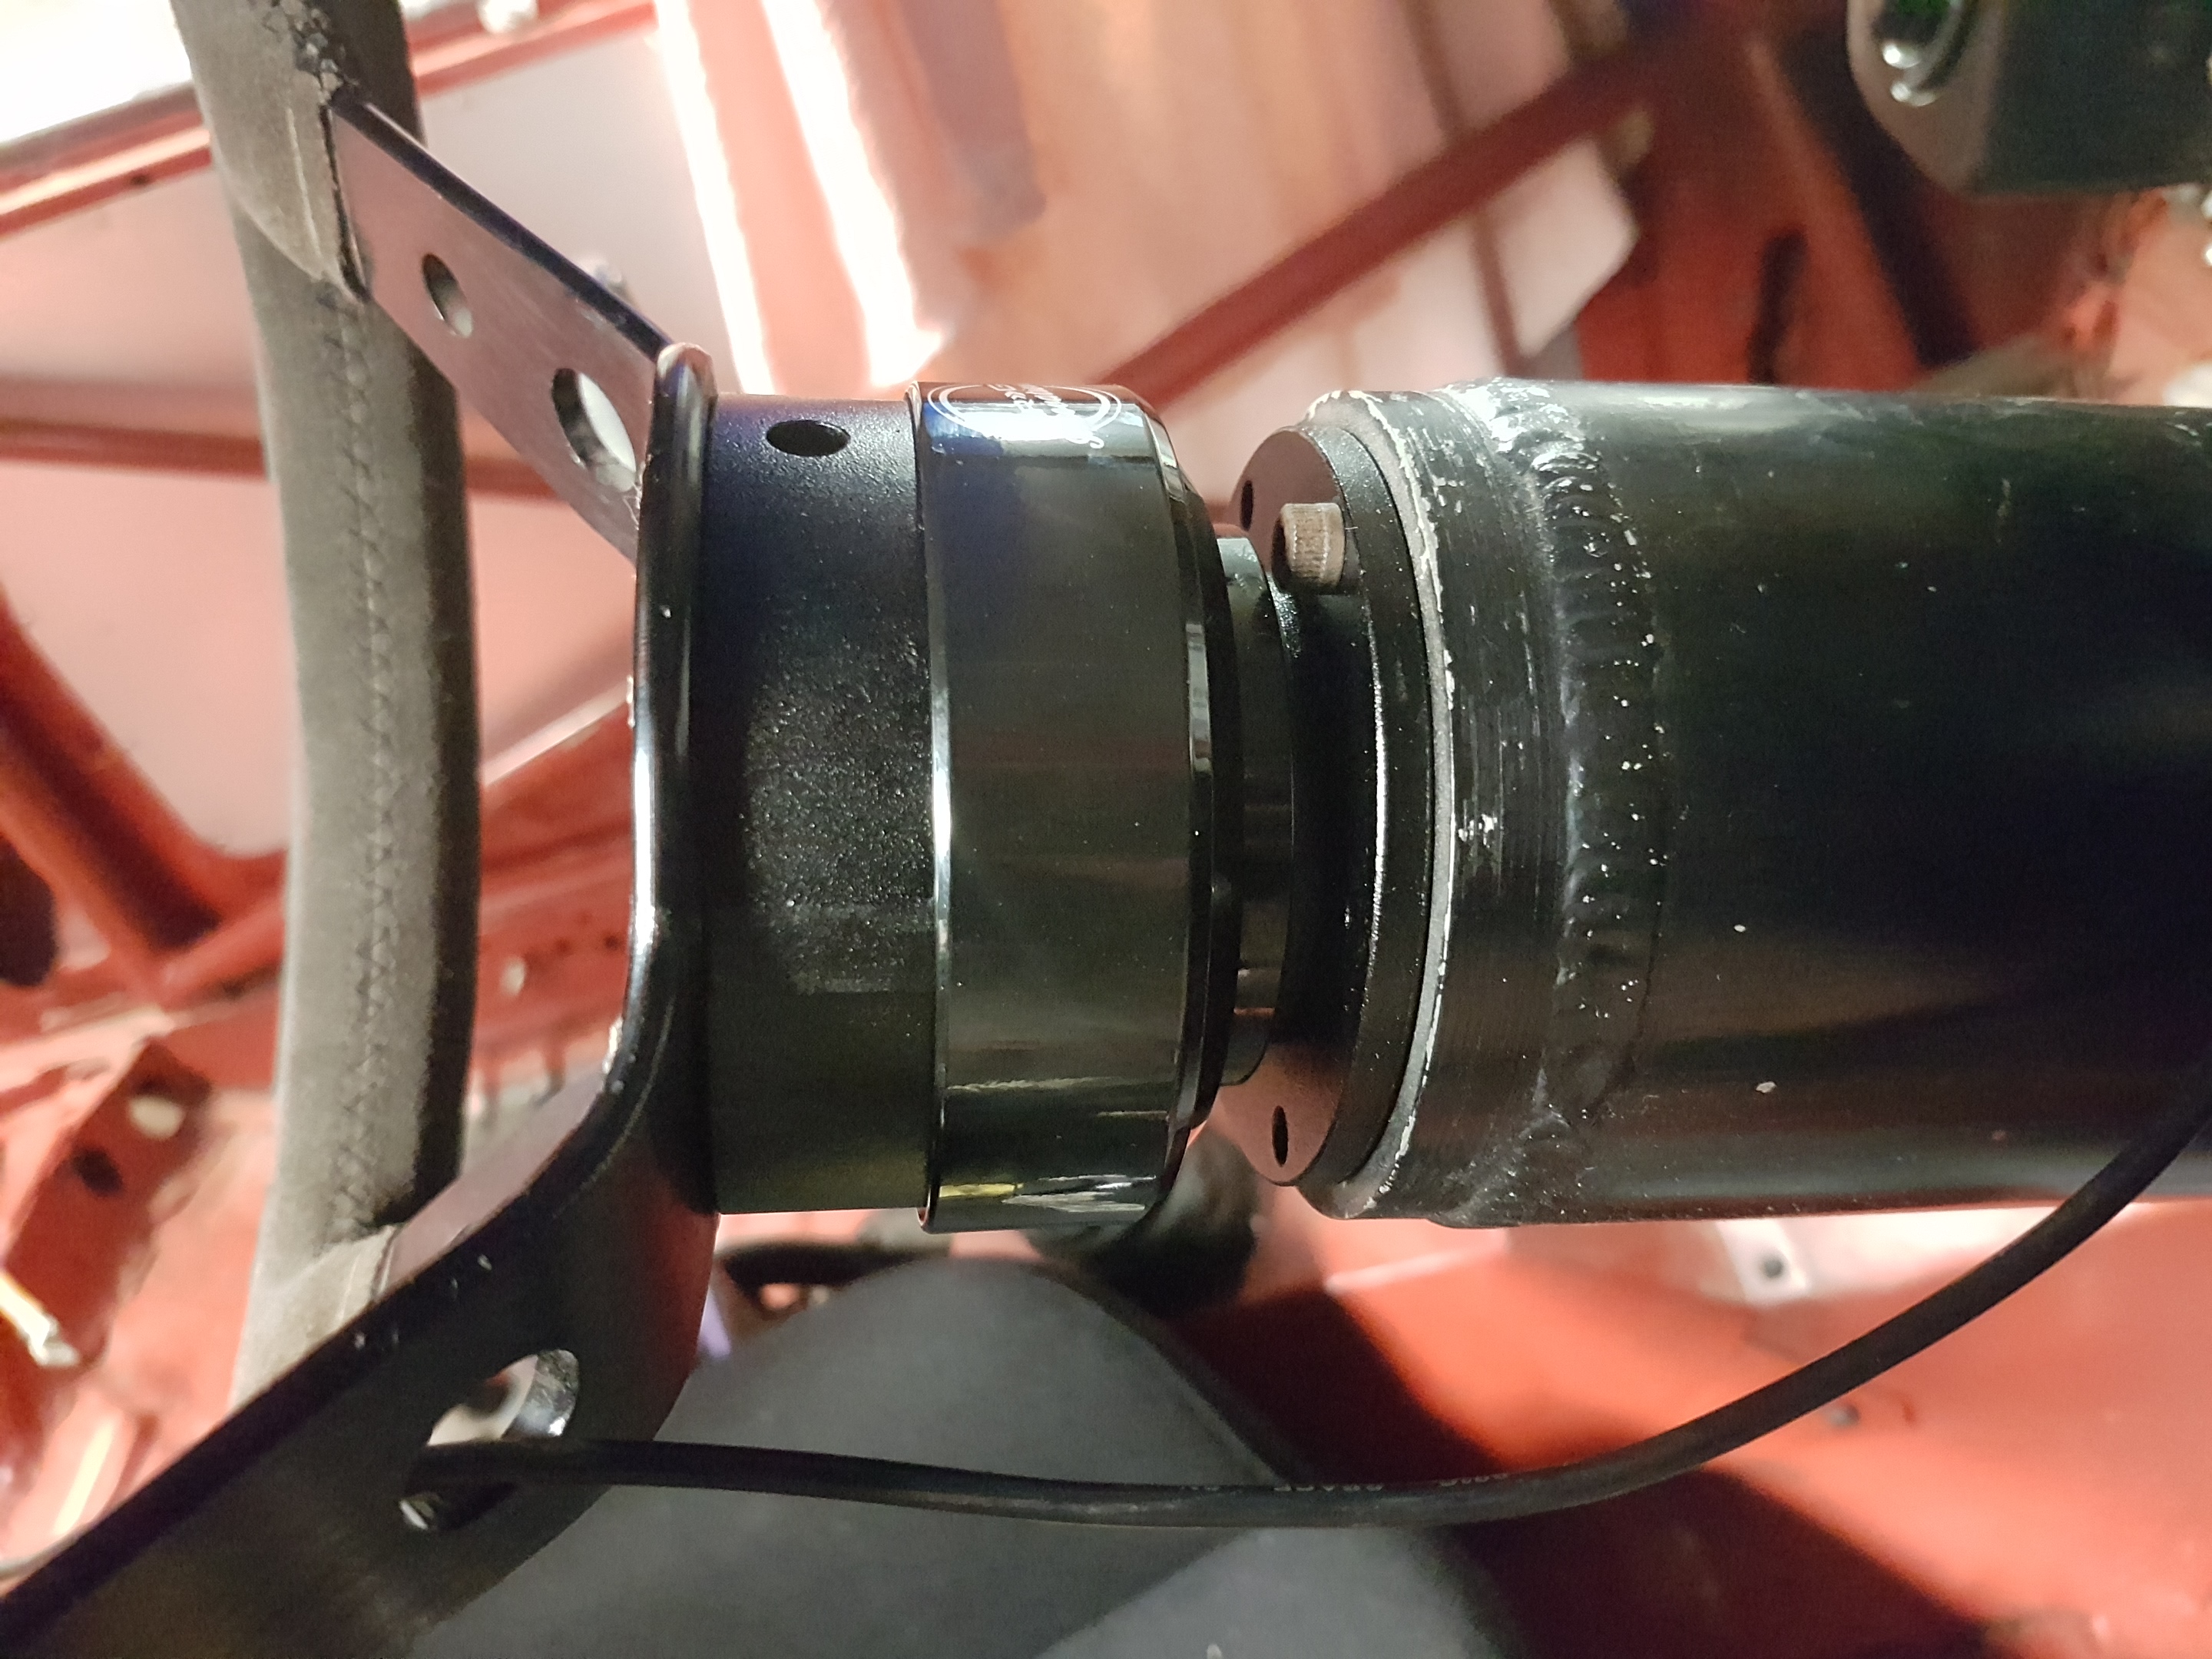
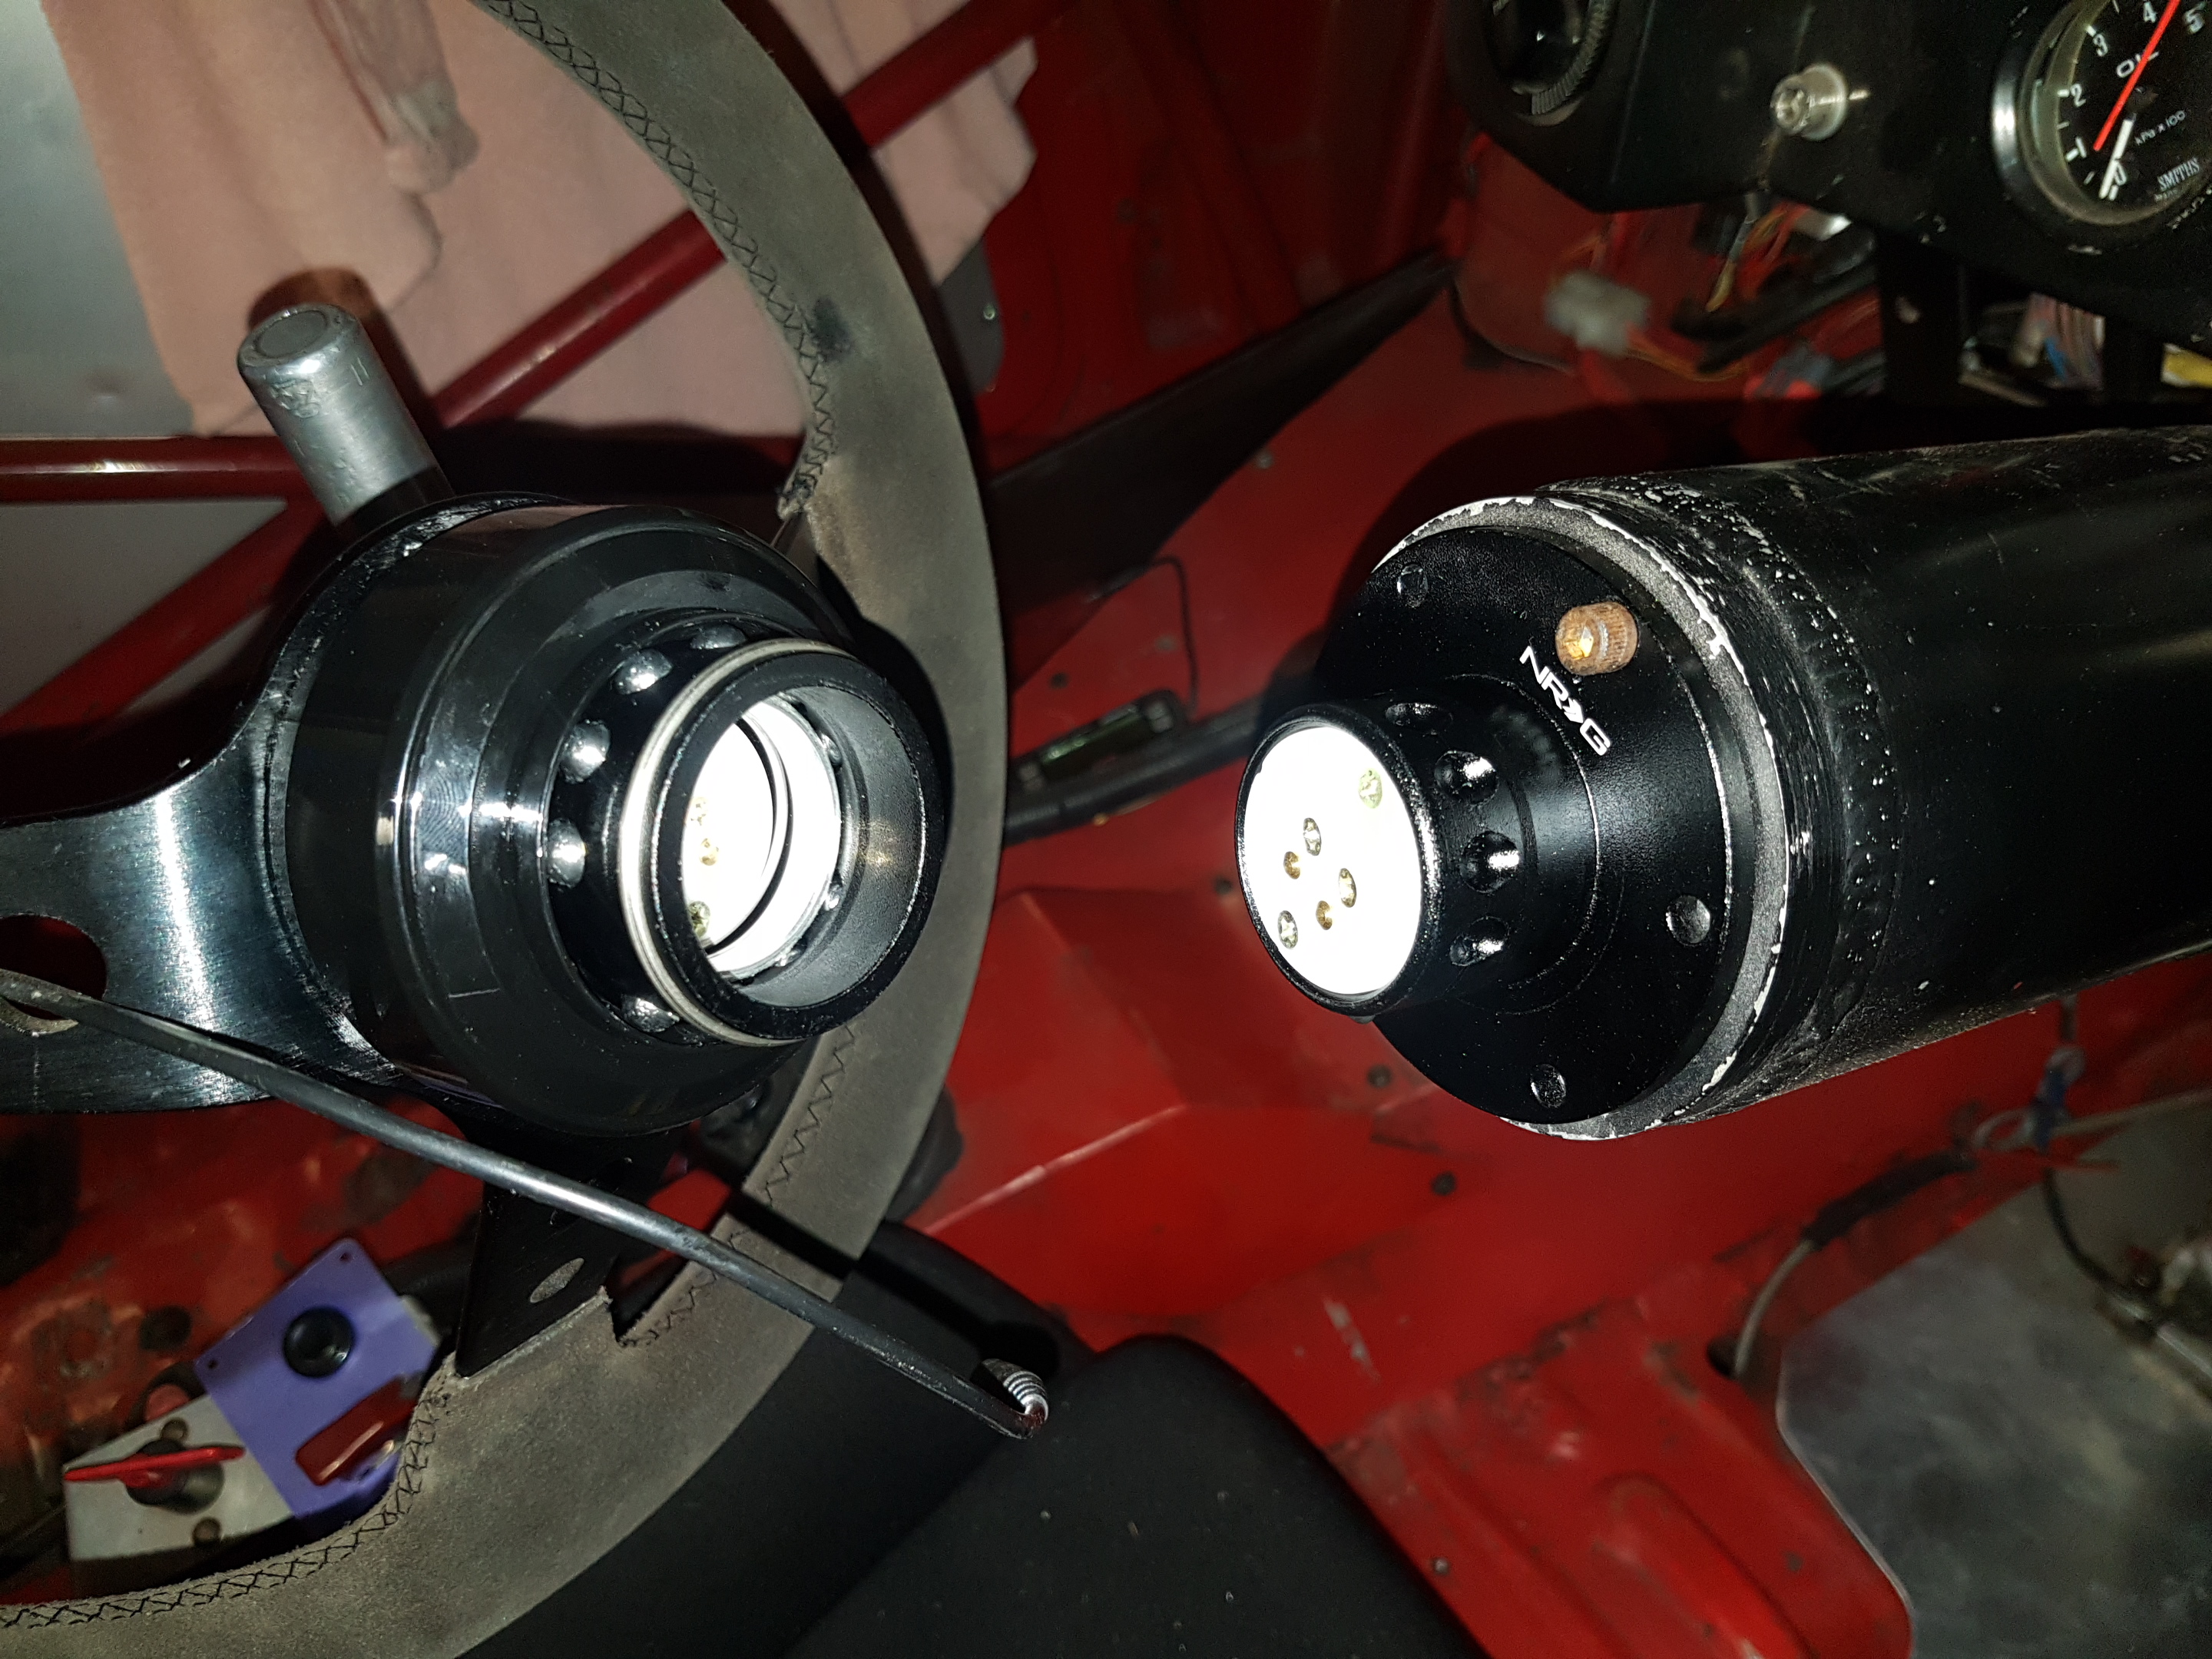
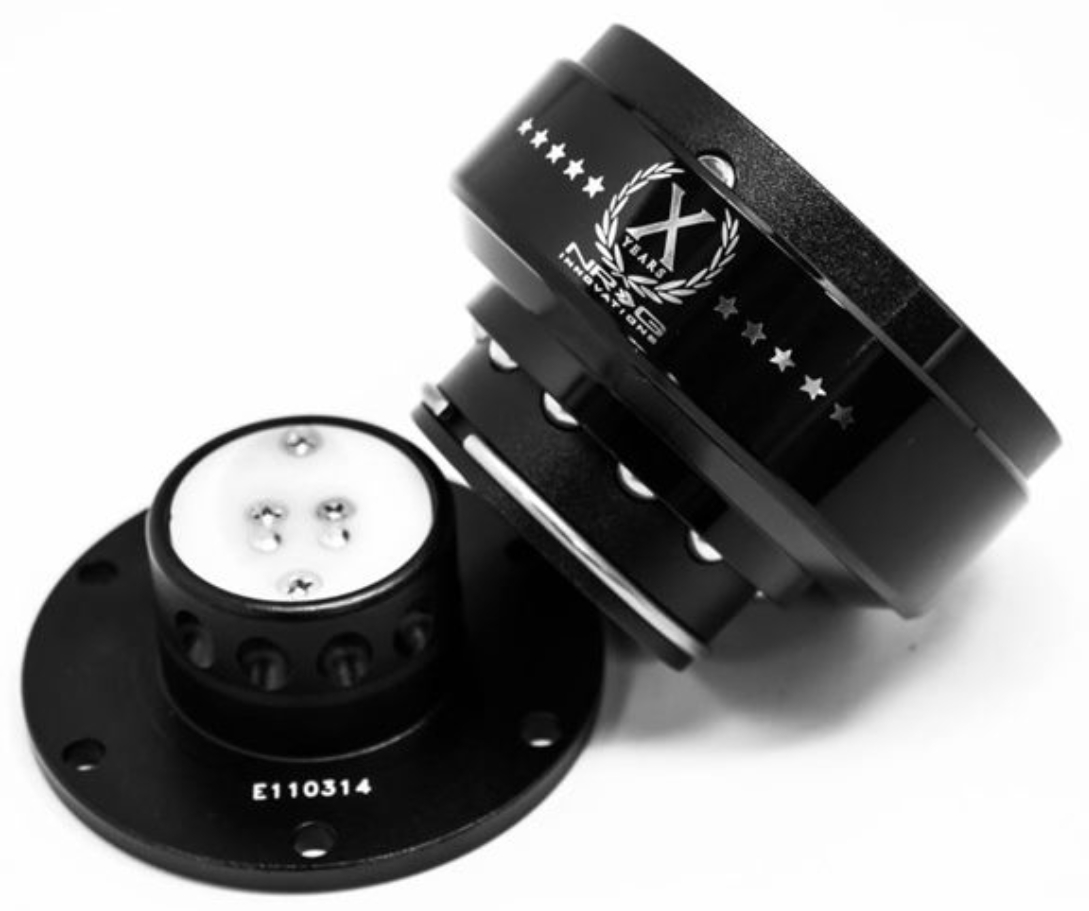
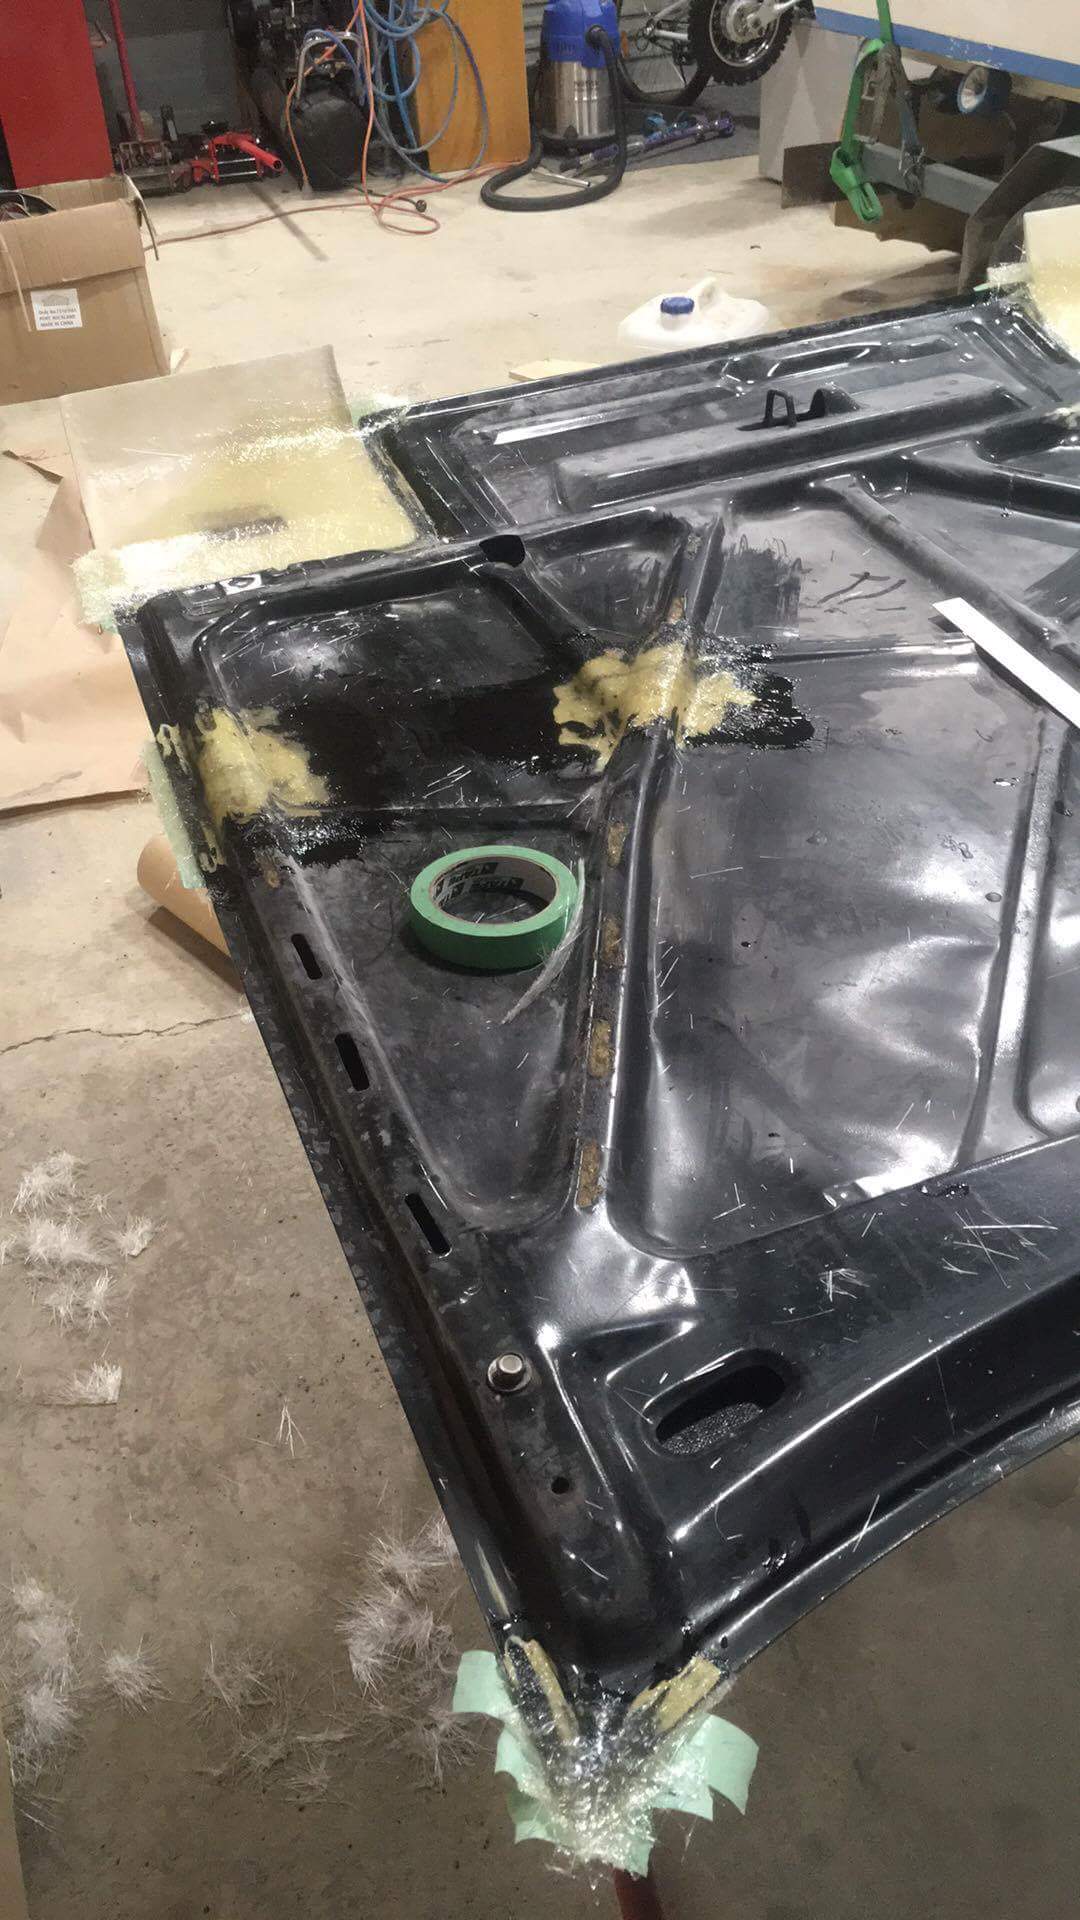
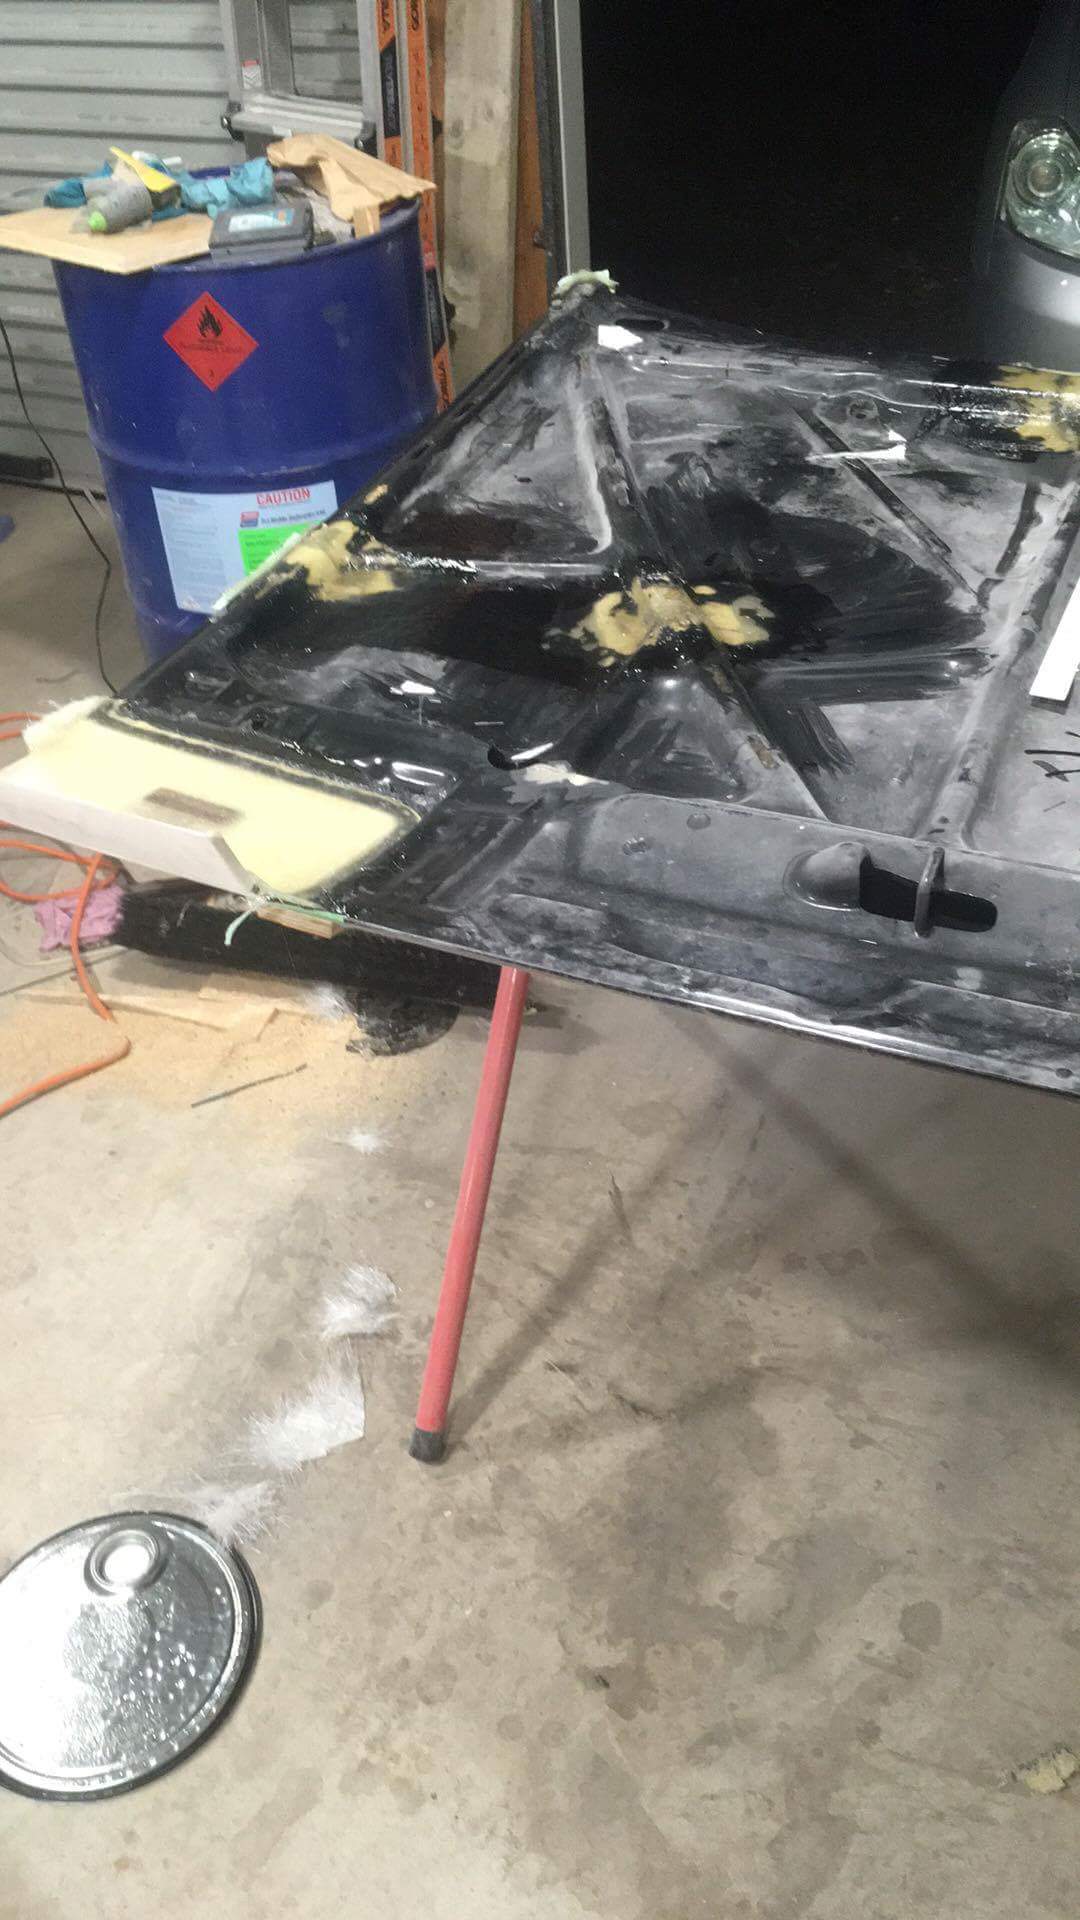
The new seat sits next slightly further back than the old one, which is great for leg length, but means that the steering wheel is now slightly too far away. I already had a 40mm spacer behind the steering wheel, so figured I needed to find or make something that was around 60mm long. The other issue is that the car is quite hard to get in and out of. Making the steering wheel removable would make life a lot easier. After asking a few people and a quick Google, the NRG quick release came up consistently as a quality option and also happens to be 60mm long. Win! I'm pretty impressed with the design and finish - it helps to justify the price. The cap screws that came with the kit are slightly too long, so I'll need to go bolt shopping tomorrow. Ive also given my bonnet to a friend who does fibreglass. He's moulded the headlight covers into the bonnet and done a couple of repairs to the underside.
-
Oh man, that video is so great! Love the smoke screen effect and the lack of expression on his face.
-
I fixed my whole project thread on Friday night. Man it took ages.
-
Truenotch's BEAMS AE86 racecar discussion
Truenotch replied to Truenotch's topic in Project Discussion
Haha, cheers. Those are old cardboard $10 bins that we took to Fieldays with us.


.jpg.a1f391ec500b19807931d5b886ee808e.jpg)