-
Posts
3461 -
Joined
-
Last visited
-
Days Won
4
Everything posted by Mr.Mk1
-
Ive started un-greening the interior in anticipation for a black and charcoal re-trim. Im not super sold on the colour and it’s very hard to capture in a photograph..it’s not as shit as it looks (metallic grey). It can all easily be changed later as all parts are removable with dash installed, but most importantly it’s not green. Did the steering column surrounds etc too. also painted the strip along the top underside in silver so it brightens up the area. The dash pad (not attached) will be wrapped in black vinyl. Polished the switches and interior lamp bezel, cleaned the radio knobs, installed the new vac block for the heater controls and greased the slides. Blasted the glovebox hinge and internal structure of lid and hit with black zinc + satin black. Have whipped out the last of the rust in the top of the drivers guard..under it is the bracing that would have trapped and been filled with crap all year round. I picked up some correctly sized bolts and nyloc’s for my spring shackles yesterday..I just chucked some engineering shop stock bolts in at the time but failed to check the ID of the new bushes!
- 188 replies
-
- 11
-

-
Dealt to this wee spot in the floor. Looks ugly but ground up well. passengers door card re-made and glued. BEFORE. I’ve welded up the trim holes down the sides too Then I went to heat-gun the old paint cause around repairs it would peel up. The black was enamel and it clogged up Sandpaper and strip discs like mad. well it turns out I can just scrape it off! About 90 minutes and a cramped hand later: Was highly satisfying! Vast majority uncovered on this old bitch this evening was really cherry! No bogged up dents or weirdness and lovely straight panels (apart from area on top of guard P.O bogged up 2 holes). It’s happiest scraping back to an old brown primer but that comes off too if you put in some more effort and you get original green and light brown primer
- 188 replies
-
- 31
-

-
There’s a couple of edges on remaining floorpan that are a little untidy that I’ll shave off but essentially yes!
-
She came home on Tuesday night, rapt to have it back even though it strains my available space! Falcons outside again but at least it’s summer. Gutted the offset of the meats means I’d be perilously close to guard rub at standard height when it’s re-assembled. Plenty of space inboard. Shelving that for a later date, much more important fish to fry!
- 188 replies
-
- 35
-

-
In desperation for a quick thing to do, I spotted the rear trim in need of attention. Previous beanbag hadn’t removed it when he bombed it enamel black and there was mis-masked bits all around the edge. I hit them with some paint stripper on a modelling brush (using wire wool was a go-to but it polished the alloy this time) then masked it up and sprayed the satin black indents. I realised I had no unmasked before shots, so imagine most of it faded like above. In structural repair cert news, my brother was putting another car though and had a bust up with his usual guy who’s attitude went to shit along with his ethics,professionalism and interest in the hobby. So that ships sailed before he even looked at Dodge. it’s coming home on Tuesday where I’ll try my luck with the local guys after Xmas. If they can’t get on board without having previously inspected it prior to repair (we have hundreds and hundreds of reference photos before/during/after) then I’ll just finish it the way I want it and drive it regardless.. life is short and the world is fucked. I have a windscreen on order but it sounded like February before it would arrive dang it.. that’s all that would be missing if I were to throw it back together for muscle car madness (my deadline from the start) but with this covid passport atrocity I won’t be able to attend anyway. In shinier news, Here’s a fellow bee my Mrs saw at Kaikoura hop!
- 188 replies
-
- 29
-

-
Here’s what a weeks wages before tax looks like. At least I’ll never have to touch it again I guess
- 188 replies
-
- 24
-

-
Rubbish update: I plucked the exhaust out of the garden and gave it a quick flick of paint. The can was naffed so i pierced it and brushed it on.. It’s purely to keep them uniform. I’d love to do headers one day so wasn’t mad keen to detail these manifolds. The pipe work is practically new, like I’d be surprised if it had 100km. Can read the part numbers stamped into it. Mufflers I think are on their second life but I have some spares.
- 188 replies
-
- 15
-

-
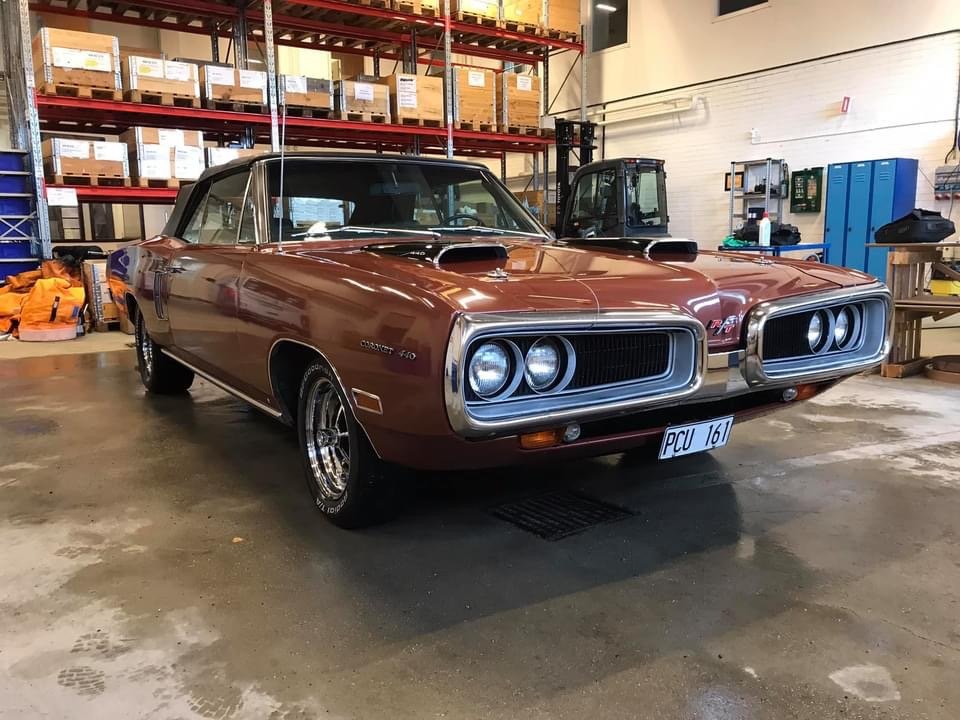
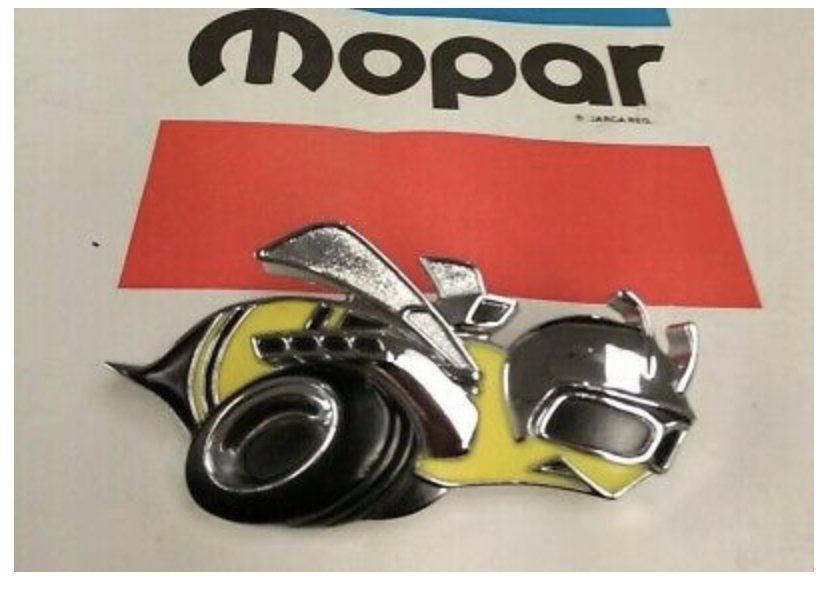
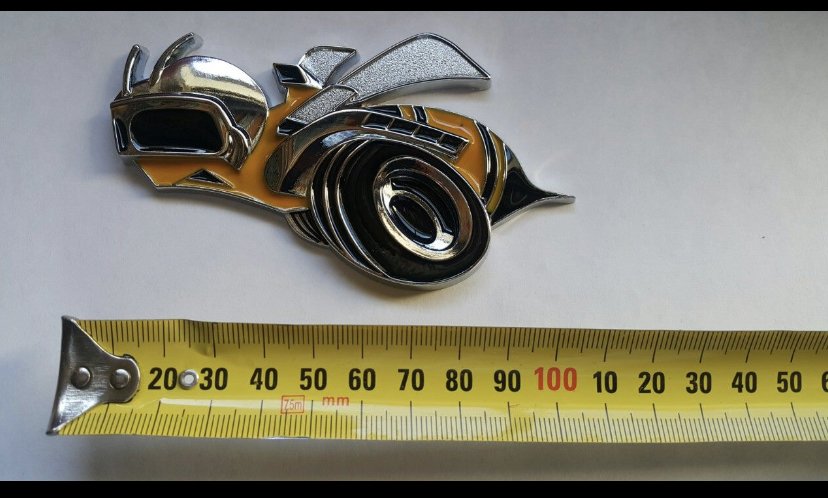
since last time: Attached the bee to the rear garnish Sprayed the inner ridge of the grilles and touched up the wee slats between the ridge and the edge with black again attached NOS bee to hood Not much else really, still waiting in the queue for repair cert.
- 188 replies
-
- 21
-

-
BNT will only send it away to another shop and clip the ticket + charge freight. Sterling brake and clutch, lamberts, Apex or Christchurch has CBC, Clutch rebuilds, clutch systems, undercar & commercial
-
There were a few pallet cover sheets going spare at work so I claimed them, brought a jigsaw and got into making some new cards. Unfortunately the fronts are still on the car..down south so I could only do rears (which were way more haggard than front anyway). Wouldn’t mind pre-fitting them before I glue them so have come to a halt. also made a new partition for between the boot and rear seat. I made some more wee splash gaskets for inner guards. This grille is a proper cunt of a design. I couldn’t successfully mask it right, ended up making a card insert to cover the black and leave the silver exposed for painting..it somehow failed and I got overspray. Don’t particularly like the silver and the plastic is kinda pitted in places which I should have primed and sanded but wasn’t so obvious before. I still want to silver the seam around the inner edge but might have to use a paint pen which won’t be the same shade.. brush will look arse. I tried touching it up and the paint fried up so that’s me giving up for a few years. tried to start into making some new brake lines and the flaring kit fucked out so I went inside.
- 188 replies
-
- 20
-

-
Poking with the torch revealed some crust in the pillar seam hidden by the roof framing so out came the welder again and brother put paid to it in a tidy fashion
- 188 replies
-
- 26
-

-
Took ages to sand the hood back, about 14 120 discs to get it uniform, lol. Only had to apply filler around the nose where I repaired, 2 wee dints and 2 repair patches and the crease that appeared when the wind caught it the other weekend in the gales and threw it onto the stand right after I welded the frame back in! shot it in leftover Isolack 2k, it’s bizarre shit..like bed liner to mix but comes out normally. The Second coat ejected some snot and fucked it up but at least it’s sealed in the meantime.. now I’ll just re-spray when I do the stripes down the track. The back of the scoop will be gloss black but I had a little spare so painted them as well as battery tray. Also scrubbed up the grills, have decided on the style I’ll paint them too.
- 188 replies
-
- 30
-

-
Friends!
-
Yep, they will fill the back up nicely.. just need to get the tyres flipped
- 188 replies
-
- 26
-

-
I’ve bee-n doing some bee buying too. Finally Sacked up and had a go at eBay. Got a NOS hood bee (shaped to fit contours of nose of bonnet, mounts with pins) Got some 8in decals for in the tail stripe and that came with 2 smaller ones that go in the rear side windows. There’s also an auction for a stick-on one in Nz that I’ll put on the tail panel That should complete the super bee disguise! I love the R/T badge already on the bonnet but I probably ought to fully commit to a theme
- 188 replies
-
- 28
-

-

-
Lame updates: fizzed some metal back into the battery tray and painted it with nice thick paint! Also stripped the pinstripes off the bonnet in preparation for sanding and some satin black 2K both sides. Hit the wiring loom with a thinners rag and wiped everything, cleaned up the terminals etc. sucked! Will tape it again as I put it back in. Blasted more clips and speed-nuts + painted, spend some time on the bench grinder wire wheeling nuts and bolts, painted inside the dash where it was a bit crusty from rodent piss. Cleaned up and painted the bonnet striker catch and voltage reg bracket. Made some gaskets for the inner guard splash guards, more to go. And in fantastic news, I jumped on some wheels for the back! Just the size rim I wanted and the BFGs are pretty perfect..hard to get used to these old man profiles but they will suit it wicked
- 188 replies
-
- 19
-

-
Got those mounts in yet cob?
-
Man, making fuel lines sucks heavily! Was ok in the vice for a start, but vice is a metre away from everything in the shed and there’s like 5 metres of line.. cable ties and clamps as I went helped a bit.. At least the brake lines are copper-nickel and much easier to manipulate (he says, having not made them yet..) Also got the hood skin goo’d to the frame and spot welded back together. Used Bostic and it was fucking awesome! I quickly buffed and painted the throttle linkages, hood latch and a fuel tank vapour breather this arvo too, have some clips soaking in vinegar.
- 188 replies
-
- 17
-

-
These two from my brothers phone didn’t make it onto the daily updates..just an after pic with quarter panel on
- 188 replies
-
- 13
-

-
More goodies.. Shoes, pads, LH thread wheel nuts, rocker covers The Mr. Gasket breathers have been display pieces on the shelf for ages so it’s good to finally have a use for them
- 188 replies
-
- 24
-

-
Another message from south today, a photo of the to-do list with only one thing remaining and a photo of the new boot edge. Not a lot else to report, just started a new job at Mount Shop, so energy is directed into that and hours have changed so I don’t have as much shed time after work. I flicked some satin black on the dash top and will pull some black vinyl over the dash pad..the weird green interior will slowly make its way out the door so I started with something that’s not going to be accessible soon as dash related things are a screen-out job. Sourced some demister vents too, mine are sun buggered and cbf making fins to complete them. The new ones aren’t from a b-body but are pretty close so I’ll just linish them until they sit into the recess nicely
- 188 replies
-
- 19
-

-
I’m speechless! What a fucking sweet car An excellent write up too, good job! Sounds like we are on a similar buzz with what we like and retaining original feel, really look forward to seeing it come together
-
This made my day! I had the radiator at the shop to see if they could stop it weeping along the bottom. They filled that and then found the whole core was pinholed. Because this was the ‘big’ radiator, they struggled to find a suitable core and would have to make one. $780+ Im sure this isn’t the correct radiator for my car anyway due to how it was mounted. I asked on the Facebook groups and a guy 30mins away had one he replaced with an alloy rad when doing engine conversion. $50!! Super stoked! Always Wanted to stay original. Will drop it into radiator shop and get the mounts re-attached and then I’ll tidy it up.
- 188 replies
-
- 26
-

-
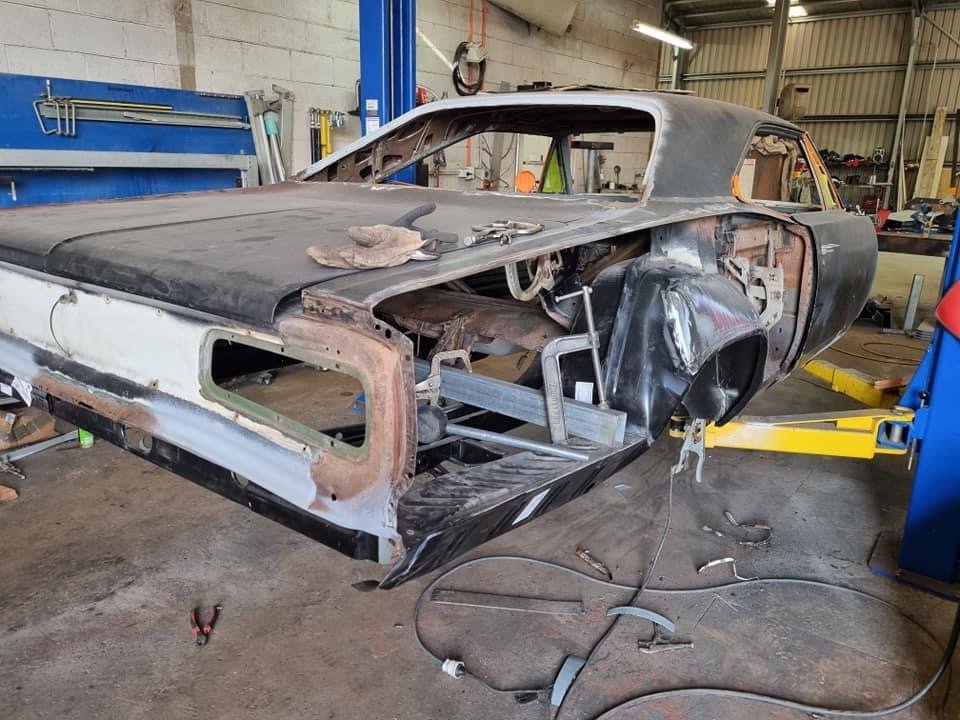
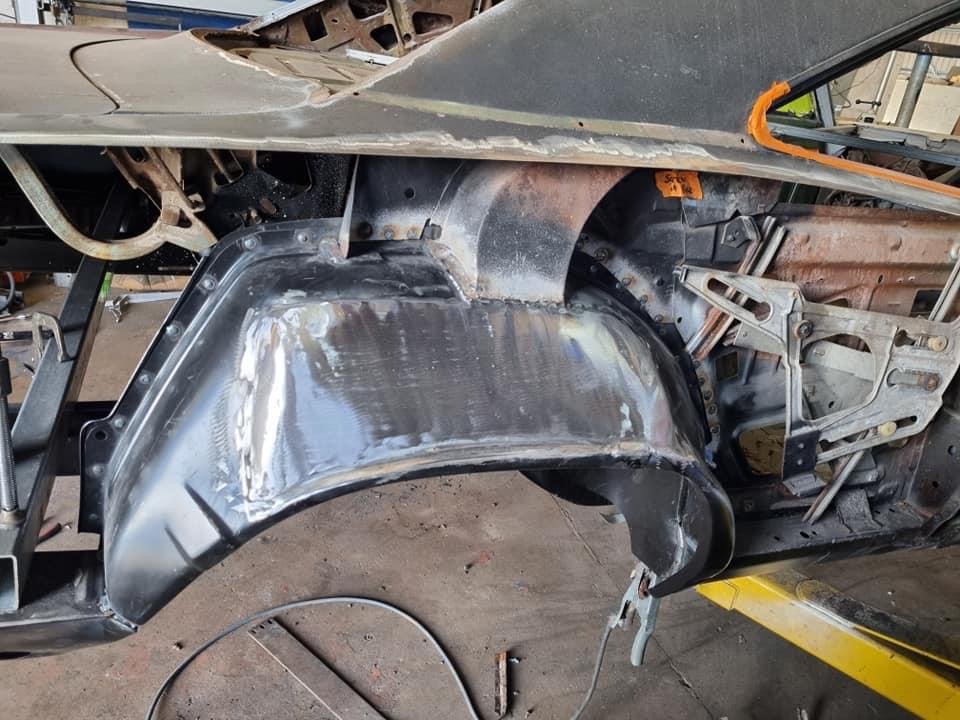
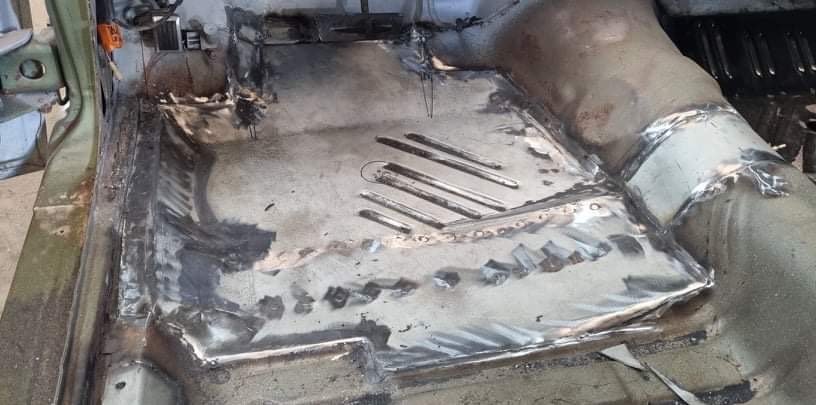
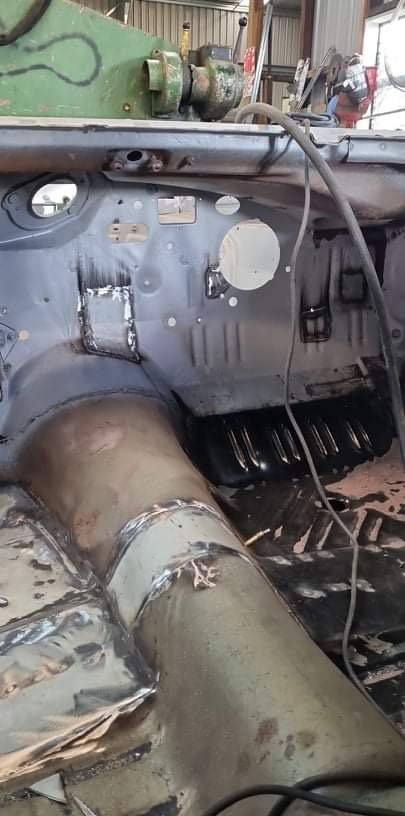
Just in from alexandra.. drivers floor pan, tunnel section and more firewall patches.. By my calculations, that’s all the main fucking holes filled, we have a god damn shell again!! Still some hours of checking it over, finishing spot welds and the usual completion stuff then we wait for the repair certifier to give us an inspection appointment
- 188 replies
-
- 49
-

-

-
I know, Shame the wheels suck! Gonna slap some paint and stripes on to keep the weather out and do it properly in another colour down the track


