
- Popular Post


zep
-
Posts
4664 -
Joined
-
Last visited
Posts posted by zep
-
-
17 hours ago, smokin'joe said:
can't remember specs, but Mitsi 4G63 8V sigma valves are an upgrade for T engines. will measure when back home
Cool. Thanks man!
-
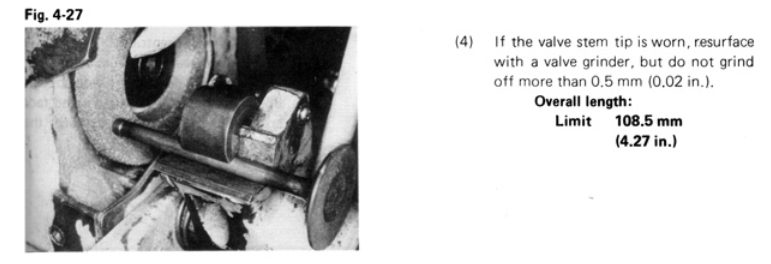
Just to reply to myself further, I found this in a 2T/3T workshop manual.

Can I assume from this that the factory length is 109mm? And if so, if the 110mm valves are good on the exhaust, should I go for 109mm or 111.54 on the intake?
-
I wonder if any one reading this knows the factory length of a 2TC/3TC valve stem?
I was assuming that they were 110mm based on these, which I've been told will be fine for my head (https://www.speedfactoryracing.net/products/supertech-tivn-1063-supertech-performance-valves-toyota-2tc-3tc-intake-valve-44x8x110mm-ss-backc)
But there are all sorts of other aftermarket valves with different lengths. Basically I'm trying to find out what "factory length" means for these valves:
https://www.euroexportinc.com/toyota-3tc-2tc-45mm-stainless-steel-intake-valve-set/
If it's 110mm then I'm good to go.
-
11 hours ago, piazzanoob said:
@zep Ive got a bare 4ze1 cylinder head if you want it for dummy up purposes.
is cracked but is also clean. has no cam or valves or springs just caps.
its free it you want it as is in the scrap bin.
its from a 2.6 isuzu trooper
Thanks for the offer but I think I'll be okay. I have a head and also you can buy new ones still, so if I mess this one up I should be okay!
-
 1
1
-
-
13 hours ago, siren676 said:
We do these at BNT/Autolign, 10/15/20mm lift available.
These look perfect. Thanks!
-
1
-
-
47 minutes ago, AllTorque said:
They are all good. Used to fit them a bit when lowering springs sagged and were no longer captive. You can get nolathane ones too.
Cool. Thanks!
-
19 minutes ago, Nominal said:
Hopefully I don't need to cut anything then!
53 minutes ago, tortron said:you would cut the groves at whatever the stock height was
you can get blank valves in whatever flavour you want too
That could be an decent option too.
-
On 10/10/2020 at 23:43, piazzanoob said:
machining the end down on the valves is normal when getting even valve heights.
but i would suspect 5mm longer would be too much. but depends on where the keepers sit.
i take it you also have adjustment on each rocker?
if you cant find something close you could put bigger guides and run a thicker stem valve but with the same 45mm valve.
also running different valves can lead into other issues like correct degree keepers and stuff or needing different retainers.
do you require stock valves for your engine? also what engine may help.
also kelfords in chch may have what you need also
This is for an Isuzu 4ZD1 with a 4ZE1 head. Stock valves are 38mm/44mm, I want to go up to 39mm and 45mm.
I will be using Porsche elephant feet swivel adjusters, so there should be some room to adjust them up: https://lnengineering.com/products/oem-911-adjusters.html
These will probably be what I buy for the exhaust: https://www.speedfactoryracing.net/products/supertech-tevn-1063-supertech-performance-valves-toyota-2tc-3tc-exhaust-valve-39x8x110mm-ss-blk - I've been told they work but I must be honest, I've been lazy and have not measured my stock valve length.
Assuming that the 110mm length is "stock" for a 3TC valve, these guys do a 45mm valve that is 2.54mm longer, so 112.54mm: https://www.euroexportinc.com/45mm-stainless-steel-intake-valve-toyota-2tc-3tc-0-100-length/
I'm not sure if it is an important measurement, but would the distance from the grooves to the end of the valve be 2.54mm longer, or would the grooves be cut 2.54mm further up the stem?
On 11/10/2020 at 12:38, Nominal said:As Torton said, you can get this sort of thing
https://themetricnut.co.nz/store/index.php?route=product/product&product_id=1166
I have seen these and will probably use them if I have to cut the valve down.
-
1
-
-
4 minutes ago, oldrx7 said:
Sorry / spam
Thanks man
 It's purely for the aesthetic. I'm preferring the look of the tires sitting right at the arch, rather than being tucked under as they currently are.
(and a little bit to get a tiny bit more clearance in the rear as my offset is a touch too wide and I end up rubbing down the sidewalls from repeated big compressions)
-
2
-
-
Yeah those are way too tall! But the same idea.
Ideally I would get new springs, "low" king springs would work ("super low" are a similar height to my current setup), but their spring rates are a quite a bit softer than my current springs which I had custom made.
-
1
-
-
What's the deal with rubber spring spacers. I'm considering raising my car by about 10mm and this seems the easiest way. If the springs remain captive then is it ok? The stock springs have a thin rubber at one end already, these are just thicker. I don't have struts. Spring and shock in the back and double a arm in the front with the shock mounted from the top arm up to the shock tower.
Like these:
Cheers
-
Thanks ya'll. Got some on the way.
-
Awesome, thanks guys!
Looks like the genuine ones are about double the price of the aftermarket ones. Do kits generally do both calipers?
-
That gives me this part number which has almost no google results
04902-12470
-
I have discs and calipers from an AE101 Levin GT APEX on the rear of my car, and am struggling to find a rebuild kit specifically for them. Can I buy one for any disc braked AE101?
This what I'm looking at currently:
https://www.ebay.com/itm/283513310257
Cheers
-
Haha, perhaps I don't understand what I'm talking about. I'm learning here.
To keep the installed height of the spring the same as stock, doesn't the distance between the groove and the spring seat (is that its name?) need to remain the same as stock? So if the groove is further up the valve then the spring is not installed at the same height.
Am I going crazy?
-
1
-
-
13 minutes ago, tortron said:
doesnt seem to be an issue cos everyone does it. will you need to recut any grooves?
you can put a cap on them to retain a hard surface
Wouldn't that depend on the distance the grooves are cut from the valve face, relative to the stock ones?
-
Are there any issues with wrecking the hardening process?
-
I am trying to chase down some 45mm valves with 110mm stems for my engine. It's becoming apparent that they do not exist off the shelf. I can find ones that that are slightly longer or shorter (up to 5mm longer or 2mm shorter). What is the go here? If I have adjustable rocker feet that this make up the difference? Is 5mm longer too long?
Cheers
-
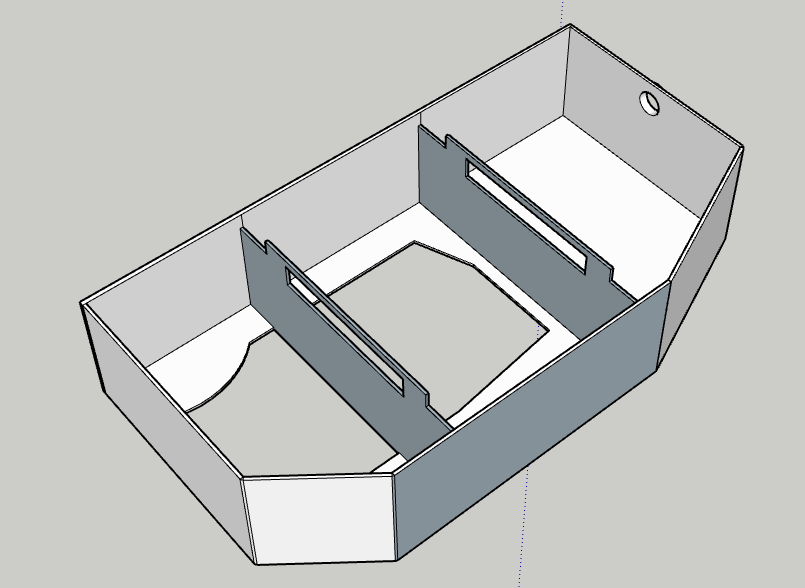
No huge update here. I have been playing around with Sketch Up and had a jam at mocking up the sump bowl:
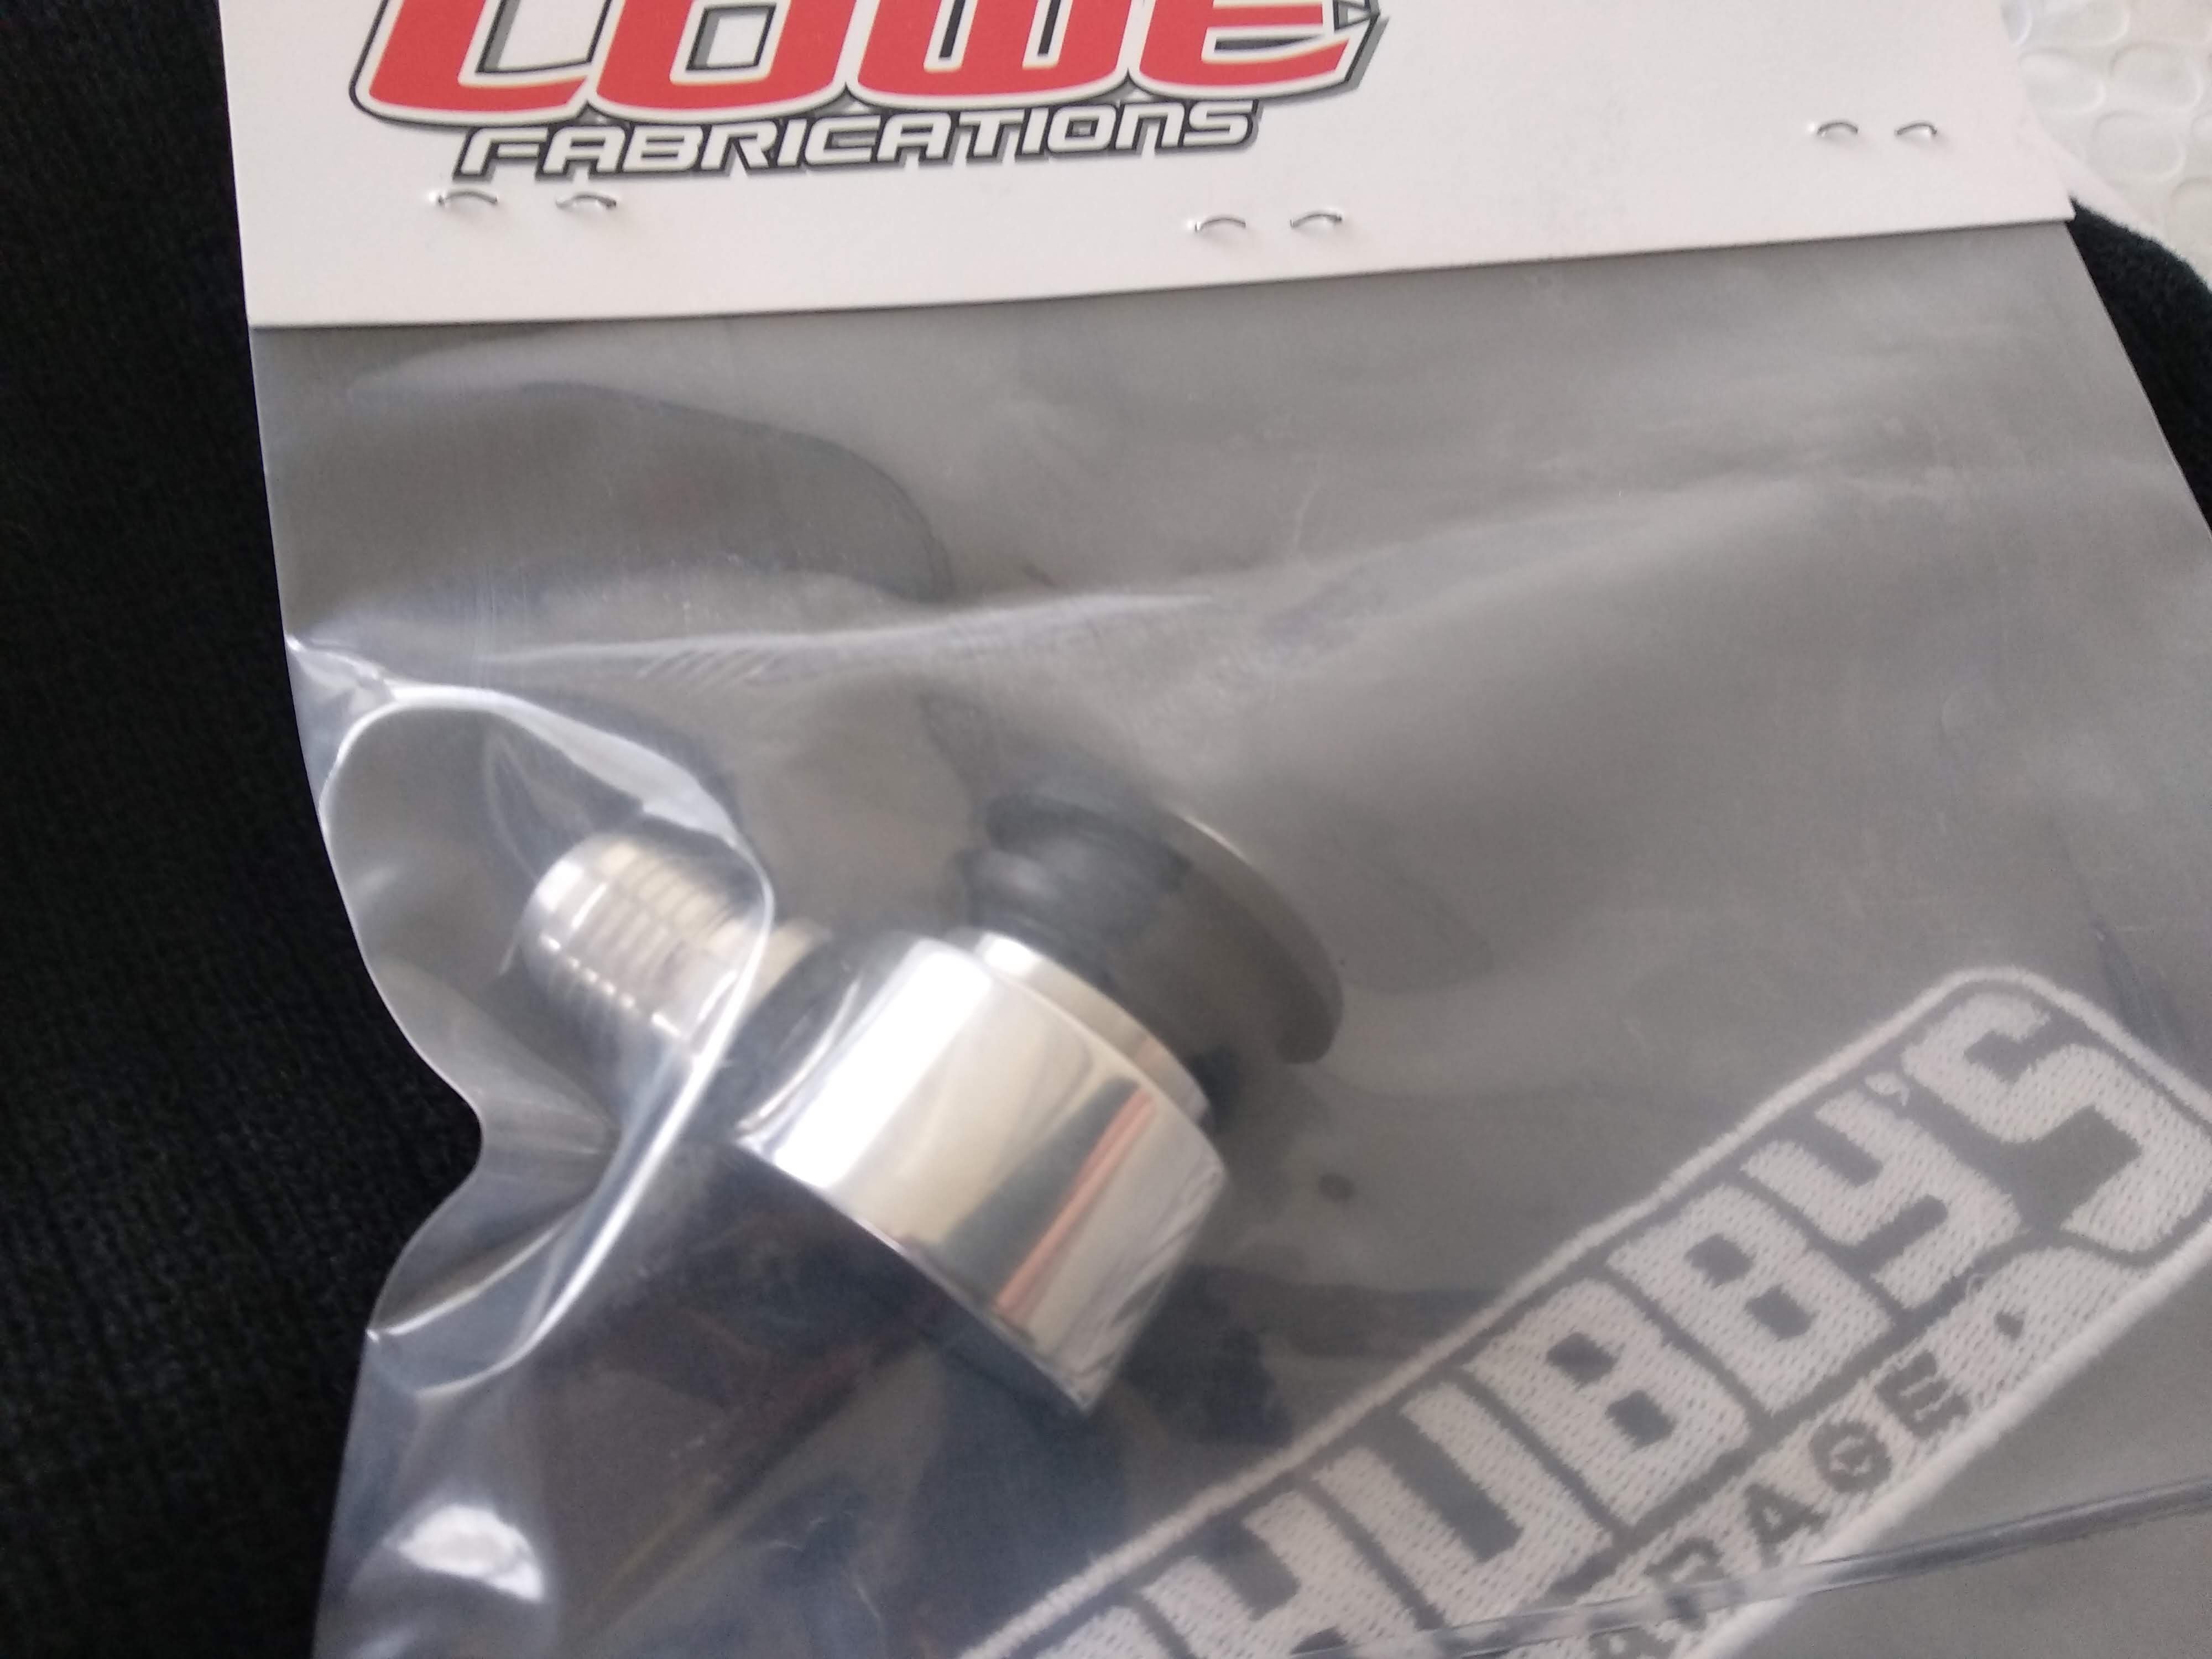
Also received more stuff. This is a booster check valve for using a braided hose.
In other news. @EURON8 has been helping me get the 4ZD1 into the engine bay, making mounts, as well as mounting my new intercooler.
-
7
-
-
On 11/08/2020 at 00:45, 64valiant said:
Depends on dash and type of car.
Classic car. Flat and not to many curvs 300 ish if it needs some repairs. If its got heaps of curves 600 plus.
Or if you are located in Auckland or love your car, go see dashboard restoration and get them to do it. Pay an arm, but end up with a brand new product.
Could you give an example of a dash with not too many curves vs one with heaps of curves?
For example, my dash looks like this. It has a single crack in the top centre but is otherwise good. I might consider paying $300 to fix a single crack, but not $600.
-
- Popular Post
- Popular Post
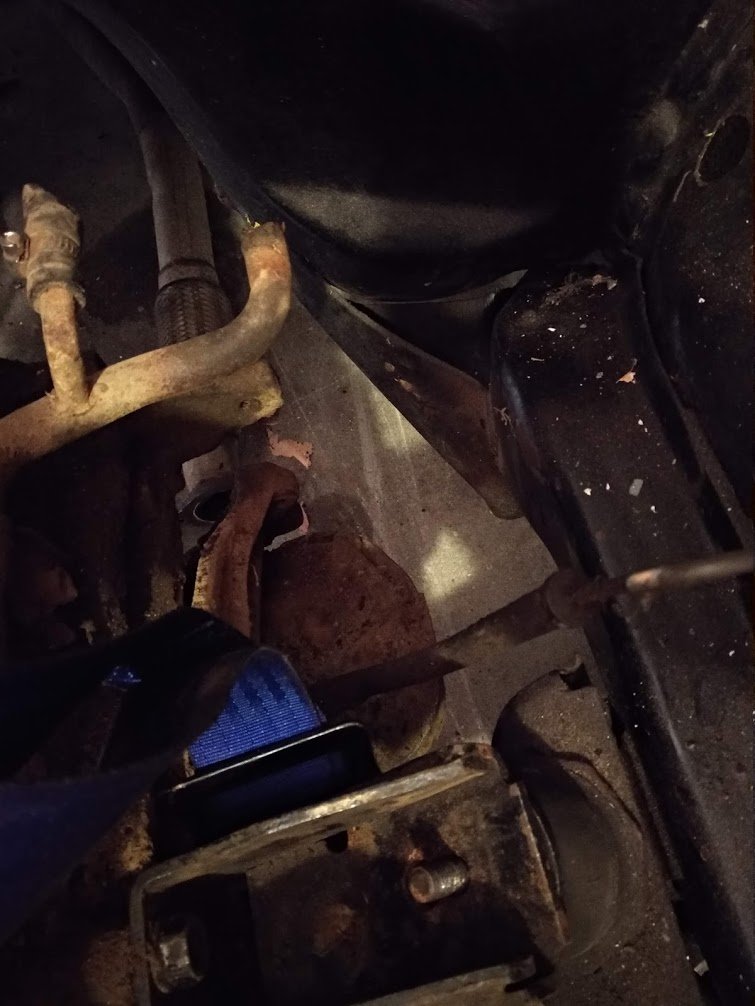
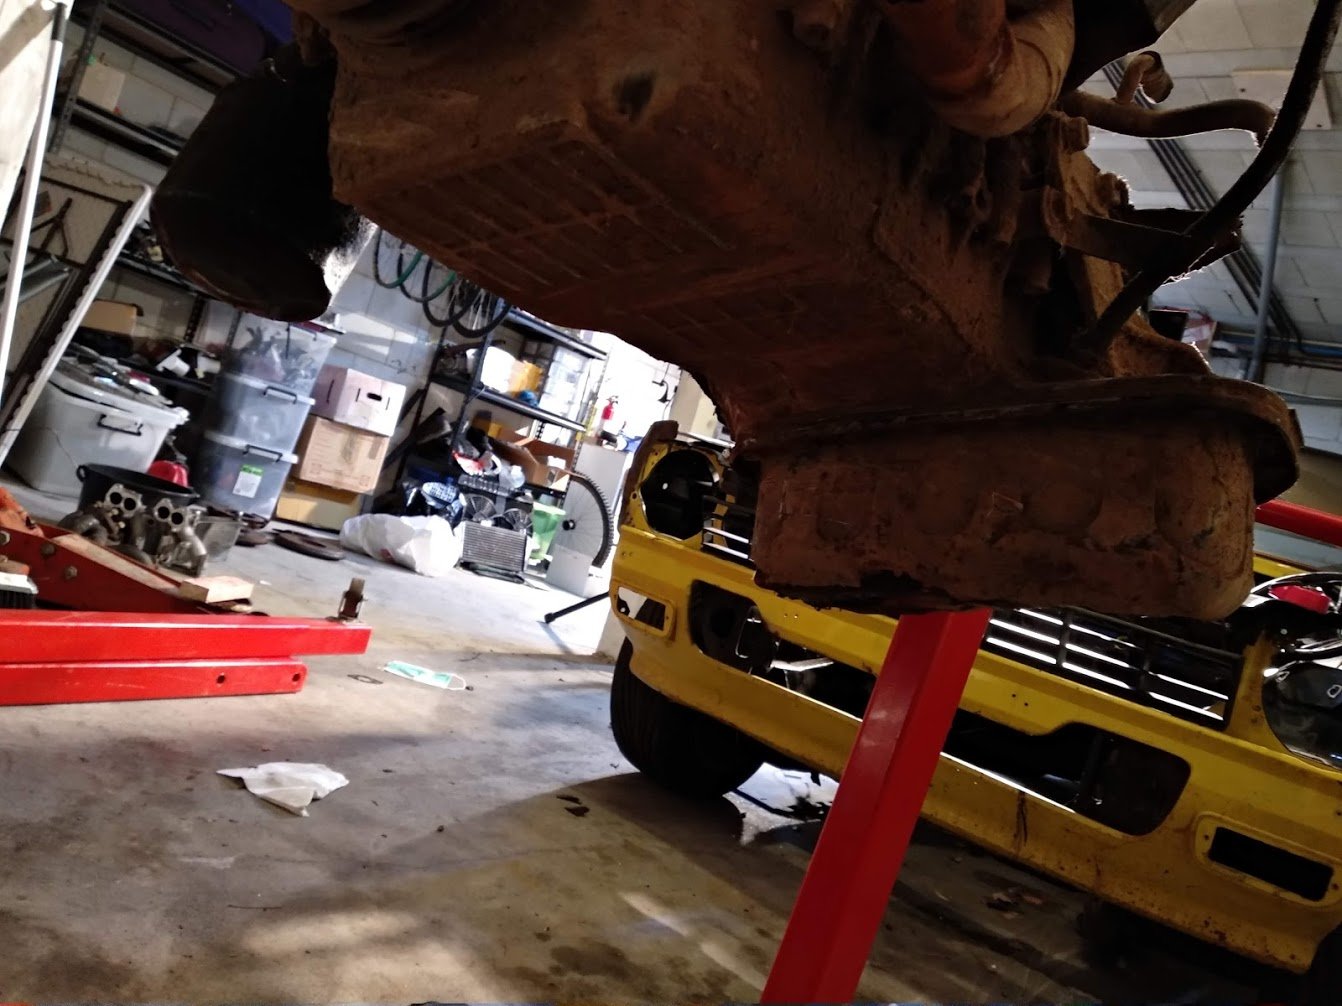
I've also been working on how the sump for the 4ZD1 is going to work. There are two main problems: the bowl is super low, like 50mm below the x-member which is already quite low itself, and the wing of the bowl is below the exhaust and is going to get in the way of any decently size down pipe that I need to use. You can see the tight fit here:
Here's the bowl sitting low:
The x-member is quite snug up under there and it hang down quite a bit. But essentially it's just an empty bowl.
My plan is to cut off the wing and weld on a new bowl that is raised, moves the wing to the intake side, increases capacity, and has some baffles to ensure maximum oil pickup.
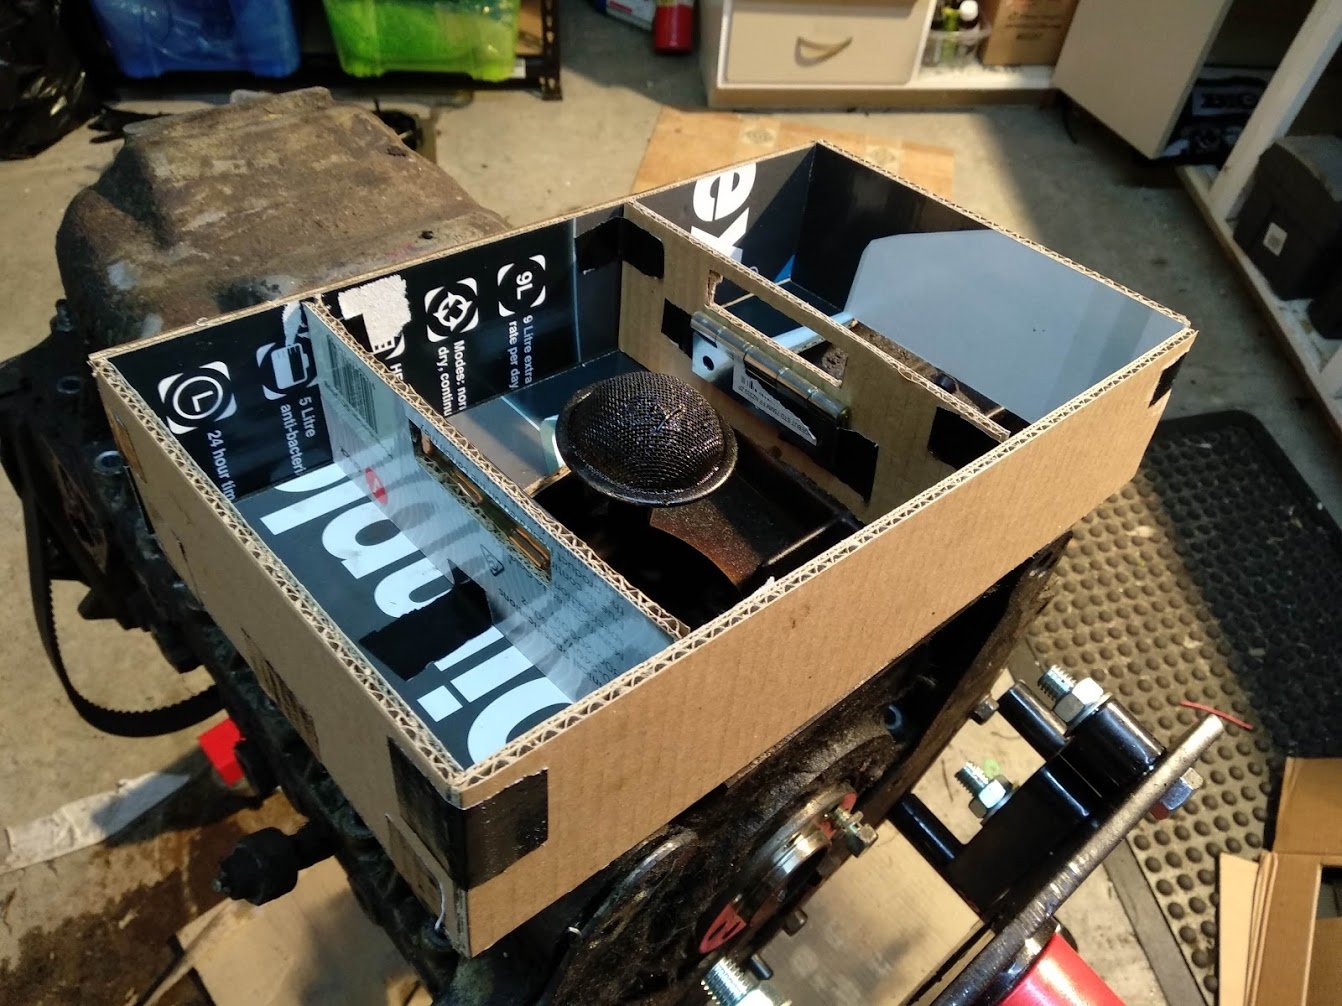
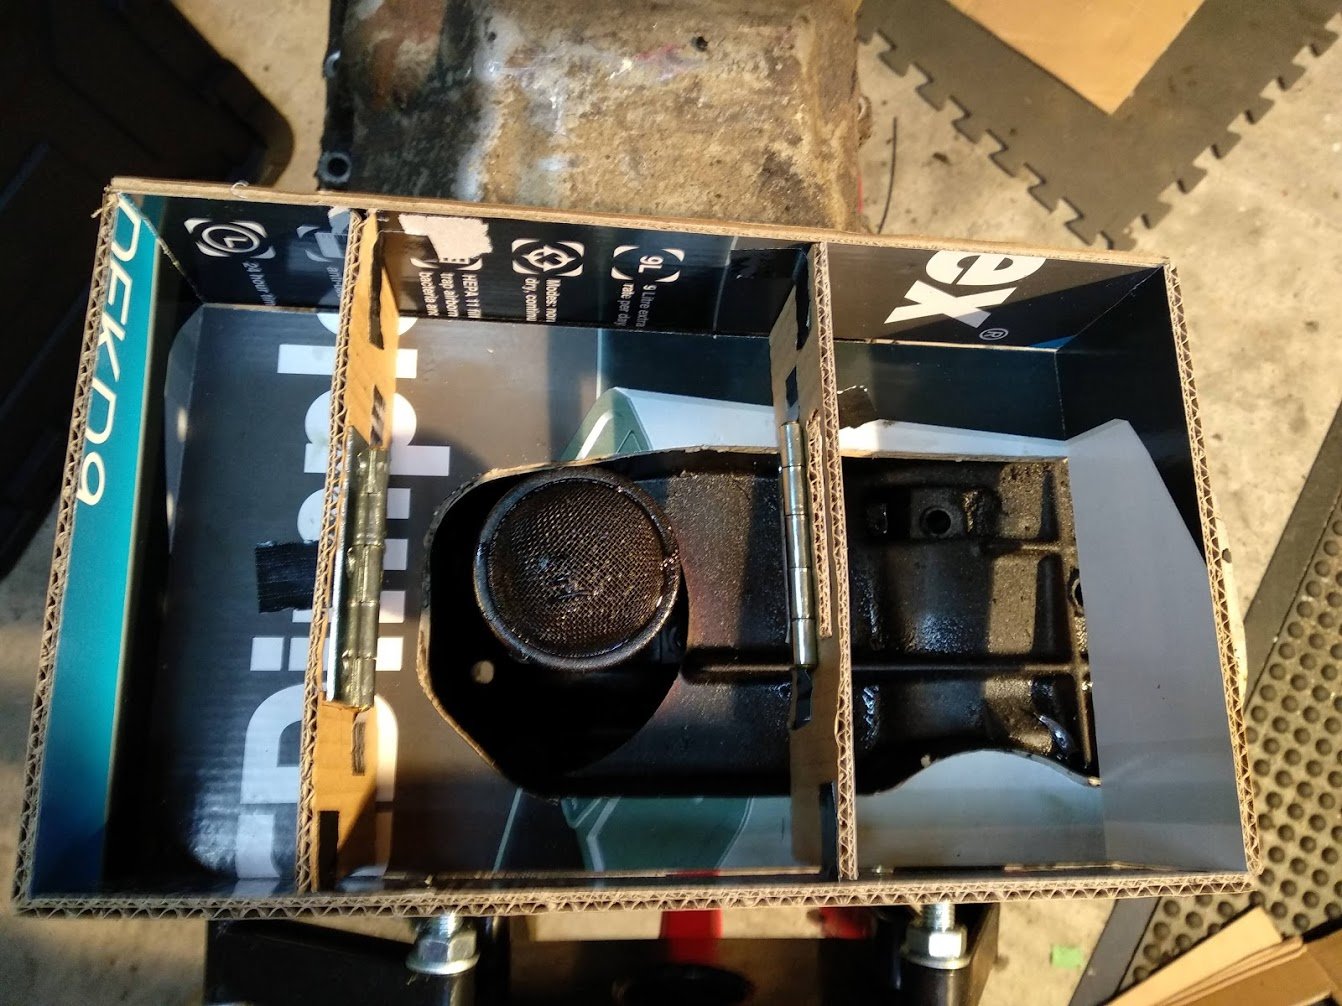
I have never done any of this before, so I'm just reading as much as I can, and @EURON8 is helping me out. Today I started mocking up the new bowl with cardboard. The adept might notice that the bottom of the sumps in these two pictures are different - the pictures above are from the 4ZD1, those below that I'm using for the mock up are from the 4ZE1, which drops much lower at the front meaning I'll have to cut more out to clear the steering rack - another story.
It looks like the pickup will just clear, but I might take a few mm out of the tube to bring it up just in case something nasty happens. You'll see I've added in some trapdoors to try and prevent oil starvation. I would appreciate any advice about these in my discussion thread. I think I need to still have some non-doored bypass so the oil can more easily self-level. Also I will probably make sure the baffle over the opening does go all the way up to stop oil slopping over the top.
-
11
-
- Popular Post
- Popular Post
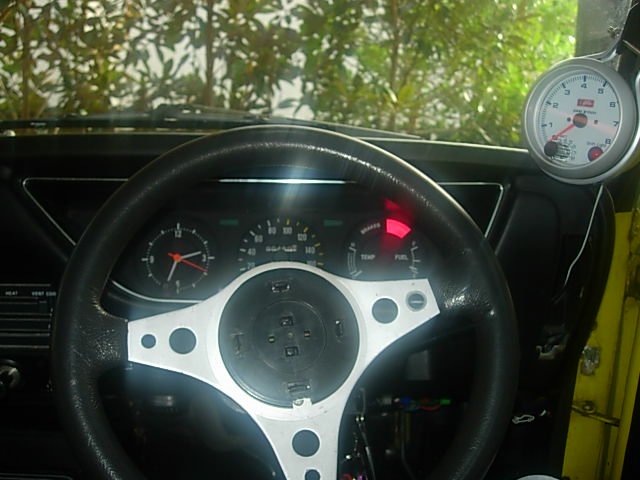
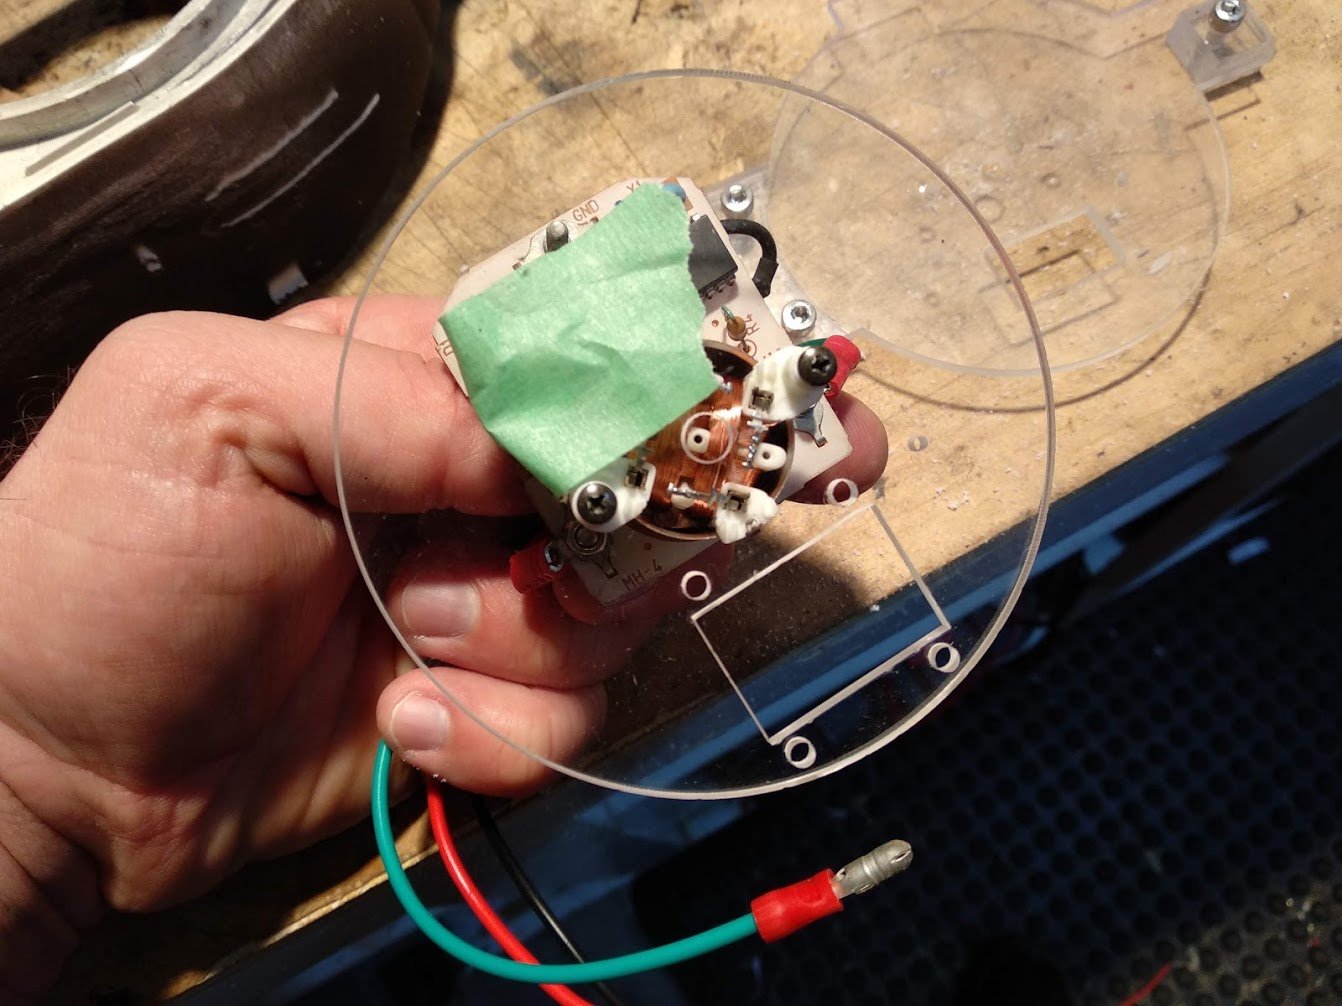
One thing I have been working on is redesigning the tacho. I was not lucky enough to be the owner of a Gemini with a "tacho dash", mine had a clock instead. Back in the day I did the old A-pillar tacho and kept the clock. You can see them in this picture. Also now I have holes in my A-pillar that I need to fix.
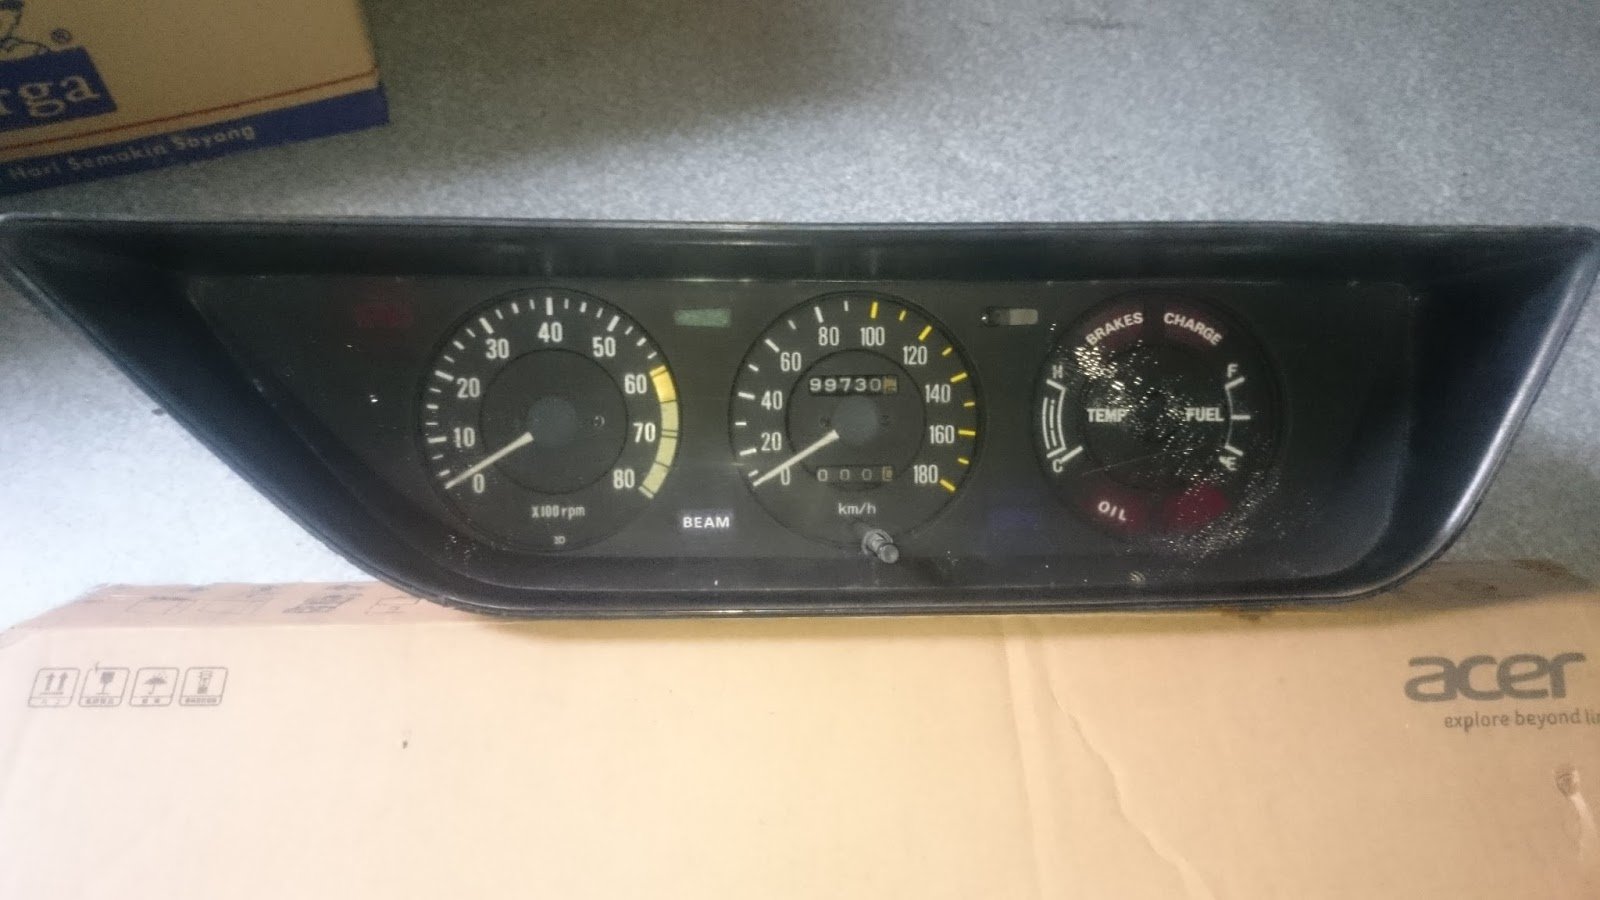
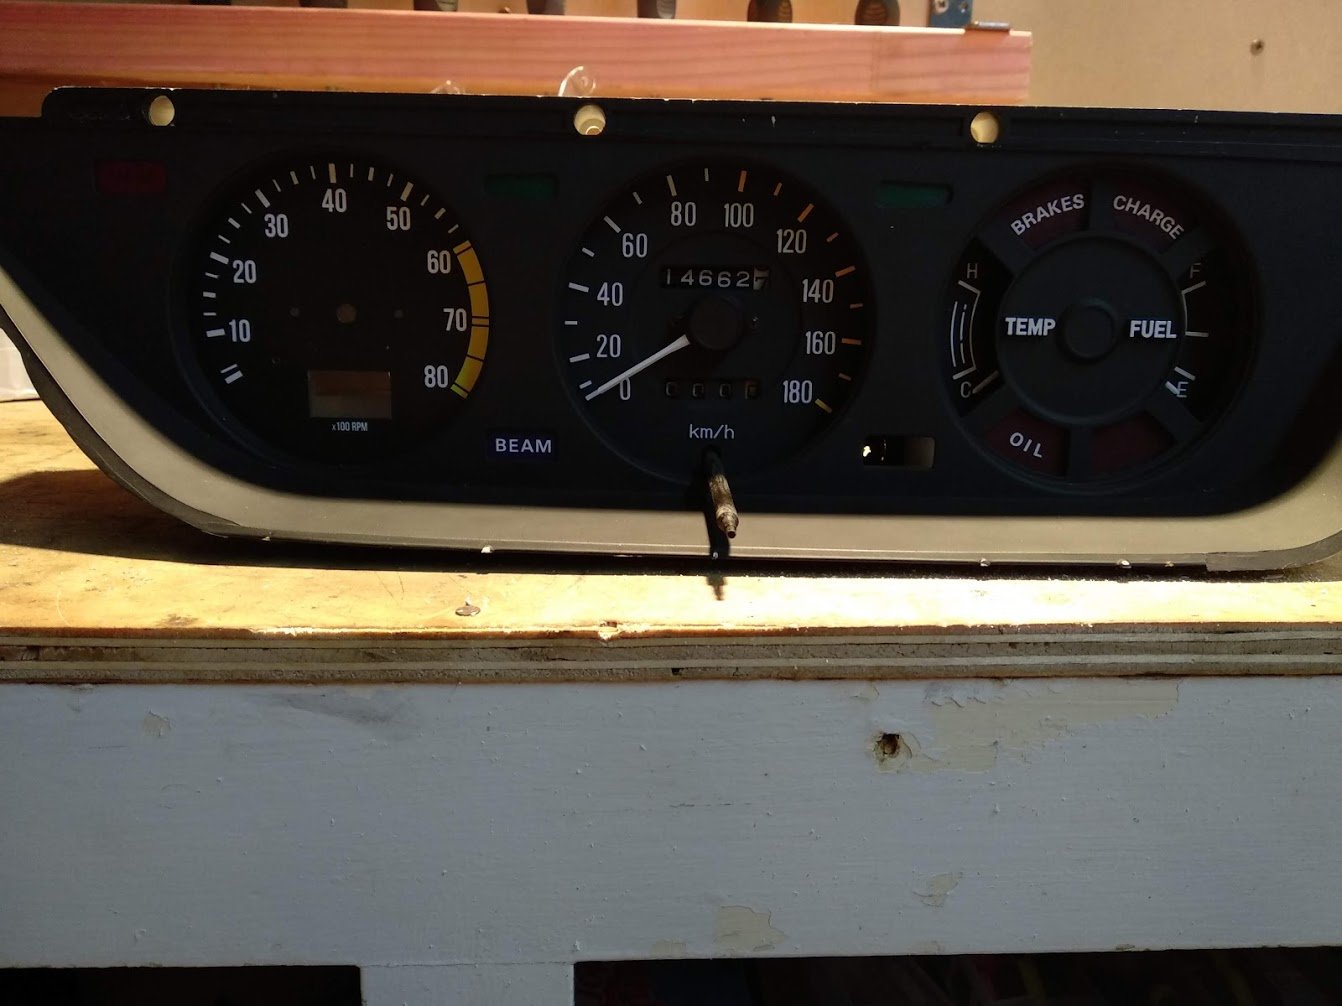
Later on I removed the clock and put a tachometer from (I think) a Ford Laser in its spot. It was just hot glued in there and was backlit. It actually looked okay but I always wanted it to have move of a stock look. This is what the tacho dash looks like:
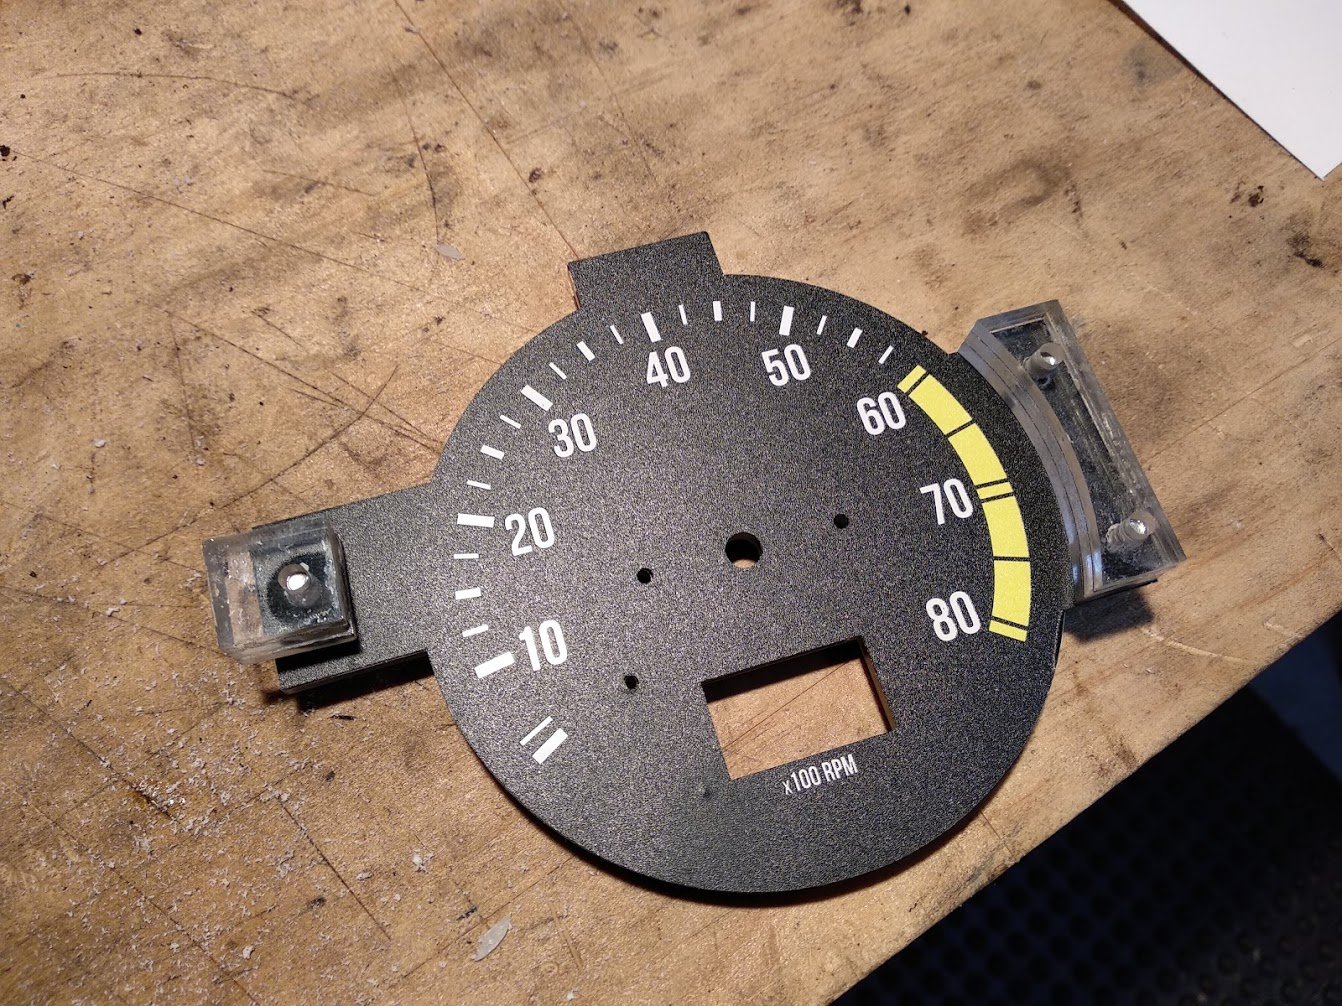
The goal was to make something that looked similar, but that also sat back into the dash a bit more so it could be lit in the normal old way with the light coming around the sides. So there are two parts - design the face, and design the mount. The face was easy enough to make in Illustrator, the hardest bit was getting things the right size - since I never had a stock tacho to reference off - and finding a font that was suitable. The one I found was not the same but close. It's the same one used for the tacho in the game My Summer Car. Huge thanks to Brett at Doozi for his patience with me sorting out the colours - still maybe need to print one more as the yellow needs to be slightly more orange. It also has a sheen on the black, but I'm not sure that can be avoided. You don't notice it when it's in the dash anyway.
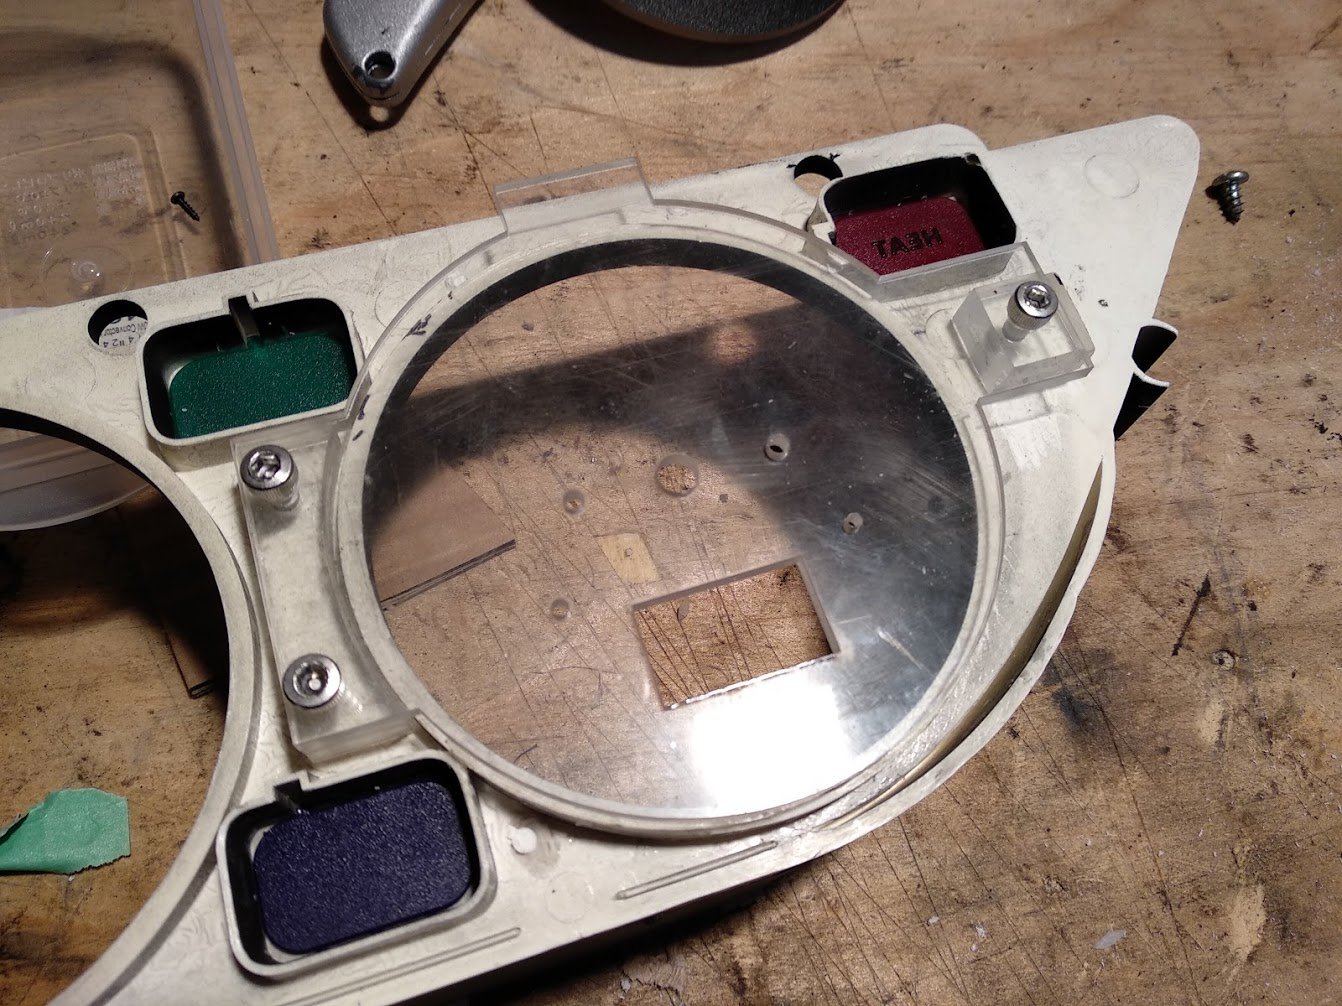
The mount was made in a similar way. I used the same outline and had it laser cut out of acrylic. I also made up some little feet so it can mount at the right level, in line with the speedometer and other gauges.
I then glued the feet in place on the back of the dash.
This allowed me to take the face off and apply the sticker and screw it back down. Well, actually I put the sticker on before I glued it, but it comes on and off easy enough. It's just using hot glue so I can remove it if I need to make changes.
From a prototype, this is how the tacho screws in, pretty self evident.
And here it is, getting there:
The square at the bottom is for an OLED that will display AFR. Big thanks to Ned for helping (basically doing everything) get that together. Hopefully I can find an old speedo needle somewhere to use as well.
-
20
-
 3
3
-
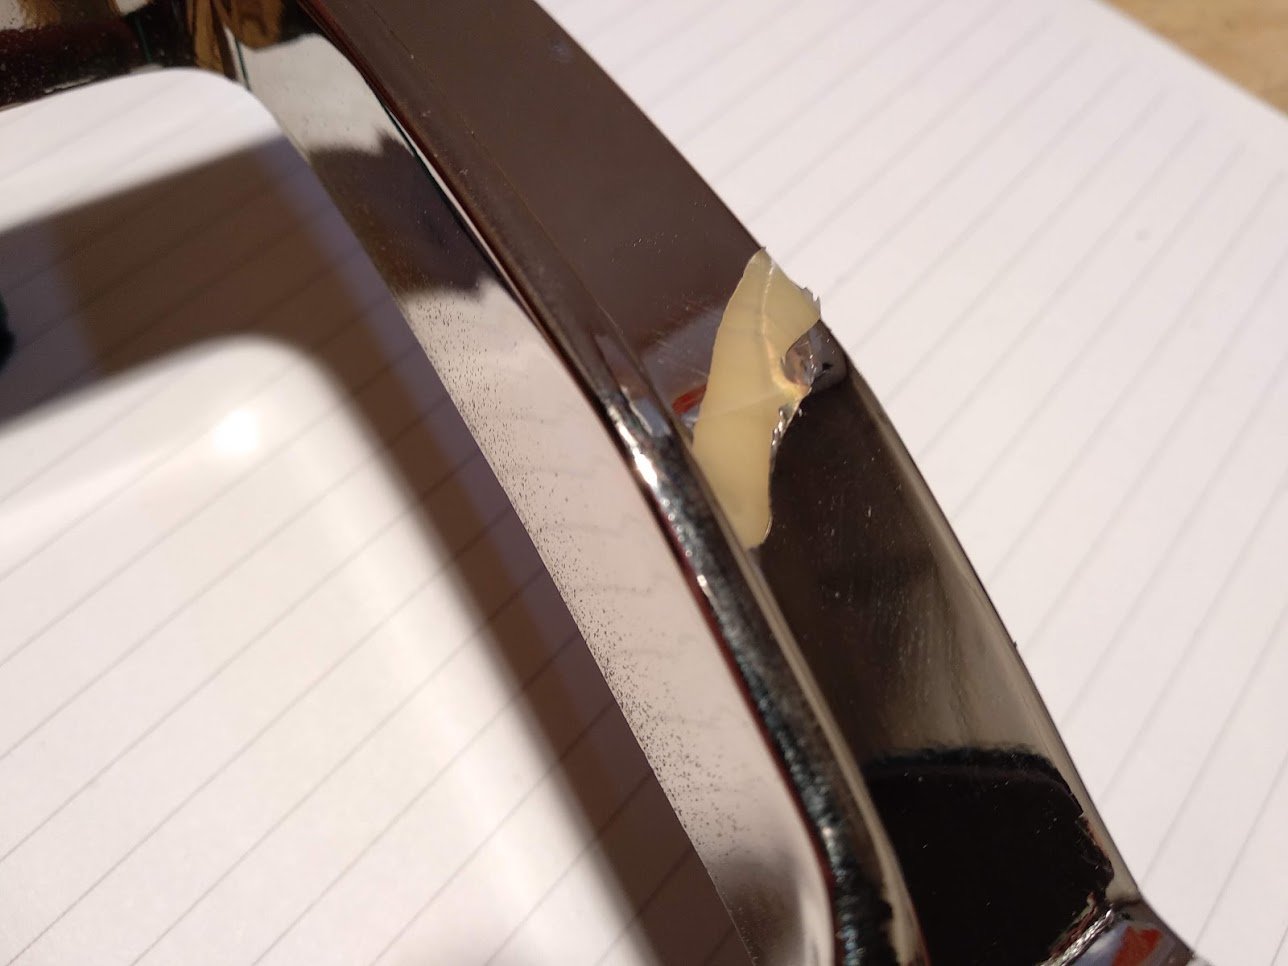
I guess I spoke (typed?) too soon, and all is not well. It was always the plan to repaint over parts of the chrome on the surrounds. I was concerned about using traditional primer and paint as I knew it would be risky to key up the vacuum metalising, so I decided to use plastidip. I masked it all up nicely and it went on quite well. Unfortunately, when I went to pull the masking off it started to pull the plastidip off too. I then decided to just remove all the plastidip, and guess what came with it? Parts of the metalising. So cool.
I'm not super sure on the next step. The guy who removed the chrome did say that he could try and actually chrome them for me, but the results are often mixed as getting it to stick to old plastic can be hard. I might try that anyway. Pretty annoyed though.
The other option is to just paint them black.
-
1
-
 7
7
-


zep's Gemini Coupe
in Projects and Build Ups
Posted
Did you ask for real progress?
@EURON8 and I (mostly Chris) have got the engine mounts for the D1 tacked up. Chris will weld them up and then I can get back to sorting the sump. At this point I could pretty much have put a better engine in. At least it's still Isuzu?
Also, thanks to @Snoozin @Spencer and @Thousand Dollar Supercar for their help with the AE101 brake kits. They turned up this week")