shizzl
-
Posts
5,609 -
Joined
-
Last visited
-
Days Won
1
Content Type
Forums
Downloads
Events
Gallery
Everything posted by shizzl
-
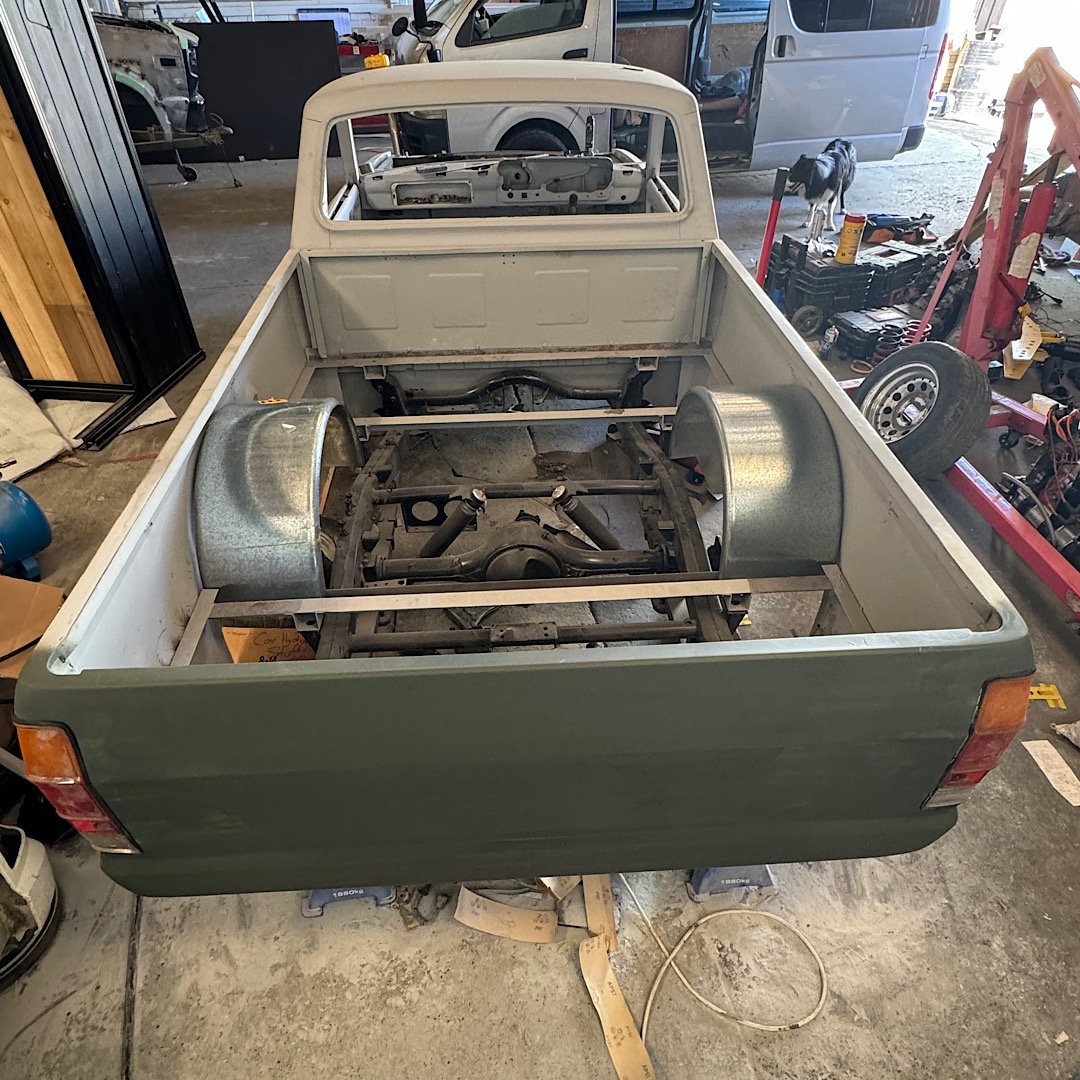
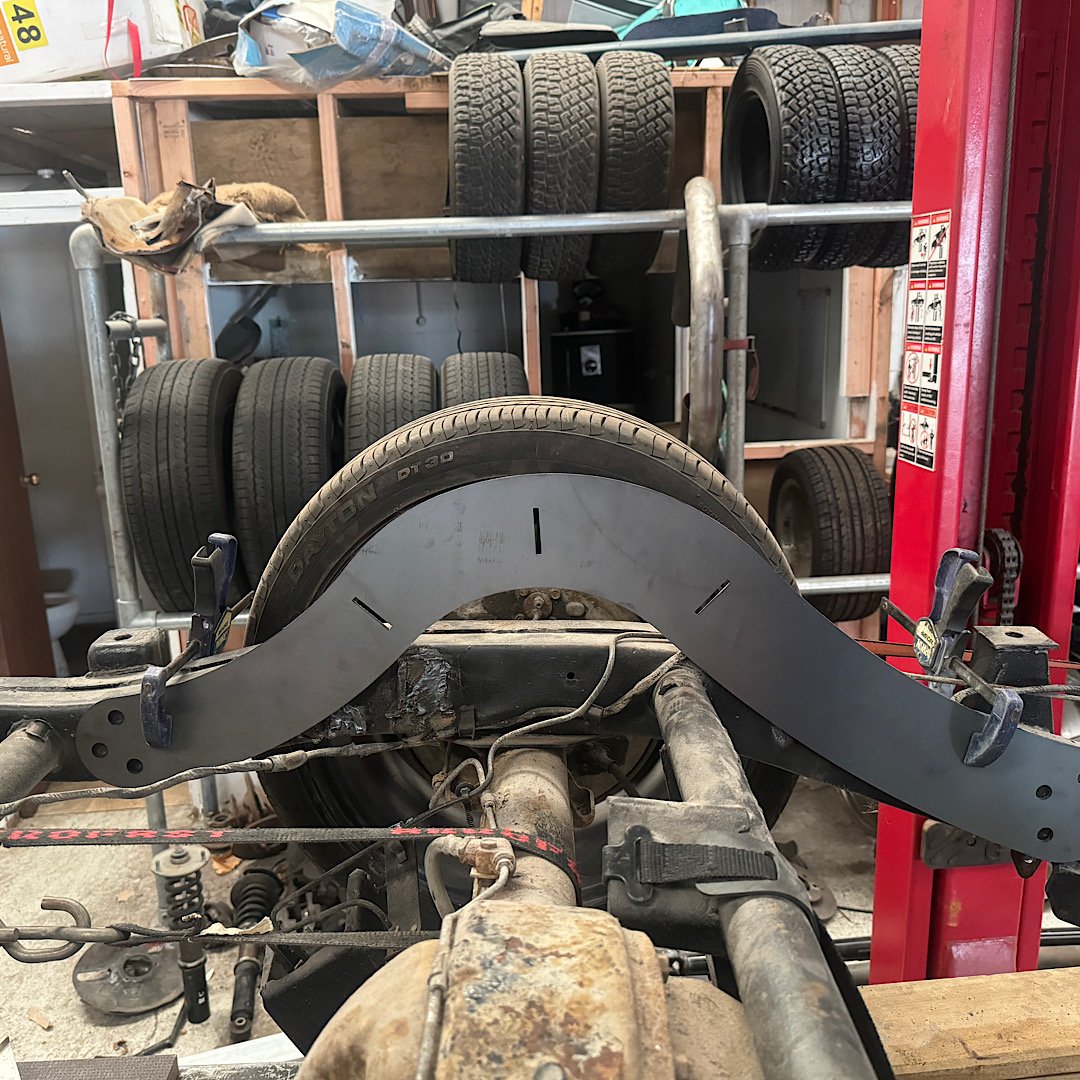
Picked up a pair of trailer guards, aka wheel tubs from a solid GC today. just sat them in place where I think they’ll end up, or there abouts. stood back and admired the look, quite like it. still need to trim to fit snug once it’s all decided.

- 148 replies
-
- 31
-

-
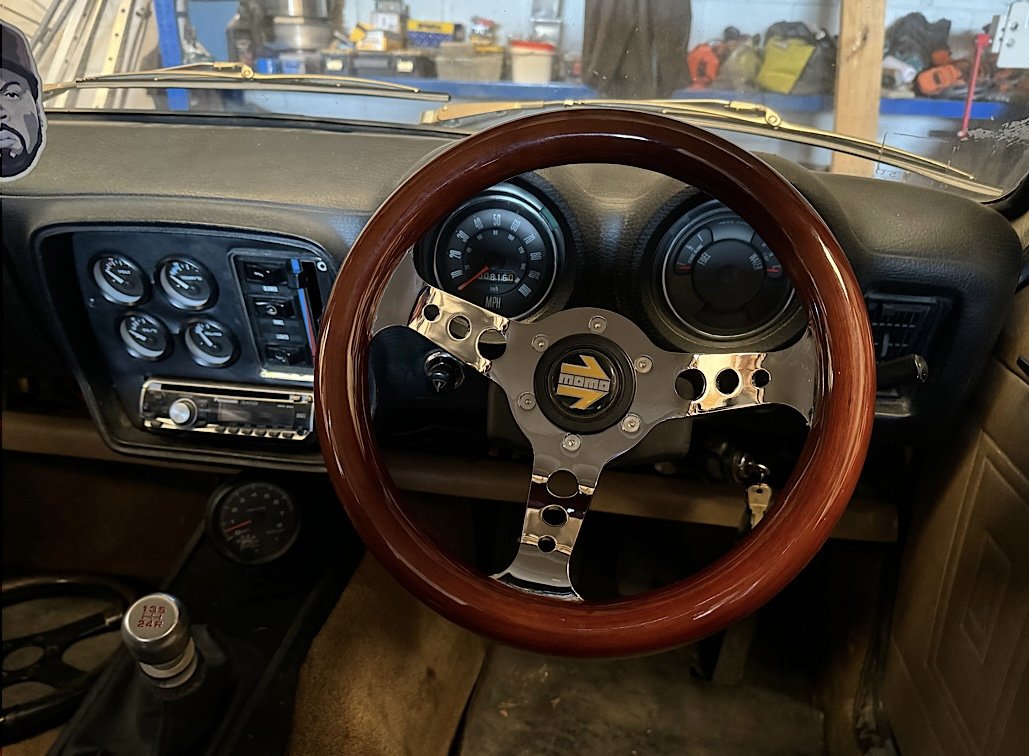
Got back from Japan with my little UP Garage purchase. fitted it as soon as I got to the shop this morning. Dayyyyyyyyyyyyyyyymmmmmmmm
- 152 replies
-
- 26
-
-
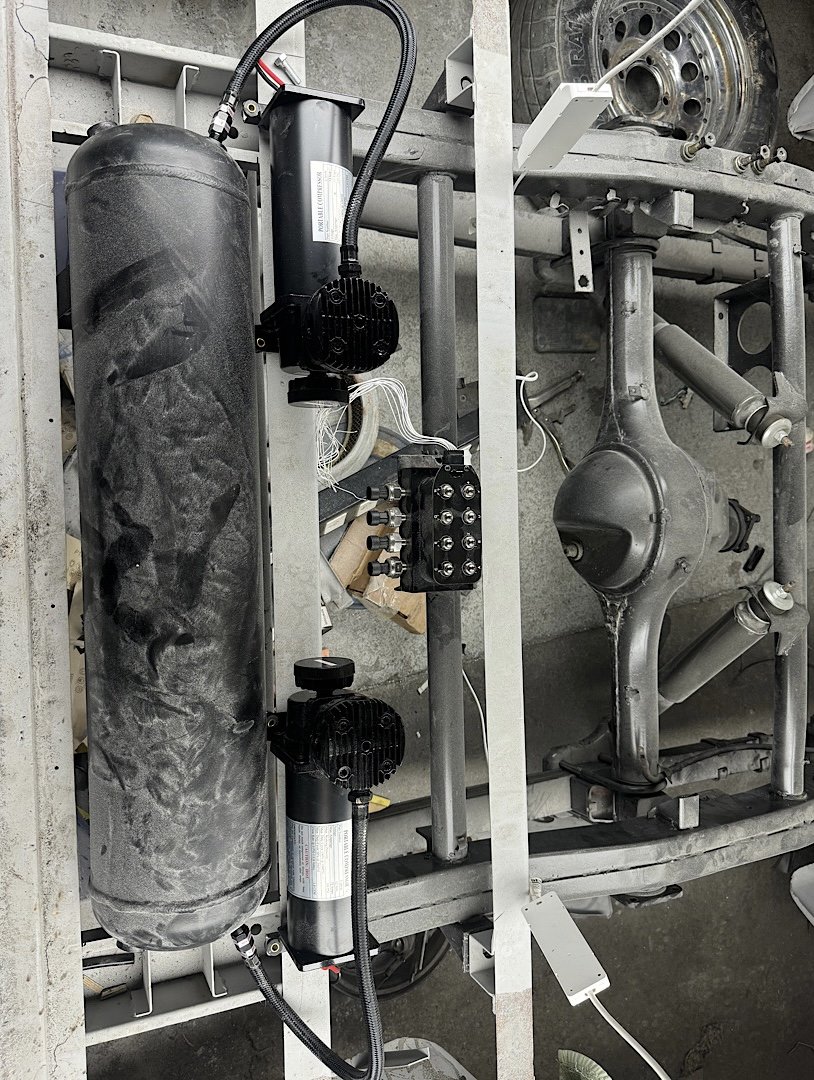
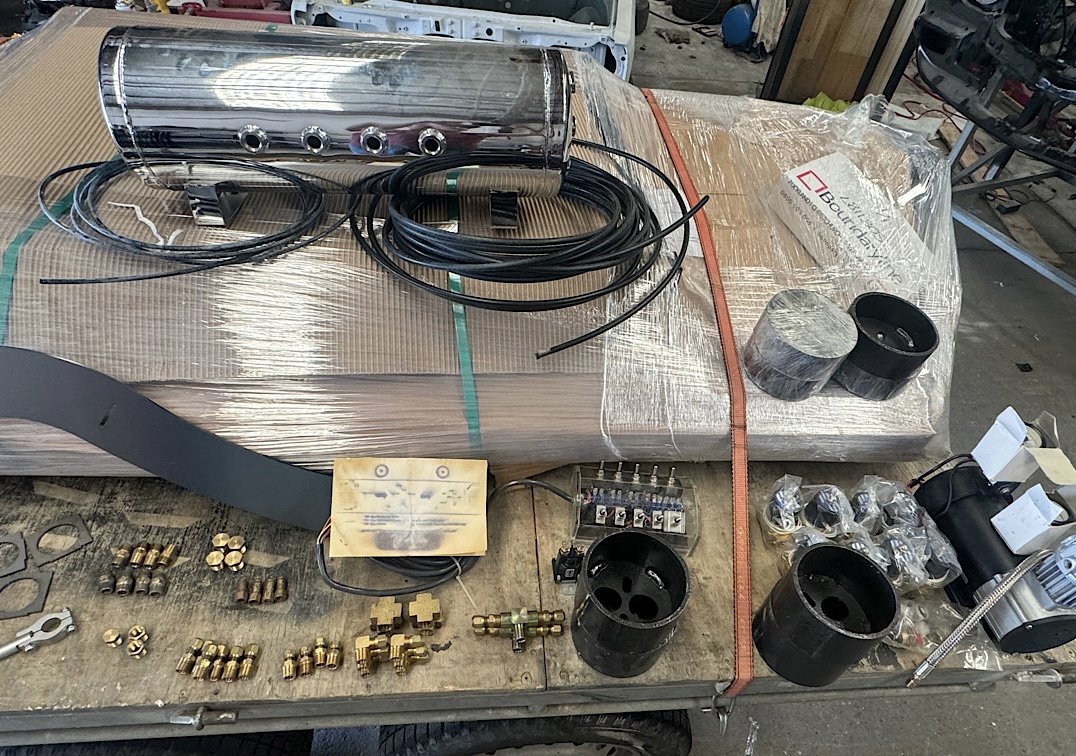
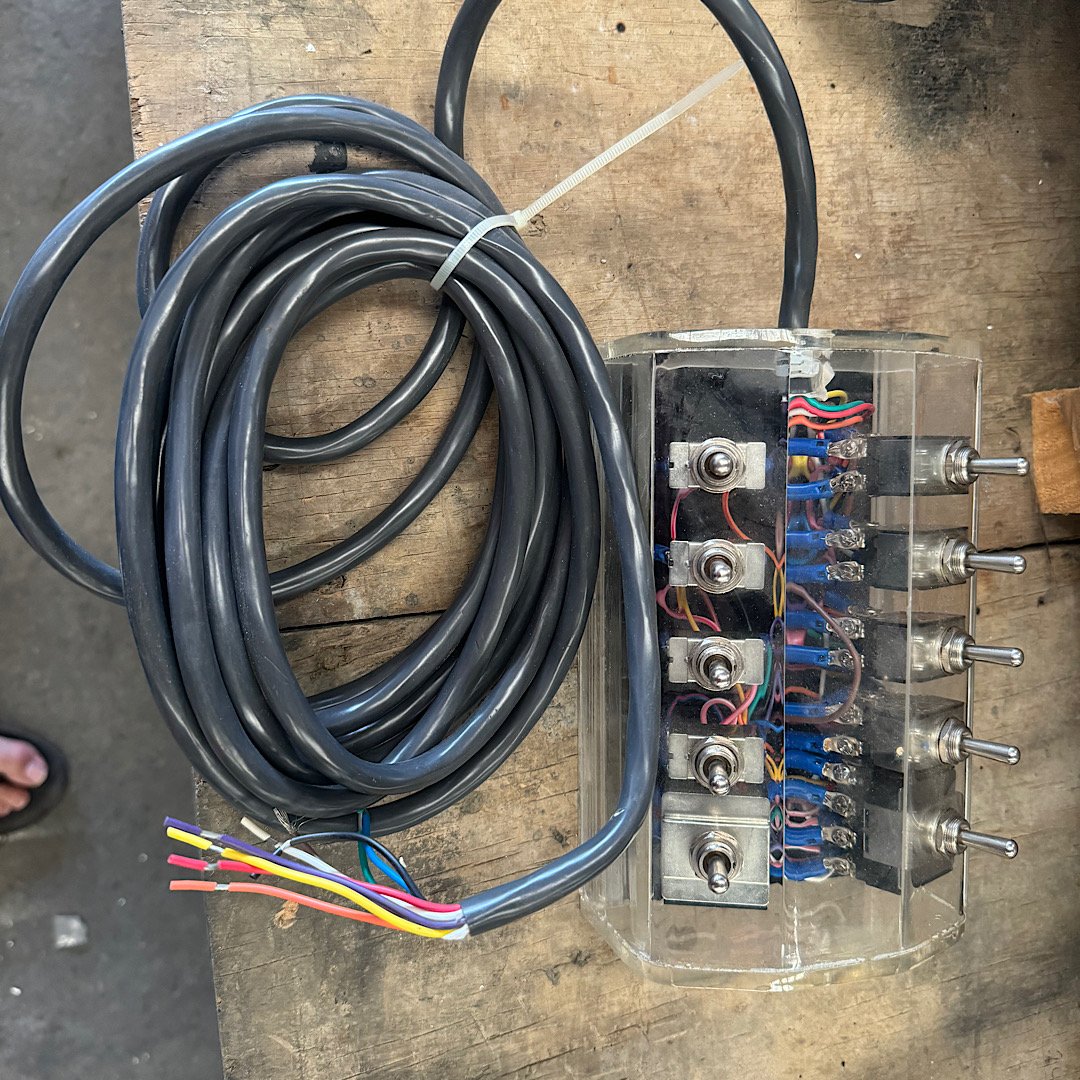
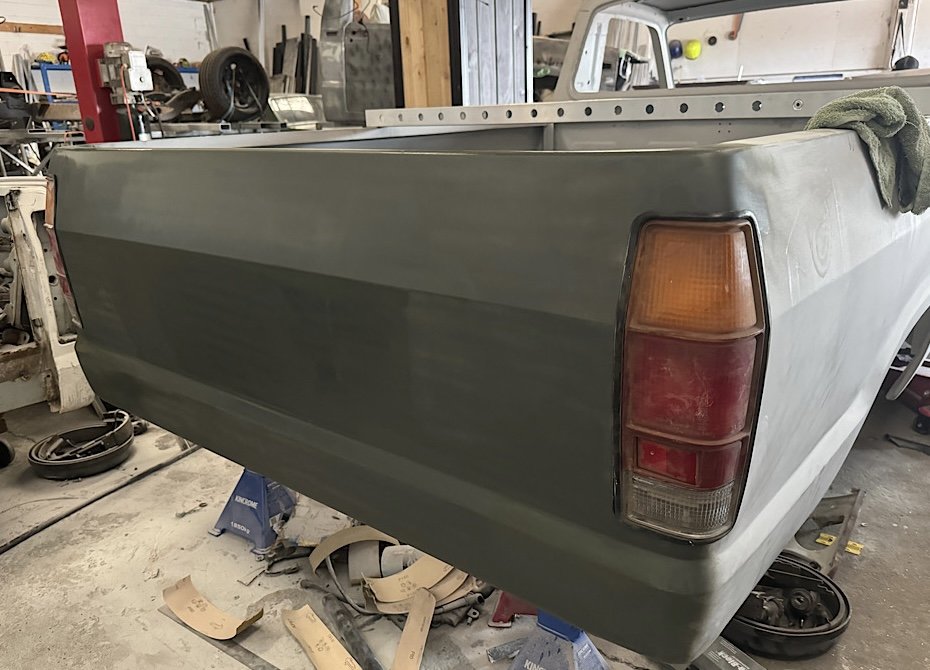
Not much of an update really. i ended up ordering a set of air ride nz’s notch kit that he had in stock. Listed as an 8” notch. i roughly sat one side in place, I figure it allows for a 70/80mm bump stop on the diff in this position. Had a play around with the air system layout on the other ute. It will all sit below the deck floor. And each compressor will have a water trap before the tank. the valve block can mount to the factory spare wheel mount. Looks quite good like that however, a deal came up on marketplace that I thought was pretty good. A “showtime” bag fitting kit for $250. this included everything in the photo below. Chrome 9 port tank, pressure switch, compressor, 2 gauges, solenoid, 10 switch controller, 3/8” and 1/4” air line, 8 x 3/8” bag solenoids, a bunch of air line fittings and a full set of bag mounts (cup type). I will use these solenoids, fittings, airline and tank. i won’t use the switch block and compressor, gauges and upper bag cups. this means my valve block, switch panel will be redundant ( this is a full kit minus bags). I can potentially buy 4 more bags to make another full kit (single pump). the air management system I will use is an air command air8000 system that has 8 presets with a digital display. i only need to figure out a way to lock out the system while it’s driving. maybe a wheel speed sensor somehow, this will be wired through the air8000 alarm circuit which locks the system when set/armed. I’m sure that will work. i slapped the tail lights in the tray for max visual, so stoked. Just need to finalise that concave line now. i fly out to Japan in 4 days, so nothing else will happen until after nats. i would like to hunt down a nice steering wheel while im over there.
- 148 replies
-
- 18
-
-
I have done some testing. I packed out the balljoint by 10 degrees, eased the binding but is very close to maxing out. so with the spare set of arms I pie cut them to 15 degrees. At ride height the balljoint sits neutral, and max lift and lower it doesn’t max out. i have noticed that the balljoint has an angle on it from factory of around 6/7 degree by eye. finding a flatted/neutral balljoint would be the ideal solution though.
-
Slap a stamp on it and give it the big send
-
When I took my Hunter for a cert, it was pinged on too much camber ever after an alignment. it now sits at 1• neg. following this thing made me cringe at the camber of the front, rear suspension looks static. also, just flap disc it and send it bruh Is rather cool but I’d paint it atleast
-
I had some 15 year old Kelly budgets on my RS legacy that was rwd, make for fun commutes. i have the re003’s on my Hiace, massive overkill running 245s, theyr super sticky. hard to see how these could harden given the compound.
-
Pokeno, technically north Waikato. Get labelled Auckland .
-
What is cjc?
-
I’ve tried organising a casual cruise day. No one showed interest. left it.
-
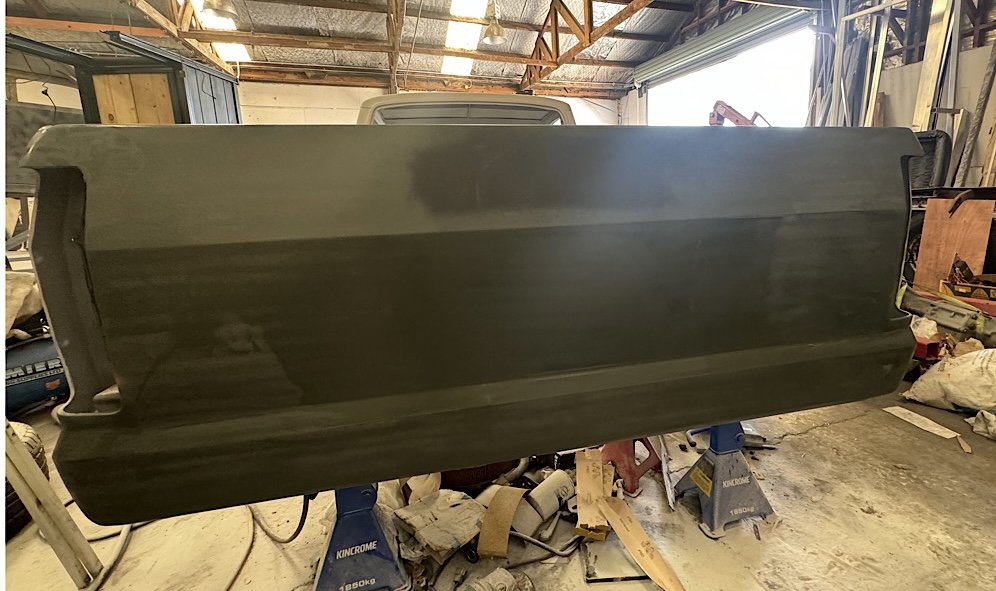
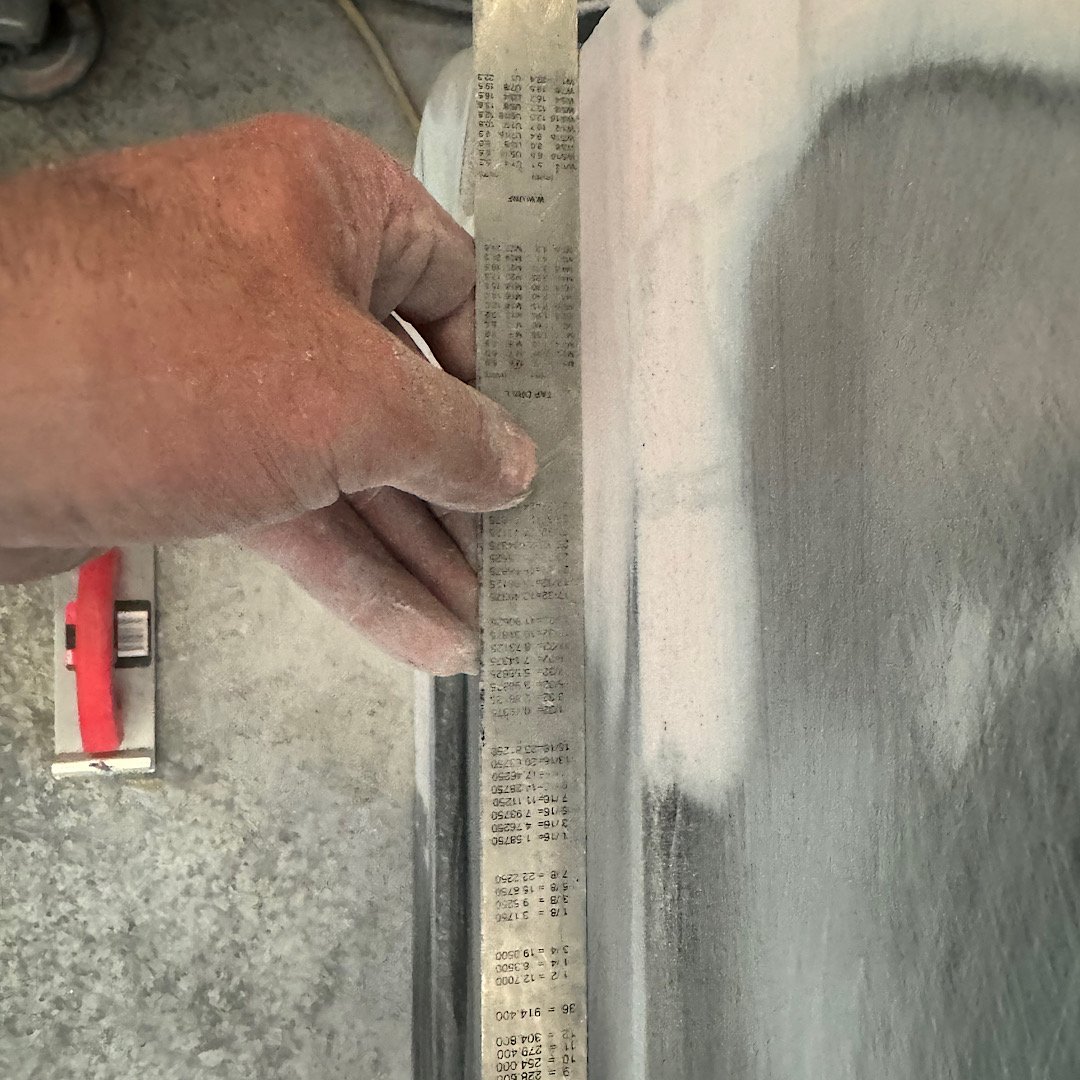
Tailgate 99% done. only have some minor fiddling to do on the concave fold line. Might need to make a shaped sanding block for it. then sand out the 80g scratches ready for a filler primer. i also played with spacing the balljoint to achieve a better angle. tried a 9 degree wedge (achieved by washers). this got the crossmember to 20mm clearance. id be happy with that, but still don’t like the idea of the bj being close to maxed out. so I decided to pie cut a set of arms (I have a spare set on the parts ute). cut it to gain a 10 degree change. balljoint sits neutral at ride height and very nice at full lift and full slam. crossmember is on its tits. Now it’s time for some c notch action. with the frame currently sitting at 90mm with the diff on the frame, a 6” notch should be sweet. I will set bumpstops to max out to the legal scrub line or whatever it’s called. think it still equates to 50mm clearance “legally”. doesn’t need to be smashing the frame into the ground. I needed to get the body into final prep before I head to Japan next week. So pretty stoked so far.
- 148 replies
-
- 23
-
-
Yeah I figured that aswell, I’d aim to have the shocks spaced out as far as possible to the factory offset to the chassis. the spacer idea seems far easier to accomplish with less risk of error and less welds
-
Thanks Clint @cletus that’s exactly the info I need to move forward. so making a tapered “wedge” spacer between the upper A arm and balljoint is ok? would be better than cutting.
-
Cheers Matt, that one that got sent to me didn’t have the majority of its front tubs and was road legal, so had me scratching my head with so many conflicting opinions out there. have spoken with Tim from shoresfab about doing the pie cut. Just need a yes or no from a certifier to proceed. will start with a spare set of arms I have to get the initial angle right. and retain the correct castor angle
-
Does the bonnet count ? Haha all good looks at the manual, but as I’ve found by experience it’s always best to get confirmation from the certifier for their opinion. 1 says yes, the next says no.
-
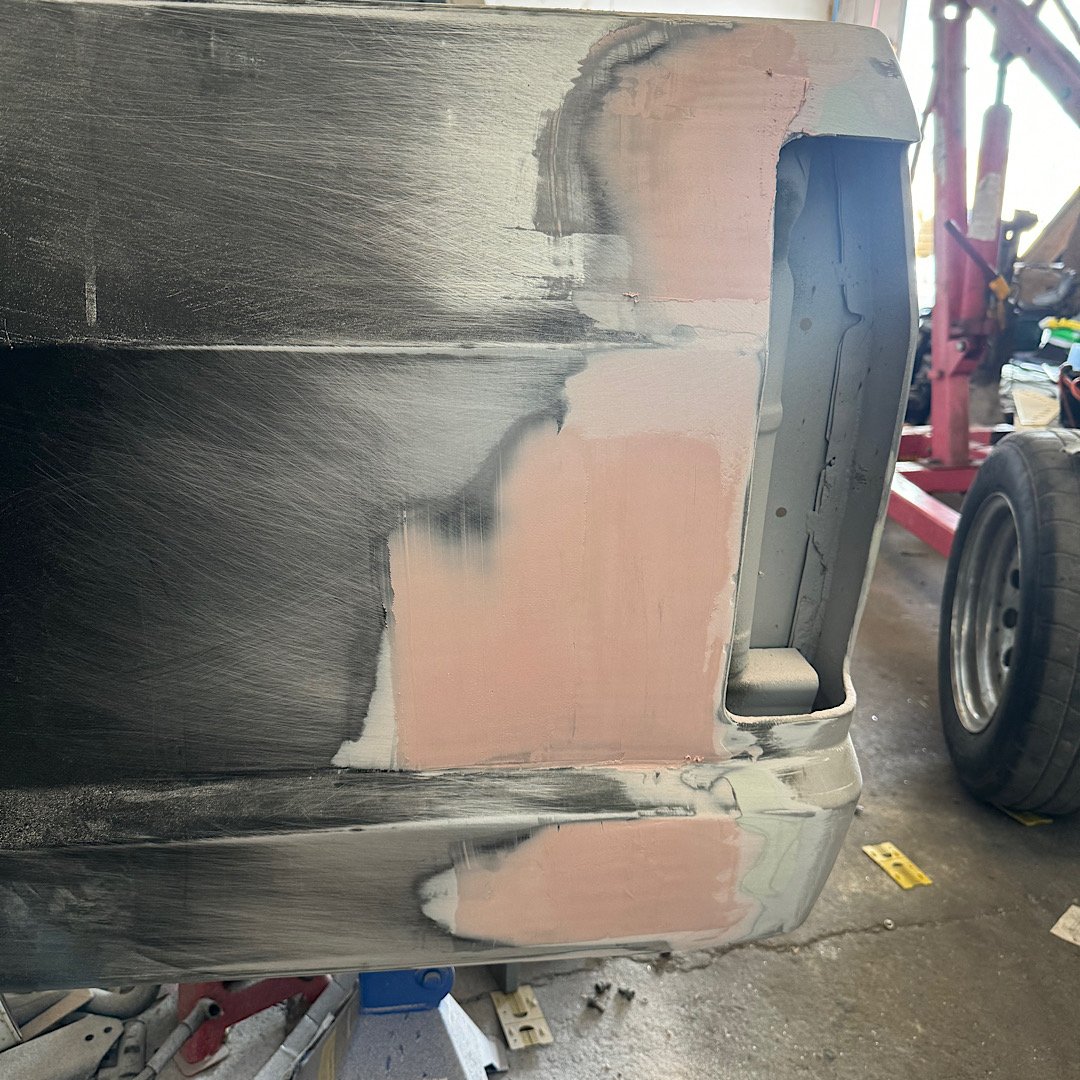
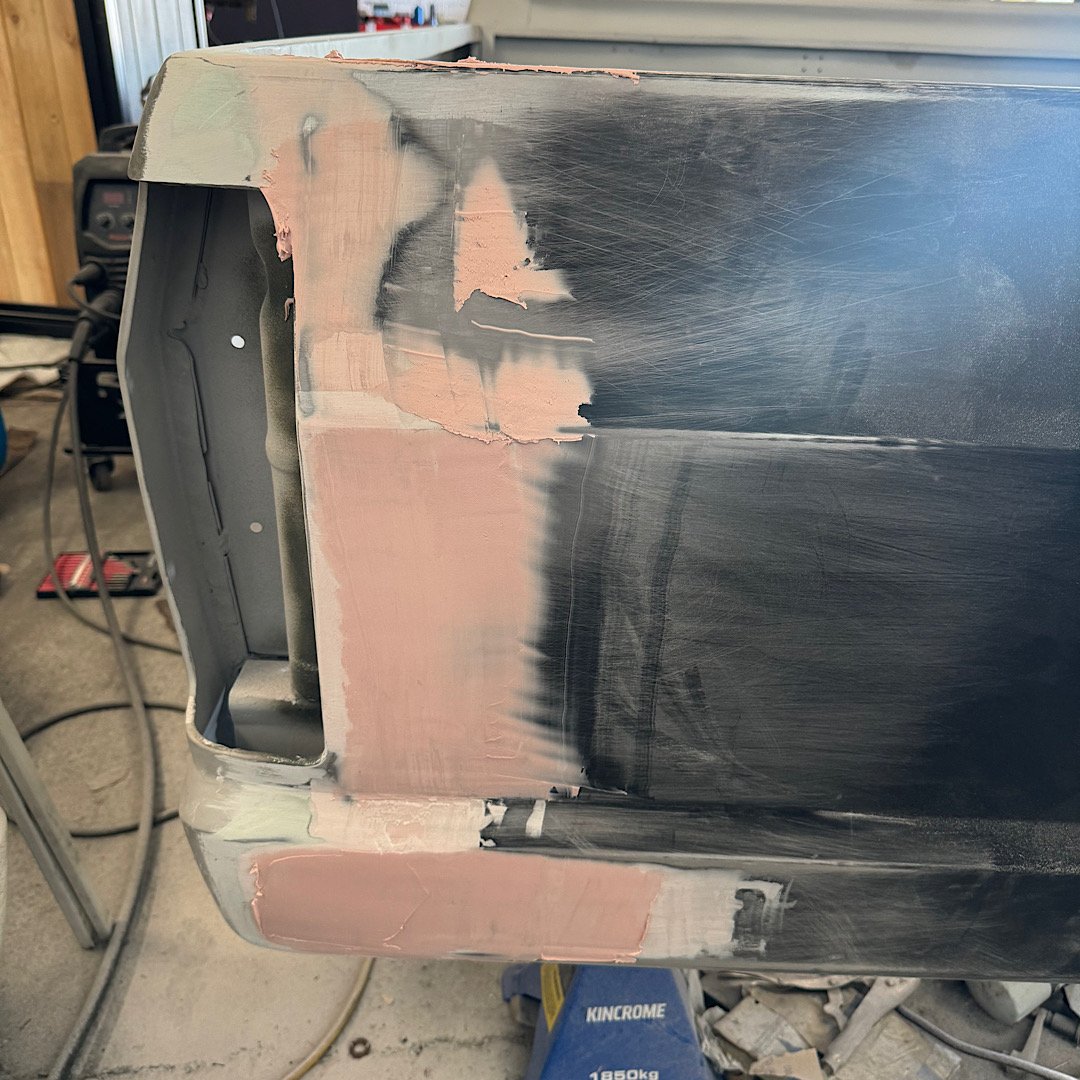
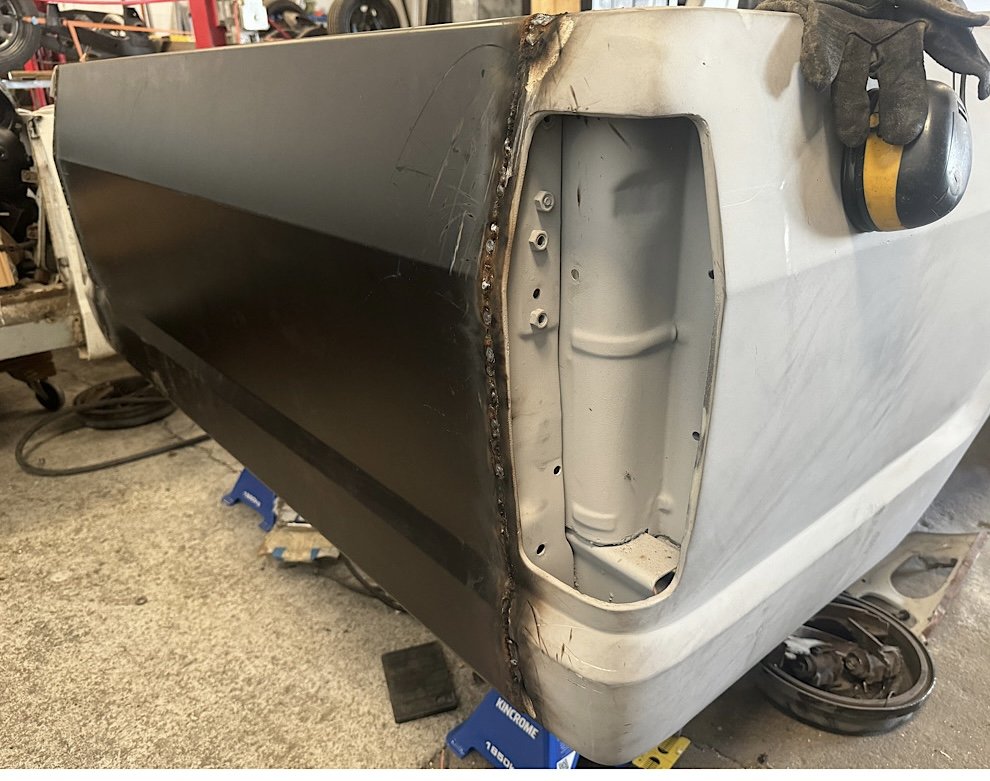
Well well well, another day of progress, well , a couple hours anyway. knocked the nubs off the welds, etched, then set about throwing mud at it. actually hasn’t taken much except where the previous body guy has just filled instead of pulling the corner out to align with the other side. not much left to finish the filler off, used about 400gm of filler with most of it going the floor after sanding. almost ready for paint. Just need to see if I can “delete” the inner guards before I lay colour. No pint going back and doing it after paint.
- 148 replies
-
- 22
-
-
Also, is it legal to completely remove the inner guards like that one?
-
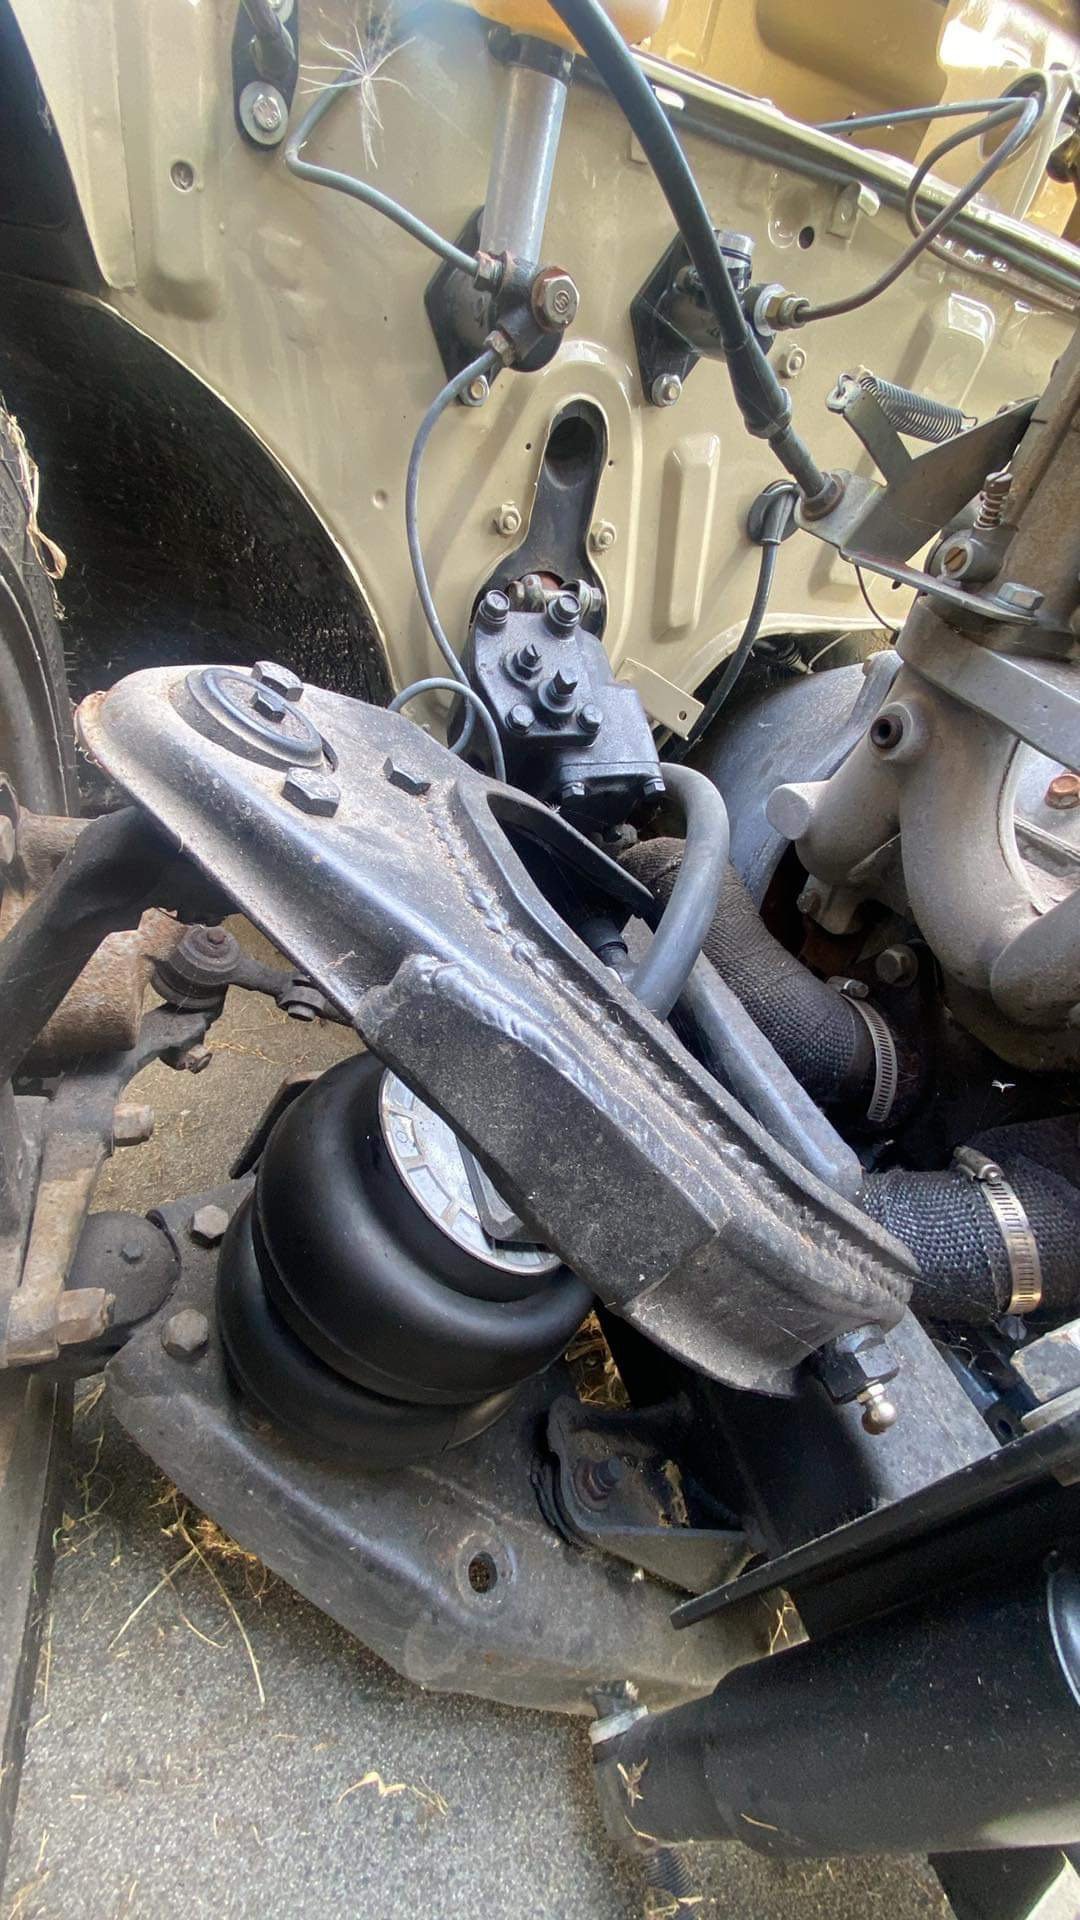
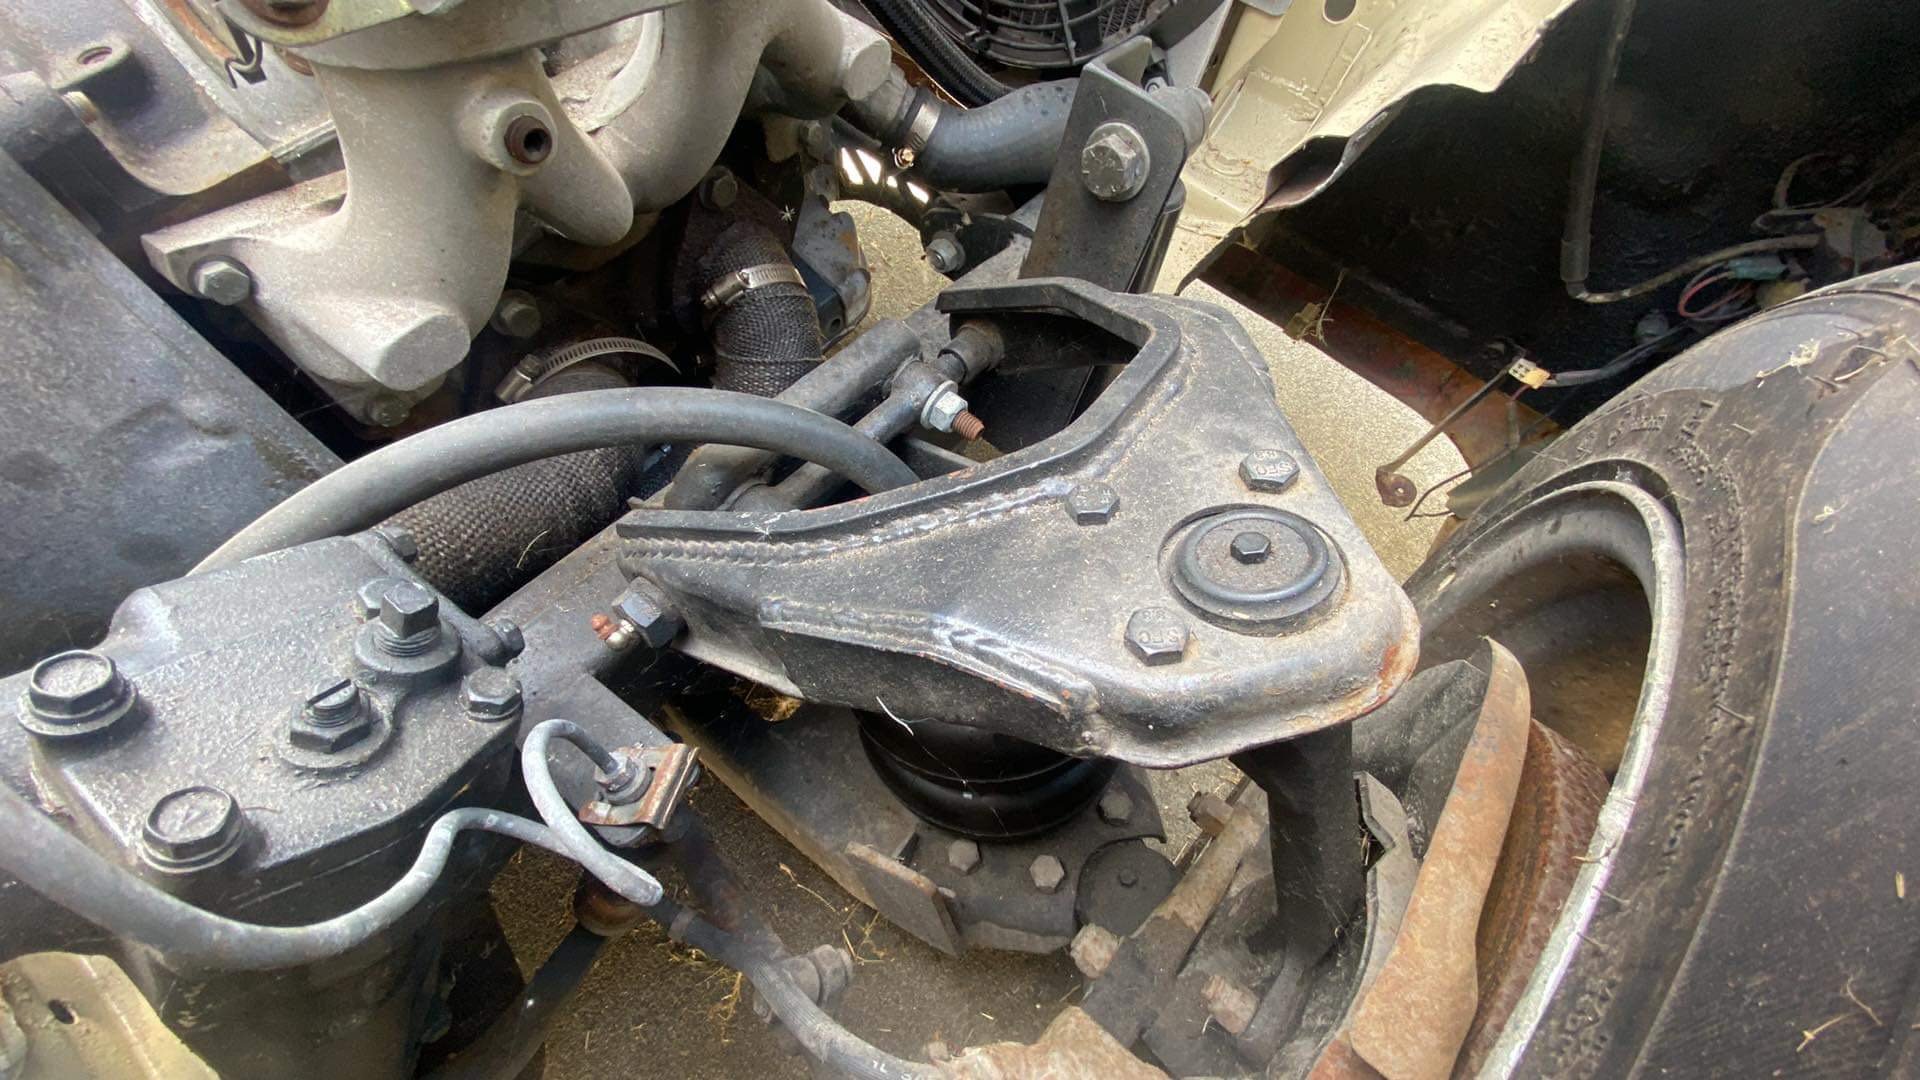
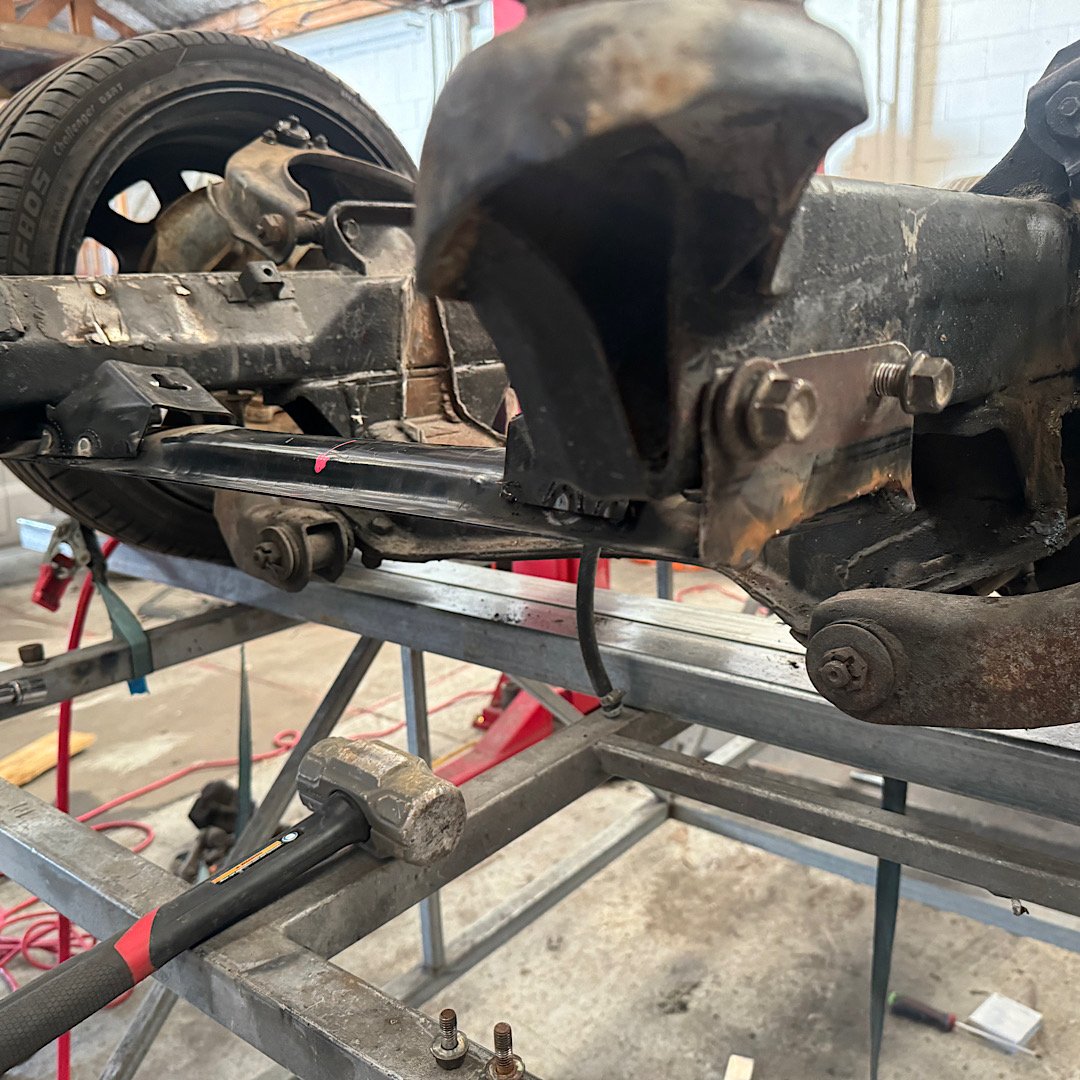
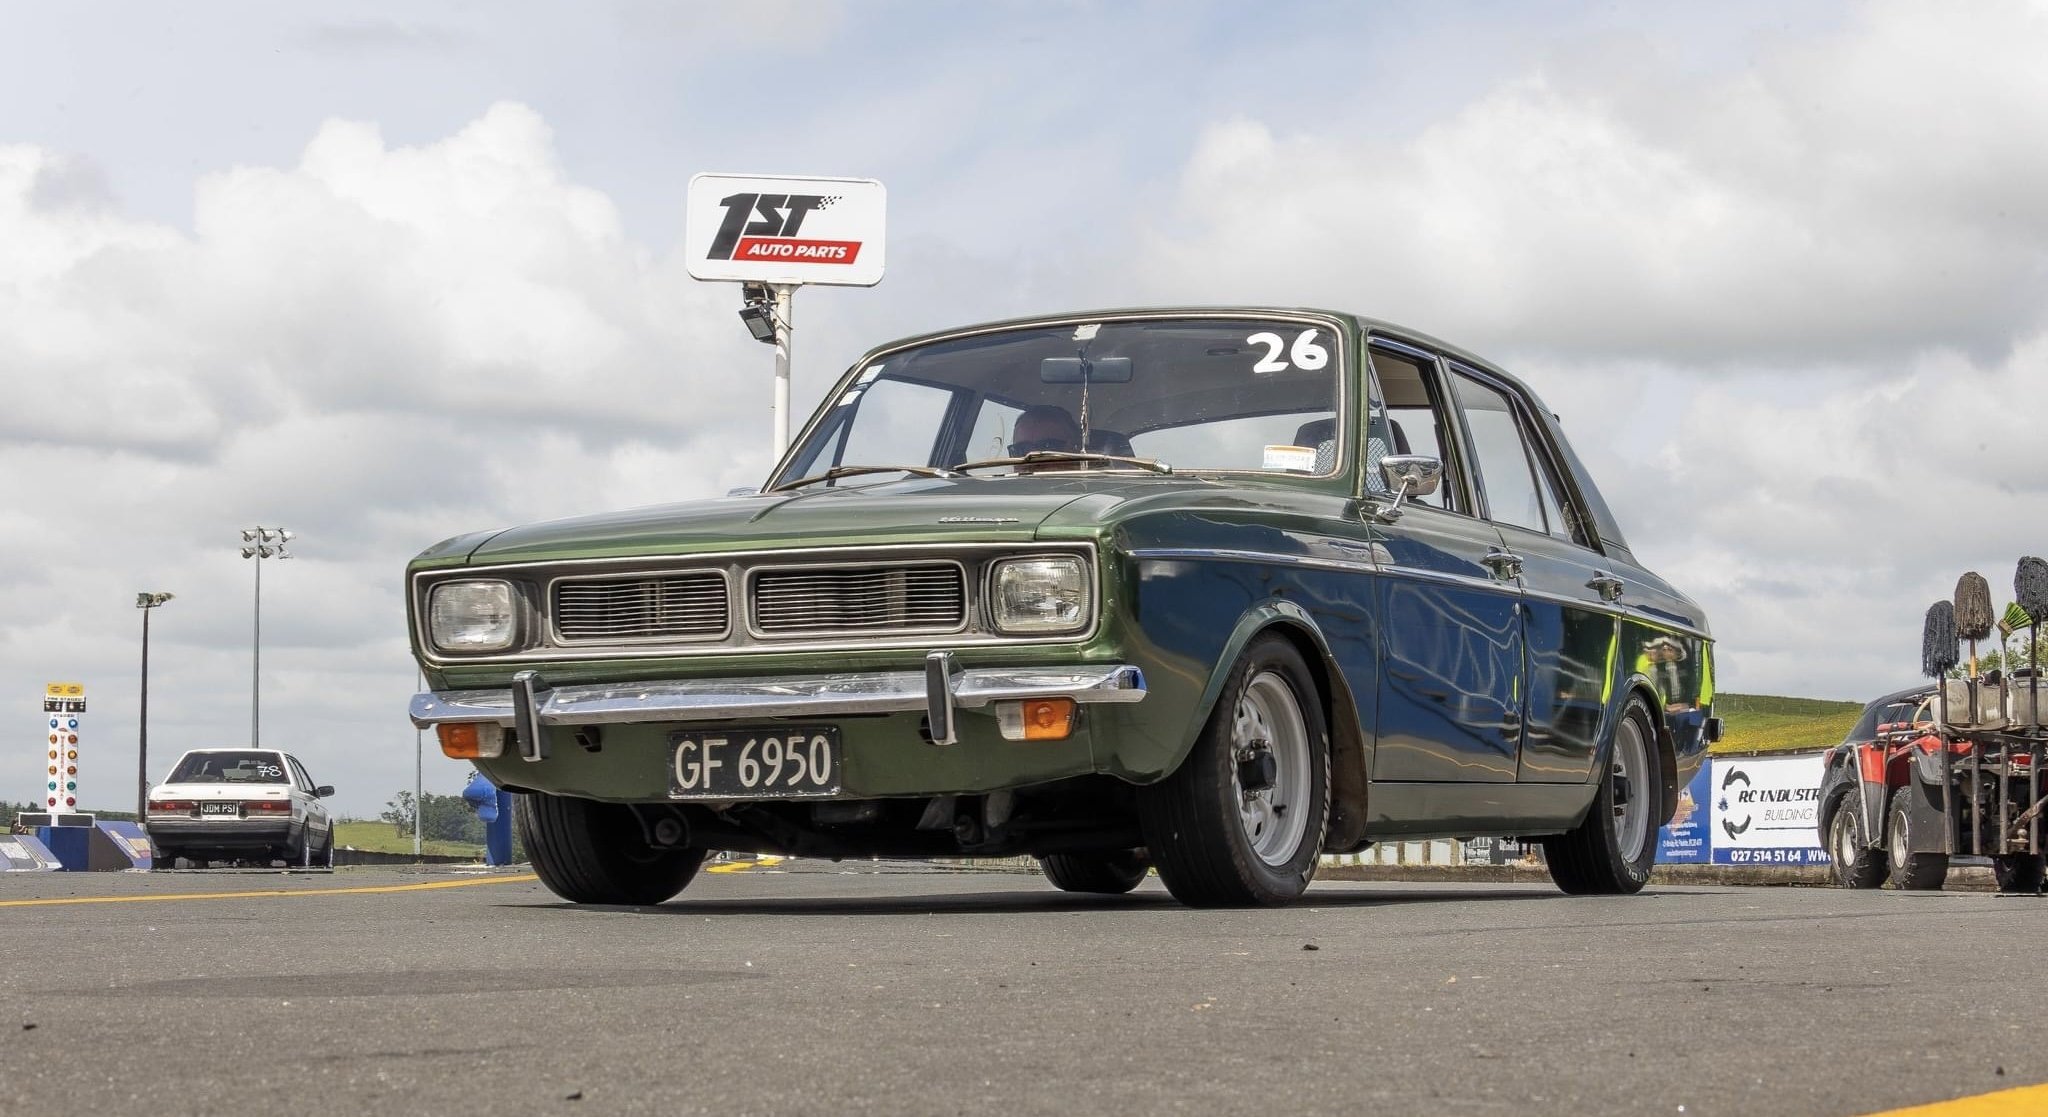
@cletus after your opinion as you’ll be getting this project eventually , whenever it’s done. So I need to get this ute lower than what it’s maxed out with the balljoint, I’ve been told to do a pie cut and reinforce it etc. these pics are of a 1st gen b1600 , bagged and pie cut uppers. what I need to know is what documentation do I need to support this mod? NDT report only? these arms sit completely flat standard, so you can judge how much it needs to drop overall to sort the binding. i also not the bump stop on the bottom arm is completely toast in those pics. what is the expected minimum for these? I do plan to retain using a bump stop for max lift travel too, I’m sure it’s wise to not over inflate bags and max out bjs etc the opposite way too. always open to suggestions and tips. also going to dig into the C notch and 4 link when I’m back from Japan. Similar to @kp60nick set up, although I think my arms are slightly shorter. I’m not aiming for massive travel change. Ride height at 100mm, slam and lift of “enough”. Using 8” travel bags. solid advice is rewarded in beers/hugs/high 5s/fist bumps/east coast waves
-
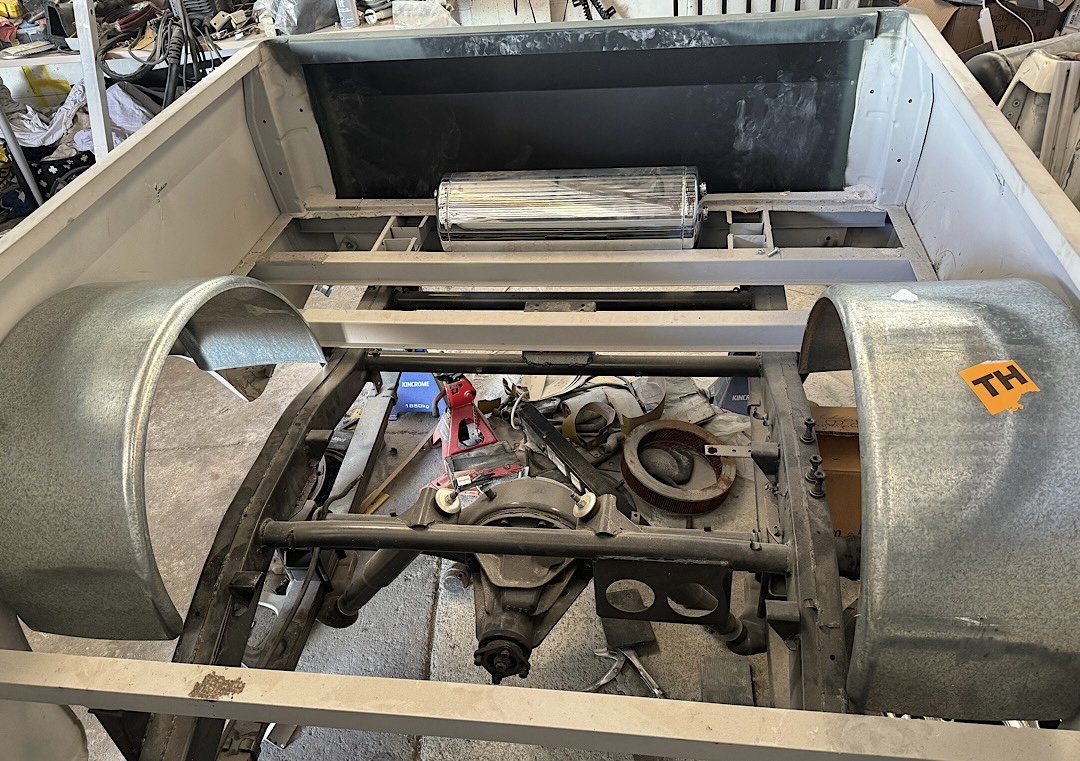
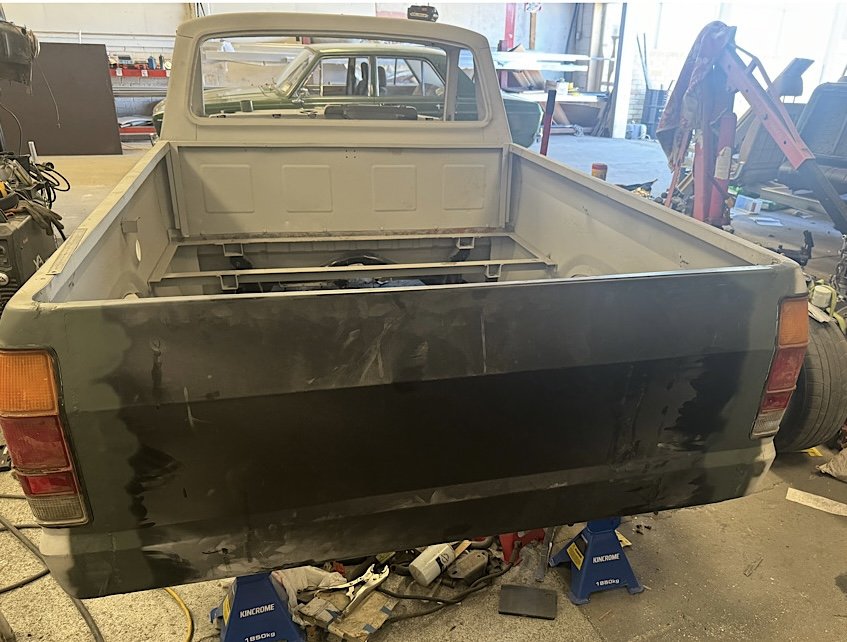
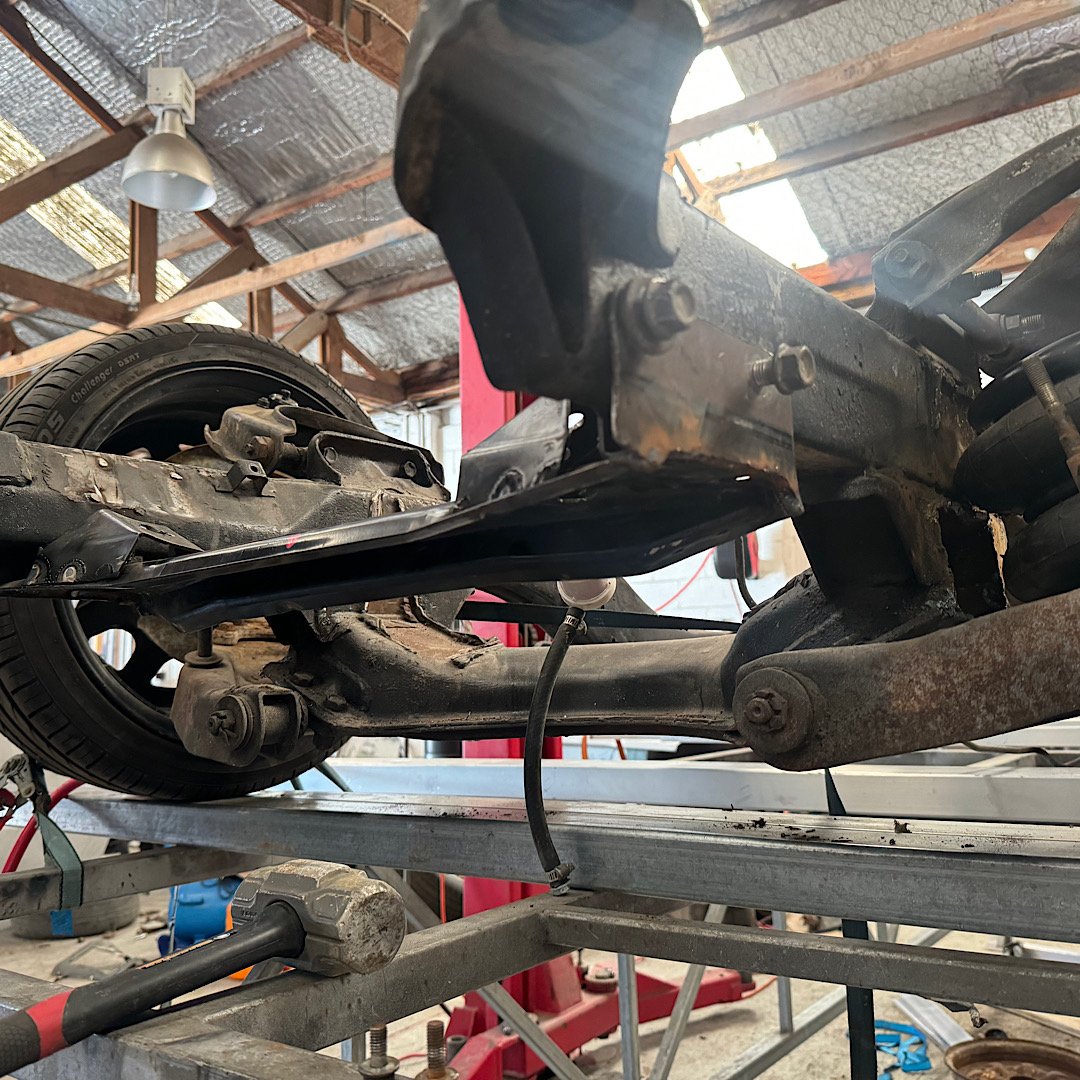
Now it’s time to get the axles back in to get it rolling, and sweep underneath it. it’s become a bit of a tip under there. im actually pretty keen to make this one RX3UTE the more I work on it. and make the 2nd ute mongrel as. Or an RX4UTE???
-
So much for working today. First proper day back and had a mad case of CBF. had a site meeting, made a plan. Went to the workshop for more ute shenanigans. this time I decided to stitch in the new tailgate skin. Mainly so when it comes time to lift the deck it doesn’t just fold up without the floor. turns out they built up the lower corner a fair bit with filler. Don’t know why. There are no dents.
-
I have a strata 215c and a XA 250, both migs. the XA was almost 1k cheaper and welds so much nicer. a box smootharc 185 was around $1600 the last time I shopped for a mig. just bought a XA plasma, really happy with the quality of this brand so far. support is great too. ive had to a couple of returns on my spool gun (Ali) where the driver quit, a screw backed out internally the first time, think they said the trigger failed the second time. Has been good since. i found the price of welders dropped by 50% over the last 5 years but may have gone up due to shipping increases
-
Was just about to leave the shop and decided to look at the 2nd chassis. nek minnit decided to put some extra strength into the crossmember as it utilises the swaybar mounts. i added wings that pick up the bump mounts, 8 bolts in total now. will send it out to powdercoat along with the gearbox crossmember yay for plasma cutters
- 148 replies
-
- 15
-
-
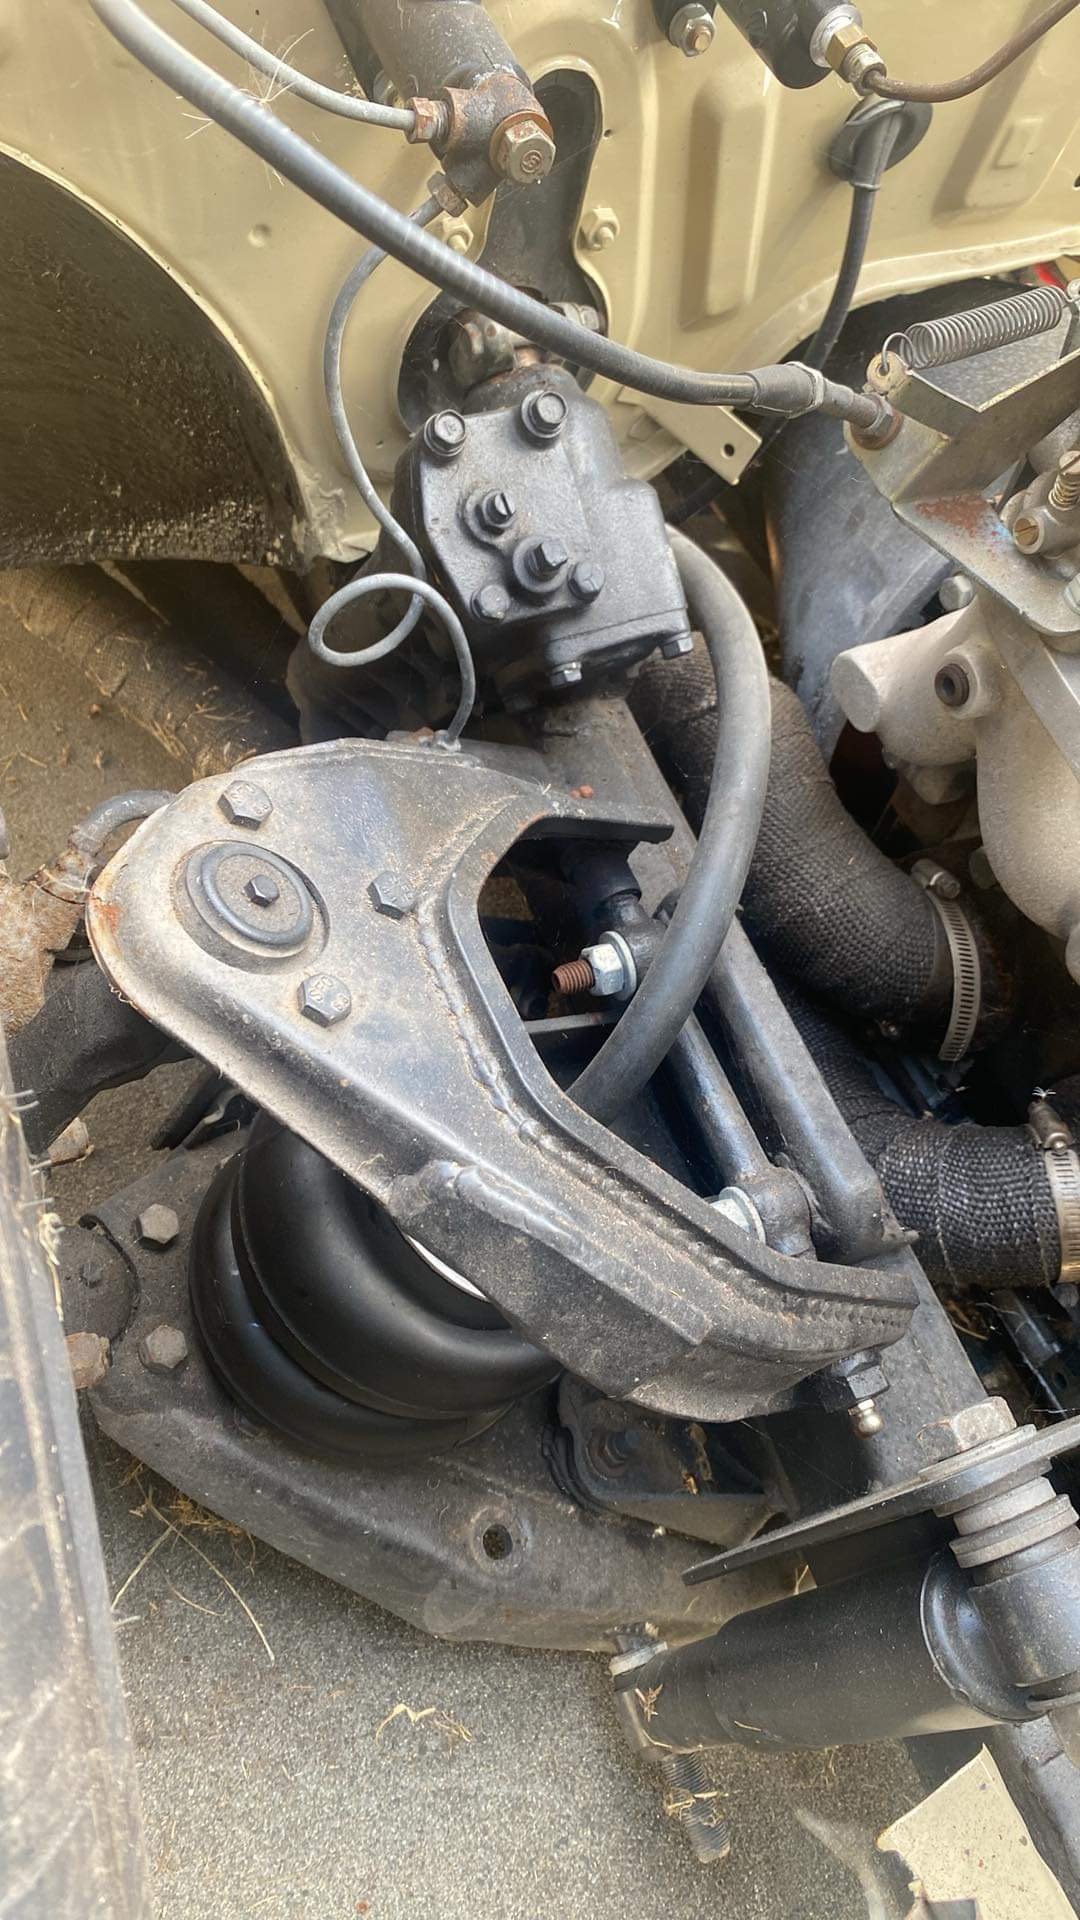
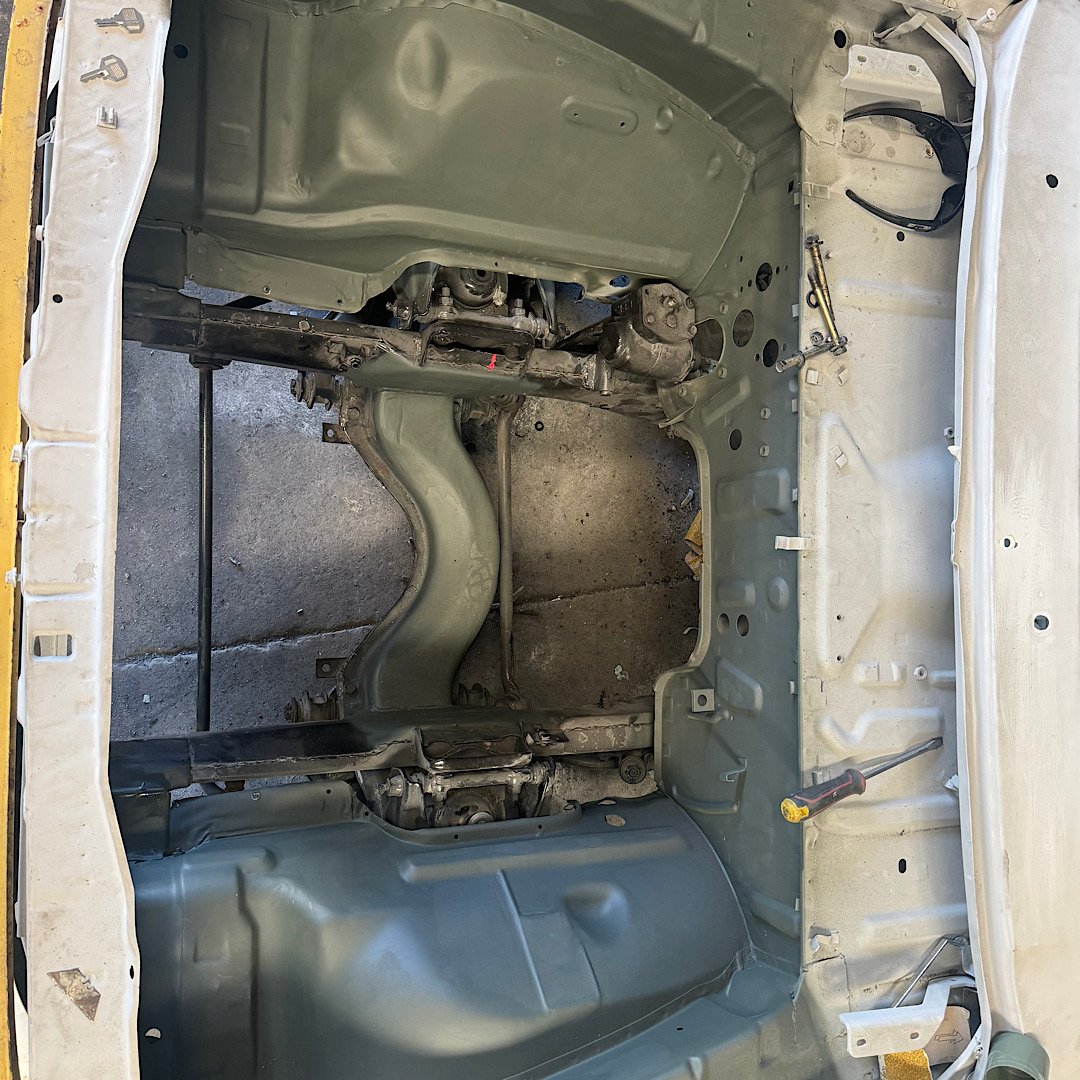
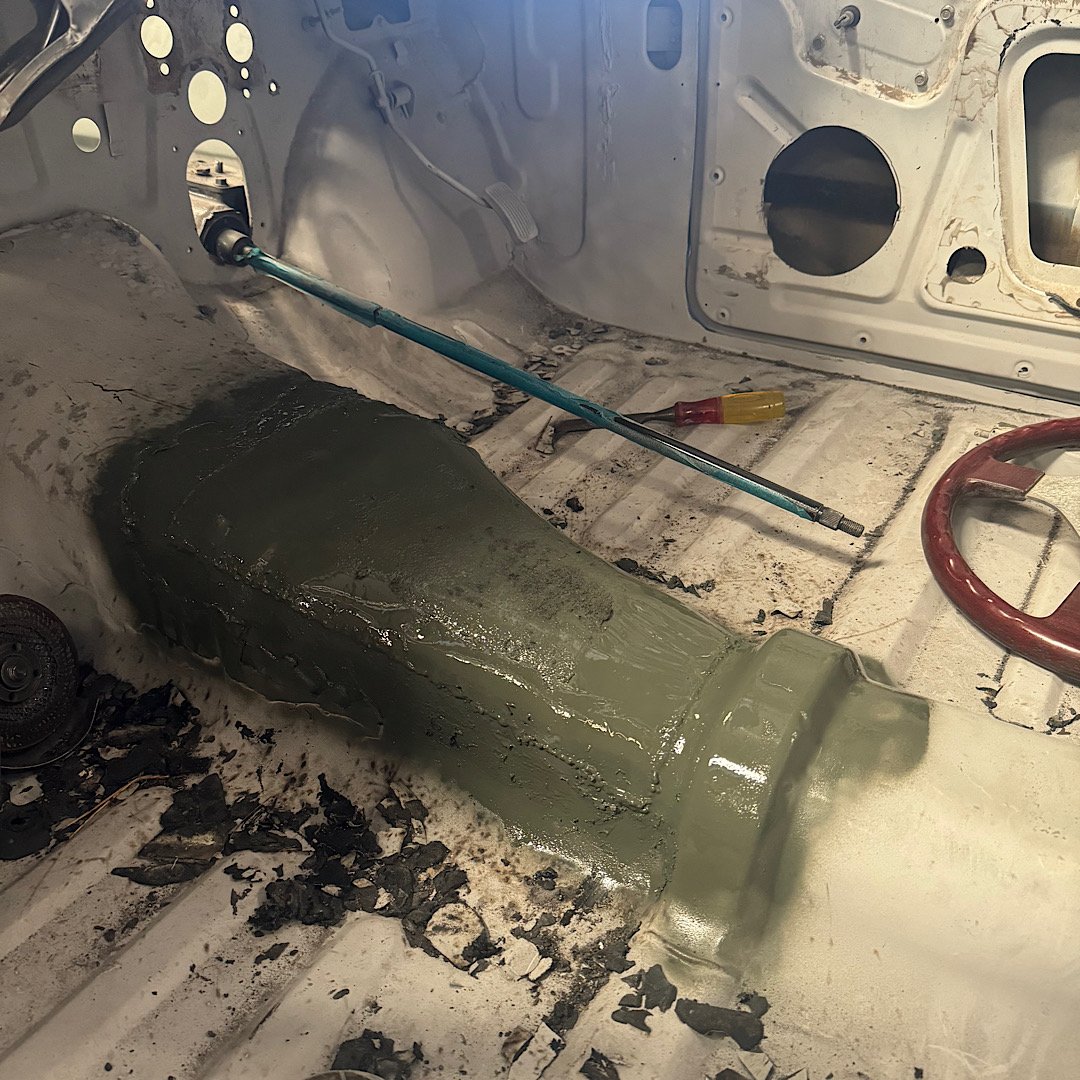
Just a quick stop in at the workshop today. etch primed the tunnel, still want to clean it up some more before painting. finally got the steering box out, had to lift one side of the cab to get it done by myself. Mega Kent. sliced off the factory rad supports and mounted the radiator and oil cooler. etched the cuts. only have the tailgate to finish before I can start the final prep and paint. i will remove the cab and deck for painting. that way I can prep the chassis side of it before they go on for the last time. (Fit fuel tank back in, touch up the etch with top coat) might even fit the engine and box onto the chassis and get the exhaust done with the cab off. im not sure where I want the exhaust to run at this stage. i have 2 flexi’s, 2 resonators, a 2-1 muffler and one of those ugly rotor shaped mufflers. i will make a new set of headers for it for better clearance.
-
No pics but I’ve done a couple of small jobs on this. 4 weeks off work and not a single day available to spend in the shop. so 1st day back to “work” I played cars. finished the filling and sanding in the engine bay, coated it all in epoxy again as a cover . Still needs flattening off before primer and paint. hit the crossmember with the grinder to smooth off the old engine mount welds. just needs top coat painting now, left it in epoxy. then set about untucking the tunnel. previous owner went full cactus and cut a huge L shape hole on the tunnel. 250 long x 120 wide and dropped down the side 120. no idea what he was up to. cut the top off the parts truck and had a pig of a job stitching it in. But I got there. needs a bit of grinding to knock the welds flatter then seam seal under the tunnel before reapplying under seal and paint inside. tried removing the steering box but I need to lift the whole friggin can to get it out. Dumb as.
- 148 replies
-
- 11
-
-
This really fills my heart with warm fuzzies, which is the reason I've been lingering here for so damn long. You guys are friggin legends.