Kimjon
-
Posts
2181 -
Joined
-
Last visited
-
Days Won
1
Everything posted by Kimjon
-

Kimjon's 110cc 4 speed pit bike motorised drift trike build
Kimjon replied to Kimjon's topic in Other Projects
They go hard out! Just remove governor and away you go. -
Kimjon's 110cc 4 speed pit bike motorised drift trike build
Kimjon replied to Kimjon's topic in Other Projects
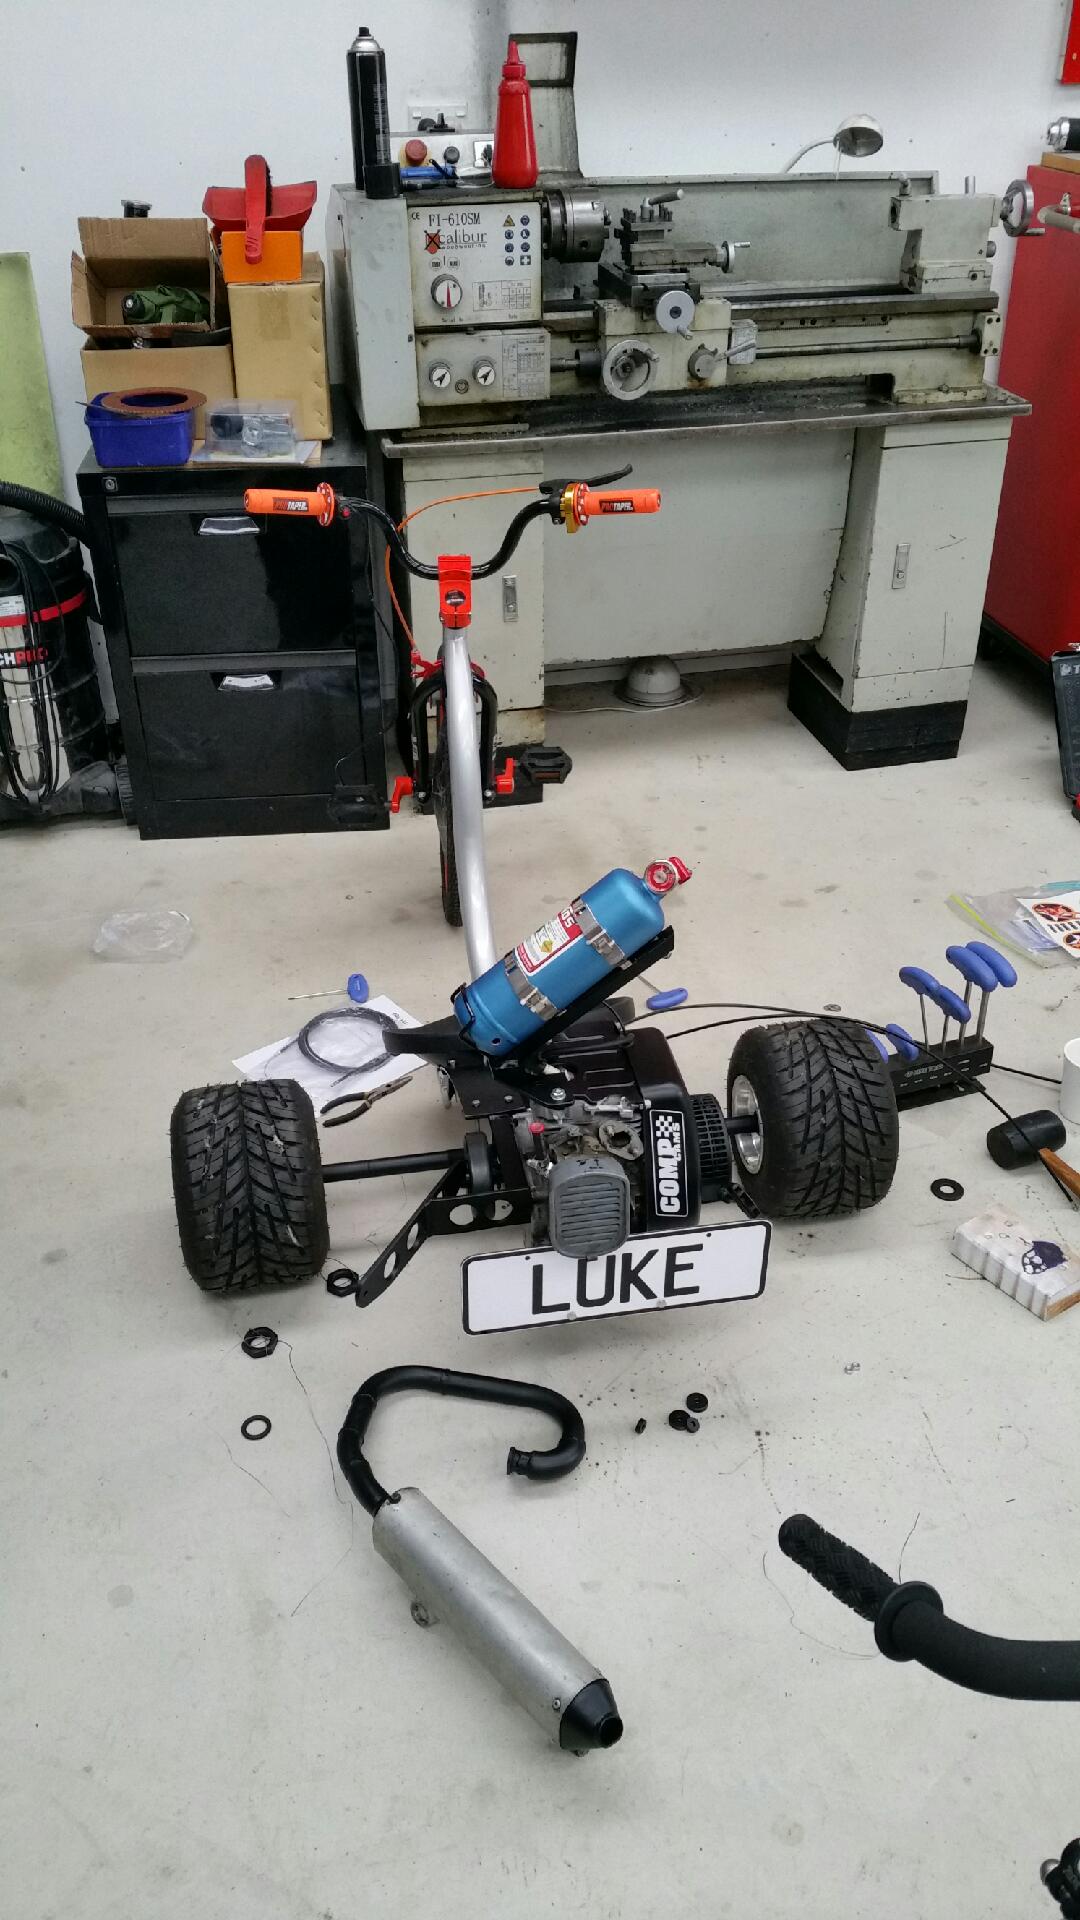
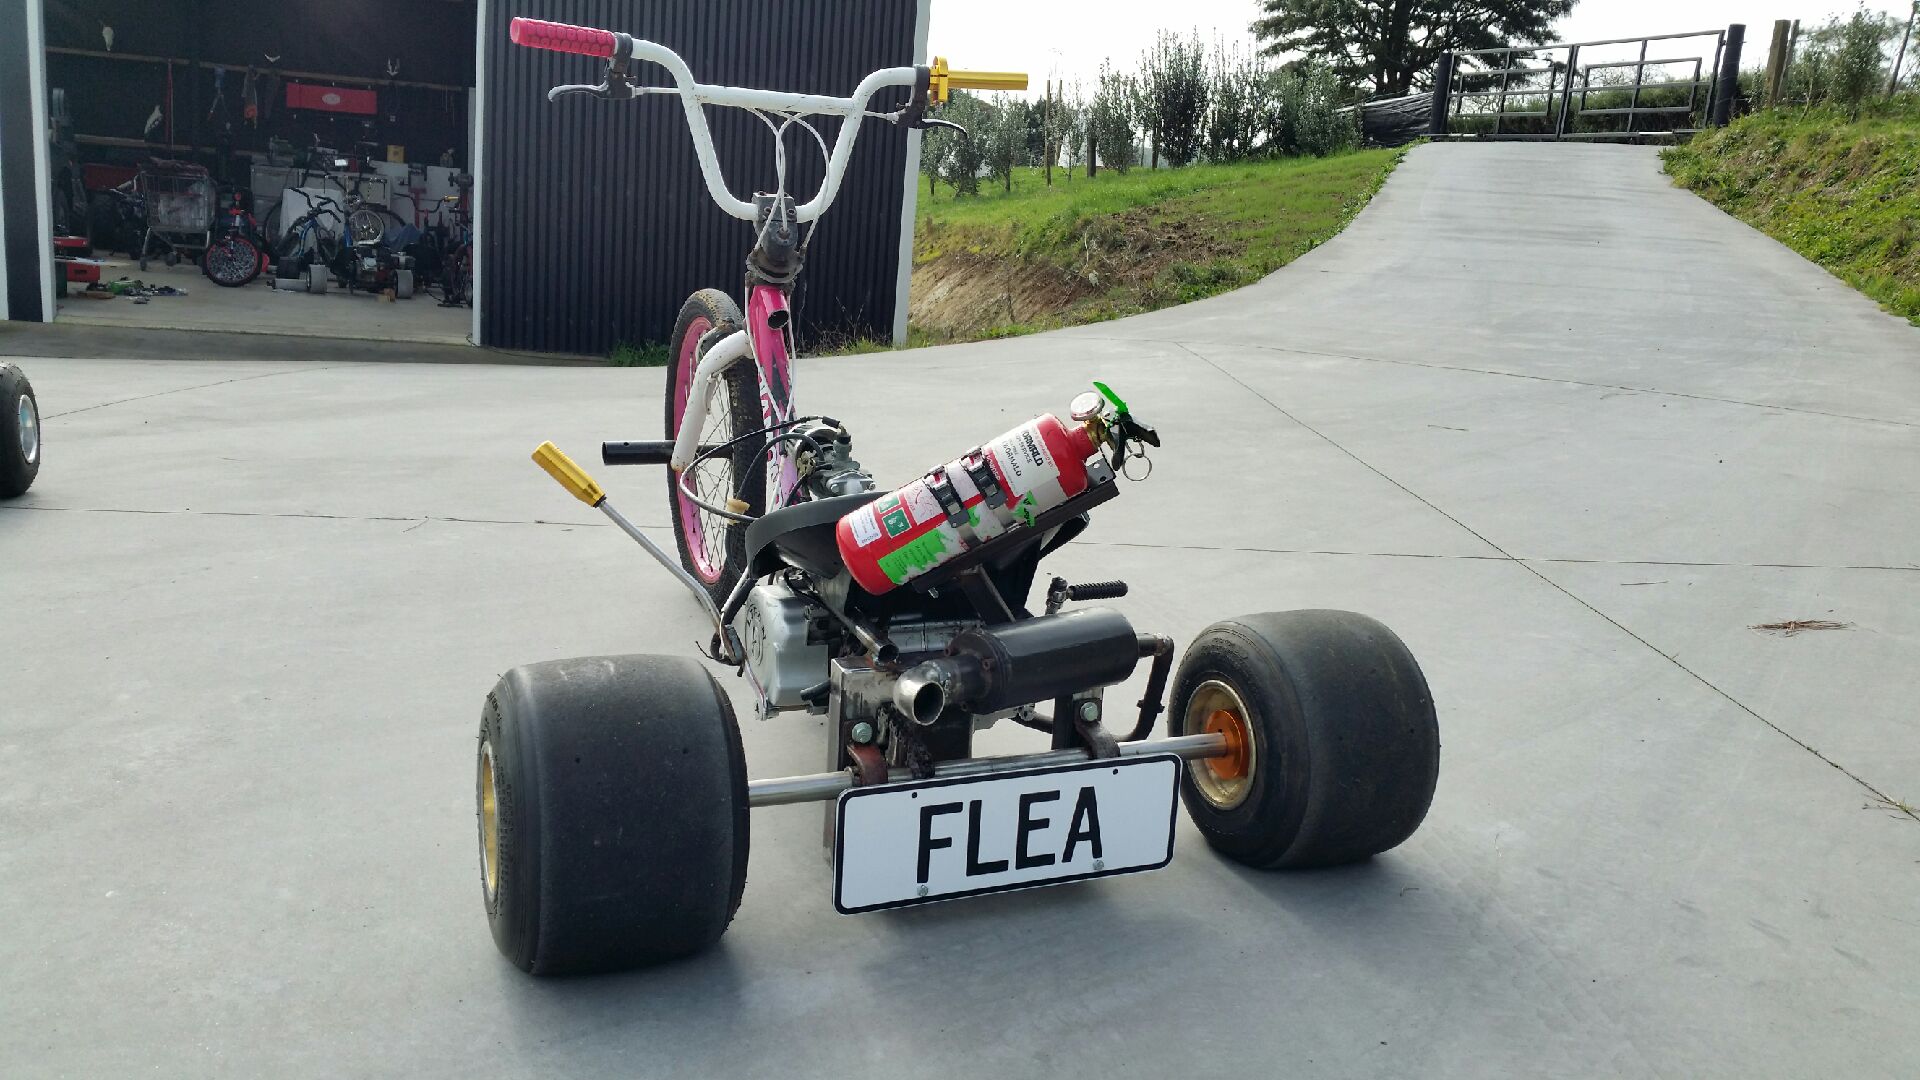
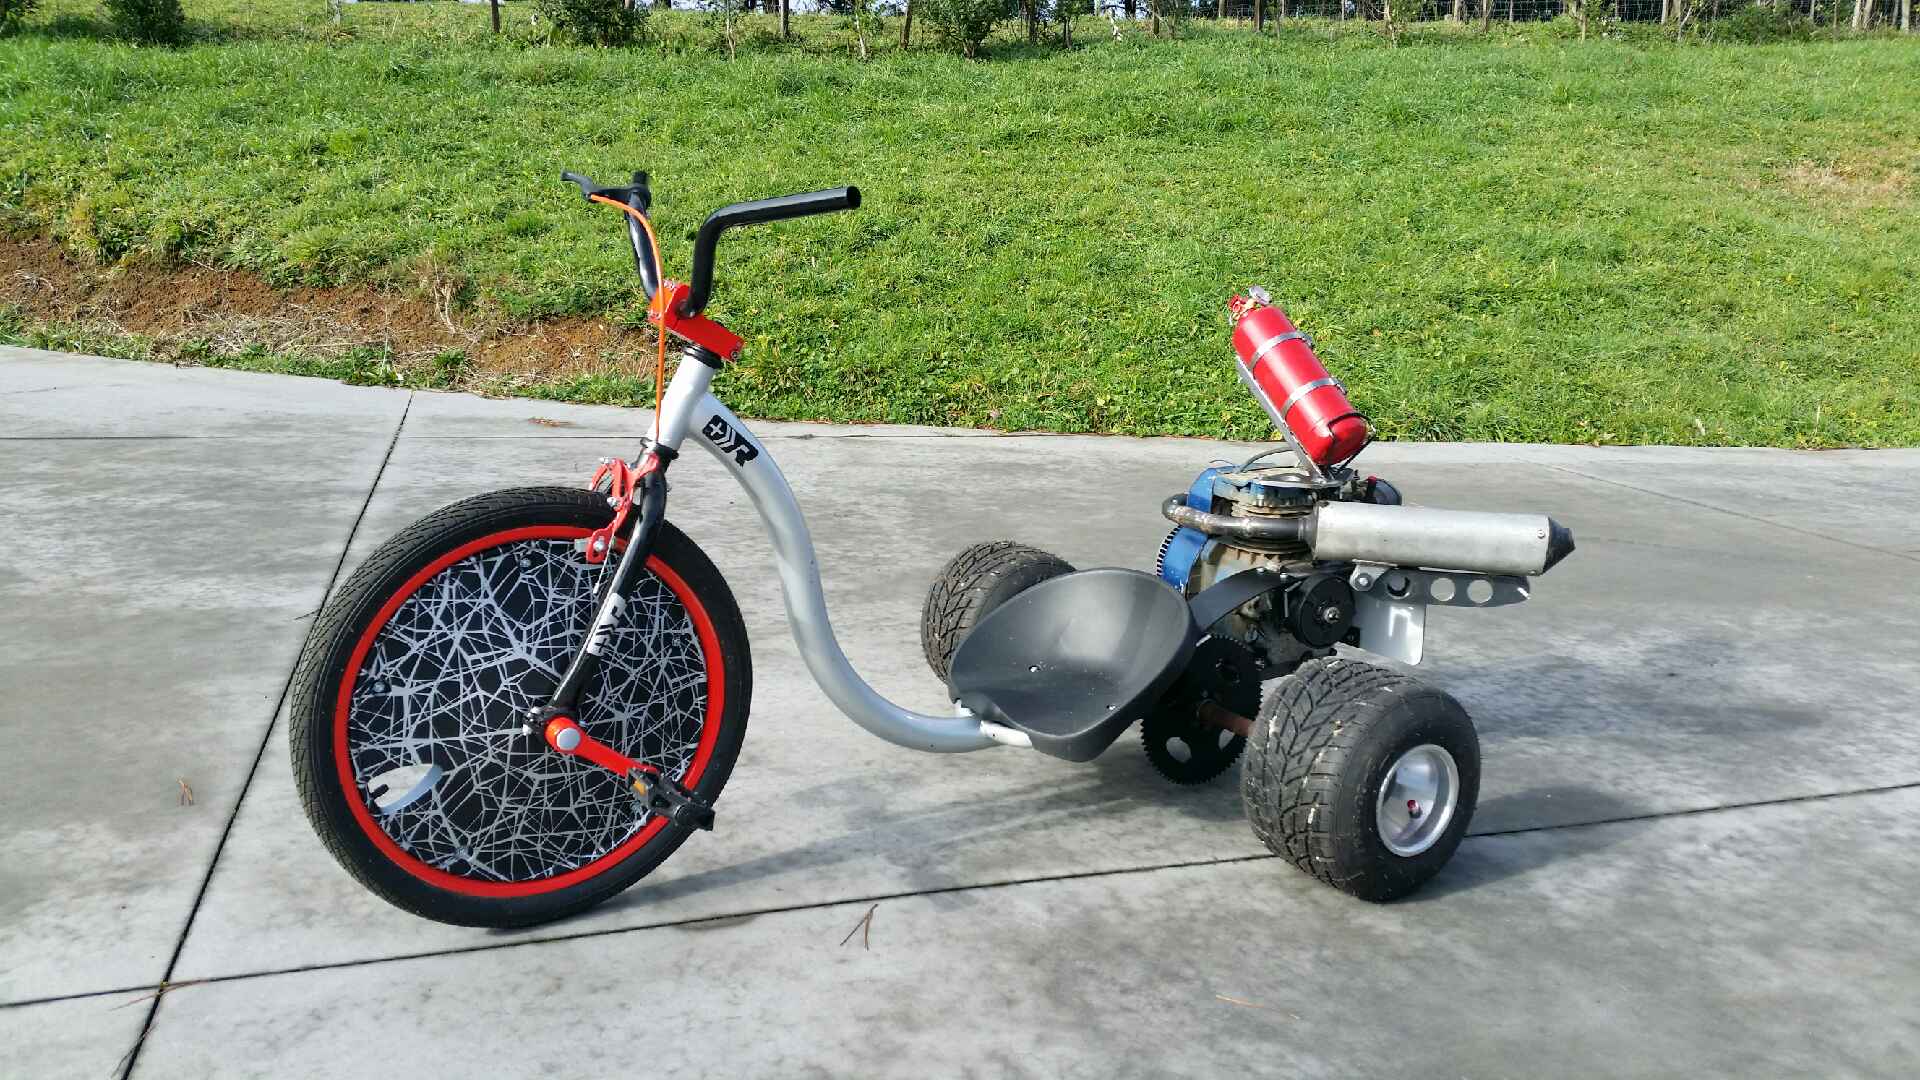
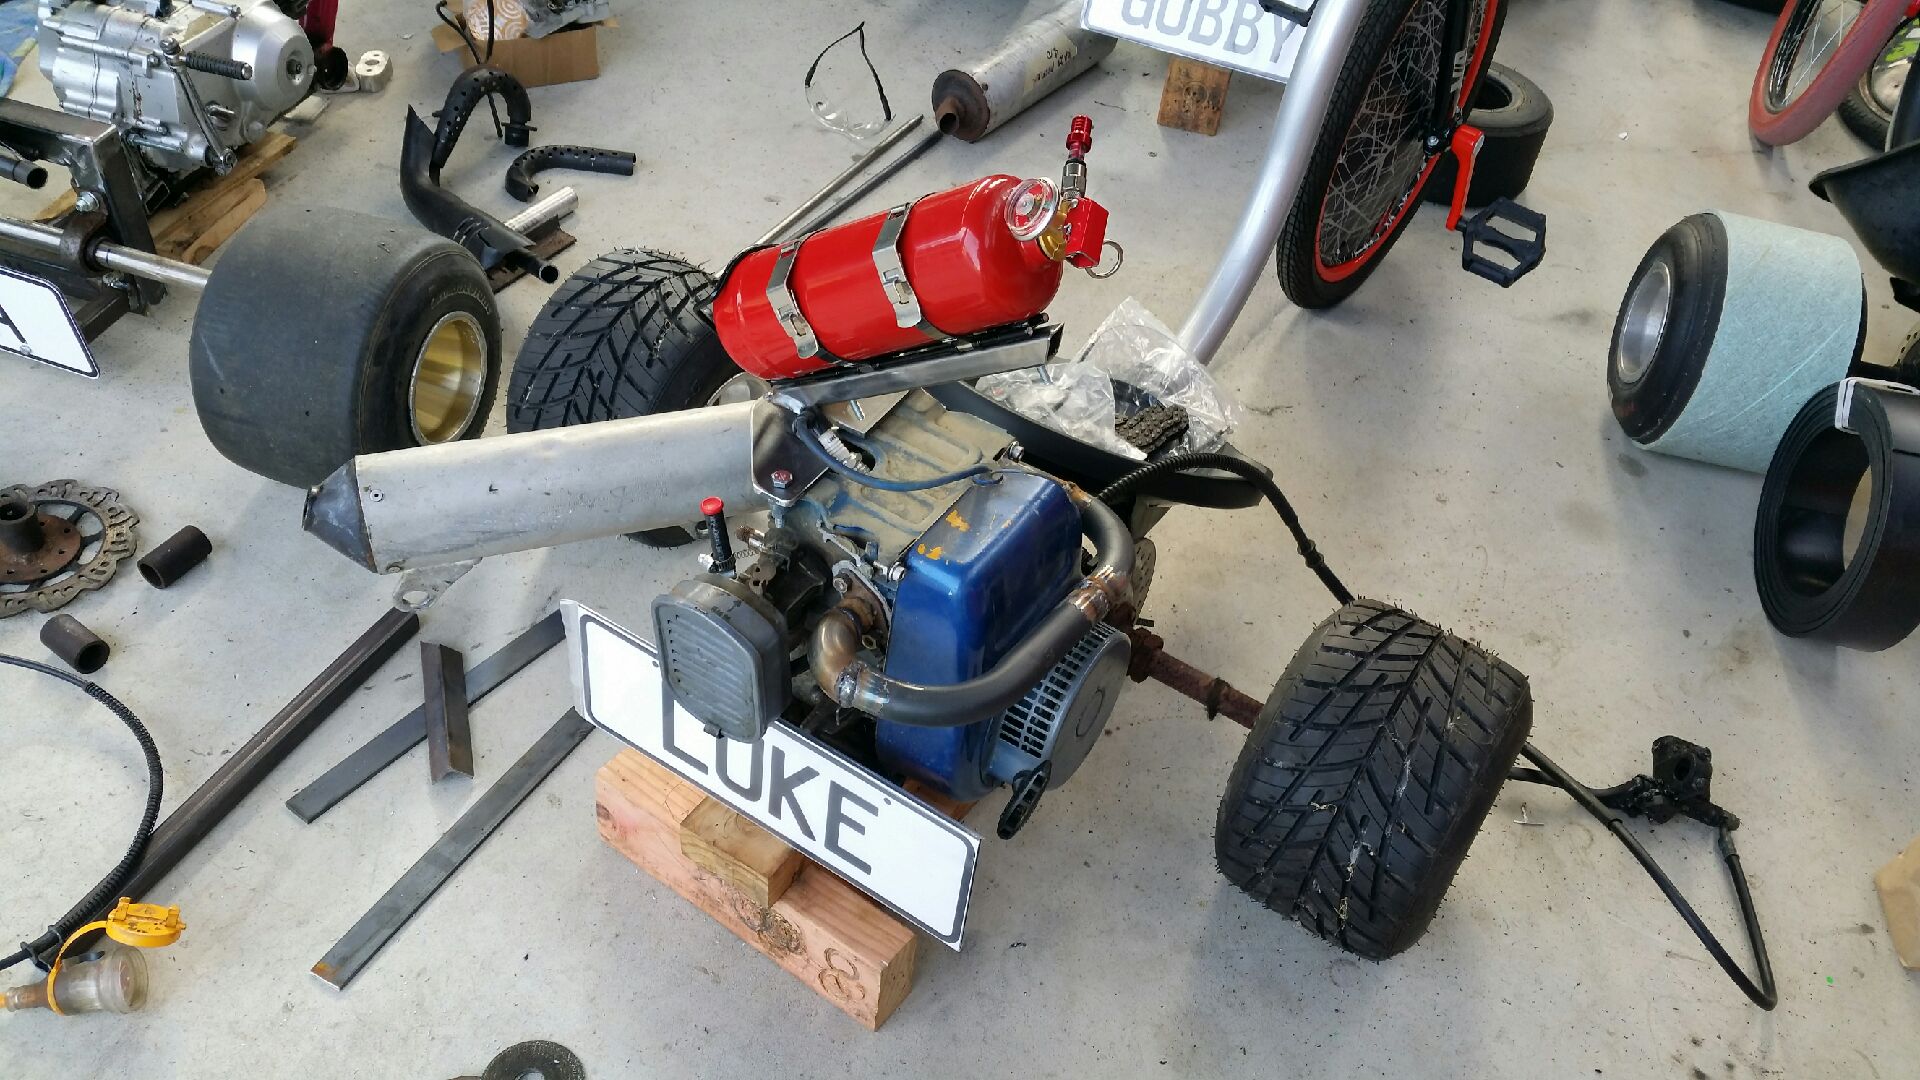
Nearly finished the LUKE trike today. Just a few cables to hook up and other minor details. But pretty much done. Now just 4 more to finish this week...no panic!!!
-
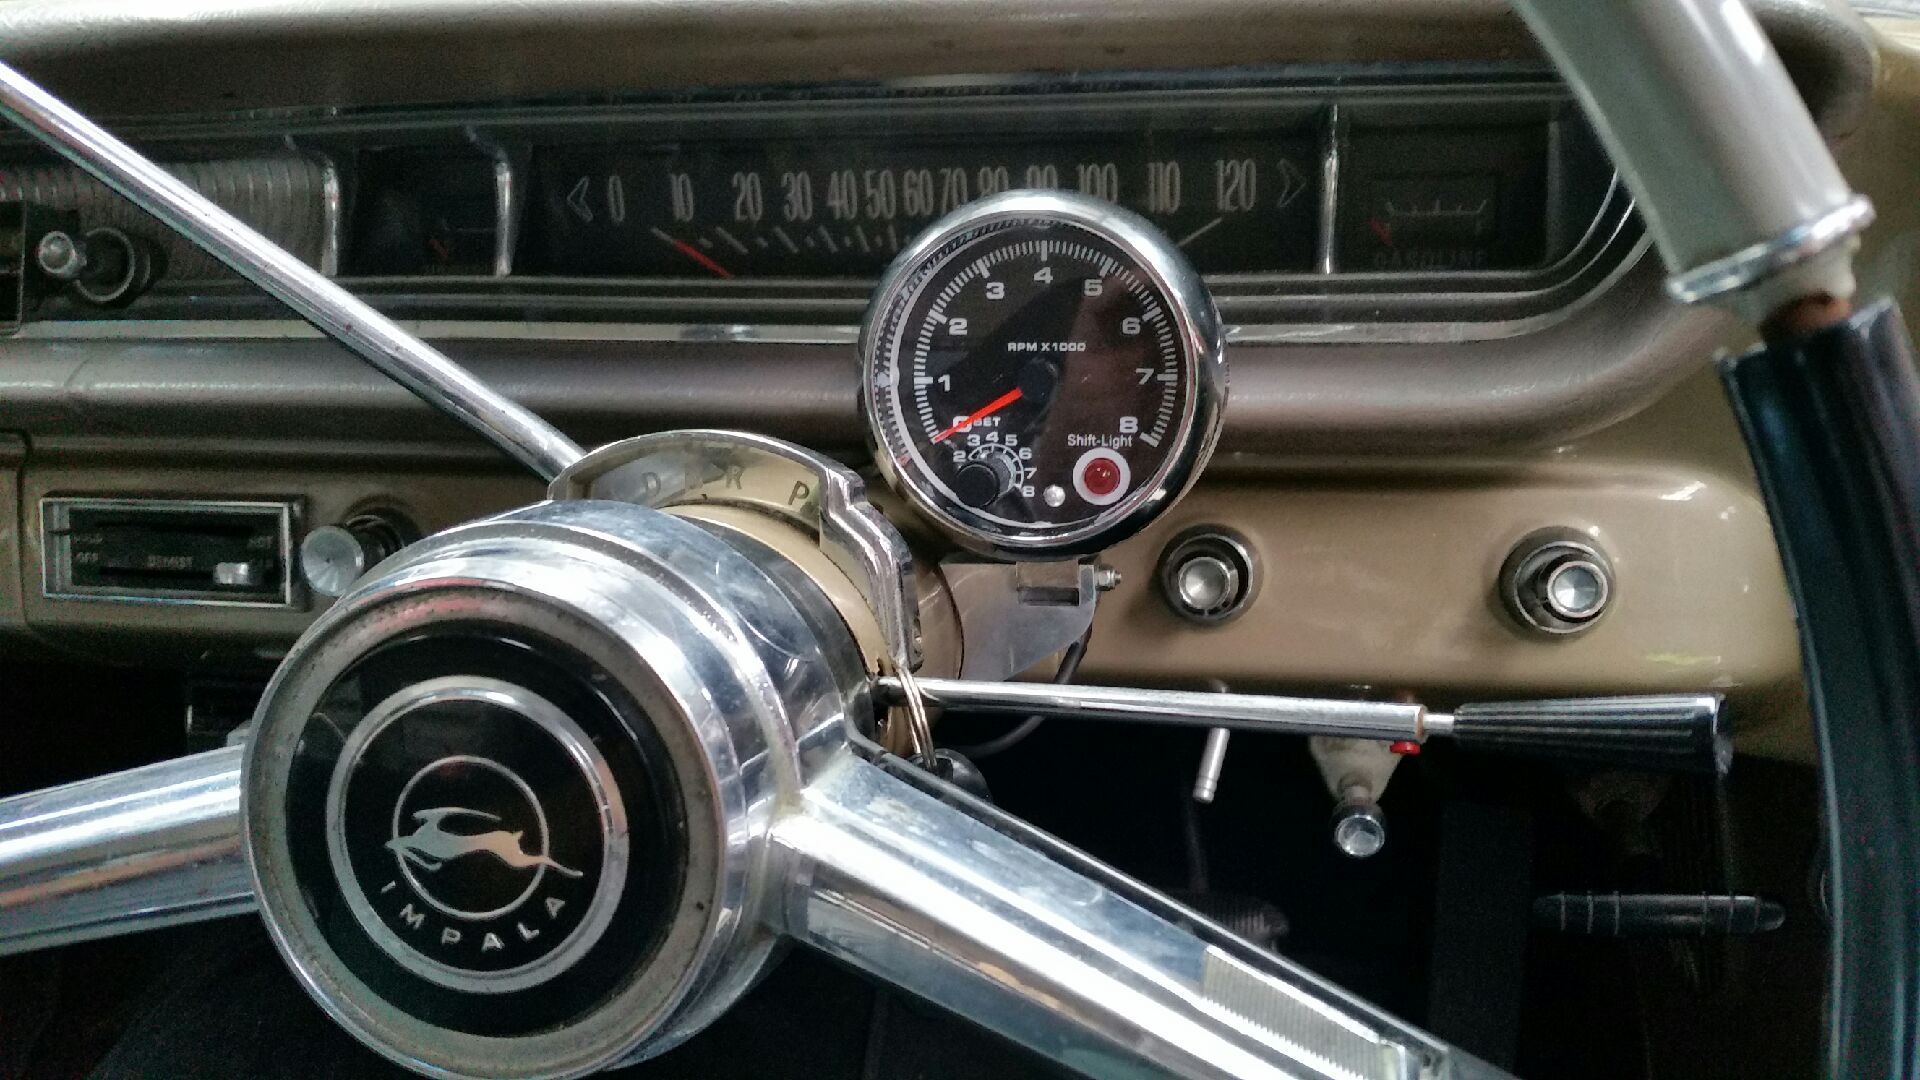
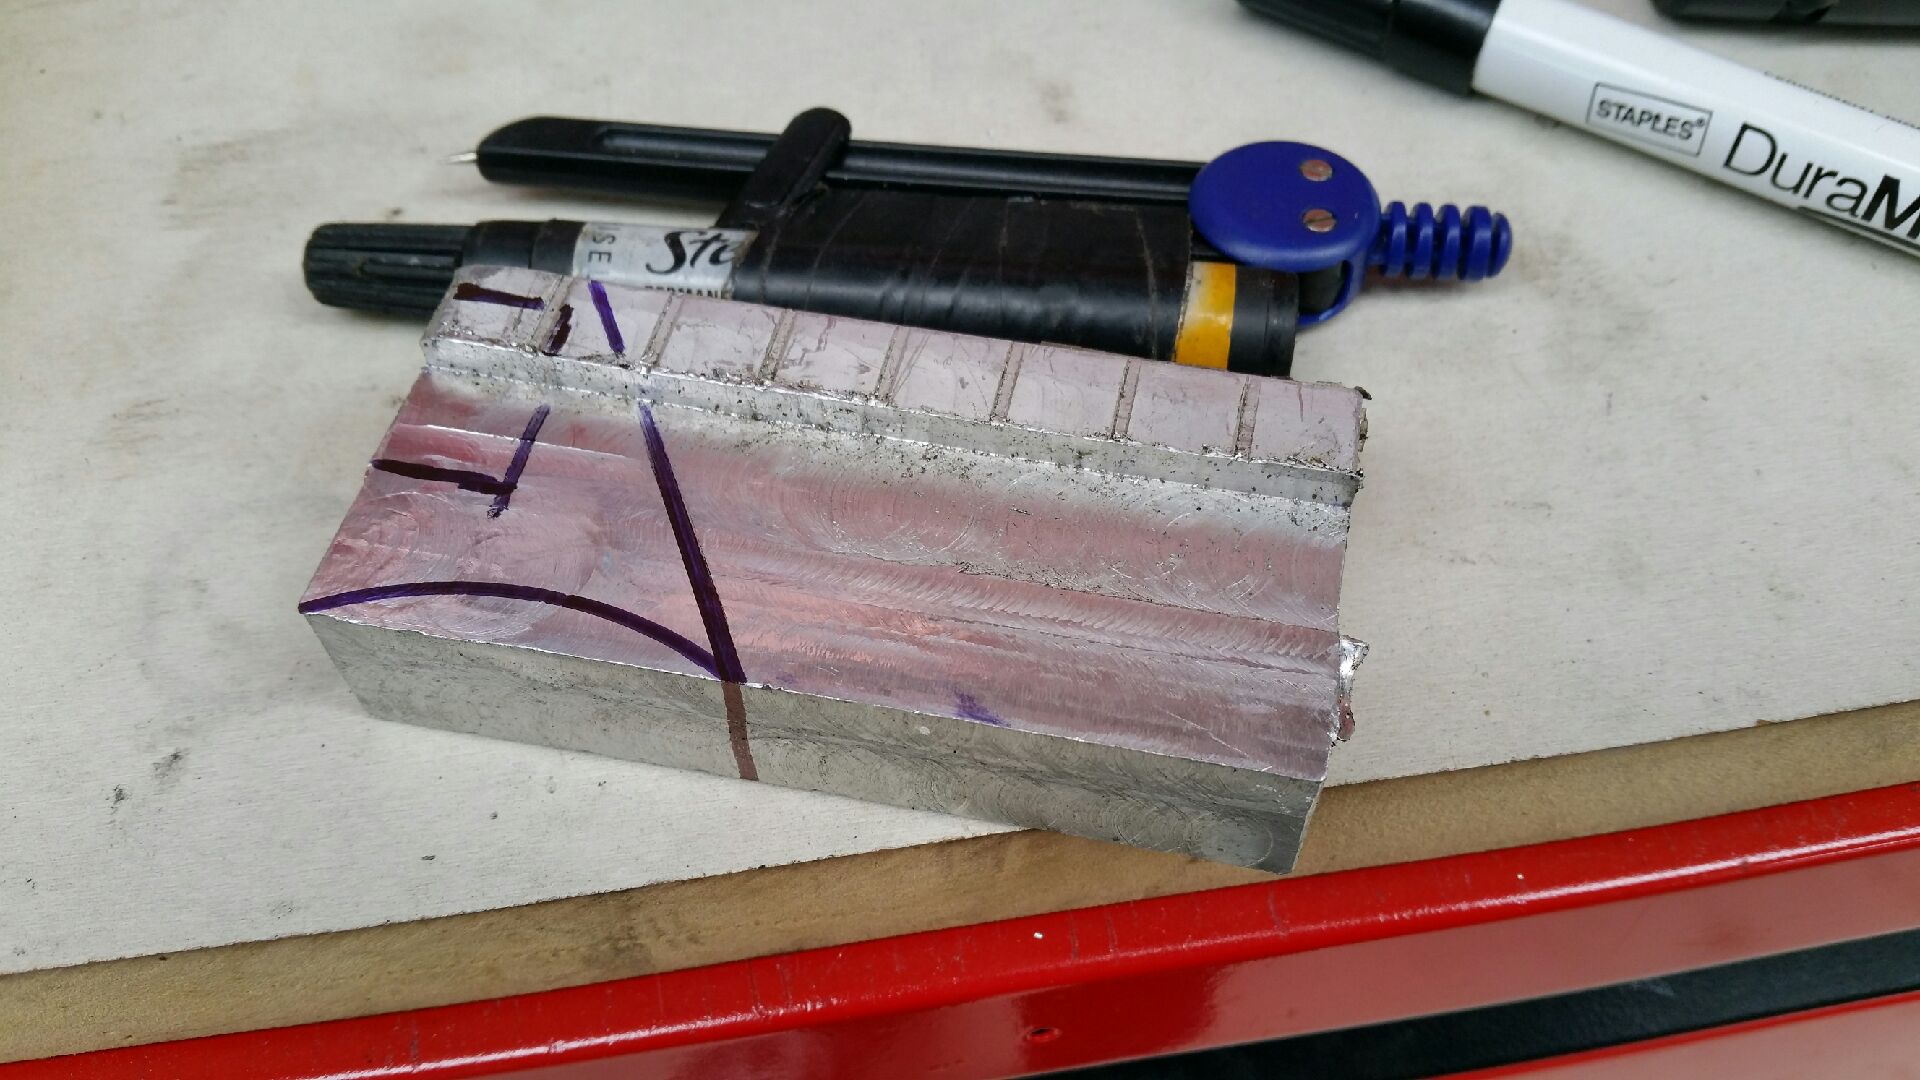
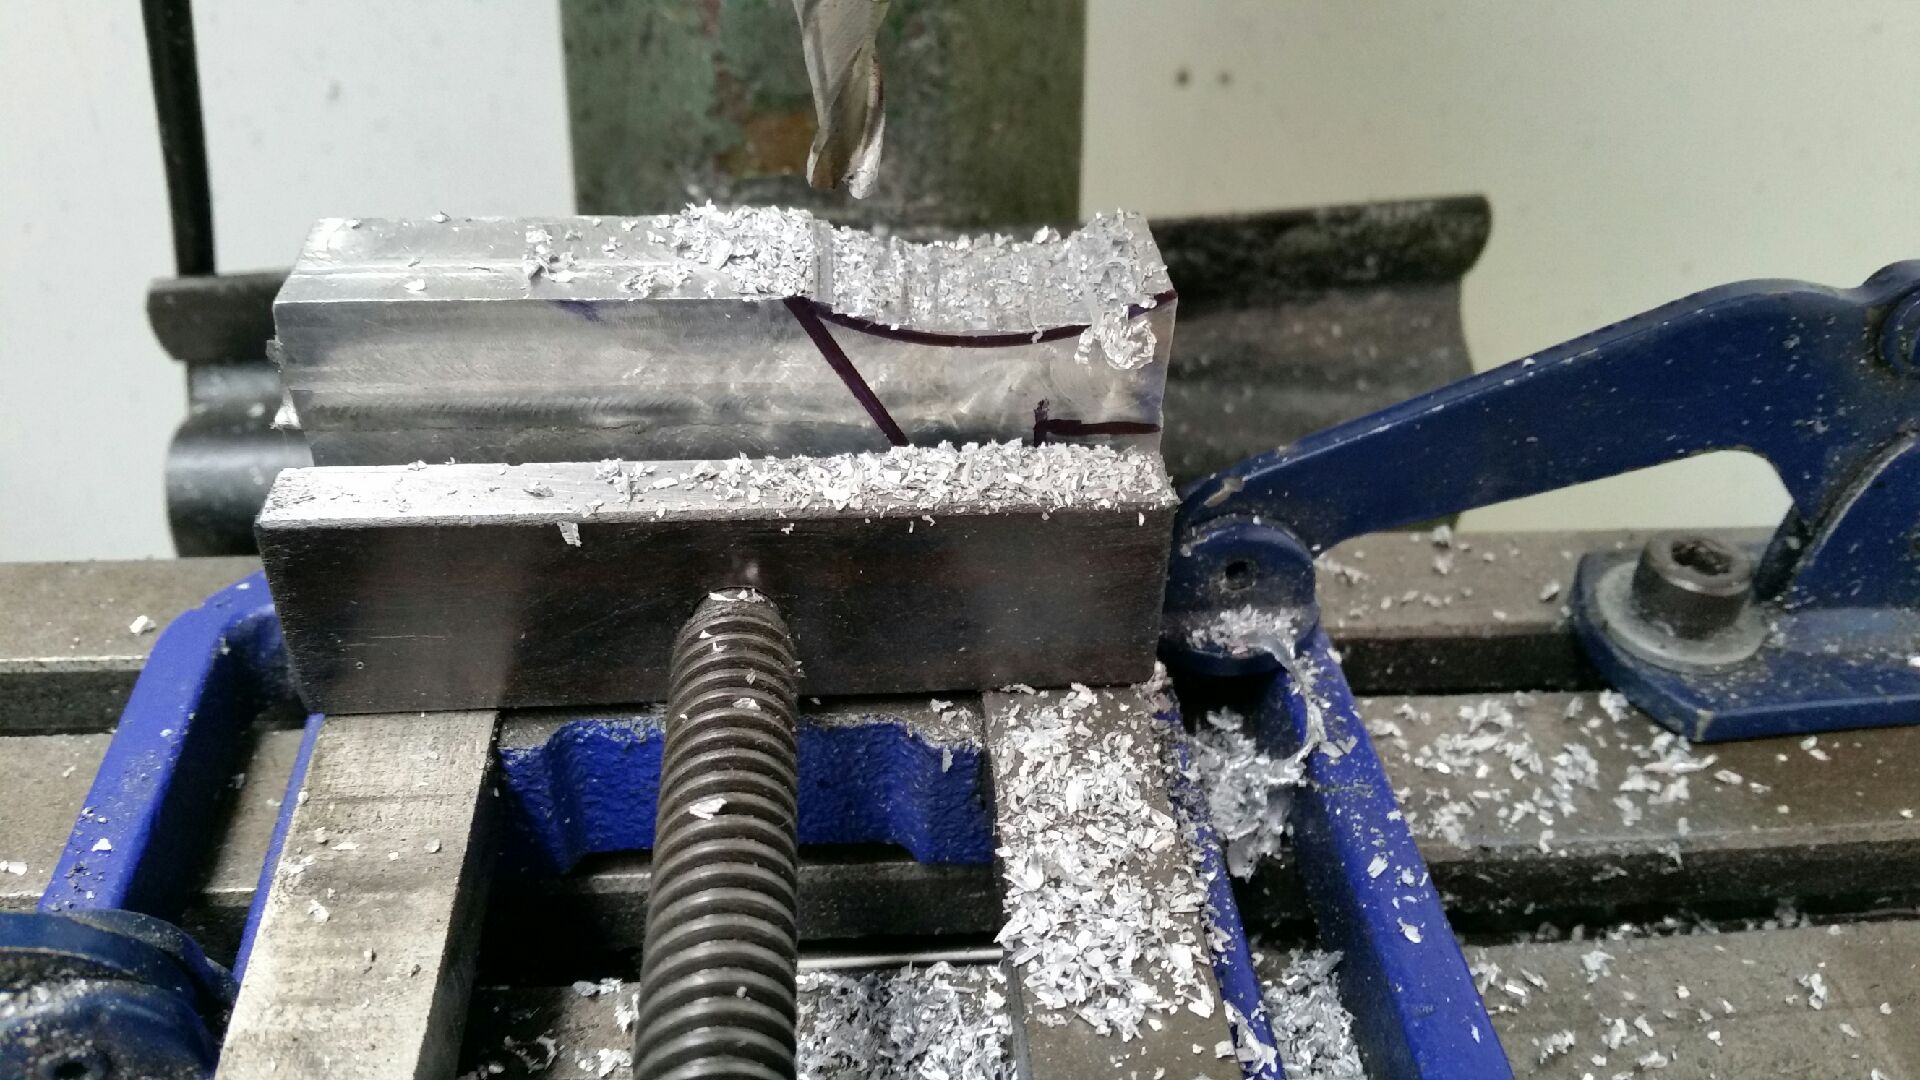
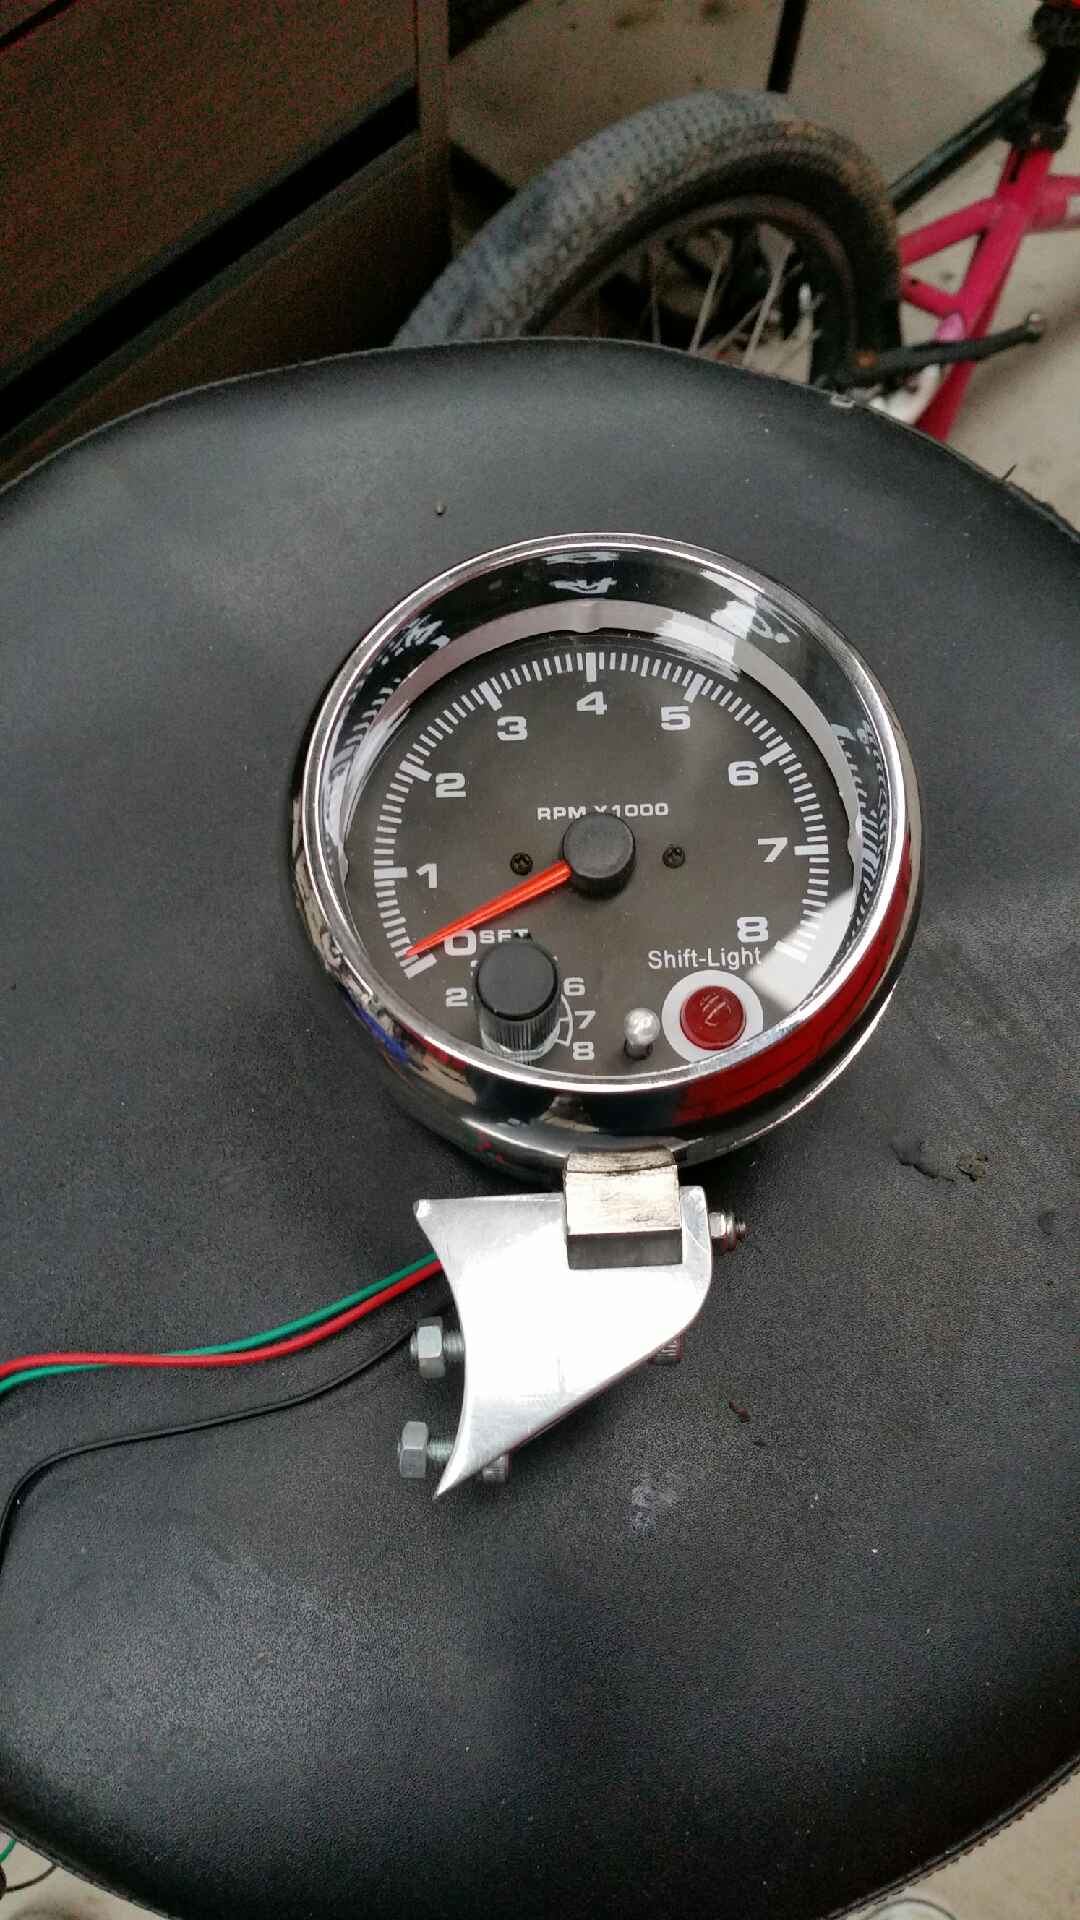
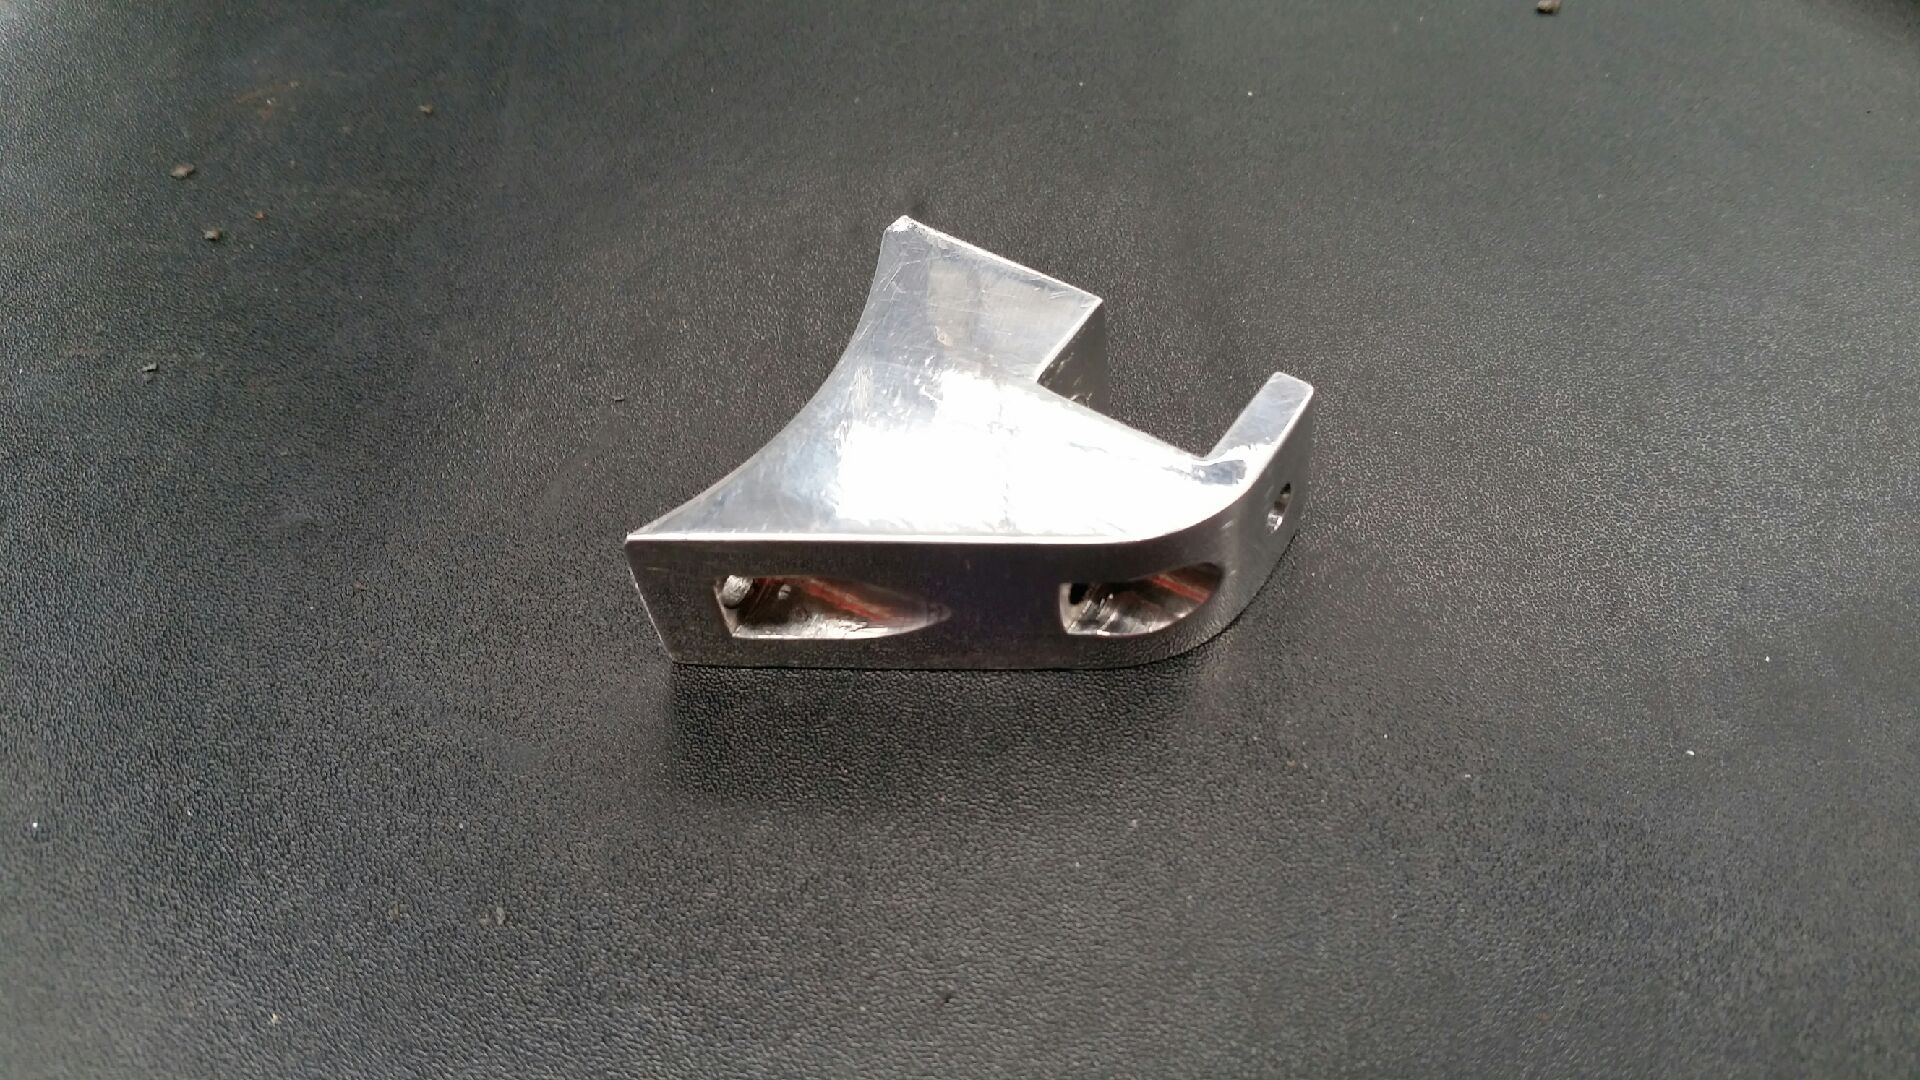
Cheers. Go on do it...it wasn't that much effort to achieve. I sanded the radius/curve into it. I used the mill to speed up the process...but it could have been done easily enough without it. I found the ideal mounting spot by sticking it to the column using a giant blob of putty first, then took measurements from there to determine the final shape of the bracket. Here's a slightly different angle. I had to still be able to access the switches behind. The gear selector also has to rotate freely as the column is split into 3 segments...but blob of putty allows you to trial and error the fit until it's where you need it to be.
-
I once mounted a 4" grinder in a similar way. Then bolted a sump off a 350 chev to a bit of MDF...and used the grinder to cut the sump off about 50mm up from the flange the entire way around. I turned the sump 180° around on itself and then welded it back together. This worked out perfectly and the motor could then go into a commodore with the sump now clearing the front cross member.
-
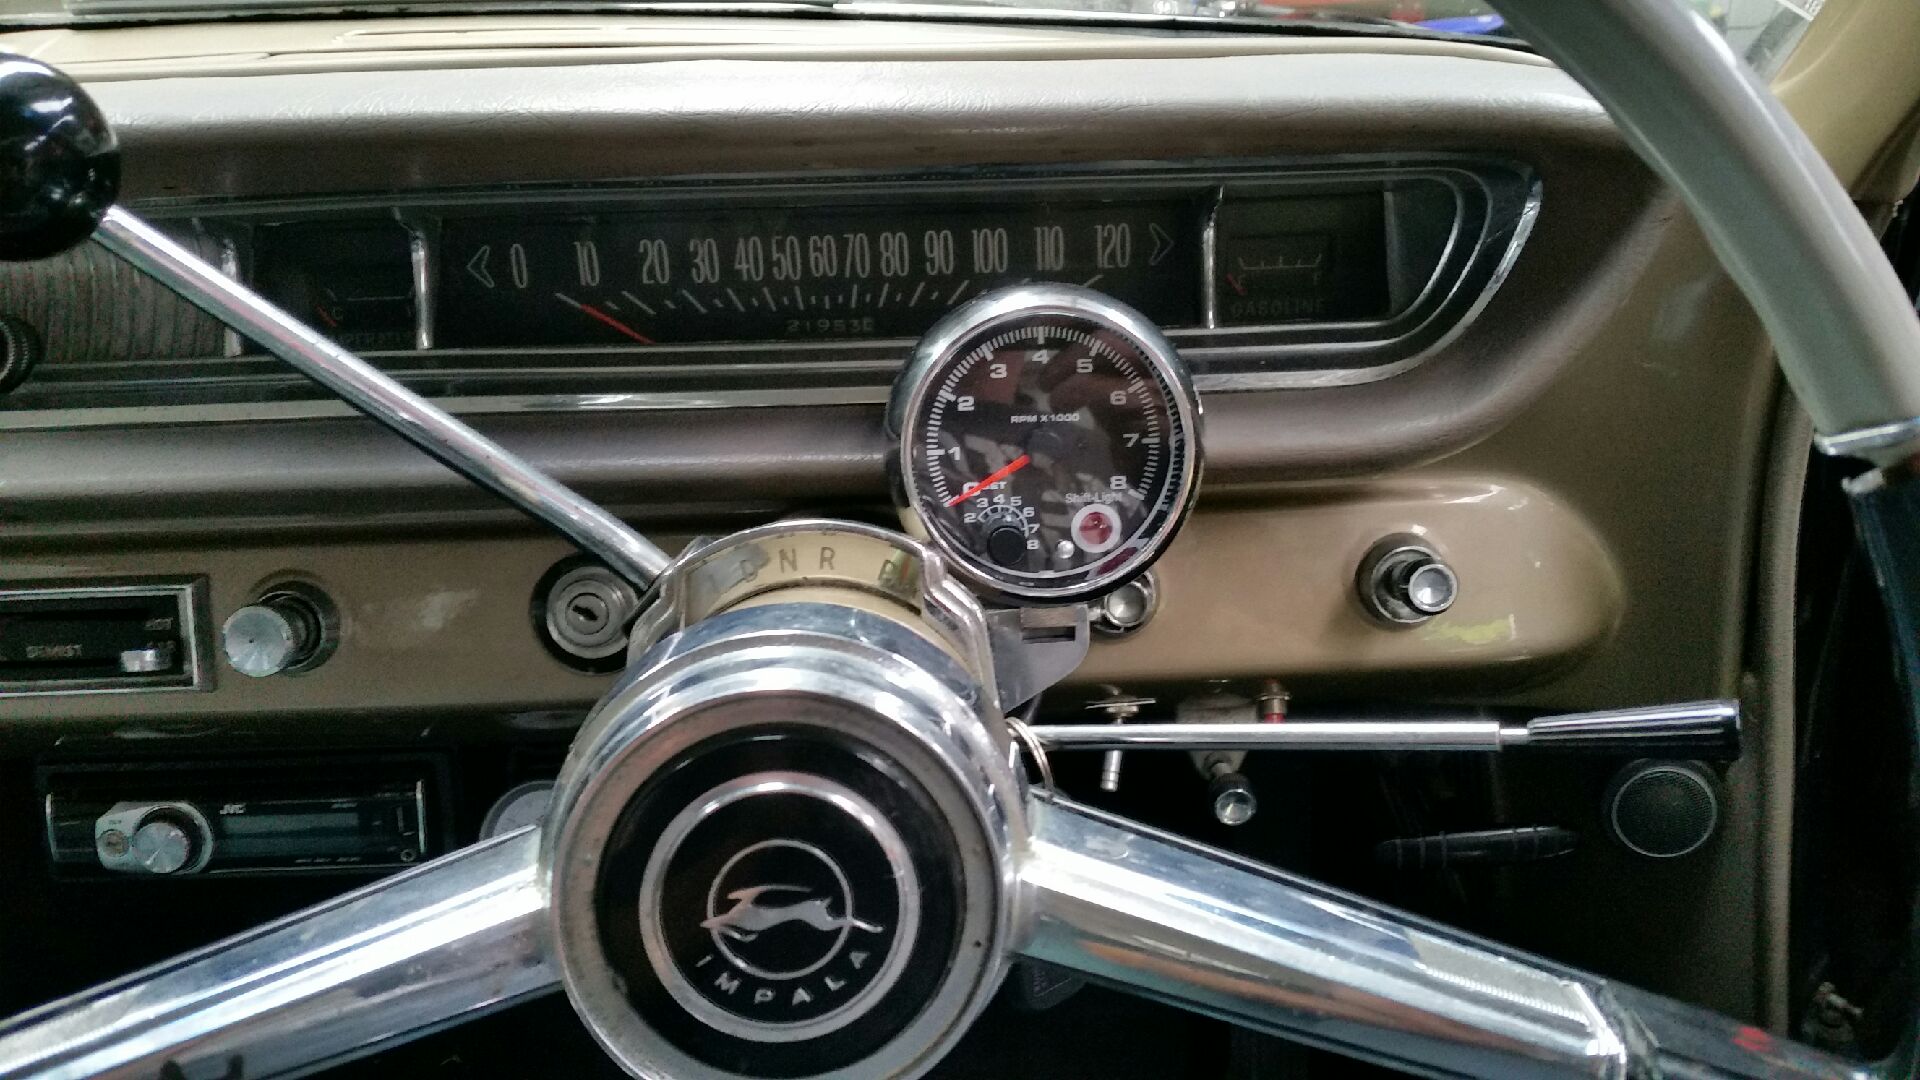
I found a tacho that suited the cars interior. Problem was this particular tacho couldn't be rotated in its cup like most other ones. If I mounted it straight above the steering column it would have obscured the view of the speedo from 20-80mph (which is pretty much exactly where you don't want to block out of view). So solution was to make a side mount, that would locate it lower down so I could see the speedo and fuel gauge, plus retain access to the headlight and wiper knobs etc. Then the not so little job of totally disassembling the steering column to gain access to the inside of the column so I could bolt the bracket in place. But we'll worth the effort! Almost looks factory, which is the look I was going for. Kj
- 4 replies
-
- 16
-

-
98cc's Resurrection Of The "Smith Spider" 2 stroke race car--Now with SOUND
Kimjon replied to 98cc's topic in Other Projects
So very well done. Fantastic effort and grwat results -
And oi! Lay off the poor old VN Commodore...they say there's an arse for every seat love that car. It's got an LT1 and a 6 speed manual...hauls arse! Though I do understand only drug dealers, scout masters and glue sniffers own VN's...well at least that's what my mates have said in the past...
-
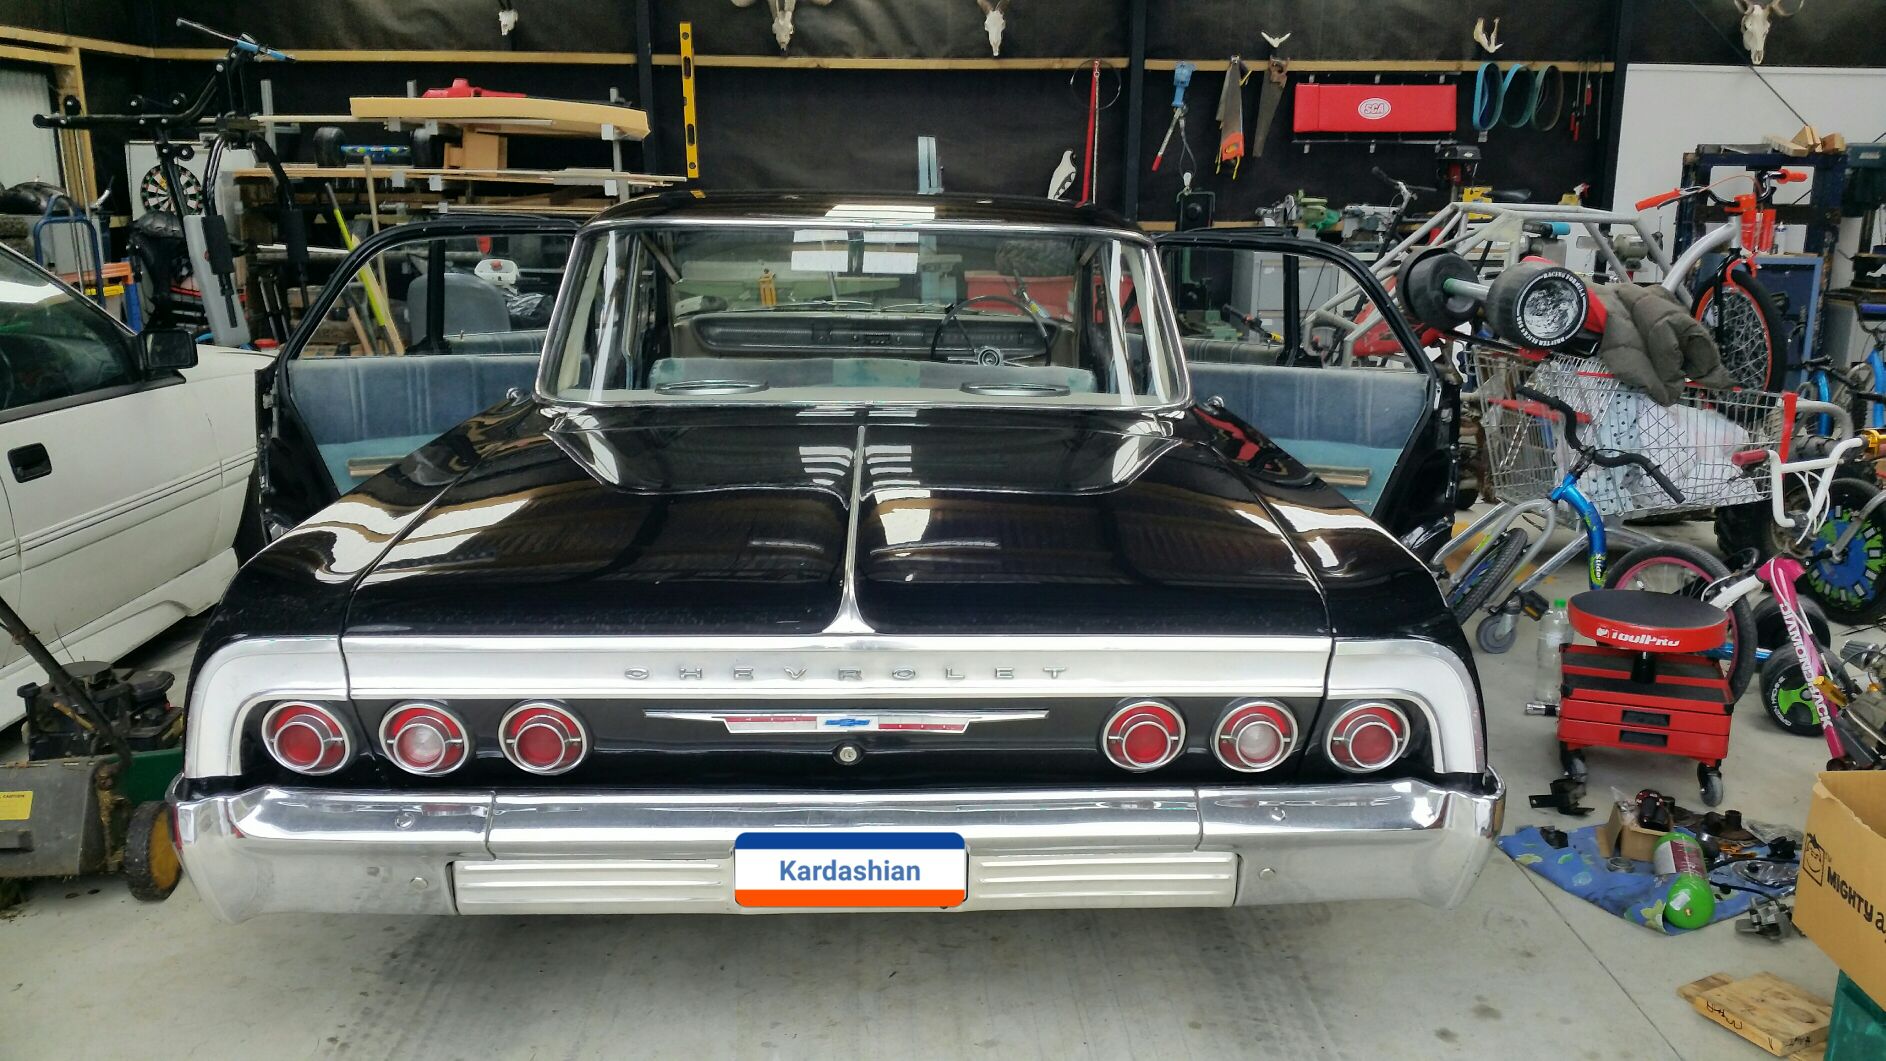
On the plus side when you have an arse like a Kardashian...who cares about mathematics??? Just drive these things and enjoy living in the moment.
-
We were both right...but I think we were talking past each other and just missing each others points.
-
Correct. Once a certain value is achieved its volume in the bag that really lifts the car....but also the pressure has an effect as area is constant...so let's put some numbers into the equation and see how it changes. P=F/A Therefore F=P.A So let's simply it and just use 100psi and 80inch2 for area. Then; F=100psi x 80inch2 F= 800lb of force. Lets do it again with 50psi and the same area of 80inch2 F= PA F=50psi x 80inch2 F= 400lb force So you see the force is a direct relationship with how much pressure is in the bag. And just like a jack lifting a car...as the bag fills it expands and exerts lift...but only once the force is larger than the dead weight of the car.
-
Pressure = force ÷ area So Force = pressure x area So the bigger the diameter...the more force for the same pressure. If you think of force as spring rate...then the more pressure the more/stiffer the "spring rate" becomes...and the higher the car will sit.
-
Thanks for replies. That is a good steer in the right direction. Looks like I need to get in touch with those guys you linked. I'm definitely attracted towards a "kit" for simplicity reasons. I've dropped quite a bundle on this car so it won't be straight away...but it's next on the to do list, as the 64's just look soooo much better dumped out low to the ground.
-
Okay guys, knowing what you've all learnt by doing...how would you approach bagging a 64 impala these days? I've just trolled through all 16 pages going back 8 years. There's a bit of evolution in ideas here. So how about now?
-
Let me know what pipe you use...I've got one of those benders and have never used it (successfully) either. Keen to try... but the one attempt just crushed the pipe.
-
Kimjon's 110cc 4 speed pit bike motorised drift trike build
Kimjon replied to Kimjon's topic in Other Projects
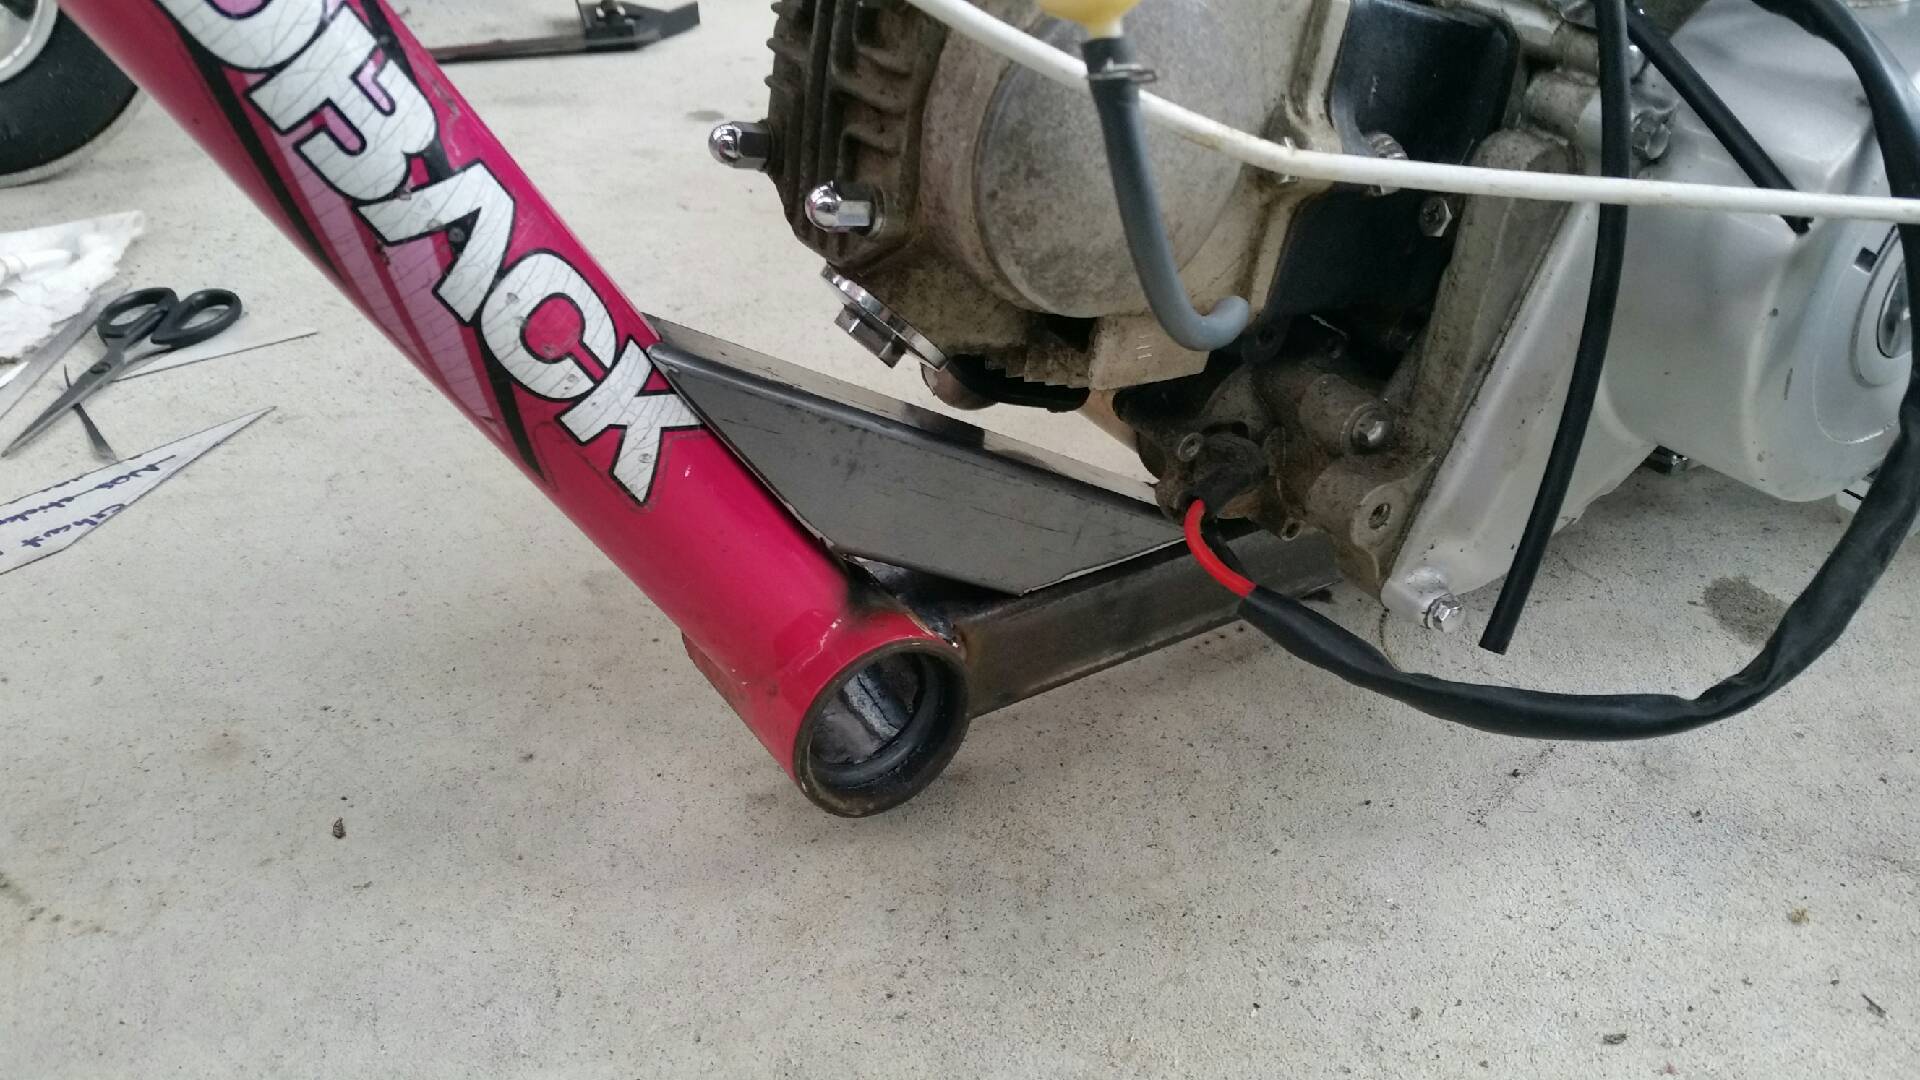
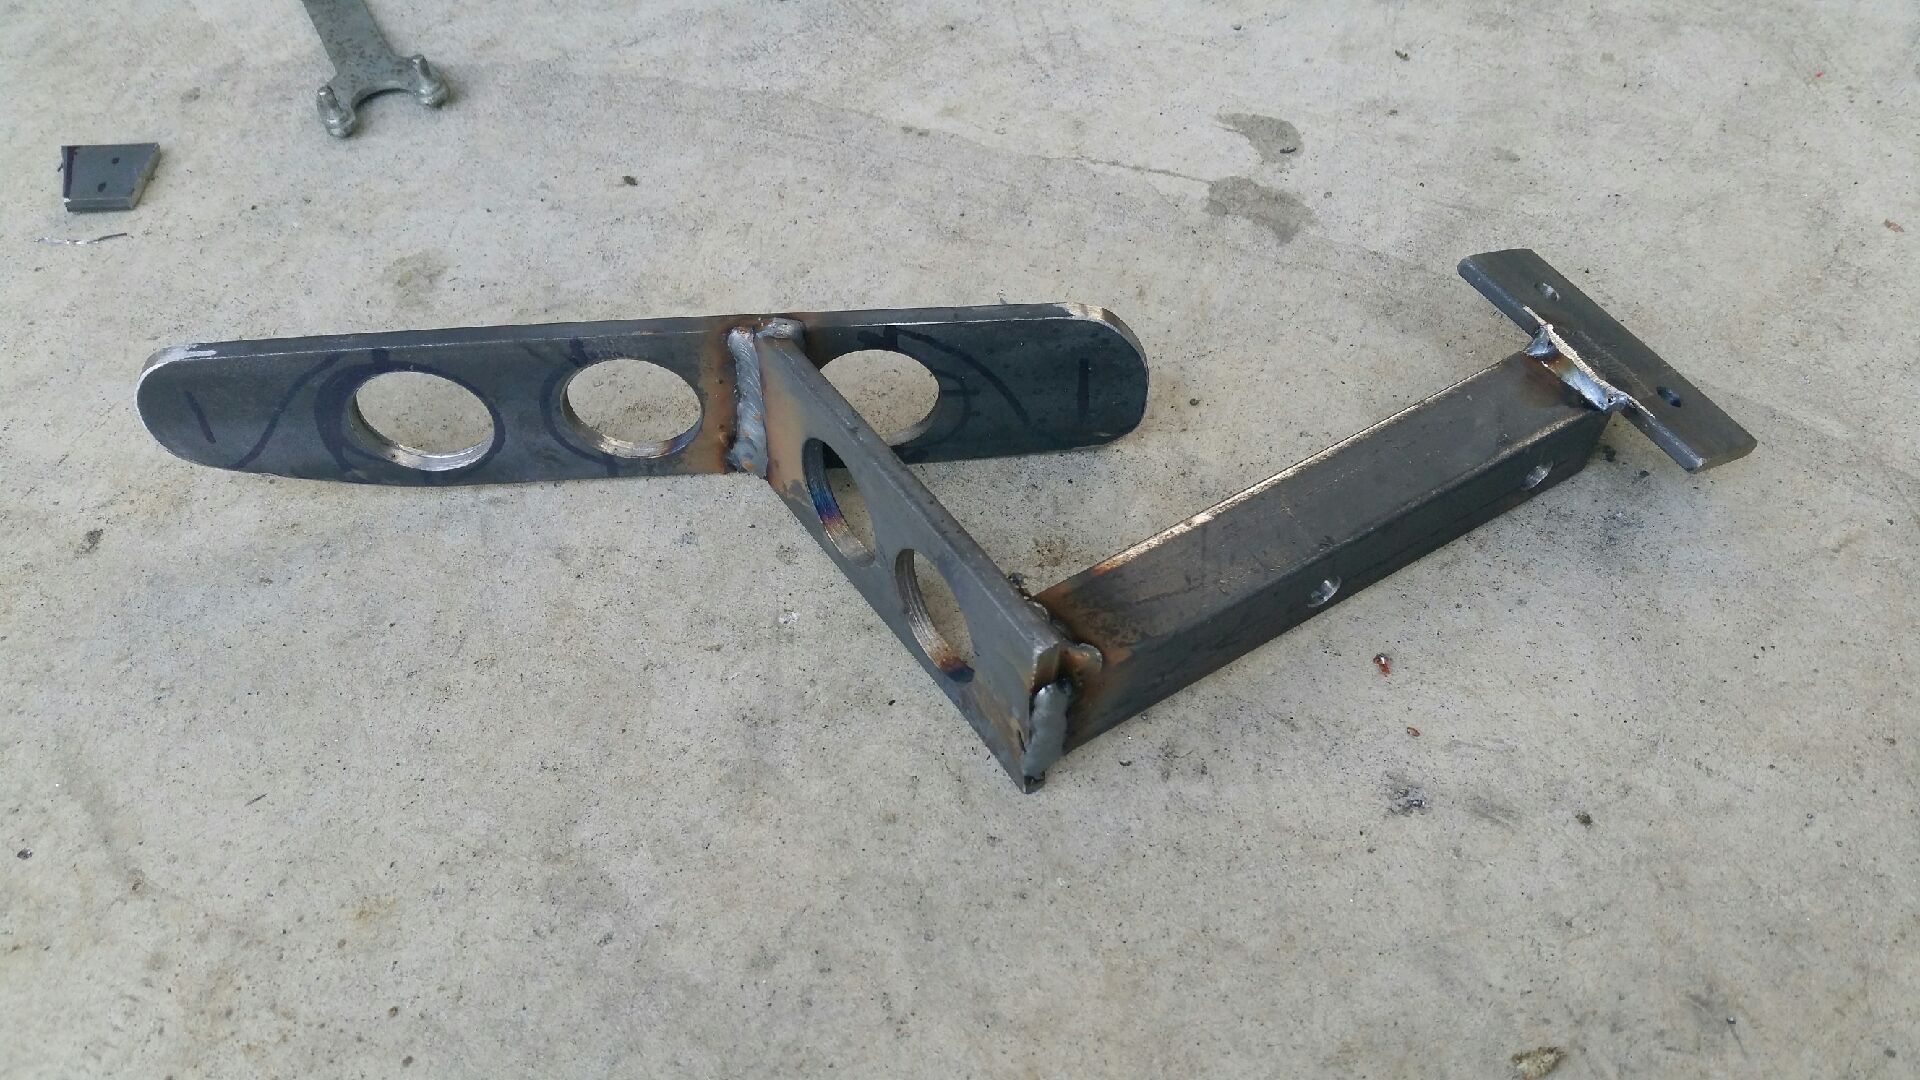
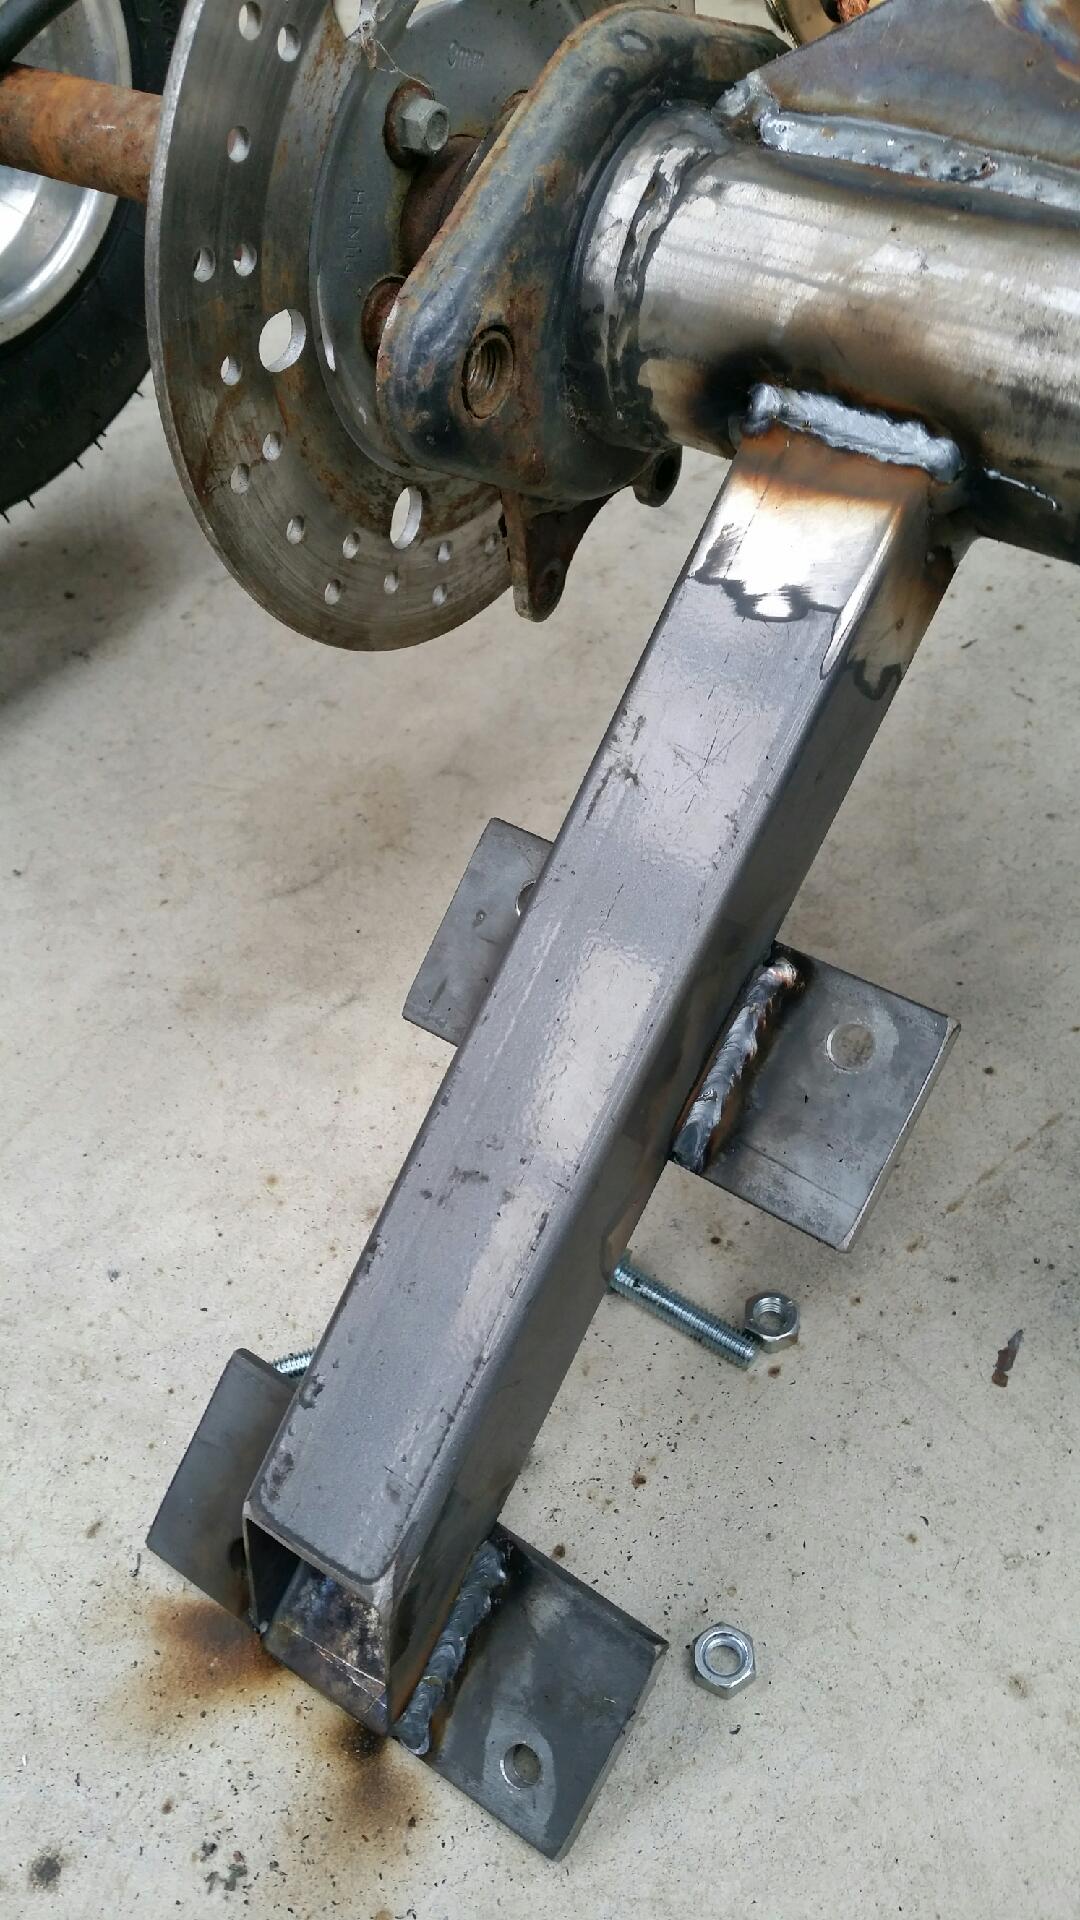
I've been weighing up the need for a form of webb to strengthen up the point where the bmx downtube is welded to the box frame. Personally I don't think it needs it(?)...but I do have an element of doubt in my mind. Considering this will have a top speed of 70-80kph I've decided to err on the side of caution and put one in to be sure. I'll only weld the sides to the downtube and not the top/bottom of the webb...as that would create a stress point and undo all the benefits.
-
Kimjon's 110cc 4 speed pit bike motorised drift trike build
Kimjon replied to Kimjon's topic in Other Projects
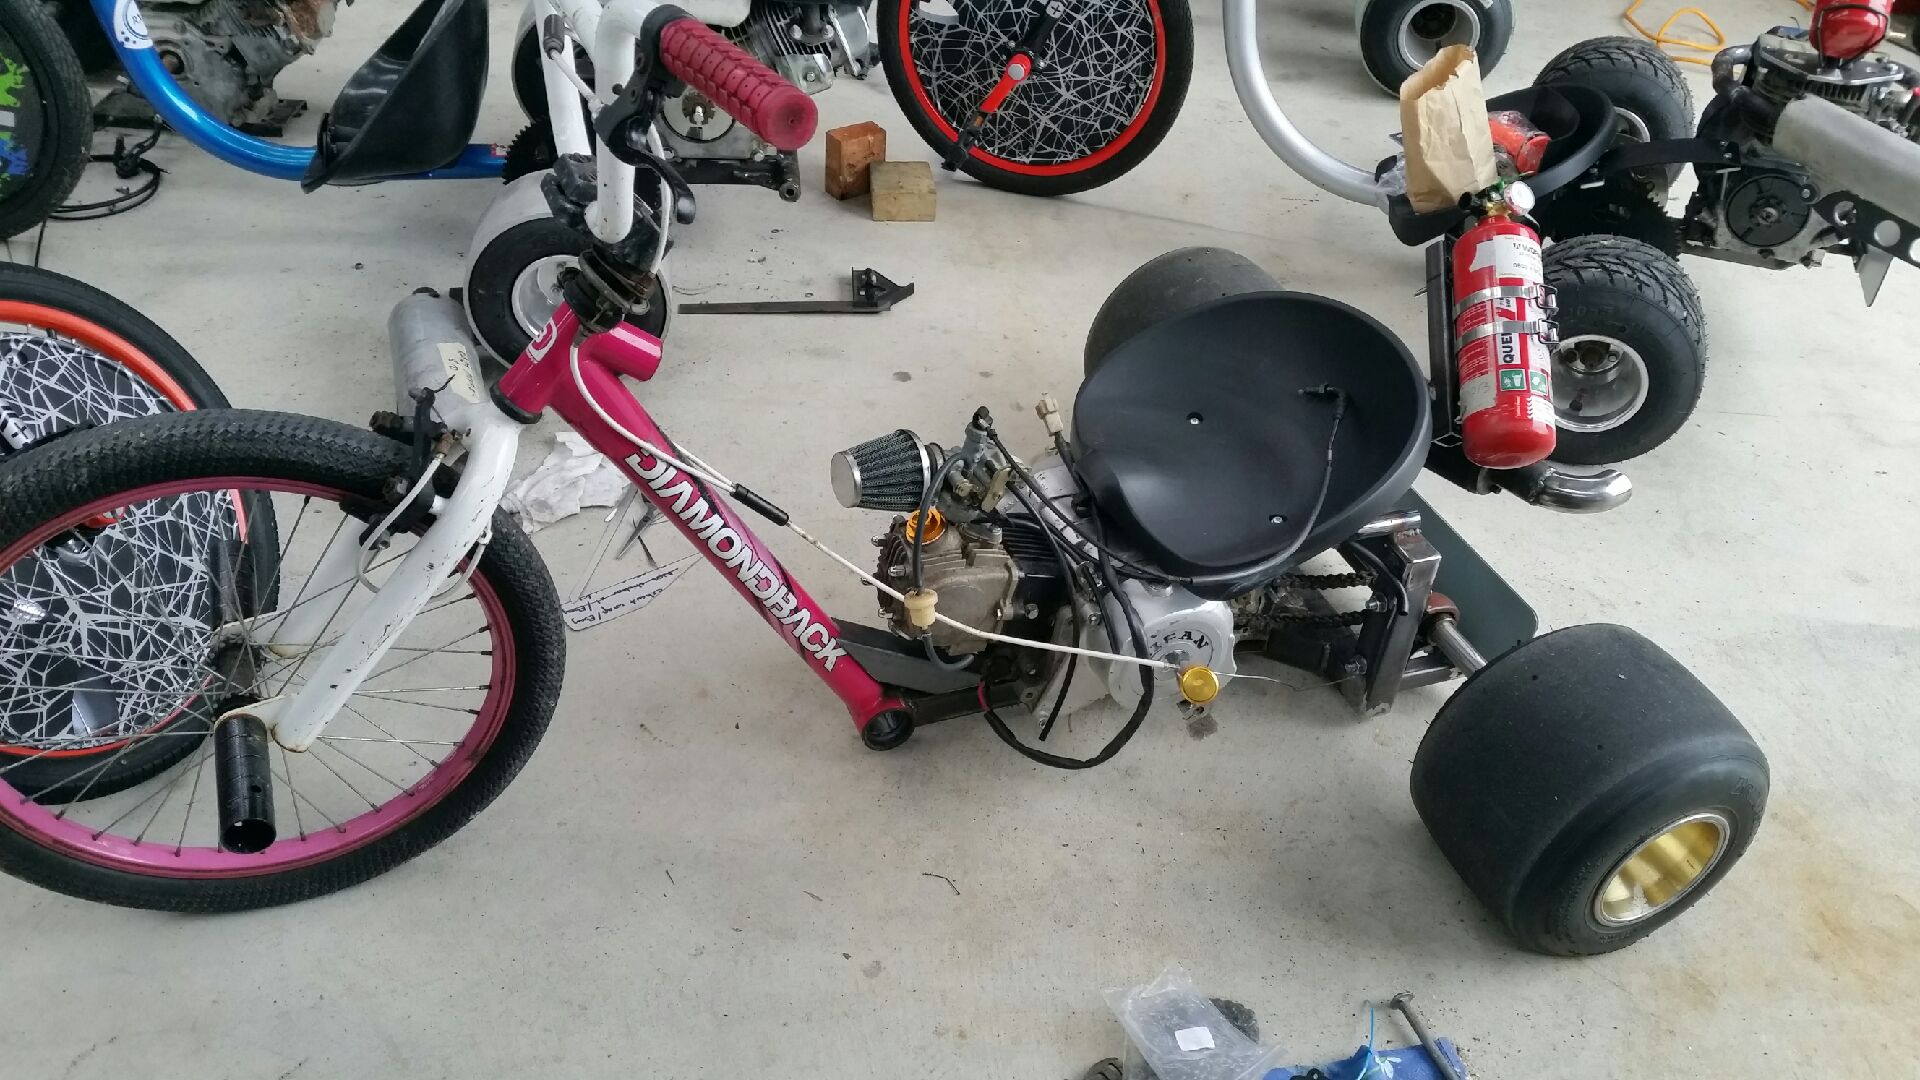
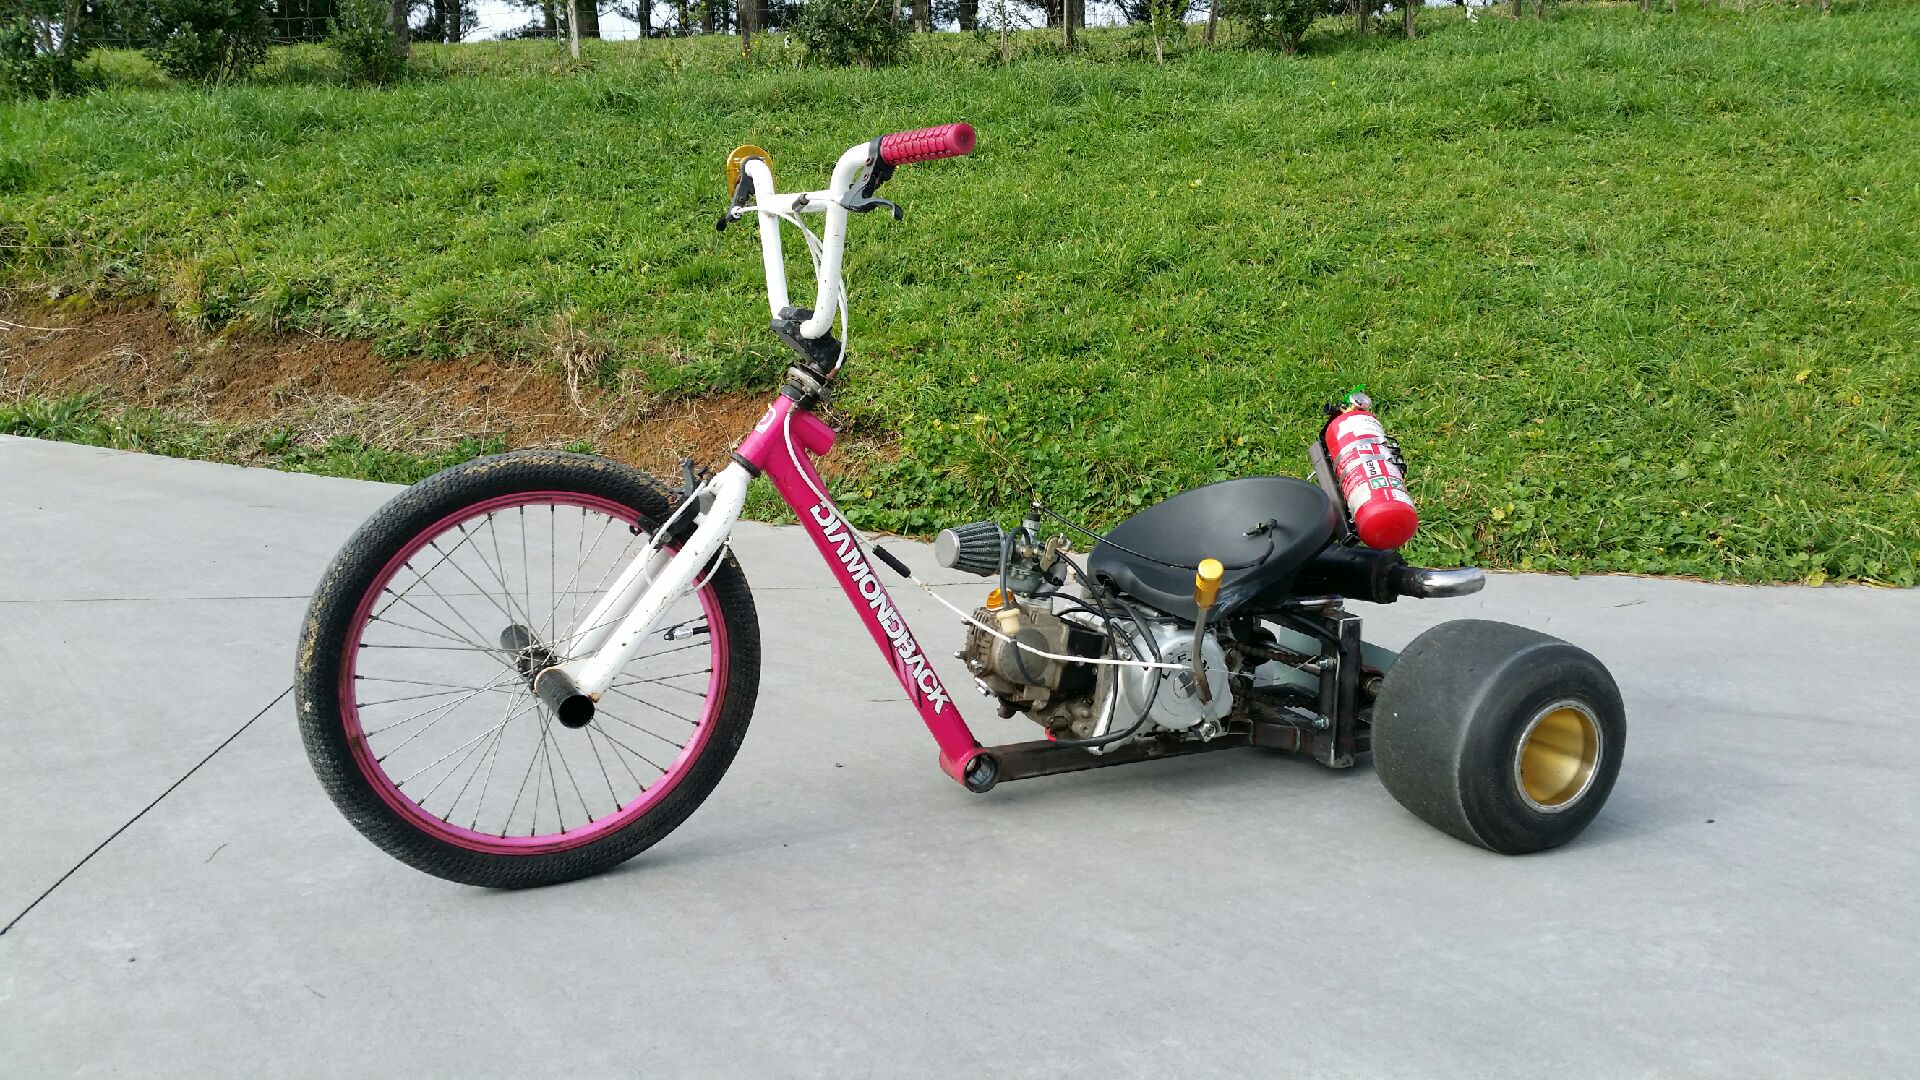
And nearly there with the OG drift trike. A few issues to sort out around wiring etc...then same as above...paint, cables, wrap exhaust ...then drift!!!
-
Kimjon's 110cc 4 speed pit bike motorised drift trike build
Kimjon replied to Kimjon's topic in Other Projects
Made a multipurpose bracket. Rediculously complicated...but I like it. Then to appreciate it...rolled it outside for the very first time and stood back and looked it over...yes, nailed it! Very happy. Paint it up, wrap exhaust and hook up cables...good to go.
-
Kimjon's 110cc 4 speed pit bike motorised drift trike build
Kimjon replied to Kimjon's topic in Other Projects
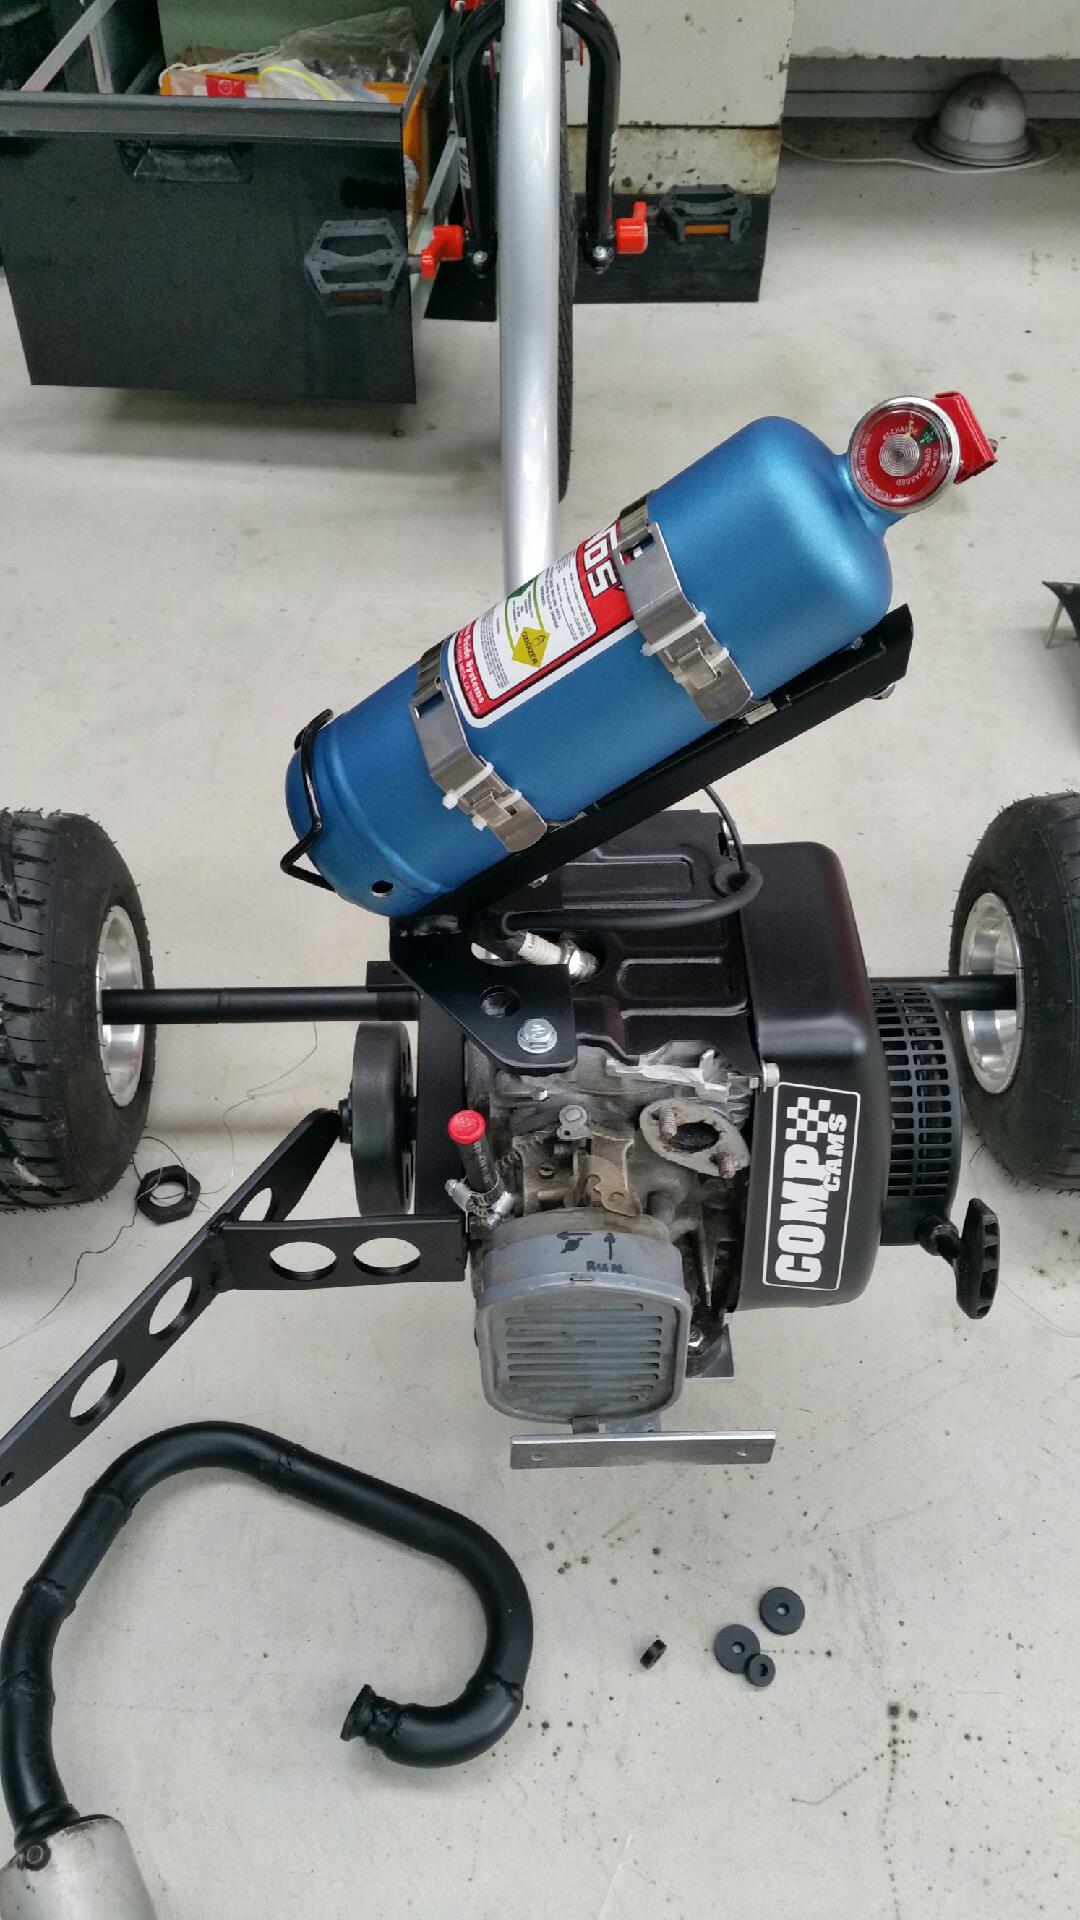
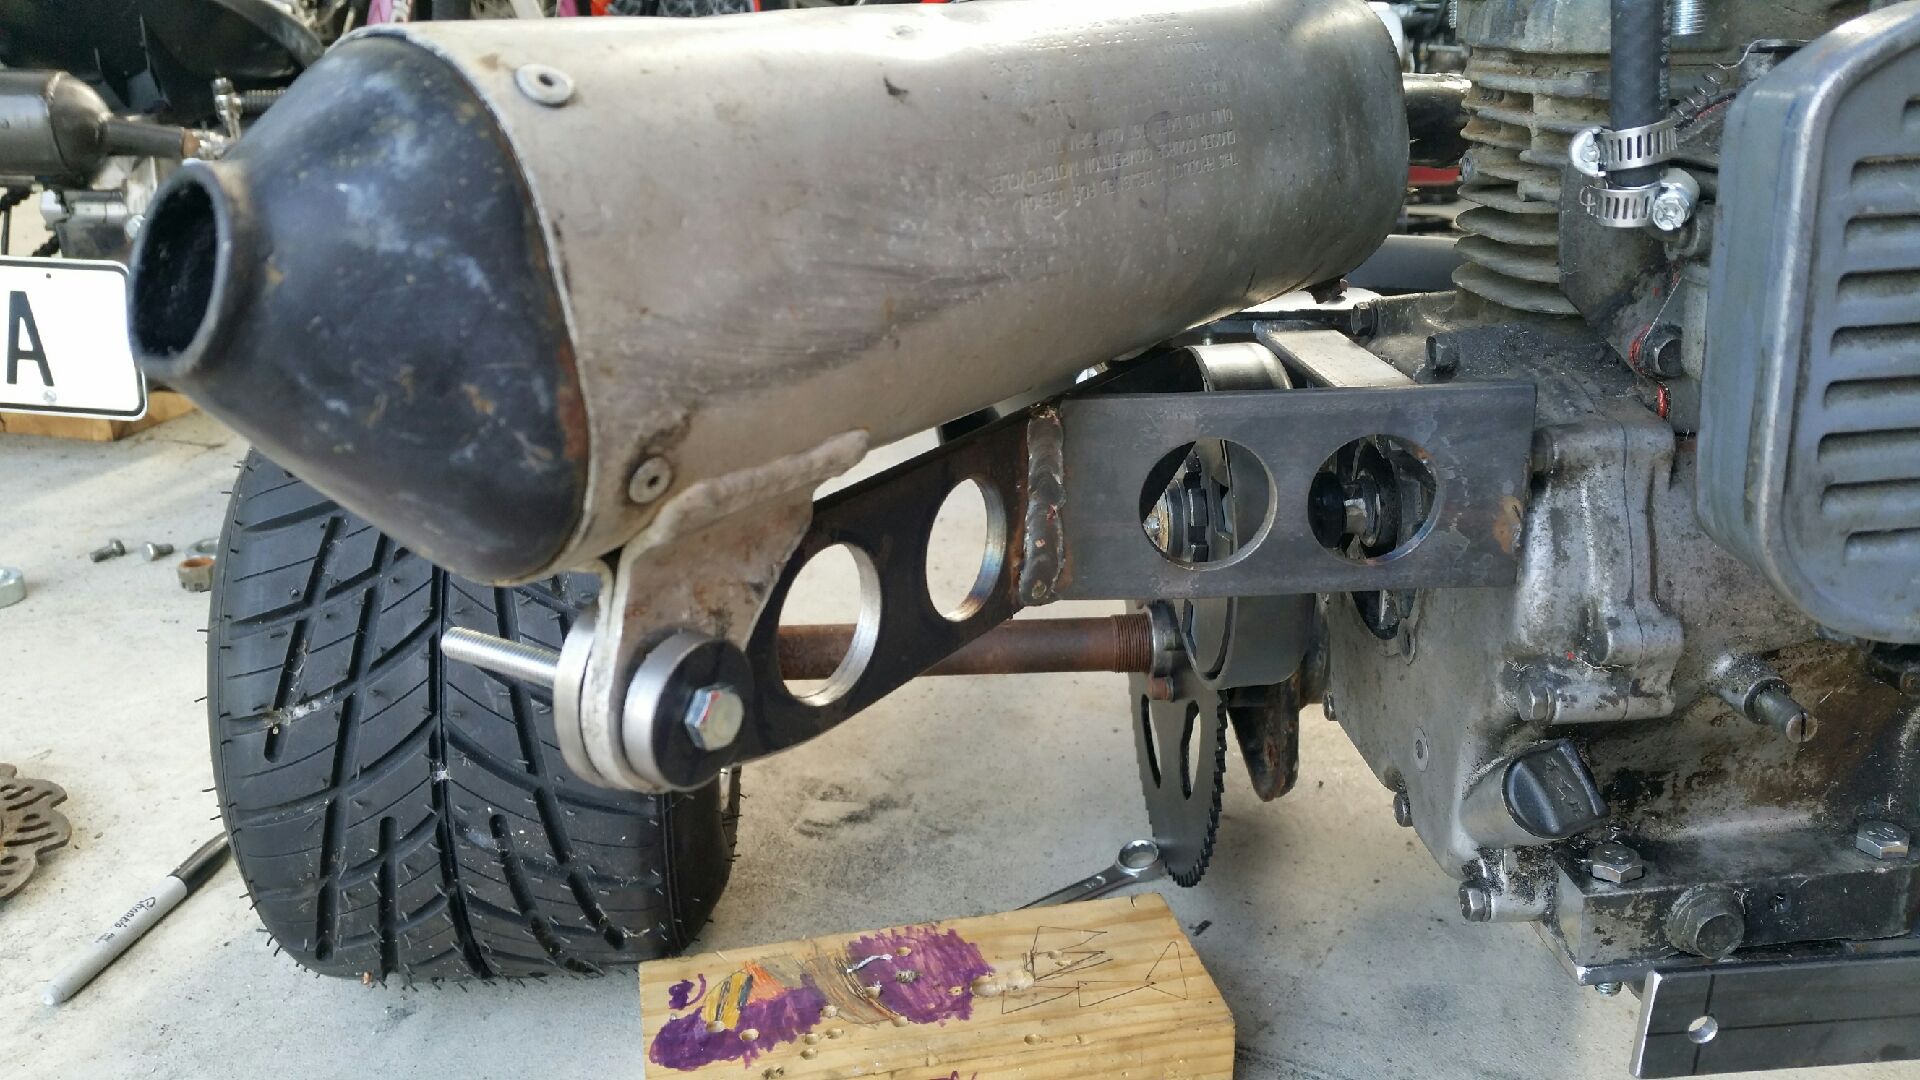
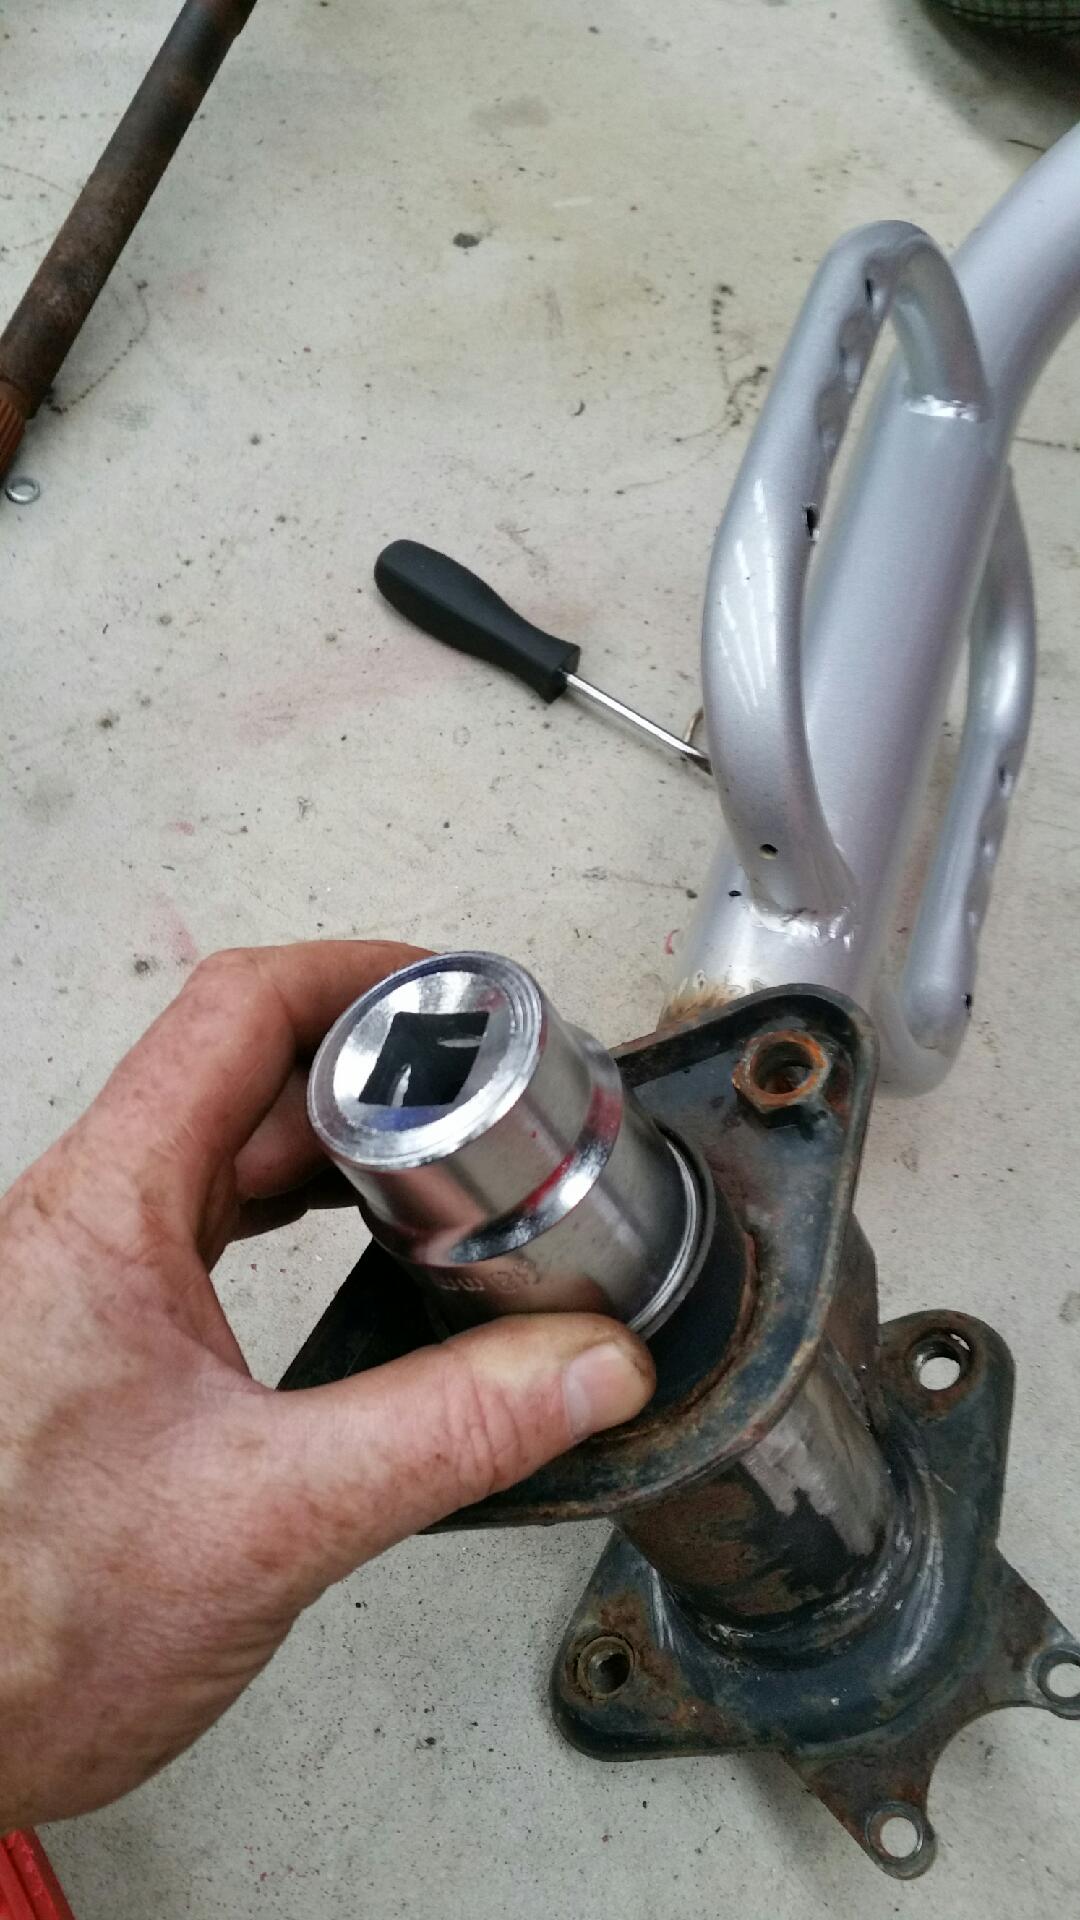
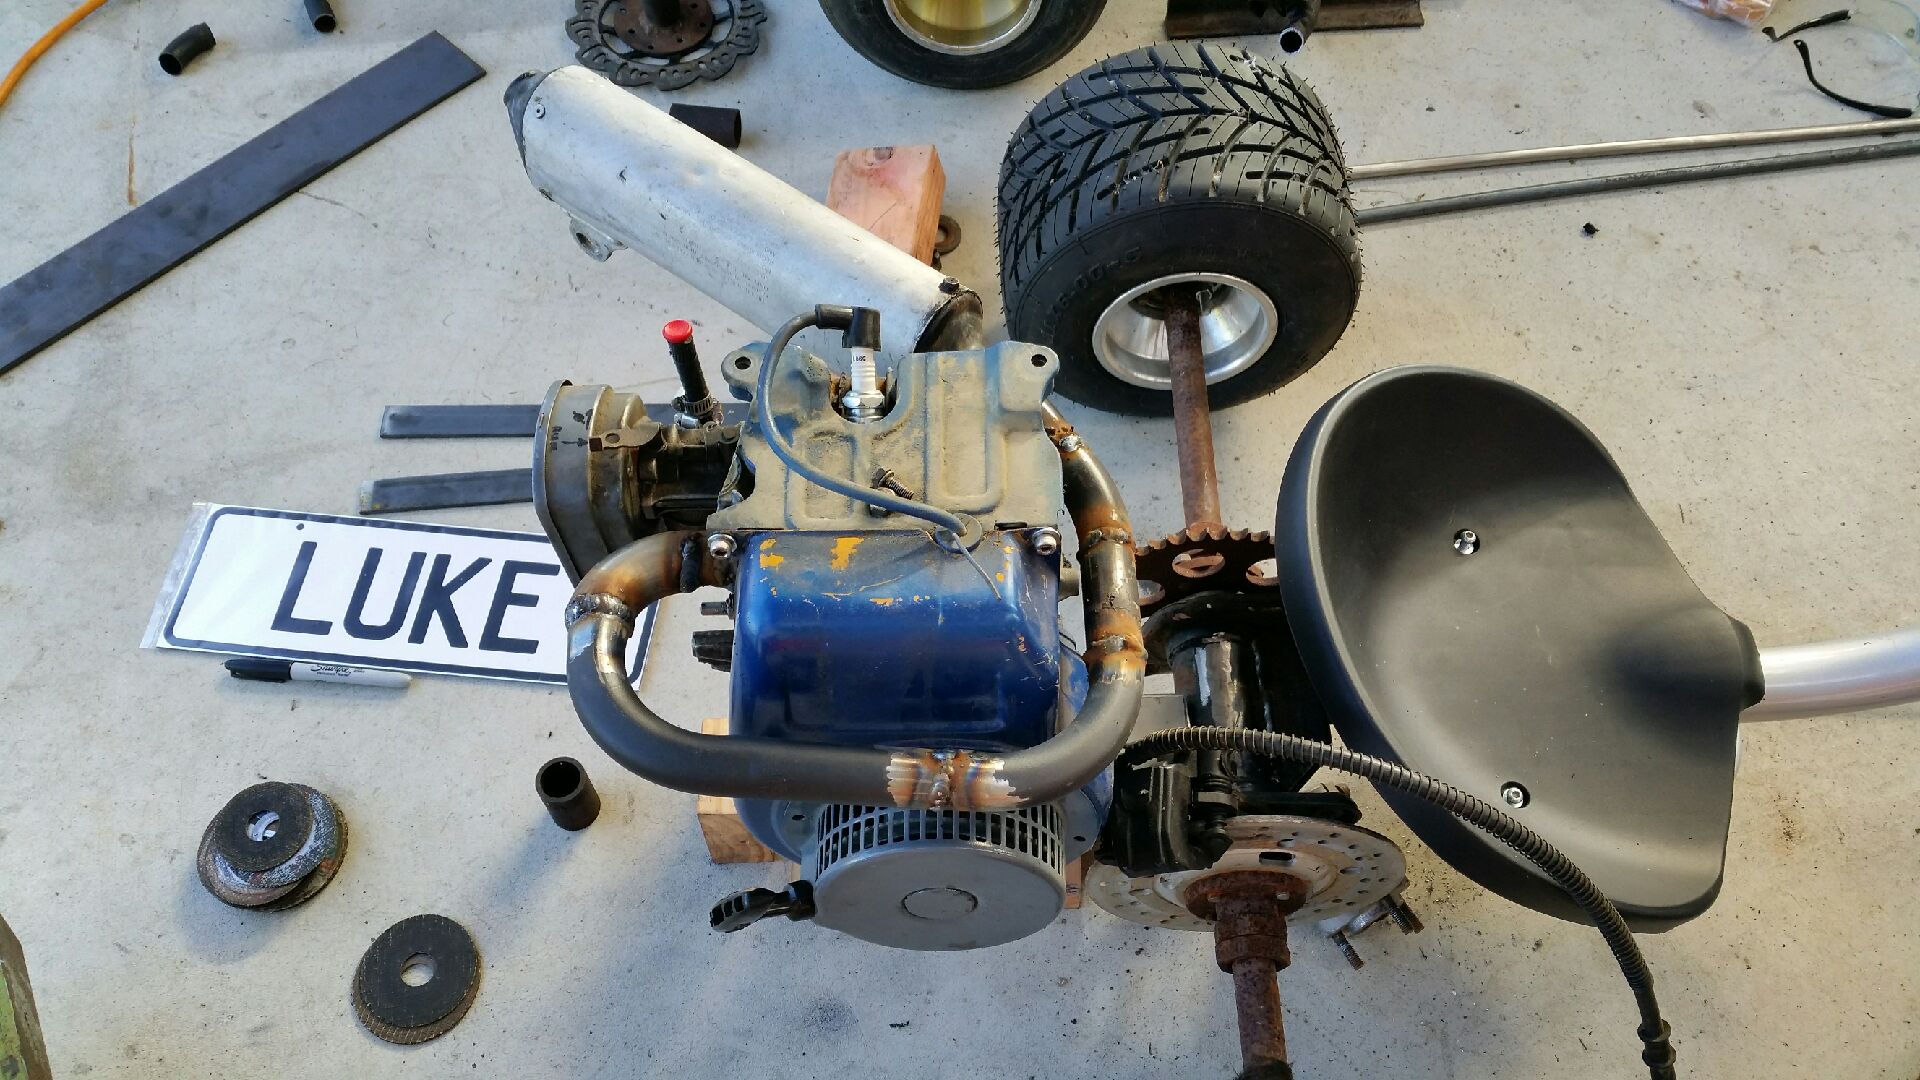
Engine mounts all done to take the above motor: Then I finally found a use for that gigantic socket set I Brough on an impulse buy and have never used. Yes...the ultimate bearing Wacker inner tool...conveniently comes in a verity of sizes to suit lots of bearing sizes.
-
Kimjon's 110cc 4 speed pit bike motorised drift trike build
Kimjon replied to Kimjon's topic in Other Projects
No keyway...no problem! As rough as it gets...can't be fuckers removing crankshaft...so just leave it in. Worked awesome!
- 99 replies
-
- 10
-
-
Kimjon's 110cc 4 speed pit bike motorised drift trike build
Kimjon replied to Kimjon's topic in Other Projects
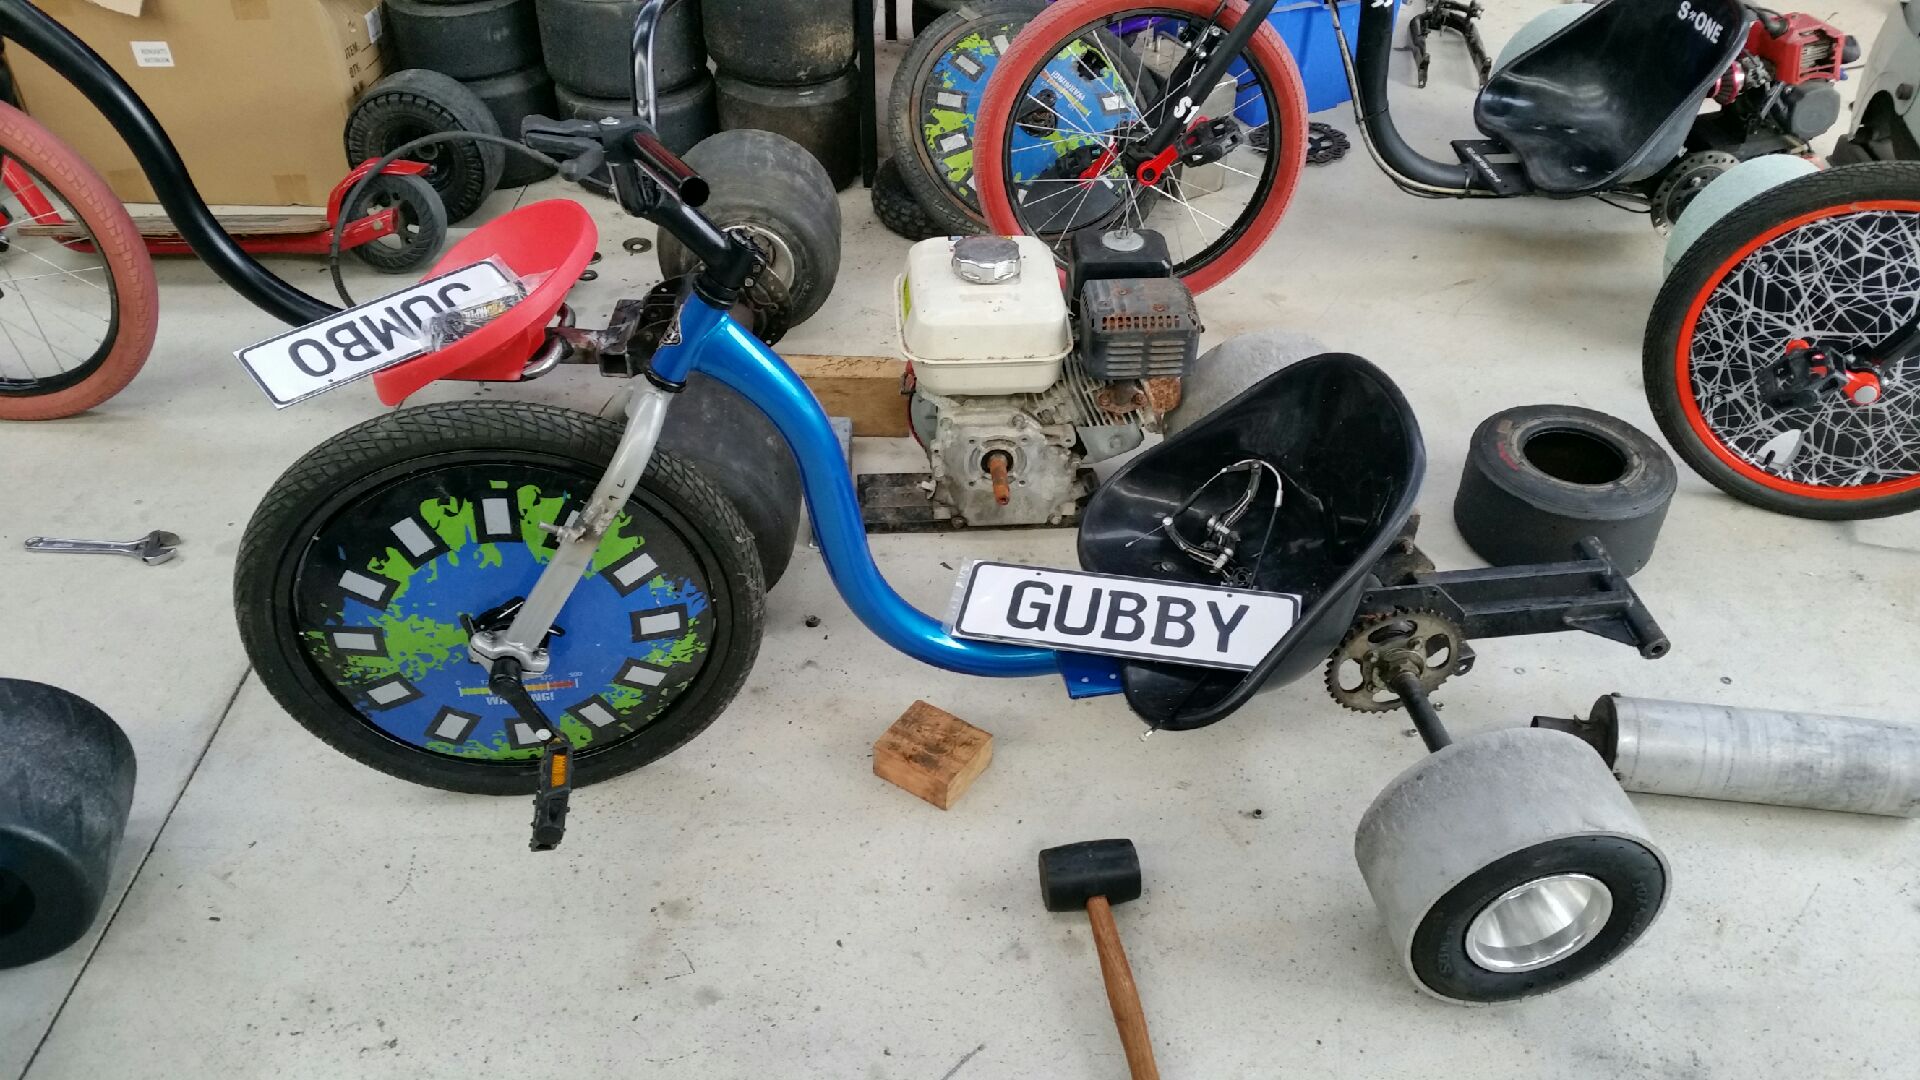
Been a while...I've not spent a lot of time on these lately, other stuff has taken priority. But I did a cheeky 3hrs today. Mocked up. Parts will change a little...but almost functional.
-
Kimjon's 110cc 4 speed pit bike motorised drift trike build
Kimjon replied to Kimjon's topic in Other Projects
Gas tank sorted... Will be painted up a different colour later on.
-
You may get away with welding? I've locked spider gears in differentials and welded the steel pins to the cast iron heads before. Ideally you preheat...weld...then bring temperature down again slowly to prevent cracking. Other way about it could be to grind a keyway in.
-
Kimjon's 110cc 4 speed pit bike motorised drift trike build
Kimjon replied to Kimjon's topic in Other Projects
Smashing it out... Stoked with this exhaust! Totally transformed a shit ugly motor off a rotary hoe into something that now looks the part. It'll get "prettied up" with paint and exhaust header wrap later...but that's pretty much done.
-
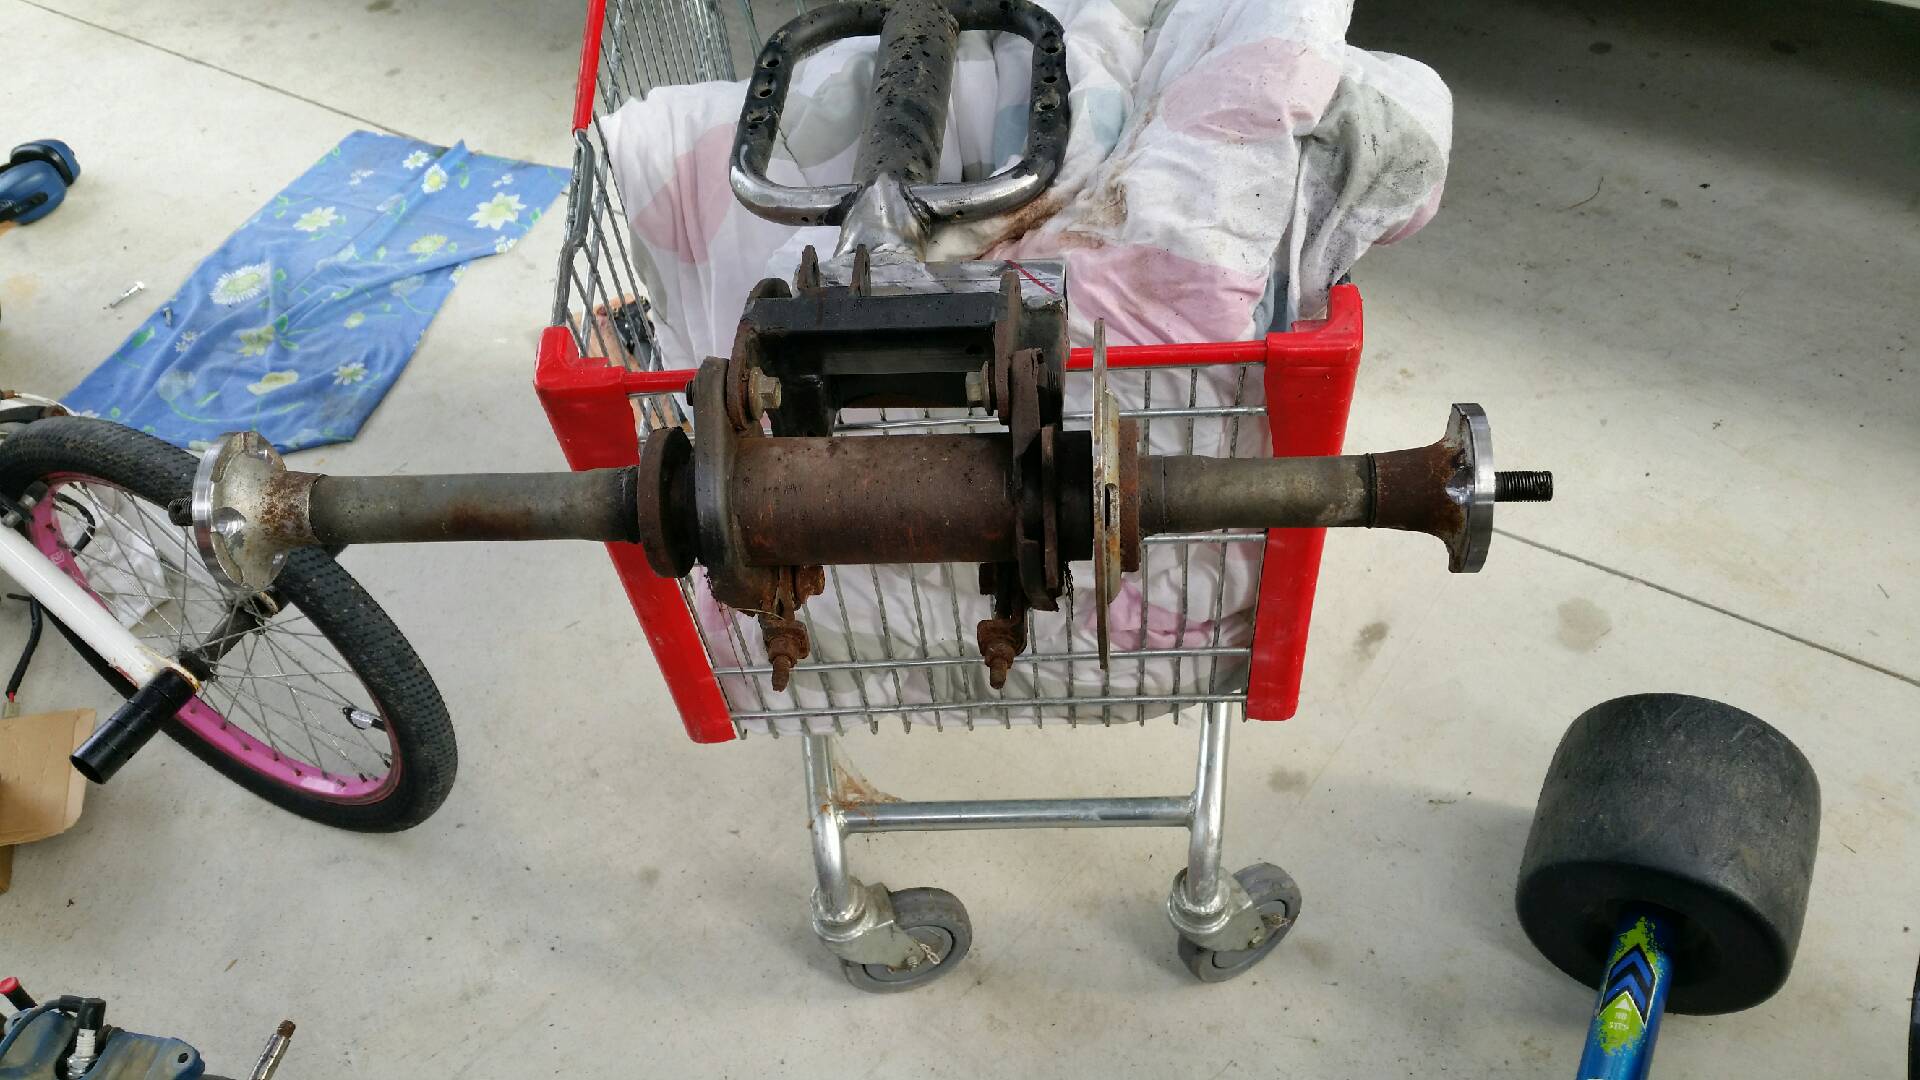
Kimjon's 110cc 4 speed pit bike motorised drift trike build
Kimjon replied to Kimjon's topic in Other Projects
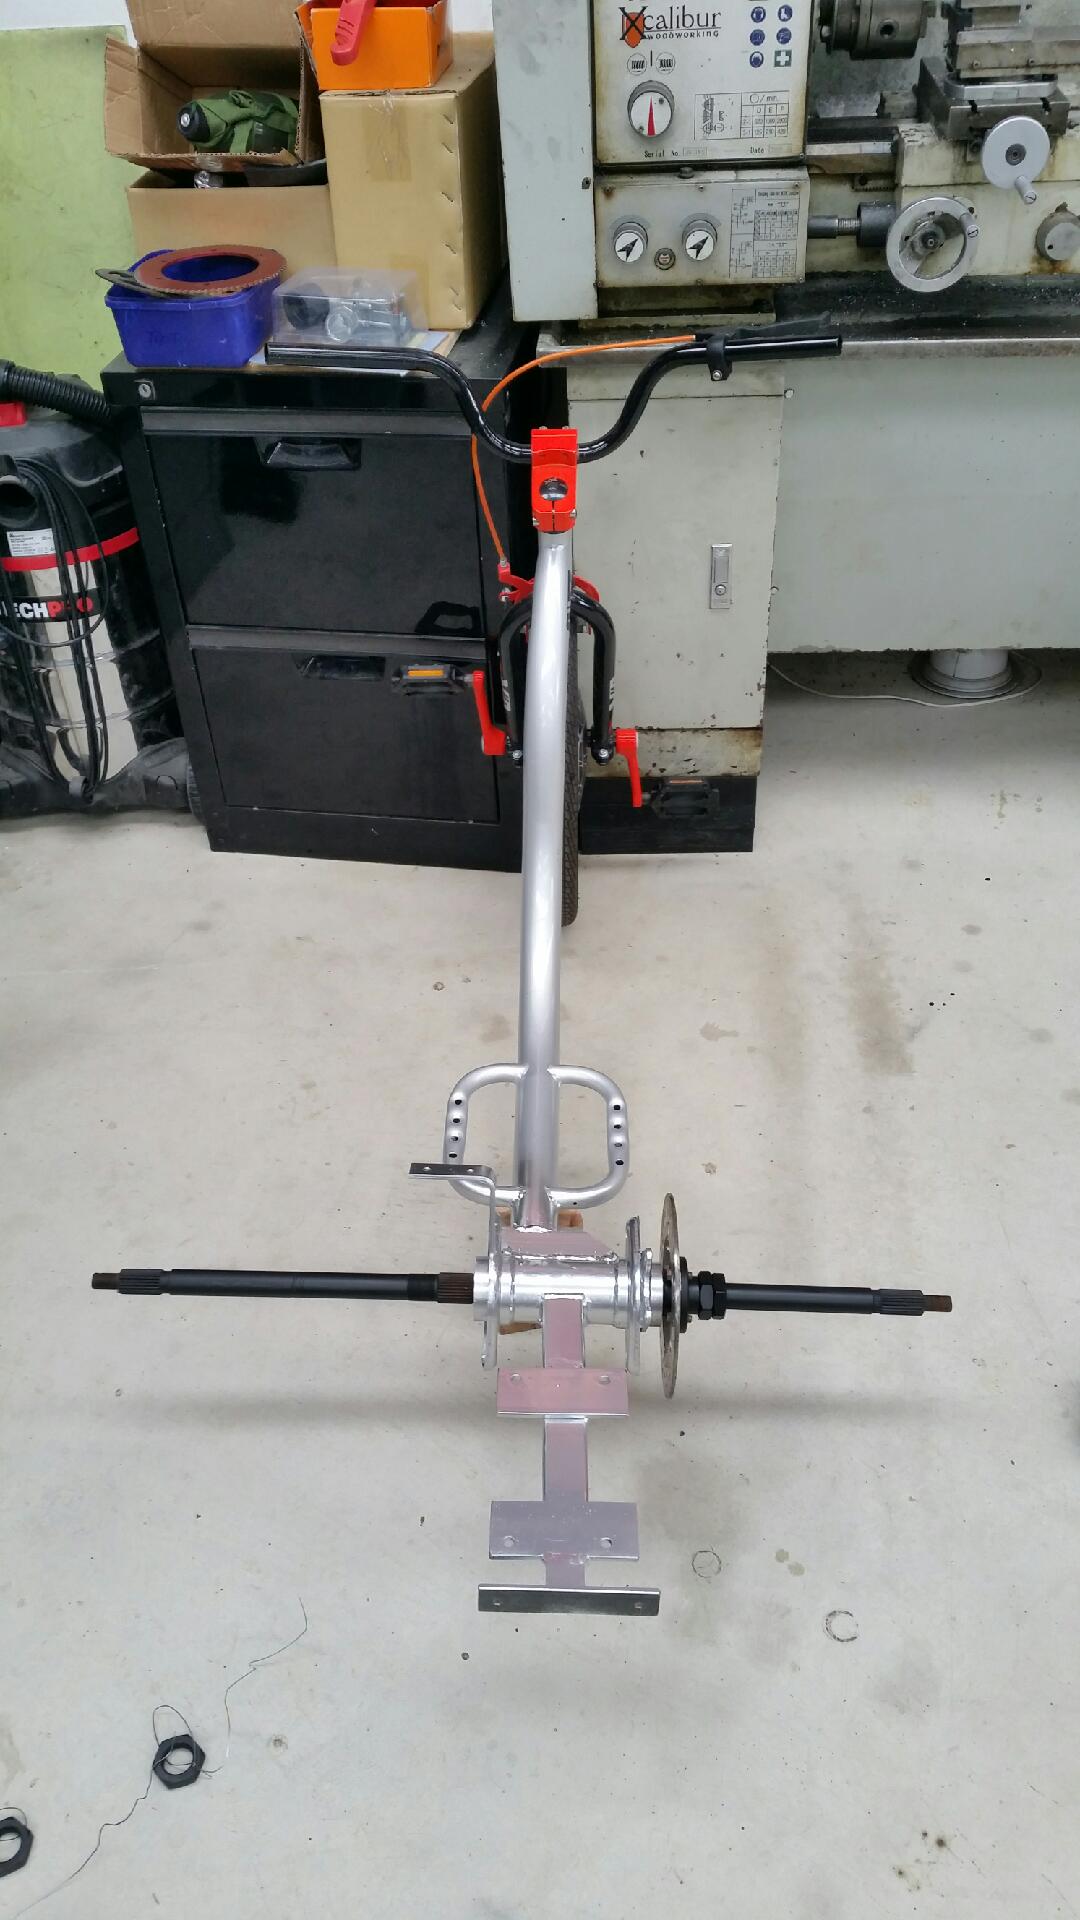
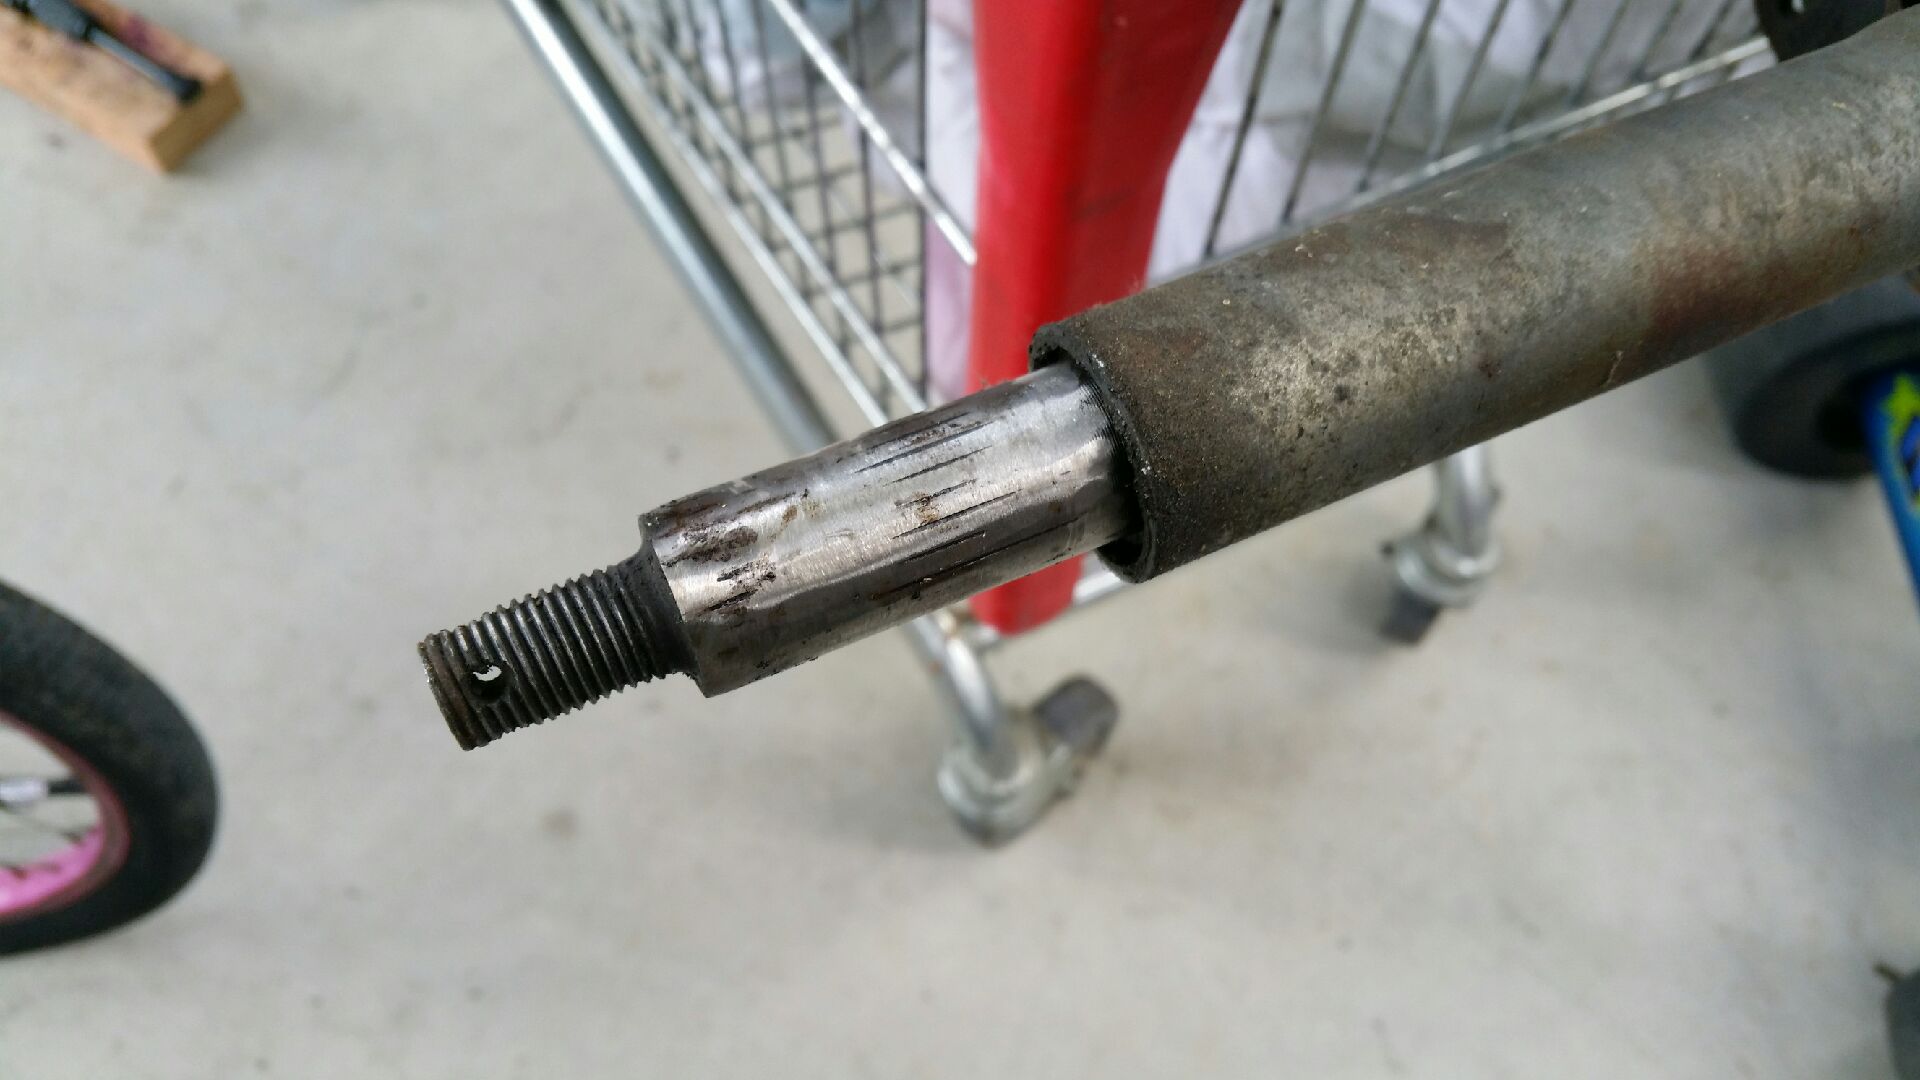
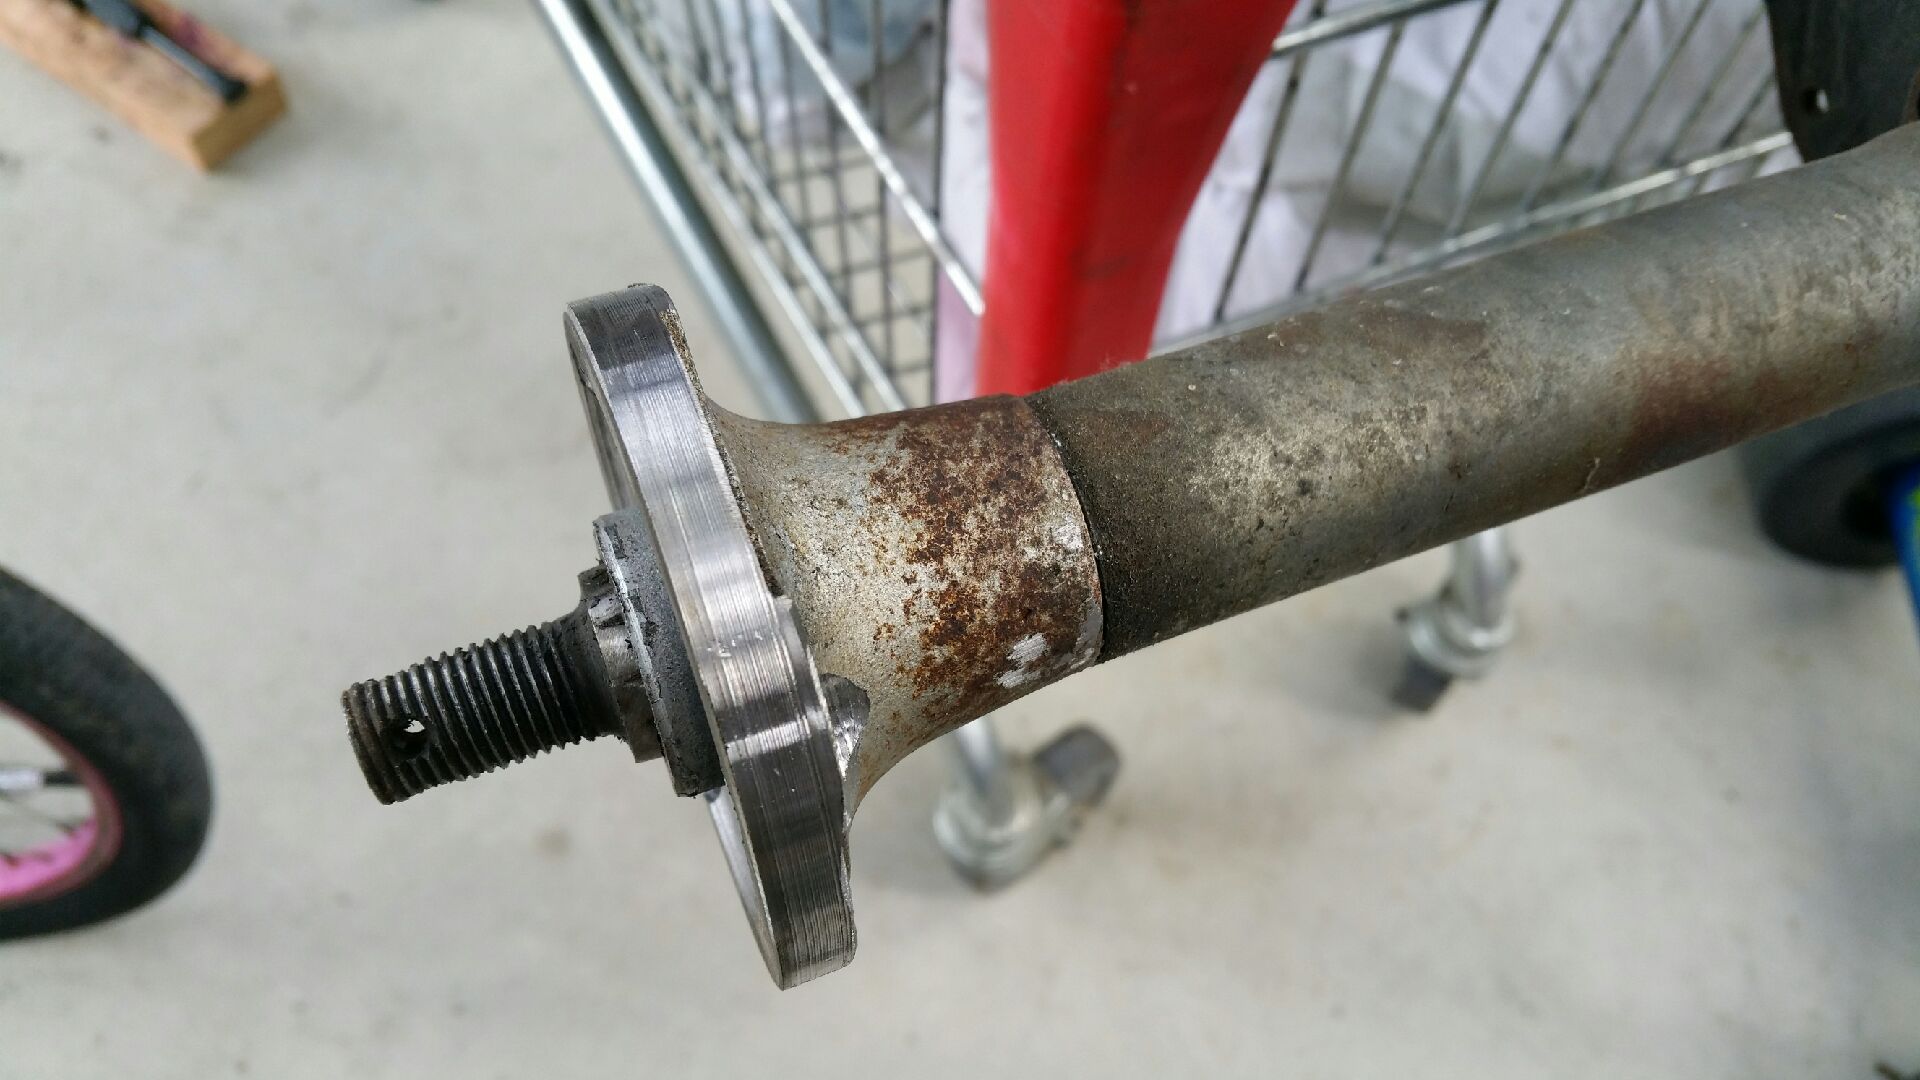
Butchery out of necessity. The axle was $1 no reserve on trademe...yup...I won it for $1. However the hubs were missing. I found some hubs second hand at an equally affordable price. Problem was they didn't fit the splines. Nor did anything else I could find. Warning: the following may upset sensitive viewers. Hubs will be welded on to axle. I've turned them down to fit and milled in bolt recesses. Good to go:)
-
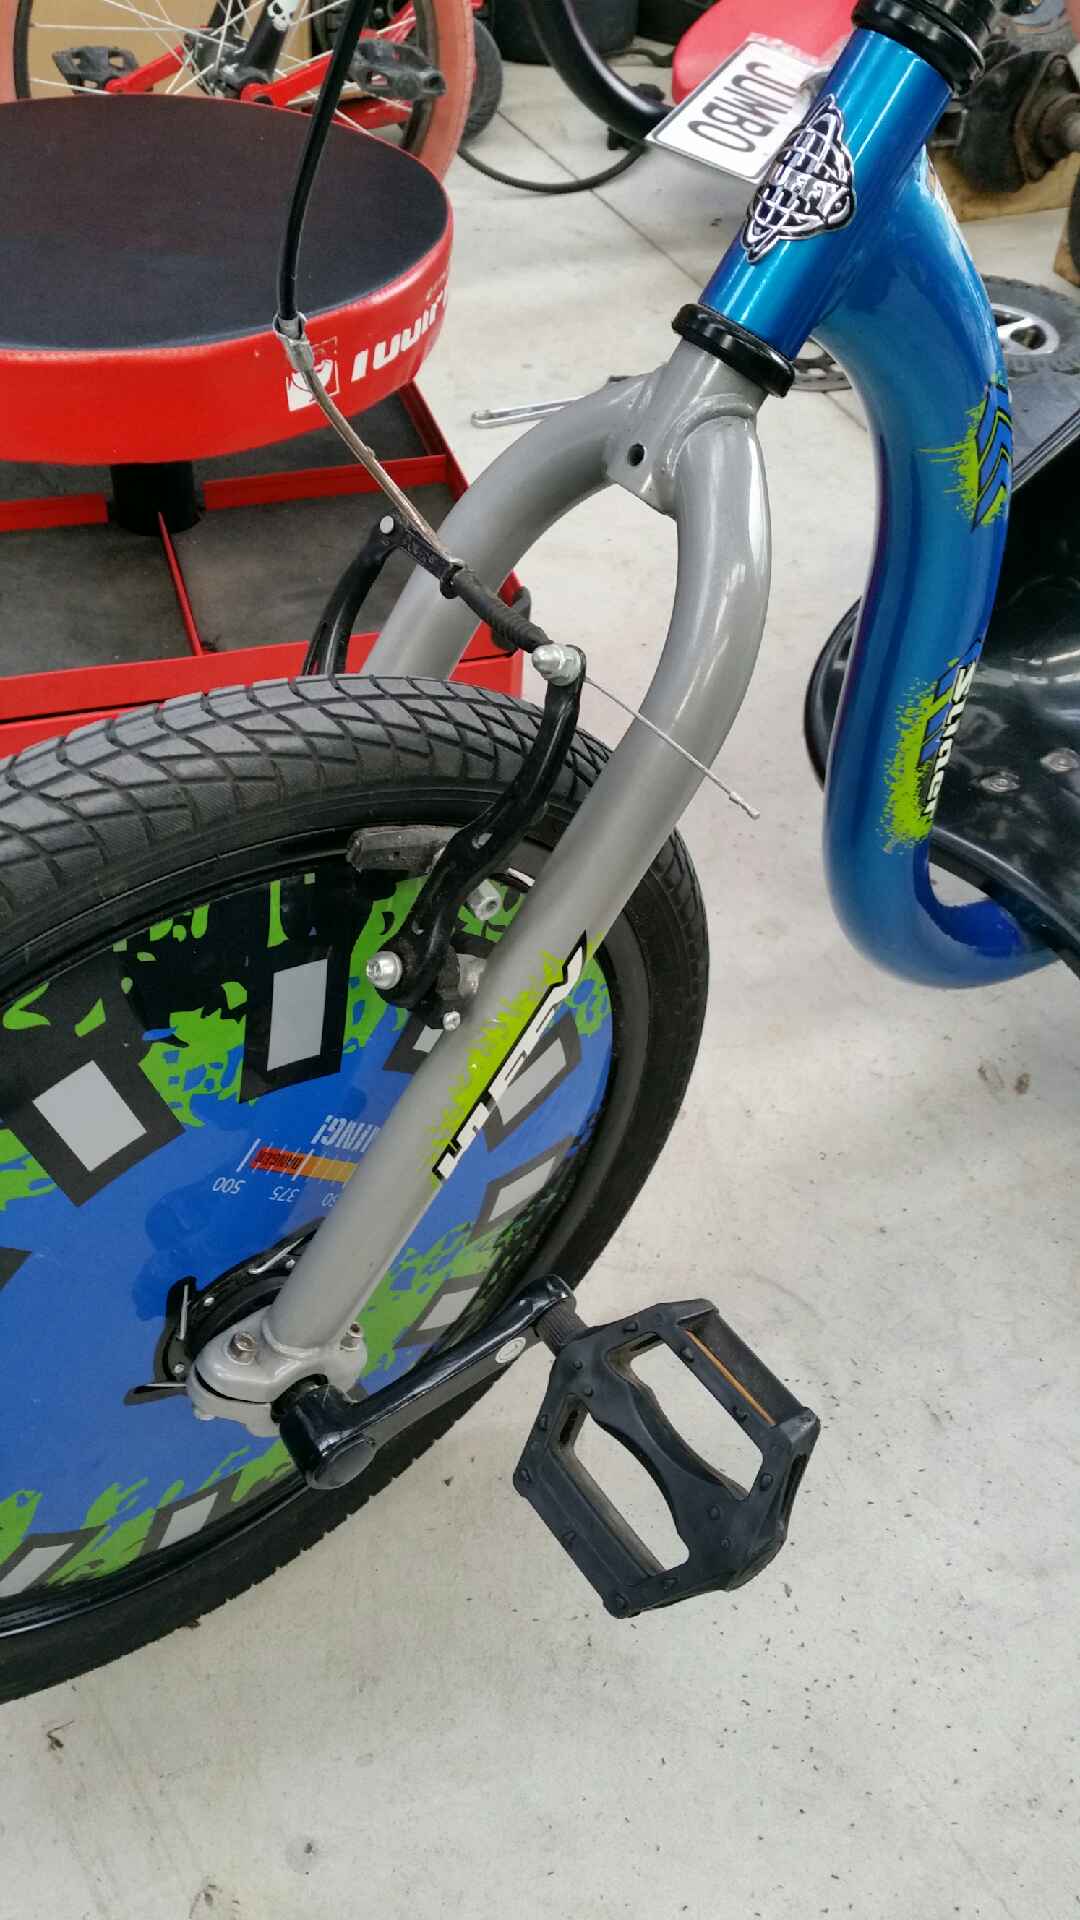
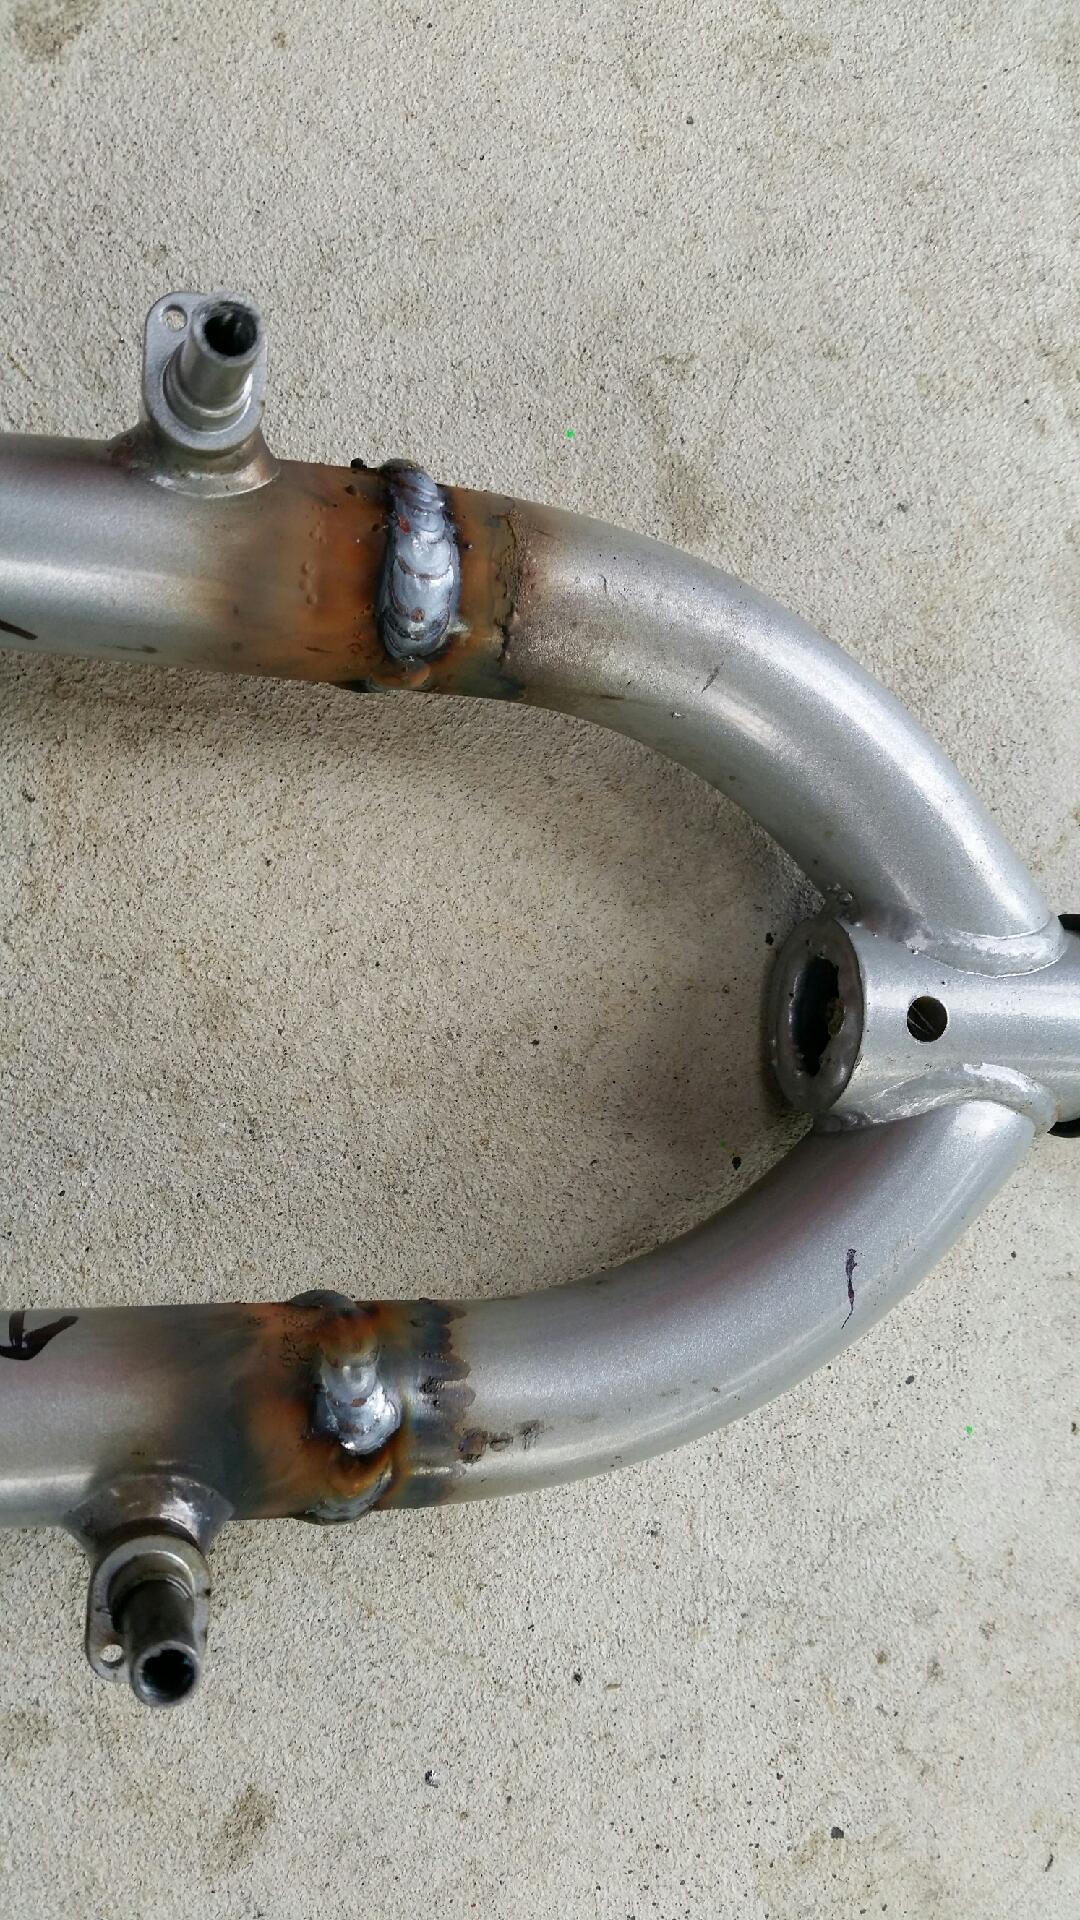
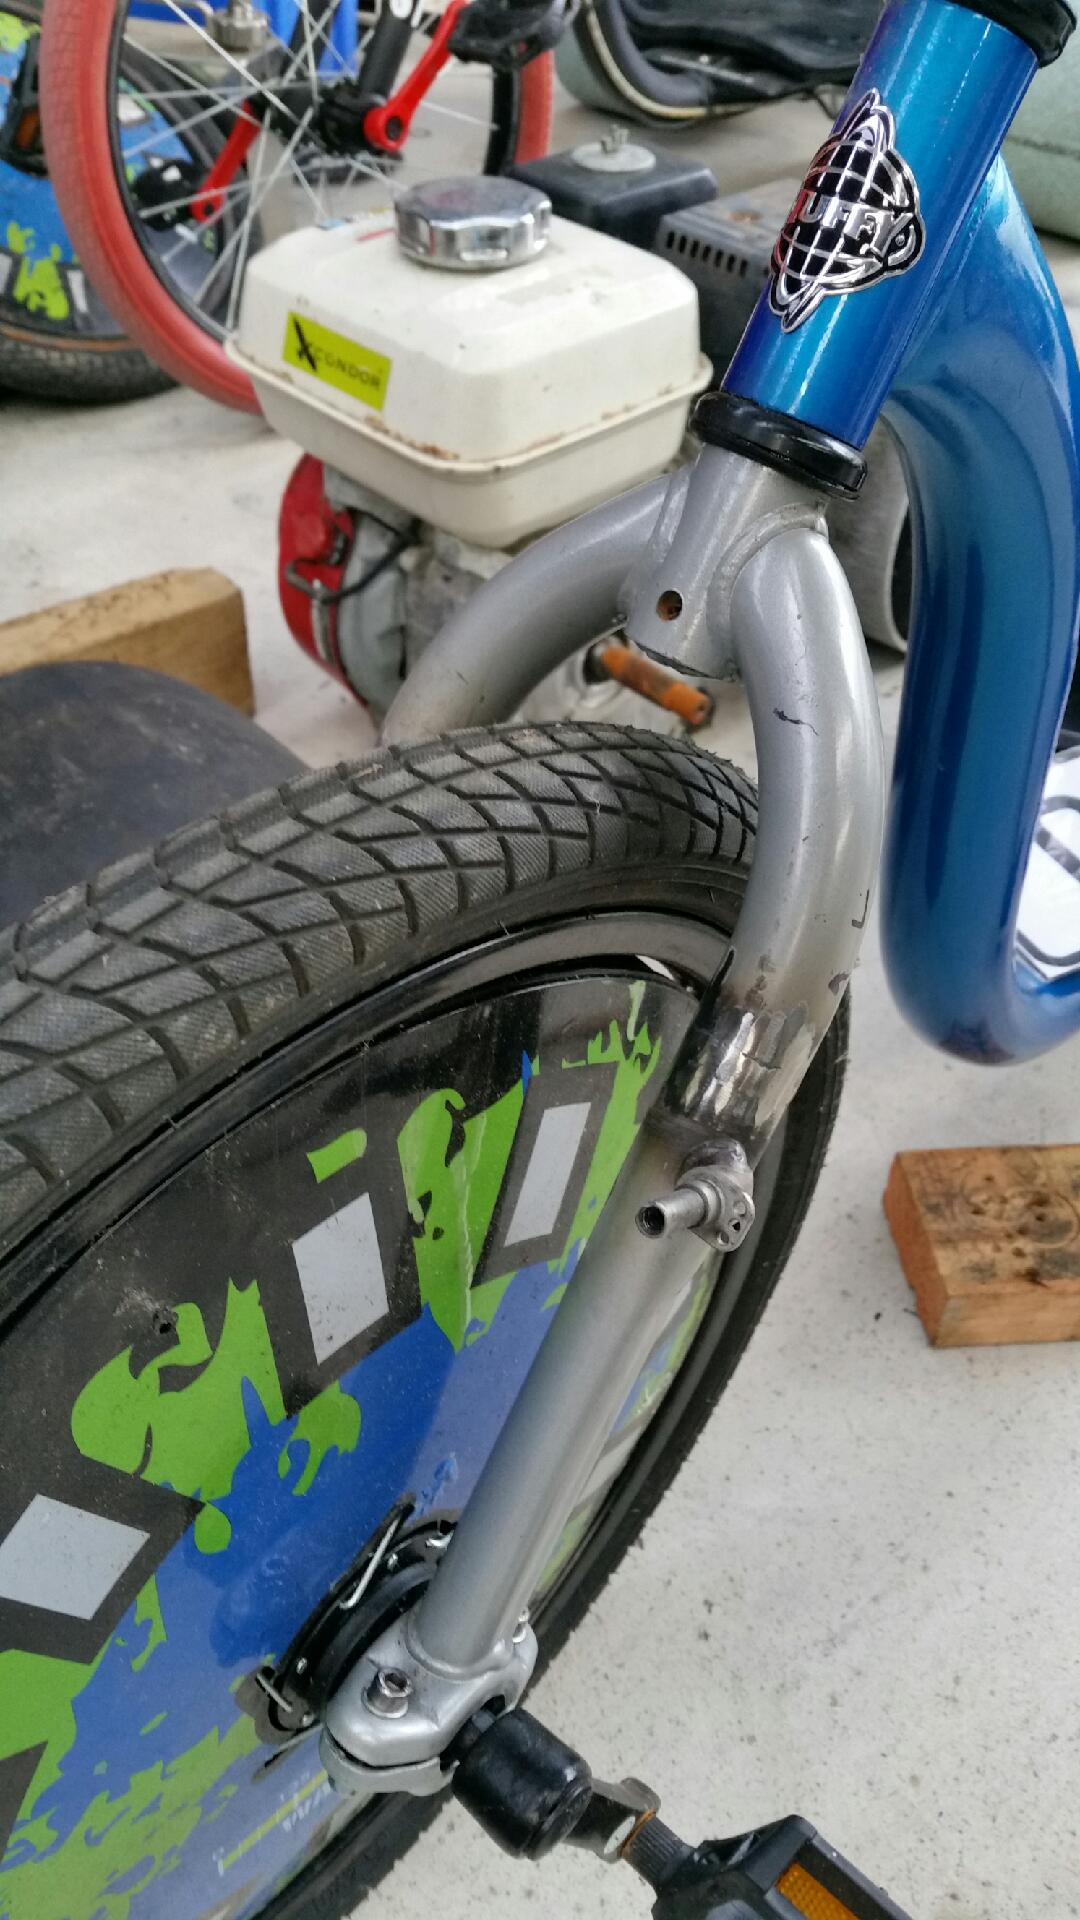
Kimjon's 110cc 4 speed pit bike motorised drift trike build
Kimjon replied to Kimjon's topic in Other Projects
Stance on one of the trikes was all messed up. Looked like a leadsled. Solution: Before Cut and weld And after: That dropped the front end 65mm lower..and it now has the right stance I was looking for. Success!!!