


Flash
-
Posts
1615 -
Joined
-
Last visited
-
Days Won
2
Posts posted by Flash
-
-
On 31/07/2023 at 18:06, Jeffs_Emporium said:
Query #1
My 1989 YH51G hiace has had the aircon stripped out of it and I would like to reinstate it.
There's the same model van at pickapart with all of its aircon still attached, for $137 I can get all of it.

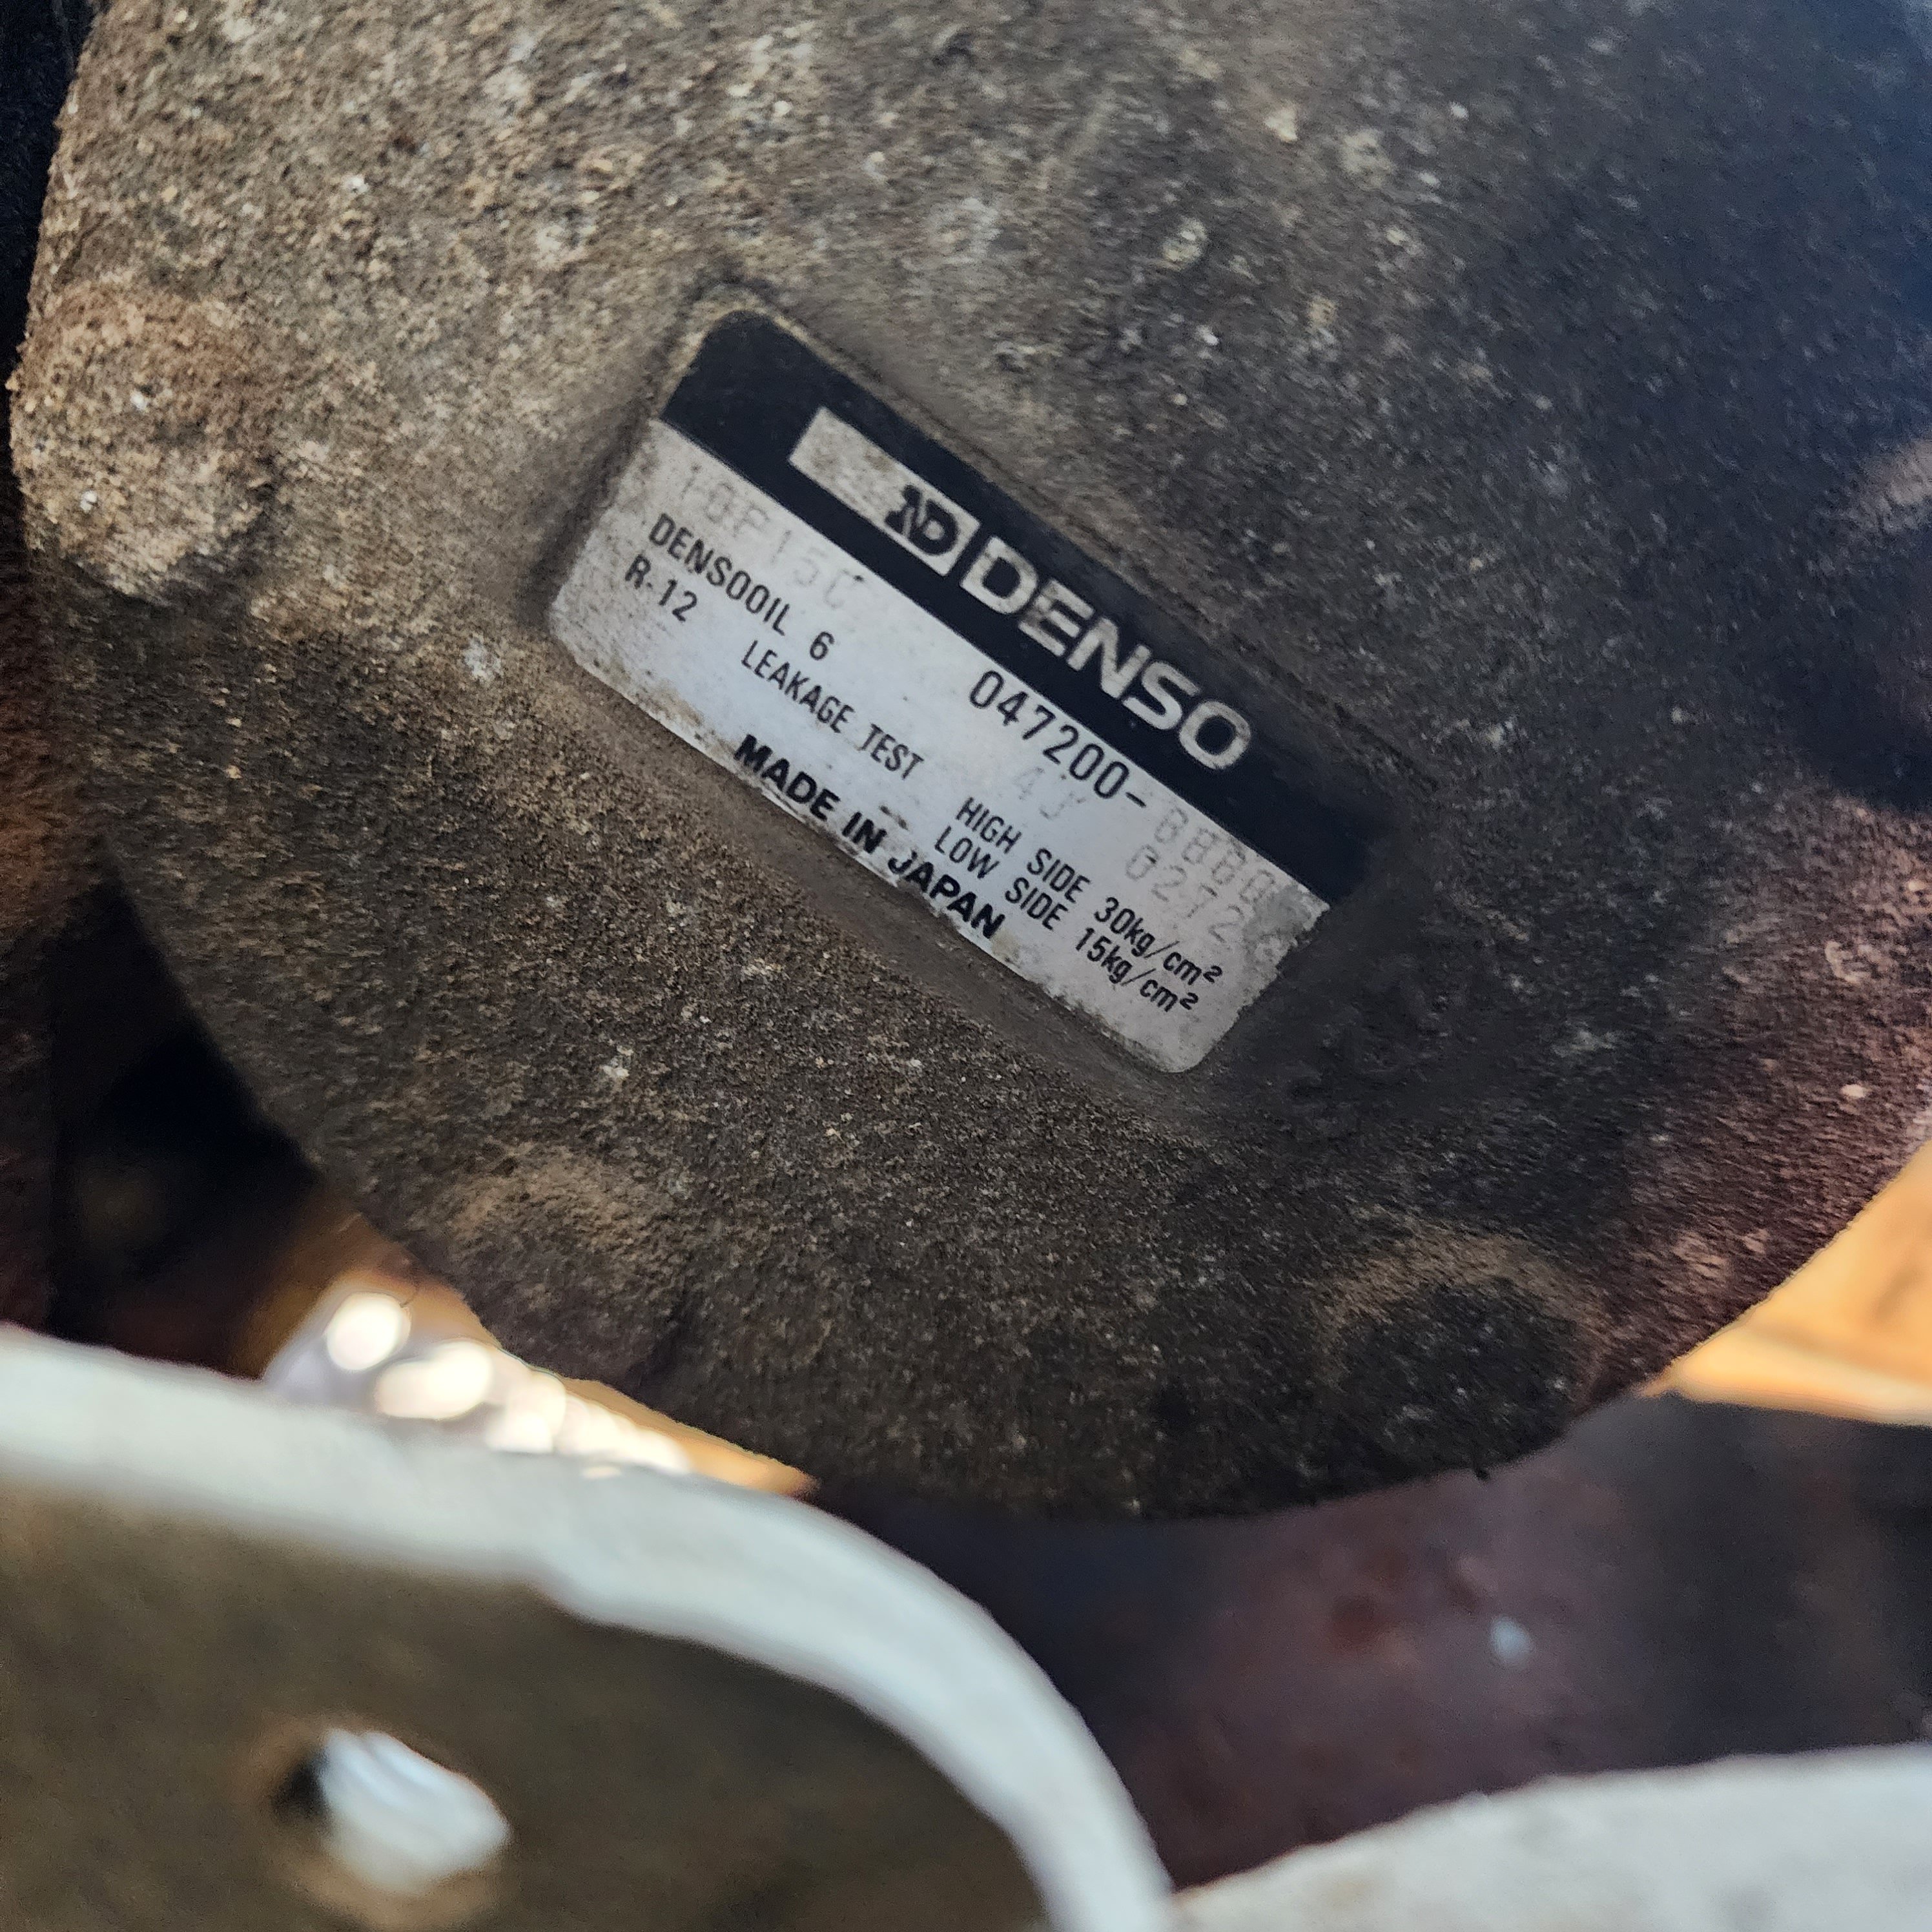
The compressor says r12 on the back and I vaguely remember it's no longer available in NZ or some other yarn similar.
Basically I don't know what I'm doing and would like to learn if this is the best method to refit aircon.
The other spanner in the works is that I plan to change the engine which would have the compressor on the other side, is it costly to have lines made up for this and to de-gas and re-gas when the swap happens?
@Jeffs_Emporium I'm putting some thought into my a/c install for my Toyota 3Y powered Thames van and in the small hours of this morning while I was doing some thinking I suddenly remembered your a/c related post. Checked it out this morning and thought I'd hit you up with a few questions as you are the only person I know who has seen a 3Y factory a/c setup in the flesh. Hope you don't mind. First question is looking at the schematics in your post it looks like the a/c compressor sits on the driver's side of the engine. Am I right ? Secondly it looks like the setup runs a little idler / belt tensioner pulley. Is that correct ?
-
- Popular Post
- Popular Post
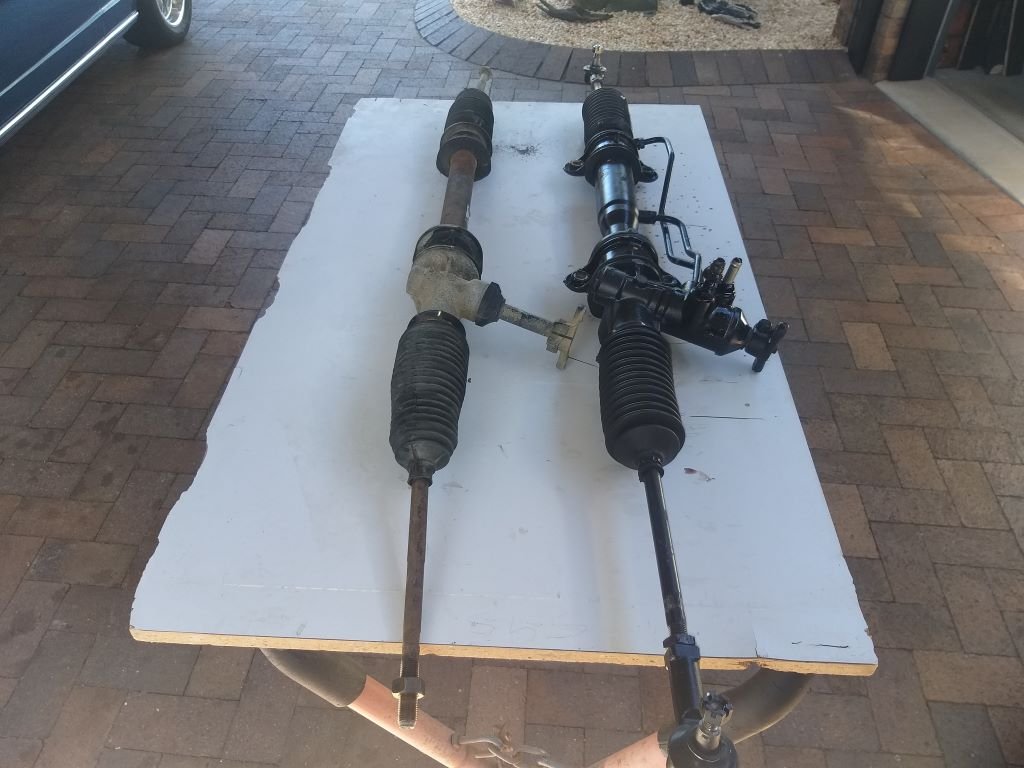
A while ago when I was chasing down a replacement gearbox, I came across a Mitsi Express van at my local wreckers that was fitted with a manual steering rack. These are pretty thin on the ground as most of the vans were bought equipped with power steering. The wrecker didn't want big money for the rack, so I nabbed it and it has been languishing in the corner of the shed since then.
With summer rapidly approaching I thought it about time that I started planning out my a/c install. The first thing that I need to do is free up some real estate for a belt driven a/c compressor. My only option space wise is to do away with my belt driven power steering pump. Longer term I'd like to install an electric power steering pump out of a Holden Astra, but for now I thought I'd give the manual steering rack a go, just to see what manual steering would be like.
So, I started off the day by pulling out my radiator to get to the power rack, pump and associated pipework. Chucked the dirty old manual rack in as is for now. If it is going to be a permanent solution, I'll give it a clean and a rattle can reco at a later stage. It could do with a new set of dust boots too and one of the knuckles feels a bit loose, but let's see what happens first.
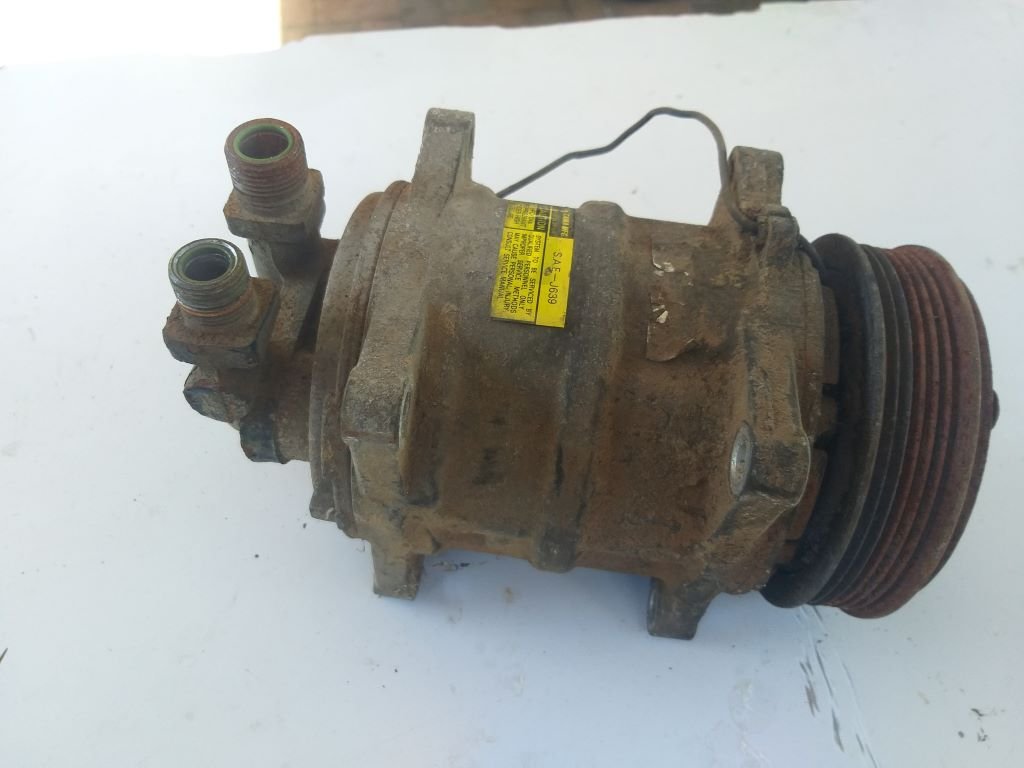
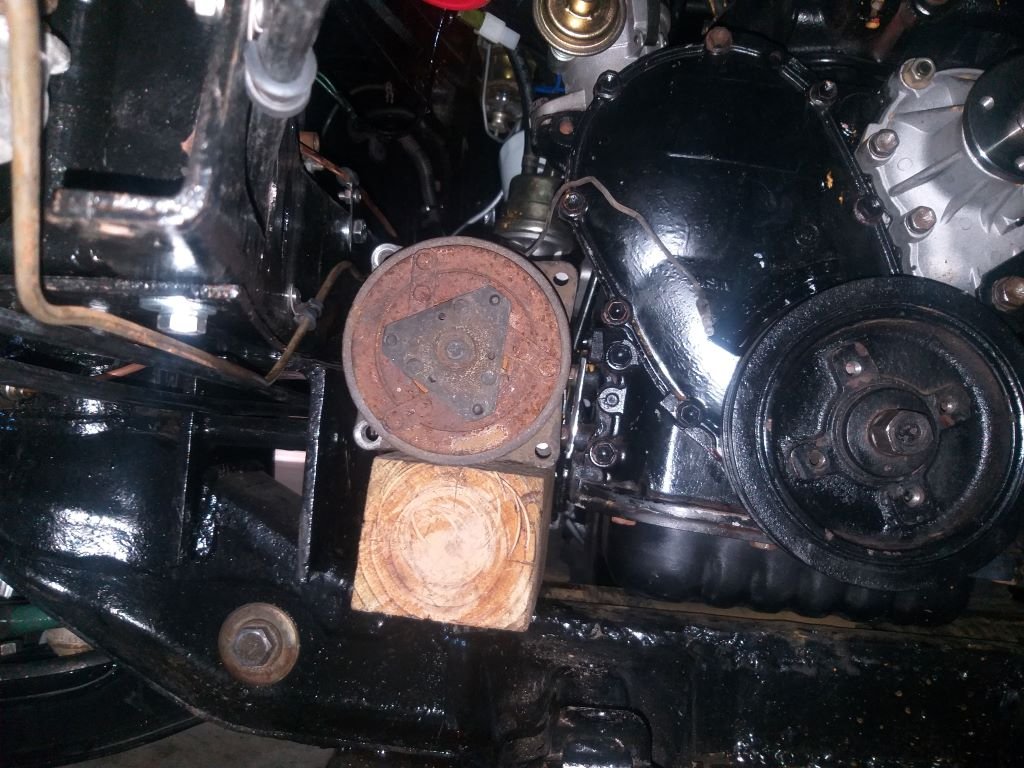
While I had the radiator out, I played around with an old a/c compressor that came off my Express donor van. It's well shagged but is perfect for mock up purposes. Offered it up to the space vacated by my p/s pump and the good news is that I reckon I can get it to fit with about 20mm clearance from the side of the engine box. My plan is to fabricate up a mounting bracket for the a/c compressor and test fit it to my mock up engine which will make things a lot easier.
Anyway, the manual rack is all bolted in, and I've re-fitted the radiator and dropped the van back on its wheels.
Lunch stopped play, but I'll take the van for a run tomorrow to check out the manual steering.
Stay tuned.
-
 11
11
-
Yep Alex, I know exactly what you mean about the conflicting float level info out there on the interwebs.
I ended up going with the 38.5mm from bottom of float to gasket surface measurement that seems to be a popular choice amongst those running plastic floats. Mine was about 3mm out from this measurement at the start of the exercise. I've still got the carby off while I finish off my fibreglass hat, but it's going to be interesting to see if my tweak has made any positive difference.
-
1
-
-
- Popular Post
- Popular Post
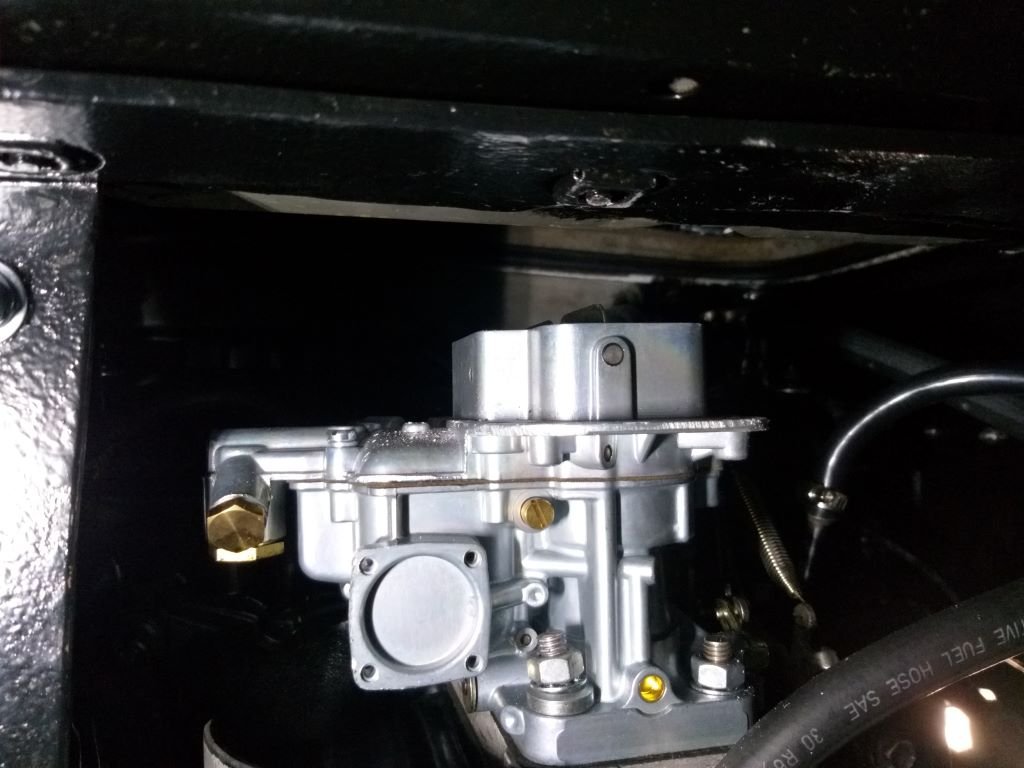
It's a bugger to work on the carby in situ as there is absolutely no space, so I whipped it off to make some adjustments.
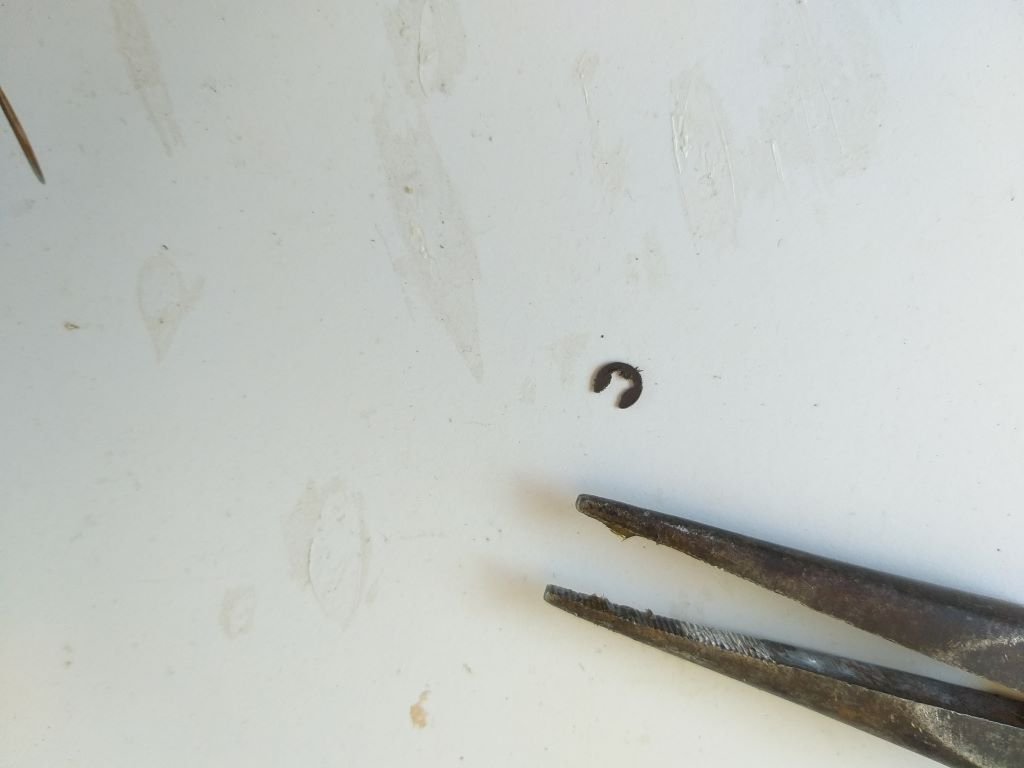
Pulled the lid and sure enough the float level was way out. Adjusting it was easy enough and went off without a hitch, apart from me managing to lose the little circlip that holds the choke lever in place. Spent a good 15 minutes on my hands and knees with a magnet until I found the little bugger. It's amazing how many shavings my magnet picked up at the same time. Eventually found the circlip so all's well that ends well.
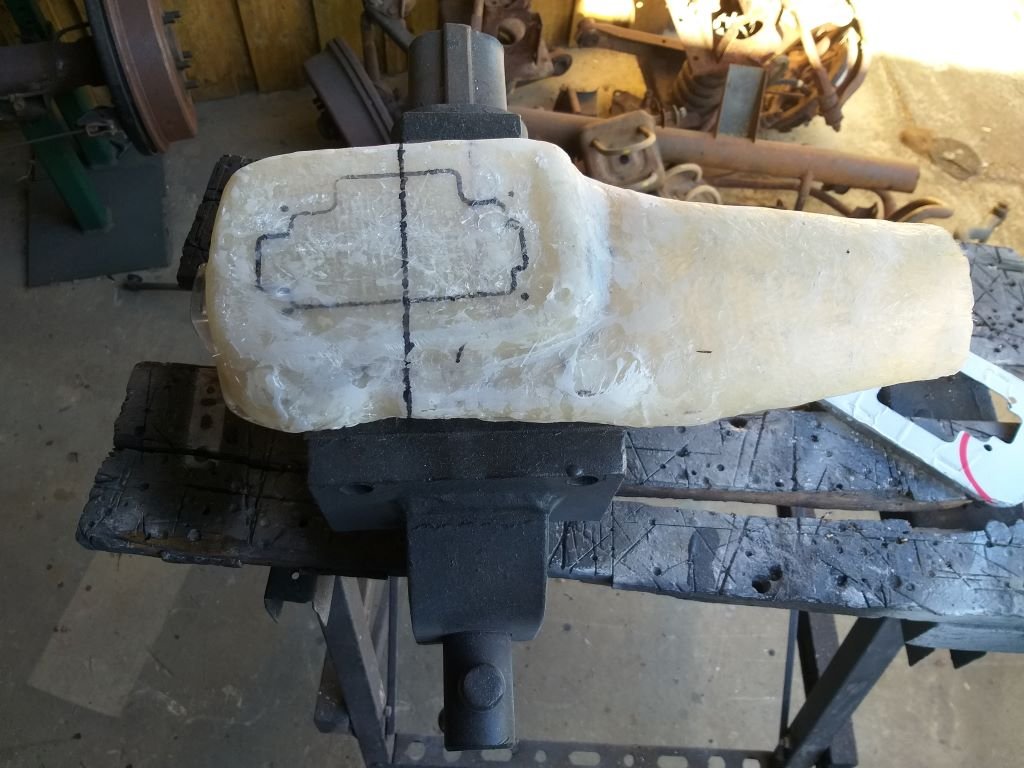
While I've got the carby off I'm going to complete my fibreglass snorkel hat. First step was to cut my creation in two and give it a test fit. It's still a bit too high, so I've sliced a good 15mm out of each side. Lunch stopped play, but tomorrow I'll mix up some resin and patch it all together again.
Oh, in other news while we were out on our cruise, I checked the speedo against our GPS. Turns out the speedo reads 10% higher than the GPS which is pretty lucky when you think I'm running a Toyota gearbox coupled to the original Thames speedo.
Thanks for looking.

-
17
-
Now that our dog has a comfy wee seat, earlier today we headed out for our longest cruise in the Thames thus far. The dog absolutely loves her new spot. The cushion is a perfect height so she can look out of her own little side windows and the sliding glass in the front doors means she is in the sweet spot in terms of catching good air smells as we cruise about.
Talking about smells there is still a distinct fuel smell every now and again. At first I thought it was maybe because I'm still not running an air filter, but the other day @yoeddynz mentioned that he was experiencing a similar issue with a customer's HiAce that has had the same carby conversion done and he suspected it was due to a poorly adjusted float level. Well, Alex was bang on the money.
After pulling out my passenger seat and the side of the engine box, I was able to shine a torch down onto the little carby drip tray and there are definite signs of some leakage.
-
7
-
-
- Popular Post
- Popular Post
This morning we sliced up the foam mattress with an old bread knife and then Mrs Flash brought out her trusty sewing machine and made up some temporary covers out of the old mattress one.
The temporary covers will do until the upholsterer does his magic.
-
12
-
- Popular Post
- Popular Post
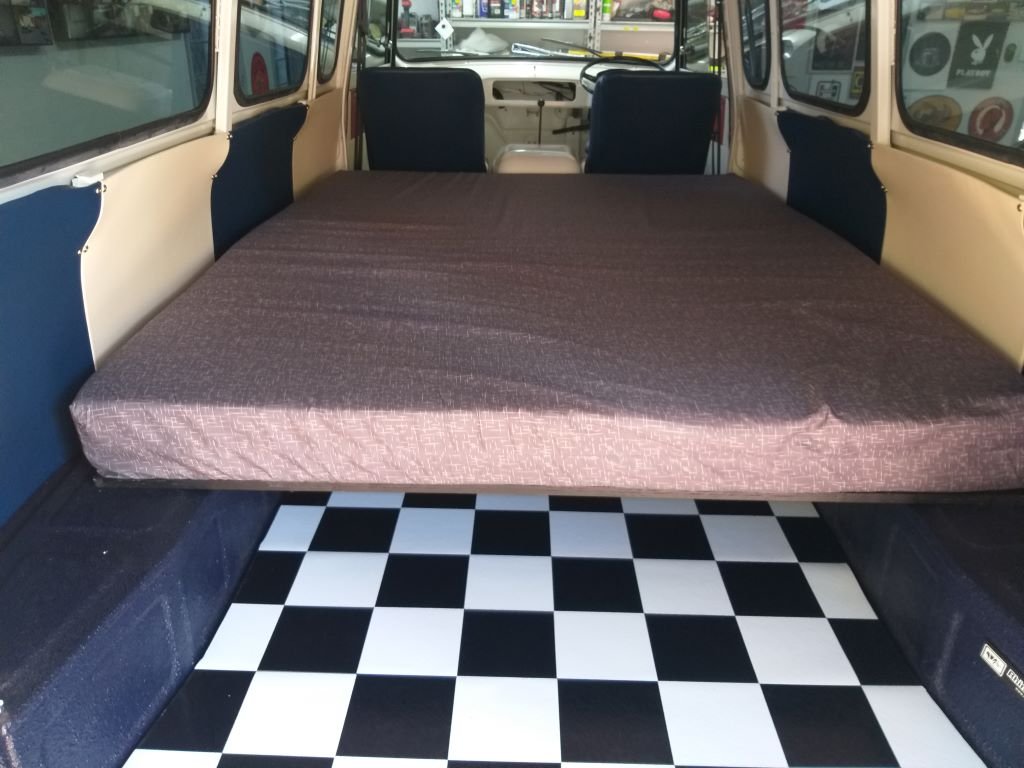
Okay, time to start work on the seat cushions for the new sleeper couch.
We have two queen size foam mattresses in stock at the moment. The one with the purple/grey cover is 150mm thick and the one with the red cover is 100mm thick.
After a test fit and a quick family discussion, we are going to go for the 150mm jobbie. We reckon the side profile of the chunkier one will look more in keeping with the 50s American diner look.
So, the plan for tomorrow is to cut the foam up into the appropriate sizes for each section of the couch.
-
11
-
- Popular Post
- Popular Post
Loaded up Mrs Flash and the hound and took the Thames out for a squirt around our local test track to get a feel for the difference now that she has some weight on board.
Very chuffed with the results. She feels nice and solid now and way quieter inside. The extra weight has dropped the ride height by another 10mm and I reckon she is sitting spot on now.
It got the stamp of approval from Mrs Flash and our wee dug, so its onwards and upwards.
-
16
-
- Popular Post
- Popular Post
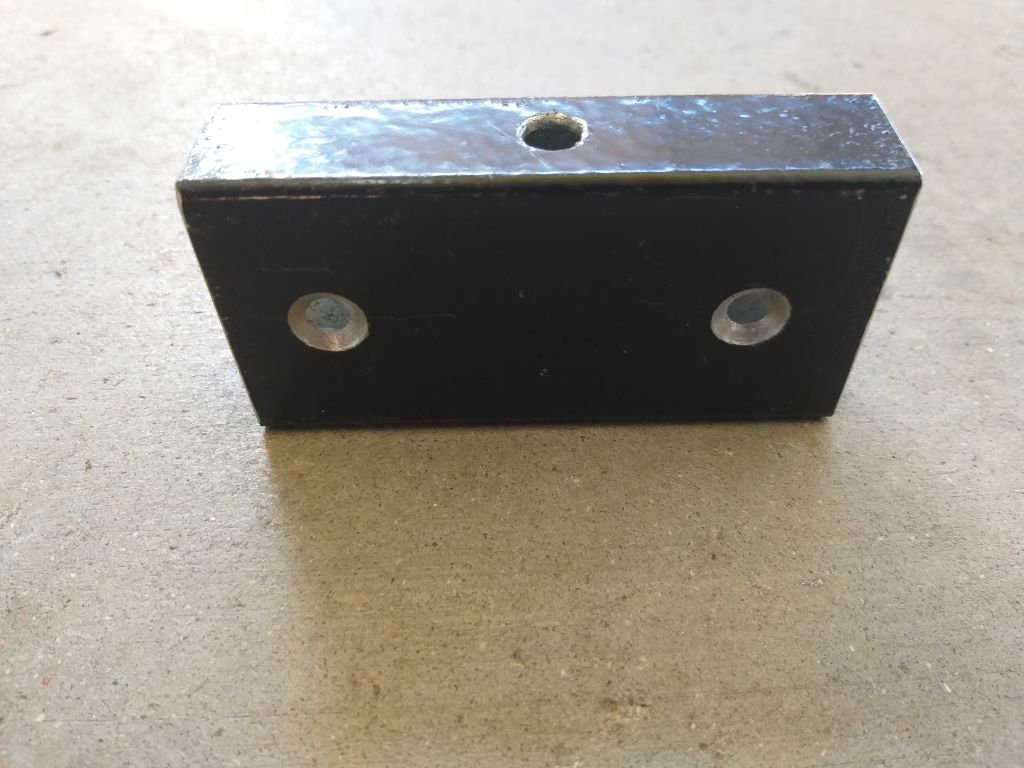
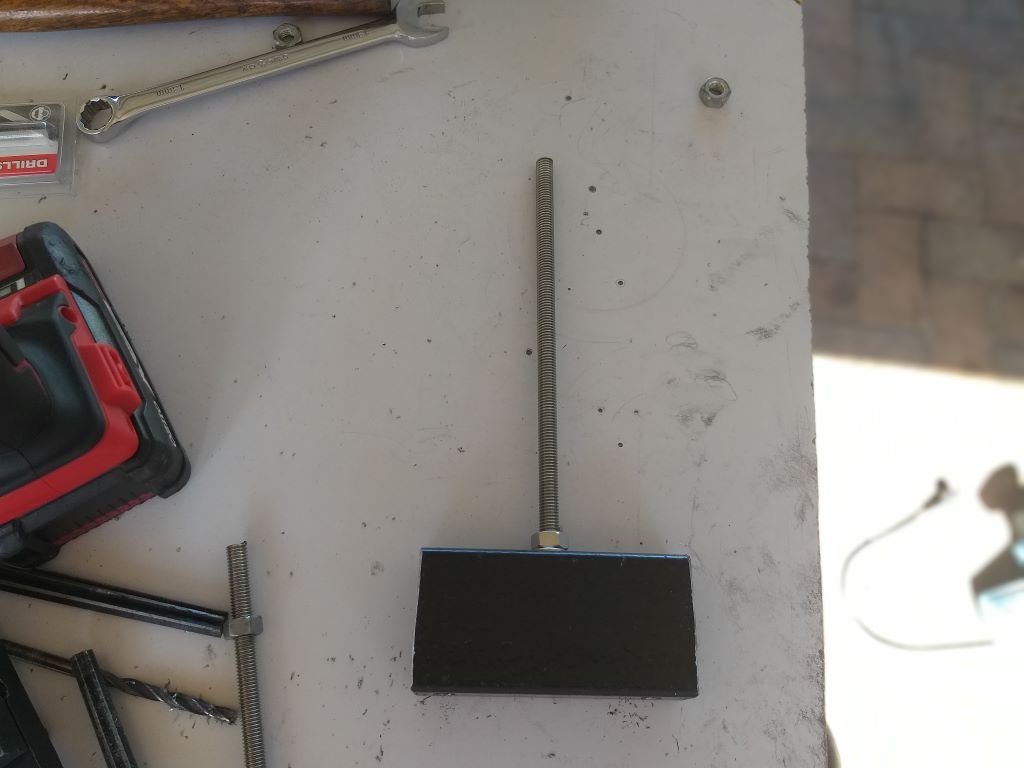
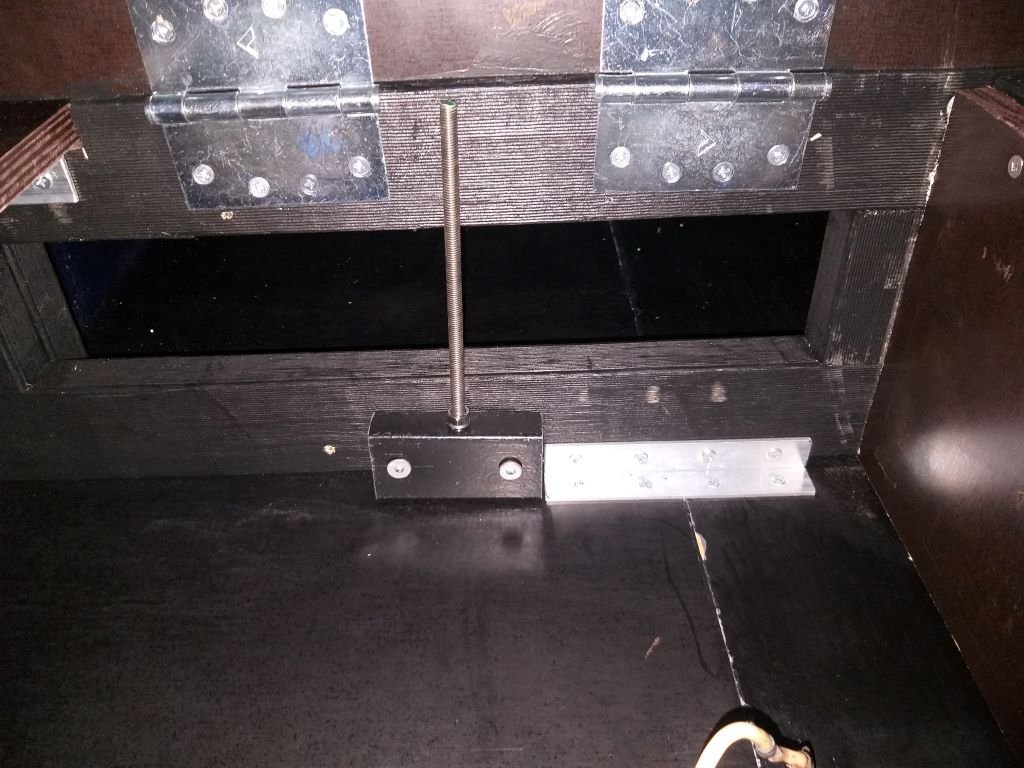
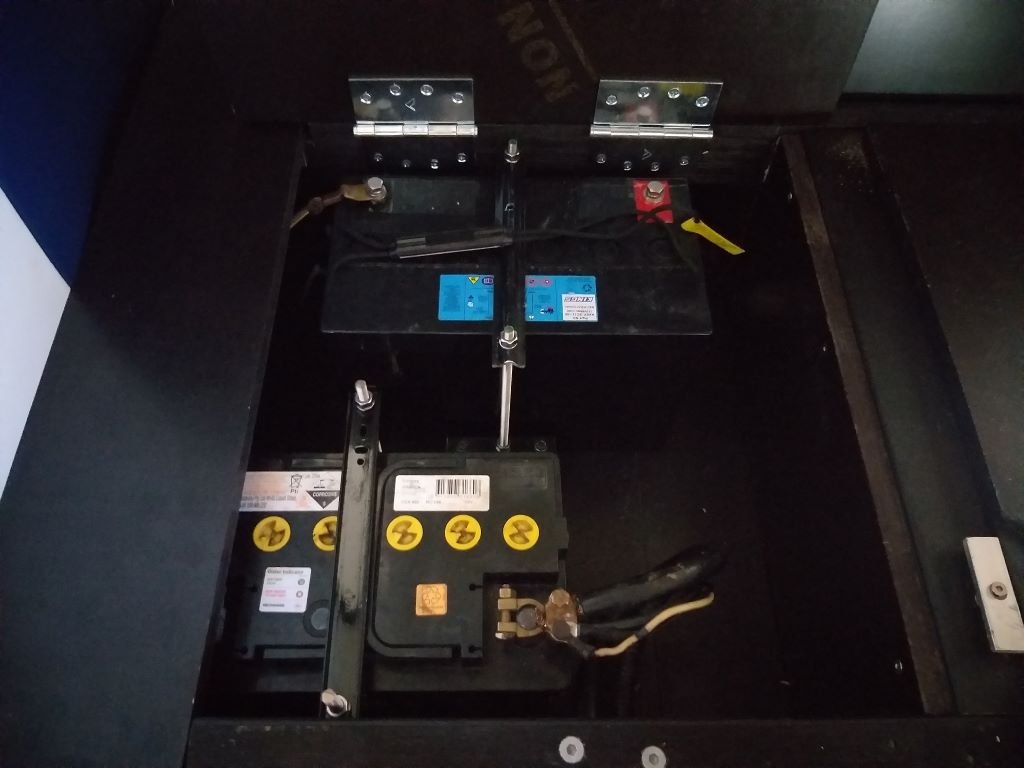
Today's exercise was to populate the new battery compartment that I have created under the dog shelf.
First step was to wrestle the two batteries into position to work out the optimum layout. The house battery is one that I have removed from my modern Bongo van. It's a 98 amp/hour jobbie that weighs a whopping 26.5kg.
More weight = less suspension bounce = good.
I rummaged around my scrap pile and came up with a rectangular offcut that has already been galvanised and powder coated - winner.
Sliced it up into 4 equal parts, poked a few holes and chucked in a bit of stainless threaded rod, a few nuts and some spring washers.
The result doesn't look half bad.
All that is left is to source a voltage sensitive relay and a fuse box which I will mount on the side panel next to the smaller starter battery.
Thanks for looking.
-
11
-
- Popular Post
- Popular Post
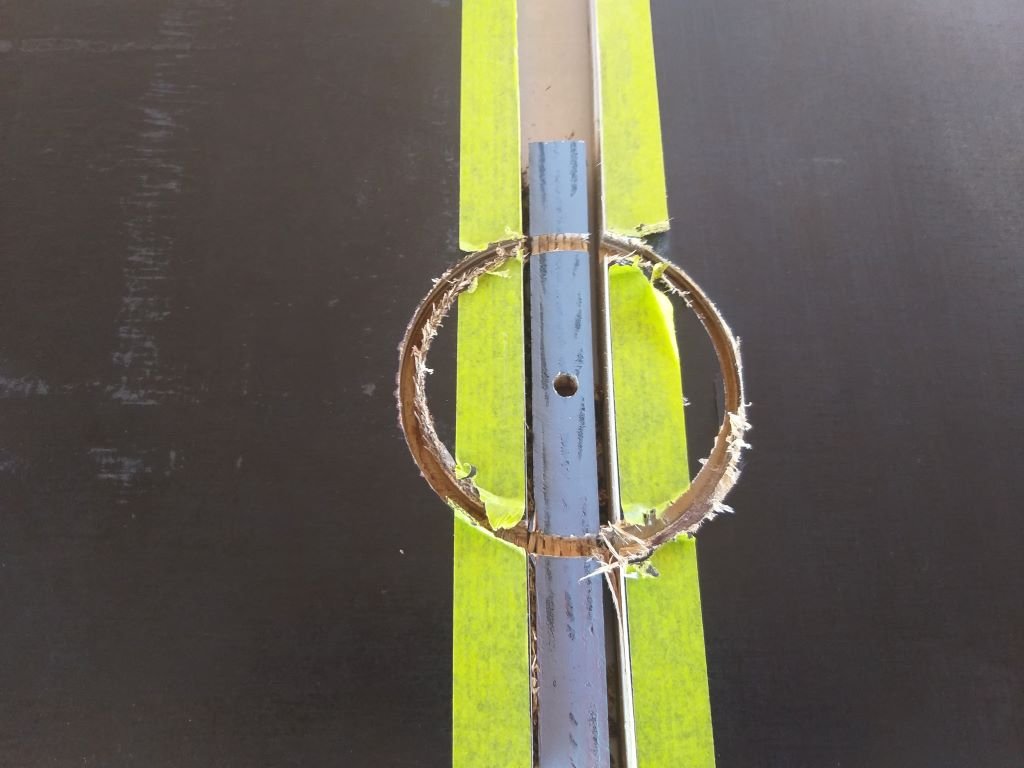
I'm still putting the finishing touches to the sleeper couch. Mainly more hold down brackets to prevent rattles out on the road.
I also came up with a cunning little latch to keep the dog shelf lids from flapping about.
The latch needed to be low profile to avoid creating a lump in the mattress, so I carved a round indent in the ply and fabricated a little swivel piece out of an aluminium off-cut.
Works like a charm.
-
11
-
- Popular Post
- Popular Post
In other news Mrs Flash dabbles a bit with paint and canvas and earlier in the week she whipped together this little cartoon image for me.
Thought I'd share.
-
19
-
 1
1
-
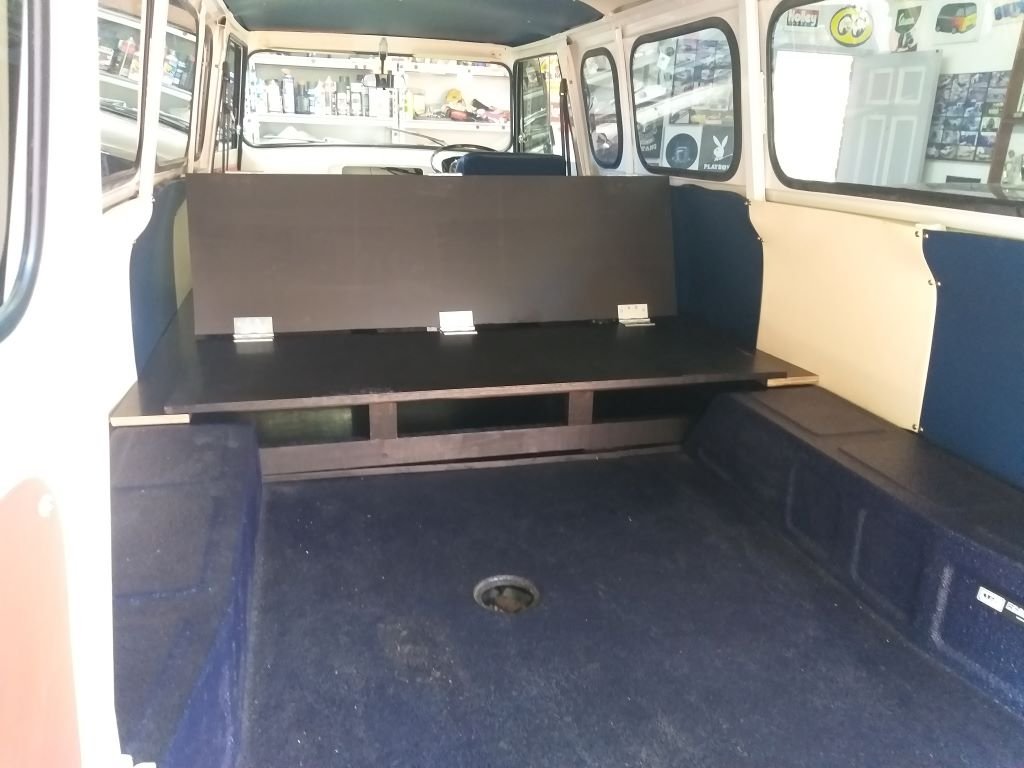
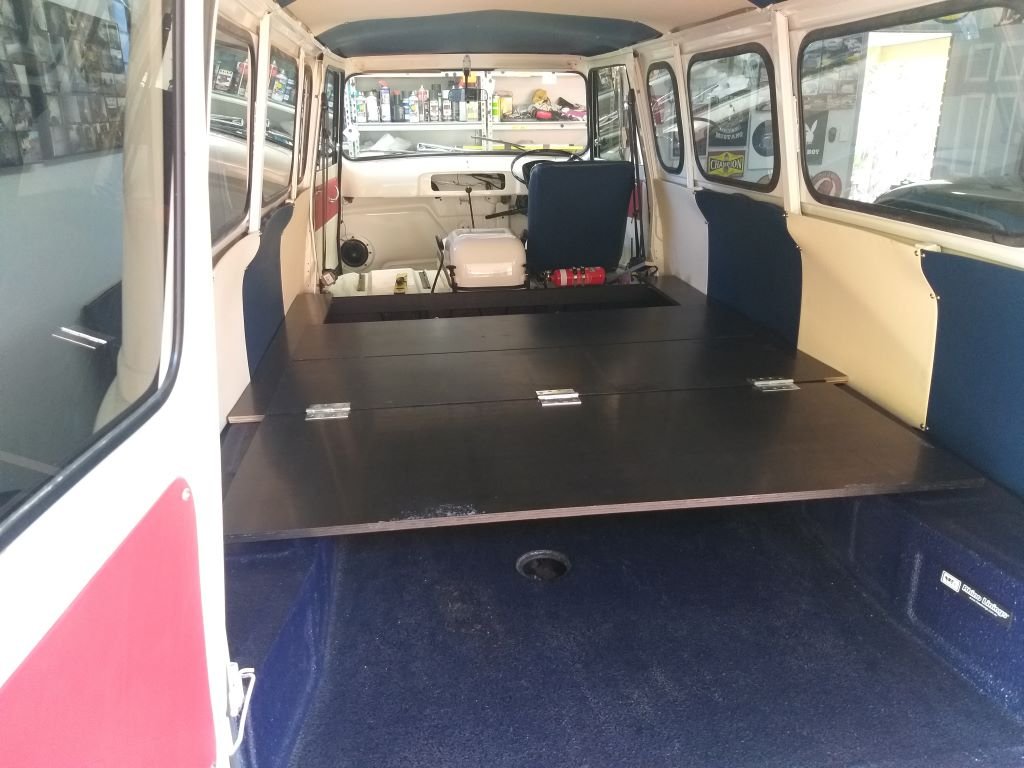
And that's the dog box done. I've split the lid into unequal lengths. The two batteries will live in the smaller box behind the driver's seat.
A few more brackets and stuff to fit tomorrow and I'll crack into the cushions after that.
I think I'm going to outsource the upholstery work as it's a focal point and needs to be perfect.
-
6
-
-
Thanks @Otodat. I'm pretty happy with how it's coming together. Got a few more hold down brackets to fit and also got to figure out a way of holding the couch backs in position so it doesn't fold down by itself or rattle about while driving around. I've got a plan in my head that I'll try tomorrow.
If all goes well tomorrow, I'll start cutting the cushions to the correct length. I've got a 150mm thick foam queen size mattress that I'm planning to slice up.
If that works out okay, then it's off to see the upholsterer later in the week. I haven't had any work done for a good few years, but I'm expecting to have to hand over a kidney to get the covers made.
-
2
-
-
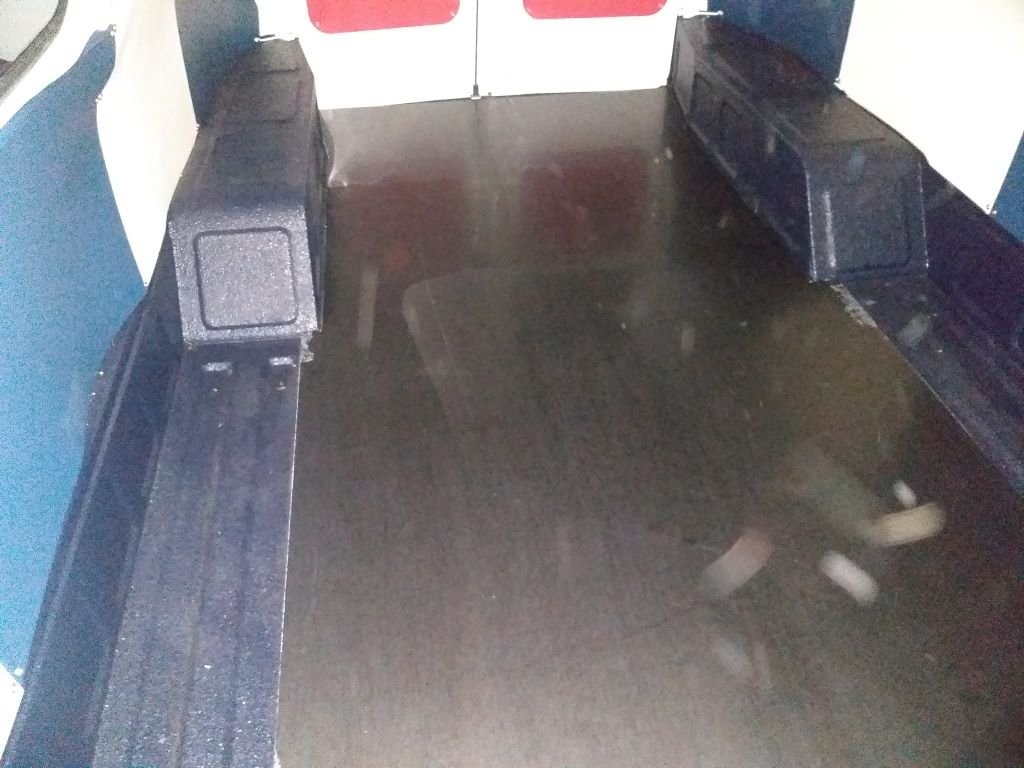
Well, that's the storage box completed, and the floor chucked back in.
Dog shelf next.
-
9
-
-
After three days of cloud and gusty winds we woke up to an absolute pearl of a day. Great weather to be outside putting the Thames sleeper couch together.
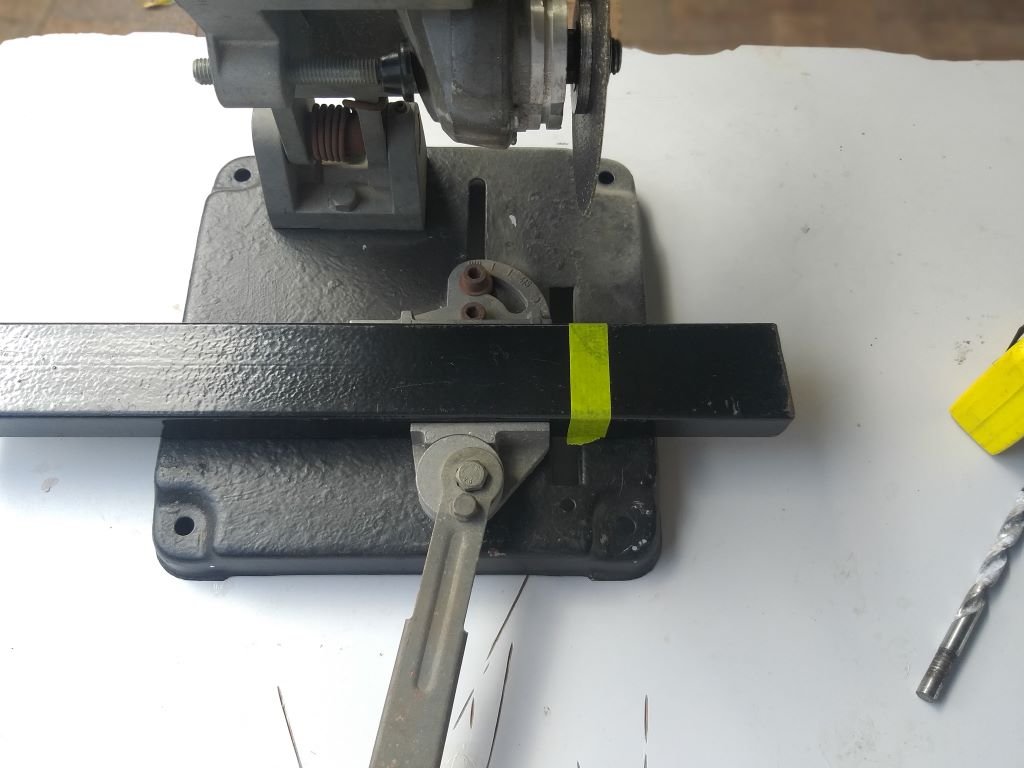
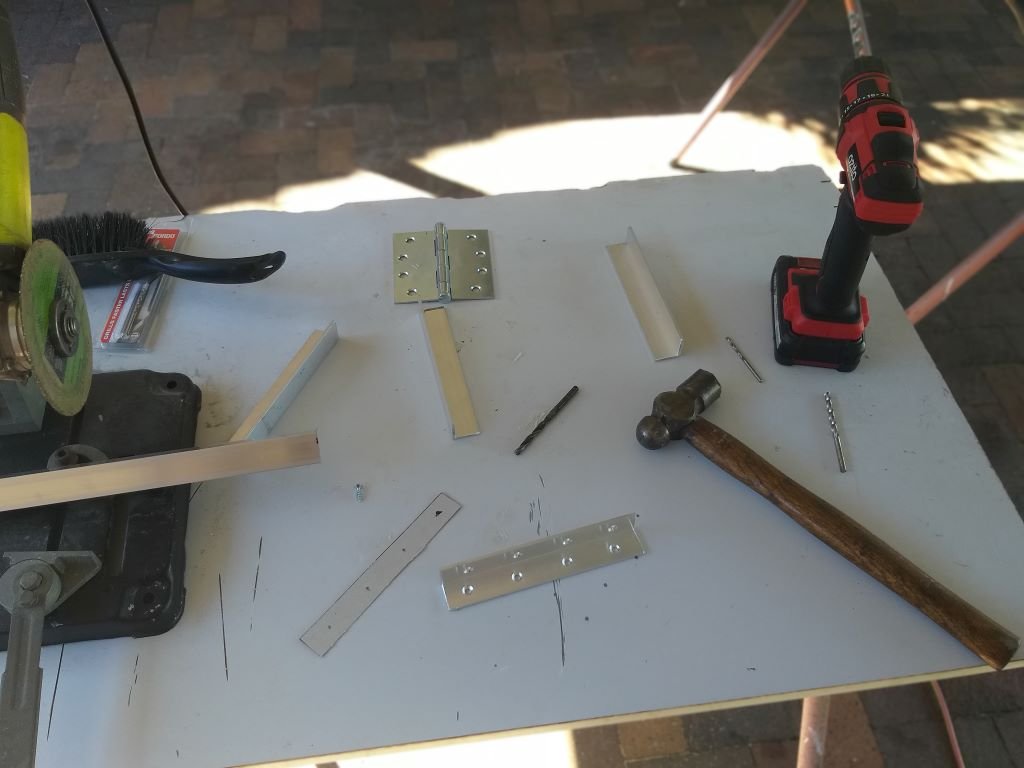
I set up a little work bench and spent a few hours carving some mounting brackets out of some aluminium angle.
With those done it was time to fix the various wooden components together.
I made short work of the base frame and then fixed the first three hinged panels in place.
I've still got to fit the lid on the front dog shelf and the back box side, so that is the plan for tomorrow.
-
9
-
-
- Popular Post
- Popular Post
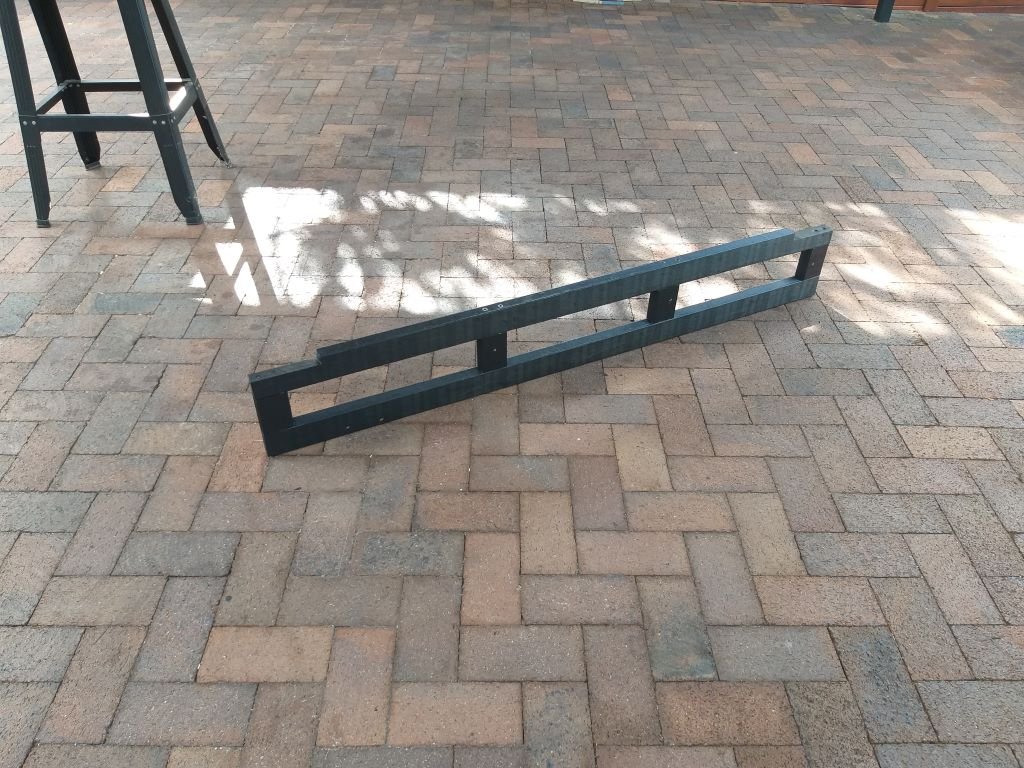
I've made a bit more progress on the sleeper couch base. All three supporting frames are now assembled and painted.
I'm looking forward to fitting them tomorrow.
-
11
-
Thanks Alex. I'm keen to hear what you discover.
-
- Popular Post
- Popular Post
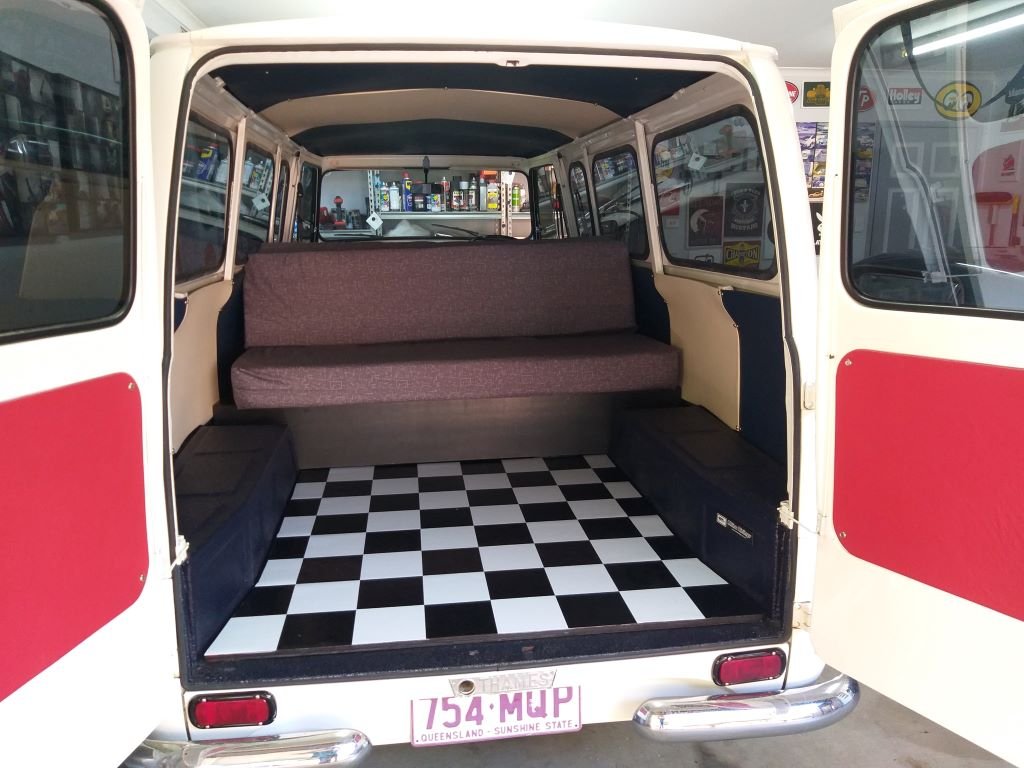
Woke up to a wet and windy day, so Mrs Flash and I decided to brighten things up by getting the rearmost portion of the floor sorted.
We are both really chuffed with the result.
The plan is to run a 25mm polished aluminium angle along the sides and step. This will neaten up the edges and at the same time it will hold the new floor down.
-
15
-
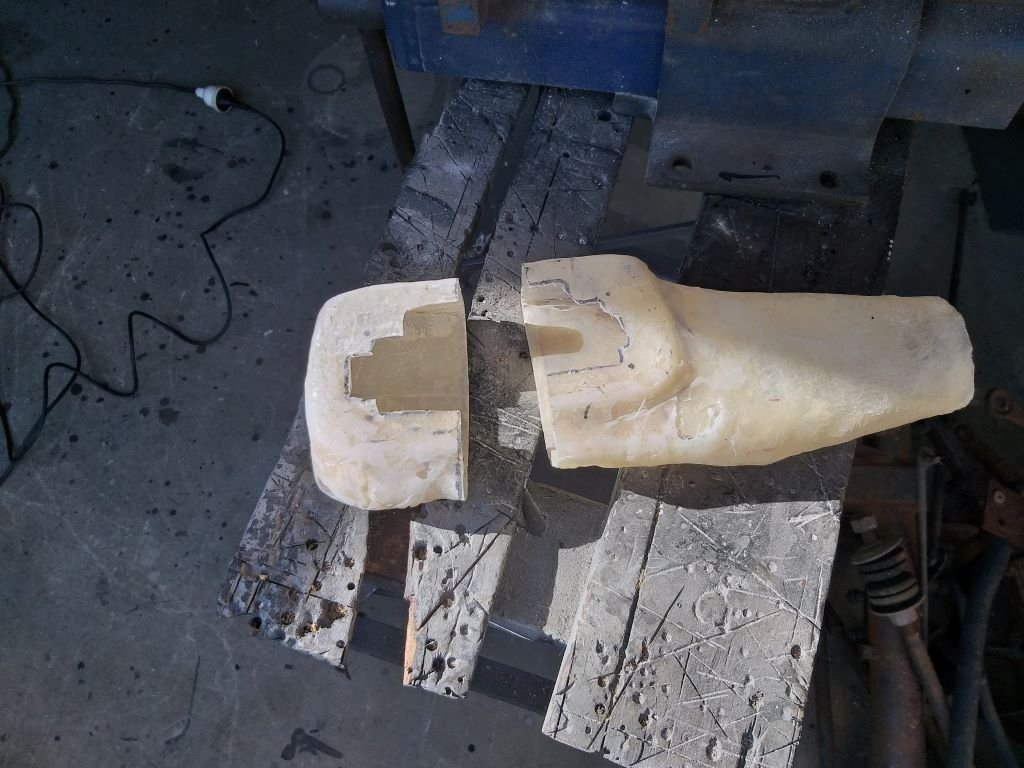
Yep, she is pretty tight. Mine will be about the same in terms of overall height (45mm), but the only way to get it to mount up is if I split the bottom and sides into two halves. The top needs a funky cut so I can get at the bolts that fix the housing to the carby, so the plan is to use the top cover from my performance filter with two hold down studs to seal up the top.
Thanks for the heads up re the float levels @yoeddynz. I got my kit from Procarb in OZ who also claimed that it had been setup by them before shipping. Mine was marked 3Y with a sharpie. Runs okay but does smell a bit fuely so I suspect I might need to make some final adjustments.
-
1
-
-
@tortron, yep typical brit look. I bet that Morrie smells of fish and chips or maybe mushy peas.
Only issue with mine is that I keep sitting on my white driver's seat while I'm wearing my dirty work jeans. Gives me the mutters I tell ya.
-
Interior - Chapter 5
On Friday nights we usually go for a cruise in the Mustang followed by a burger and chips down at the beach. But this Friday we decided to take the Bongo for a run into town to fetch some extra floor tiles and the timber we need to build the sleeper couch. Burgers and chips in the Macca's carpark aren't a patch on the beach, but sometimes you just have to make sacrifices for the greater good.
Anyway, the plan is to use 17mm form ply for the floorboards and also for the bed base as its much smoother than standard ply. For the structure I'm using standard interior framing timber. So that's what we loaded up with at Bunnings together with some batten screws and a handful of hinges.
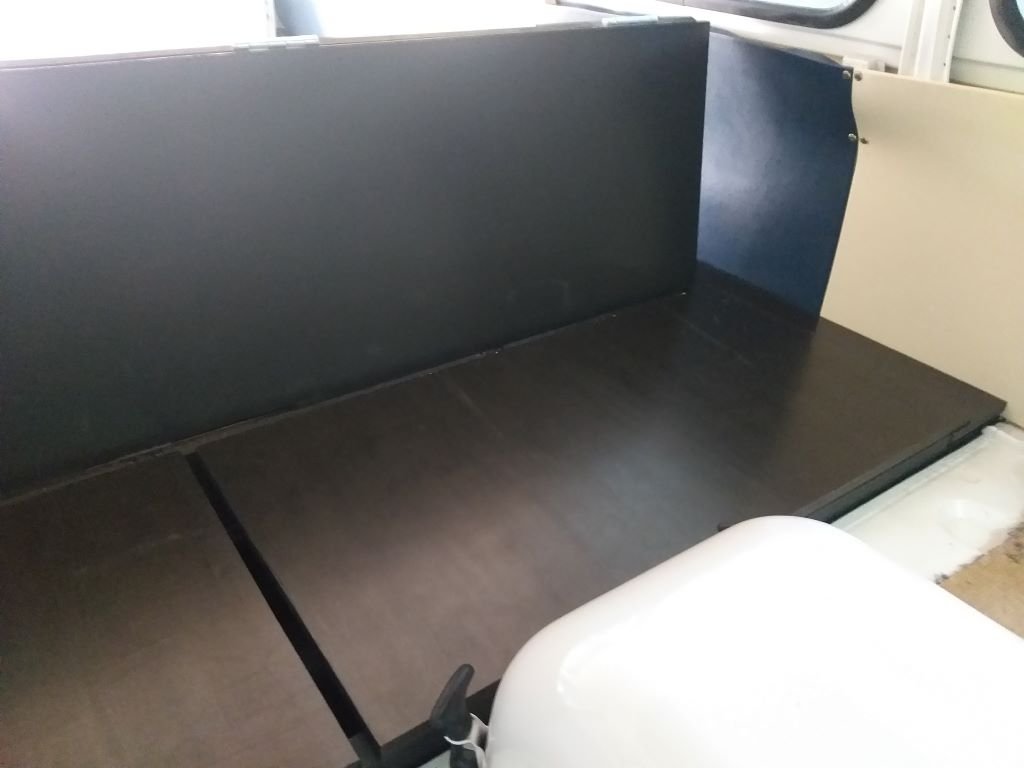
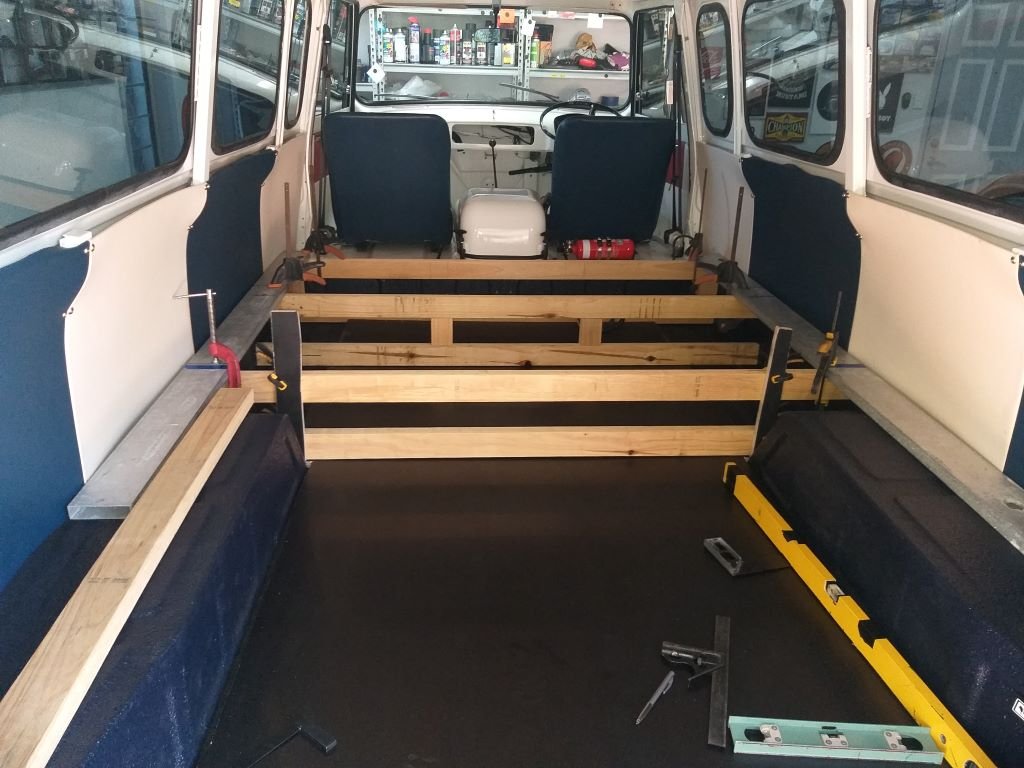
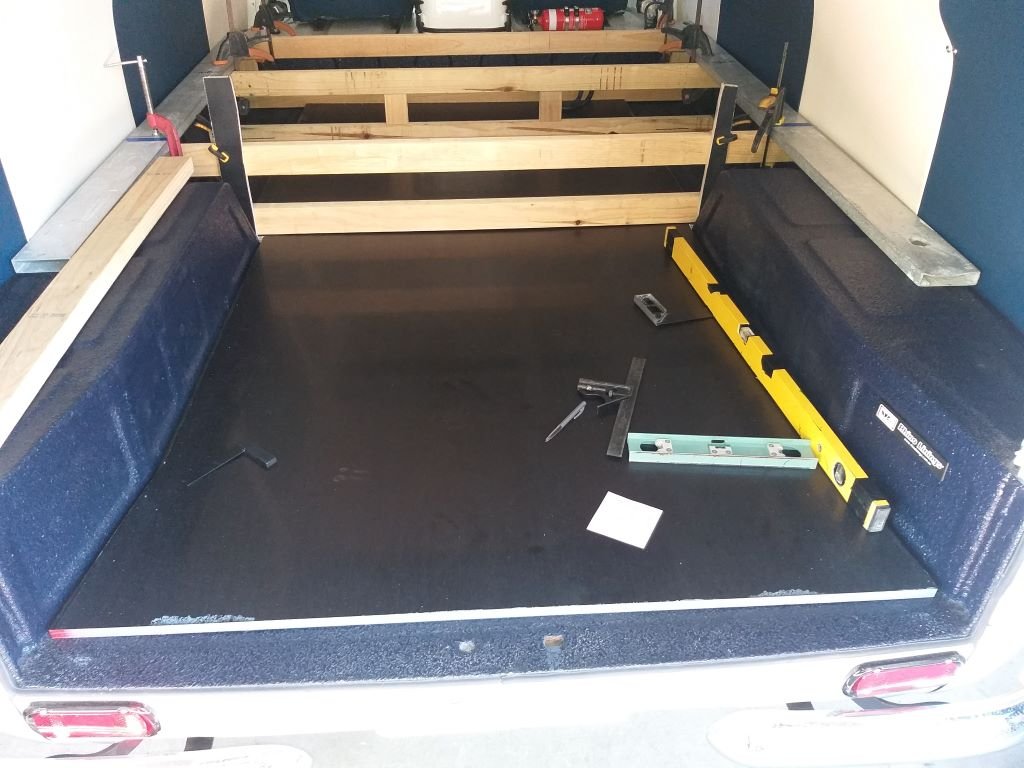
First step on Saturday morning after unloading the Bongo was to create a cardboard template for the floor which I then replicated in formply. I've started off with a single 2.4m x 1.2m board which is a bit cumbersome, but I'll eventually cut this in two once I know exactly where the couch will start. I'll then slide the portion under the storage box to the left and fill in the gap on the right. The reason for going modular is easier removal of the structure in future if needed.
Next step was to begin planning the layout of the supporting timber for the bed base / storage boxes. The cross braces are temporarily clamped in place. Their final positions will be fine-tuned as the couch takes shape.
Today I started cutting the rest of the formply sheets into the required sizes and I finished off the morning by fixing the two backrests together. I've used 3 fairly meaty butt hinges which should be up to the task.
More tomorrow.
-
7
-
-
Thanks heaps for sharing @yoeddynz. Great job Alex !
I'll take function over fashion any day of the week.
Please make my day and tell me that the new carby hat has got rid of the fuel fumes that those performance air filters seem to suffer from on the HiAces.
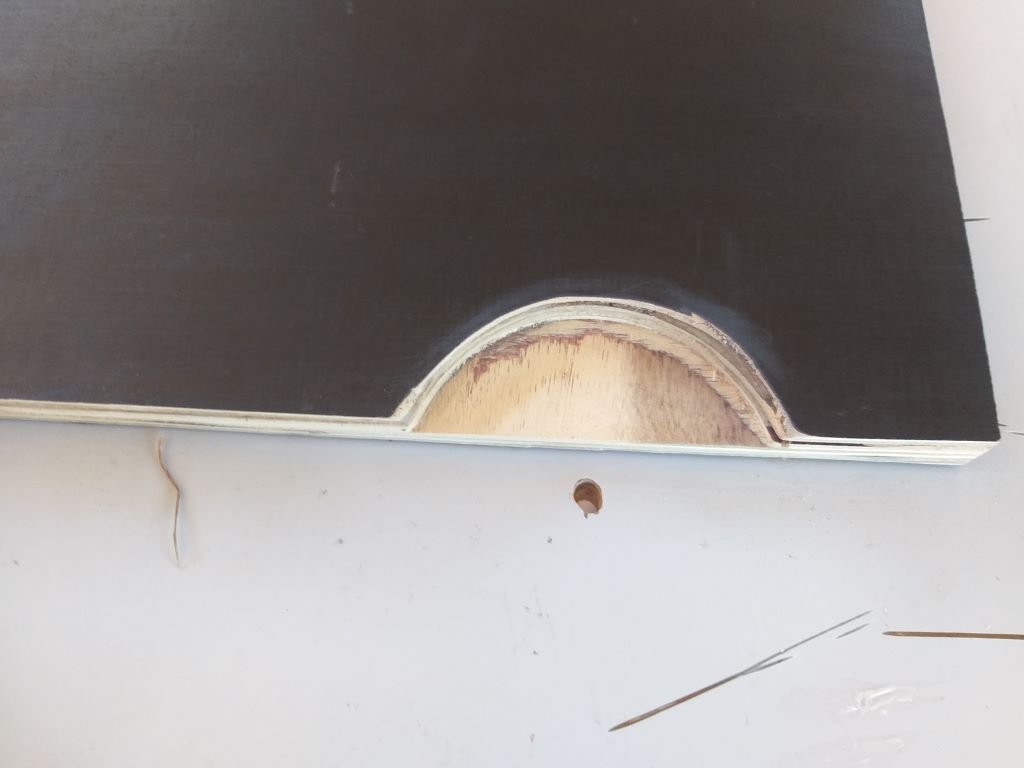
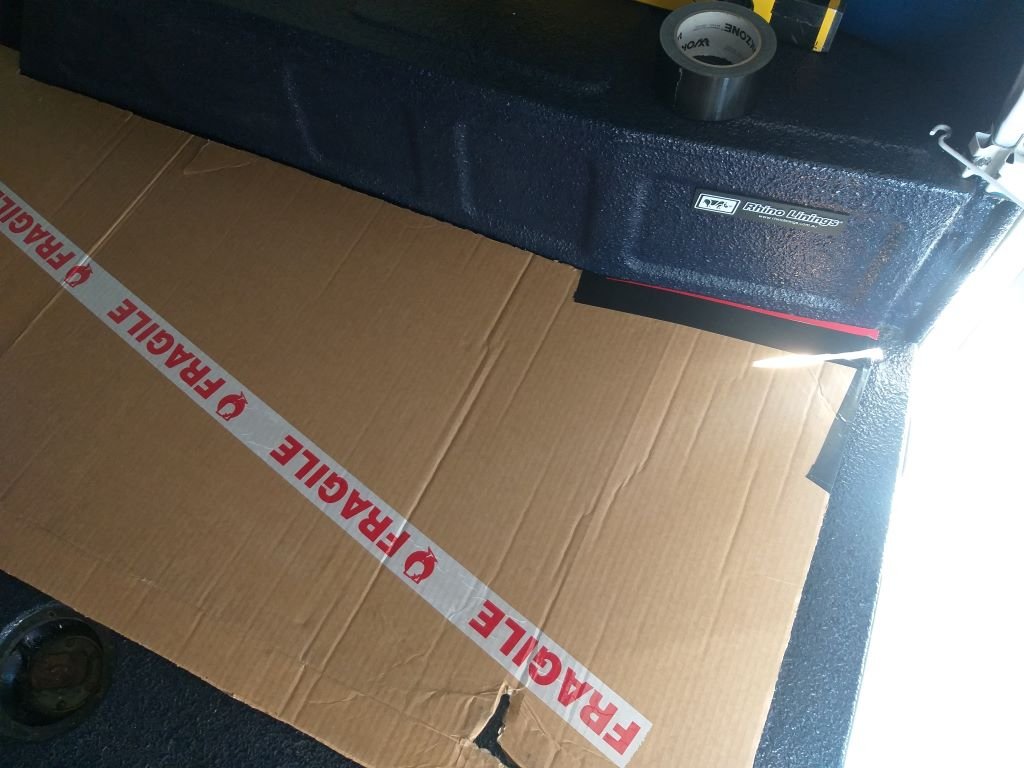
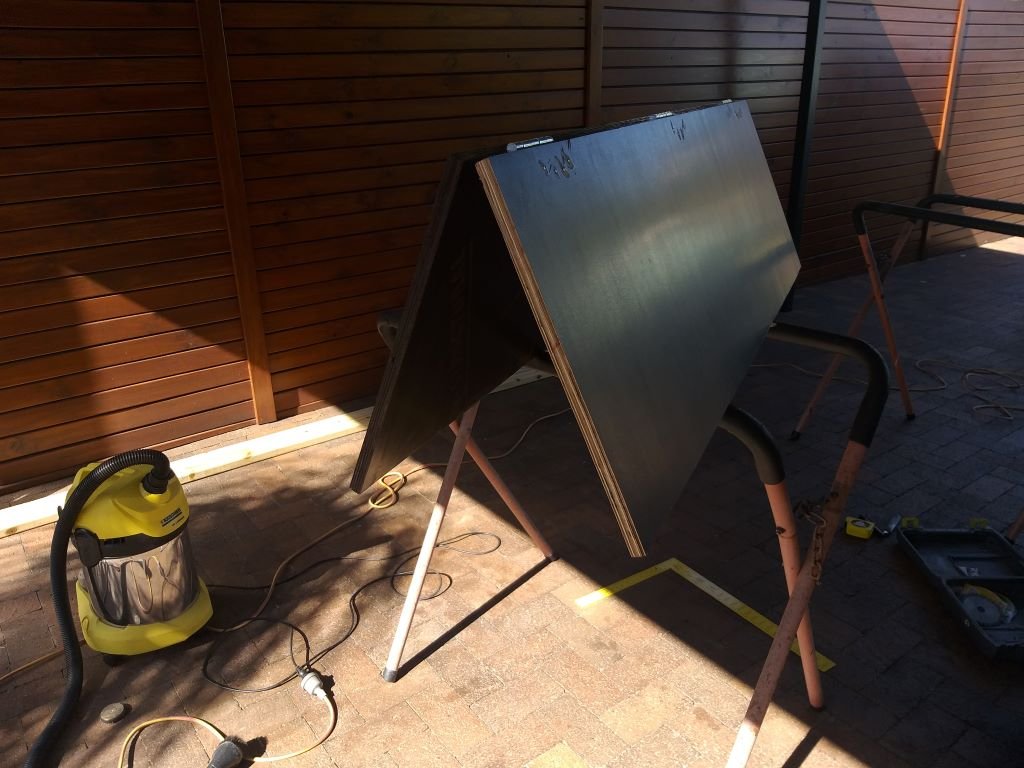
The advantage of the HiAce is that with the engine cover raised you have clear access to the top of the carby, so it's easy enough to drop your newly fabricated hat onto the base plate that you have made. Unfortunately, with the Thames I have a portion of the cabin floor in the way that gives me a paltry 35mm gap between the top of the venturis and the floor so I have to make the box in two halves and slide them in on either side.
-
1
-
-
Hey @igor, clearly your daughter has impeccable taste.
Thanks heaps for the feedback. We took a drive into town late yesterday and picked up the timber and the rest of the floor tiles that we need. I was wide awake by 5 am and spent an hour plotting and scheming. It looks good in my head. Hopefully it will look just as good in practice. Stay tuned.
-
1
-
-
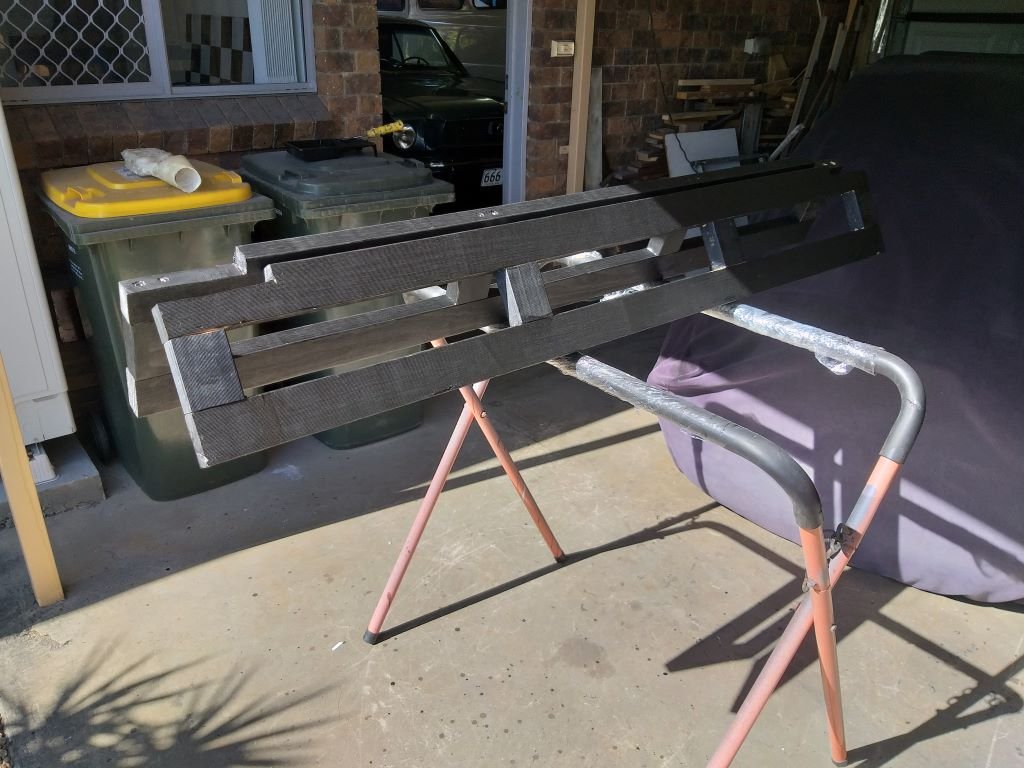
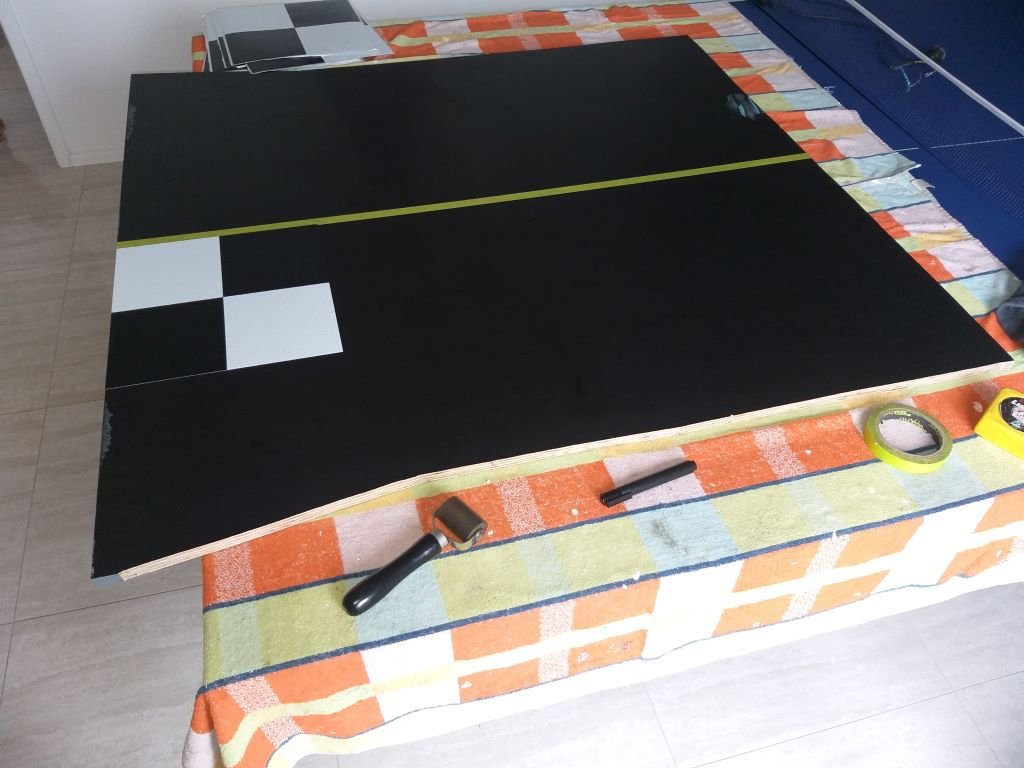
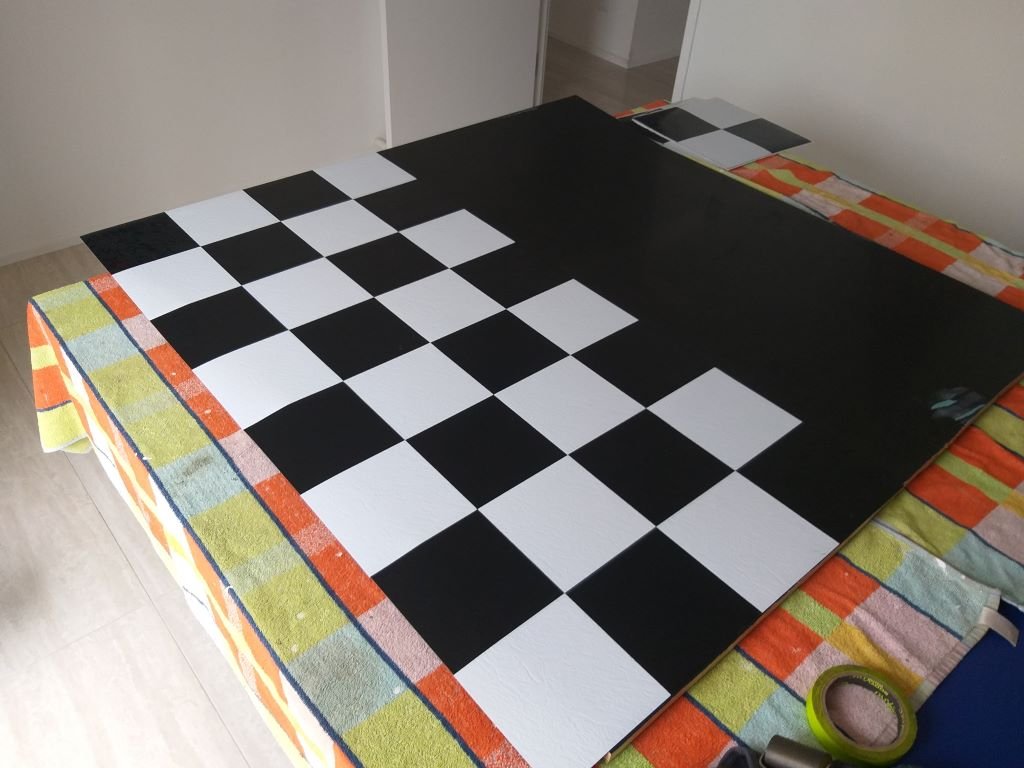
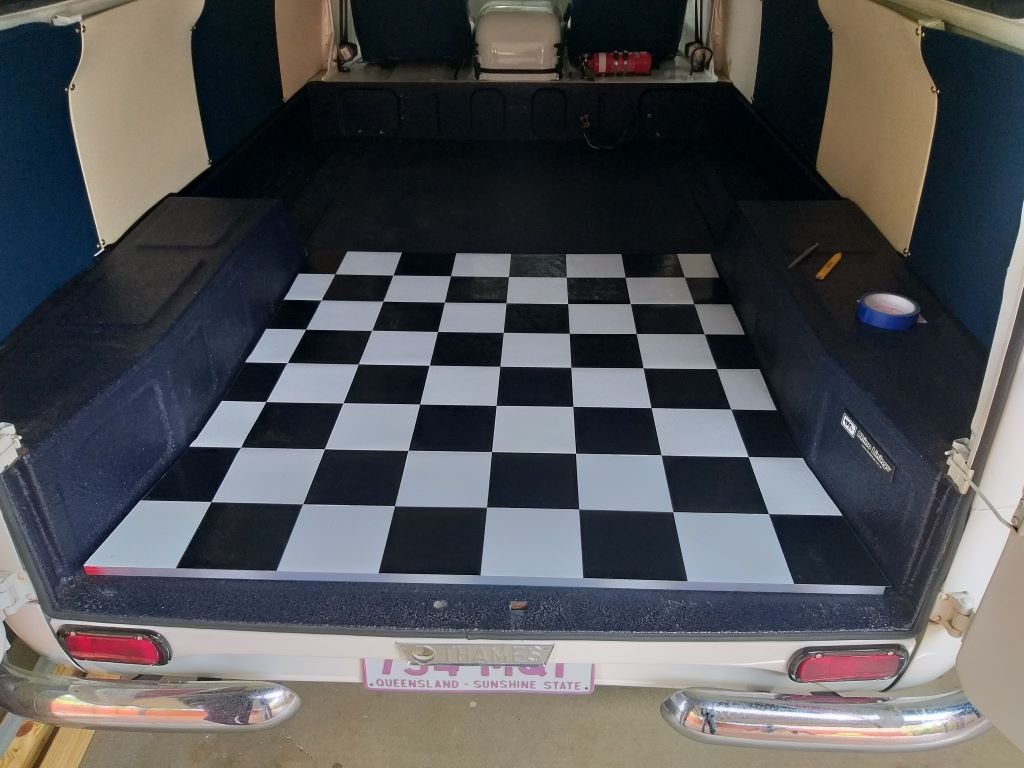
Interior - Chapter 4
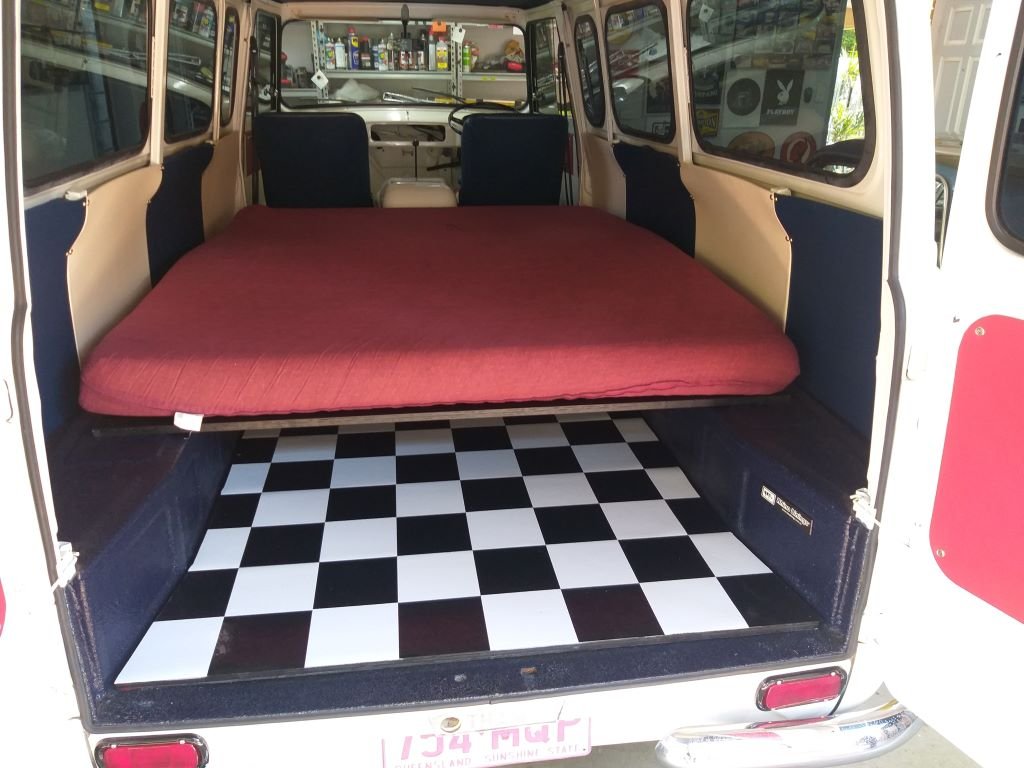
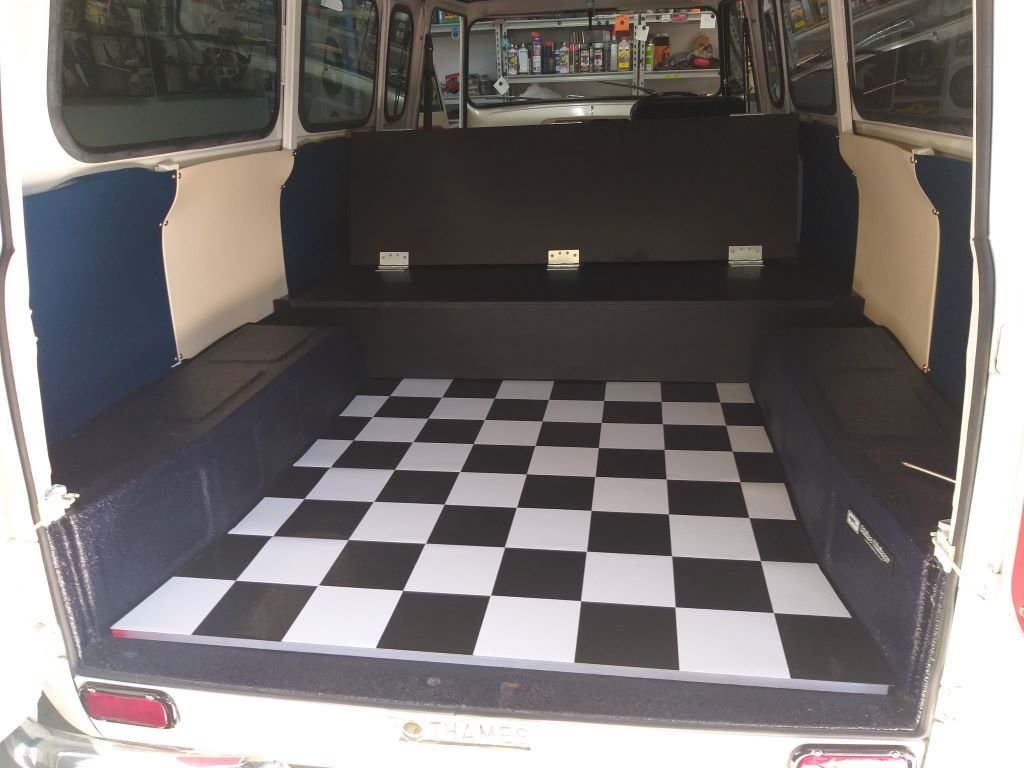
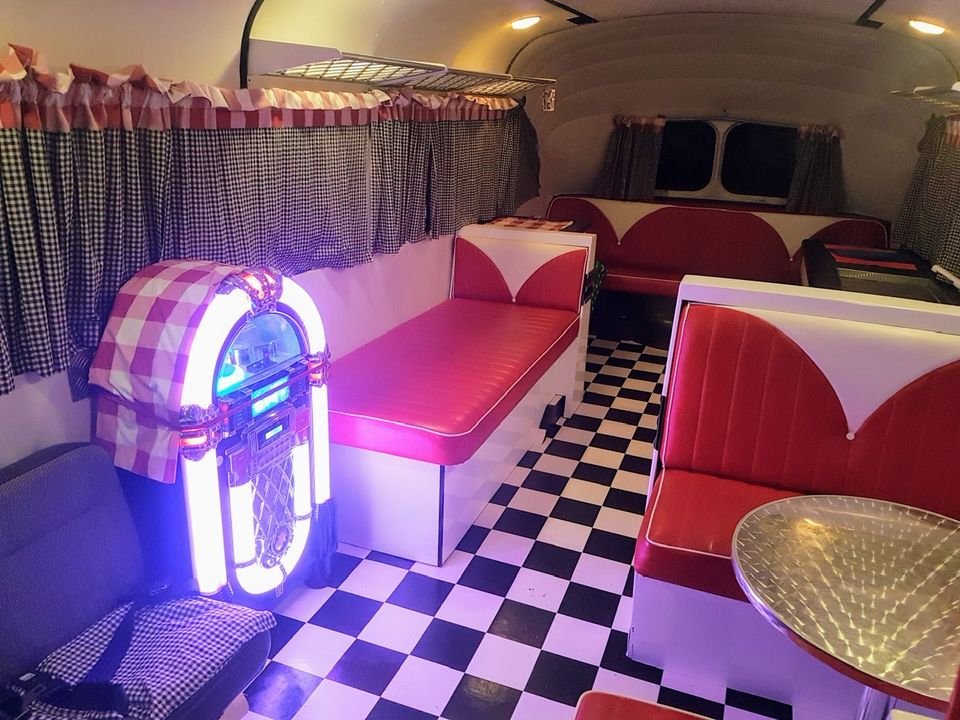
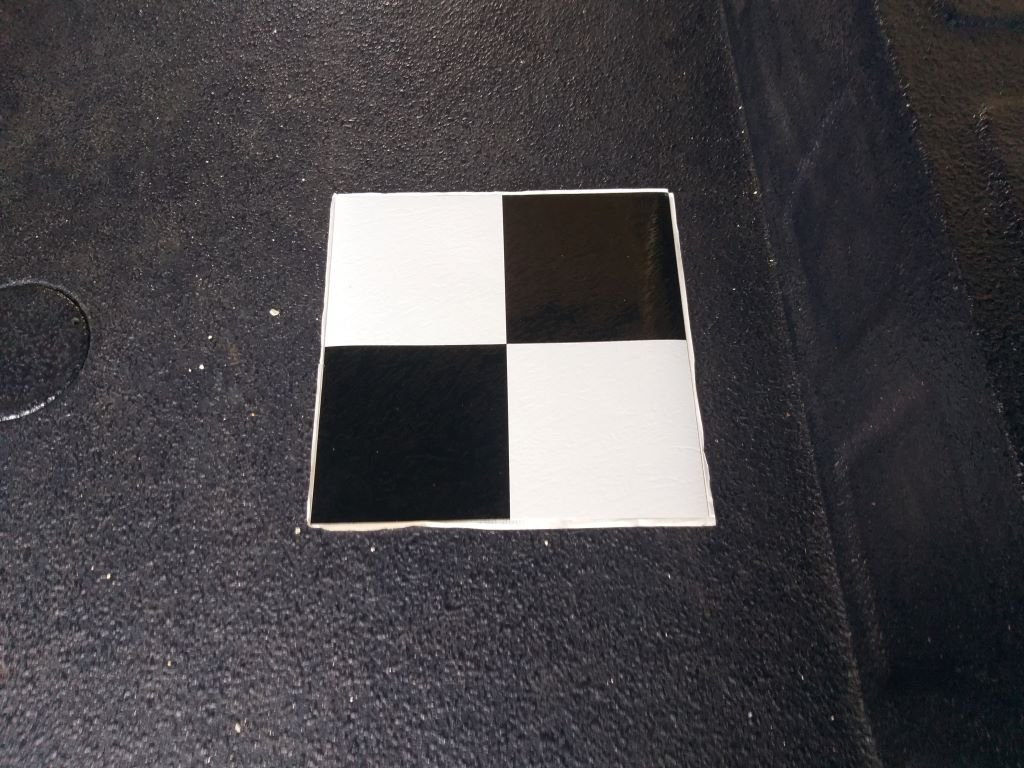
Expanding on the overall colour scheme and style as outlined above, we are thinking of incorporating some touches from a typical mid last century American diner and with that in mind you can't really go past the typical checked vinyl floor.
Trolling around on the net we couldn't find anyone who supplies the white and black floor tiles in anything smaller than about 300mm x 300mm. At these dimensions our concern was that the checkered pattern would make the inside look absolutely cramped.
Then yesterday while I was in Bunnings getting some more resin for the carby hat I happened to stroll down their flooring aisle and stumbled upon nirvana.
Its 305mm x 305mm sticky backed vinyl tile but each tile consists of 4 smaller black and white checks. I immediately grabbed one to take home to show Mrs Flash.
This morning we laid the sample tile loose in the back of the Thames, just to get the feel.
Much excite!
So, it's off to Bunnings to grab two dozen more.
-
9
-

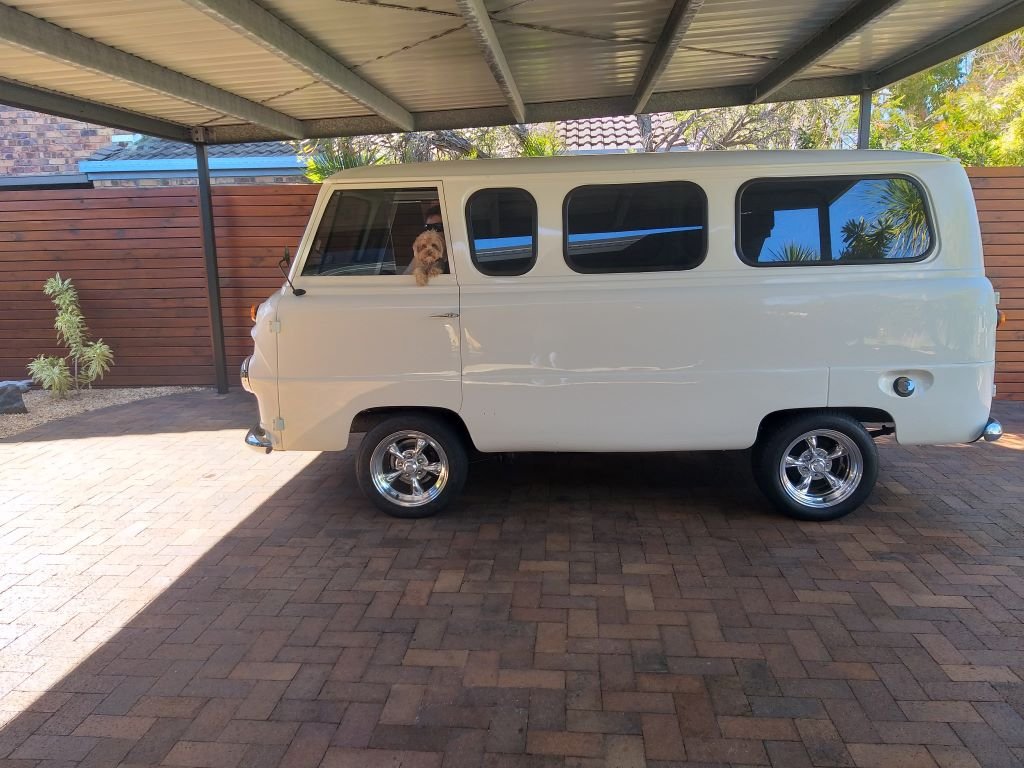


Flash's 1965 Ford Thames
in Projects and Build Ups
Posted
Took the van for a quick squirt around the neighbourhood to test the manual steering. As I turned into our driveway she suddenly died. Pulled a plug lead to check for spark ... nada.
Pulled the dizzy cap off to check spark at points. Turned the engine over and the rotor wasn't rotating .... WTF.
Pulled the dizzy apart and the shaft is broken. That will teach me for buying one off fleabay.
I'm going to head into town on Monday to visit our local Toyota Parts Depot to see if I can source a reputable dizzy from them.
Oh...... and in other news manual steering is pants compared to my power steering, so guess what I am refitting tomorrow ?
https://youtu.be/l6S6nJY7t68