Flash
-
Posts
1615 -
Joined
-
Last visited
-
Days Won
2
Everything posted by Flash
-
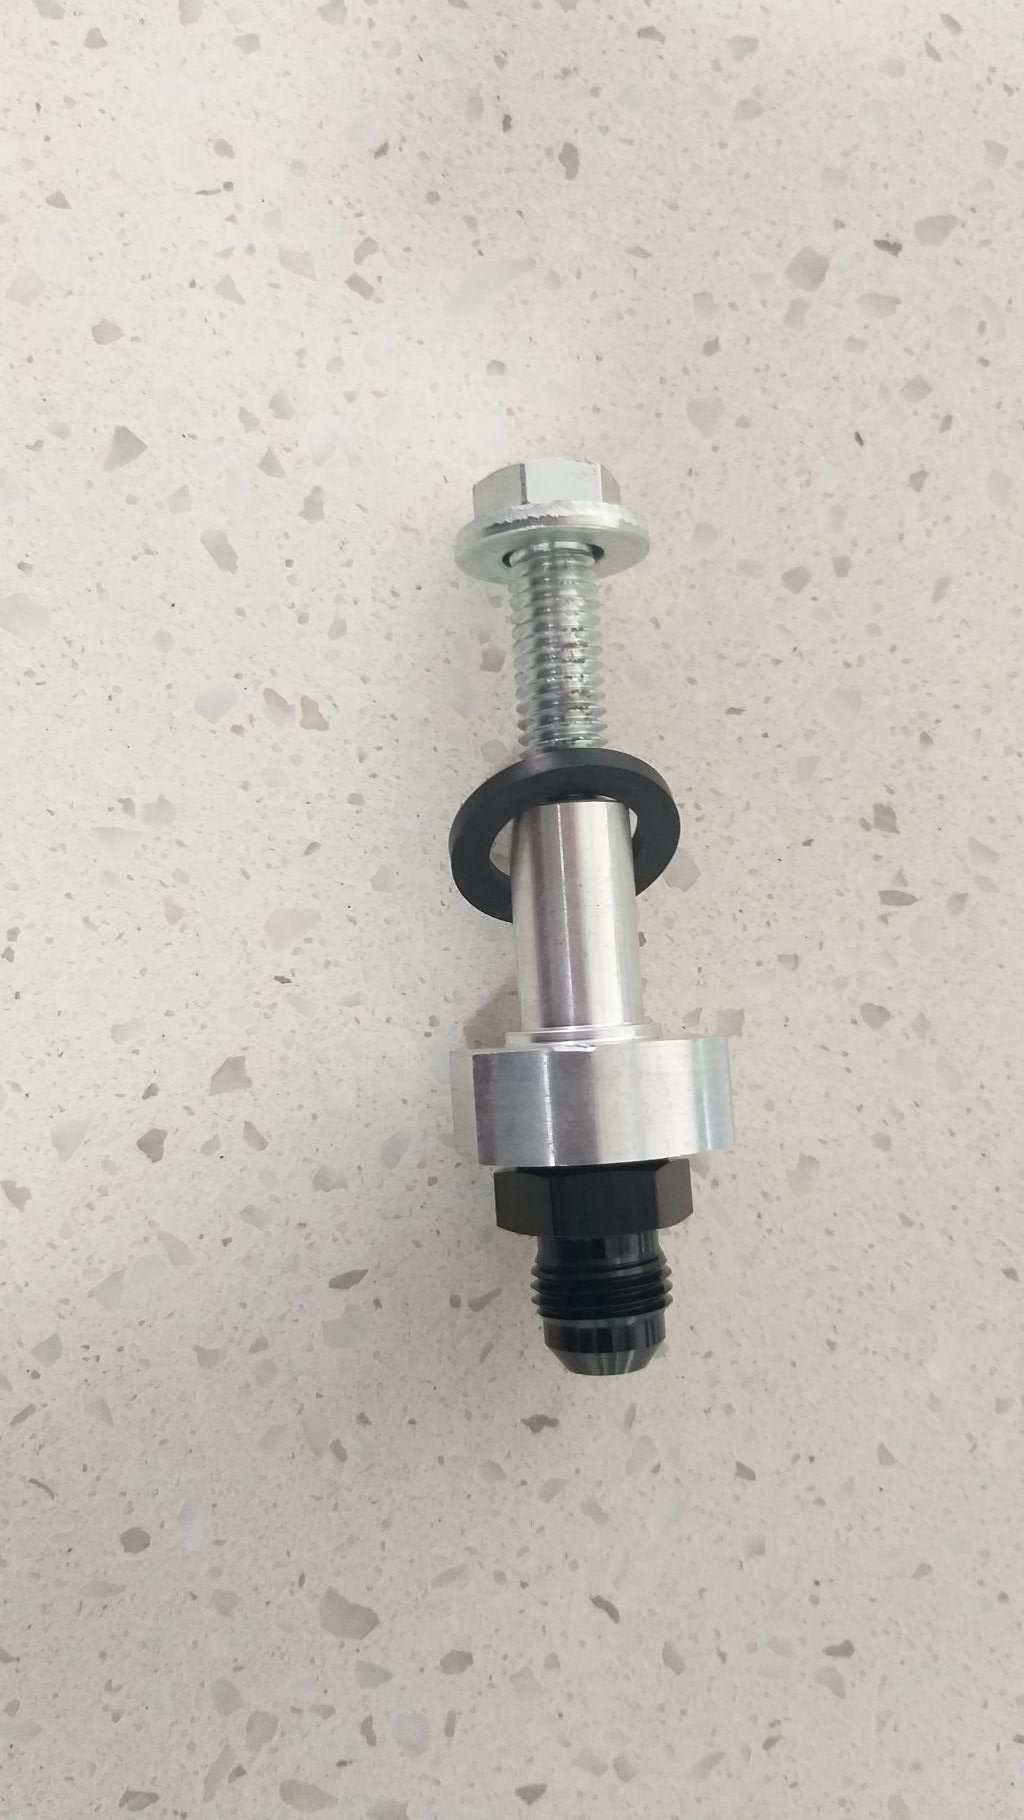
Next step is to plumb the return line into the factory fuel tank. Some guys fit a "T" piece into the fuel filler neck, but that would have entailed me routing the return line into the boot and I wasn't keen to do that. The Fitech master installation kit comes with a little fitting that works on the same principle as a rivnut. Only downside is that it means having to drill a hole in the tank. Now feel free to call me a bit of a big girl blouse but I've heard a few horror stories of sparks causing fuel tanks to blow up wreaking injury and carnage to those caught in the fray. I don't really fancy the sound of that, so haven't been looking forward to this step. But, yesterday arvo I pulled out the tank and first thing this morning I put on my big boy pants and cracked straight into it. First up a few up close and personal photo of the rivnut type thingy for those interested:

-
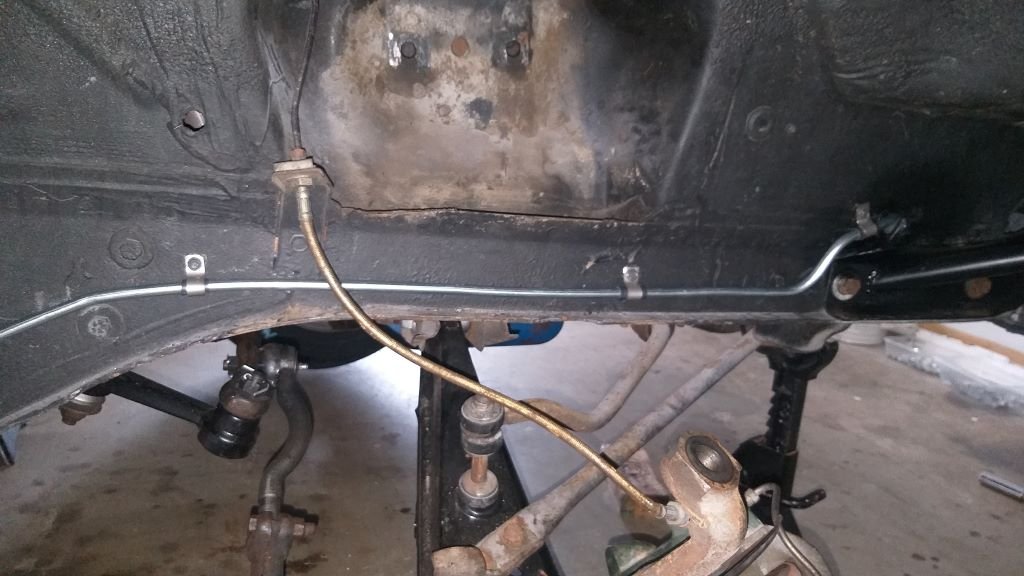
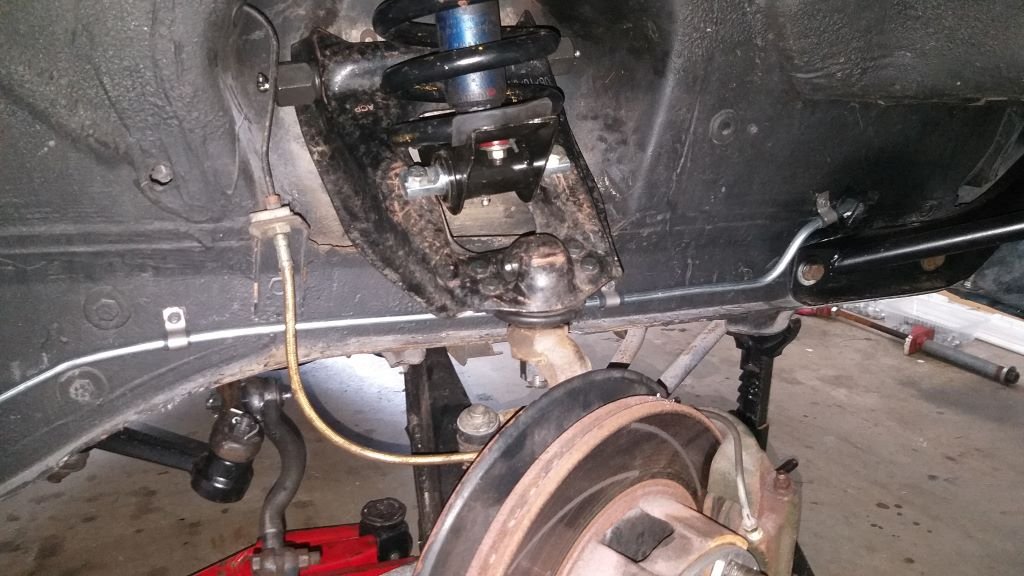
Chucked the fuel return line in for its final fitting and I'm happy with the overall result. Not that easy to take decent photos of it running along the transmission tunnel, but here are a few of the portion that sits inside the front fender:
-
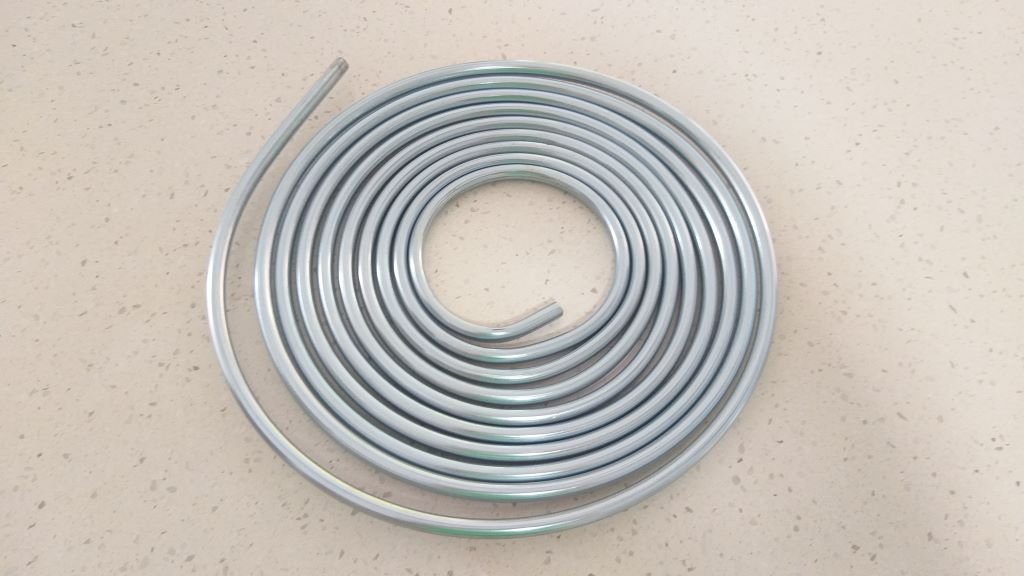
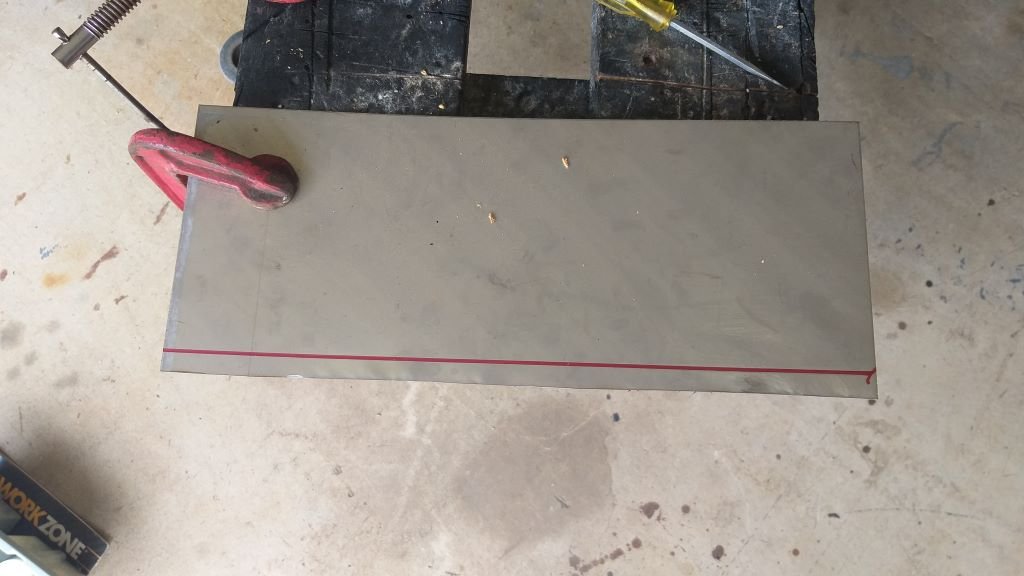
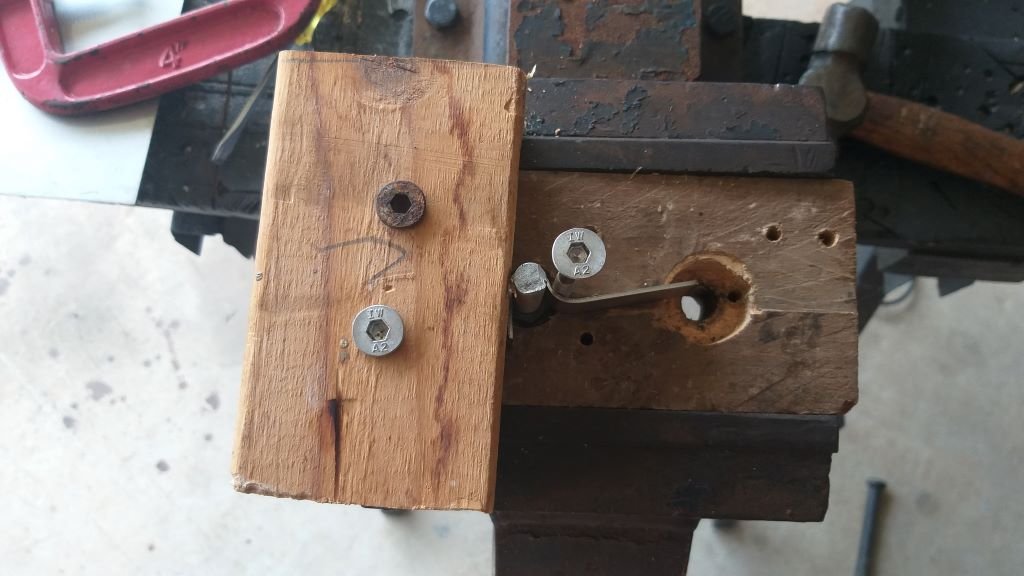
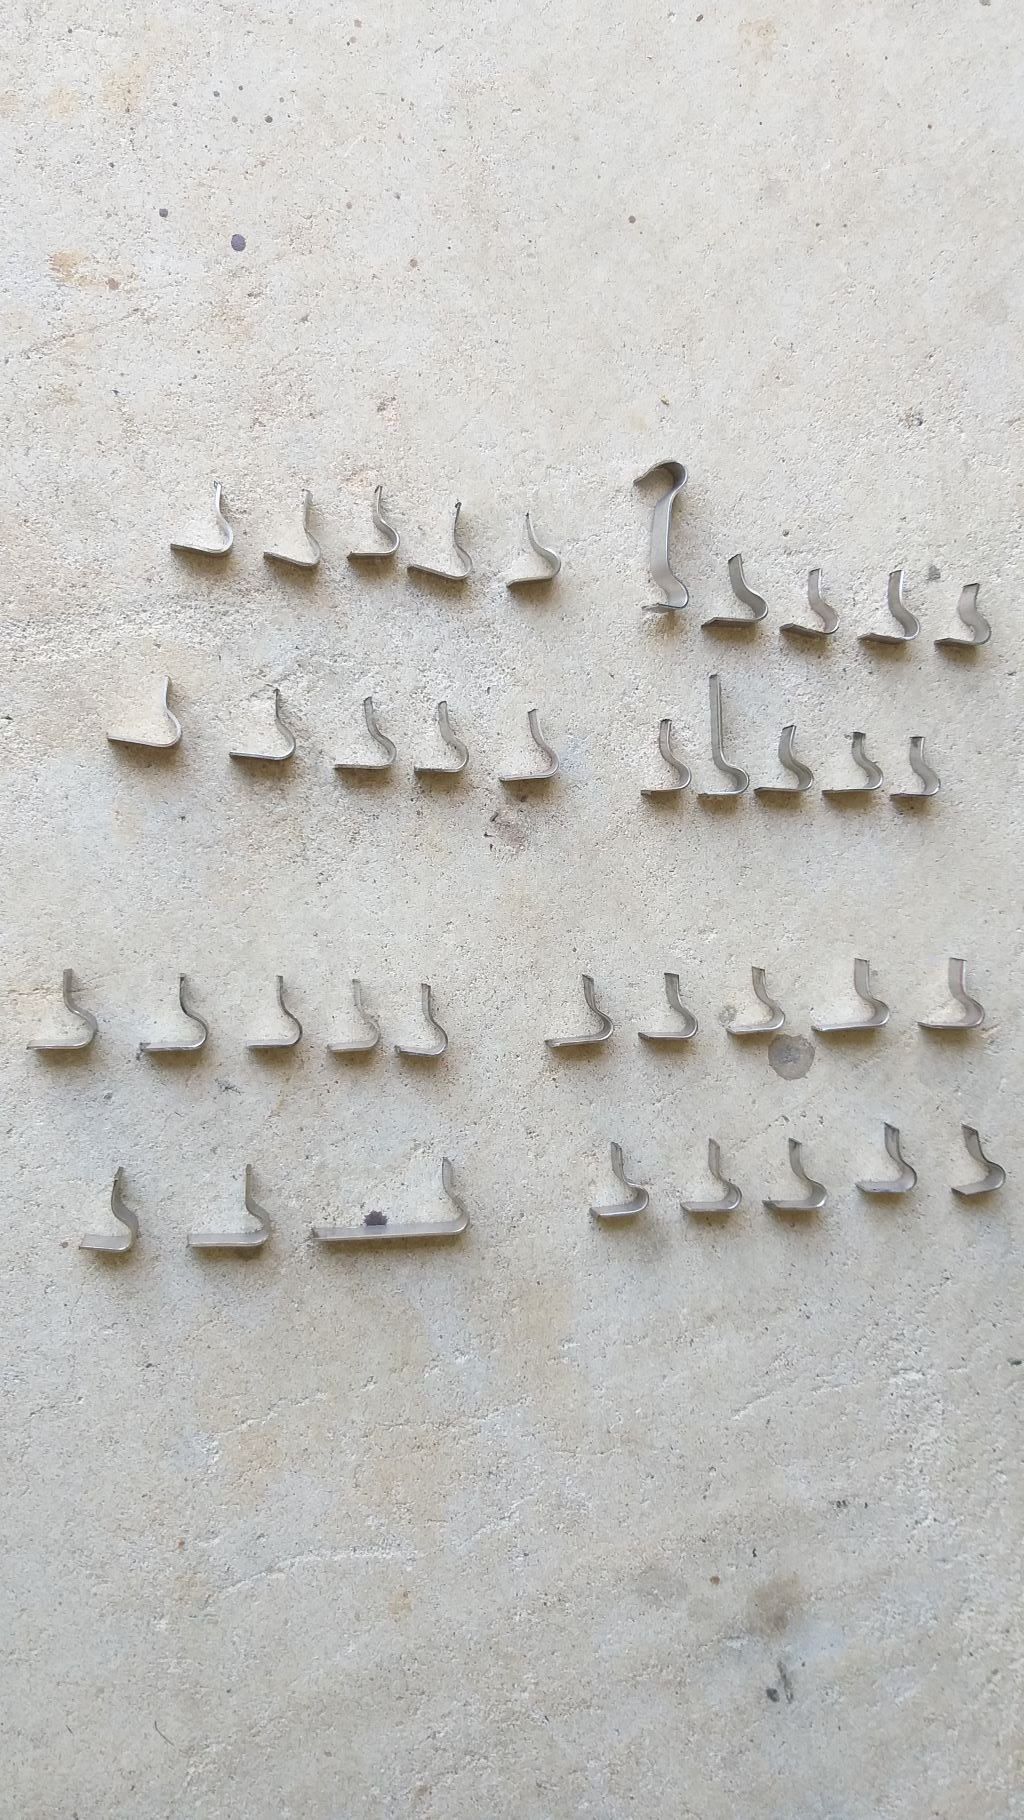
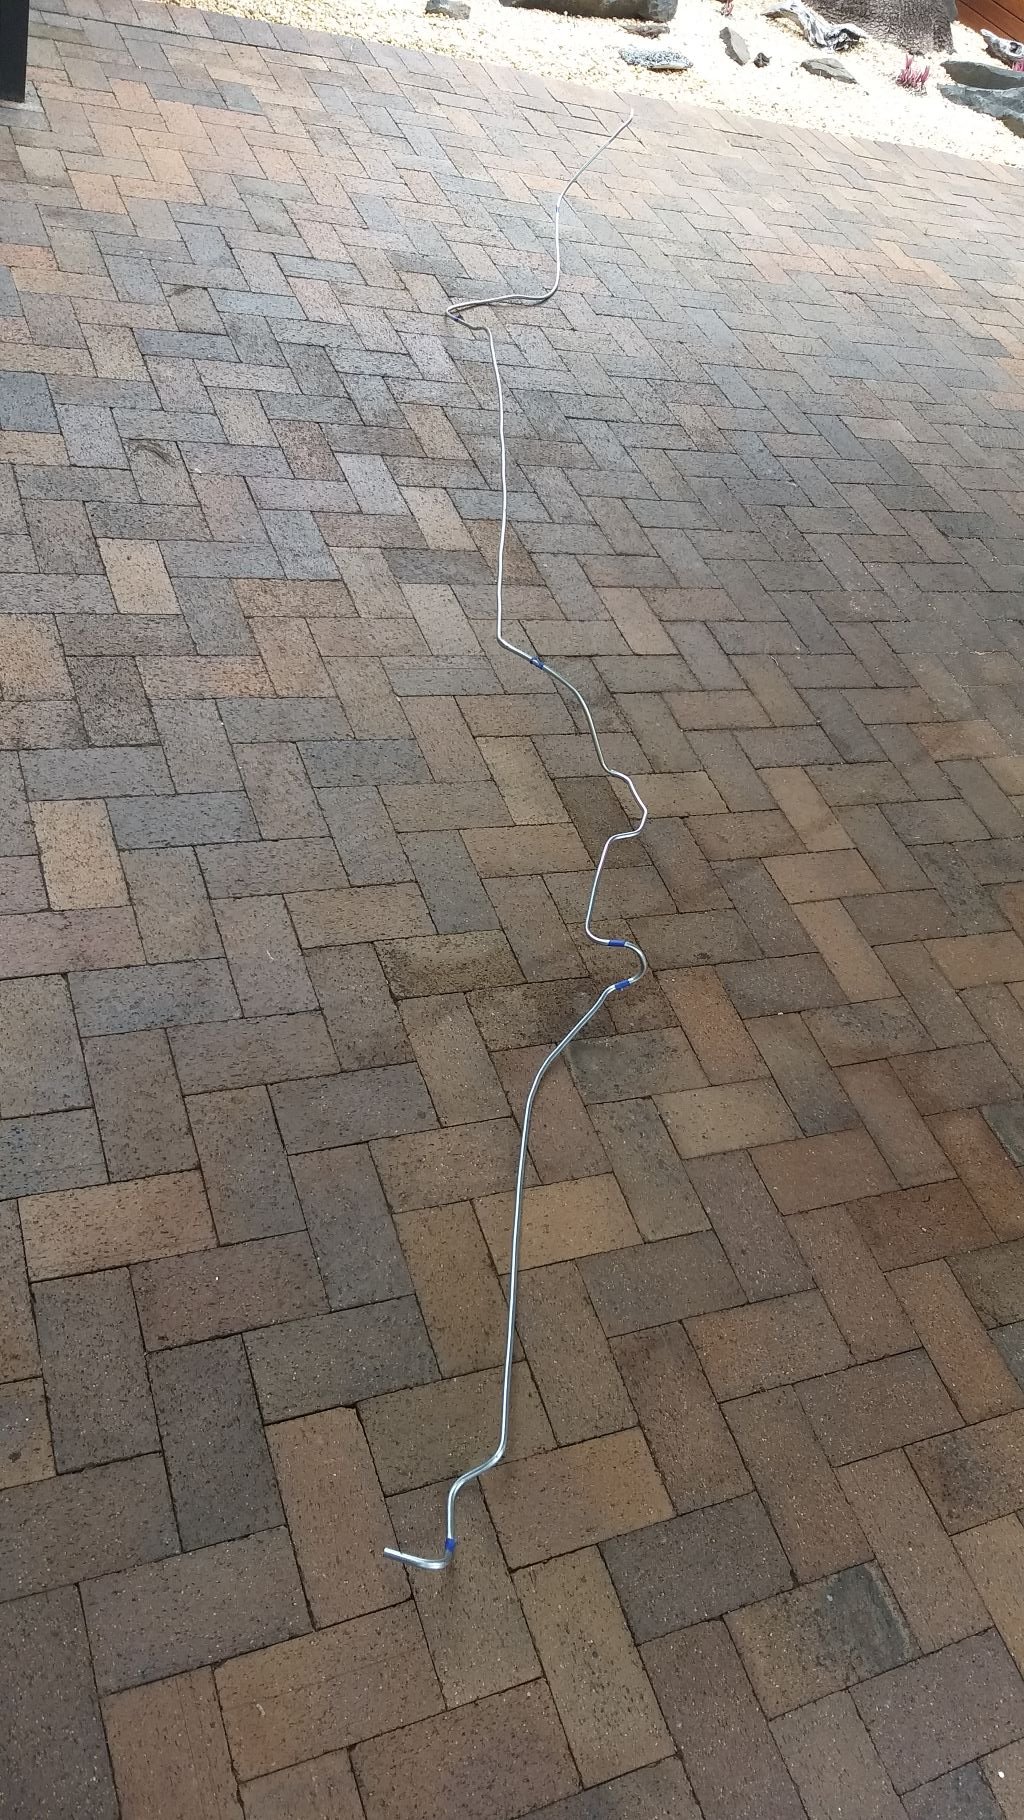
Two rolls of fresh 3/8" bundy tube arrived early last week, so I've been steadily plugging away at installing the new fuel return line. I started off by creating a mock-up out of some discarded brake lines that I had in my scrap pile. Looked pretty good until I realised that I was creating a headache for myself further down the line. Sometime in the not-too-distant future I plan to install a set of sub frame connectors to stiffen up the chassis and by running the return line as I had planned, would have clashed with the right-hand connector. So, it was a case of going back to the drawing board. For my second iteration I ended up mirroring the factory fuel line that runs down the left-hand side of the chassis and now have the return line running down the right. I was determined to get the line completed in one solid length from front to back which turned out to be a mission and a half. Ended up having to remove the right-hand exhaust, drive shaft and half of the front suspension to get the pipe in. Then spent hours and hours fitting, checking, pulling it out, fine tuning the bends and refitting until I got what I was hoping for. I ended up making a little "rough as guts" jig out of some wood scraps and fabricated a batch of holding brackets out of some stainless-steel plate that I had lying around. I suppose I could have bought some brackets, but where is the fun in that. Anyway a few "in progress" pics of the various components including a candid shot of the newly bent return line just to whet your appetite:
- 194 replies
-
- 11
-

-
Yep, I dropped by your place to check out your 105E saloon before the auction ended. We took it for a run and from memory it pulled like a freight train. I'm chuffed to hear that you still get to see and drive it. I've seen it at a few car gatherings over the years and it still looks good. Sounds like it went to a good home. A mate of mine is running a 4AGZE in his 105E, but they are pretty thin on the ground these days. I can't wait to see what you have planned for your van.
-
Hey @rusty360, I'm assuming it's your green Anglia van that you are talking about. It was real solid from memory with just some floor replacement needed. I remember perving over it when you were selling your burgundy 105E saloon back in 2009. Still wish I had bought that car of yours at the time. It was nicely sorted.
-
@cletusThanks again for raising this point. I've just taken a look at LM10 which is the Queensland regs covering fuel system modifications and it states: "Any fuel tank or fuel system component must be at least 100mm inboard of the permanent body line". I guess the million-dollar question is whether they include the grill, front bumper and valance as part of the "permanent body line" I'd be keen to hear your thoughts on this.
-
That's a bloody good question Clint. Thanks for raising it. I'll look into the local rules.
-
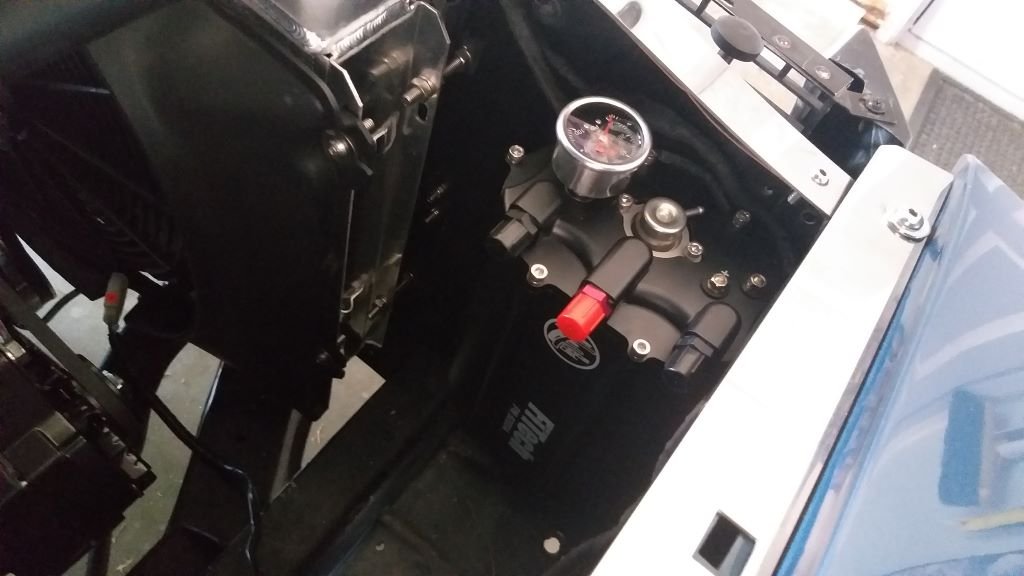
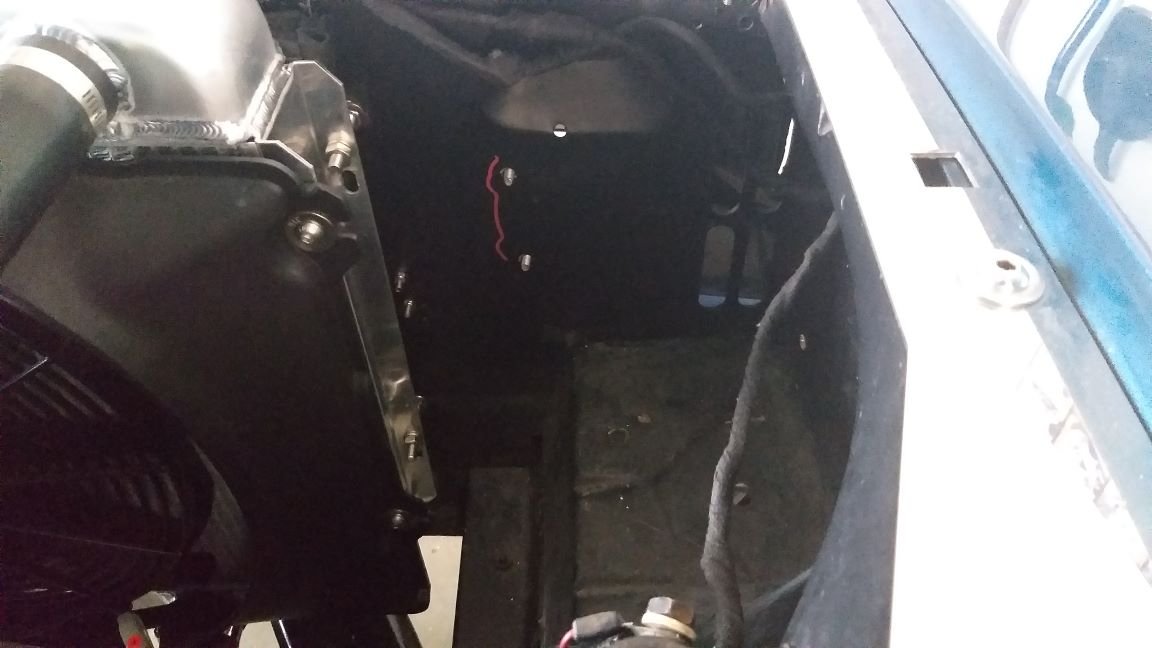
Poked a few holes in the radiator support panel, chucked a few nuts and bolts into the mix and the surge tank is now safely tucked up in its new location. I've ordered a few rolls of 3/8 bundy tube, so when those pitch up, I'll install the return line back to the factory tank. I'll also bend up a short length to extend the feed line from the mechanical pump to the surge tank. Thanks for looking.
- 194 replies
-
- 14
-
-
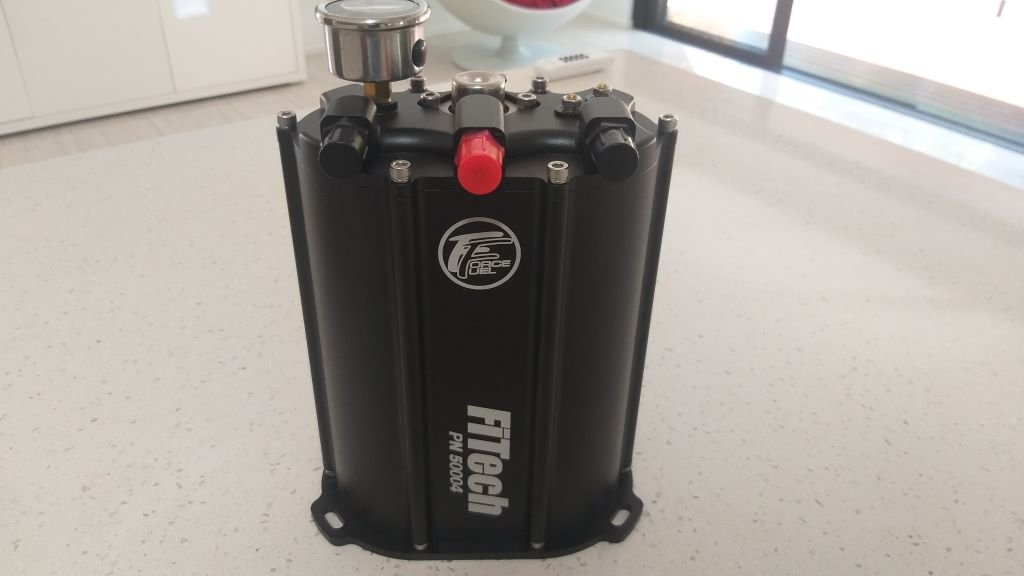
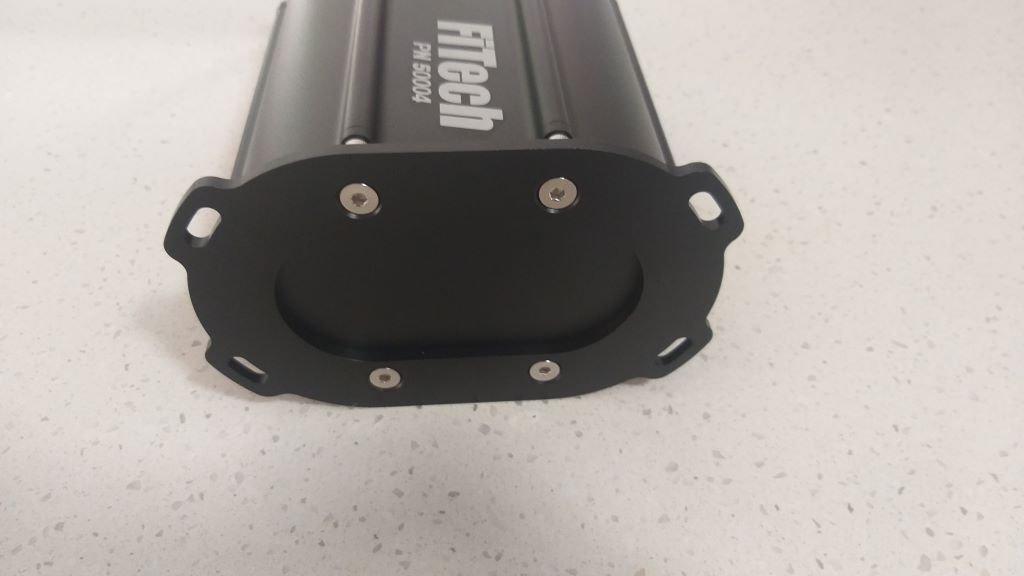
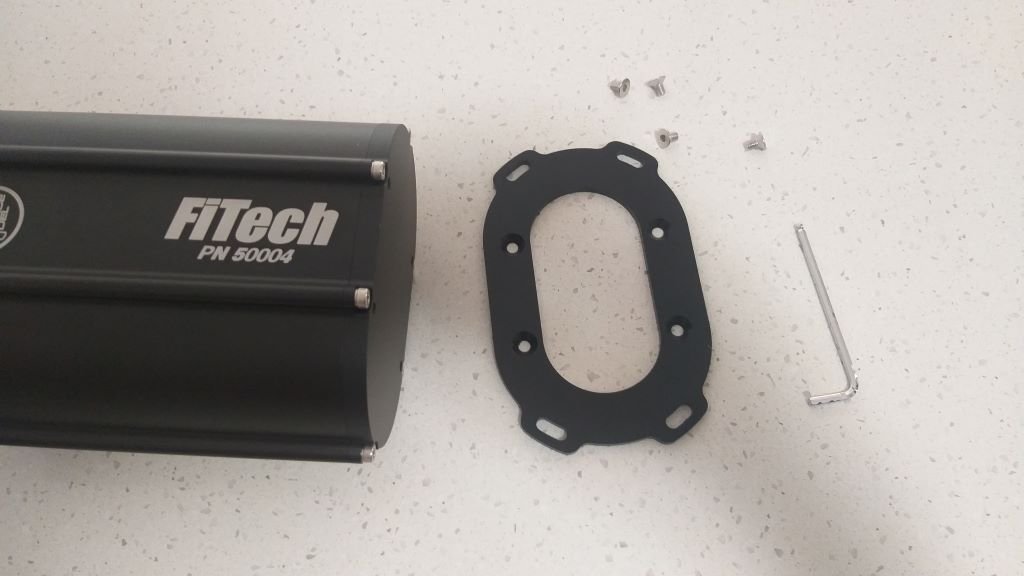
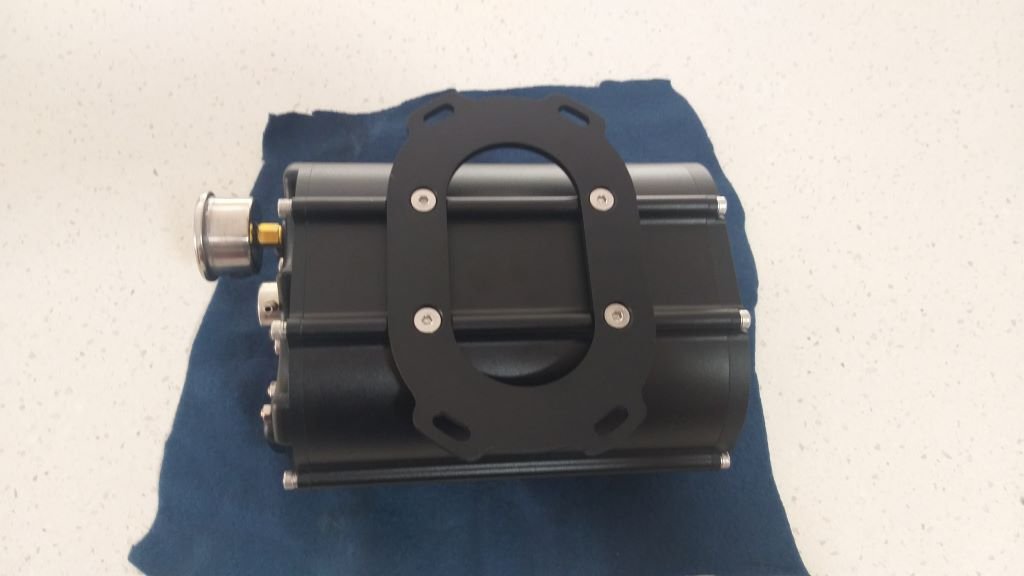
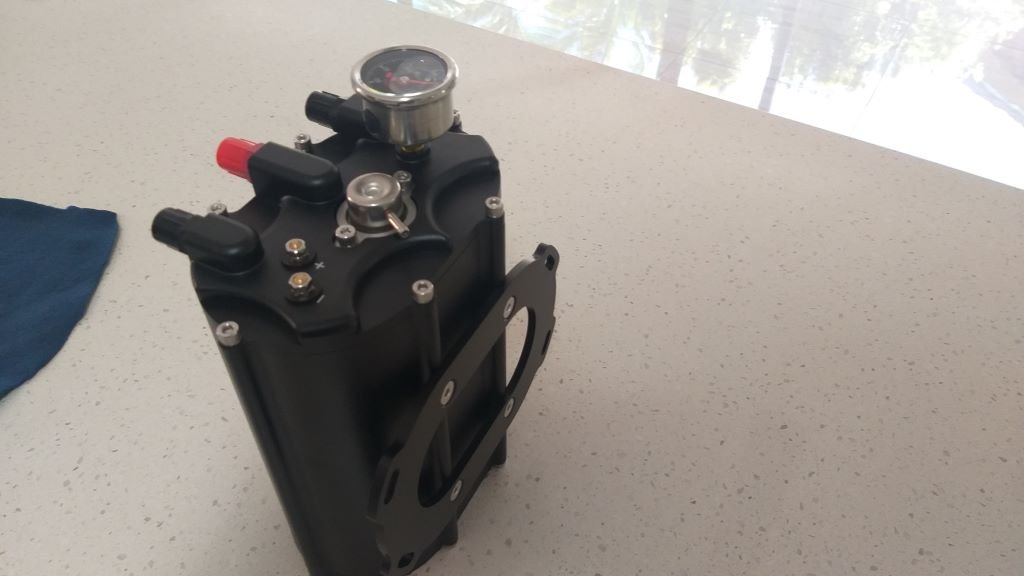
I've kicked off step one of the EFI install which is determining a location to mount the mini surge tank that came with my EFI kit. So, first off a bit of scene setting: Fitech offer three fuel delivery options. Option One is an eternal high-pressure rail mounted pump. Whist this is the most cost-effective solution from an initial purchase point of view, in reading through the Fitech related tech info that is out there it seemed like a number of folk have battled to maintain consistent fuel pressure with this setup, largely due to pump cavitation caused by poorly setup input feeds. Most solutions seem to involve opening up the fuel tank to install baffles and bigger diameter fuel pickup lines and the like. This is way above my skill set and being a tight arse, I wasn't keen to outsource this to someone else. Option Two involves retro fitting an in tank high pressure pump. Again, this entails some tank modifications which are way out of my comfort zone. Option Three consists of a mini surge tank that incorporates an in-tank pump. This is the most expensive option from a purchase point of view, but to me it looks like the simplest way to achieve consistent fuel pressure without having to undertake "open tank" surgery. So, Option Three it was. All that the surge tank needs is a low-pressure input line and an output line that feeds excess fuel back to the factory fuel tank. In terms of surge tank location the options are endless. Some folk have mounted the surge tank in the boot using a low pressure 12-volt pump as the feeder and then running a high-pressure fuel line all the way to the throttle body. Another option is to mount the surge tank in the engine bay using the factory standard low pressure fuel line and mechanical fuel pump as the feeder. This is the option that I am going with for a number of reasons. First up I'm more comfortable with retaining the low-pressure fuel line under the car. Secondly, I'm keen to retain the original factory mechanical fuel pump as this allows me to re-install the carby with relative ease should I need to. My thinking being that if ever my EFI lets me down I'm able to get the car back up and running on the carby with very little effort. So, where to find a spot in the engine bay for the little tank ....... Well luckily, I have a bit of real estate that was recently created by my battery relocation exercise and it's just perfect for my needs. The tank comes with a mounting bracket that can be mounted on the bottom or side of the tank. I've gone for the side mounting option which will allow me to tuck the tank up hard against the radiator support panel. First step was to change over the mounting bracket:
-
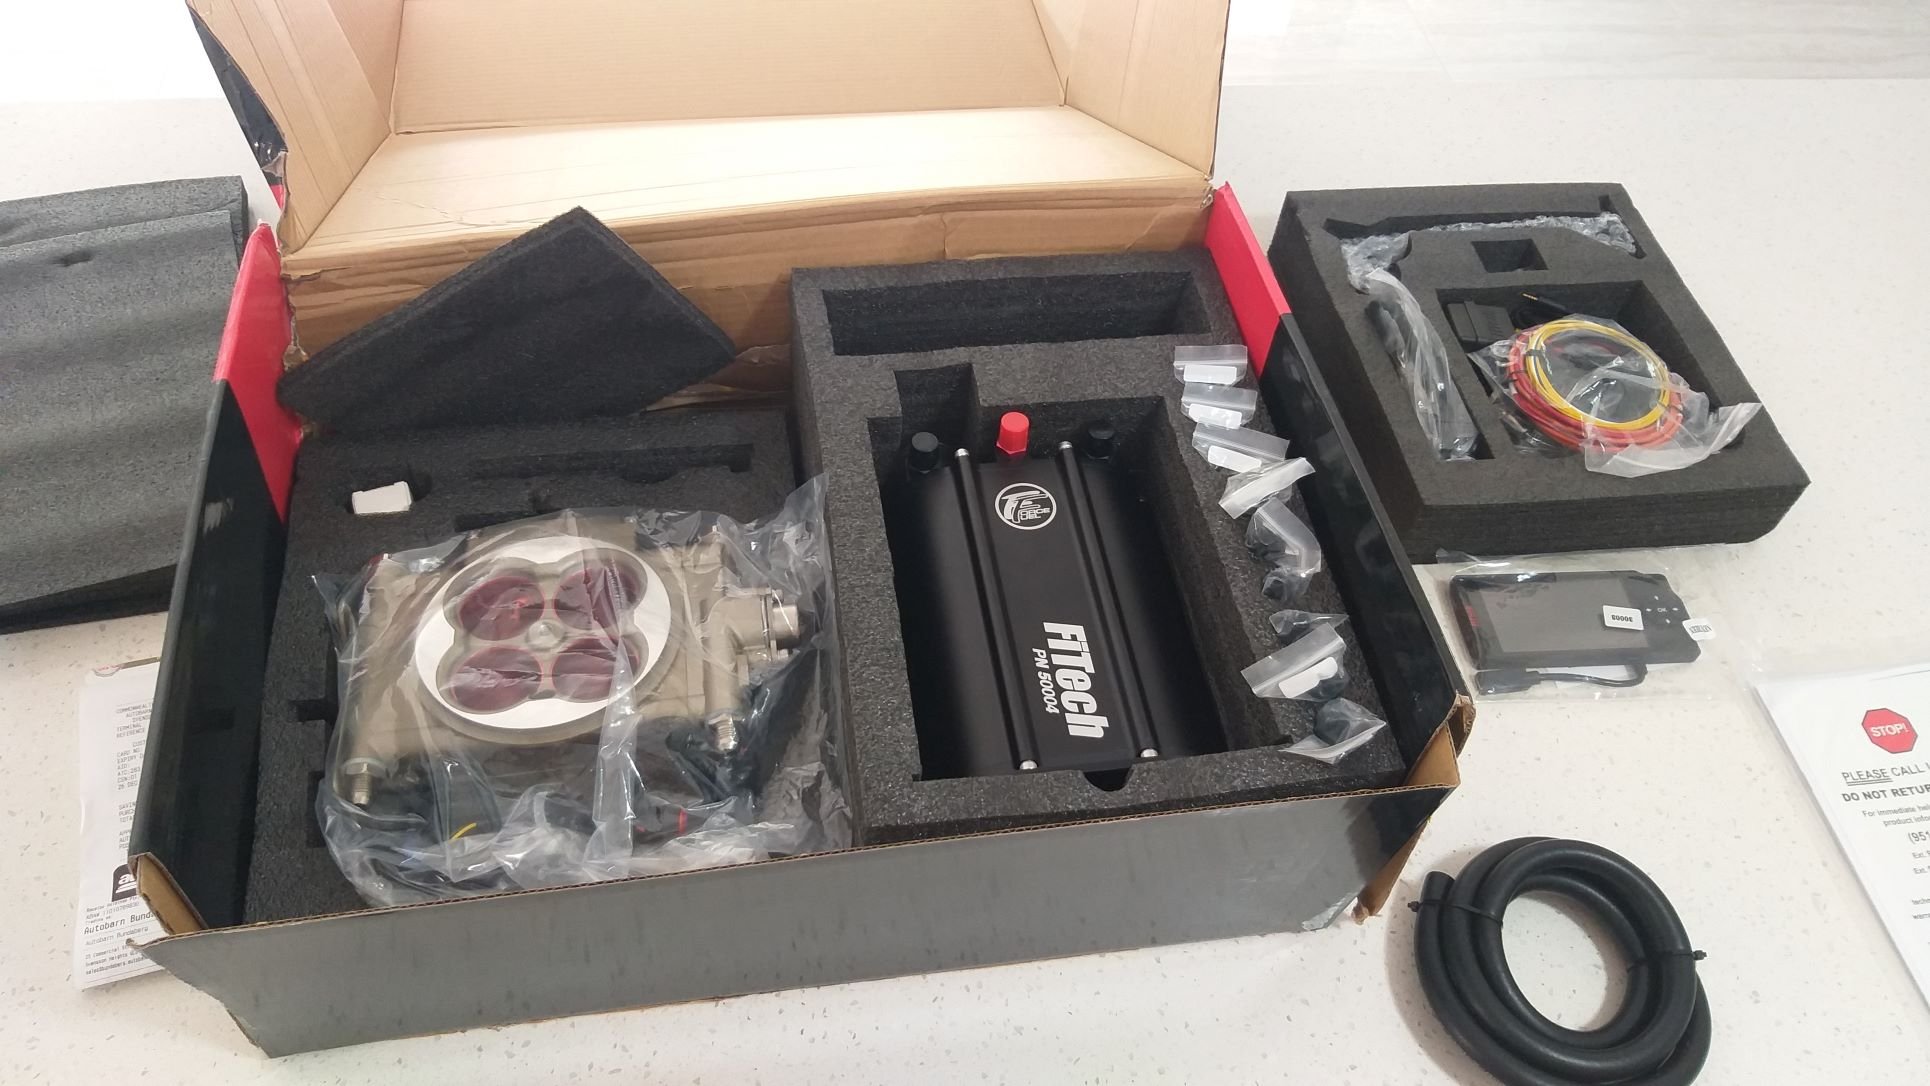
I've been pondering what to do on the Muzzy from a fuelling point of view for a few months now. Allow me to set the scene: A previous owner had fitted a brand-new Holley 600 4-barrel carby to the mighty 289 small block. Although the car runs really well, it can be a bit "fumey". Chatting to a couple of folk more knowledgeable than myself, the general consensus was that she was over fuelled. This was supported by the fact that the car cold starts easy as with absolutely no choke required. Another clue is the fact that after a short drive with the windows down I smell like I've just been out mowing the lawn. Whilst "eau de unleaded" may appeal to some, it gets a bit tiresome after a while. Anyhoo, supplied with the car was the original 2-barrel intake manifold as well as two old carbs, a 2 barrel Holley and an old Autolite. Both look pretty manky and would need a full refurb. I'm not really keen to go back to a 2-barrel, so I discarded that option. My next thought was to look out for a Holley 465, but they are getting hard to find and are also pretty spendy. I tracked down a family run performance shop down in Victoria who specialise in refurbing old carbs and they were offering a reco'ed and bench run 465 without me having to supply a core unit for just under $900 delivered to me in Queensland. So again not exactly cheap. Now back in the day when I was playing around with my V8 powered Bedford van I ended up trying and discarding 3 different carbies before I was happy. First up was a Quickfuel, then a Holley and finally a refurbed Rochester Quadrajet. With the cost of each carby plus a few dyno tunes thrown in for good measure the spend was getting up there. I was never 100% happy with the van as even with the Rochy it guzzled the juice and at one point I even toyed with fitting EFI, but at that time the cost of off the shelf EFI kits was pretty eye watering. So, getting back to the Muzzy I decided that a bit more research was needed before pulling the trigger on the carby. Spent many a night with my good friend Google and Youtube. Even pestered a few USA based Mustang gurus for their advice and eventually ended up setting my sights on the Fitech EFI. Now it just so happens that my local Autobarn is a Fitech stockist and earlier in the week I dropped by and saw that they had one Fitech Master Kit in stock. Today they were having a 25% off Boxing Day sale so first thing this morning Mrs Flash, our wee dug and myself hopped into our trusty old Bongo van and headed through to town. Got there 10 minutes before store opening and I was second through the door. Literally bowled over the poor shop assistant to get my hands on the kit, but get it I did. This is my first foray into the land of aftermarket EFI, so I am on a steep learning curve. Let the fun commence.
- 194 replies
-
- 17
-
-

-
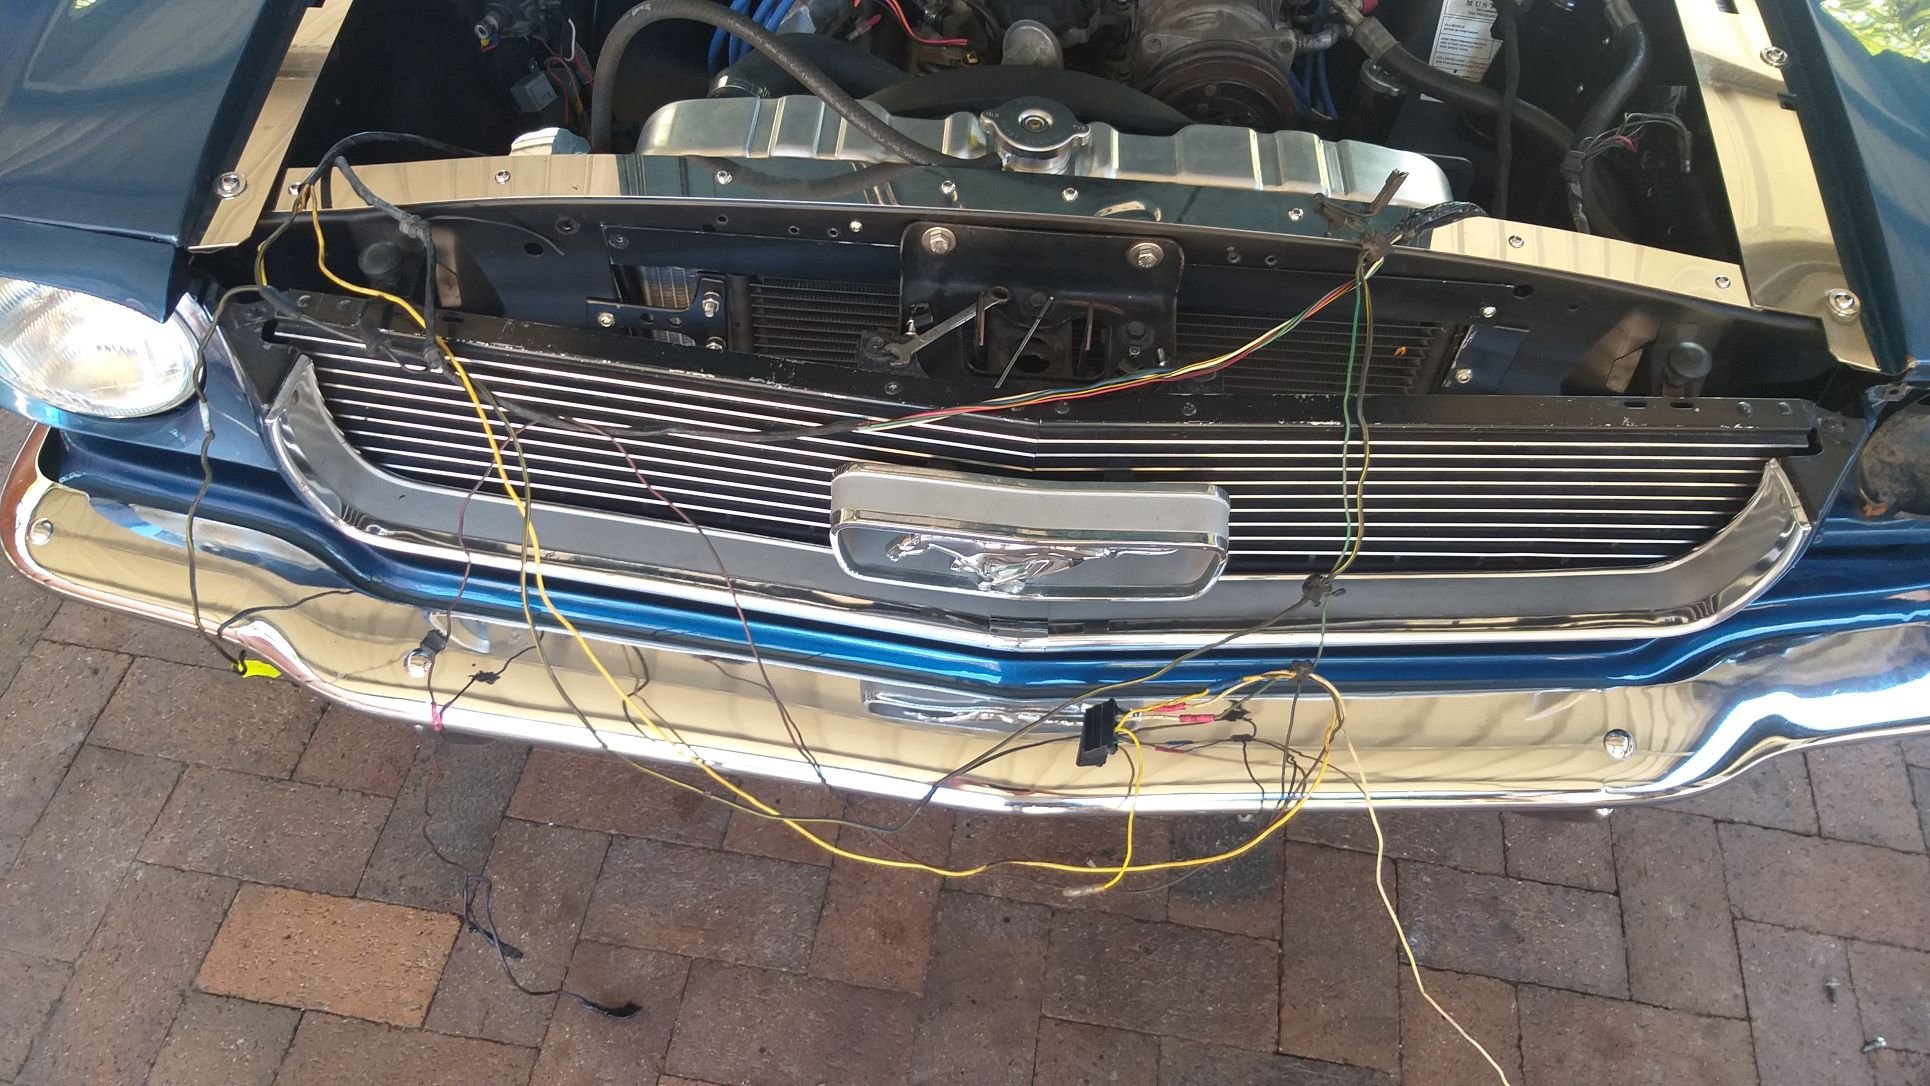
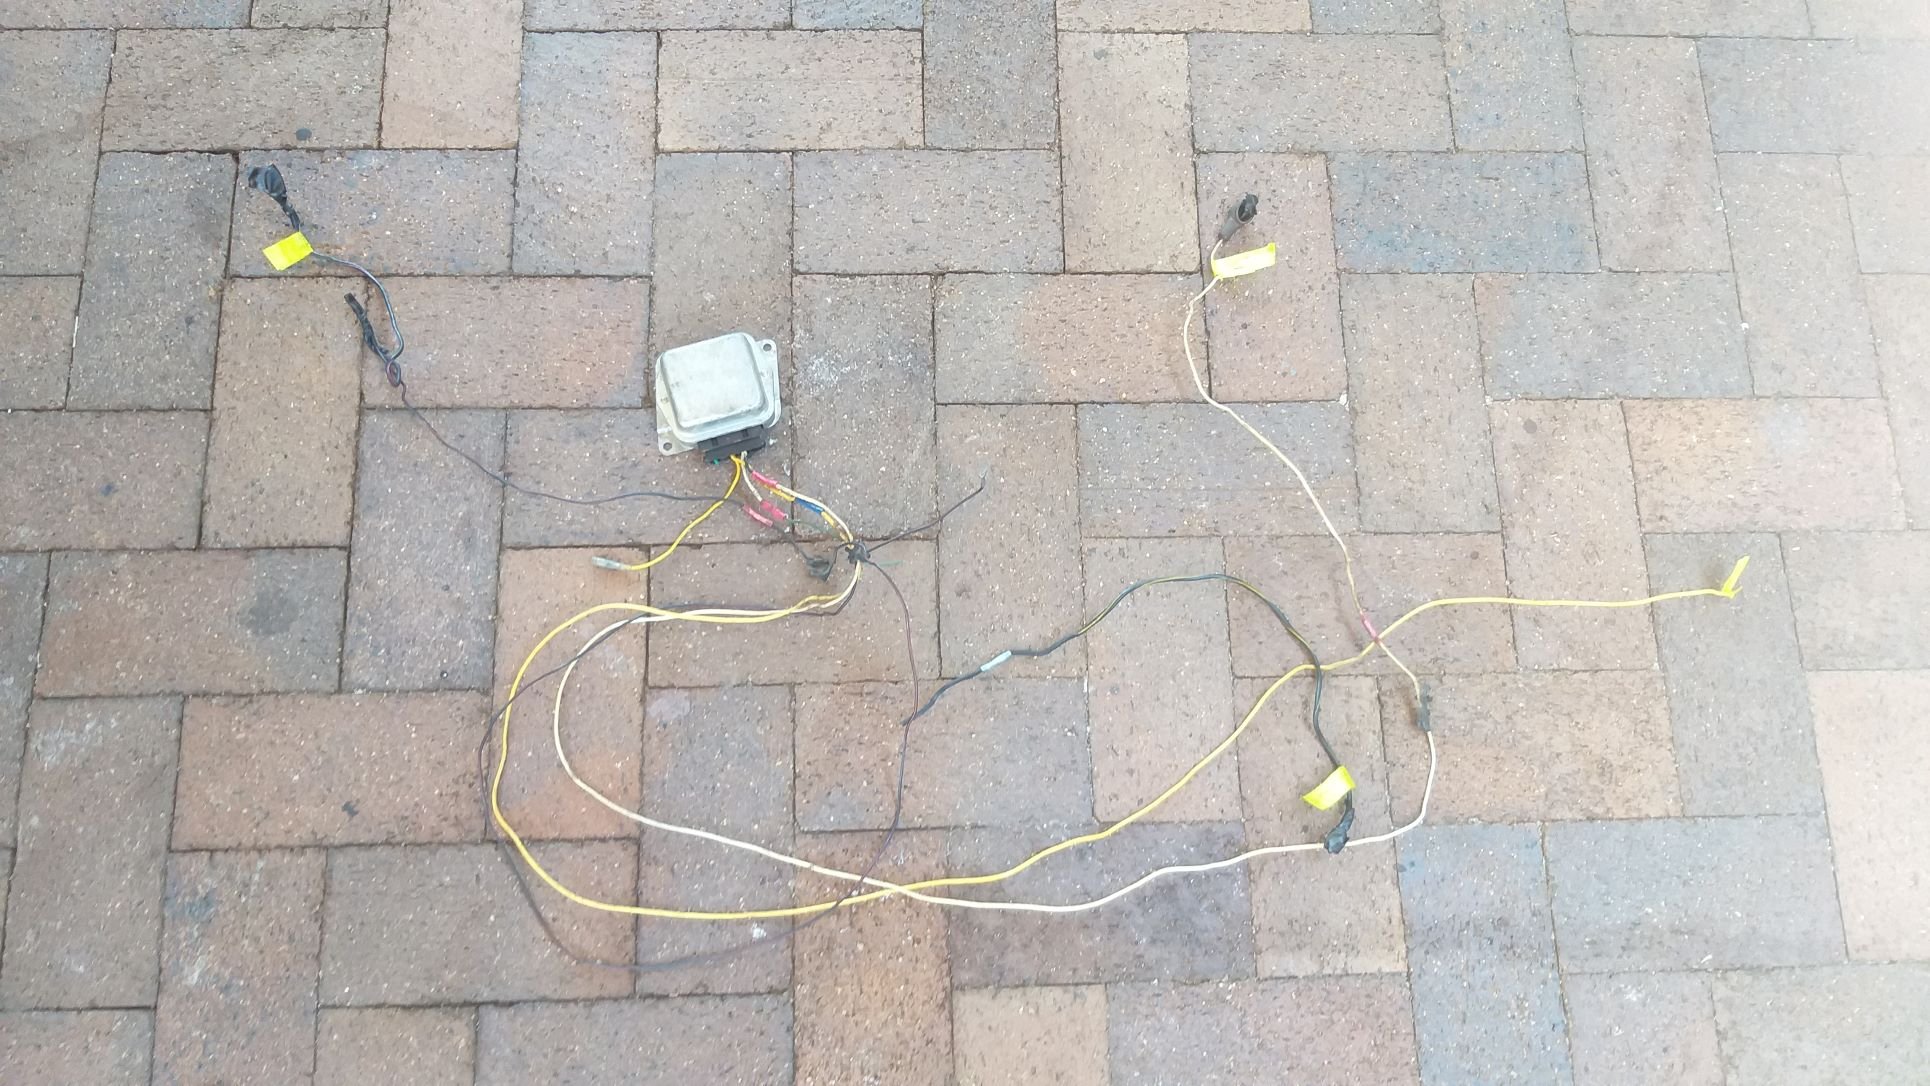
Hey, hey .... it's wiring tidy up day. I had to disconnect my left headlight and blinker light to create enough slack in the front wiring loom in order to work on it. Next step was to unwrap the harness and what a mucky job that is. With the wrapping off I was able to remove the wires associated with the now defunct external voltage regulator. Then a quick wrap with some fresh cloth tape before tucking what is left of the harness back behind the radiator support panel. And that's another small job jobbed.
- 194 replies
-
- 12
-
-
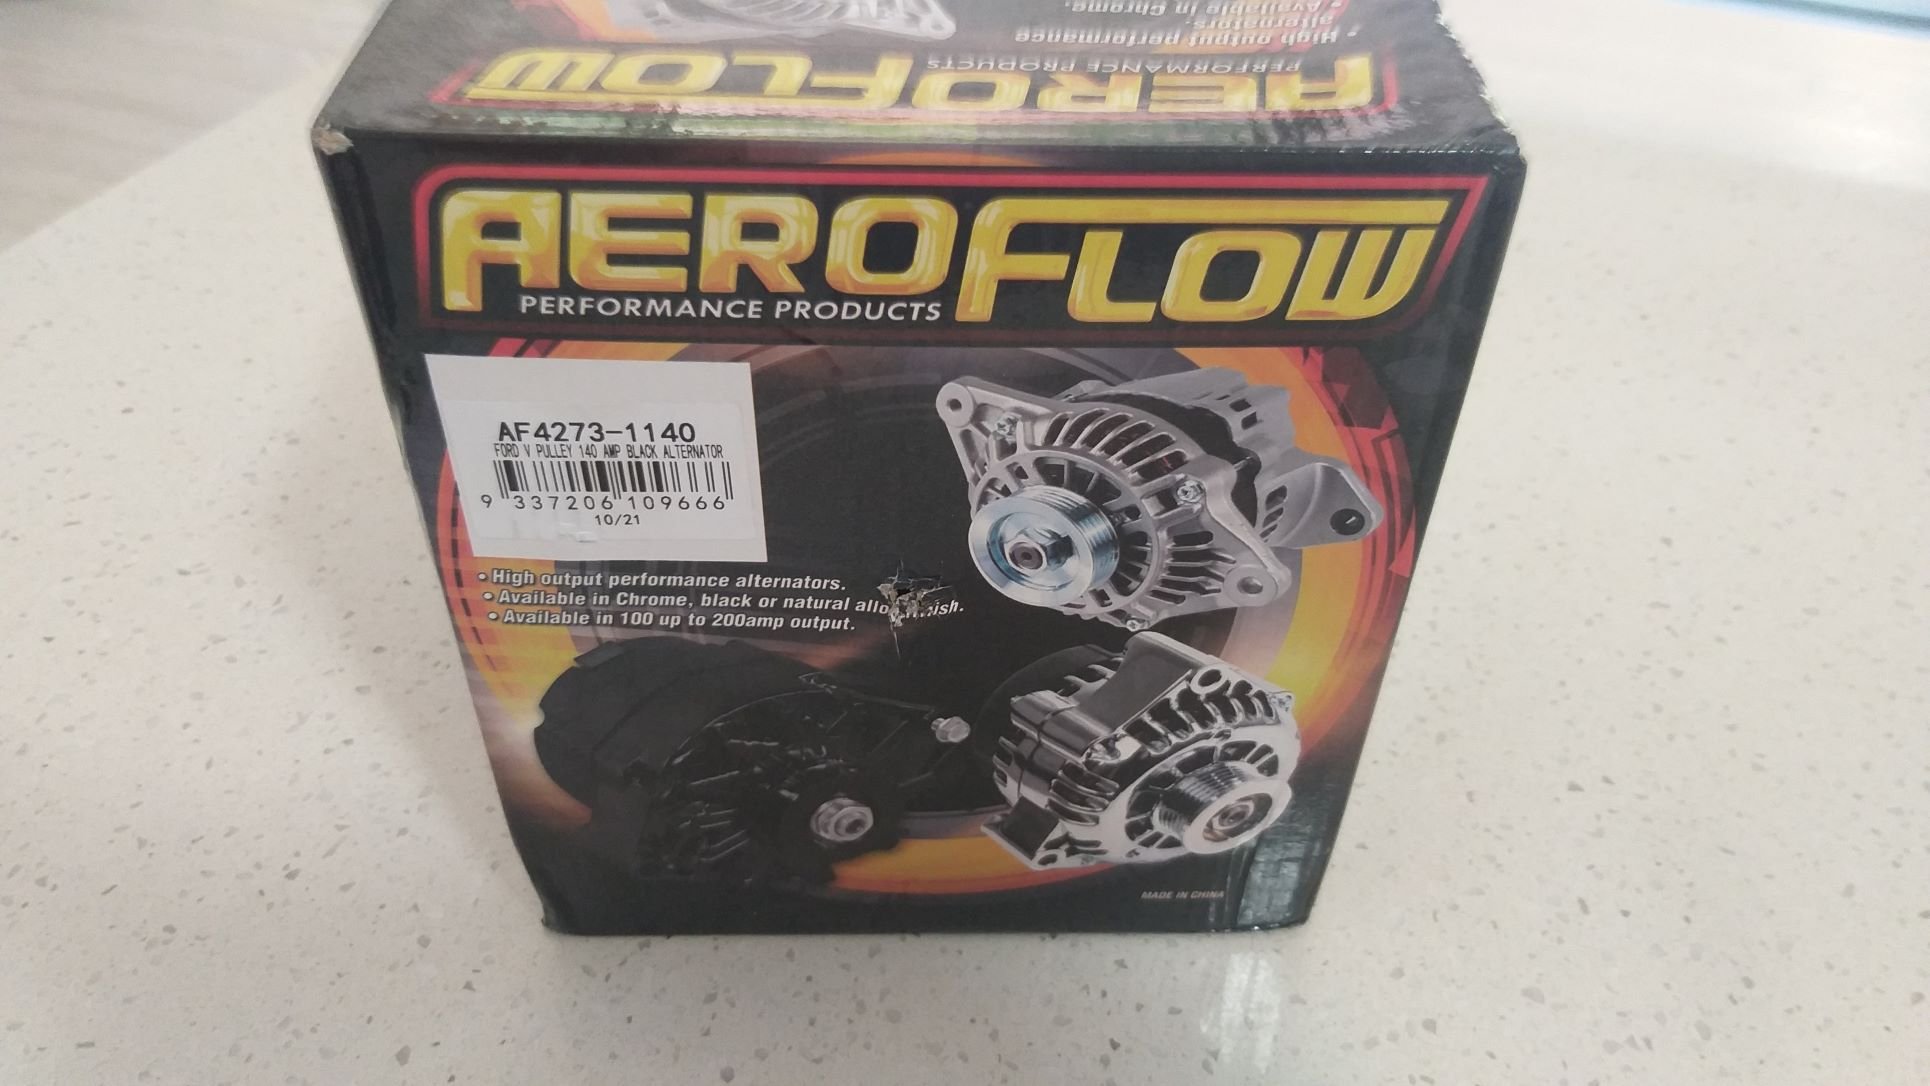
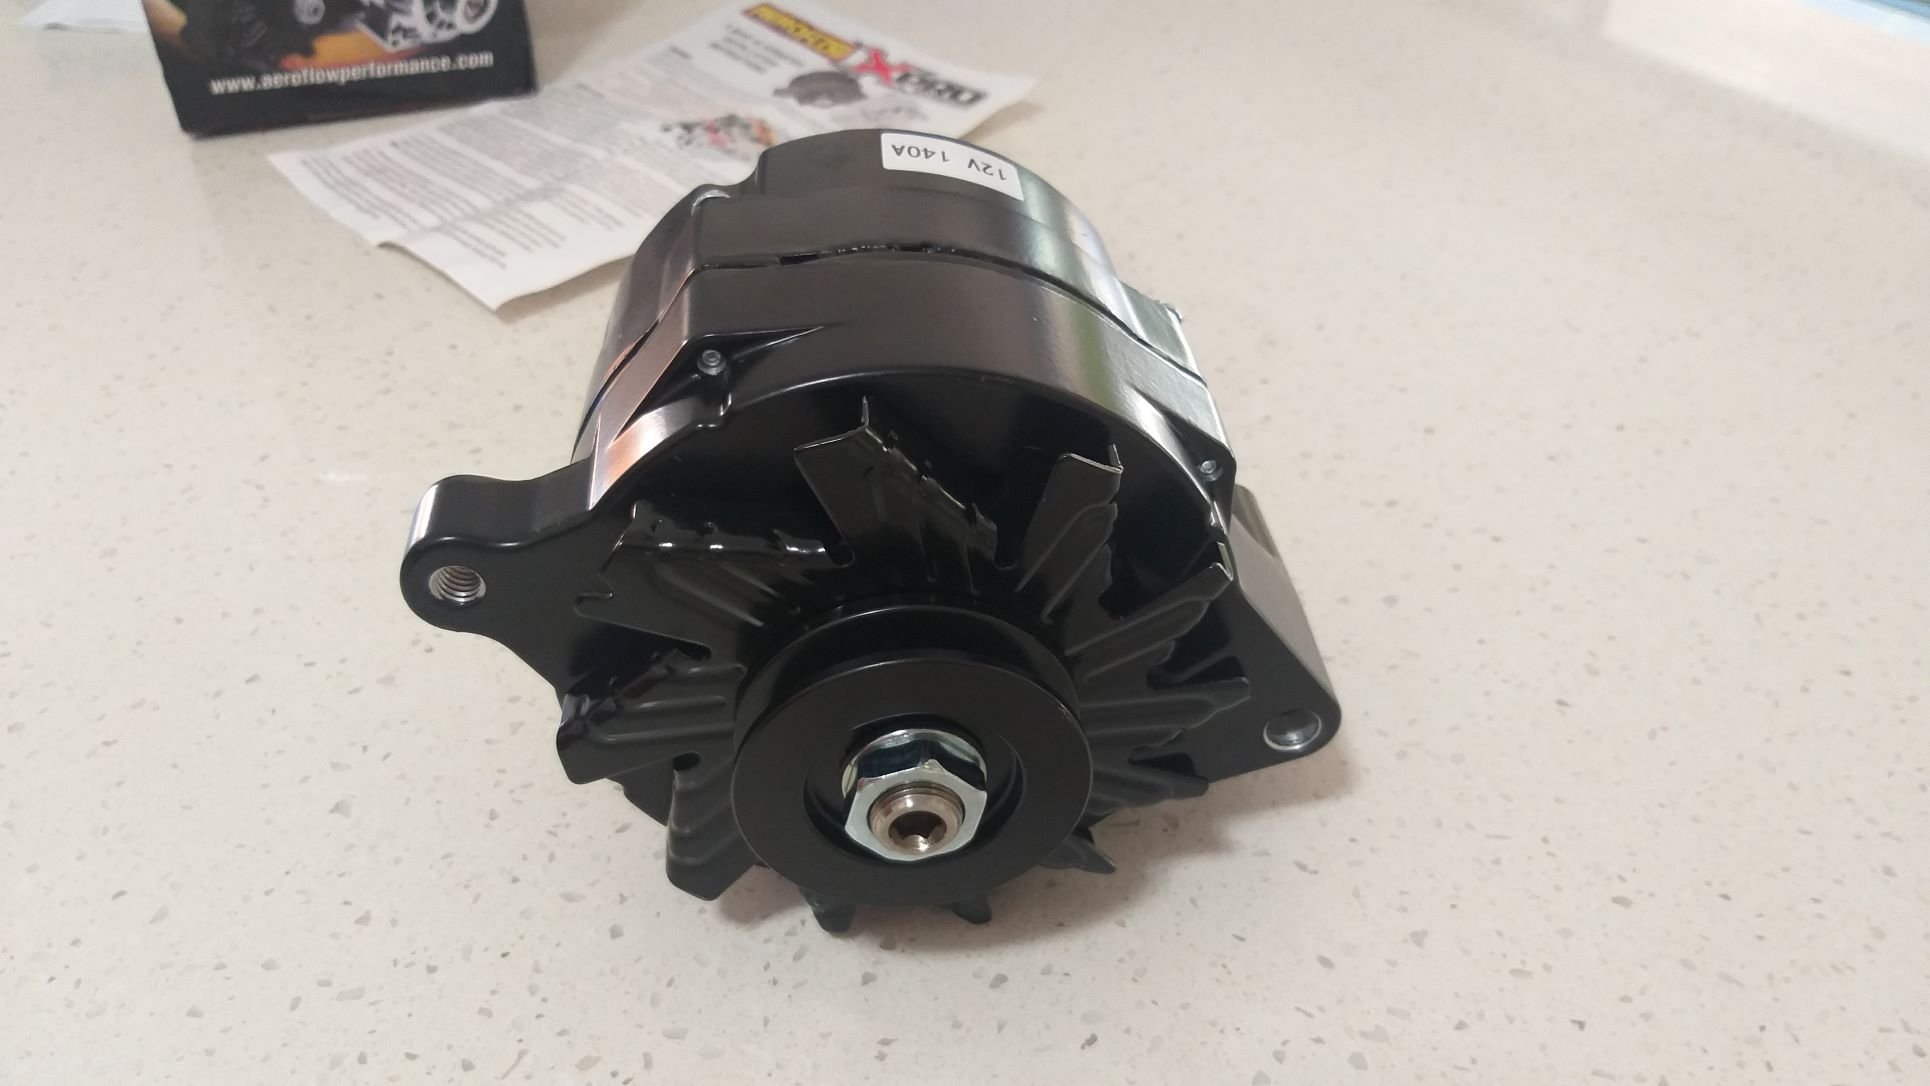
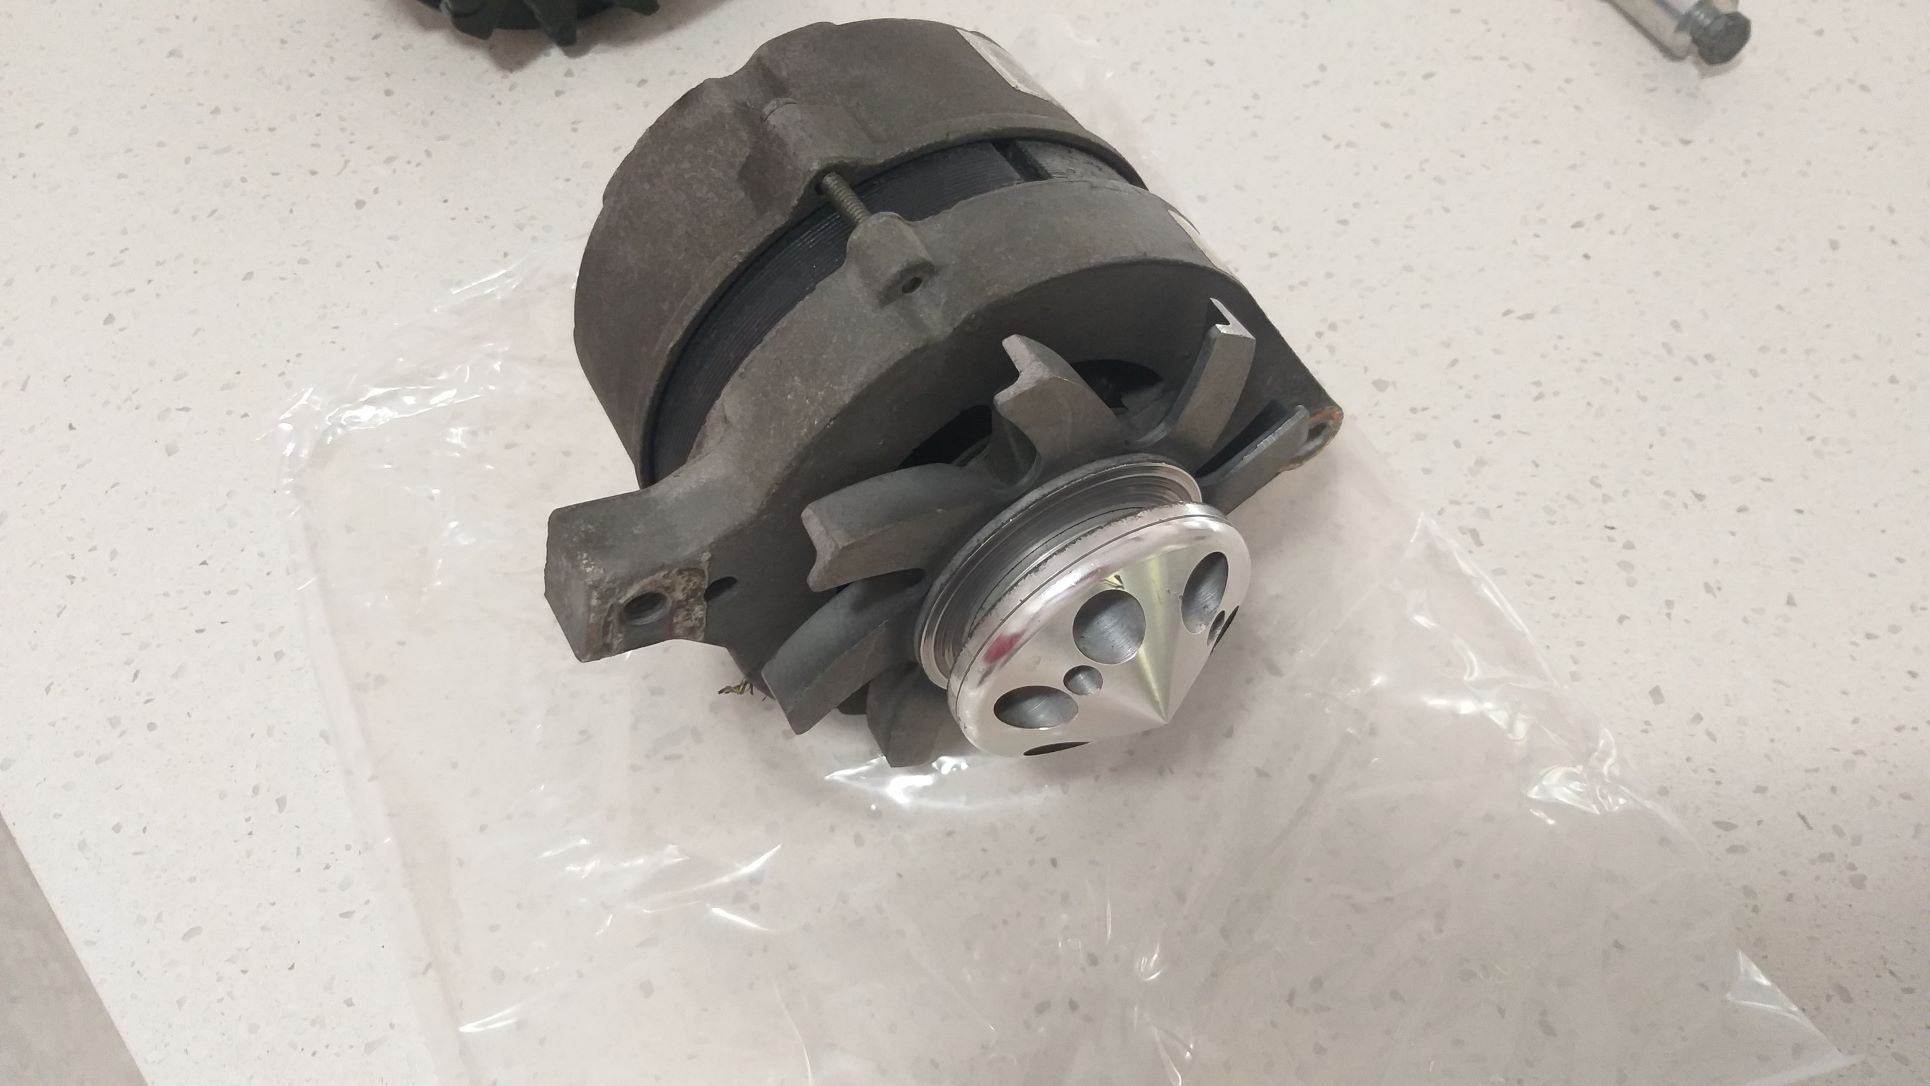
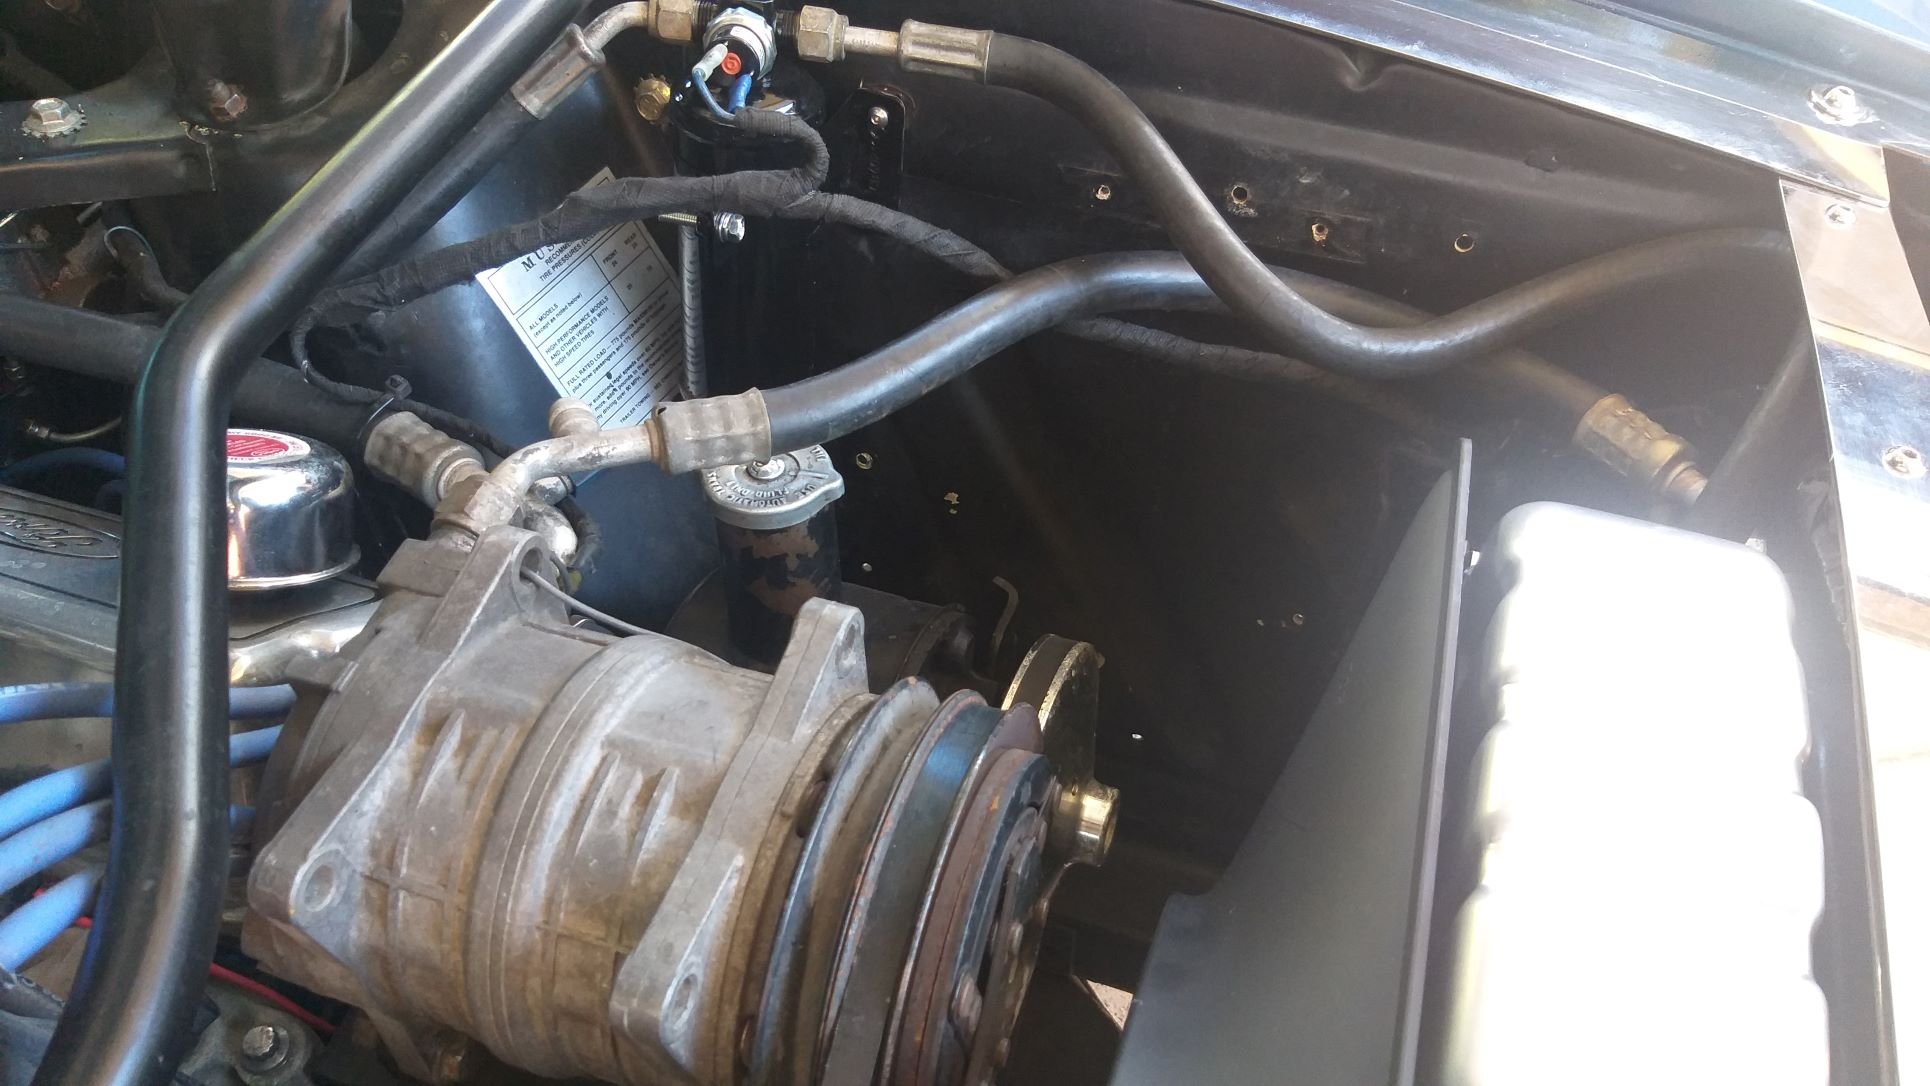
Well, it's been almost a month since I got the a/c up and running in the old Muzzy and I might add that the timing was pretty perfect as we have experienced a few scorching days this month including one rather balmy day that reached 34 degrees C. I've notched up just under 300km in this period and the car is running really well. I've only got two minor complaints. First up I've noticed a bit of condensate that drips down one of the a/c pipes inside the cabin. It then meanders down the accelerator pedal stalk and lands perfectly on top of my foot. I've stuck my head under the dash and the last inch of a/c pipe before it enters the fan unit is exposed. I've got a short length of foam cladding which I'll need to slit down the side to fit, but hopefully with that and a few cable ties I can solve the issue. The second issue was a little more annoying, but again a relatively easy fix. I'd noticed that the a/c blower fan would speed up as my engine revs increased and would then slow down when I decelerated. I figured that with the extra load of both my Spal thermo fan and the a/c blower fan running almost continuously, the poor old factory alternator was struggling to keep up with the extra load. A quick poke around the internet and I set my sights on a black Aeroflow 140 amp single wire jobbie that the vendor reckoned was a direct bolt on for any of the small block Ford engines. Yeah, right, I've heard that one before. Anyhoo, I hit the "Buy Now" button and the parcel arrived earlier this week. So, this morning I cracked straight into it. Pulled the old unit out, then taped up all of the external regulator wiring and tucked it out of the way. Made up a meaty power and earth cable and chucked the new alternator on. Much to my surprise the new unit bolted up perfectly. Took the Muzzy out for a quick squirt around my test track and hey presto .... the a/c blower fan now holds its revs no matter what the engine is doing. Winner, winner. I had read a few horror stories about the factory ammeters getting fried up due to the higher amperage. I'm a bit sceptical, but I disconnected the gauge before fitting the new alternator anyway. I'm going to temporarily fit a 2-amp inline fuse before I connect it up again just as a bit of insurance. I also need to remove the factory fitted external voltage regulator and associated wiring as I don't plan on ever going back to the original setup. So that is another small job to do. A few photos of the new and old units for your viewing pleasure. Thanks for looking.
- 194 replies
-
- 14
-
-
Great news about the replacement heart for Lucas. I'm chuffed to think that you will be able to enjoy the Rover whilst you toil away on completing your Marina. Then when the dust has settled you can take your time to decide on the long-term plan for Lucas .... yummy high compression 3.9 or matching numbers original EFI. Boy you are spoilt for choice now.
-

SR2’s 1947 Vauxhall “Rigamortice” Discussion thread.
Flash replied to sr2's topic in Project Discussion
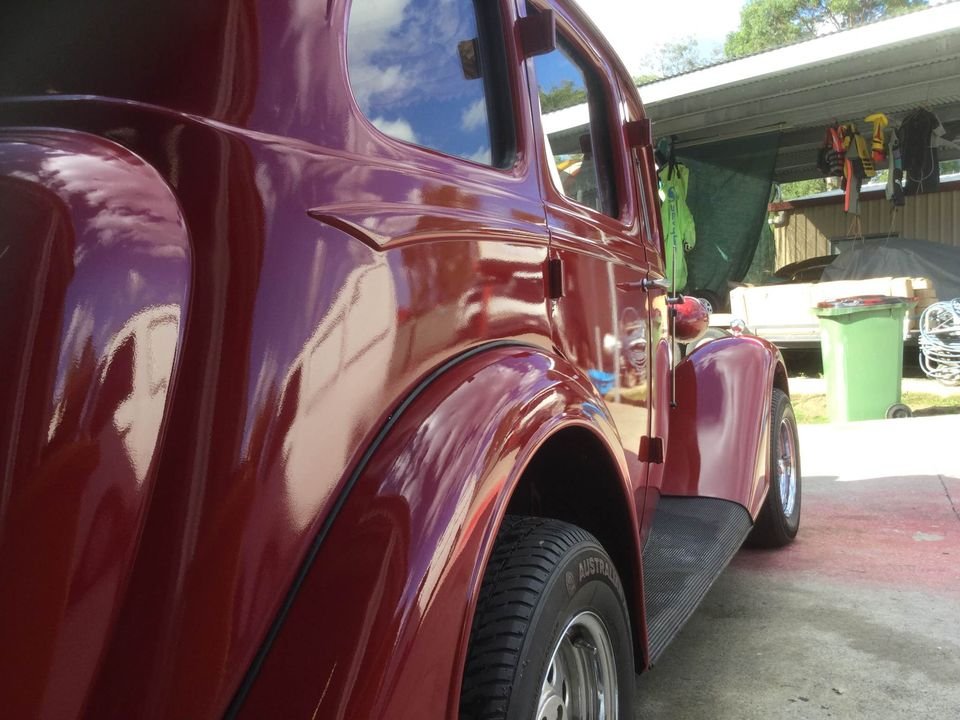
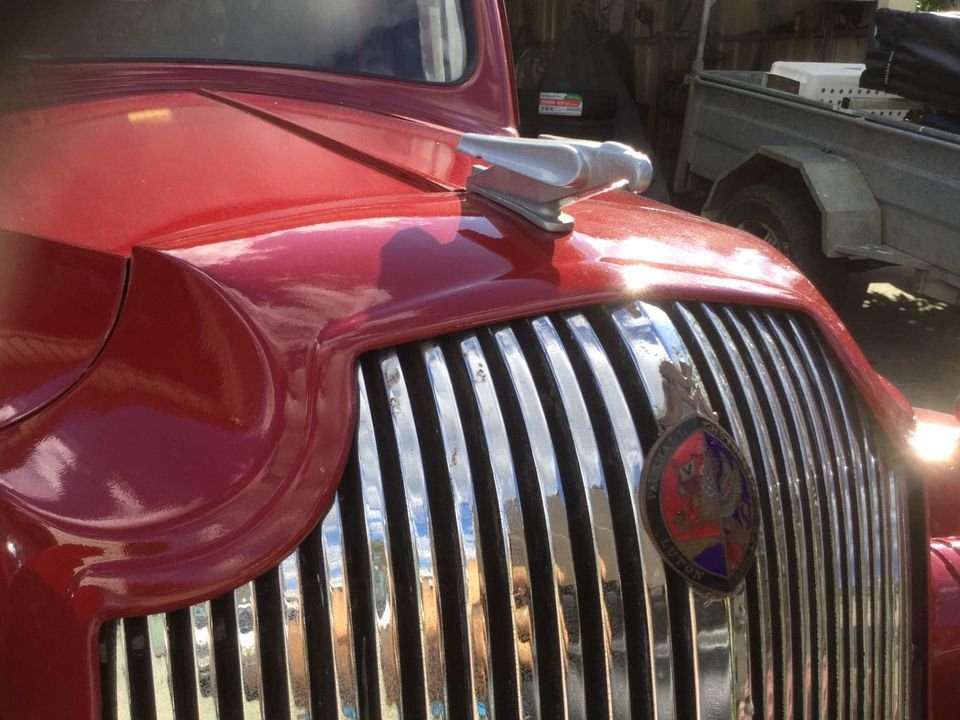
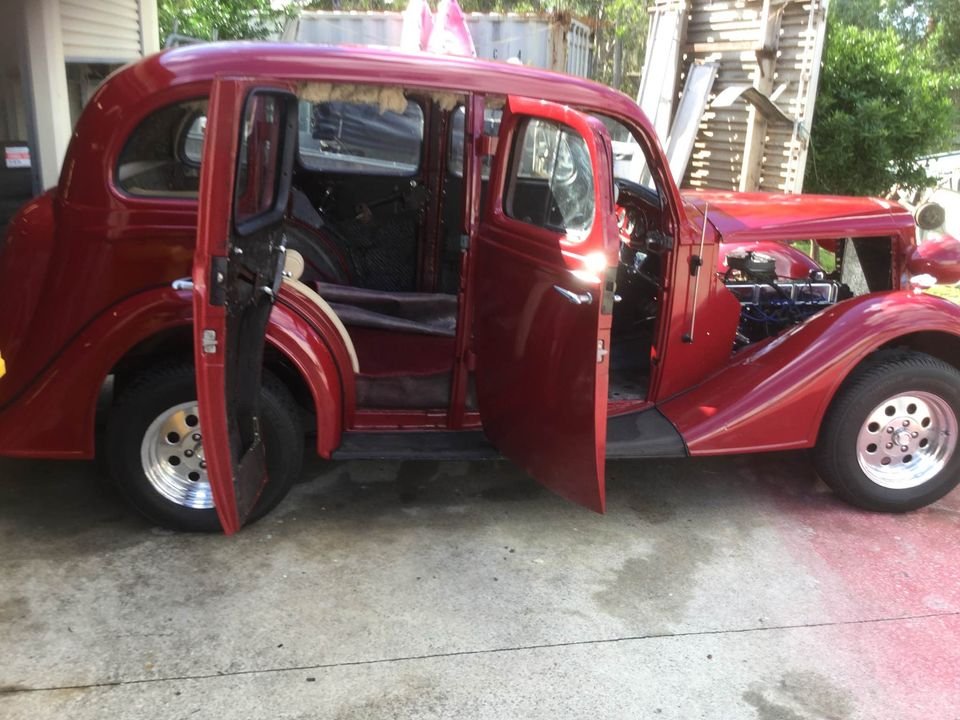
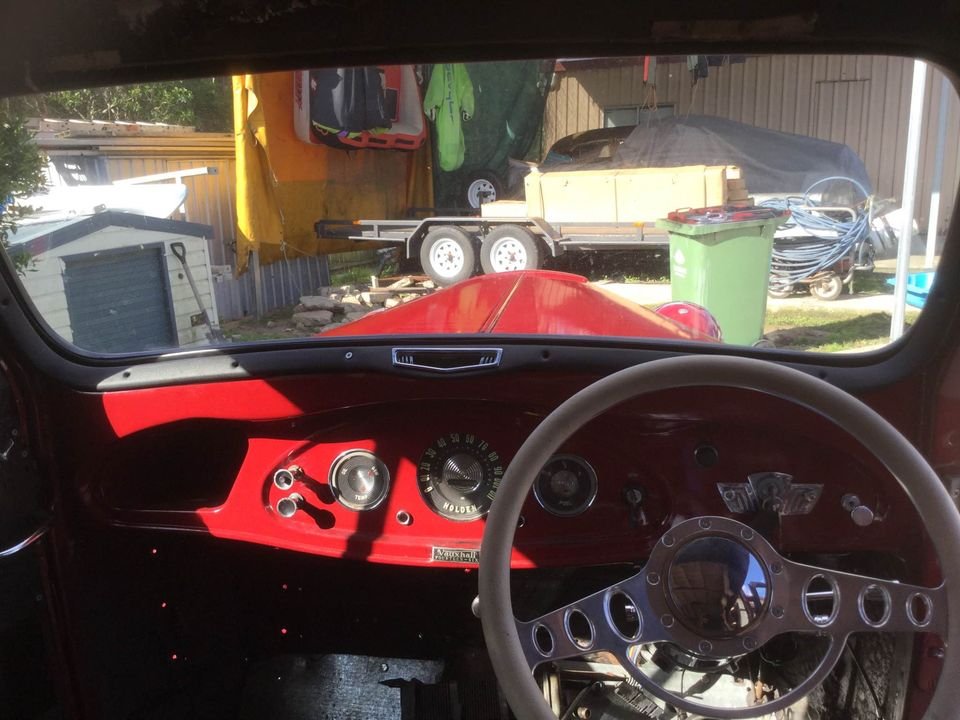
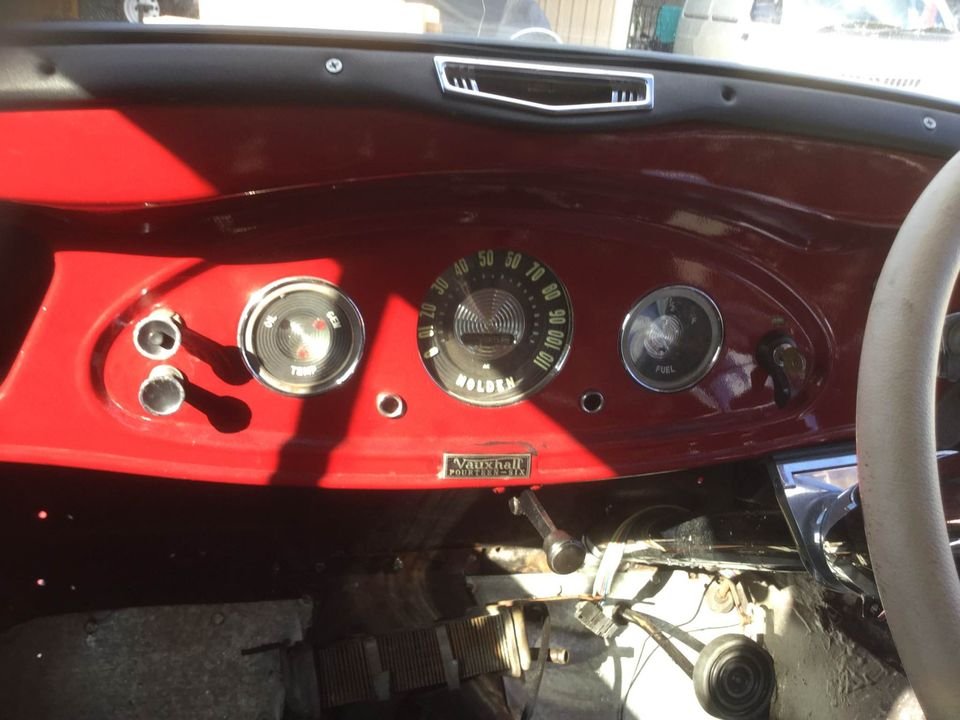
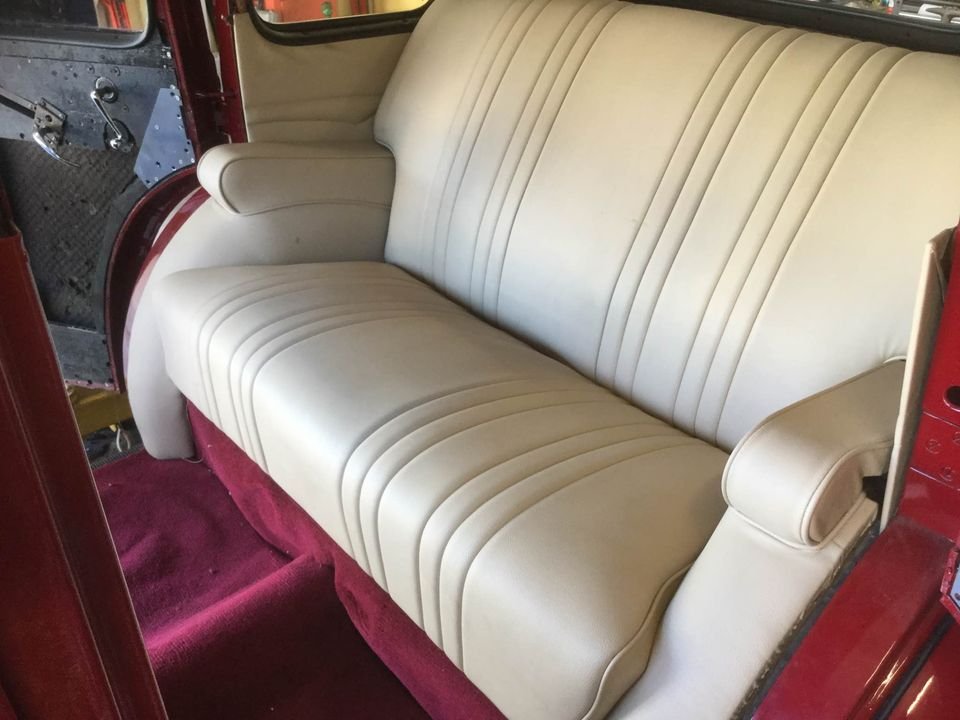
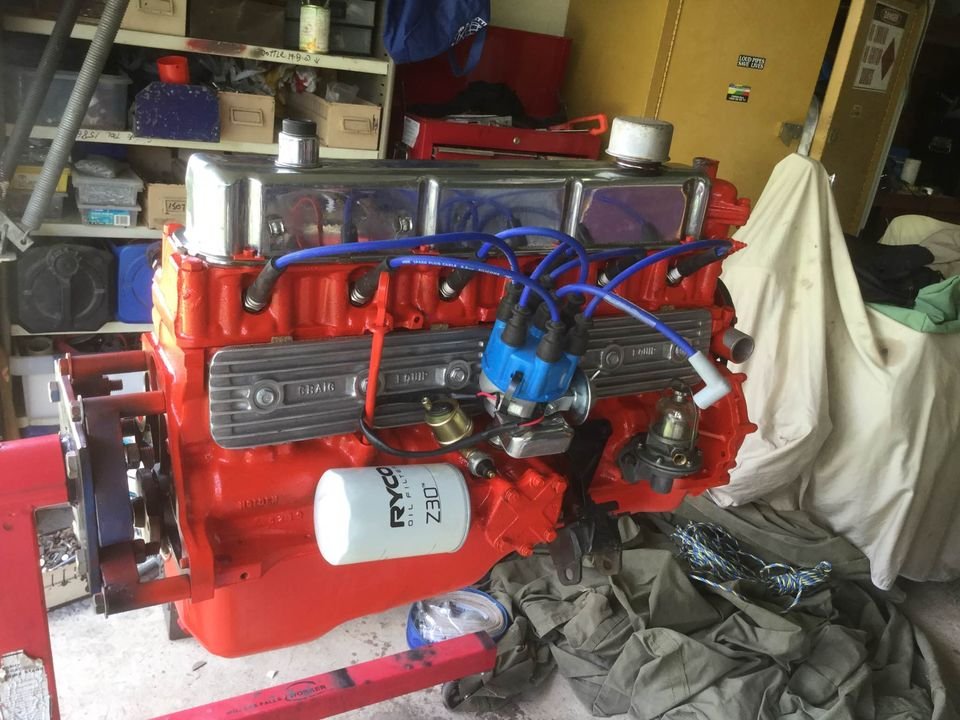
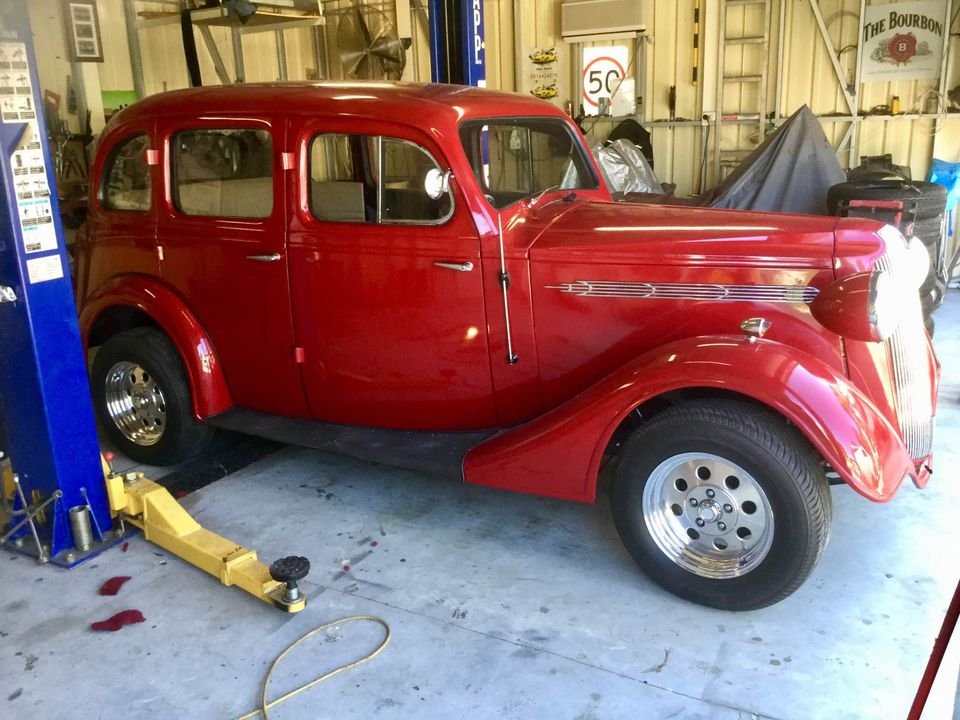
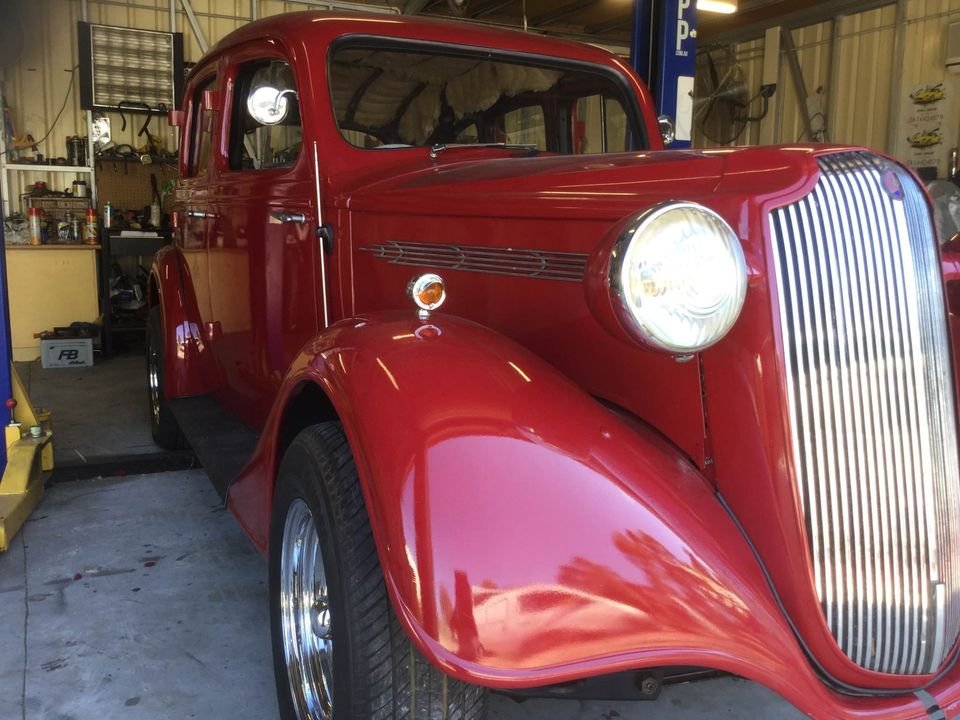
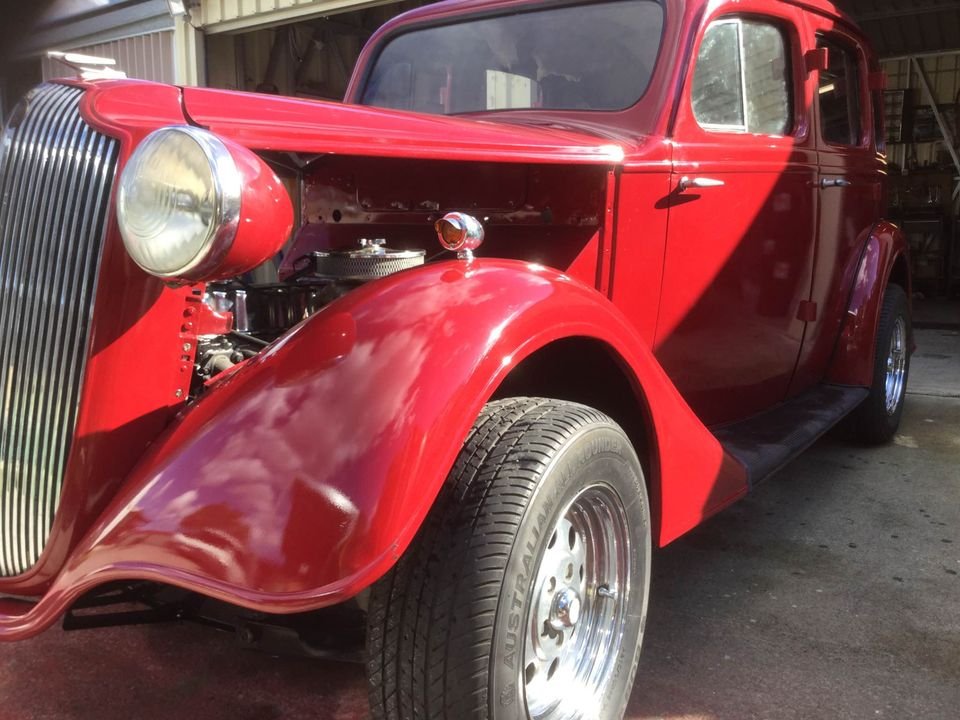
That's a bugger. Here is the info from the post: Up for sale is my 1937 vauxhall hotrod have had this for 5 years to build but now just sits in shed as have no time to drive , paint was fully blasted of and was professionally painted in 2 pac hermatige red , has all hr holden running gear inc front end , brakes and diff ,interior was fully redone in cream leather to original specs , 15 inch dragway mags , it has a warmed up holden 179 HP red motor and tri magic gearbox with a 2300 rpm convertor motor and box were fully rebuilt with picks to prove , I have over 100 photos of build and is all blue tag plated for qld it is on full qld rego but will need a few things for rwc as wipers don’t work , carby may need reco as been sitting and idles rough .. Many hours of work went into this and very reluctant to sell but we are moving to the farm out west and is on a dirt road so can’t take it , plates IAMA37 can stay with sale but you will need to supply rwc or rego will be canceled .I no this isn’t everyone’s cup of tea but was built so anyone could drive it , it can be changed to a v8 if someone wants to so please no keyboard hero’s or you will be blocked in comments . Asking price is Aus $30K and I've added the rest of the photos that were with the listing.
-
SR2’s 1947 Vauxhall “Rigamortice” Discussion thread.
Flash replied to sr2's topic in Project Discussion
Sorry for the delayed reply. Here you go: https://www.facebook.com/marketplace/106043989427445/ -
SR2’s 1947 Vauxhall “Rigamortice” Discussion thread.
Flash replied to sr2's topic in Project Discussion
Hiya Simon. This Vauxhall has just popped up on FB Marketplace across here in Straya. Made me think of you and old Rigamortice.
-
Mate, like others have said I'm gutted for you. From your previous postings I can tell that Lucas has a special place in your heart and each of your updates made me think of someone who has adopted a rescue dog and is showering it with as much TLC and love as possible. All of us have shared your highs and lows along your journey with Lucas and whilst I can relate to your current thoughts of cutting your loses and running, I'm really hoping that you will let things cool down for a few days and then reassess your options. I fear that further down the track you will come to regret letting him go. All the best mate.
-
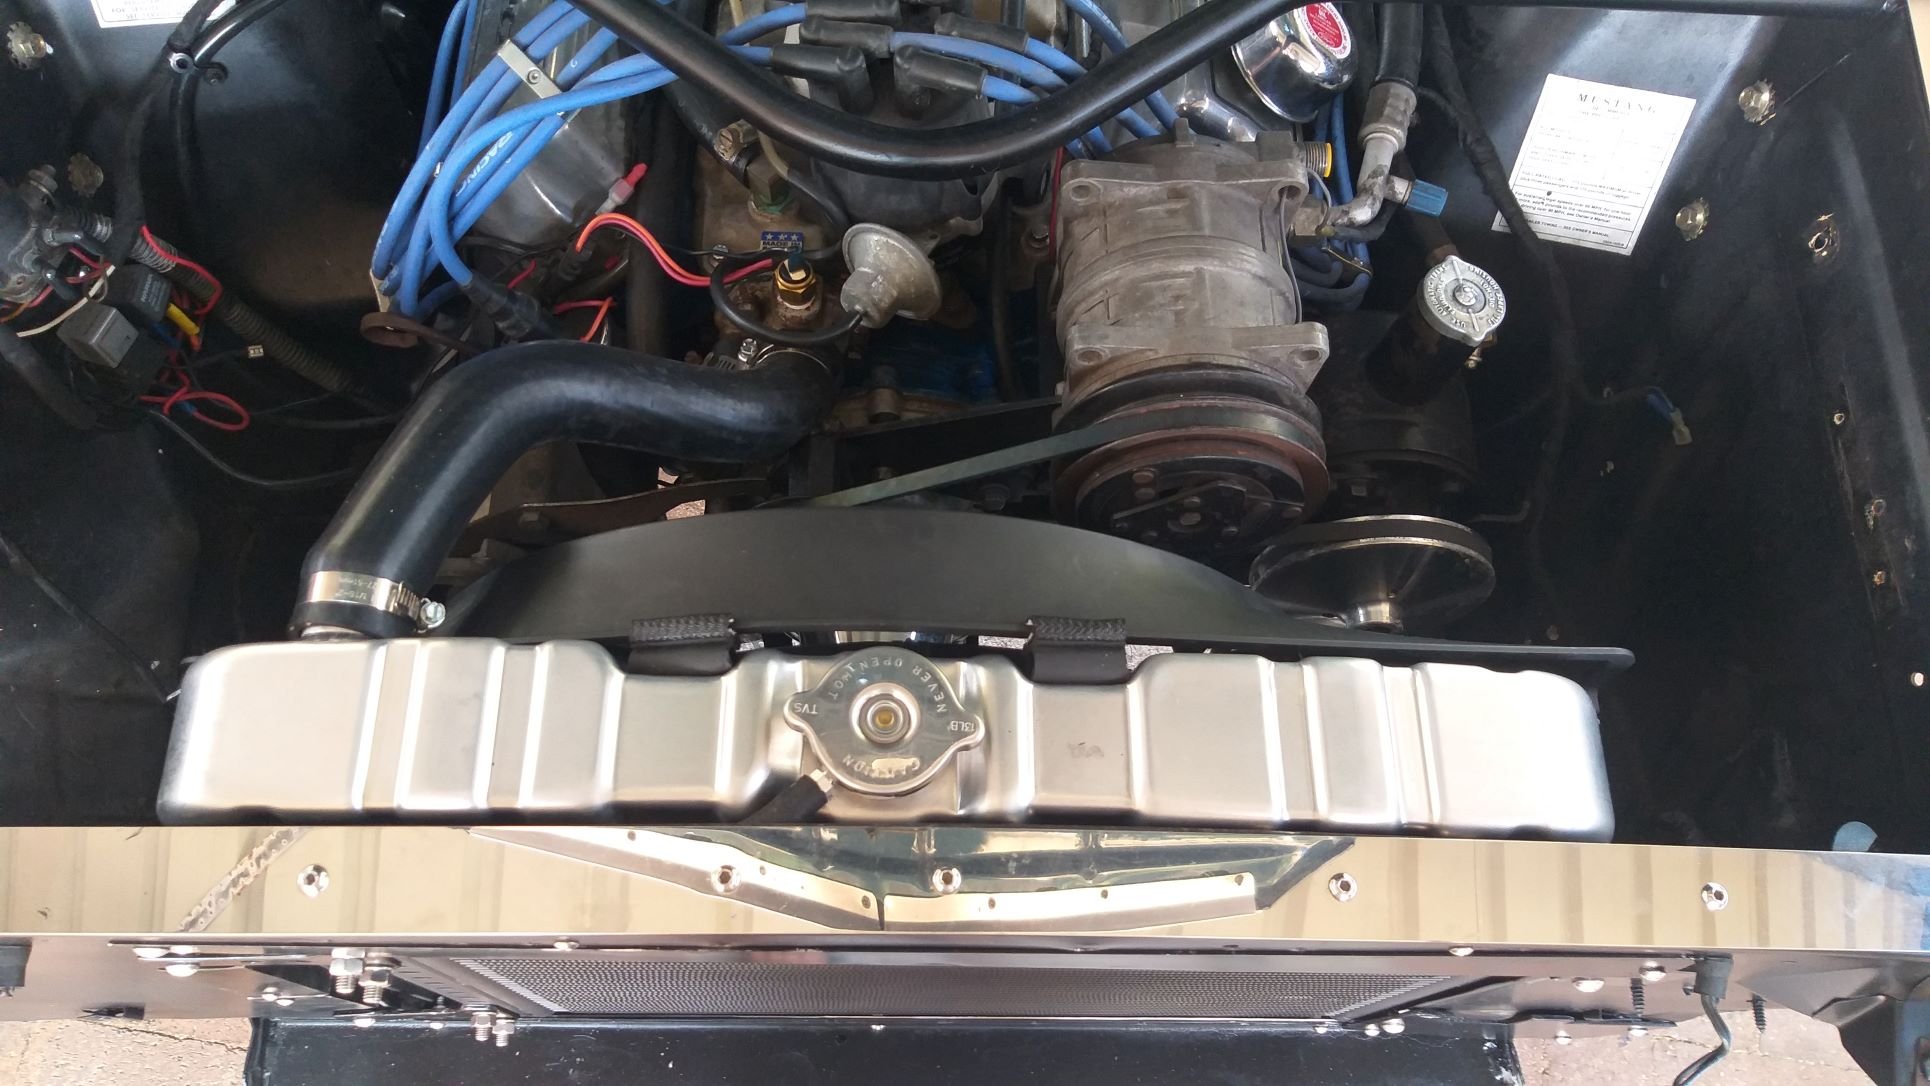
Spent a few hours yesterday putting the Mustang's face back on, then headed out for some spirited driving this morning. Got to say that I'm really chuffed with the results. Previous temp on the thermostat housing with smaller radiator and a/c condenser was 209 F. Highest I could get today was 178 F. And that is with a 180 F thermostat fitted. Top rad hose was previously 184 F compared to 169 F now. Bottom rad hose was previously 163 F compared to 147 F now. Celebrated with a blue berry muffin for morning smoko, then cracked into installing the rest of the a/c components. Original hoses are back in with new o rings. Bottom hose is now slightly long for the job, but I managed to tuck the excess under the front lip, so that was good. I've also chucked in a new drier bottle and pressure switch for good measure. The a/c hasn't operated since 2014, so it will be interesting to find out if there are any issues with the rest of the components. I won't know until Steve the mobile a/c guy pays me a visit sometime next week. Finished off the morning by giving the old girl a bit of a bath. Thanks for reading.
- 194 replies
-
- 15
-
-
I've been in a bit of a holding pattern on the Mustang front. Needed to wait for my next town run to buy some rubber seals and angled aluminium in order to fabricate the radiator surrounds. Wanted to seal the edges up as much as possible to force the air through the a/c condenser and radiator. Still need to seal around the edge of the rad shroud, but I ran out of rubber, so I'll grab some more on my next town trip. With that all done, this morning was the first start up to check for leaks. The good news is no coolant leaks. The bad news is that I had a leak from one of the tranny cooler lines right on the joint where the threaded pipe end enters the cooler. Should have checked it before I pulled the car out of the garage as that would have saved me from having to clean up the floor. It's amazing how much pissed out in such a short run. Oh, well, that's just how it goes sometimes. Quick fix with a bit of plumber's tape and she is good as wood. Time to put the front back together again so I can do some road testing.
- 194 replies
-
- 16
-
-
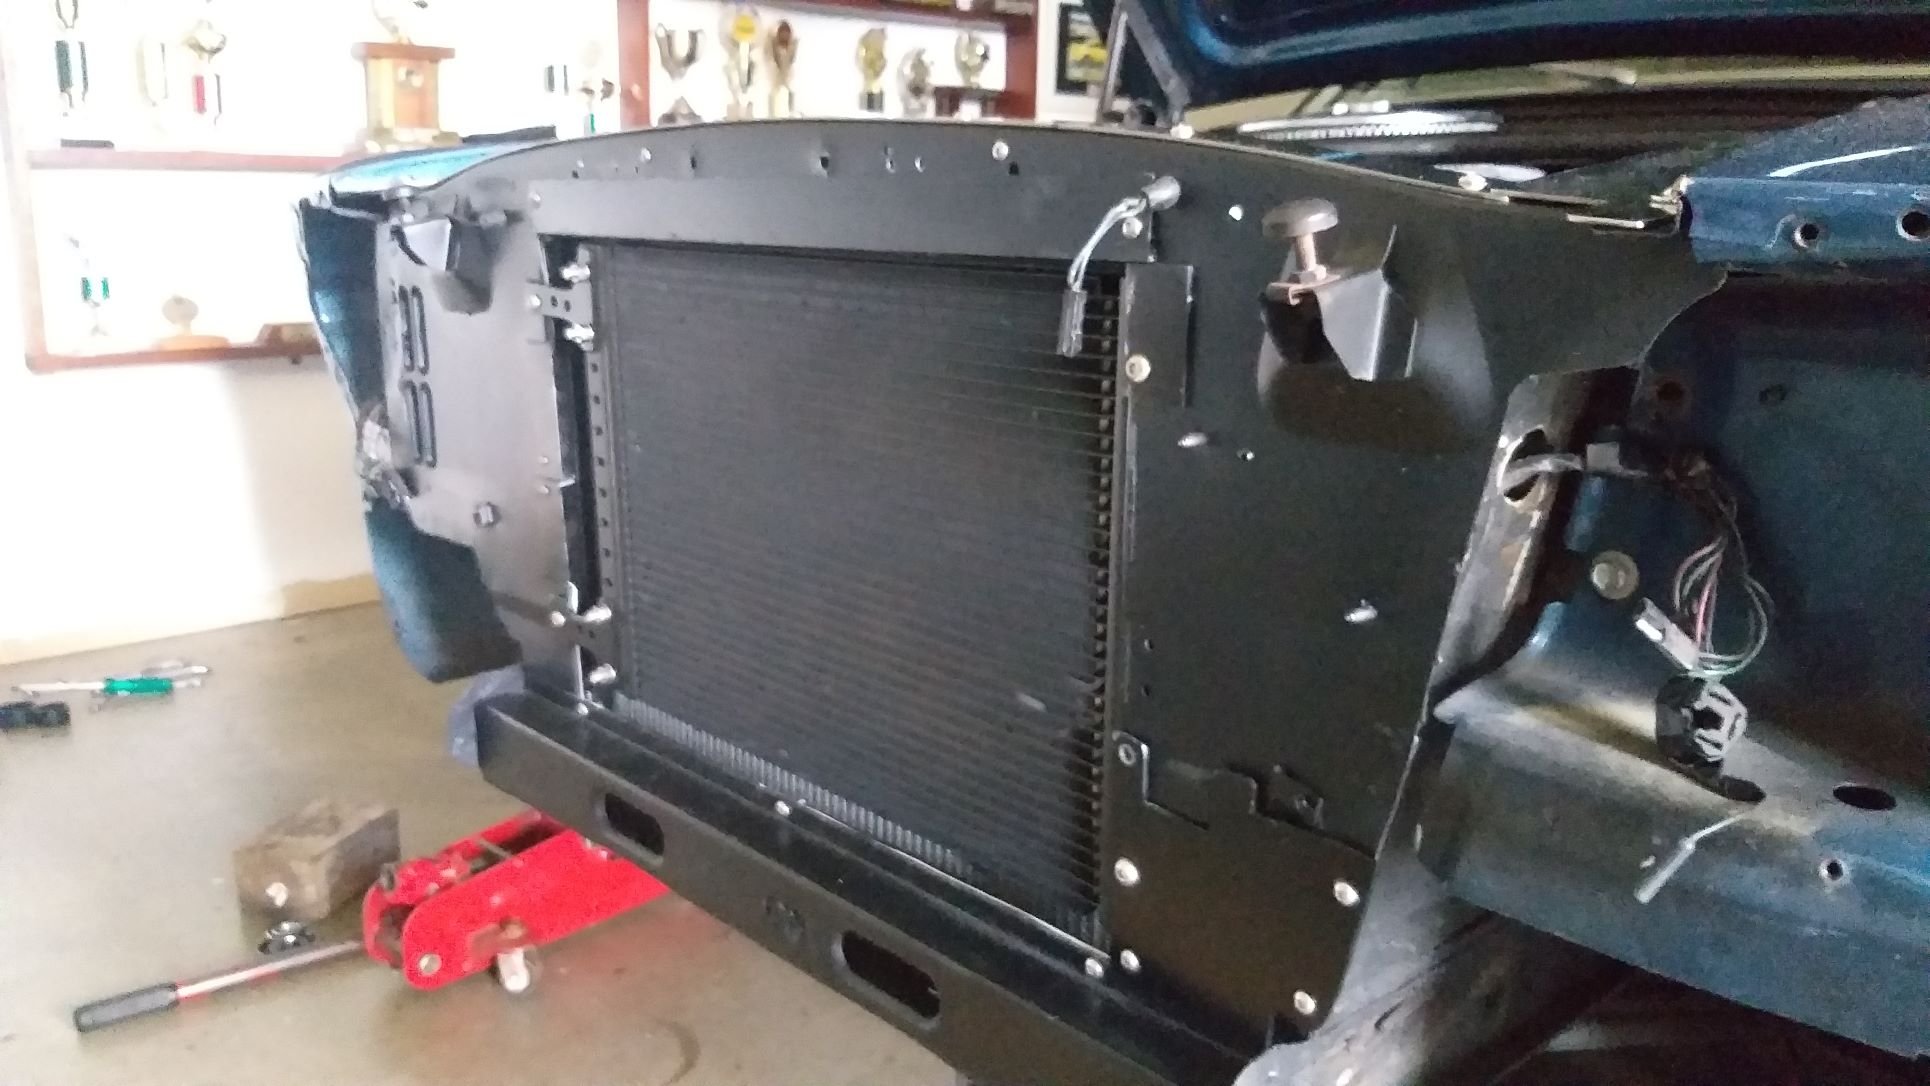
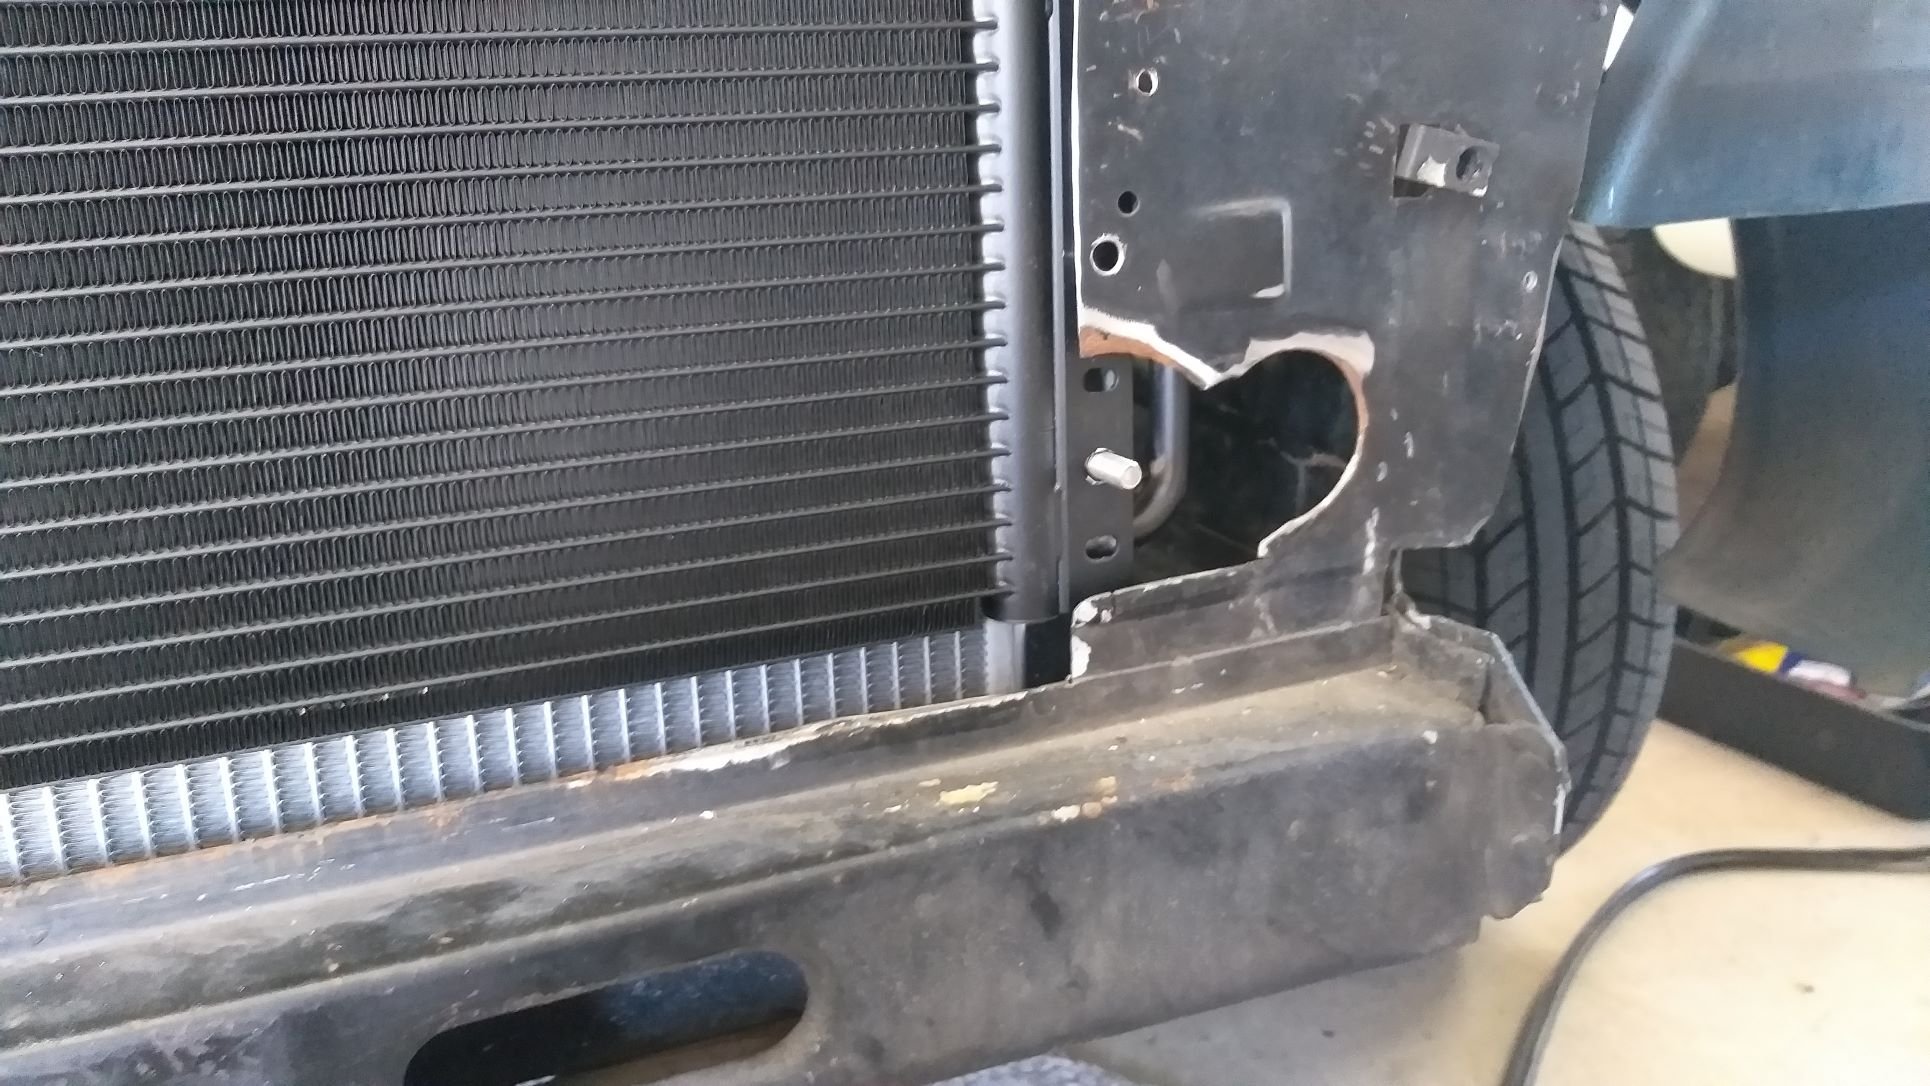
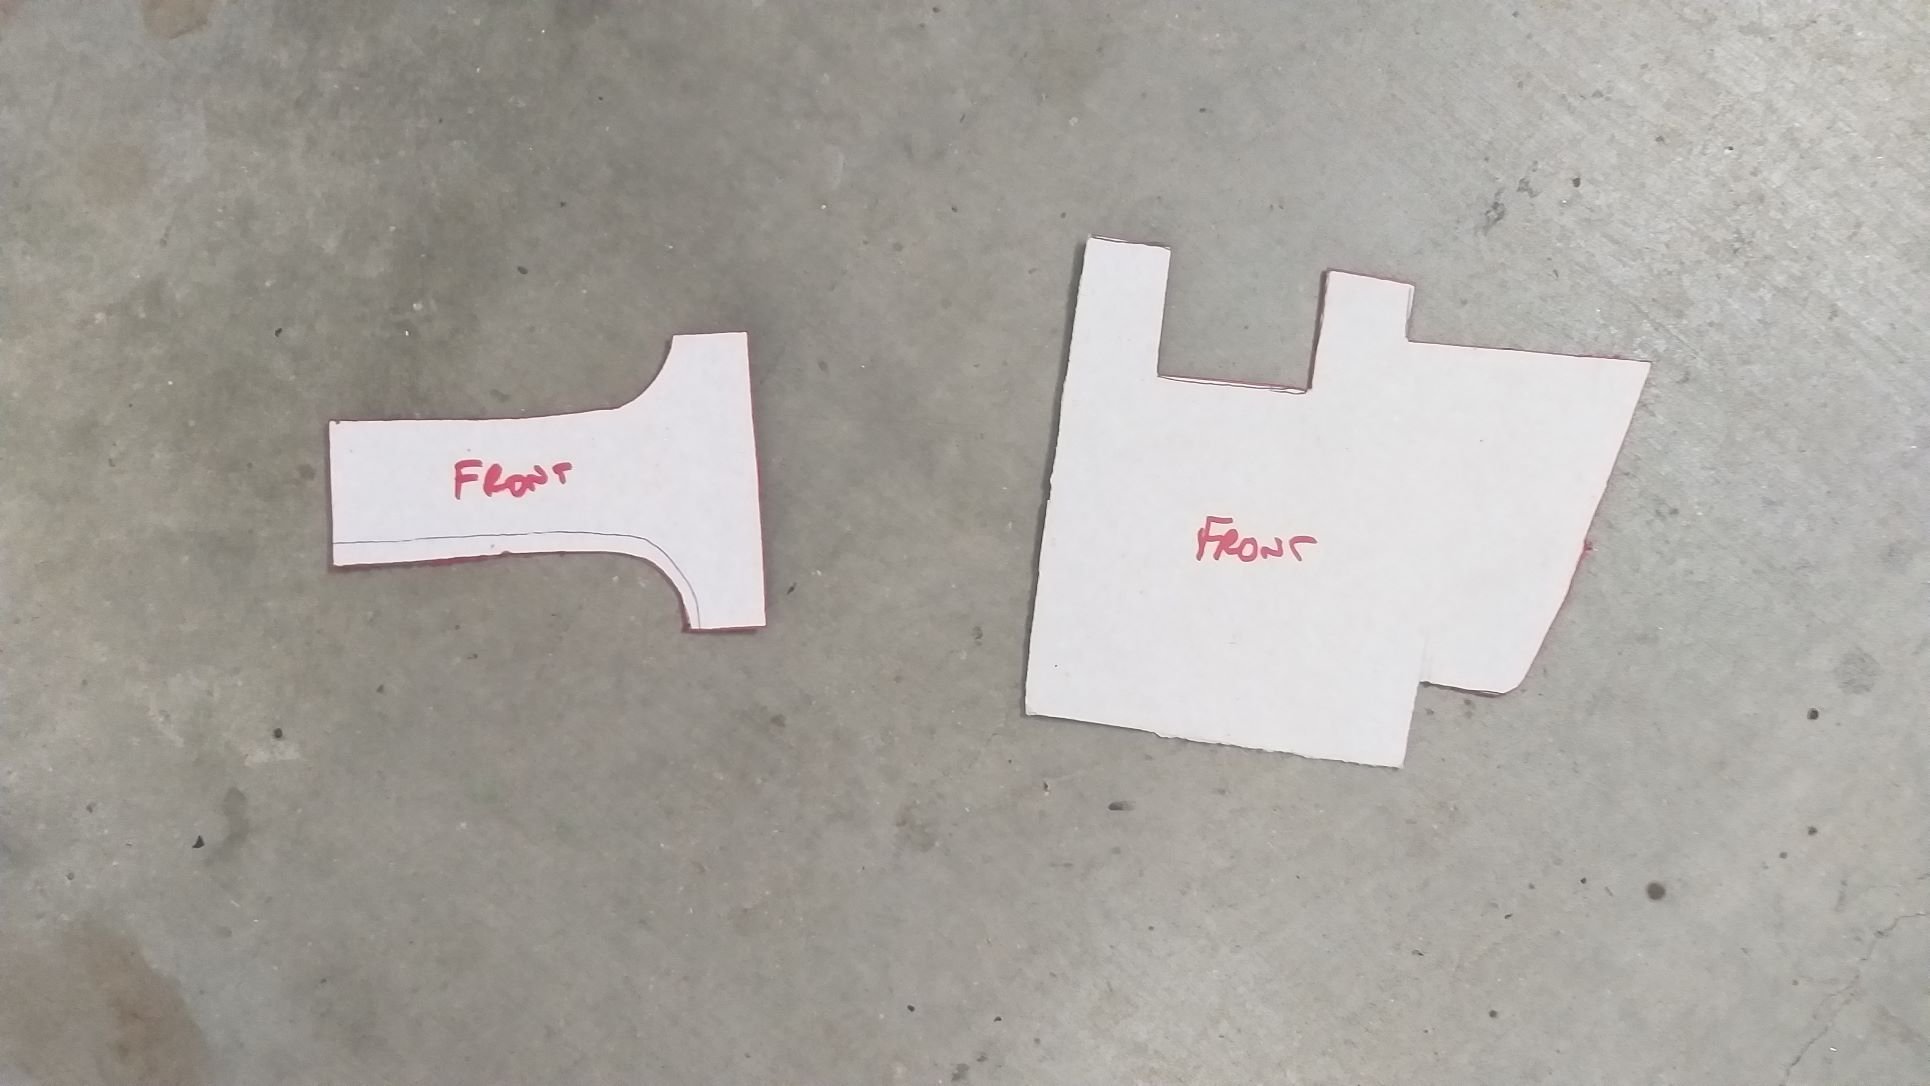
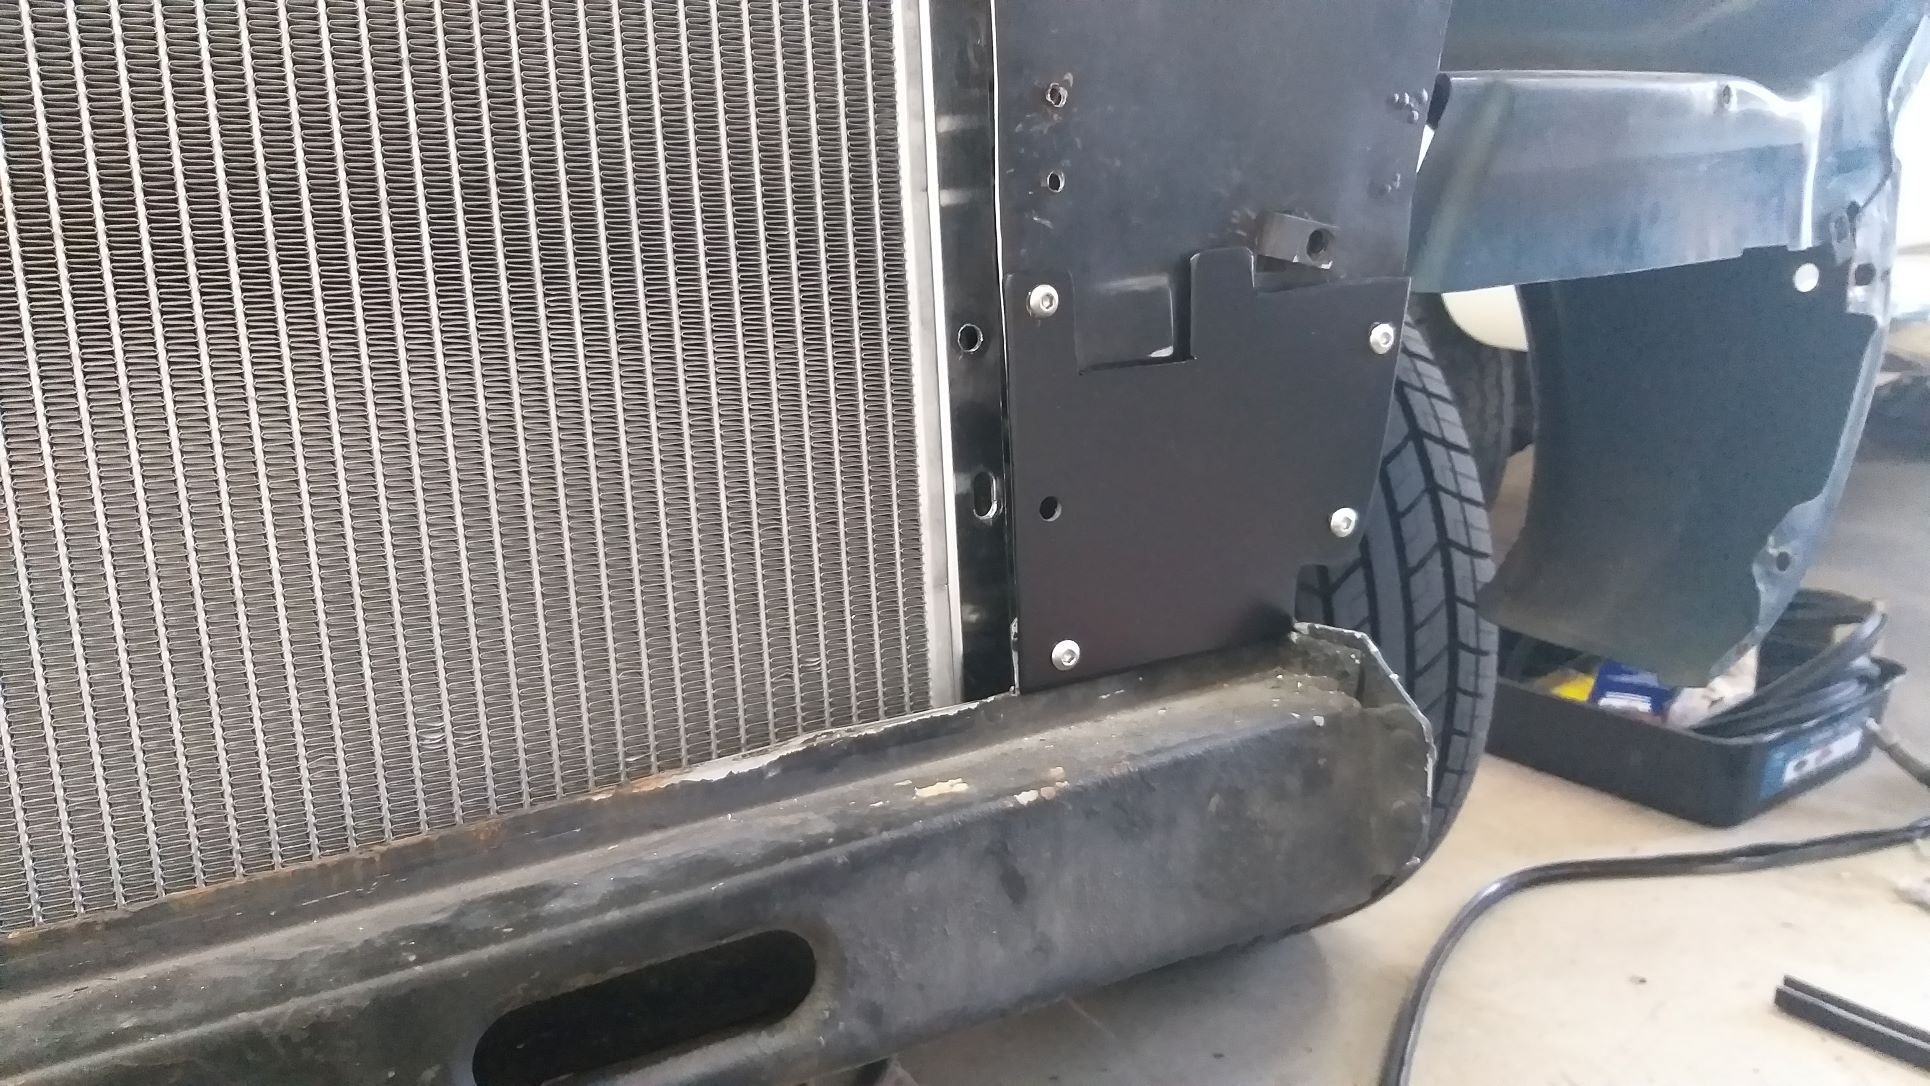
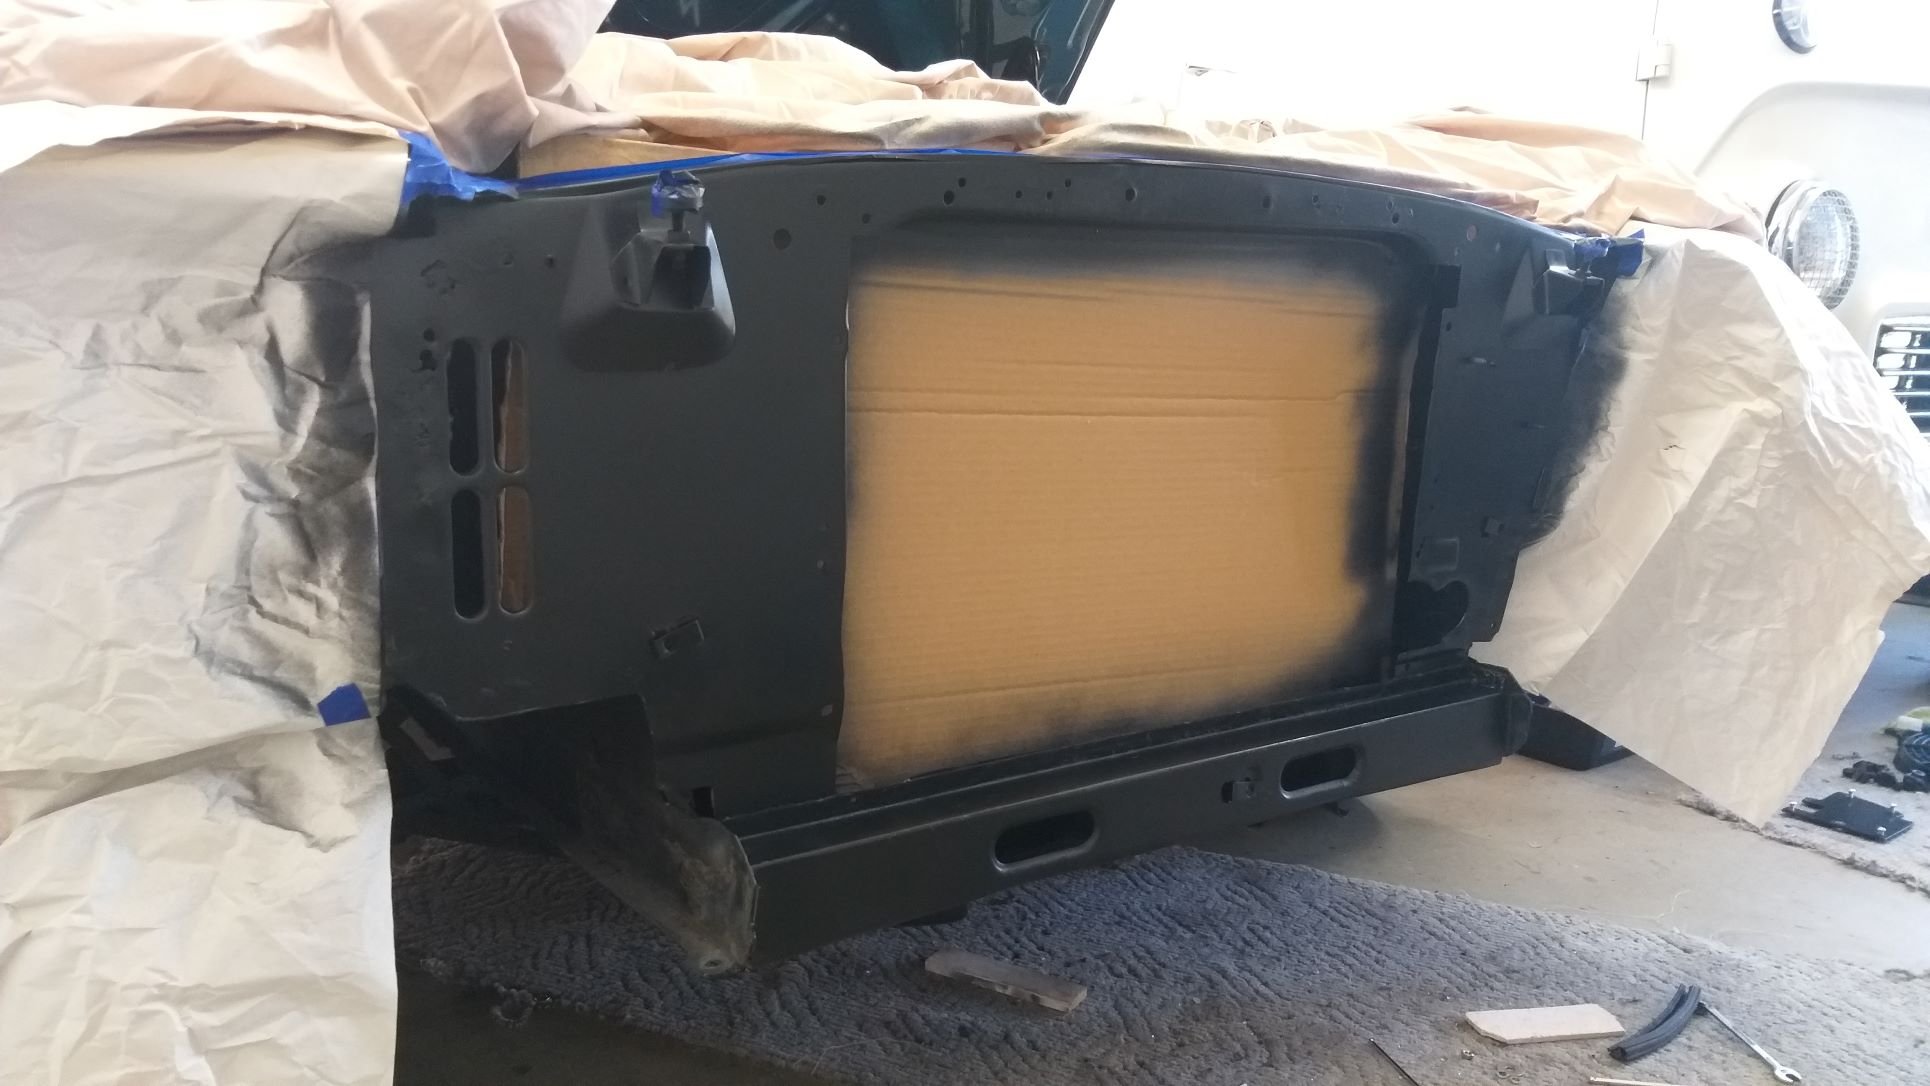
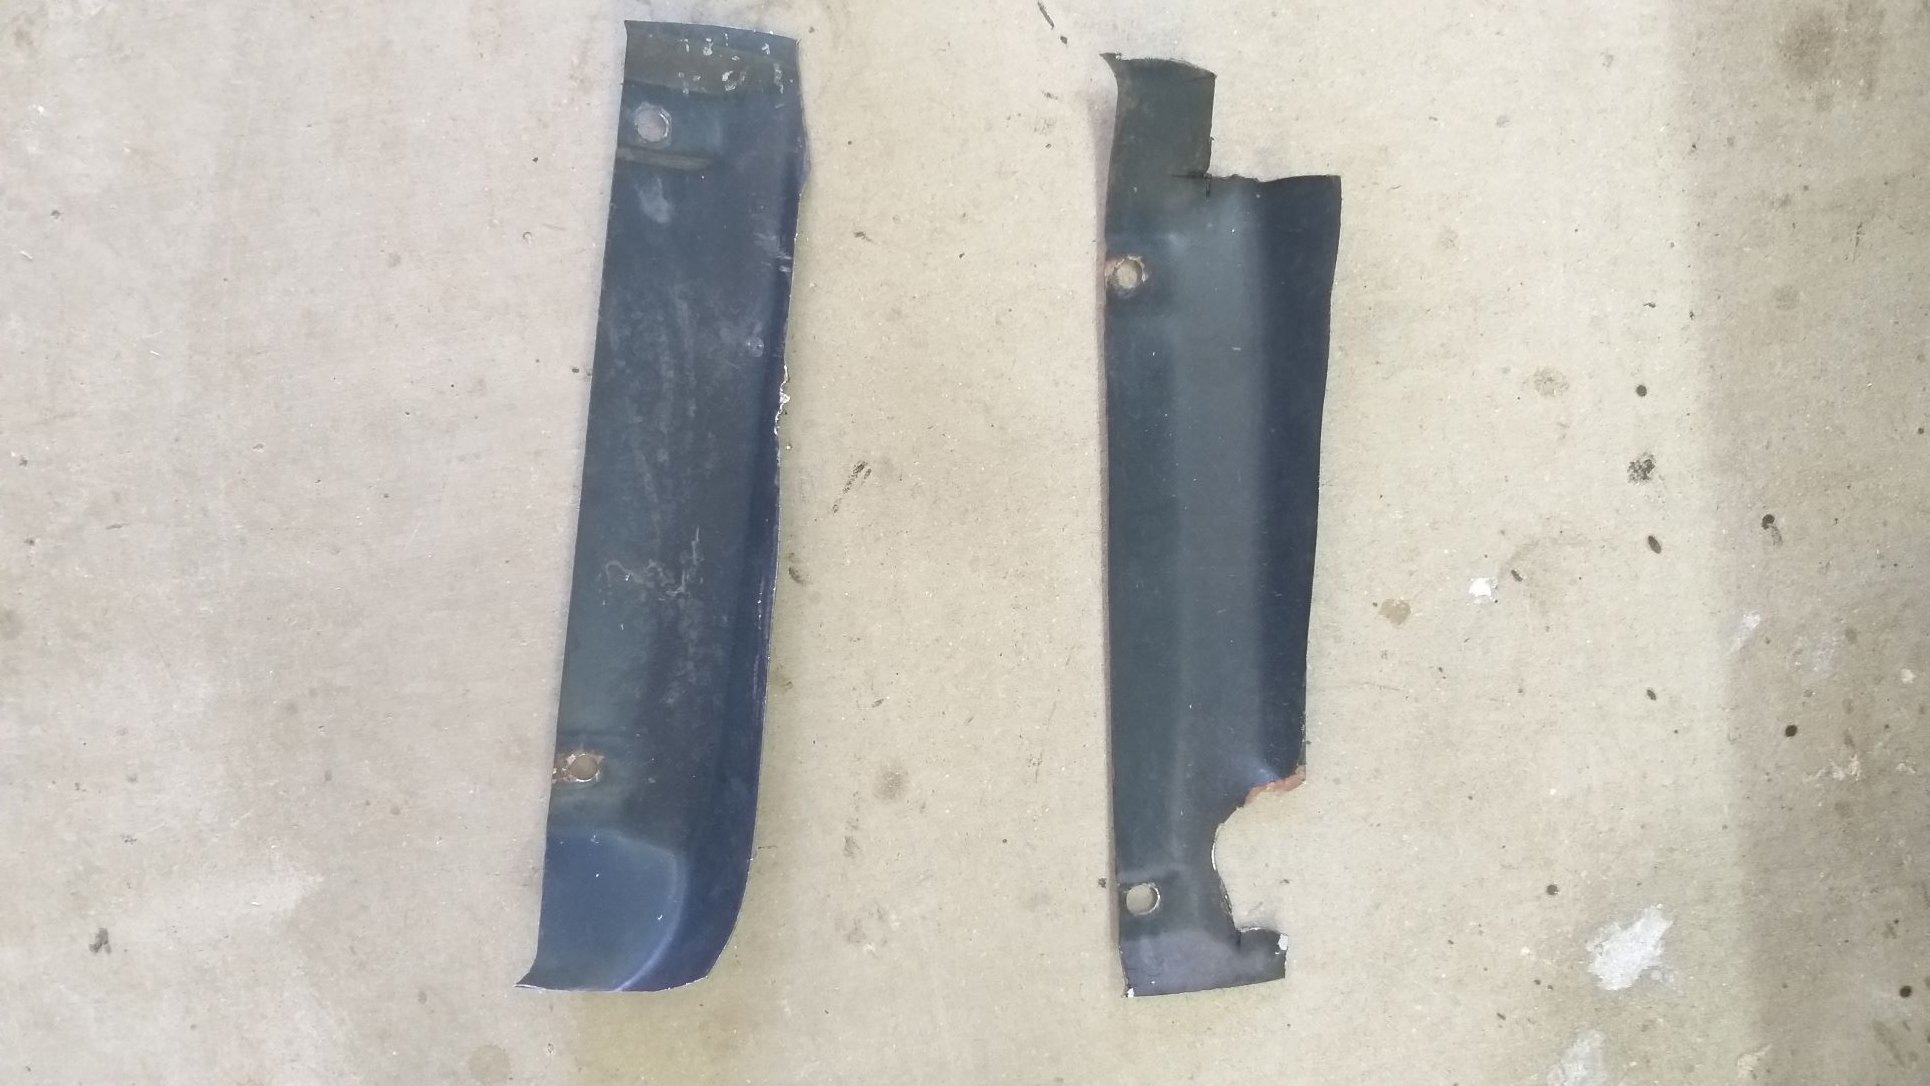
I'm still plugging away at the new radiator and a/c condenser install. I ended up sourcing a 23" x 14" condenser. It's a bit shorter than the new radiator, but the next available size was 25" x 14" which would have been way too big for my current opening. I've mounted the condenser as far left as possible for two reasons. First up it was easier to run the a/c lines this way as I didn't want them rubbing on the new radiator core. Secondly, I figured with the radiator inlet and outlet both being on the right-hand side and the radiator therefore having a natural tendency to push a higher percentage of the coolant up this side of the radiator it made sense to have the unrestricted airflow on this side. I don't really know if this will help, but hey ... it is what it is. With the condenser test fitted I made some templates for the two additional mounting brackets required and I also carved a little filler panel to cover the old a/c hose holes. Figured I'd refresh the front panel whilst I have the grill and valance off, so that is looking a lot neater now. A few "in progress" photos:
- 194 replies
-
- 16
-
-
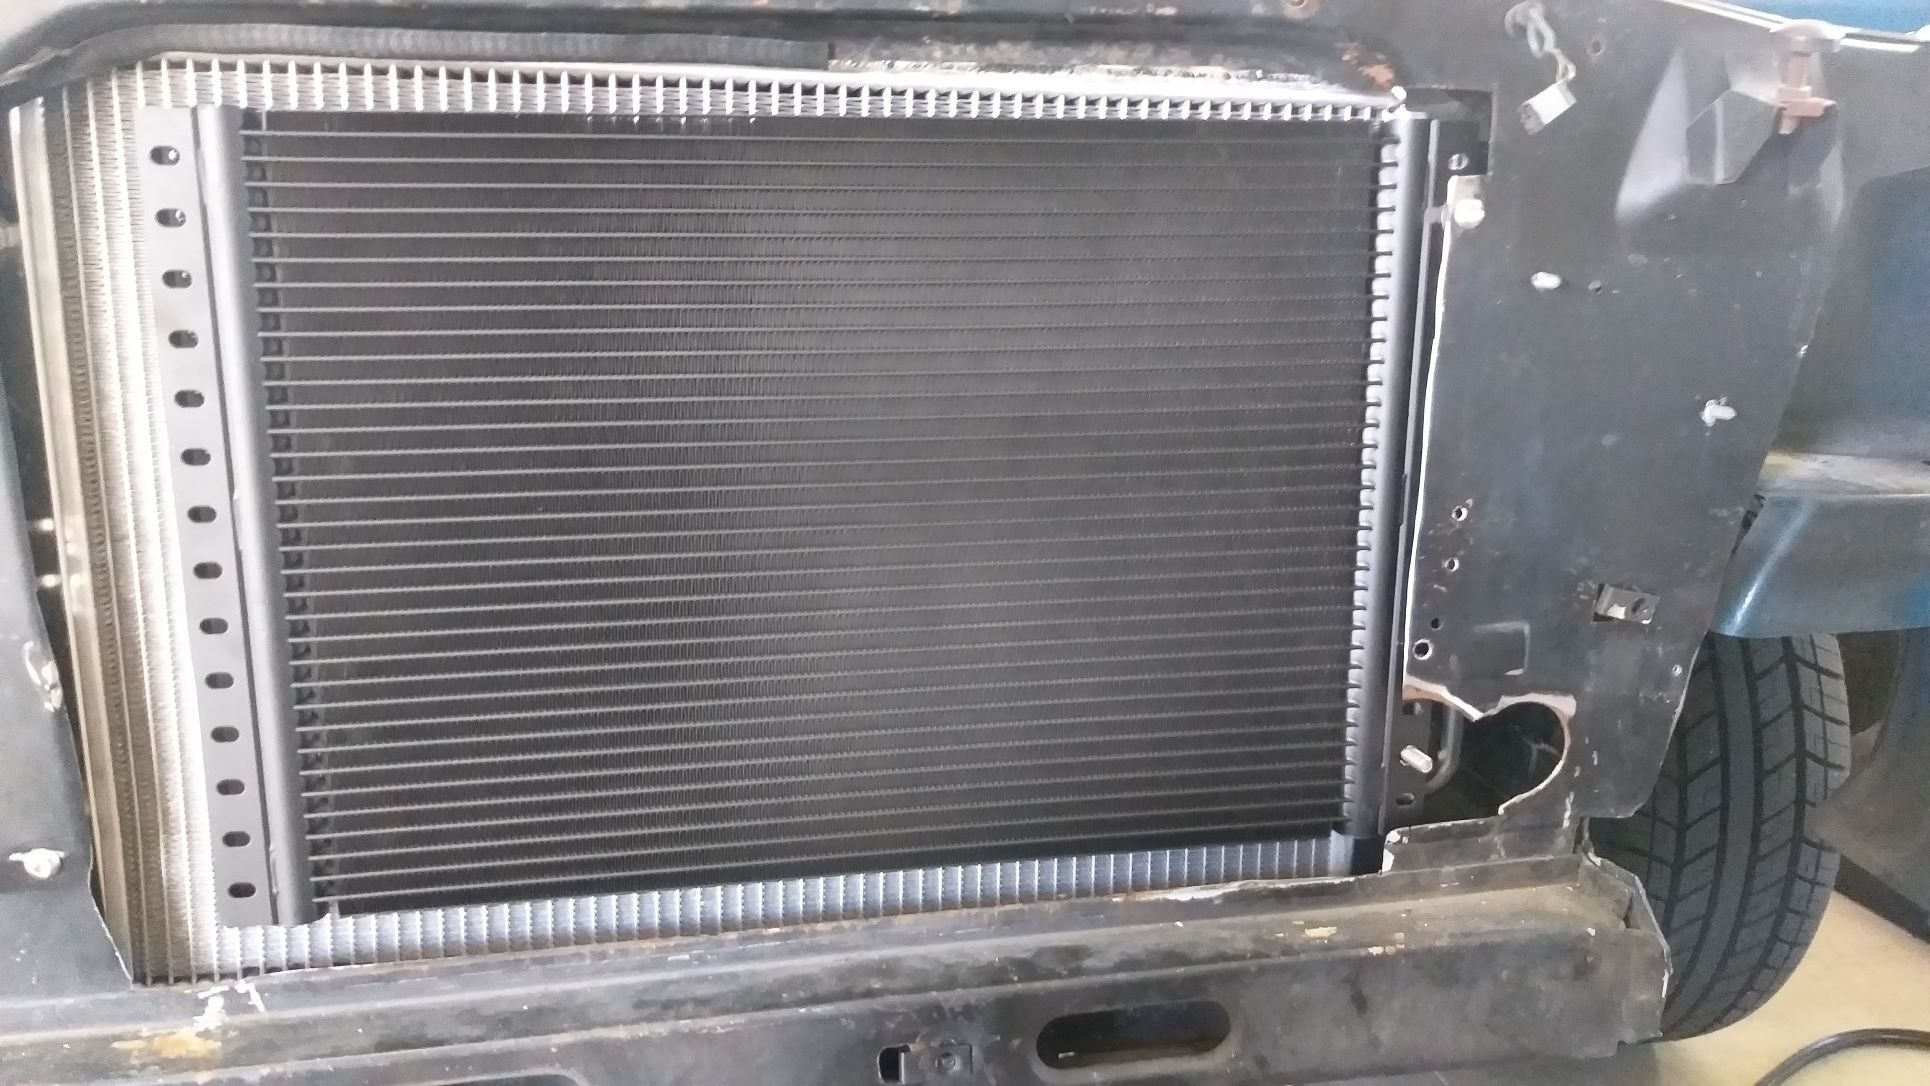
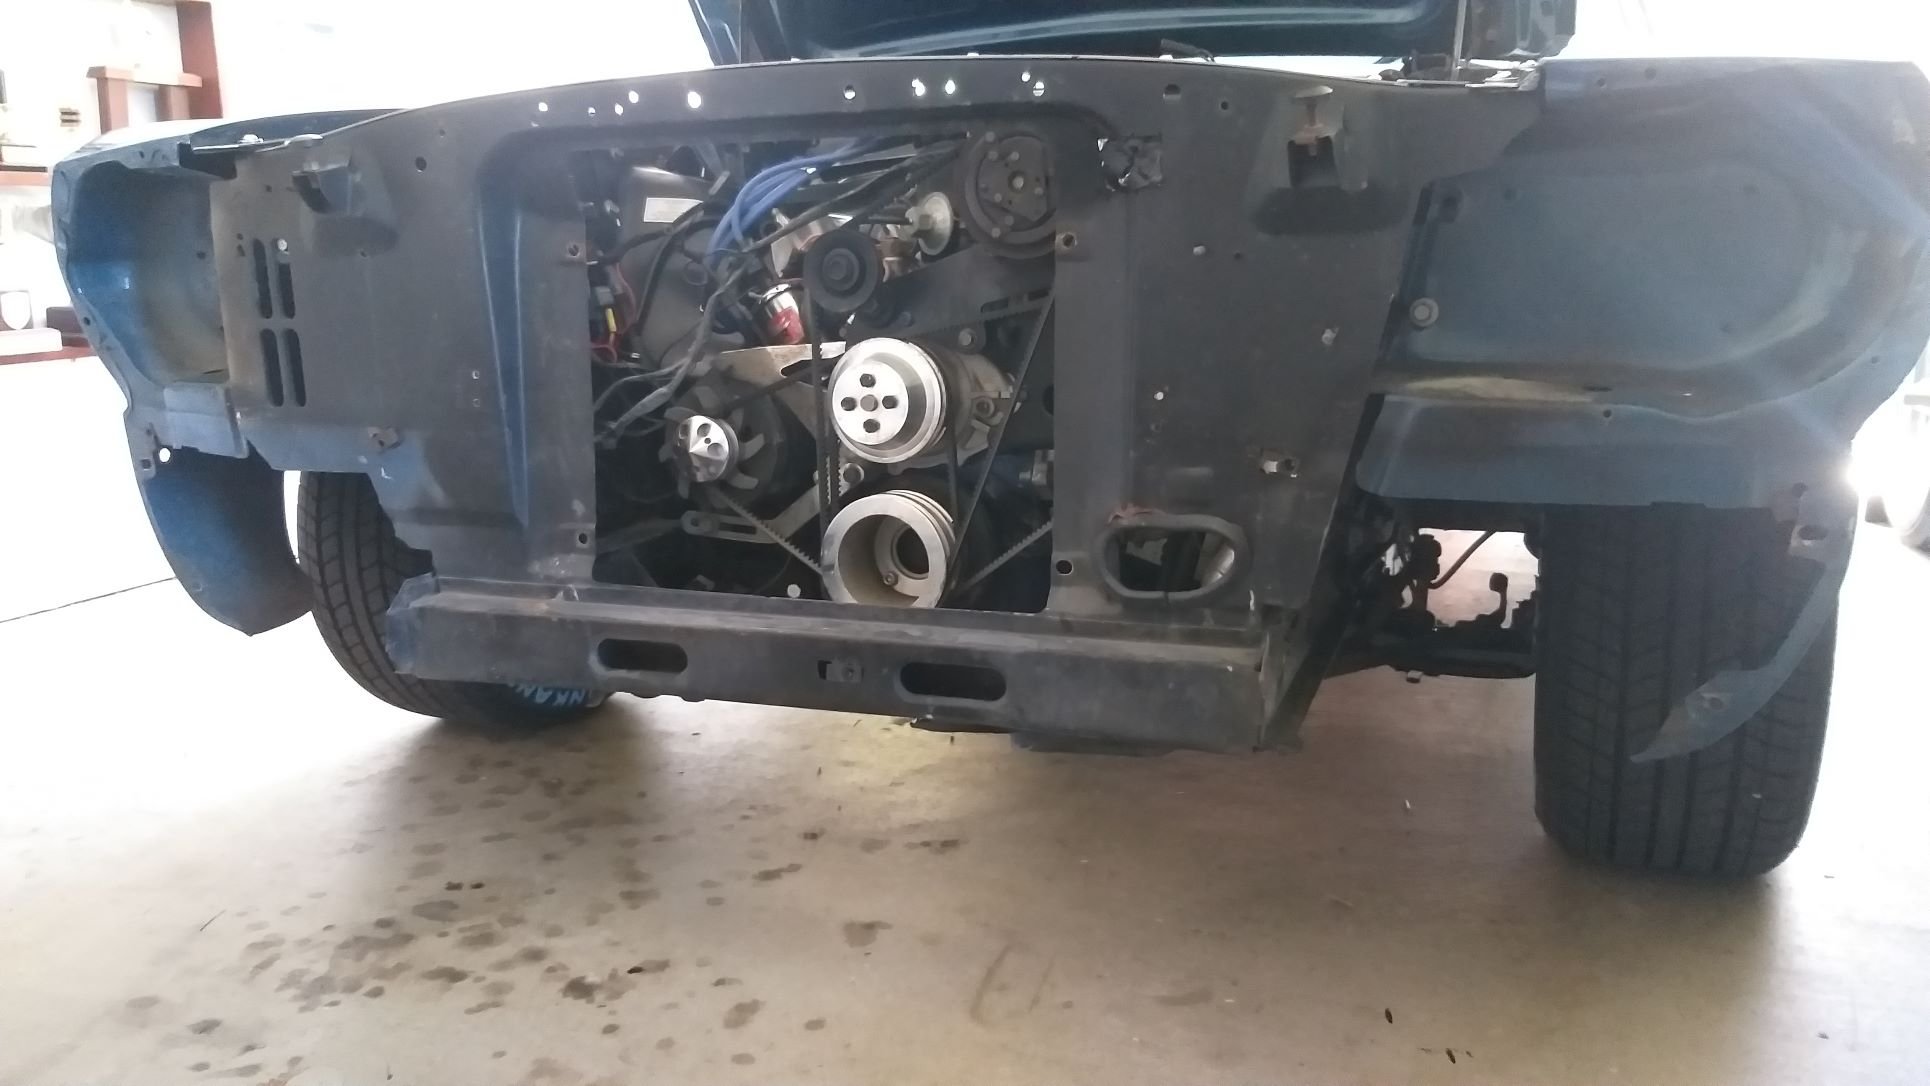
After checking that my new radiator hoses and the tranny cooler lines all line up, I spent the rest of the morning cutting out the sides of the radiator support panel to expose the full core of the new radiator. The bite sized chunks out of the right-hand panel are the cut outs for the original a/c lines. The new rad is temporarily bolted in position, but I can't finalise the mounts and filler panels until I've sorted out my new a/c condenser location and its mounts. Talking about a/c, just before lunch I swapped a few yarns with my local supplier who has suggested replacing the current 18 inch condenser with a 23 inch unit which will reduce the generated heat. With a bit of luck I can pick up the new unit tomorrow and then button everything up. Thanks for looking.
- 194 replies
-
- 13
-
-
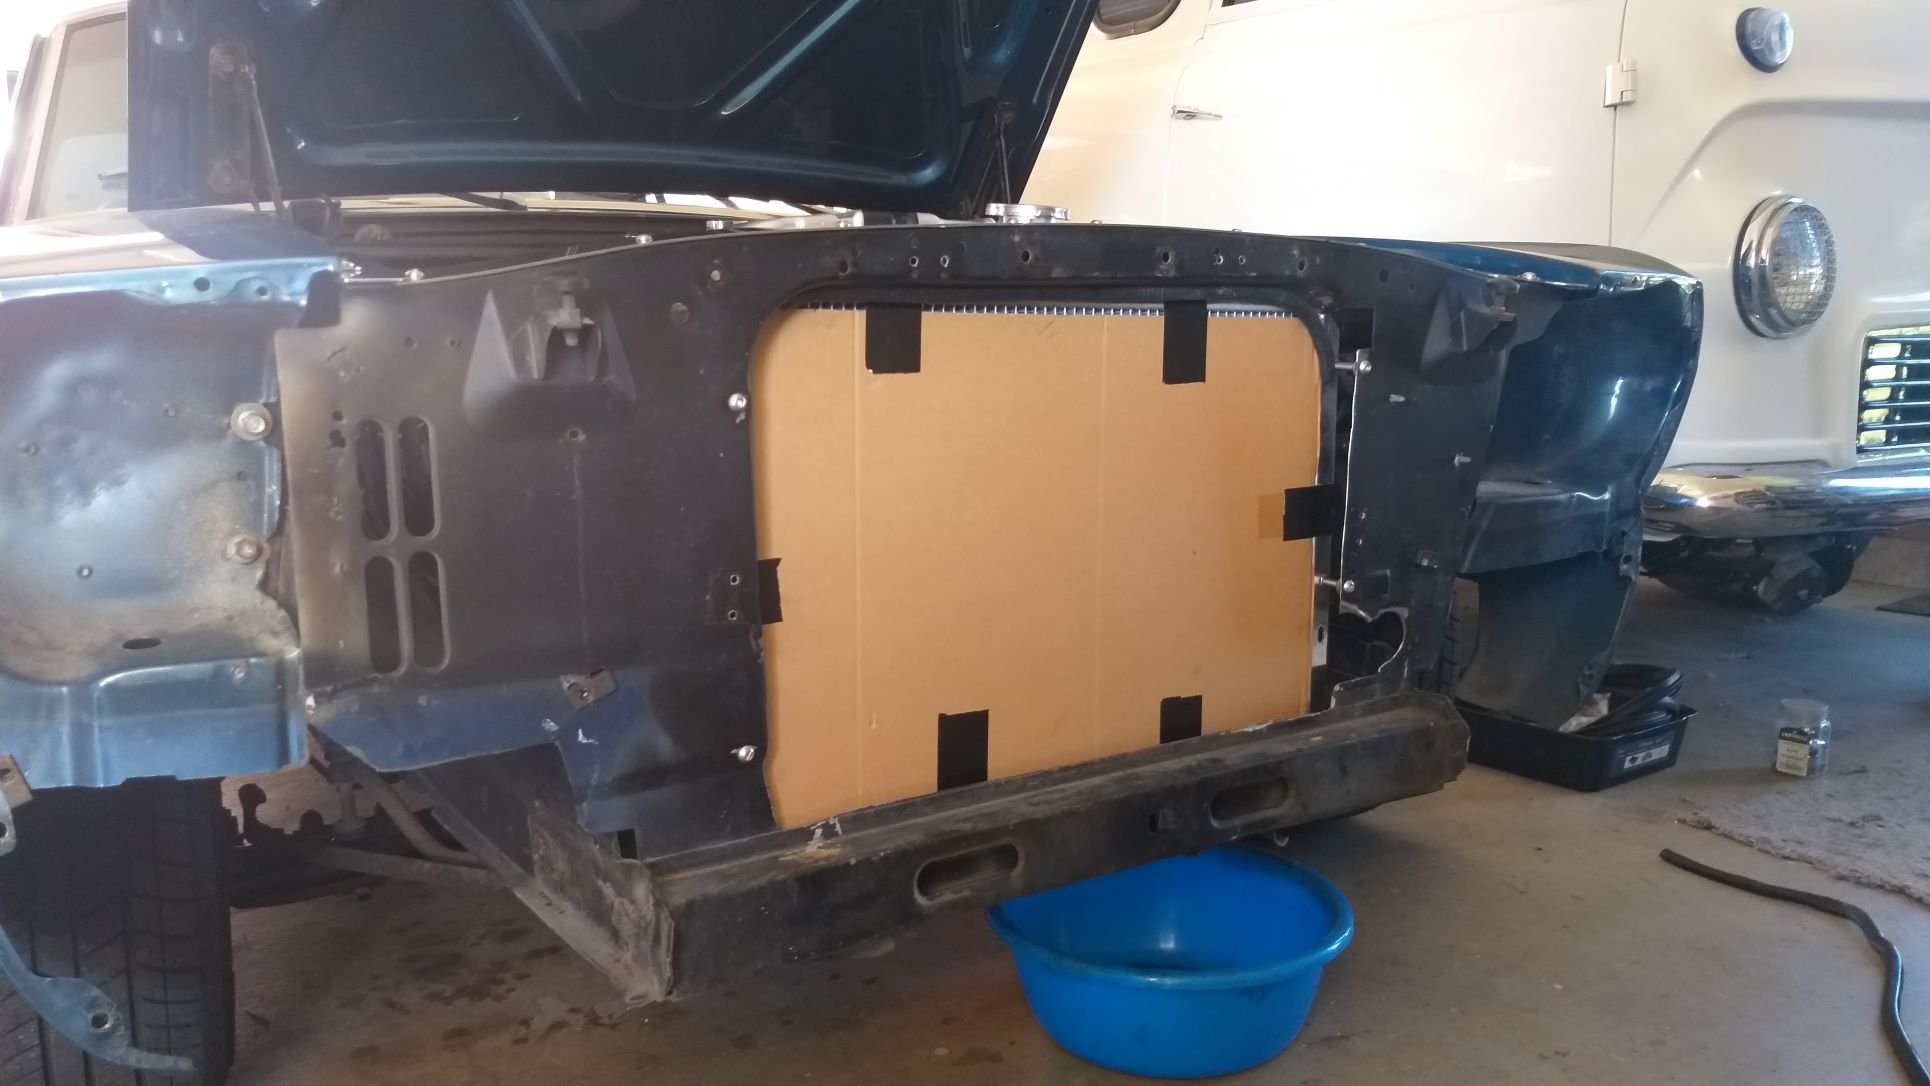
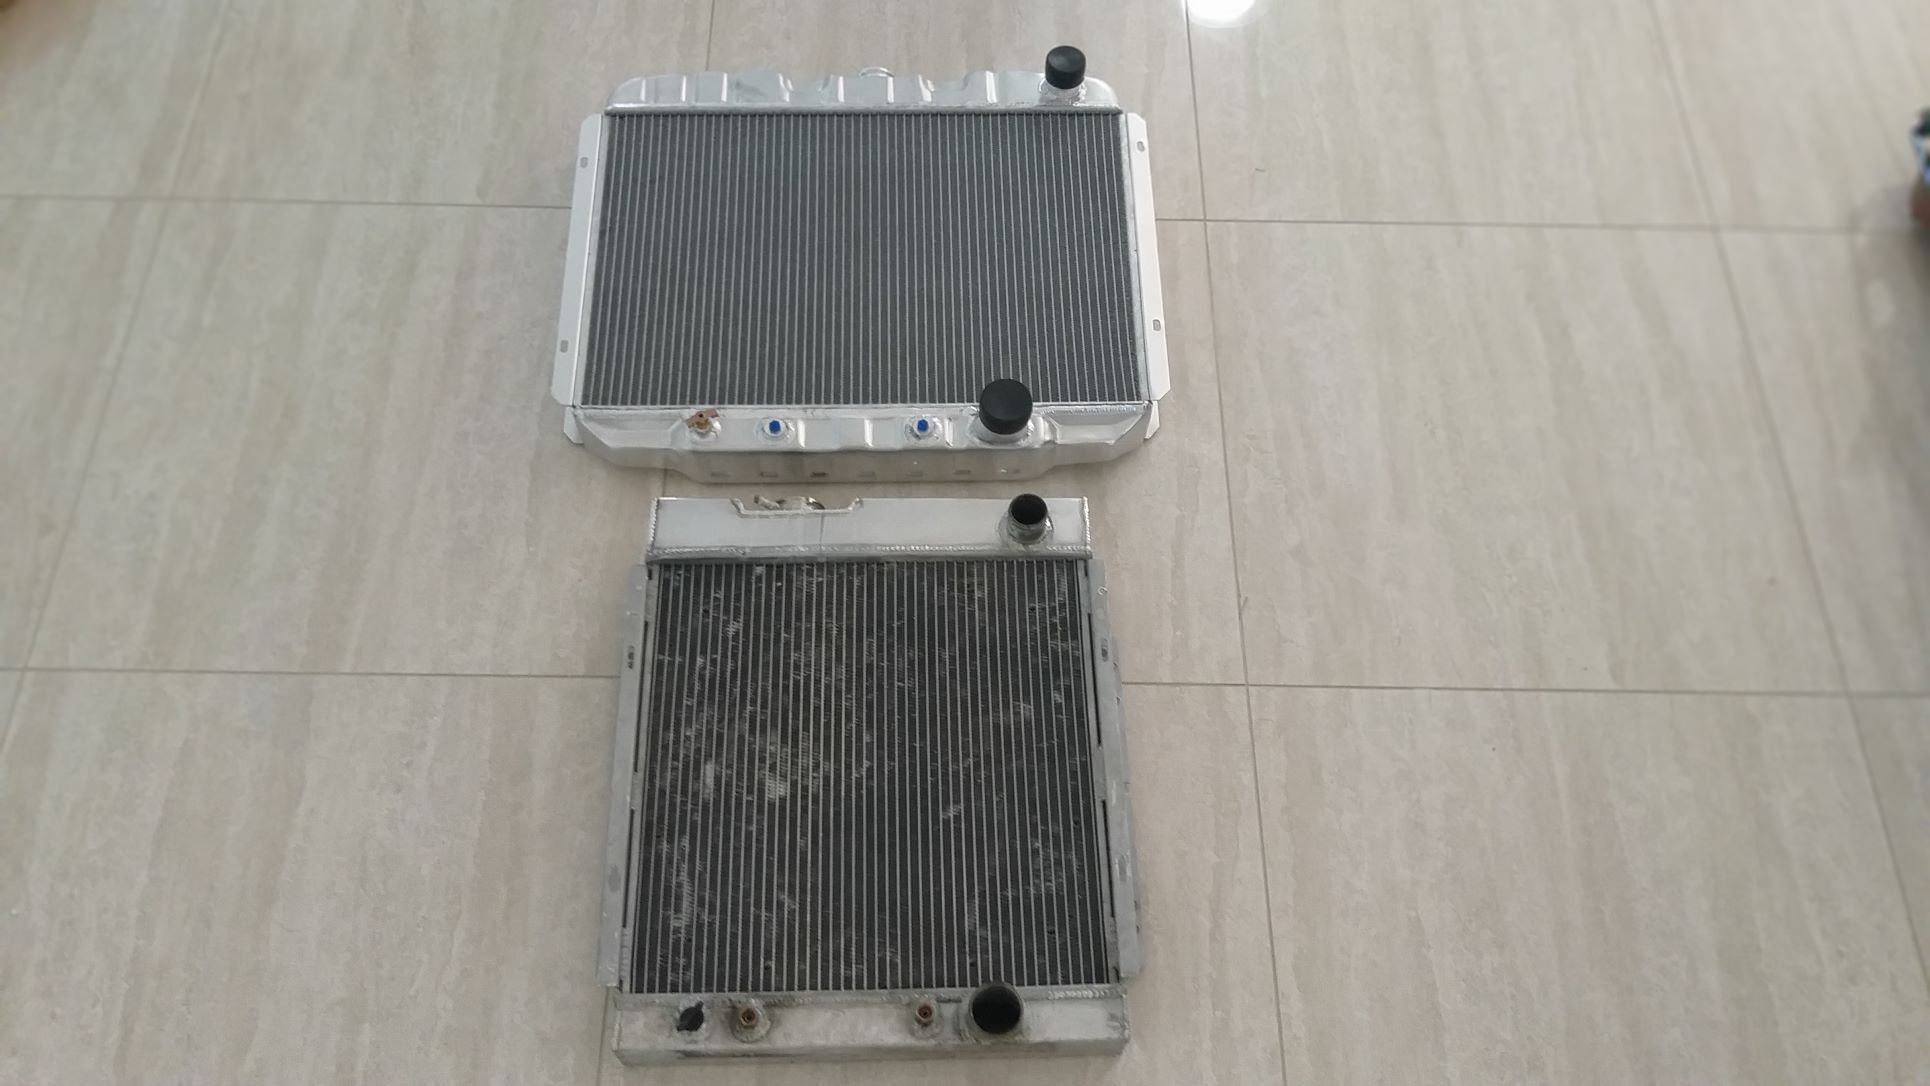
Cooling Issue - Chapter 9 A while back as part of my cooling diagnostic exercise I flushed the system, but I figured it was worth giving things another good flush before installing the new radiator. Managed to do three flushes over the past two days and I reckon I've got things as clear as I am going to get them. So, this morning I cracked into the radiator upgrade. First step was to strip the front of the car which I managed to achieve before morning smoko. With the old radiator out of the car I was able to put the new and old next to each other for a quick comparison. My plan is to test fit the new radiator to make sure that my tranny cooling lines and new radiator hoses all line up and once I'm totally happy with the fitment, I'll then pull the rad out to butcher the bigger opening. More to follow later in the day.
- 194 replies
-
- 11
-
-
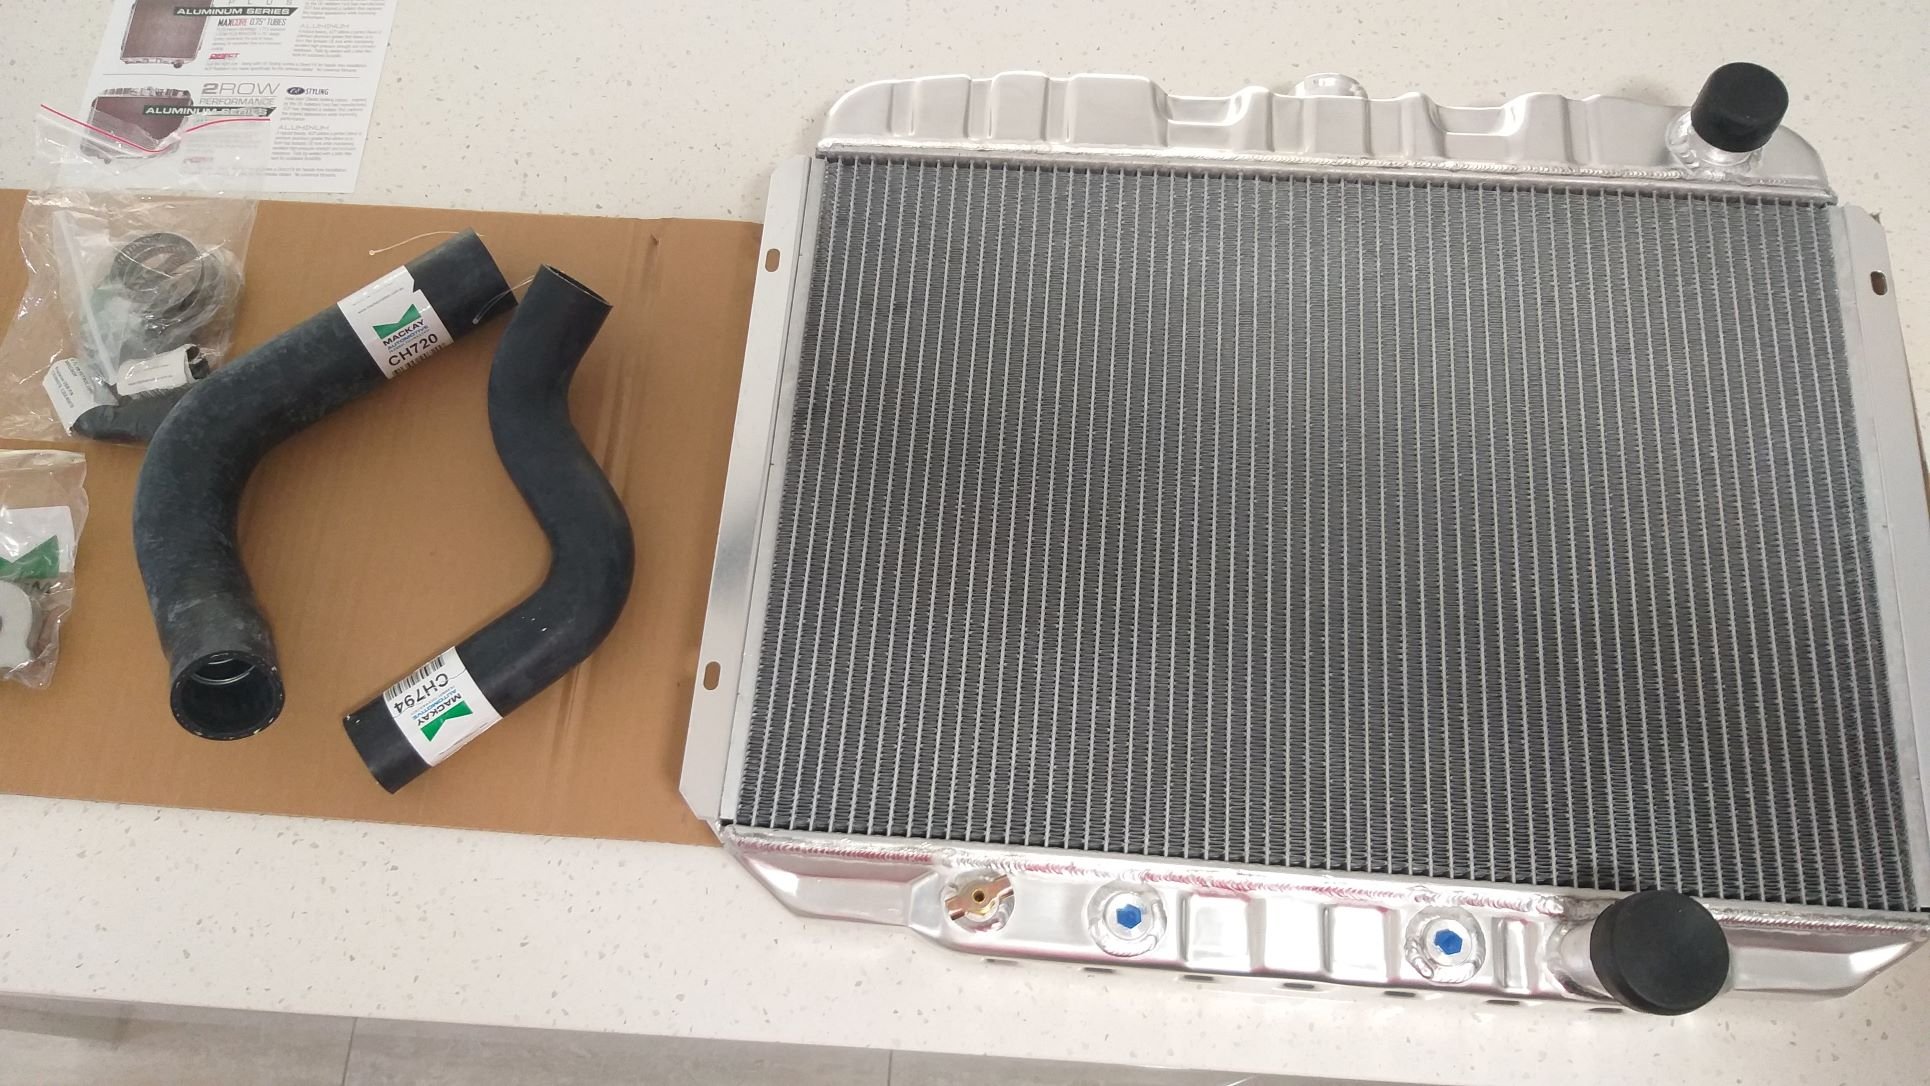
..... and the courier just arrived. Woohoo ! Guess what I am cracking into tomorrow ....
- 194 replies
-
- 12
-
-
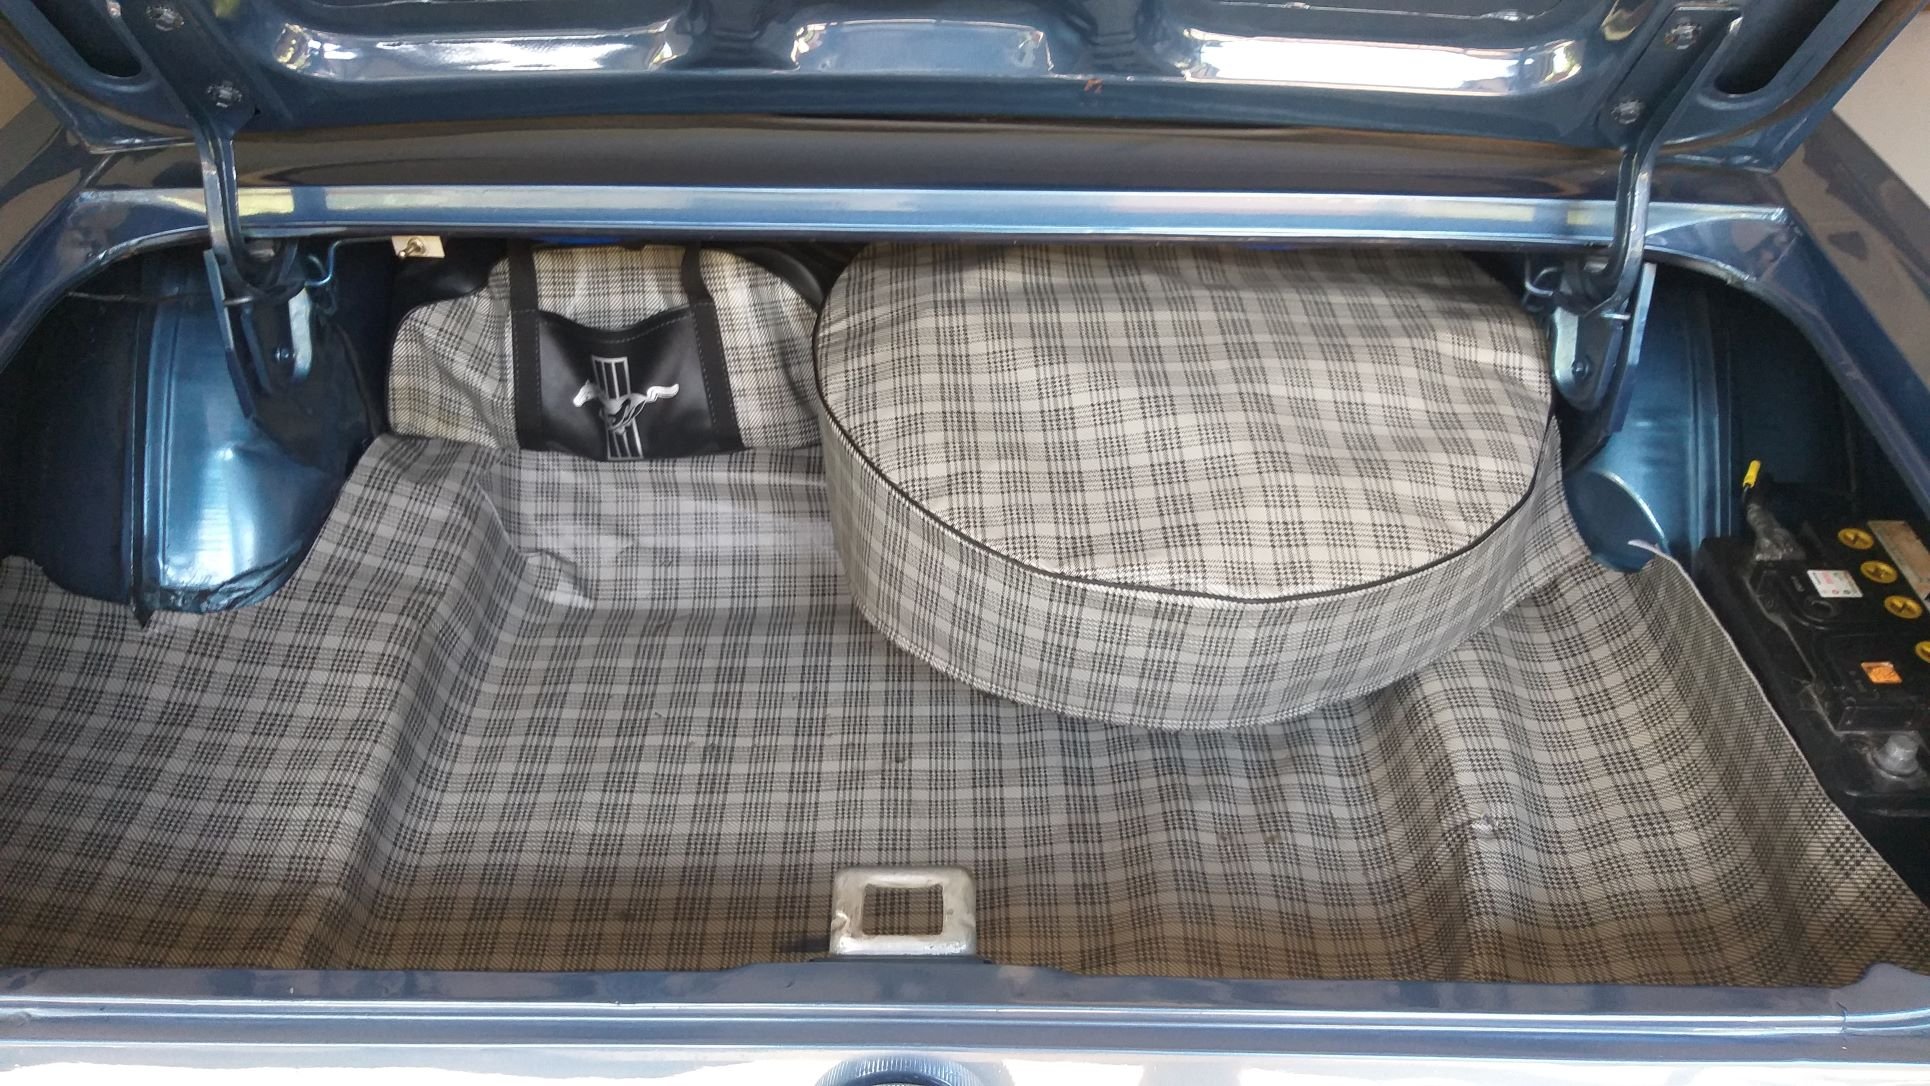
And, that's the boot more or less sorted. The existing boot liner is a bit tatty, but new ones are available so I'll order a fresh one sometime in the future and will then cut up the old one to make a neat little battery cover. That should complete the look nicely. I'm happy with the new spare wheel position as it has freed up some extra useful boot space. Thanks for looking.
- 194 replies
-
- 10
-
-
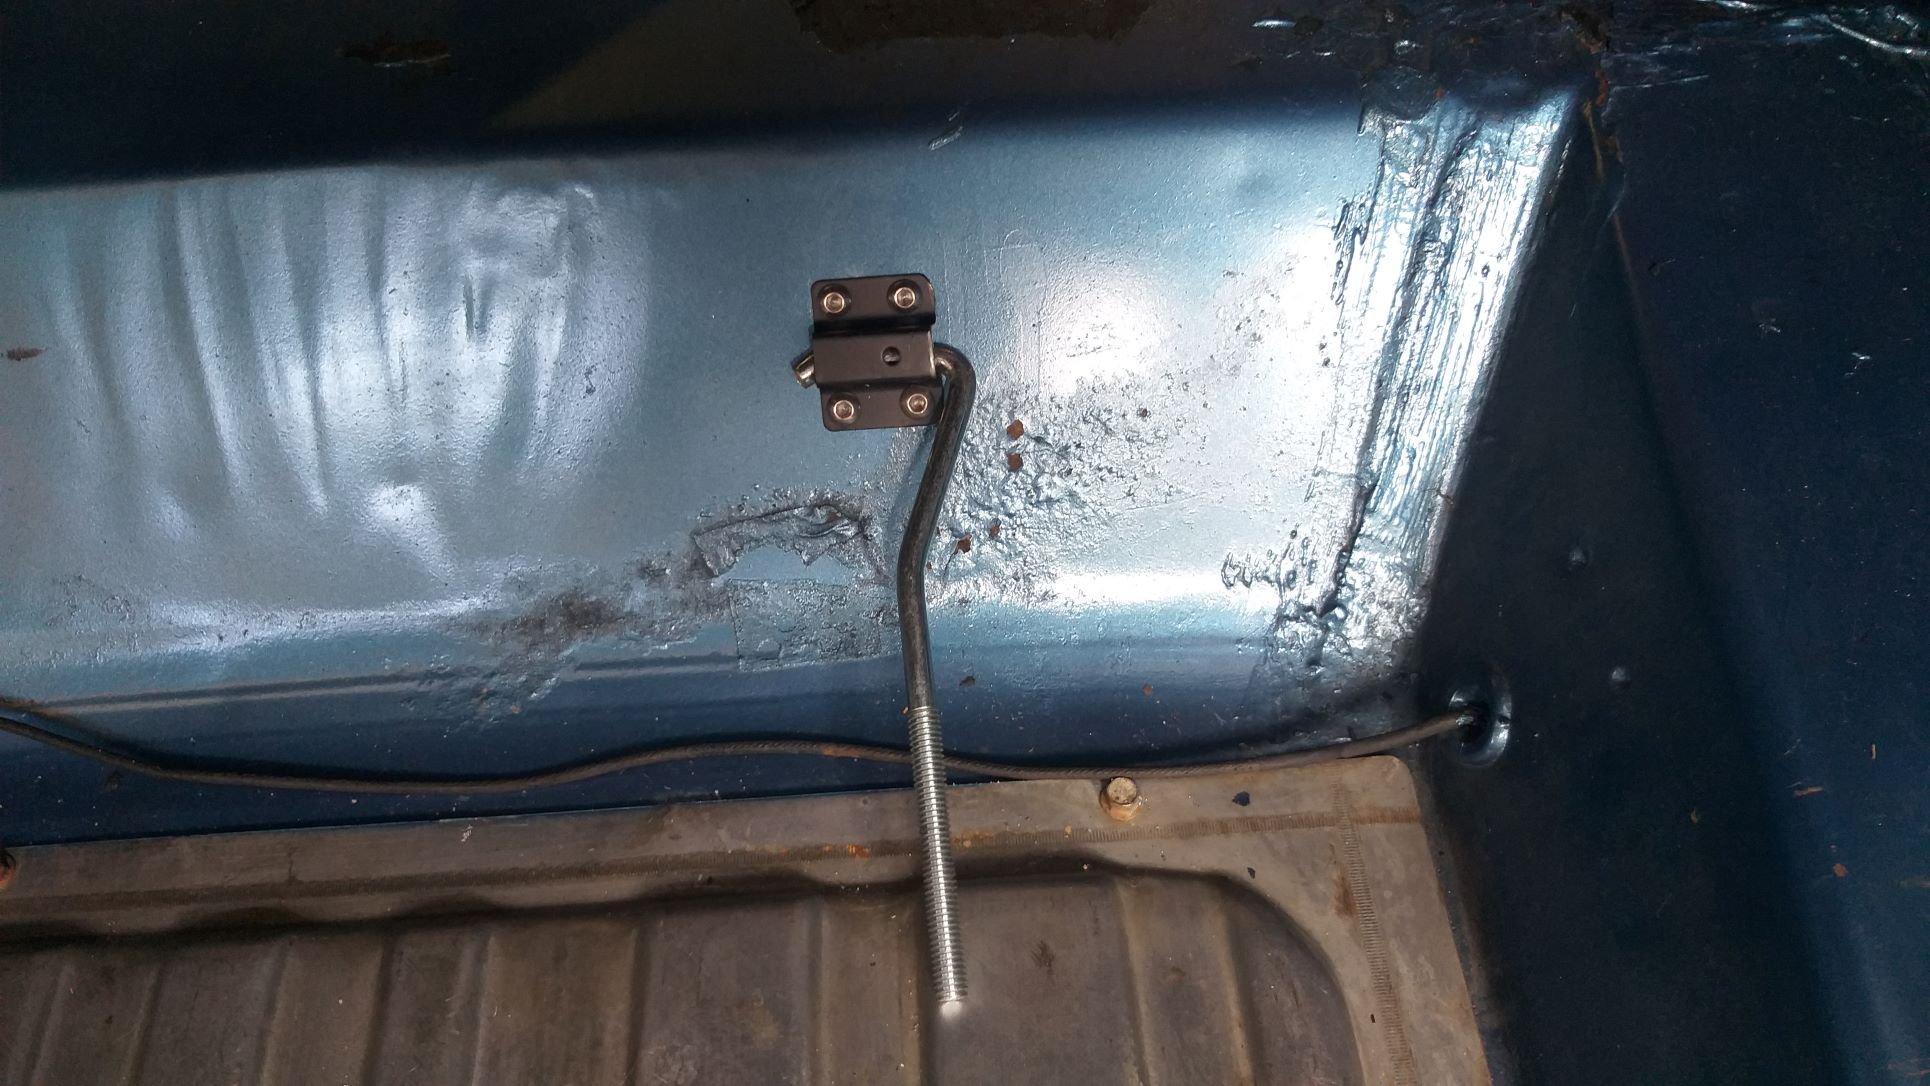
Trimmed the replacement bracket down a bit, poked a few holes, slapped a bit of satin black on it and called it done.