sr2
-
Posts
760 -
Joined
-
Last visited
-
Days Won
1
Everything posted by sr2
-
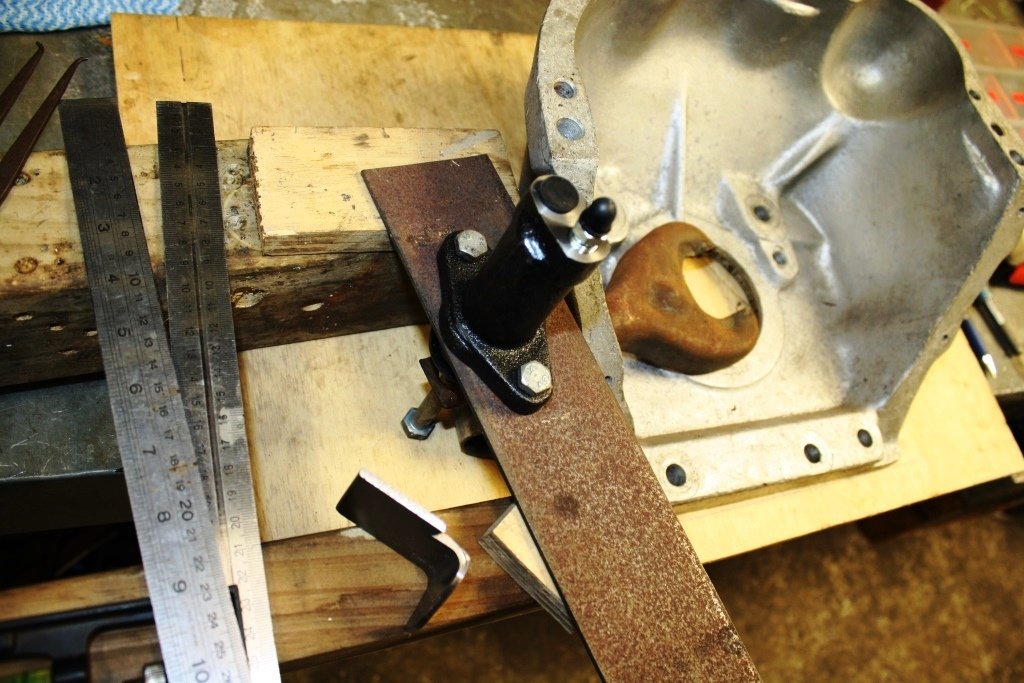
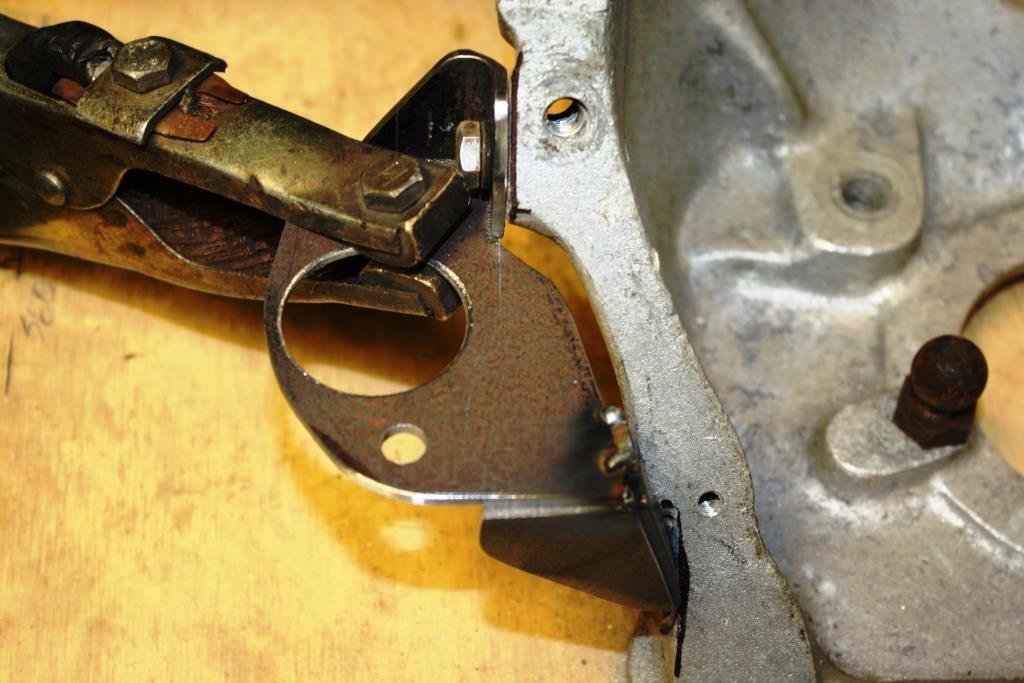
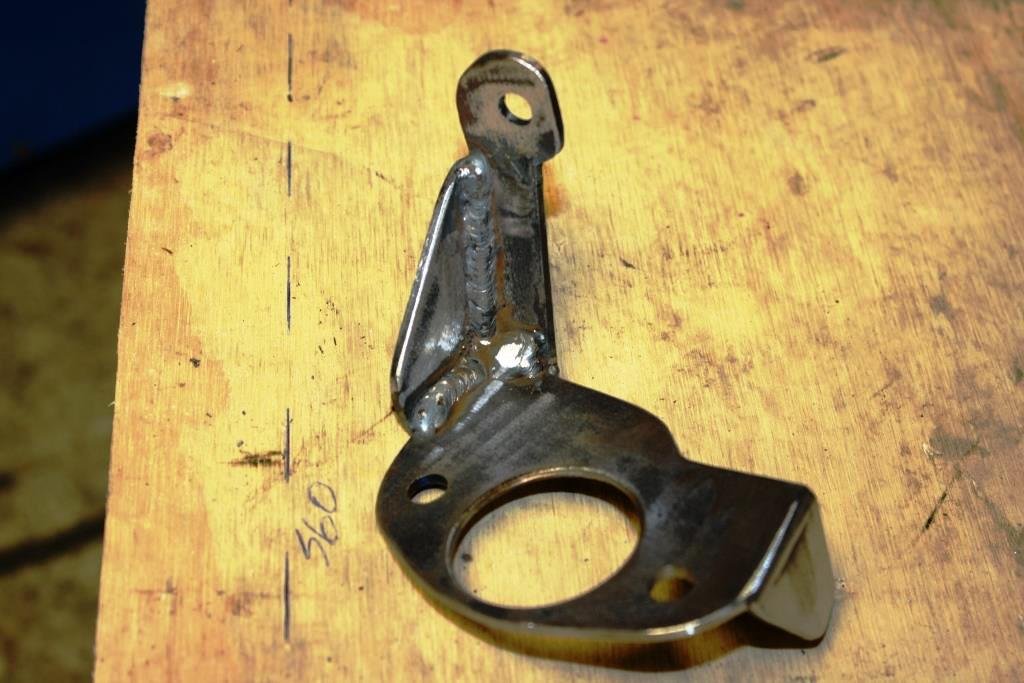
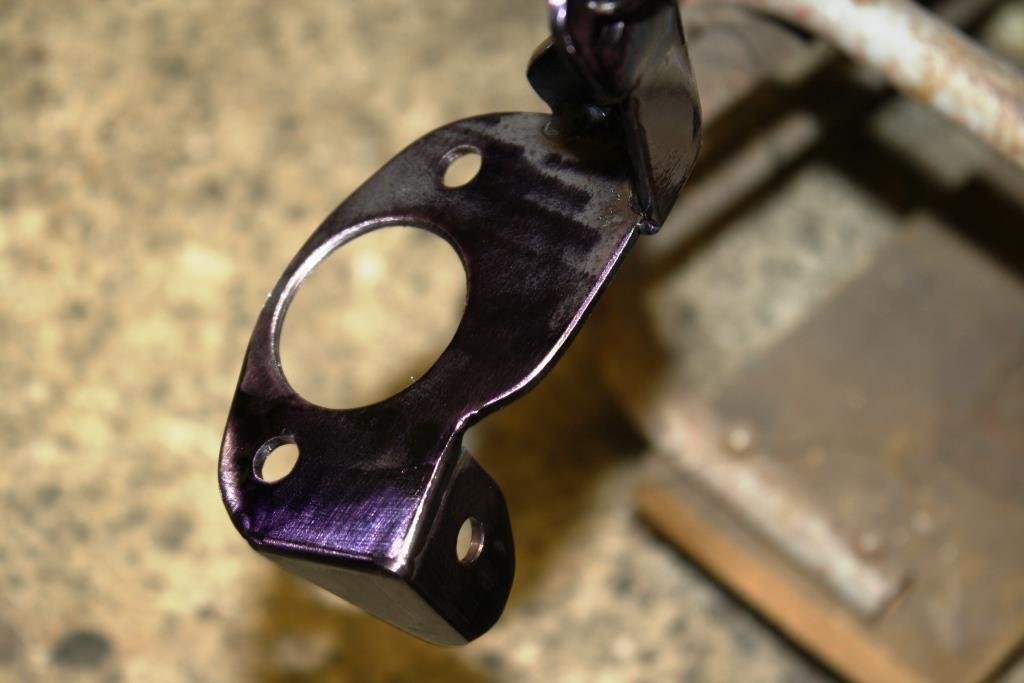
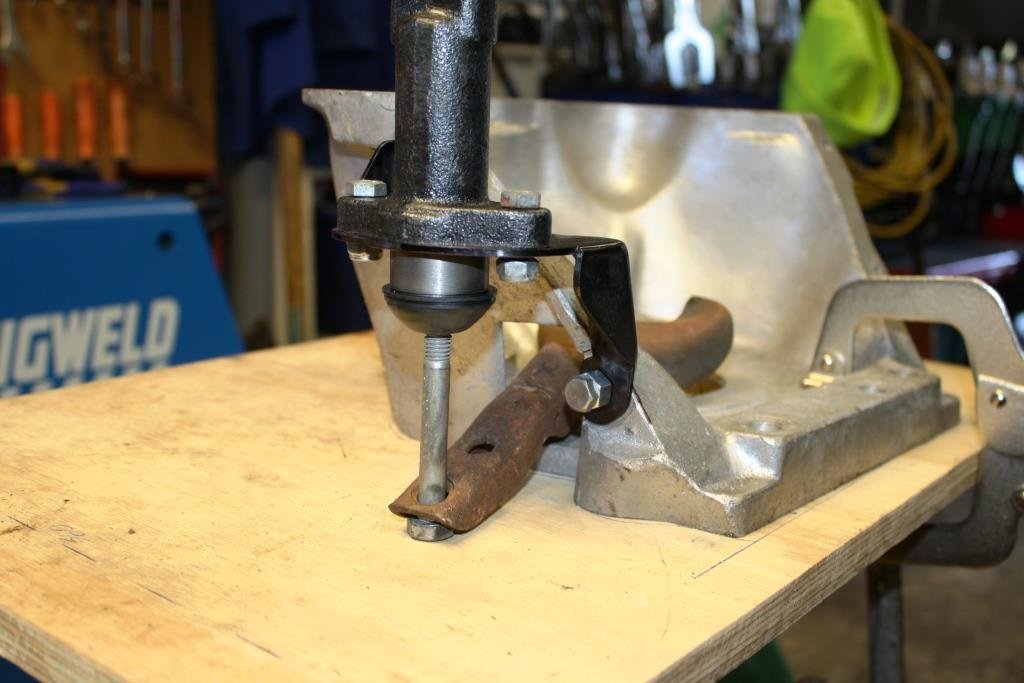
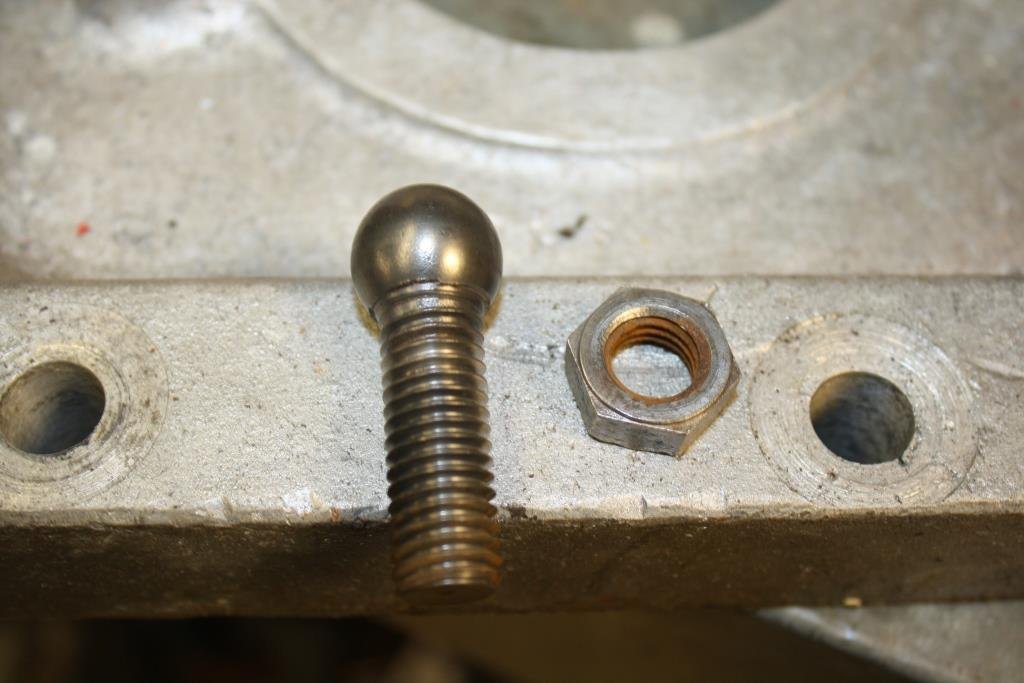
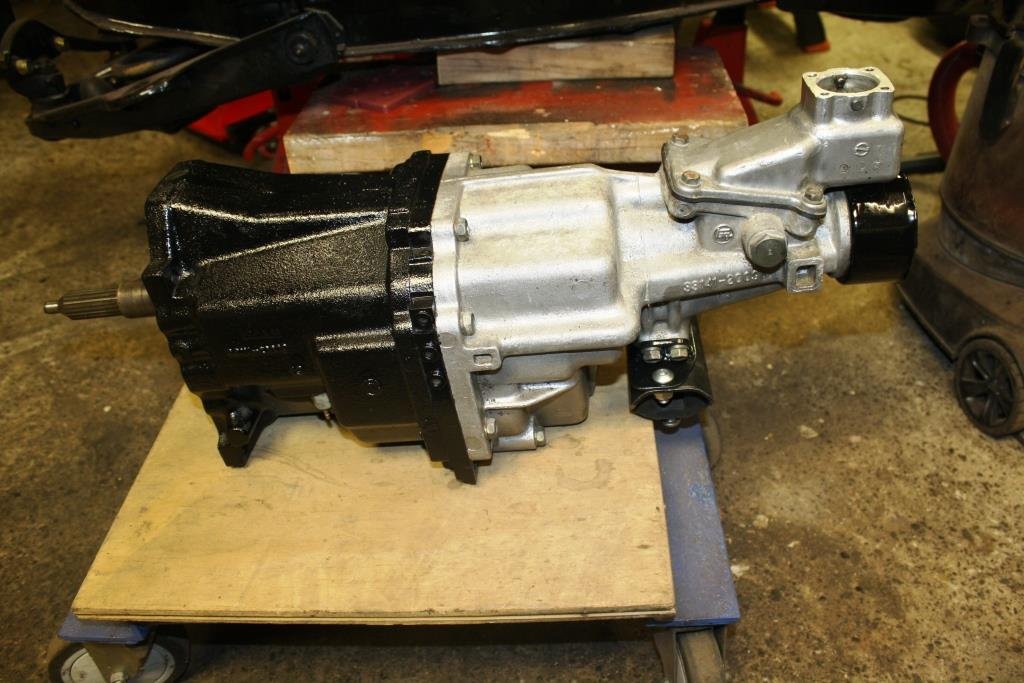
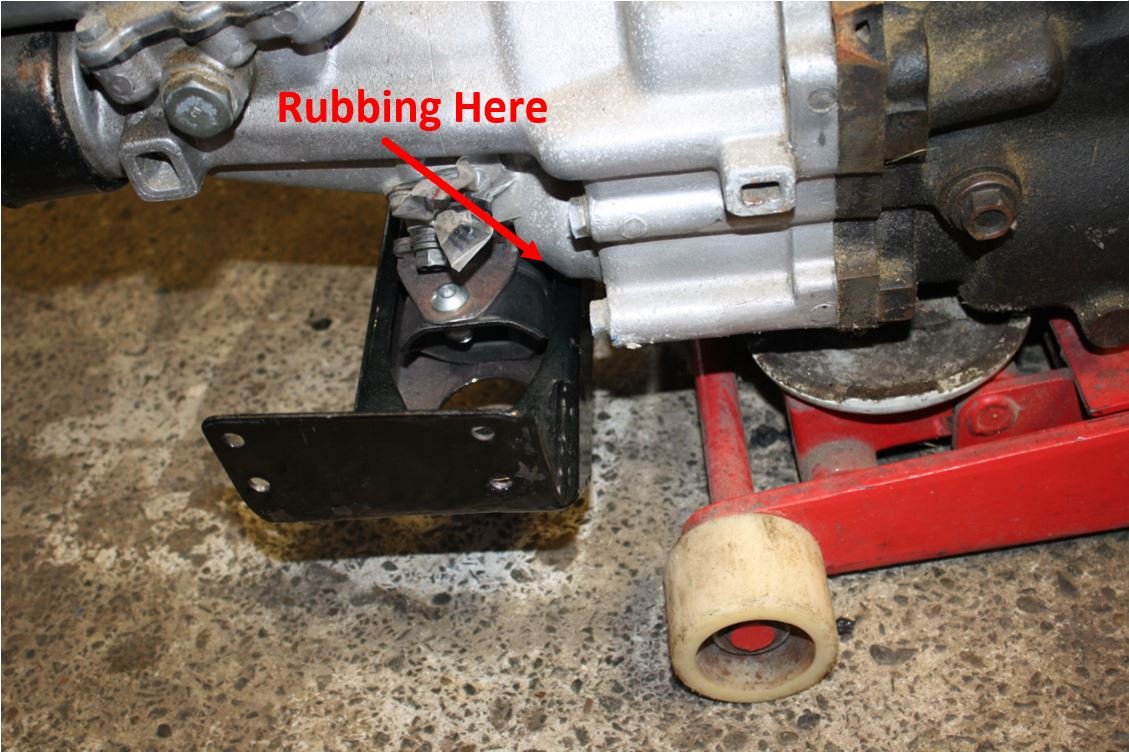
Thought it was time Rigamortice had a motor and box sitting between those sexy black chassis rails, (yes I know I probably need to get a life!). Pulled out my classic Castlemaine Rod Shop Holden/Toyota bell-housing, the recently purchased 1” Triumph slave cyl, and started mocking things up. Trimmed things up and tacked on some mounting tabs, so much easier to do this stuff on the bench, not on the car. Stitched it up, cleaned it up & threw on some paint. Looks good on the bench, I’ll make up an adjustable push rod once I have everything assembled. Just had to put in a pix of the clutch lever pivot, it cleaned up well with no wear on the ball. It came from a 1966 HD Holden. You can only wonder how may clutch movements it’s had over the last 56 years.

- 184 replies
-
- 14
-

-
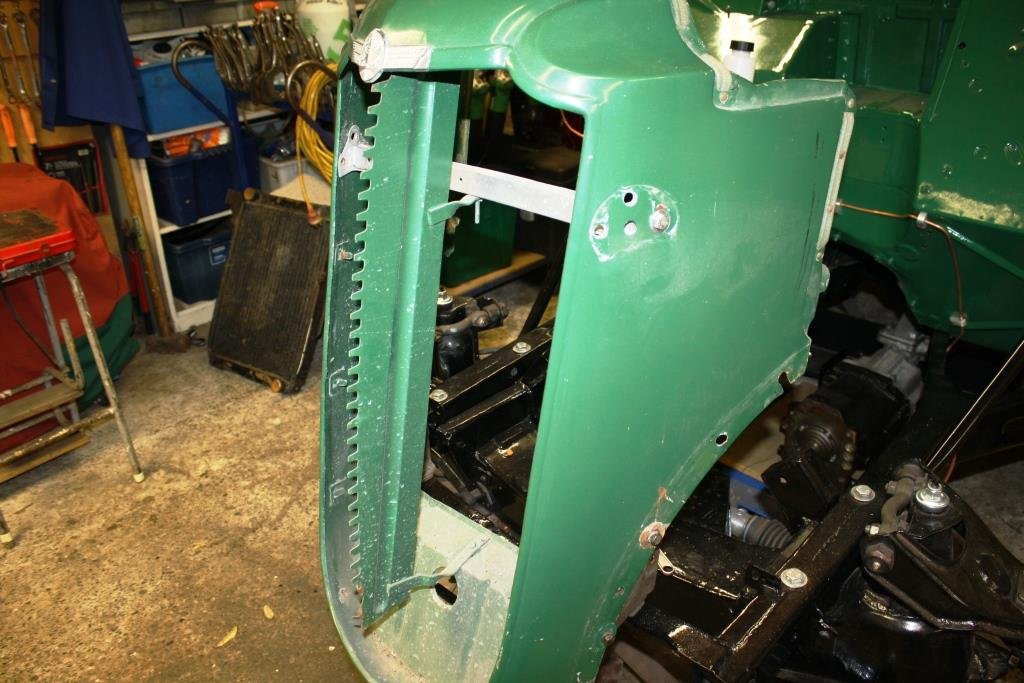
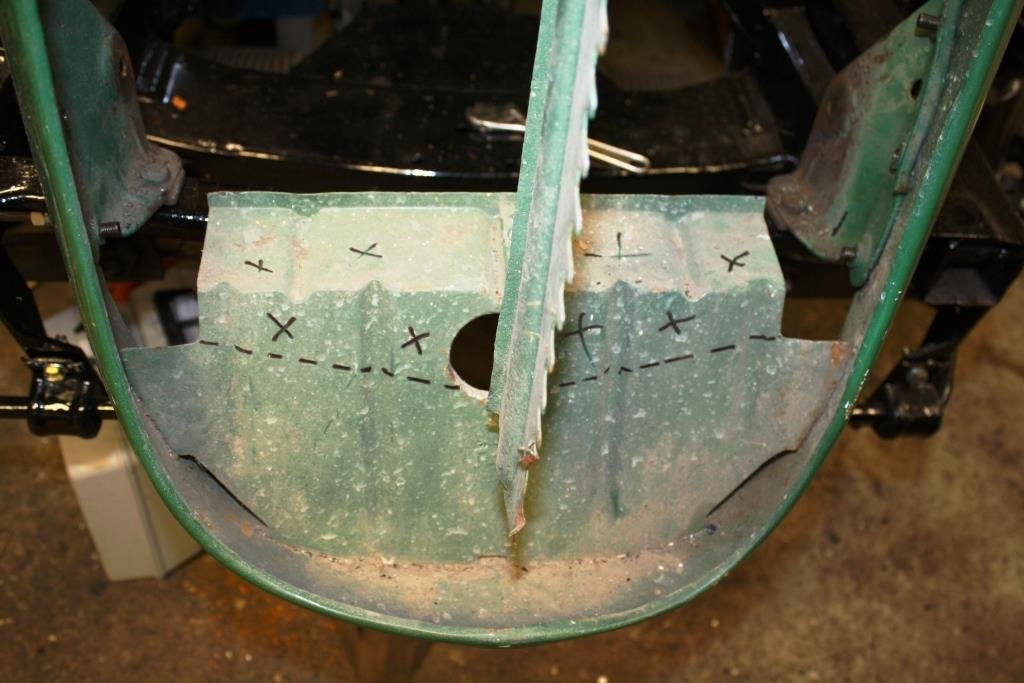
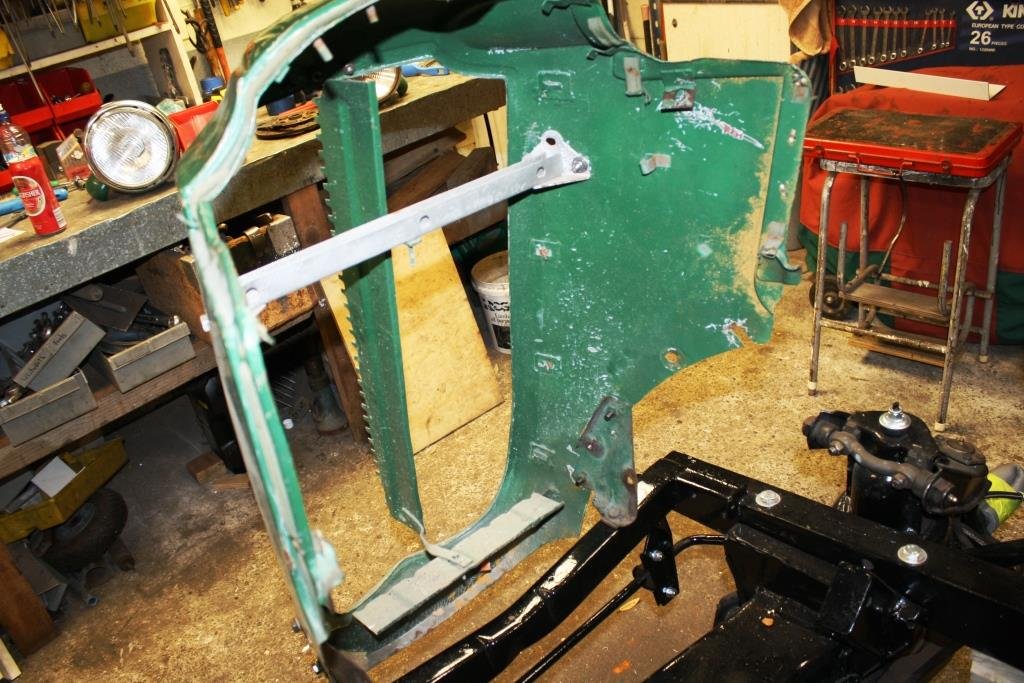
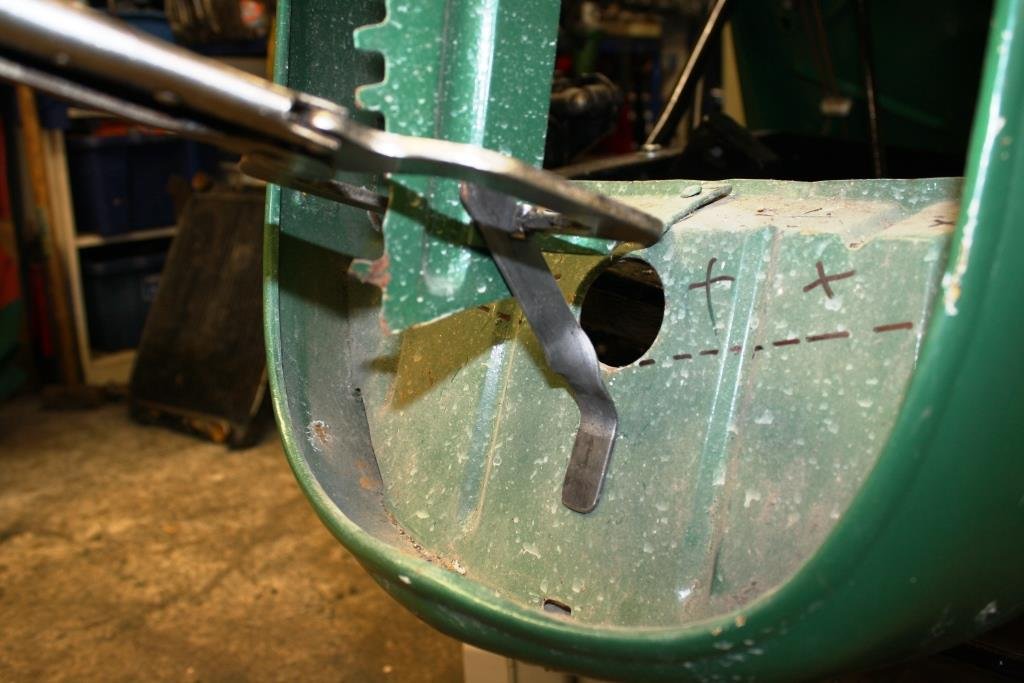
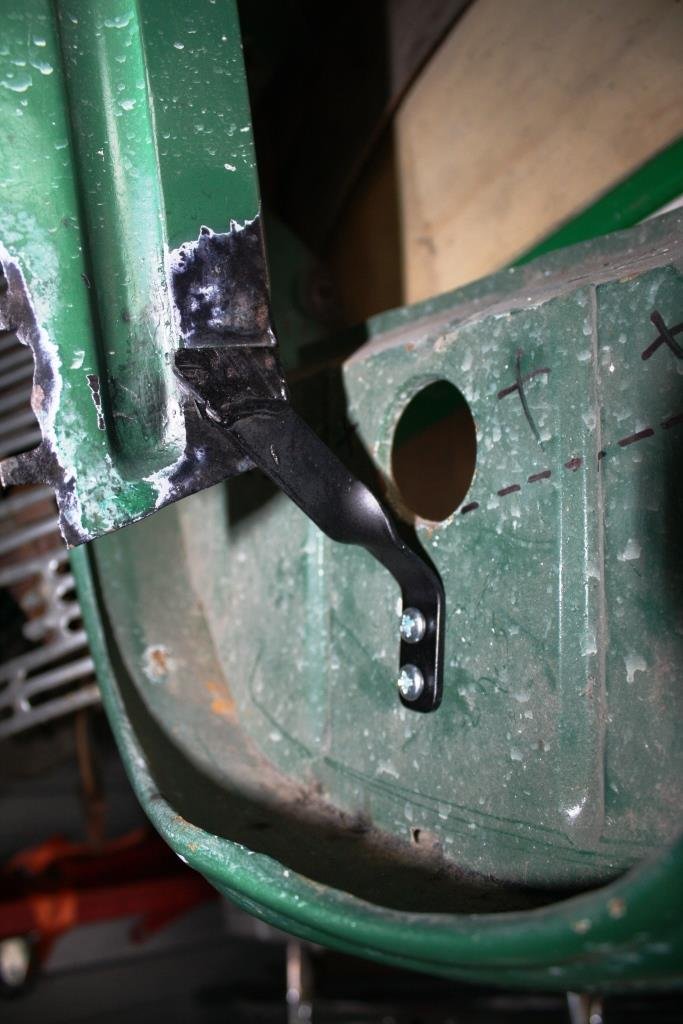
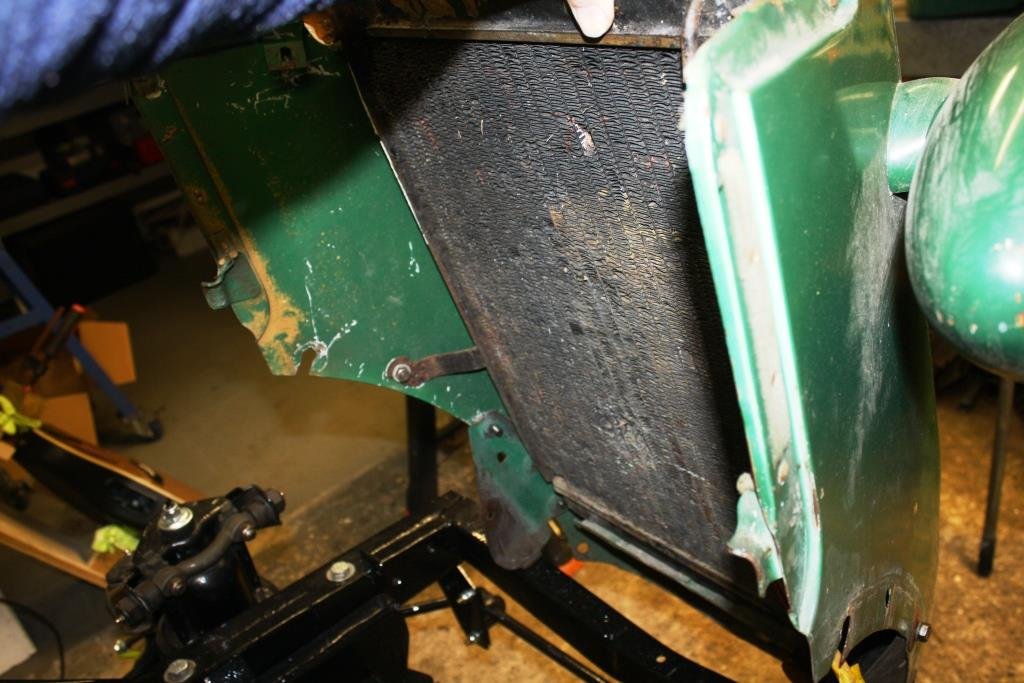
Pulled the grill out of the nose cone to figure out how to get a big enough radiator in there. There’s a reasonable amount of extra height available if I start cutting out sheet metal but at only 400mm wide it’s going to hard to find something to fit. Thought I’d change the lower grill brace mount to keep it out of the way. Bent up a piece of flat…… And welded it in place. Made the call that because I’ll be building up a 2nd bigger and more highly tuned motor I really need to make sure I have adequate cooling capacity. After failing abysmally to find anything that would fit I’ve made the call to have something custom made.
-

SR2’s 1947 Vauxhall “Rigamortice” Discussion thread.
sr2 replied to sr2's topic in Project Discussion
It is definitely copper nickel not copper. The copper look is just a coating, I like the look but you have to be careful not to scratch through it when bending or flaring. I bought it from a wholesaler in Australia. -
Rigamortice has asked me to remind you all that “insipid green” was actually an OEM Vauxhall color …. I’ve also been asked to point out that they were and still are considered by discerning motorists to be a “chick magnet”. Whatever the *** that means! ............. facepalm.
-
SR2’s 1947 Vauxhall “Rigamortice” Discussion thread.
sr2 replied to sr2's topic in Project Discussion
Thanks mate, I've made the call that because I'm planning on eventually running a stroked motor I need to swallow my pride and have an alloy custom radiator made up. -
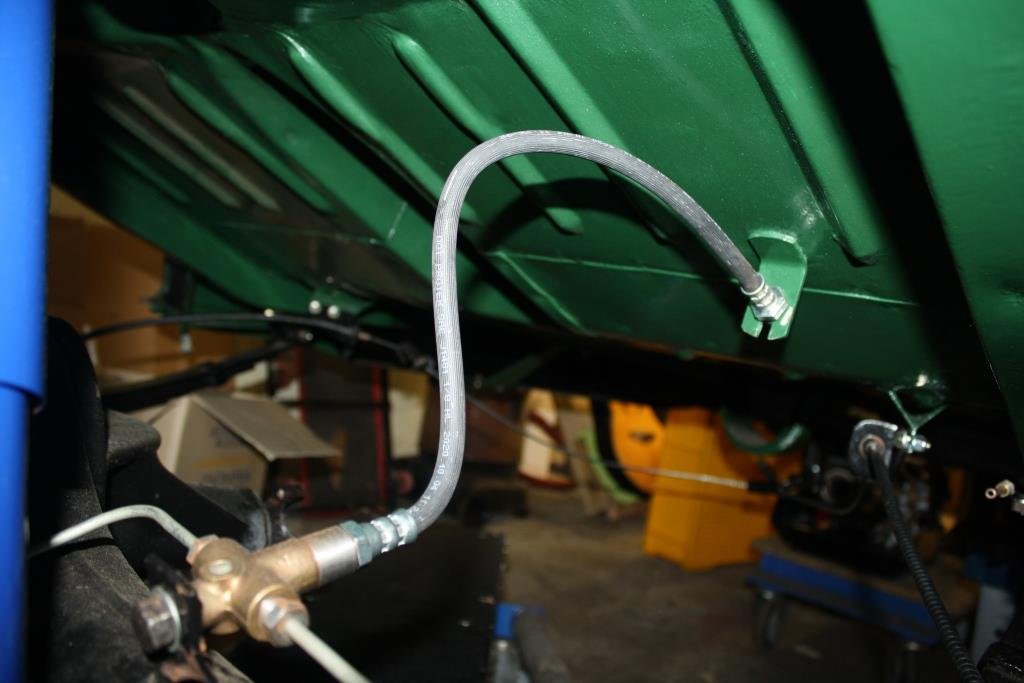
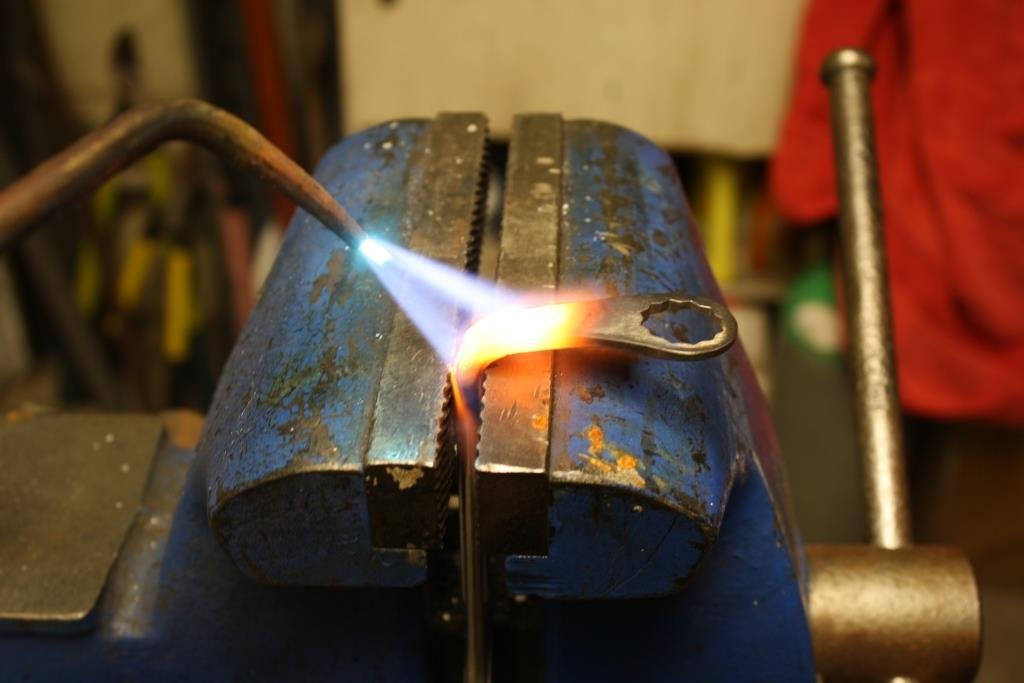
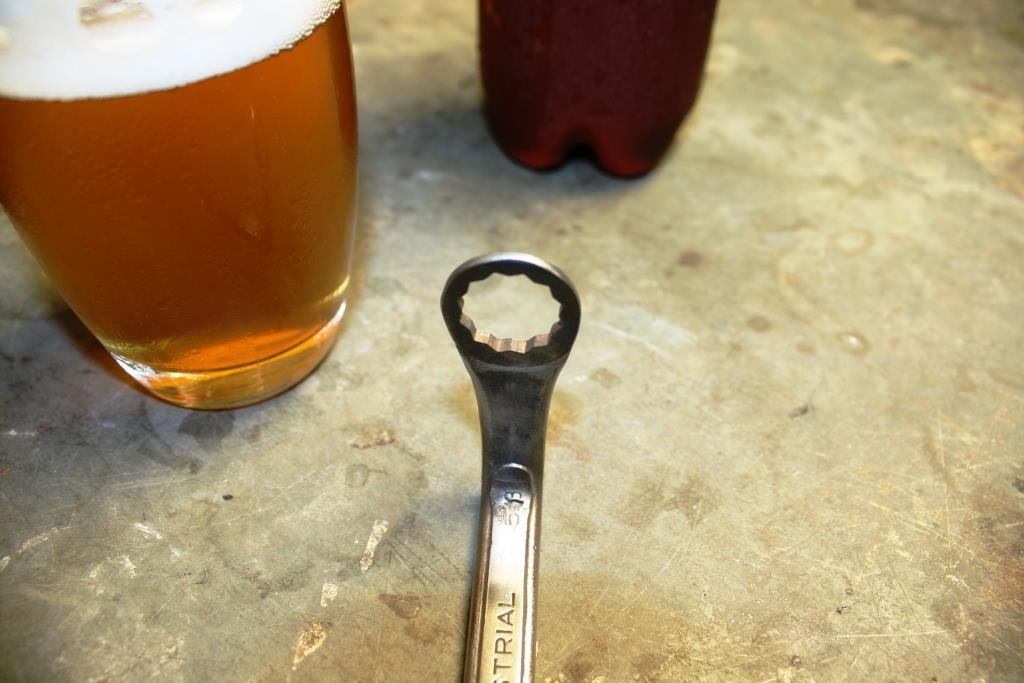
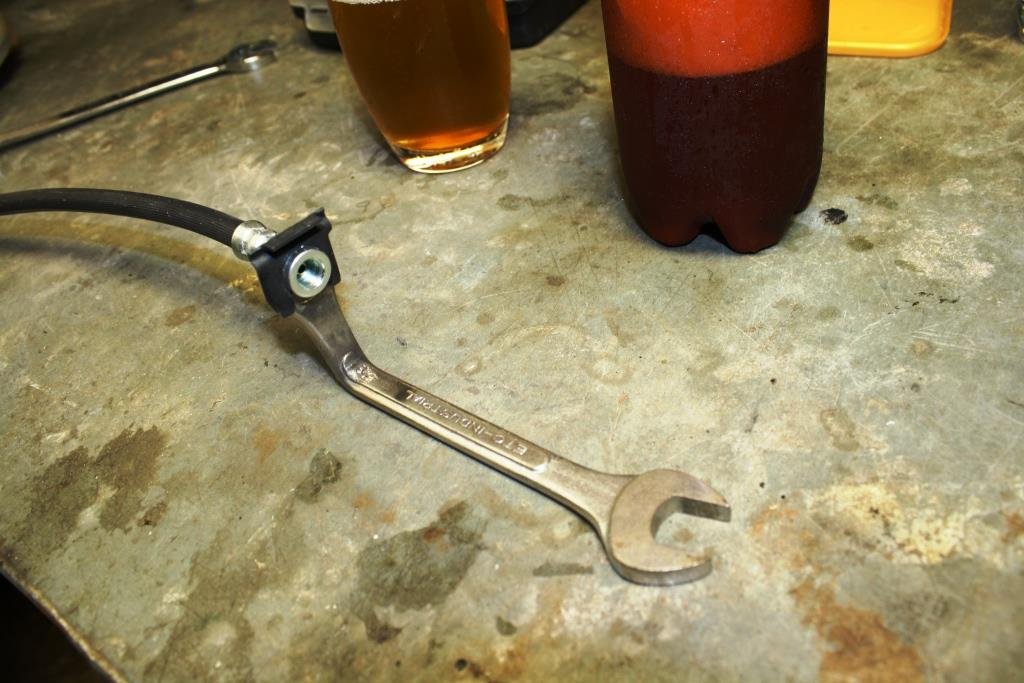
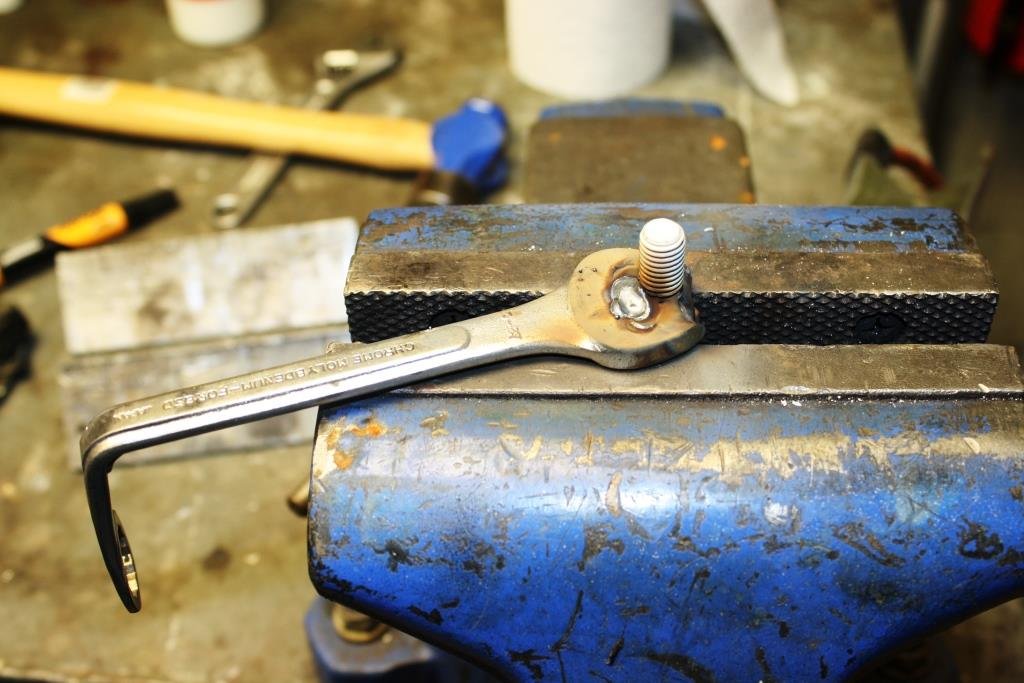
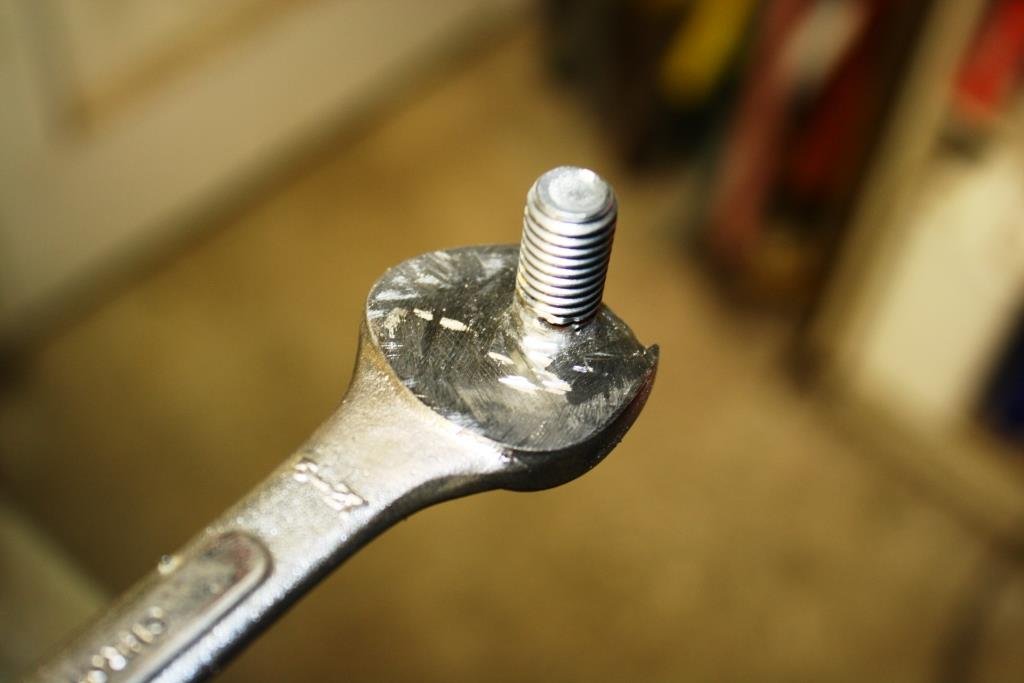
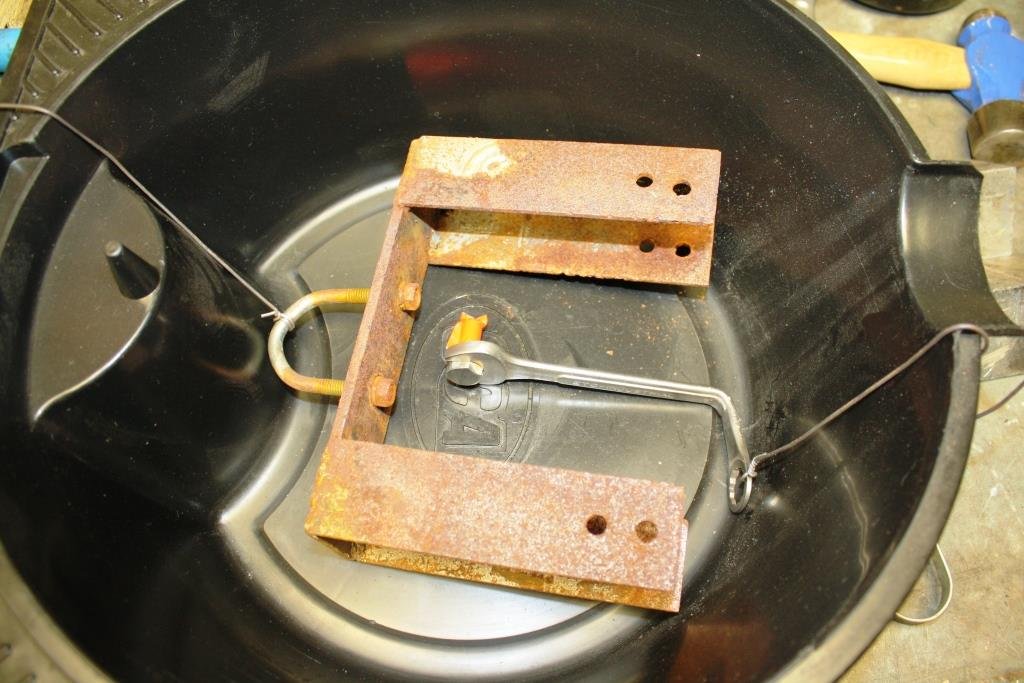
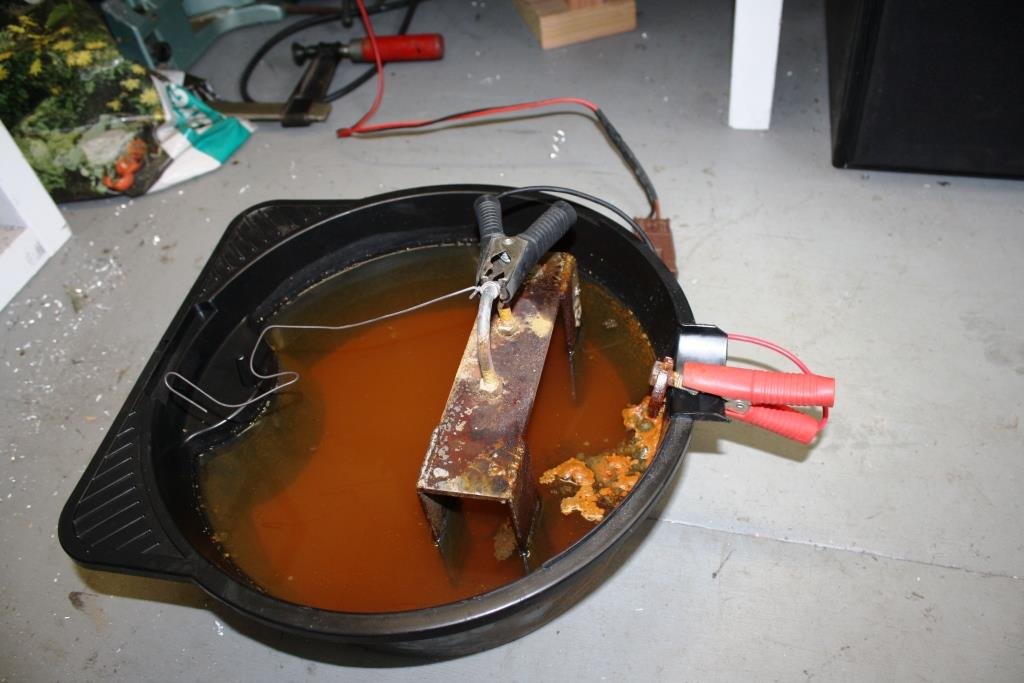
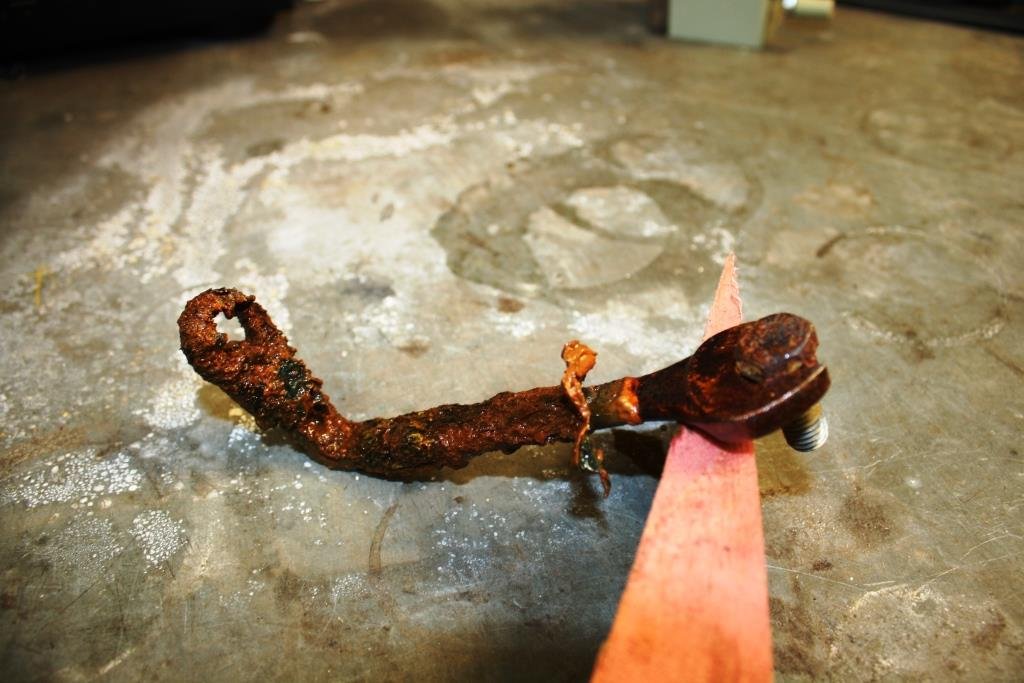
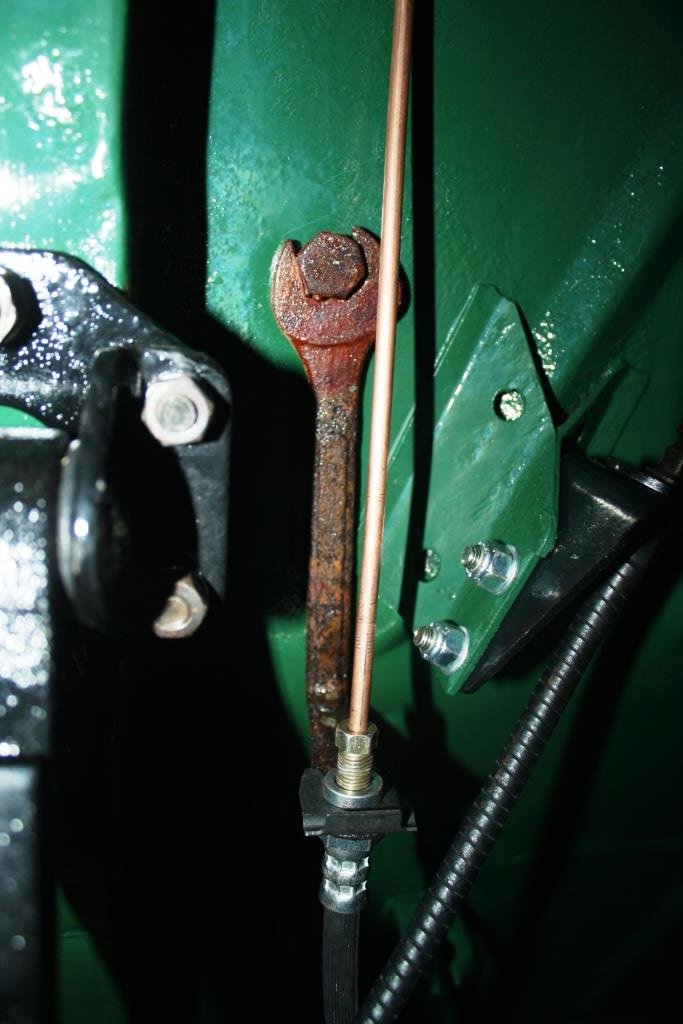
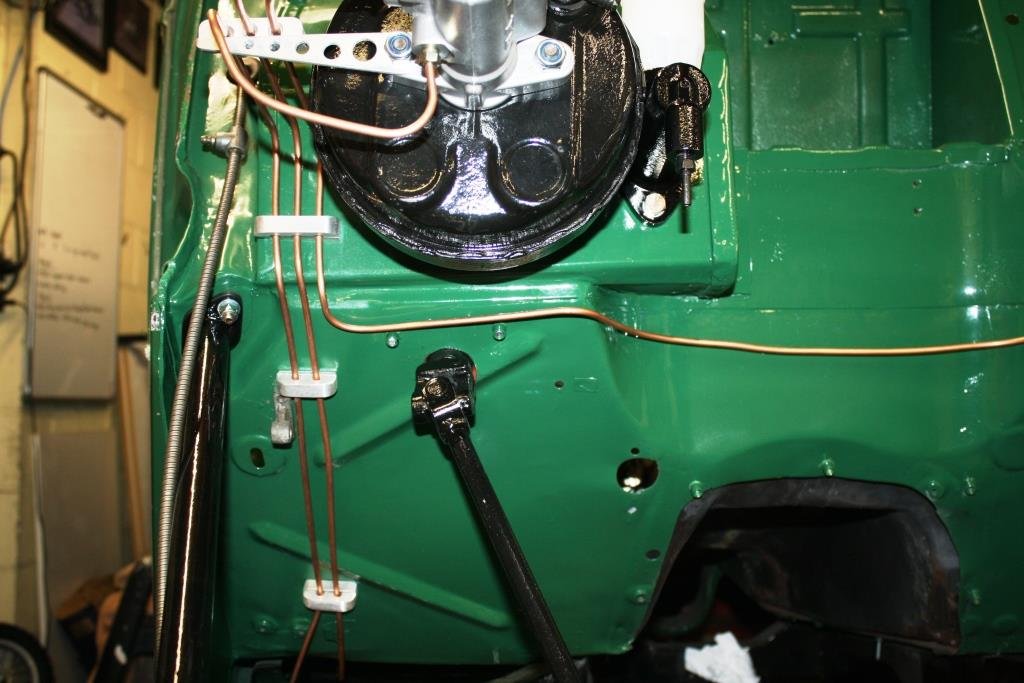
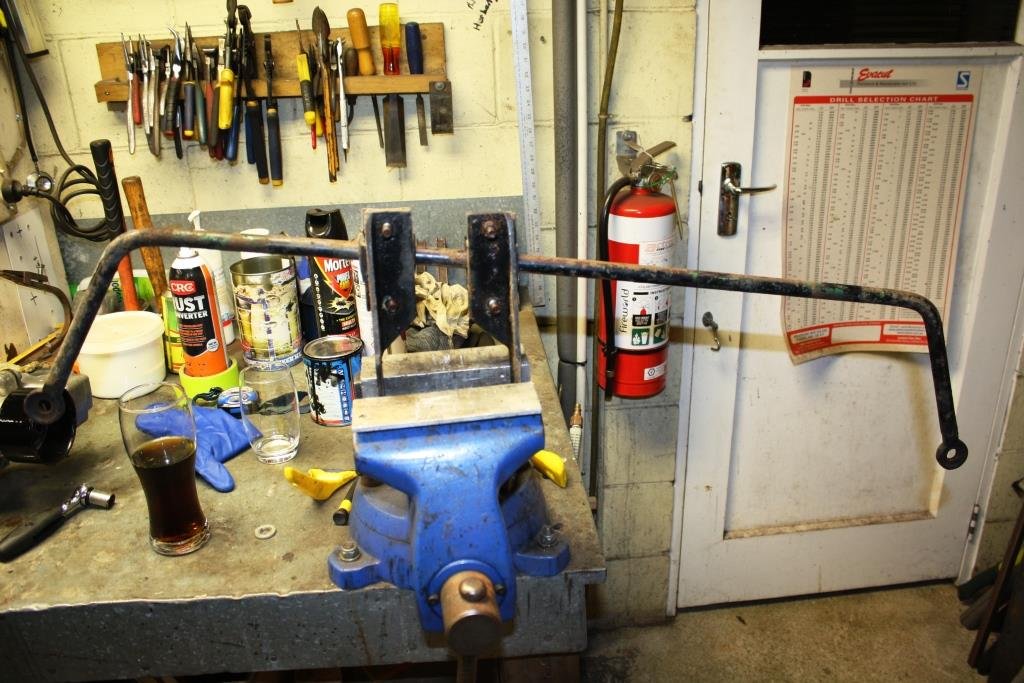
As I’d mentioned earlier I made the call to use HQ brake hoses as I figure they will always be available, (HQ’s are a religion in Aussie!). The problem with using the original rear brake hose mount was the large bend in the hose. One night Rigamortice and I got bored and decided we needed to sample the latest brew and devised a cunning plan…….. What could possibly go wrong? Found an old 5/16 AF ring and open end spanner and applied some heat. Hit the ring end with the linisher to make it a little thinner. A perfect fit for the HQ brake hose. Welded a bolt into the open end… And cleaned it up with the grinder. Started thinking it was all looking a little too shiny…… If you’ve followed this thread you’ll be aware that I’m a big fan of using electrolysis for rust removal, why not use it for rust plating? Found a piece of rusty scrap and made it the cathode, made the spanner up the anode, added some washing soda & water and hooked up a power supply. The following morning we had rust soup and a slightly fuzzy head. And a gloriously rusted spanner. Sealed it with some clear lacquer and bolted it in place. A nice little hidden surprise for the WOF man.
- 184 replies
-
- 29
-
-

-

-
Hi, a couple of points here. Absolutely nothing wrong with brass re-sleeving , the main reason it's gone out of favour is that the amount of specialist skills (and man hours) required to machine to an interference fit is far more than what is required to machine to a "slopping good fit" and then glue in a stainless sleeve. Remember neither brass or s/s corrodes. I'm not sure where the "Brass or copper tend to be too soft and oval out which causes it not to return" comes from - I've never seen any hydraulic cylinder re-sleeved in copper? and in all the years I spent working in the brake remanufacturing industry's heydays I never struck a stuck piston caused by oval wear? Yes brass can wear more than s/s but it responds far better to a good hone than s/s ever will, if I'm working on an elderly ride I'm always pleased when I find a brass re-sleeve. The same old rules apply. Most brake issues are caused by failing to replace fluid on a regular basis; brake fluid is hygroscopic encouraging corrosion and it also degrades when subjected to high temperatures - there's a good reason why we replace brake fluid after a days racing! Hope this helps and yes I have a soft spot foe Morries.
-
After decades of body and chassis repairs I'm still a huge Zintec fan. Untreated steel begins to rust the second it's exposed to the atmosphere and has to be ground/linished before you weld it where as Zintec is great to weld. Re repair panel gauge (i.e. thickness), with anything structural avoid using steel that is thicker than the steel you're replacing. The added rigidity of thicker material will only put more loading on both the welds and the surrounding original metal increasing the likelihood of stress fractures.
-
I bought a cheap on one Bangood some years back and wouldn't be without it. It's surprisingly accurate for the price and most of the time you're looking at comparative temperatures like top/bottom radiator hoses or exhaust headers. It's saved a a fortune on brake indicator (thermochromic ) paint on the race car and most importantly is very handy when brewing beer!
-
SR2’s 1947 Vauxhall “Rigamortice” Discussion thread.
sr2 replied to sr2's topic in Project Discussion
Please do mate. -
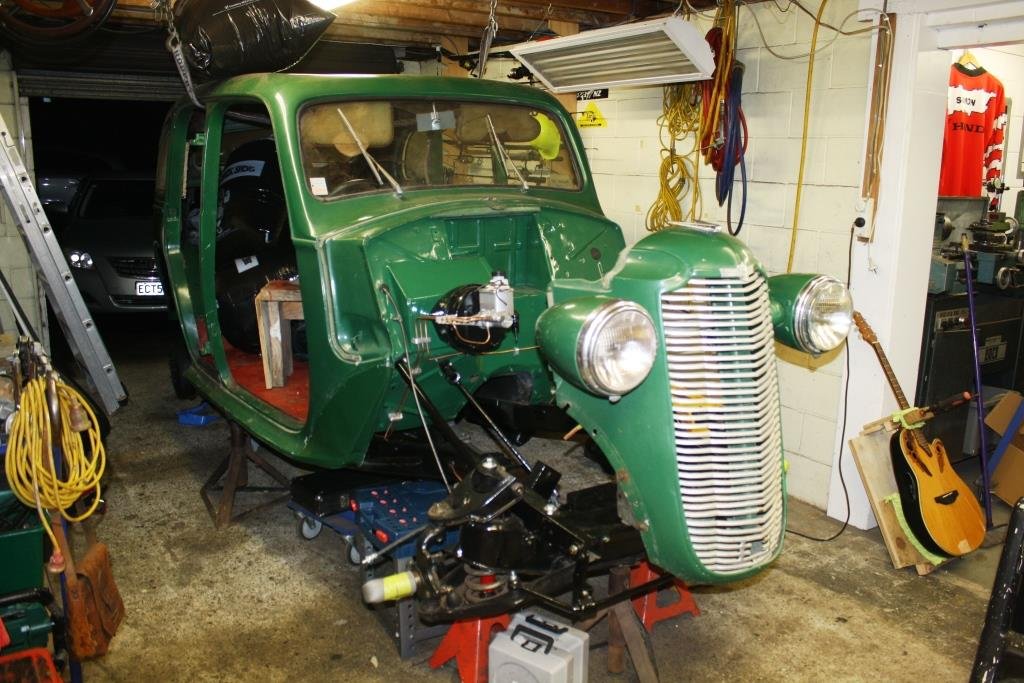
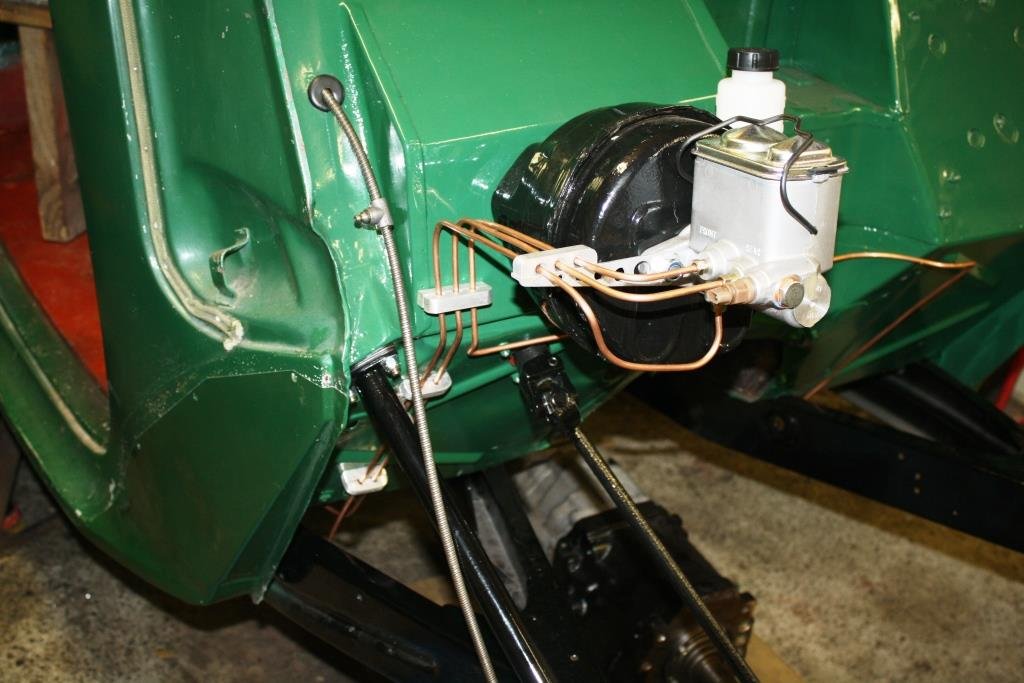
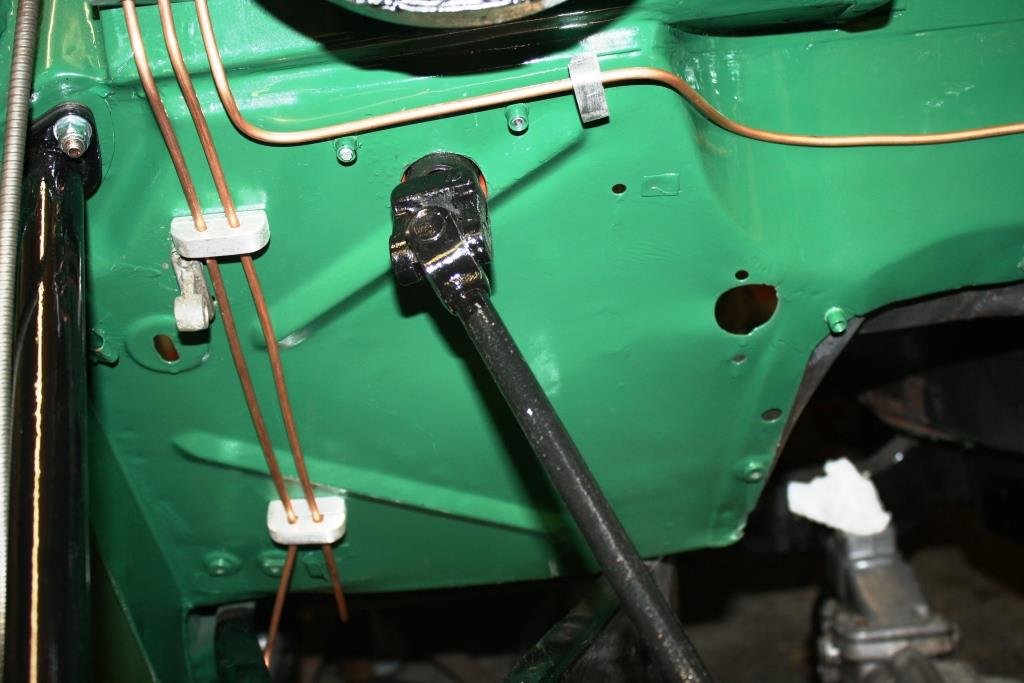
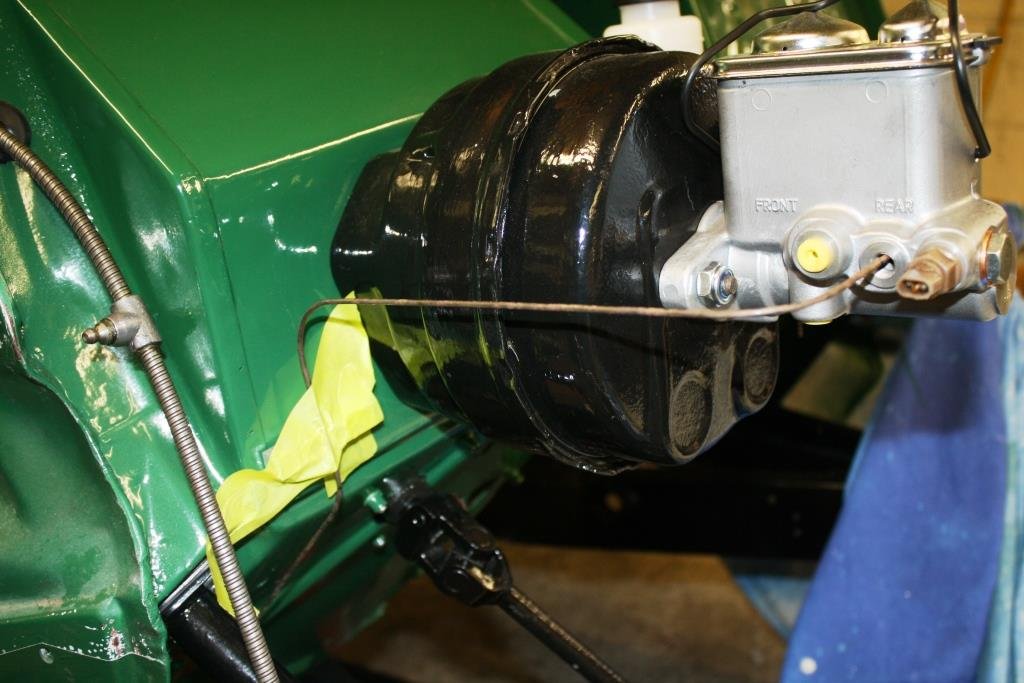
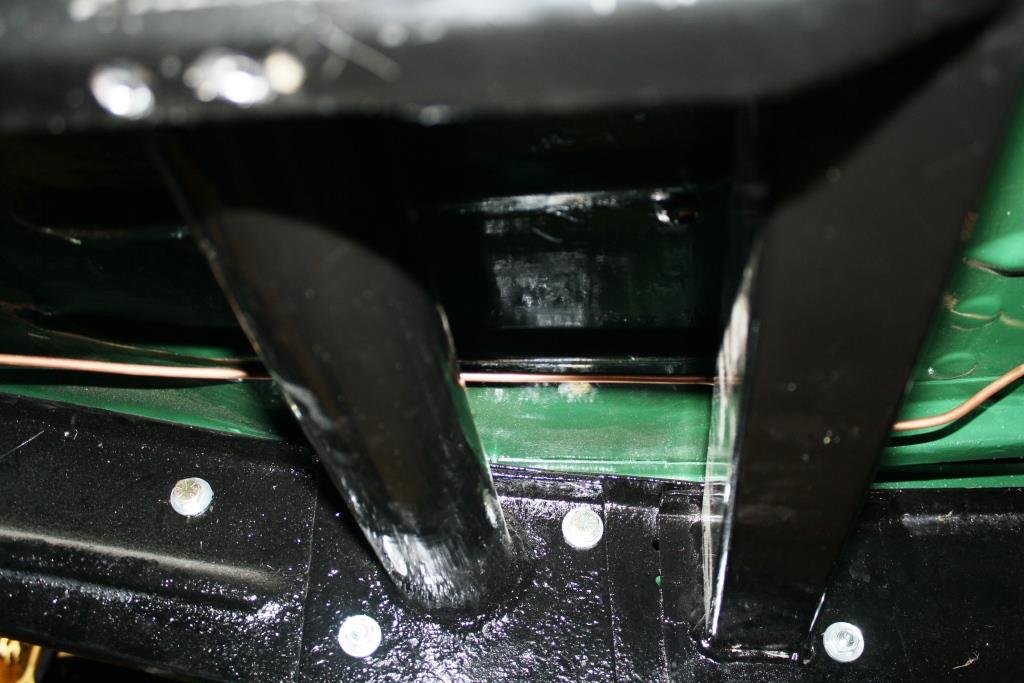
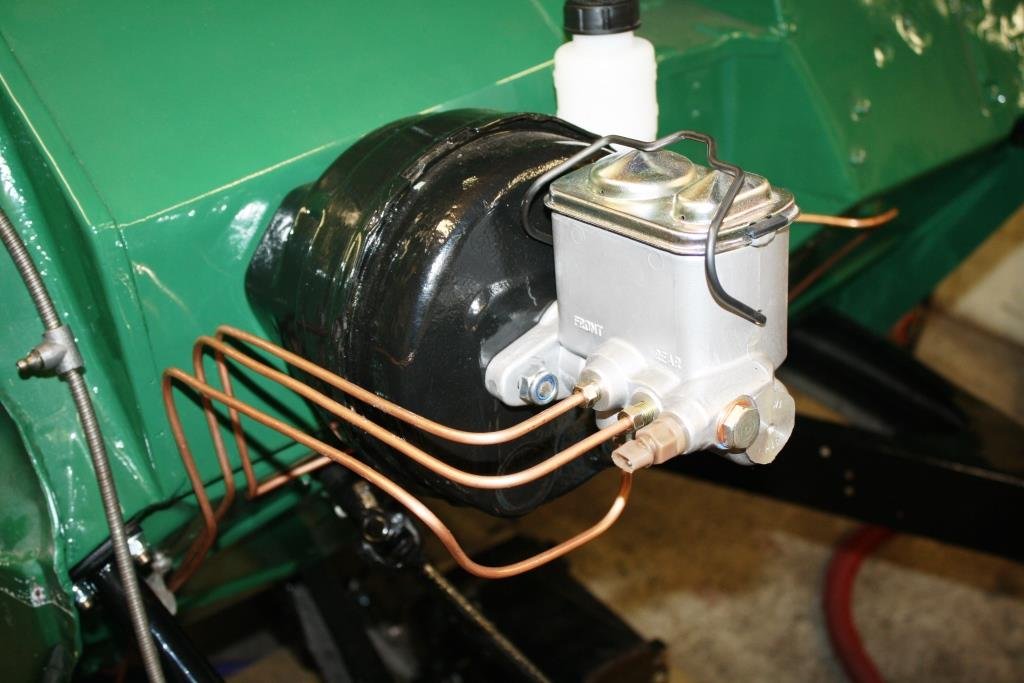
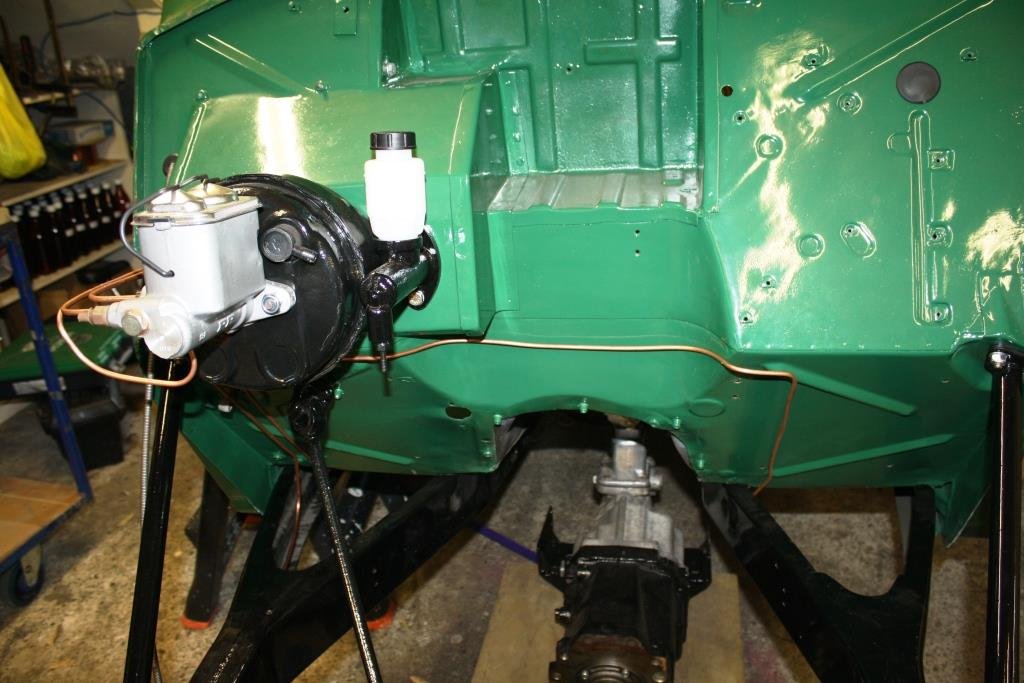
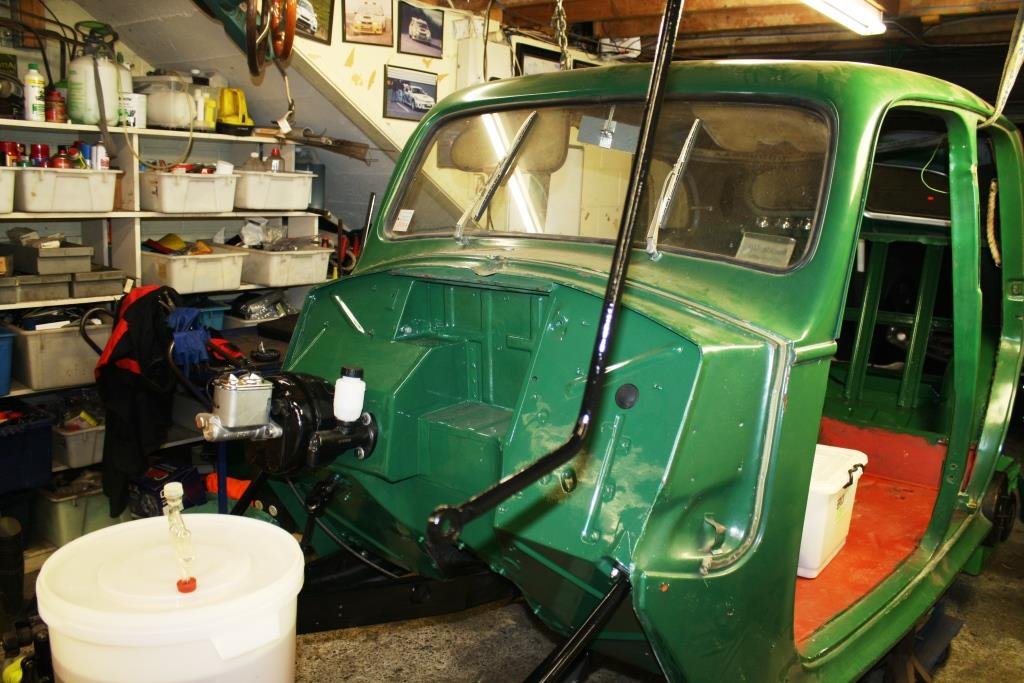
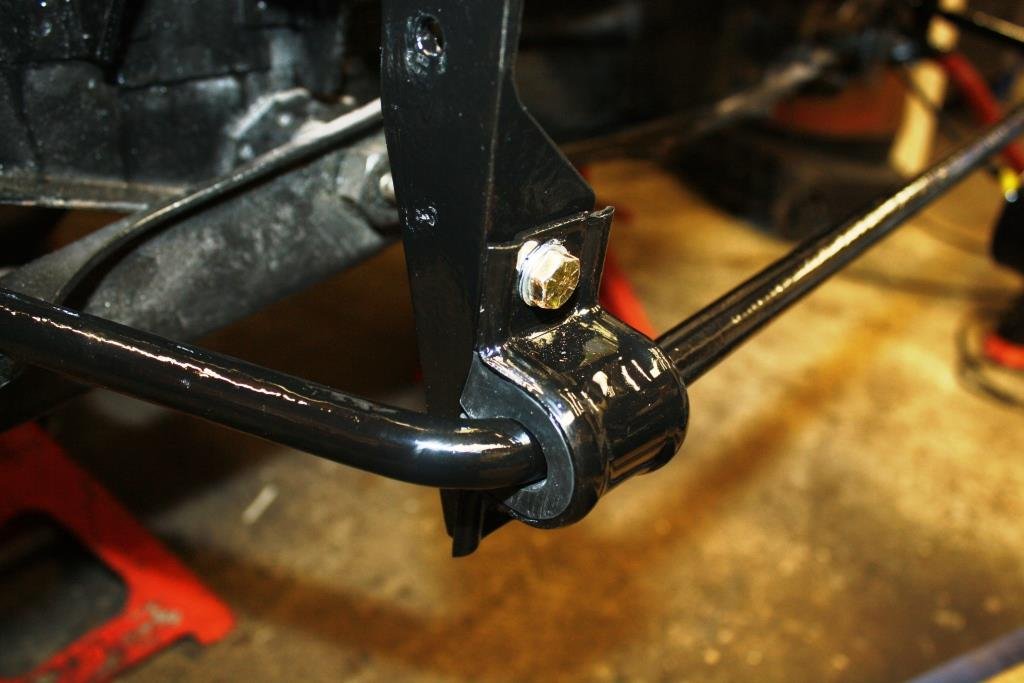
A bit of a slow week stuck at home isolating with the bloody ‘rona and lacking motivation. Managed to finish off mounting the brake plumbing. I’ve been taking second glances at the front sway-bar setup, the top mount of the dropper arm is shared by the front bumper mounts and it’s not ideal as there is some movement there when the suspension is working. In its defense the setup has covered literally hundreds of thousands of km and it’s easy to forget I made this stuff in the early 80’s with only rudimentary hand tools. Long term plan once Rigamortice is back on the road is to put some of my race car suspension tuning experience toward seeing how well I can get the old girl to go around corners – could be a bit of a laugh on a good bit of open road! I’ll probably need the sway bar to be adjustable so the big question is do I do it now? Mounted the front grill surround to check how much room I’ll have to play with having lowered the front end – still no clearance issues I can see. The radiator is in pretty bad shape and I haven’t a clue what car it originally came from. Anyone with any ideas of where I can find a 400mm x 600mm radiator please let me know, I’d prefer something old-school as plan B (fabricated aluminum) could look out of place. https://oldschool.co.nz/index.php?/topic/49843-sr2%E2%80%99s-1947-vauxhall-%E2%80%9Crigamortice%E2%80%9D-discussion-thread/
-
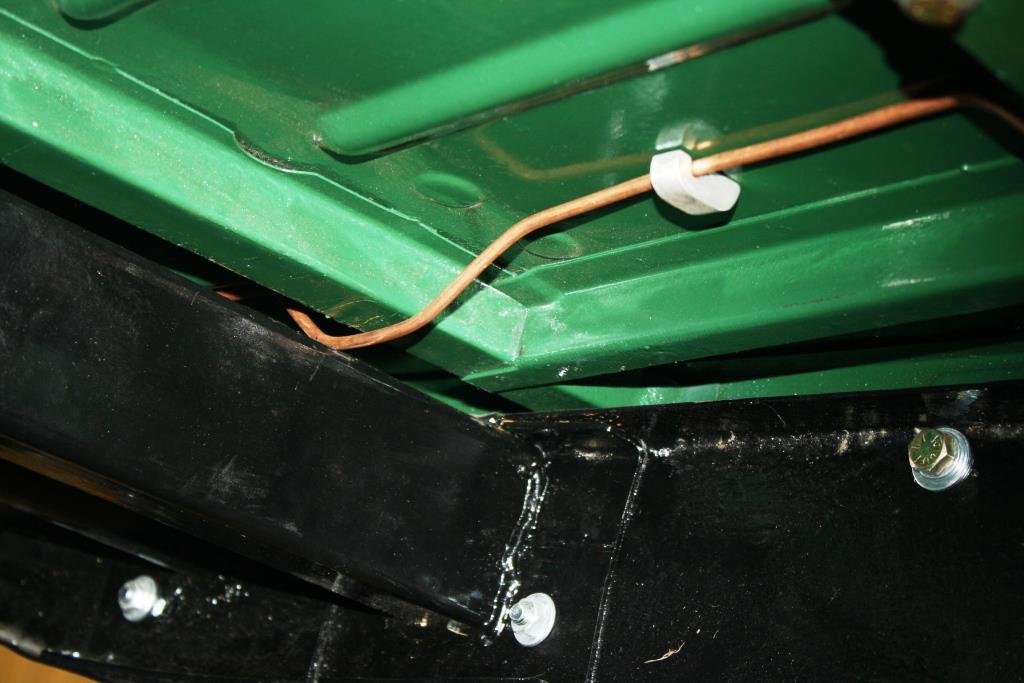
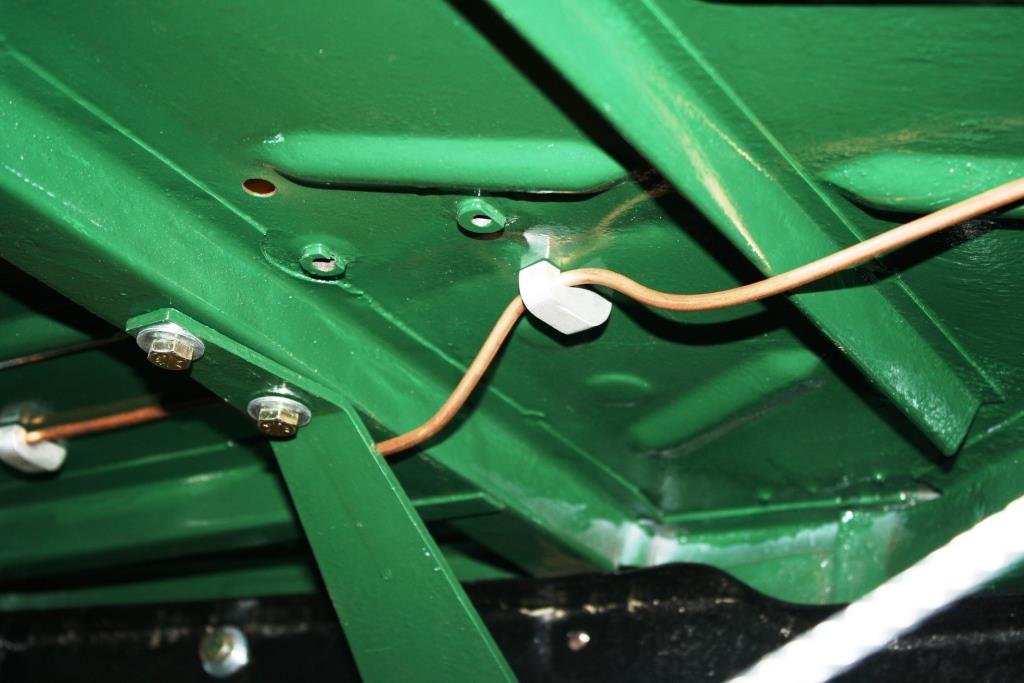
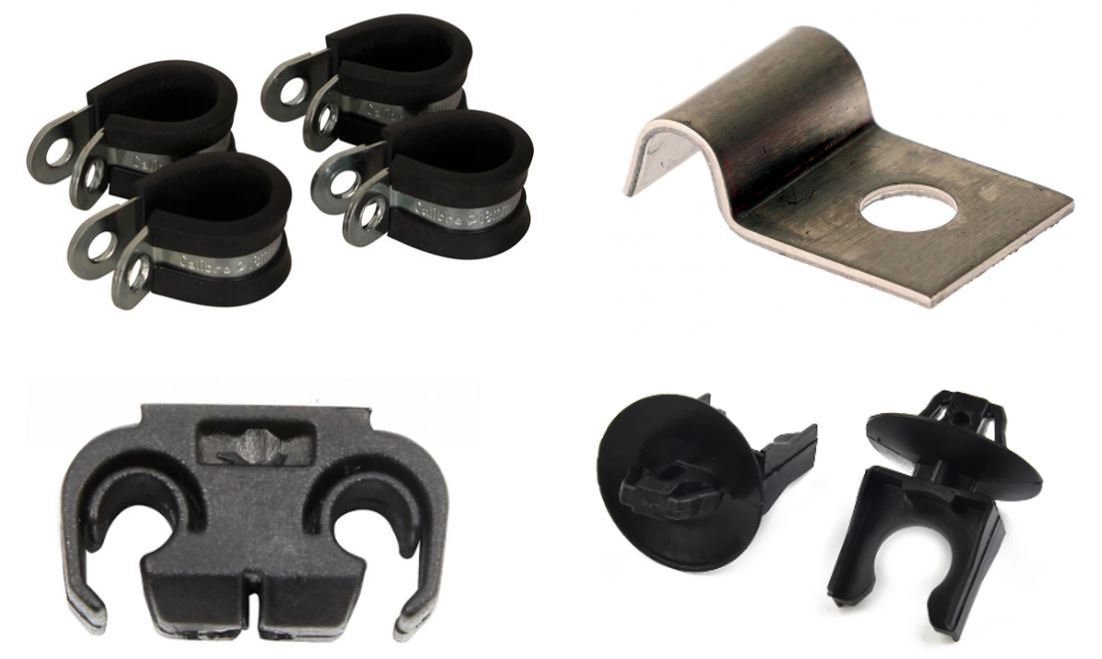
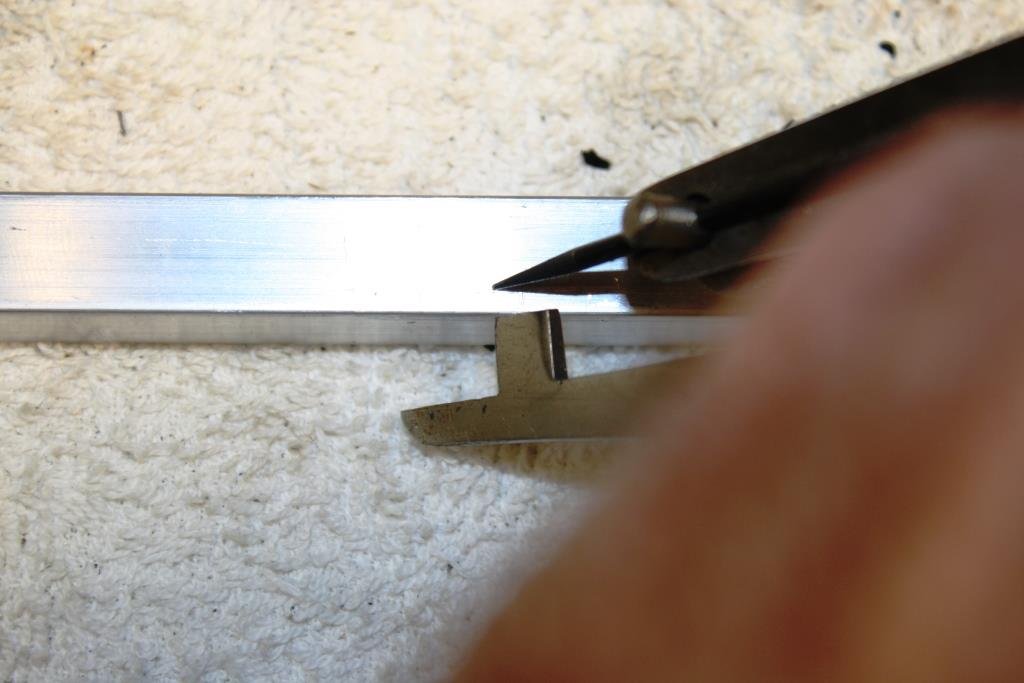
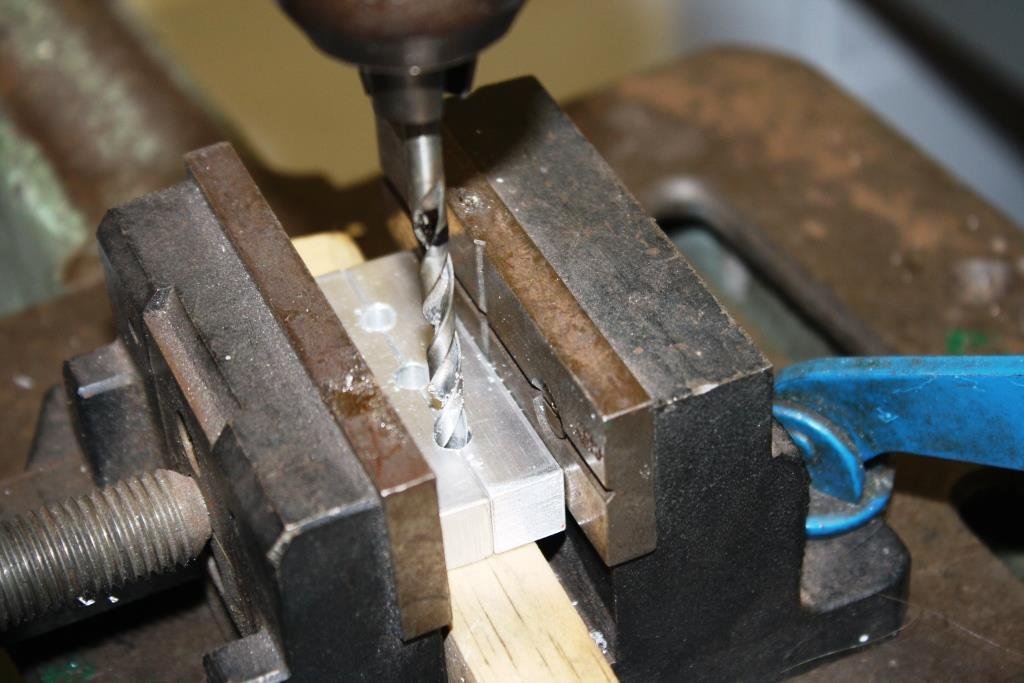
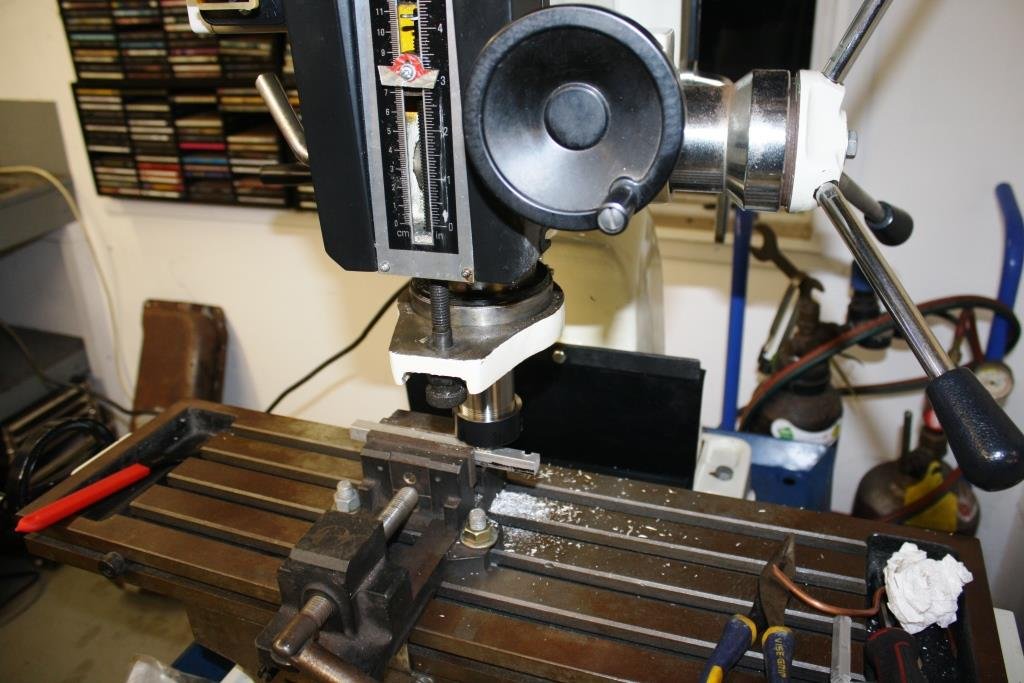
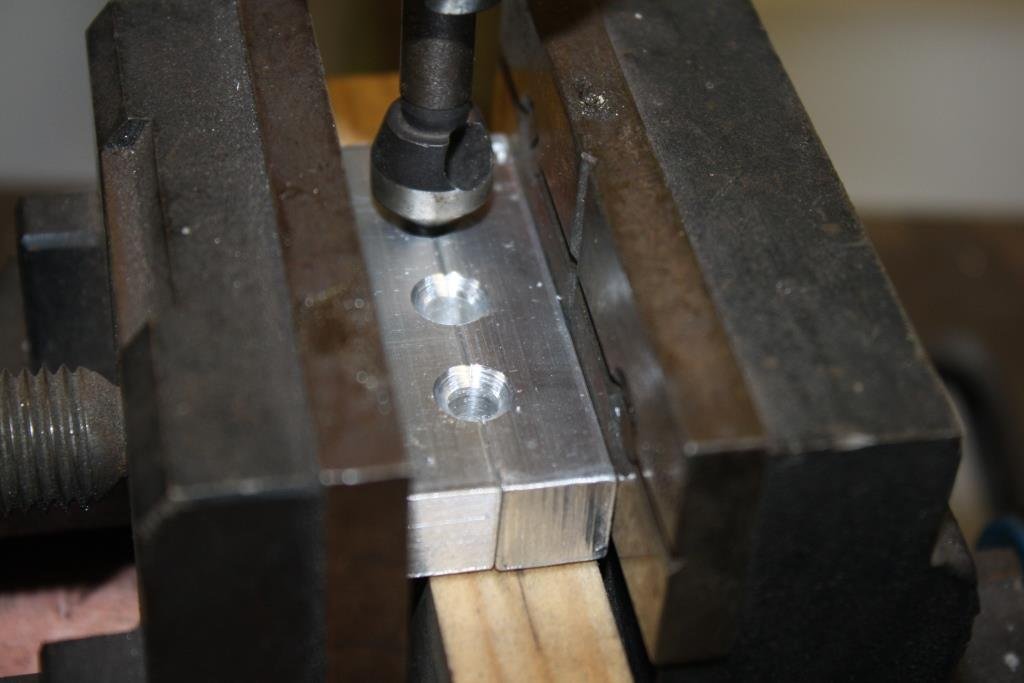
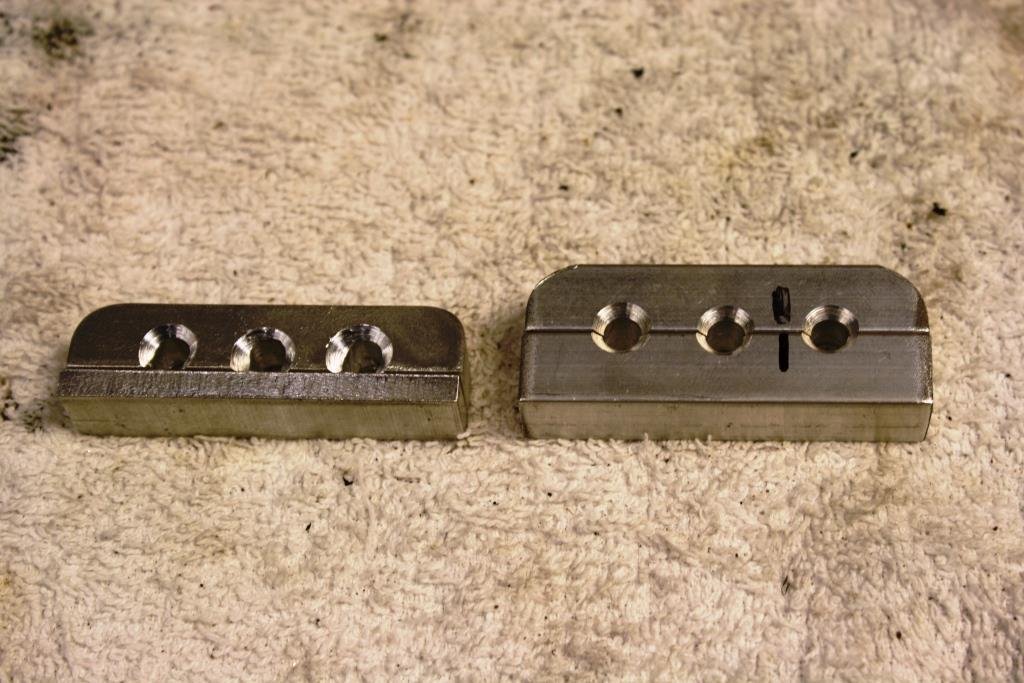
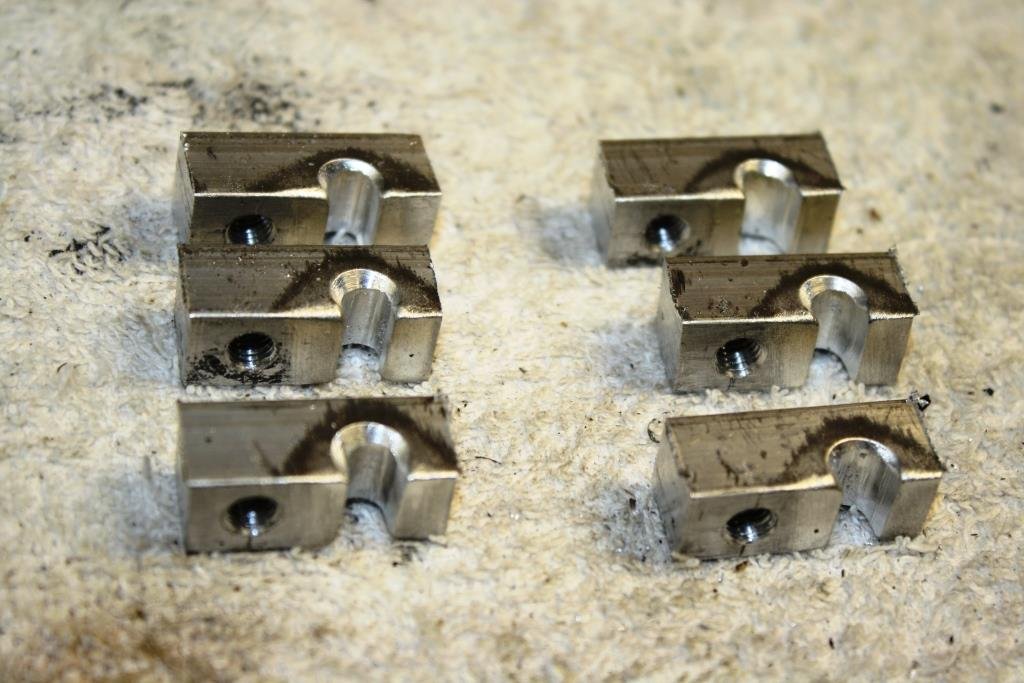
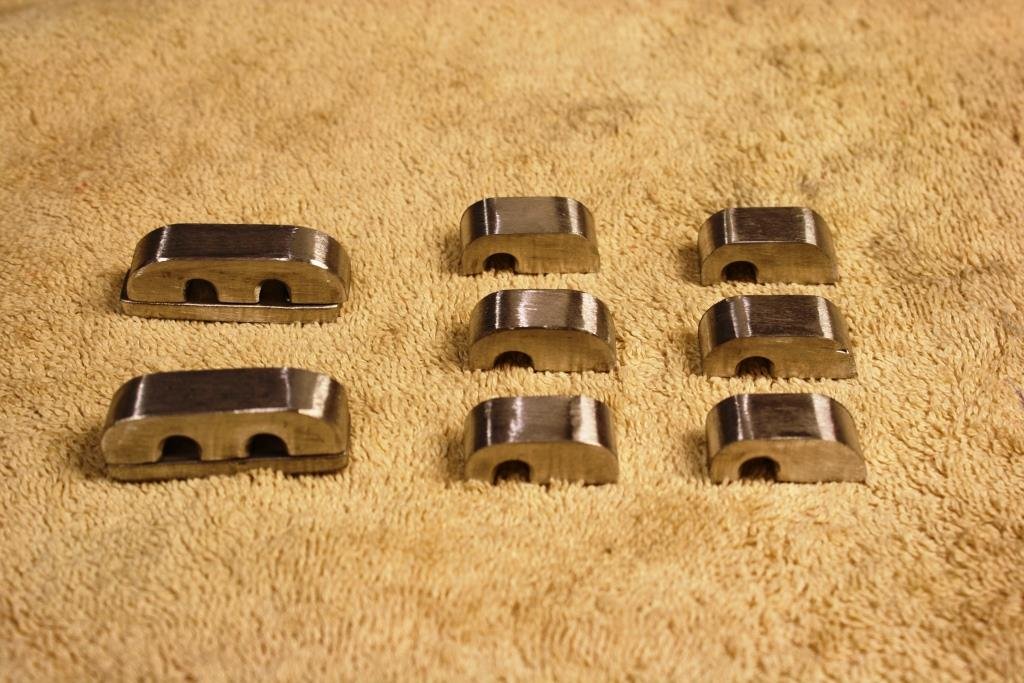
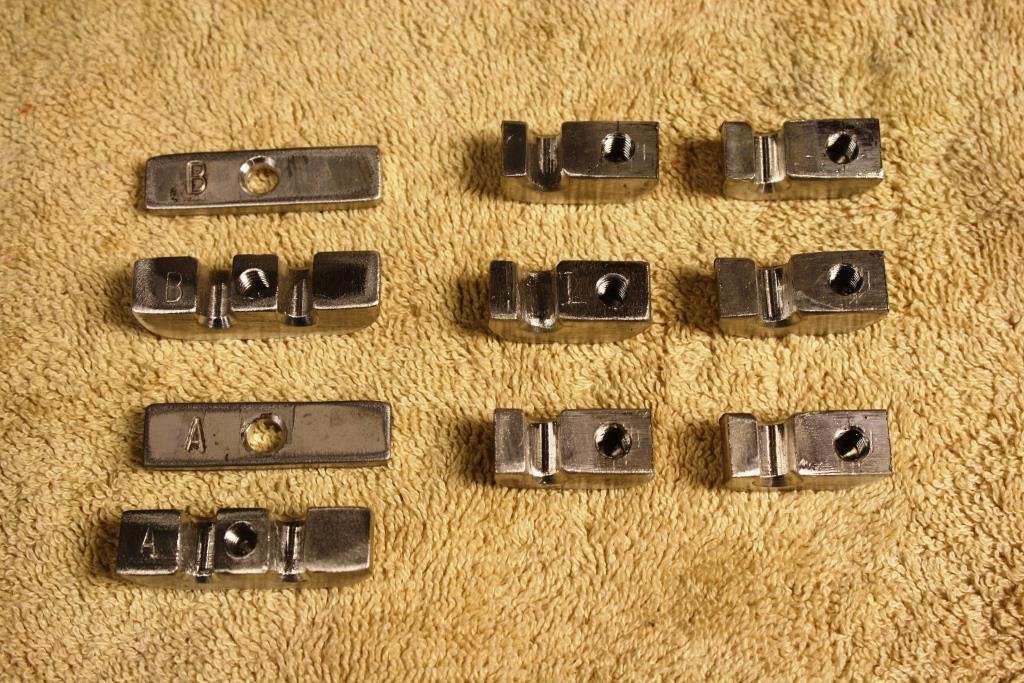
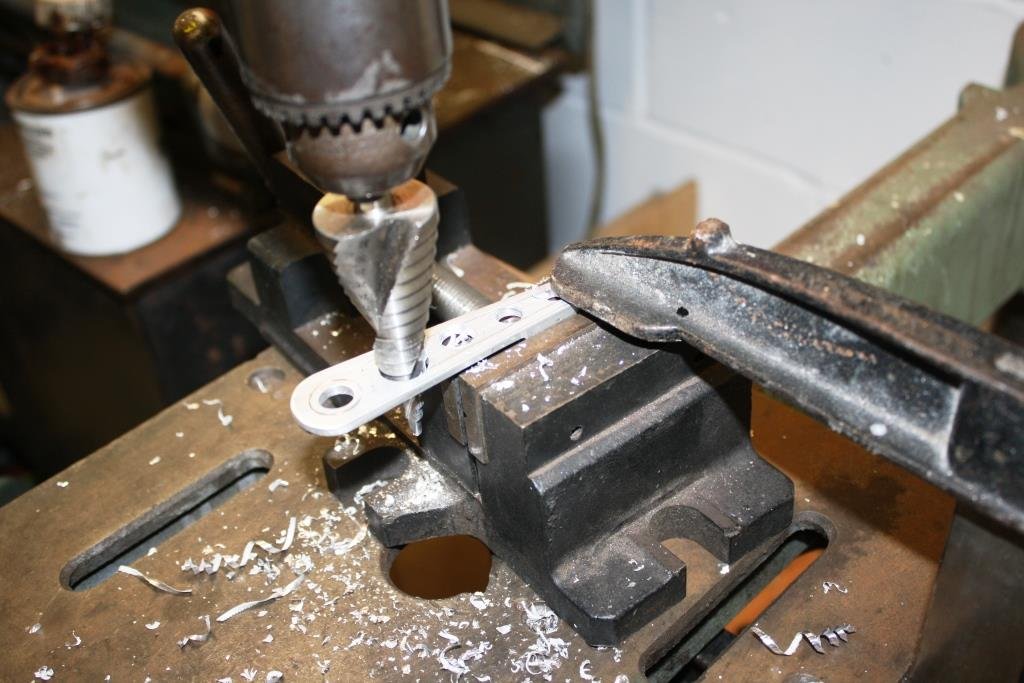
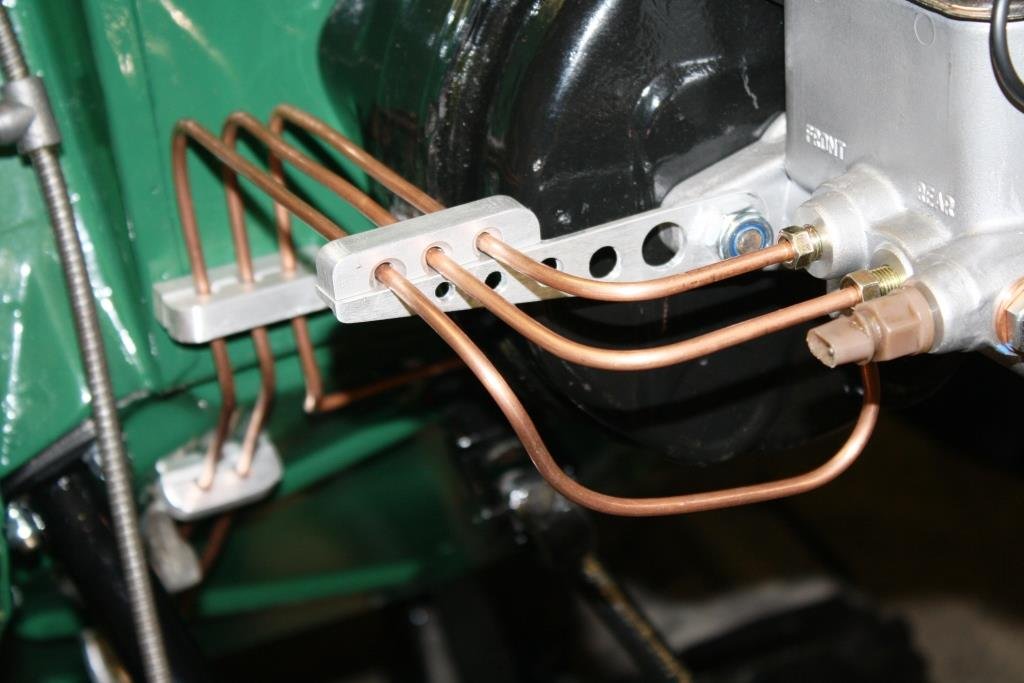
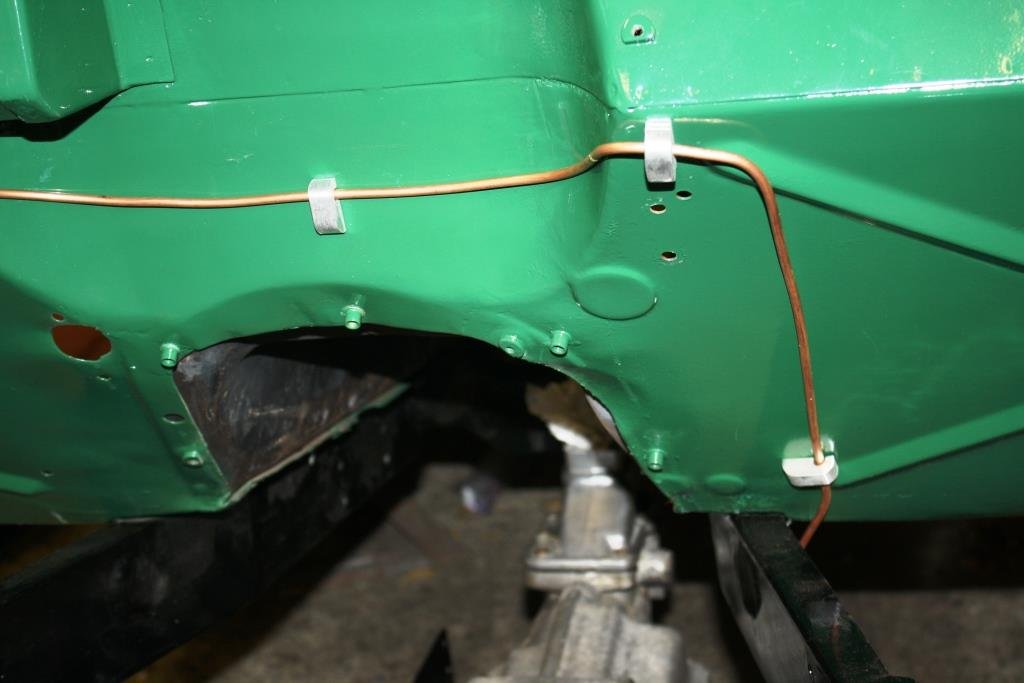
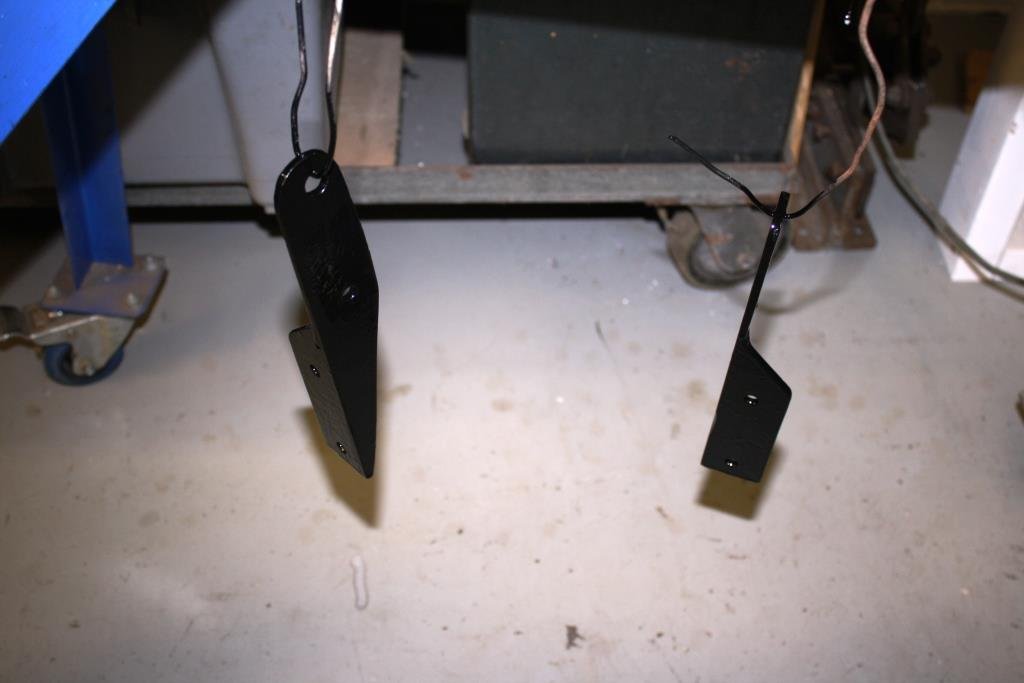
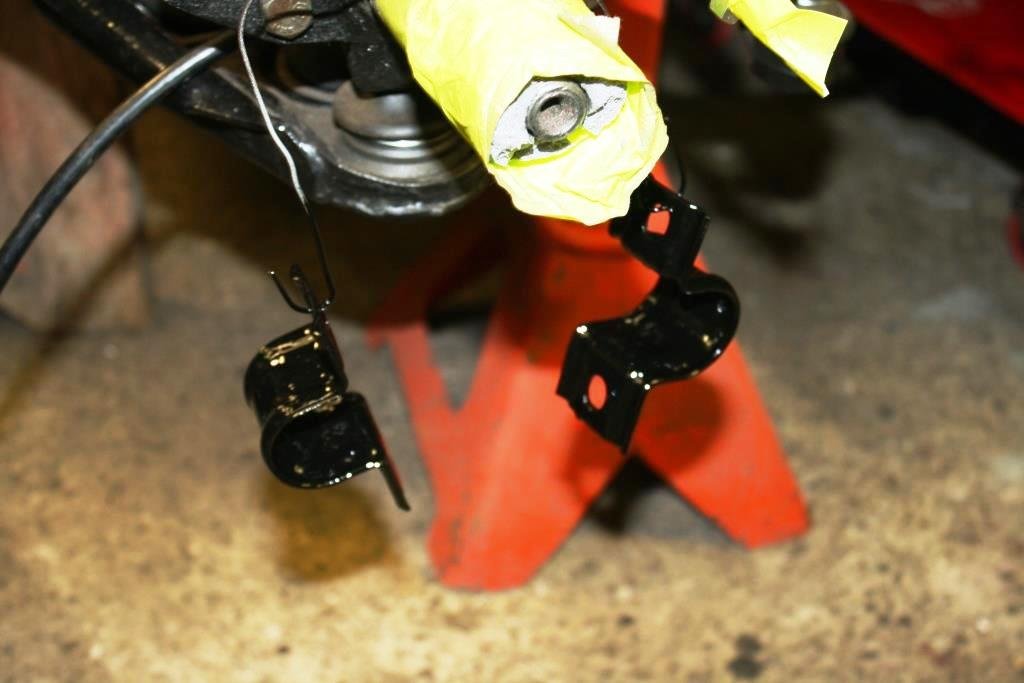
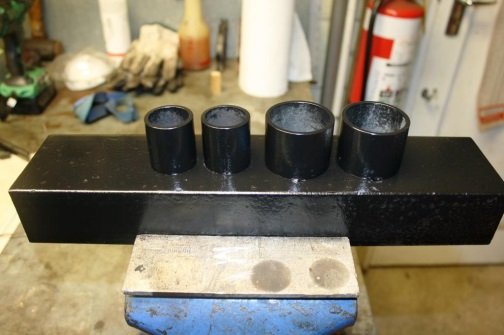
Started looking for suitable brake line saddles, all I could find were the same old clips we were using 40 years ago and some newer B/S plastic variants. Just a reminder that the plan is for this rebuild to last another 75 years – When the time rolls around for the next rebuild Rigamortice should be going strong while we’ll all be dead & buried! Maybe we need something a little more old school with a little steampunk thrown in for good measure? Started by buying length of 10mm ali square from SD Aluminium in Albany (great company). Marked things out with the odd-leg…. Started cutting, milling, drilling, countersinking and tapping…… Cleaned them up on the linisher….. Knocked up a holey bracket or two…… And bolted it all in place.
- 184 replies
-
- 30
-
-
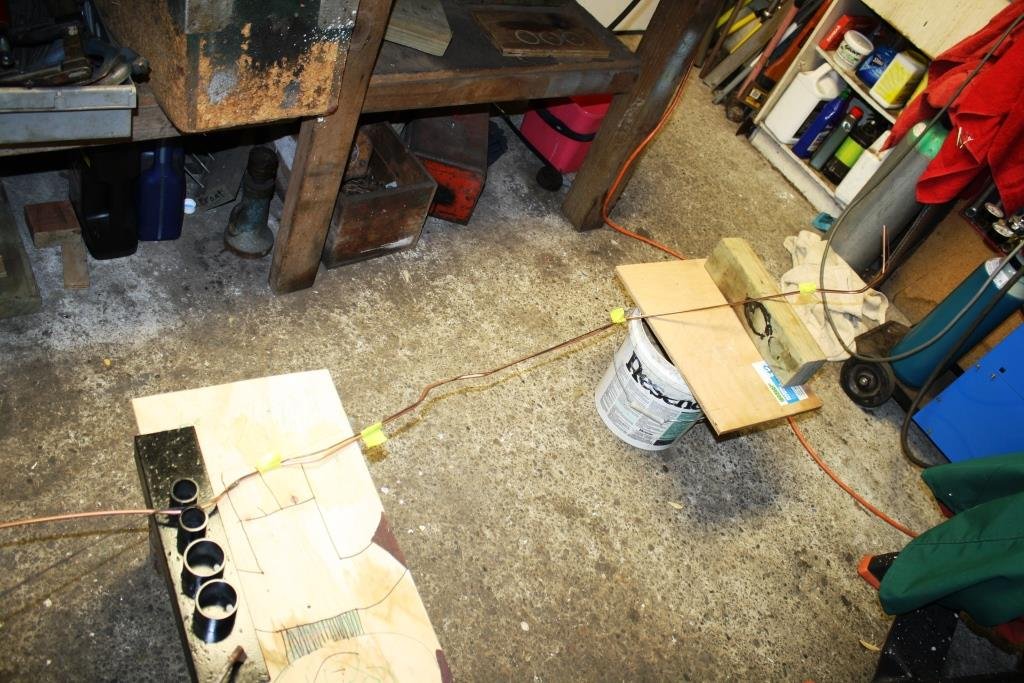
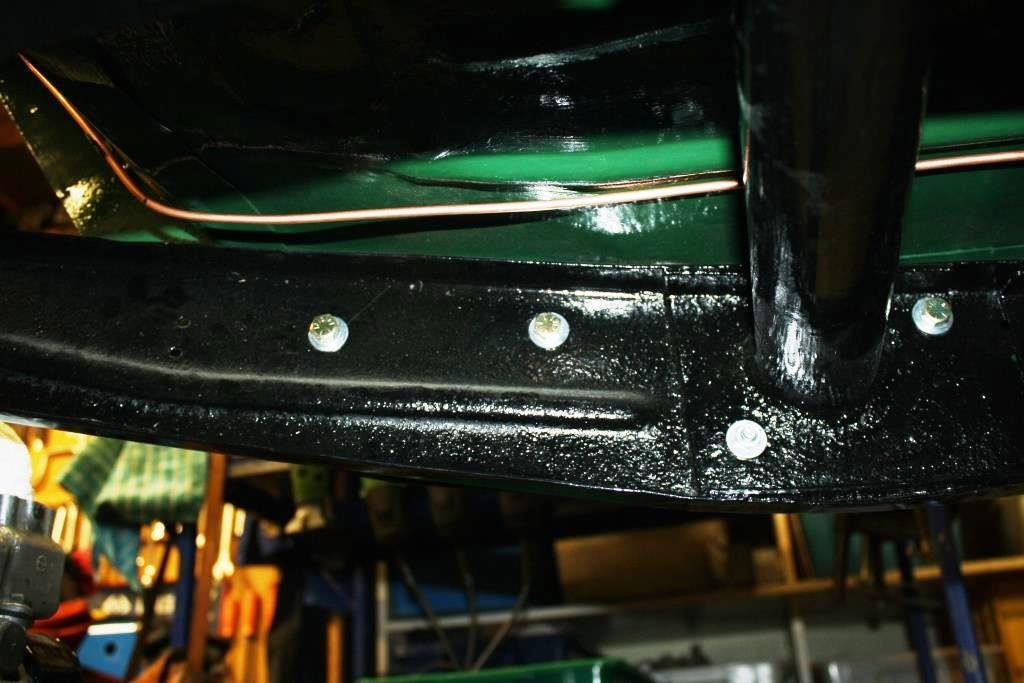
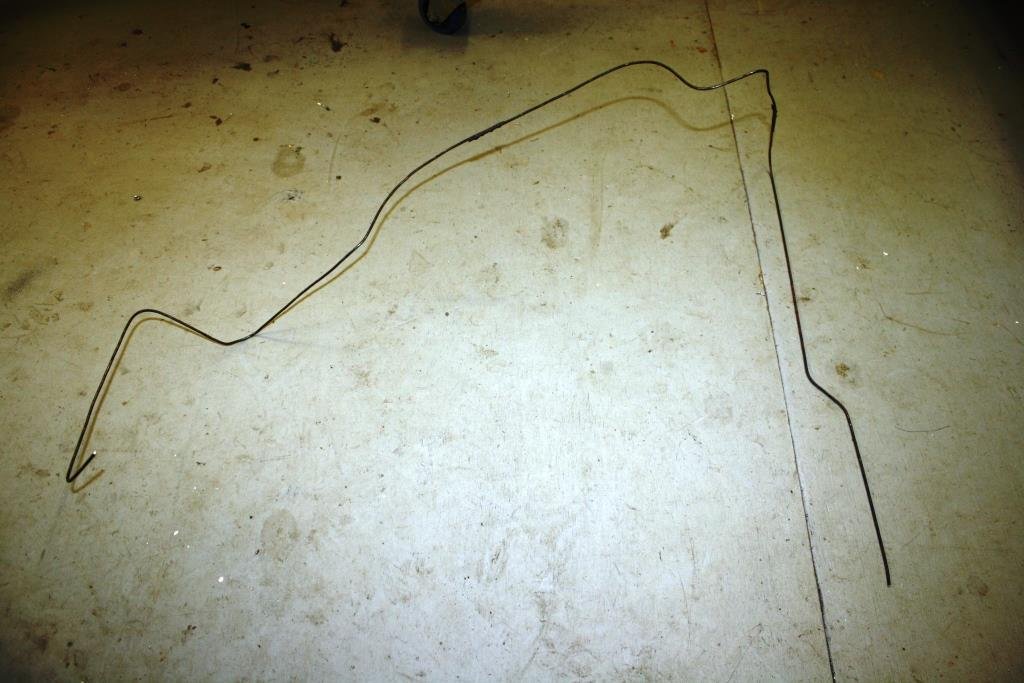
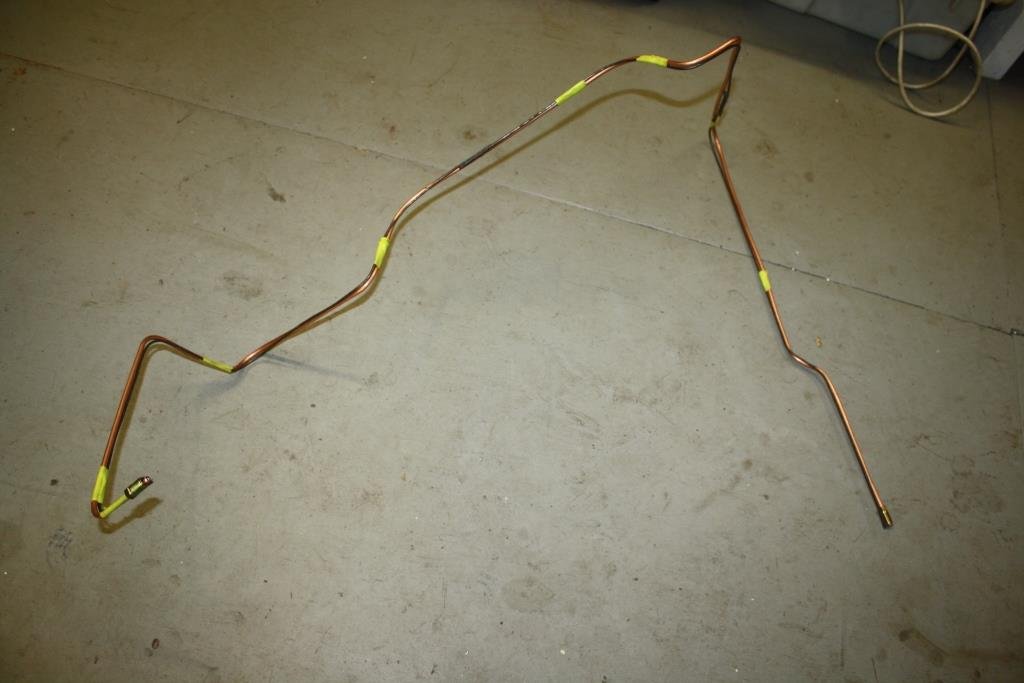
Time to run the brake lines, starting with the rear as it’s the longest. Welding wire pattern……. Following the wire pattern (I find it easier to tape them together as you go). Happy with the result… And it even fits! Starboard front was a lot easier. Bit more drama with the Port front… A rather convoluted shape… Lots of bending in all directions… Once again happy with the result. And once again it bloody fits!
- 184 replies
-
- 22
-
-
-
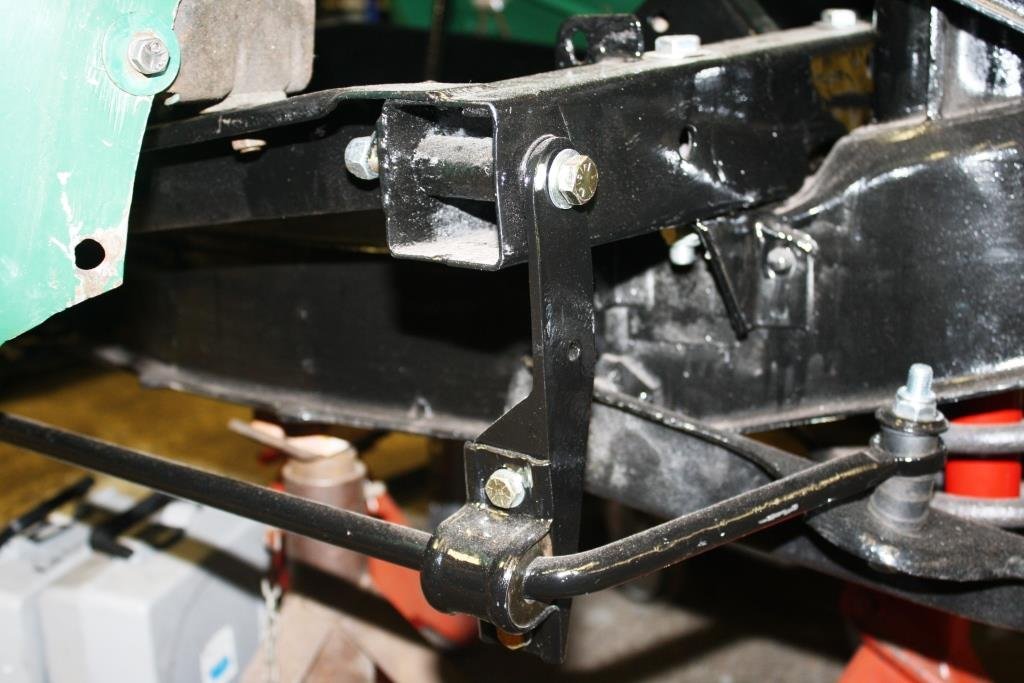
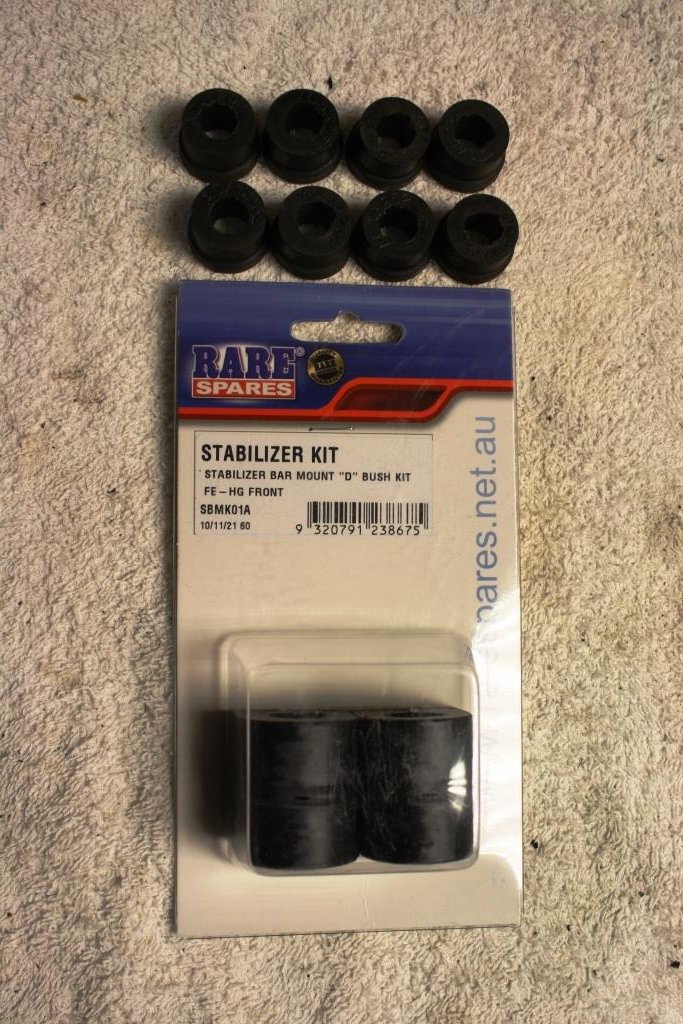
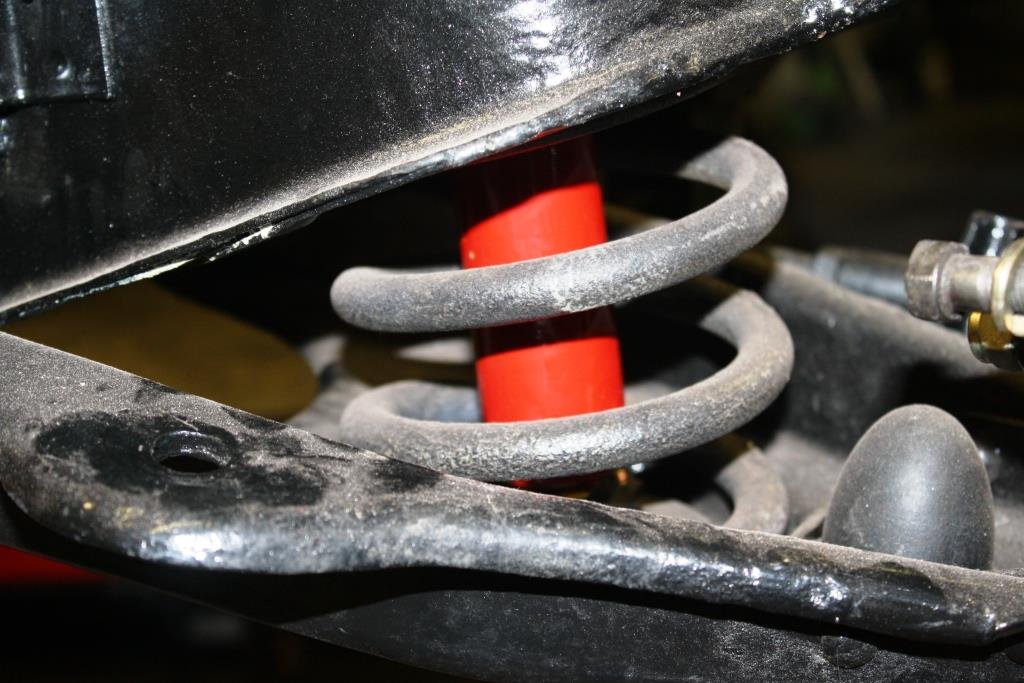
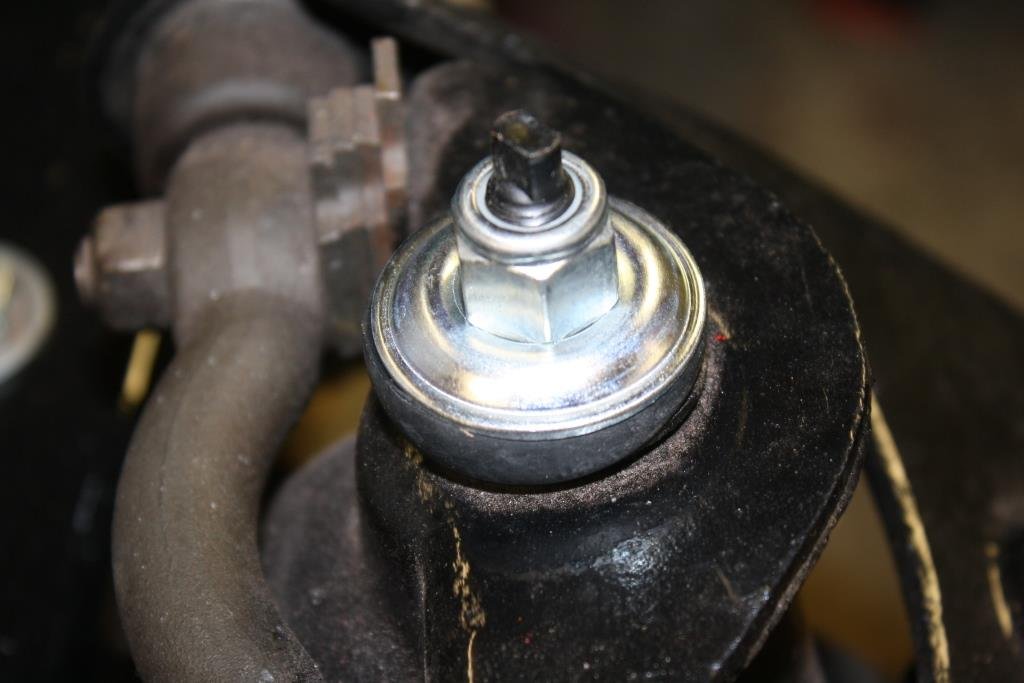
Time to sort out the front sway-bar and shocks. Disassembled the sway-bar and started cleaning and painting. A lot of painted parts hanging out to dry… Had some D bushes arrive from Rare Spares in Oz and some doughnuts arrive from Basis in NZ. The standard HR Holden sway-bar is mounted to the chassis rails with D bushes and dropper rods to the lower suspension A arms. Because Rigamortices chassis rails were closer together and the radiator shroud was in the way I’d mounted the sway-bar to the bottom A arms and dropped the D bushes to be below the chassis. Dug out the new shocks I’d had in storage for a few years…. Just love assembling new and refurbished parts, always feels like Xmas….
- 184 replies
-
- 13
-
-
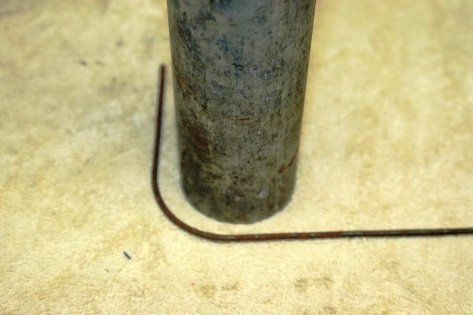
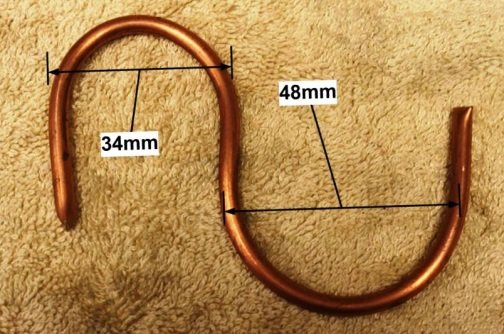
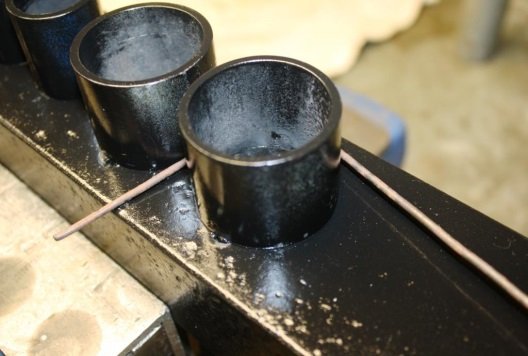
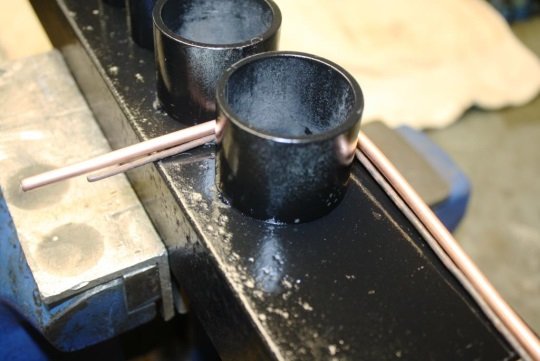
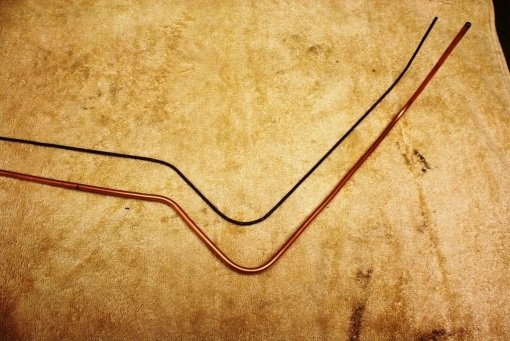
Brake line bending 101 Hi guys; more semi-incoherent, sanctimonious musings from the Universally Renowned sr2 man-cave University of Beer, Bullshit and Bad Manners. As always feel free to comment, disagree or just sling random insults. https://oldschool.co.nz/index.php?/topic/49843-sr2%E2%80%99s-1947-vauxhall-%E2%80%9Crigamortice%E2%80%9D-discussion-thread/ Just finished a brake & booster upgrade on a friends MBG GT and thought I’d share my brake pipe fabrication technique. For what it’s worth this is how I do it. In the late 70’s and early 80’s copper tube was commonly used and we produced some very pretty hand bent installs. In its defence despite copper being soft and susceptible to work hardening we had no failures due to the material used. These days with higher pressure/less displacement systems copper is frowned upon and after a brief flirtation with steel Bundy tubing (bloody awful stuff) most of the industry has settled on copper nickel tubing. It’s malleable, looks the part and is a joy to work with. Traditionally I’d make a pattern using 2.5 mm welding wire and then attempted to replicate it with my trusty bender. Problem was replicating handmade wire bends with a set radius bender at best produced an average result. After a rare Wild Turkey inspired flash of inspiration (i.e. a rush of shit to the brains) I tried using a piece of scrap pipe of the correct diameter (i.e. 48mm as per my tube bender) to bend the wire pattern. Things got a lot easier but it was still challenging to get the length of tube between the bends consistent with the pattern. I had a little play and discovered that with copper nickel I could ditch the bender and just wrap the tubing around my pipe former and better than that I could even manage a smaller 34 mm radius bend without distorting or collapsing the tube. Next step was to knock up a 34/48 mm bending former out of scrap. I use the bending former to bend the wire pattern… And then line the tube up to make the same bend in the same position. Easy as… Bottom line is if you use the same bending former for both the wire pattern and the brake tube you save yourself a lot of grief.
- 184 replies
-
- 19
-
-
-
That's friggin gorgeous mate.
-
LOL, I suspect I might be classified as being an "old fart"! Nothing wrong with keeping things original, tidy HG's are getting thin on the ground theses days. I've never seen a new booster install from that era needing a cert, the aussie stuff was pretty generic.
-
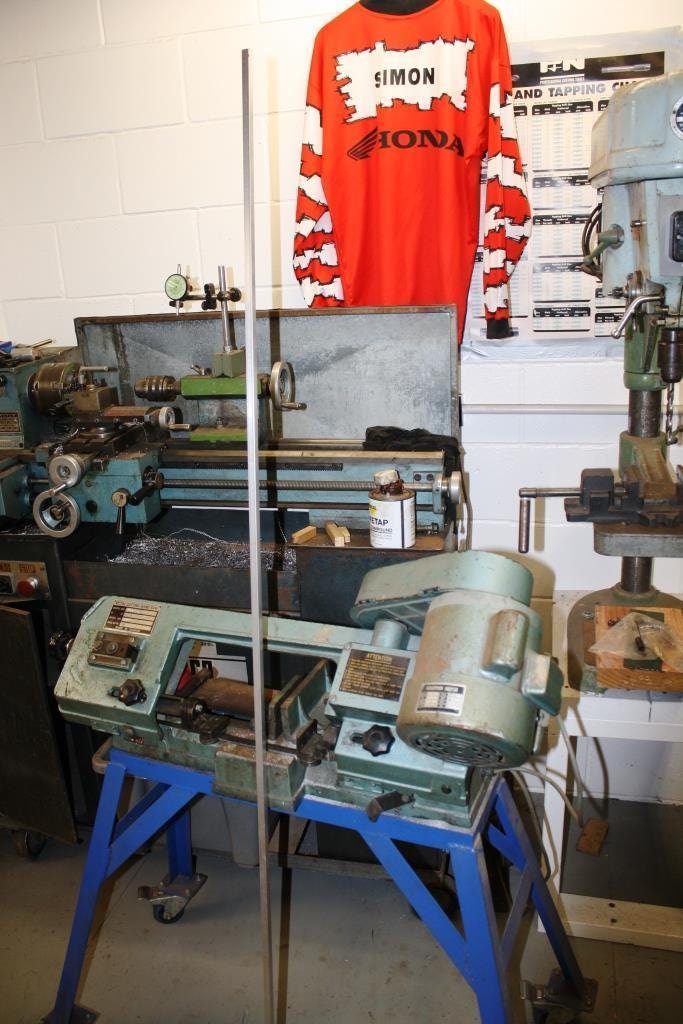
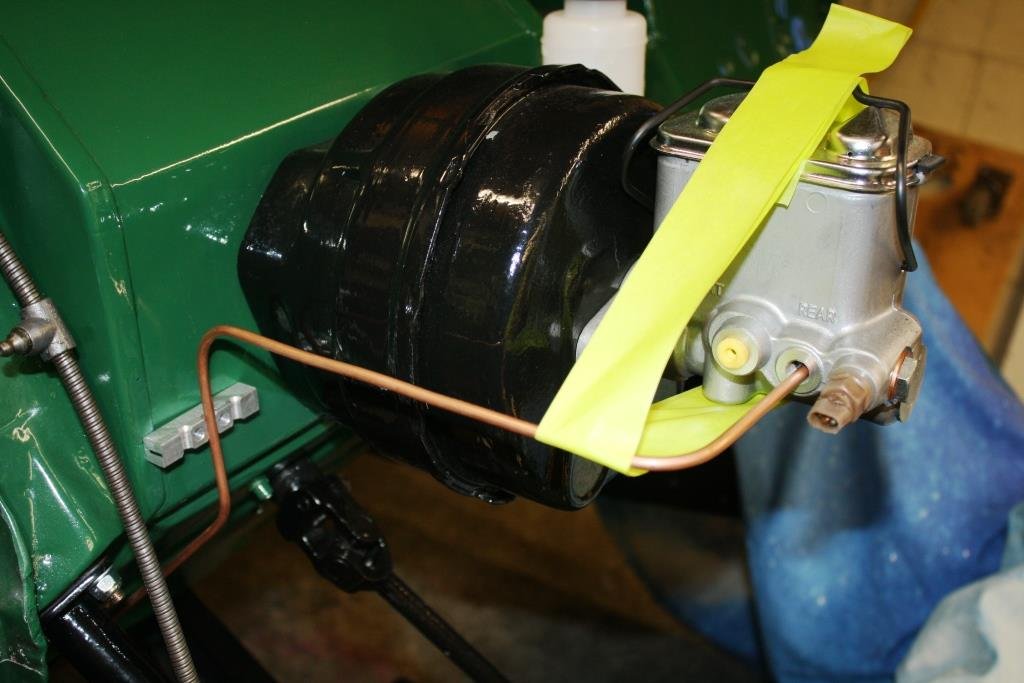
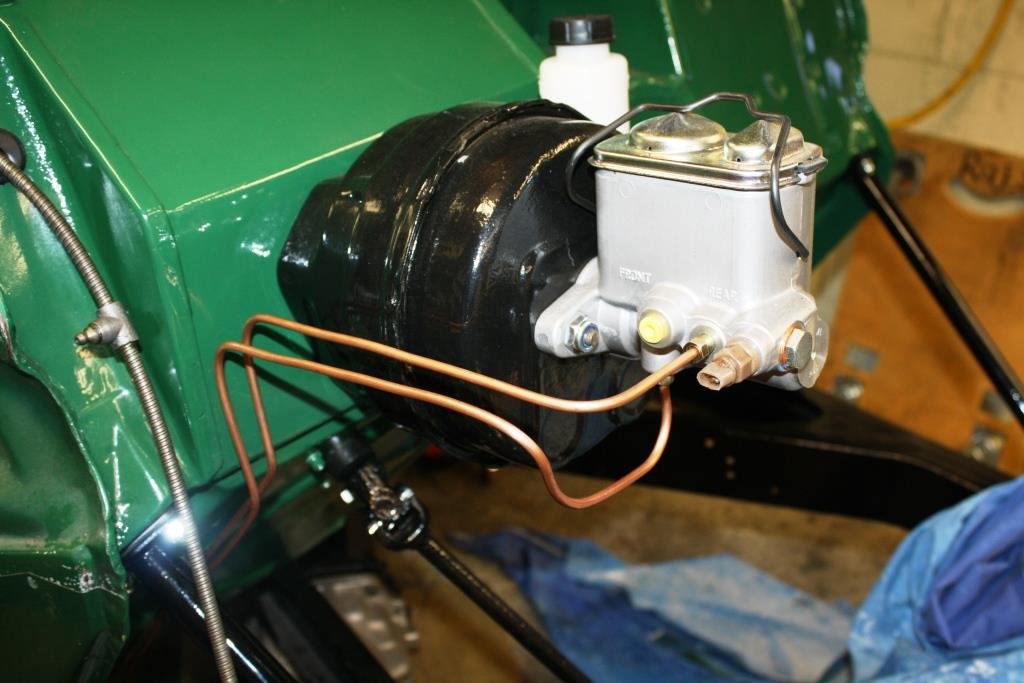
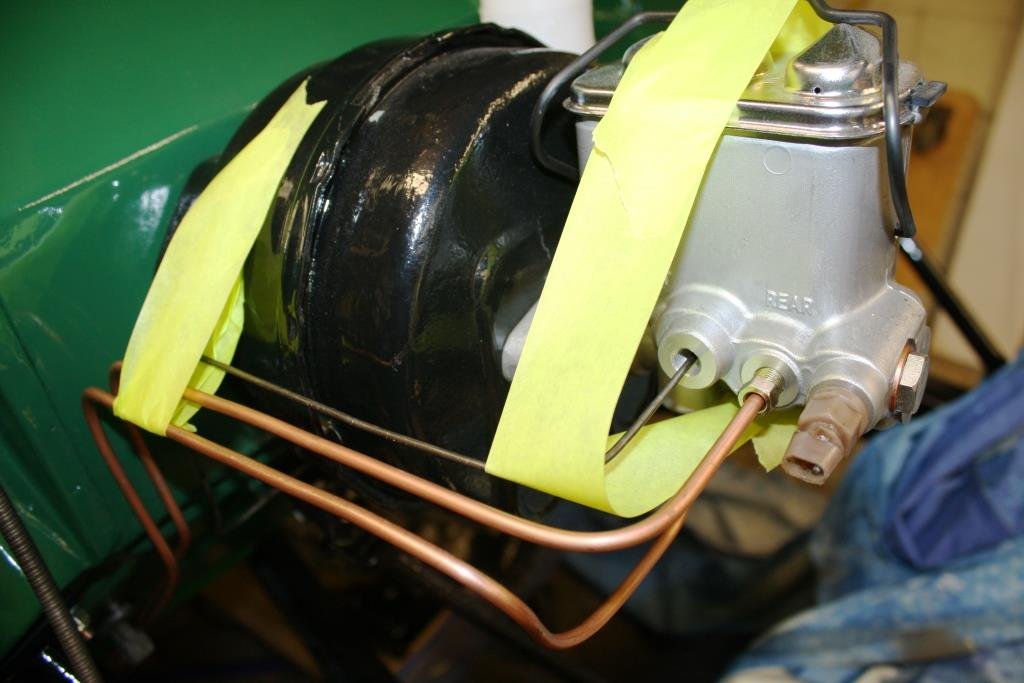
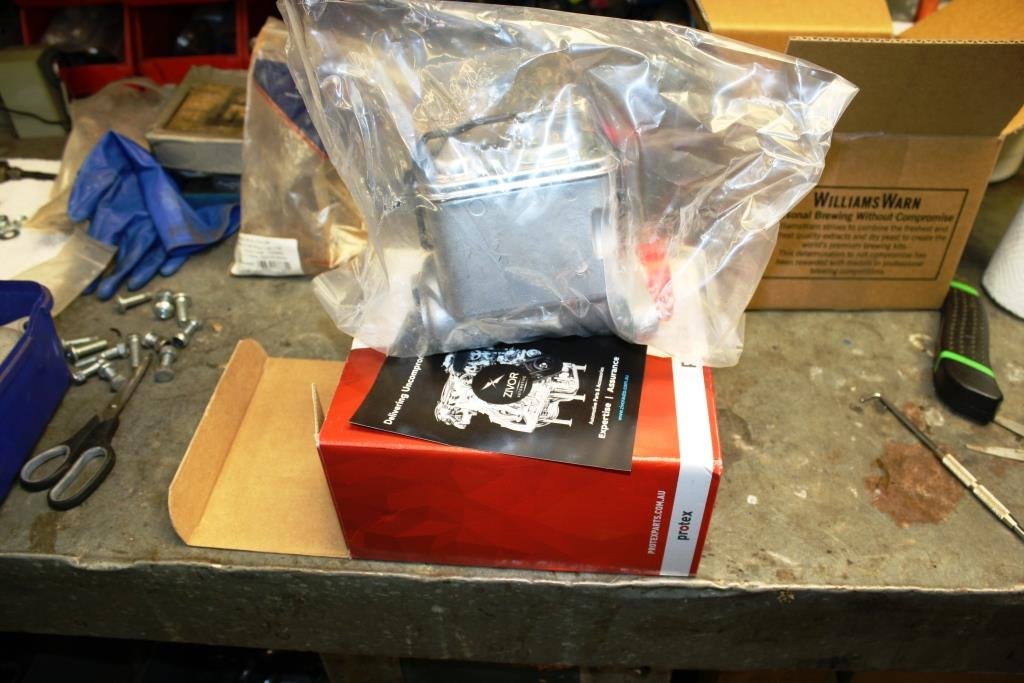
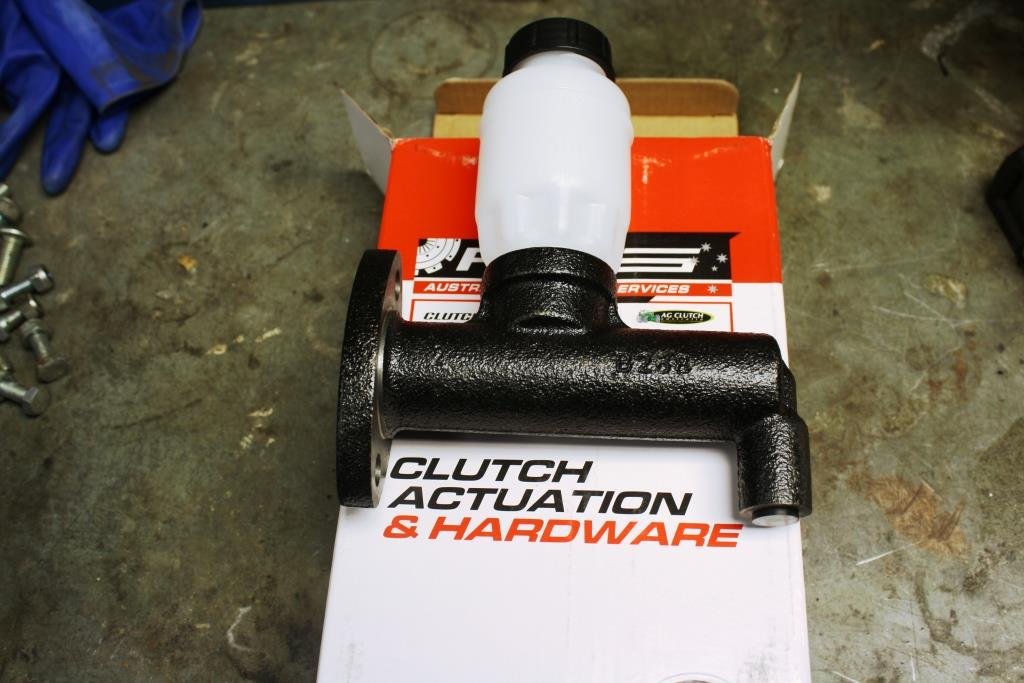
A new Master Cylinder arrived today…. And a clutch master as well… A bit more paint…… All mounted up….. Needed a 1 inch clutch slave and found a Triumph 2000 one at a great price.
-
LOL, I have to confess I haven’t had one of those in bits for a long, long time. Even when all the internal parts were available new they were pricks of things to work on. The two piece Bakelite valve body had a habit of breaking when you unscrewed them and it was often a mission to get them to hold a vacuum when reassembled. As a rule of thumb if an earlier style tandem PBR Mastervac is is working and most importantly dry inside all I would do is replace the output shaft seal & lubricate, replace the foam air filter and lubricate the input seal. In their defence they were reliable as long as the master cylinder didn’t dump brake fluid into them. Yes the cans are hard to separate, even with a jig it’s quite easy to bend the studs or even rip them out. The trick is to work your way around the lip with a small pry bar to break the seal, even then the diaphragm rubber sticks to the steel can like s*** to a blanket! Another option is to bite the bullet and spend around $500 AU on ebay and buy a new aftermarket booster/master cylinder assembly. https://www.ebay.com/itm/222137052973 I think Flash bought something similar for his Mustang, could be worth contacting him re the supplier. With rear brakes I never trust the self-adjusters, a little extra effort when assembling often avoids excessive pedal travel issues. It’s also important to radius the shoes to fit the drums. Feel free to PM me if there’s anything I can do to help.
-
What were the symptoms?
-
Is that the big single diaphragm HQ Mastervac booster?
-
Have a chat to Brugar Engineering in Barrys Point Rd Takapuna, helped me out of a few tough spots over the years. I can't recommend them highly enough. http://www.magwheelrepairs.co.nz/index.php/services/alloy-welding
-
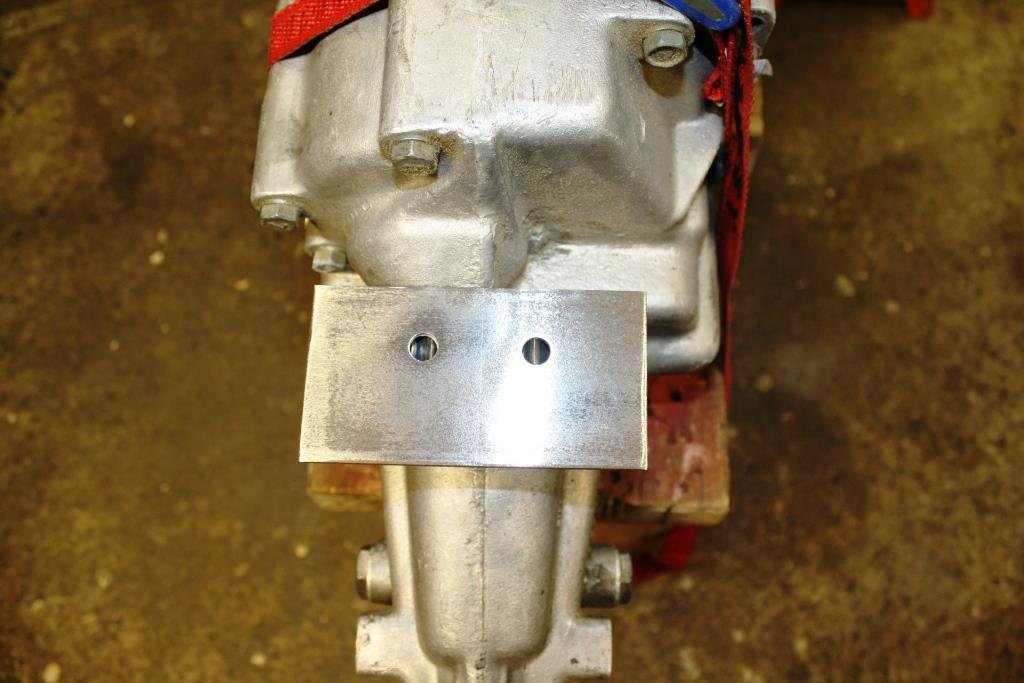
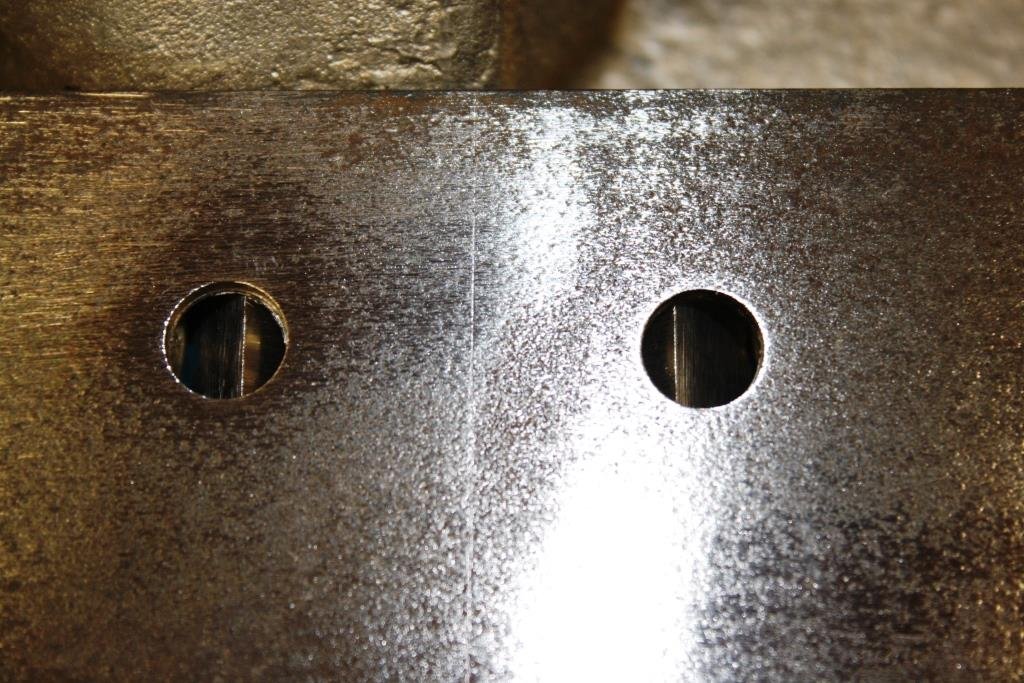
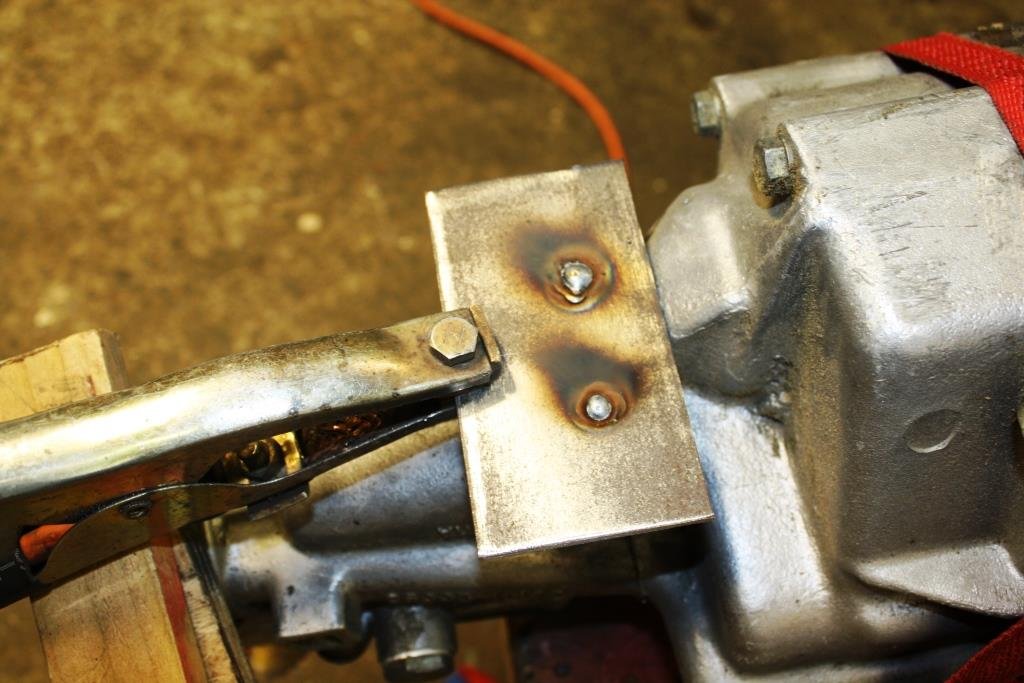
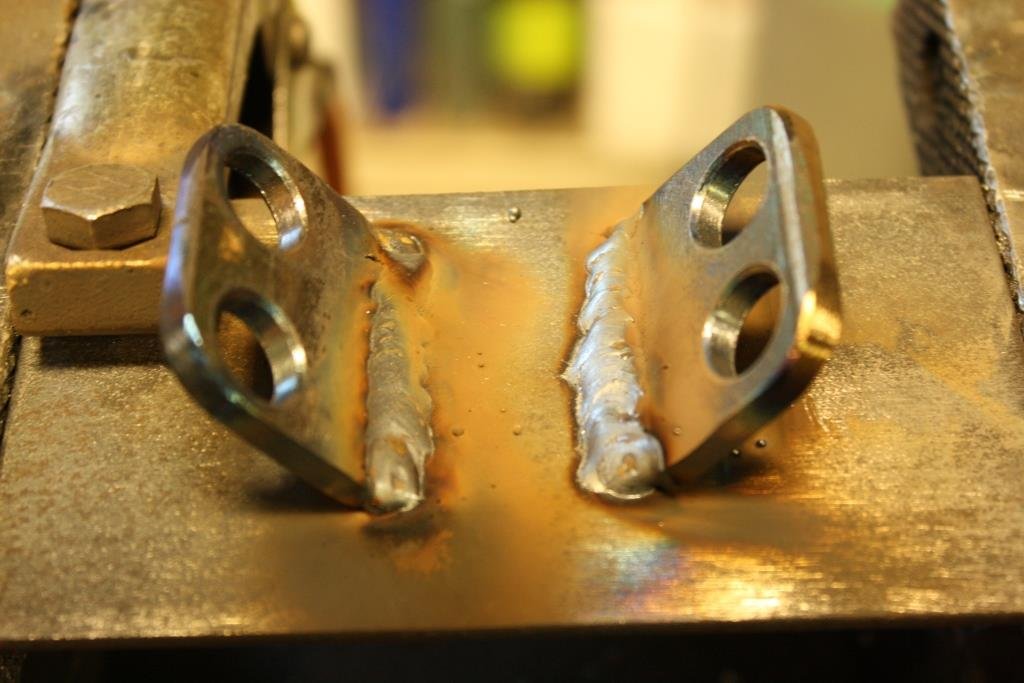
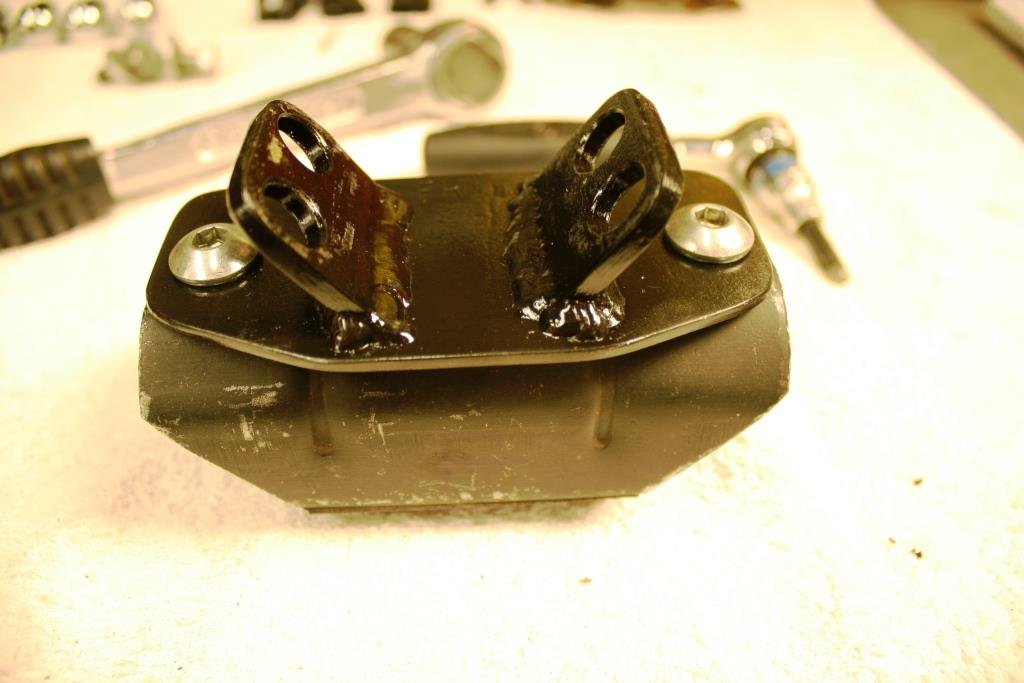
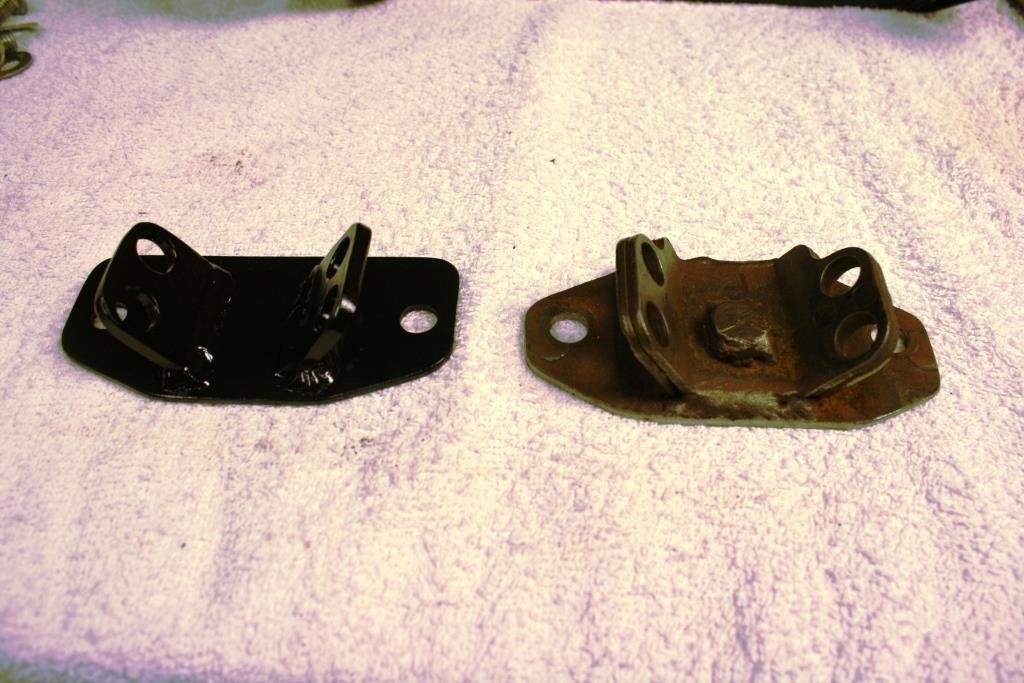
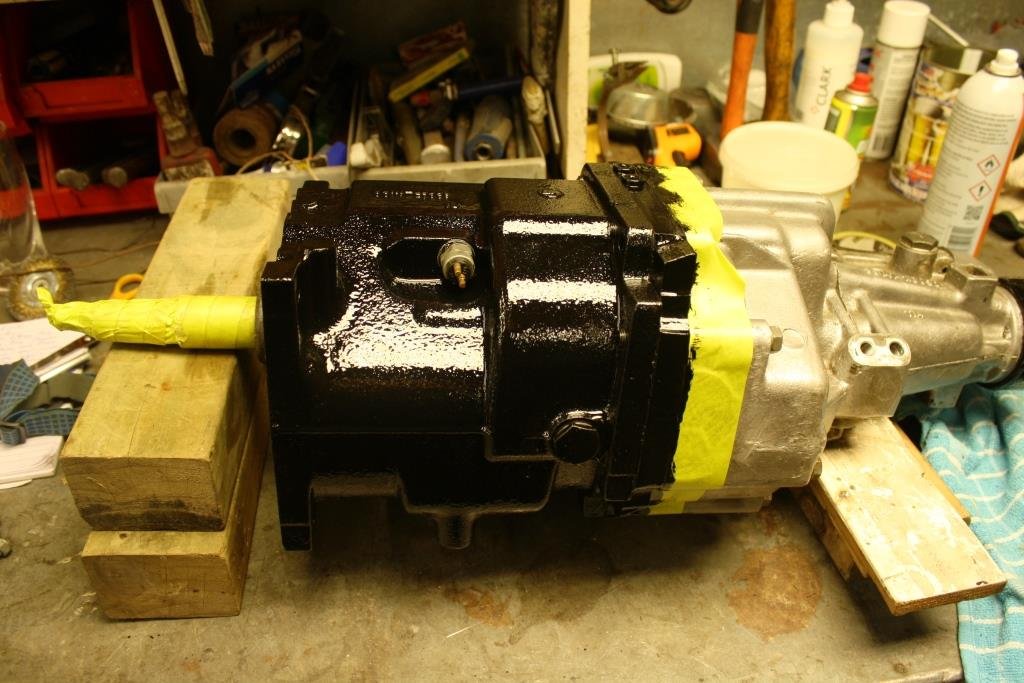
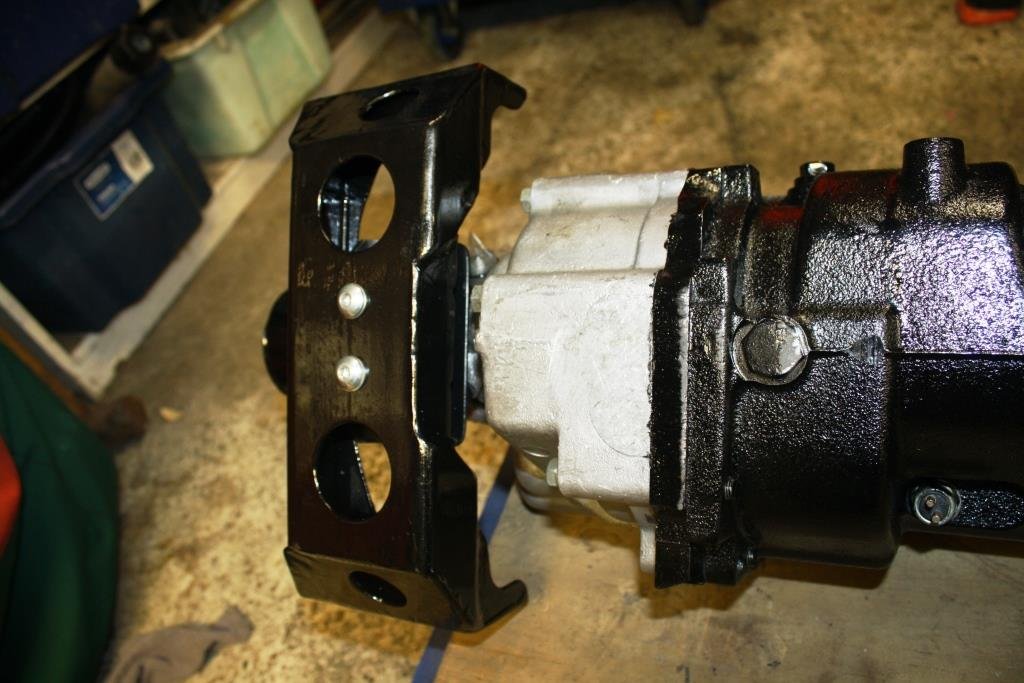
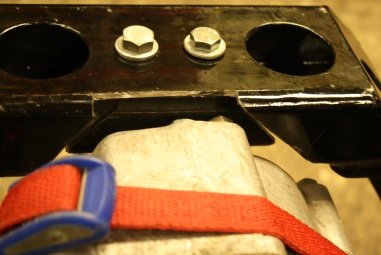
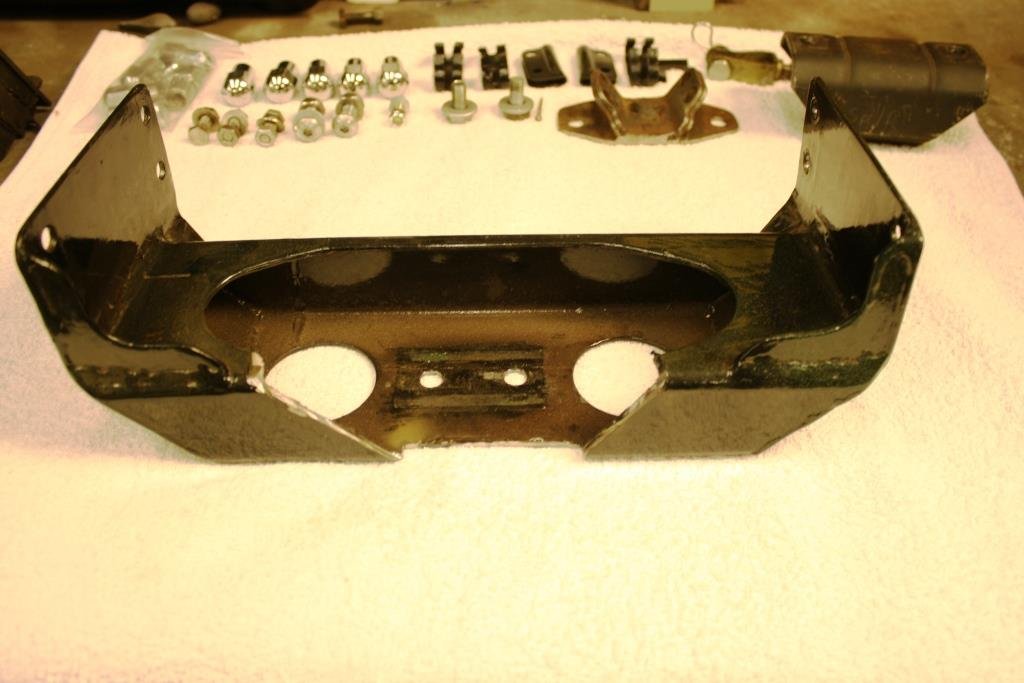
I wanted to use the standard Holden rubber g/box mount and decided the Toyota to Holden adaptor I’d made some 30 years ago was a little too manky. Cut out some plate… Cut out a backing plate… Drilled a few holes to tack through….. Flipped over and welded it all up. Did some shaping and painting…… Old vs new. Splashed some black paint on the box…… And it all fits.
- 184 replies
-
- 15
-
-
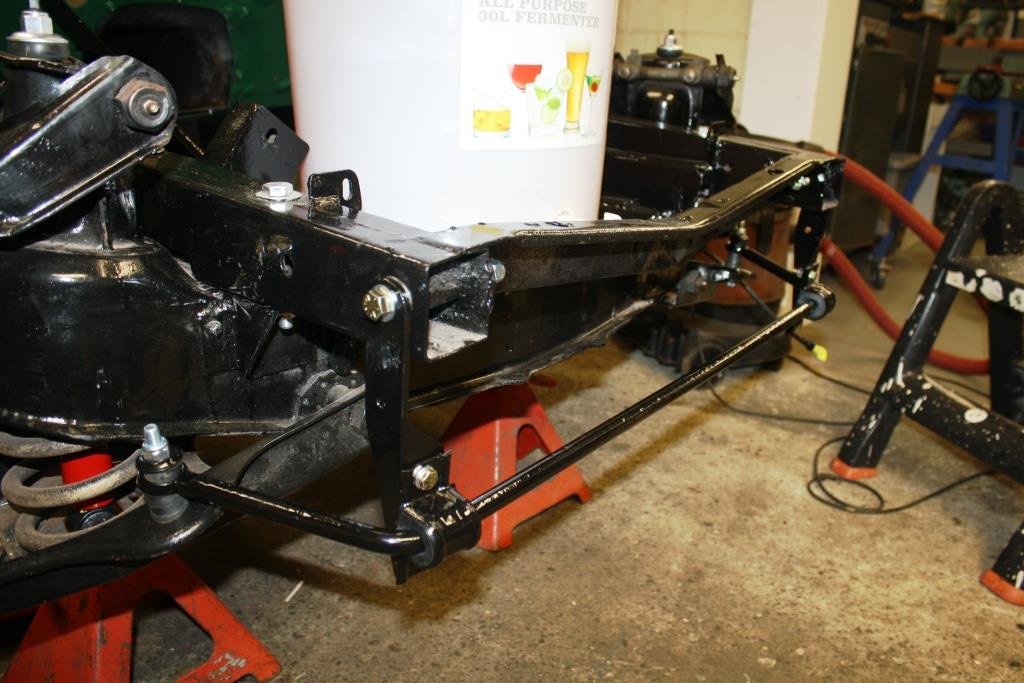
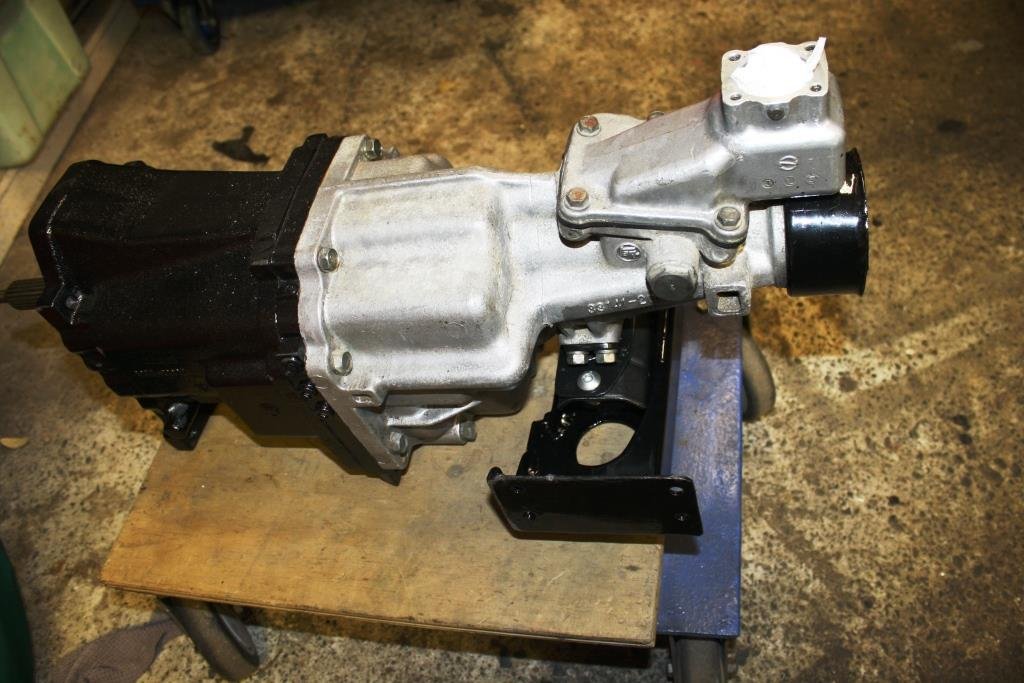
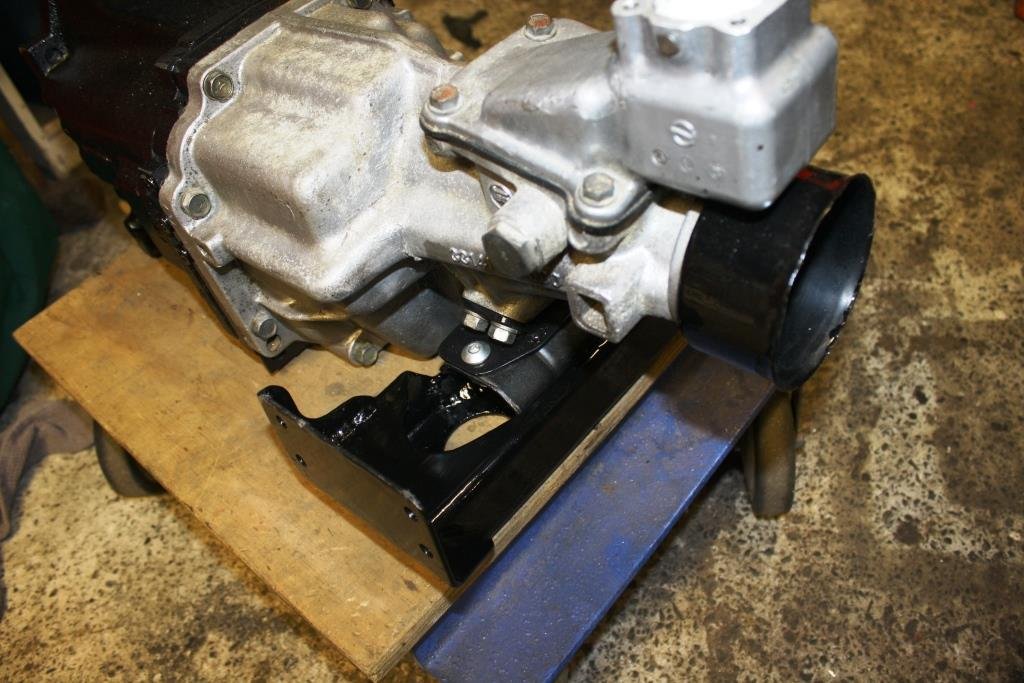
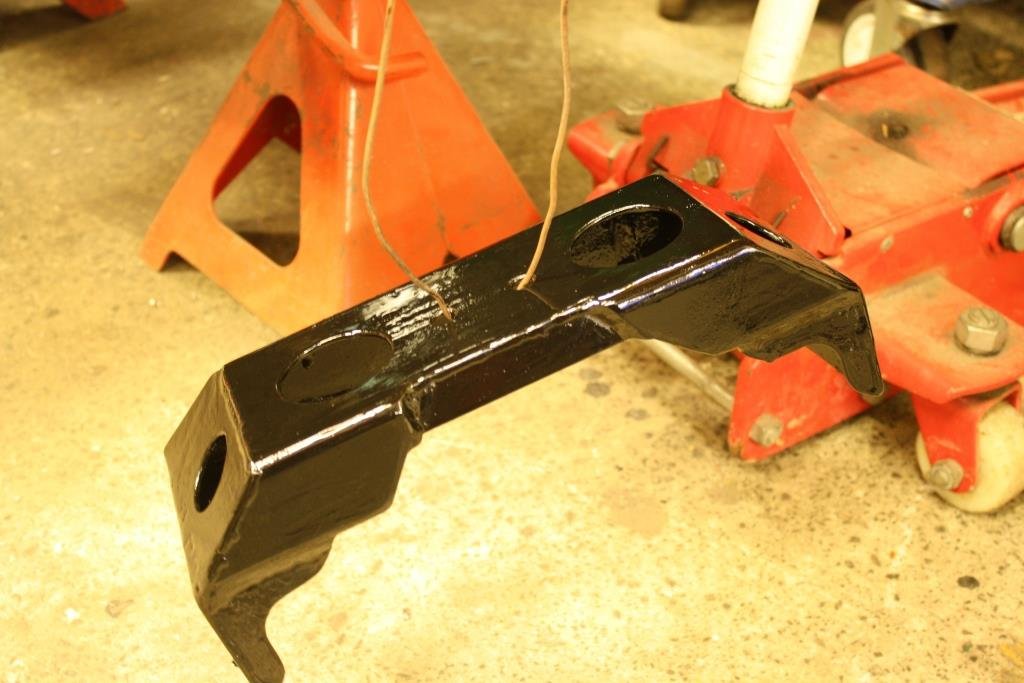
Thought I’d revisit the gearbox mount for a change of scenery. Big thanks to Oldschool member ‘Big Harry’ for pointing out there was a difference in the Toyota cross members used with W40 and W50 boxes, the collective depth of information in this forum rocks! Problem is my dummy engine block/trans used a W40 and I was planning on running a W50…bugger! After considerable measuring, head scratching and a few Wild Turkeys I figured out there was only 10 mm difference but the extra gear in the W50 meant the cross member I’d made would not clear the gearbox. As much as I hate hacking into something I thought was finished you sometimes need to grit your teeth and fire up the angle grinder to make it work. Added some gussets and repainted – sorry I didn’t take more photos.
-
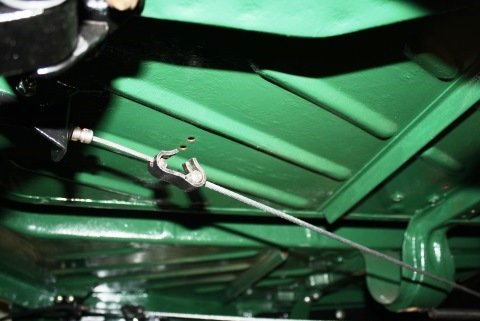
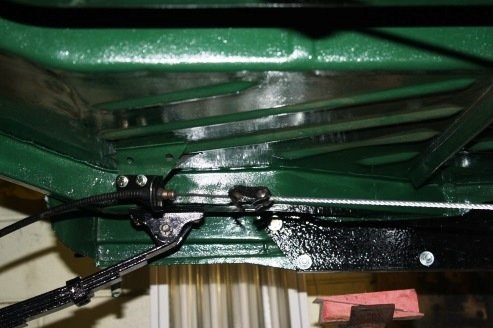
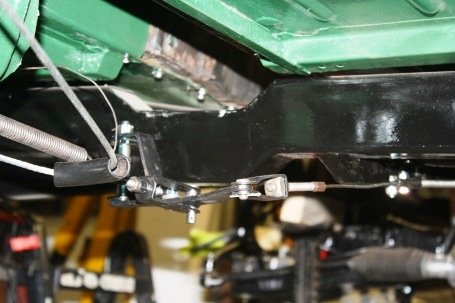
Some pictures of the under car hand brake assembly. The piece of bailing wire is holding one end of the return spring – I’ll make up something a little more elegant in the future.