bmxnz11
-
Posts
1,157 -
Joined
-
Last visited
Everything posted by bmxnz11
-
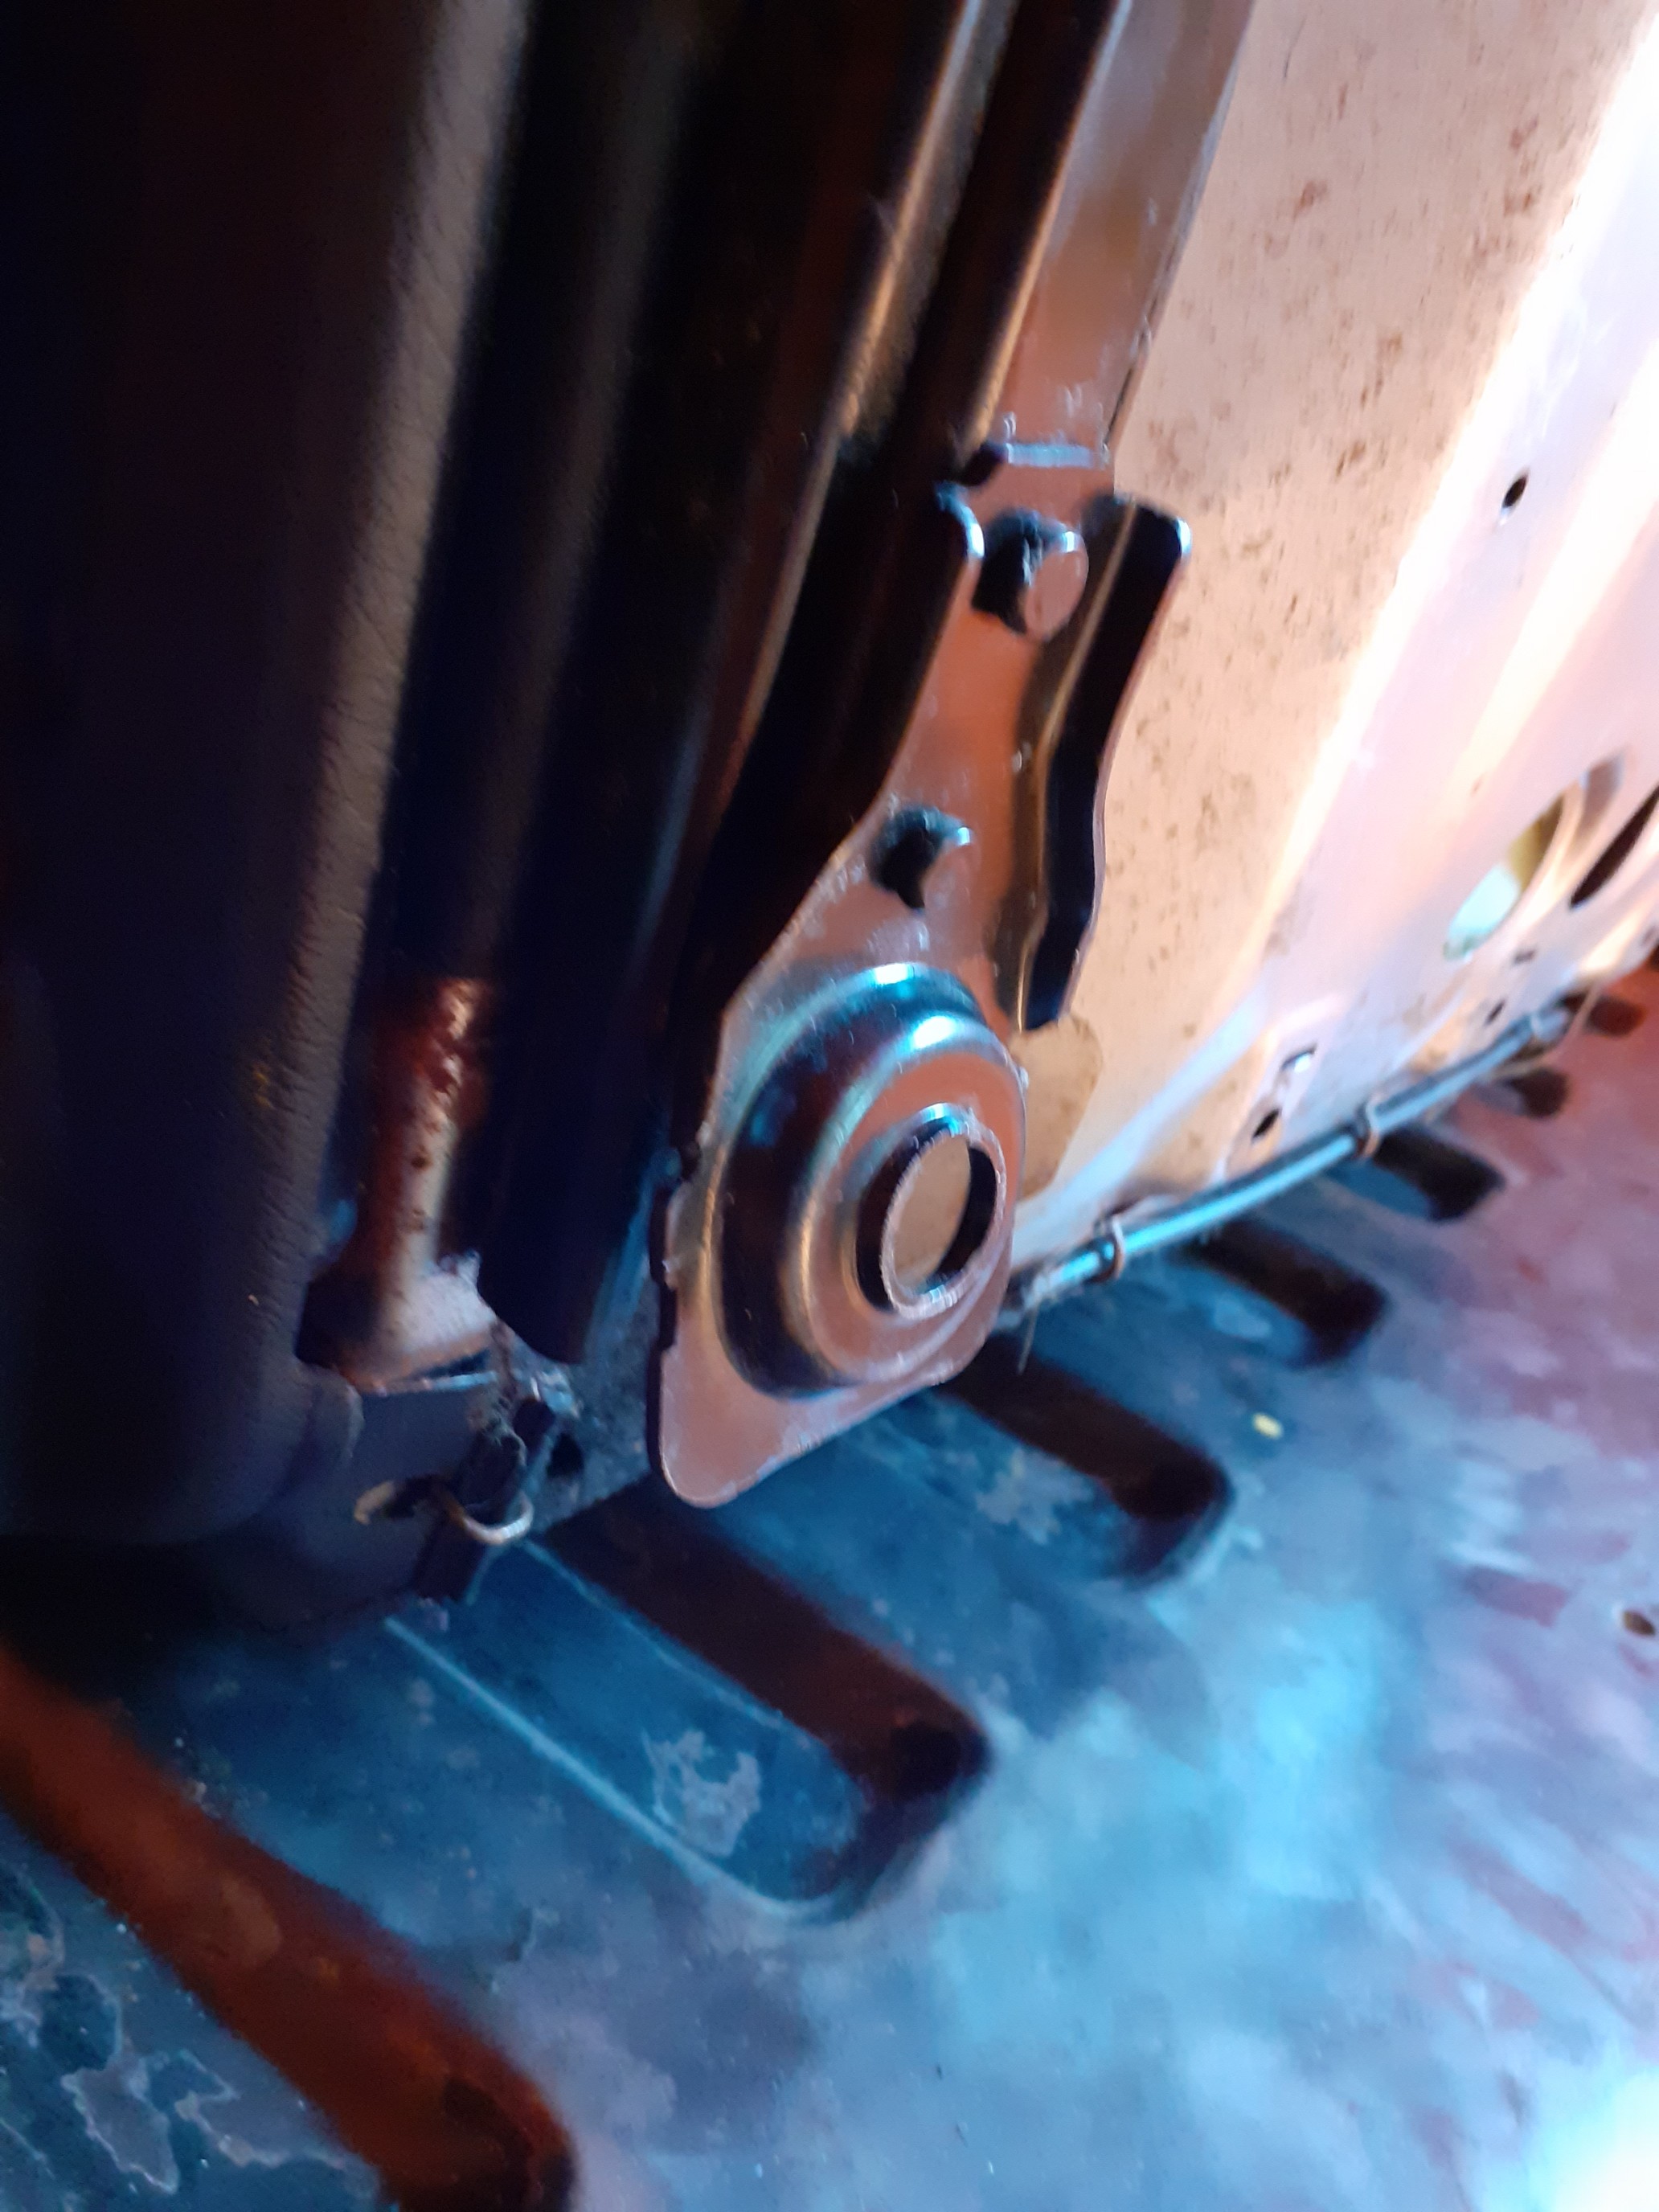
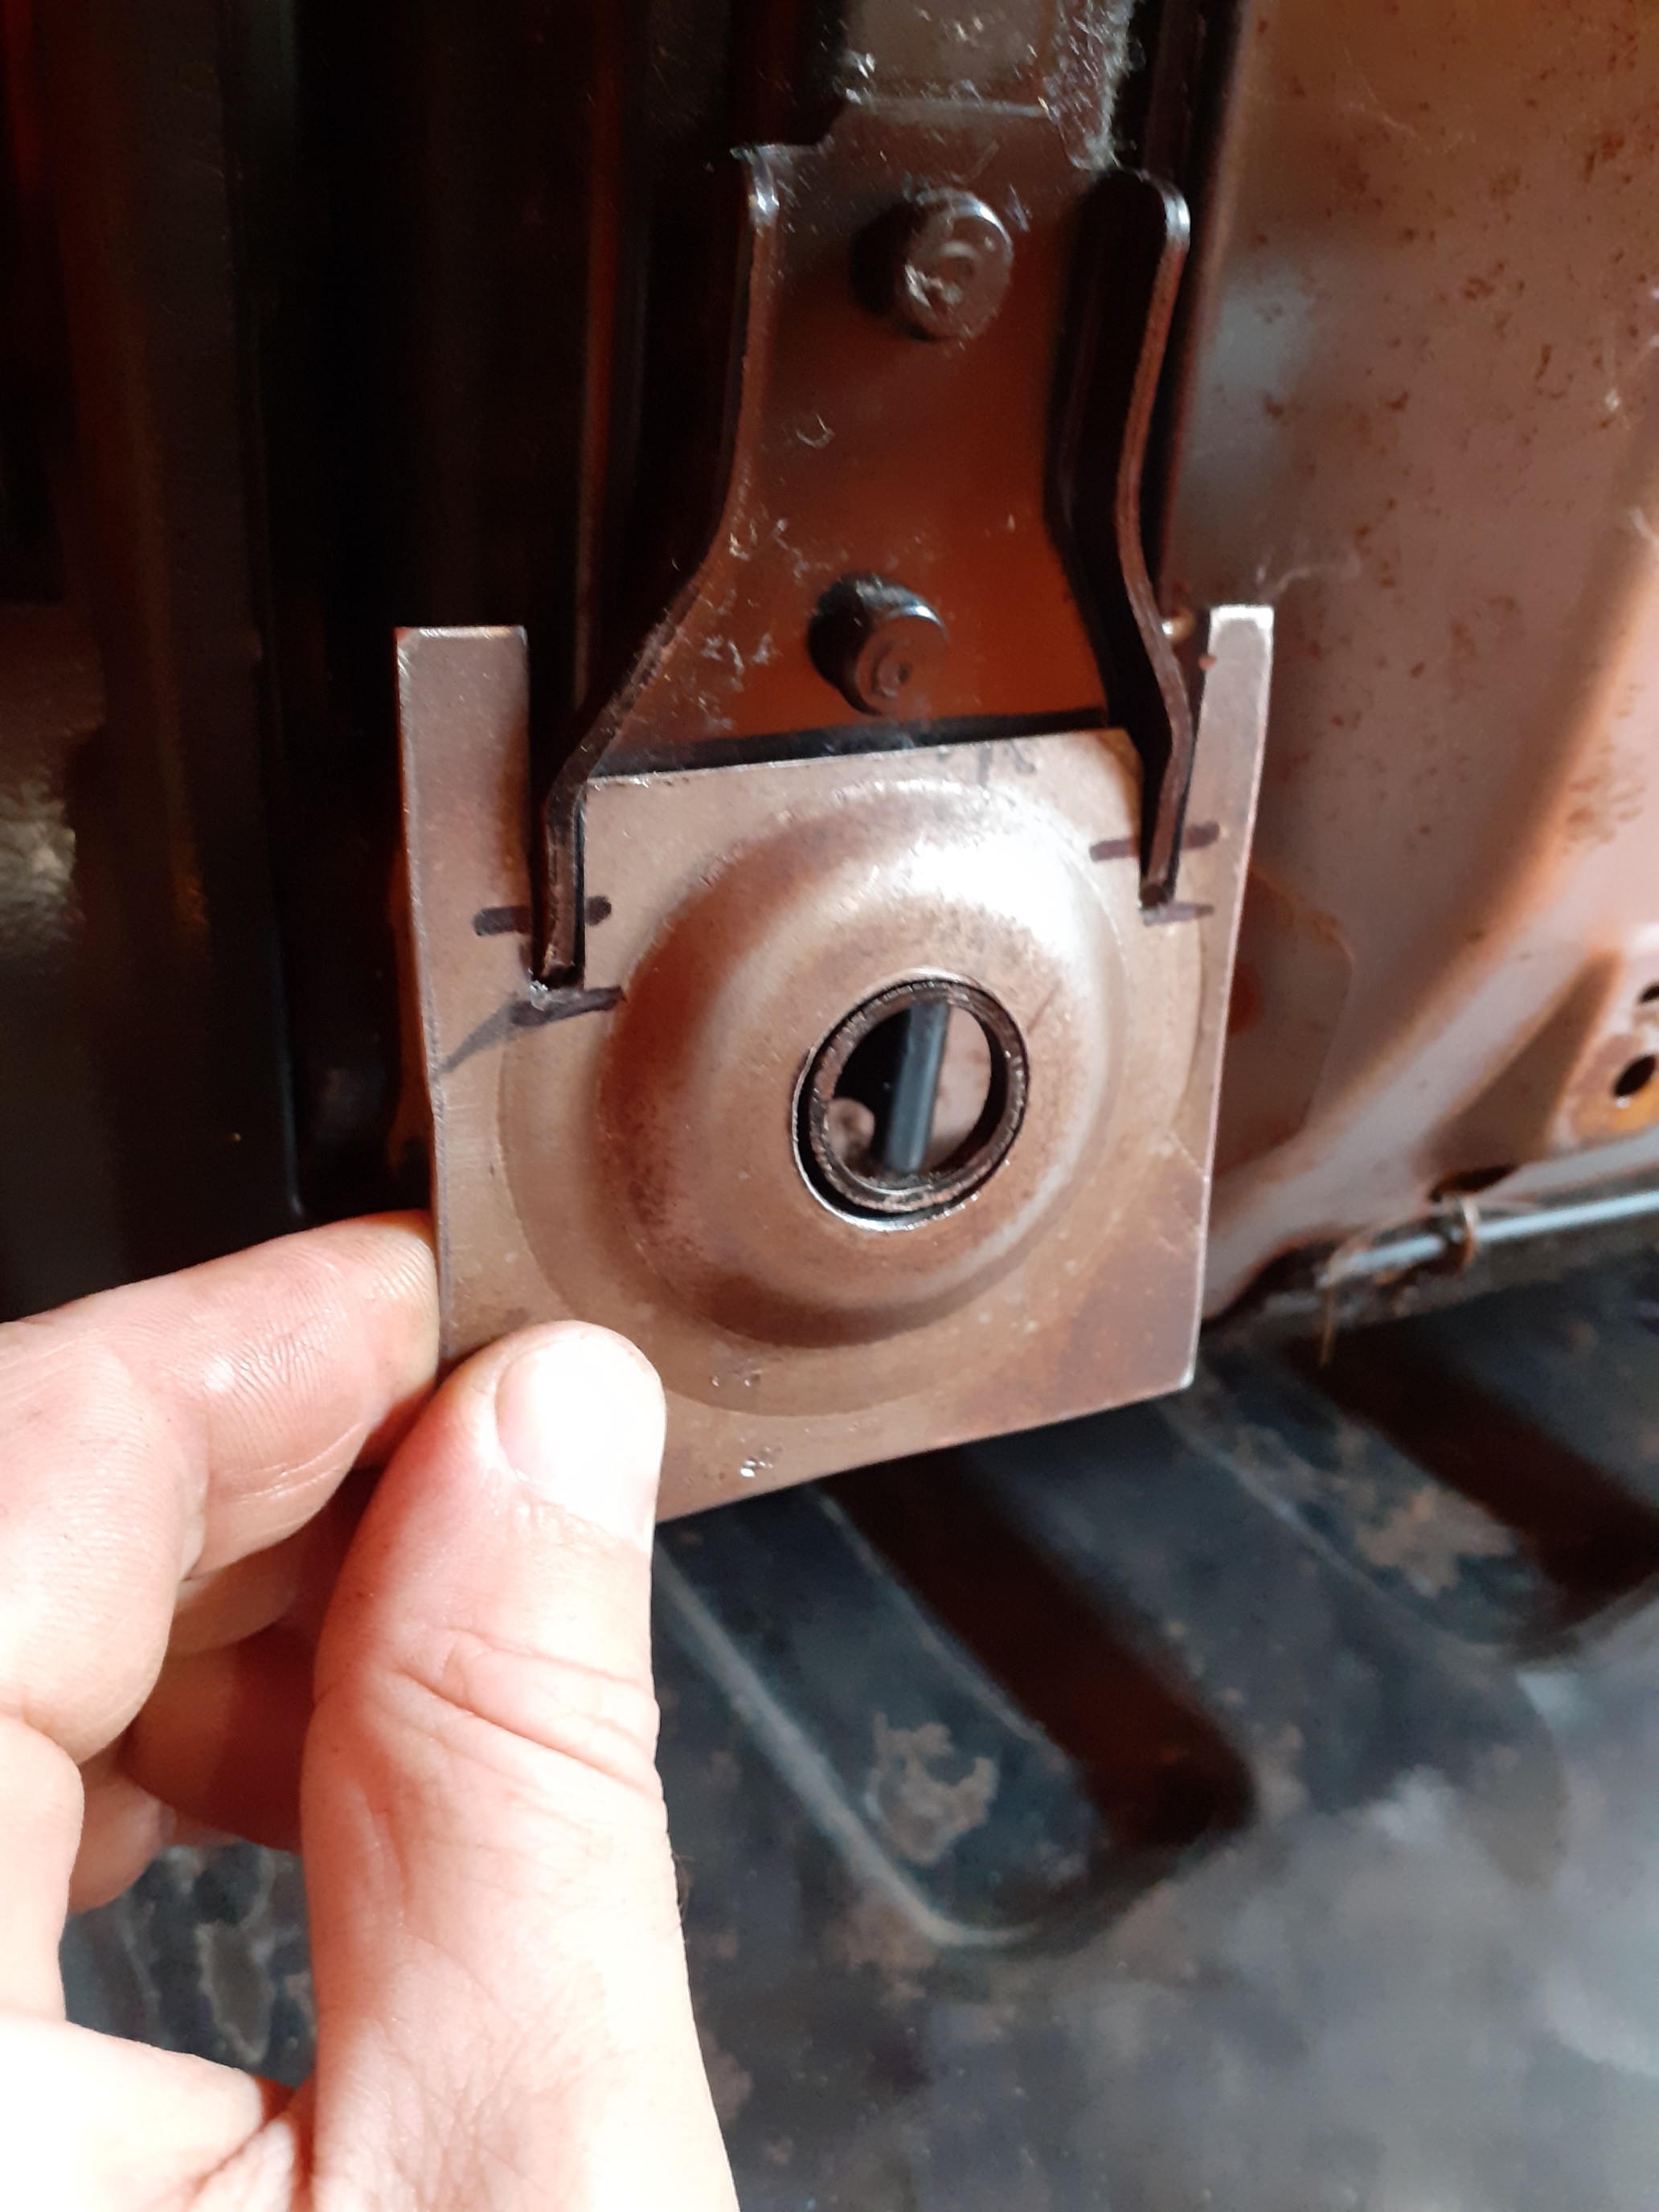
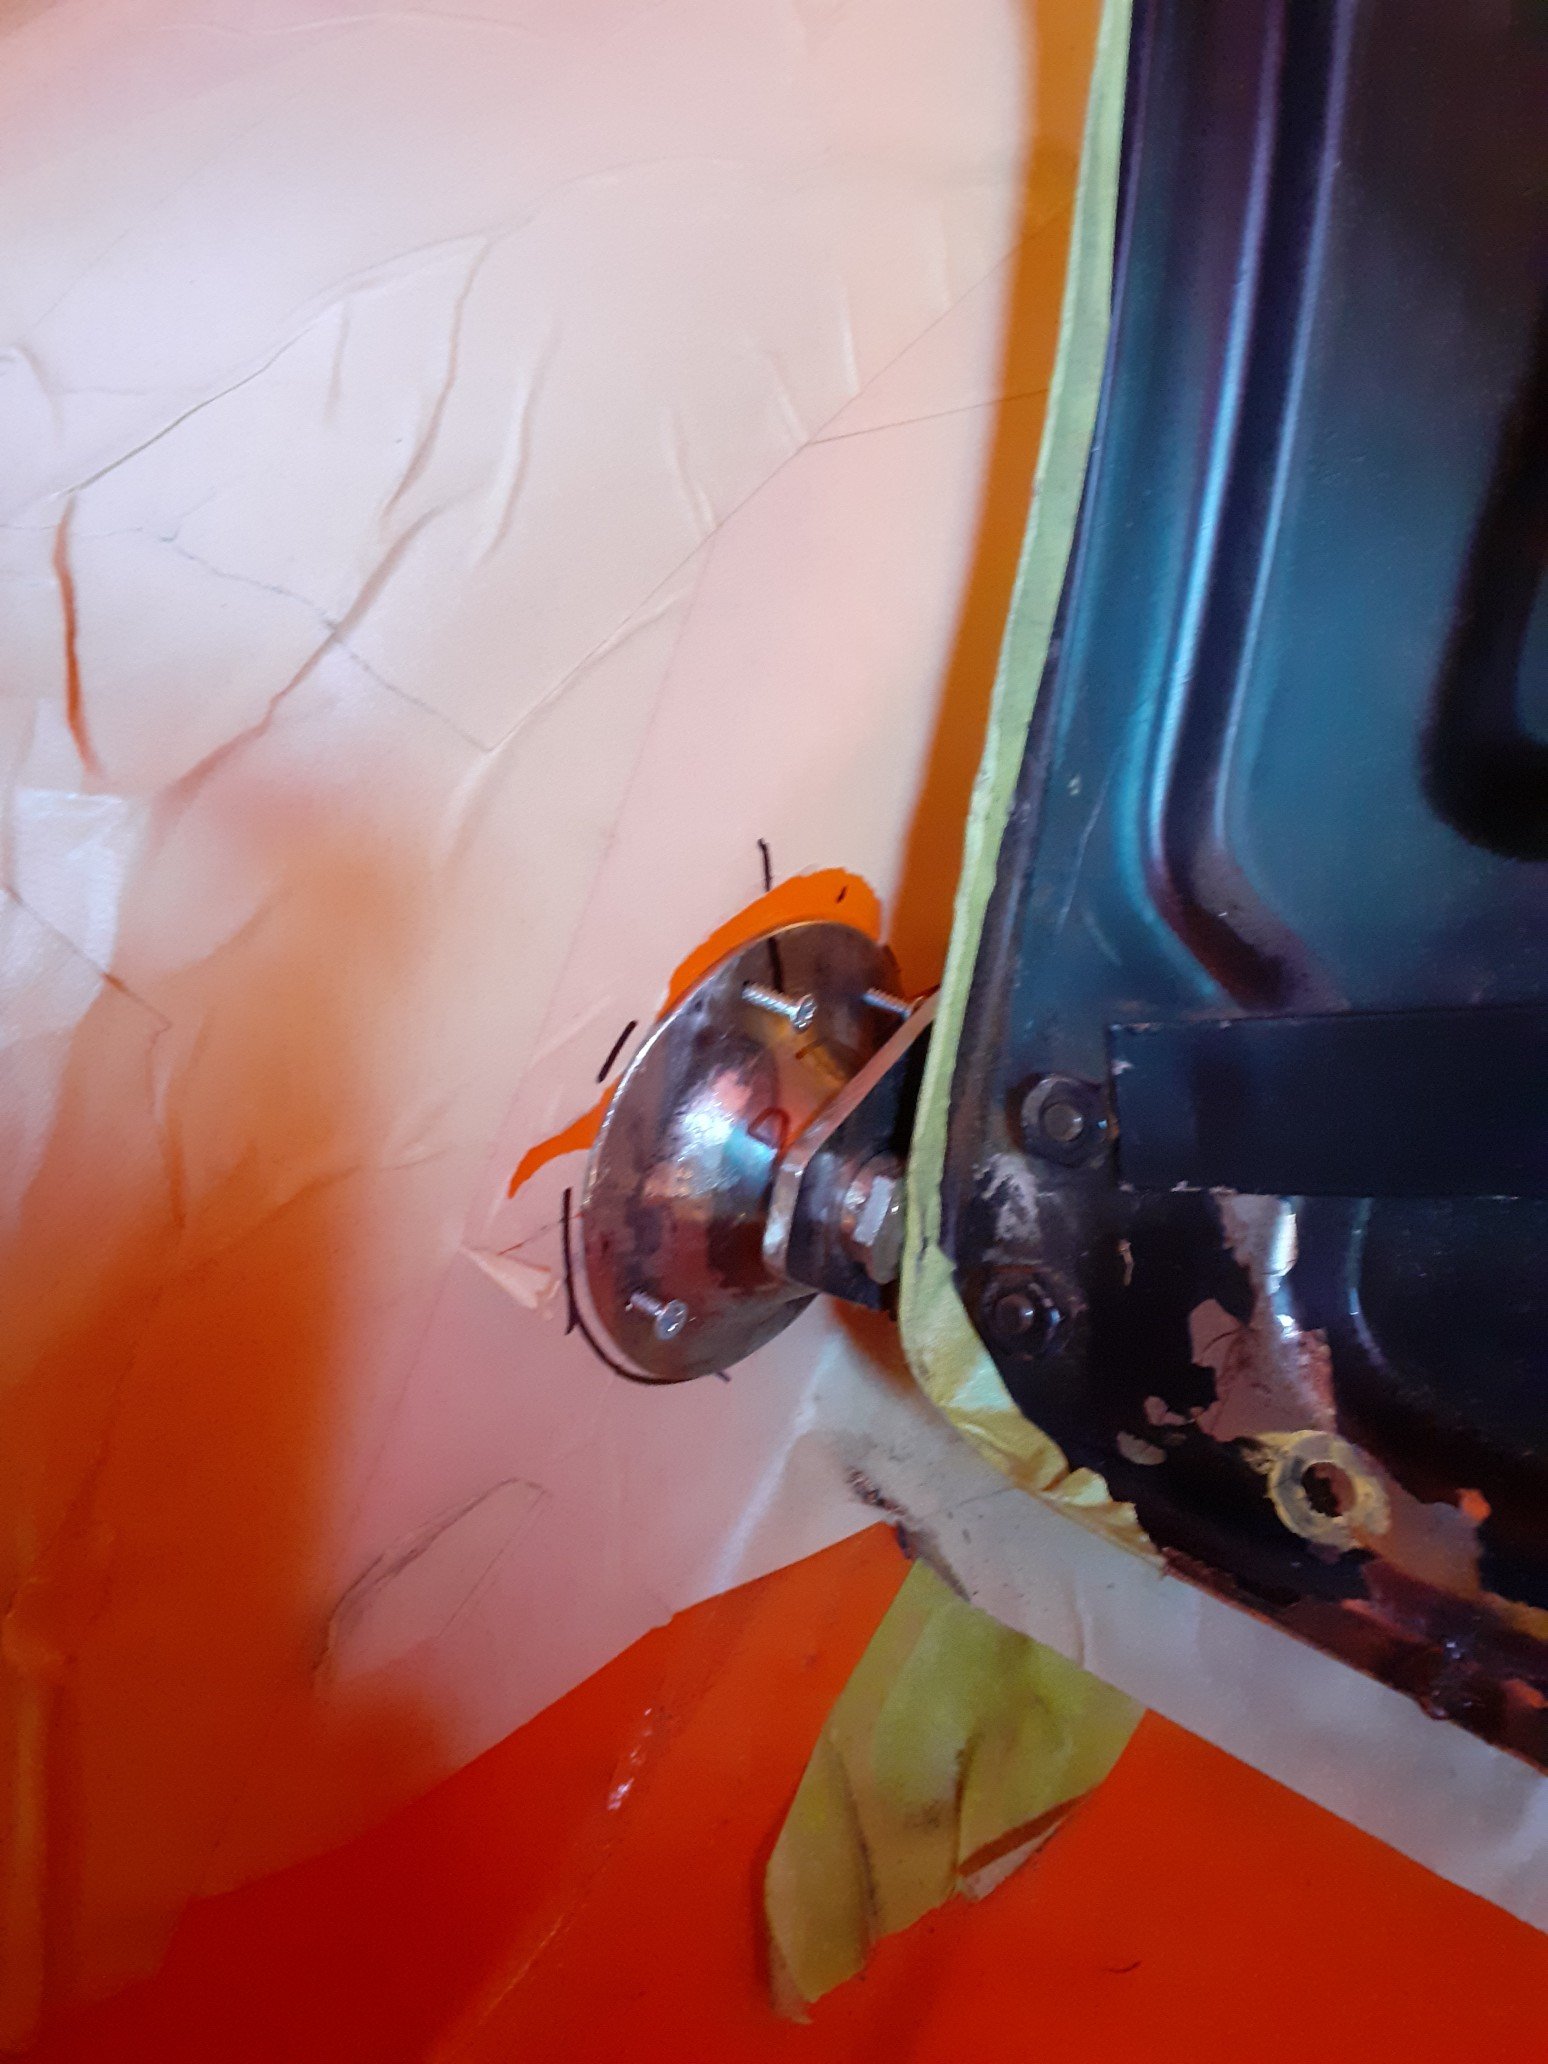
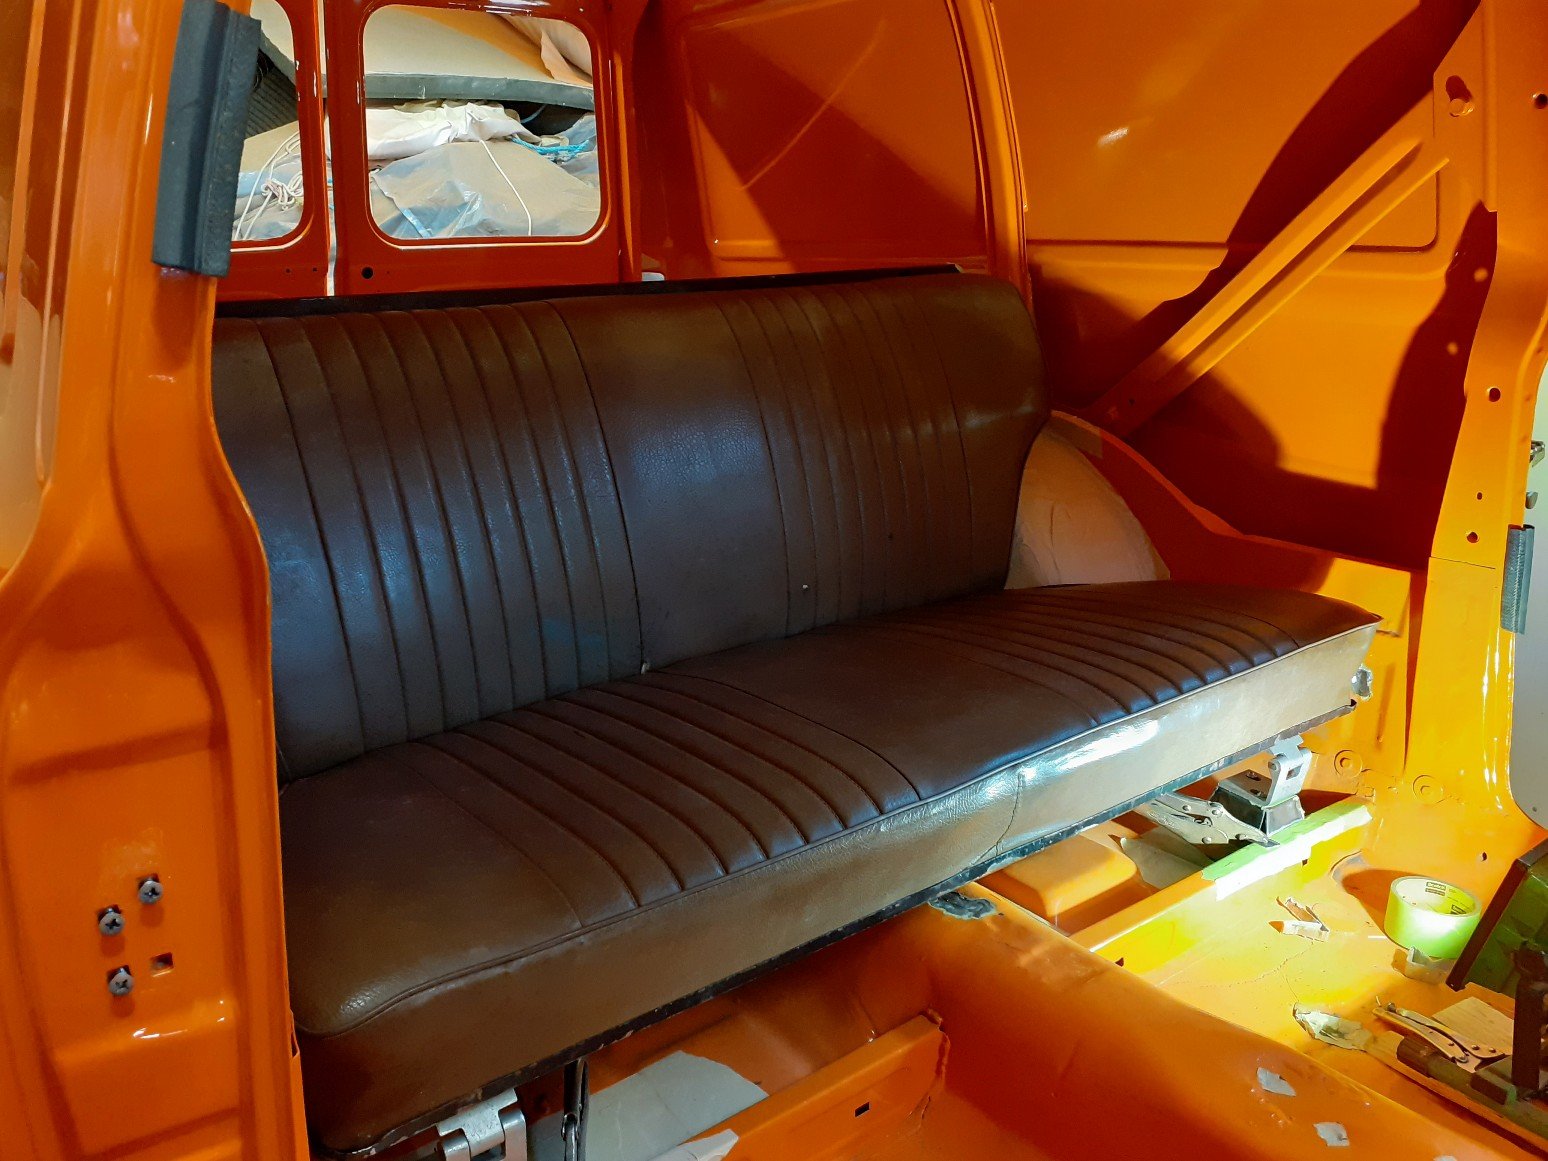
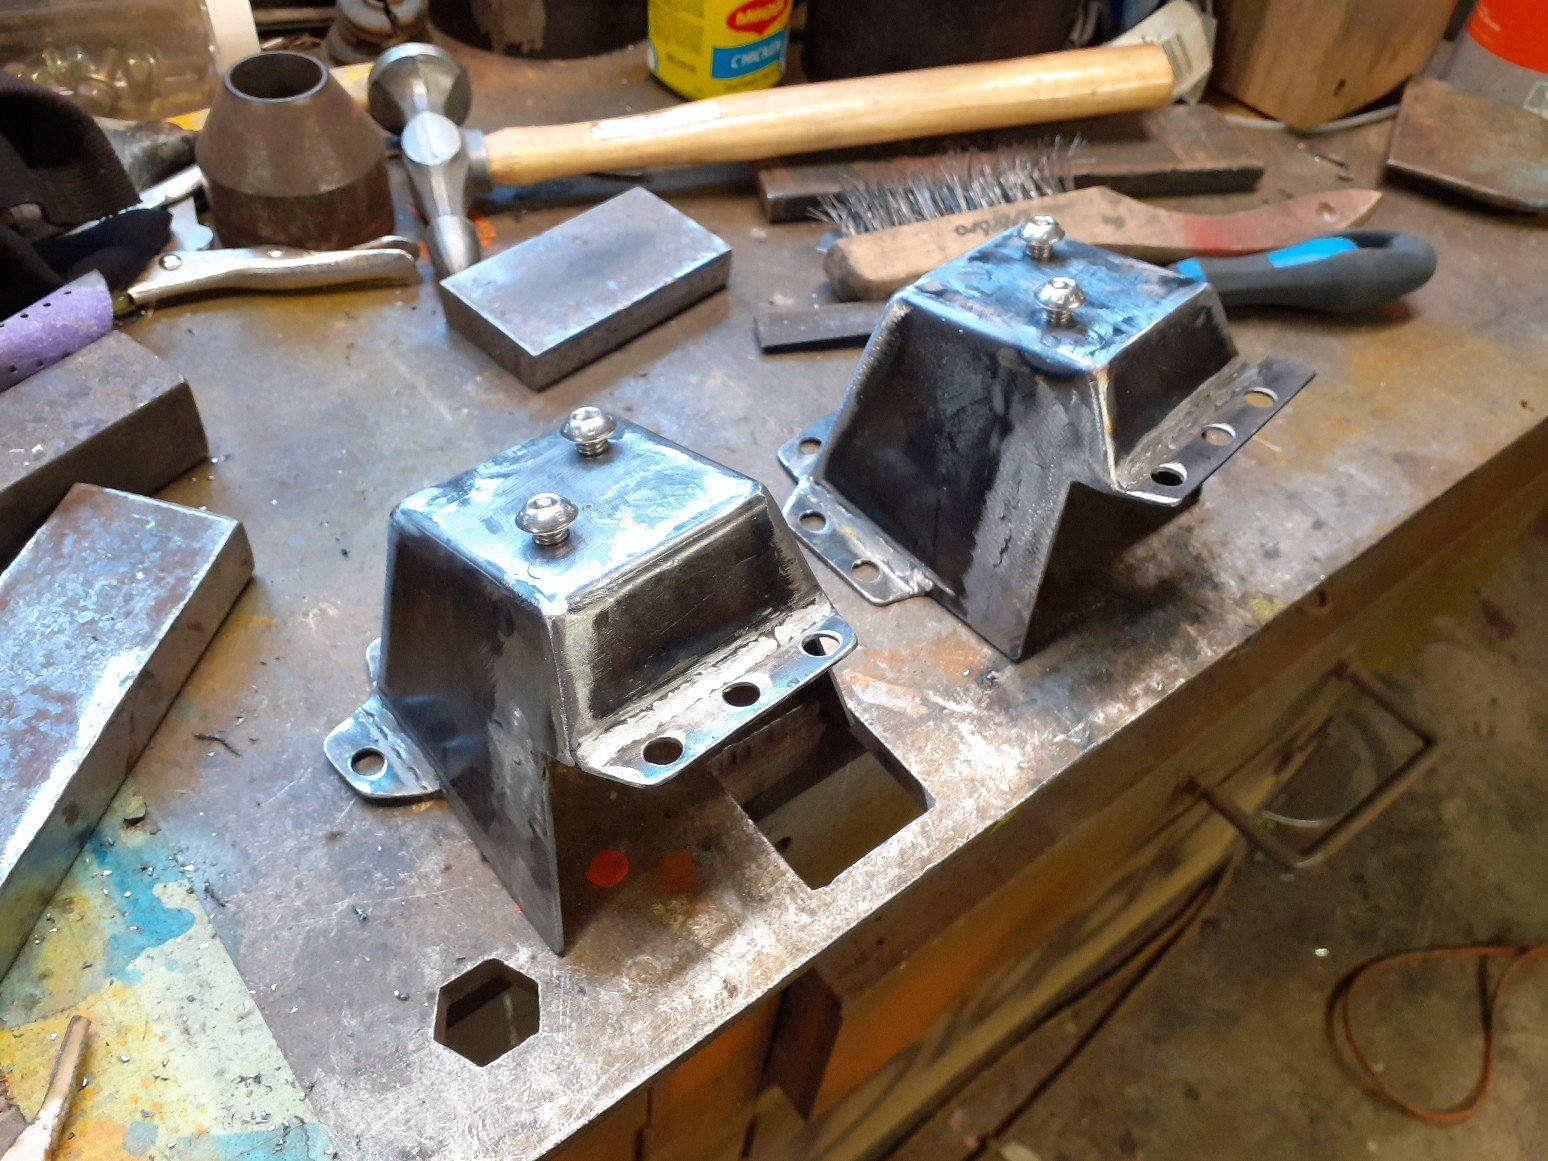
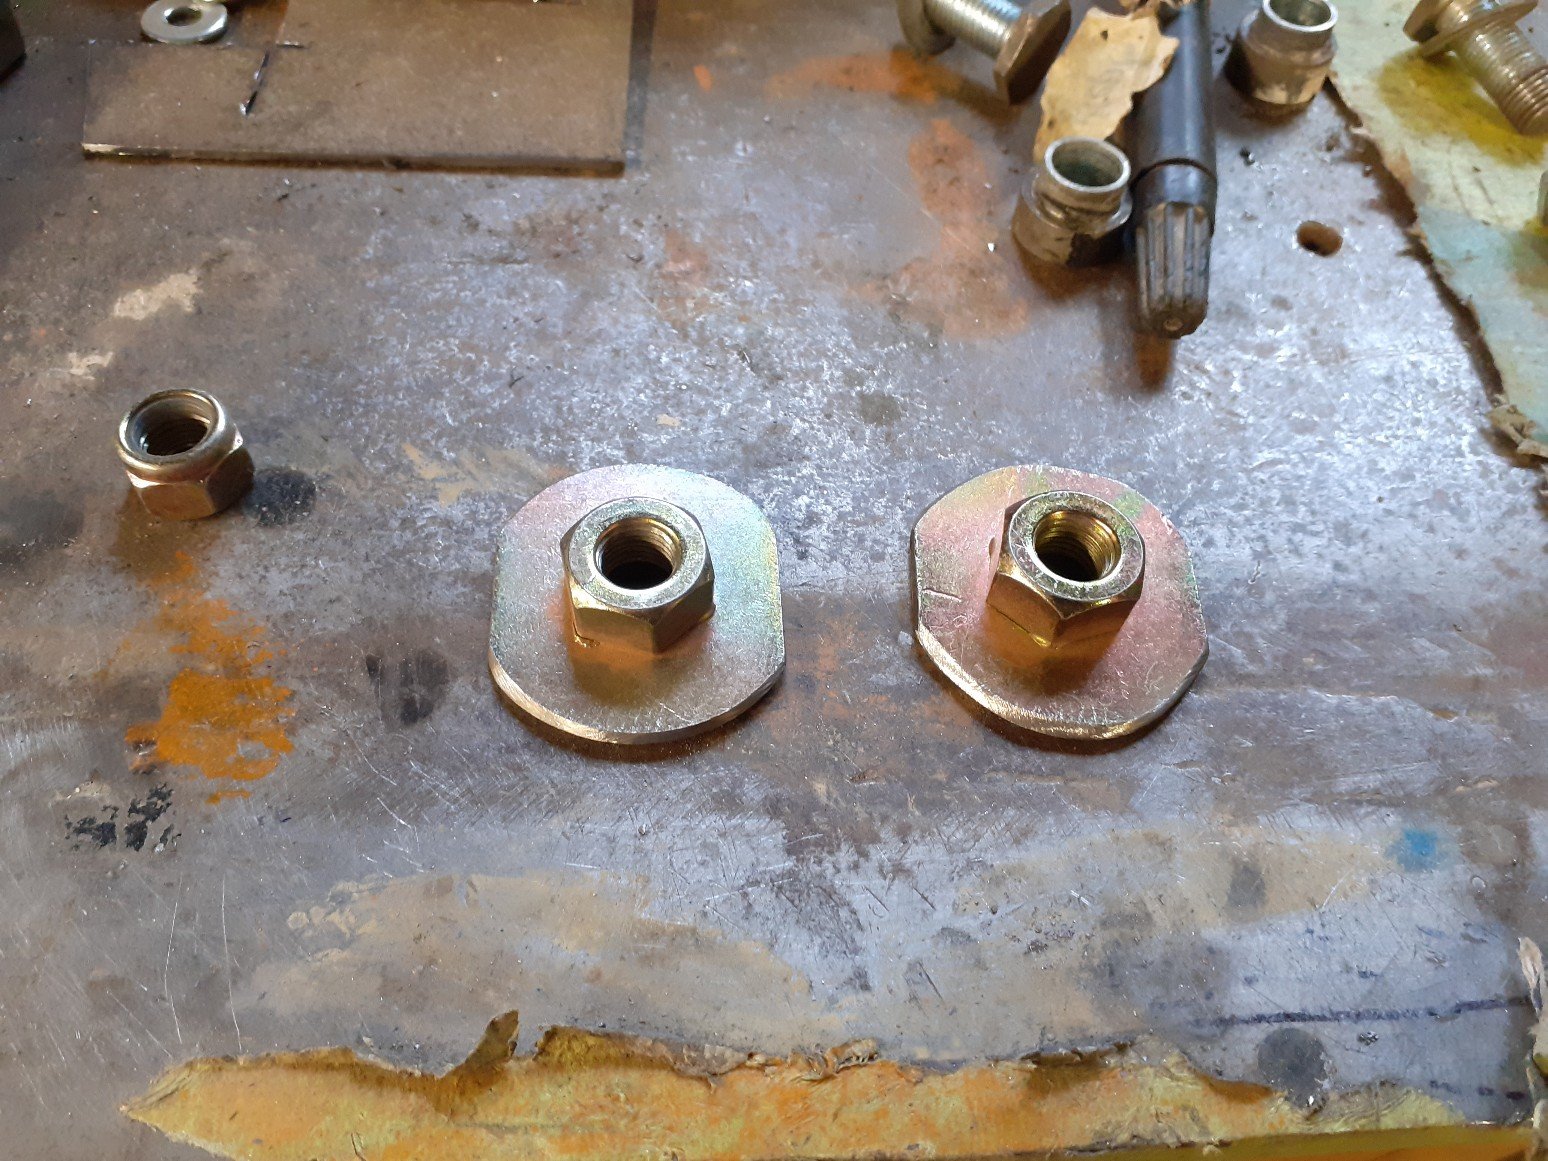
Back to the back seat. I didnt like where the support mount attached to the back seat when it was upright, it just sat way too high on the wheel arch. The cardboard cutout shows just how high it would need to sit. I added a drop down bar on each side to bring the mounting point down. I then made a housing which had to house the latch, look flush and bee able to come apart incase the latch needs to be fixed or replaced. I made this housing in 2 pieces. The mounting holes on the latch pull the 2 covers together and they both bolt through the wheel arch. The bolts go up from under the arch and through the housing so that from underneath only the heads show and they shouldn't interfere with the tyres. To release the latch, theres an arm on the lever on the outside so you dont see it. It now makes the all satisfying "click" when pushed into place. Both sides have a latch each.

- 104 replies
-
- 11
-

-
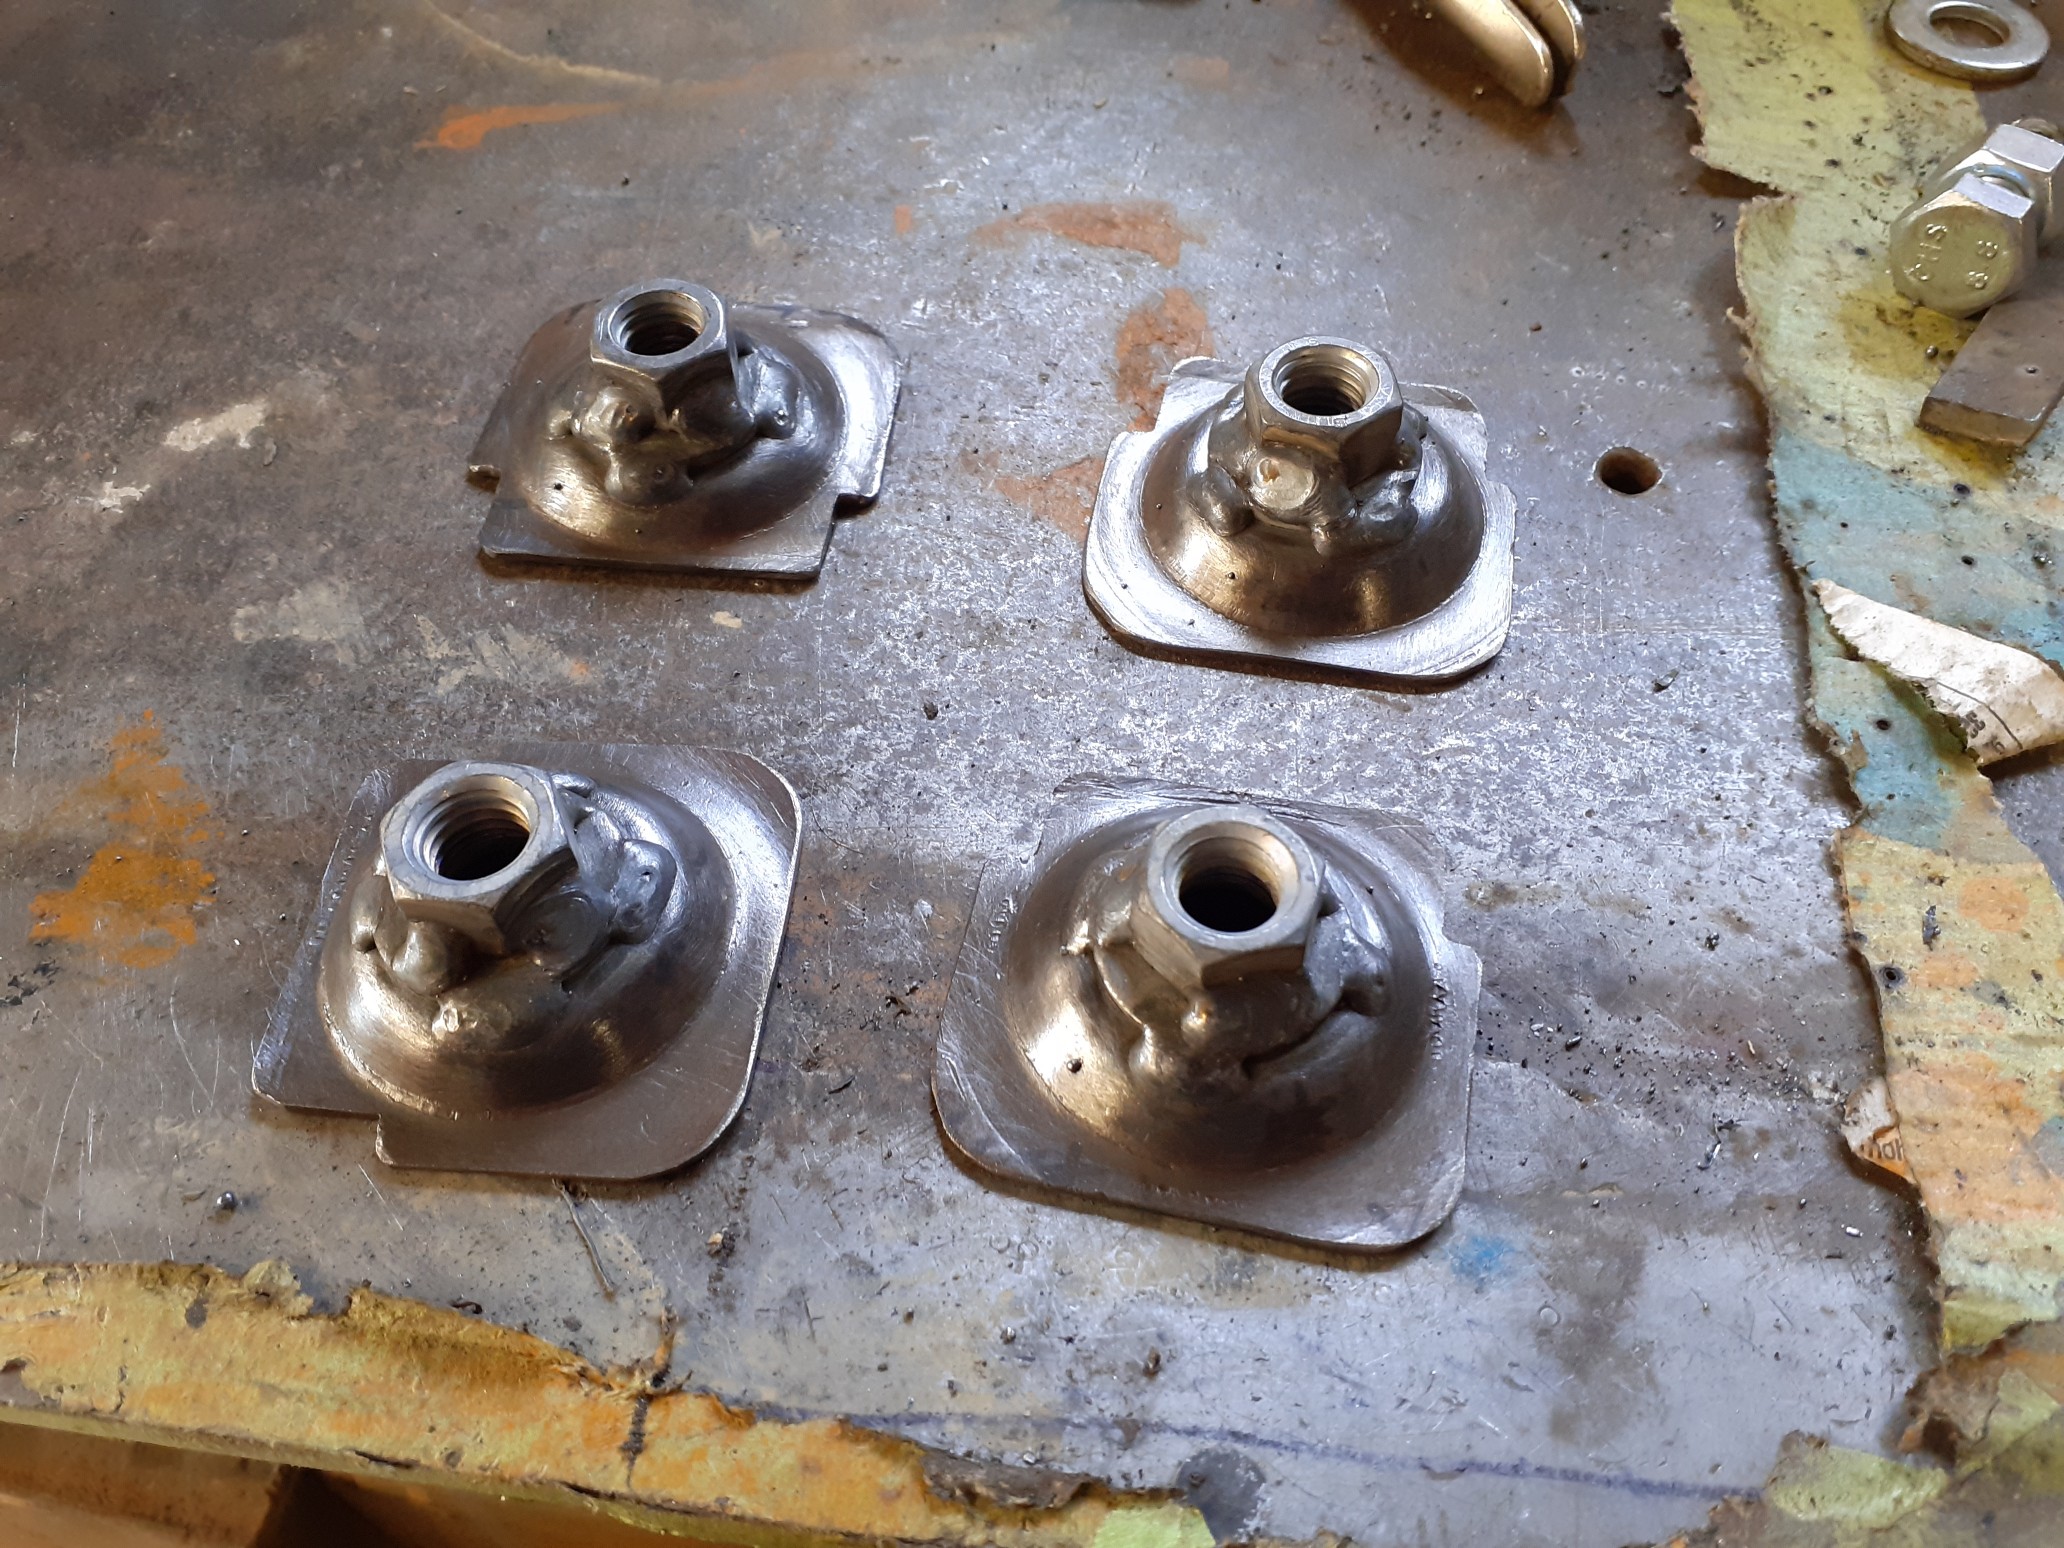
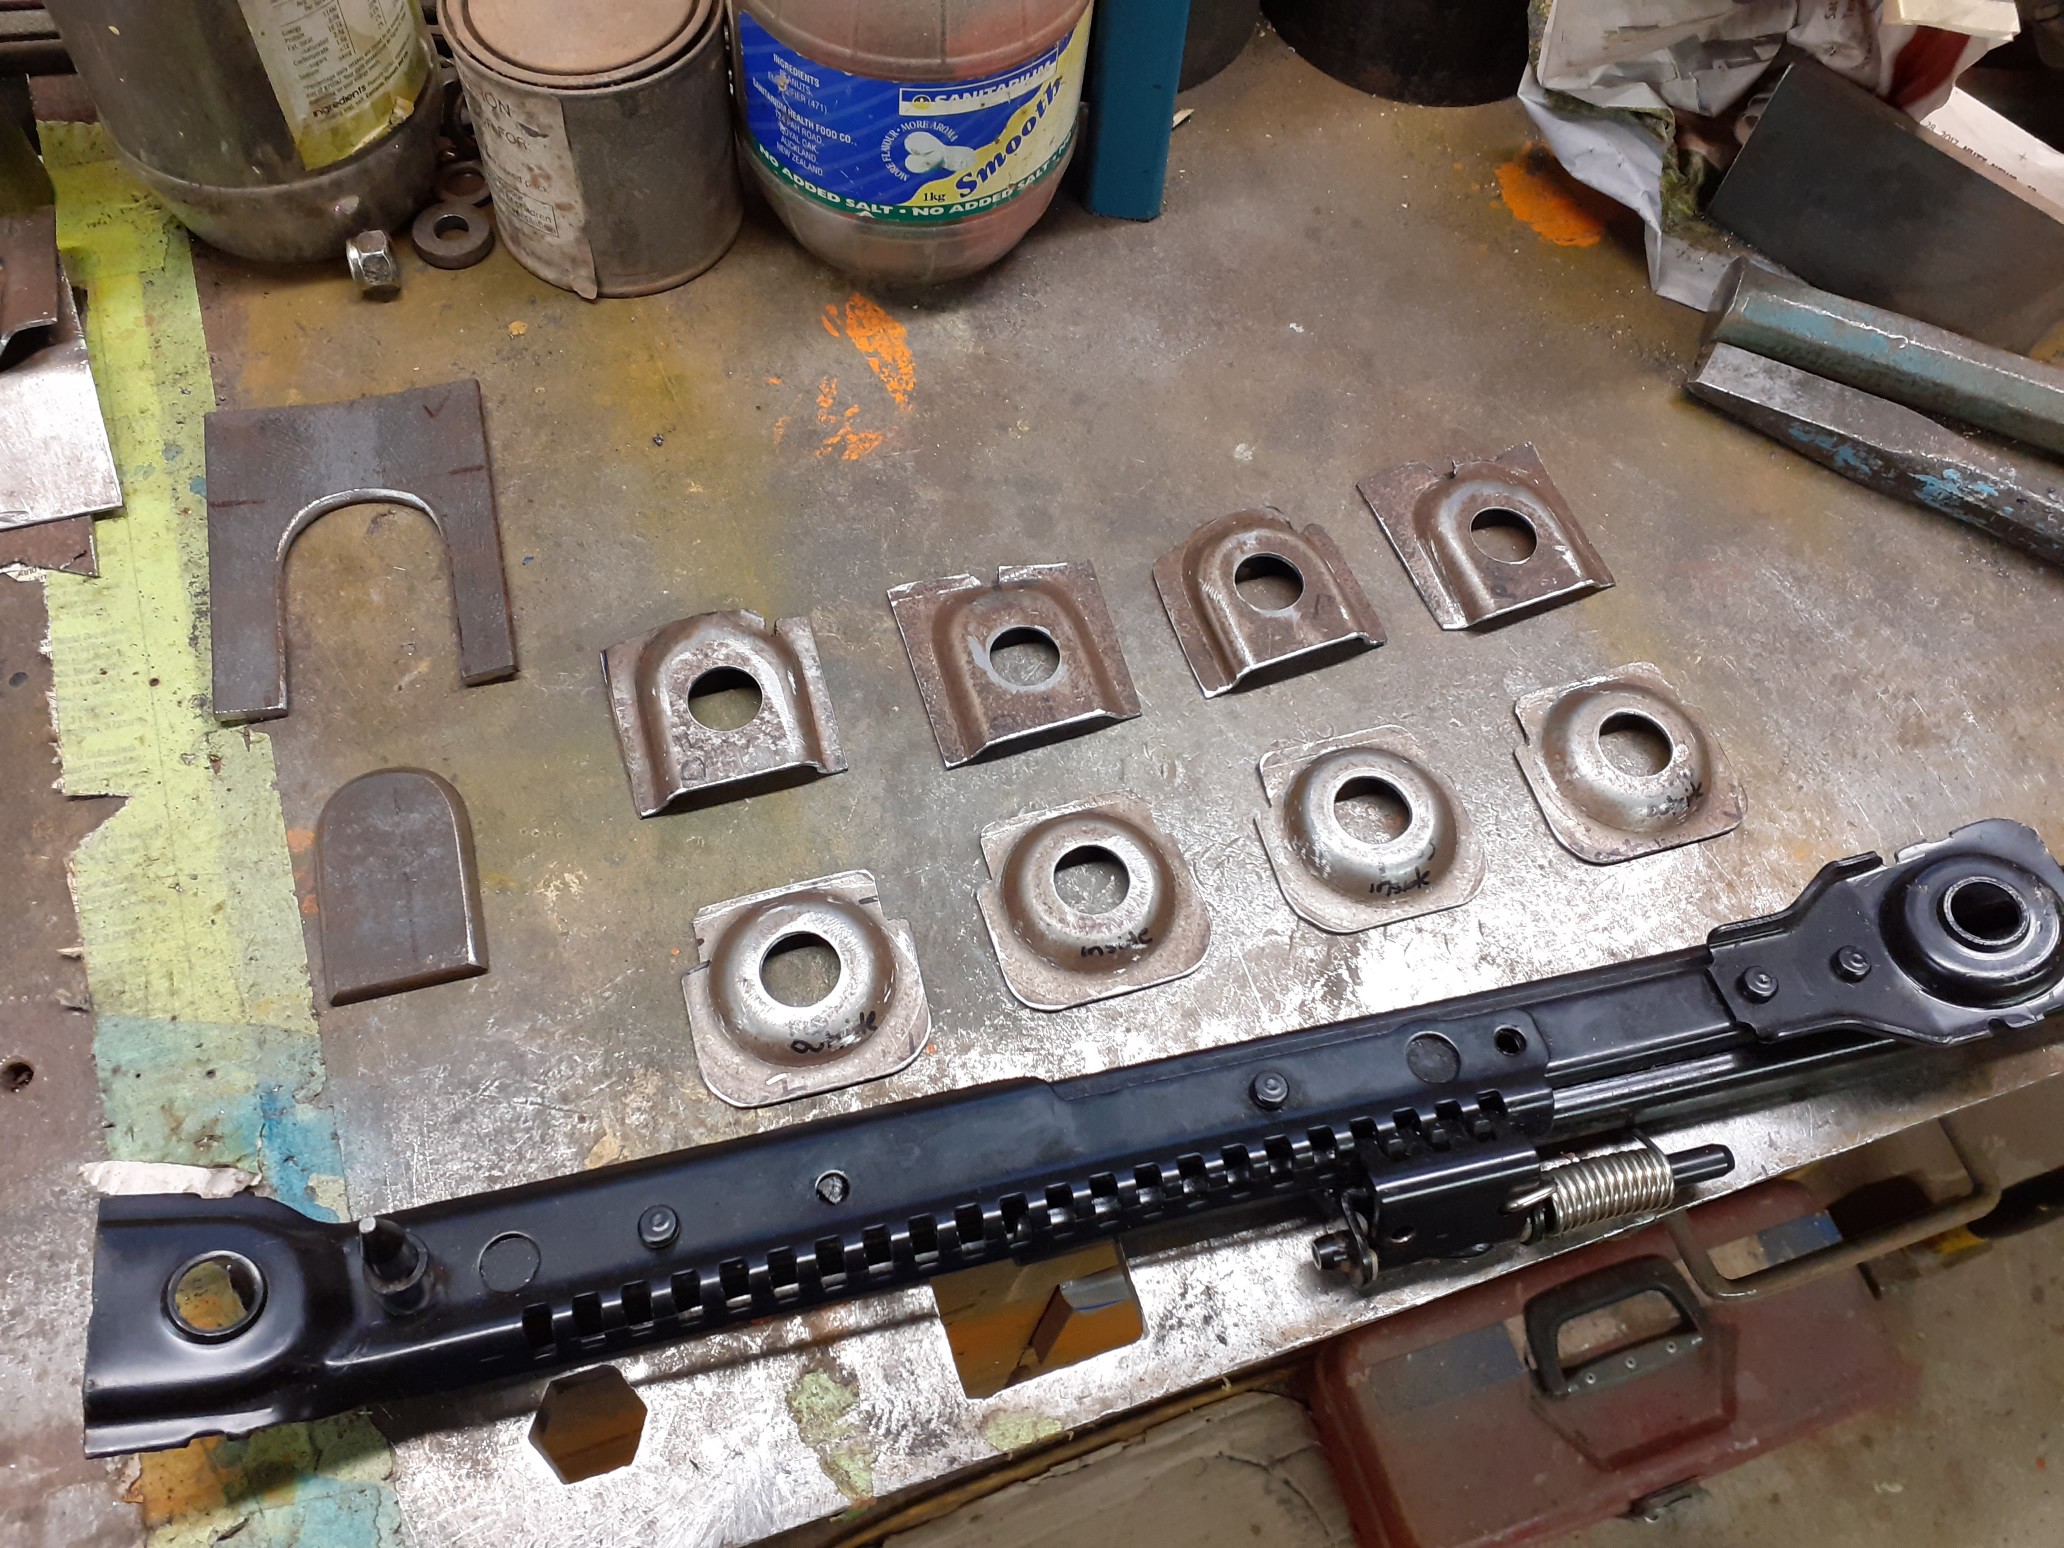
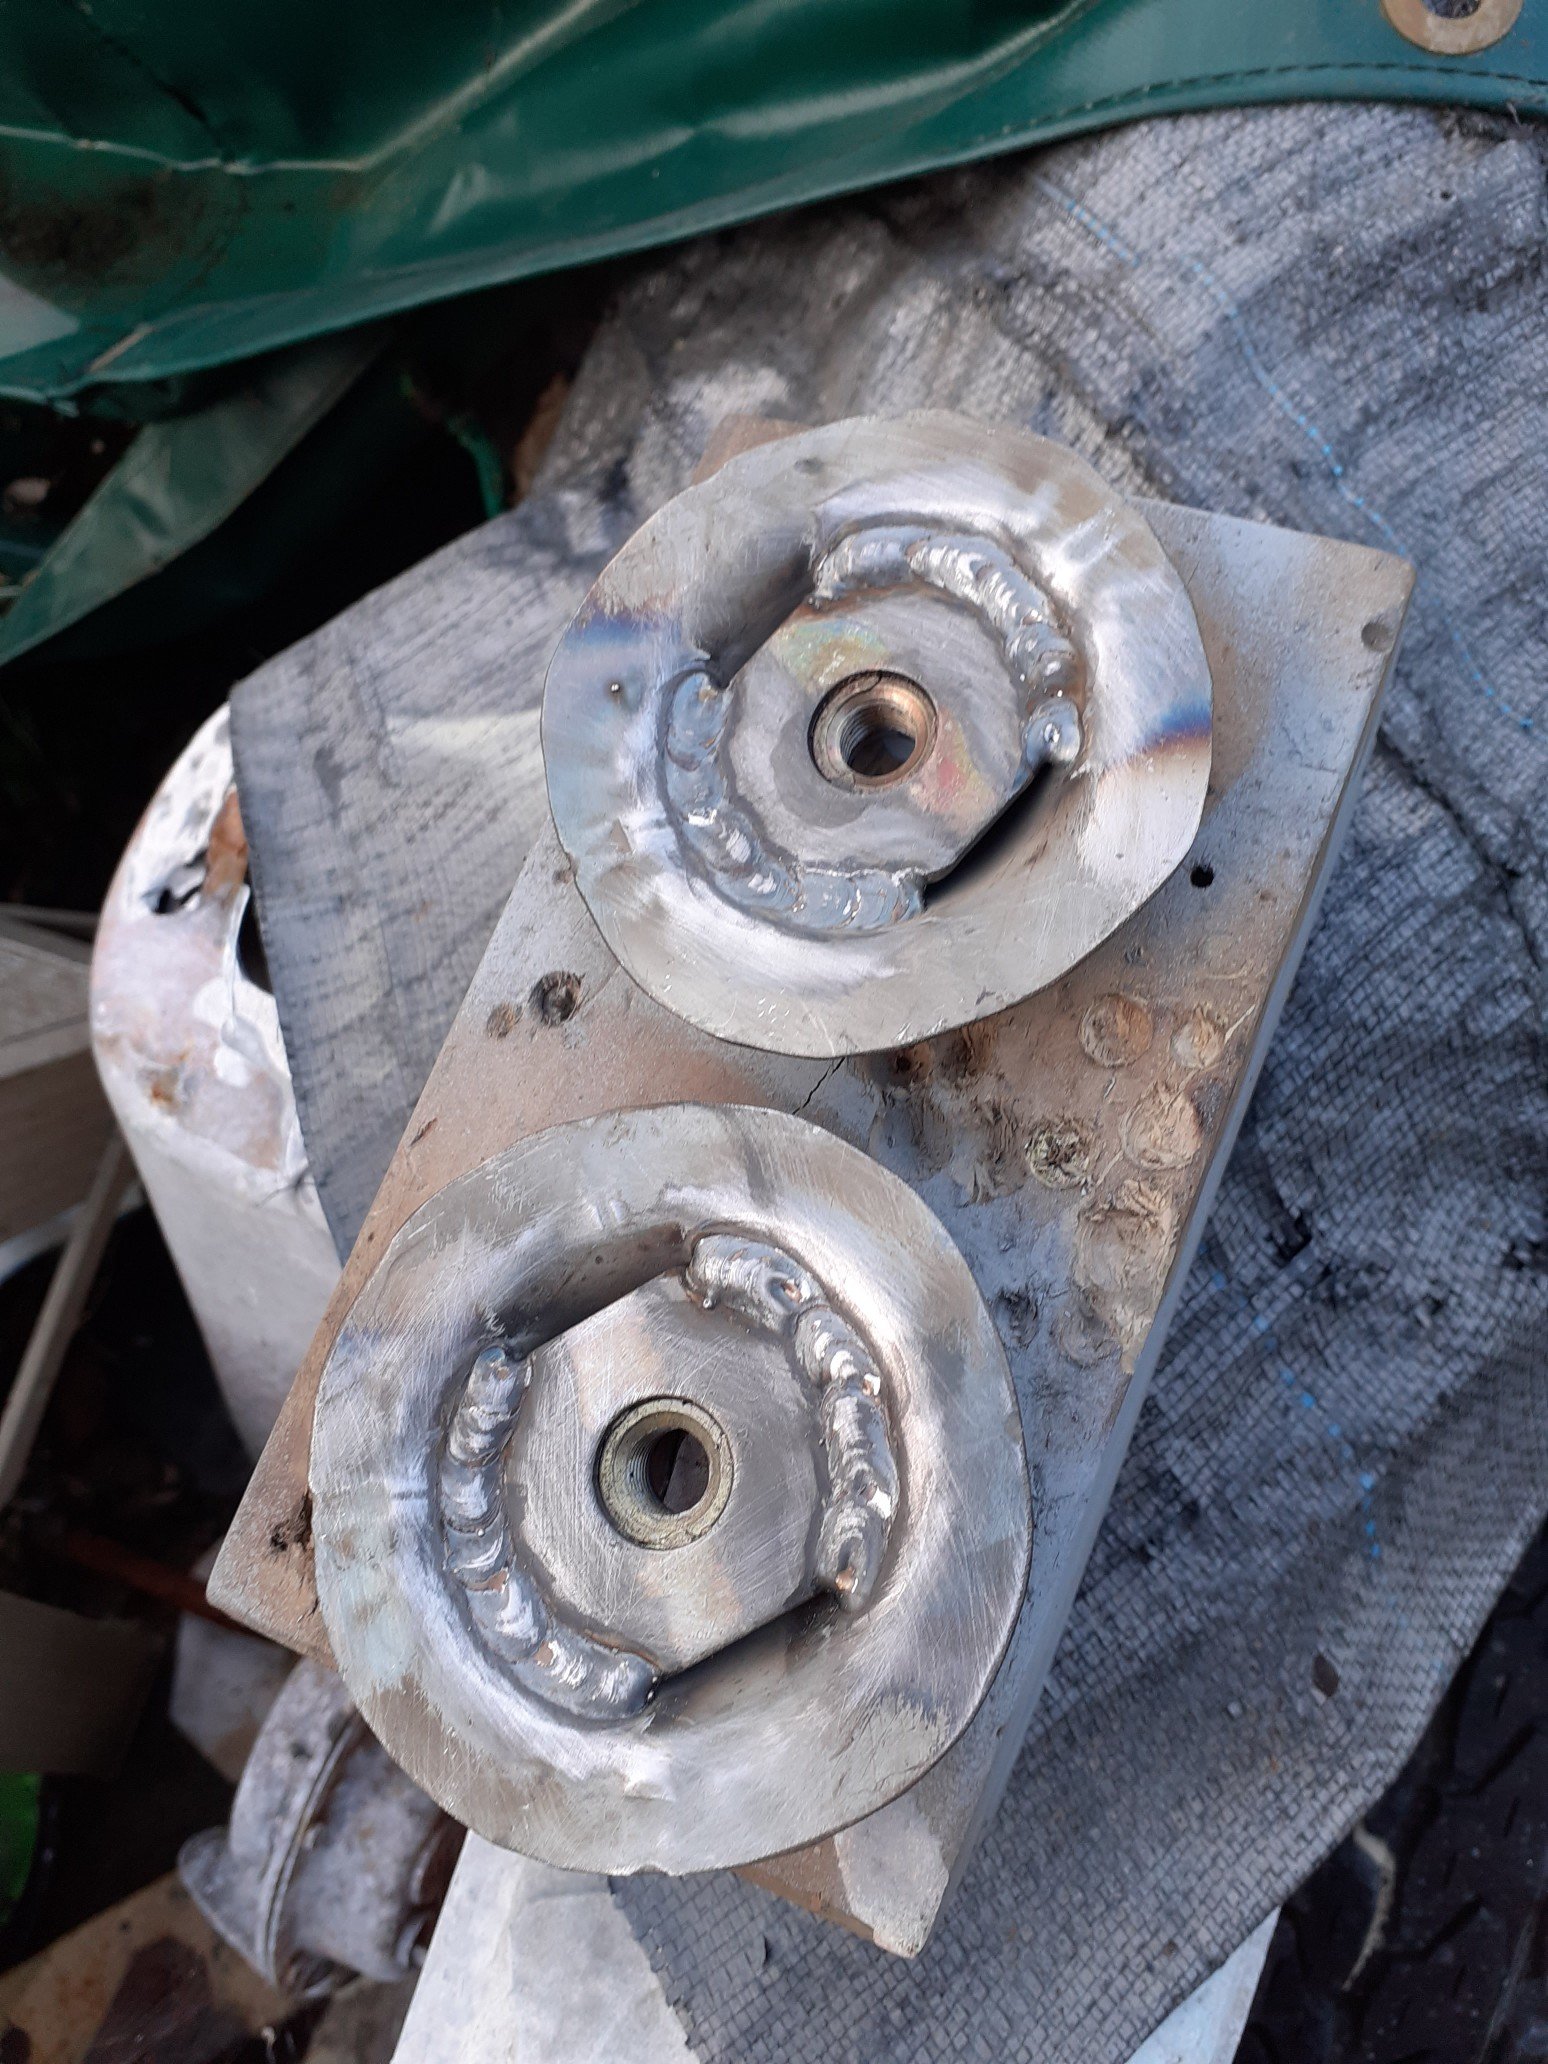
Playing catch up.. I welded a plate and a nut on the back of those cups which hold the recessed/step down shape snugly. I then made up a dummy seat frame to hold the seat rails in place and bolted the newly made cups to that. I then spend quite some time working out the best position to attach the cups to the metal base straps. You can see the bottom left corner I have started boxing in the shape, whereas the far left is just hovering in place. I did this for both sides, drilled some speed holes and painted them in 2k black. These bolt straight into the original escort floor seat holes so I have the option to have these mx5 seats or the standard escort seats.
-

Wellington Monthly Meet - Discussion thread
bmxnz11 replied to KKtrips's topic in Lower North Island Region
I forgot I double booked myself for tomorrow so out anyway sorry -
Wellington Monthly Meet - Discussion thread
bmxnz11 replied to KKtrips's topic in Lower North Island Region
Visited in the weekend and the service was a let down, wouldn't recommend. How about a visit to petone? -
Wellington Monthly Meet - Discussion thread
bmxnz11 replied to KKtrips's topic in Lower North Island Region
In -
Wellington Monthly Meet - Discussion thread
bmxnz11 replied to KKtrips's topic in Lower North Island Region
@Nominalyou around tomorrow? -
Wellington Monthly Meet - Discussion thread
bmxnz11 replied to KKtrips's topic in Lower North Island Region
Better get my early in's in. In. -
Wellington Monthly Meet - Discussion thread
bmxnz11 replied to KKtrips's topic in Lower North Island Region
Forgot about prebooked plans so I'm out -
Wellington Monthly Meet - Discussion thread
bmxnz11 replied to KKtrips's topic in Lower North Island Region
I'm out aswell sorry. -
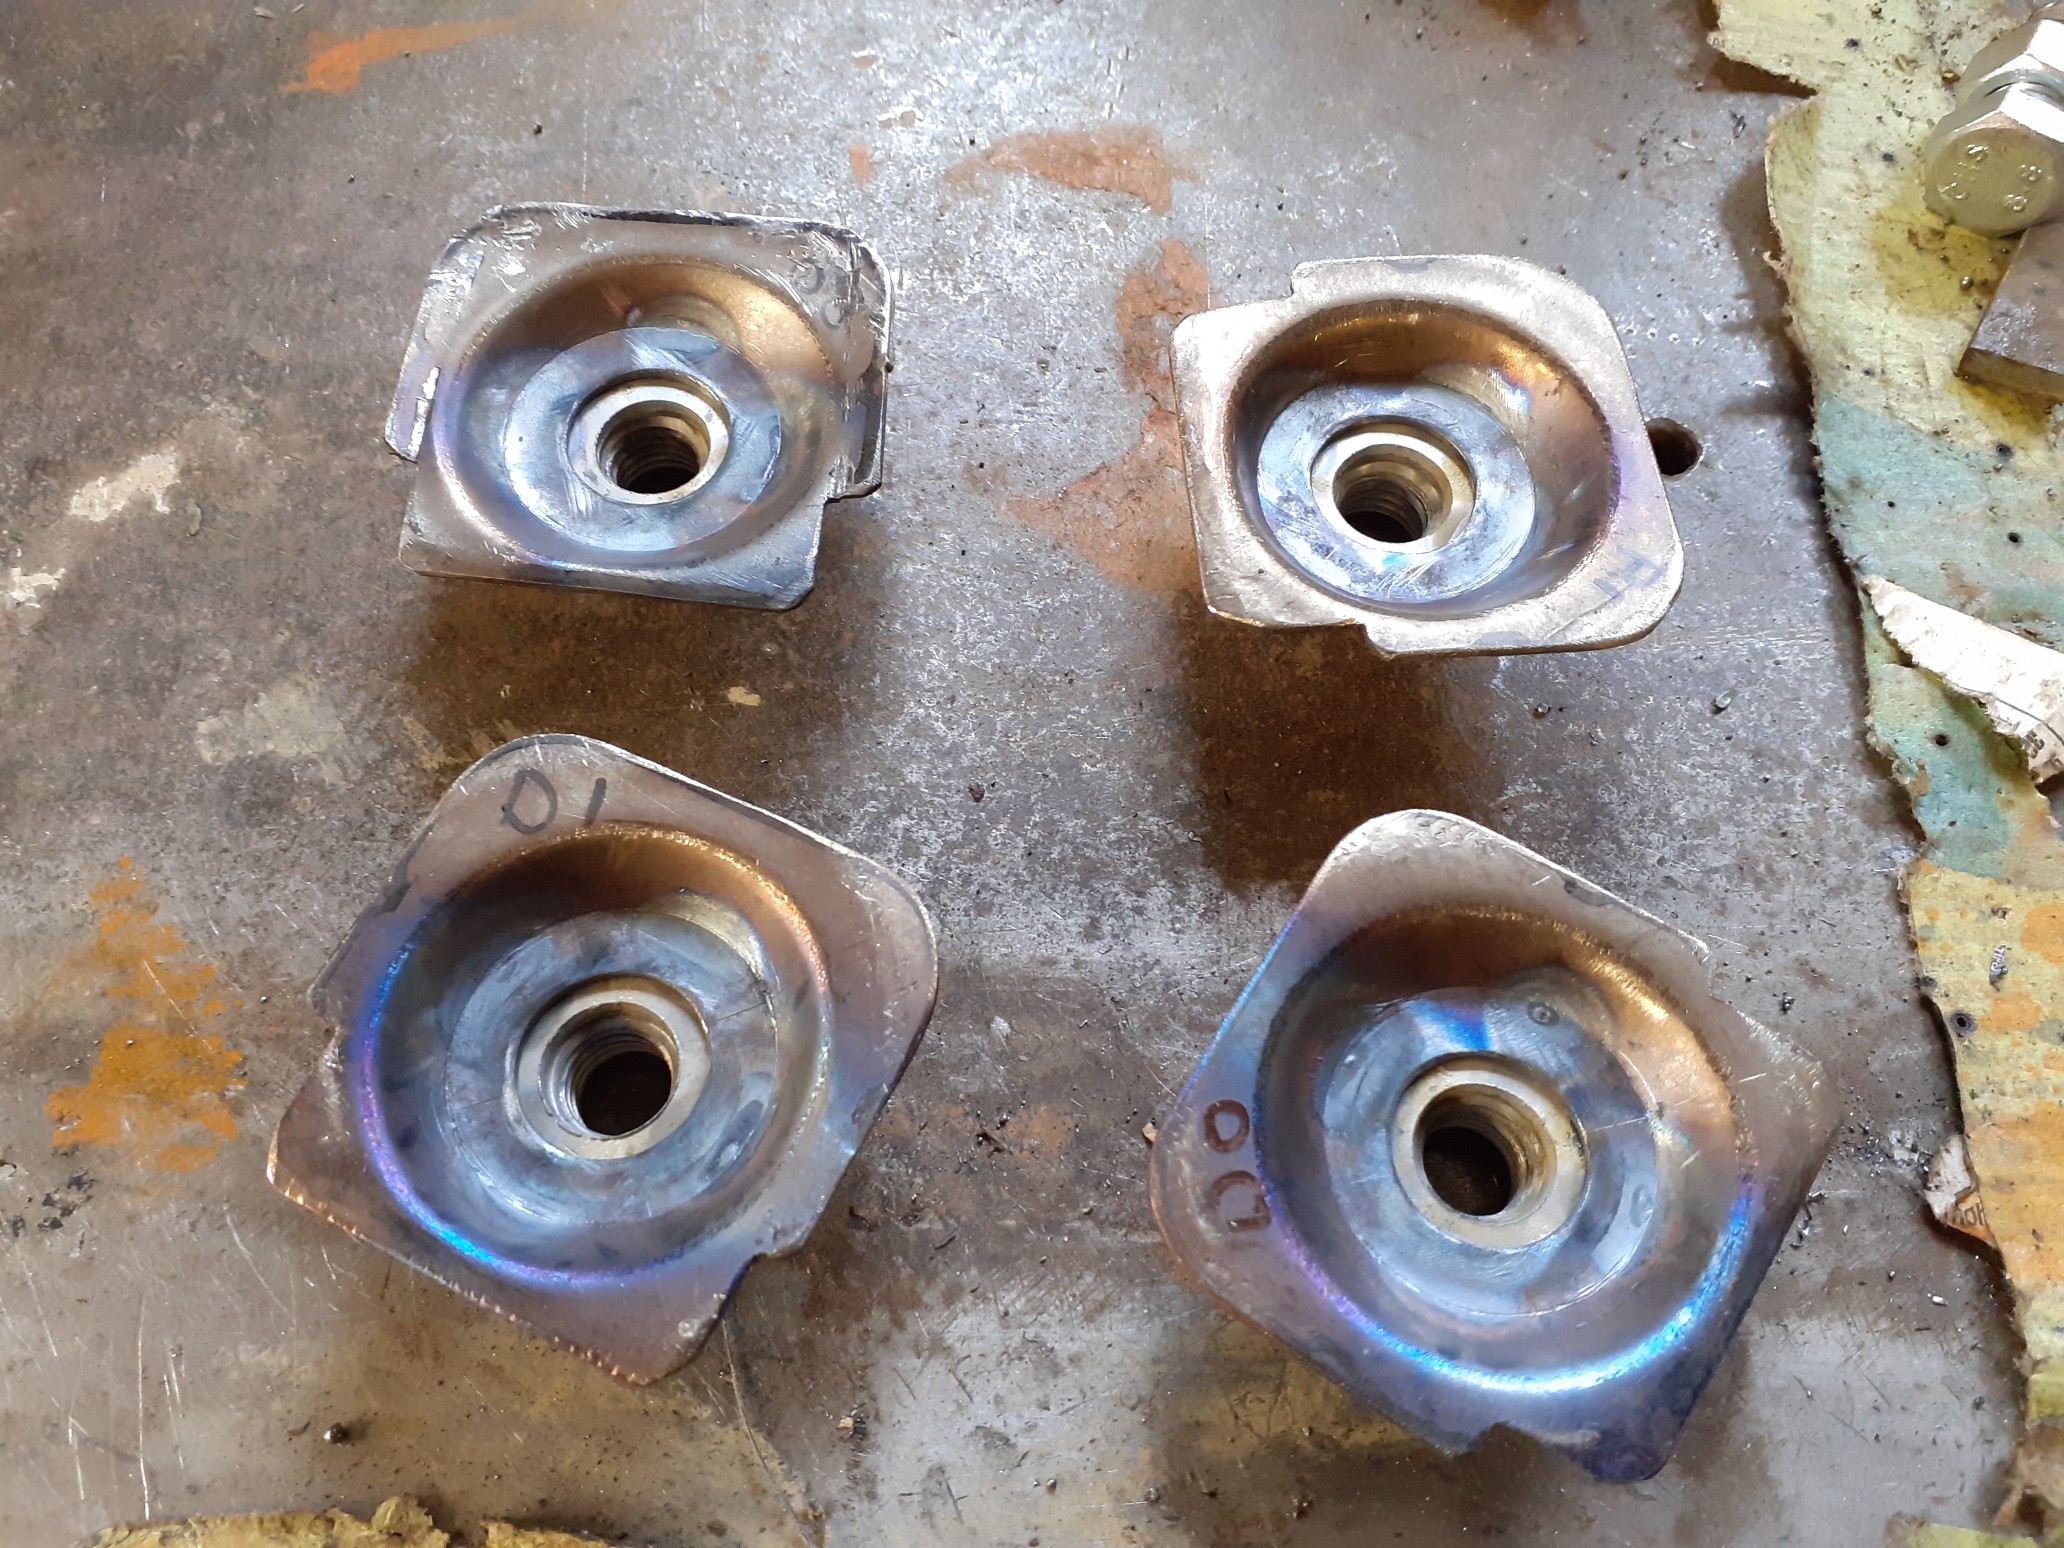
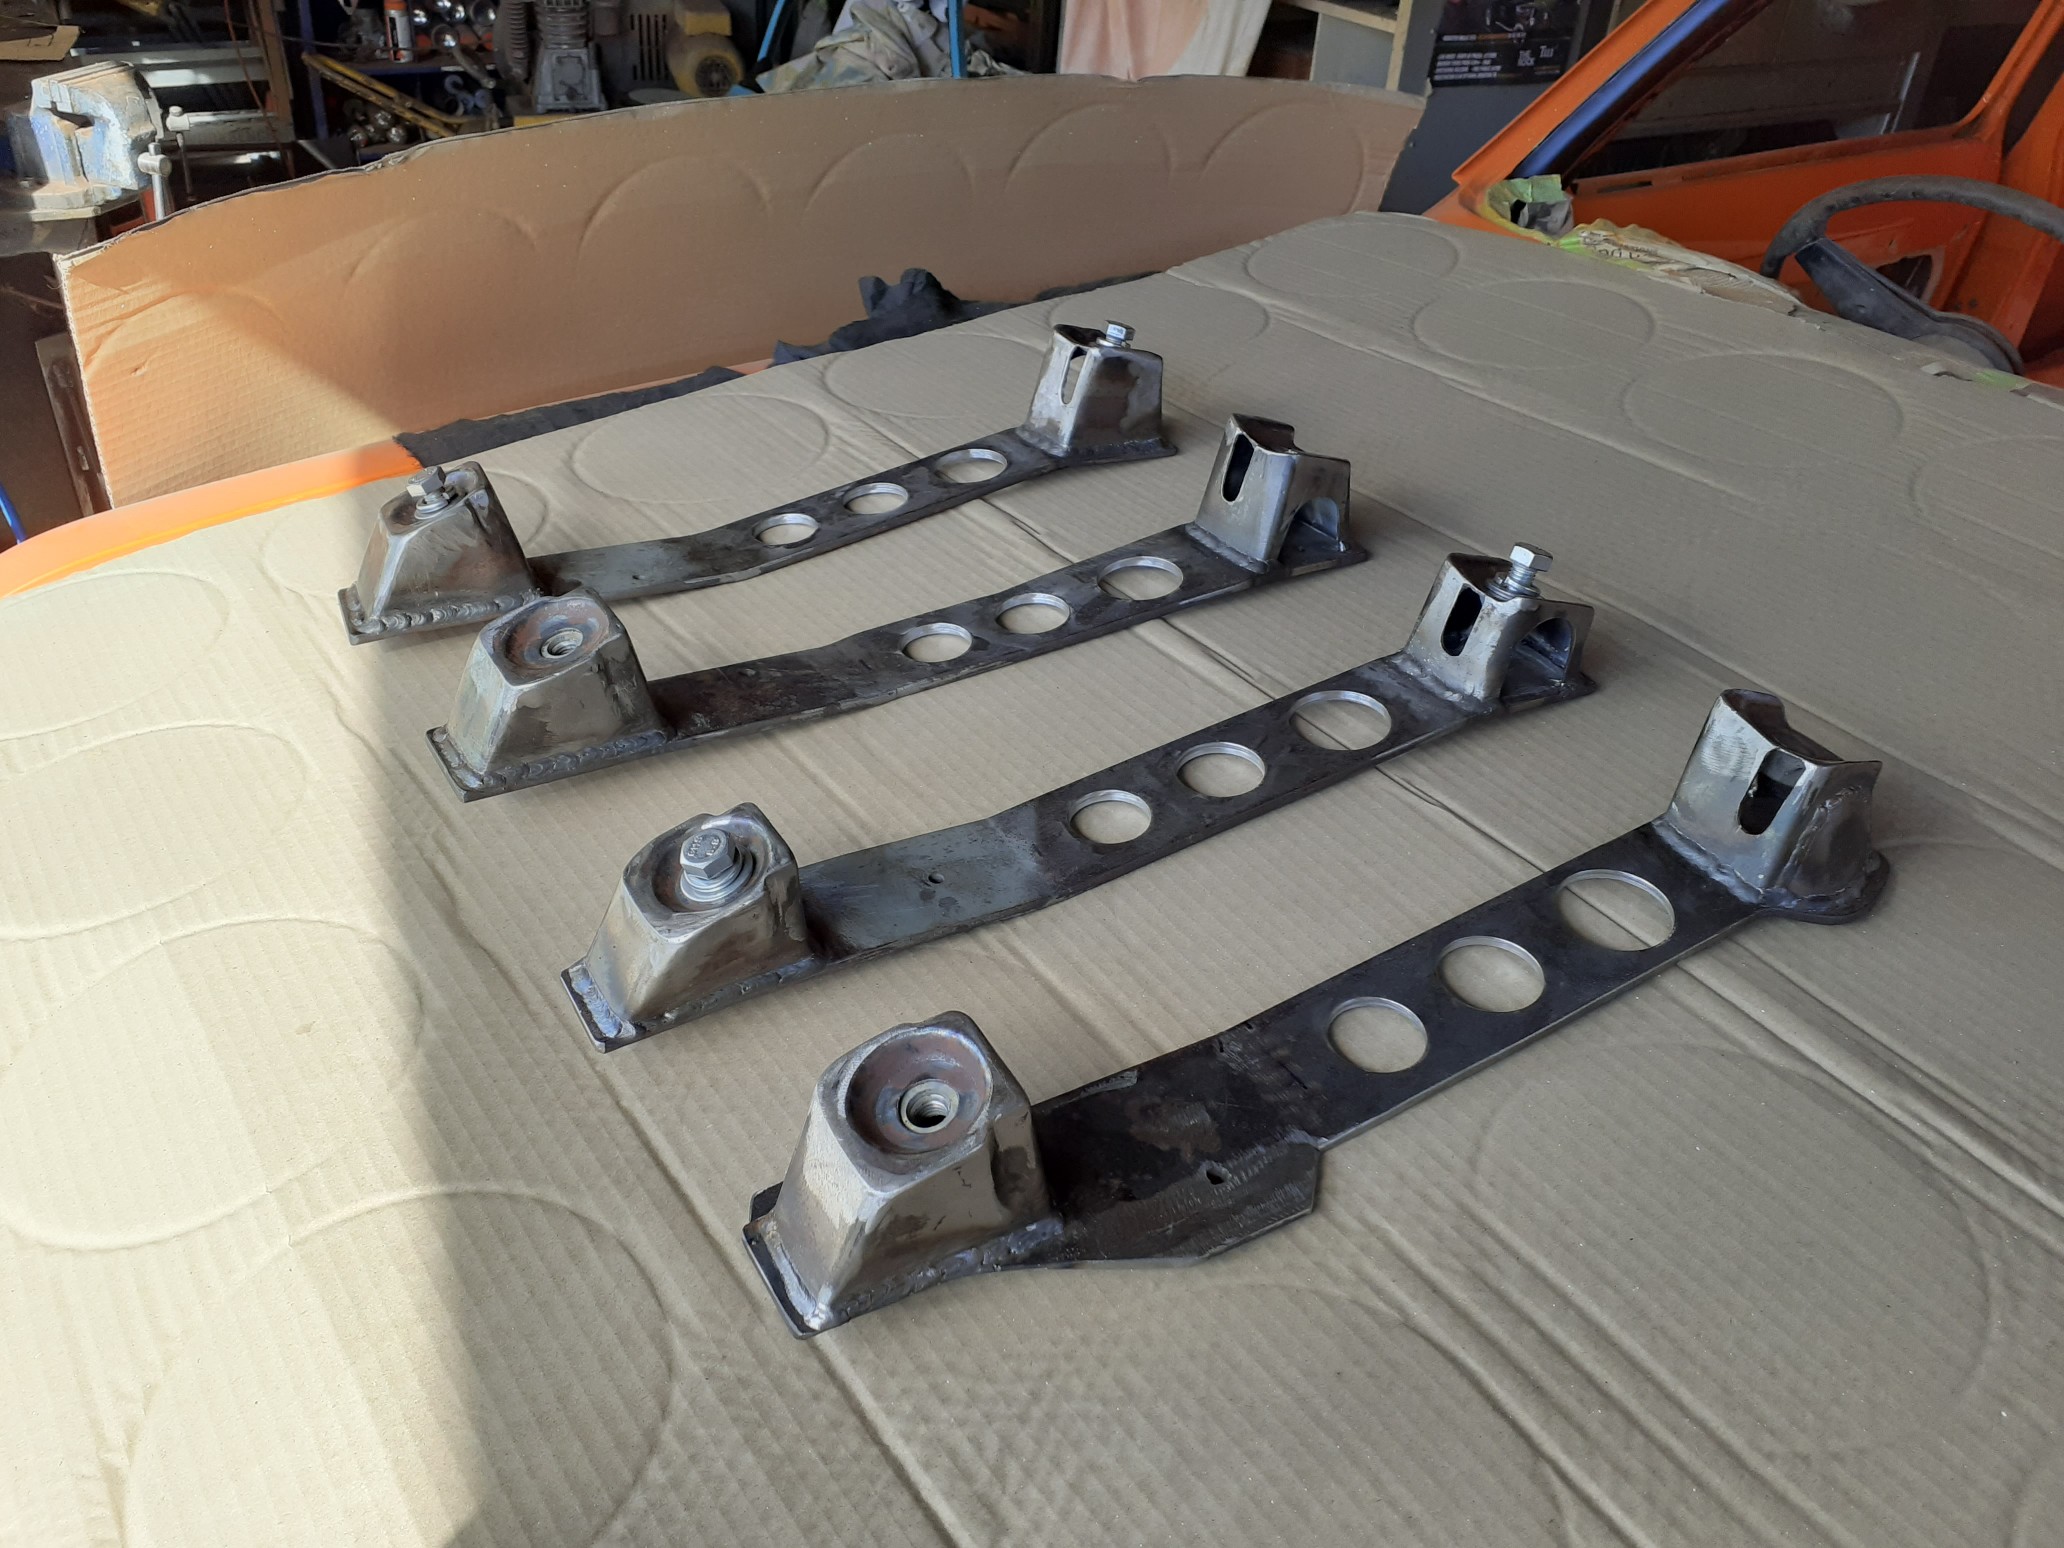
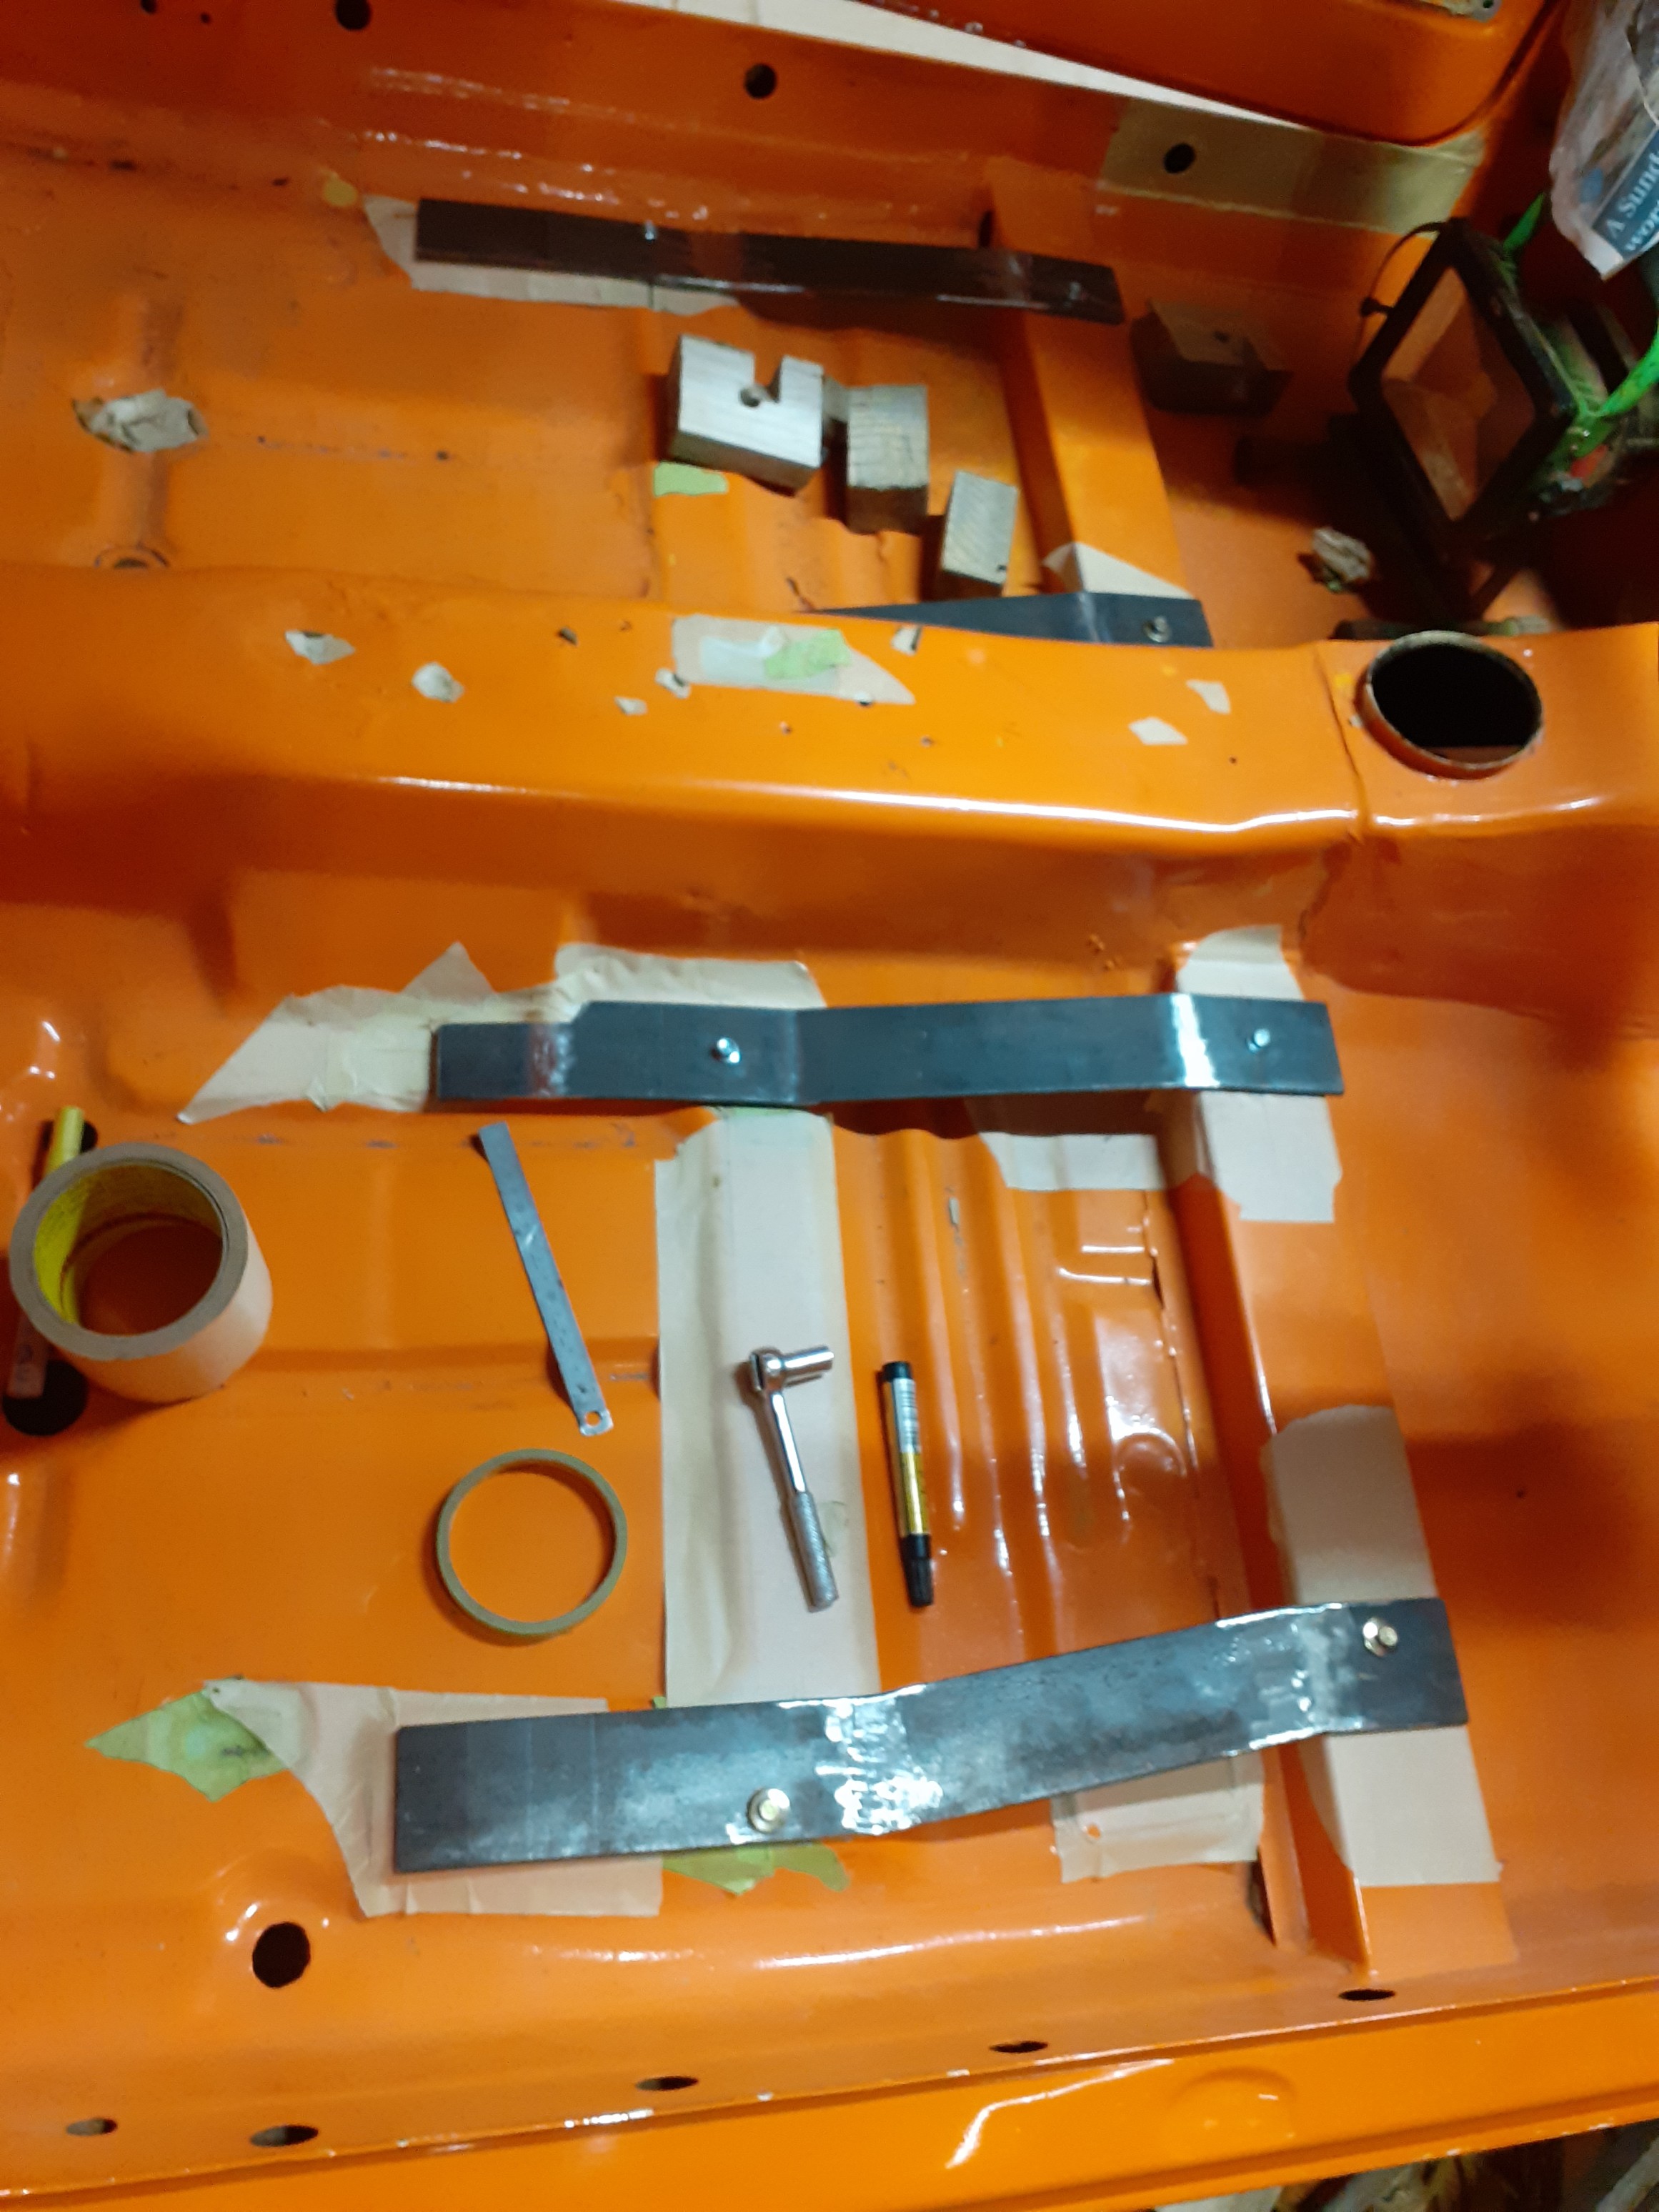
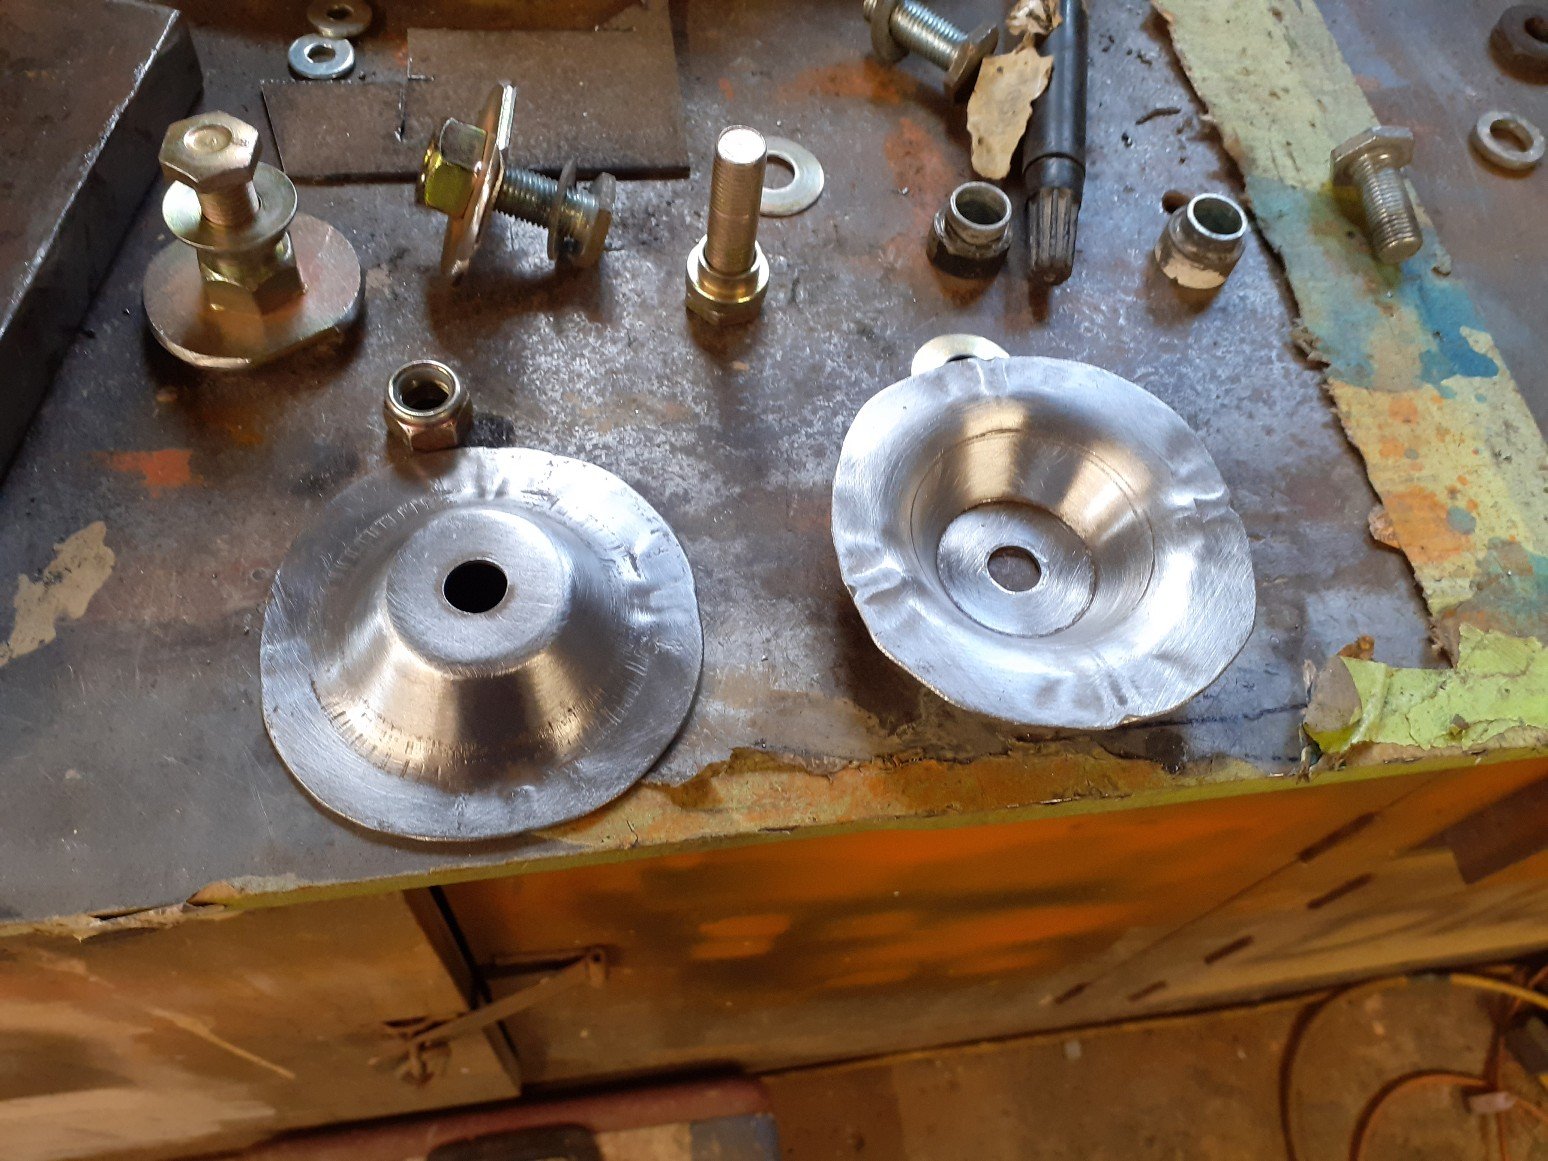
Made some hats for the seat rail feet to sit into. Next step will be to make some towers to join these hats to the flat bar which bolts to the original holes. Made up a couple of dye's out of flat bar and used these to press in the shapes. They fit pretty well and will look correct once tidied up.
- 104 replies
-
- 16
-
-
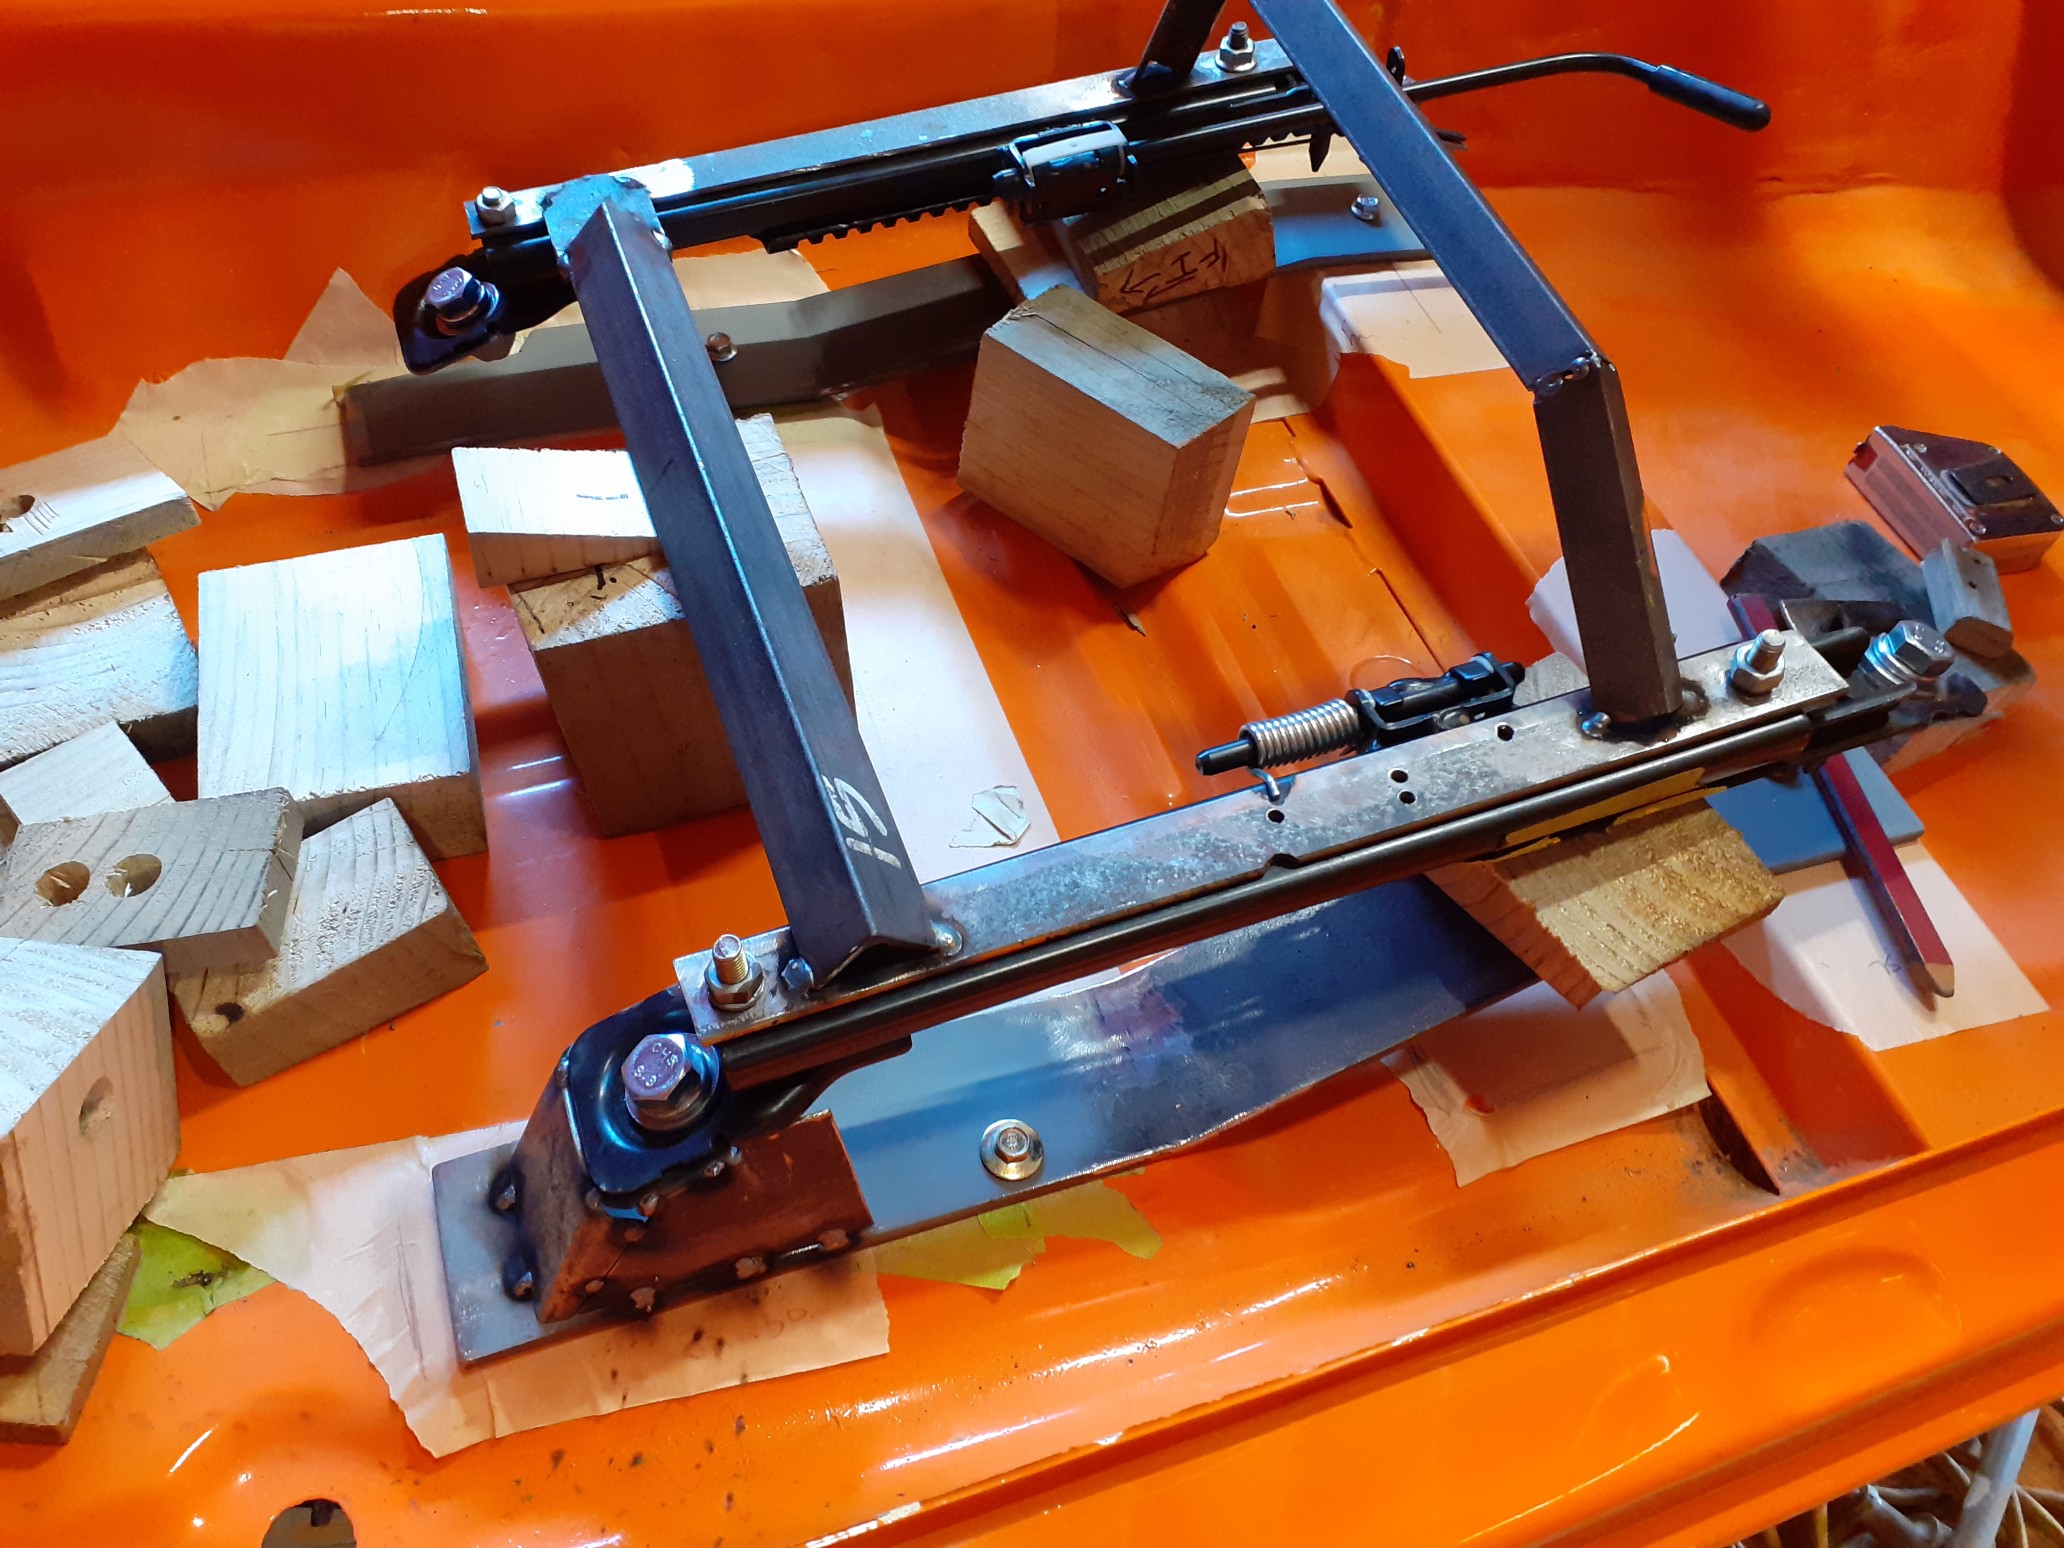
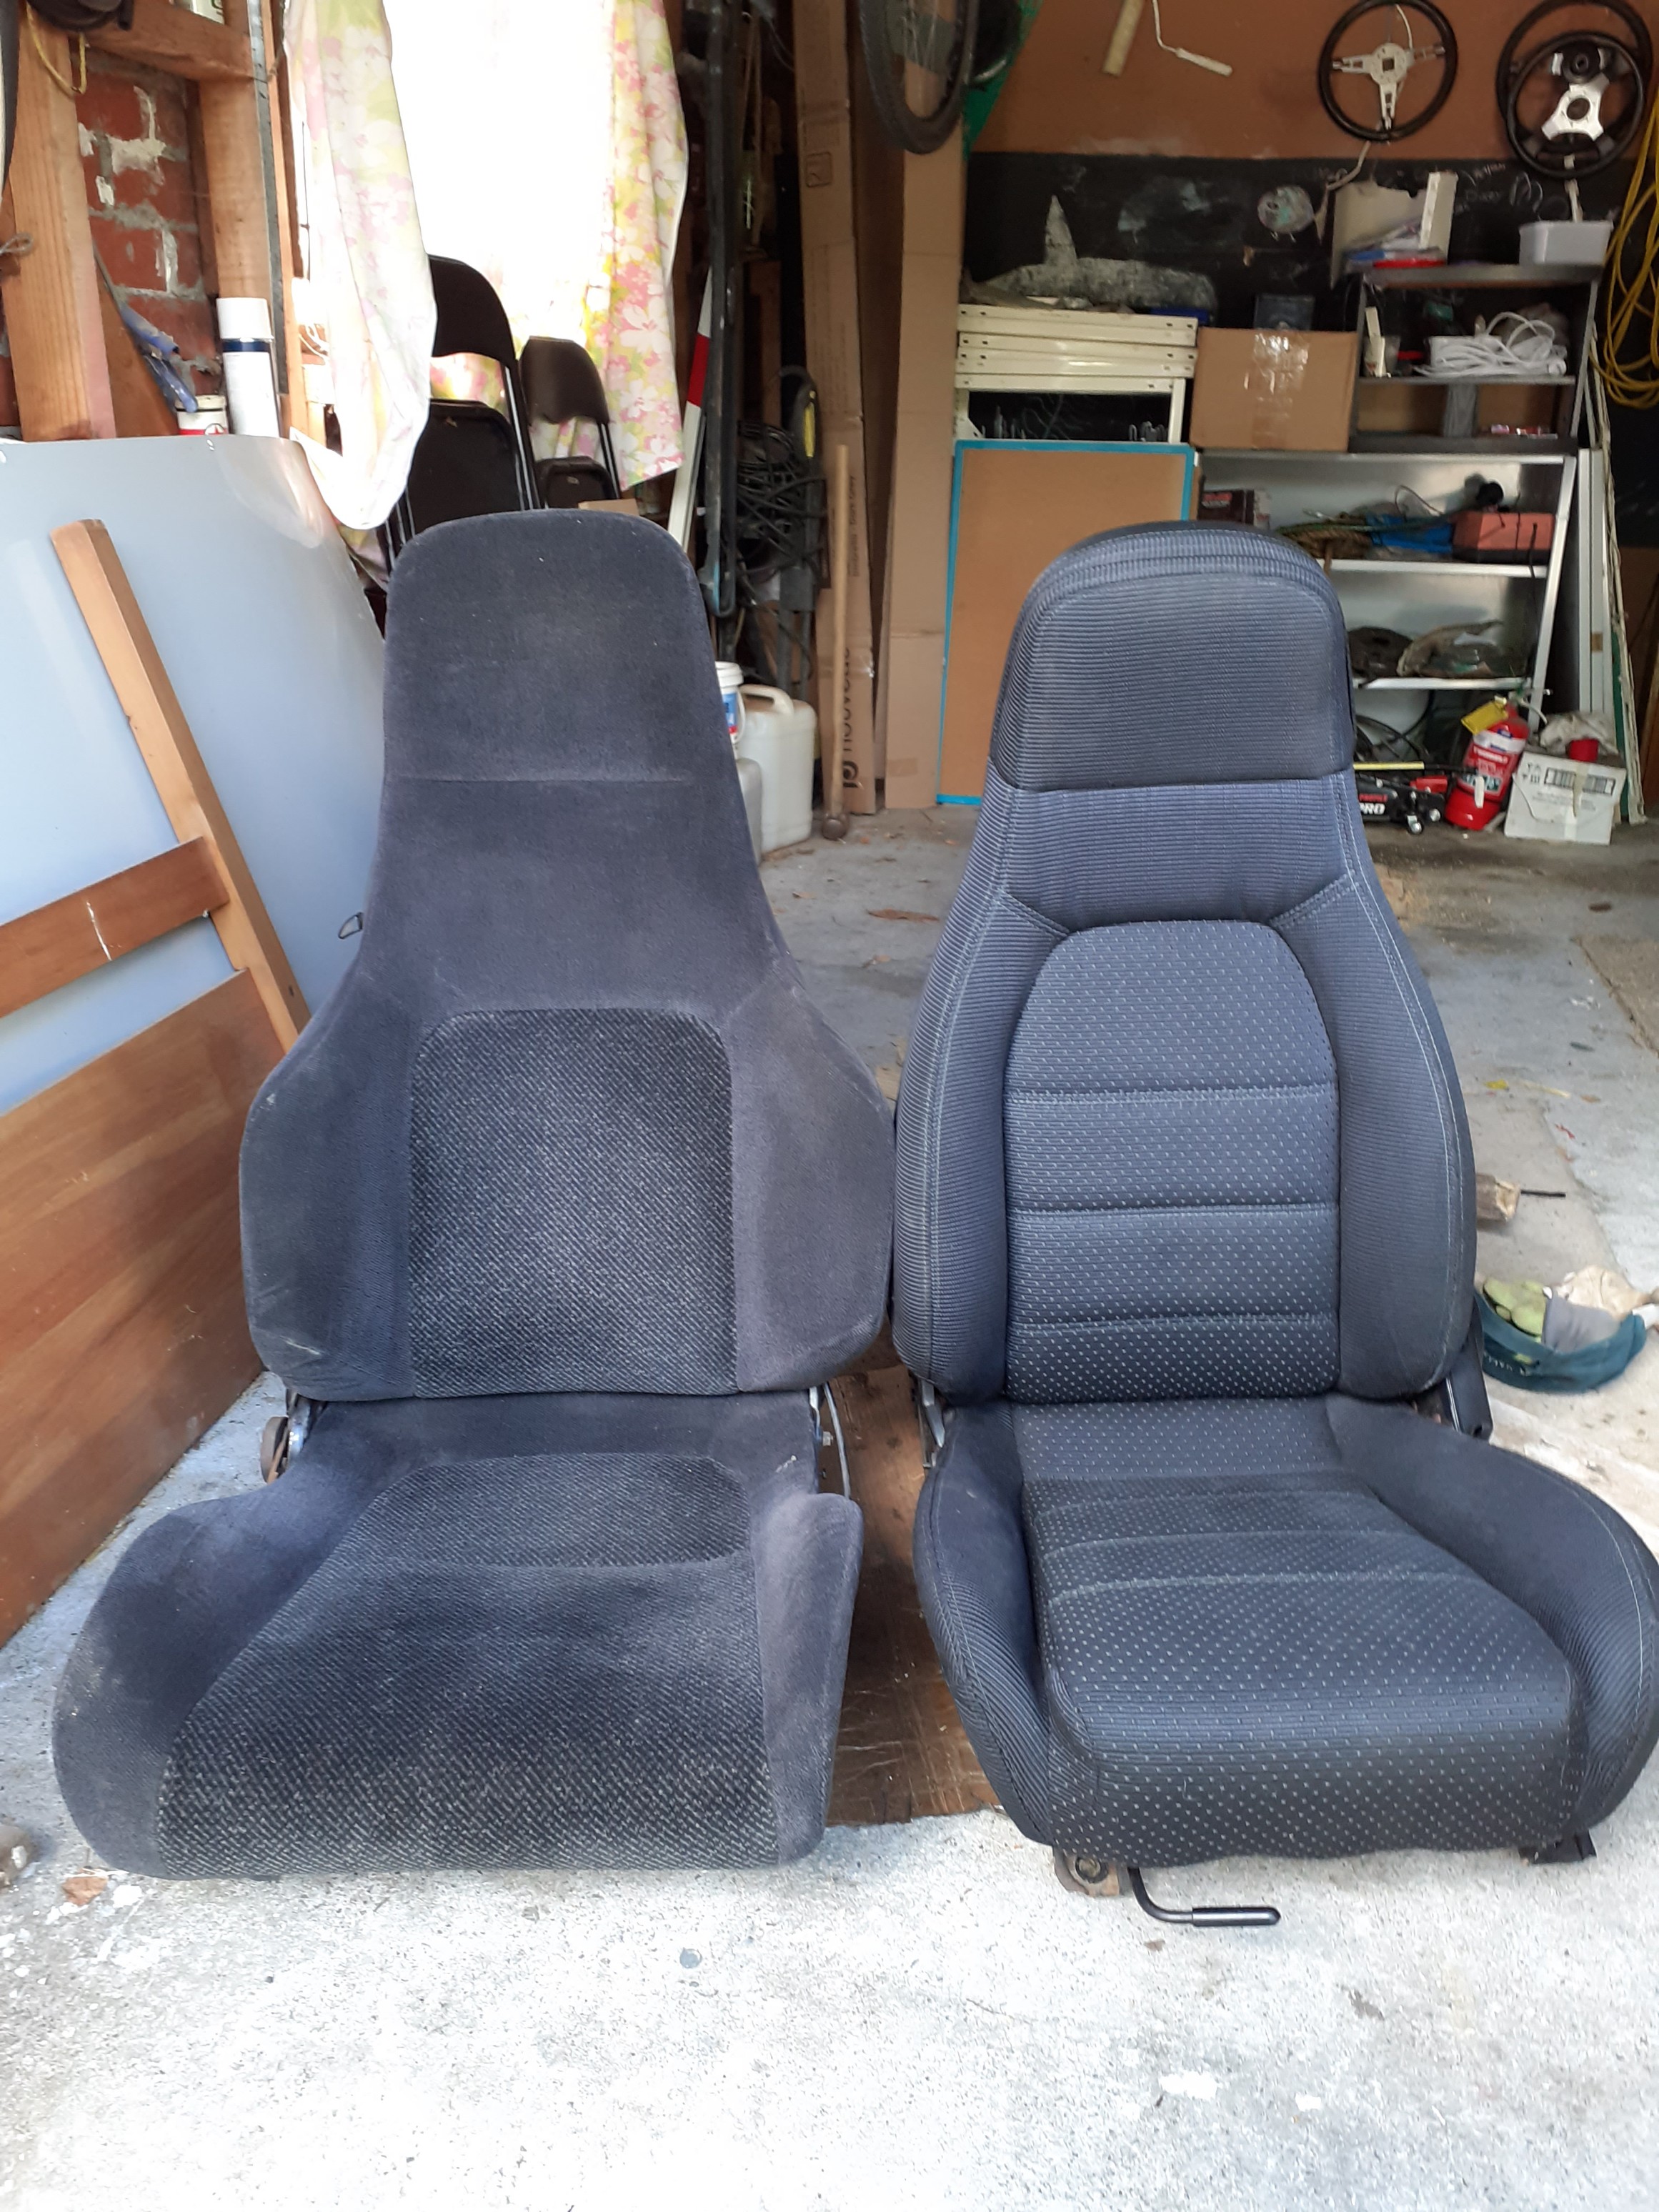
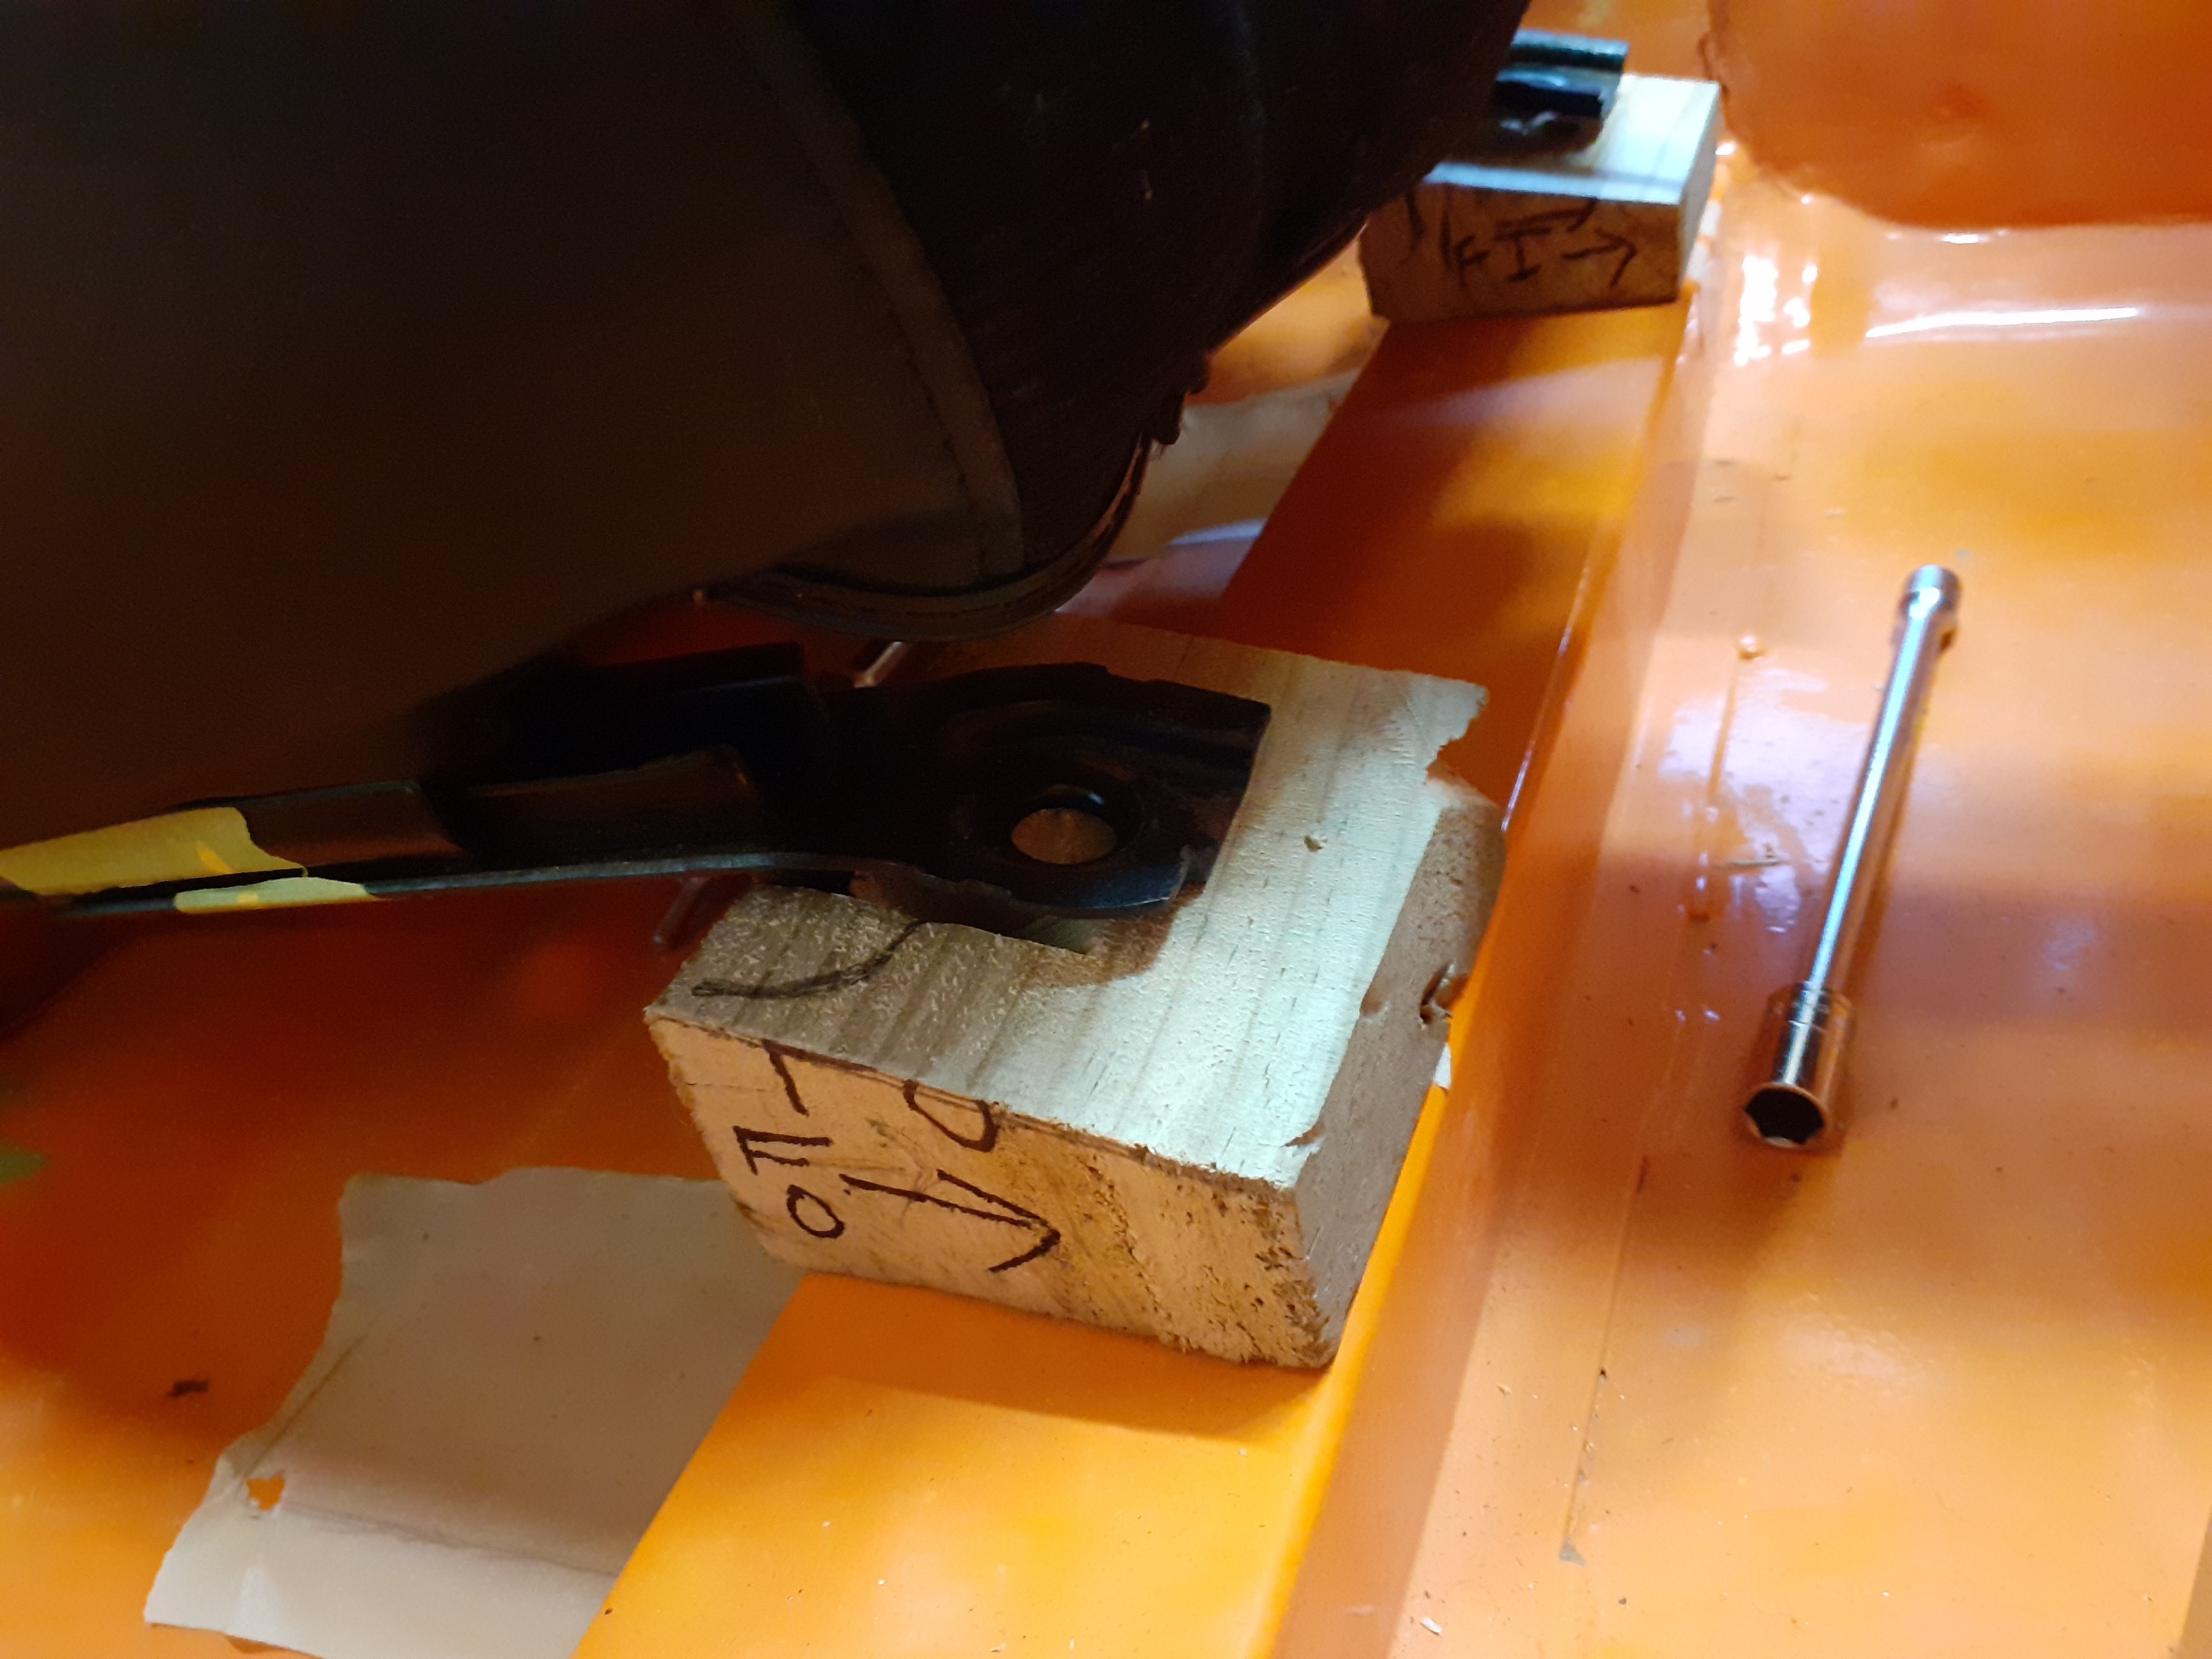
For sometime I've been keeping an eye out for some better front seats, such as mx5 or recaro, to replace the prelude ones which came with the van. Last week I ended up getting some NA mx5 seats from just around the corner. Tiny bit of wear on the drivers bolster but will do for now. The plan is to make an adapter plate for each seat so that I can use the original anchor points in the escort, and use the standard mx5 rails. The thinking is, if I find a better pair, I can just switch them straight out, or put original escort seats in. Have made the adapter rails out of 5mm flat bar, it's overkill but all I had at the time so I may drill some speed holes in them at a later date. I'll need to press some shapes out to fit to the bottom of mx5 rail feet, and make some towers to suit. The final position will be 20mm higher then the wooden block below.
- 104 replies
-
- 13
-
-
Last one from me. I'm fitting a rear seat in my escort van (original estate seat) which flips down when not in use. I need to make two supporting towers which hold the back rest in place when the seat is set up to be used, so it doesn't swing back or forth. There are two bars welded on the back of the seat above the wheel tub to work with. Do I need a locking latch on each tower? Or can I have a locking latch on one, and a plastic block to rest on, on the other?
-
I'm putting mx5 seats in my escort and my question is, certwise, is it easier/cleaner to modify the original escort seat rails to suit the mx5 seats or the mx5 seat rails? I will be keeping the original mounting positions and holes, and wont be changing the original floor mounted belts.
-
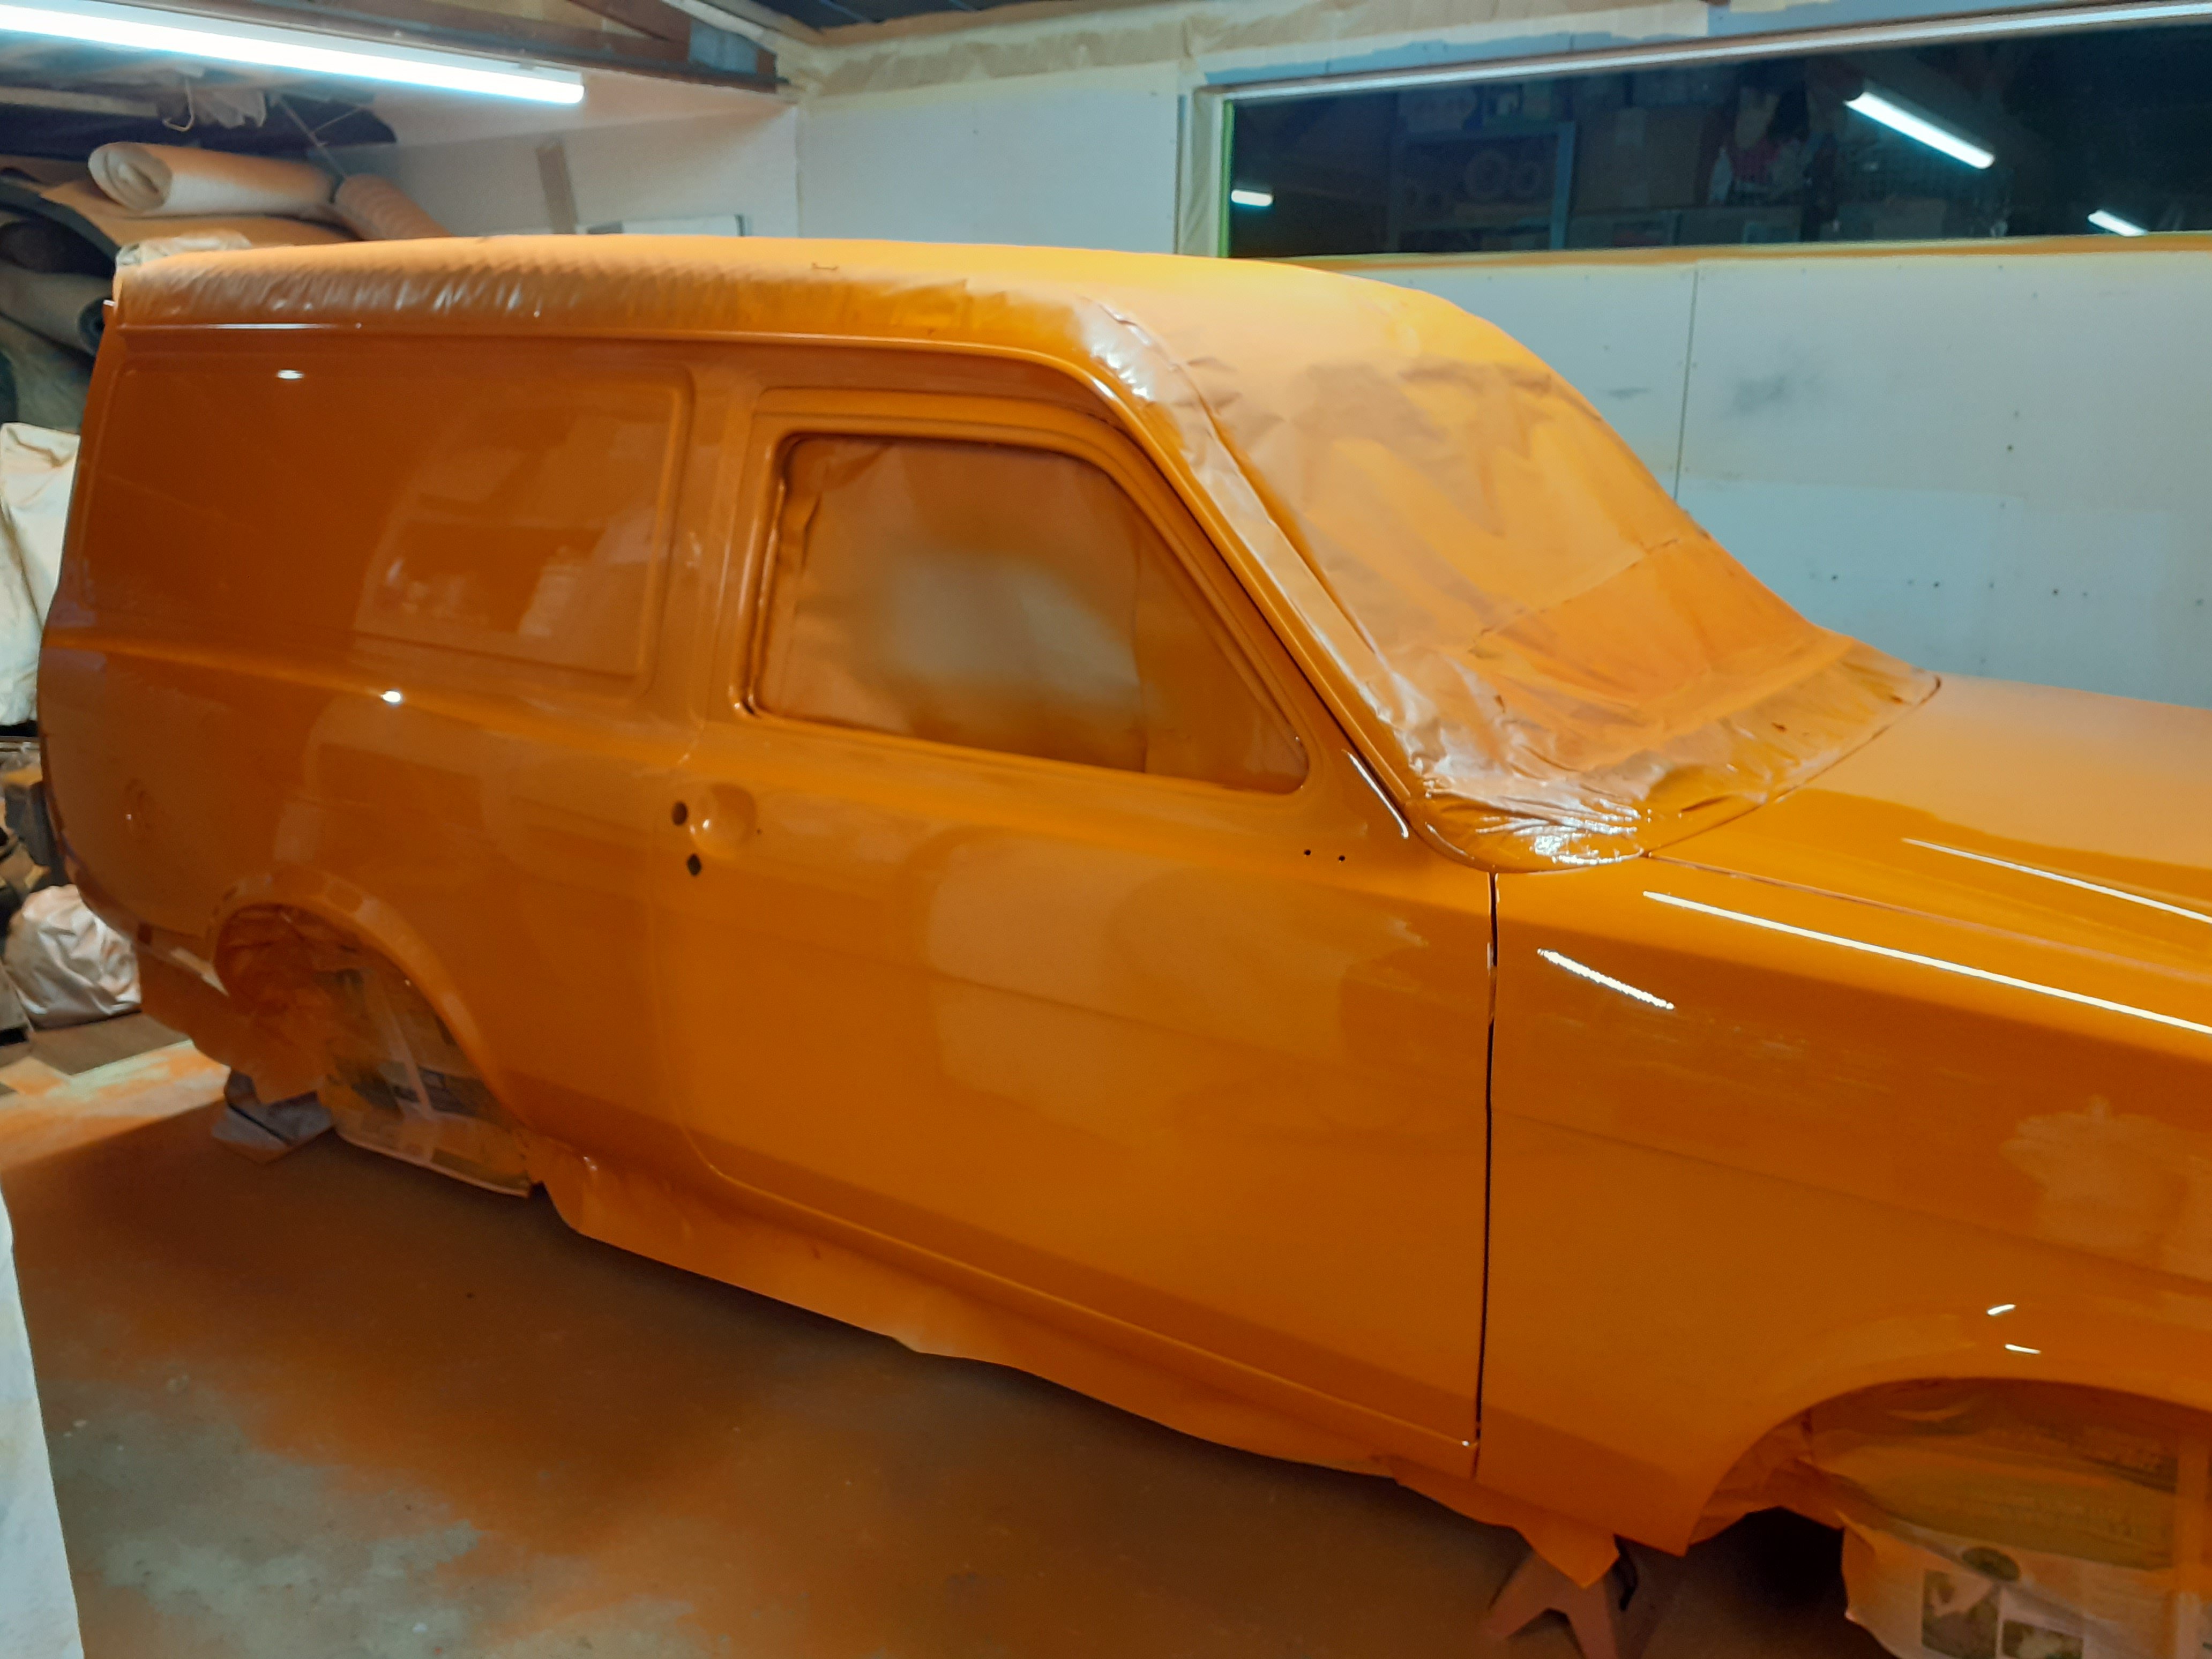
Thanks man. I think it's the biggest decision when working on a car. I did um and ah for ages and had a few spray outs. A little concerned there may be a bit too much orange with the lack of trim but we'll see when it rolls out. The back seat has no seat belts (pre 77) and no side windows so it's not a great place to be, but atleast the option to have a 3rd or 4th person is a bonus. Think I'll stick with the original brown vinyl color to keep it period.
-
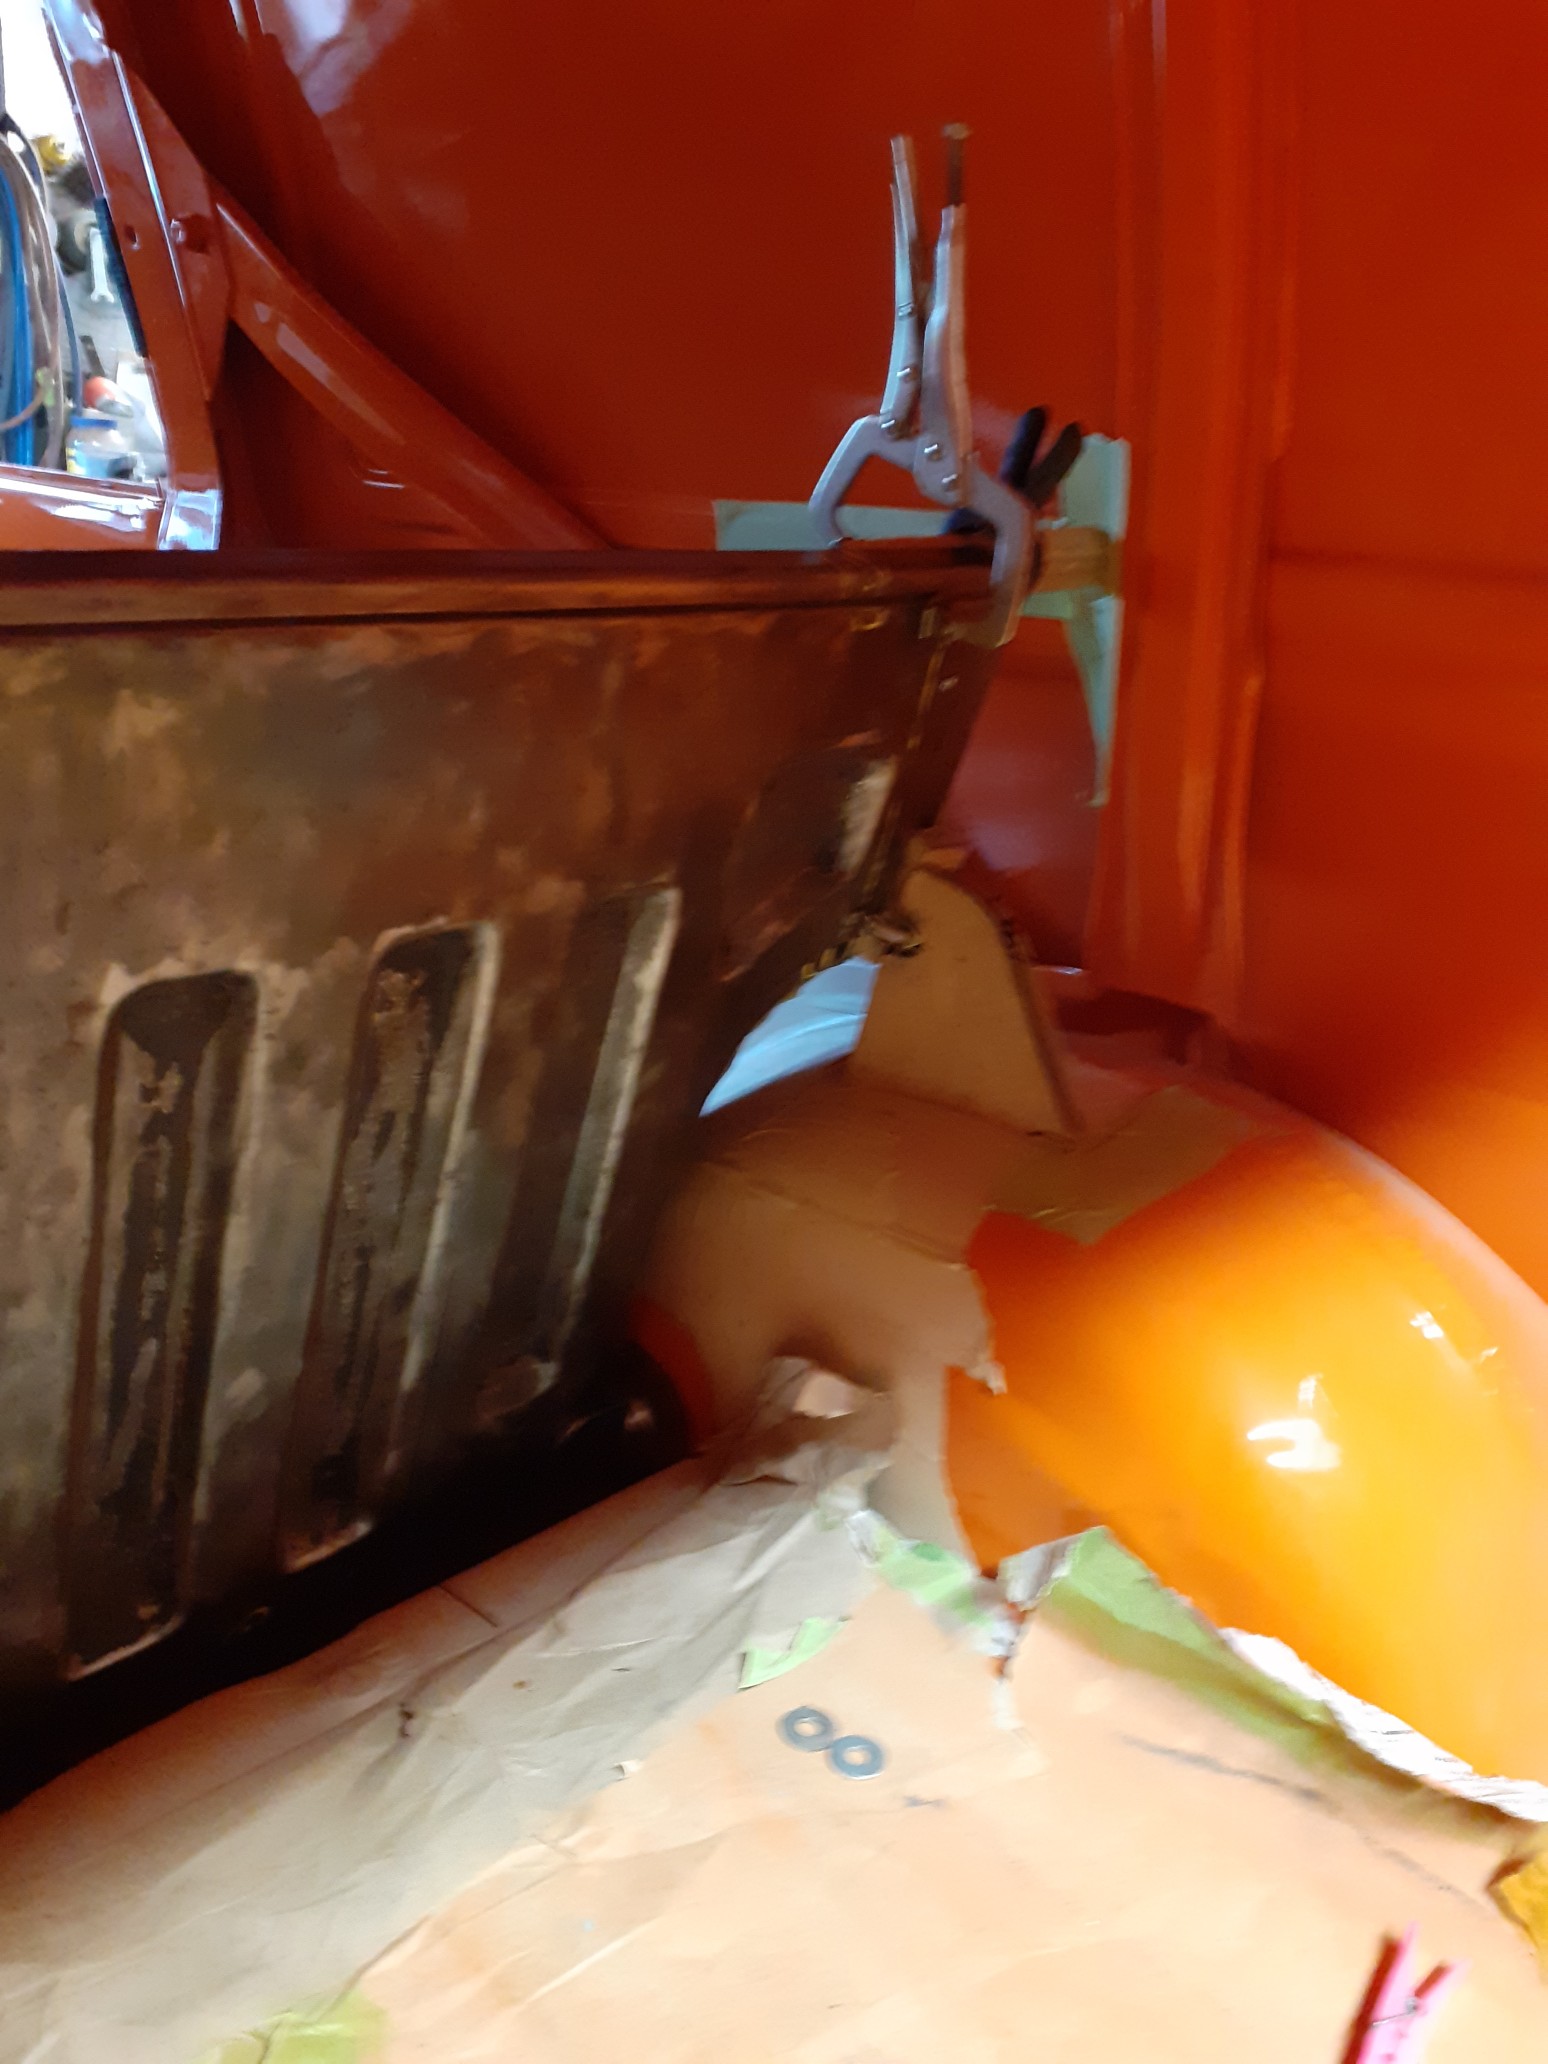
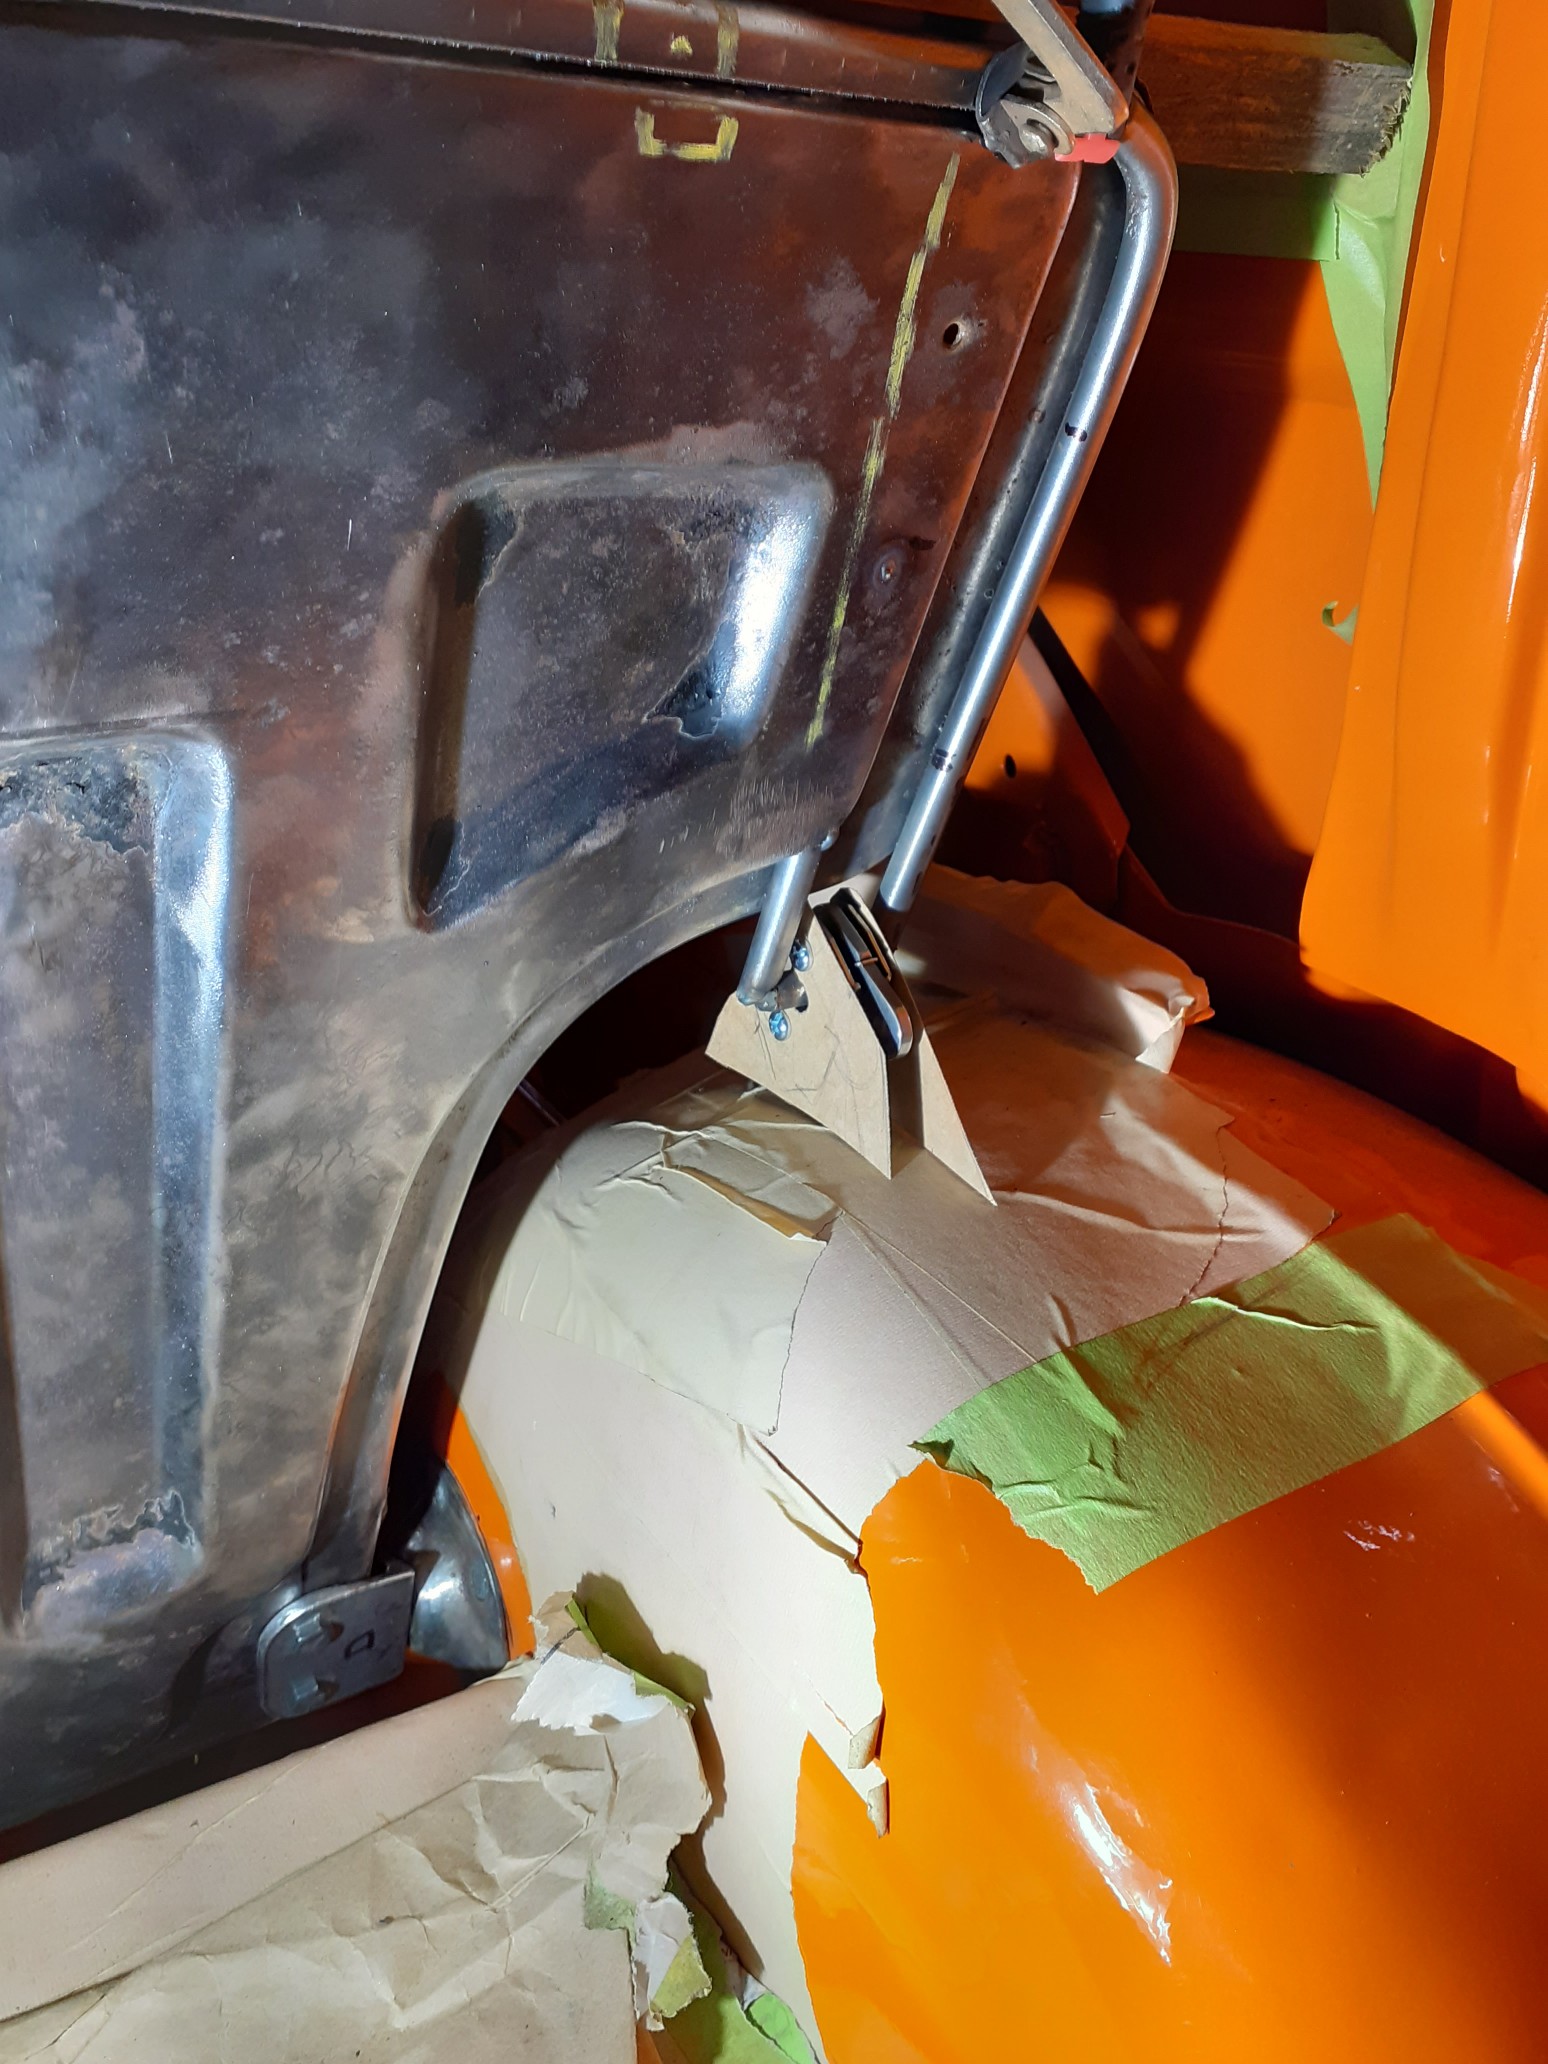
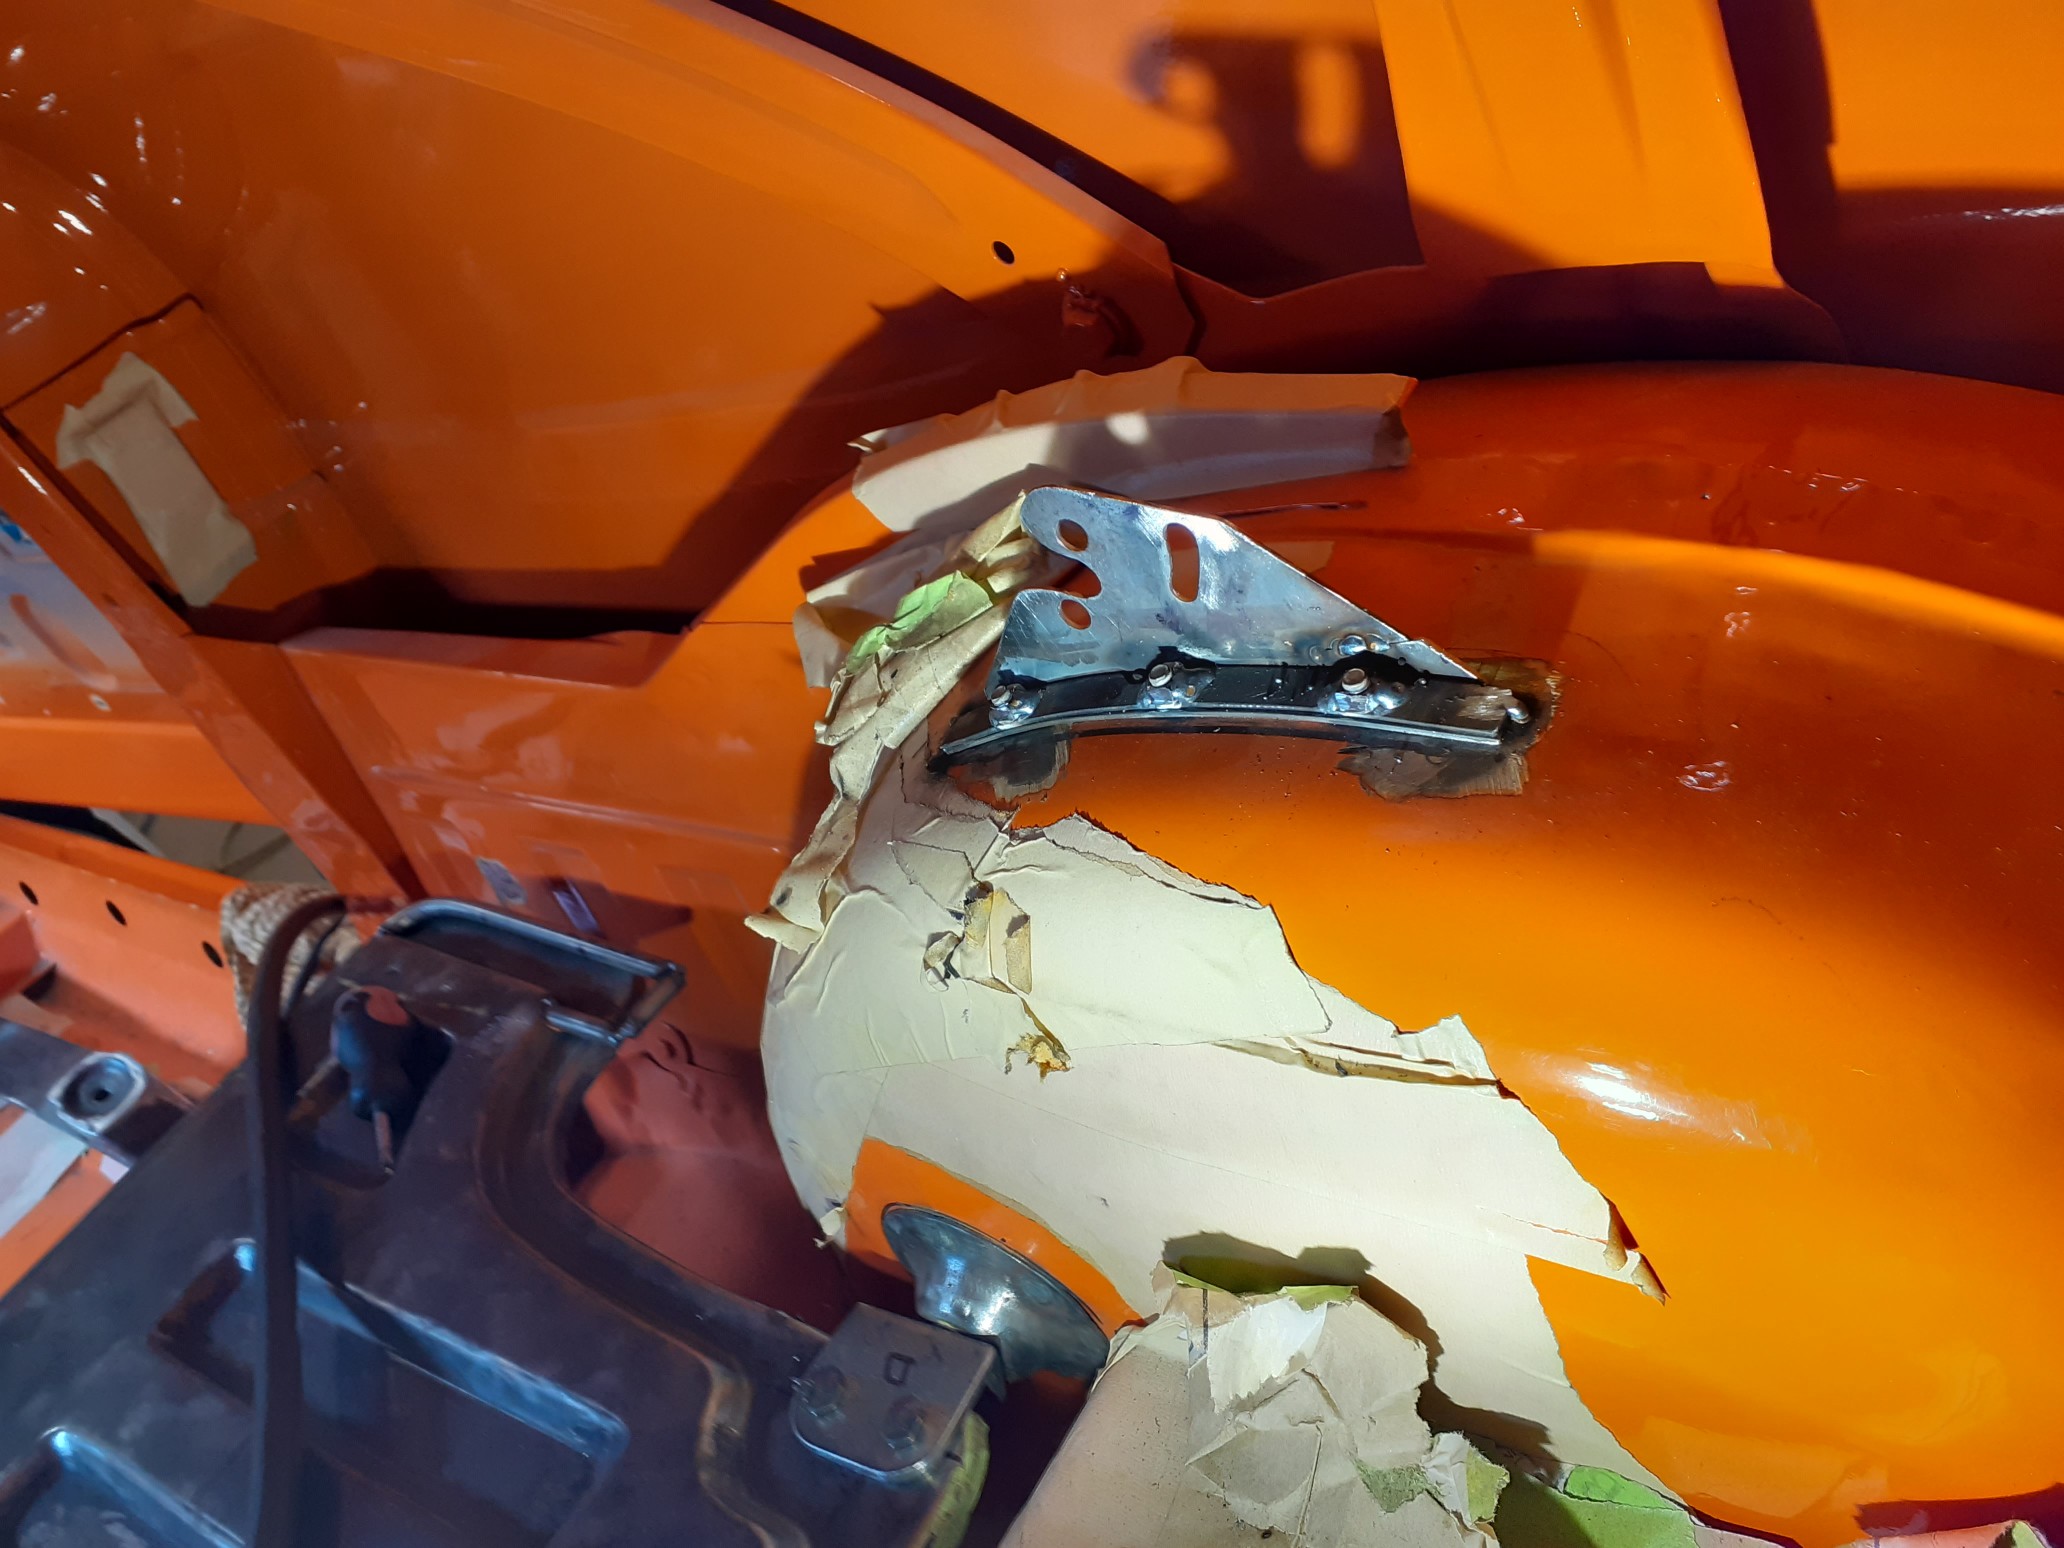
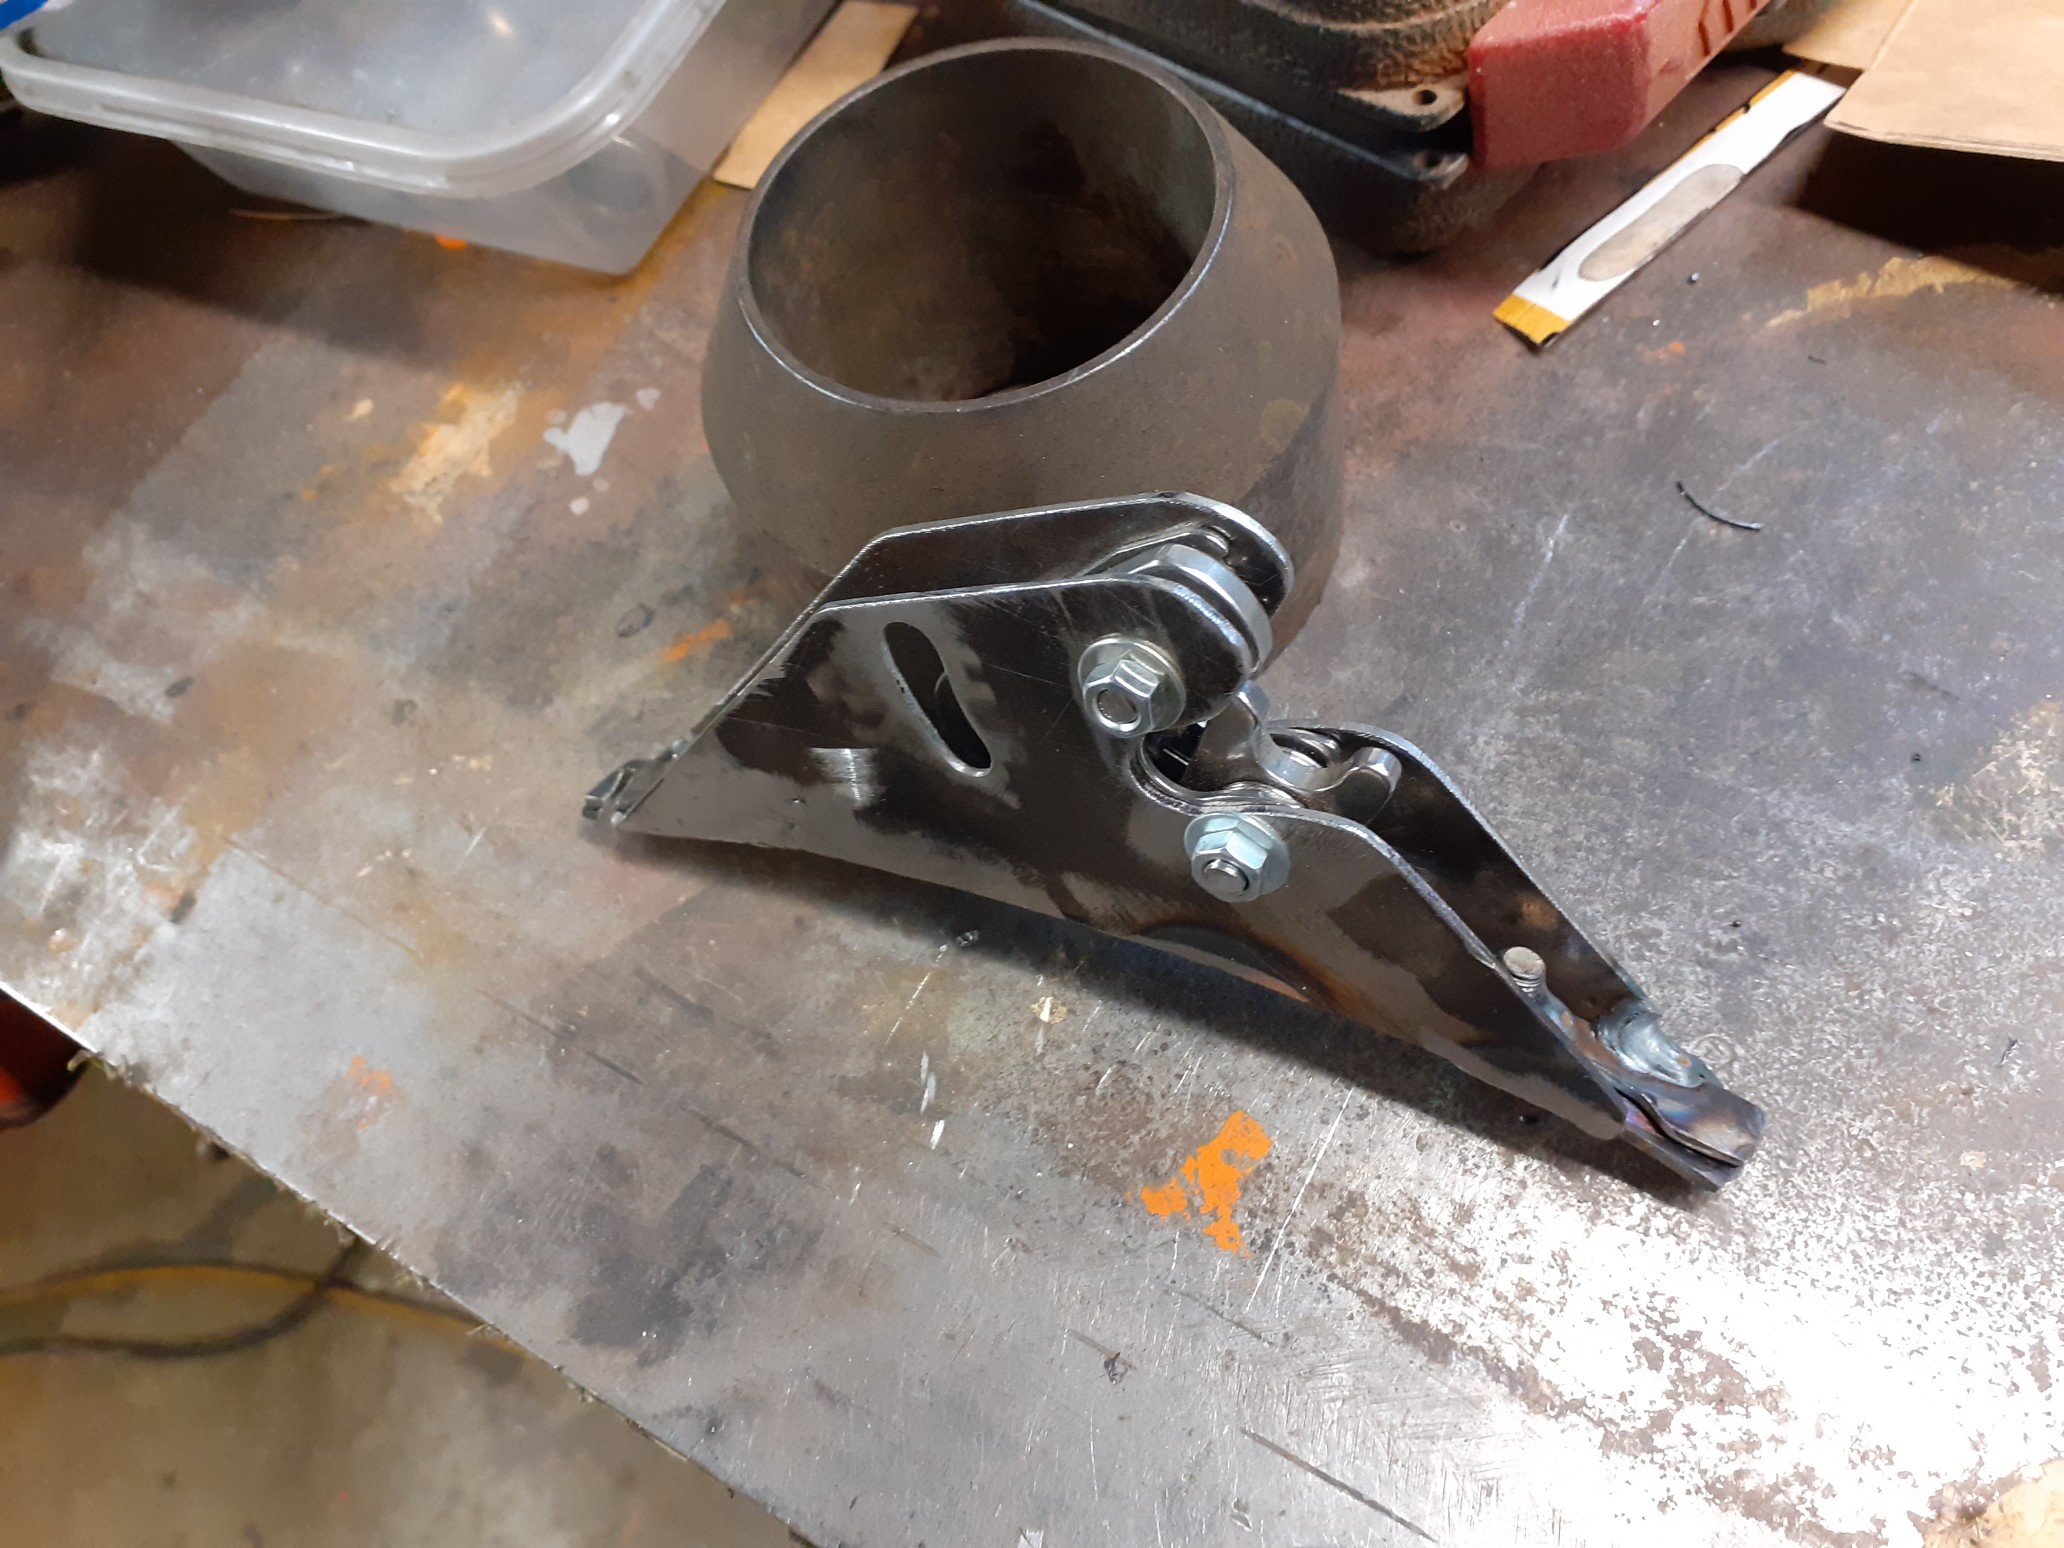
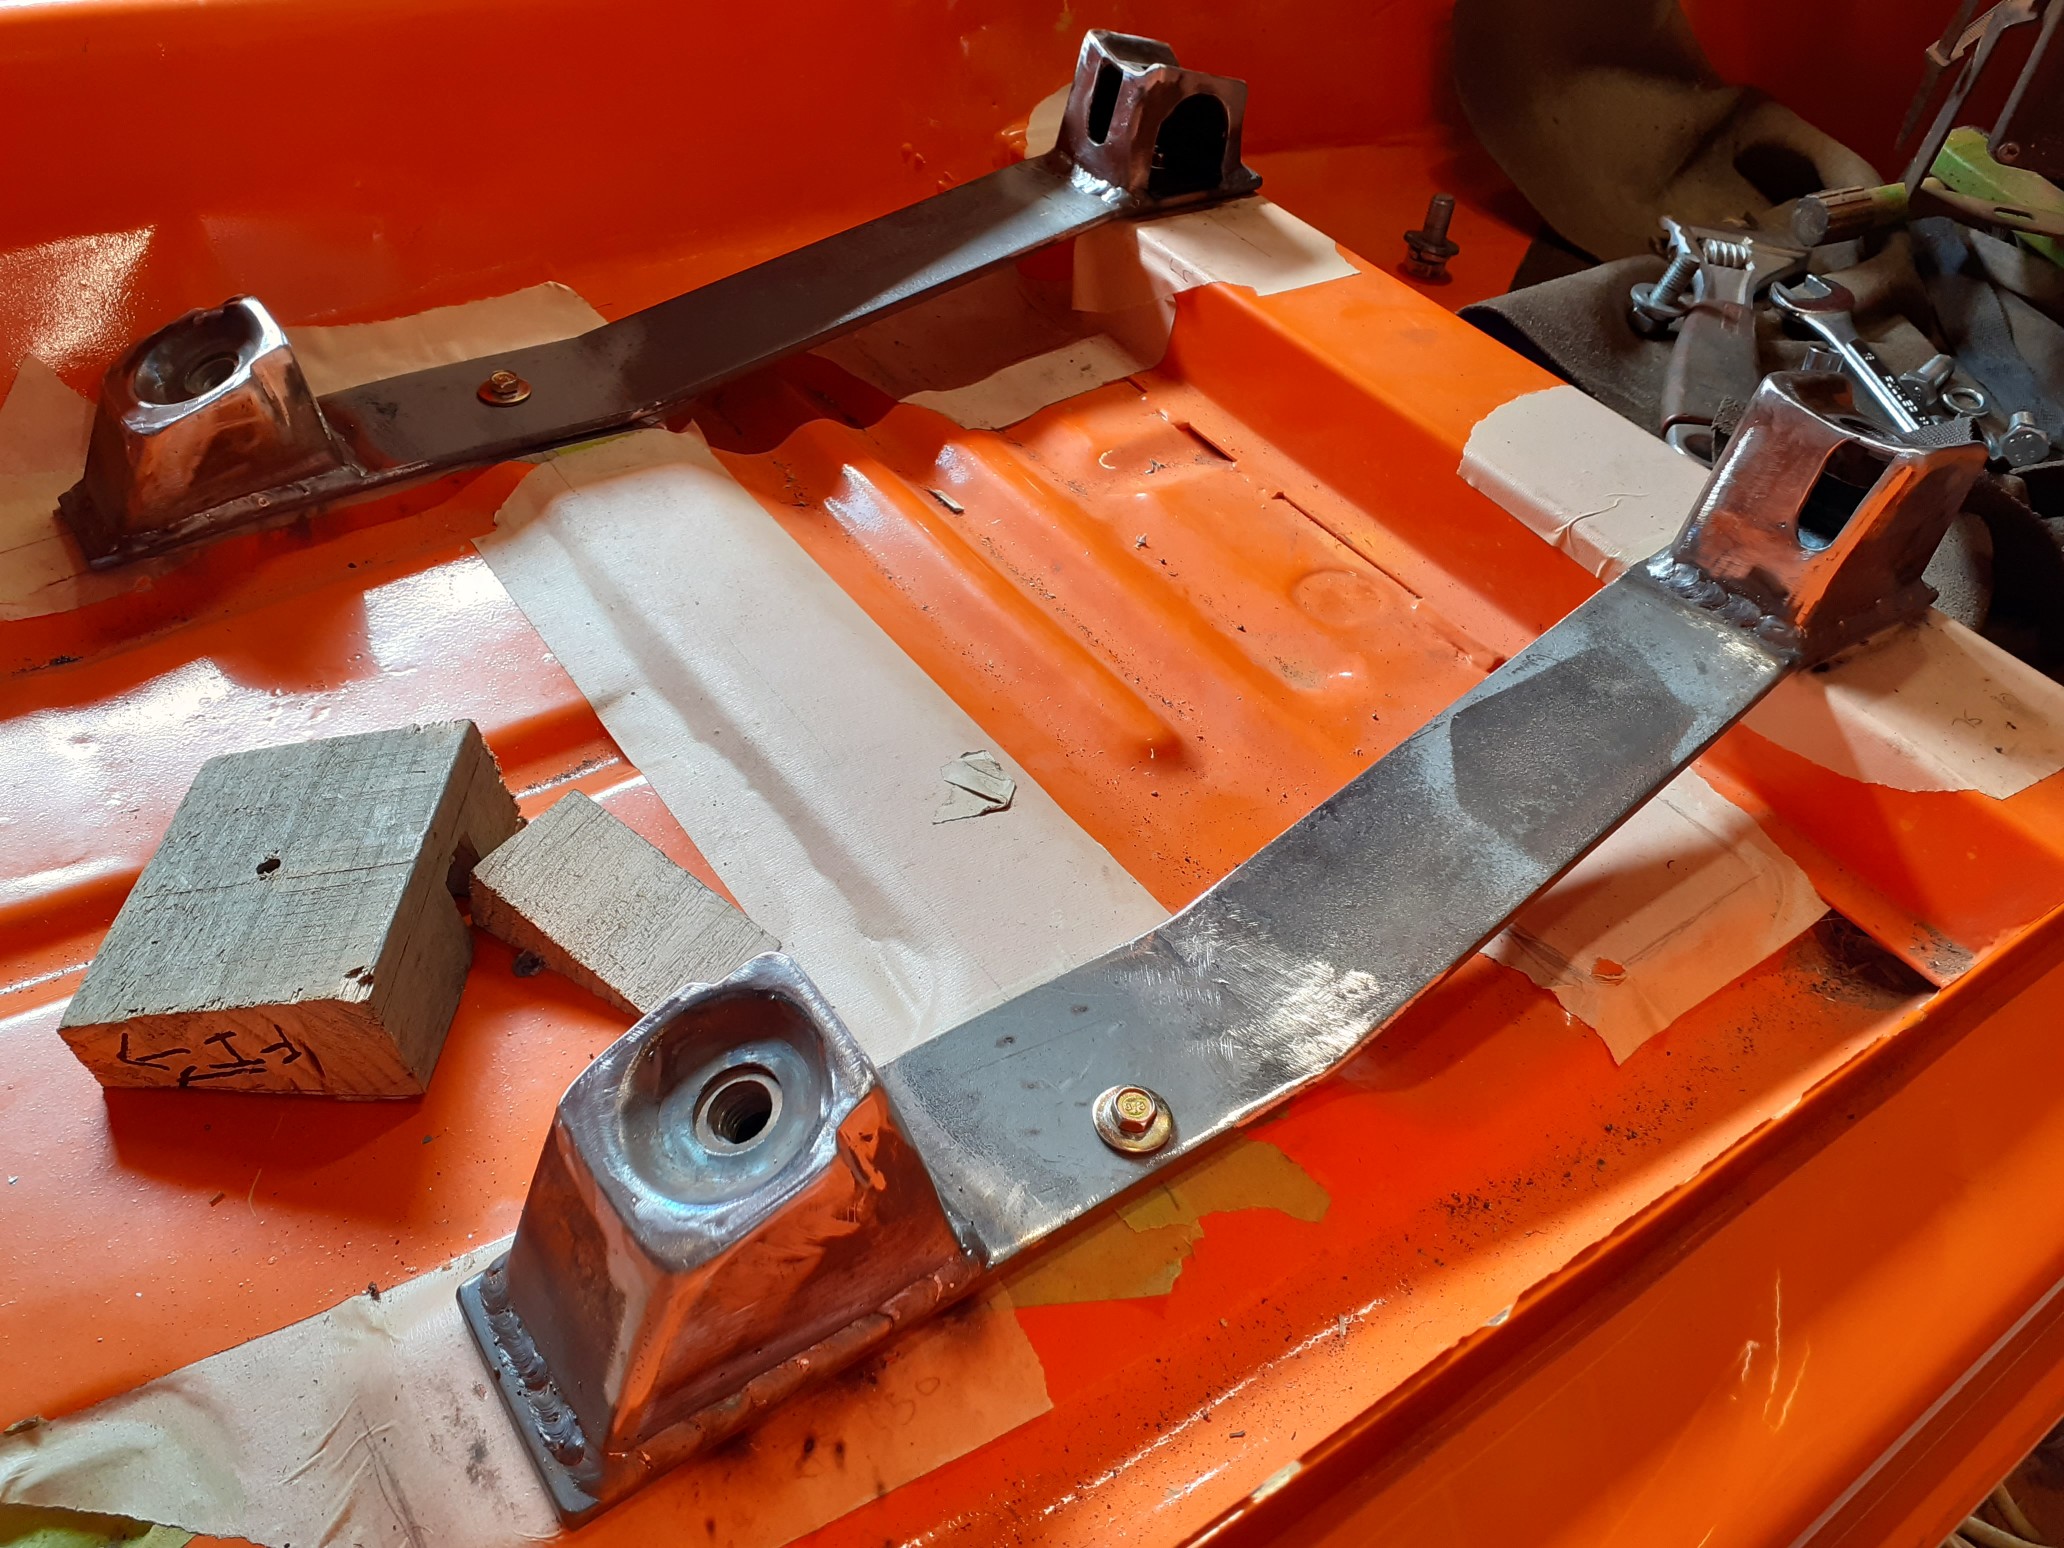
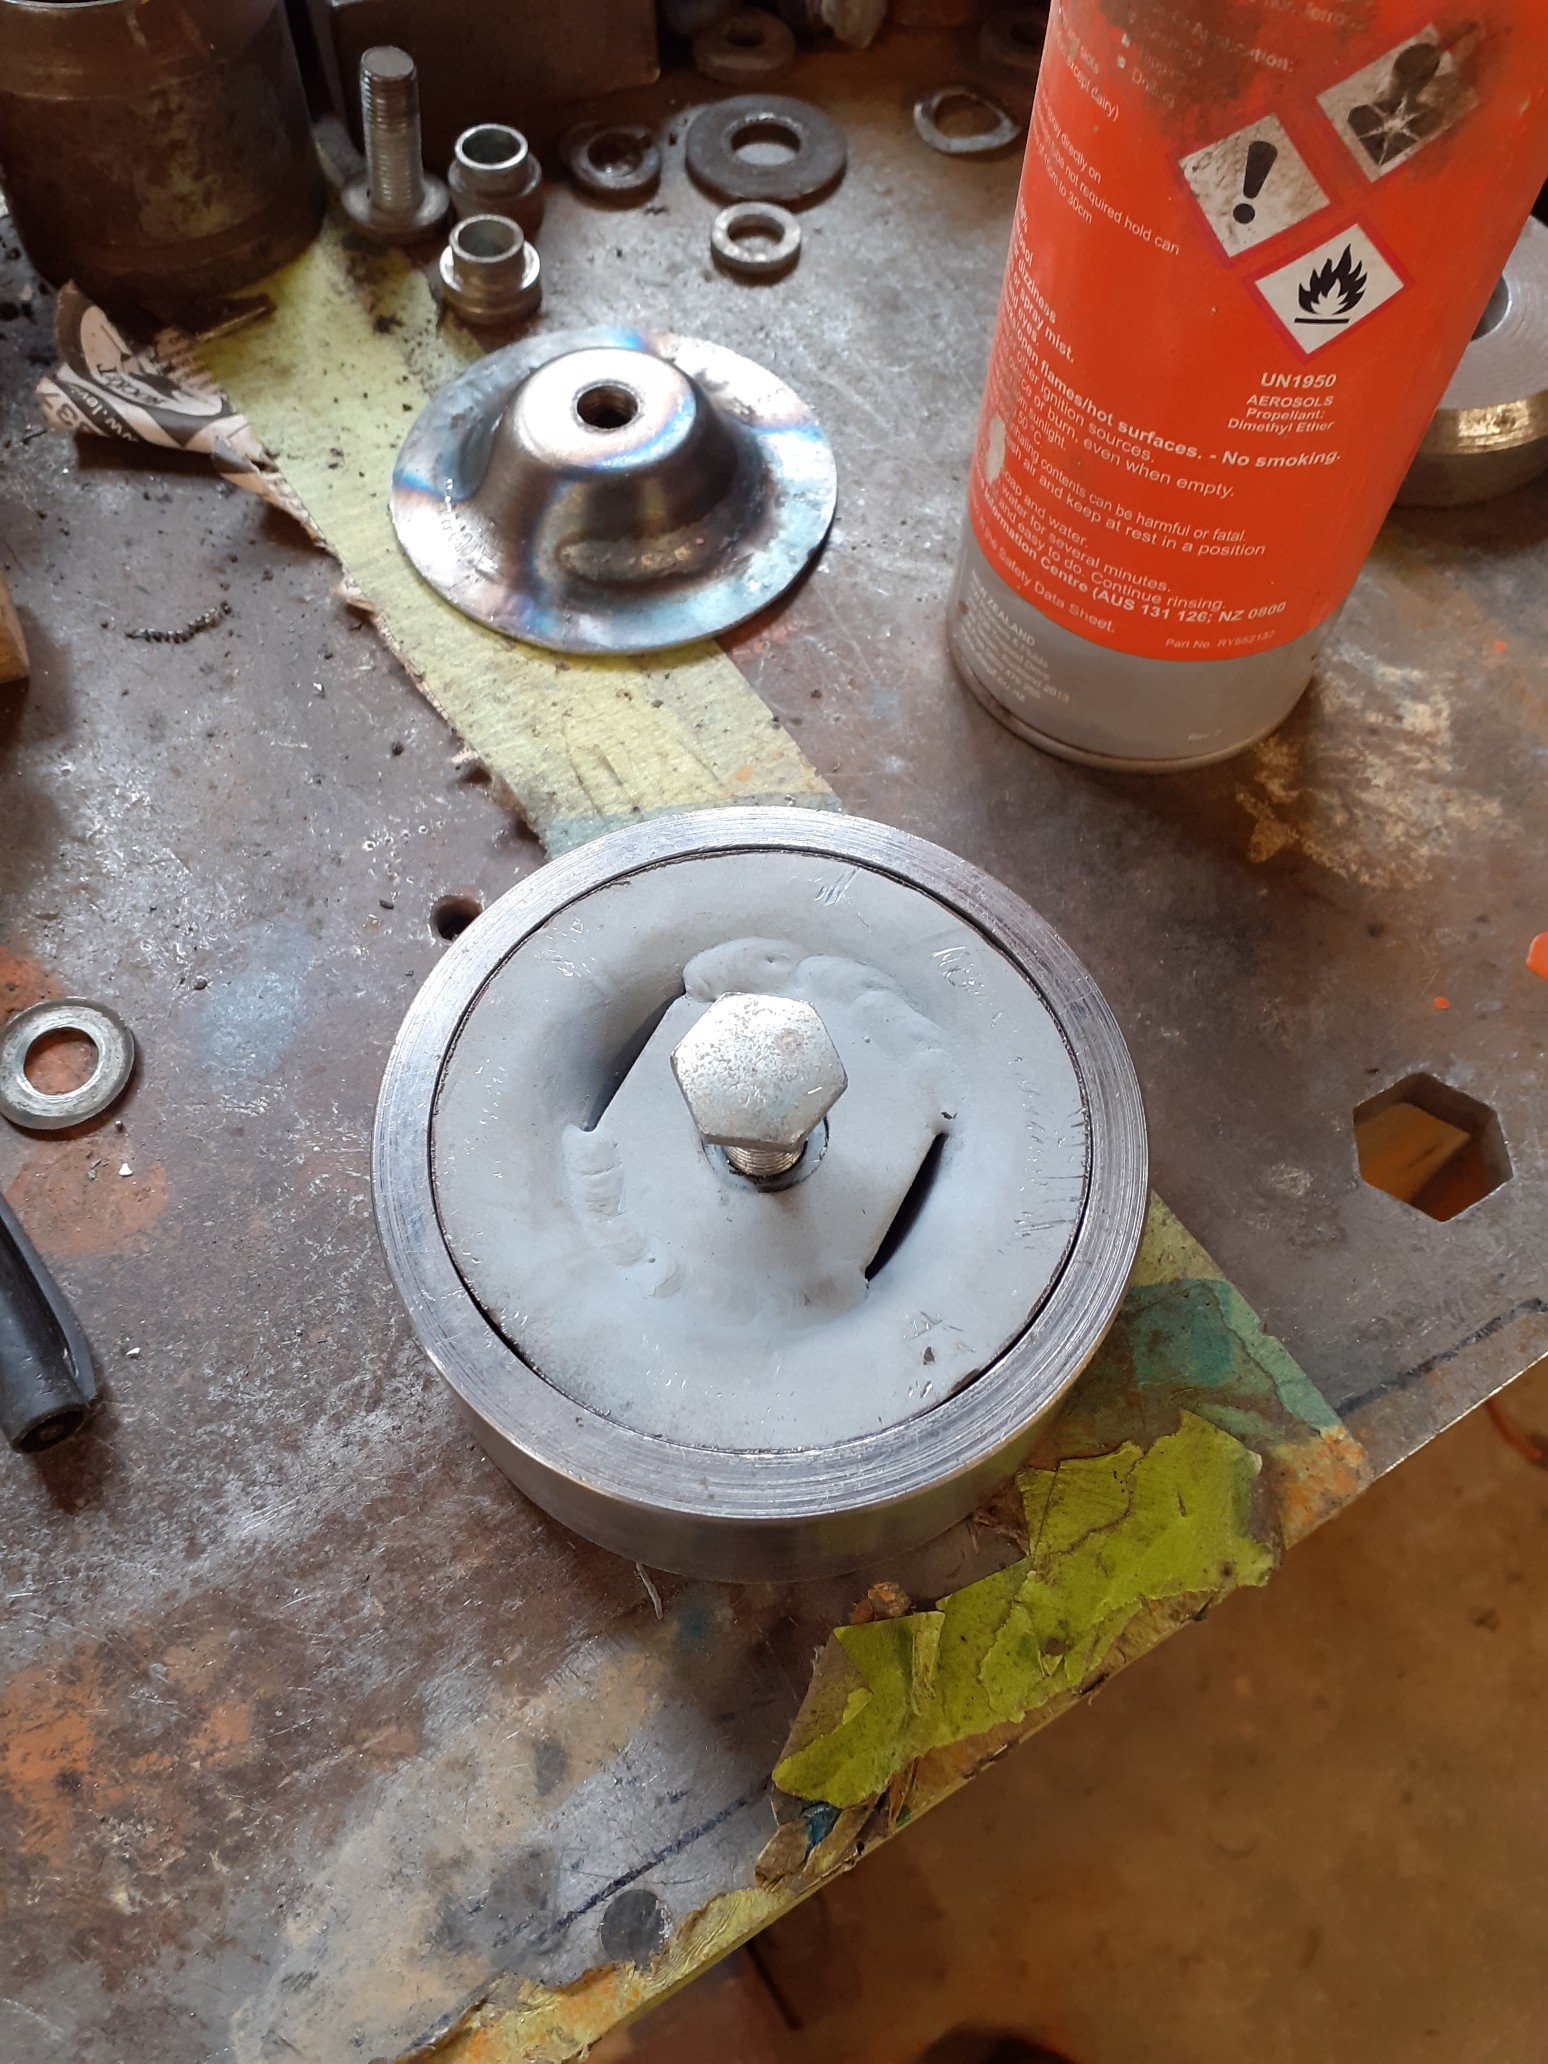
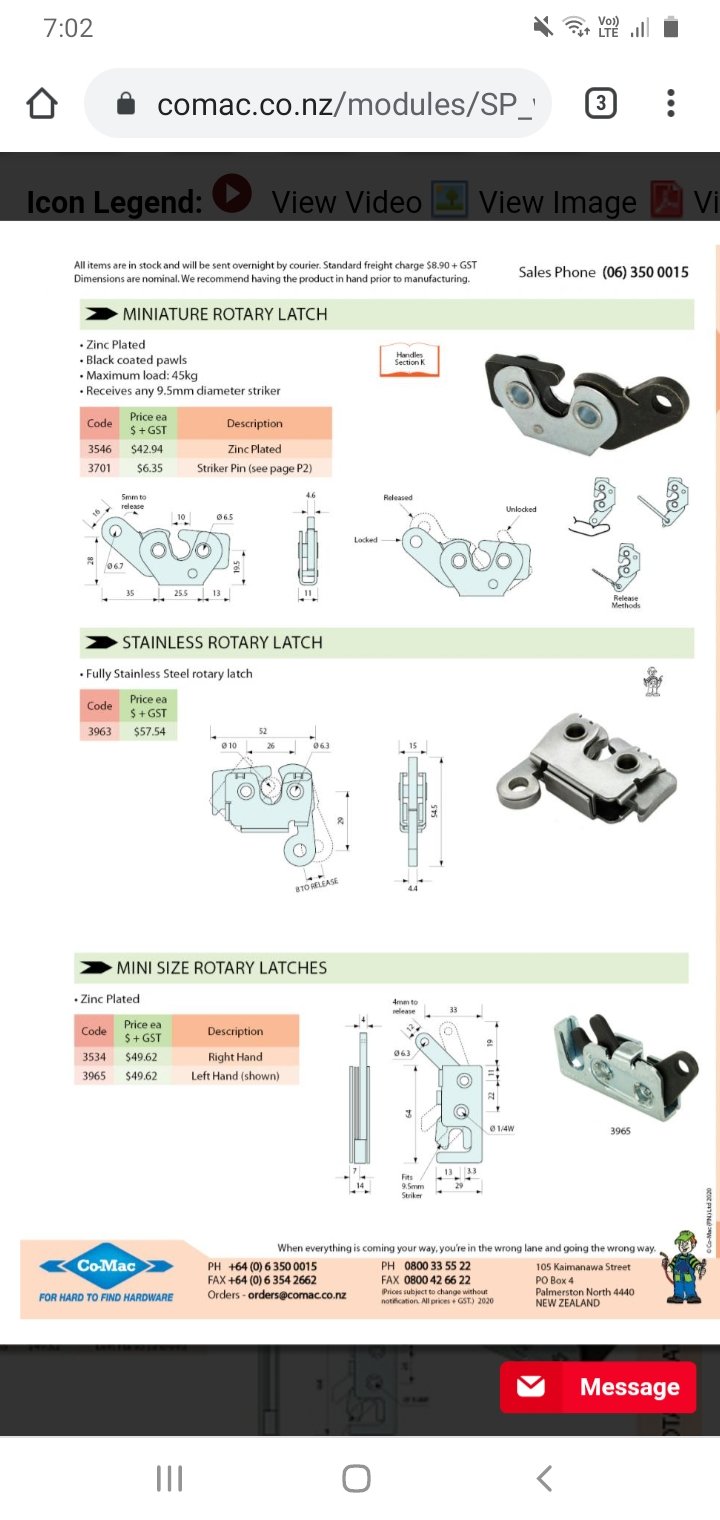
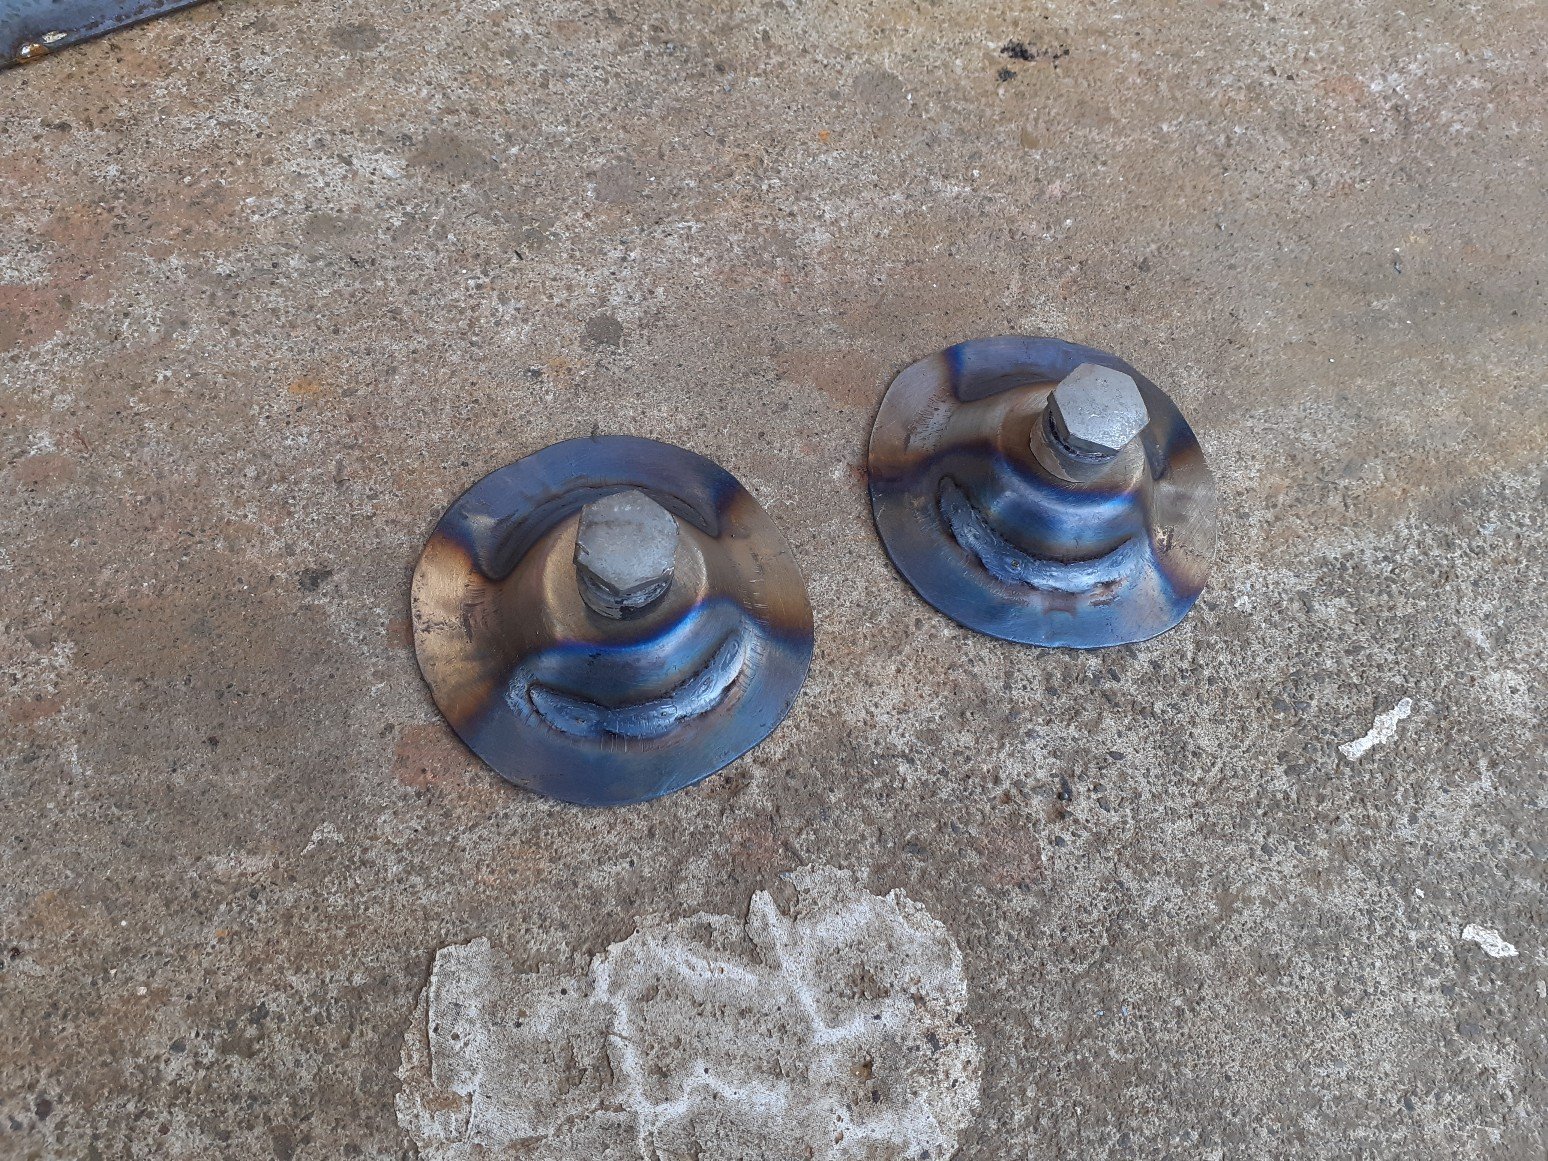
Rounded the cones by hand, had some round pipe as a guide. Found there final spot and temporarily drilled into place to try with the seat. Made some hinges out of 5mm angle line, which will later be trimmed up, driled for counter sunk screws and zinc plated. Primed everything and welded into place. I've maxed out the adjustments to have the seat level with the floor with folded flat. The floor section will be color matched the van, and the upright will be painted black to break it up. Plug welded in place. Will be primed and painted orange. This the last mounting point to be made. It holds the upright in place when in the seating position and should lock in it so in an event of an emergency stop, it shouldn't fold forward. Looks like a big gap but this is the normal and there is no room for adjustment when folded flat. Thinking some post which would encase a locking mechanism like the below would be the go. I like the idea of pulling the seat up and clicking it into place, and having a release lever when needing to fold it flat. Any other ways of doing this? Needs to lock it in place, and support the back rest.
- 104 replies
-
- 11
-
-
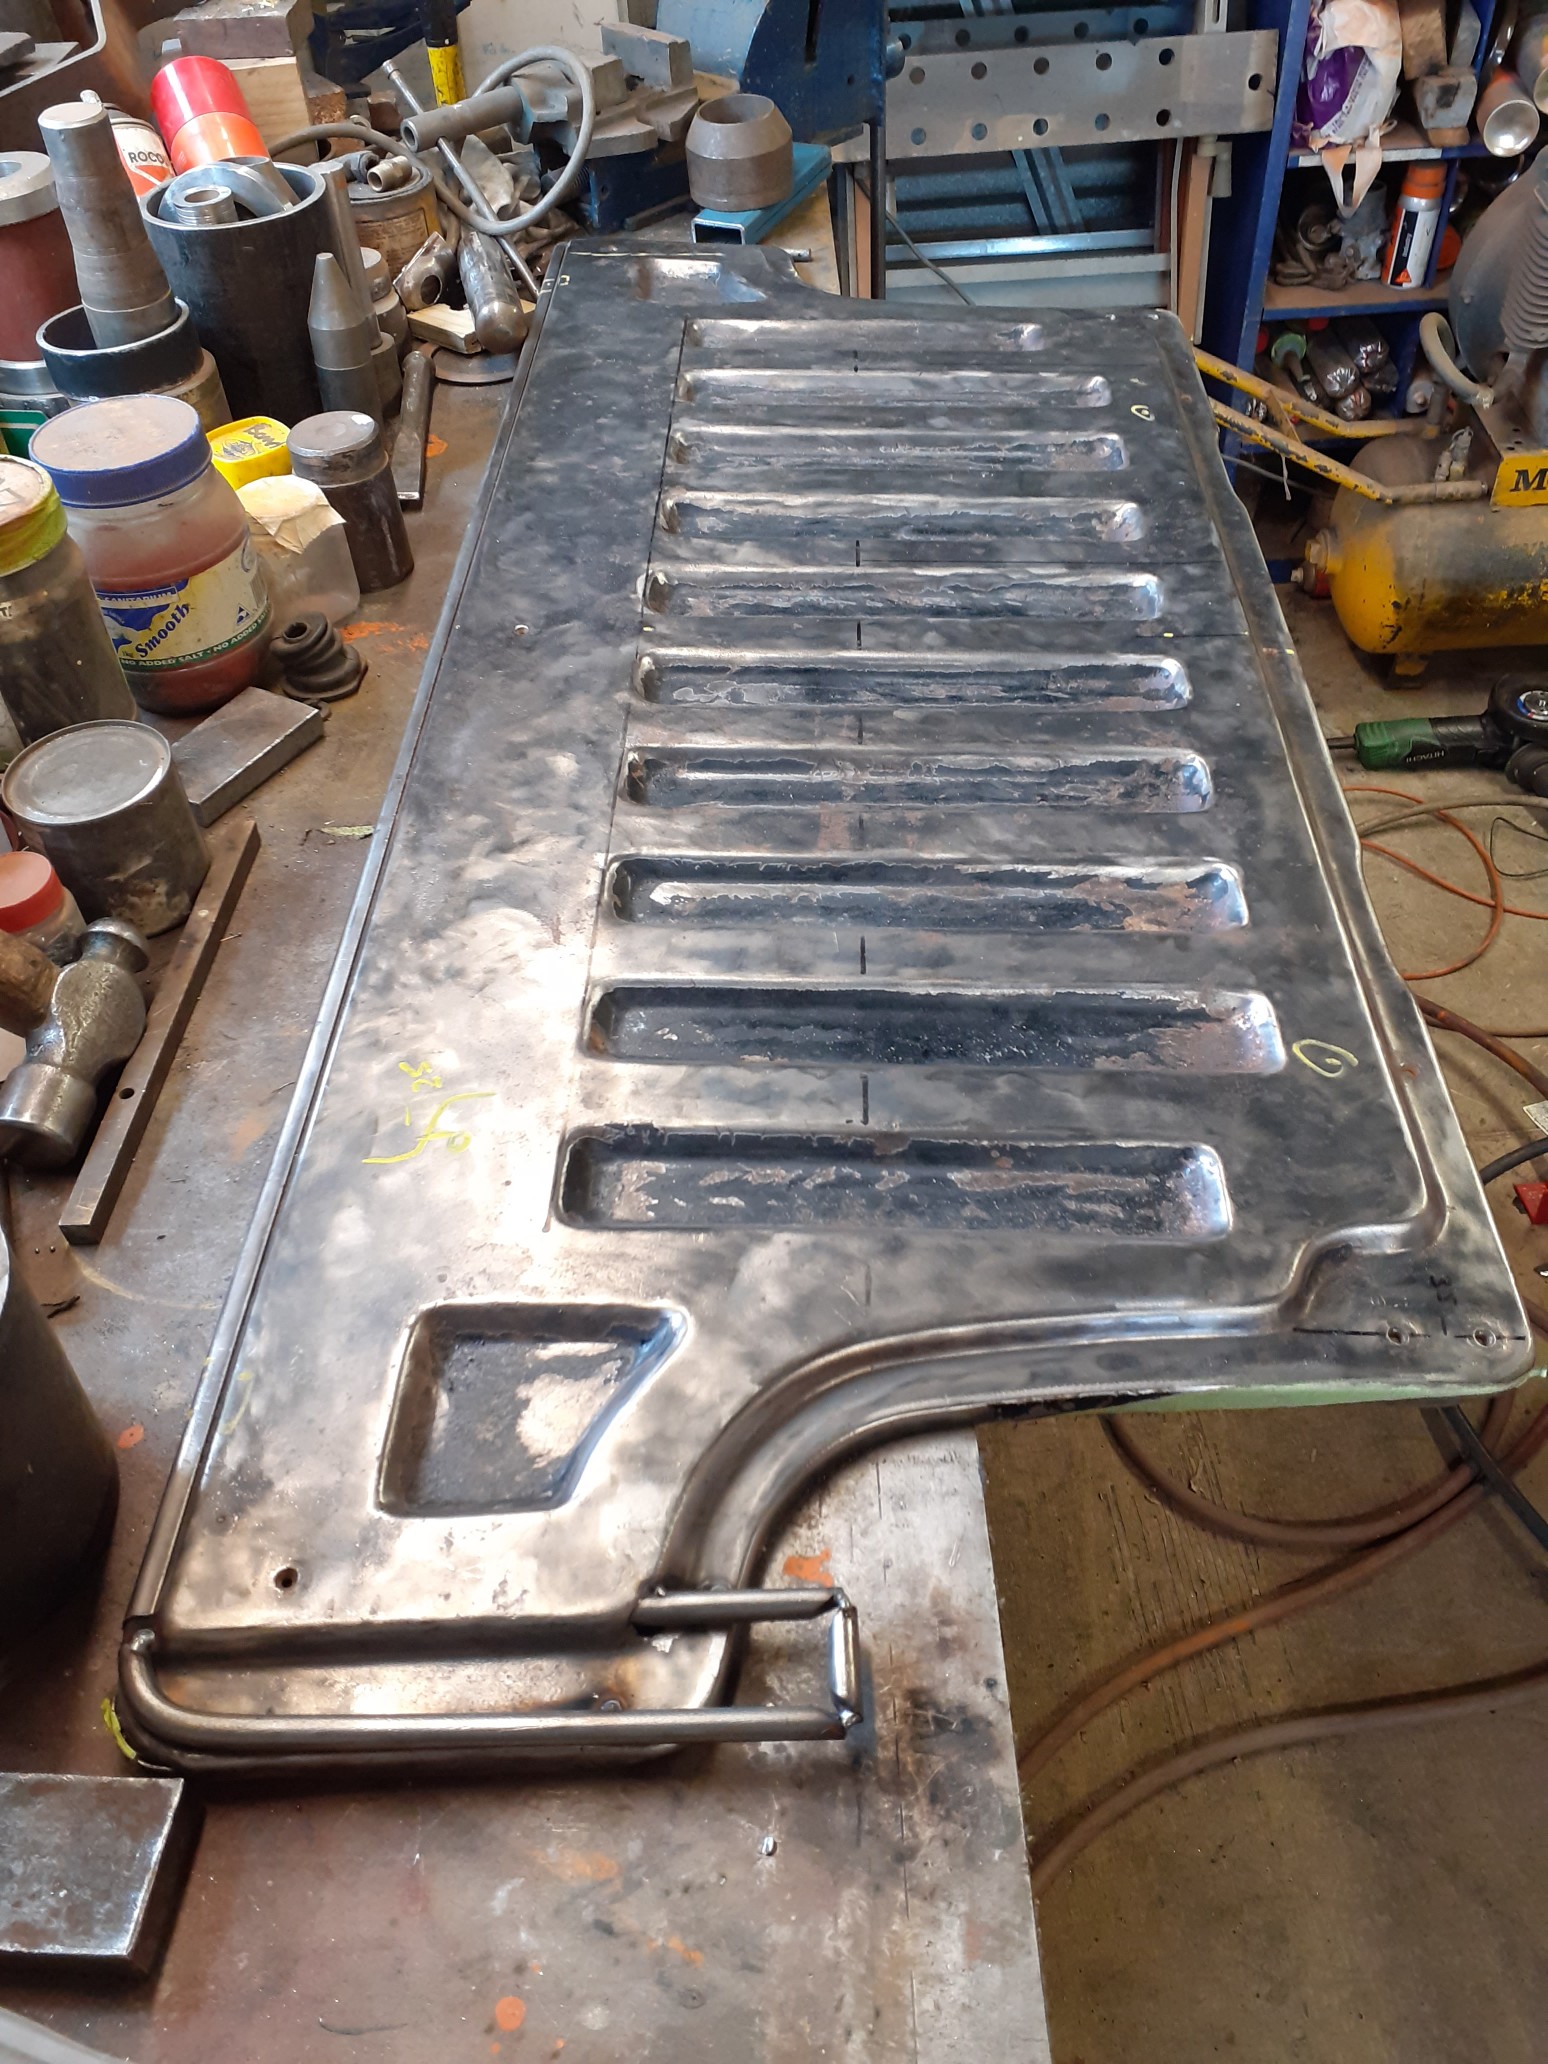
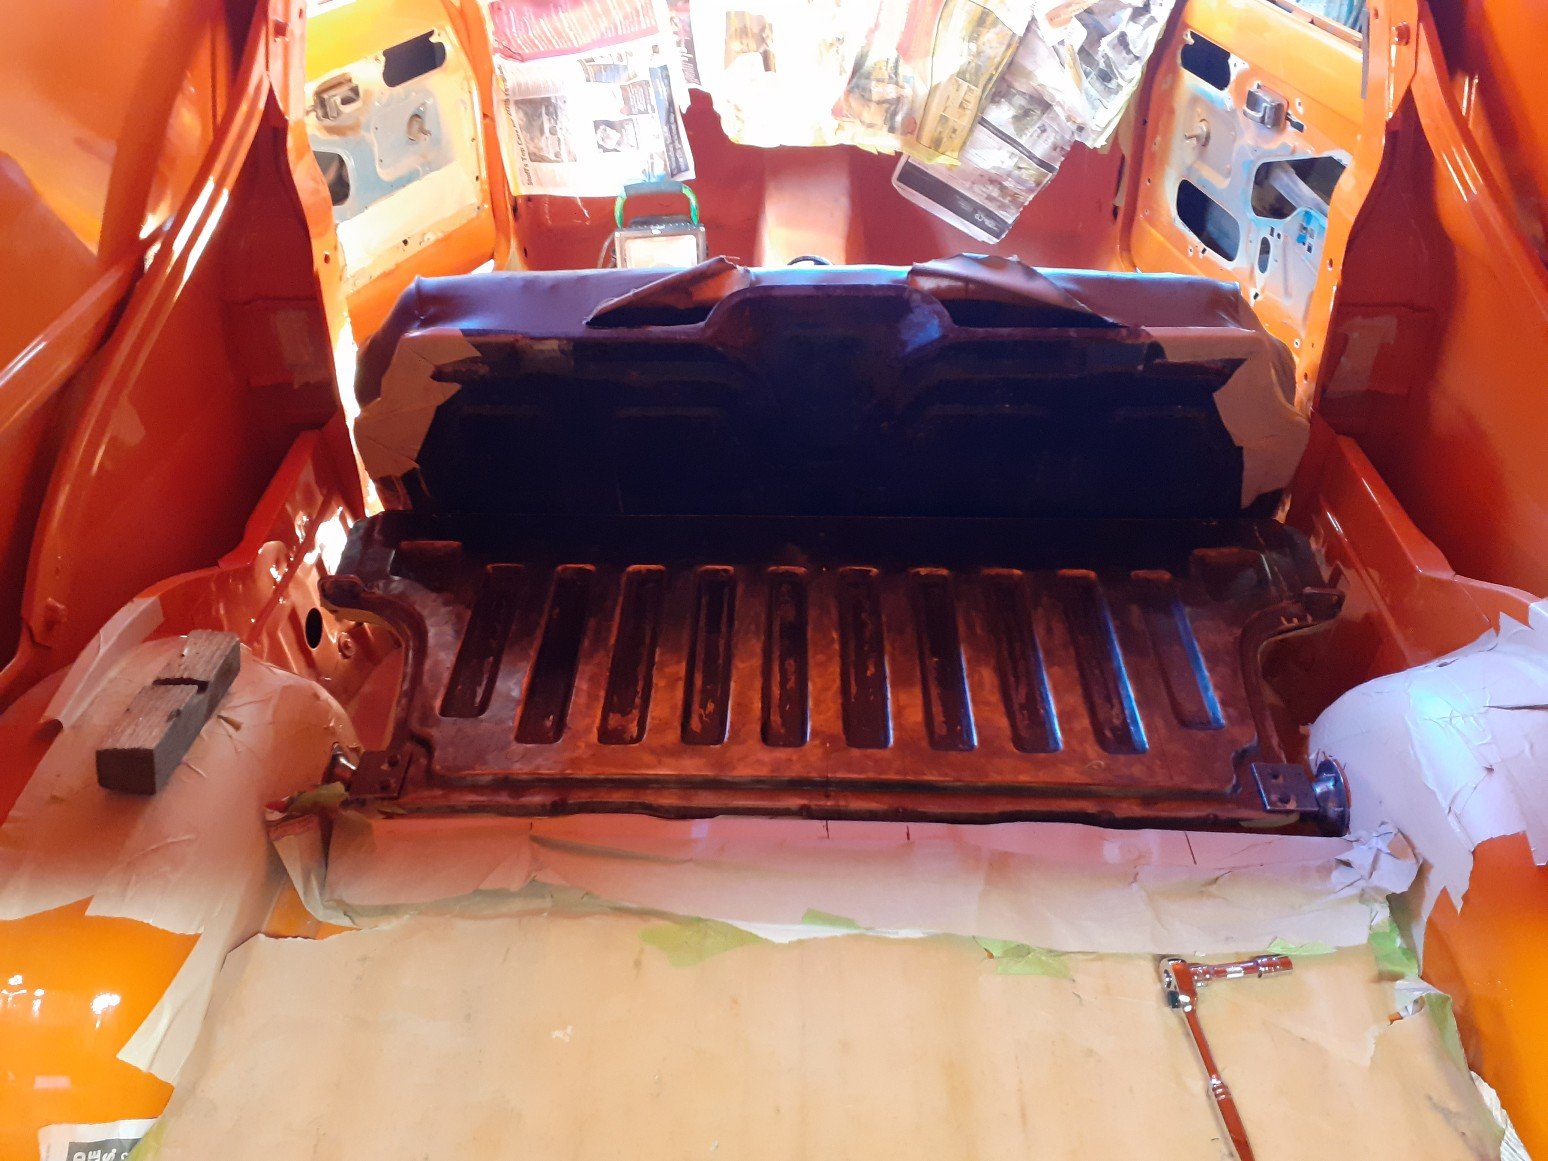
Spent way too long cutting and buffing the entire outside but it was worth it. Super smooth and straight now, just needs a polish. Since then I've been working on fitting the rear seat. Van's never came factory with rear seats but it was very common to cut out the front section of the rear floor and have a rear seat made and fitted. Most seats fitted were home made out of ply wood and were very roughly mounted in, this one was no except. Escort estates had seats were fitted from factory and had a metal floor backing so when folded down and not in use, it looked like it was just an extension of the floor. I have been looking for one of these for years and was hoping to have one before I painted it, as I would have to weld in mounting points. Didnt end up happening and found this one afterwards. Untwisted it and it will need full upholstery at a later date but it fits (Temporarily fixed). Started making mountings for this, the first being the towers at the front of the lower half of the seat. Have made these so I could use the original alloy hinges. Have welded a plate into the bottom and tapped some 8mm threads. Started working on the rear upright half of the seat. The starting point of mounting the seat is based around making the back part completely level when folded down. Some temporary brackets were made to find its final position. After the front towers were made and welded in, I started making the mountings where the upright section would swivel down flat. I made these cups, which will be welded in to close the gaps between the wheel tub and seat frame, using the correct fine threaded seat belt bolts and fixings. Once these are welded in there final spot, I can start working on the last mounting points which sit on top of th wheel tub and hold the upright section in place when in the correct seating position. Again, from factory these were pretty poorly thought about. I have a few ideas of how to improve this with an automatic locking mechanism.
- 104 replies
-
- 23
-
-
Hey guys I'm hoping to get some small brackets, nuts and bolts zinc plated for my van. Before I go ringing around, does anyone have any recommendations for a company in the hutt or wellington area? Theres no rush on this stuff, I wont be getting it ready until after the holiday break. Thanks
-
I have nothing scientific to provide but I was at a 40th a couple weeks ago and got speaking to an older coach builder whose worked here, Aus and Eng. We got chatting about things and he mentioned your youtube channel, he was most impressed with your testing and set up. Thanks for giving us something to chat about.
-
Wellington Monthly Meet - Discussion thread
bmxnz11 replied to KKtrips's topic in Lower North Island Region
Always a favourite spot. Count me in. -
Wellington Monthly Meet - Discussion thread
bmxnz11 replied to KKtrips's topic in Lower North Island Region
I'll show up this time -
+1 for Spencer's advice. That's what I've been doing and have not had any issues yet. Another tip I was told, and have used, is when prepping for bog over epoxy, scratch up the bare metal with an old file or something before applying the epoxy so it gives the metal a rough surface to help the bog bond. It gave me peace of mind if nothing else. Some epoxys you can apply and then bog straight over the next day without any prep between which can be a bonus.
-
Wellington Monthly Meet - Discussion thread
bmxnz11 replied to KKtrips's topic in Lower North Island Region
Feels like it's been forever since the last but I have coodies this week so I'll have to give it a miss. -
joe's "my dad had one of those" mk2 cortina
bmxnz11 replied to MightyJoe's topic in Project Discussion
Great example of the mk2. Credit to you for all the new equipment/love its getting. I have the same wheels on my van but I dont have centre caps or the screws/plugs around the outside. Do you have a closer picture of the caps and plugs? I'm keen to get some for mine. -
- 104 replies
-
- 35
-
-

-
It's been a super long week but I finally painted the body. Its come up pretty damn straight but unfortunately I also have a few runs which will need sanding out. Absolutely stoked to get it to this stage but plenty more work to come.
- 104 replies
-
- 24
-
-