piazzanoob
-
Posts
1247 -
Joined
-
Last visited
-
Days Won
1
Everything posted by piazzanoob
-

piazzanoob's 1964 Ford Galaxie 500 seeeedaaan
piazzanoob replied to piazzanoob's topic in Projects and Build Ups
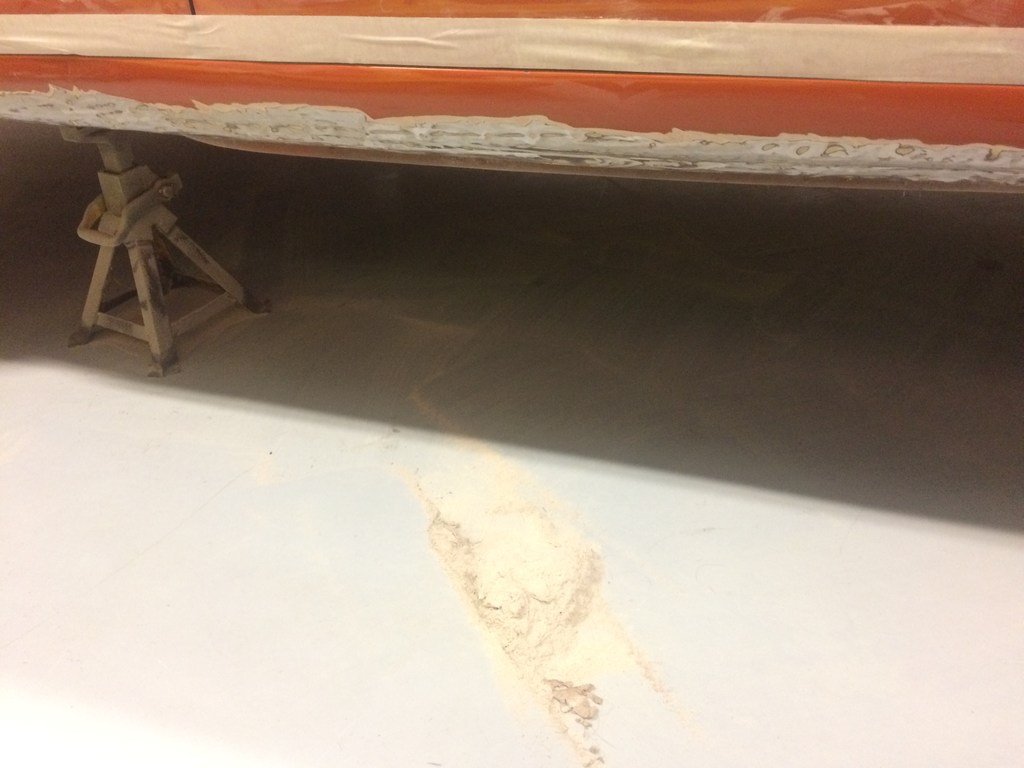
And then with that done i applied two coats of the white knight PPG rust guard paint. Came out pretty good not too fussed anyway as the carpet will cover it too. also applied with a paint brush so not exactly a quick job. and now just to get the underside blasted and painted
- 77 replies
-
- 16
-

-
piazzanoob's 1964 Ford Galaxie 500 seeeedaaan
piazzanoob replied to piazzanoob's topic in Projects and Build Ups
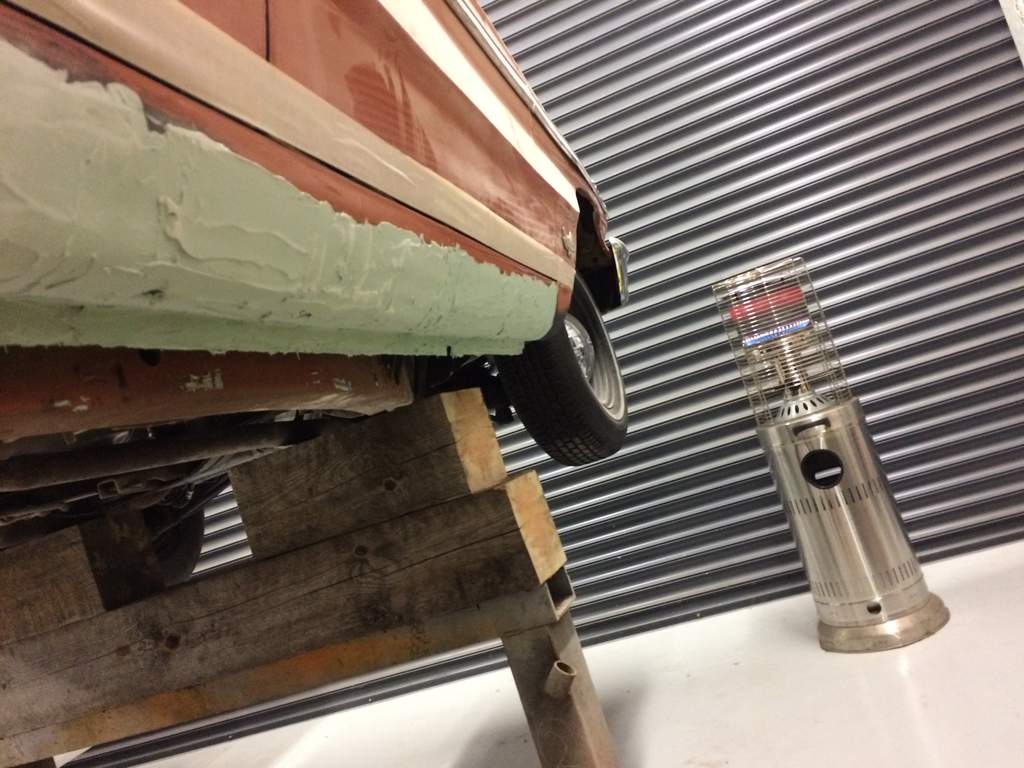
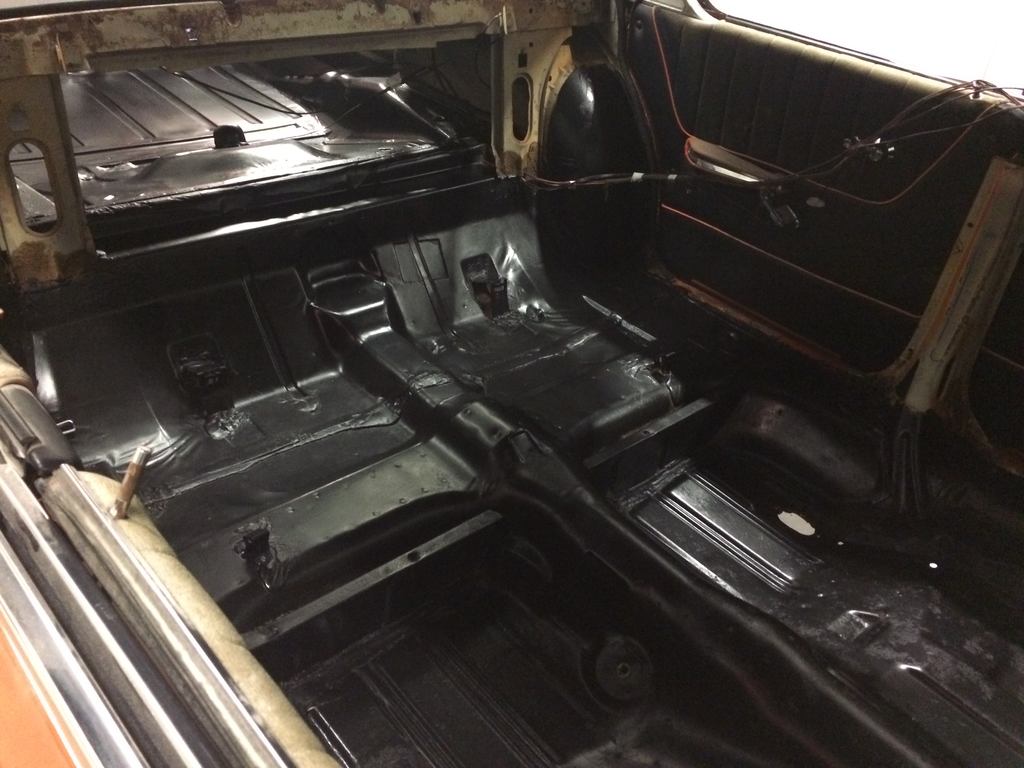
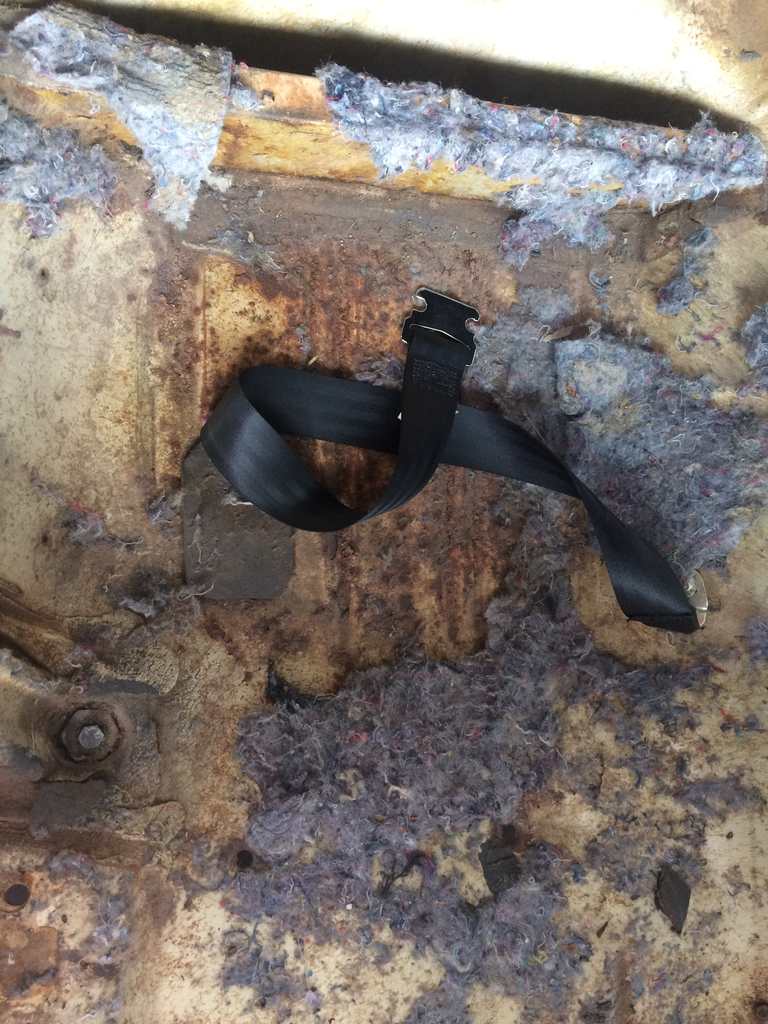
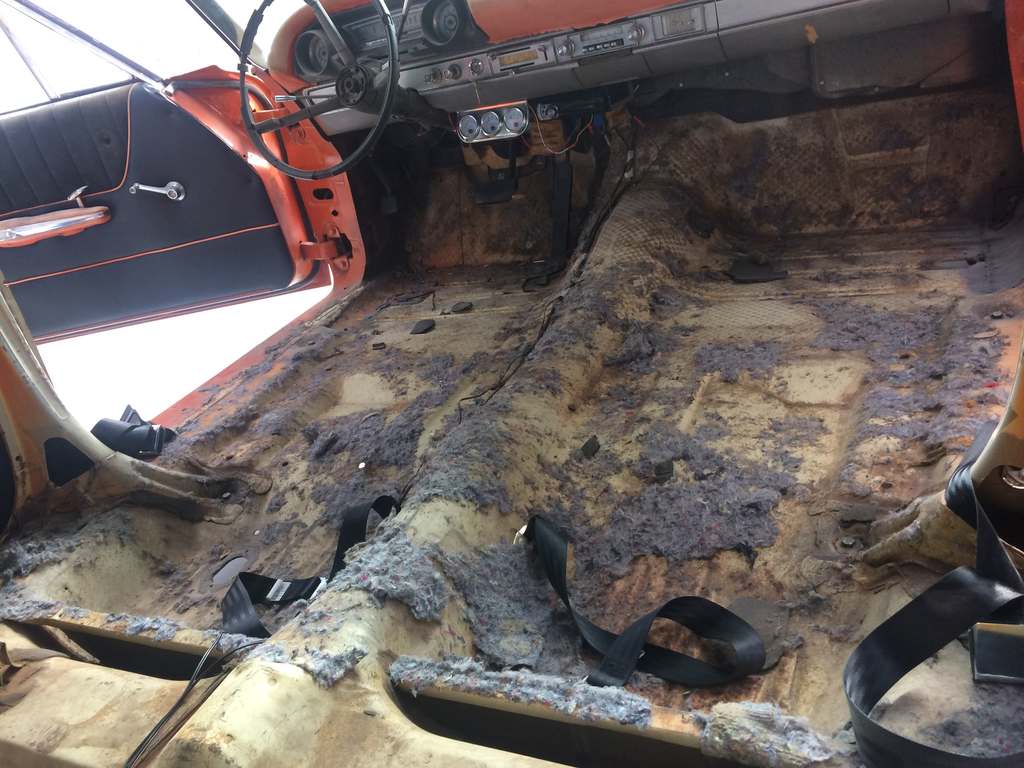
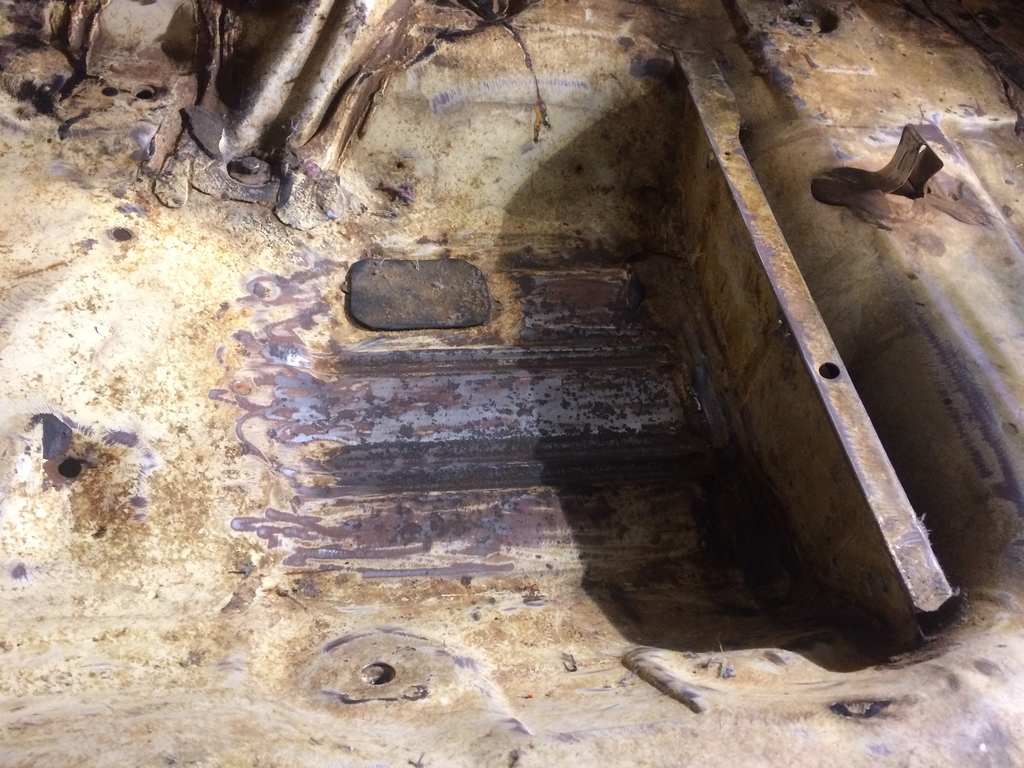
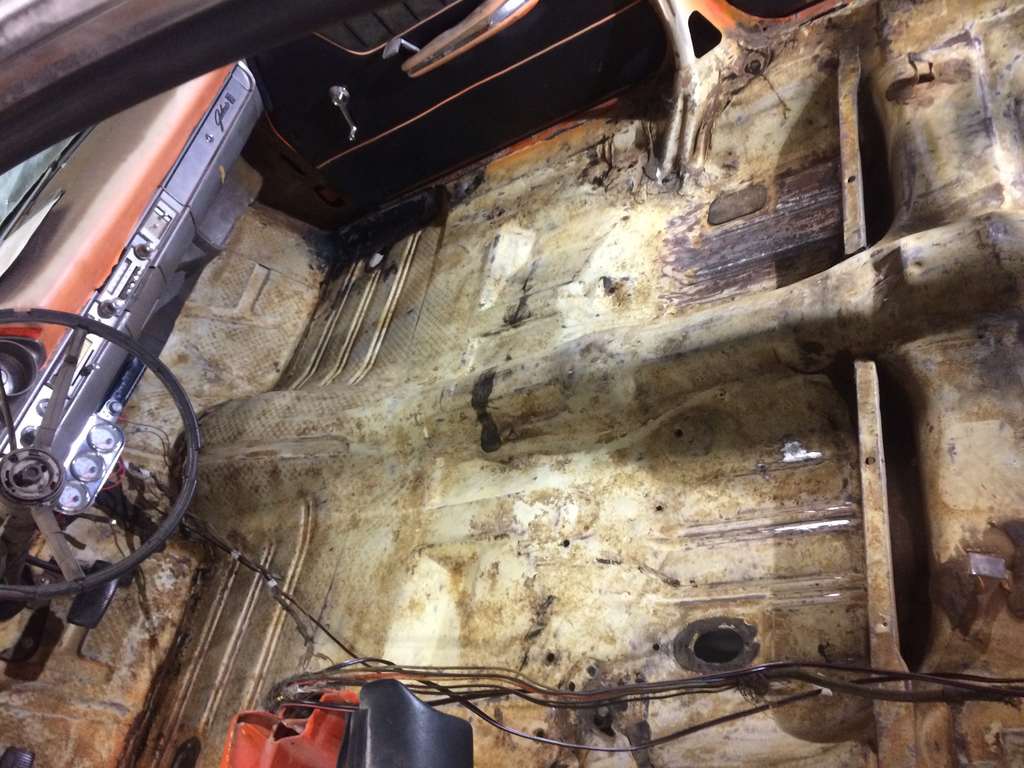
with the car being back on the ground it was time to have a tidy up and set to work on cleaning up the inside of the floors It started with cleaning up the old underlay crap off the floor Just used a scraper and got most of it off even mum came out to lend a hand and the last photo shows the only rust that was in the floor being on the rear passengers side i then got the wire brush and an abrasive disc on the grinder to get the surface ready for paint i also while i was at it cleaned up the patch on the R/F floor abit more. then after this i cleaned the whole floor with prepsol and twice in some place so it was clean and ready for paint. And covered the holes in the floor to prevent paint spilling on the floor
-
piazzanoob's 1964 Ford Galaxie 500 seeeedaaan
piazzanoob replied to piazzanoob's topic in Projects and Build Ups
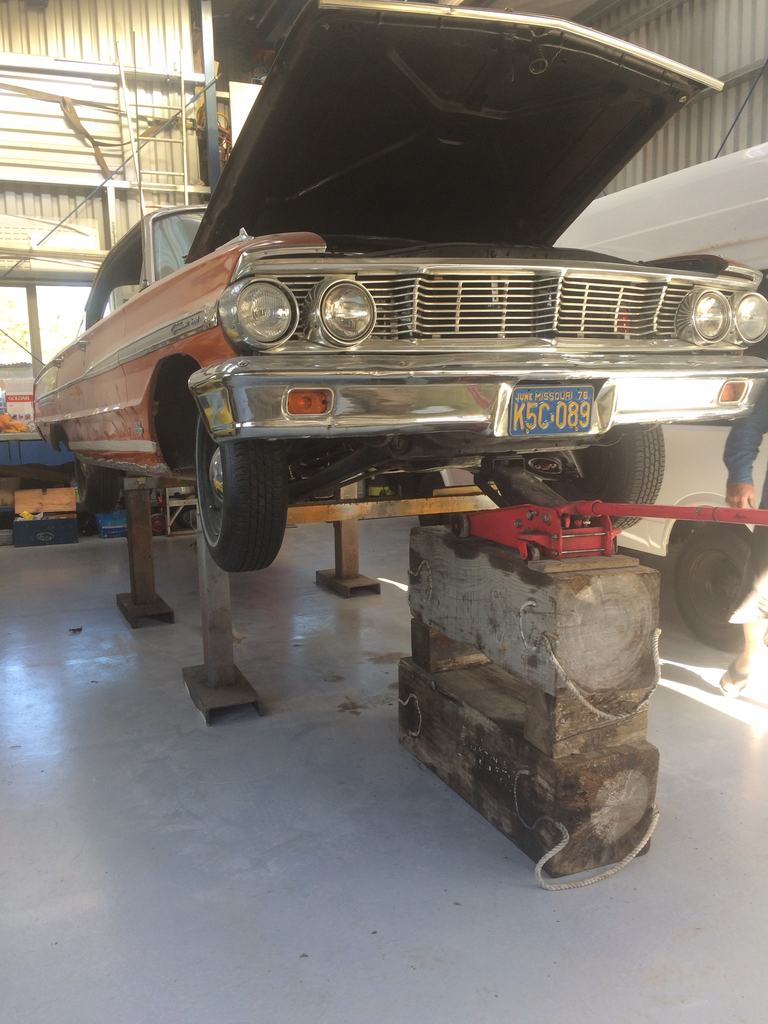
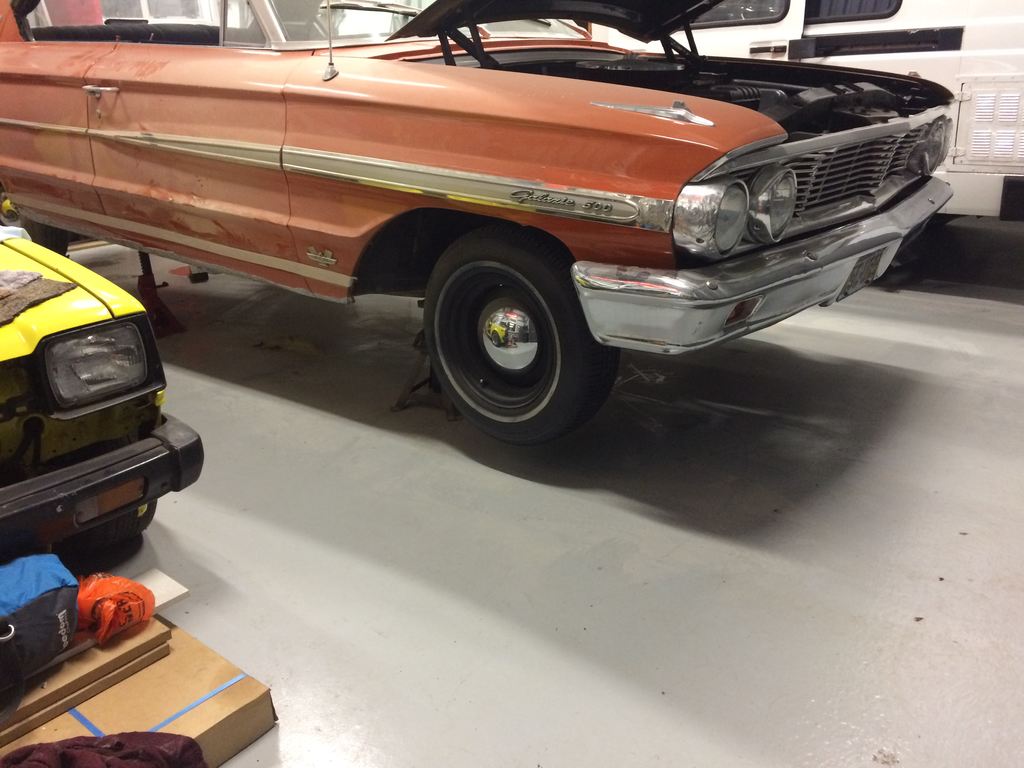
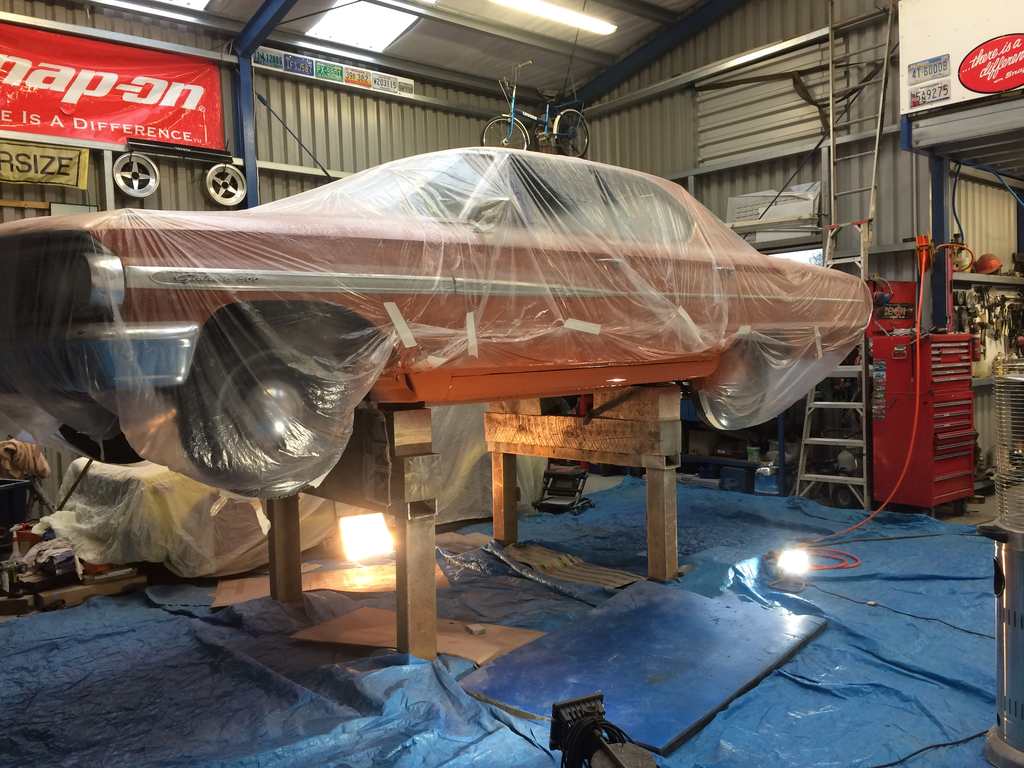
now the next job was to get it down off the stands unfortunately not many photos were taken due to being the jack operator so for this job i decided to borrow another trolley jack to help with the job this was also a slow job being that remove one block then let it back down as we were unable to do big drops on the jacks then once we were at a height where we could remove the trestle stands we placed some blocks with the axle stands at full height. then remove blocks from below or above the jack and drop the axle stand down a notch. this job took about 2 hours with 3 people and this was all done by the help of on the jack m8
-
piazzanoob's 1964 ford Galaxie 500 seeedaan
piazzanoob replied to piazzanoob's topic in Project Discussion
Cheers have acquired another trolley jack so will make the job 100x easier -
piazzanoob's 1964 Ford Galaxie 500 seeeedaaan
piazzanoob replied to piazzanoob's topic in Projects and Build Ups
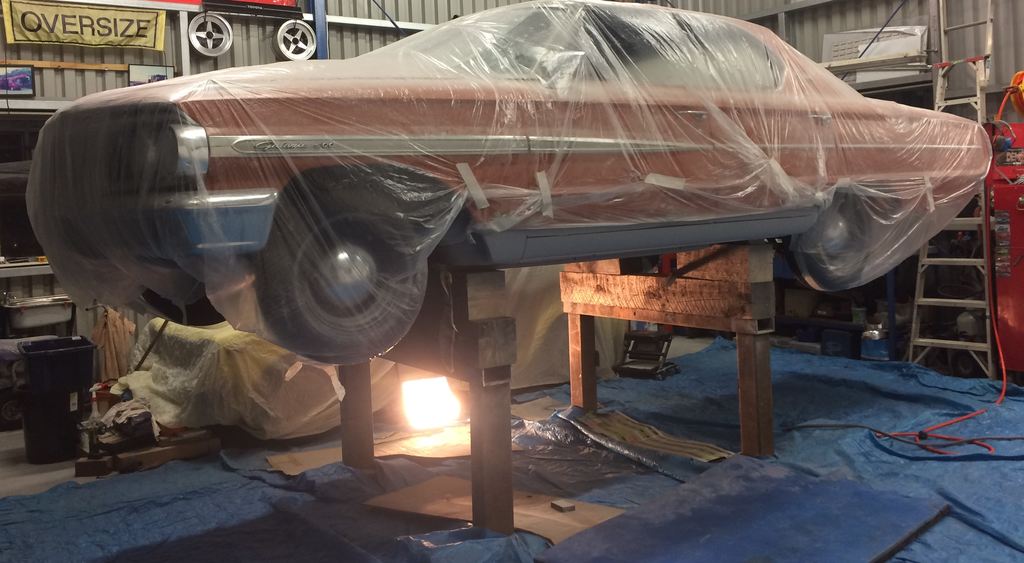
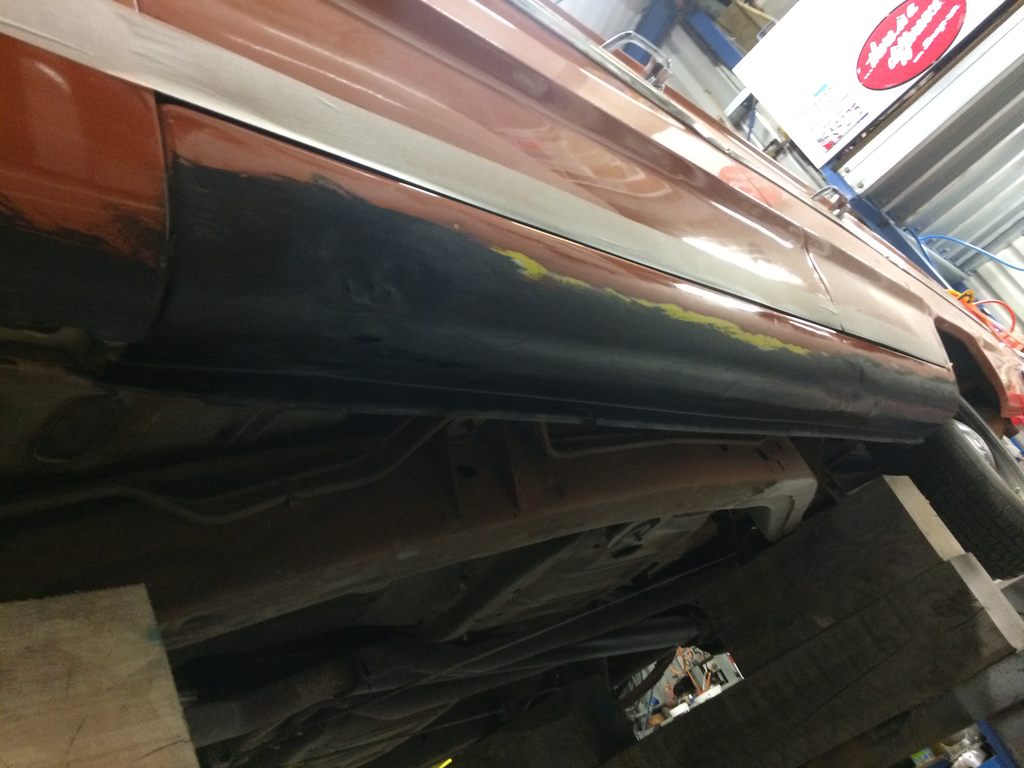
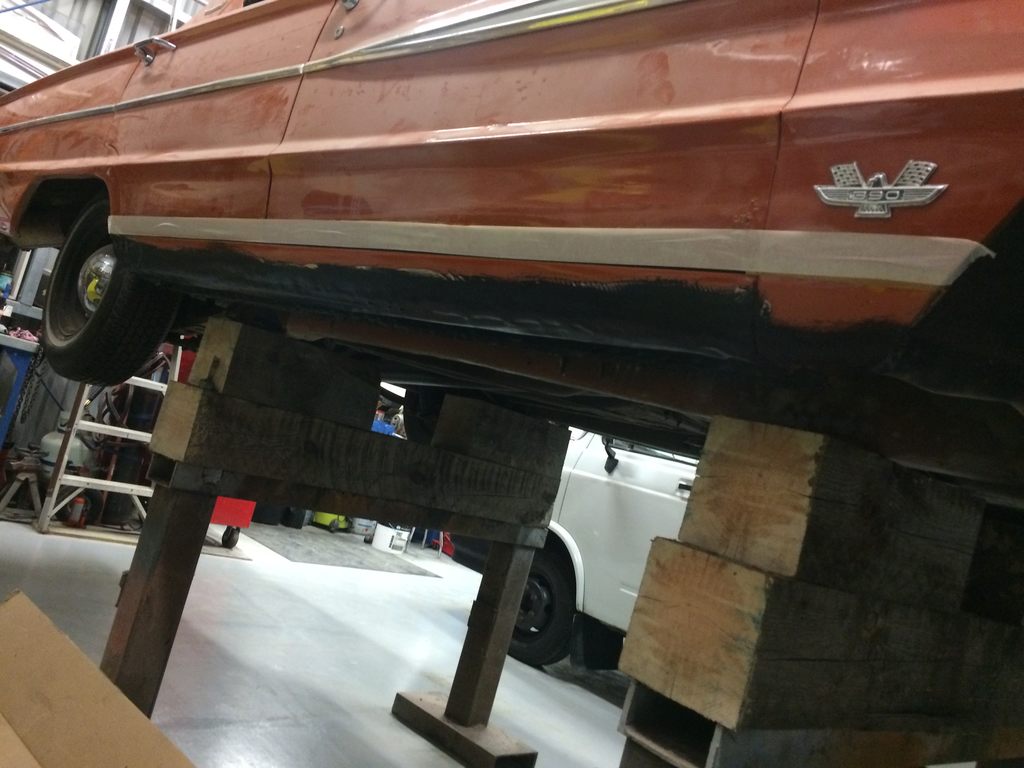
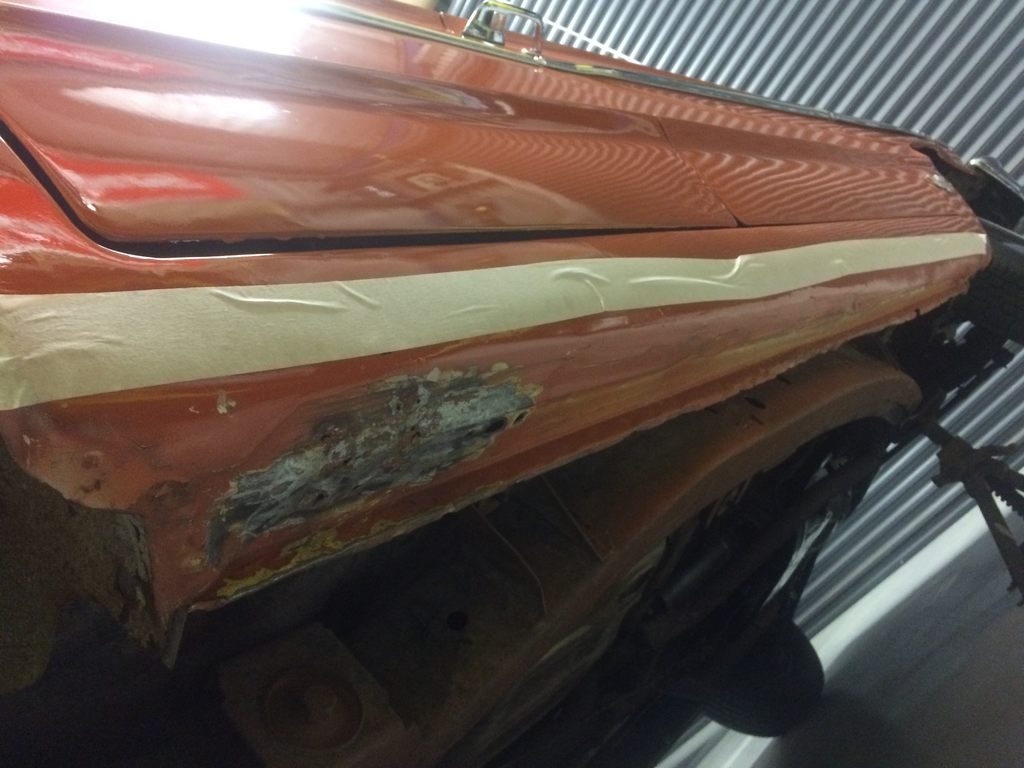
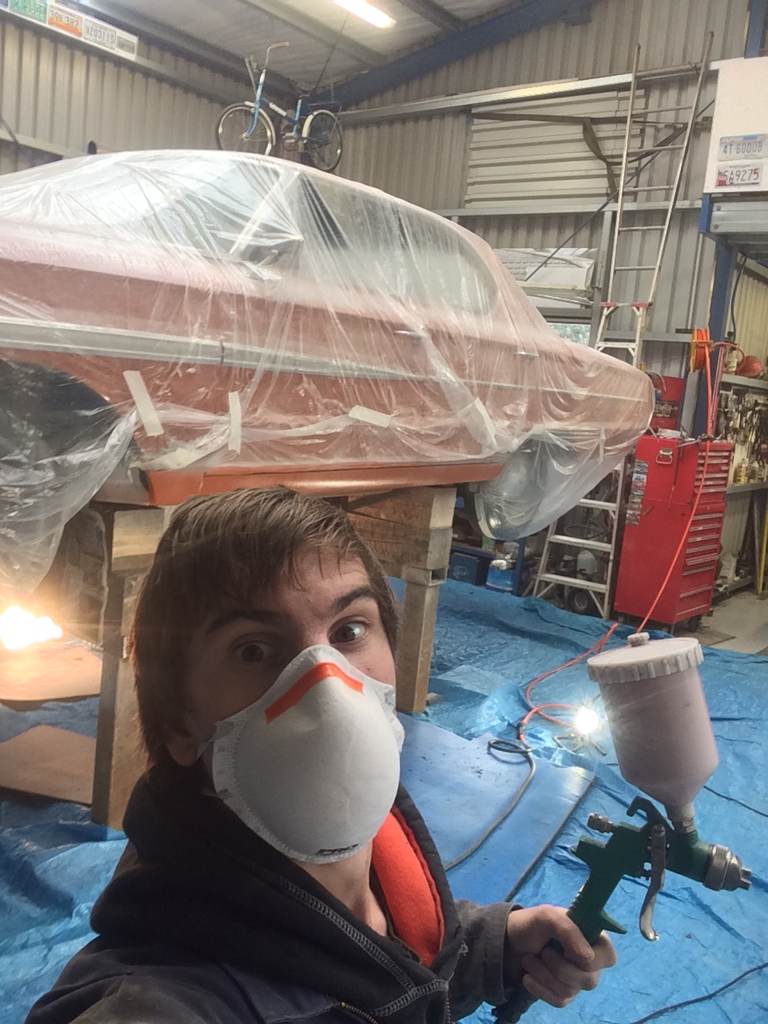
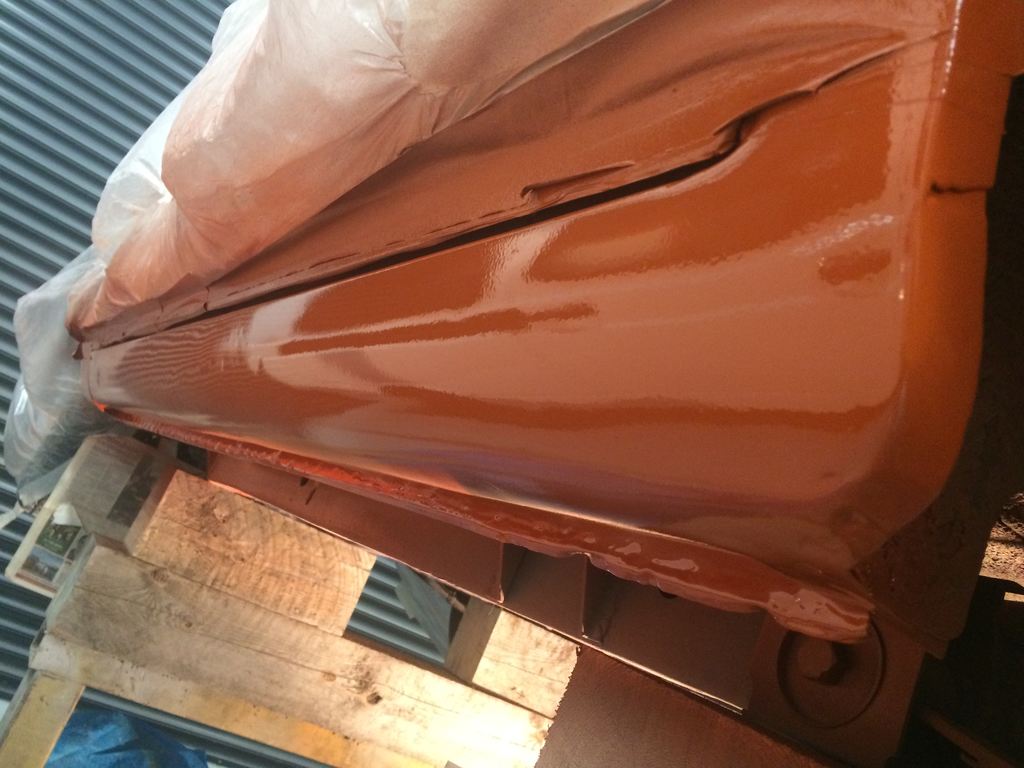
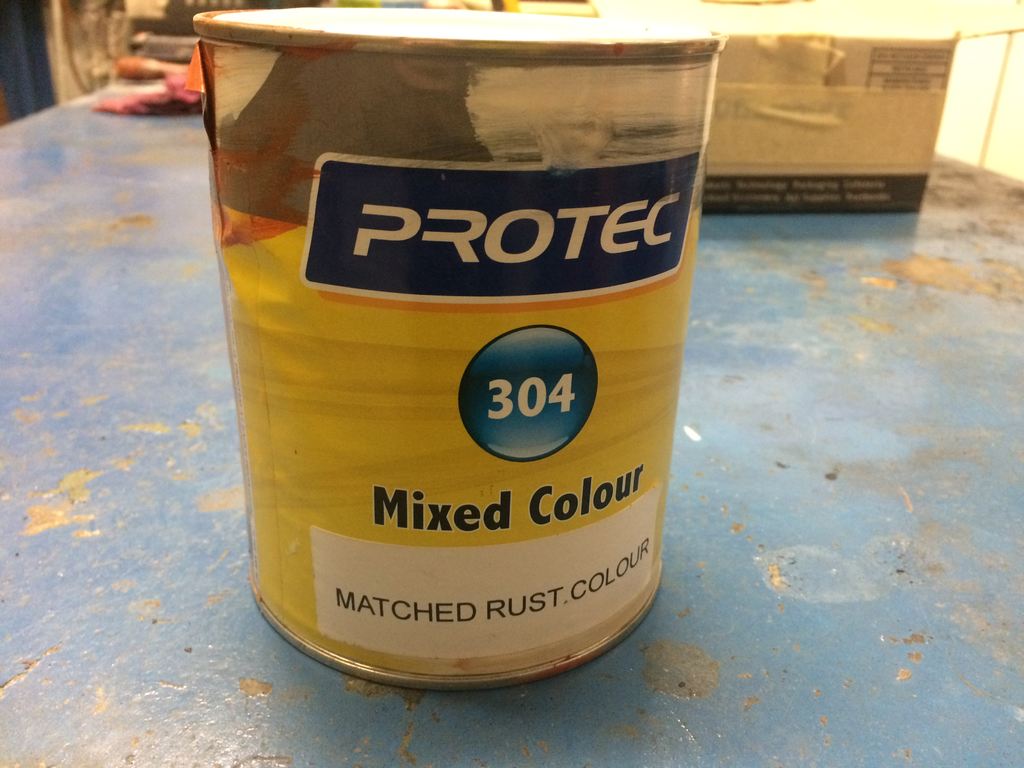
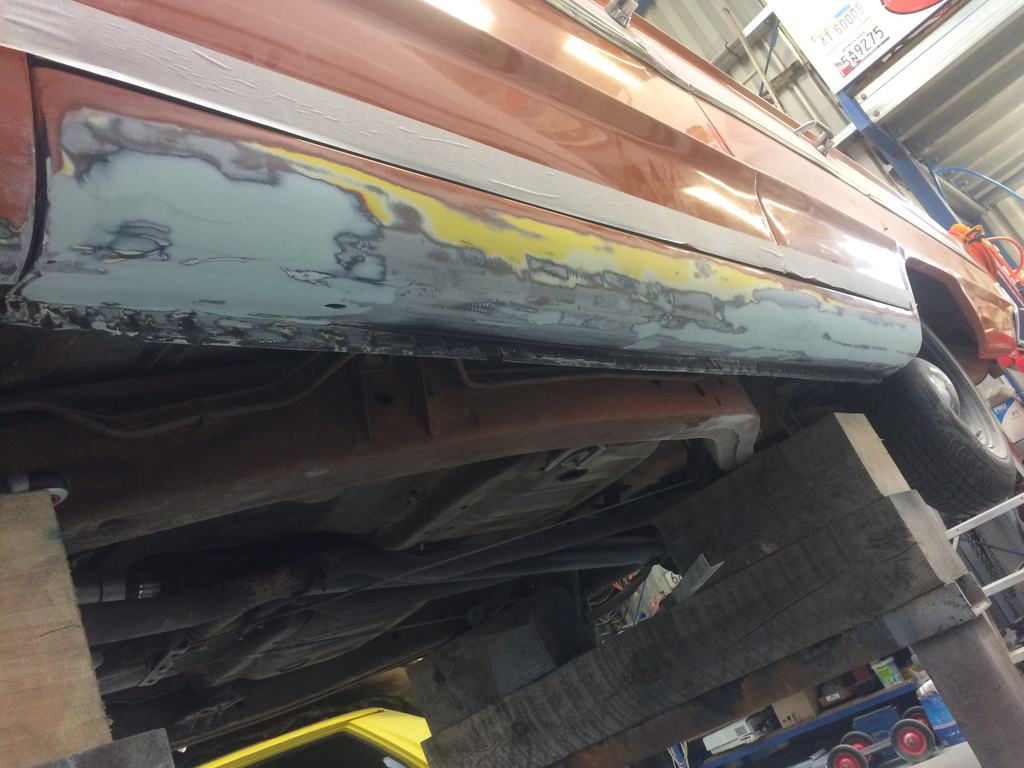
so after it having a few coats of primer on the sills i gave it one final light sand to help with a better paint finish. i then gave the sills a blow down and wipe and laid some paint down with some paint that i had matched up using the fuel flap as a sample colour name seems right to me then applied one light coat And while i was waiting for this coat to tack on... I then applied a few more coats on each side with them not being very thick coats with leaving some time before applying each coat. ended up using the whole amount i filled the gun up with And didn't end up with any runs in the paint and a pretty good finish for a non paint guy. could've got a better finish if i had applied the coats thicker but also didn't want runs haha oh and next up ill take it off the stands which should be quicker than it went up
- 77 replies
-
- 25
-
-
piazzanoob's 1964 Ford Galaxie 500 seeeedaaan
piazzanoob replied to piazzanoob's topic in Projects and Build Ups
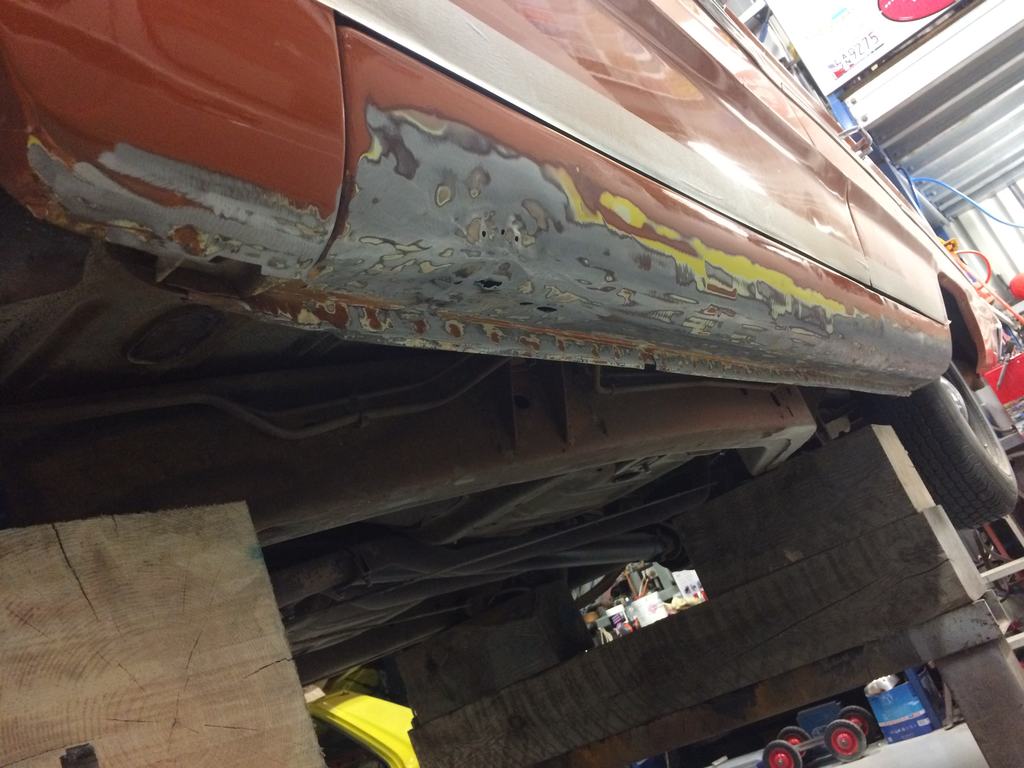
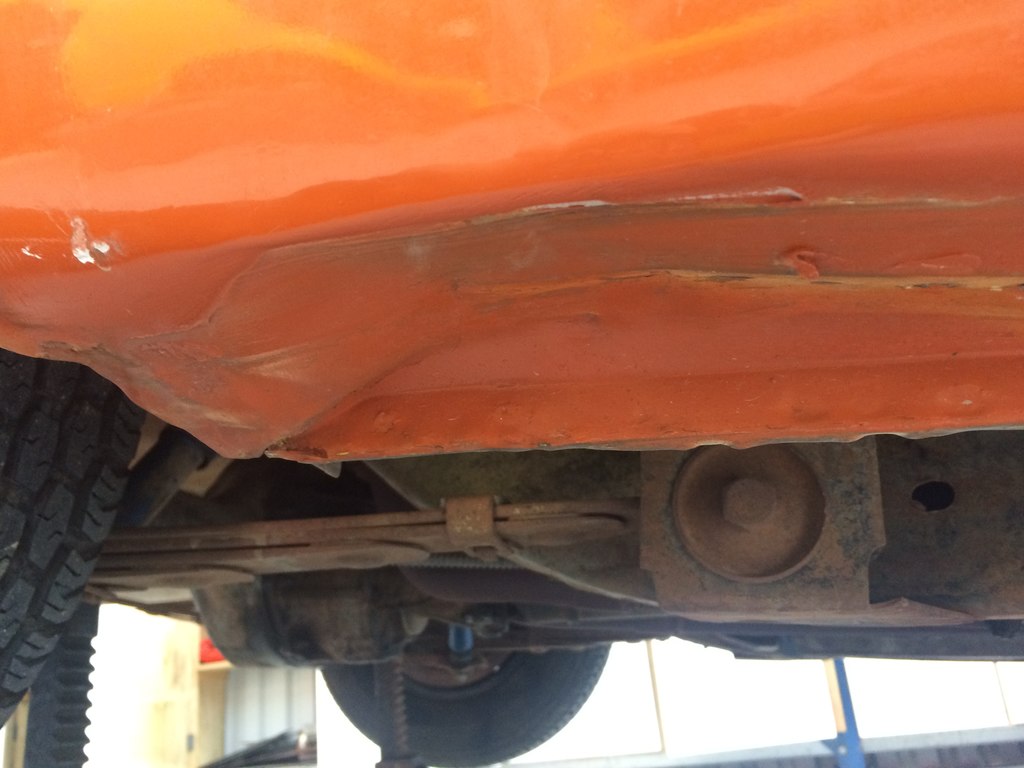
now with some bog smith work... after letting the etch primer dry i applied some body filler to both sides And with the drivers side needing much less. we then sanded it and sanded it then added more bog and sanded it again. with about 10 hours of shaping the sills as i keep finding inperfections in the bodyline and sanding and bogging. we then masked up the car to set with putting some primer on tapped two of these thin plastic masking sheets together due to the width of the car. then we pulled out some primer we had but it turned out the primer had separated and it was fucked although the last time we used it was to do the piazza so it was a few years ago now. so ended up going to supercheap as it was a sunday and they had some. laided some primer down then sanded some more then went out to supercheap again to get some spot putty put some spot putty on as the filler gets air pockets in it. oh and @GuyWithAviators where's all your stock gone. everytime i go in your store you dont have it in stock then sanded that and got it to a acceptable level as the rest of the car isn't show spec. next you will find how good a non professional can get a paint job
- 77 replies
-
- 11
-
-

-
piazzanoob's 1964 ford Galaxie 500 seeedaan
piazzanoob replied to piazzanoob's topic in Project Discussion
doesn't sound like you've had much luck with cars and jacks in the past -
piazzanoob's 1964 ford Galaxie 500 seeedaan
piazzanoob replied to piazzanoob's topic in Project Discussion
wait i don't suppose your @bigfoot are ya? -
piazzanoob's 1964 Ford Galaxie 500 seeeedaaan
piazzanoob replied to piazzanoob's topic in Projects and Build Ups
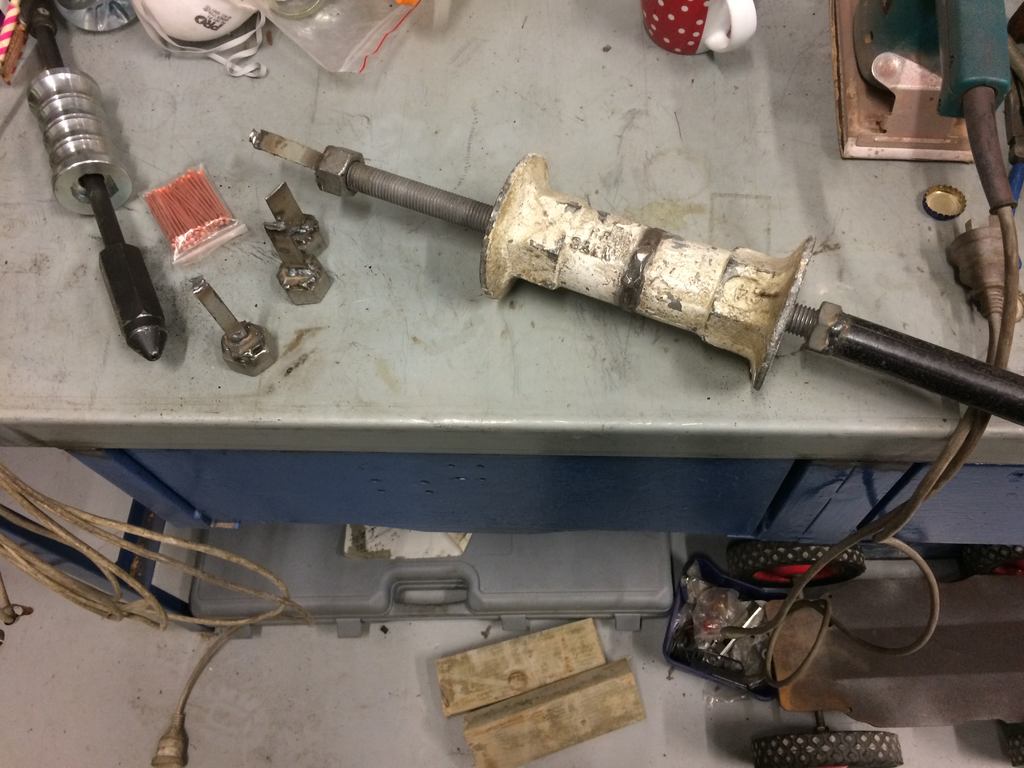
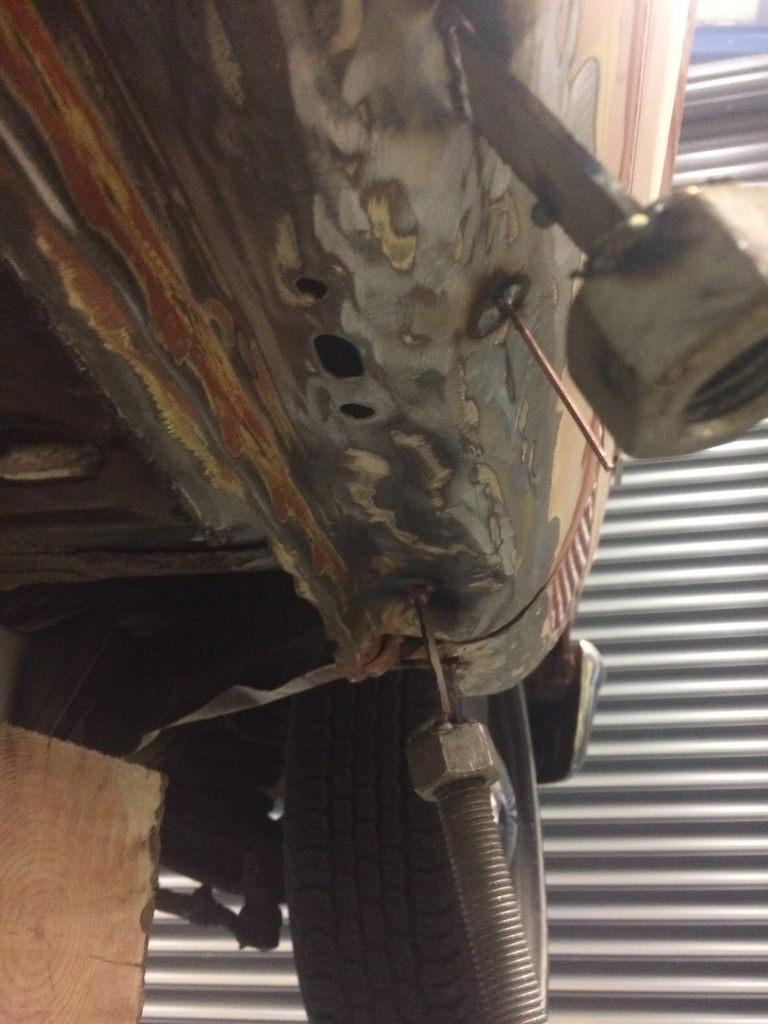
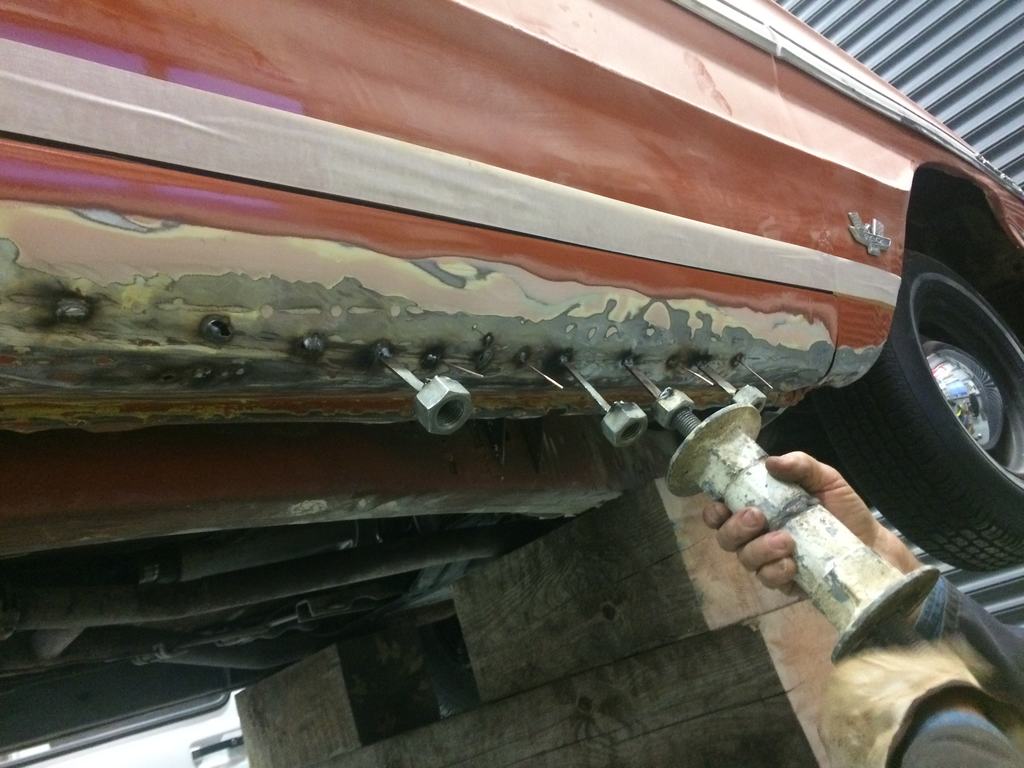
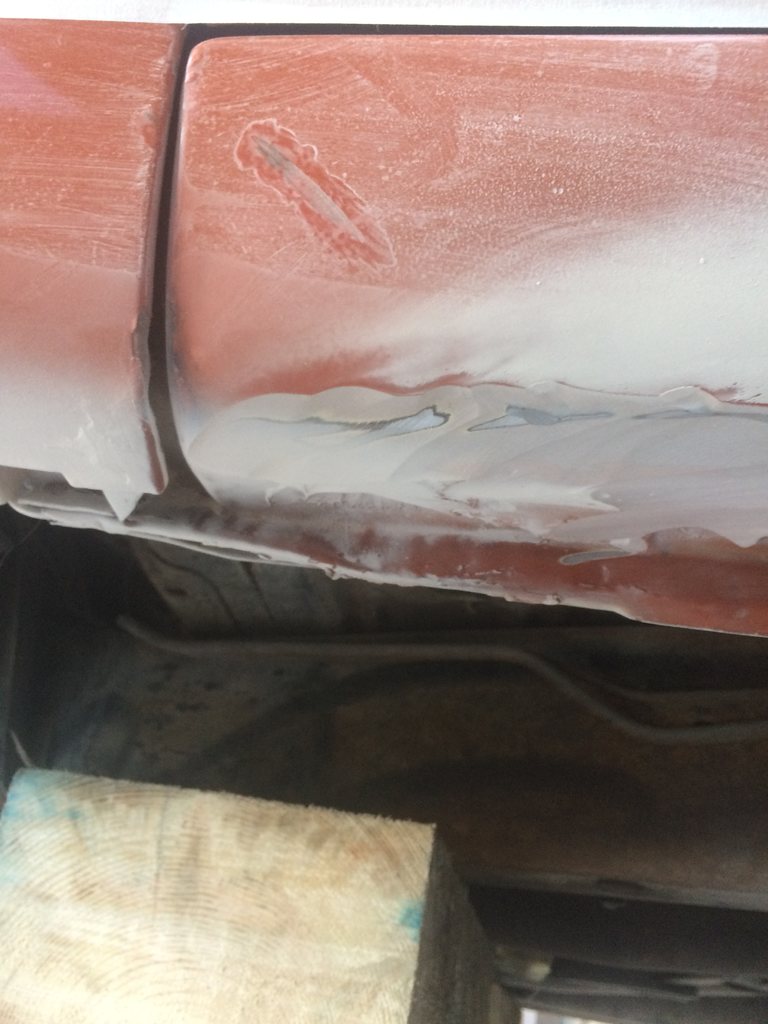
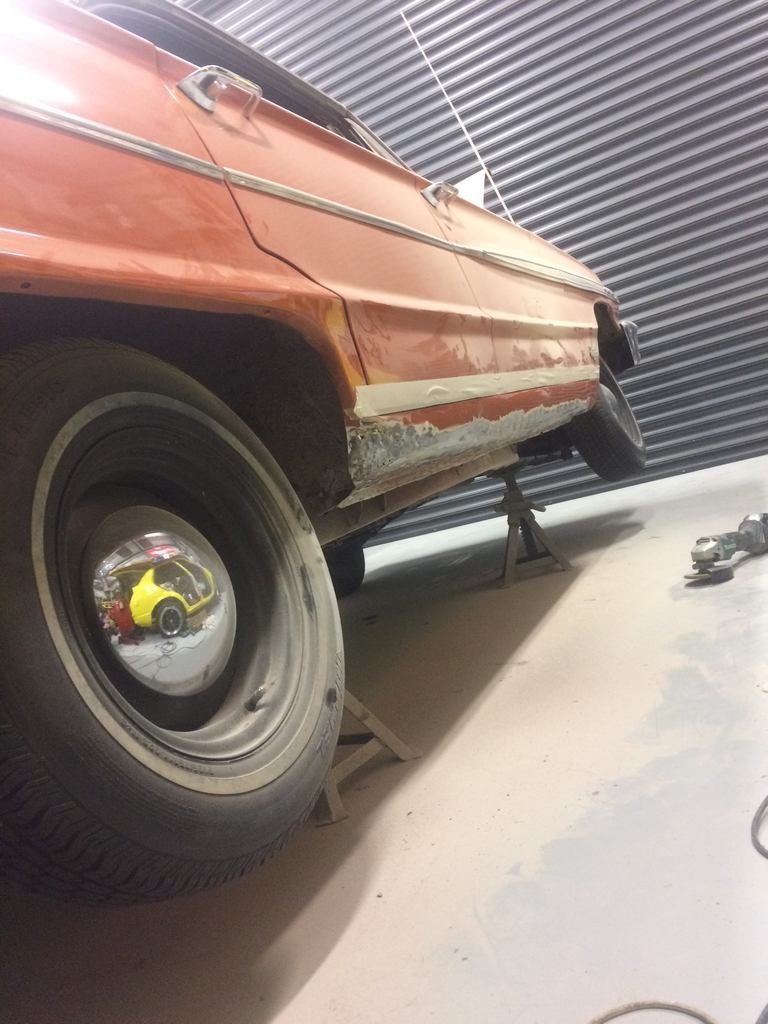
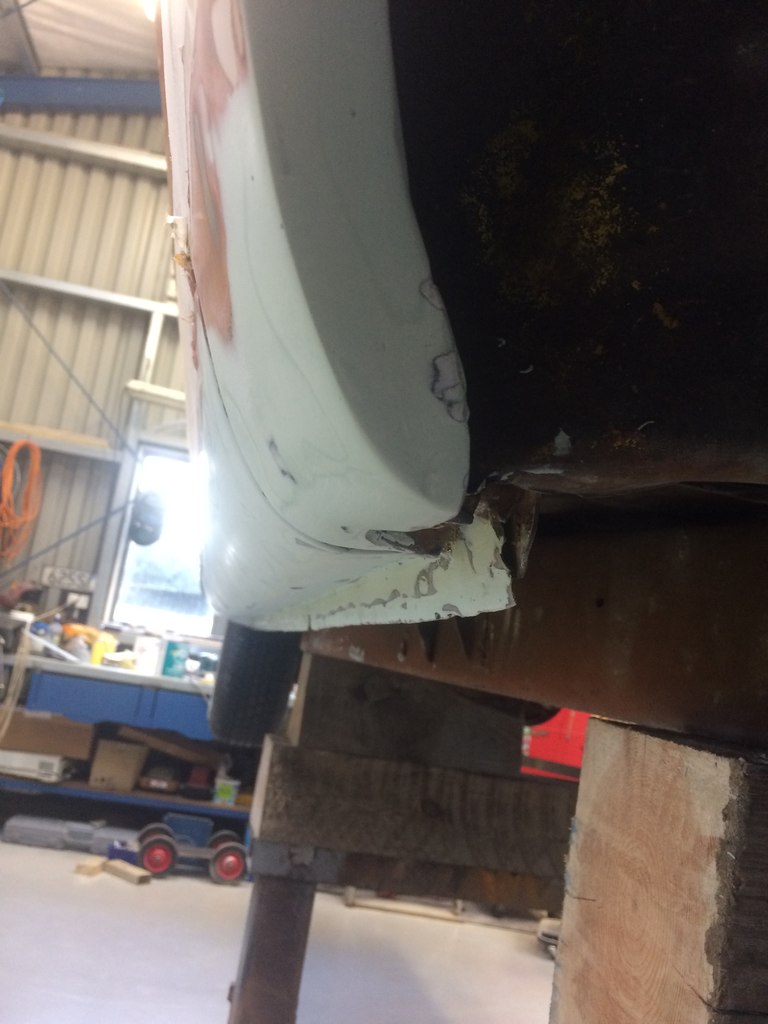
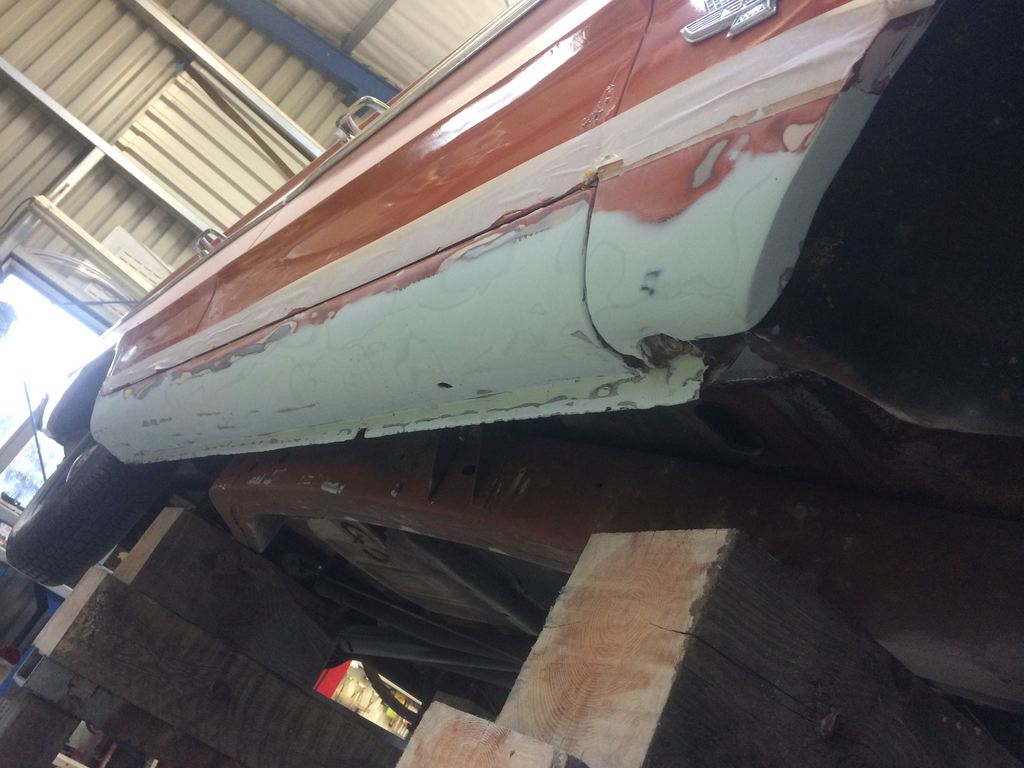
now with the important part of the job also as seen in the previous post that i had already stripped 90 percent of the bog and paint off the passengers sill the next part was to remove the drivers side bog and paint and the other 10 percent from the passengers. oh thanks bog smiths which then to this point which revealed only really one big dent photo doesn't really show the actual size is much bigger than the photos then stripped the rest of the passengers if you look closer at the photo you will find a dark line which is a big long dent in the sill and again with a dent in the front like the other side and some previous panel pulling had been found due to holes in the steel that would've been from a screw type puller then pulled my pullers out had purchased the one on the left as its a eastwood kit as came with an attachment for the mig welder to weld the the pins on but didn't work that well. nor did the puller have any good way of getting it tight enough onto the pins to pull. does work but would only really work on thin flat panels. would not recommend though but the one on the right we made up ourself with some stuff lying around but is just abit heavy to use but works 100% so got the dents out to a reasonable level without tearing the metal with using both pullers. which came out like this so grounded the welds off and any other shitty bits and applied some etch primer just brush painted this on due to the small amount needed. now next ill show you how to be a bog smith cheers m8
- 77 replies
-
- 10
-
-
piazzanoob's 1964 ford Galaxie 500 seeedaan
piazzanoob replied to piazzanoob's topic in Project Discussion
Yeah that's true main thing to do is a nice carb and tune and give the cooling system a good once over and get it running abit cooler. but after that will just be cosmetic things oh and lets no forget some more low low -
piazzanoob's 1964 ford Galaxie 500 seeedaan
piazzanoob replied to piazzanoob's topic in Project Discussion
Oh mate that would've been the quicker option -
piazzanoob's 1964 ford Galaxie 500 seeedaan
piazzanoob replied to piazzanoob's topic in Project Discussion
Yeah but there is still a big amount of work and money involved to where it's a good reliable car. But have driven it quite abit as is with US plates and no wof and rego just the compliance paperwork. So most of the big buzz I got from driving it has worn off abit but still enjoy the shit out of driving it. The hori reactions are the best tbh haha -
piazzanoob's 1964 ford Galaxie 500 seeedaan
piazzanoob replied to piazzanoob's topic in Project Discussion
With the amount of work involved in the sills yeah nah fuck that. Plus trying to pull dents out bog it sand it and paint it isn't that easy at the low height while trying to do a reasonable job of it Plus old man wouldn't help if it was that low due to old back etc so that was more of the deciding factor -
piazzanoob's 1964 ford Galaxie 500 seeedaan
piazzanoob replied to piazzanoob's topic in Project Discussion
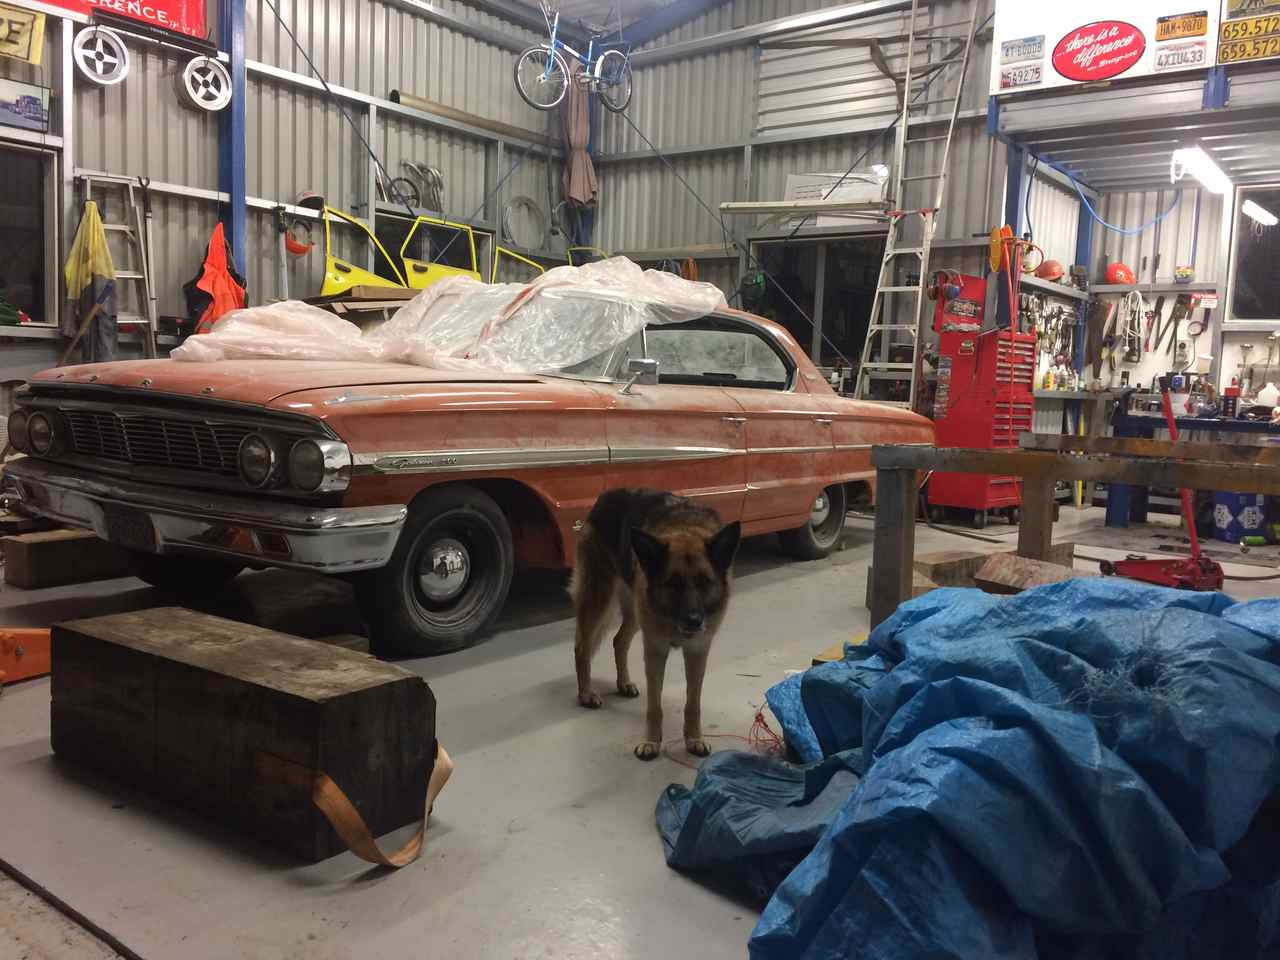
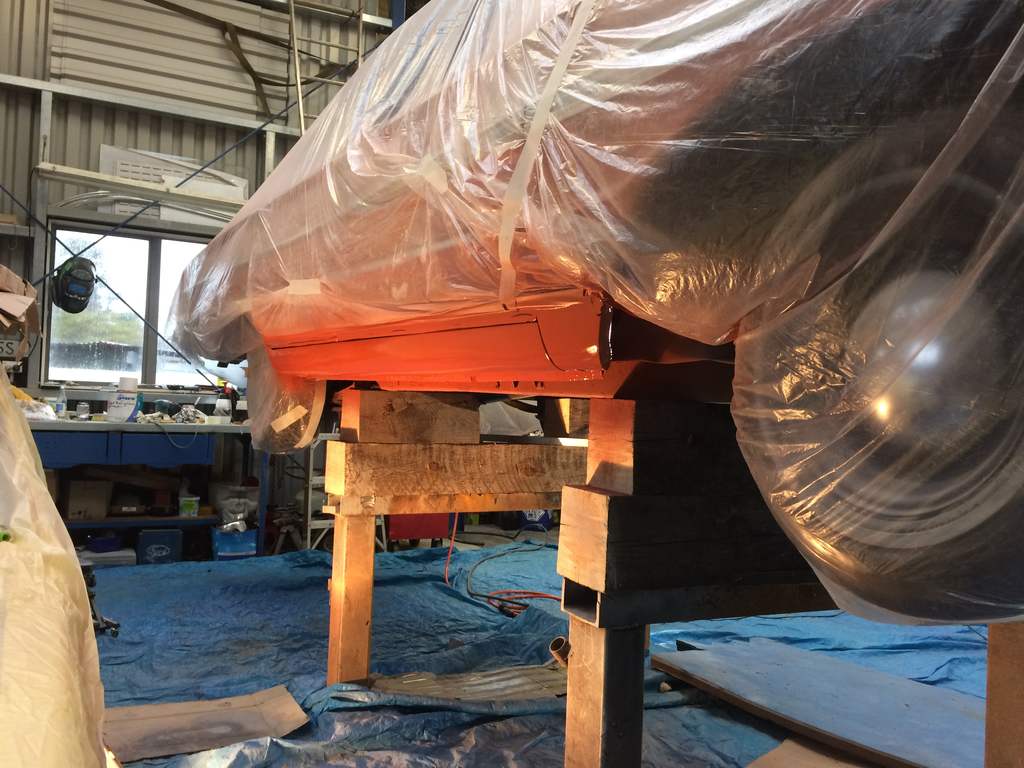
Haha yeah much better. need to keep up to speed with the progress of the build thread. But updating it becomes a much bigger job than working on the car in my opinion. Sills are all done and painted and the car is currently in the blast booth getting sandblasted underneath then I'll be painting the whole underside for the rest of today. -
piazzanoob's 1964 ford Galaxie 500 seeedaan
piazzanoob replied to piazzanoob's topic in Project Discussion
Yeah mate much scarier then that night. Ended up getting a wing man mate to come which helped that night from standing there awkwardly. Also had some good sharns but none good enough bothering with getting their numbers. Yeah the jacking process wasn't much of an enjoyable one to say the least haha -
piazzanoob's 1964 ford Galaxie 500 seeedaan
piazzanoob replied to piazzanoob's topic in Project Discussion
Could put some braces but I liked the idea of being able to go under the car while on a creaper seat. Plus just the stands felt sufficient enough for my liking. -
mate you should just finish it. super cool and fun go kart would buy myself but also got too much shit and other projects. now just chuck up some videos when its done
-
piazzanoob's 1964 Ford Galaxie 500 seeeedaaan
piazzanoob replied to piazzanoob's topic in Projects and Build Ups
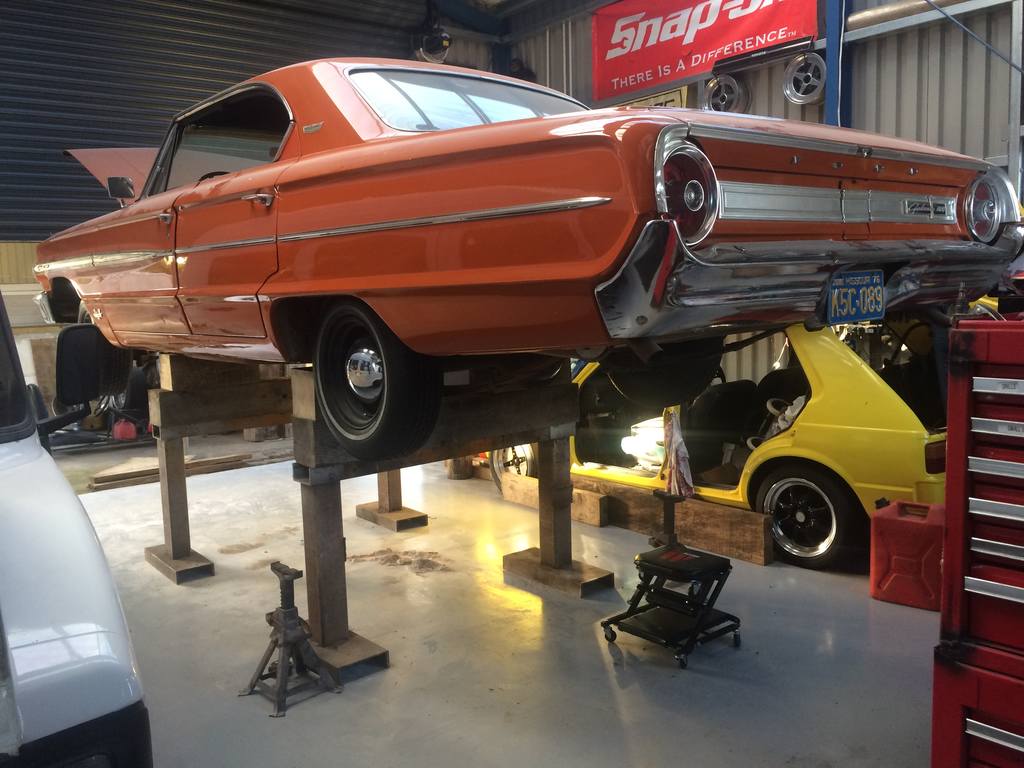
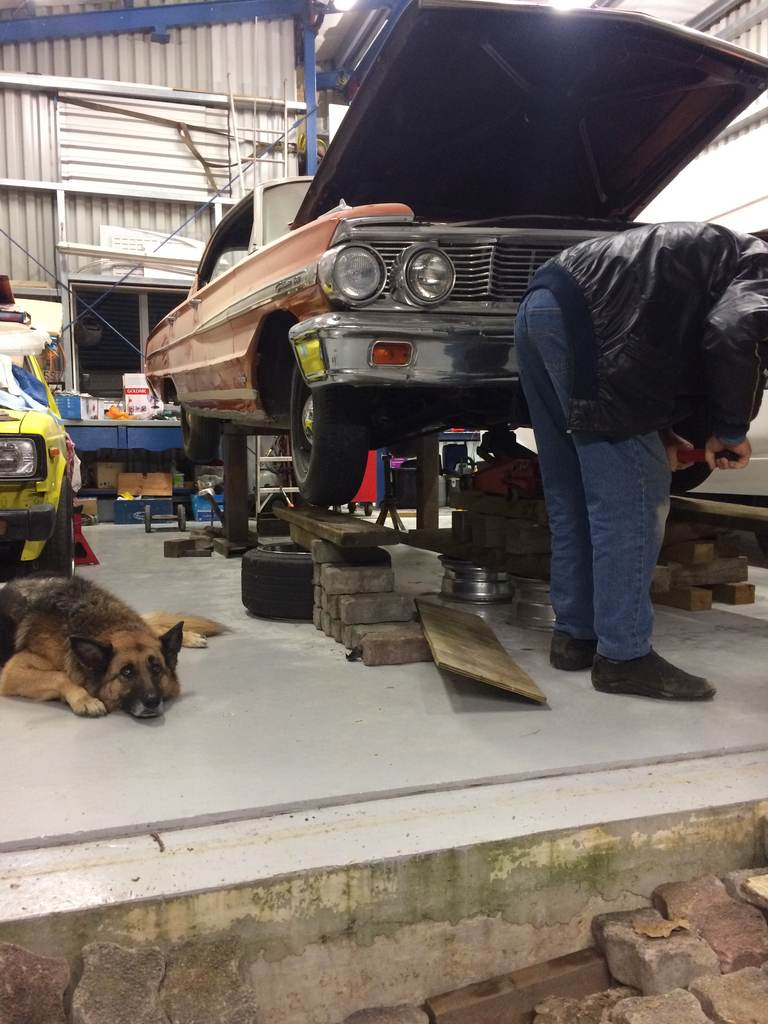
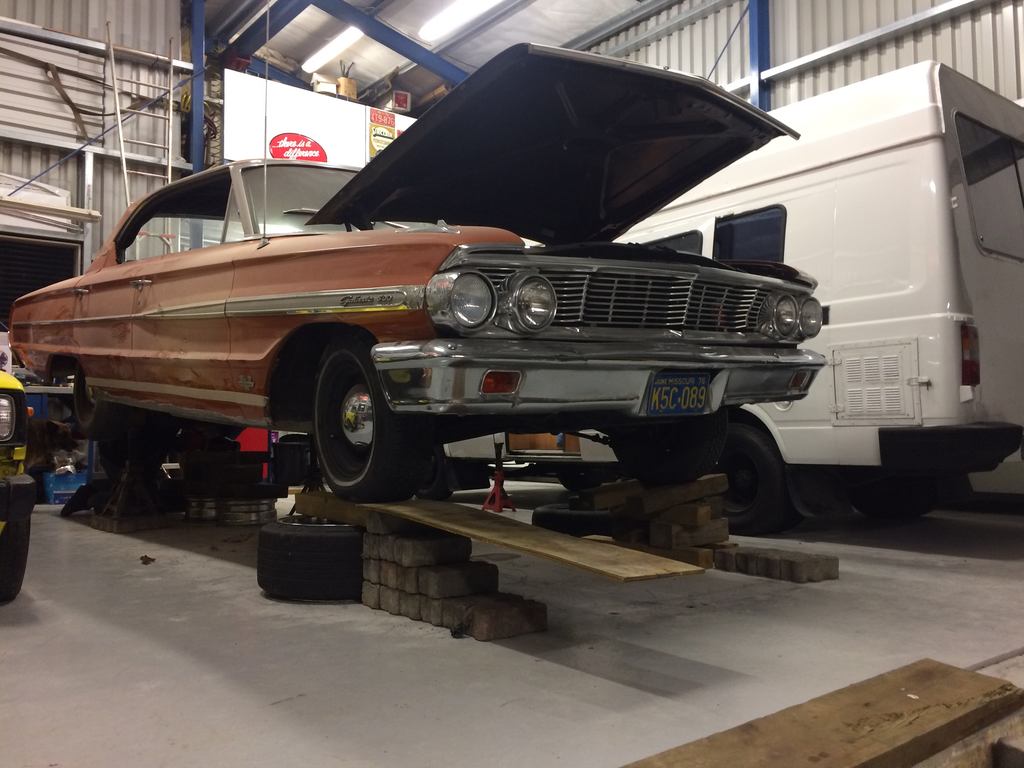
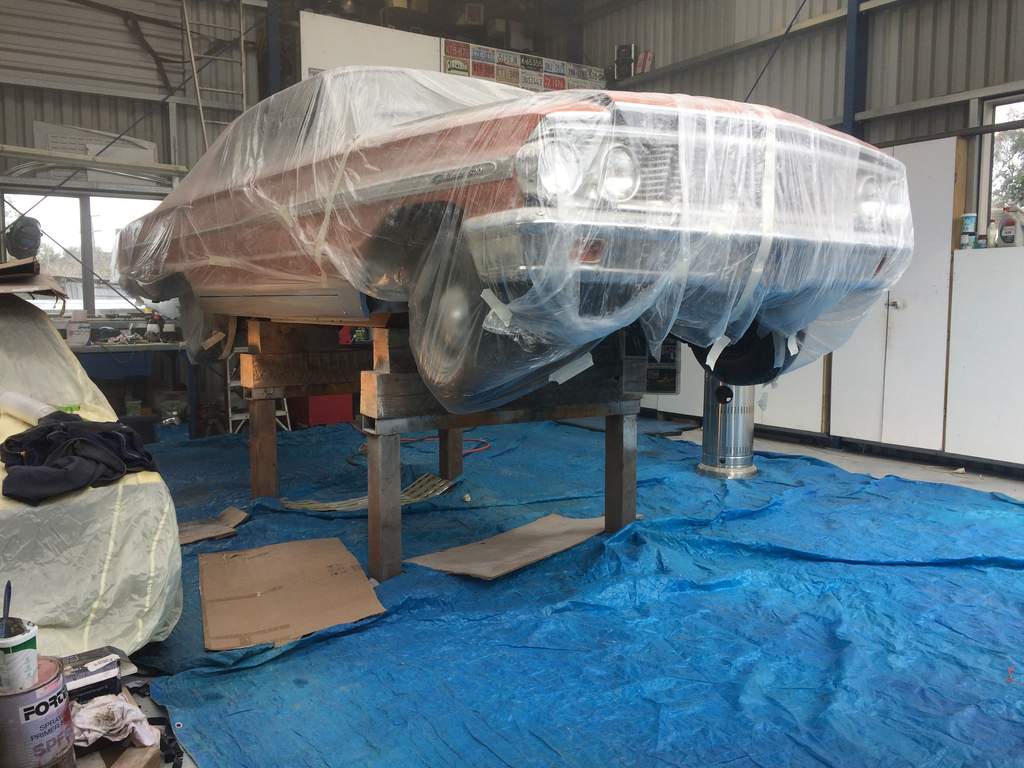
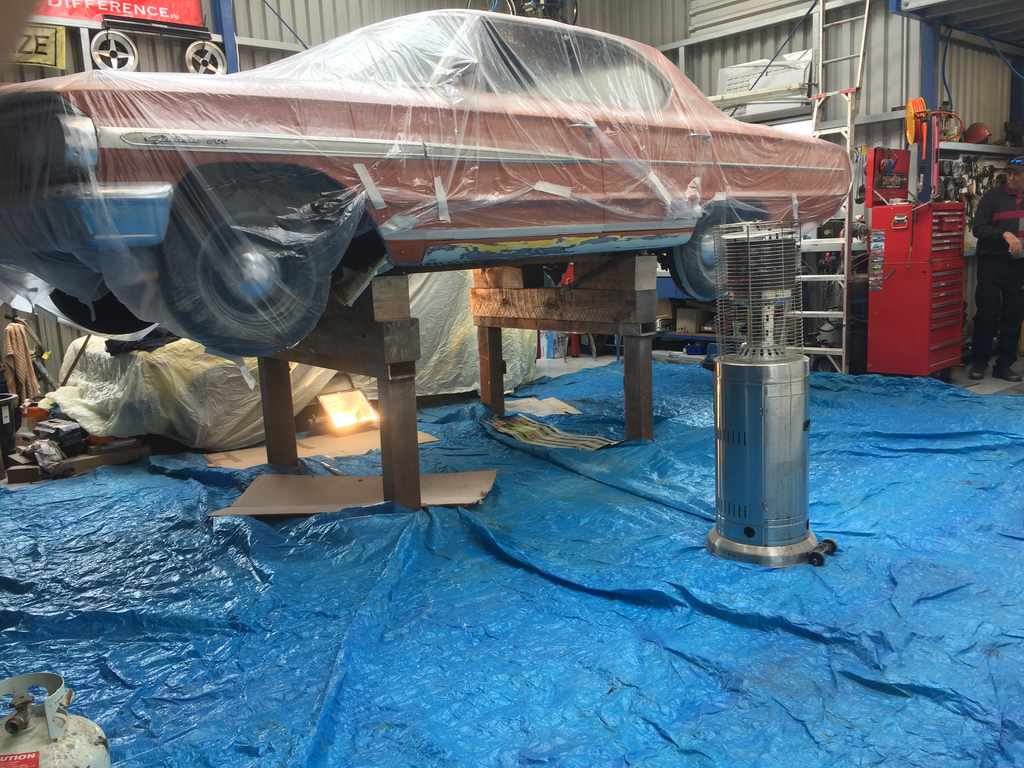
so with more stuff to do i got to work ' figured i would start off with doing the sills this was one of the dents in the sill that the engineer had noted he want done when he first inspected the car so i pulled that dent out when i did the chassis repair and left it bare so you could see the repair was not bogged up. unfortunately i have no photos of the excess bog that was on the sills so started with grinding one side with one side on axle stands and lying on the floor oh and some lovely bog dust collected And now at this point i knew this job was to big of a job to be doing while lying down and a 2 post hoist wouldn't help due to the arms being in the way. And with having no one with a belly lift hoist that would allow me to do grinding and sanding. we had some heavy duty steel trestles that we would jack the car onto this was the full height on the axle stands i had and so now prior to the photo being taken is where the jacking process started turning to shit. before hand the front was on the wheels and one block of wood above that on each side that you can see one the L/H wheel and the rear i had managed to jack high enough by stacking wood above the floor jack and placing two bunnings saw horses bellow the diff which was super dodgy and making creaking noises while the weight was on it. i figured i better get them out asap before they collapse so i got the trolley jack again on the rear diff and stacked about 3 logs high above the jack to which i got it high enough to slide the steel trestle under the drivers side L/H sill but needed to come up another 50mm to side it under the chassis And now i was at the point the blocks above the jack were starting to tip and the front wheels were close to rolling off the wheel and blocks due to not having the brakes applied. so i stood there holding the wheel from rolling off the edge and thought about what the fuck am i doing with my life while feeling help less so i gave my bro a call to get to mine asap before it falls off the jacks. but before he arrives the blocks and the jack slip out and fuck off 1.5 metres away and the rear makes a sudden drop while the steel trestle takes most of the weight while stitting on the drivers side sill. and the saw horse luckly not collapsing. while the car sitting on one big gangster lean enough of one that if the saw horse collapsed the car would've roll over onto the starlet and crushing me to a slow and painful death. so did some more unsafe jacking and got it to the point of the photo above. much safer than before. by this point some helping hands had arrive to help out with the jacking process. also had the over paid safety inspector on site to keep things in control so with the use of some quality Japanese alloy wheels cobble stones and blocks of wood and a trolley jack we got it high enough safely to place the trestles underneath the chassis. and by this point it still wasn't at a nice comfortable working height. so the next day we got some bigger blocks and cut some up to place above the trestles and did some jacking again To which we ended up at this comfortable height to work with. safer than a hoist m8 also having 1 trolley jack to do this job is painful. but got there in the end also gave it the rock test and passed flying colors. now your inner safety Nazi can tell me off
- 77 replies
-
- 14
-
-

-
i think personally you would be better off buying yourself a small blasting cabinet and doing stuff yourself. but this depends on what budget you are working with also it would also be good to use a stripper disc on the chassis and other bits as i have found wire wheels are not super abrasive just some info you properly already know but yeah super cool ute and looking forward to progress
-
piazzanoob's 1964 Ford Galaxie 500 seeeedaaan
piazzanoob replied to piazzanoob's topic in Projects and Build Ups
so seen as all the work that was required on the engineers cert check sheet was done. I arranged a time with him to come view it on one of the hoists at work so he comes inspects the work and is quite impressed with the chassis repair and replacement floors bits put in. so figured sweet it will get signed off... well he wanted where the chassis repair was done painted right up until the wheel arch meets along the back rail and the other side to suit. well FFS i left the underside unpainted so you could see the repair. then wants the leftover bog taken off the bottom of the sills as when it was painted in the states the sills were bogged and left the bottom side untouched as you cant see it right. and he also wanted the floor inside the car cleaned up and painted in a couple of areas due to him stating its surface rust. that i was fine with then he starts going on about the very very light underbody surface rust. to which i said i would get it done after its legal and stated that it would be getting lightly sand blasted then painted. to which hes reply is oh just put some rust converter on it then a top coat. cheers m8 so now im left with more stuff to do and all this stuff being not on the list he wrote. this made my blood boil due to him already inspecting the car and not saying the first time round which fucks me around as i could of already had that stuff done. so now i have 0 faith in these repair cert cunts doesn't know shit from chewed up dates. -
@f100_dreamin the media blasting guy I know has quoted me 700 to do my galaxie just blast underneath and another 700 to paint it. But with that quote I will be there helping his boys out mask it up and make sure they don't miss shit or warp my floors. he said they have ramps so it will be done on there. The GC is also giving me access to their hoist for me to paint it underneath myself to save some coin. Also that way I know it's done well and only have myself to blame if it ends up shit haha. i guess he's giving me a fair deal as I got him into the import yourself from the states as now he has two 58 chev apache's
-
Yeah that's the place although I just rang them up and got that price.
-
^^ I like where this conversation is going. And perhaps the whole reason why we cant go there should of been said when the problem occurred but yeah to late now And getting a proper health and safety plan along with timetables of when and where the carpark would be in use and the times used. would take away just a whole bunch of people turning up to a well organised social club event. also having a sharn to the manager of that burger fuel which he manages a few from memory would also be beneficial so we work along side with his H % S guild lines and then being a group organised event. just my 2cents
-
so how you were saying about it being Arizona car it may have from new but i dont think its been there for a loooong time my galaxie is from Arizona and all of underneath is what i would call brushed rust super light and not a very dark colour. And even mine doesn't look that bad by going off your photos. easy tell tale sign its from a super dry state is all the rubbers are fucked and interior isnt much better haha and sun burnt paint. but yeah will also be getting mine blasted and painted underneath to knock the surface stuff off. but your job to do first is to get the underneath free from any grease or oil as the sandblaster will spread all that all underneath and your paint wont stick at all. so would 100% give underneath a good steam clean as once its freshly blasted blow off the sand and its paint time as its a clean bare surface. also let me know how the guy you are going to see goes as i know the crowd in glen field are 2 grand to get it done plus more if you get it sprayed in galvanising. it also wouldn't hurt to check with a repair certifier and compliance people prior too. as they dont like fresh paint too much as im sure your already aware of
-
piazzanoob's 1964 Ford Galaxie 500 seeeedaaan
piazzanoob replied to piazzanoob's topic in Projects and Build Ups
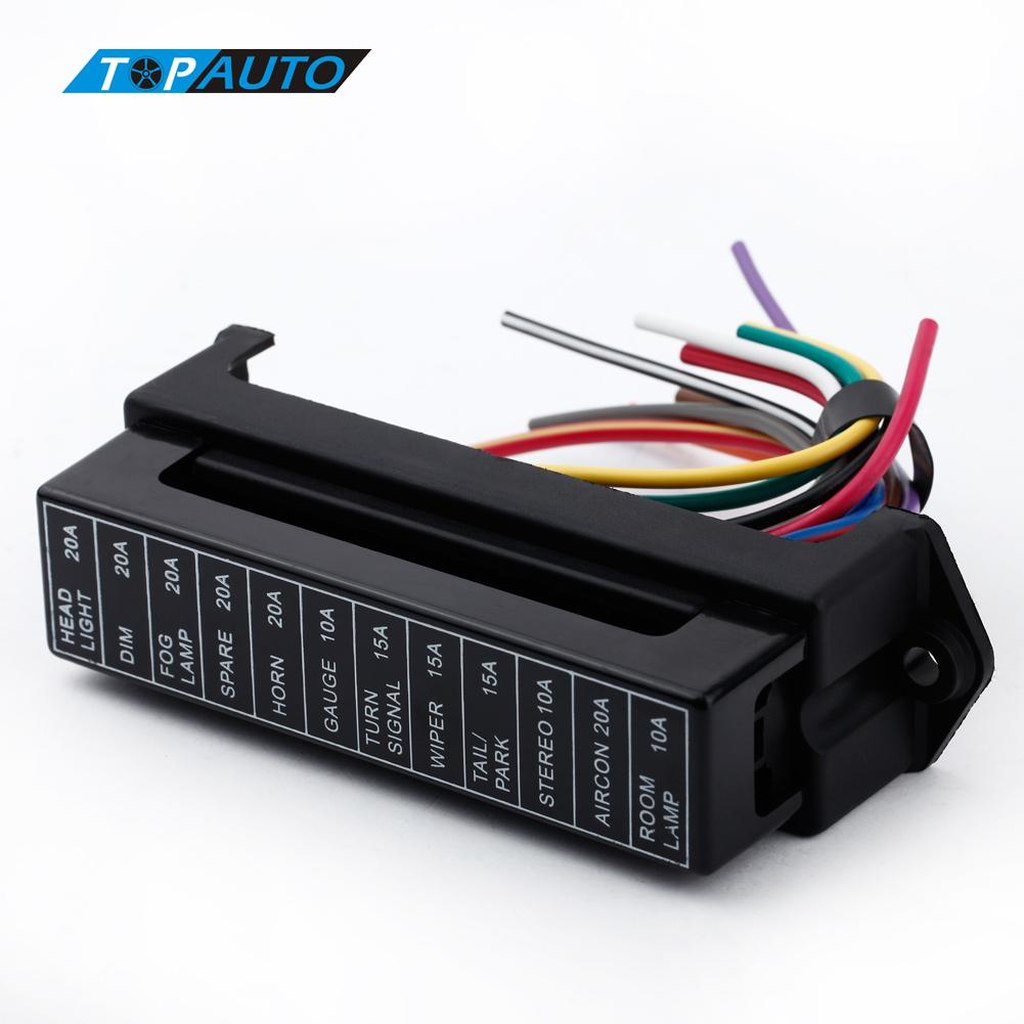
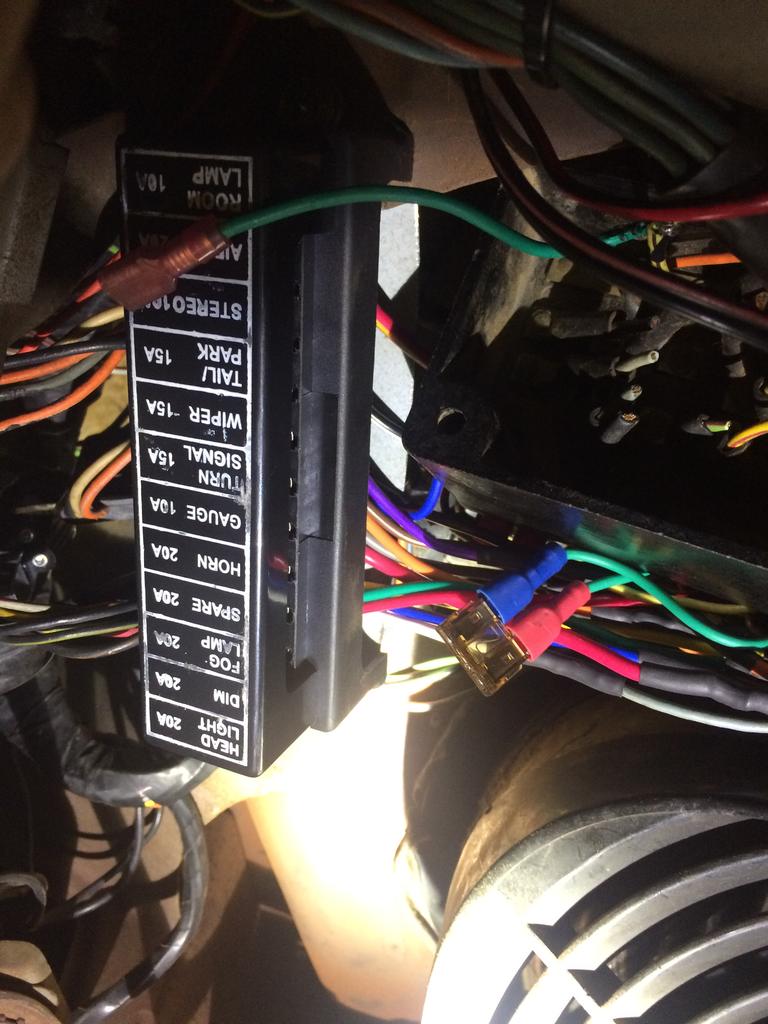
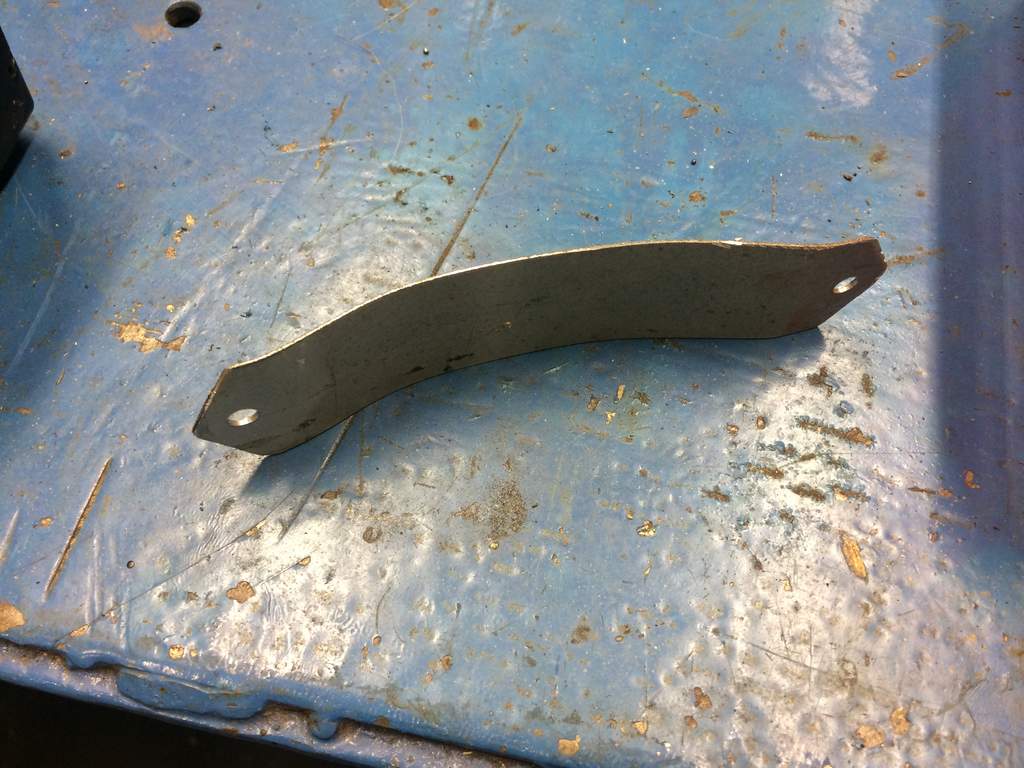
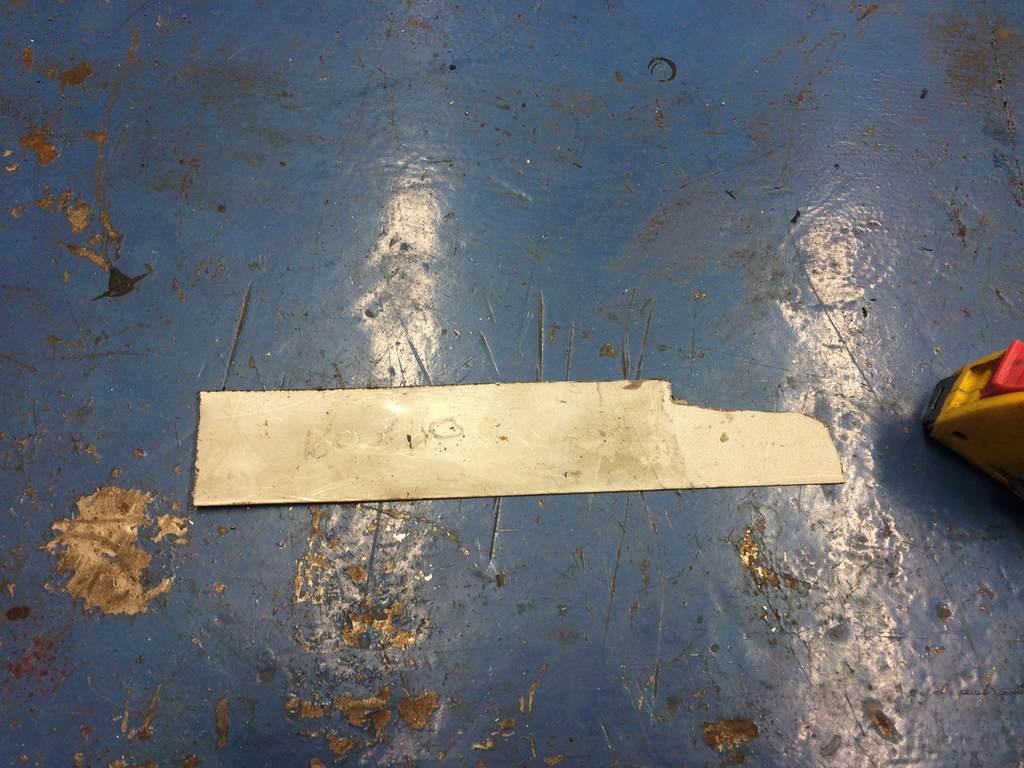
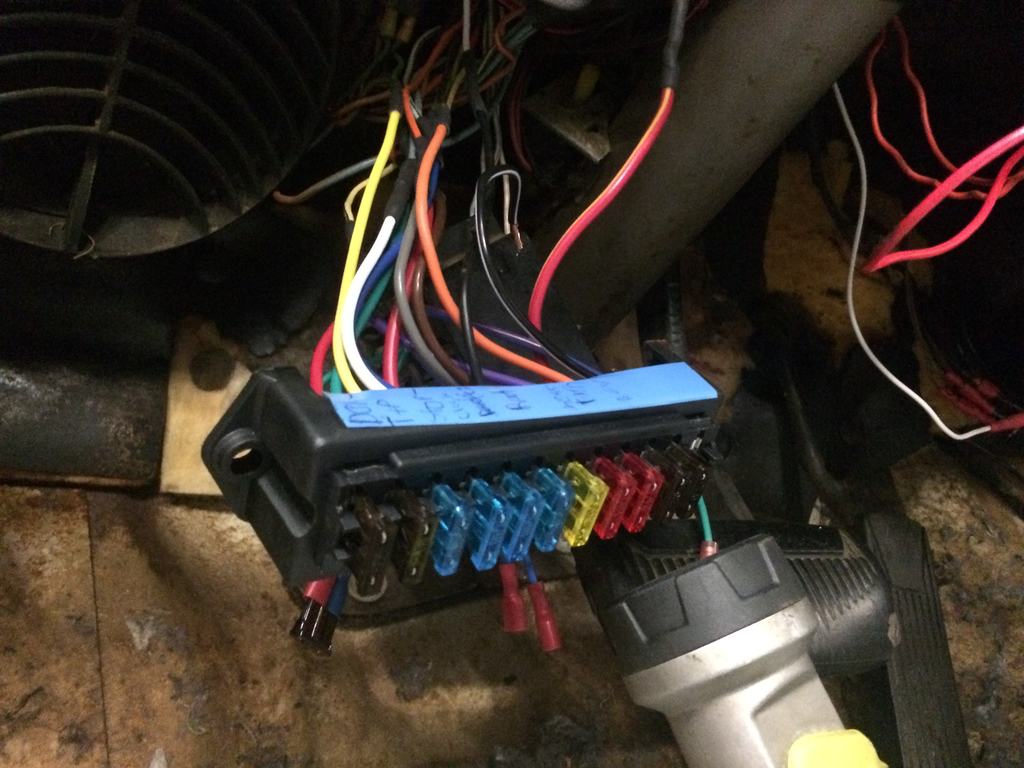
next job on the list was some wiring work. The old fuse box in this car was dangling under the dash and missing its cover plus with it having the glass type fuses its well overdue for replacement. so did some shopping on ali and bought this for the price the Quality is good then the next part of the job was to get @chris r to rewire this new fuse box in with chris doing that i made a bracket to hold the fuse box in place. did some cutting and bending and made this And there it is bolted in place tidy under the dash And placed the cover in upside down for bonus points. so with that now in and that side of the electrical working i just need to order a big fuse and holder and then i can remove the old fuse box from dangling there

.jpg.716bed421427b2d649e026013310ea1f.jpg)
.jpg.e7422178552318a7156bd1b178b8465f.jpg)
.jpg.8092a87ae2918e15bb87e0f46f718369.jpg)
.jpg.bb6d583d51228110304e6dd5014d38be.jpg)
.jpg.004f2e066b412e34488e5b8cf5bbffc4.jpg)