.jpg.75c043a44982294d69ea071d787bc2b4.jpg)

64valiant
-
Posts
6286 -
Joined
-
Last visited
-
Days Won
10
Everything posted by 64valiant
-
Hamilton Monthly Meet - 29th July 7pm Cock and Bull
64valiant replied to Truenotch's topic in Upper North Island Region
Yeah I got headlights on the kombi. -
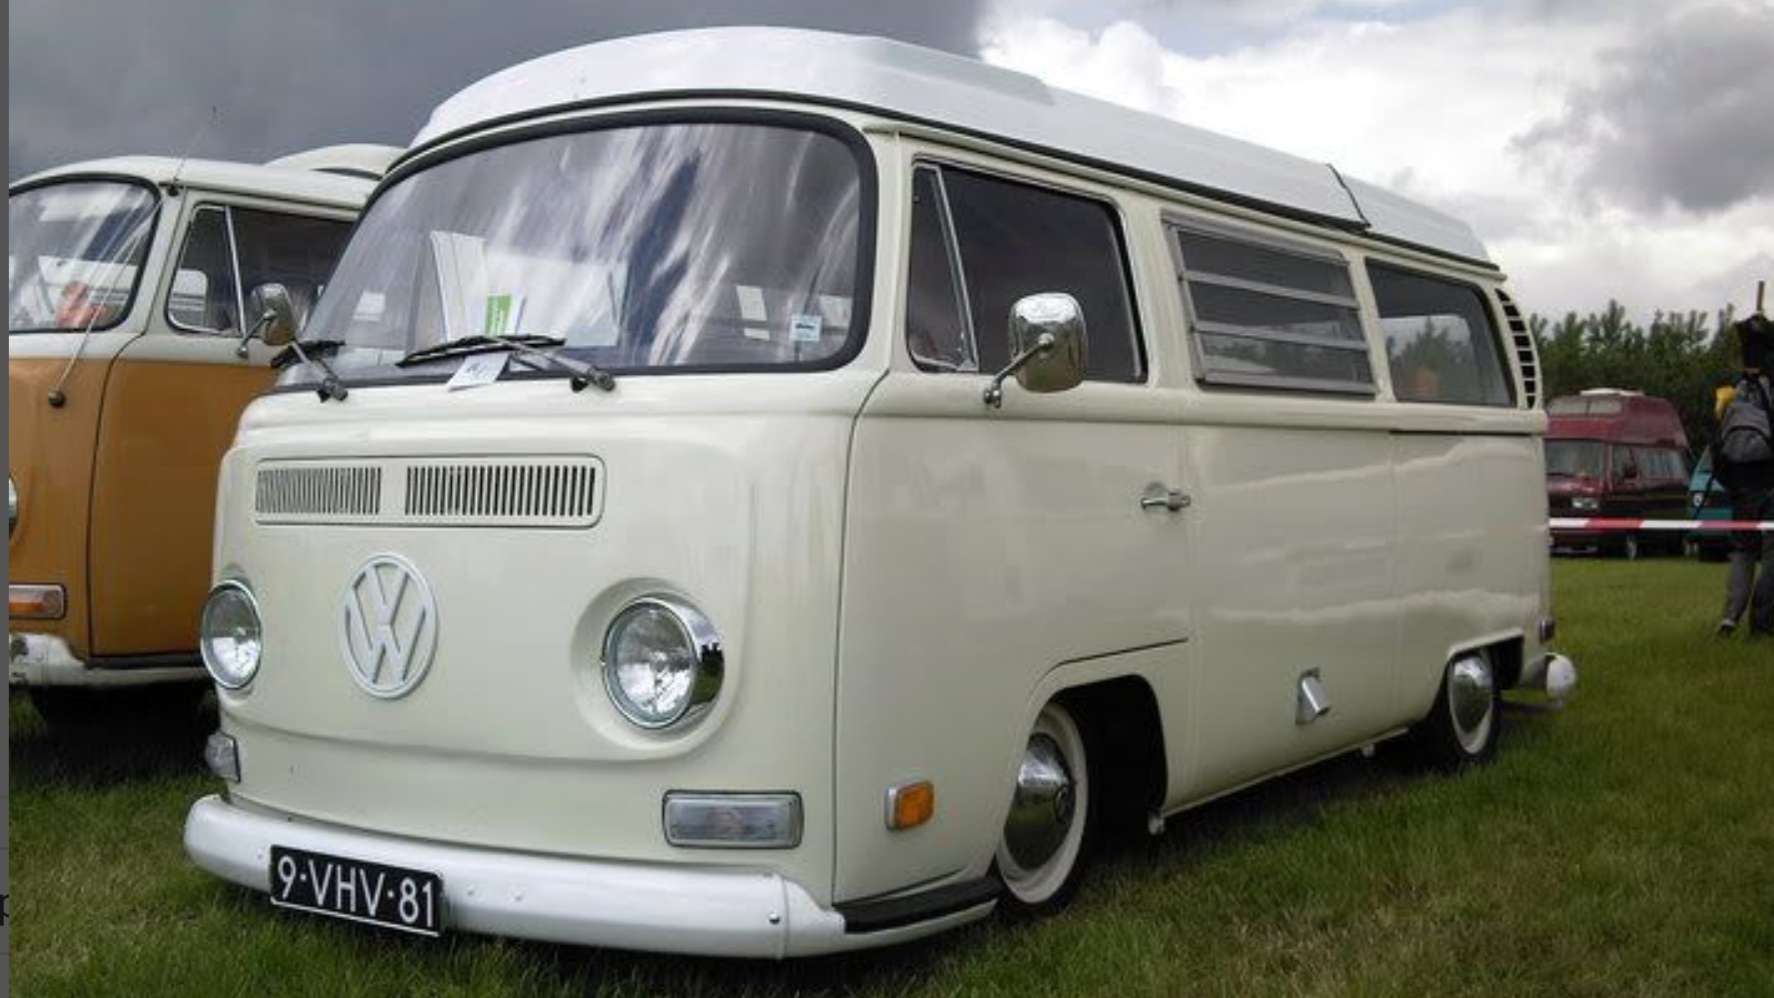
right i am meant to be cleaning the work shop right now but i kinda cant be assed and i feel there are a few people that would like to see the details on what its taken to get the bus driving. we left the detailed post at i was off to get my flywheel skimmed up. there was a lip on the other side but for some reason it seemed to have been a sleeve on it or something and i had planned on having to take that to old mate geofphy to get cleaned up but it kinda just fell off when i picked it up. job done. Paul was busy on the phone again but it was sweet i still had jobs i could do, so i proceeded with putting the head studs in want to know why there are three different sizes? well in this photo there are four but dont look to close the longer 8 are for the bottom four on each side, we then have two short short ones for the middle on each side at the top, and then we have two medium size ones for the right hand side of the motor and now we have left is one long and one short for the left hand out side. here is why we have a long one. the casing nut is really far in the block so this is why we need the long one. i went over a few of these with a tap as some were a little funny but most of these were finger tight. and that's a photo of the finished result i ended up lock tightening this bad boy as it was pretty much finger tight and was very lose he holds on the fuel pump btw looks some what like this, thanks to google you'll see this in photos to come. next was the pistons, now on the top of the pistons you will see an arrow, that arrow goes to the fly wheel, and well if you are rebuilding an engine you might not be able to see the arrow so on the bottom of this you will see the little bulge on the piston, that is the equivalent of the arrow. and always place out your circlips with your pistons so if you lose one, you should be able to tell now, top tip. don't do this drunk cause things will go wrong and you'll have to do this again tomorrow. Pauls friends learnt this the hard way you can kinda see the little bulge on the right hand side piston where the vivid mark is now if your clever you put the inside circlip in so you slide the gudgeon pin in with out having to go through the head studs. i guess you'll do it a few times before realizing how much of a retard you are and figuring this out. i probably would have done this tbh. we also put the oil pump in and torqued that up, also put goo in it to oil doesn't come dripping from it. i got told off for been to efficient and maybe putting the studs in a tad to far for these bolts to go on. but hey they worked right..... perfect if you ask me. next day now, time to clean the heads. and what do you know bloody norm (parts lady) has packed the wrong heads so i go back and yell at paul, who yells at norm and i yell at norm and well then norm gets the other heads which she got told to grab to begin with. lets see if my new barrels fit in this lot huh. hey hey we have a winner. time to clean these. and then back to the hot water so it can evaporate even thought they wont rust. it was at this stage i got shown this cool two peace crank hows that for cool........ it even drove broken. just made a funny sound. ok time to get back to the engine. time to put all the studs in the heads for the exhaust, intake and the rockers. all done. before i knew it Paul had slid the barrels on and i was over here putting the new oil cooler together now this isn't a factory oil cooler for a standard fan shroud which you would see on most beetles and early kombis. this is what they call a dog house. a dog house fan shroud works a little different and instead of the oil cooler been in the middle and the heat from the oil getting pumped onto the left hand side cylinders it gets air pumped out the back and the air just disappear not heating up those cylinders. here is a photo of one in the shop that paul used and showed me. note the oil cooler there out the back. and here is a photo off google showing you with the extra tin wear on how it works now i asked Paul should i have one of these. he answer was yes. but not cause i said yes, yes cause..... and then explained what i just explained. it was a pretty no brainier why we should be putting one on the engine. i just come across this image as well you might find it help with my bad explaining here is a standard one and the oil cooler usually goes between the letters a and b pretty much and the heat from your oil just gets spun around and onto your cylinders ok so i also had to change the oil cooler bolt. from a standard one to what we are now usuing. doesn't it look so cute. the one on the left is the old guy. we went to see if my windage pus rod tubes would fit next fuck me i just wrote this next section out twice now and hit ctrl z to go back one steep and lost it all fuck me i'm not doing this again or i'm not going to have a fucken computer come tomorrow!! FUCK back to my windage tubes. this is the difference between standard and windage tubes well yeah the next photo is of mine cut down to standard lenght haha this isnt that funny after writing it the 3rd time now ok so now that they are done time for the heads to go on now. and my next job was to do some more cleaning, im getting pretty good at this cleaning stuff now. so cleaned they were and paul chuck the rods in and bolted the rockers up and checked the tolerance and put them at 6 thou while i was off next door doing something else. i asked oh nice were are your feeler gauges, he point at his tool box and said some where in that thing if you want to find them and check. i ended up asking how on earth did you work out what 6 thou is with out using them. his response was when you have cars driving from hours away to your shop and you burn your god dam fingers from checking tolerances you sure as hell learn quick how much 6 thou is and its _____ amount of turn from touching. ok so yeah i didn't check this guy knows whats what. next is the rocker cover and gasket, now what we do here is we smear a little grease on the asked both sides and then slap the covers on. want to why we put grease on the gasket? well the detergent in the grease eats the cork gasket and glues it together so they dont suck in or fall out of place. wish i knew this when i had my 1st bug after it happening so many god dam times on my way to and from leadfoot. old @Archetype will be able to tell you about this experience as well. was not good. so the engine now looks like this as you can see we now have the alternator stand on, yup an alternator not a generator, those can go in the fucken trash. one less thing to fuck out, these things are self regulating as well. next is the tin wear. that wont be hard its all brand new and will just screw right on i laugh so hard!!!! this is what people must think when they but kit set upholstery haha. yup had to modify these peaces to fit. i think it was a total of 5 peaces i cut or modded to fit. and then i took this photo for the Instagram people i really like it. and it was also the end of that day. another day now. next on the list was making the intake bolt up and work. but firstly this bus has vacuum operated boosted breaks. and the vacuum comes from the intake. these intakes come with a little hole in them that we plugged up as its to small and kinda in the way once you try and put everything else there. so we have to drill a new one and find something to make it work as these hoses are huge. drill said hole here. you can also see the black grub screw that was filled. time to dig around in this and we came up with this tapped the hole and put some cement around the fitting before we put it in. call that job done. its at this point its fucken great that Paul has a shop like this with all these little things laying around and taps all different sizes. shits pretty legit now yeah that didnt fit as well, the runners on the intake on the left hand side was a little long, so Paul used and hack saw which would have been as sharp and a bread knife to cut it down to begin with and well yeah had to be cut down some more, i used a grinder with a cutting disk on it i proceeded to ask if he wanted it cut straight or on the piss like he did, got told to shut up smart ass and cut it, and cut it straight! haha bolted it all up and put the carb on as well. time to slap the exhuast on. 1st job 1st j pipes. but wait a min. lets cut some more tin wear haha. these are j pipes btw. they go from the rear of the engine under the block and out the front to meat the other half of the exhaust, factory ones of these have big fins on them and a box around them which heats up and that's were you usually get the heat from for a beetle or a bus in side the car. here is an example of what factory ones look like now the moustache bar. now i know your asking what on earth is that? well this bolts to the engine and acts and the engine mount to the body of the bus. looks like a moustache doesnt it? now for the front half of the exhaust. these usually have heat risers on the top. The heat riser forms two important functions. It prevents ice forming under the carburetor (caused by the fuel evaporating and cooling the inlet air below freezing - icing will eventually block the manifold and stop the engine. (straight cut and paste from google here) but mine were blocked off. they do serve a good purpose. me and my friend grinder sorted this out also Paul put the alternator on at the same point i was doing this. he asked me if i wanted the flash nut or the standard nut, i said whats cheaper, well standard nut it was...... only until he found i had a flash nut for my main crank pulley, but he put a crap nut in there to match my cheap ugly bolt up the top. we now had to put an oil filler neck on this. these come straight for difficulty or bent for a bit easier. guess what guys, the straight one comes black and the nice shiny looking one comes in bent..... well fuck me ok put the bent one on but if ya god dam doing that put the shiny bolts on, so old crapy bolts off and shiny ones back on. this is what im talking about here. these go on the alternator stand this is the straight one and black well now thats on lets put some oil in it time to put it on the engine stand shull we. and that's the night we started it. ( i also just copied all this and put it into a word document in case it didn't save and i was going to be pissssssssed off )
- 49 replies
-
- 18
-

-
- kombi
- volkswagen
- (and 2 more)
-
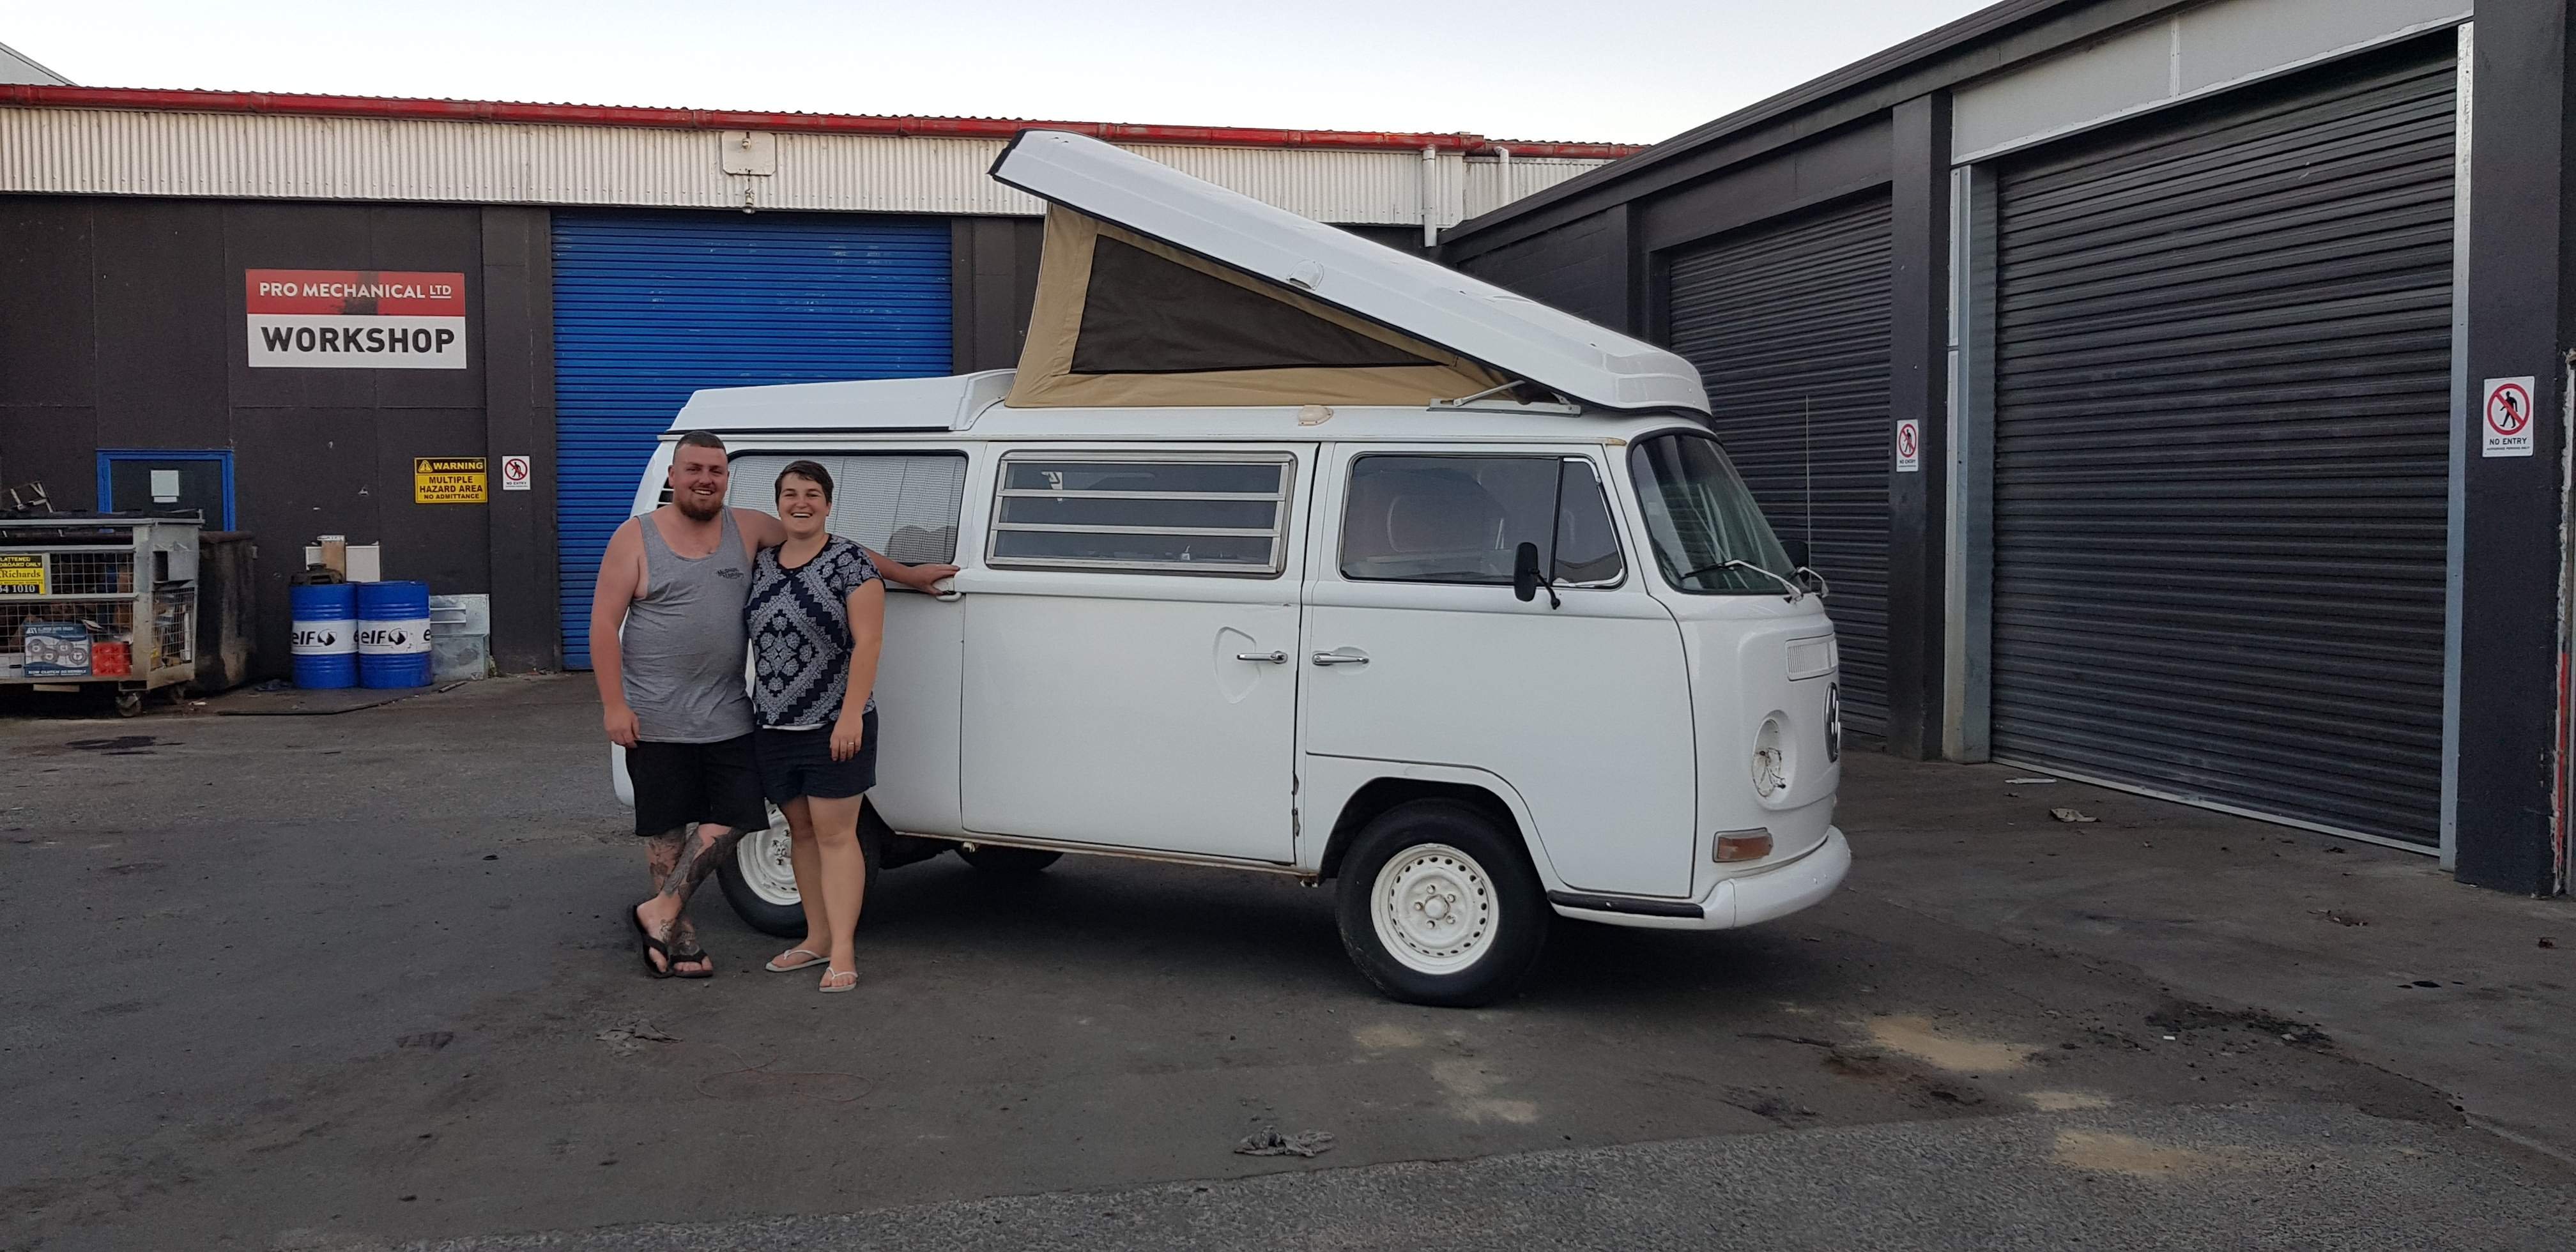
When we purchased this kombi i said to myself and to others I would ideally wanted to be able to drive it over the 10 day break of Easter and Anzac. We'll tonight was the 1st time it's probably driven since I can only guess 2000 when it was last registered. Its been such an achievement and I really happy with the goal. 54 days it took from purchase. It really shows if you put your mind to it you will make it happen. Thanks to those who have helped so far, you guys are the best.
- 49 replies
-
- 22
-
-
- kombi
- volkswagen
- (and 2 more)
-
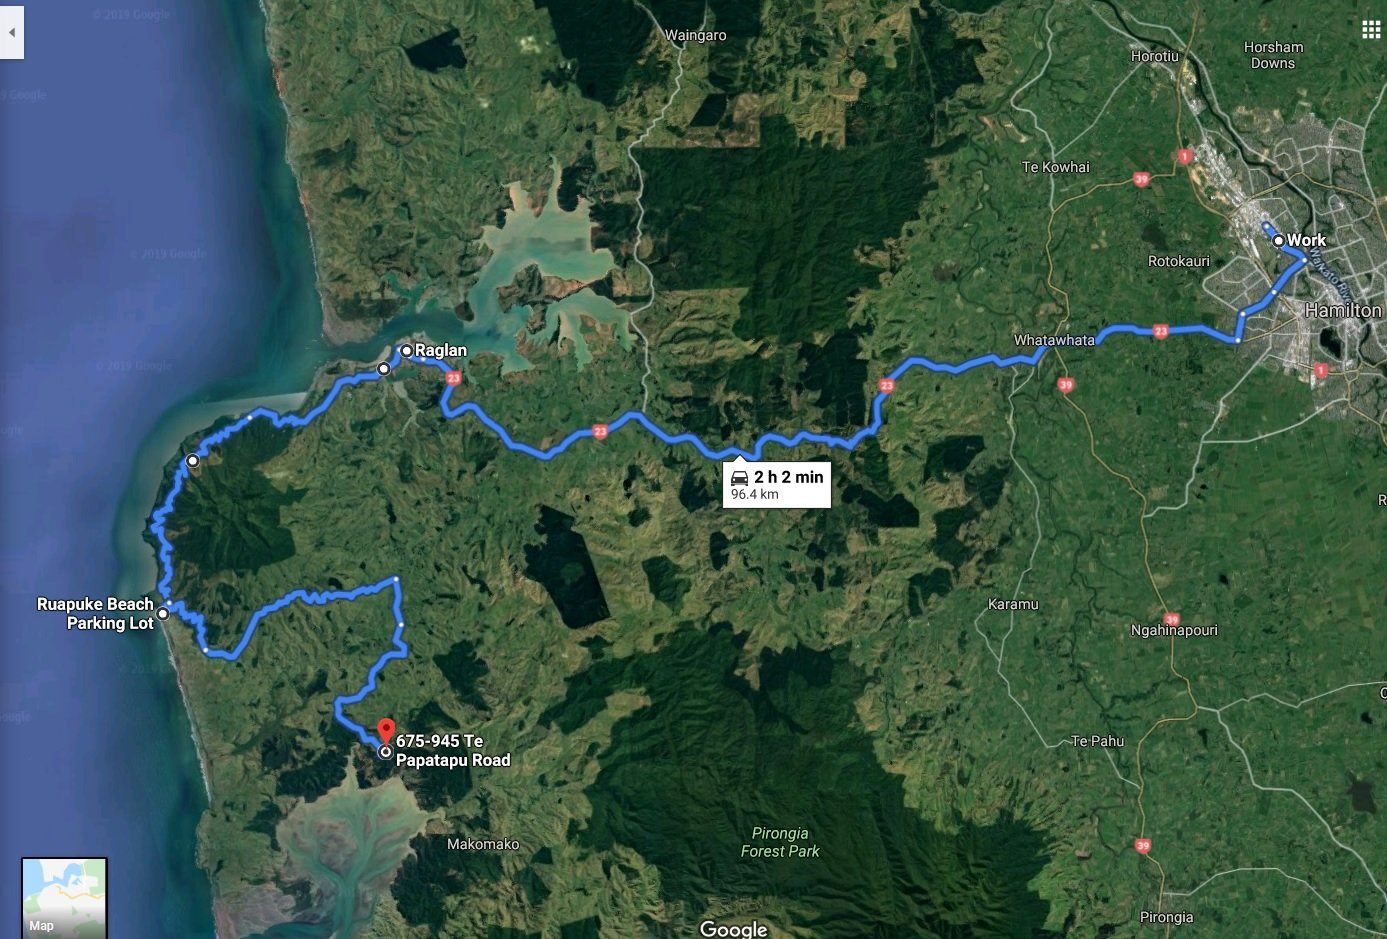
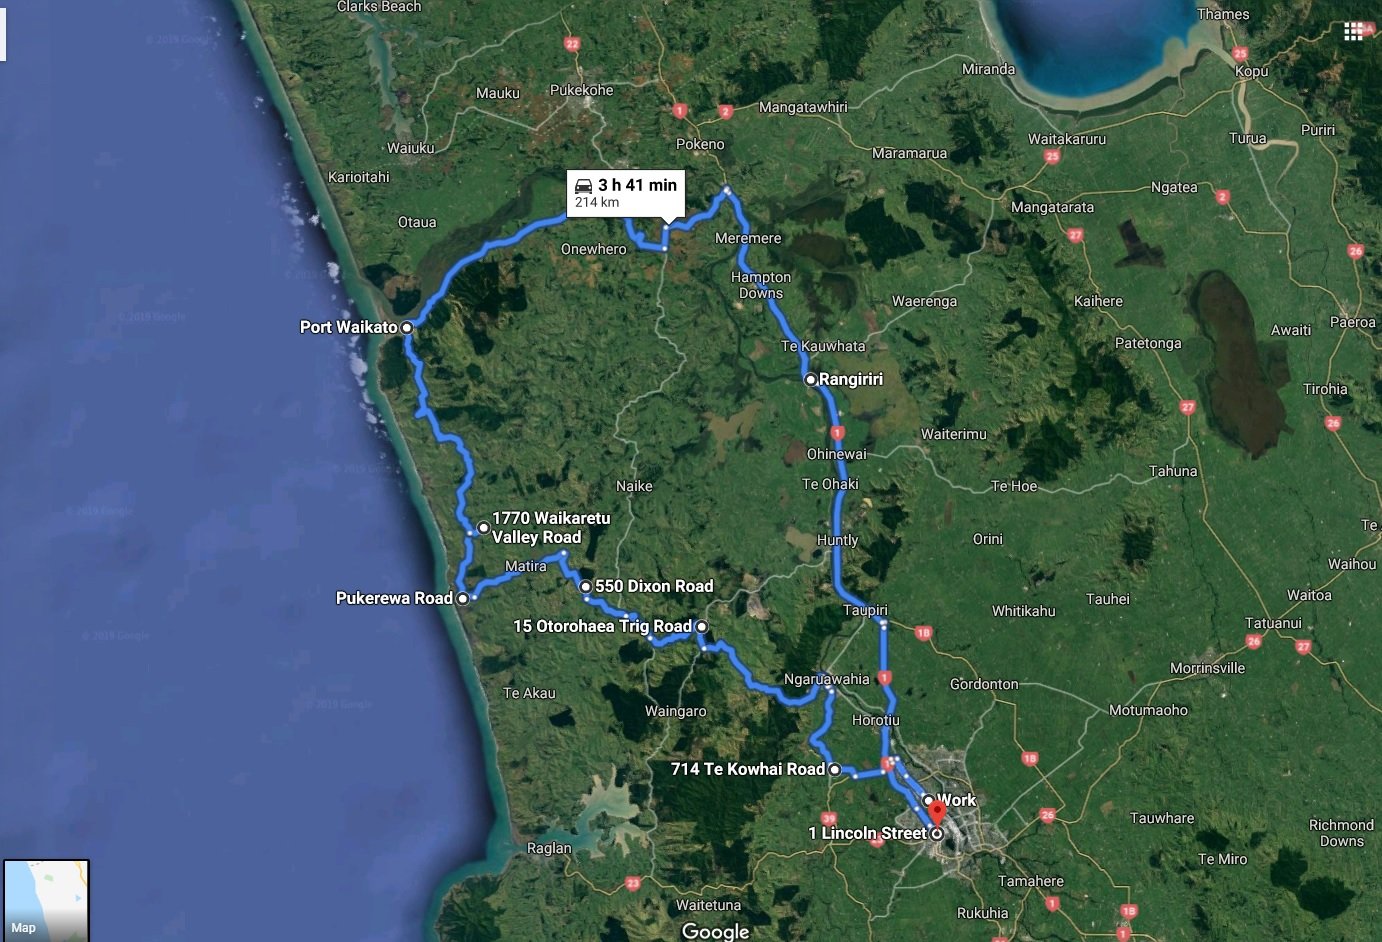
just came here to view what my last post was and all my east cape pics had gone, so back up now. have been riding this pretty much everywhere i get a chance to really. a few days ago i went for a ride with old mate @flyingbrick and this is how it kinda went. The earth is flat i tell ya! oh hello greg why have you stopped ohhhhh yeah got a flattie lets boost backwards to those guys see if we can get a hand, old guy that lived next to the boat ramp hand some tools and i was able to get the rim off and he offered to mow his lawns for us so we could pack my tire full of grass i ended up limping it back to cell phone reception and called the guys net to me at work (ntb motorcycles) and they came out and picked me up. they were about 20mins drive from my final resting point. ahhh this is also what happens when you cant be assed trying to find your tools or your spare tube you usually carry. it was a bloody good hoon thats for sure. our next stop was kawhia we also went for a hoon yesterday, out the back of mine and towards port waikato and back. some bloody beautiful country we have on our door step i tell ya! seems i took this photo with a potato but i took @Zeubins gas off him to give him less weight so he can go faster. wasnt long and we were on the gravel roads doing some sweet hoons old mate @Zeubin came off a little while after this, he got a little distracted by the bloody pheasant that flew in front of him. we then had to deal with a flooded bike that wasnt running well. few push starts here and there and alive it became. carried on out to the next stop which was Nikau Cave & Cafe had a quick bite there and avoided all the paper wasps. some more lovely gravel roads and a few shat pants from a giant tractor and we then done some vape clouds well richard did while reubin checked his bike cause well yeah still not running right.... few more gravel roads and what not, boom baby we got the coast. this section of gravel road was so god dam fun! but we kept on hooning and made it to the beach. old mate richard went for a hoon down the beach that we got to but yeah water was to high for my liking i did go for a hoon on the sand dunes though i also got a nice photo of @flyingbrick picking up his bike....... we continued to get our hoon on really good after this, some of us more than others. but as we got closer to tuakau reubins bike started to loose speed and not sound so great, we chucked more fuel in and we dropped some oil in it, seemed to have given it a bit more life, well not for long. he checked the spark plug that well wasnt happy at all. a phone call later and he had a car coming to pick him up and the bike. bit of a bummer, his dad recons the rings and broken, hopefully we see the modded small bike out again. all in all a great trip again. here is the map of this trip we done alos fun fact @GuyWithAviators got stuck in grass and a little bit of water in his 4x4 at the bottom of that trig road. (it may have been clay) but both maps great fun if your keen on some gravel road riding. i will be back to ride them again!

-
Next year. Not doing one this year.
-
yea sorry this build has gone faster than my spare time to write out the next post. so for the mean time i would like to show you what you can achieve in 11 days after work doing a few hours here and a few hours there. A huge thanks to Paul. now dont worry i will go into detail on what we have done and how i went about it all, but i feel the need to show you guys and gals this. Cheers team, we might just be driving George the kombi over the Easter & Anzac break.
- 49 replies
-
- 13
-
-
- kombi
- volkswagen
- (and 2 more)
-
Not a problem. It's been super cool to learn from some one with so much knowledge. I asked him if he had any idea on how many engines he has built. His response was, "some weeks I would build two a day back in the old days, spend all weekend cleaning the casings and parts and then just build engines all week." Guy sure as hell knows what's up. Hopefully get some more stuff done tomorrow night once the fly wheel is back.
-
So last Saturday i headed out to the v-dub shoppe to make a start on my engine. Paul was kind enough to work late and help me out. This is my engine and everything that is ment to go with it. inc the two boxes on the floor. I get all the bitch type jobs, clean this, clean that, and yeah clean that as well. so start with cleaning the crank. a little scotch in the cleaning tub and then we rinse it off with hot water. want to know why we use hot water? well hot water evaporates and doesn't leave any residue and wont rust. unlike cold water. now that that's done onto the casing. his has been machined out to fit the larger barrels and pistons to make it a 1776 so yeah lets crack it open see how many peaces of raw material i can find. oh hello. this stuff has gone everywhere. see if you can spot the peace tucked away here. that little peace of silver on the oil pick up is what you are looking for, well now that they are all cleaned up out side to wash these down with cold water. cause these are not steel and they wont rust away. hey presto we looking good now. 1st things 1st. dizzy gear in. i didn't snap a photo of this but here is one off the net. with that lubed up and in place the dizzy goes in over top. while i was putting that in Paul was putting the bearings in and making sure they lined up and marking them to make our life easier for when the crank slides in. i have also slid on 6 little rubber gaskets over the main bolts. bearing 1st. cam gear next, with some heat slid on over and sitting in place with its key way in next is distributor drive gear. my key way was a little lose, luckily we were in the right place and a few steps to the left was a container with a bunch of them in, found one that fitted better. some heat on this and on it went. bearings for the rods and on they go now. no photo of this stage my hands fill and doing other things but lets drop that on in in she goes and lined up Pauls pink dots and dropped the cam in as well.so far the only things out of the old engine are the gear peaces on the crank and the dizzy, even the dizzy drive was in a pile of other parts to the left of me that Paul just pulled out of old stuff. The rods and cam are from another purchase of parts i ended up with including the bearings and all the gaskets.Next Paul swears at his employees for leaving his gasket goo with out a lid and we put some goo on the casing and he drops the other side of the block on. finds some nuts that should come with the casing and he torques them up. its bloody handy having a store room the size he has, off i went find myself some lock nuts, re stock the draw in the engine build section. they get thrown at the engine and torqued up but to a smaller amount. sump on and well bake to the store room to find some dome nuts for the sump plug and the mesh for in side that, and a stud kit for the fuel pump, oil pump and a few other things. actually here is a photo of the kit, thanks google ahh while this was up side down we also dropped these in. which i learnt the other day is a duel pressure relief, vw casings come out duel and single, only early ones come out single. ended up watching a YouTube video of how it works and where they are. if you want to learn here is the video i watched it was a pretty good Saturday learning and building the new engine. last night i headed in and done some more work. removed all the head studs while Paul was on the phone and cleaned them up, he then came down and gave me some shit about how i didn't get the fly wheel and shims ready for him, few seconds later he had them, he worked out the end float and put some shims in allowing some small amount of thou. he was also trying to calculate out loud and man that shit was confusing as fuck to me. with that all sorted i now have the fly wheel and we are off to get skimmed and it has a really nasty lip where the rear main seal would usually sit so ill take that to geophfey and get him to take the lip off that. all in all shes been a great few days so far.
- 49 replies
-
- 30
-
-
- kombi
- volkswagen
- (and 2 more)
-
Borrow a car transporter trailer auk/ham?
64valiant replied to tortron's topic in Upper North Island Region
860 is the center gap @Archetype and @tortron -
Borrow a car transporter trailer auk/ham?
64valiant replied to tortron's topic in Upper North Island Region
I'll messure the gap when I get home tonight for you guys. -
got a message from @Mrs 64valiant saying we need to get a buddy seat for our bus. (center seat for a walk through) found a diagram on the net add that to the list of things to make
-
i can see all them. Instagram is another version of face book pretty much that just post photos. it seems to work for a bunch of other people but ive edited them so you can now see the photos. should be able to see them @yoeddynz yea bay windows have gone up in price. def low lights
-
hmmmm ok hold fire and ill edit them for you some time tomorrow. @yoeddynz have you been able to see the ones i just posted
-
Hell yeah. as much as i was not happy about the smashed window im so happy. the clean window is so good. such a better look with out the tint strip on it. very un happy but happy with the result. so brilliant. kass wanted to stay late and work on the buss and get it going as he has been working on his BSA during work hours, not that fazed but give some get some right. so we chucked the new second hand breaks on the front. new hoses and then moved to the rear. the first job was to fix the oil leak. we are running an adapter to suit the kombi engine mount off the oil pump and casing. we stripped the thread on the bottom to bolts and i said to kass fuck we should do that, his response was like nah it cant be that bad dw about it, lols. kinda a pain in the ass. had to take the exhaust off and a bunch of other things. so yeah broke the other exhaust getting it off and well hey lets just fit this one instead. while we done that i also got into the rear breaks. Fuck me thats right, hub nuts........ 1.7 meter bar with a 46mm socket welded to the end piss easy mayte. oh hello we have a few missing peaces here. lucky i brought stuff from the vdub shoppe and it'll go straight in right. oh nice the pistons and shoes i brought are the wrong ones, so off we go back to the vdub shop and get the correct ones. its also missing a few peaces so ill scavenging through the scraps and wrecks to find the missing stuff. thats enough for today. hopefully we can get it sorted and drive it next week.
- 49 replies
-
- 19
-
-
- kombi
- volkswagen
- (and 2 more)
-
Well today was successful. But glad I was able to fix the rust and weld up a few holes. Beth and I said yes to a price on rebuilding a new engine from scratch and put a bunch of money down on that. Which has been good cause I've been selling things here and there and what not. Sold the chrome BRMS that I wanted to keep for my bus but ahh well. Just this week I've sold 2900 in two sets of rims. Paul has a new case and everything in Stock so weekend after beach hop we are going to build that. Brought a empi short shifter and some pre loved front break calipers so will install that stuff. Also got a new starter motor...... I didn't want to remove the one out of the beetle cause the second I go doing that I'll regret it when I go to do some work on it. Can't go robbing parts of other cars. That's a no no.
- 49 replies
-
- 6
-
-
- kombi
- volkswagen
- (and 2 more)
-
I had this engine floating around from my beetle purchases last year some time. i thought lets see if we can put that in and get it running and see what else is needed to be done. Well wiring needs to be done. Just looked at complete replacement looms. not badly priced. and ill pull the starter motor out of my bug and swap it into this since i wont be using the bug any time soon. would be pretty cool to get away in it over Easter weekend just locally but we will see what happens and how things go. got some 2nd hand break calipers for it as well, they are better than the ones ive got on it. while i was trying to sell @Hot Dog Flavoured Water some vw parts i asked what size tyre he ran on his buss and went and brought some to see how much slam im going to need to acquire. looks like i need to acquire about 100mm well and truly so i brought some adjusters while i was at the vdub shop. might try swindle @flyingbrick into doing that for me while i have some one elses tig welder here atm. that will do for now. might even give beach hop a miss to get this thing going.
- 49 replies
-
- 7
-
-

-
- kombi
- volkswagen
- (and 2 more)
-
Chris.QCRs 1980 Harley Davidson Sportster XLH1000
64valiant replied to Chris.QCR's topic in Two Wheels
Chuck them in the letter box and send me a pm with your address. I don't know what time I'll get away but I'd like to get away before after work hours. -
Chris.QCRs 1980 Harley Davidson Sportster XLH1000
64valiant replied to Chris.QCR's topic in Two Wheels
im visiting the mt on fri and sat @HighLUX and if i can grab them from @Kimjon tomorrow on my way over? -
Had Geophy follow me to drop off a customers kombi after work and then we sat in mine. I then suggested he catch the window as I pop it out. Surprise surprise we found this orange stain under the rubber. A quick wire wheel and scotch and well that's that problem fixed. Let's see what this weekend and the following weeks bring.
- 49 replies
-
- 8
-
-
- kombi
- volkswagen
- (and 2 more)
-
nope can confirm it is a steel. i need to mention its got rust, no engine and some other minor issues that dont need to be mentioned...... but all those issues are easy fixable. still for the price we paid for this one we wouldnt have got our other buss to any where near this stage. the guy we brought it off is selling his other kombi for 22k. even the mother inlaw is happy for us and thinks its a good purchase. she is probably the one who mostly would have been like "ahhh greg why on earth have you brought another bloody car" although i havnt told my mum yet.
-
would you like to buy a project @Archetype i now have a spare kombi for sale? is came from hot dog flavored waters build thread convo
-
Morning smoko time. Time to unload everything that was jammed in side it for the trip home. Then assembled it all to home is should be
- 49 replies
-
- 8
-
-
- kombi
- volkswagen
- (and 2 more)
-
Looks like I don't need to find it any more. I'll settle for the white I have in the mean time.
-
So what really happened was I was scrolling trade me Tuesday night after work. Kass said he saw a kombi he liked on there. I continued to see what was on there and came across this. It was listed for 5k no reserve and a buy now of 7k. (a kombi in our price range) I immediately forwarded the link to @Mrs 64valiant followed by a phone call. She looked at it briefly and said give him a call and see if we can view it on Sunday. Proceeded to call him and date was arranged. I then started to get my hustle on and try sell some of my other things. A guy had only messaged me in the weekend wondering if I wanted to sell my oval. Well I sure as hell do now. Boom sorted a price and hell yeah. Wednesday morning wake up go to work and do a few things and check trade me. Shit cunt fuck. Some one clicked the buy now. Only Tuesday we didn't quite have the full amount of money to make anything happen. So thought wonder what the account looks like now. Ahh crap yup some bills had been paid and well I could have now afforded the kombi that was now sold. Ahhh well. Better luck next time. Proceeded to be upset and have my dreams crushed and the rest of it all. Drive to Hawke's Bay and had a hell of a good time and witnessed some friends get married. Also brought cone4u numberplate cause well the kombi didn't go to plan so I could lest drown my sorrows in the p plate for my ice cream trailer. This morning we started with unloading all the bbq trailers and went on our merry way when as I was about to drop the trailer at @Archetypes I get a txt. Hey man the buyers have backed out are you still interested in the kombi. A couple of phone calls away and well yup off to Auckland. 1st stop was to drop the oval off at the sellers place that I sold it to. Was a bummer cause I had already sold this and only selling to buy the kombi that had already sold. But hey things happen for a reason right. Next stop the kombi. The owner lived in Melbourne so was yarning to his dad and trying not to get to excited about it all. A phone call was made to his son and boom, money transferred and well time to push in on the trailer now. Here are the photos from trade me. Fucken excited.
- 49 replies
-
- 19
-
-

-
- kombi
- volkswagen
- (and 2 more)
-
So yeah I skipped a few stages of this build. We painted it white. Put the steering wheel on the other side and a few other things like smaller stud pattern and put a westfalia on it and in it as well. Edit : we brought another low light kombi.
- 49 replies
-
- 24
-
-
-
- kombi
- volkswagen
- (and 2 more)