gazguy
-
Posts
488 -
Joined
-
Last visited
Everything posted by gazguy
-
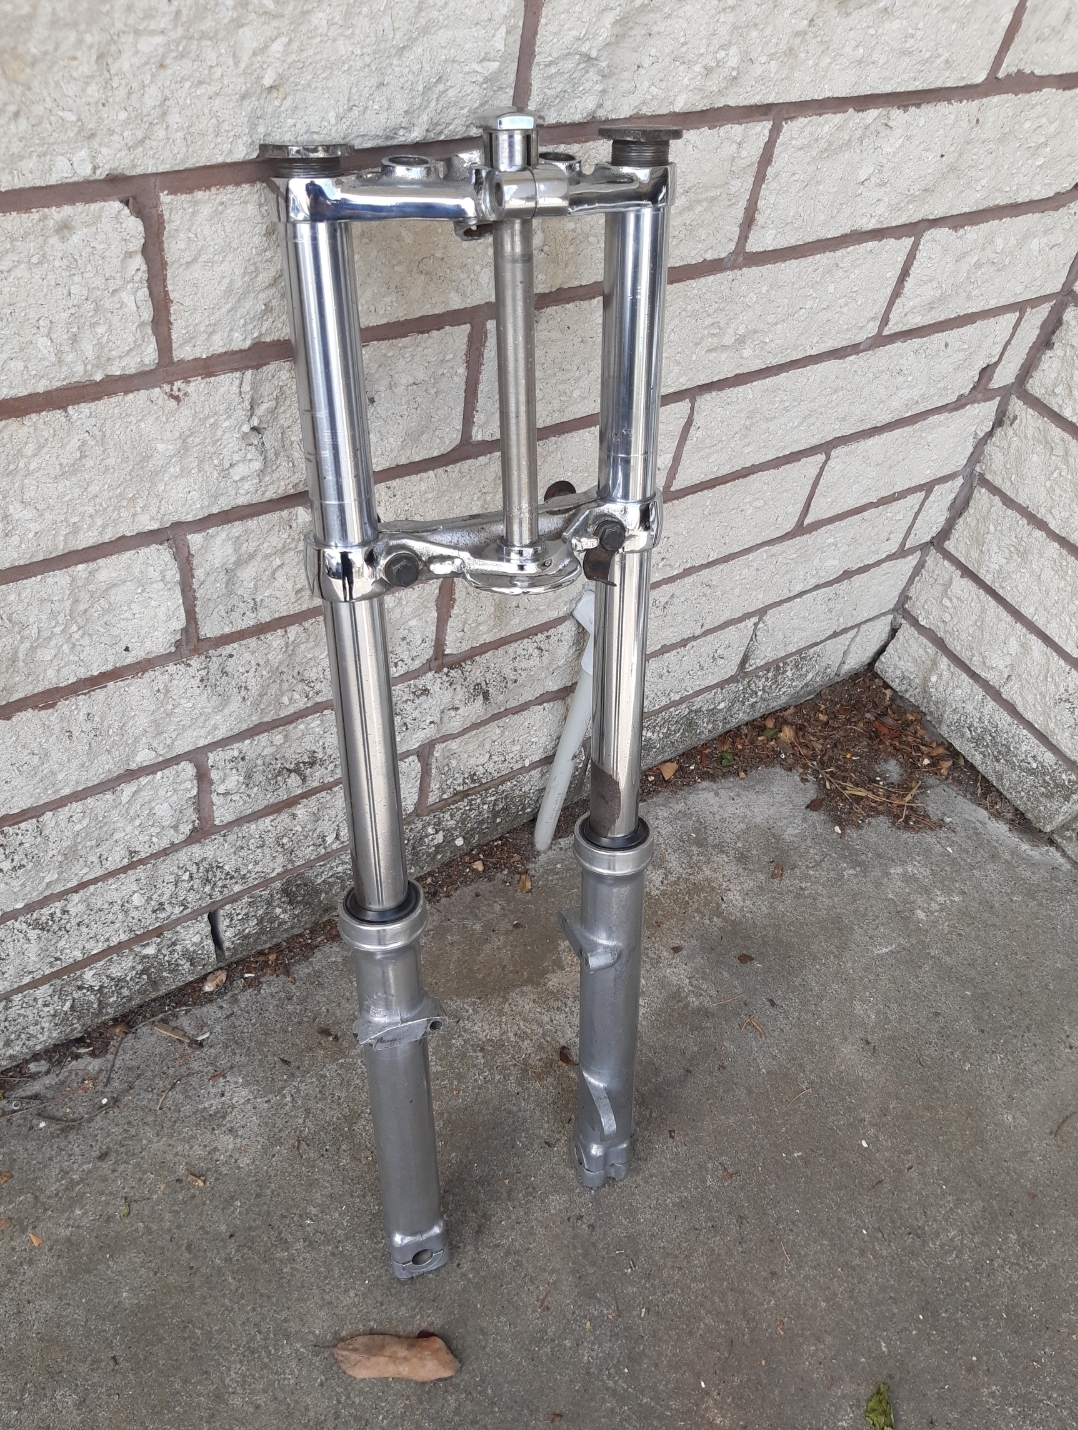
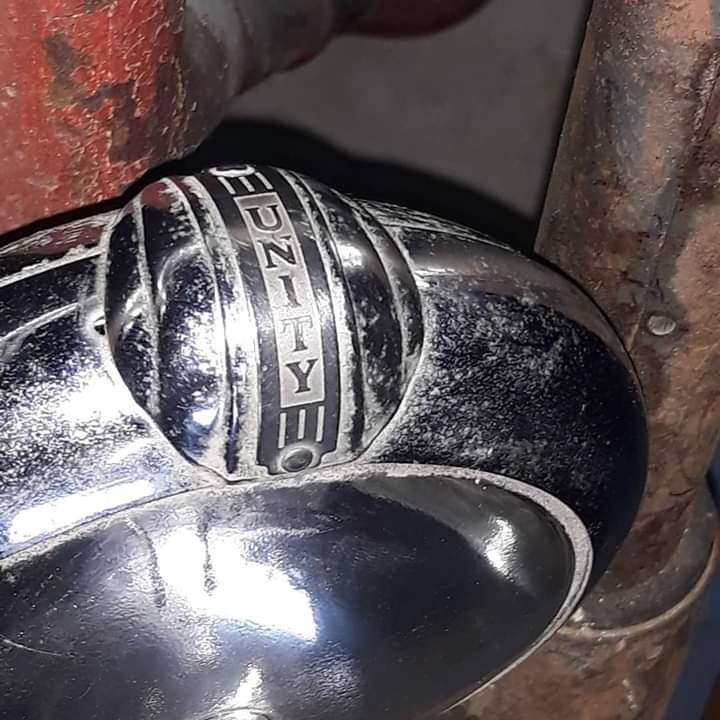
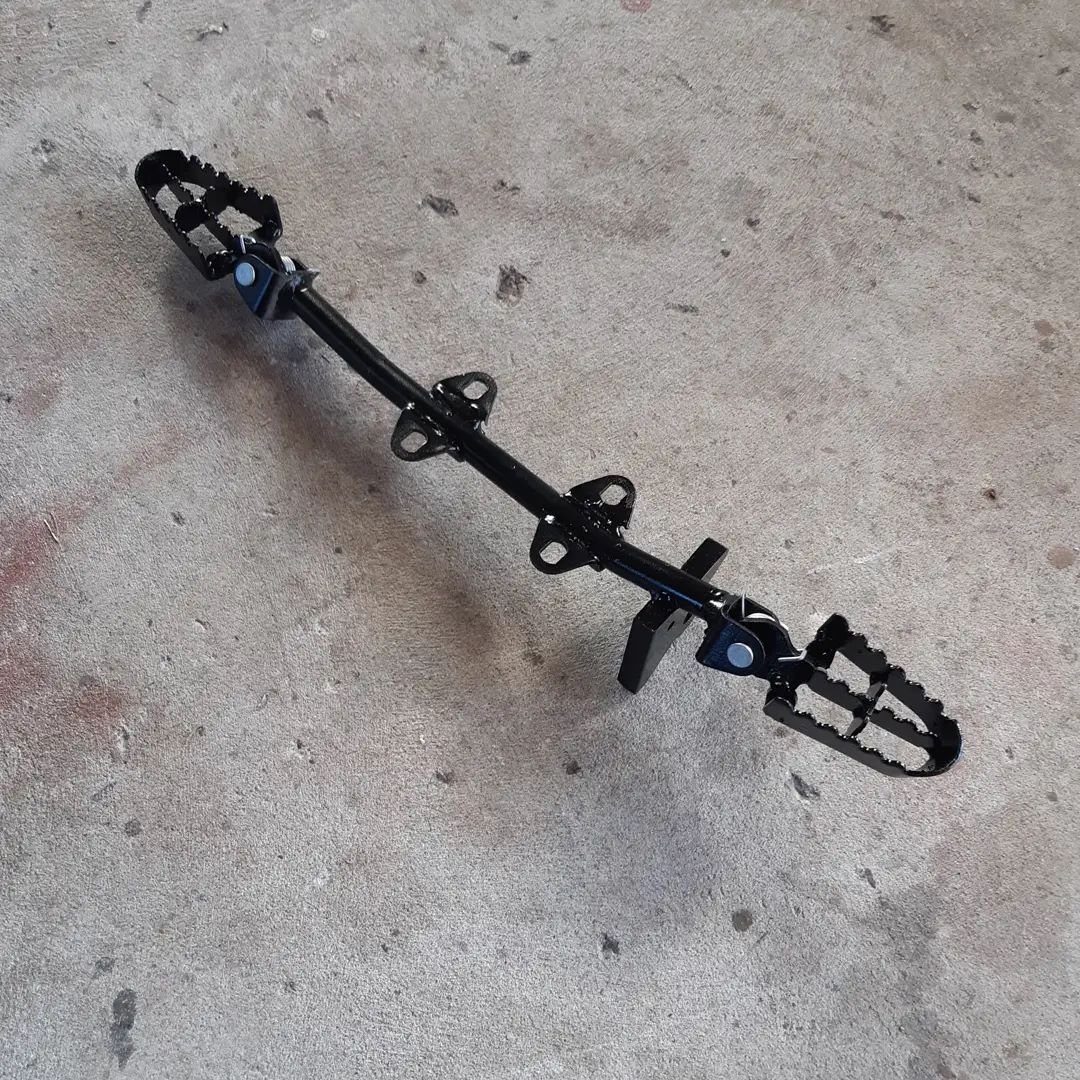
I got given these footrests from a mate, the sidestand mount had snapped off so i made up a new one and fizzed it on. When I went to paint the foot pegs the small tube that the clevis pin goes through had detached from both of them so I fizzed them up too. A lick of epoxy enamel later and they are good to go. When i was over in one of the sheds I grabbed a spare 19inch wheel and tyre I had on a CT185 and put it on temporarily while I get the wheels blasted and powdercoated. The fork shrouds were painted and fitted today as well. Having them both painted the same colour made the front end look longer than it was so i painted the headlight mounts hammered finish silver to match the dimple died panels and the lowers satin black. I'm really happy with the outcome

-
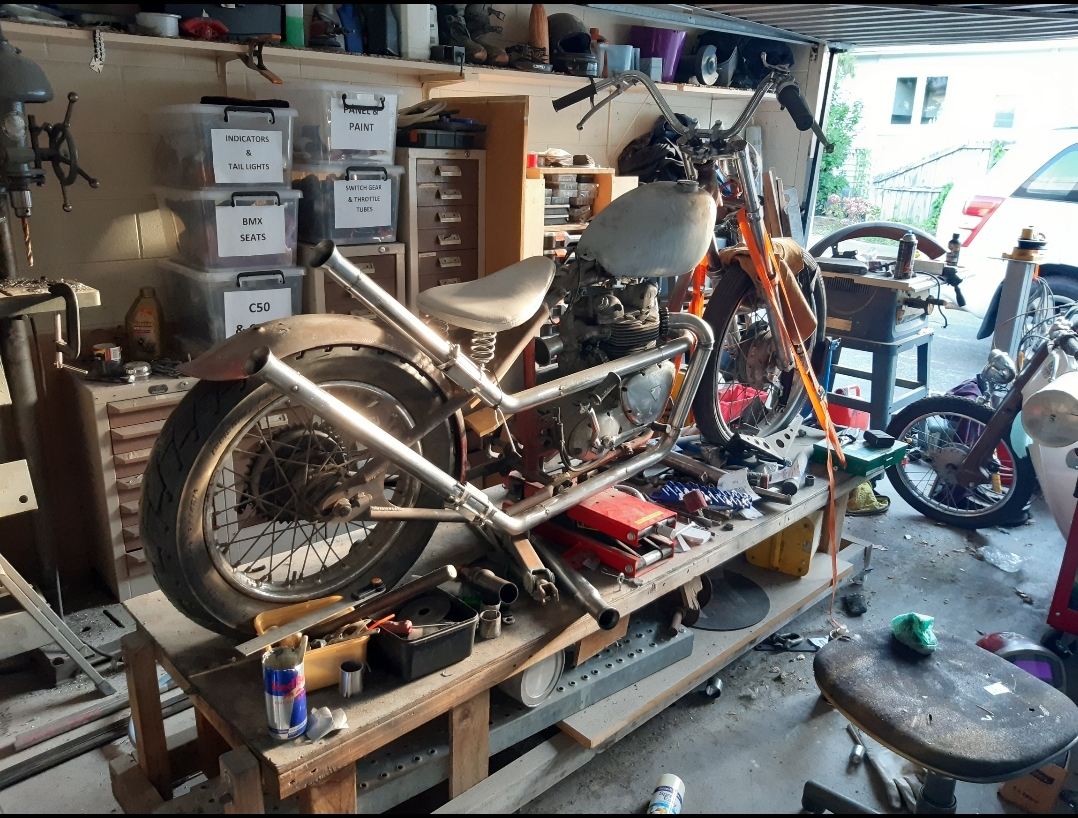
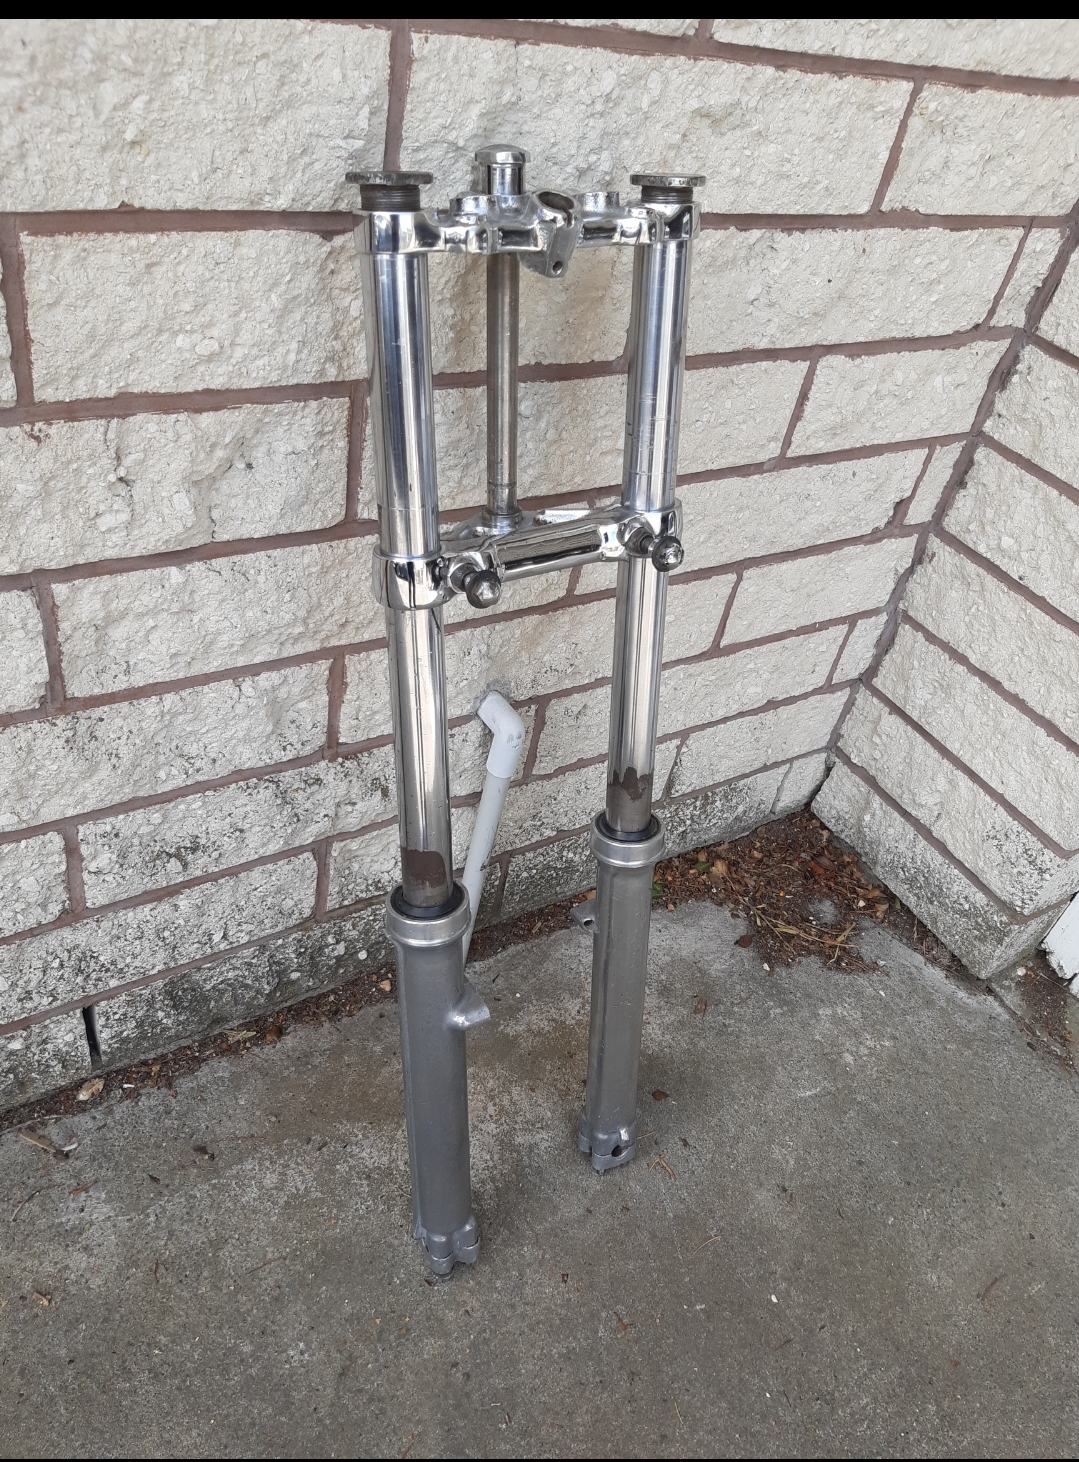
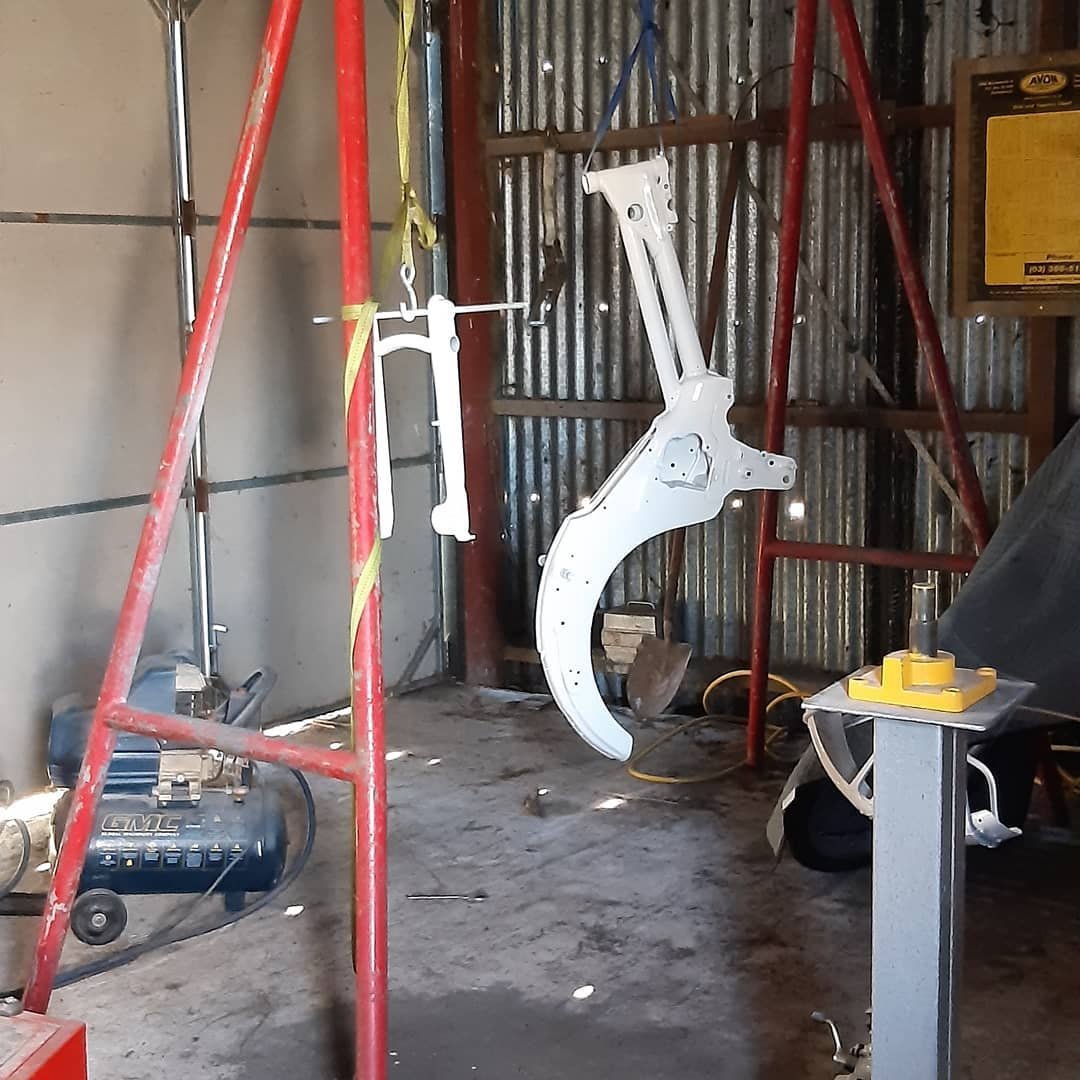
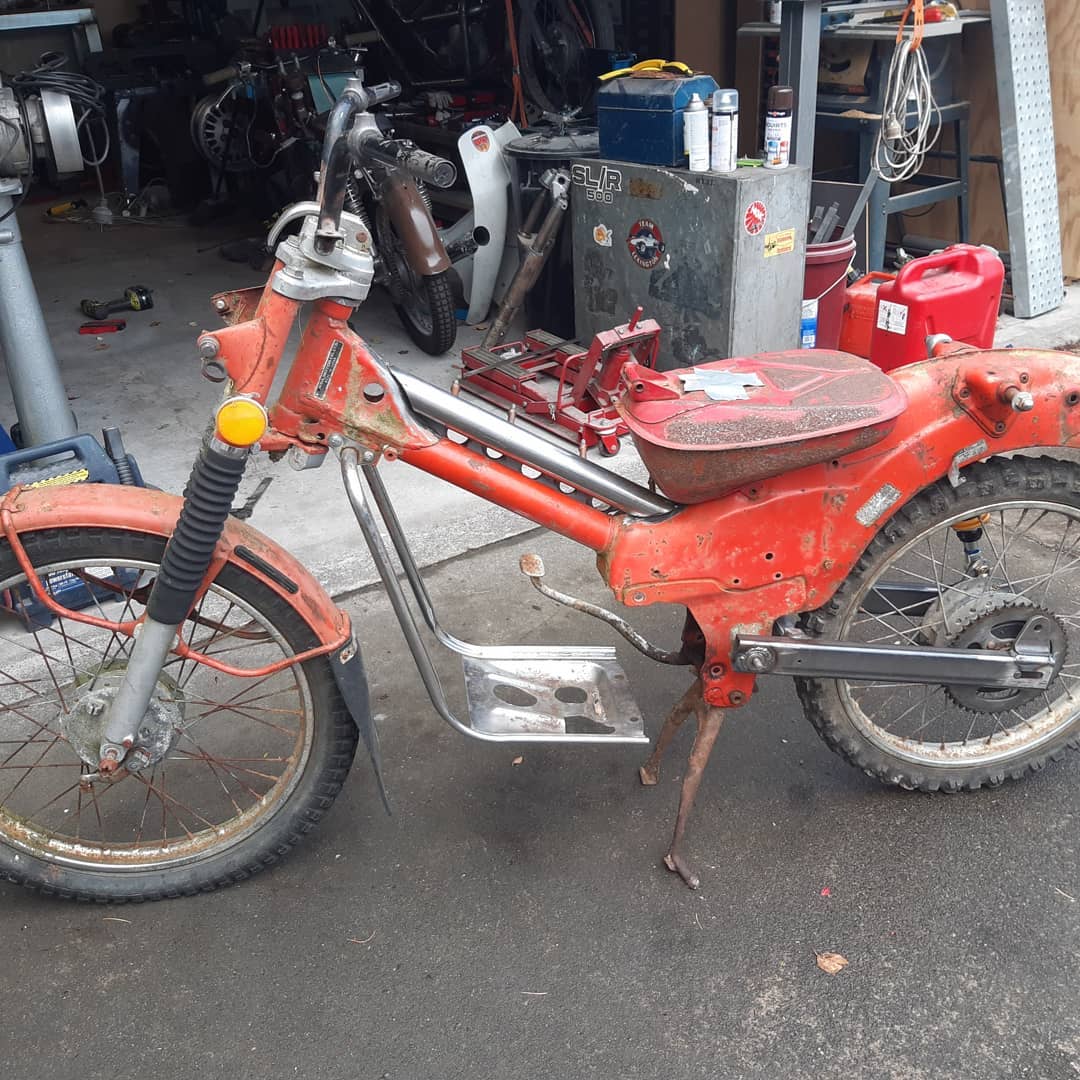
Once all the welding and body work was completed I painted the frame, swingarm, mudguard and tank with epoxy gloss white enamel, no flash paint here! just a 1L tin from Bunnings I wasnt too happy with the look of the bars either so i cut the cross brace I made and replaced it with a removable item made from stainless round bar and a stainless shackle cut in half. The bars and bashguard were then powder coated at work. When i went to put the original CT forks back on the bike I noticed the seals were leaking due to the fork tubes being very pitted, so I tried on some CB forks ive had stashed away for a few years along with NOS fork shrouds, which I'll either paint white or black. I'll get the wheels sandblasted as theyre a little scabby and get them powder coated also
- 11 replies
-
- 11
-

-
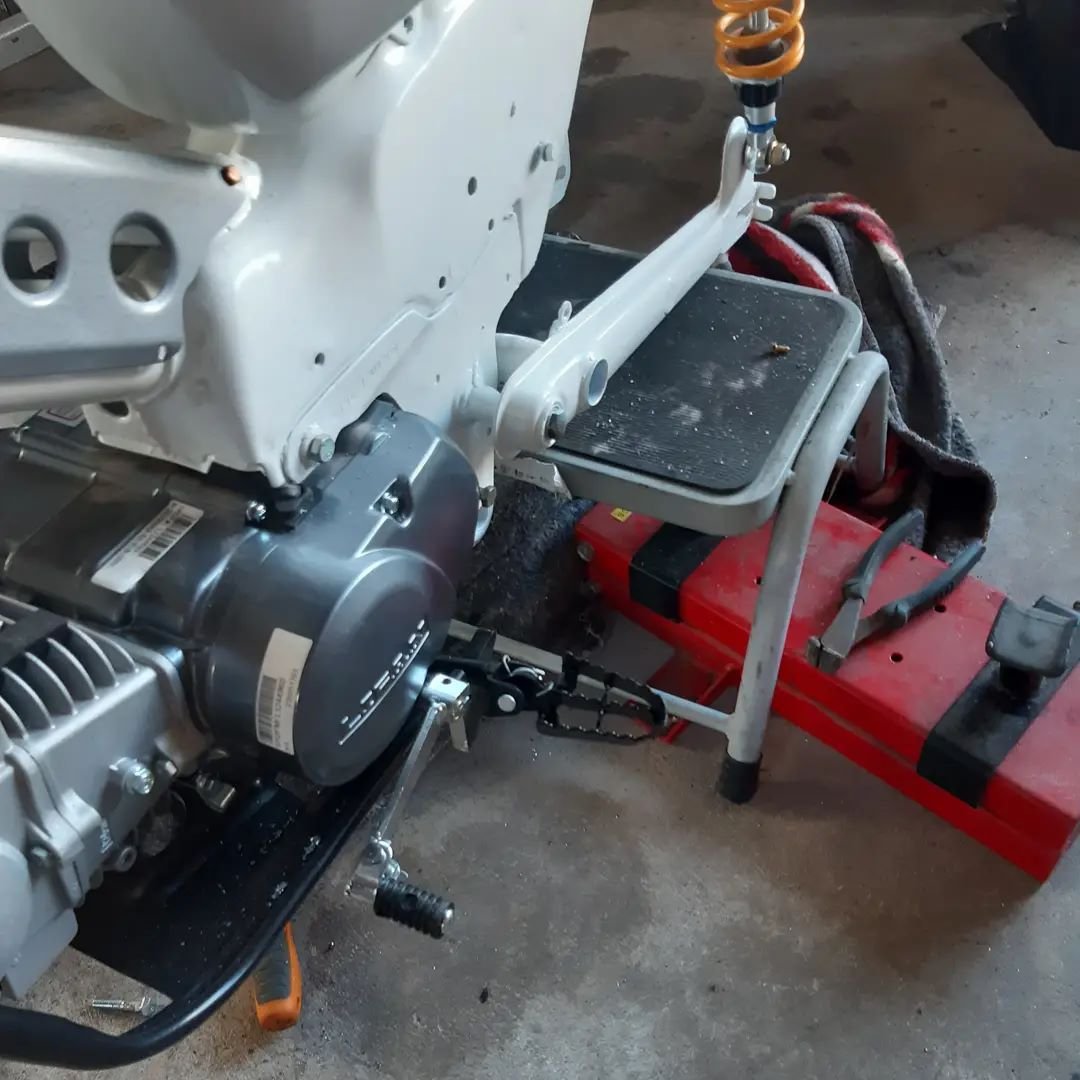
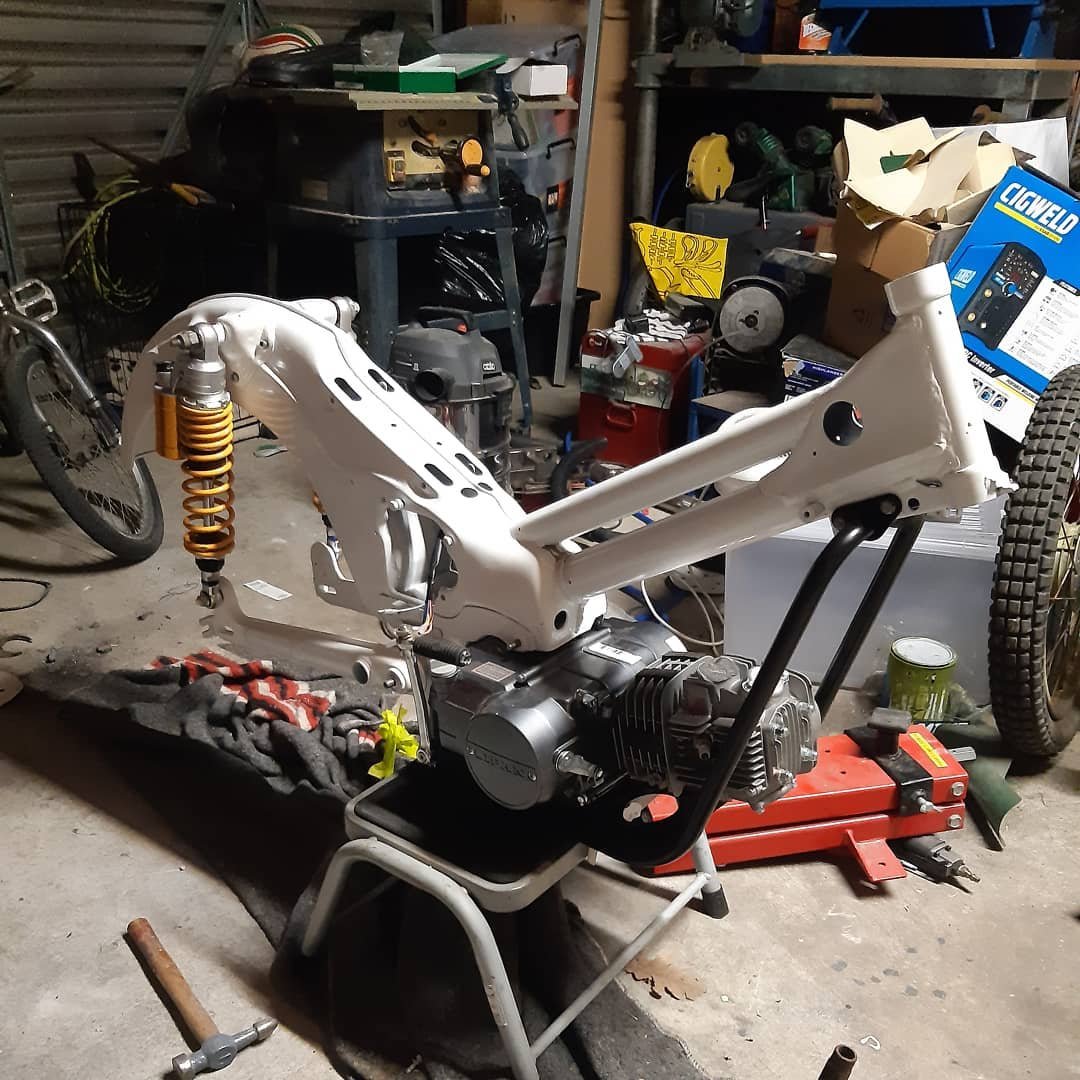
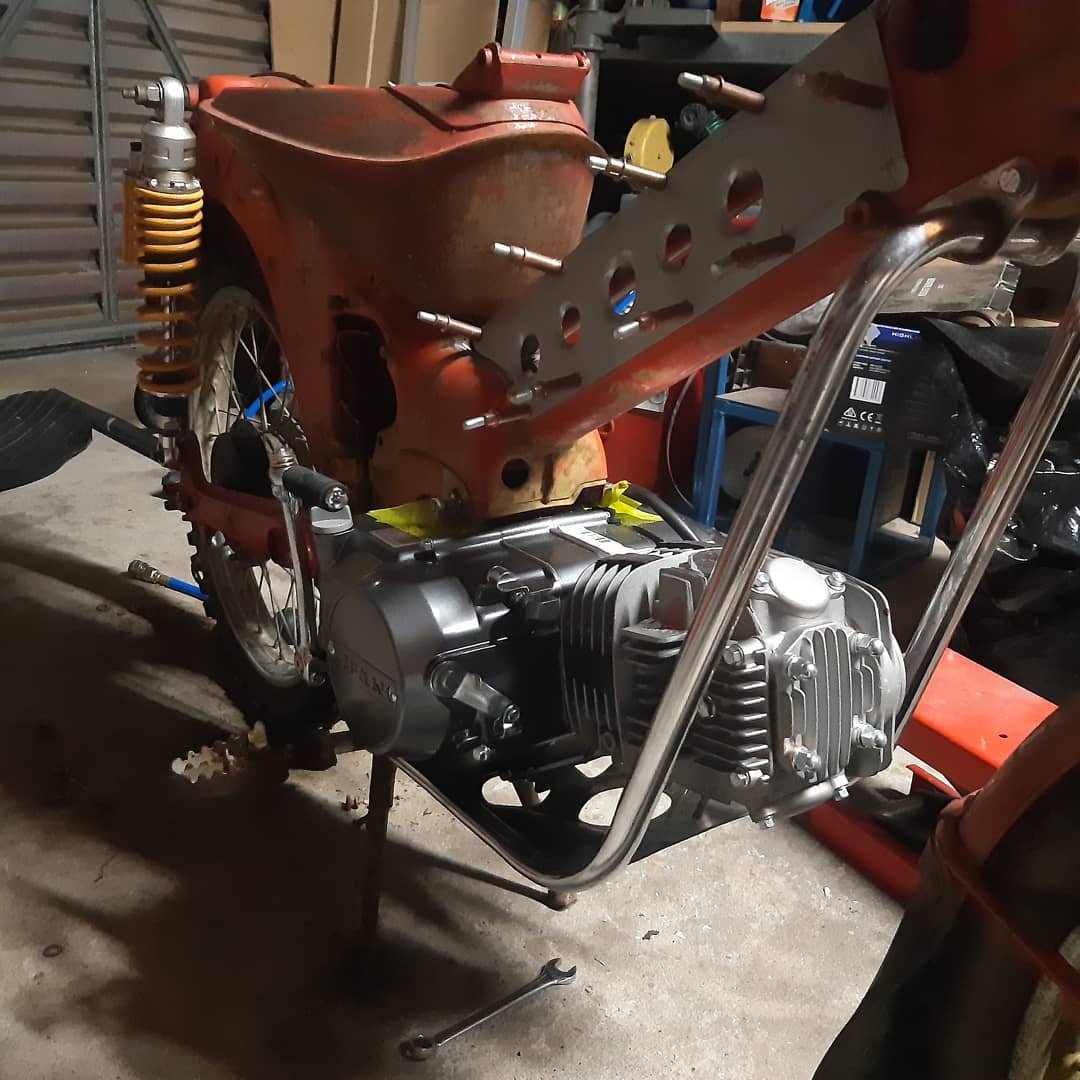
After contemplating on what engine to put in I decided on a manual Lifan 125. The mounting holes are different and some minor cutting around the mounts was needed to make it fit snug. I left the top hole as is but redrilled the frame to accept the bottom mount and reinforced it with a heavy washer welded to it. I dropped the frame and other parts off to the blasters the frame came back a little worse for wear. various amounts off peppered metal which were cut out and replaced with new steel. Even though its an offroad hack I still like to have my bikes looking half decent. I got a replacement swingarm cheap that needed some surgery due to the previous owner running the rear wheel loose.
-
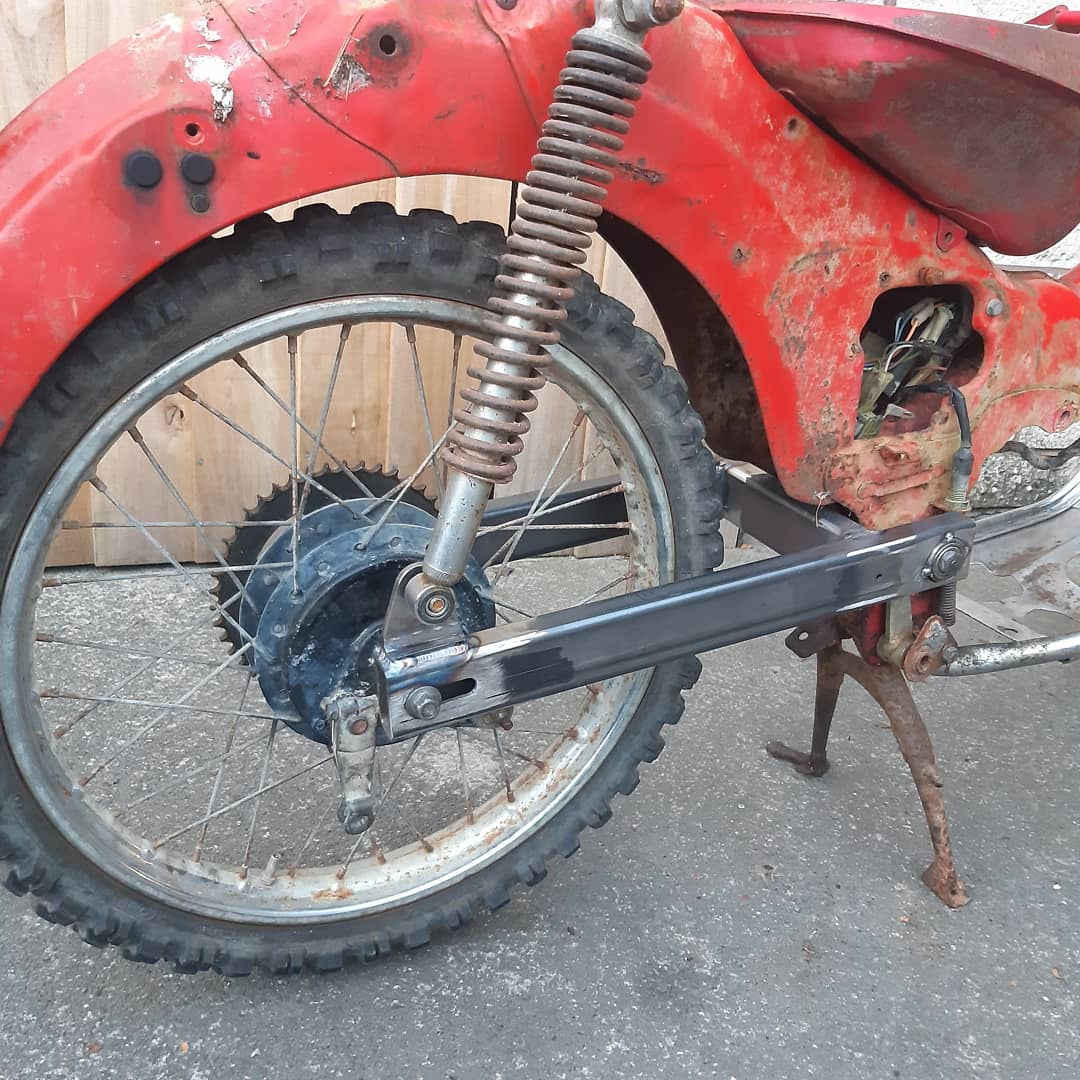
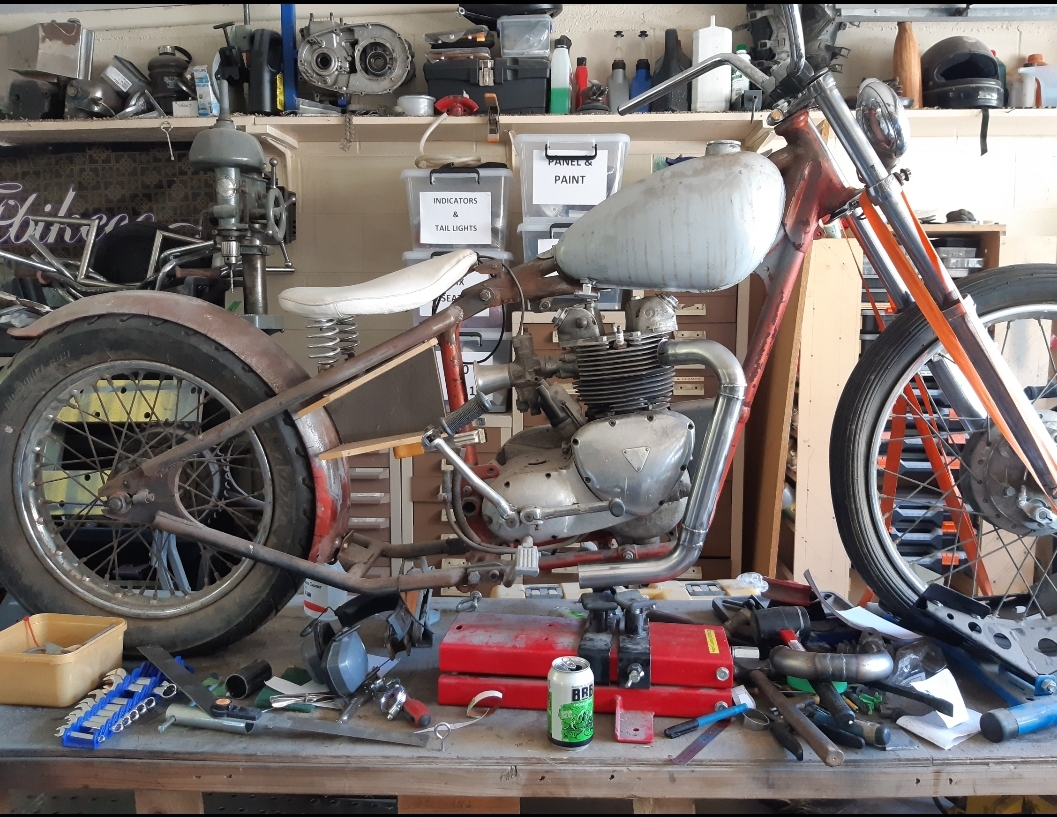
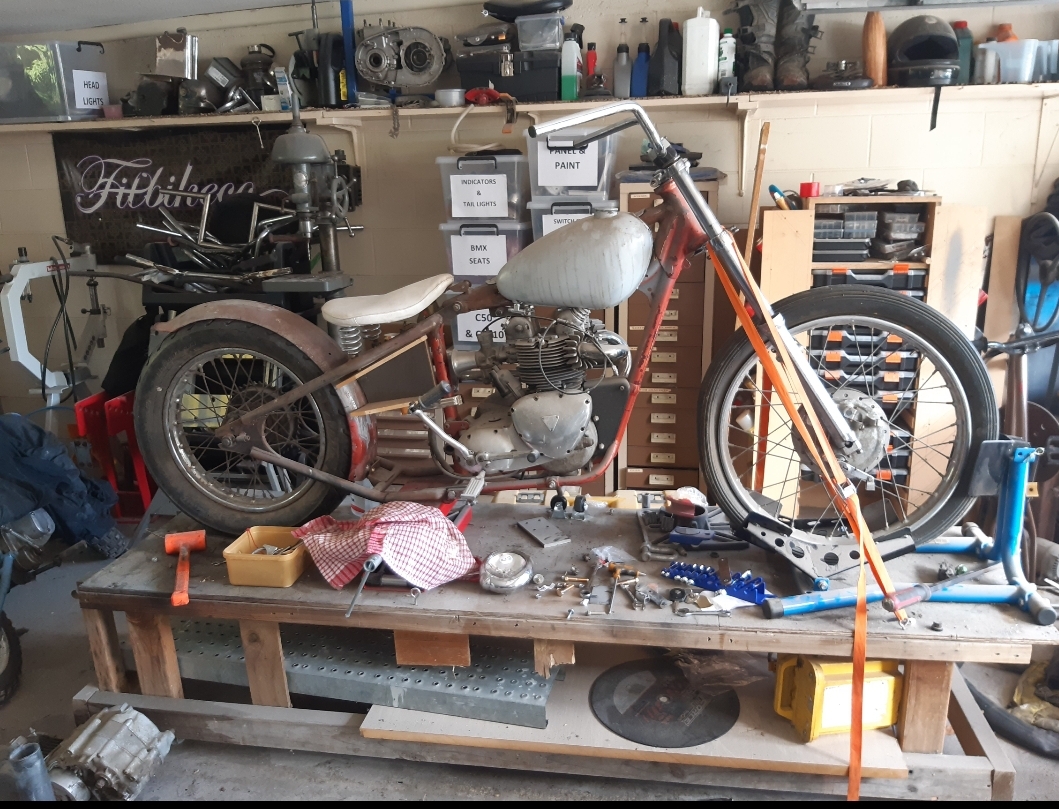
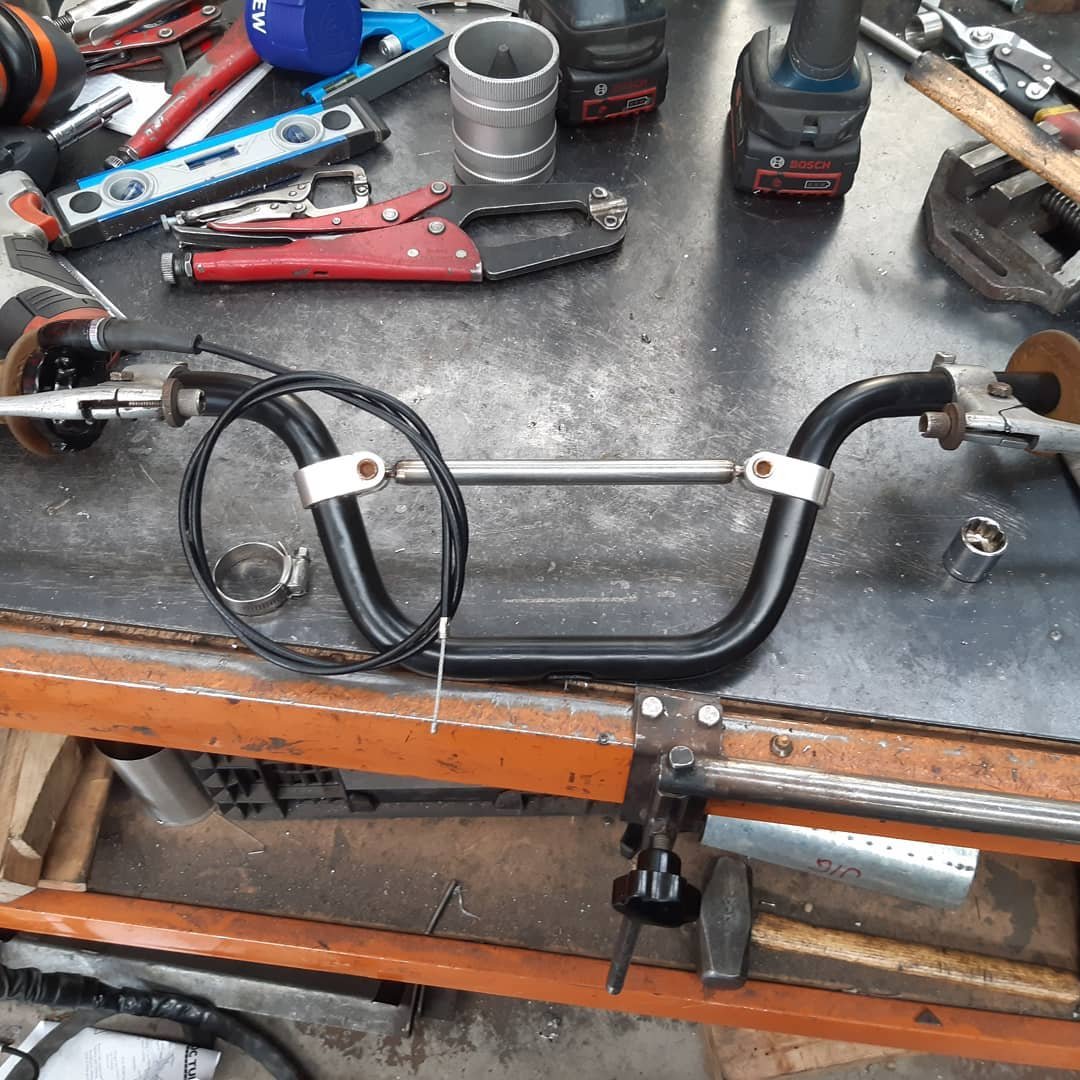
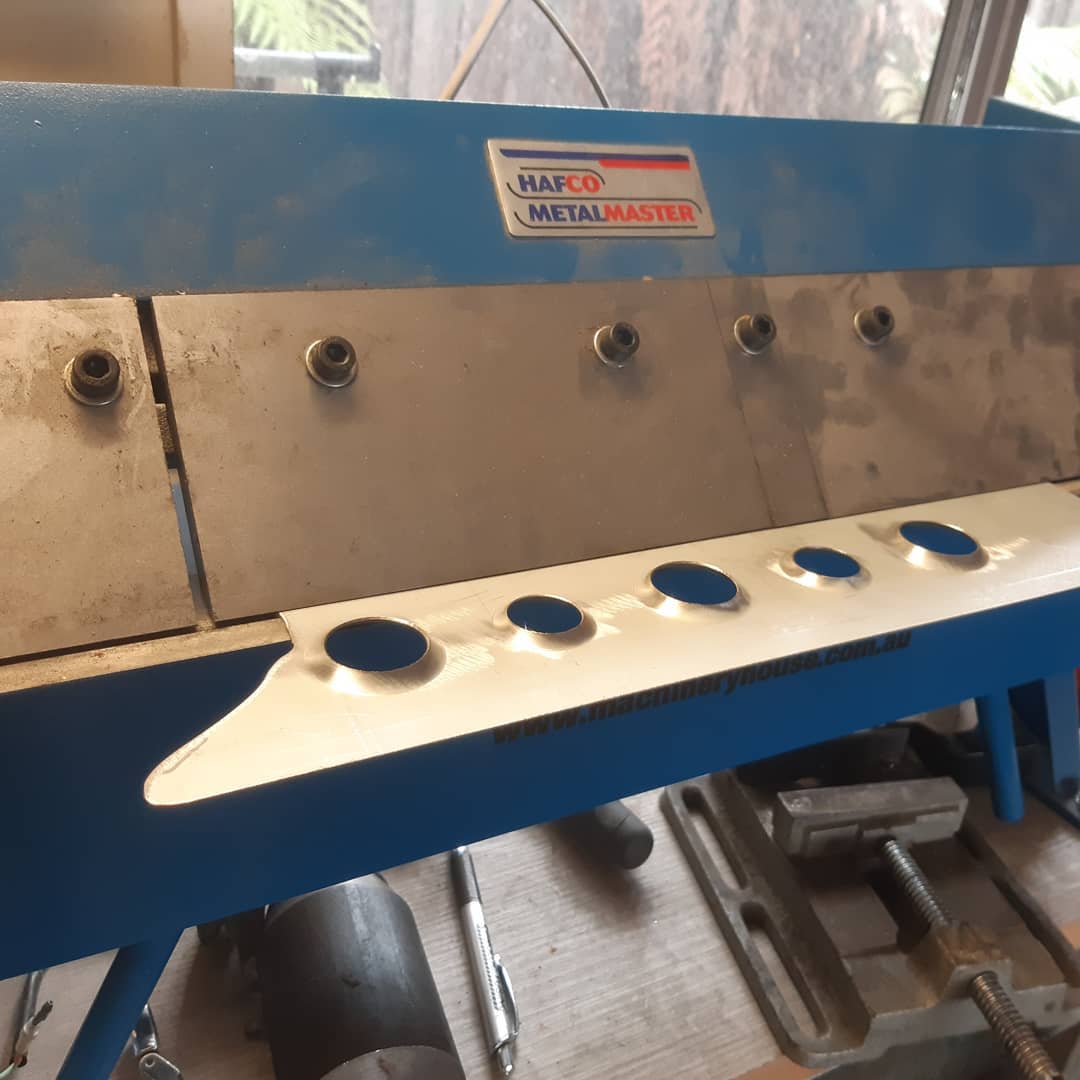
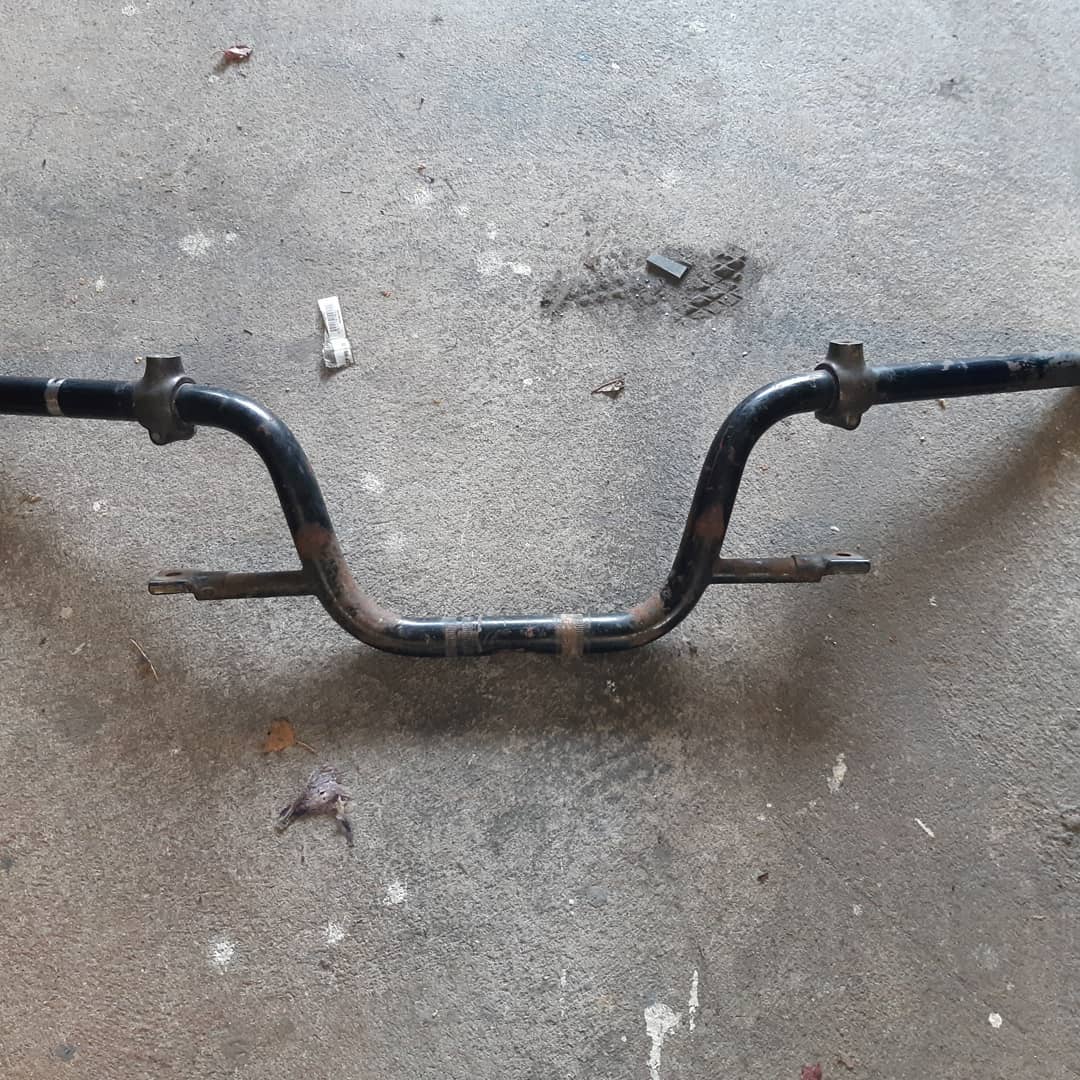
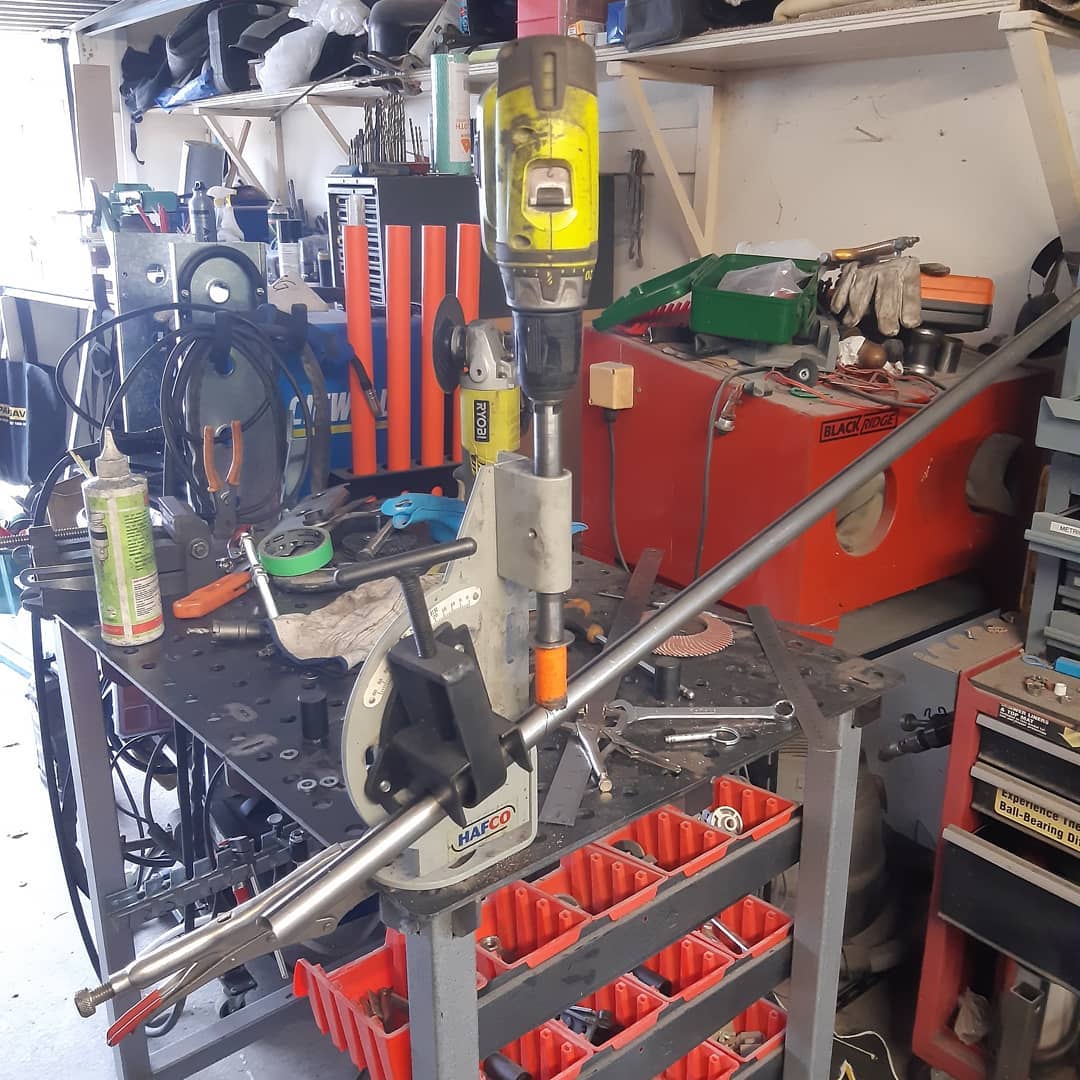
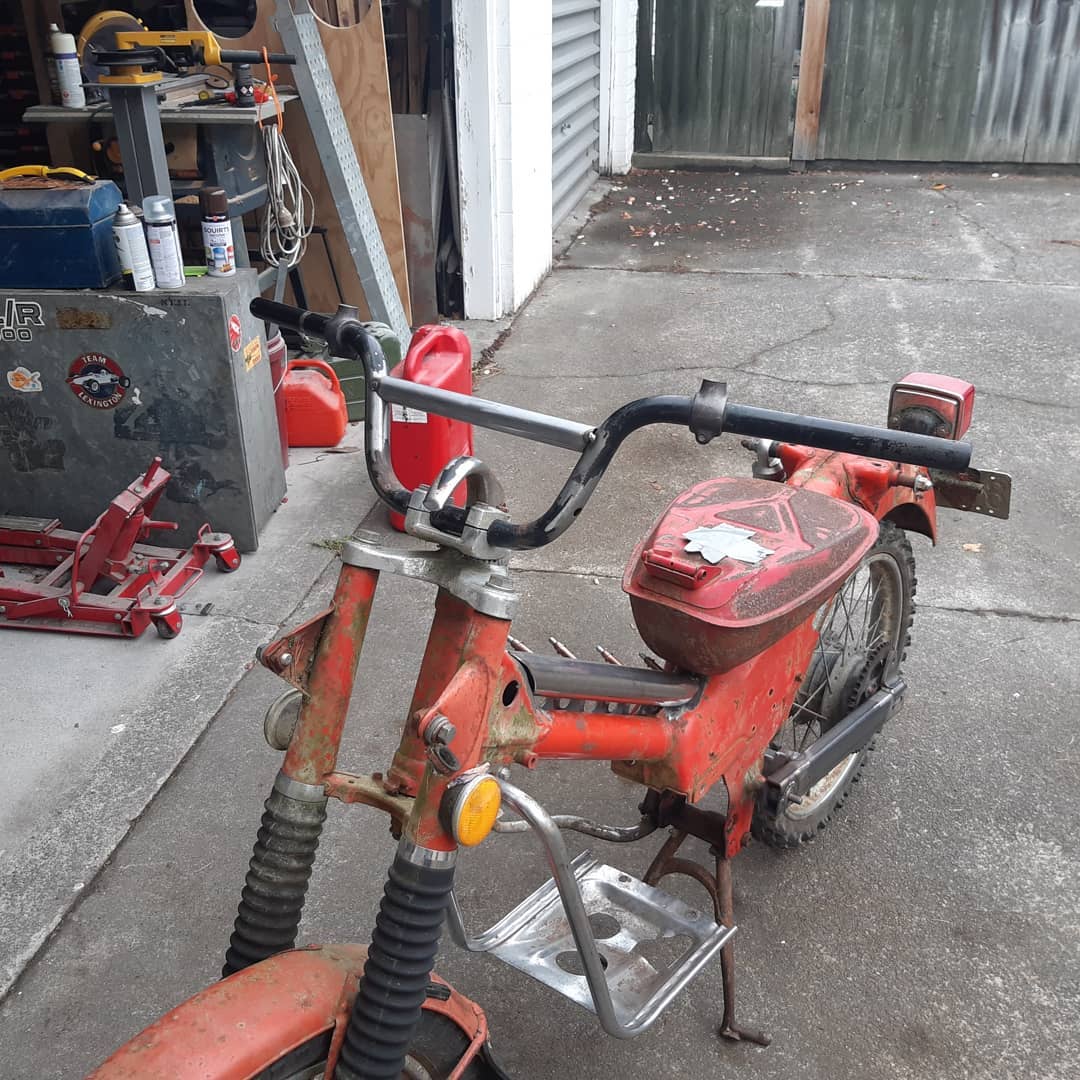
Today I was planning on welding up some patches on my vauxhall but the weather turned to shit, so I thought I'd do some work on my ct90. 1st I cut some 41mm tube to make a double downtube, but because its above the downtube does that make it the top tube? Then i trimmed up some 18g steel, drilled some holes ready for dimple dies then put a small brake on the edges so it sits better on the tube. At 1st i was going weld the plate to the tubes but wondered how I'd remove dirt that would gather inside. So I flagged that idea and now it will be held on with button head cap screws. Ill change the position of the holes as theyre messing with my OCD. Its held on with clecos at the moment, I'll repeat the same for the other side. To give the bars some strength i added a crossbar, the same as BMX bars and cut of the indicator mounts. I used my tube notcher to cope the 22mm tube, its from Machinery House and is branded as their own, it took some dicking around to get it centred as it was cutting on the wank. Its the same as a harbor freight unit just a different colour and stickers A few nights back I notched the brace in the swingarm to get more movement, and I mounted one of the shocks to see what it would look like.
- 11 replies
-
- 12
-
-
A while back I cut and machined some 25x50 RHS to make a swing arm, just to see how it would work out. So I jigged it up and glued it together. I still need to notch the brace to allow for more movement as it currently hits the frame under full load. Ive got a pair of Aliexpress Ohlins knock off shocks to go on too
-
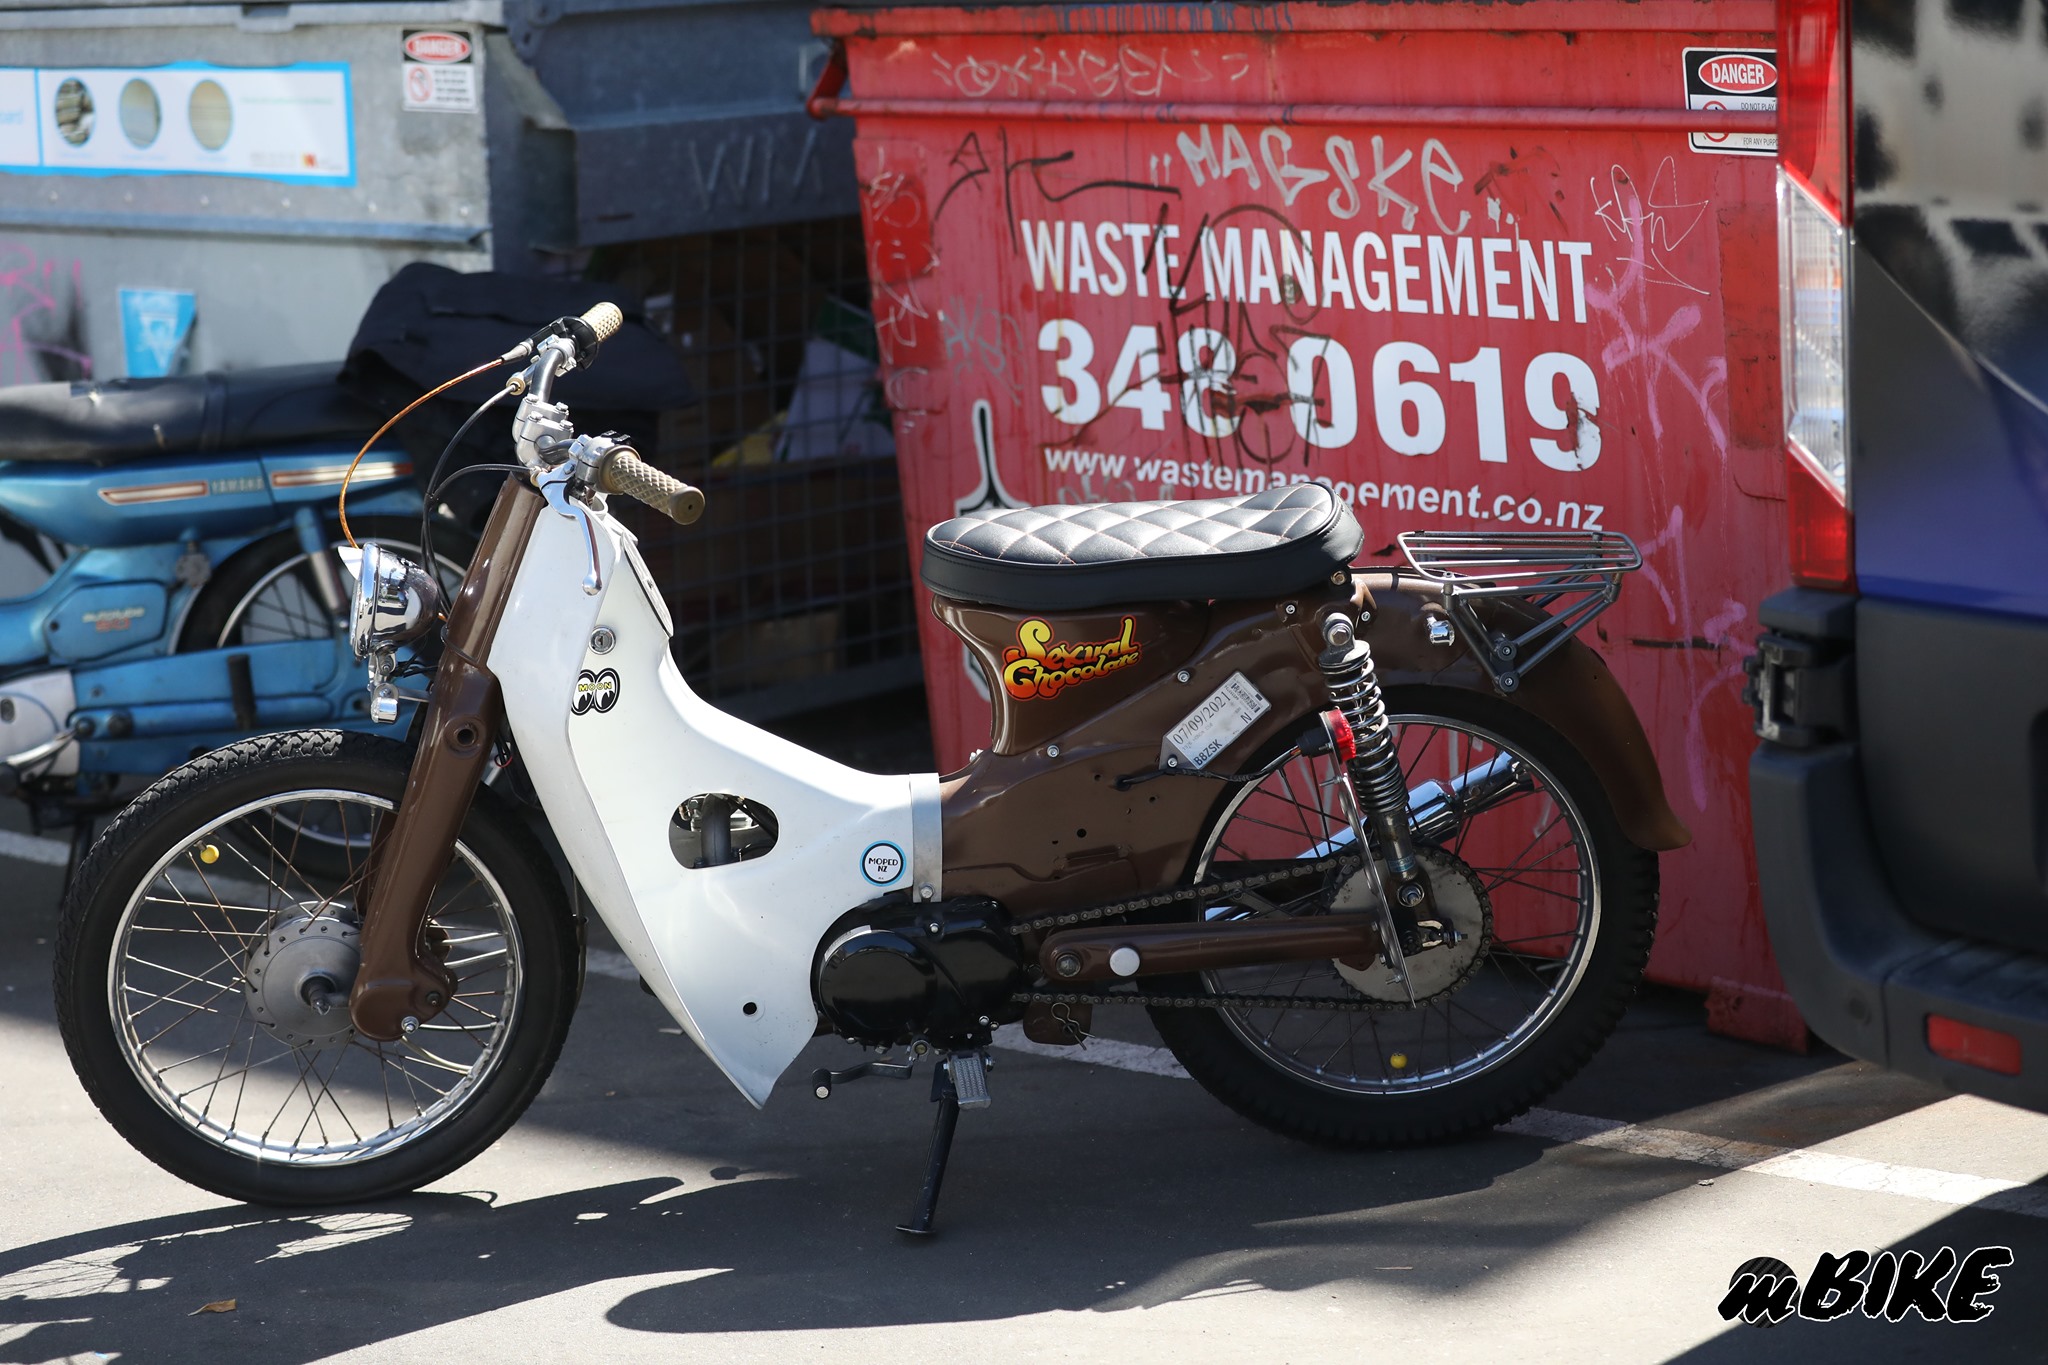
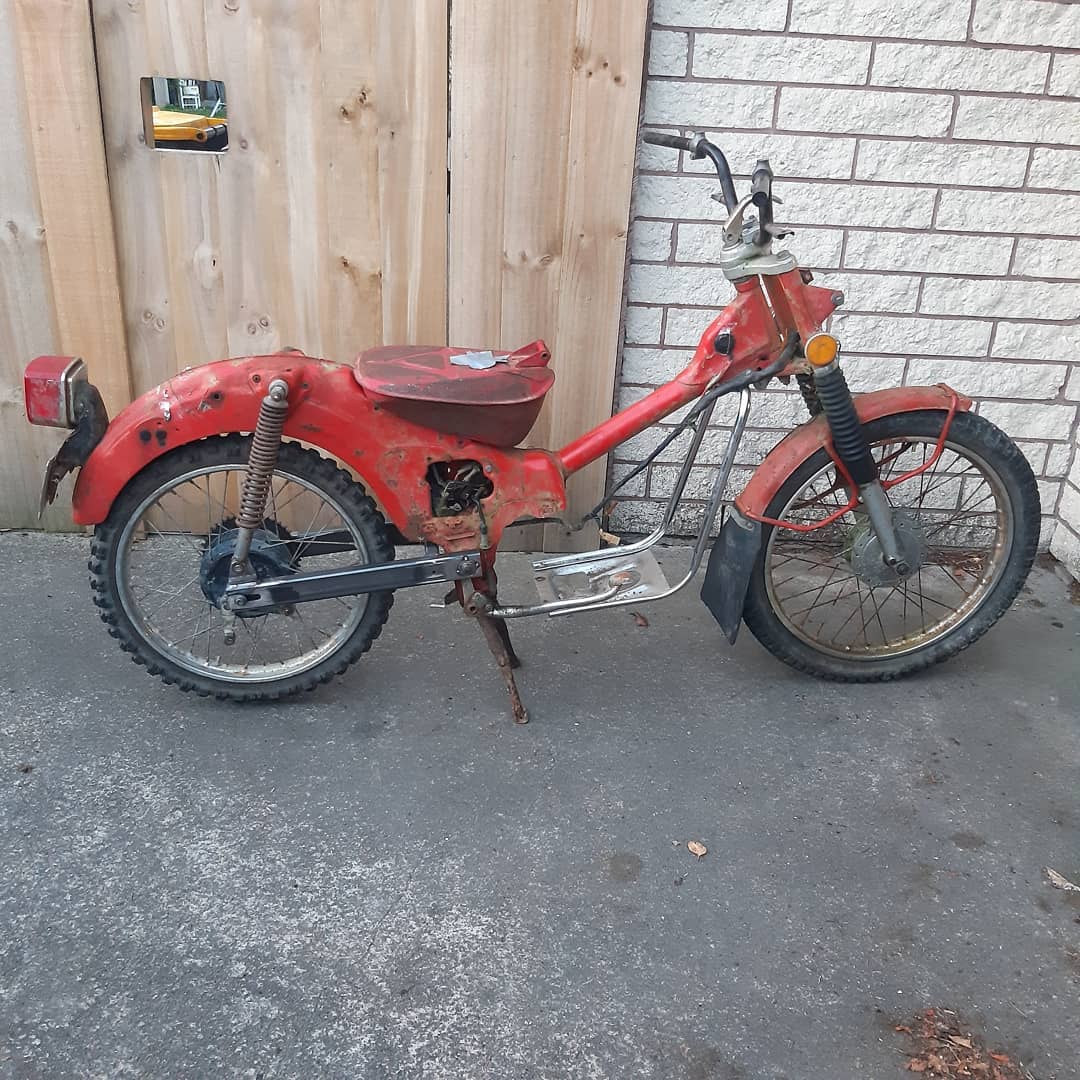
Lately Ive been having a clearout of stuff that I really dont need, that includes unfinished projects. So to help things along I bought an old CT90 frame and front end. Plans for the bike are to strip it to bare minimum, Lifan it and ride the fuck out of it at the waimak tracks. There will be some small bits of fabricating but nothing too extreme and keep it quite simple and tasteful. The theme of the bike is The Pork Chop Express from the 80s movie Big Trouble in Little China. I have a thing for 80s movies, I named my poo brown C50 after Sexual Chocolate from Coming to America
-
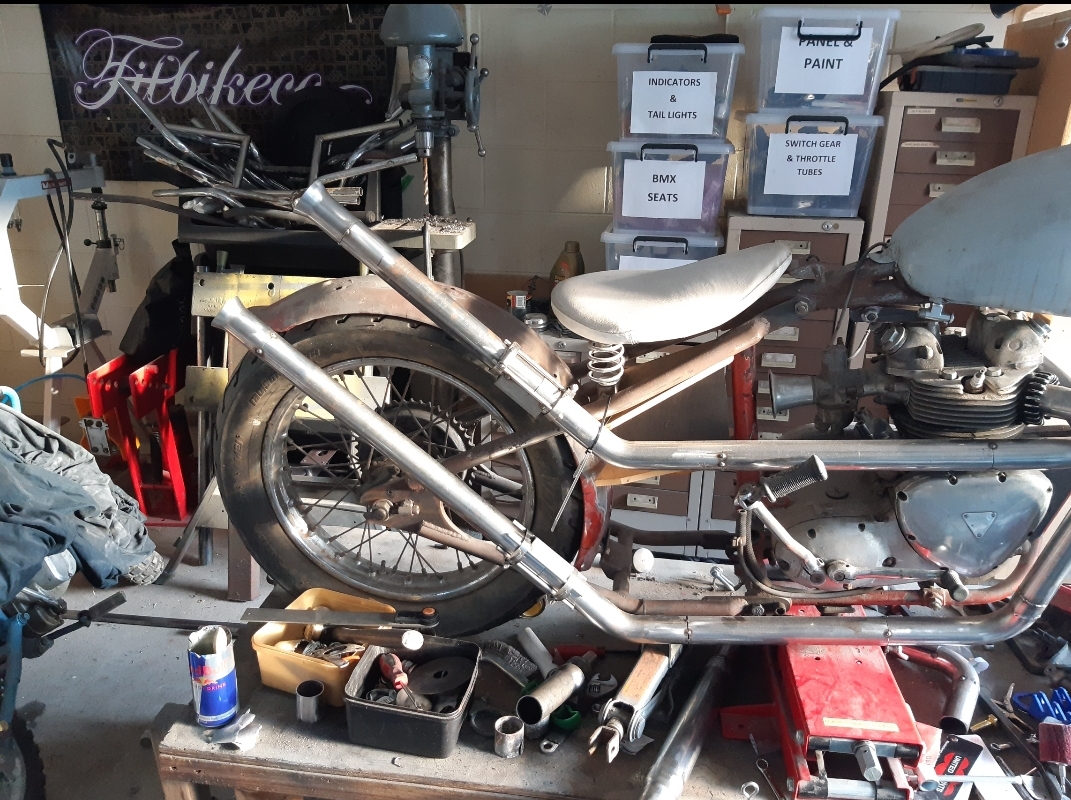
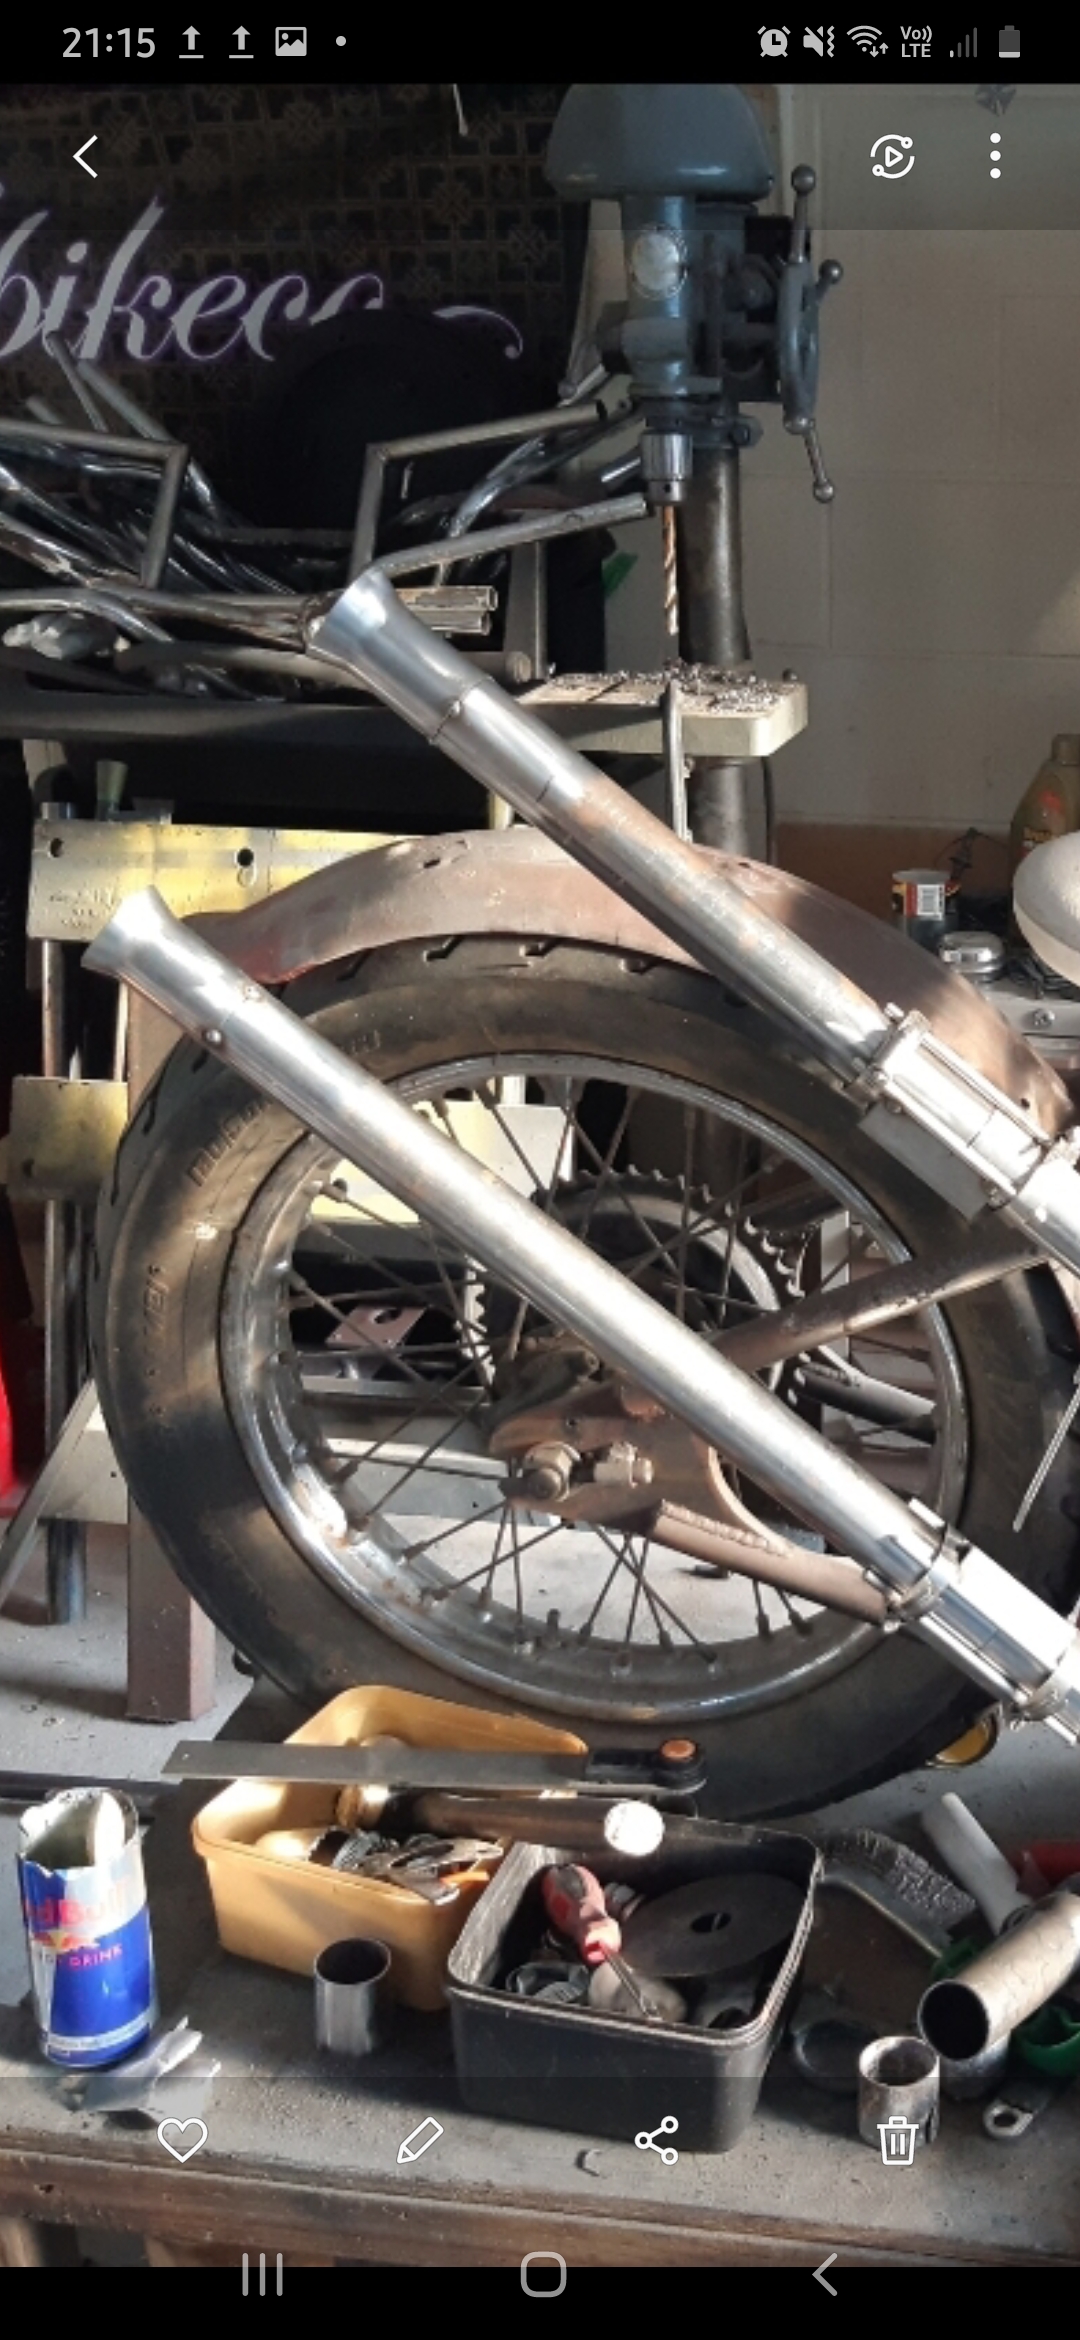
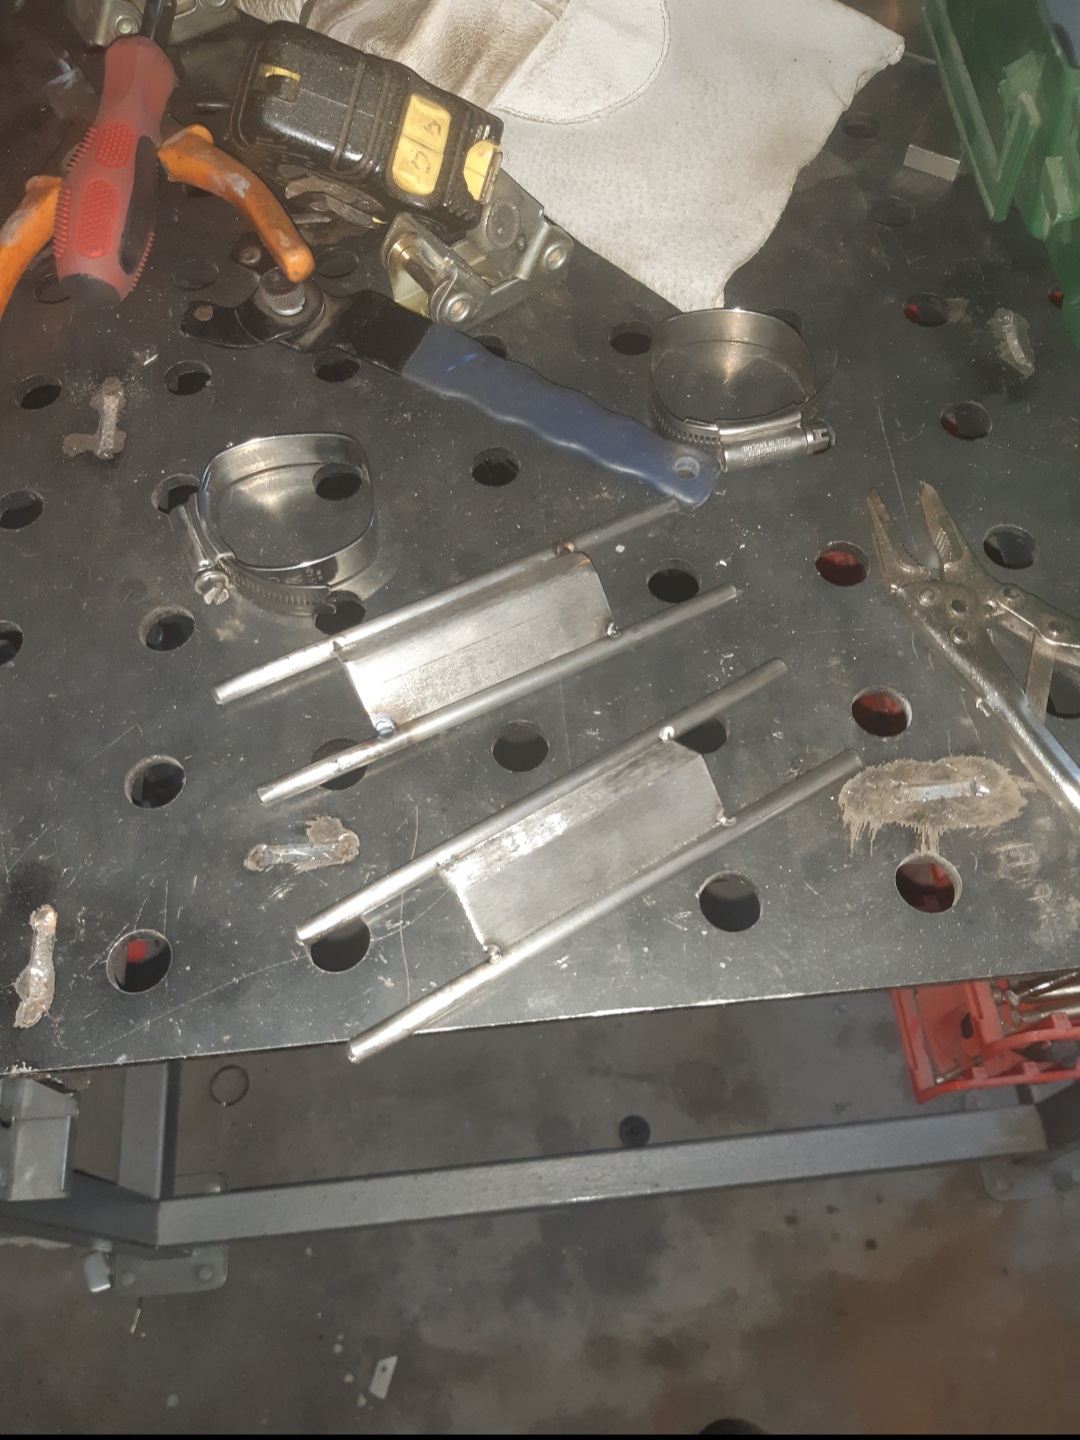
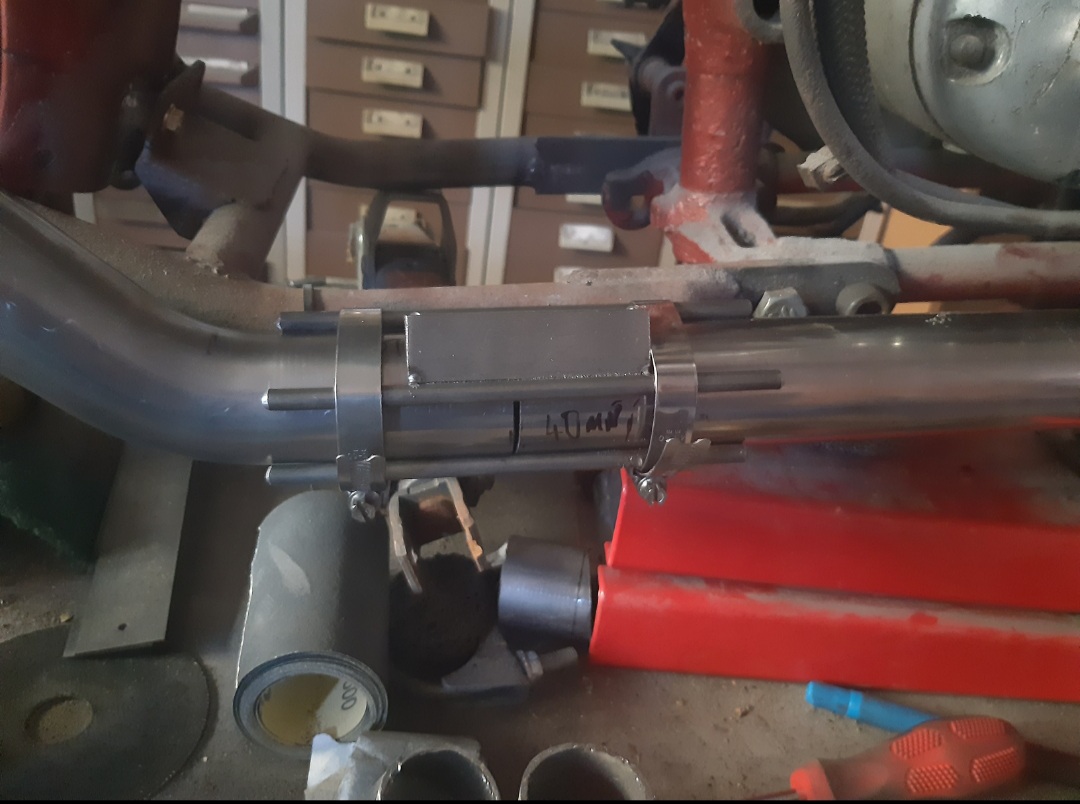
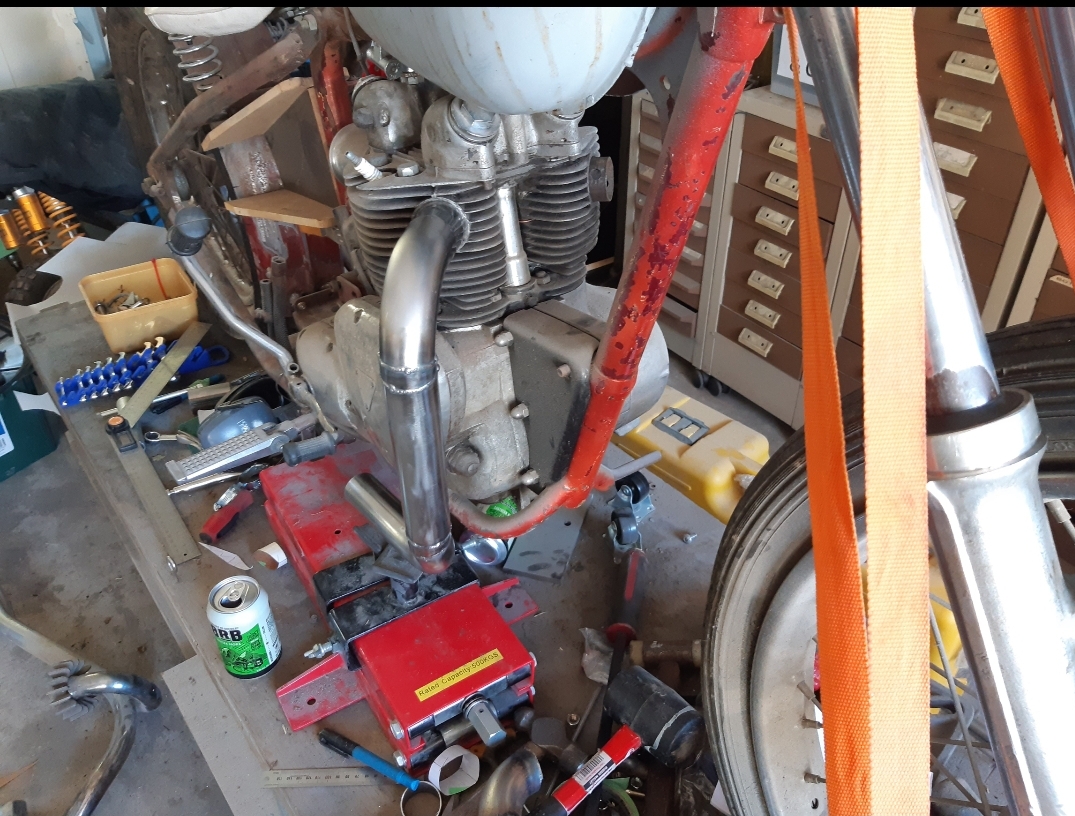
Once i got the 45 degree bends positioned to where i wanted i set about making the tailpipes. Originally I wanted rippled pipes and tried having a bash myself with no real results to show for it as the tube was too heavy a gauge, so ive settled for just straight pipes with a flared end which i made myself by making a tapered die on the lathe at work and used my hydraulic press to put the flare in. Id used a tow ball for my 1st goes which looked not too bad but it was hard to get the tow ball to sit perfect and it would give an uneven flare. Overall im quite happy with how the exhaust has turned out, I'll sort the mounts out and fully weld it up once I redo the hardtail, its pointless doing the same job twice.
-
Once I got the bends I ordered from Uniweld I slowly started piecing them together. I pretty much redid the whole top pipe with a 90° which looks so much nicer. Then I added 2 straights with a 45° at each end. To get the tubes to line up nice for welding then metal finishing I made a clamp made from some bits of 25mm angle, some round bar and 2 hose clamps
-
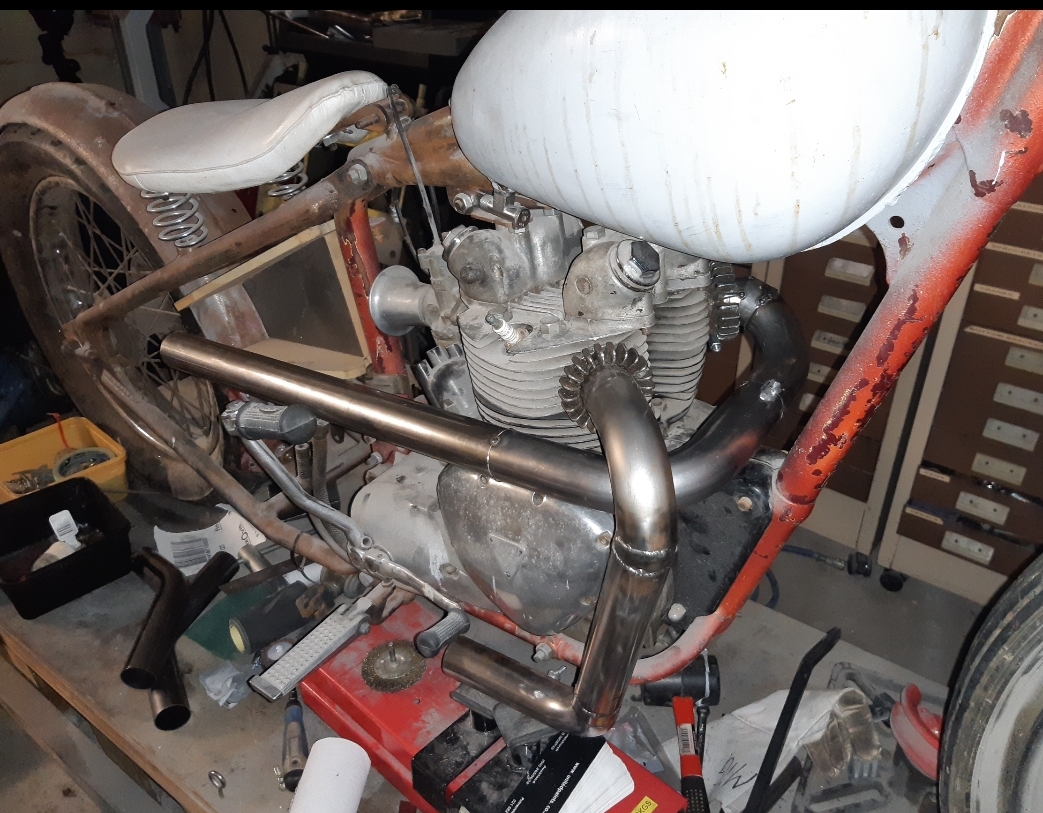
I found some old bends in my box and had a go at the other exhaust. I was gonna tig it together but I ran out of argon. I'm thinking of buying a 90 bend to replace the tube that runs across the timing cover so there's less welds and overall better finish
-
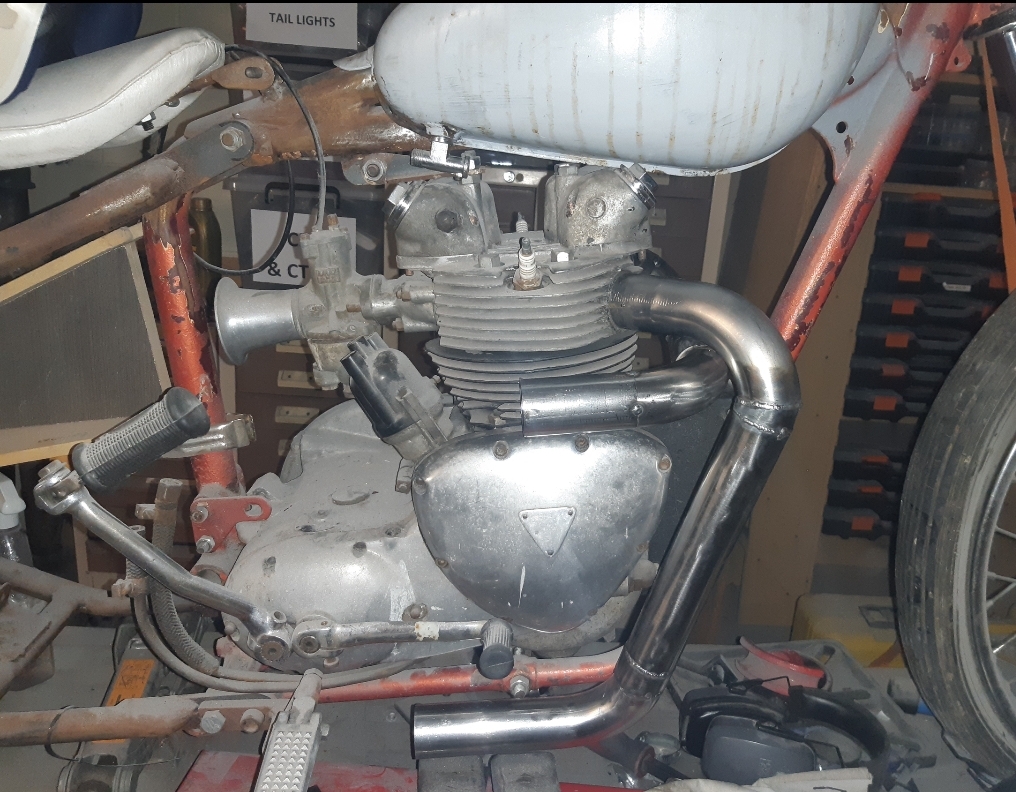
I mulled over that exhsust last night and I wasn't 100% on it so I had a rethink and decided the other side would run over the top of the timing cover. And the right side would go straight out and down. It was a bit of mish getting the tubes to run parallel with both the down tube and bottom frame rails but I got there in the end. On to the other side when I get more tube.
-
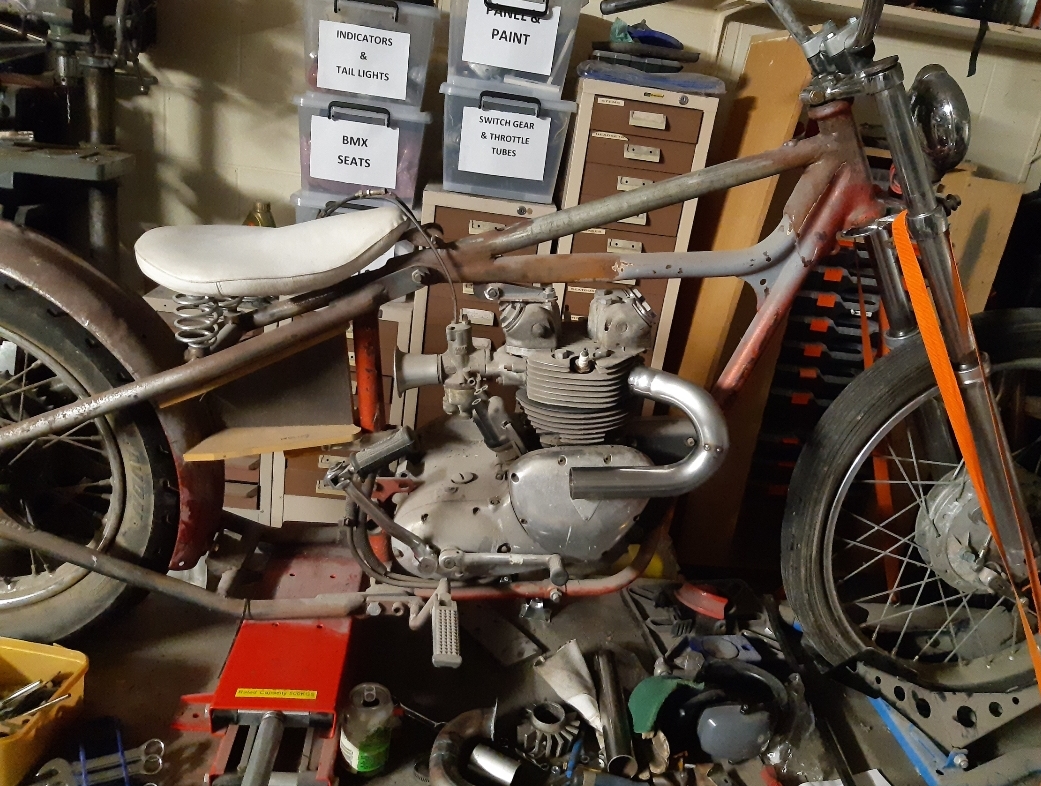
Today I threw those forks on to see how they'd look, I'm thinking a 2inch drop to get the frame rails parallel with the ground, but overall I'm pretty happy with them. I also made a start on the exhausts with some 180 bends i had lying around. I'll get some more bends to do the other cylinder when I get the chance.
-
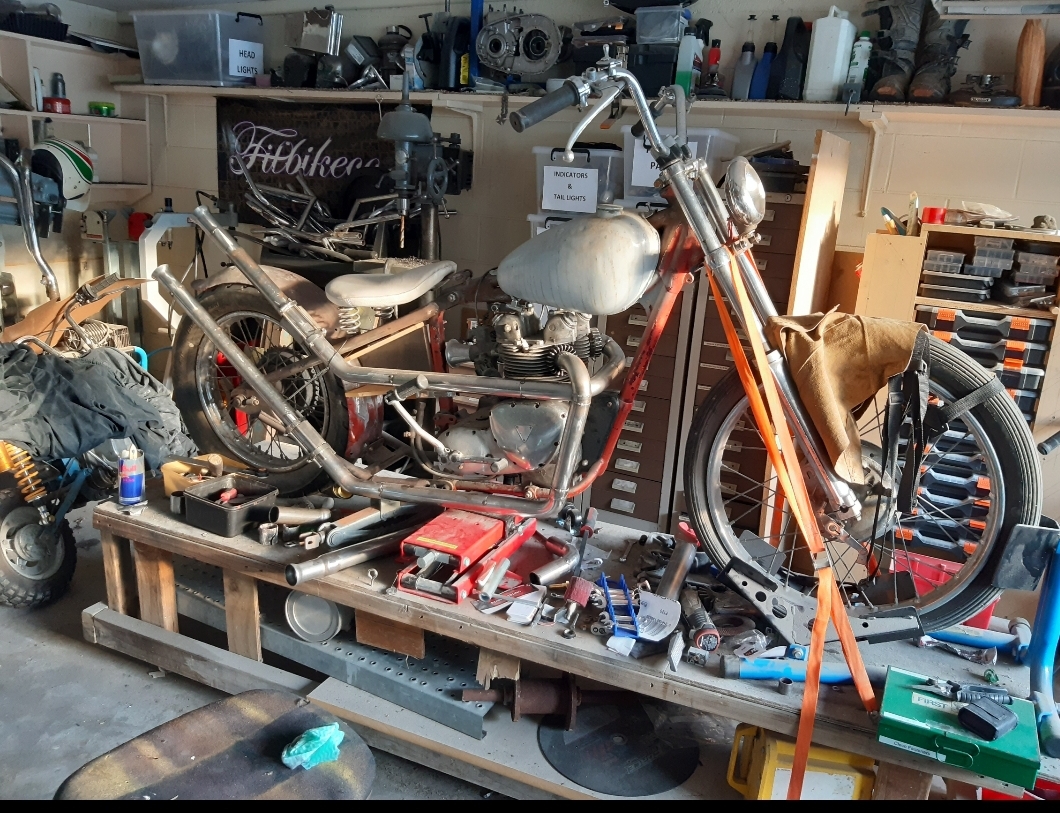
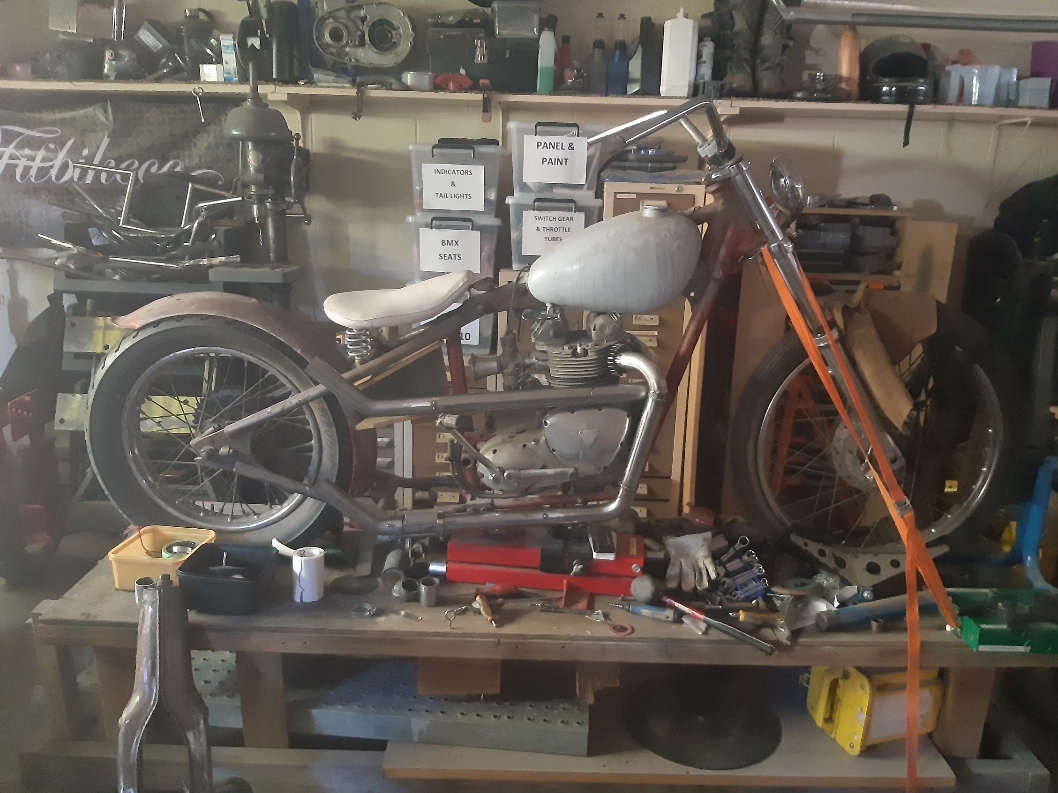
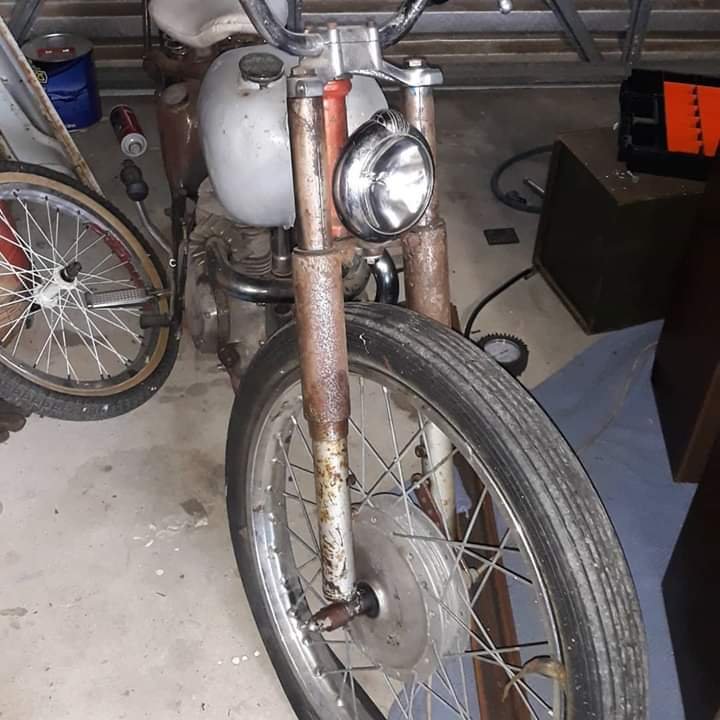
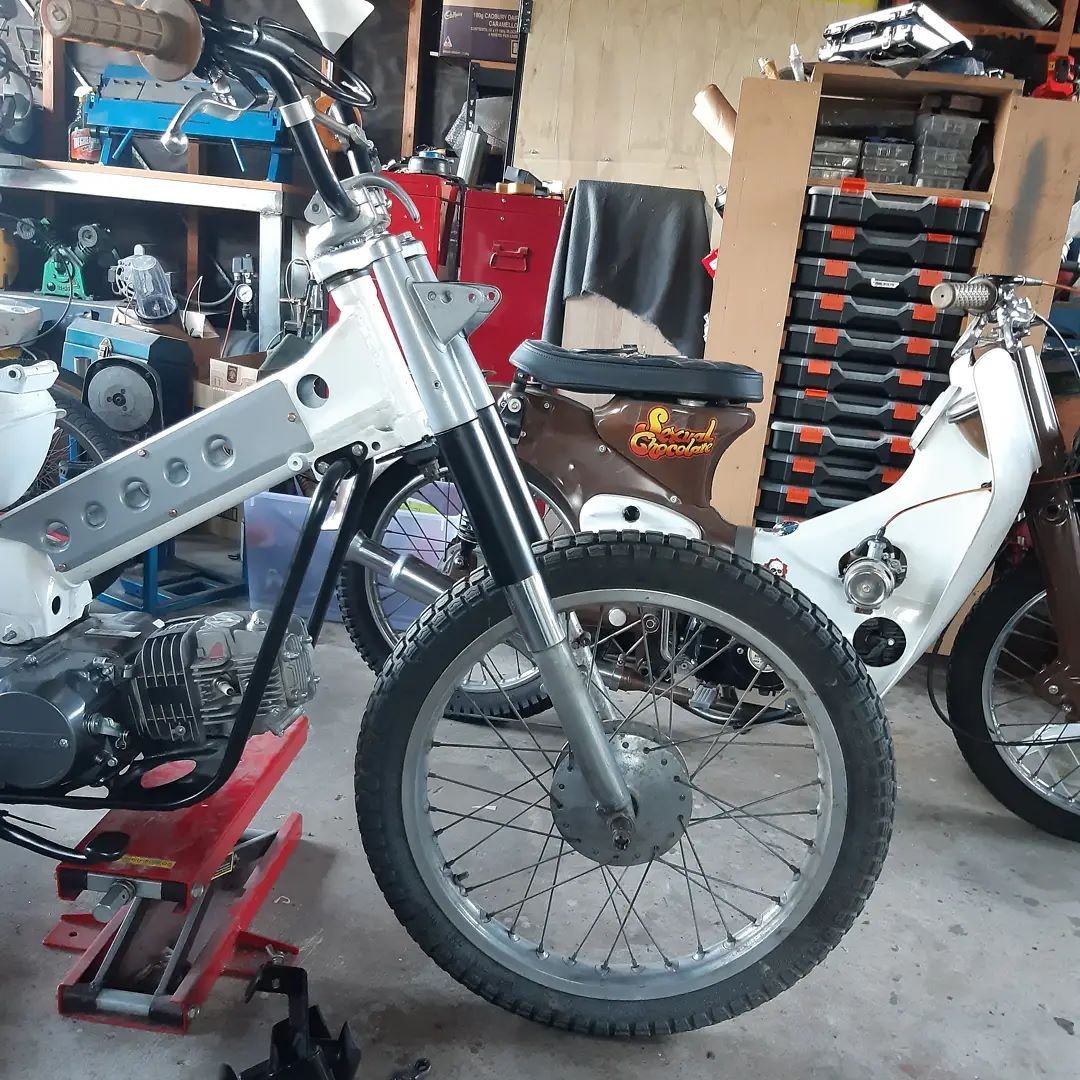
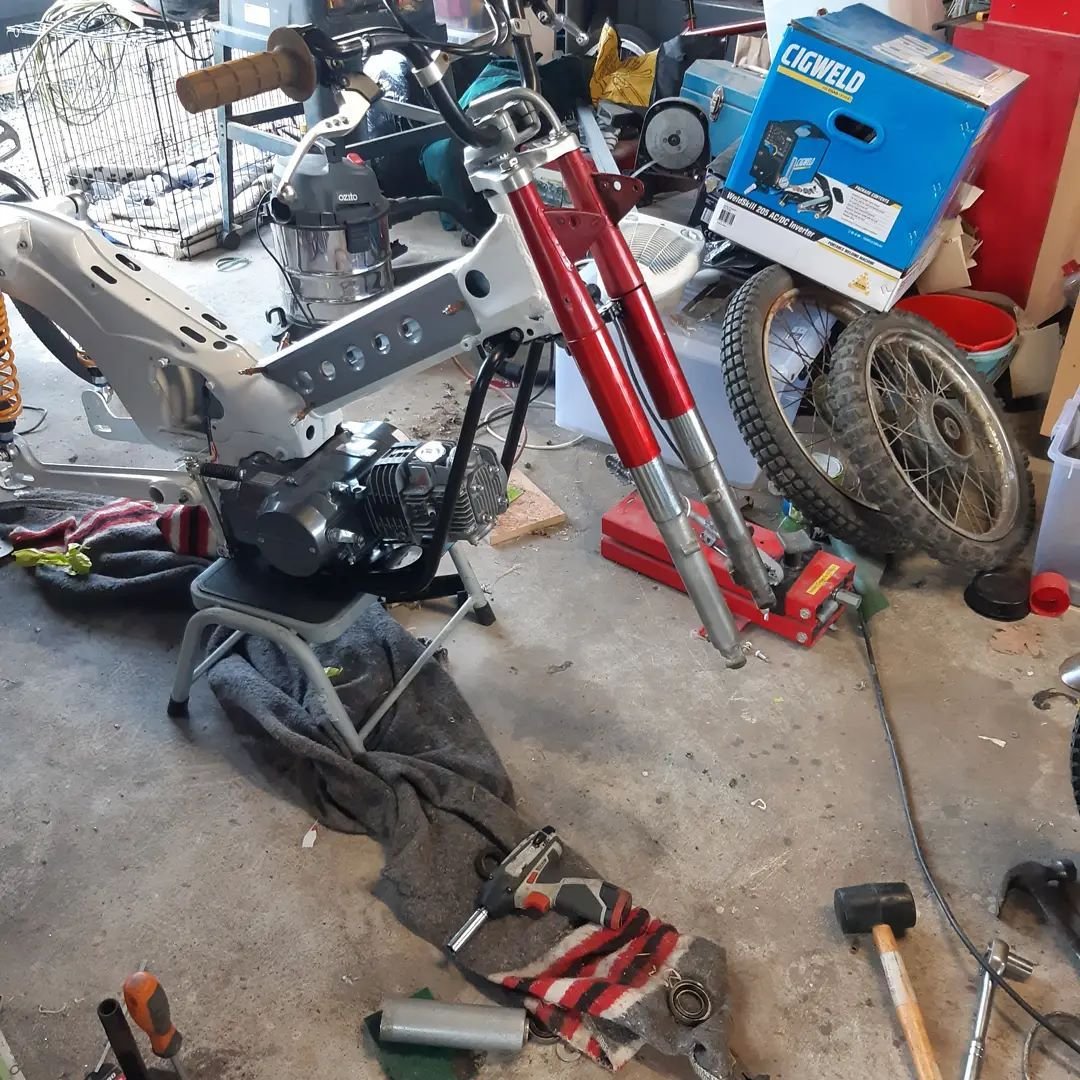
Shit 2 years since I last posted about this bike! This year is gonna be the year I really put some more effort in to this thing. I got these forks to replace the current ones. I'm gonna shave and polish the lower legs and give them a general once over. Other plans for the bike are to remake the hardtail, so I'll get some tube ordered at work and get it bent up and fizzed together and transfer all the parts from the current engine into some good condition cases that I've got stashed away.
-

Fourfingapete's 1963 PB Vauxhall - Discussion
gazguy replied to fourfingapete's topic in Project Discussion
Have you tried Butlers in chch? -
McLeans Island Swapmeet - 11-13 October - 2019
gazguy replied to - i5oogt -'s topic in South Island Region
Thanks again Chris, you and Aaron have got me fizzing about starting my moped build -
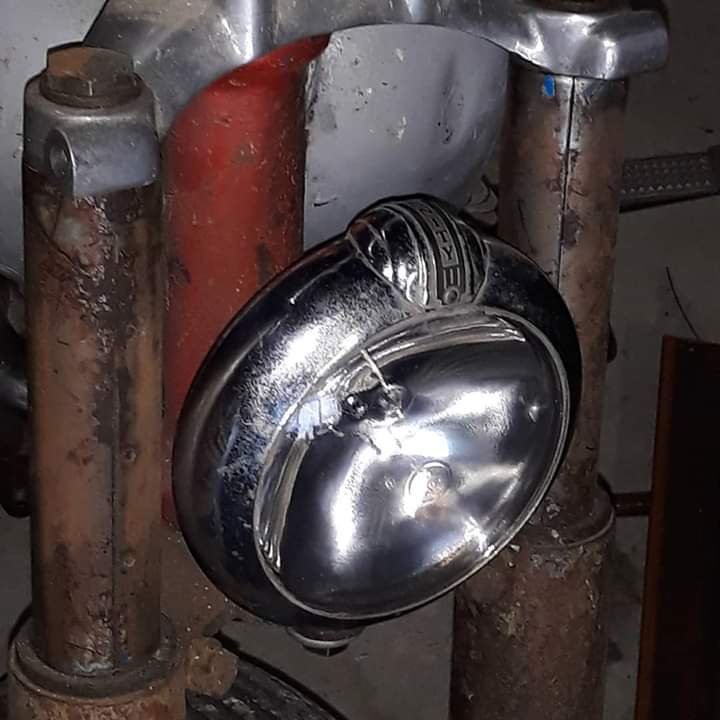
This things been put on hold for a while. Pretty much too many projects and the missus not too happy about me working on them. Plus they're all out at my parents place. I've been trying to spend my time getting my Vauxhall and cf Bedford roadworthy. So it's about time I got started on it again. Put on a headlight I've had stashed for a while. Really suits the style of the bike.
-
i bought a convection heater from the warehouse to bake parts in, like the ones you use to warm up pies and savories you could try one of those.
-
All good, cheers Al
-
I'm thinking of putting a Nissan diesel engine in my cf Bedford. Its already coming out of a Bedford and comes with the mounts. How much would it roughly cost to get it certified? Cheers, Gaz
-
So yesterday i tacked the rear mudguard mount on that id bent up during the week. To bend the round bar i just used my cheap pipe bender. I was surprised at how good it came out. When i was at work i bent each side to get the right distance to the bungs that I'd drilled and tapped to the dropouts. when i got home to mount it it looked like shit, it looked too bulky. When i bent the legs at work i bent them too far down. so to straighten them i put one leg in the vice and it seemed to do a decent, tried the other one and.... I didnt really expect much else from it to be honest. So I went out to my shed at Tuahiwi and used my shop press which did a better job. I shouldve waited to use that but i got a little impatient. Here it is just tacked together. I'll fully weld it up at work or when i have some spare time at home. I also made a little brake rod thing to attach it to the brake pedal. Before I'd just threaded the end and bent it and kept tit on with a couple of nuts and washers. It was just temporary until i could figure another way of doing it, So i made this.
-
cheers man, unfortunately we wont be going down in the bedford anymore, we're gonna go down in my dads car and tenting in a camp ground.
-
Its been a while since ive posted anything and its been a while since ive done anything to the bike. I recently bought a bedford van and have been chipping away at the bedford every weekend to get it ready for the Burt Munroe Challenge. Over the past week and after getting motivated from the Smash Palace Bike Show. I bought a new pedal rubber at the Mcleans Island swapmeet, but the shaft was too small in diameter so i cut it off and welded a piece of 16mm round bar. To mount the mudguard i turned up some steel bungs and drilled and tapped them to M8, then cut and drilled a bracket out of some 50x50 angle. The angle was tacked to the frame. I wasnt too happy with the match of the radius of the mudguard and the tyre so i remedied it by using a method i saw on the lowbrow website using 2 bits of 2x4 to widen the distance inbetween the guard and in turn tightening the radius.. The black marks are refernce markd every 50mm To mount the middle of the mudguard i drilled and tapped some 16mm roundbard and cut some 22mm tube for the round bar to slip in to. I tig'd the 2 together and faced it up on the lathe. Another bung was made to go in the mudguard in the centre of the rib so the 2 bolt up flat together. Knocked up a kickstand at work from some 16mm round bar and some 25x25 shs Tacked on the brake stay tab on the chainstays and held it in place with a strong hand tools magtab. I'd recommend thes to anyone Front brake stay
- 83 replies
-
- 14
-
-
I decided against using my round aluminium oil tank and chose to use what i think is a Pre-unit oil tank.Using a flat bit of 5x25mm flat steel with holes drilled either end I bolted the flat bar to the bottom hole on the engine mount on the seat post and the oil tank to the other, just to hold it into position whilst i figure out mounts for it.
-
If they're cheap enough I'll buy em, even if I don't need them.I've got a thing for zundapp tanks too
-
I was fucking about in the shed and was looking at the bars and decided to swap them out for a set i had in box and had been humming and harring over for a while. I payed $5 i think at the mcleans island swapmeet. Pretty happy with them and theyre staying on. Next up is to mount the mudguard and mount an oil tank.
-
Finally got round to making to footpegs, the BSA ones i had originally werent going to cut it and i wanted to use a set of Anderson style pegs that Ive had kicking around. The right one was pretty simple. I cut a plate out of some 10x25 flat, drilled and counter bored some holes to match those in the frame. Bent up some 16mm round bar and made a mount on my lathe to accommodate the bolt for the peg. Same sort of deal for the left hand except 2 bends to clear the primary cover and a shaft for the brake pedal to pivot on


.jpg.2d3bfad8aff3cf1287913e12c1f6a38f.jpg)

.jpg.85f38af6f7061ee141a260910c9b73f6.jpg)