gazguy
-
Posts
488 -
Joined
-
Last visited
Everything posted by gazguy
-
I can lend a hand. Im in shirley and can bring some tools/welders etc
-
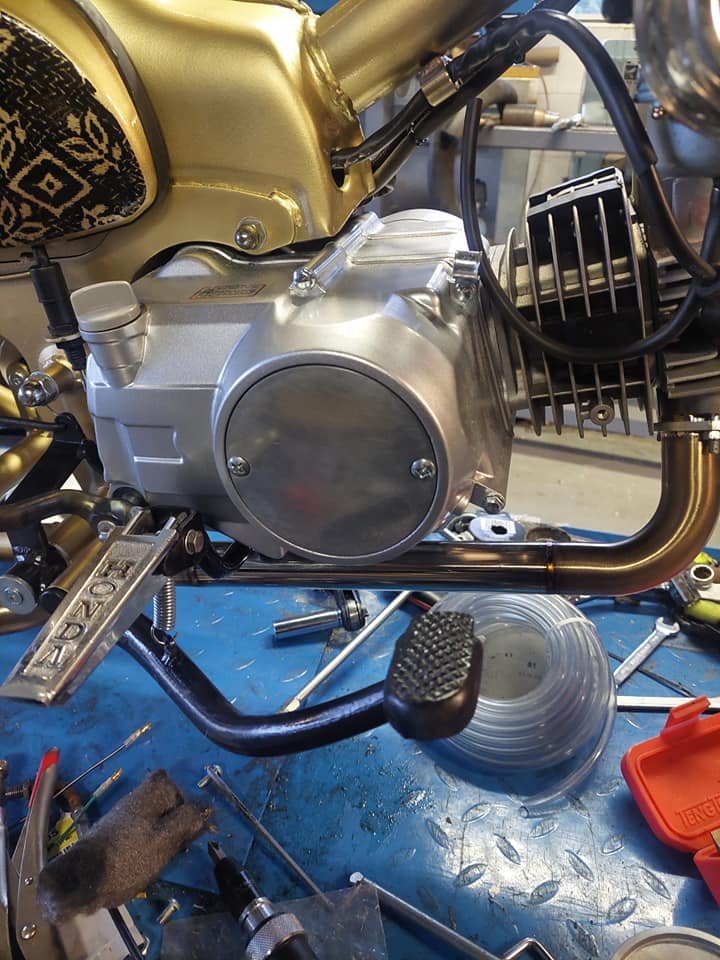
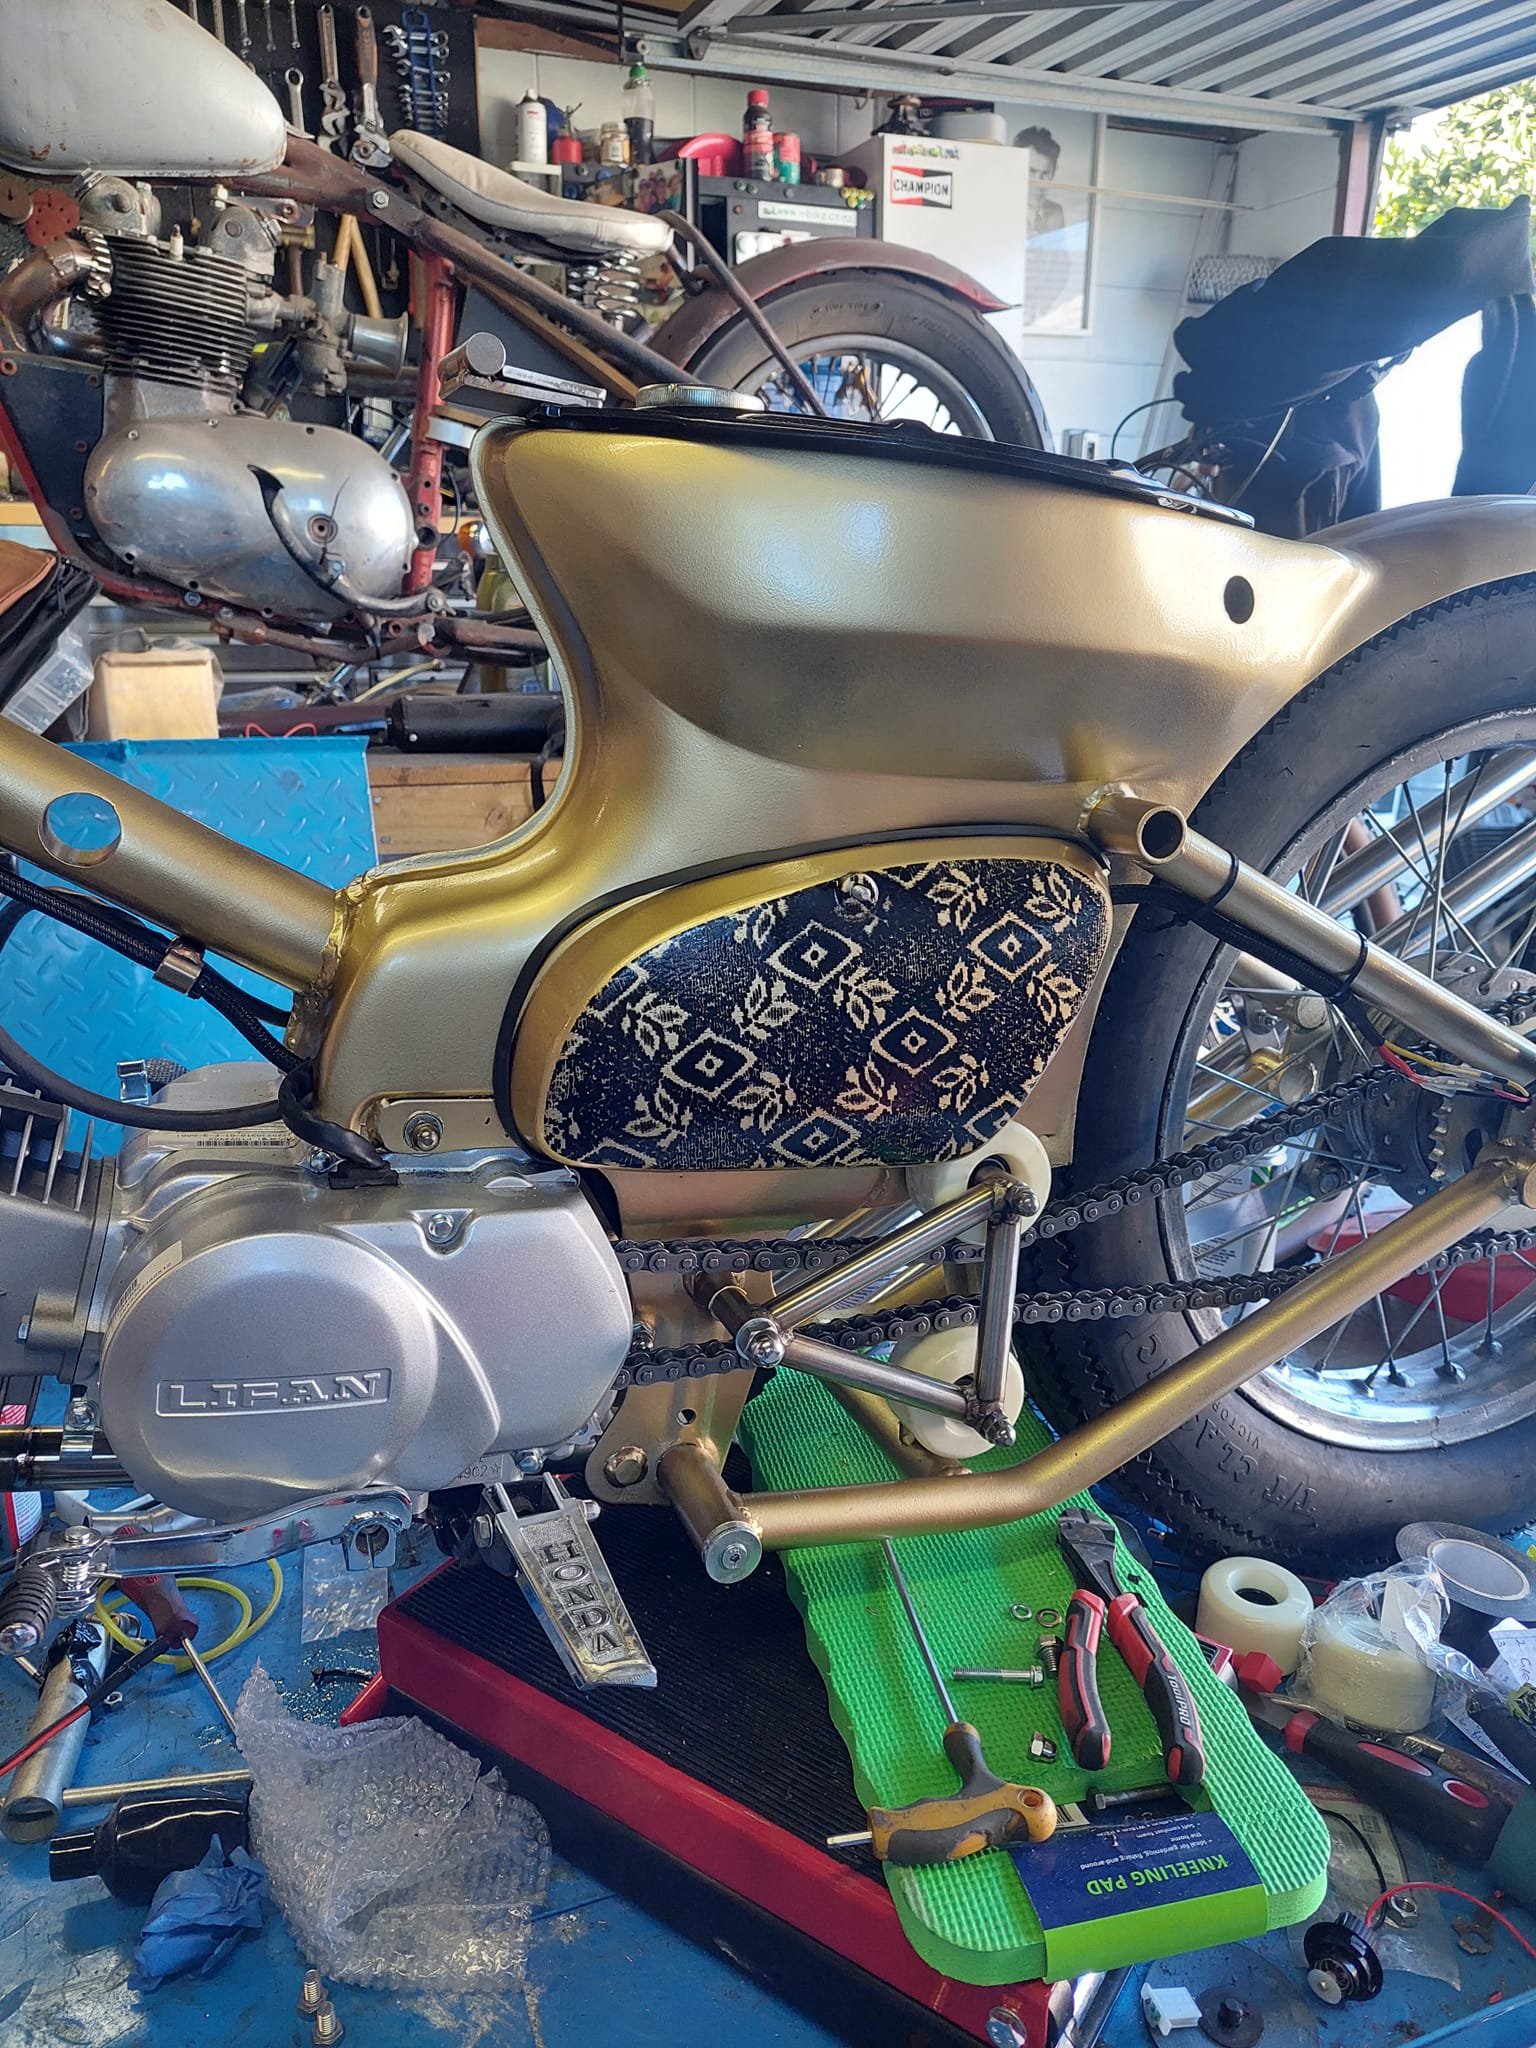
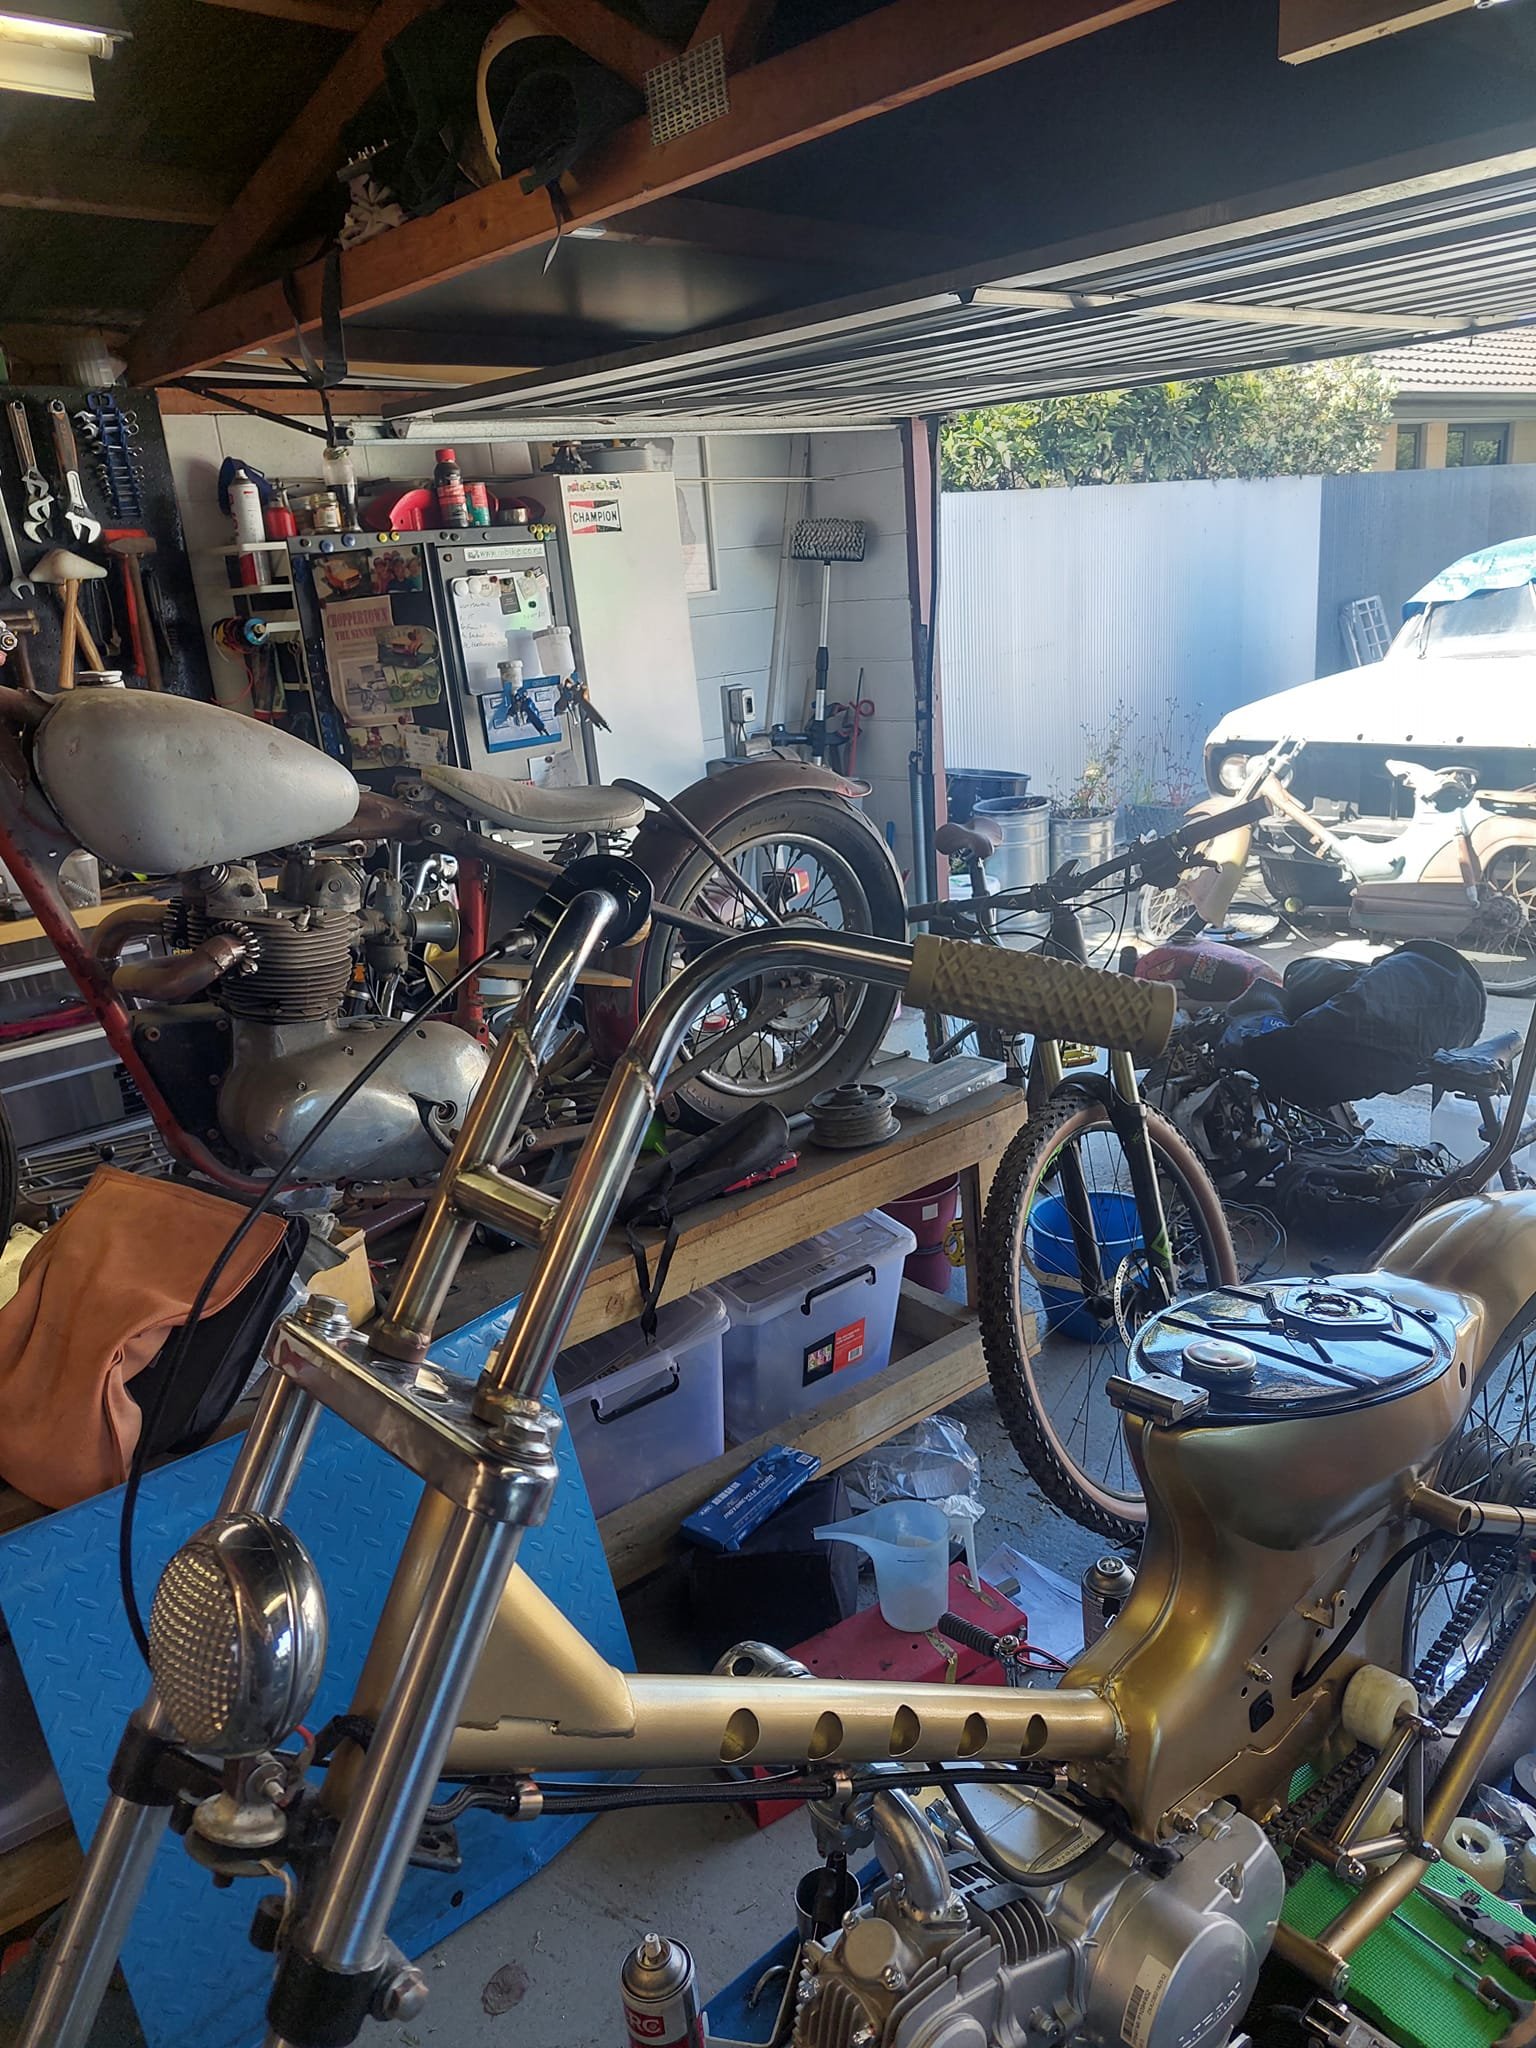
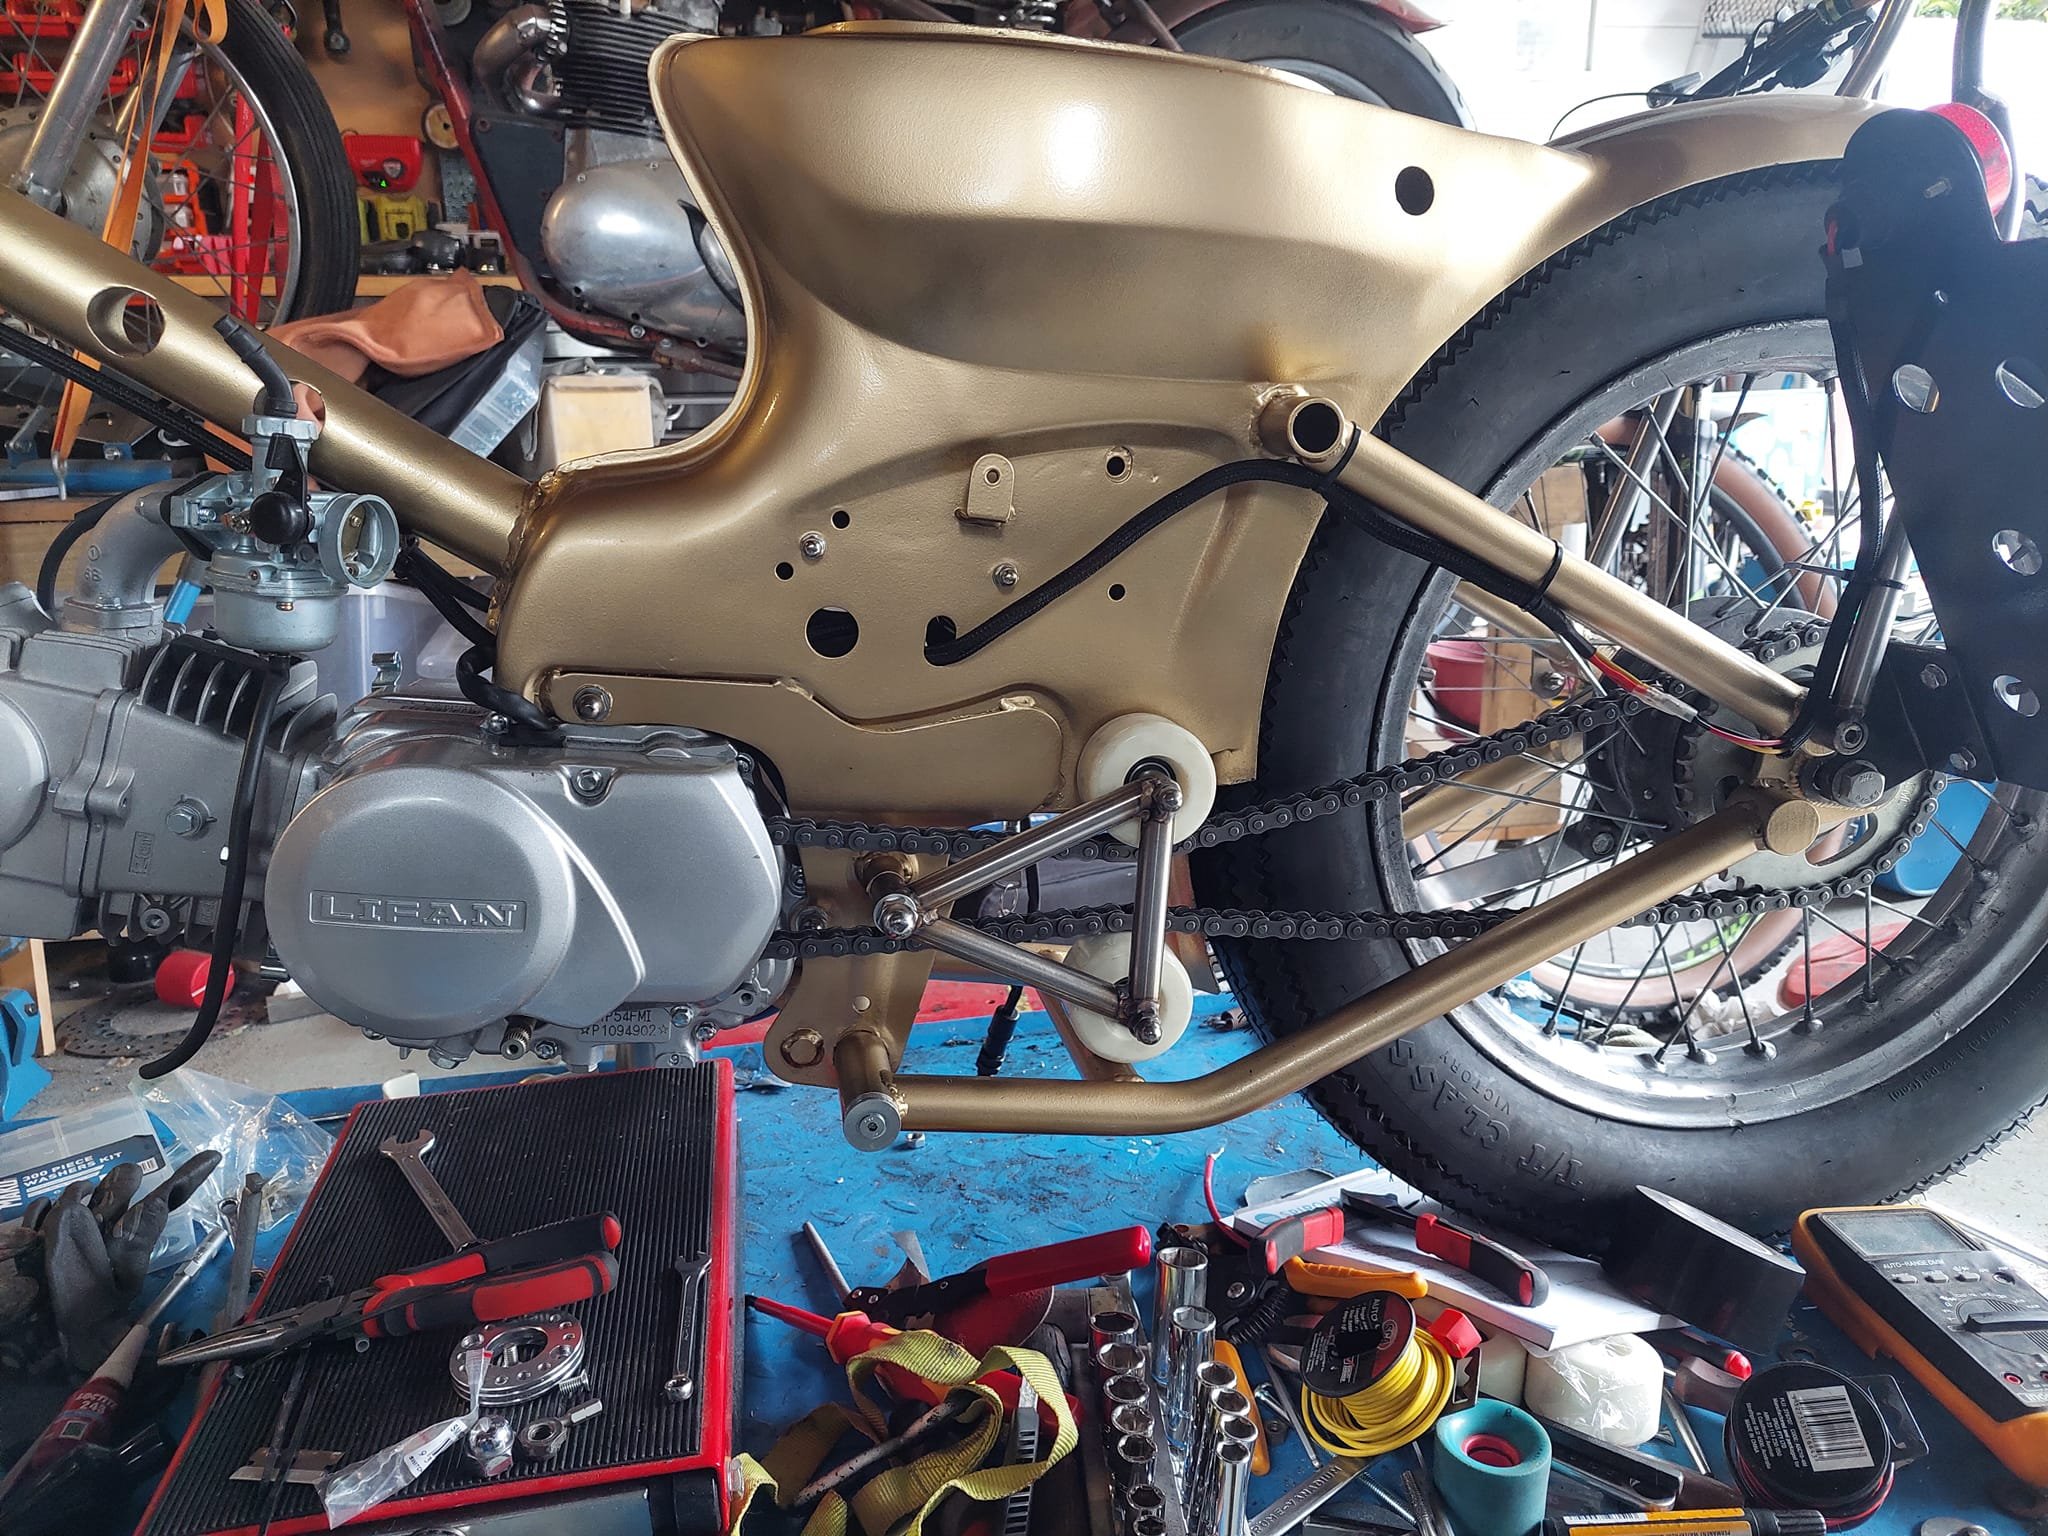
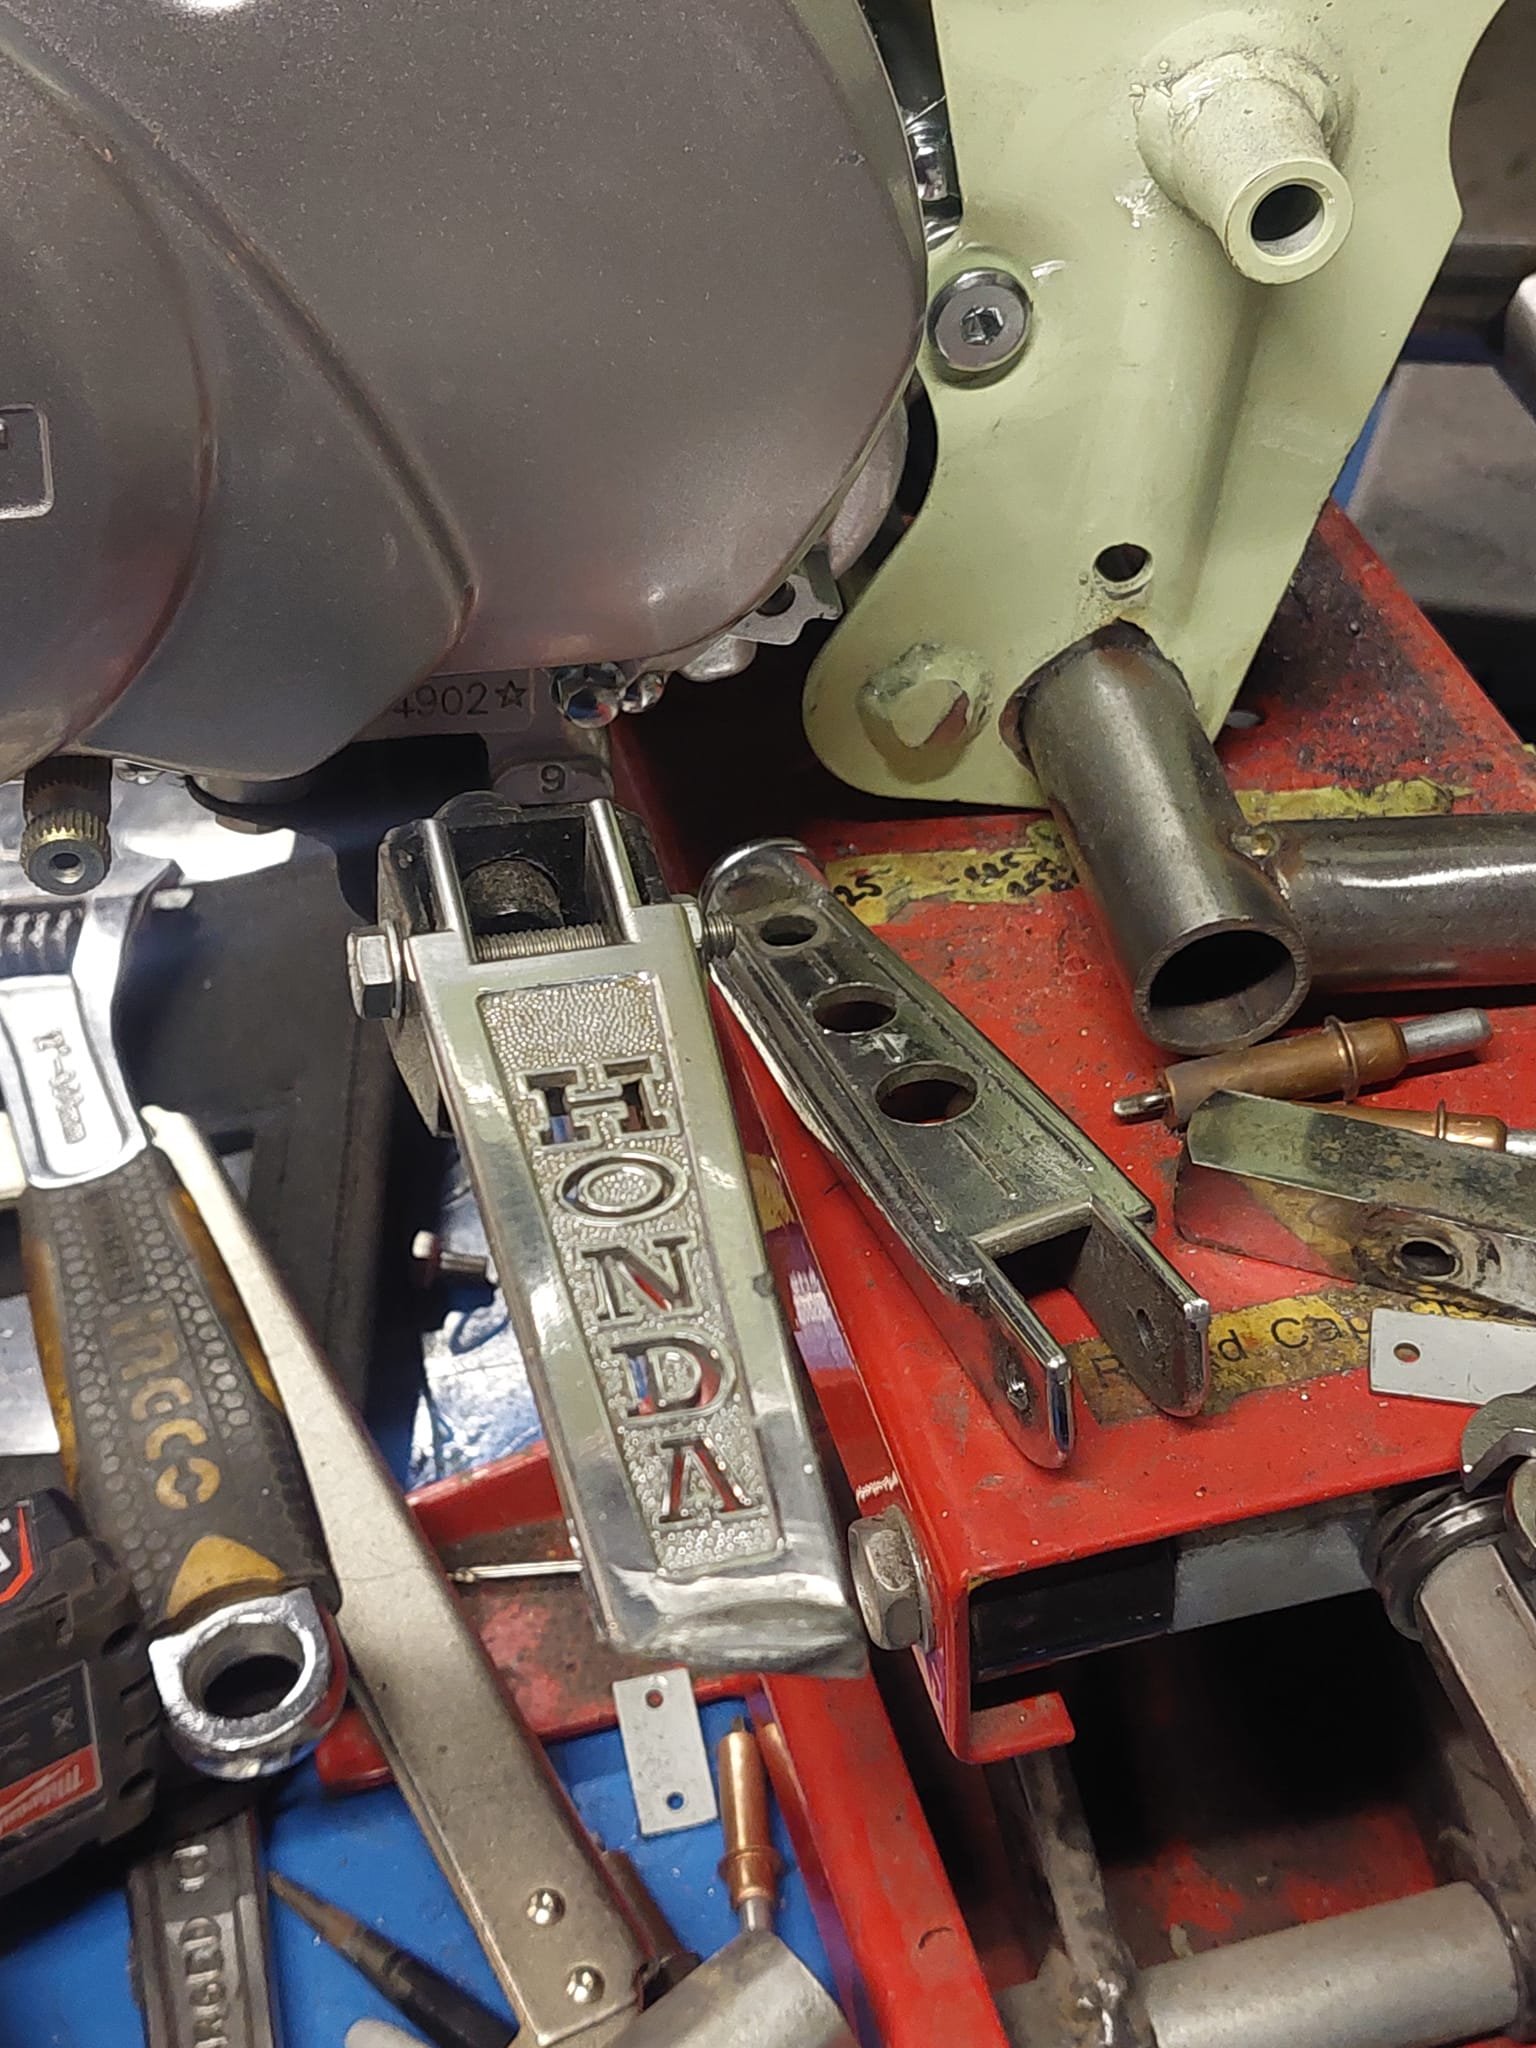
To get rid of the lifan badges I ground off the rib on the clutch cover and polished that up then mounted a ''honda'' side cover from mbike that i bought from a mate 2nd hand and gave that a minor polish to contrast the painted cases. This bikes had more small touches to it than Jimmy Saville did on top of the pops!

- 22 replies
-
- 12
-

-
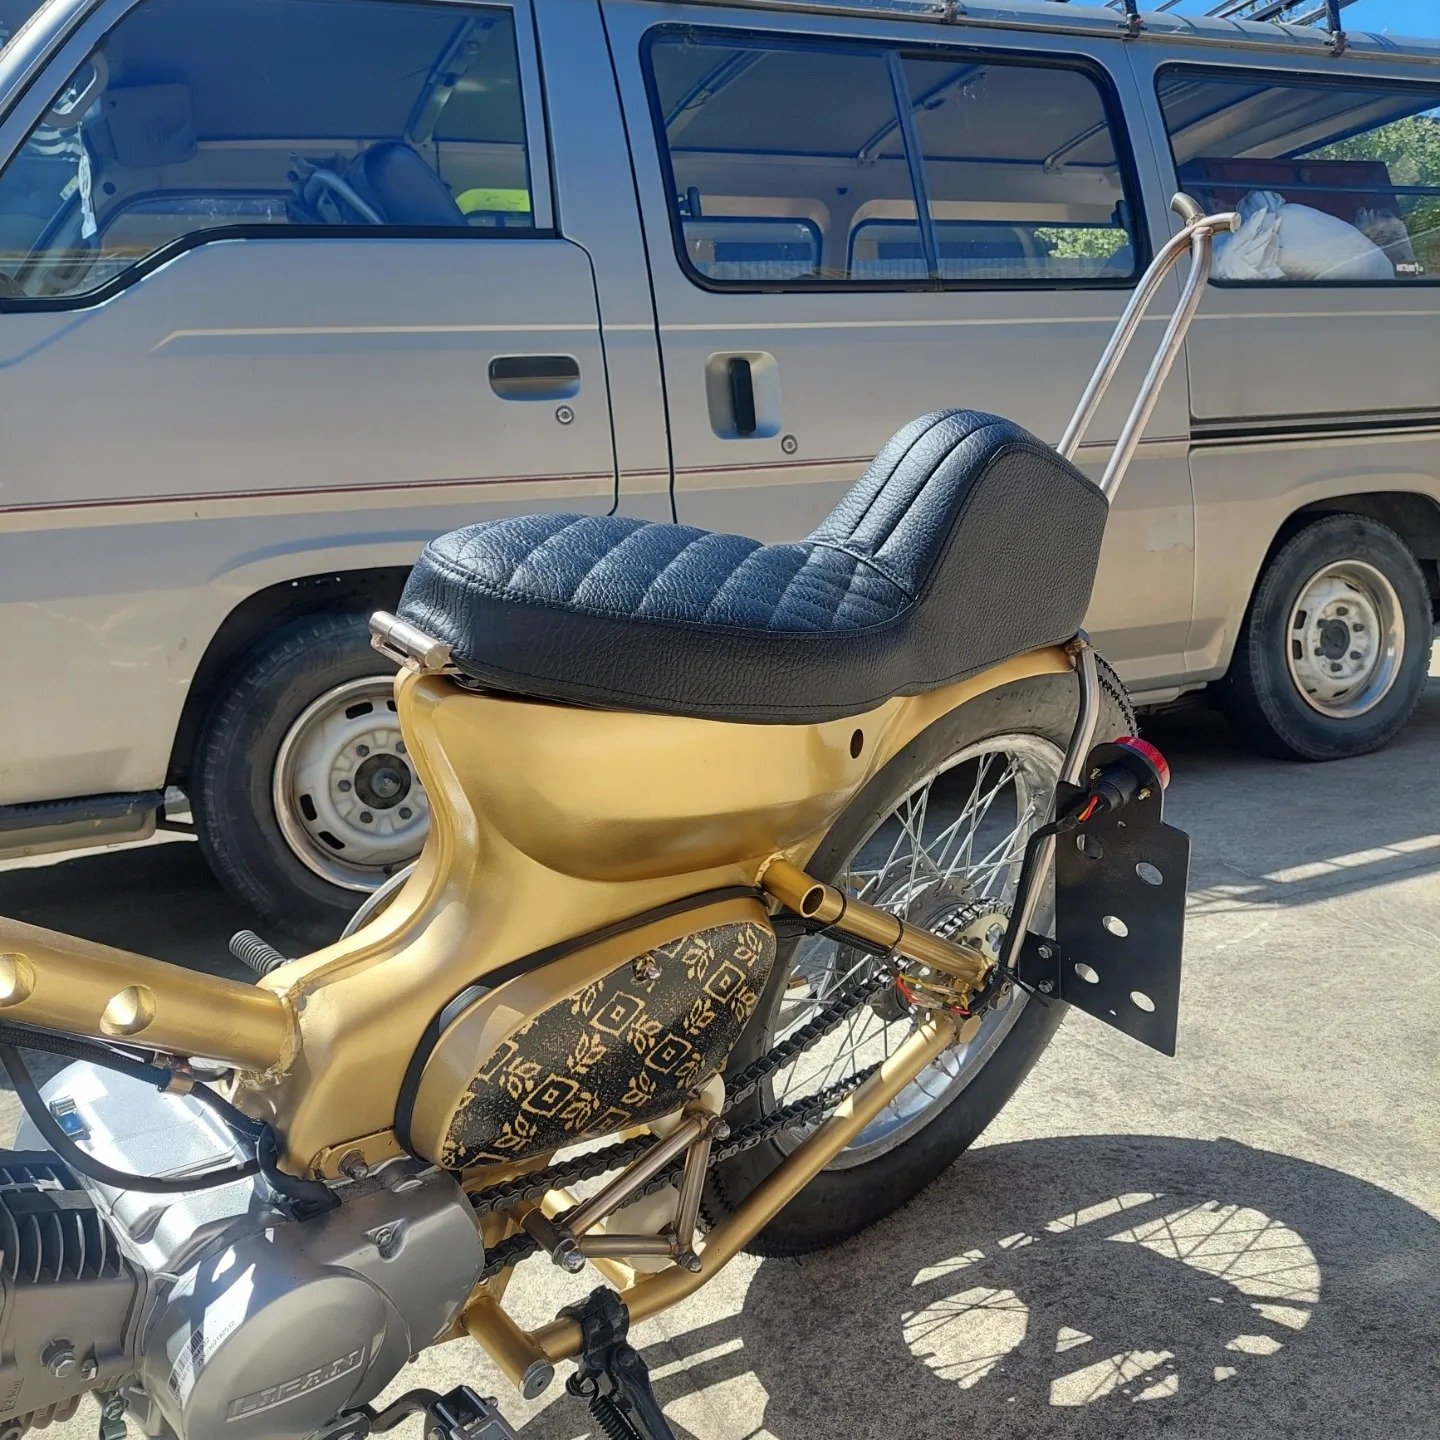
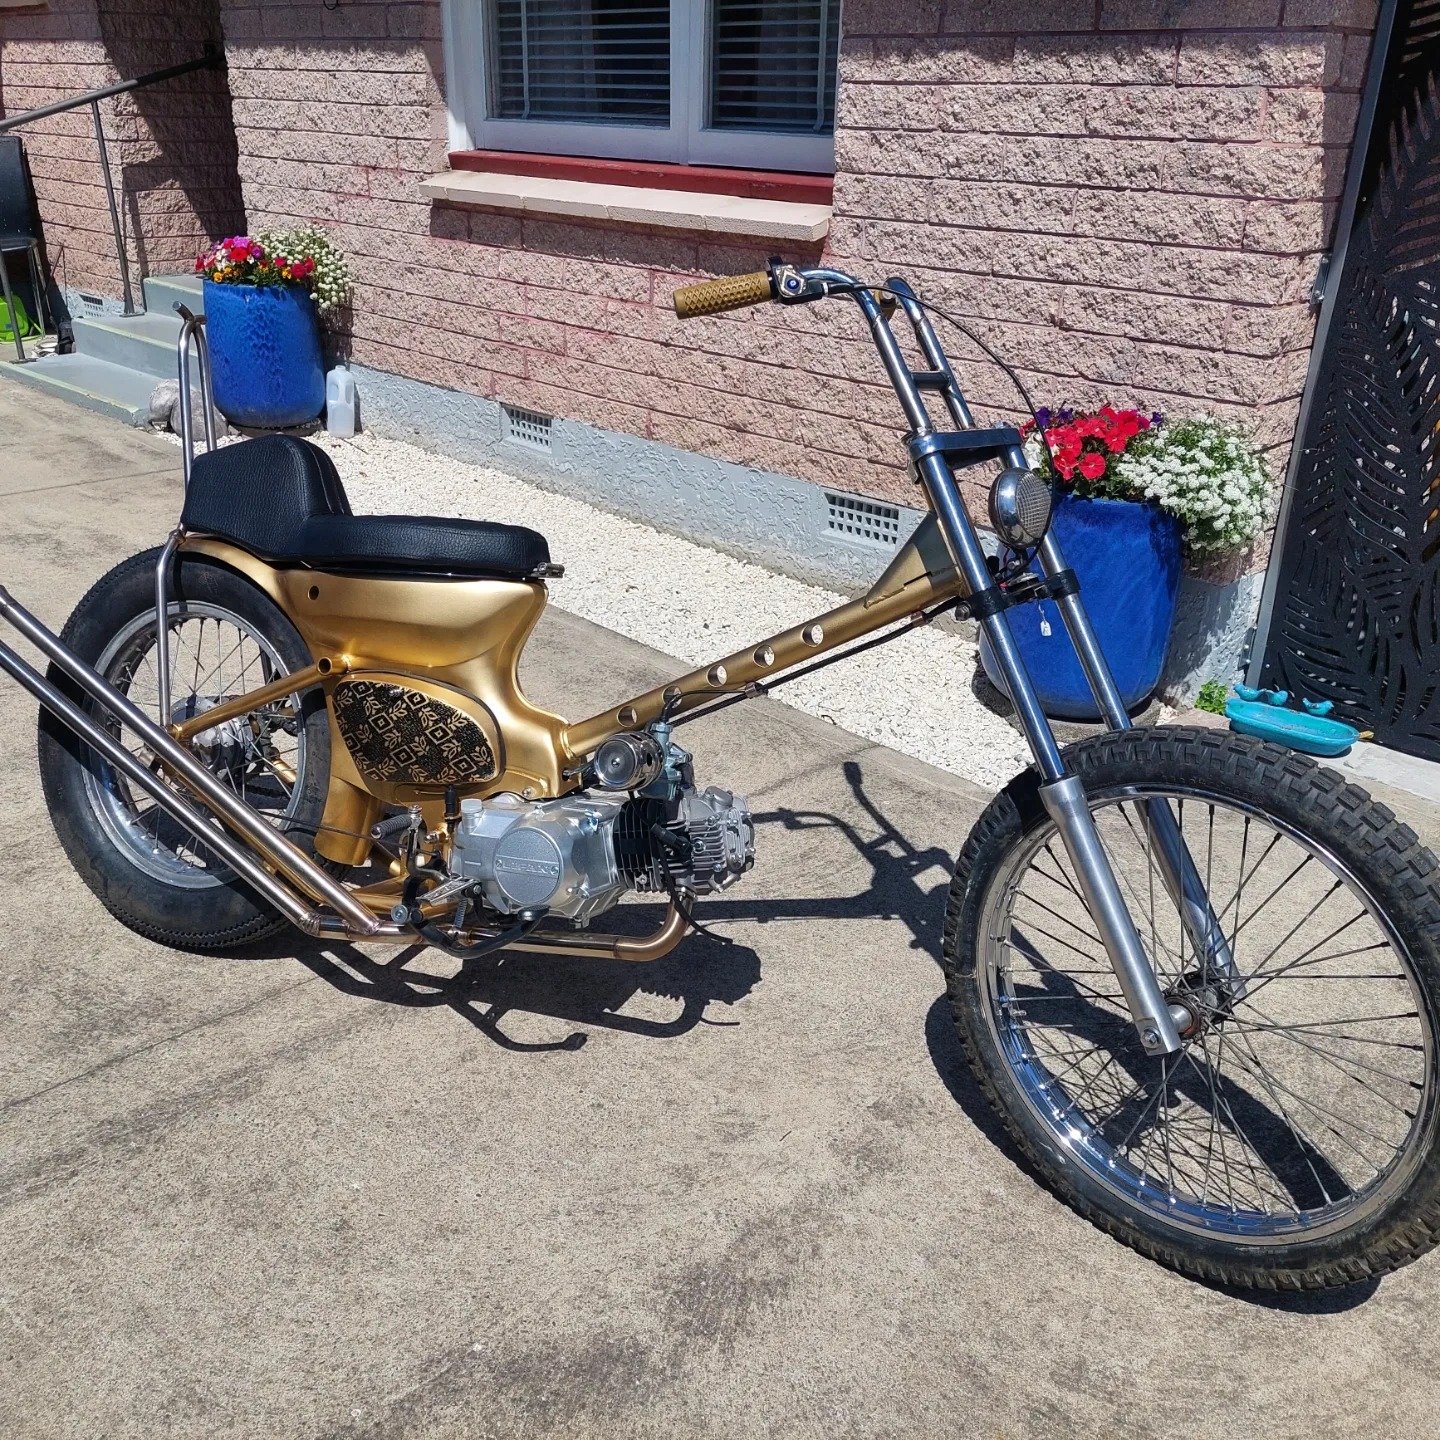
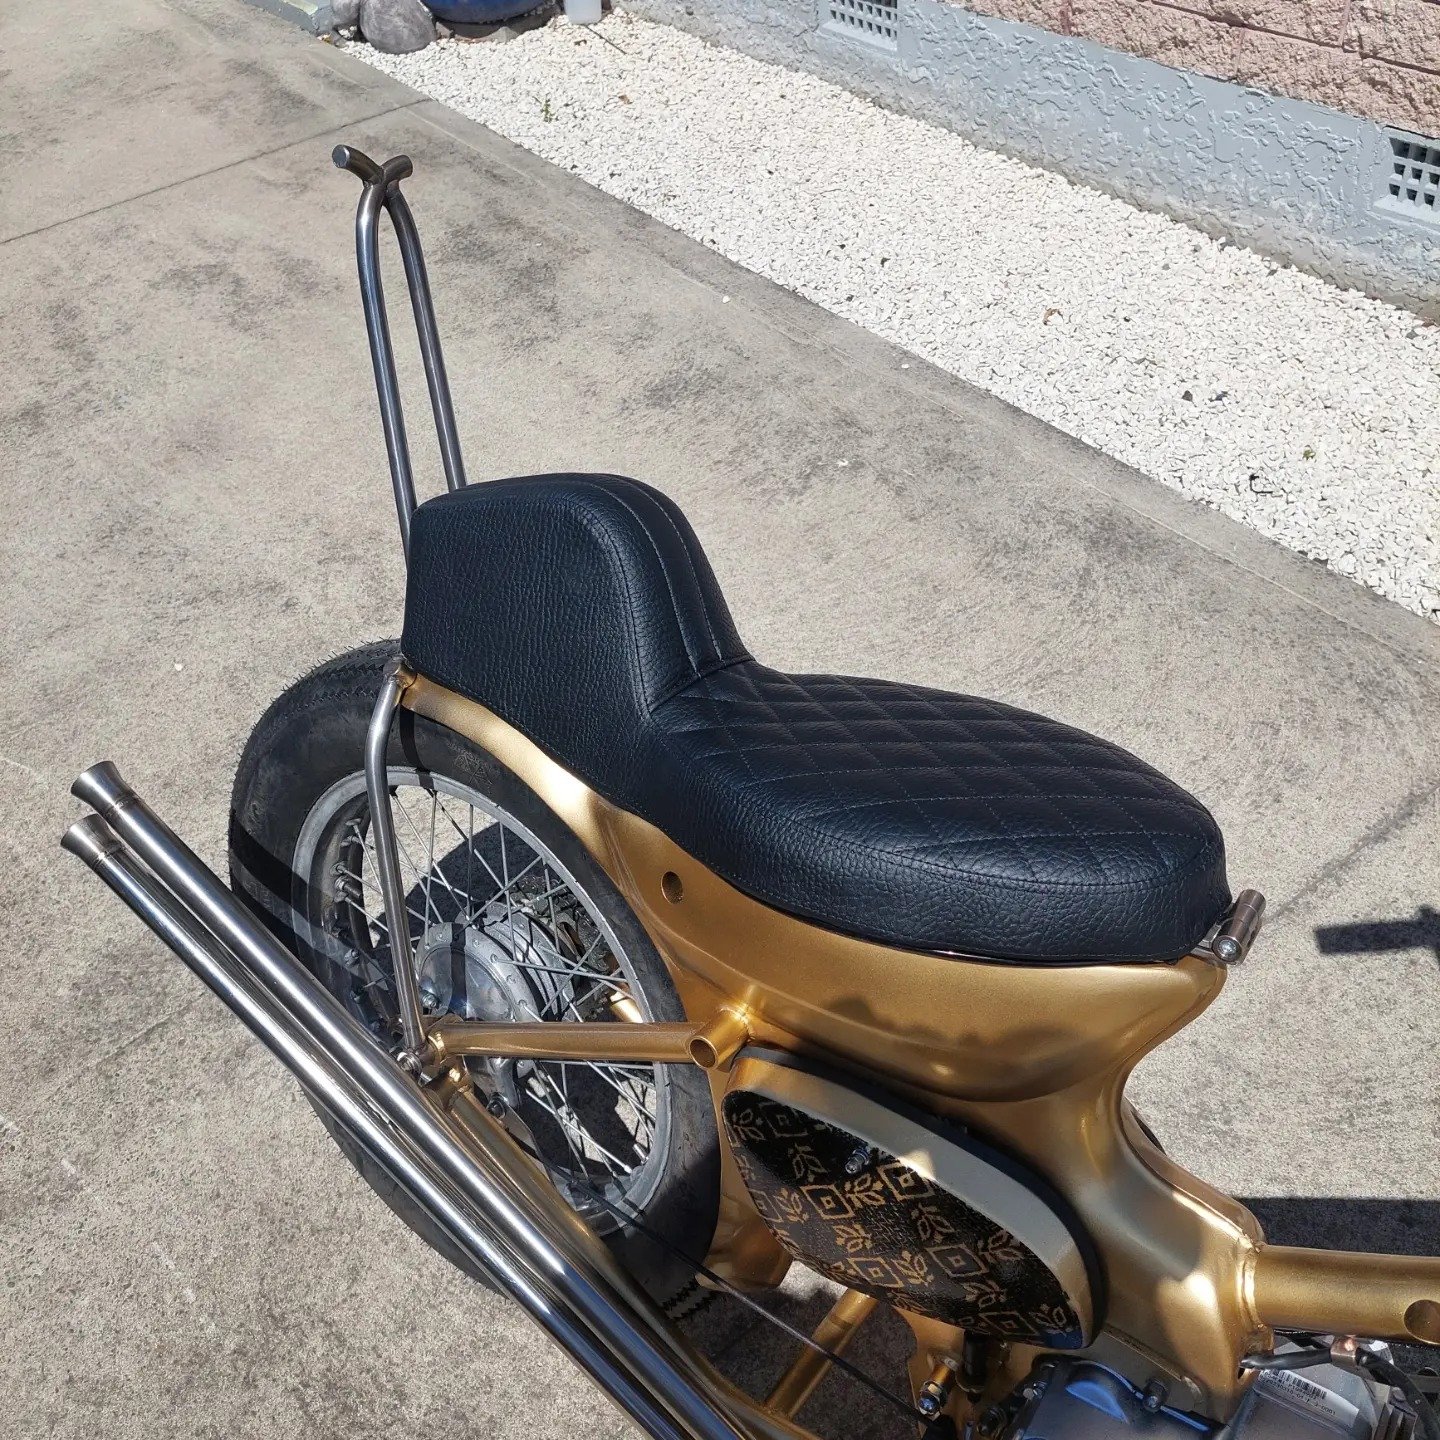
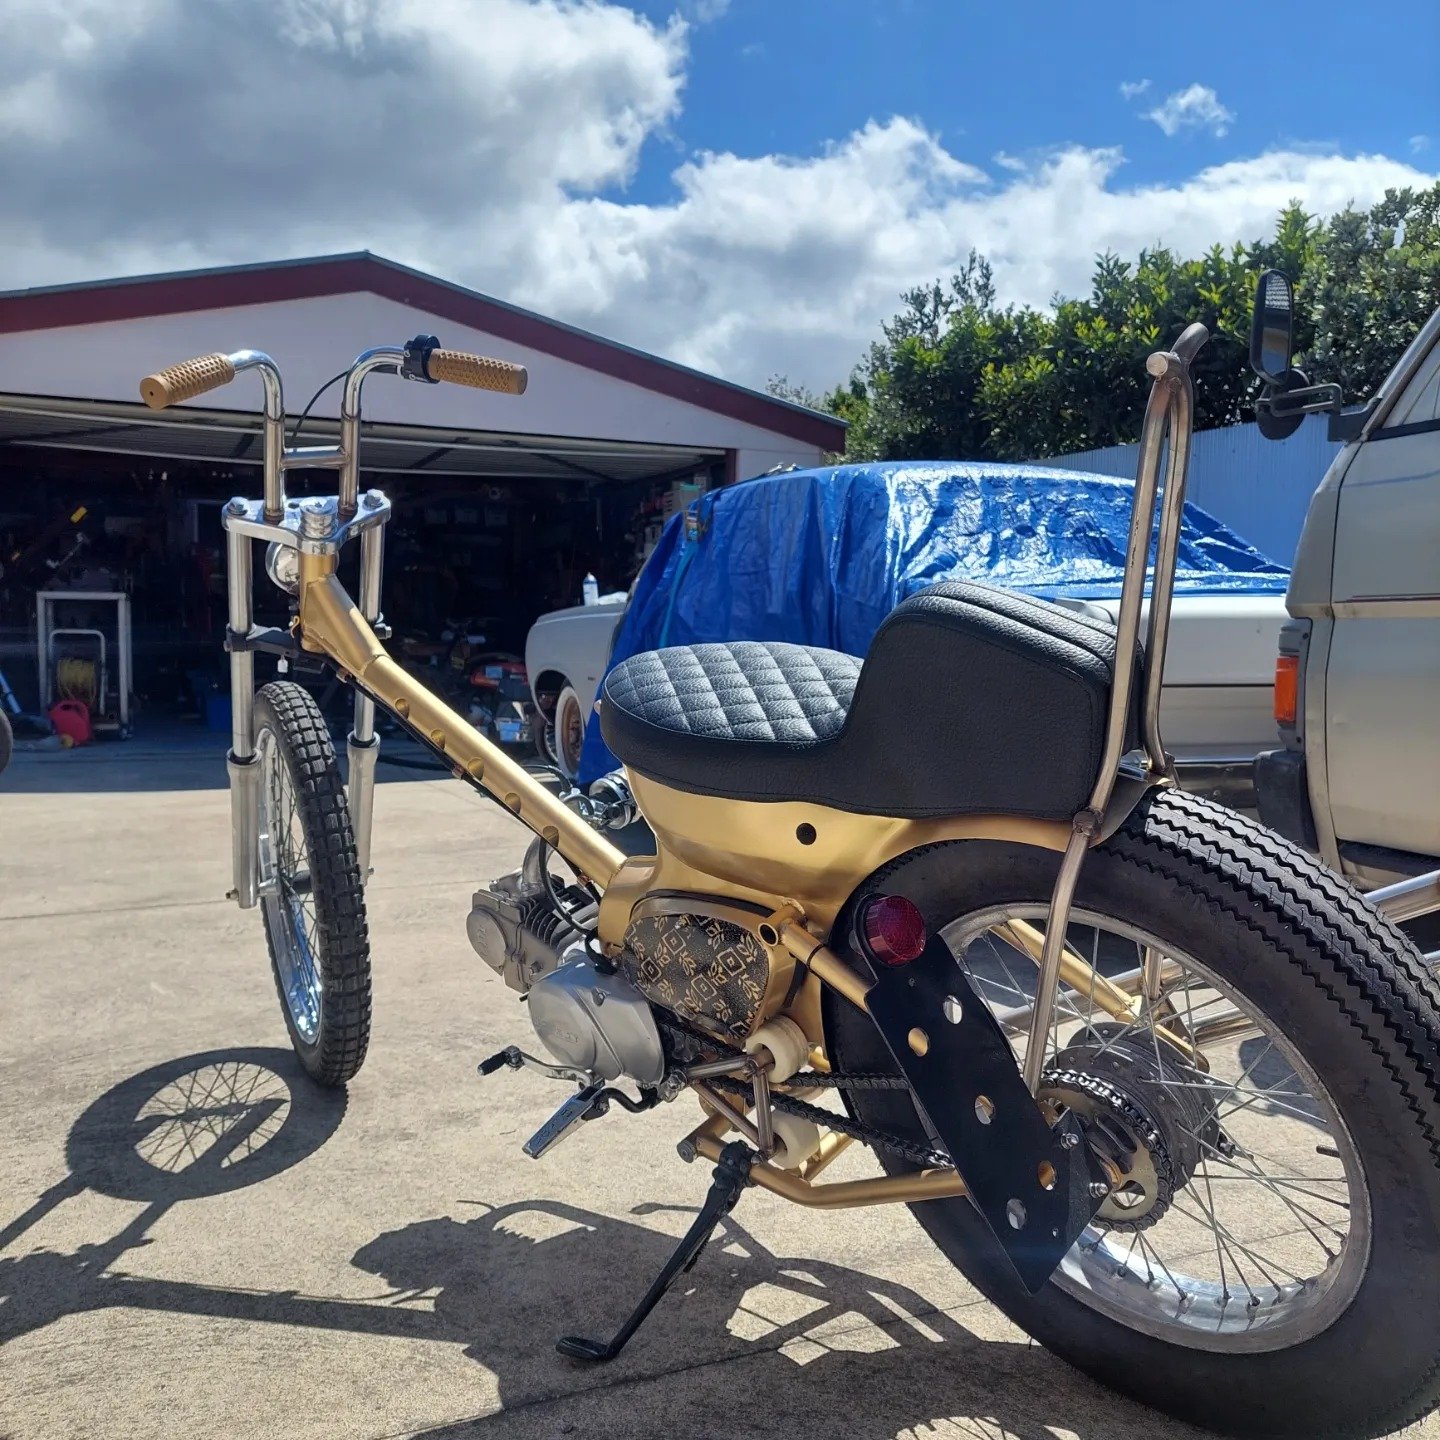
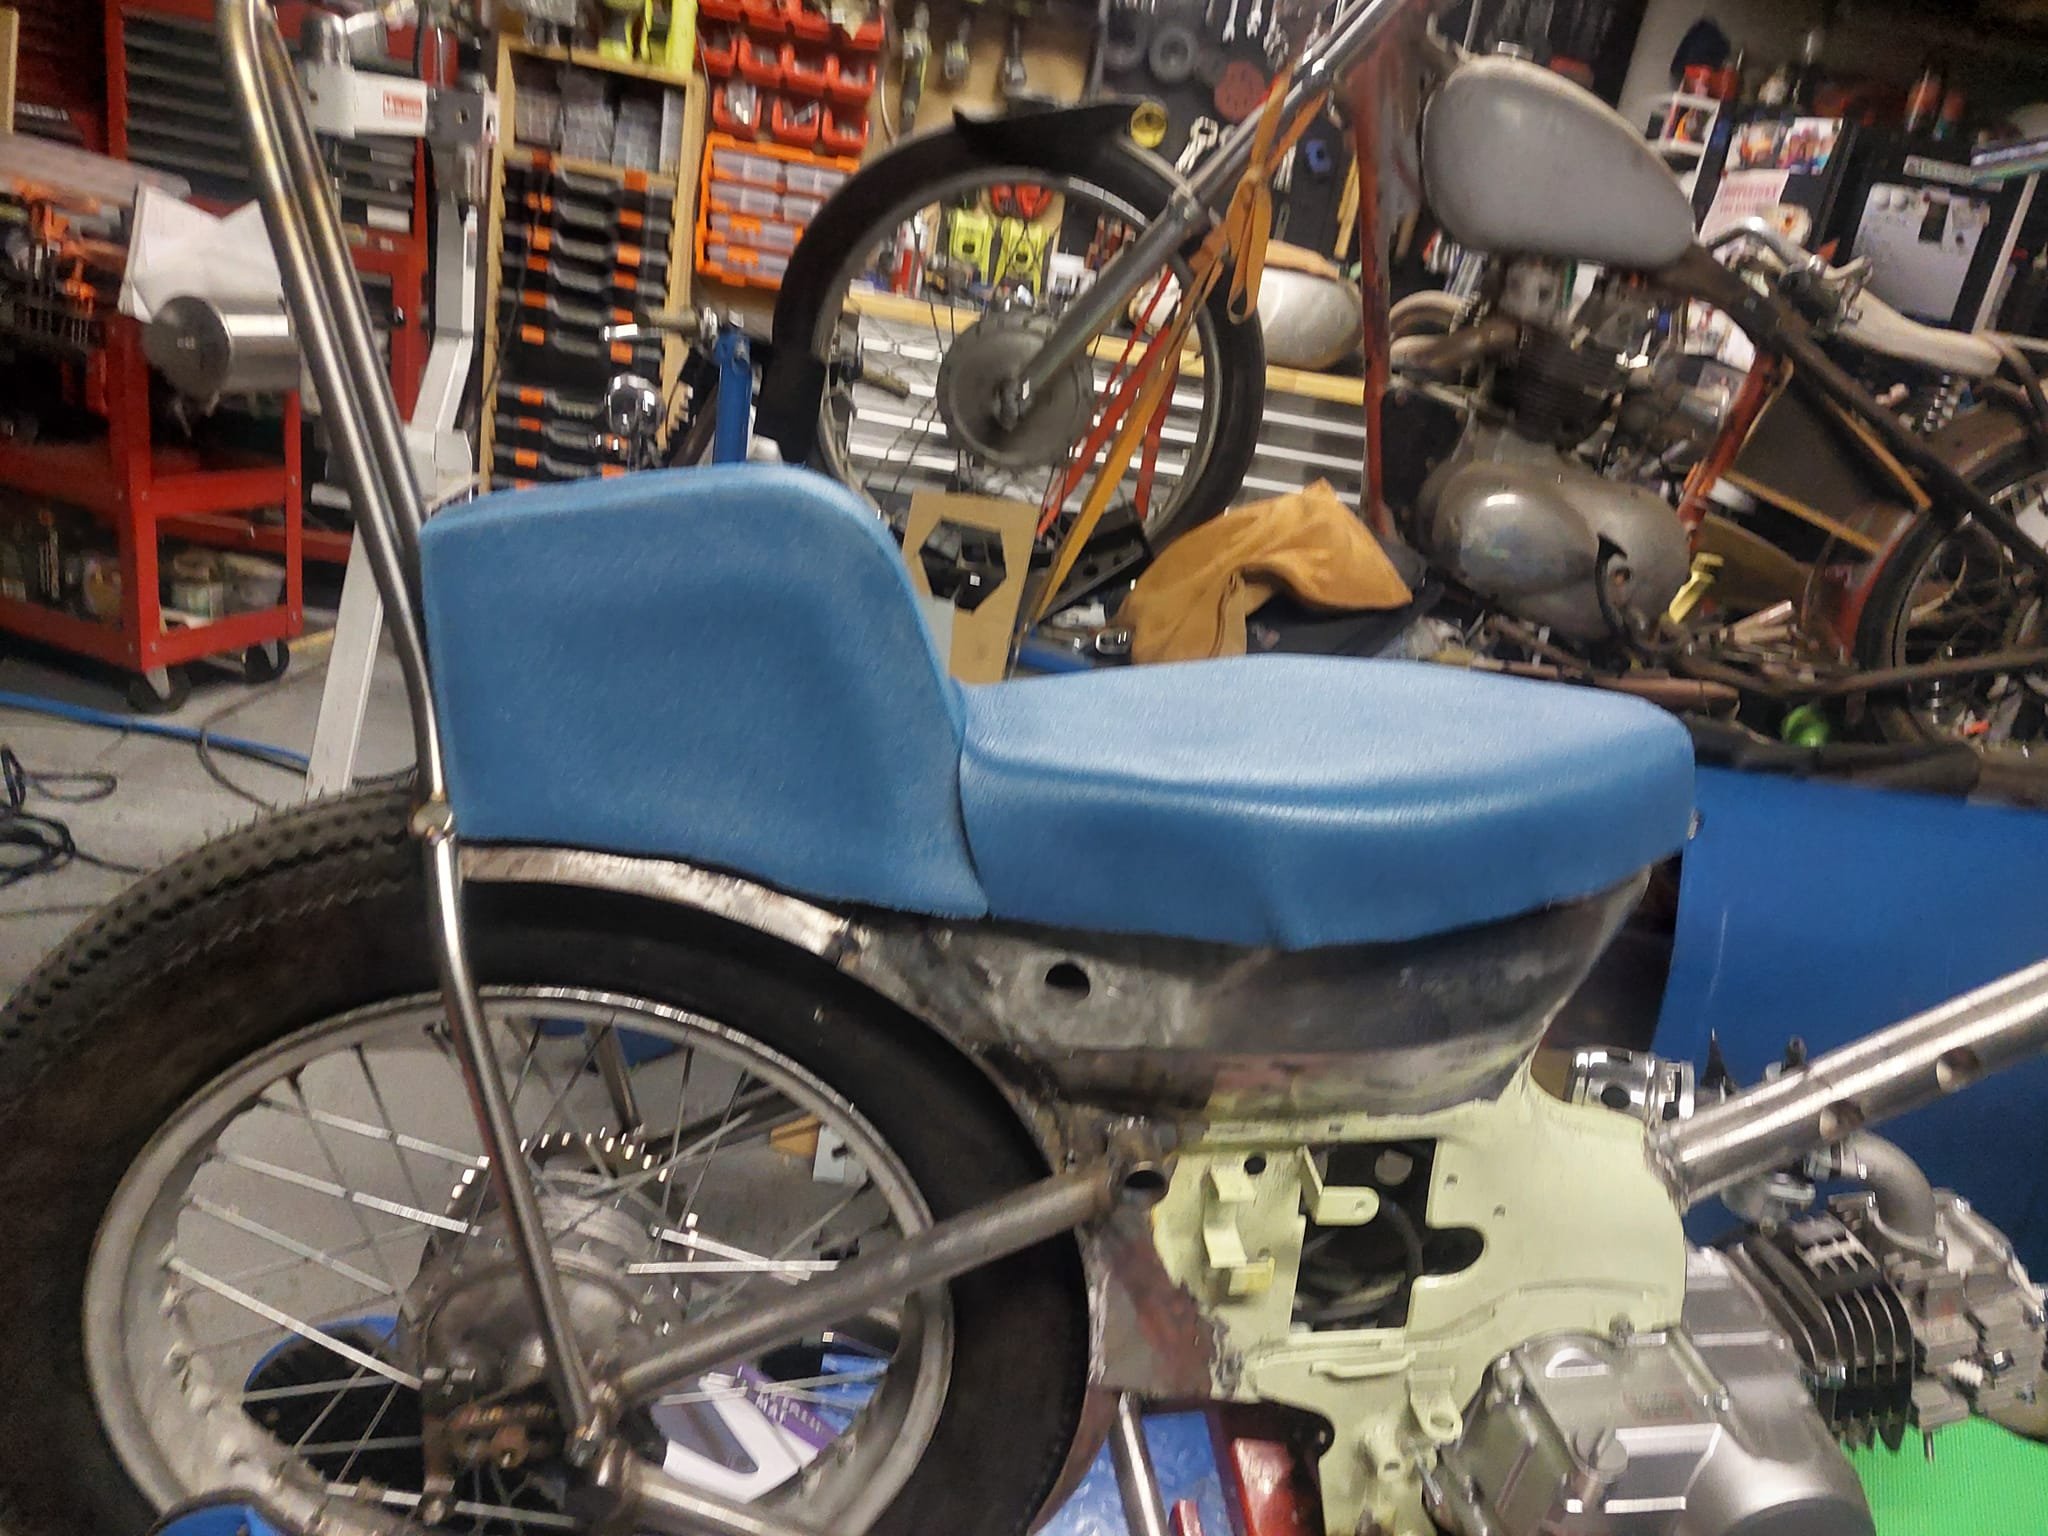
My seat is finally done so I took no time in mounting it. So stoked with it. My mate Josh upholstered it for me. He did a stellar job on it as usual
-
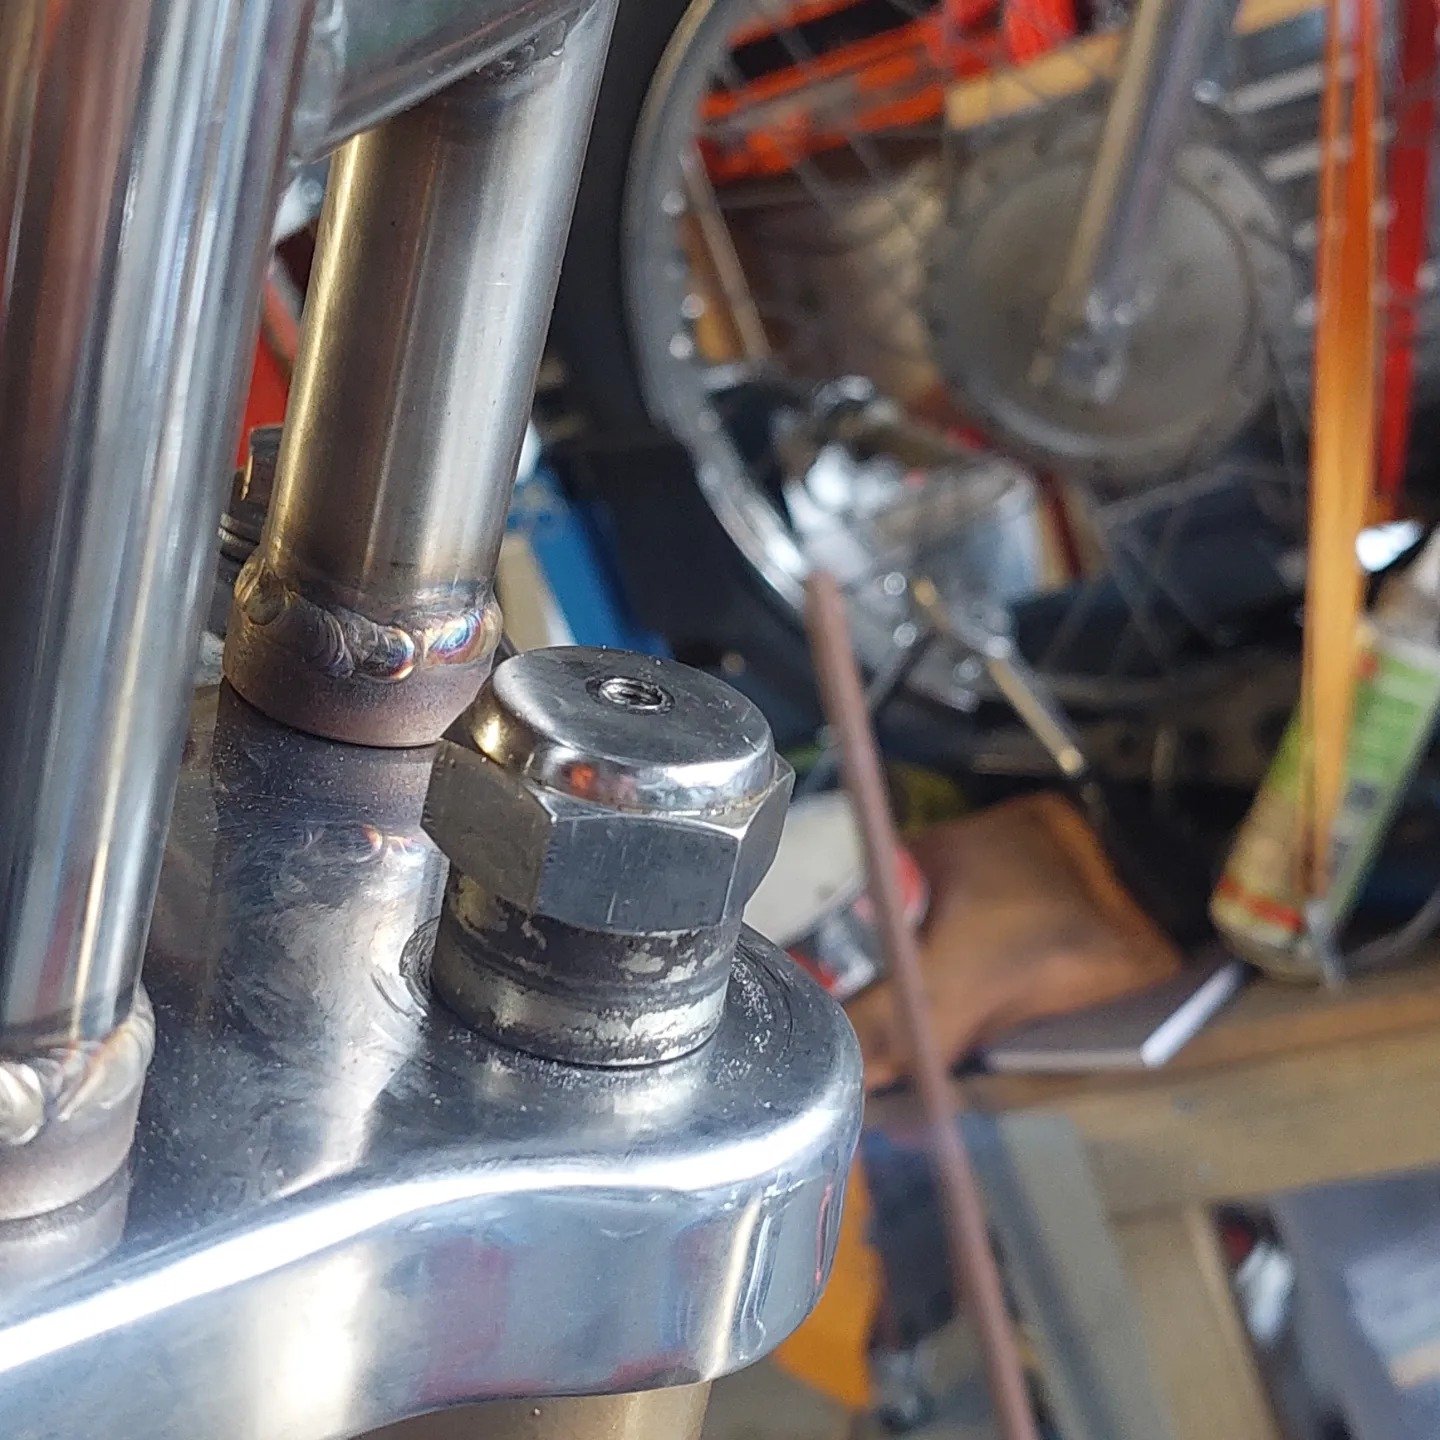
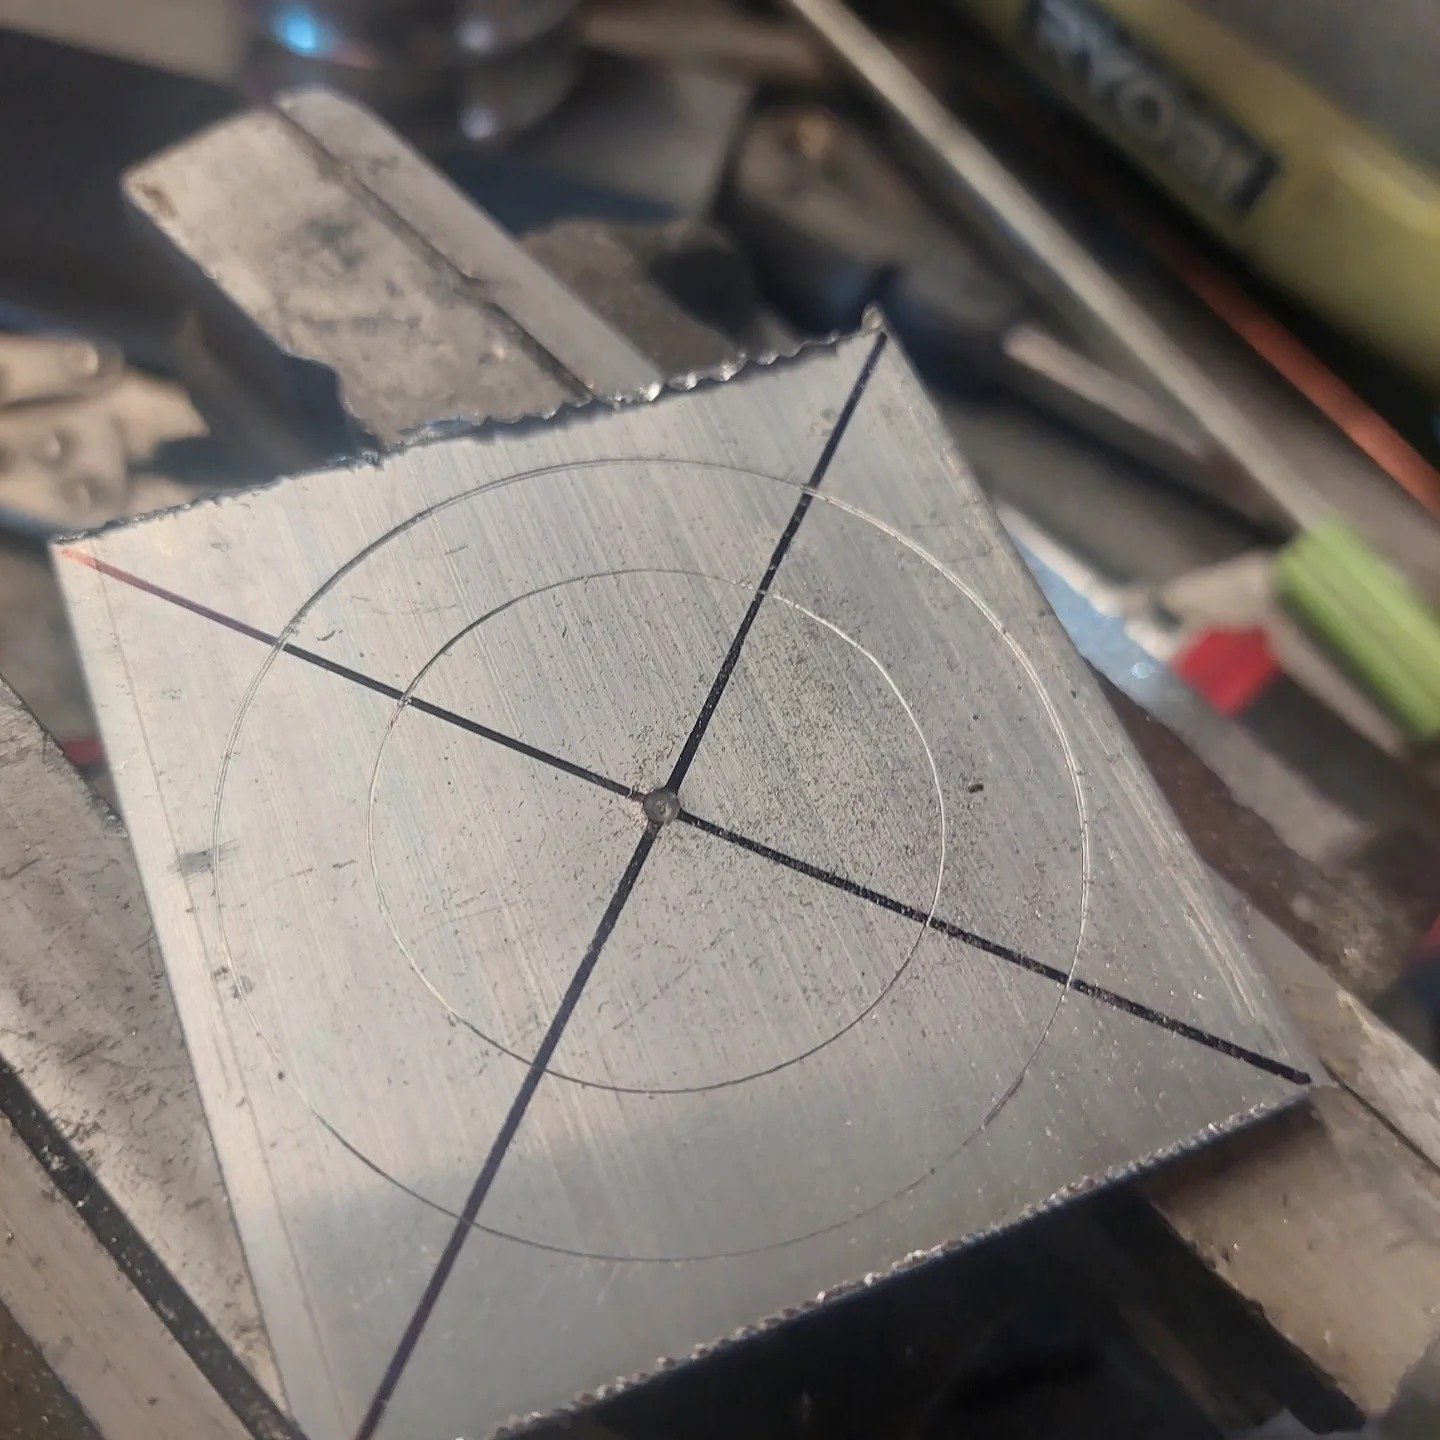
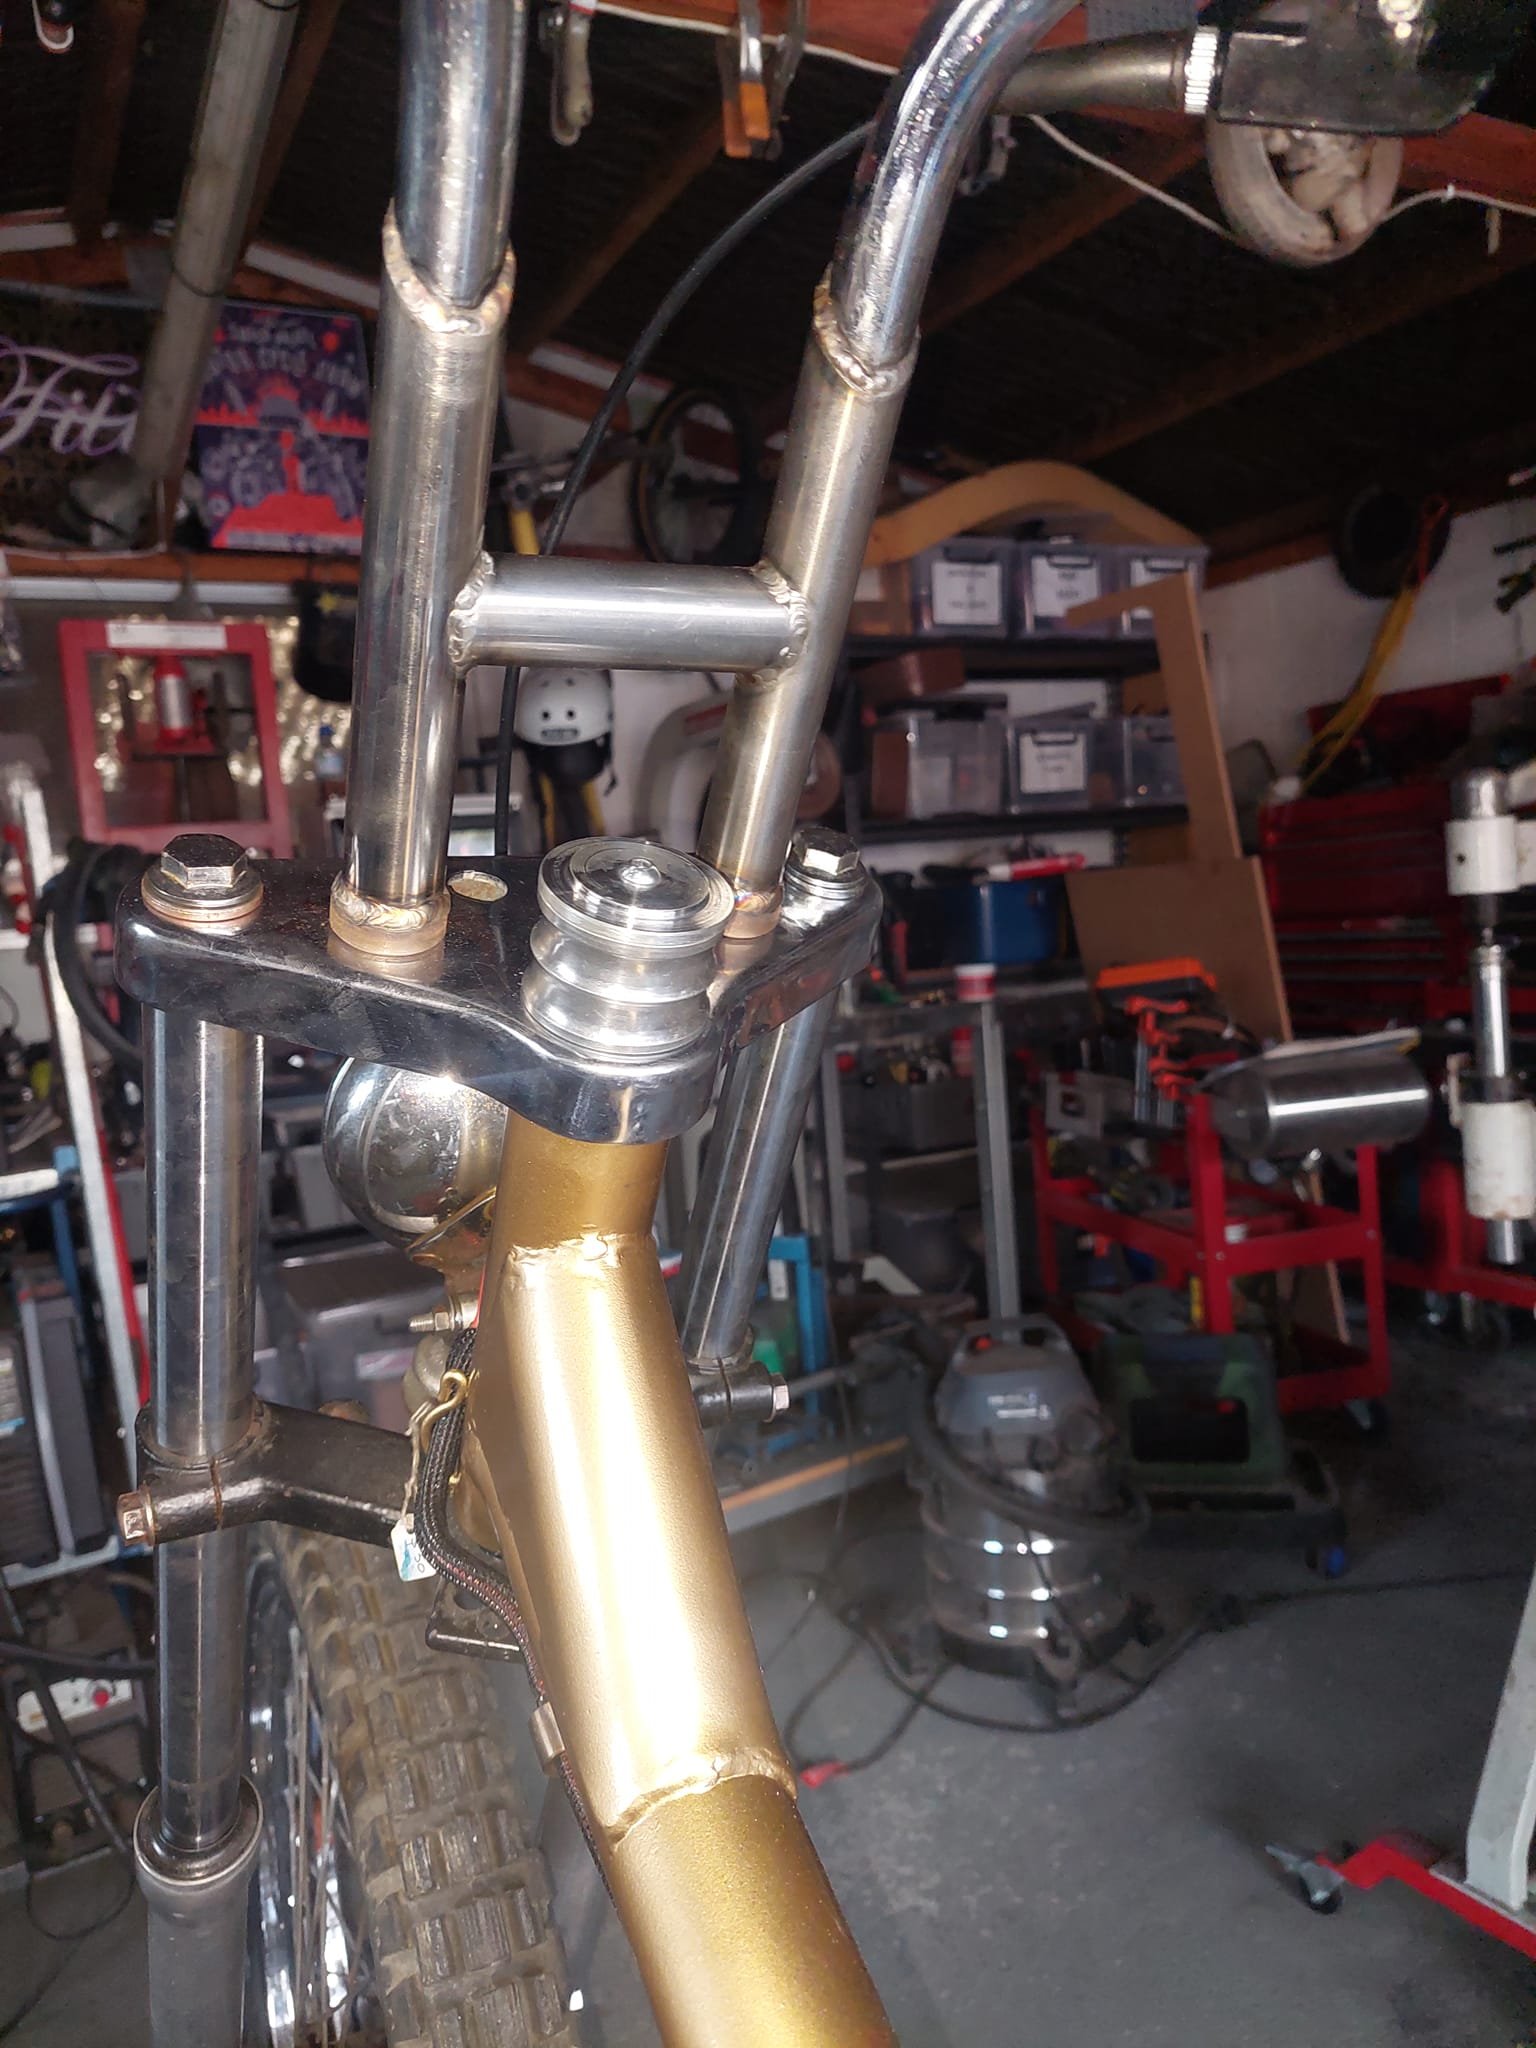
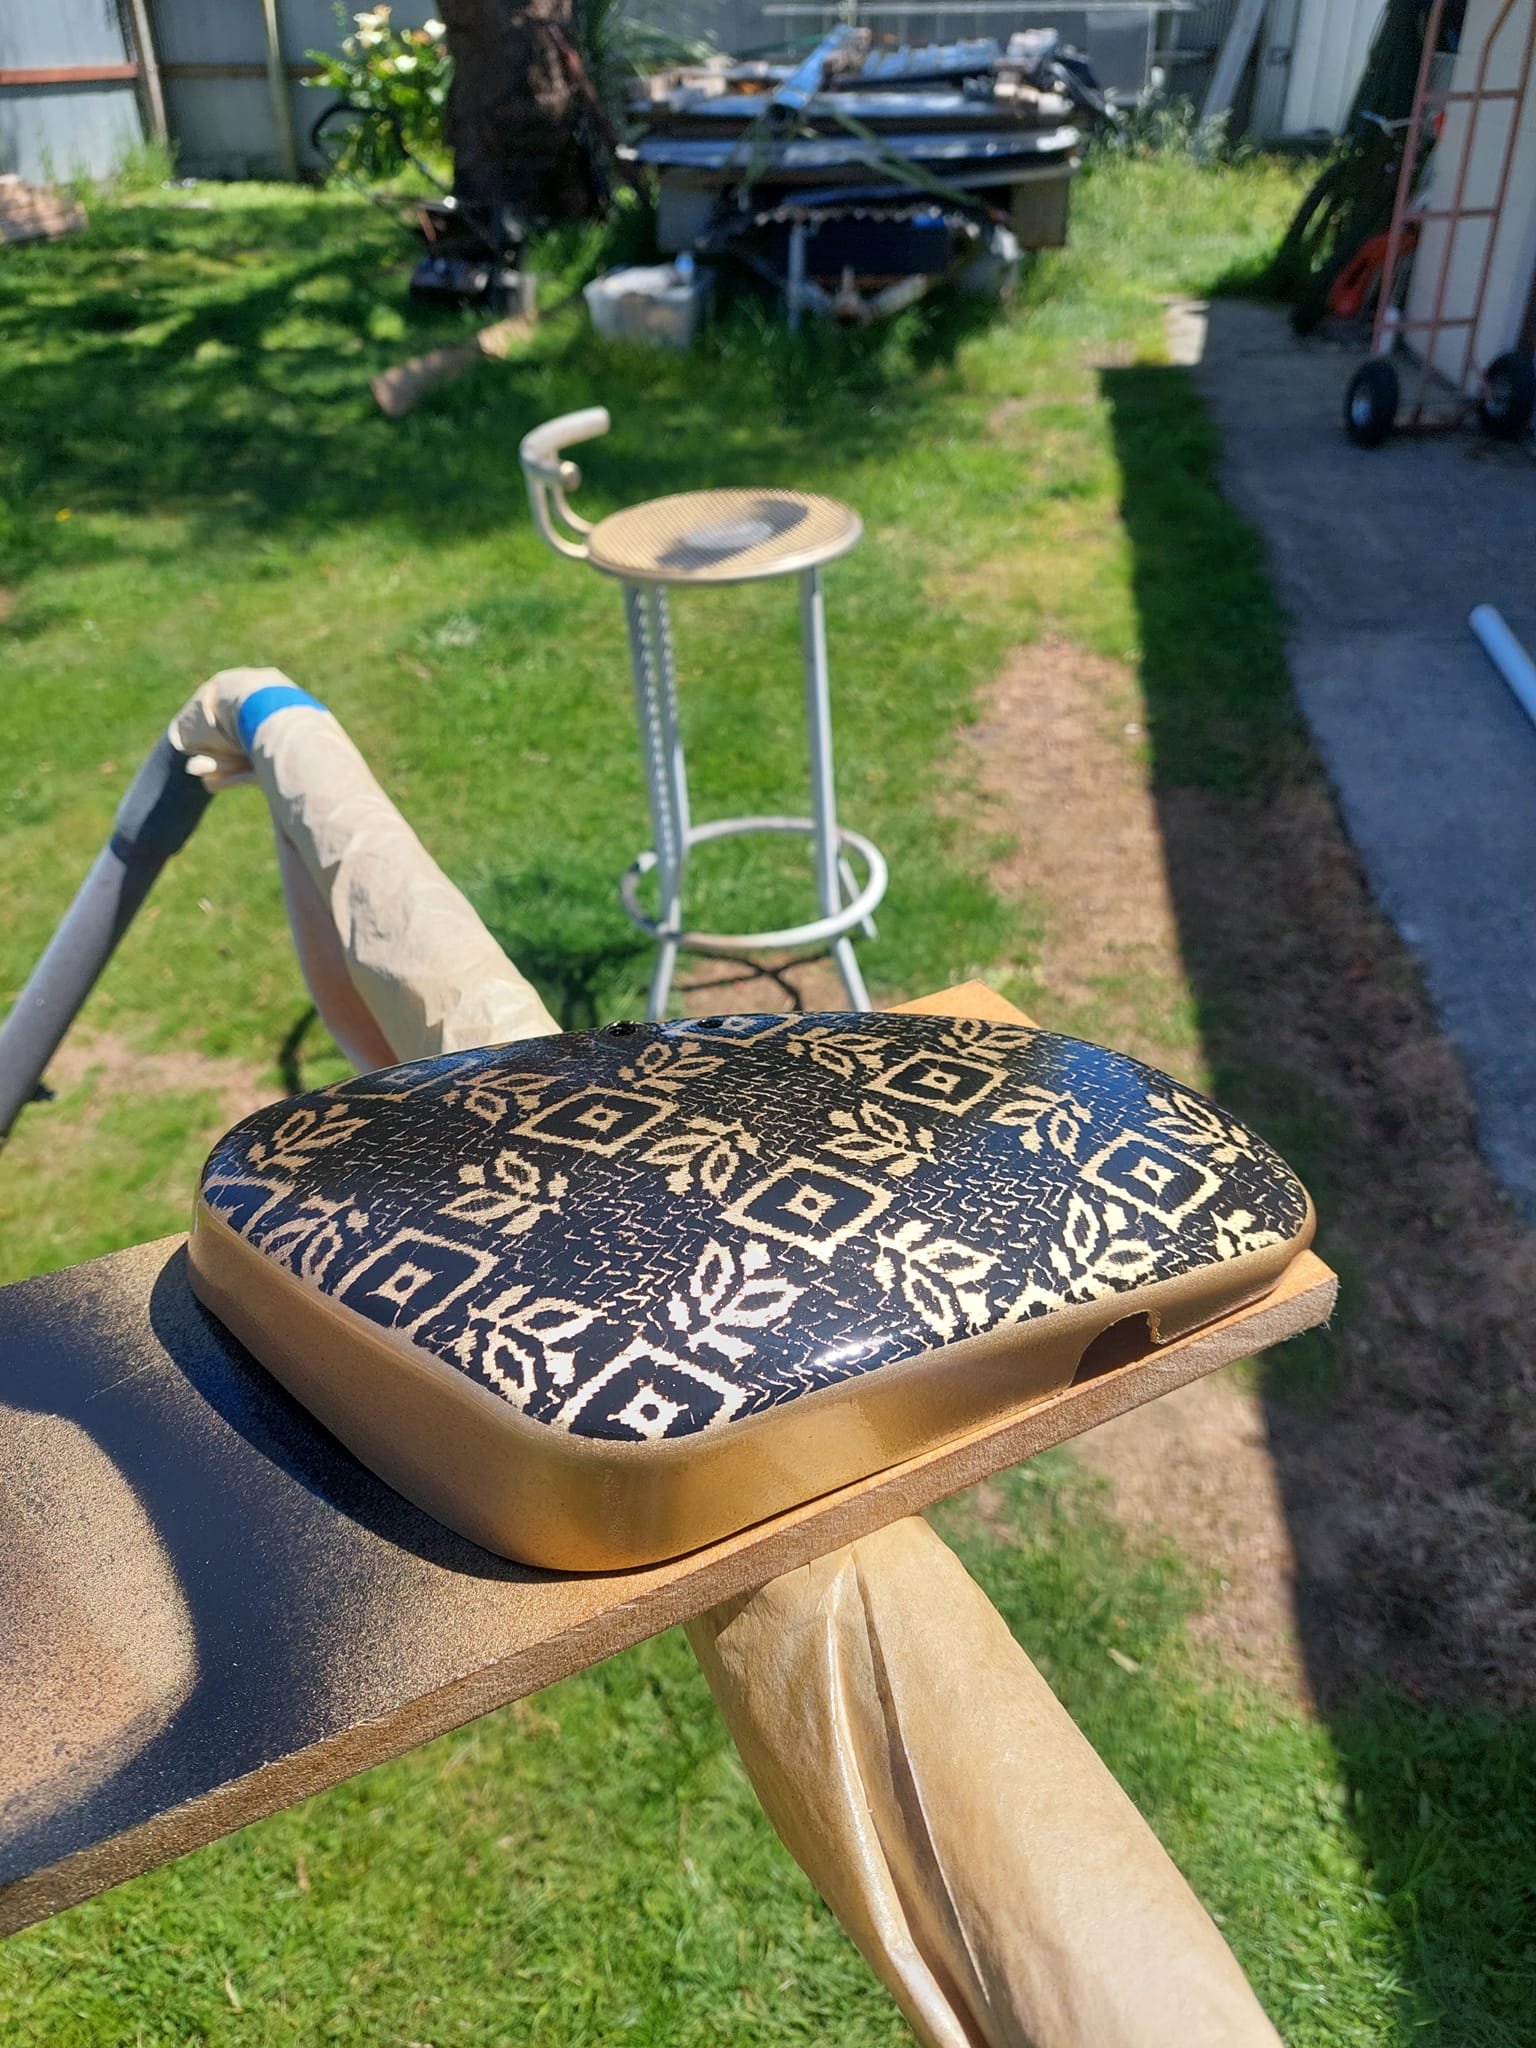
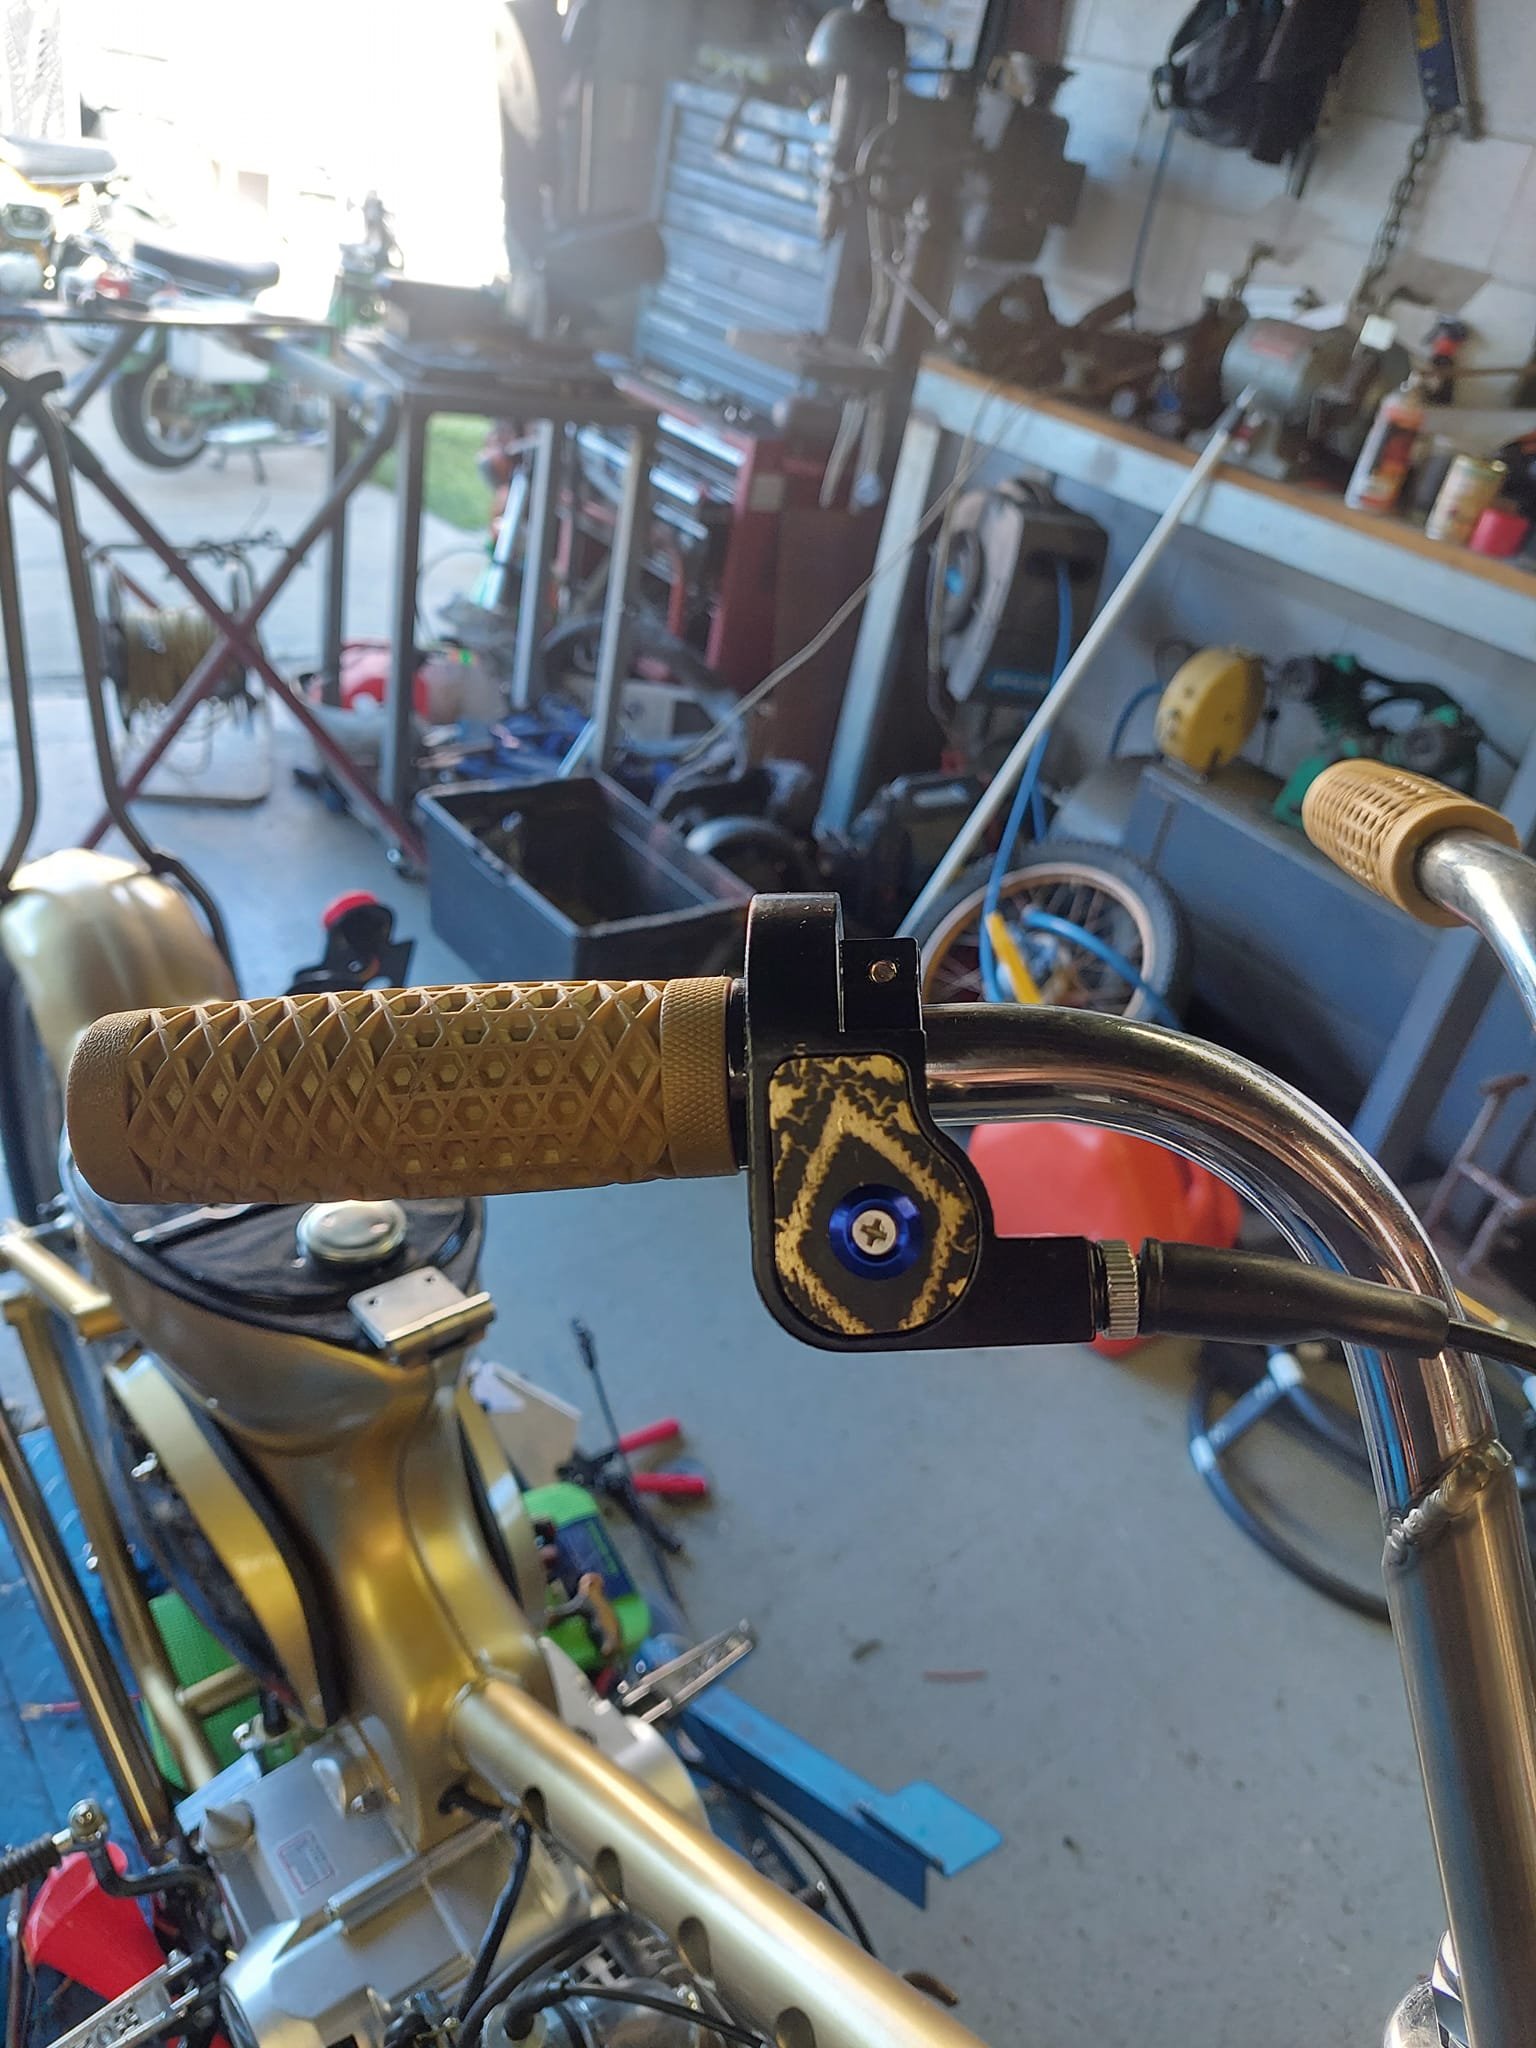
More little details that most will probs overlook. The stem nut for the forks looked kinda average so I thought I'd make a cover for it. I bought some napkin rings from a vinnies op shop. I got 8 of them for 10 bucks. I bored one out on my lathe so it would fit over the nut and spacer. Then I drilled a 5mm hole through the stem nut and tapped it M6. Them I got 6mm aluminium from work, marked and drilled the center and fixed it to a spigot in my lathe and turned it to the same od as the napkin ring. Same principle as a headset cap on a BMX/MTB
- 22 replies
-
- 11
-
-
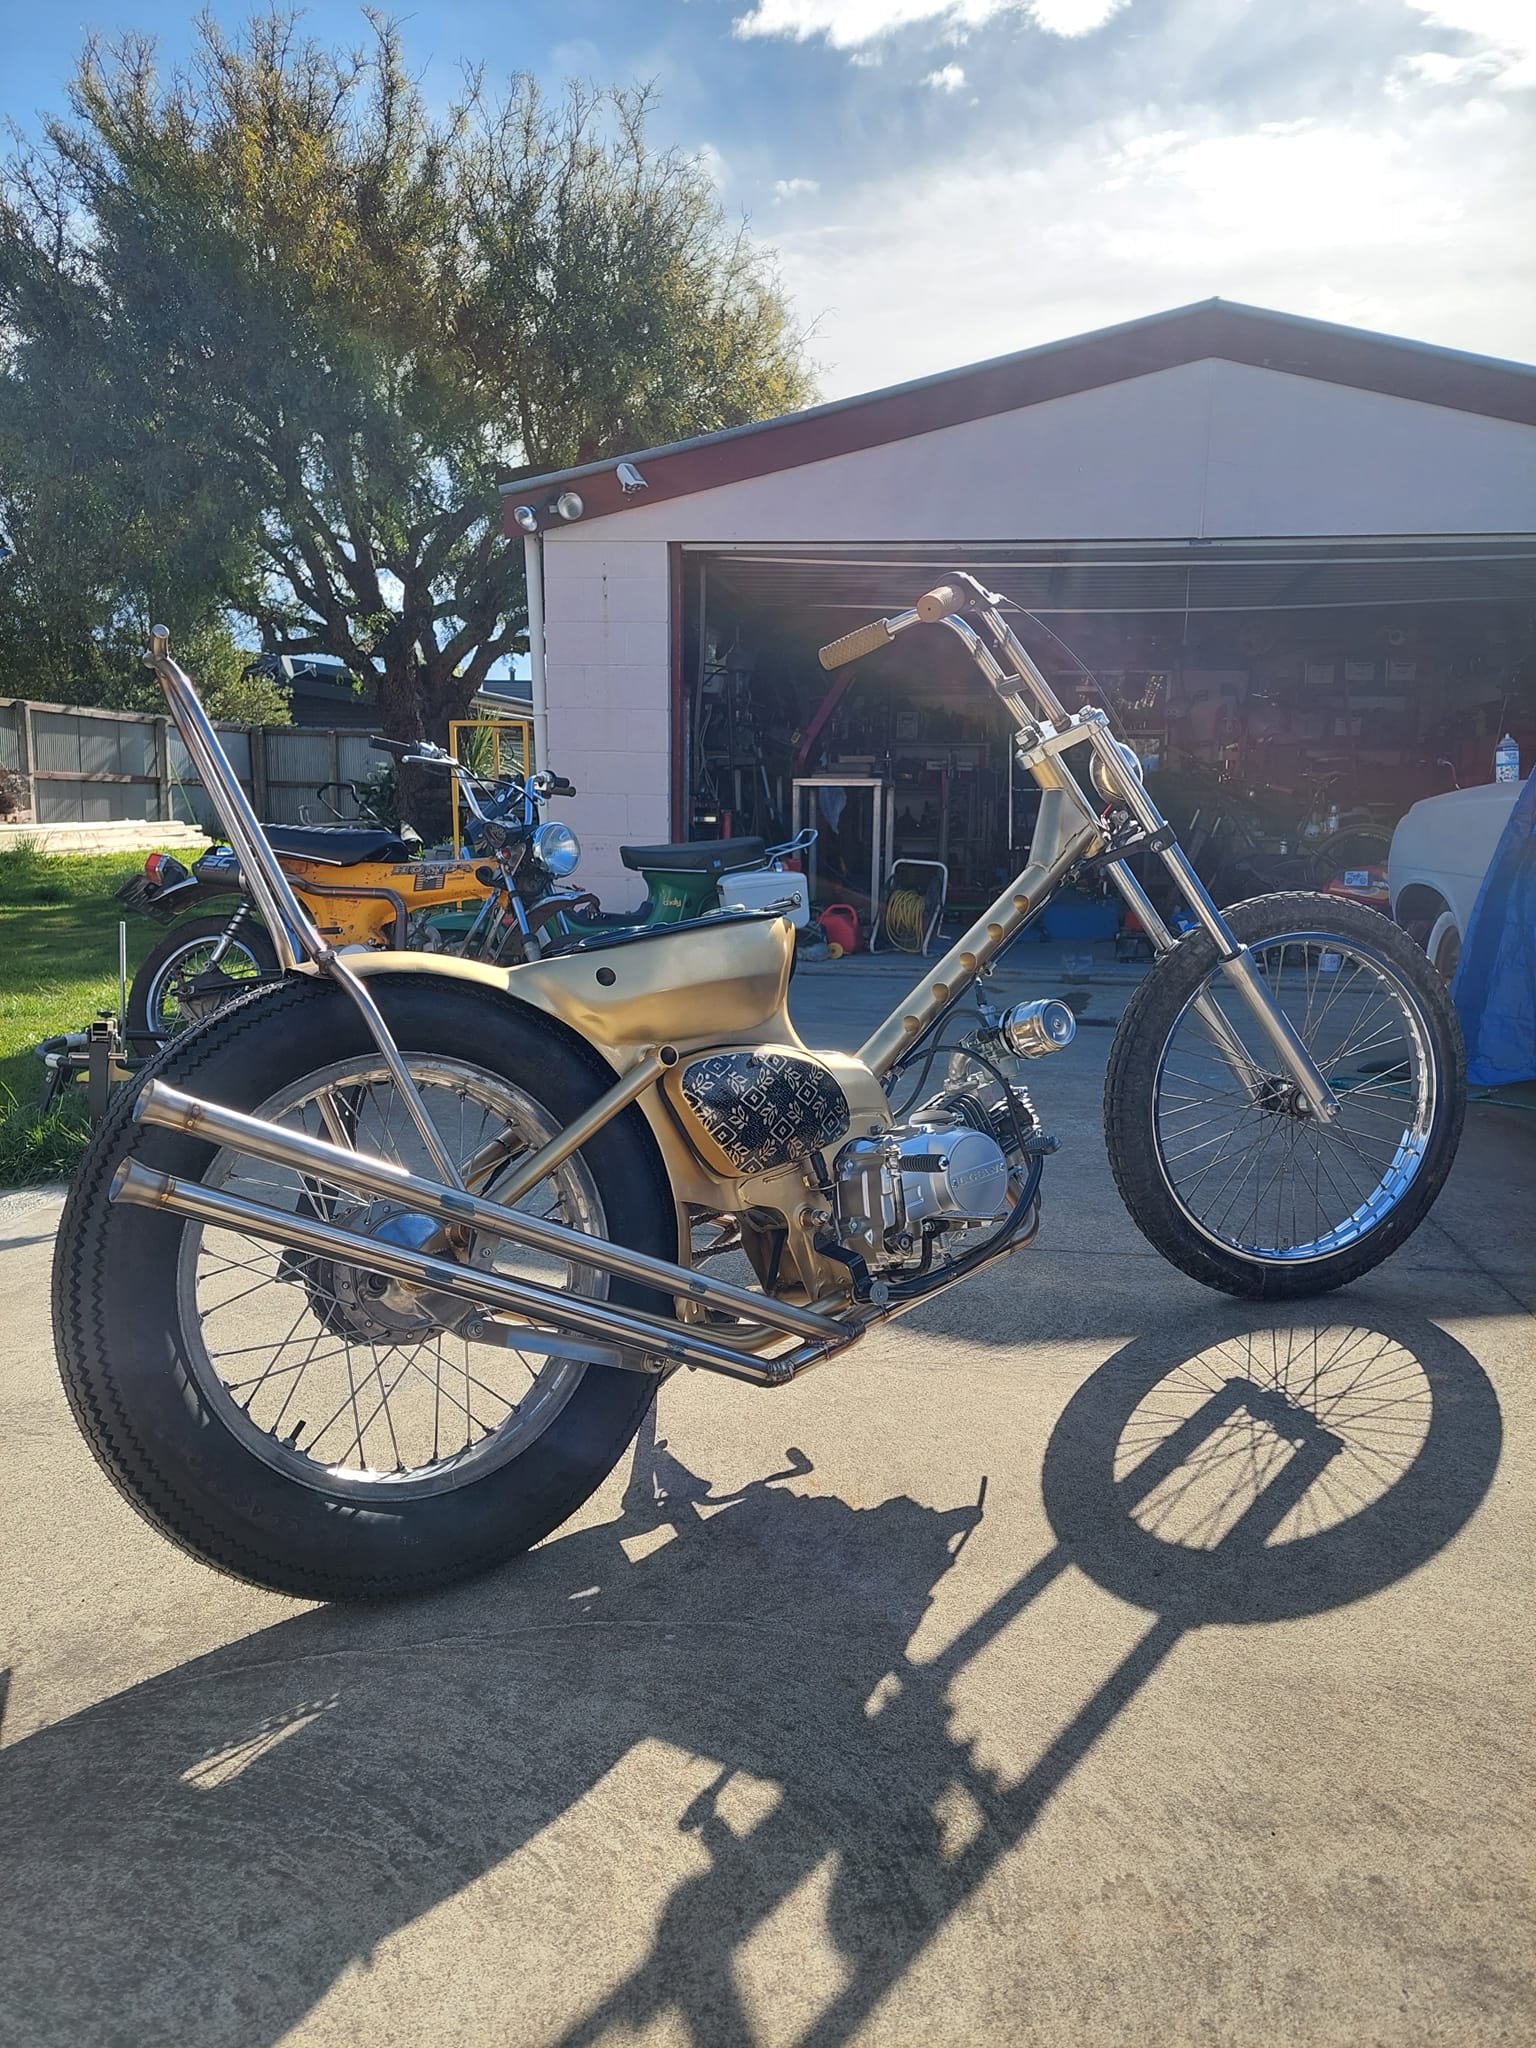
Just some more assembly pics I narrowed the bars too by 50mm each side Just waiting on my seat now and hook up the brake rod
- 22 replies
-
- 15
-
-

-
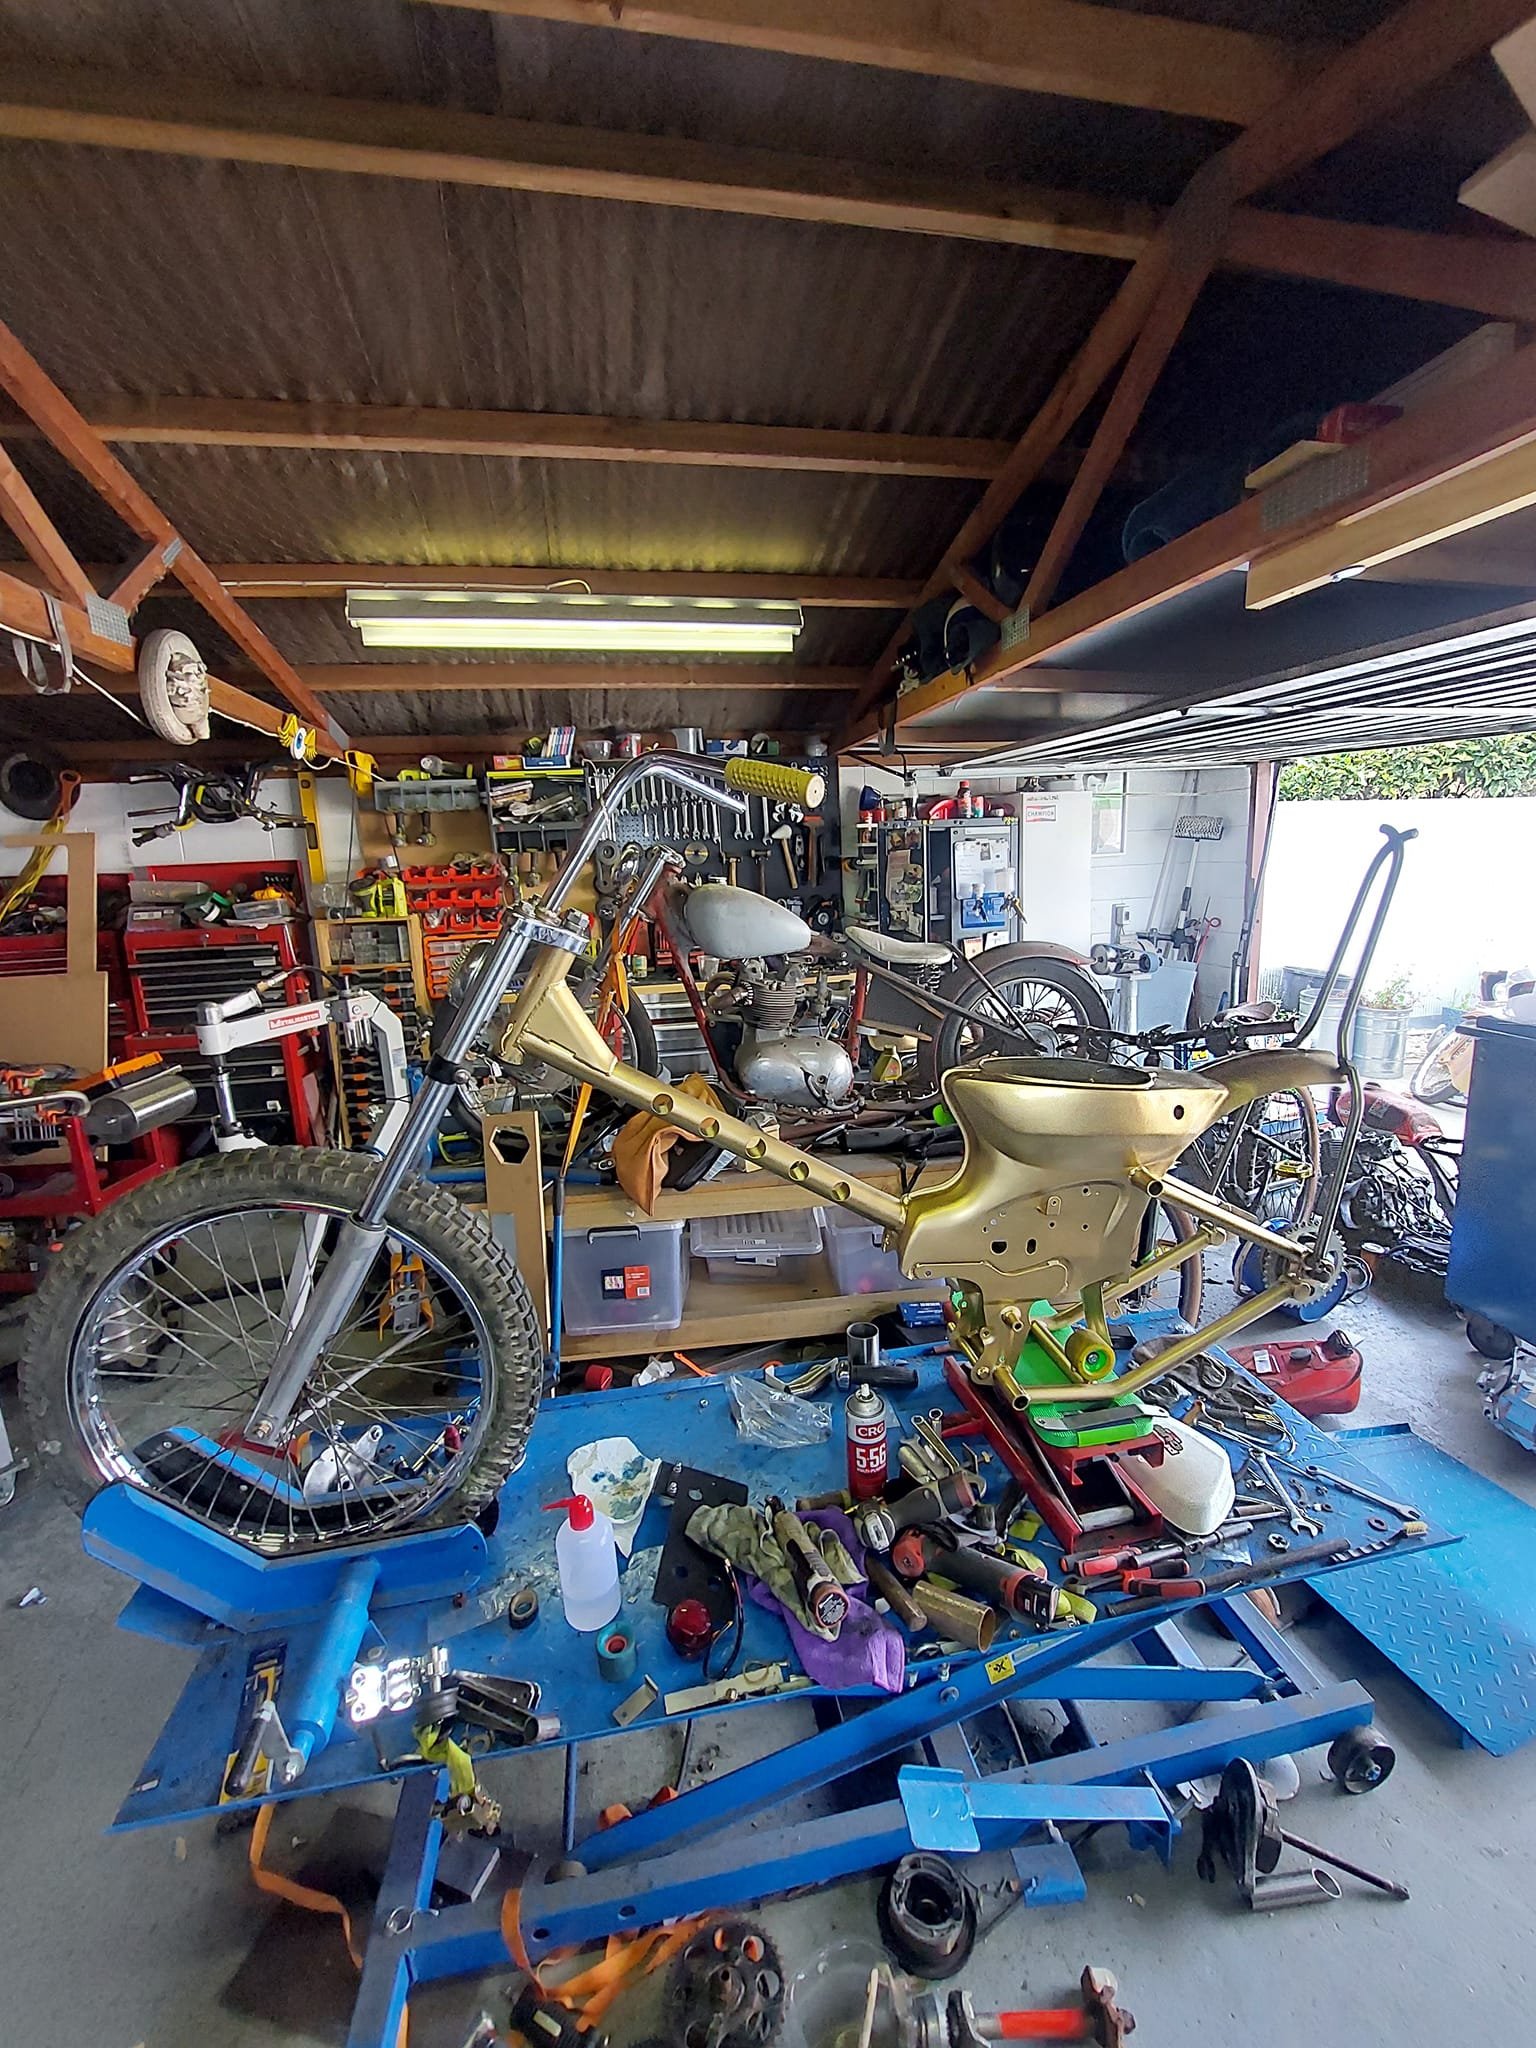
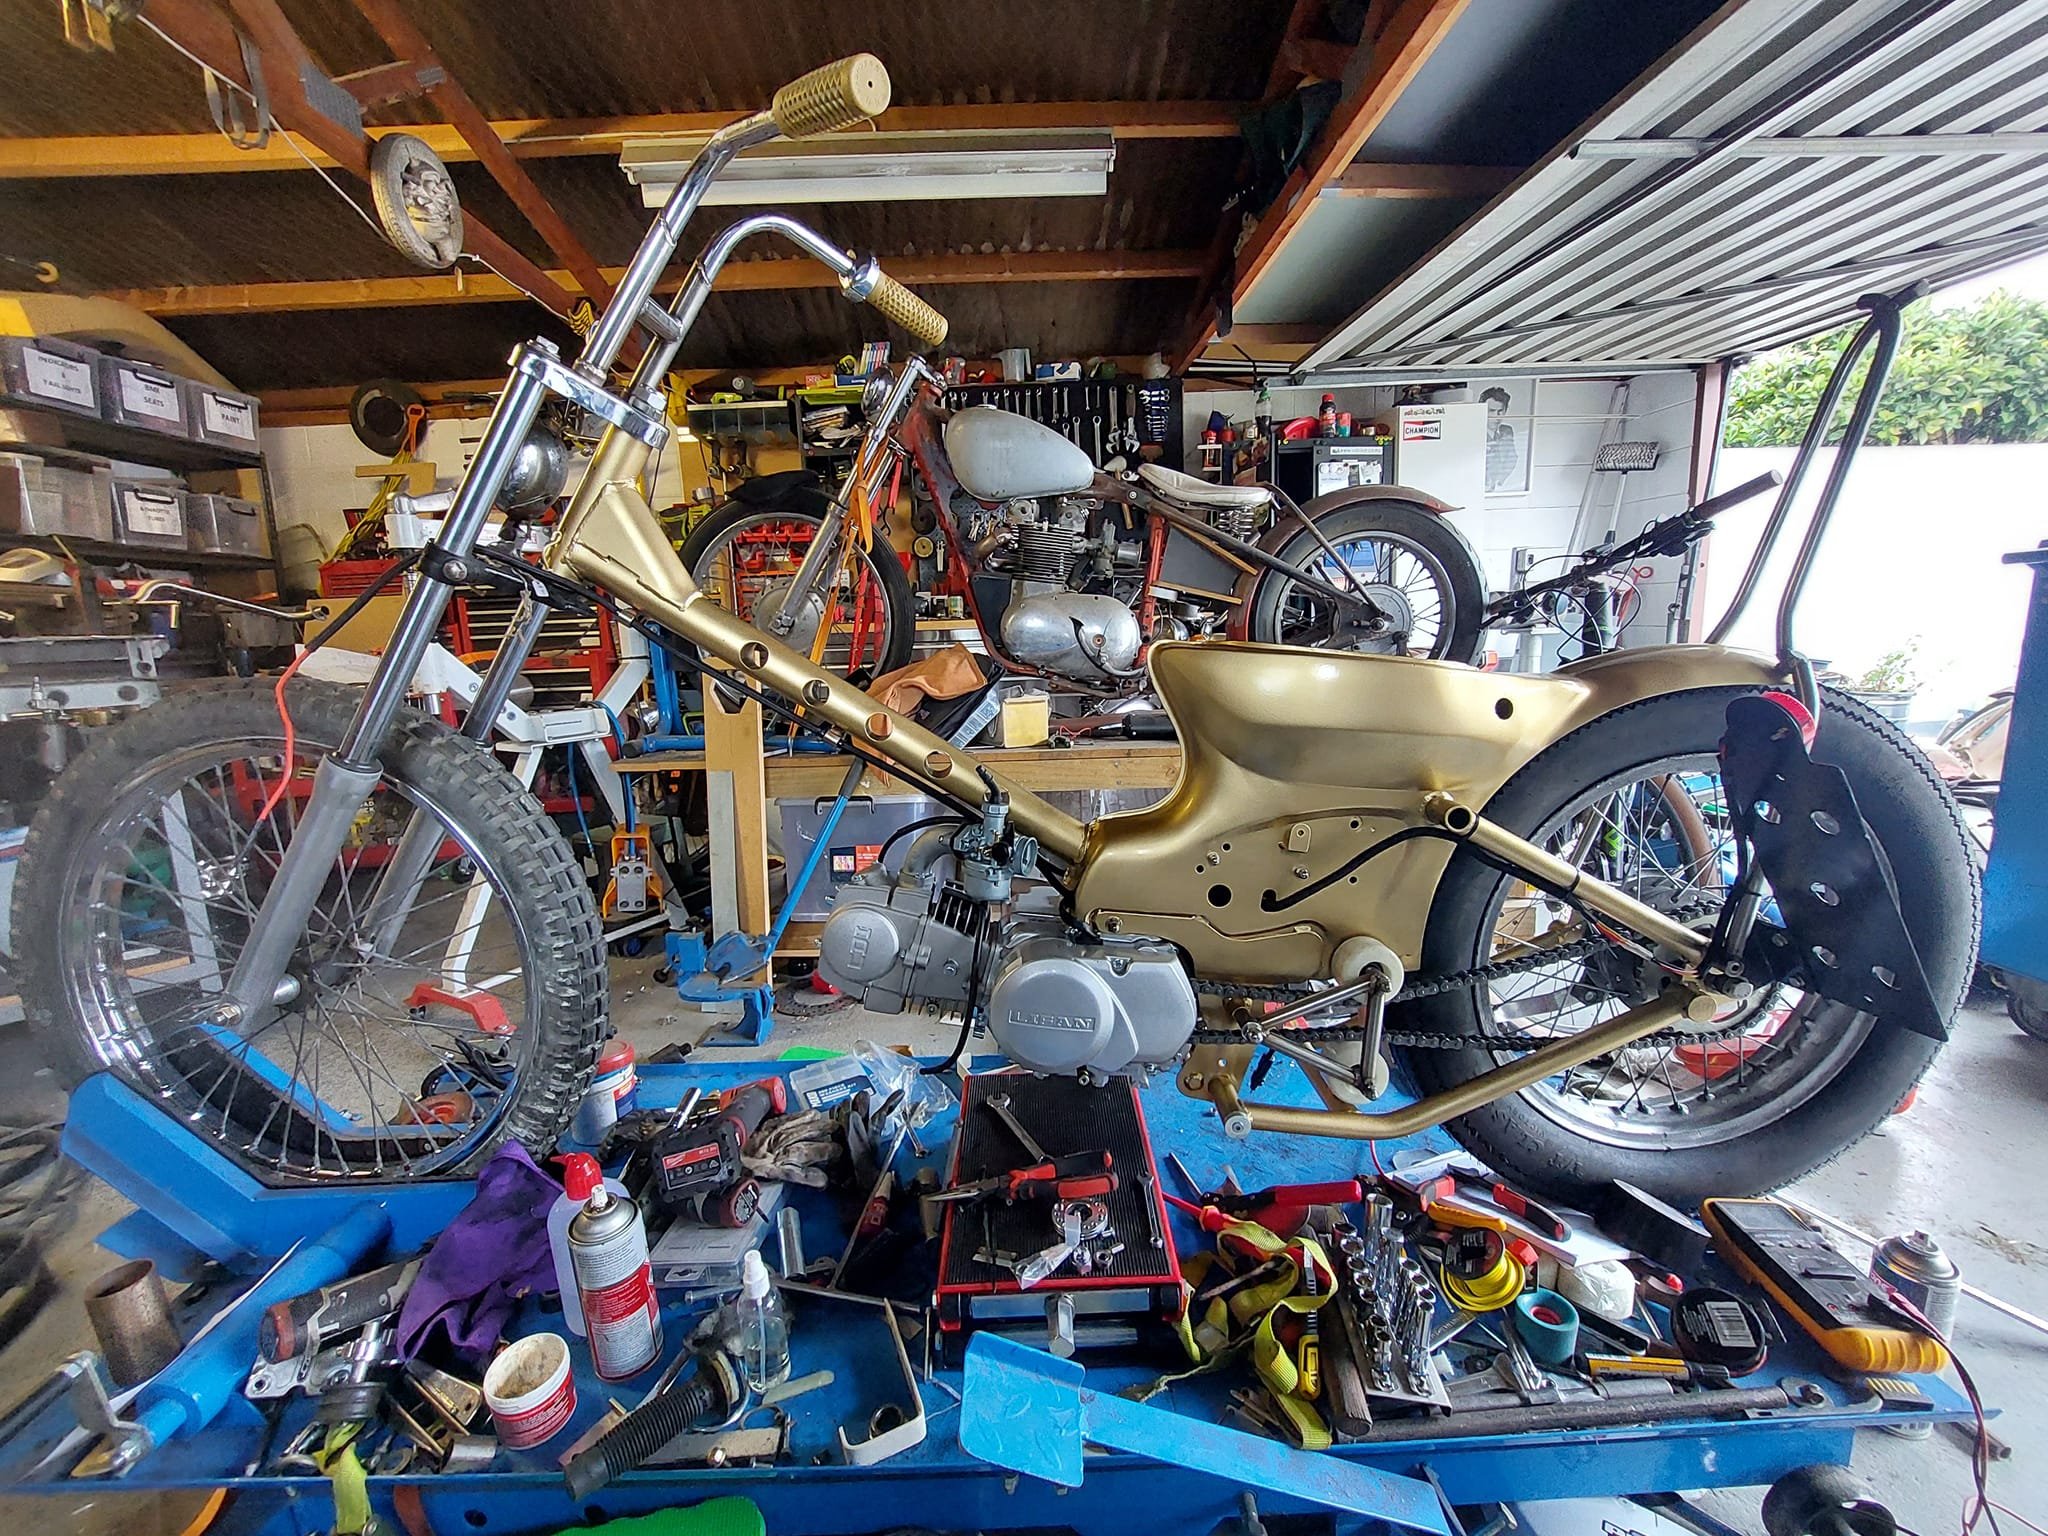
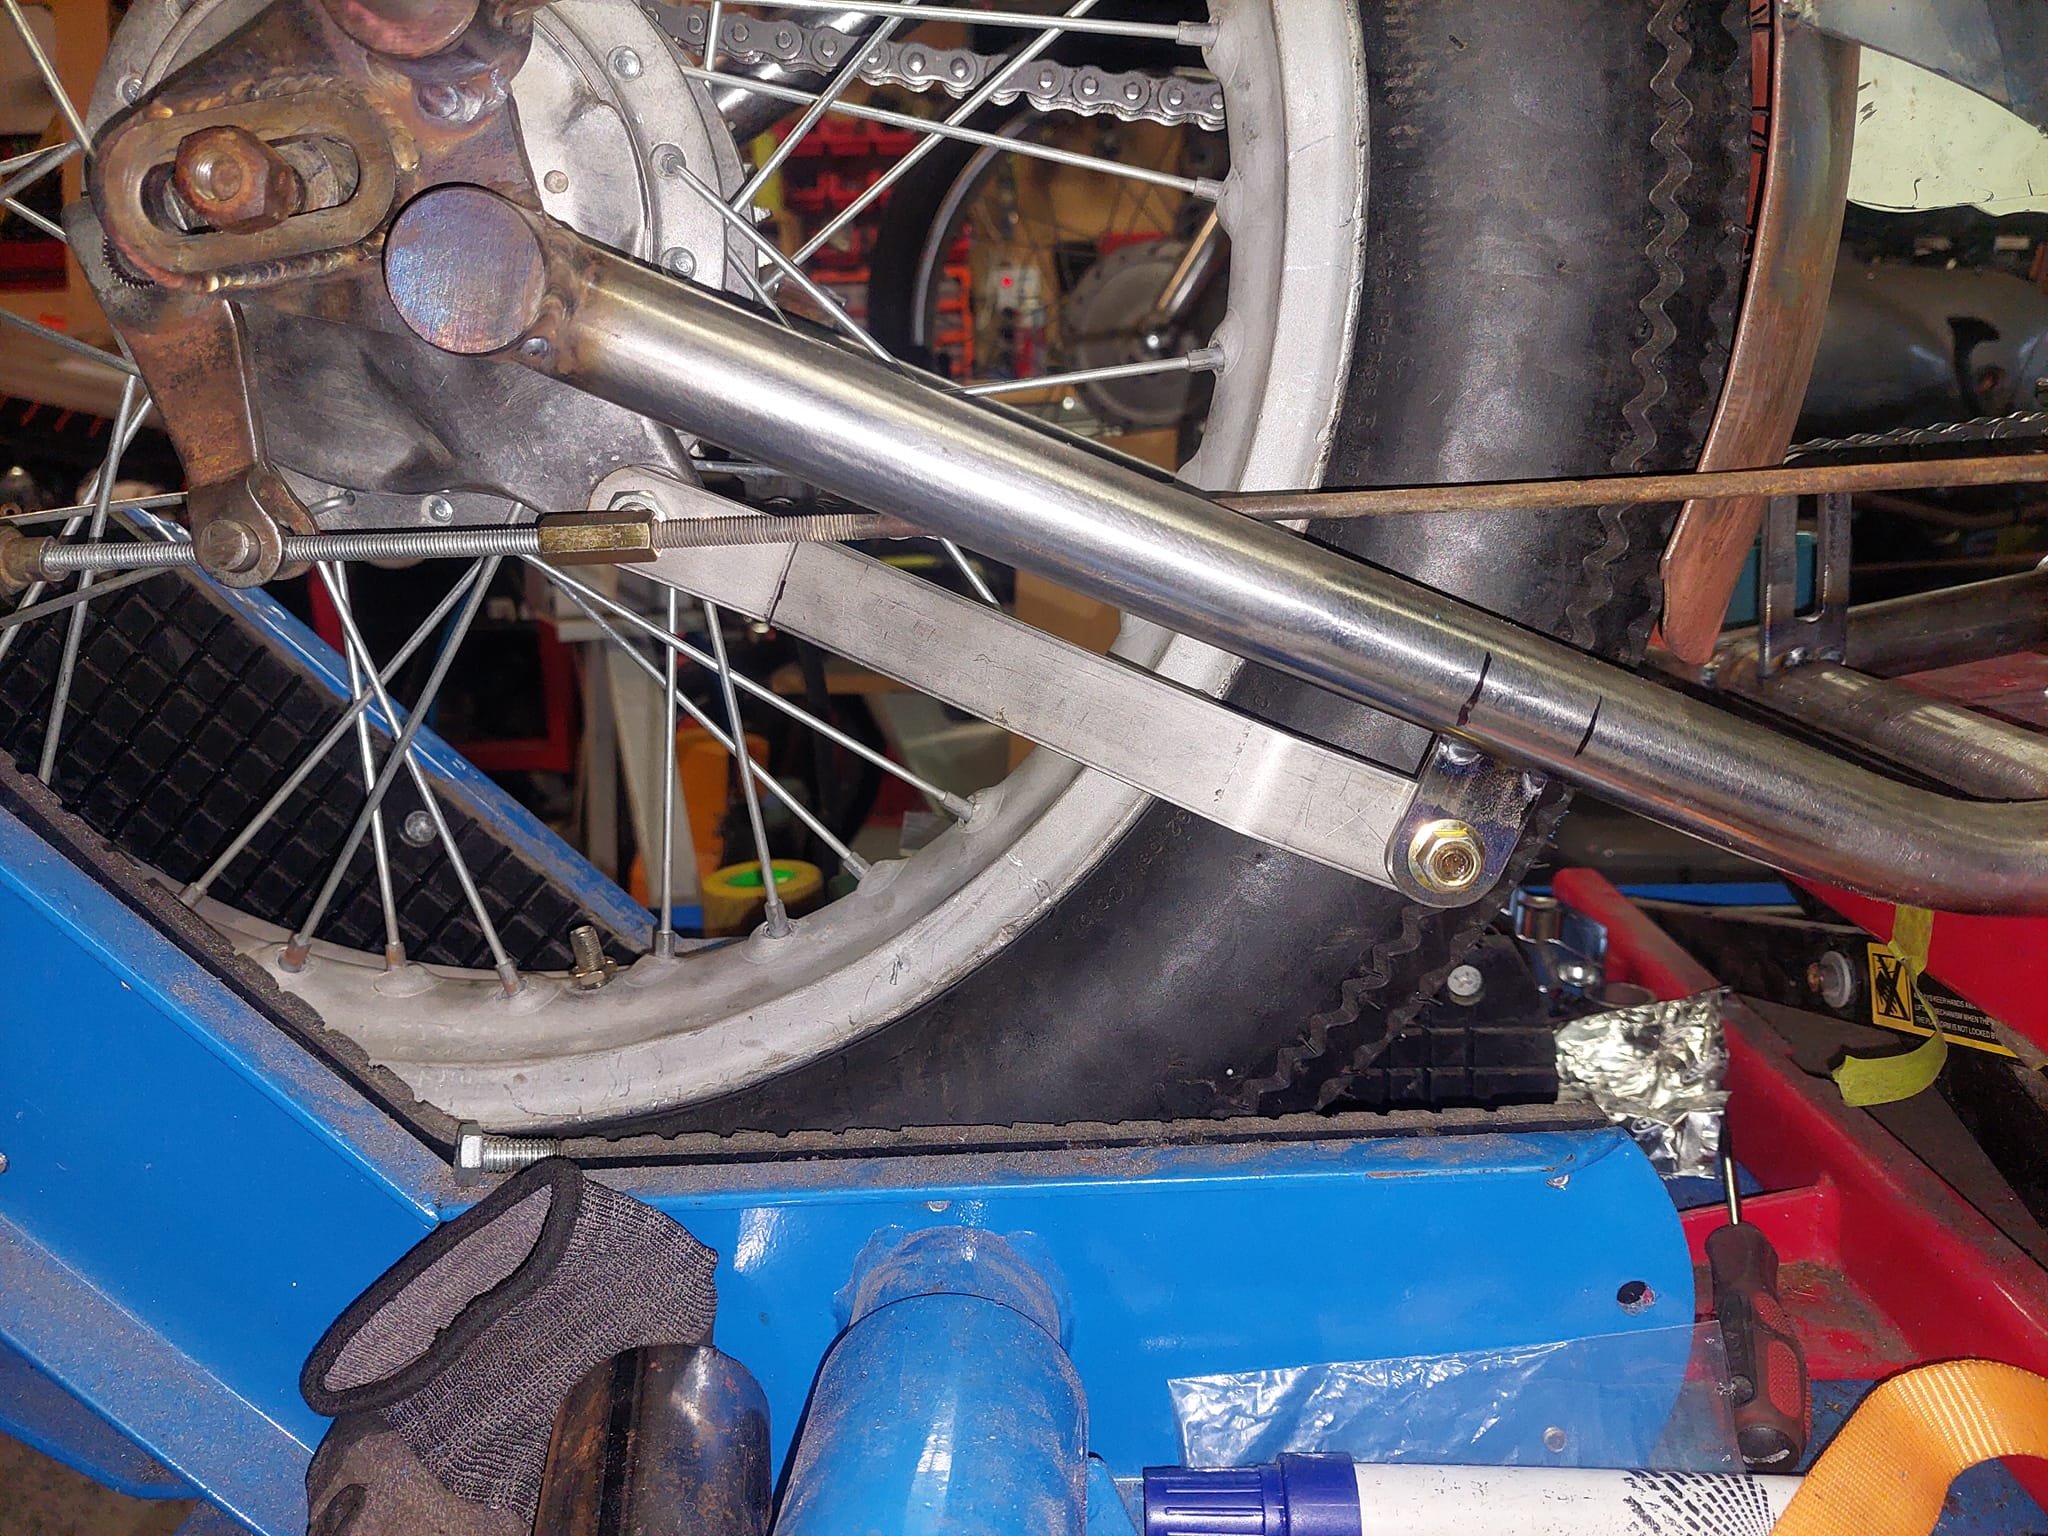
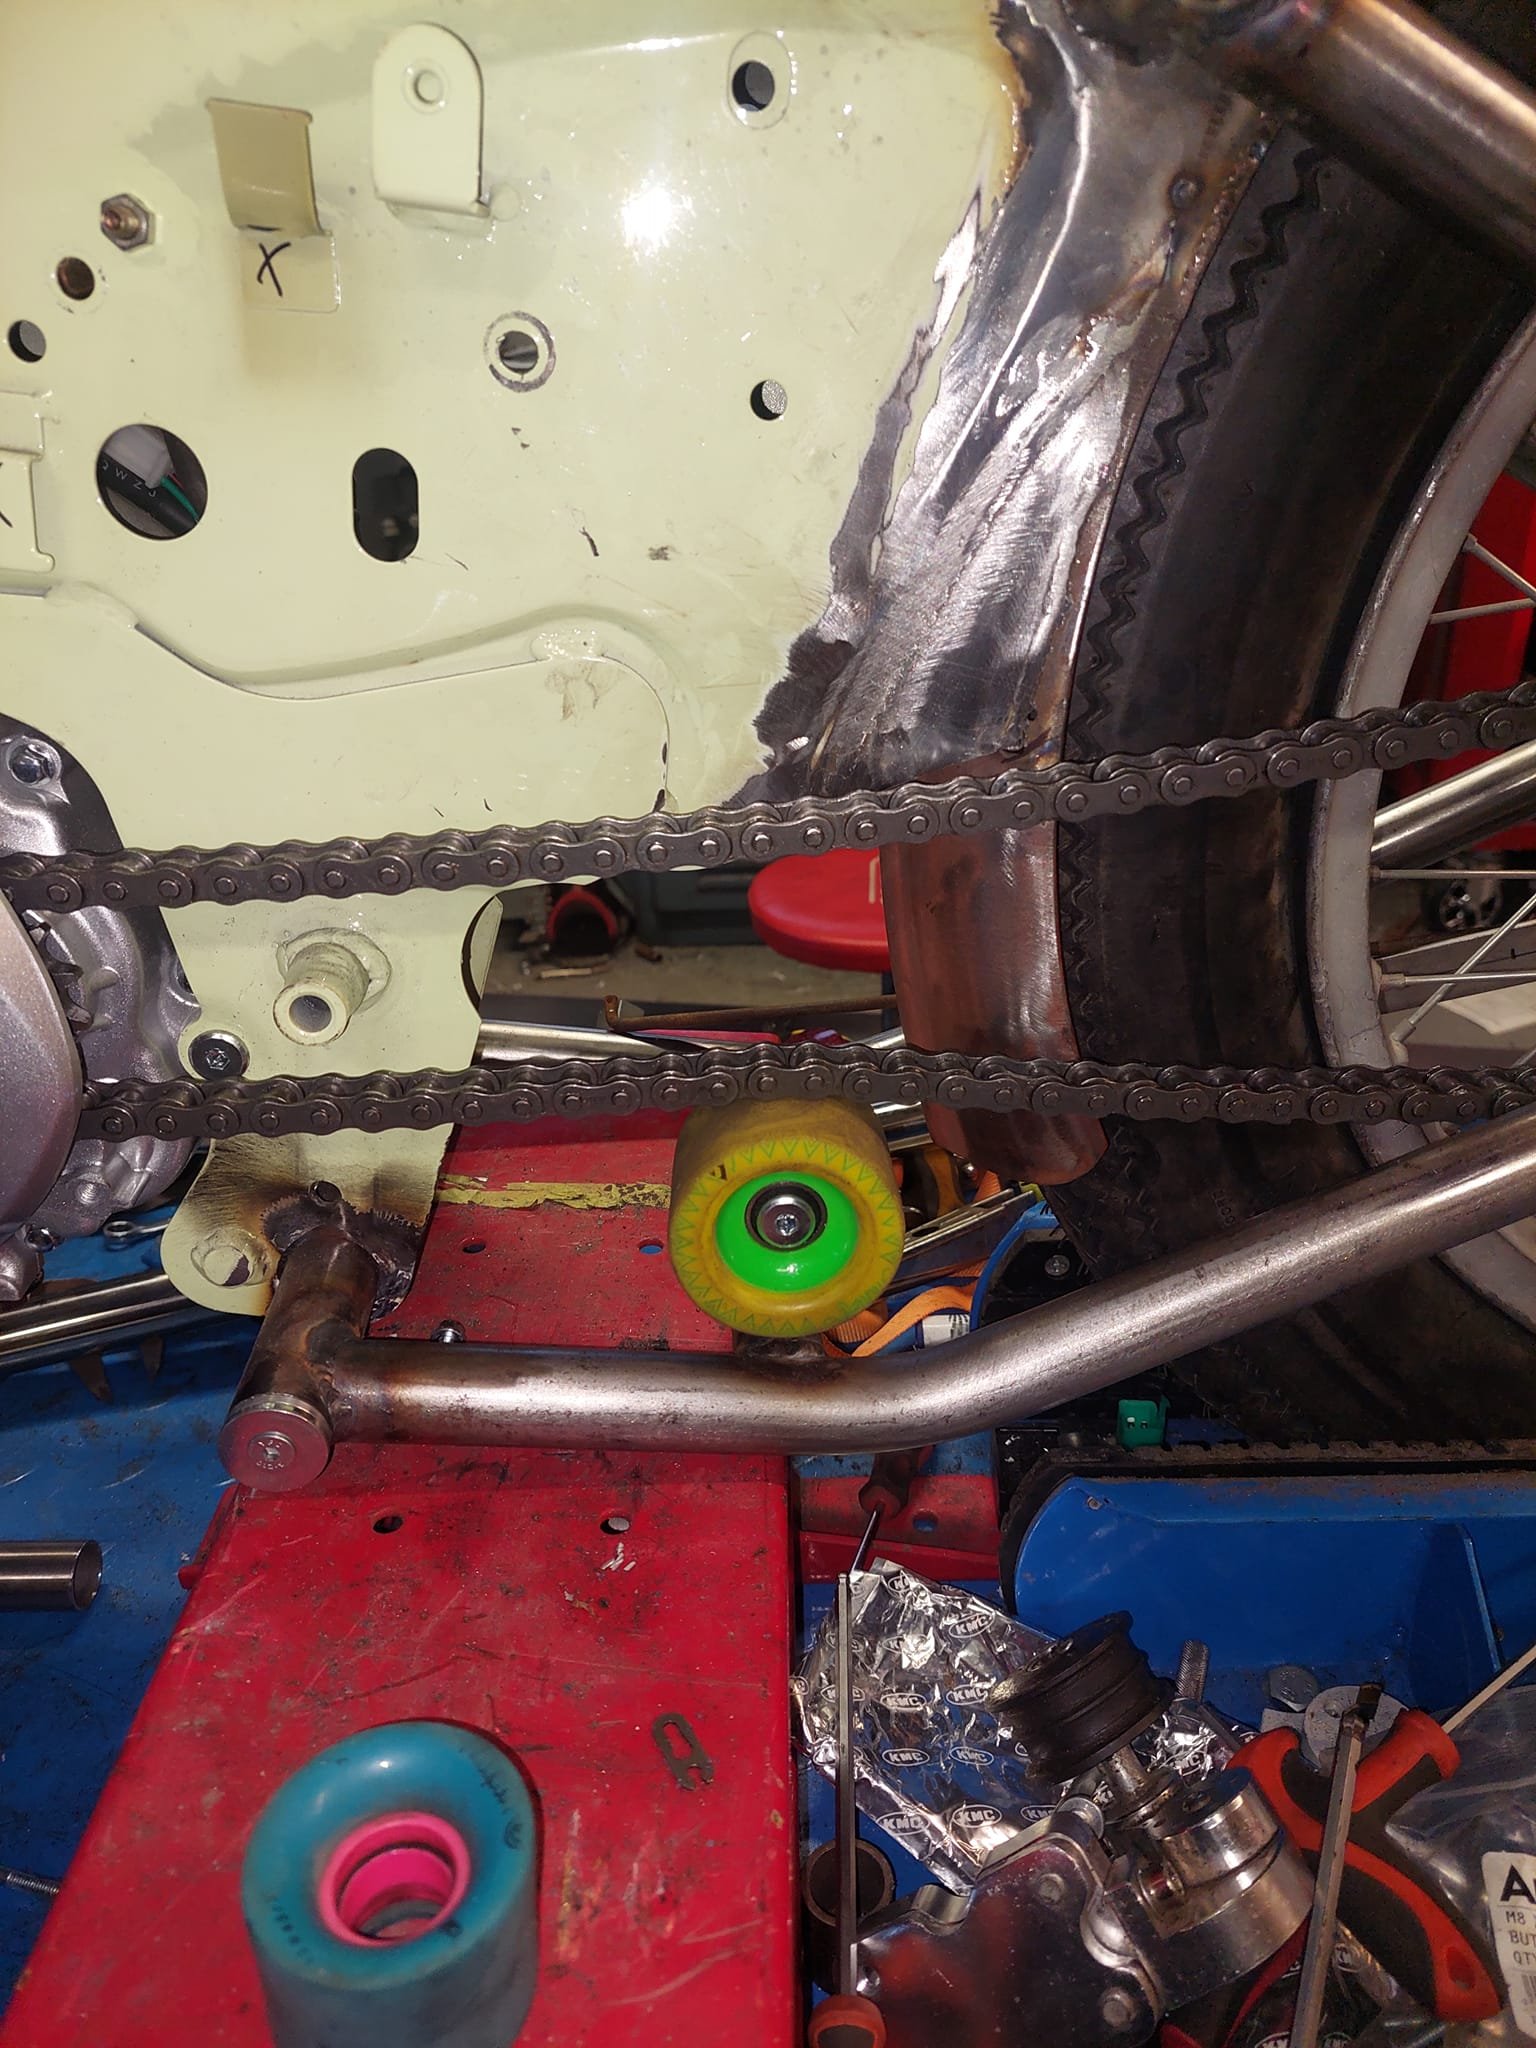
I was gonna get the frame blasted (I wish I had) but due to time restraints I stripped it myself with the combination of a strip it disc and stripper. Some filler, black primer, paint and a clothes line later.... I carried on with the assembly that I could and came into a problem with the chain, which should have been resolved during the mock up but I thought the notching of the mudguard would have solved that. I t didnt so I came up with the solution of using 2 skateboard wheels instead of just the one. So I made a bracket which located on the original tensioning wheel and the swingarm mount ( which I originally was going to cut off ) I poured some fuel in and it started 1st kick. Im waiting on a throttle cable being delivered then I can tune it properly
- 22 replies
-
- 14
-
-
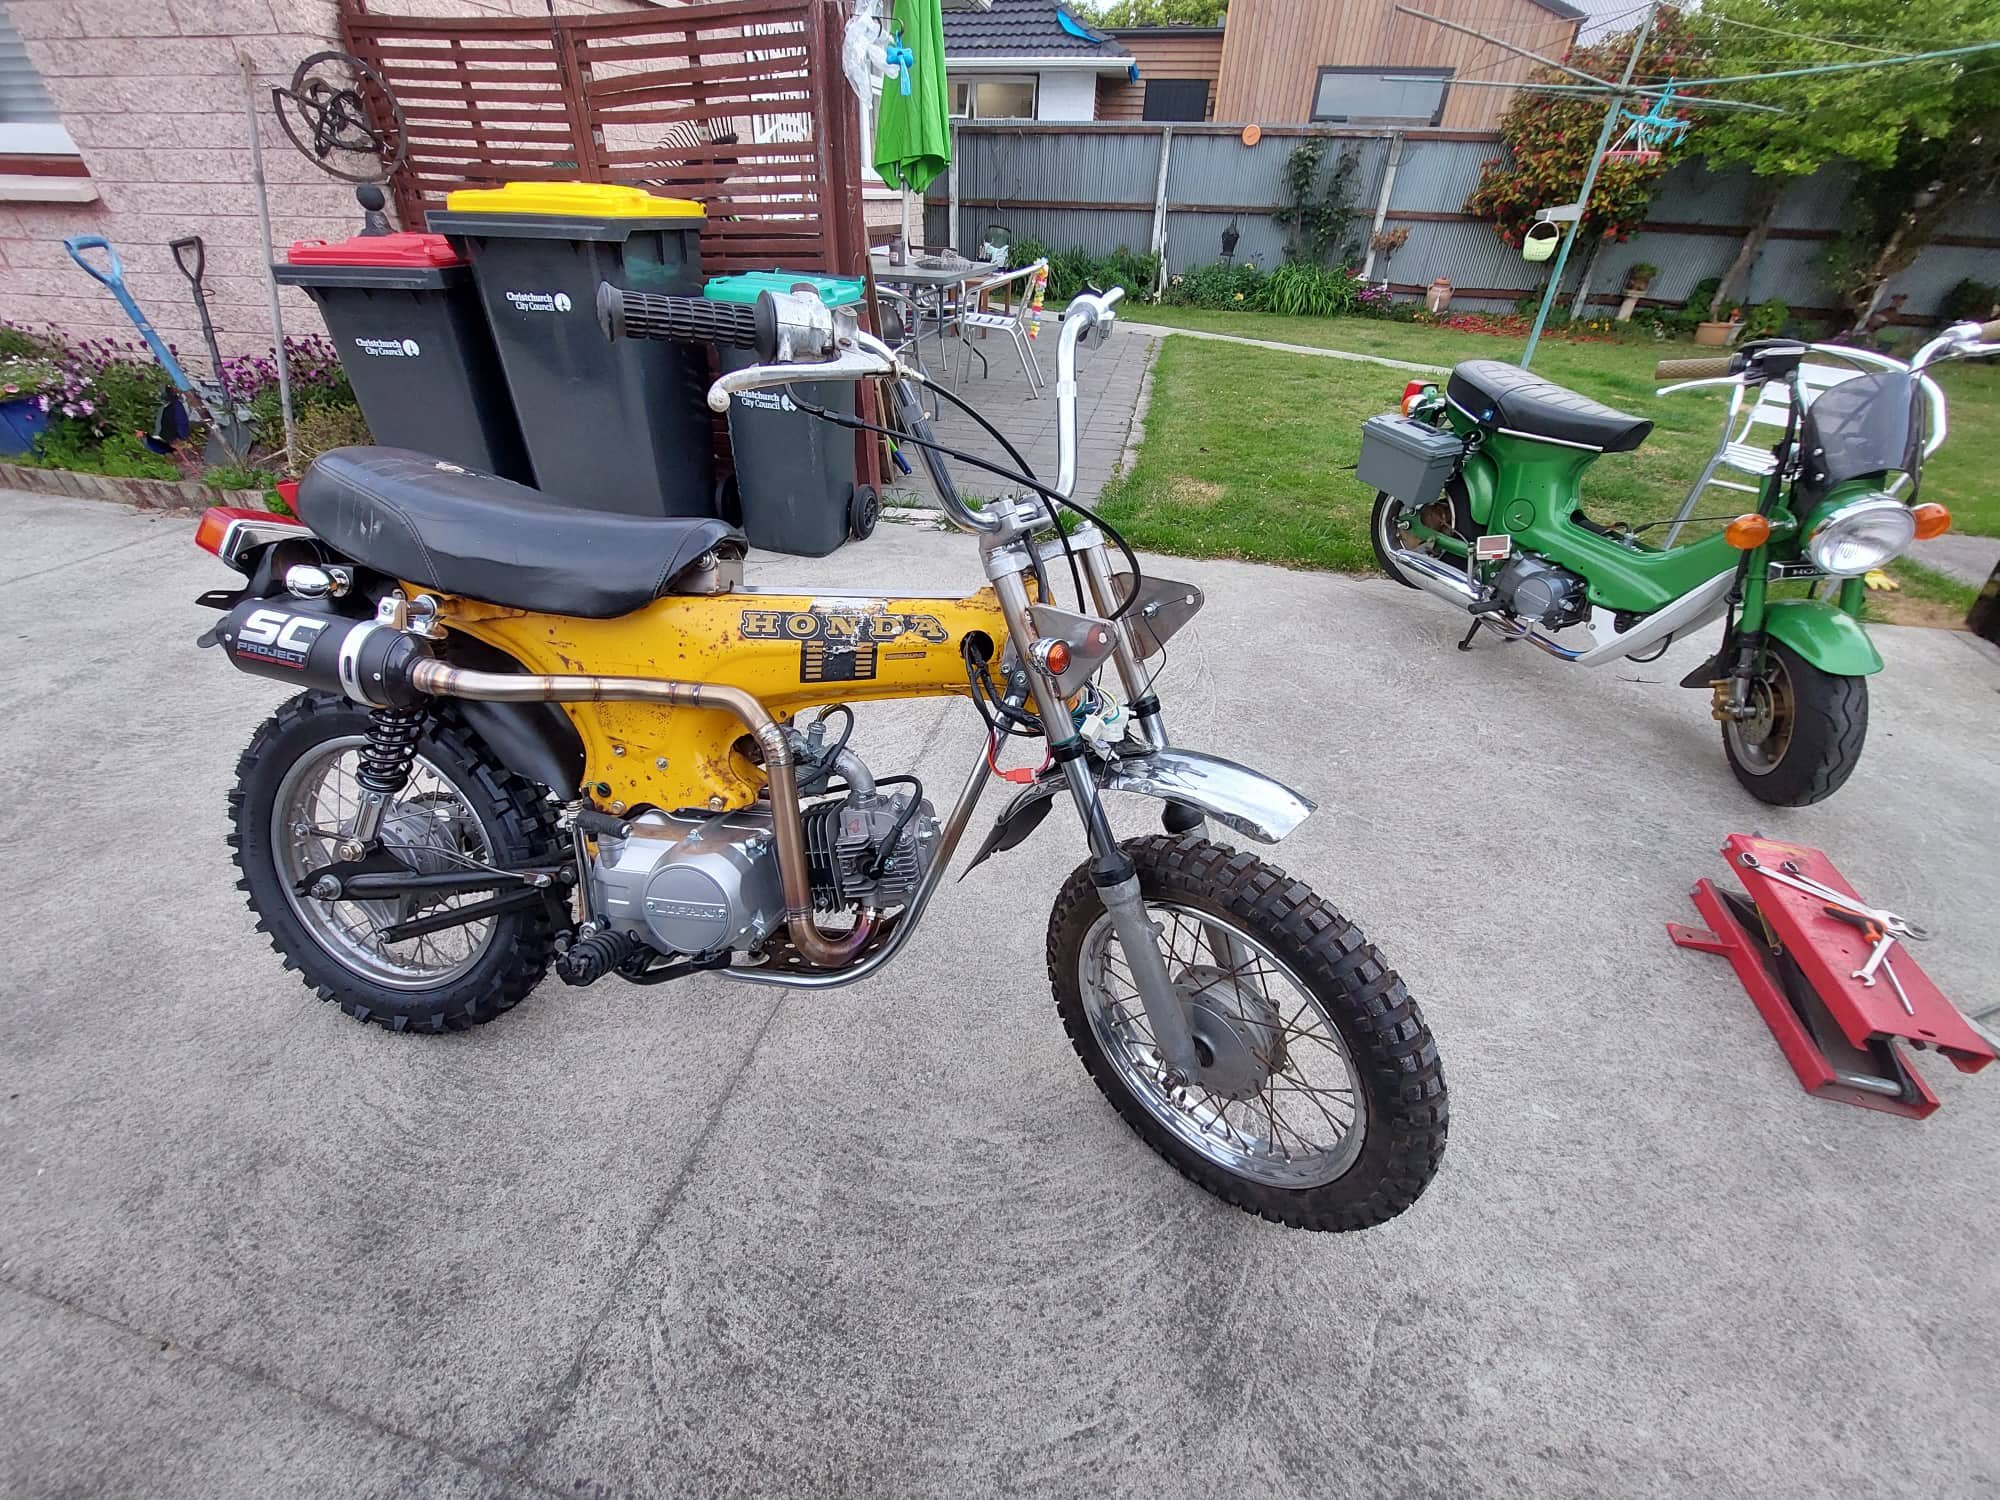
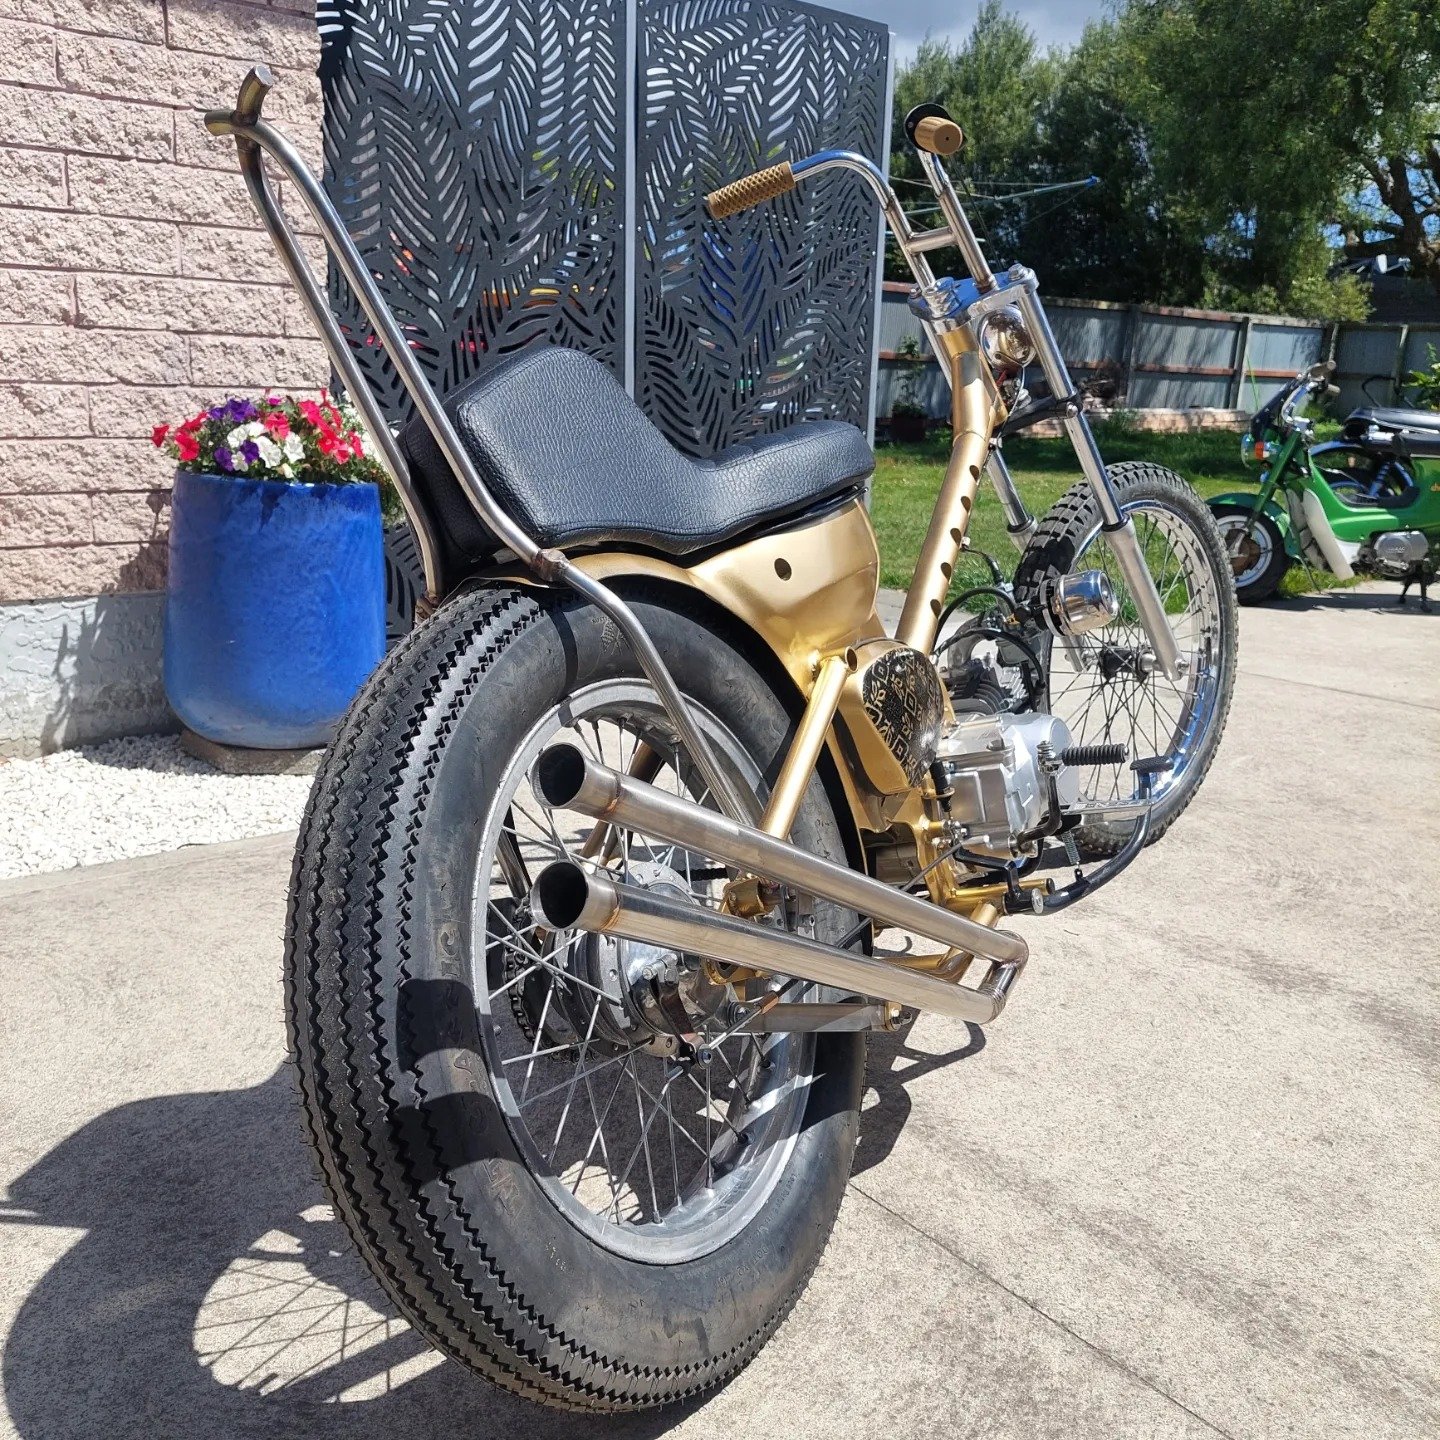
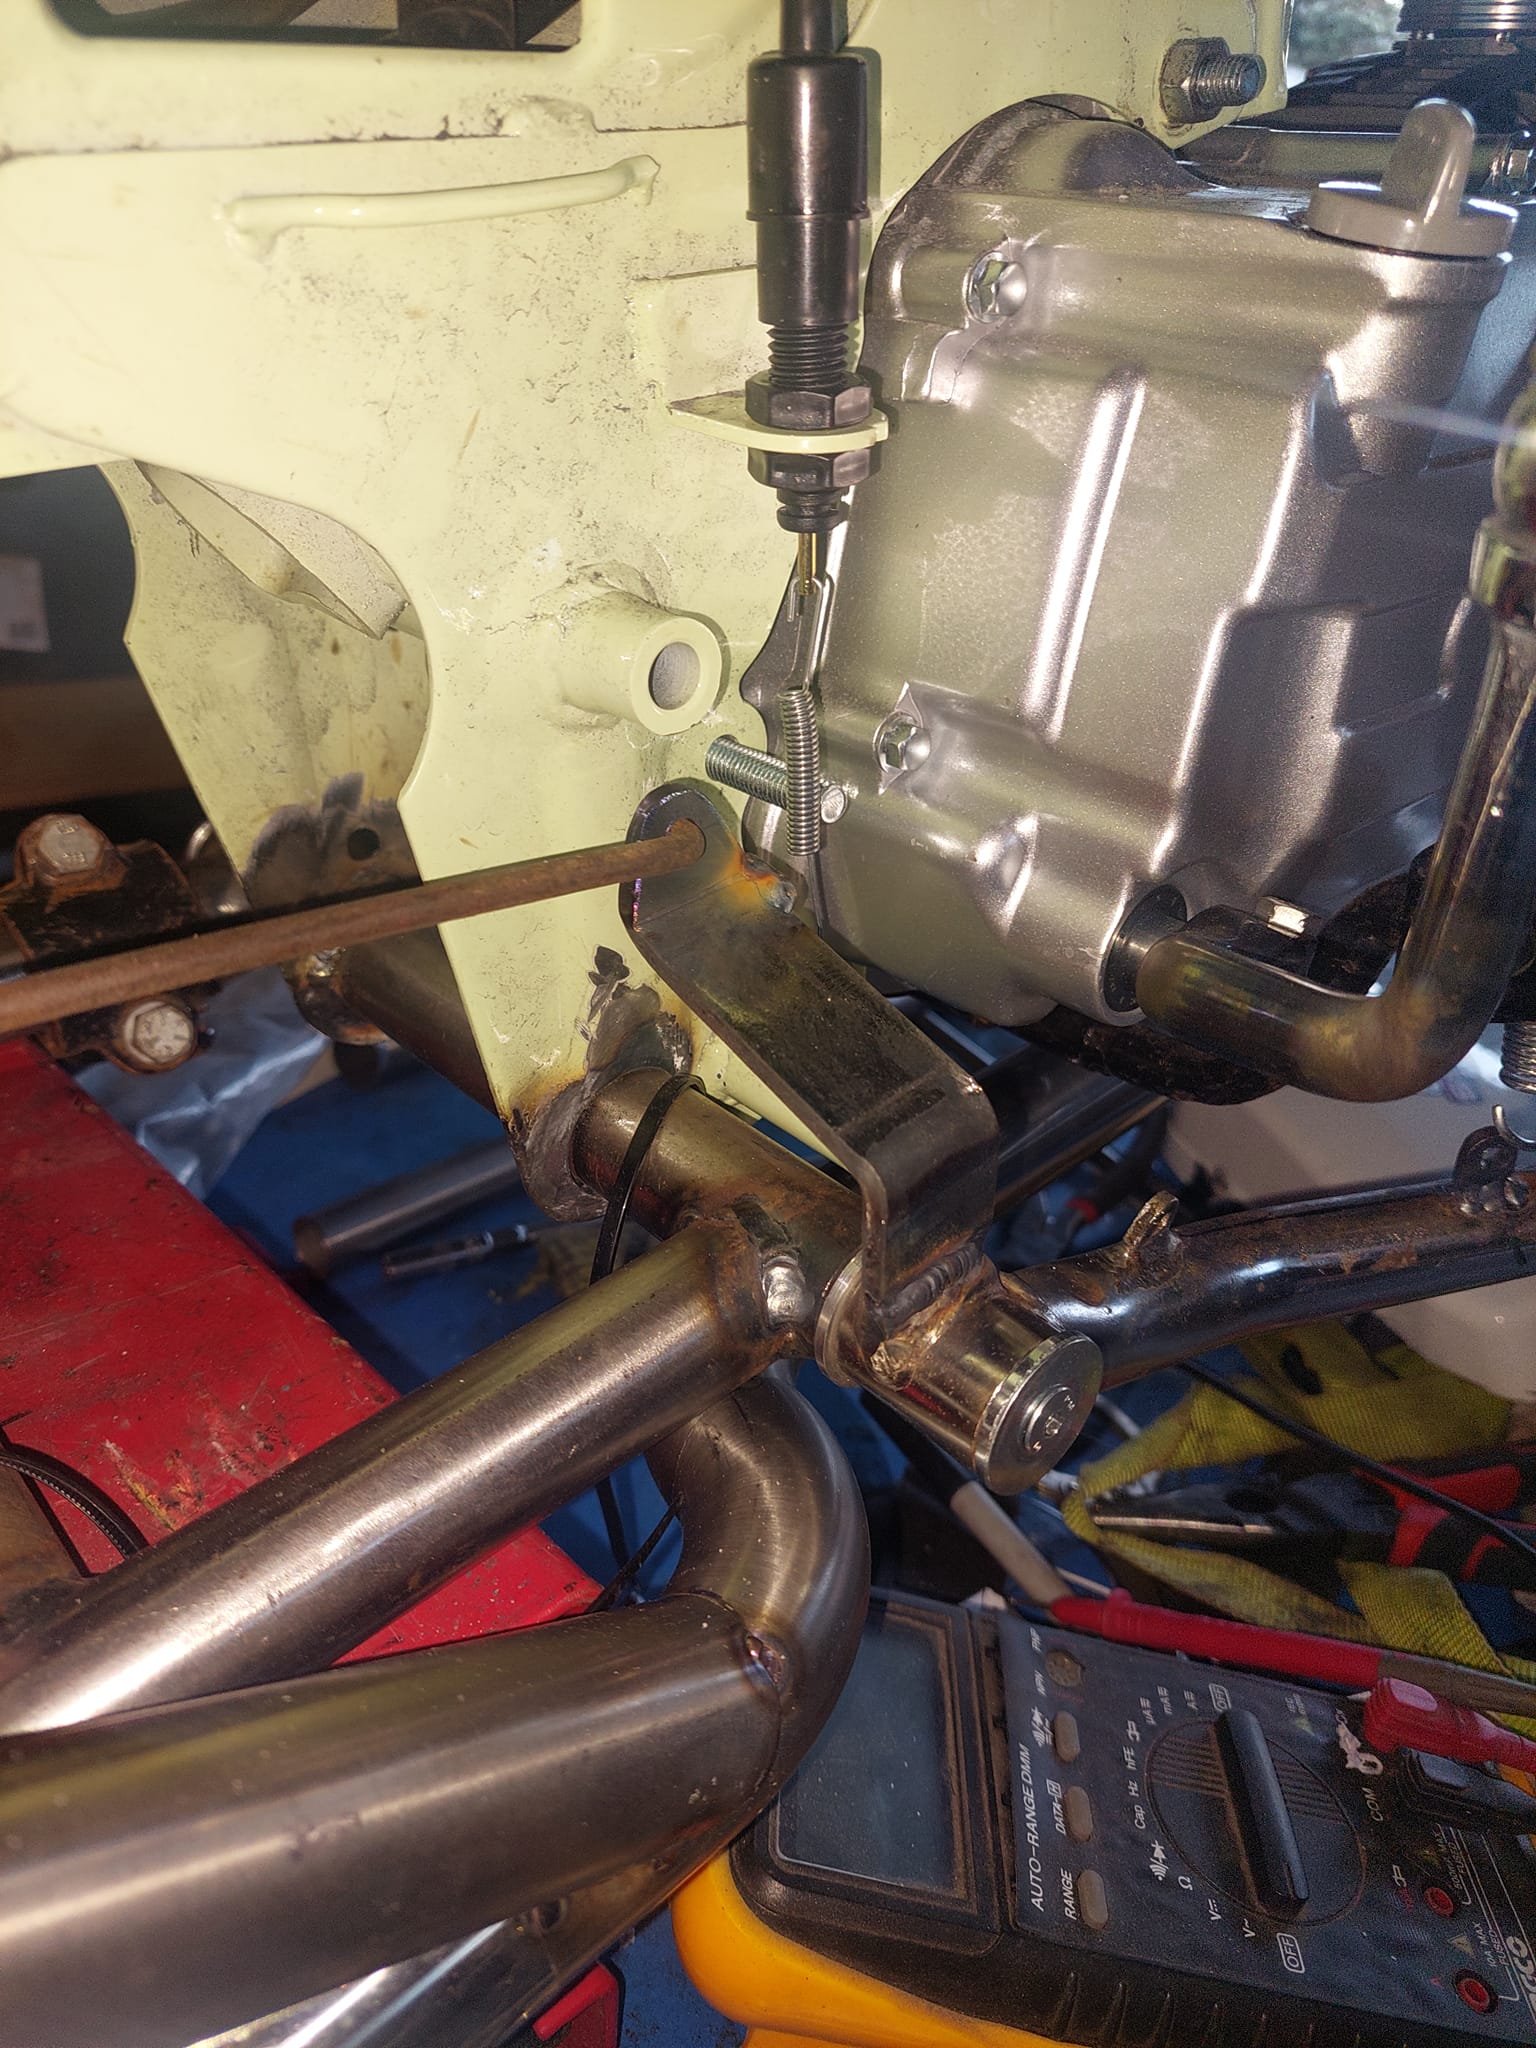
Exhaust was the last of the major fab work to do so I thought I'd at least get it all mocked up and tacked together I also had to extend the bracket that the brake rod attaches too also
- 22 replies
-
- 11
-
-
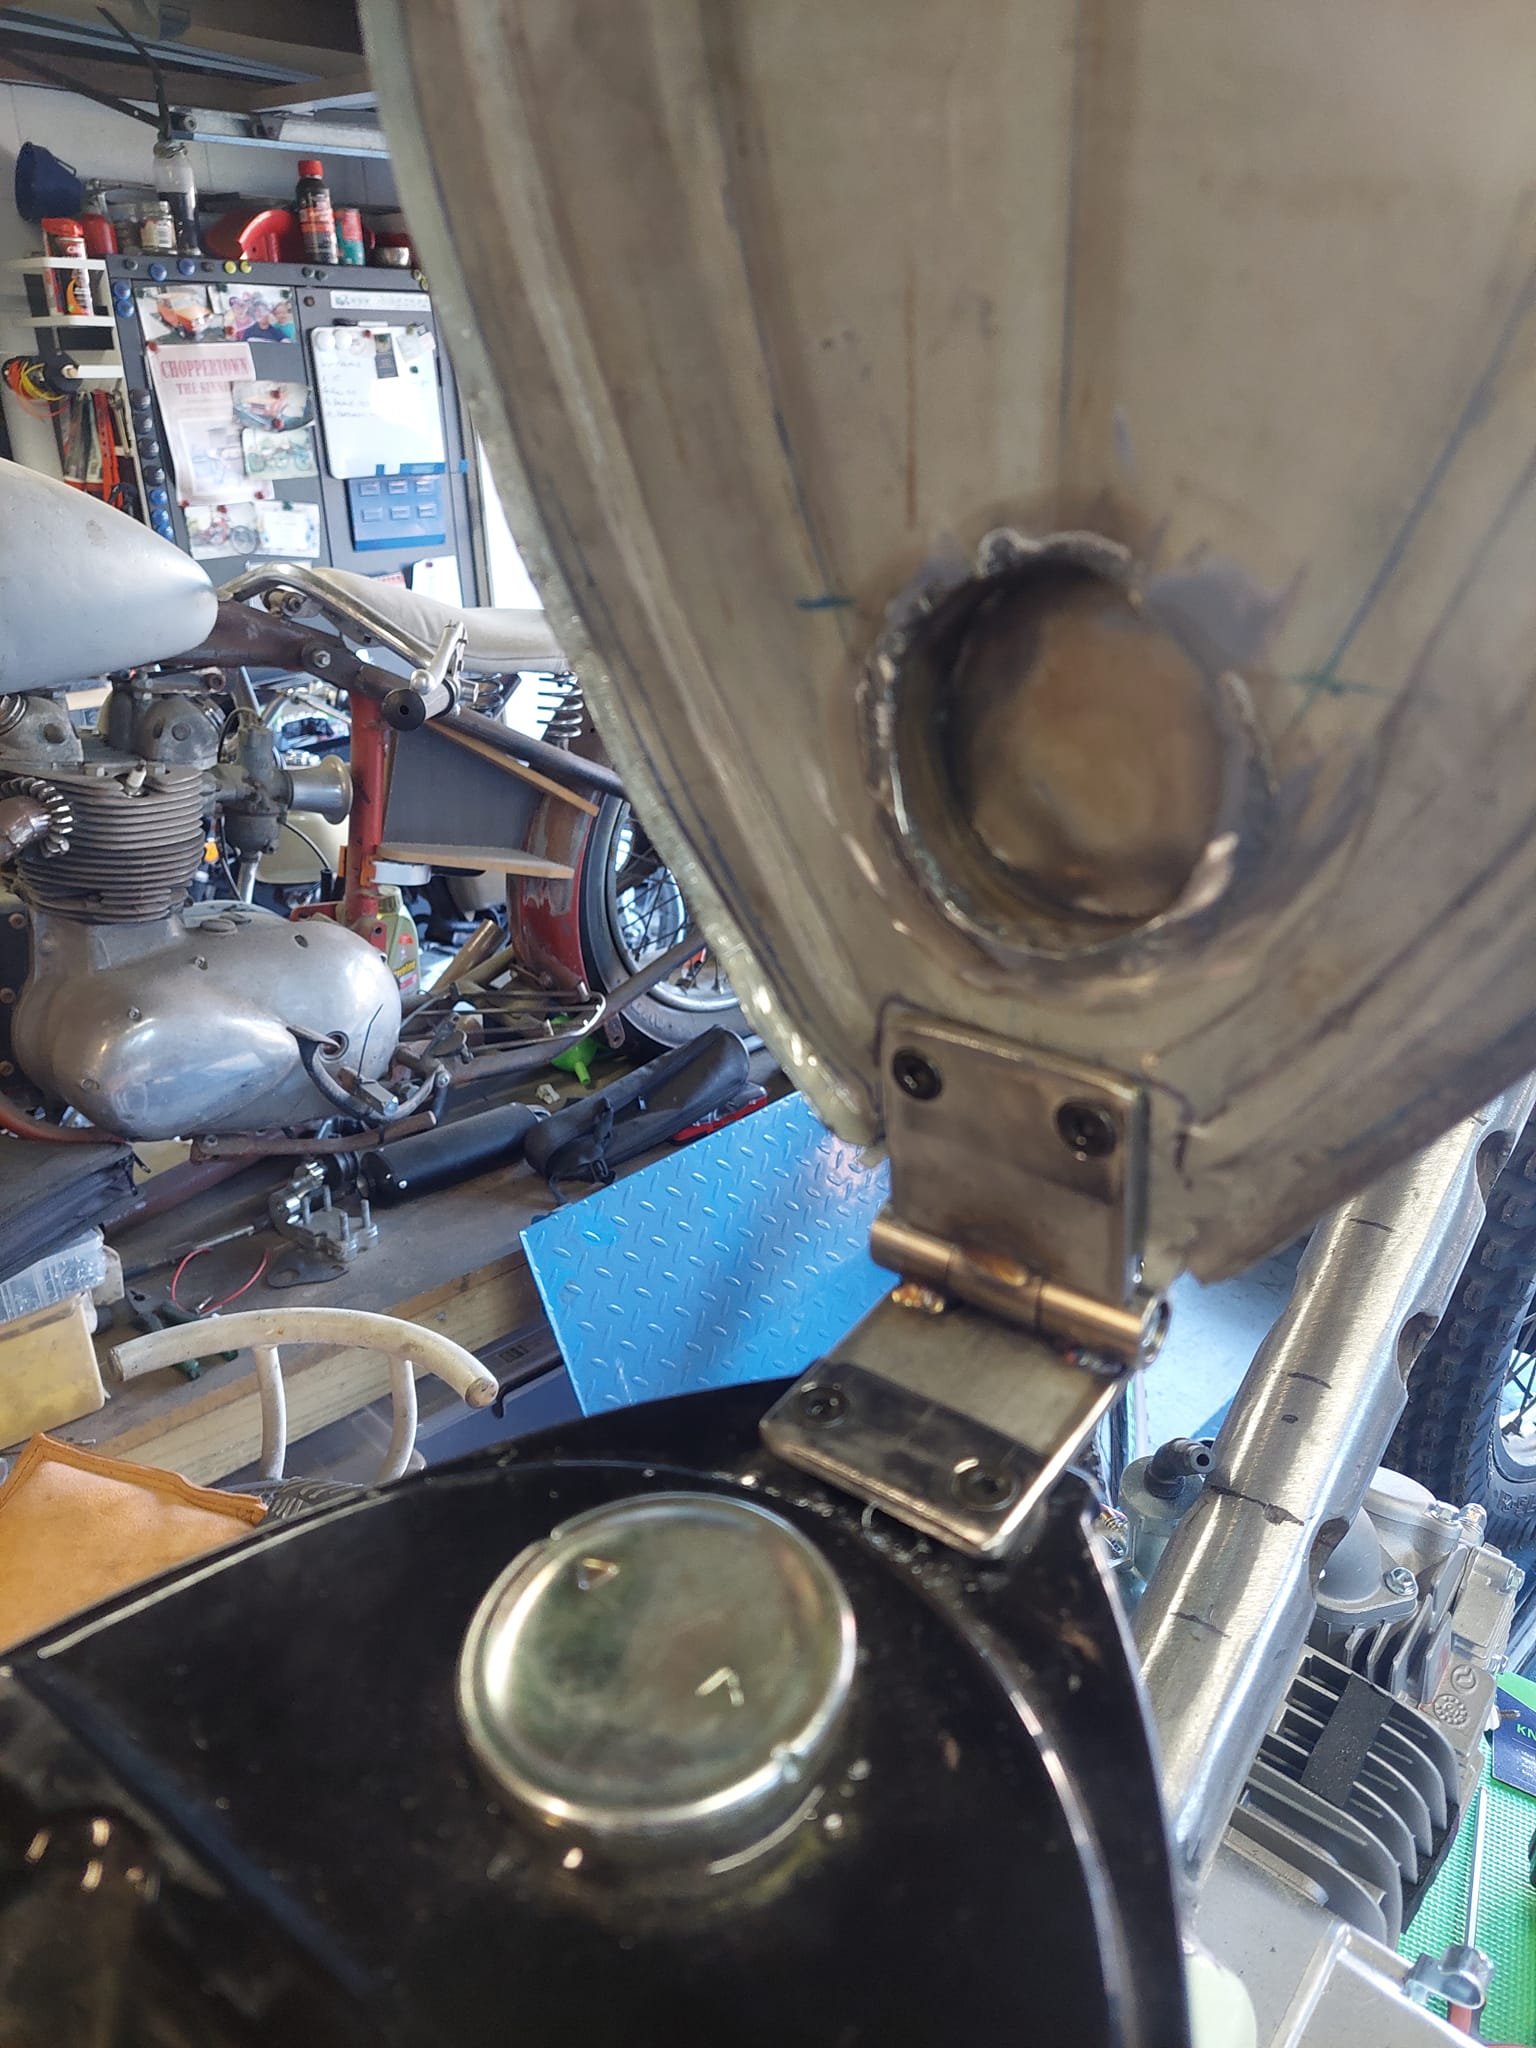
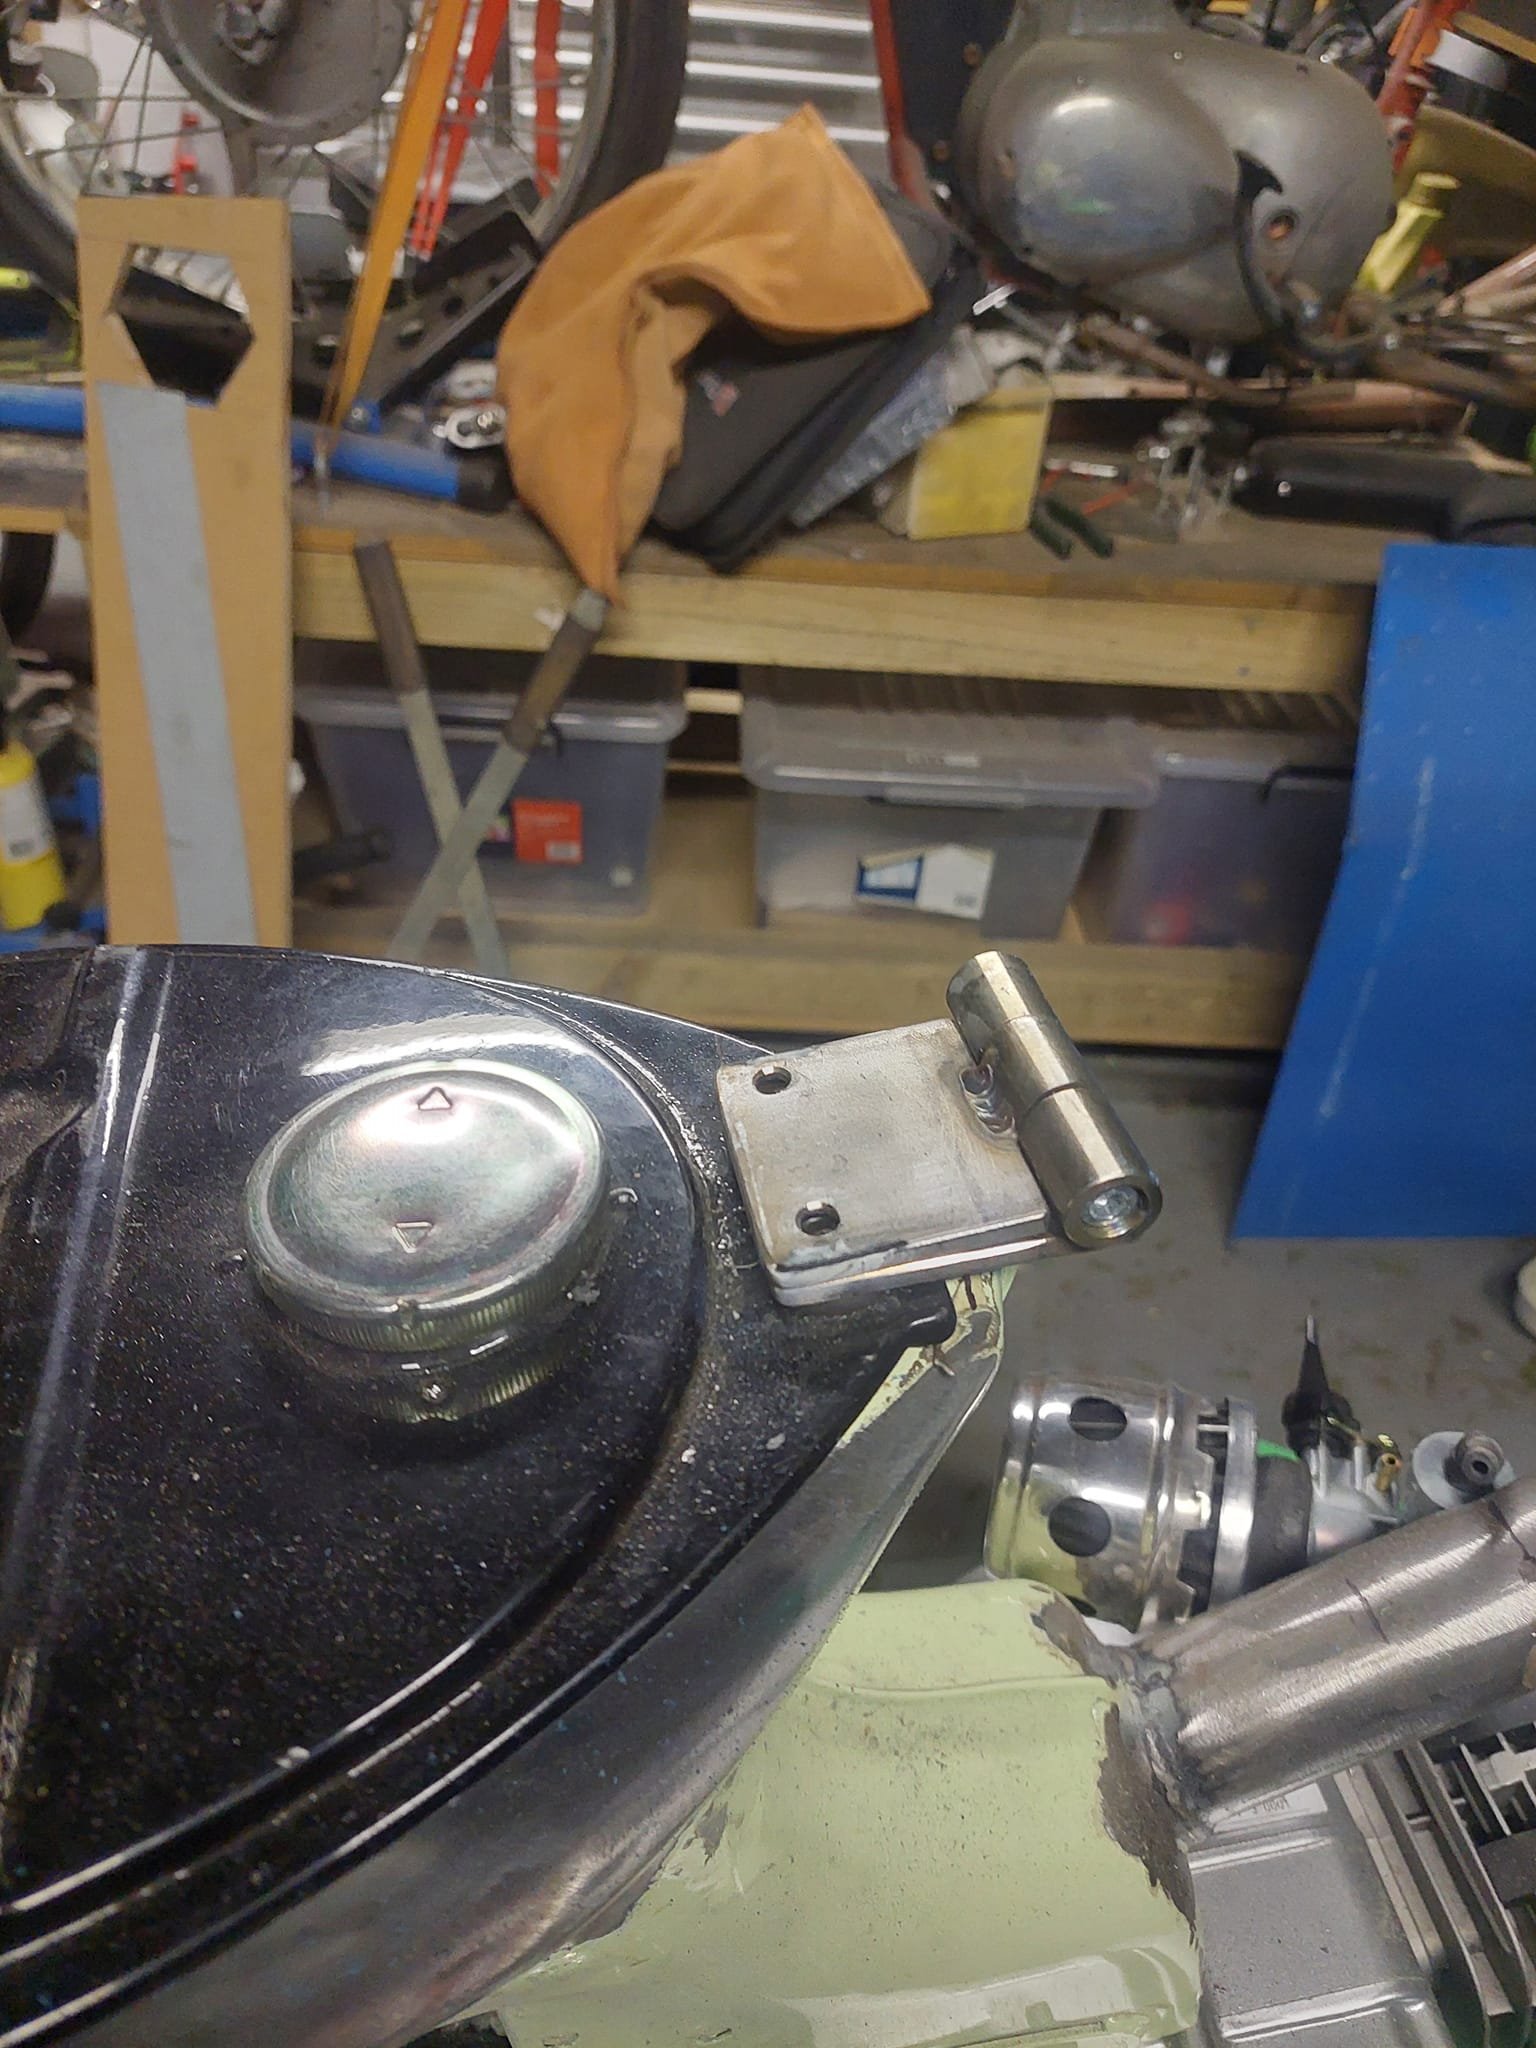
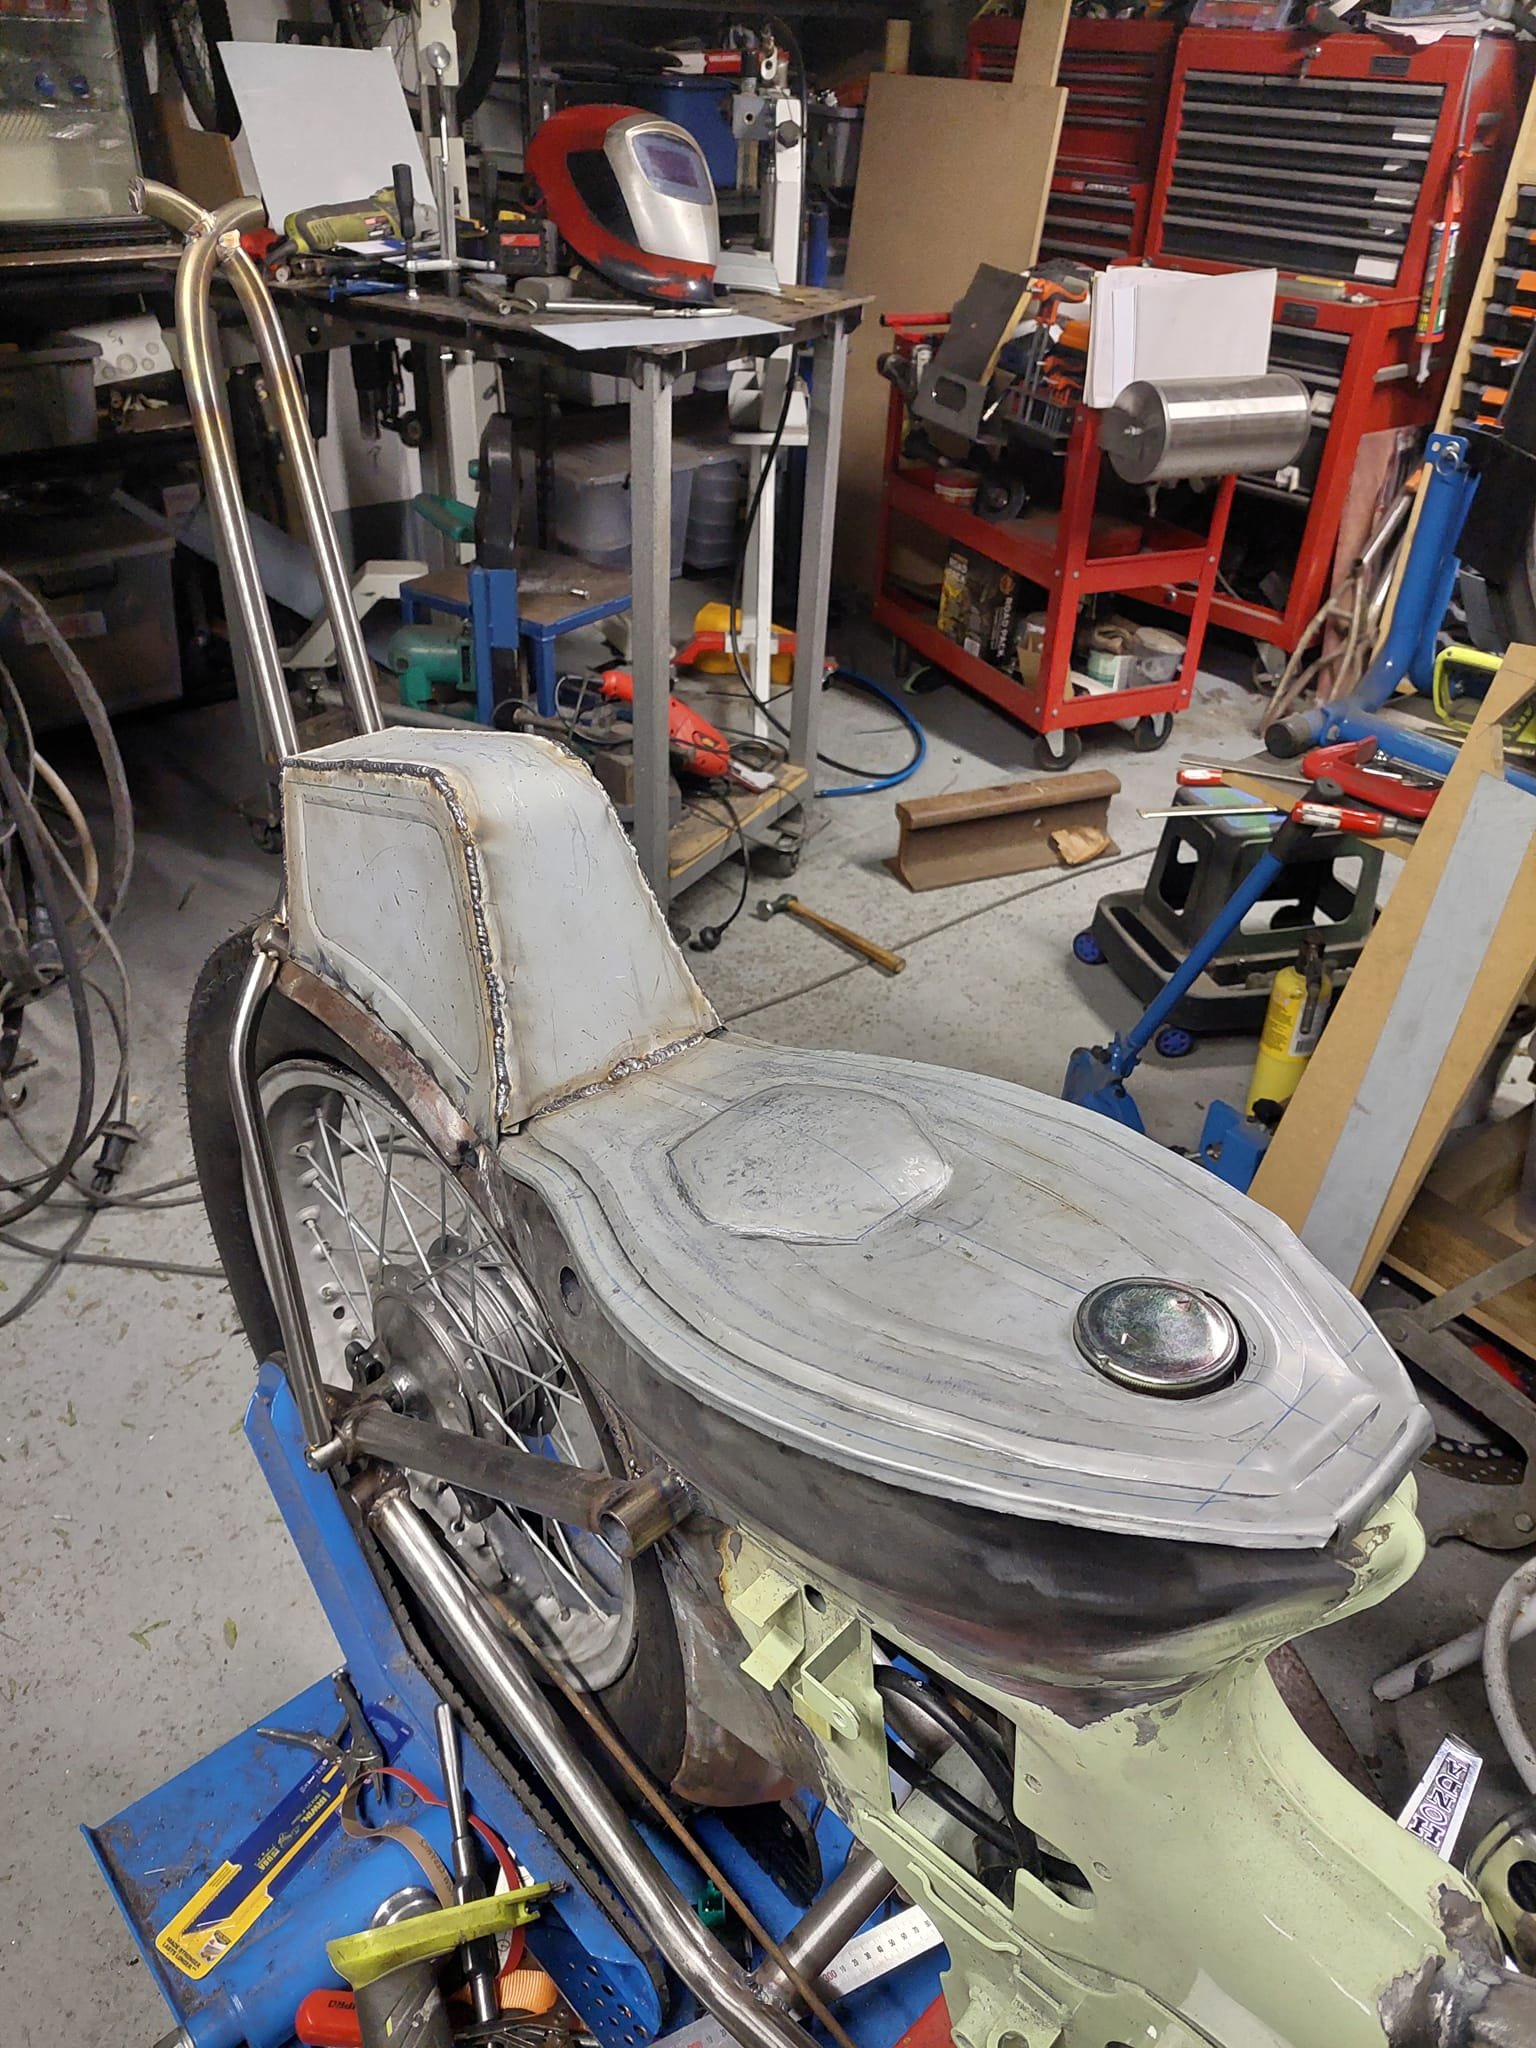
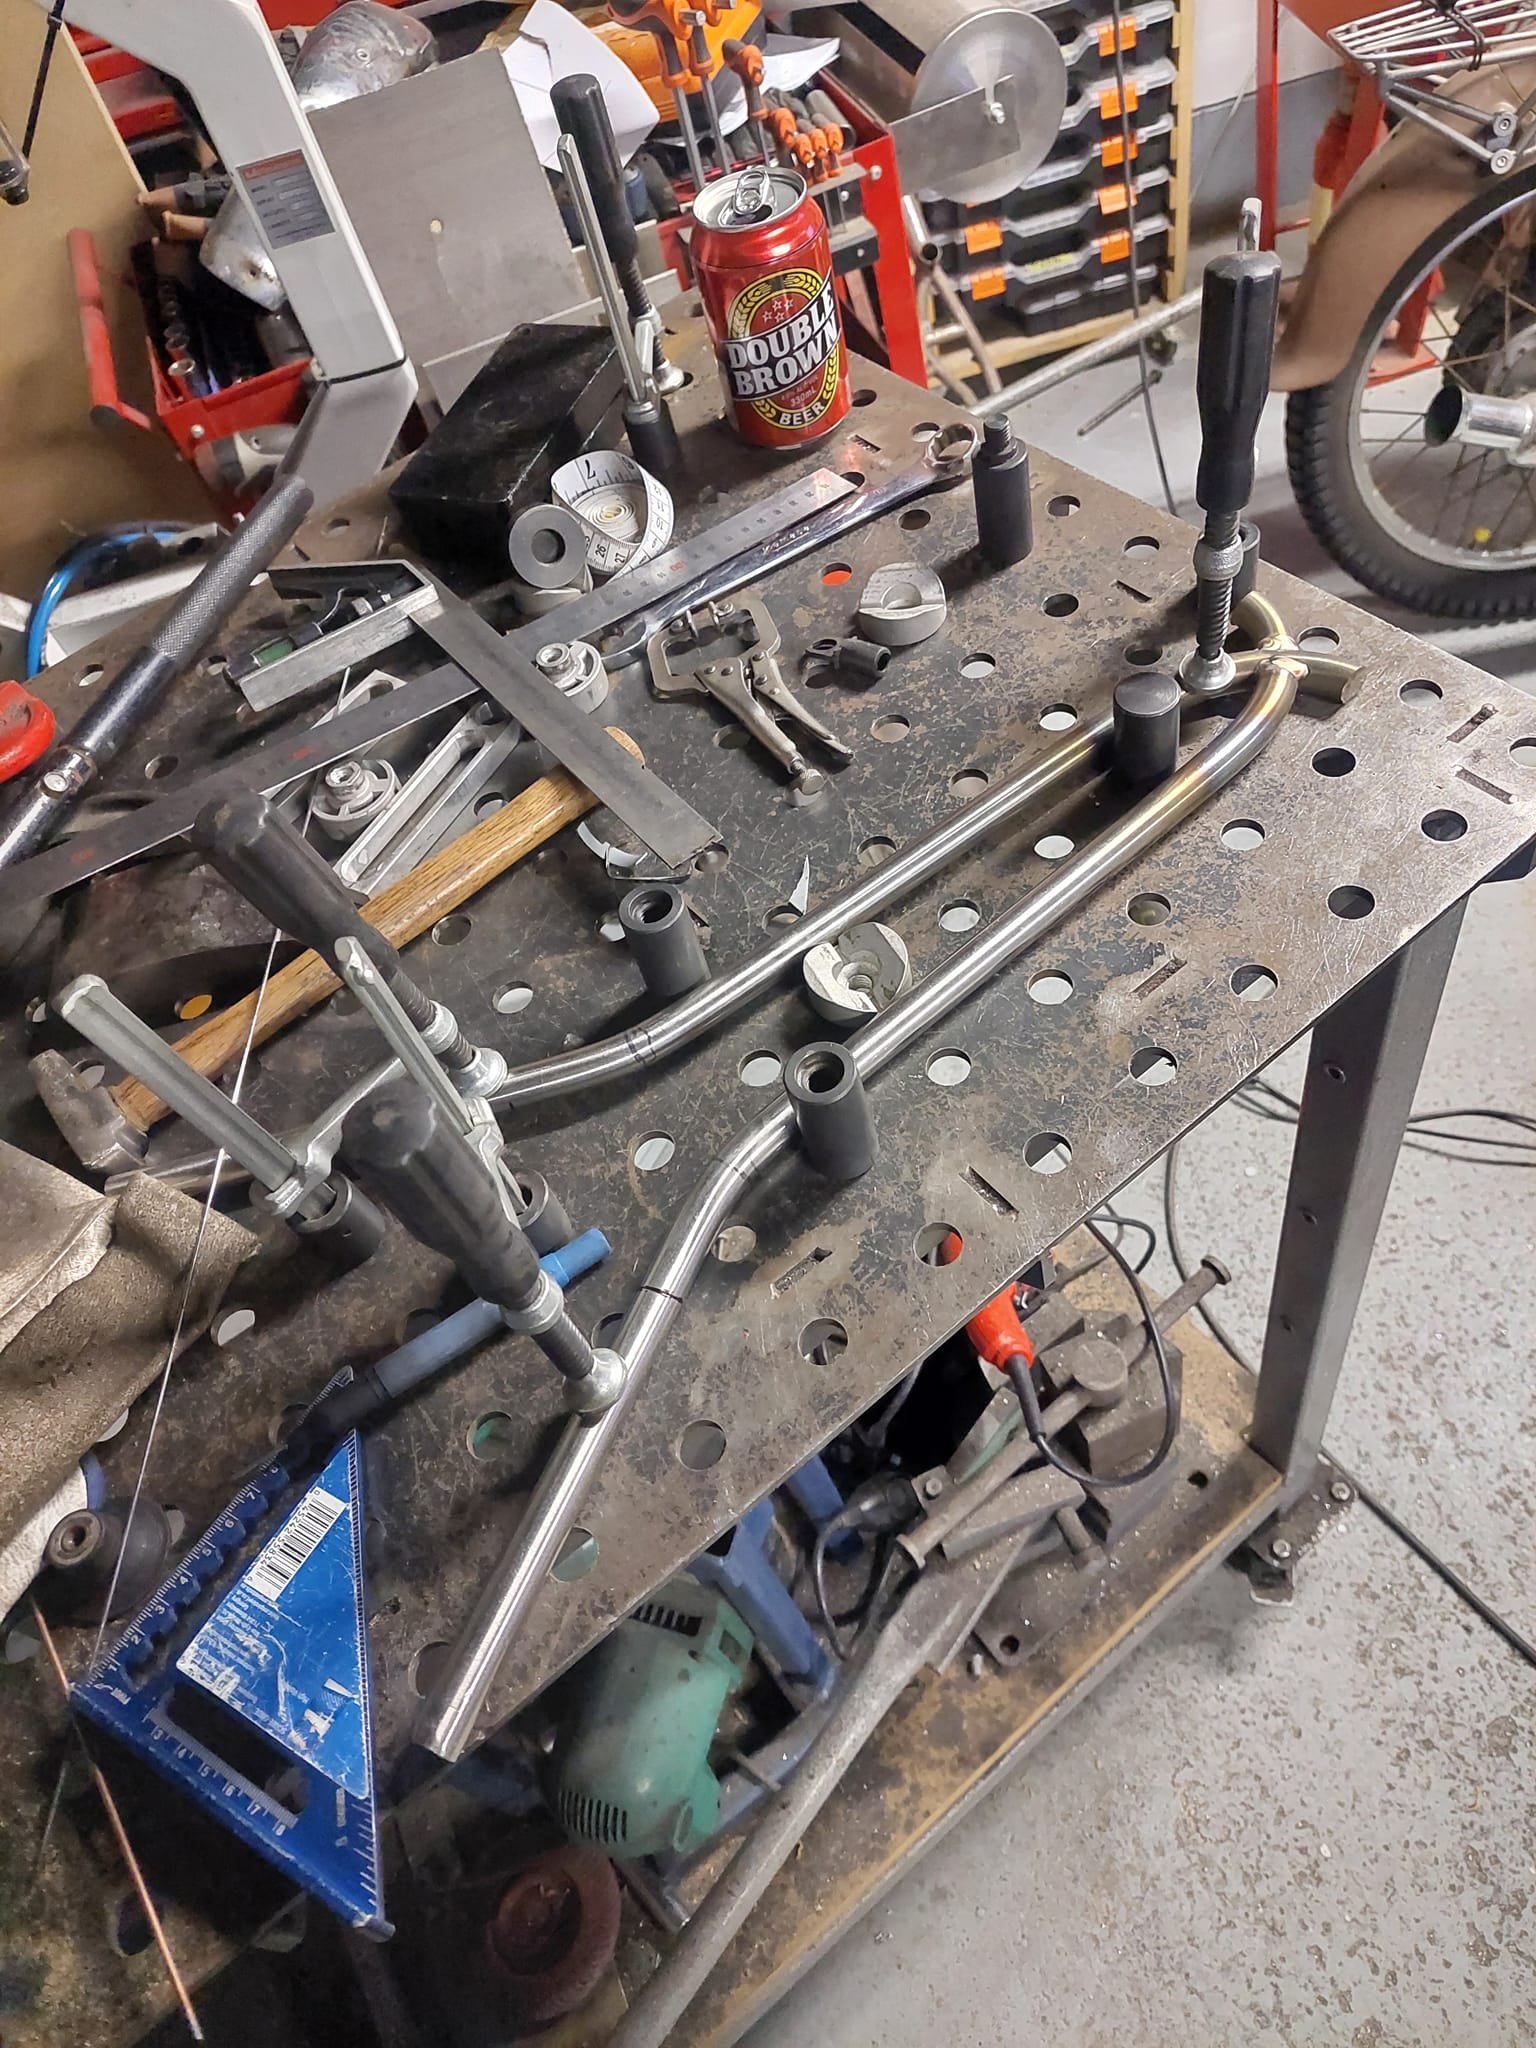
Syds Run is almost a month away, I've had a few things going on preventing me from doing as much as I wanted to do. I've got whanau visiting from the UK and left my job of 4 1/2 years so I've got 2 weeks off before I start my new job I couldnt find a hinge that was suitable for the seat so I made one from the leftovers of my sissy bar and some 5x50mm stainless flat bar Next job to tick off the list was the new front wheel spacers for my new front wheel I cut out a tab for the rear brake stay bar to mount to the tacked it to the frame, and also made the rear brake stay bar from some 25x3mm stainless flatbar I did a similar thing on the other side this time for a chain tensioner The last job from the weekend was to add some foam to the seat base. I bought a couple of rolls of yoga mat from the warehouse and some spray adhesive and kept adding layers of foam to build up the padding. Once the glue has set the foam is then easy to shape with a sanding block and coarse sandpaper. I'll a bit more time on shaping it better to suit my J-Lo booty or lack of it better
- 22 replies
-
- 13
-
-
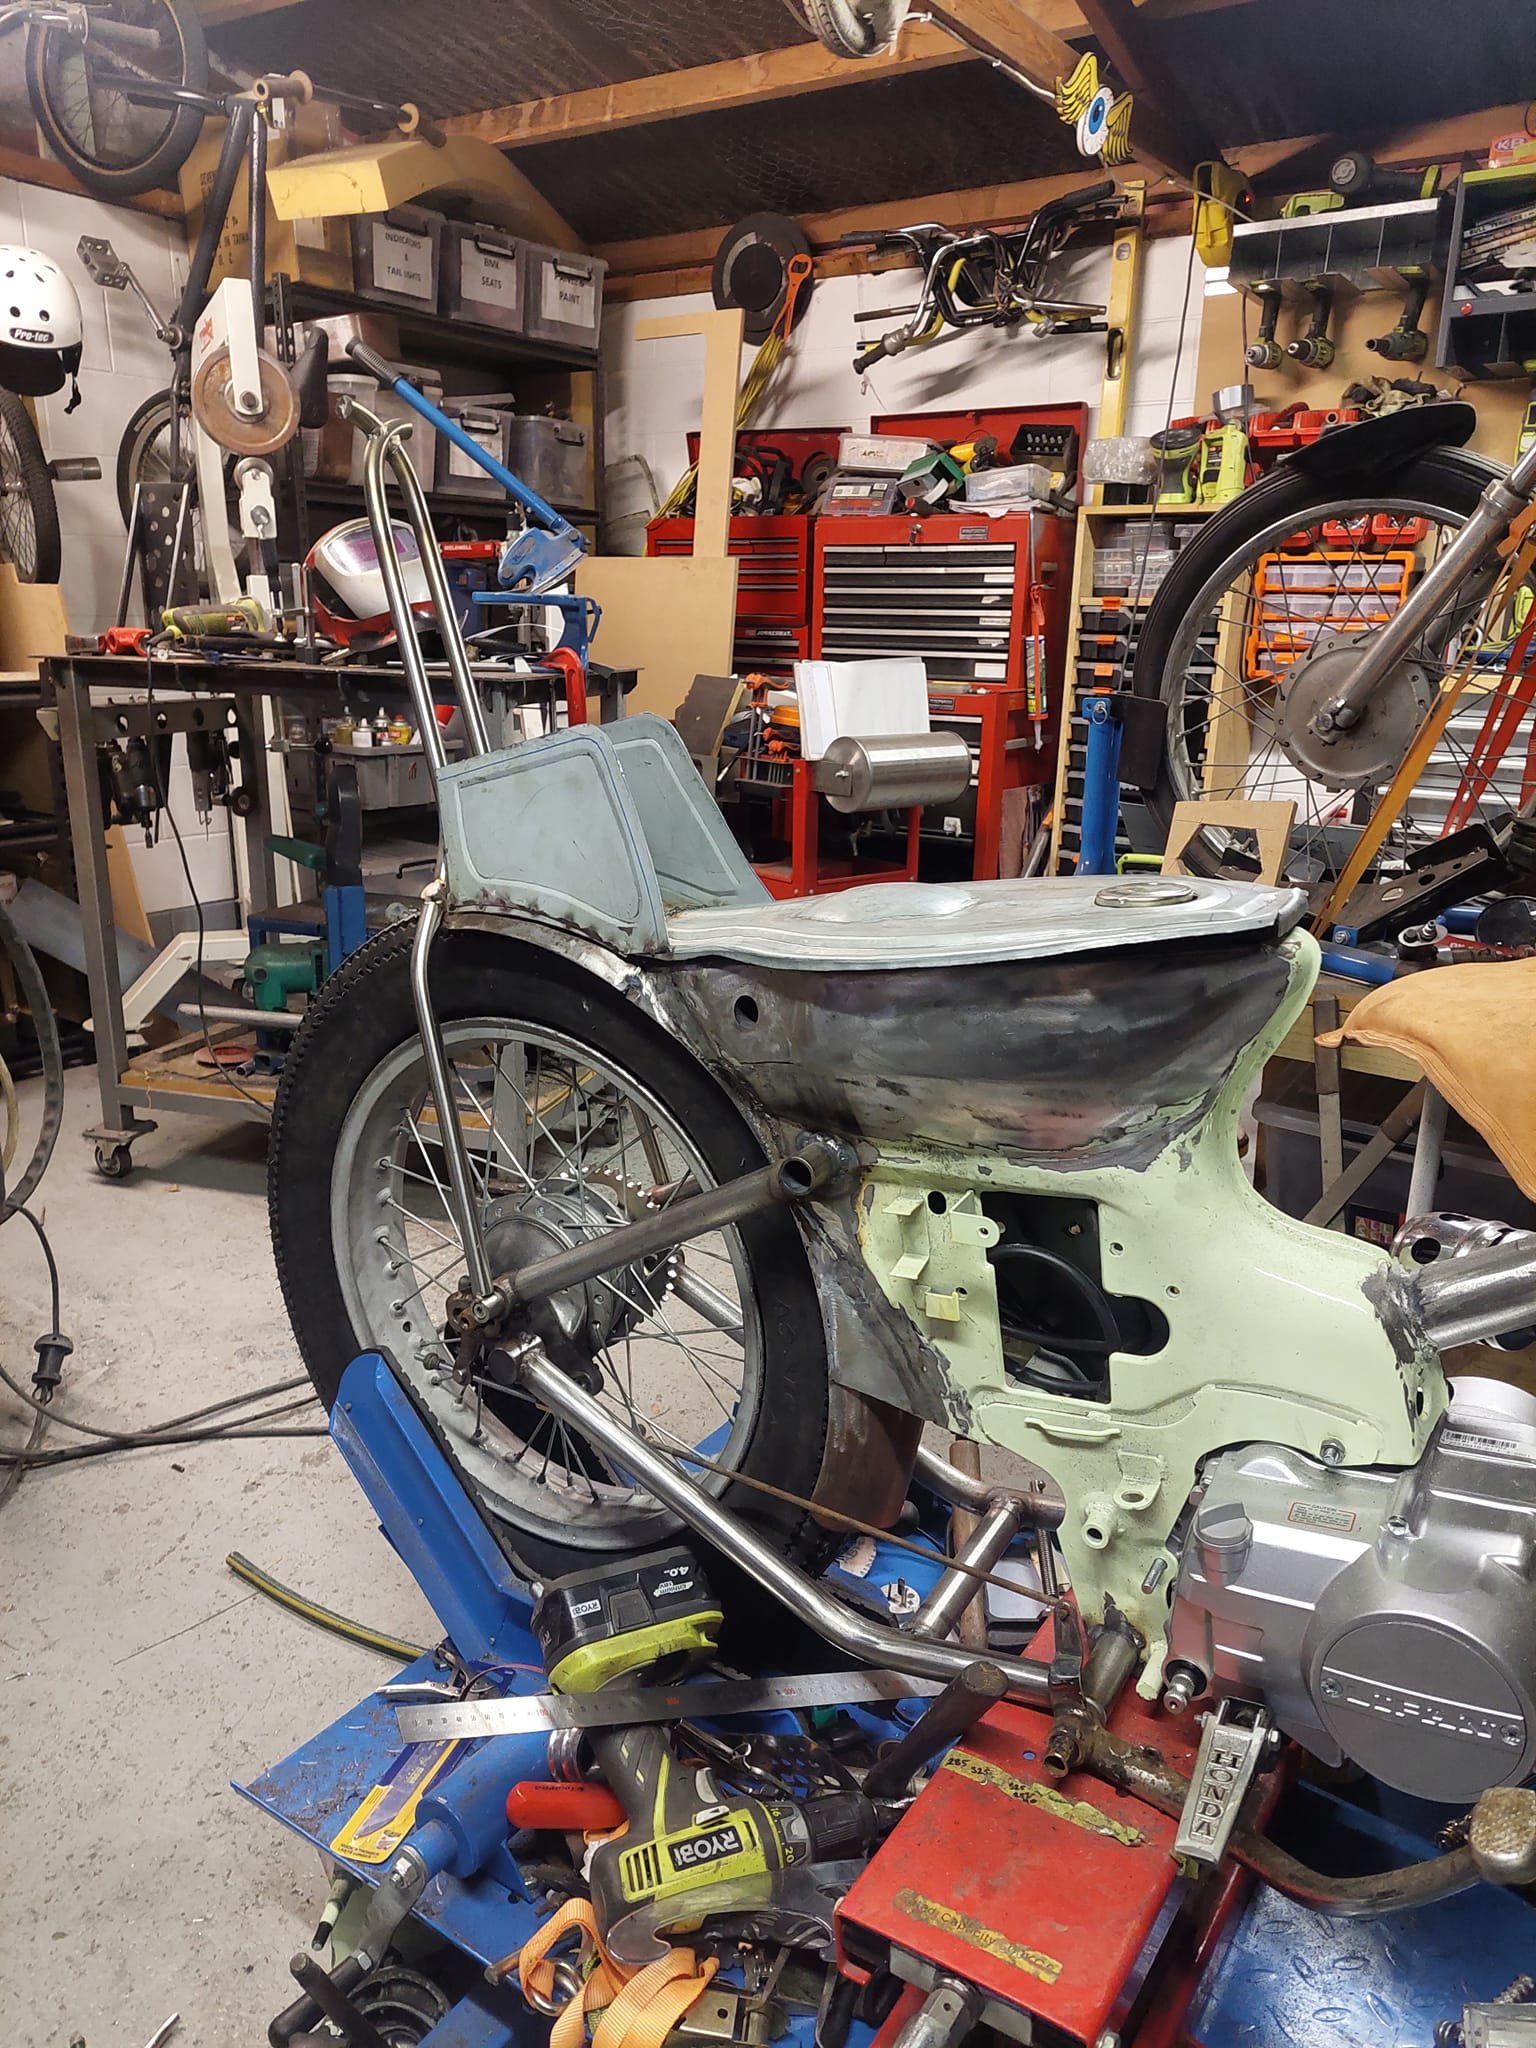
I wasnt really happy with the seat base I made so I learned from my mistakes and made another one. I'm happier with the fitment of this one too and also made the ''queen'' part of the seat. I'll get a few rolls of sleeping mat from the warehouse and start adding the foam. I need to make the hinge for the front too.
- 22 replies
-
- 13
-
-
-
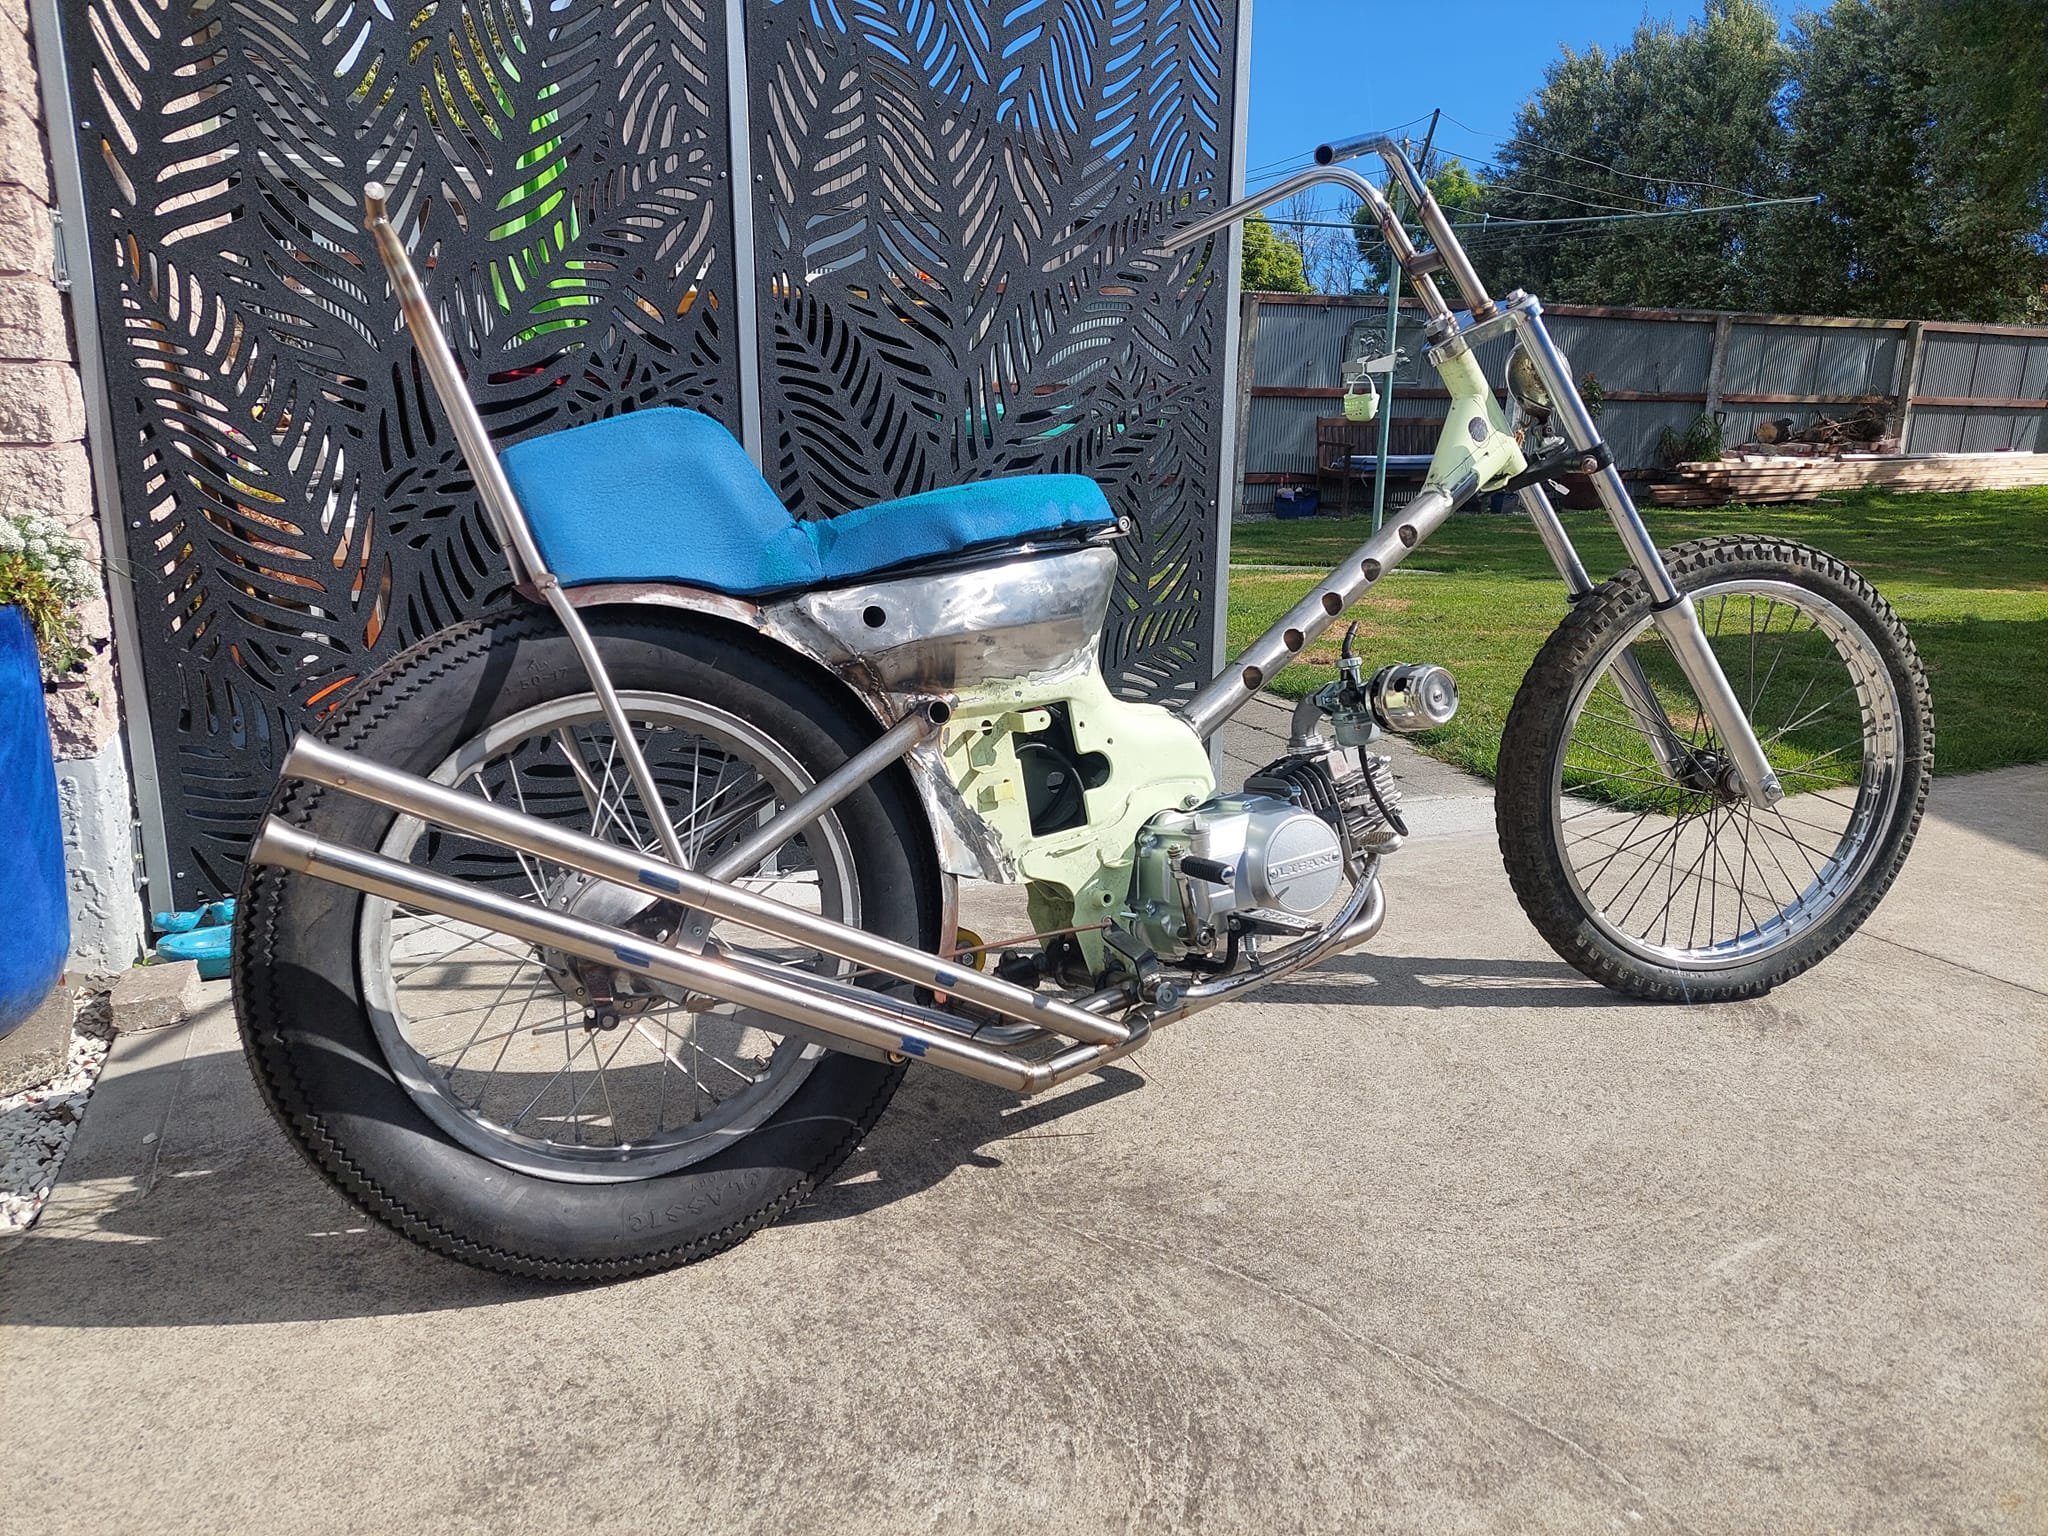
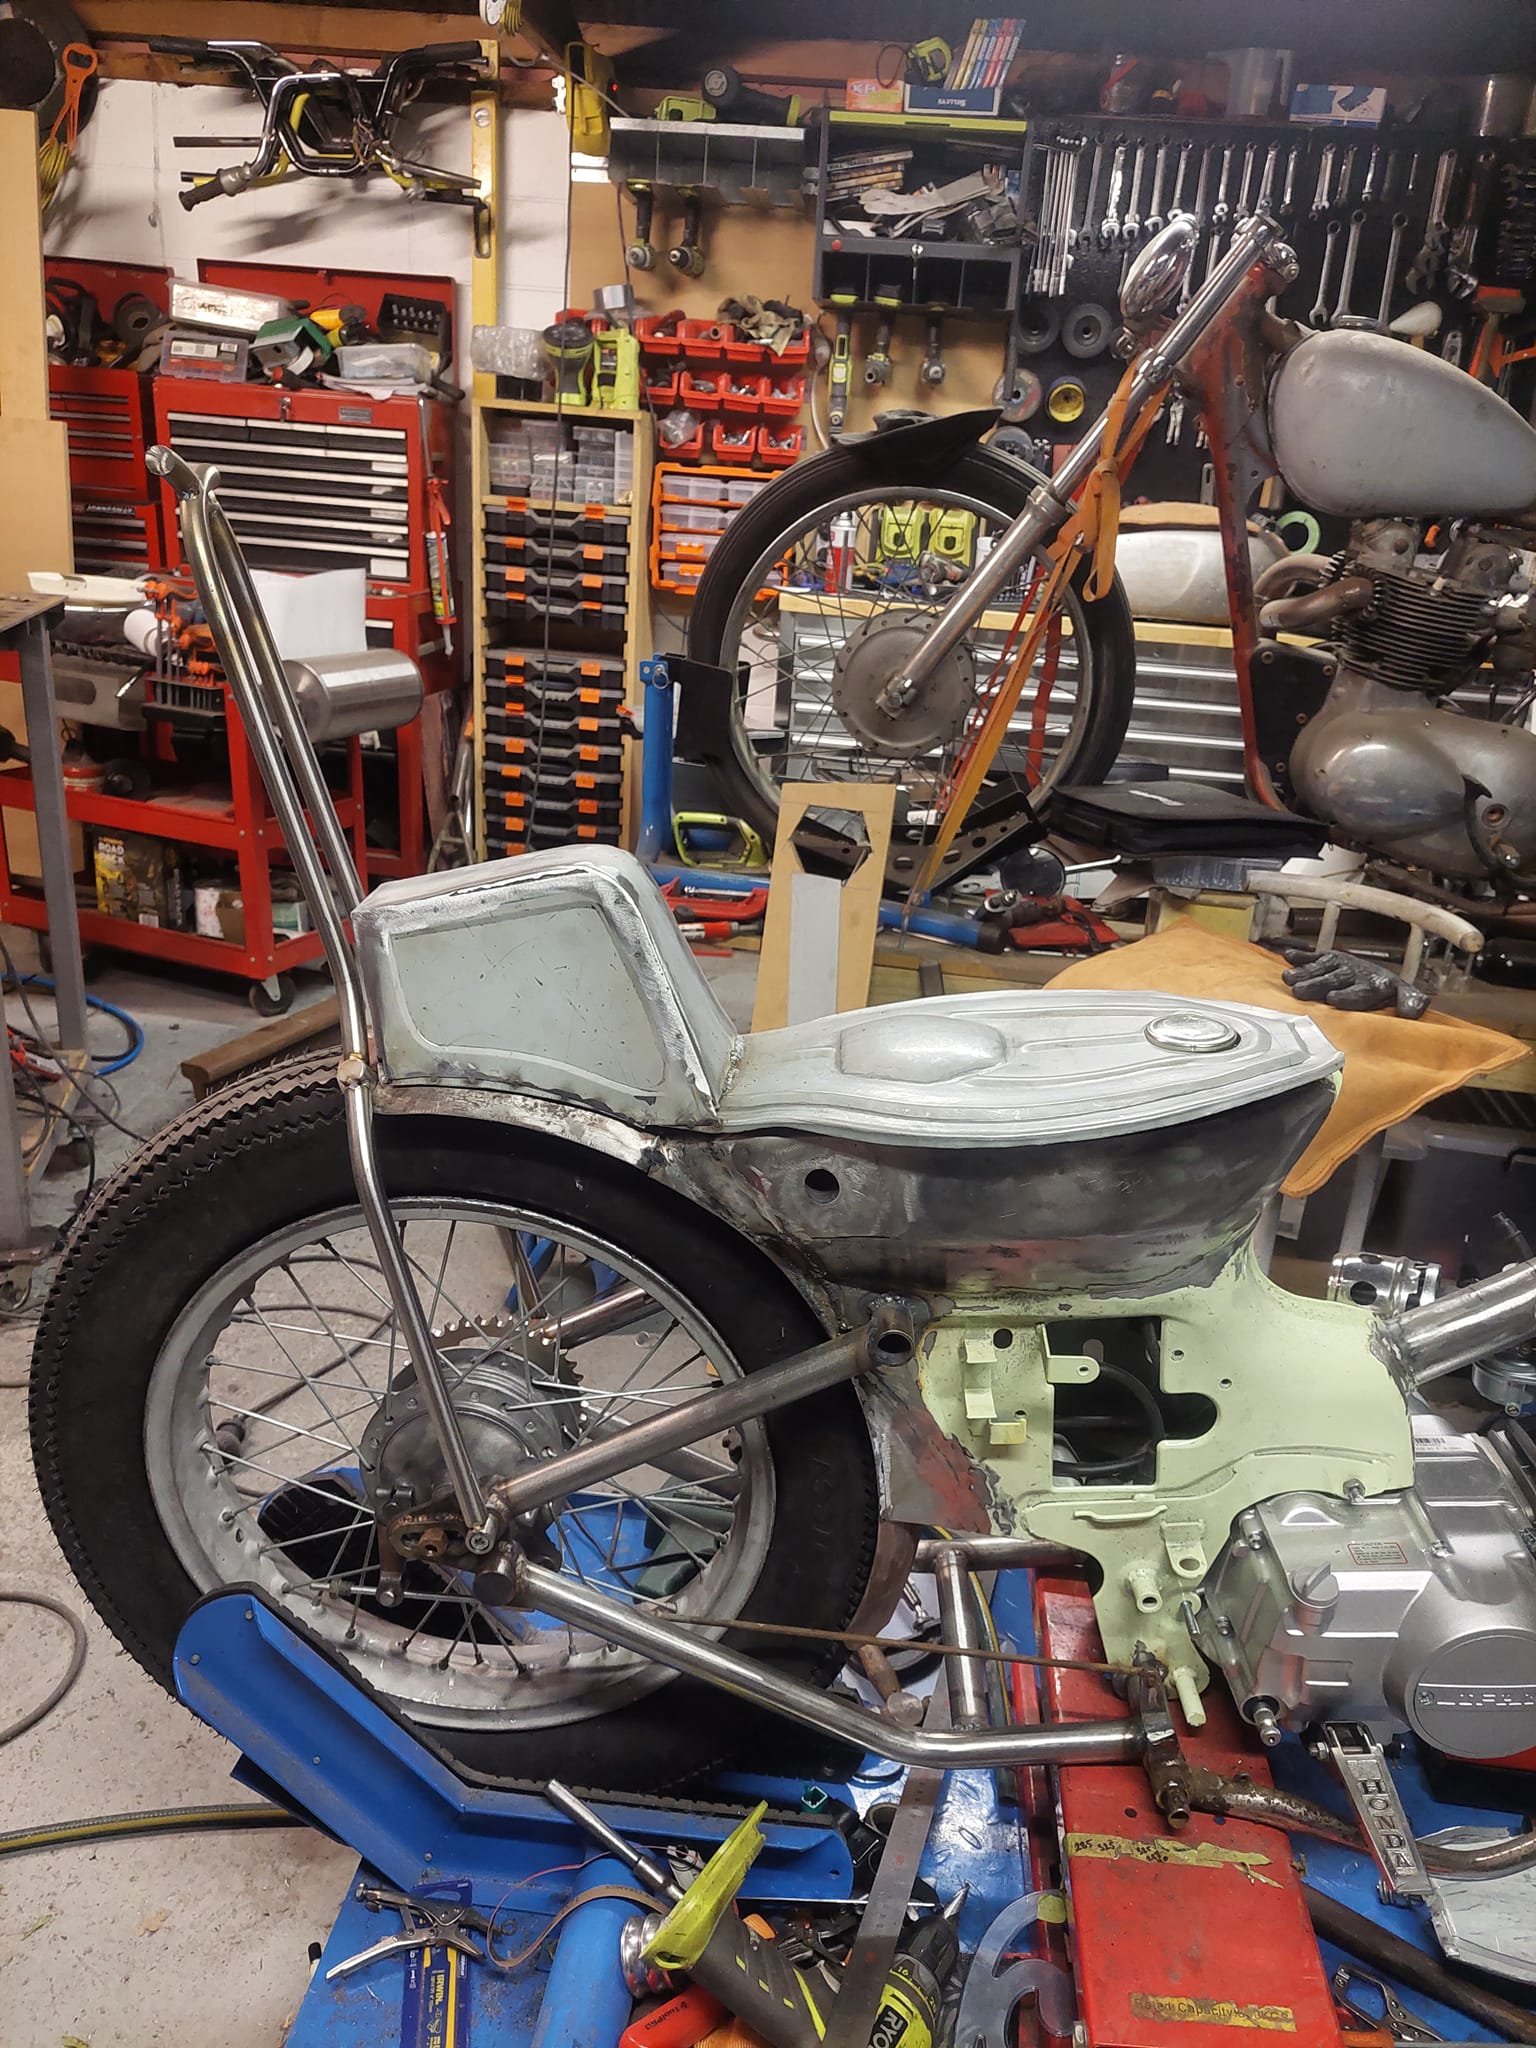
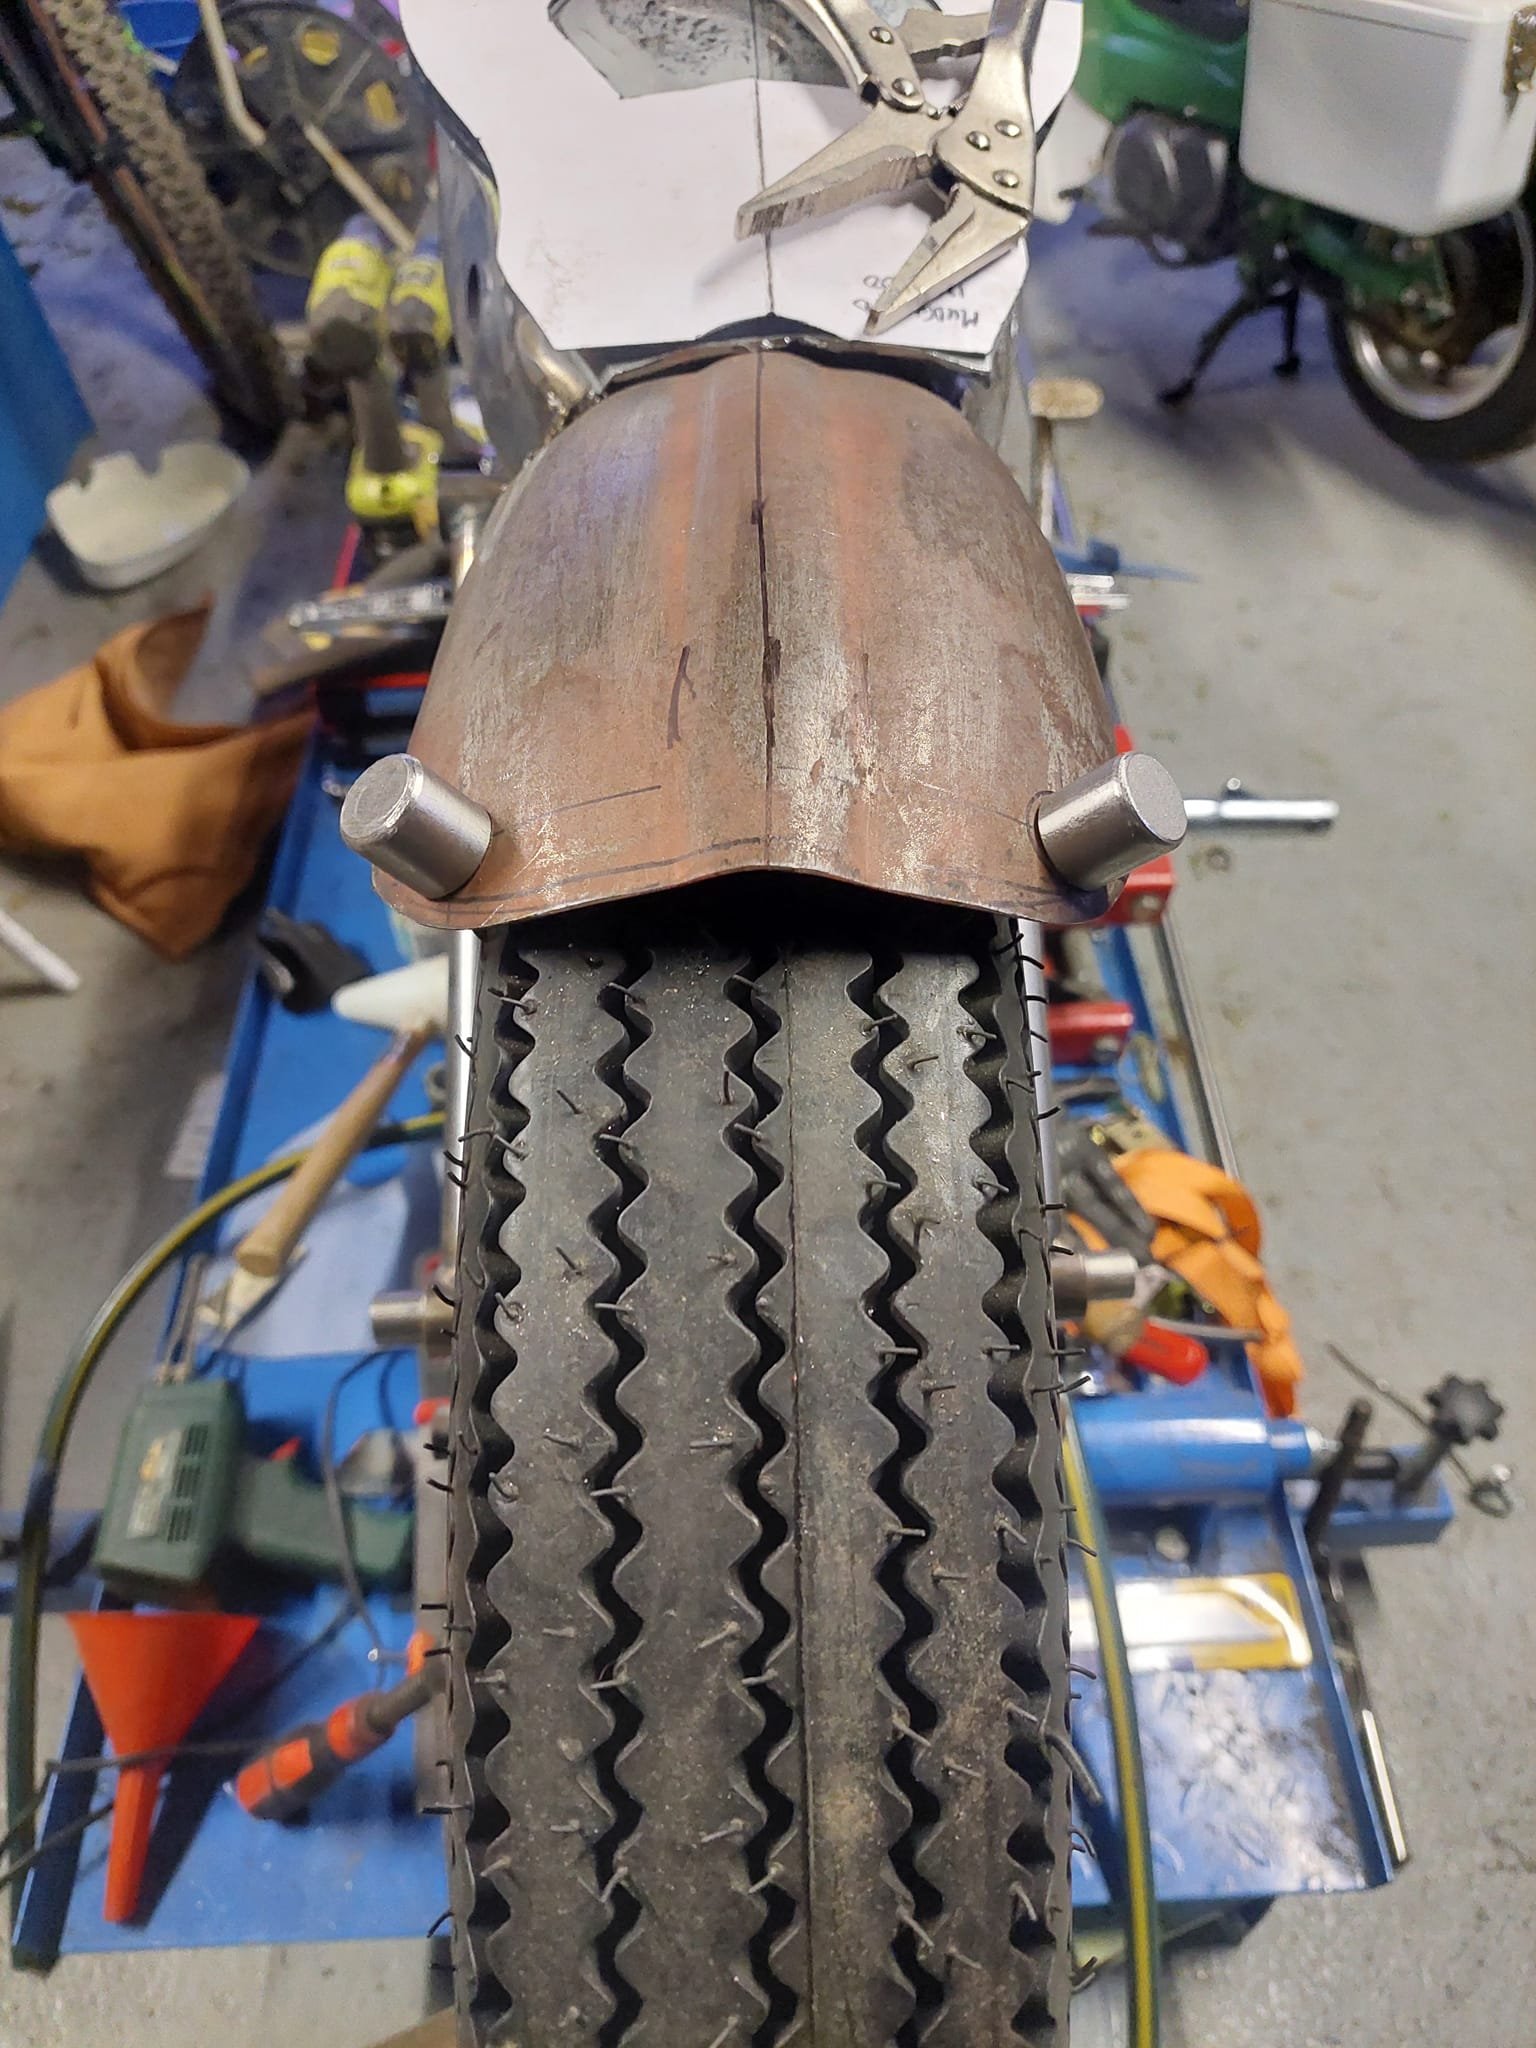
I drilled and tapped the mudguard bungs the bolted them on. Then started bended up some 16mm stainless round bar for the sissy bar. After some dicking around with my pipe bender and heat I came up with semi symmetrical shape but I wasnt really happy with it so I cut it in half and flipped it around, so my mistake kinda worked out in my favor. Once I'd done that I thought I'd get the struts out of the way 1st before I welded the top part of the sissy bar on then I tacked the top part on. I've always wanted a spool hub for this bike to match the smoothed fork legs. An old lady was selling some of her partners bike bits on marketplace and this wheel was one of them. She was super nice, we yarned for abit, I paid her then on my way out I walked straight into her hanging basket bracket. It nearly knocked me on my arse and I was close crying once I got in the car
-
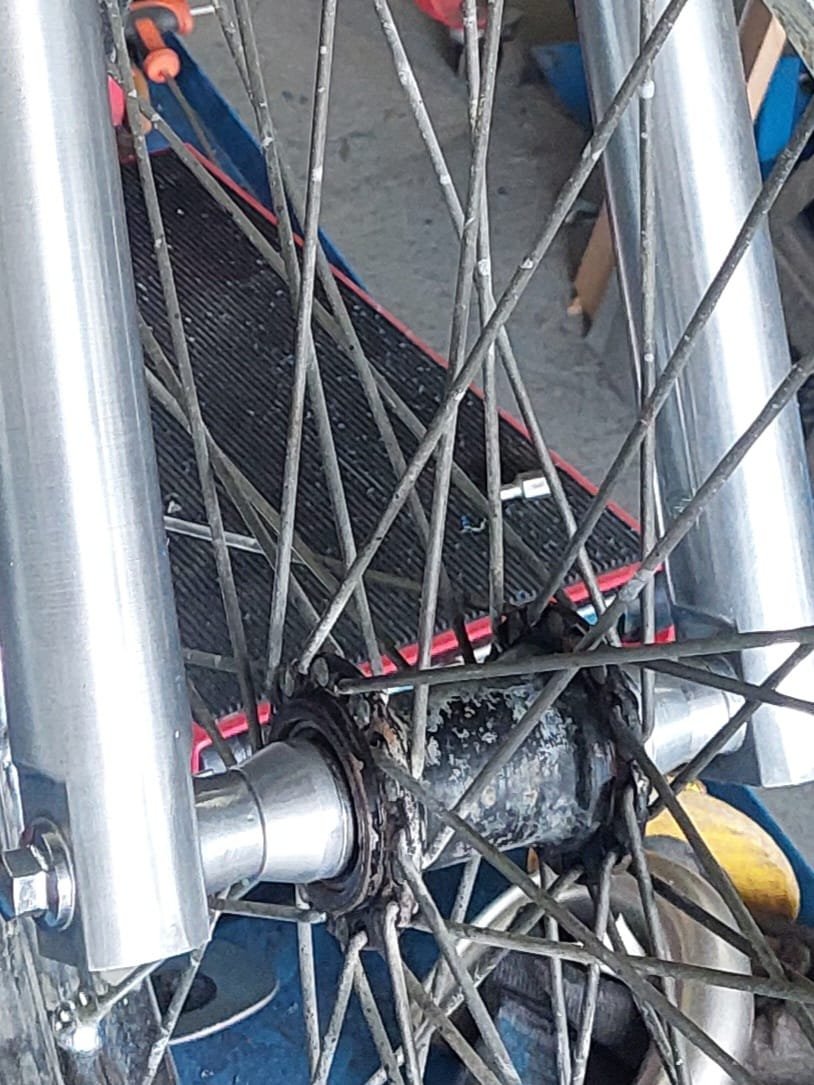
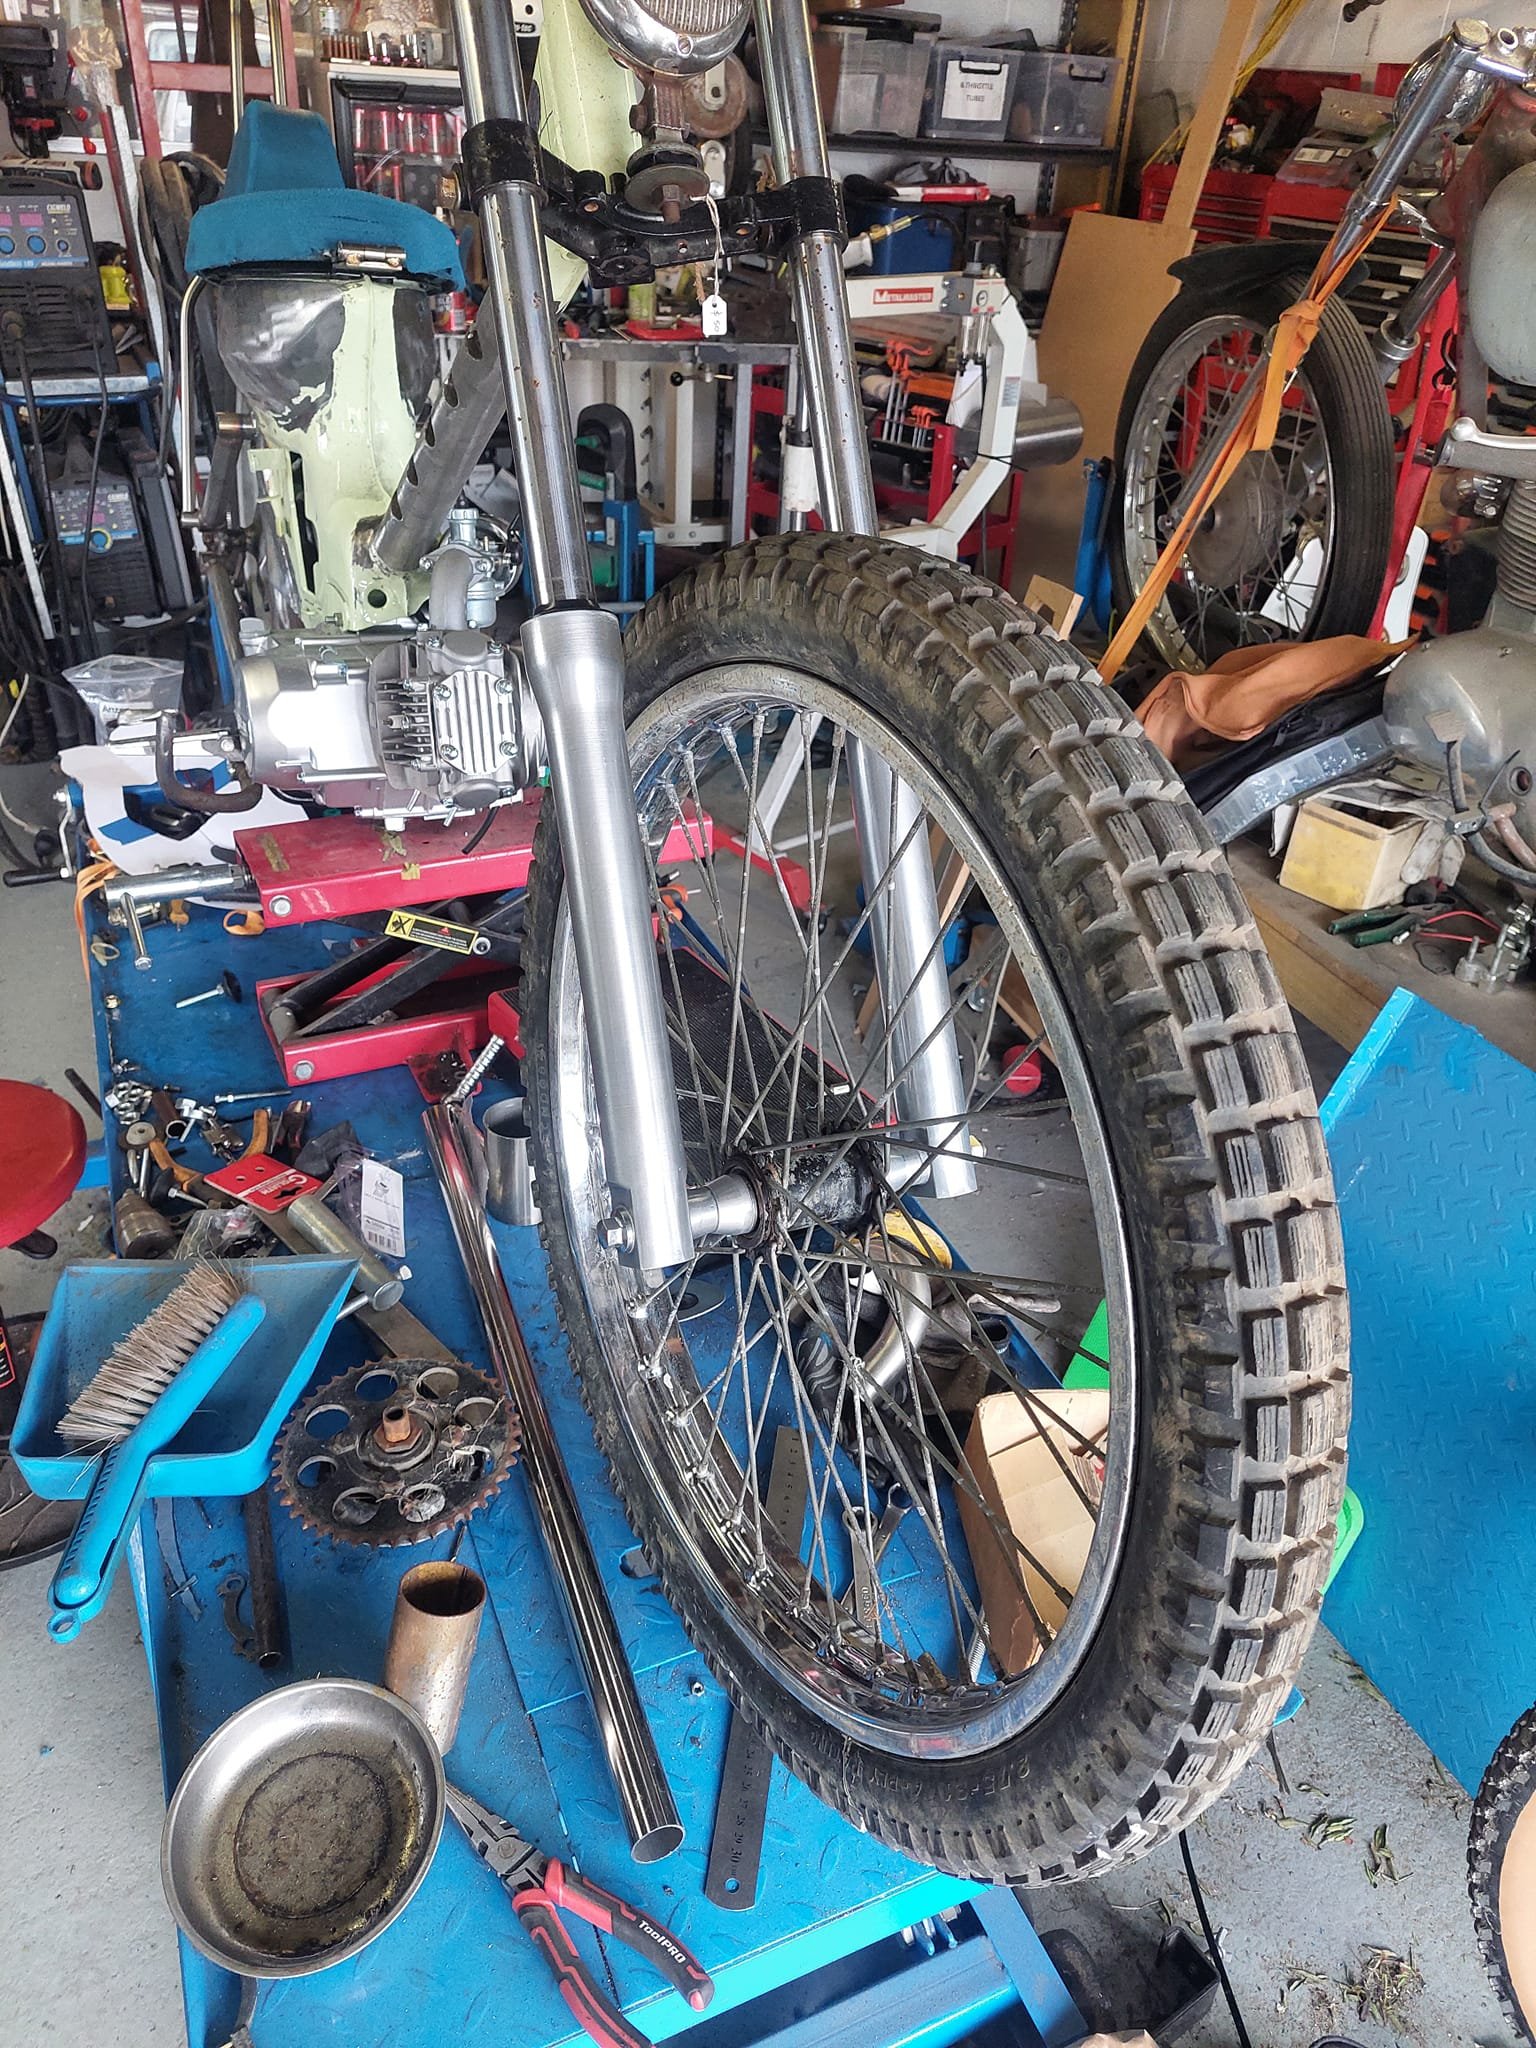
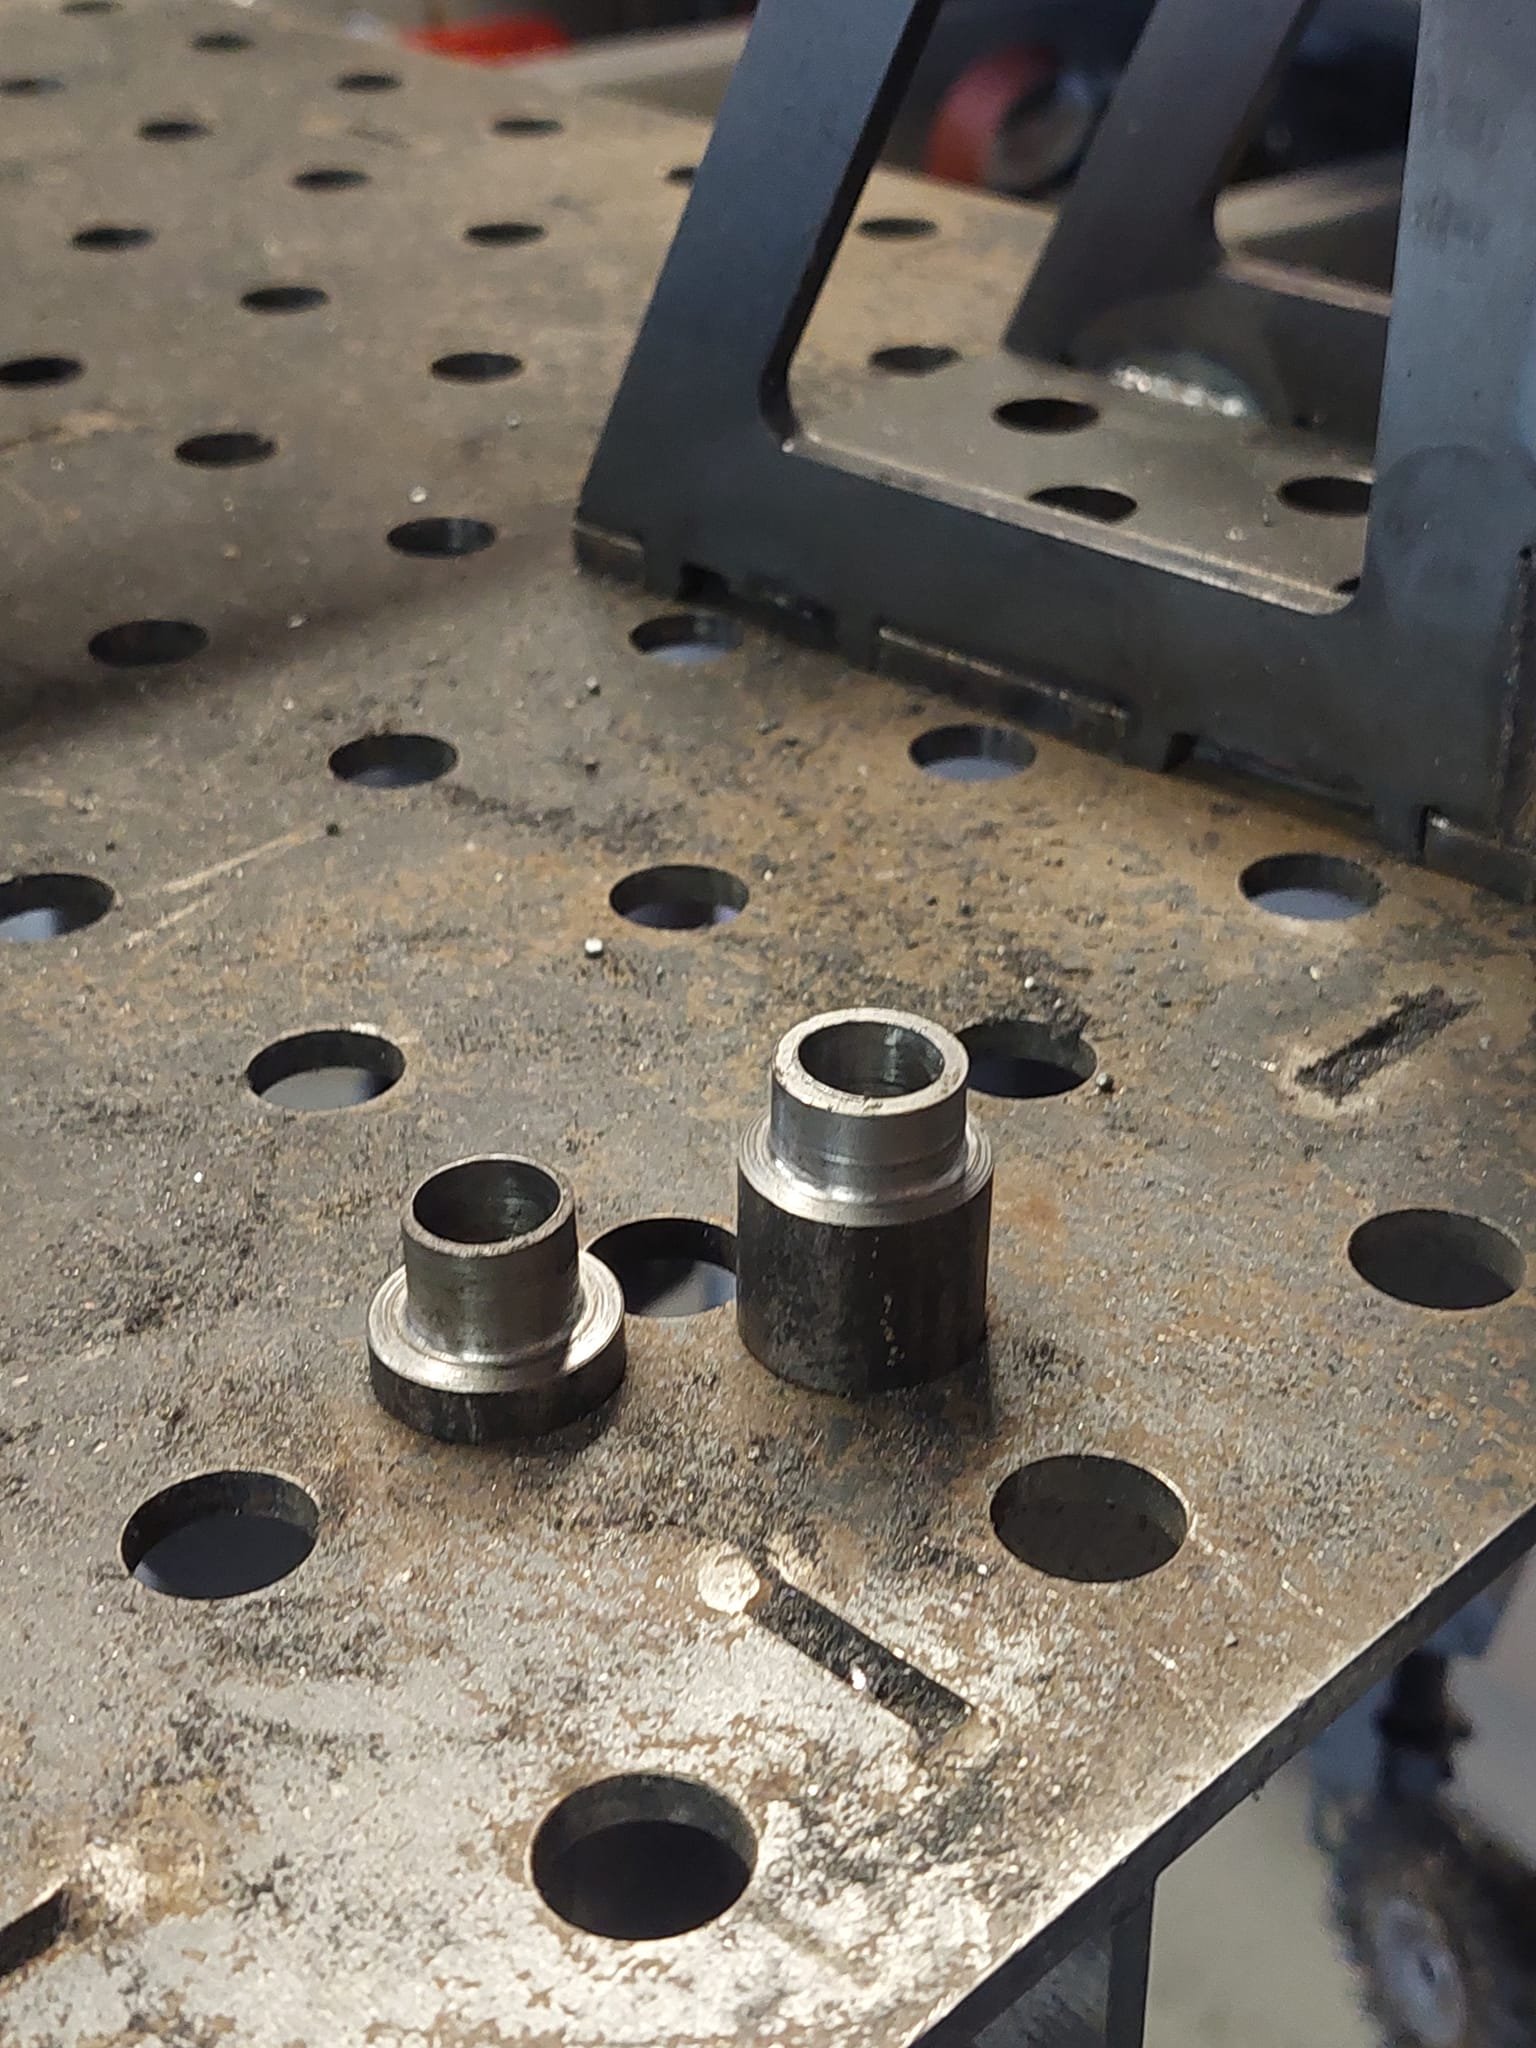
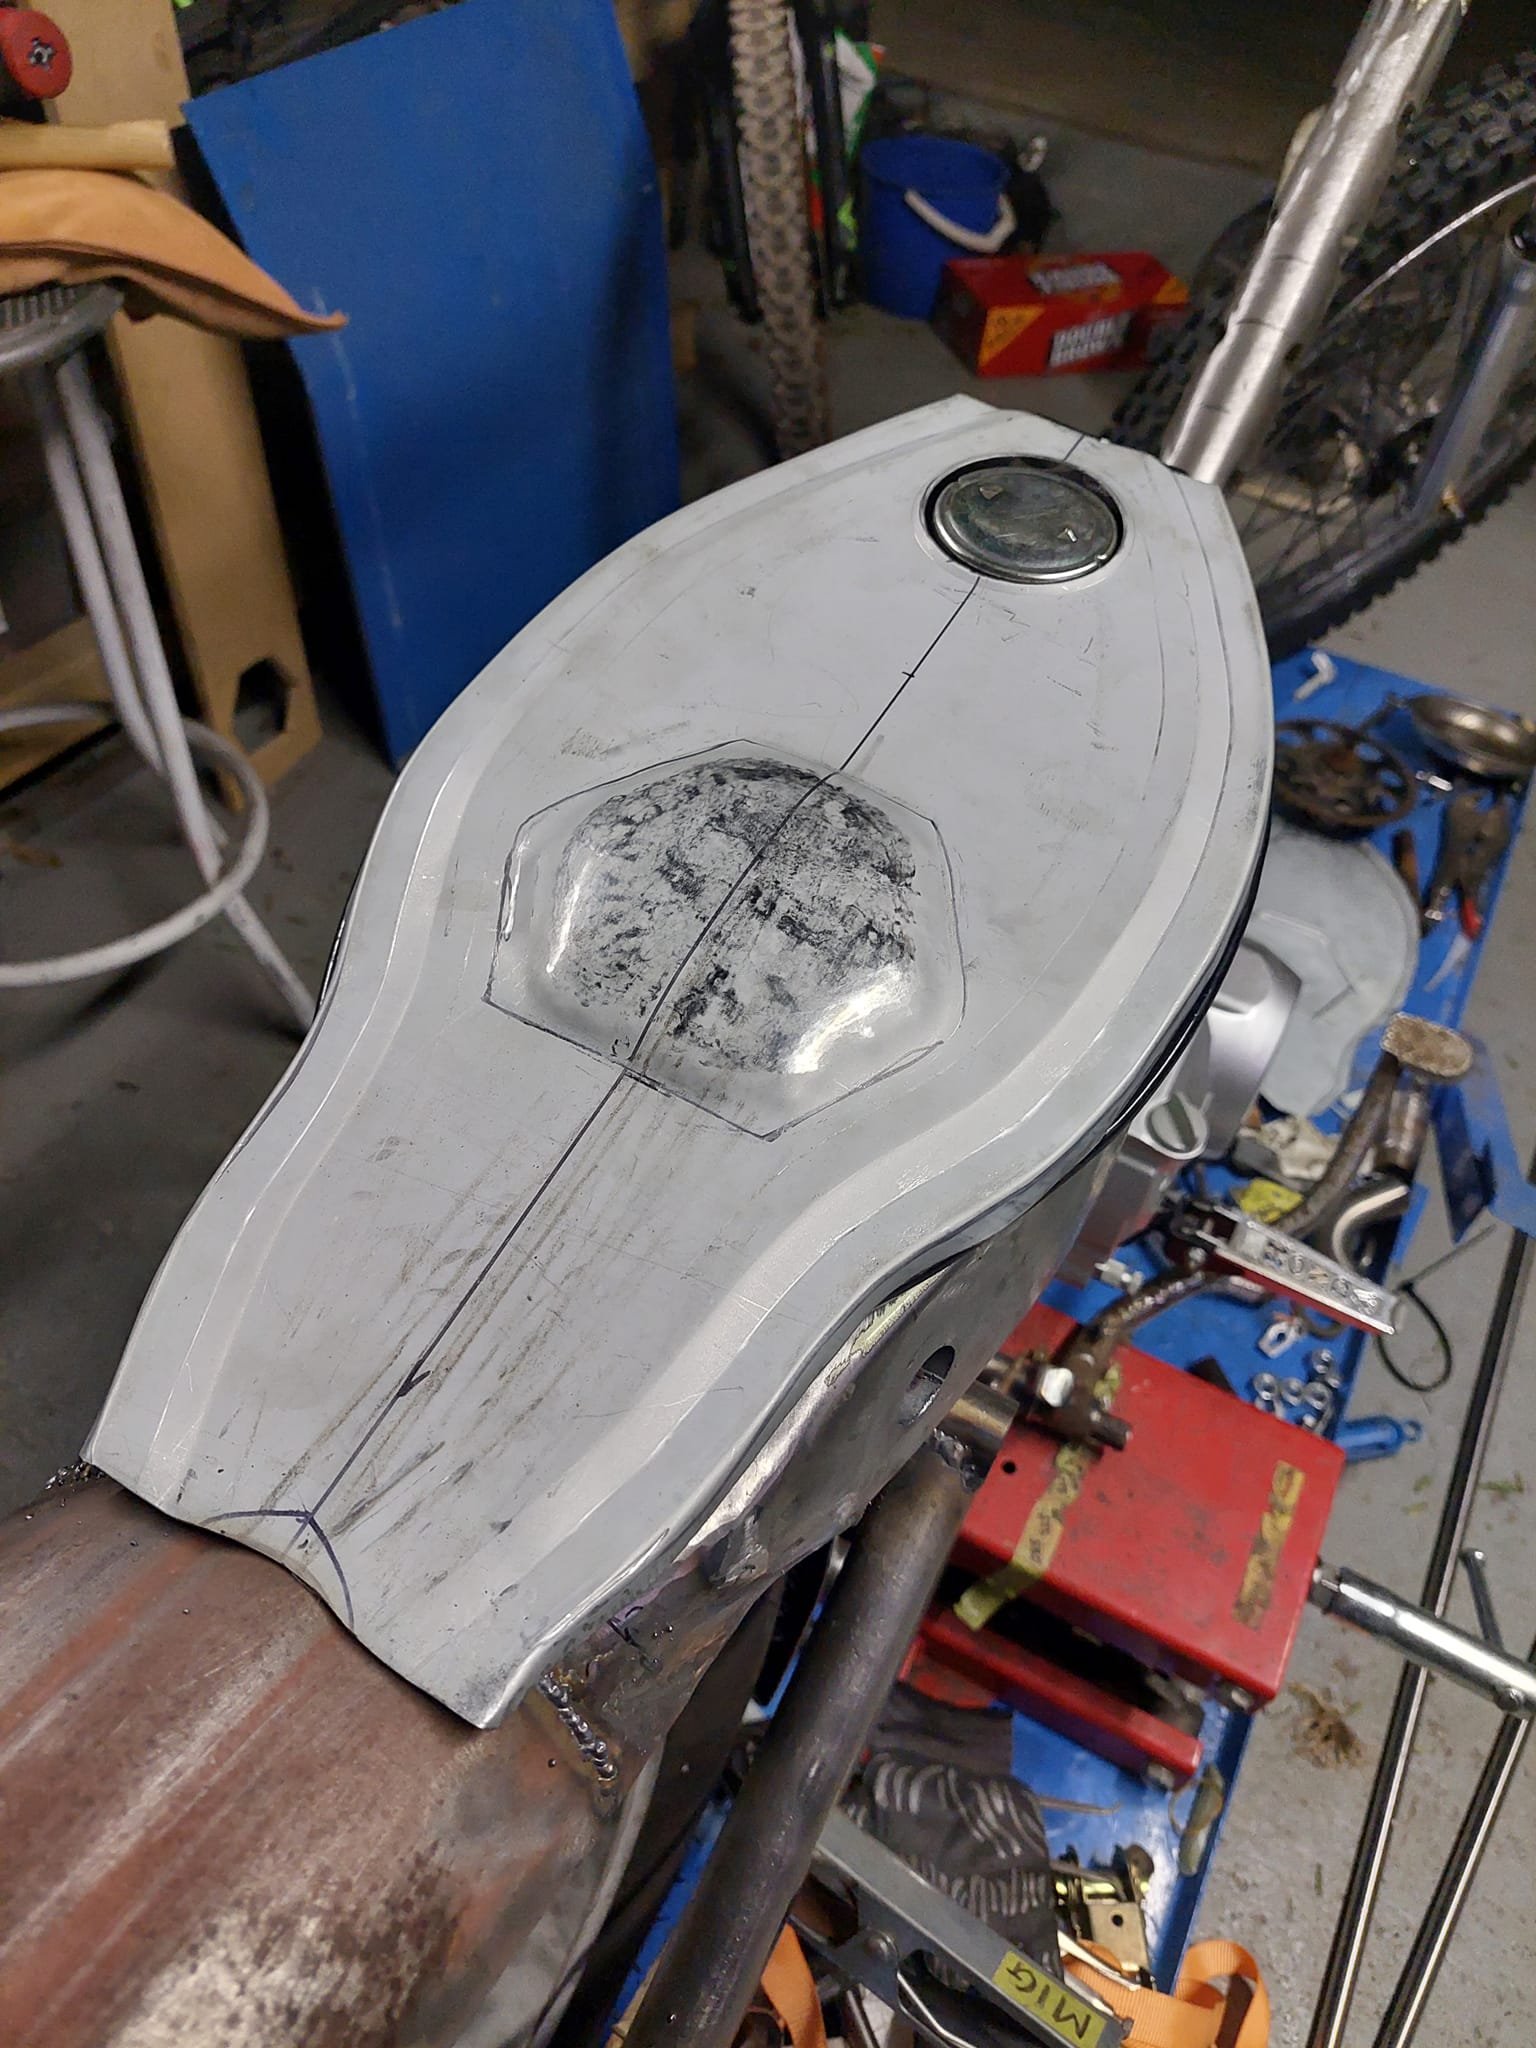
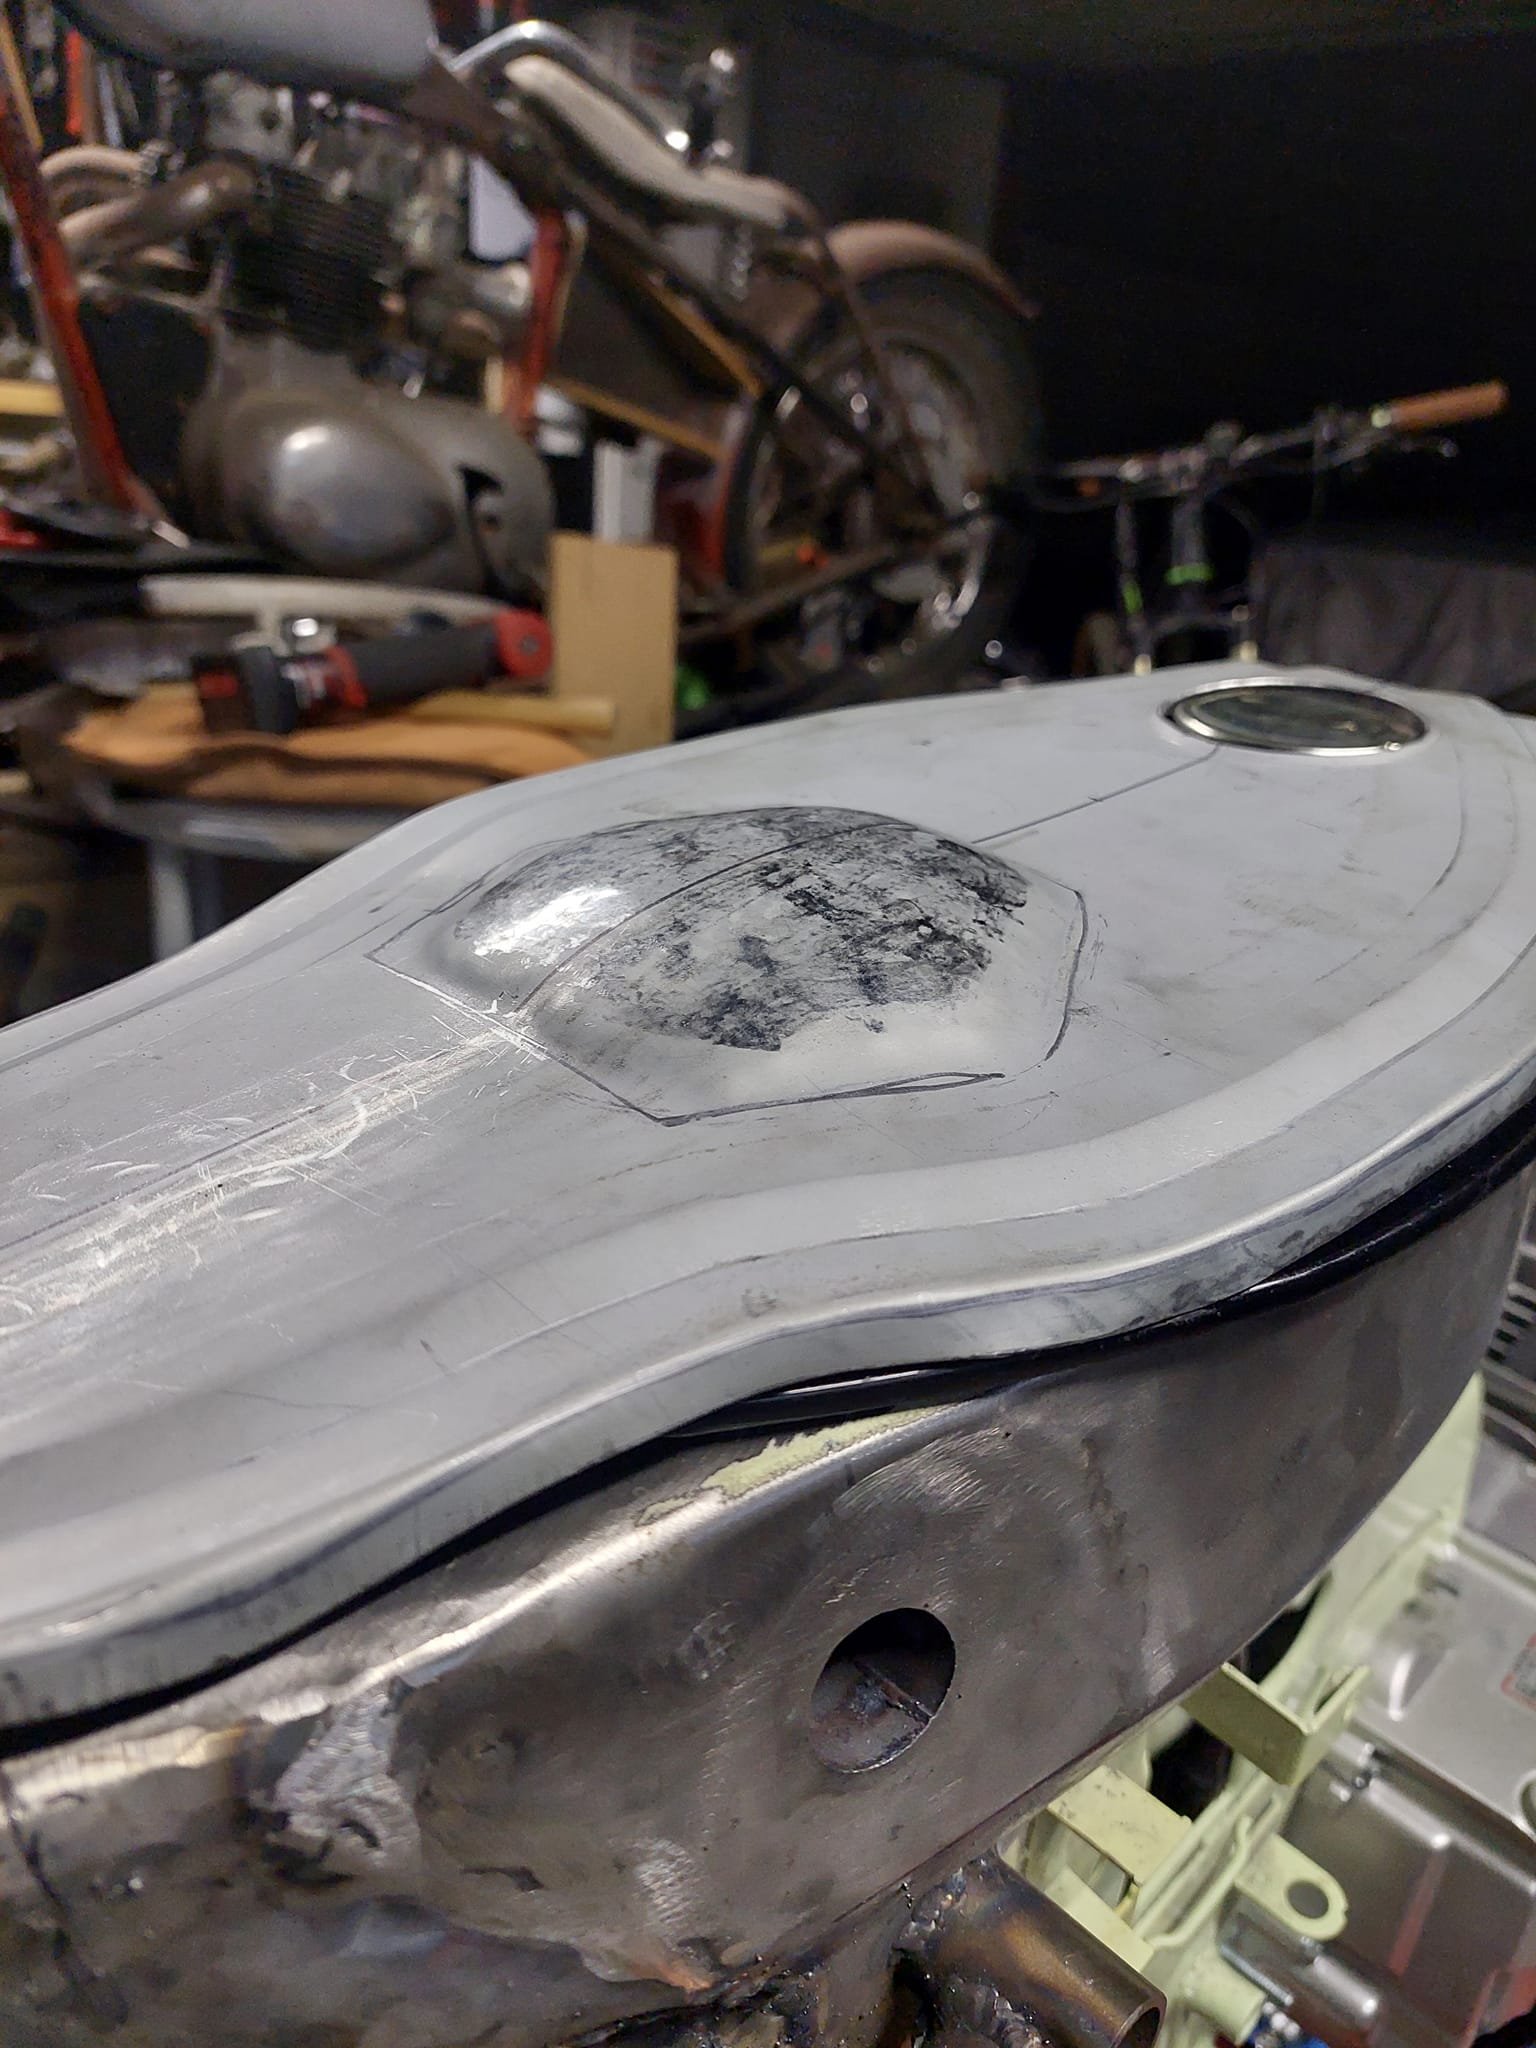
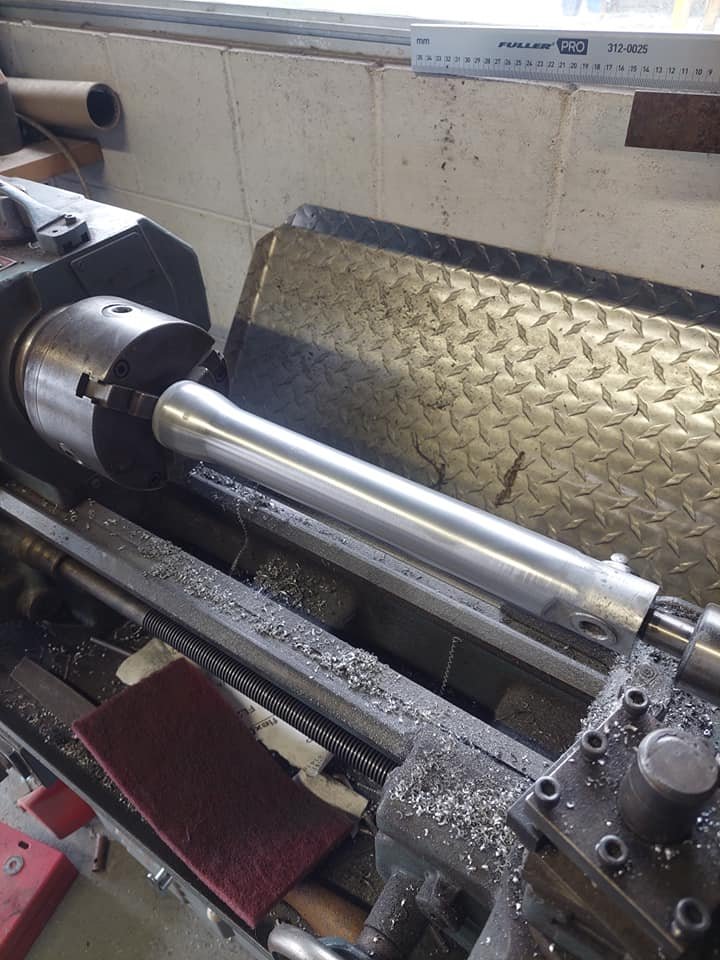
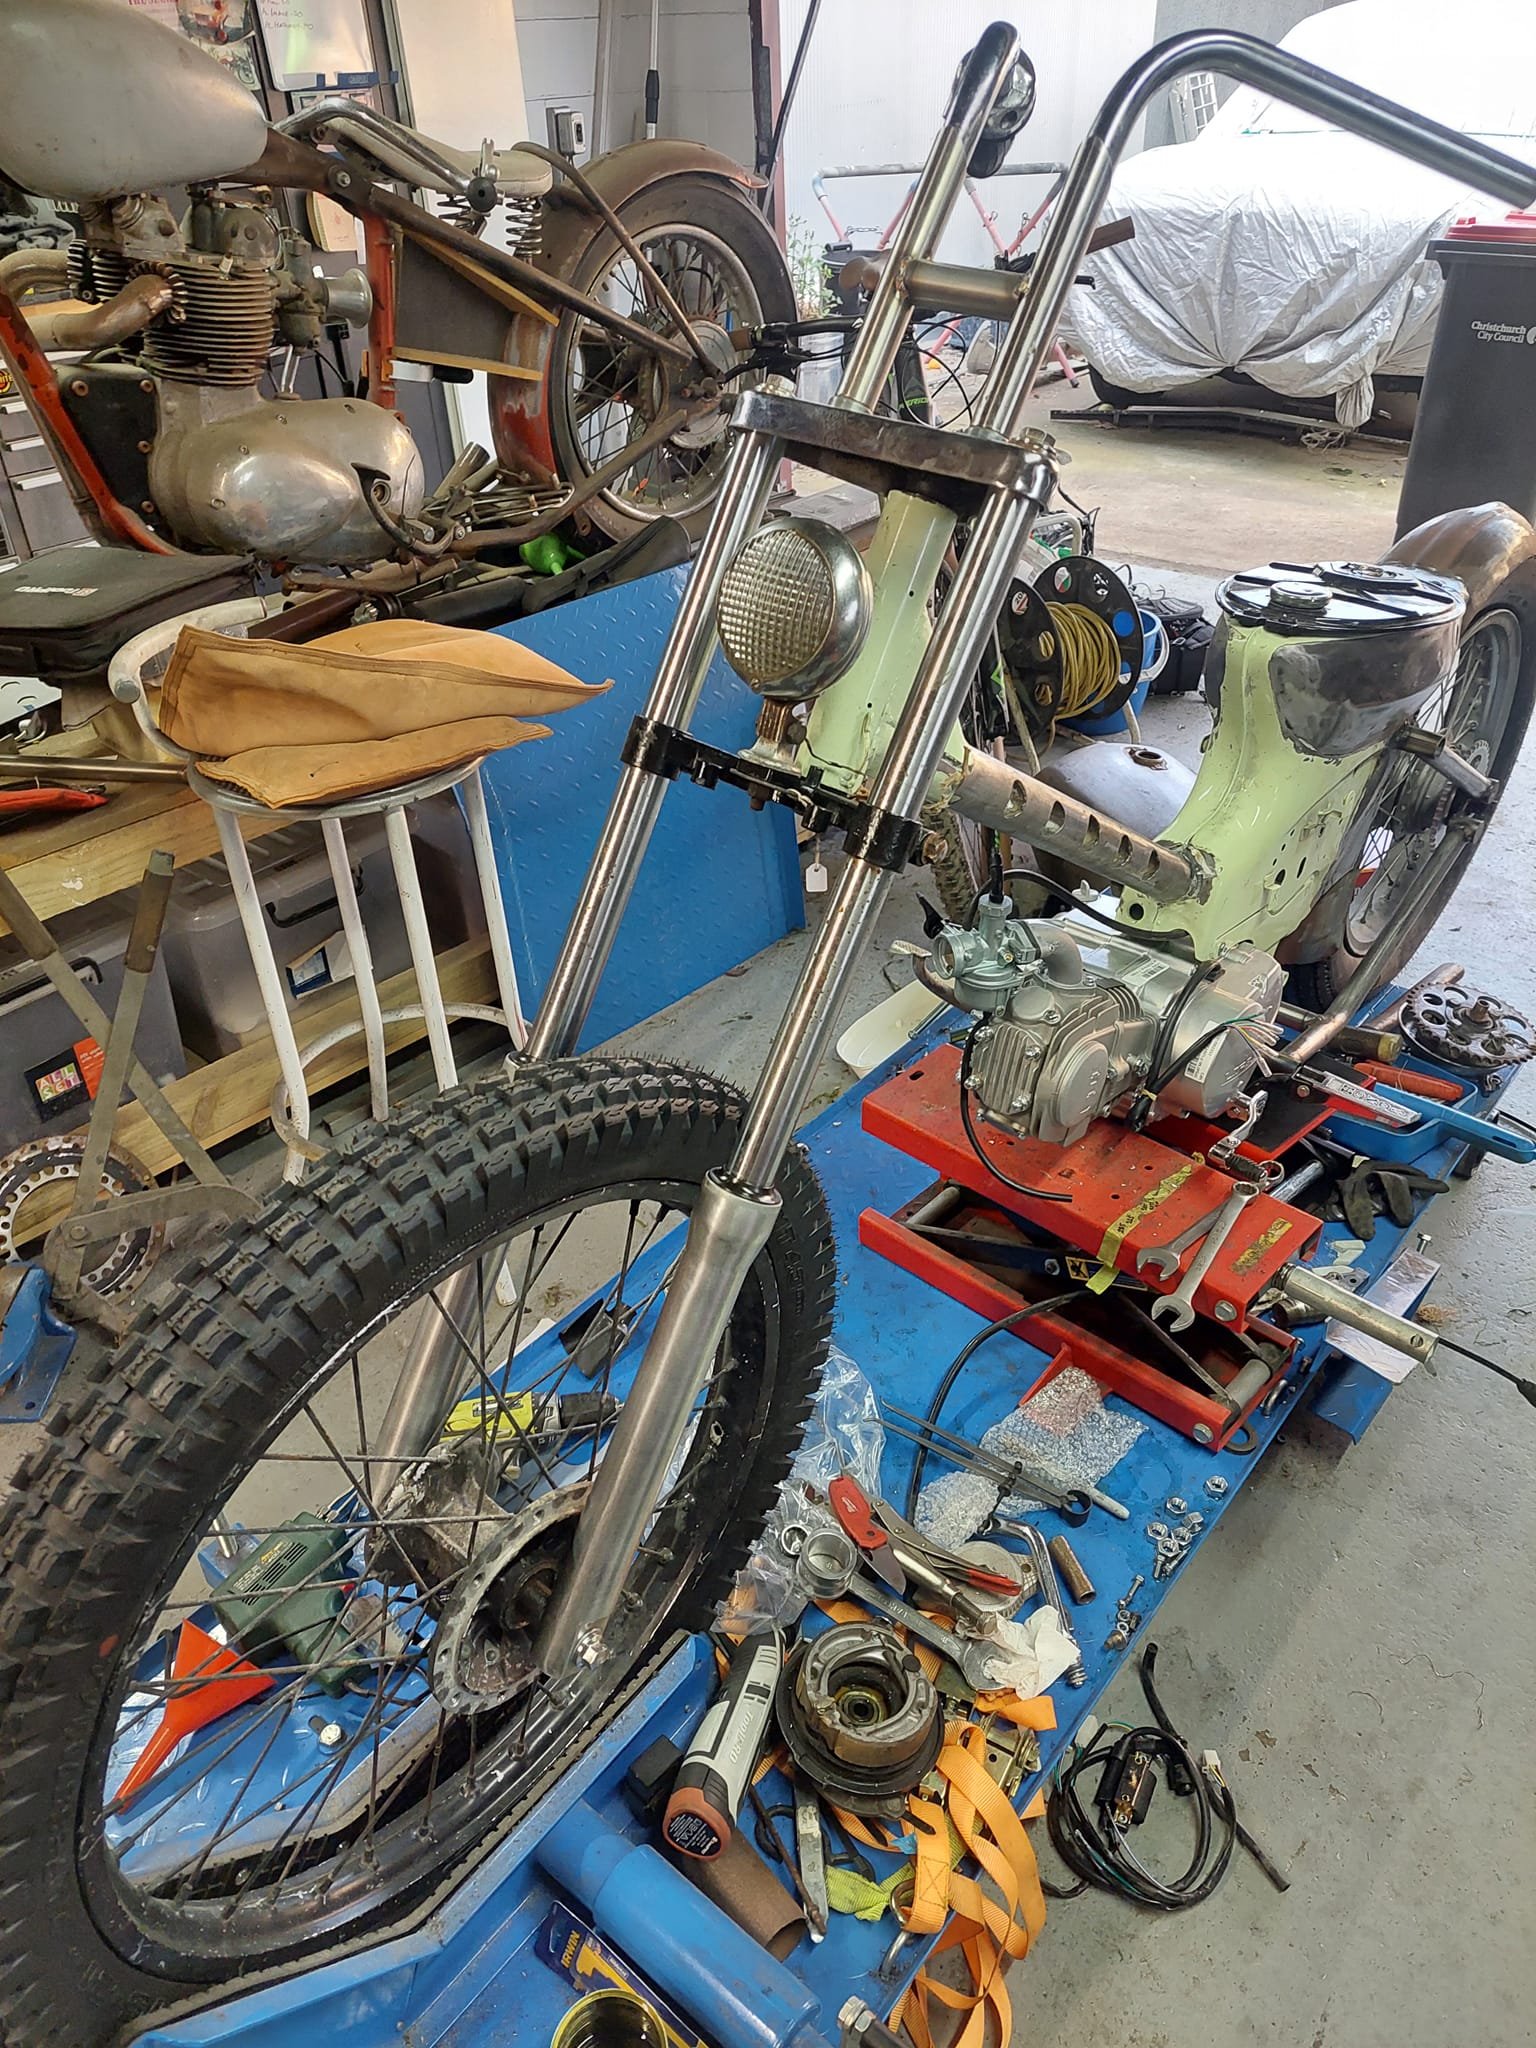
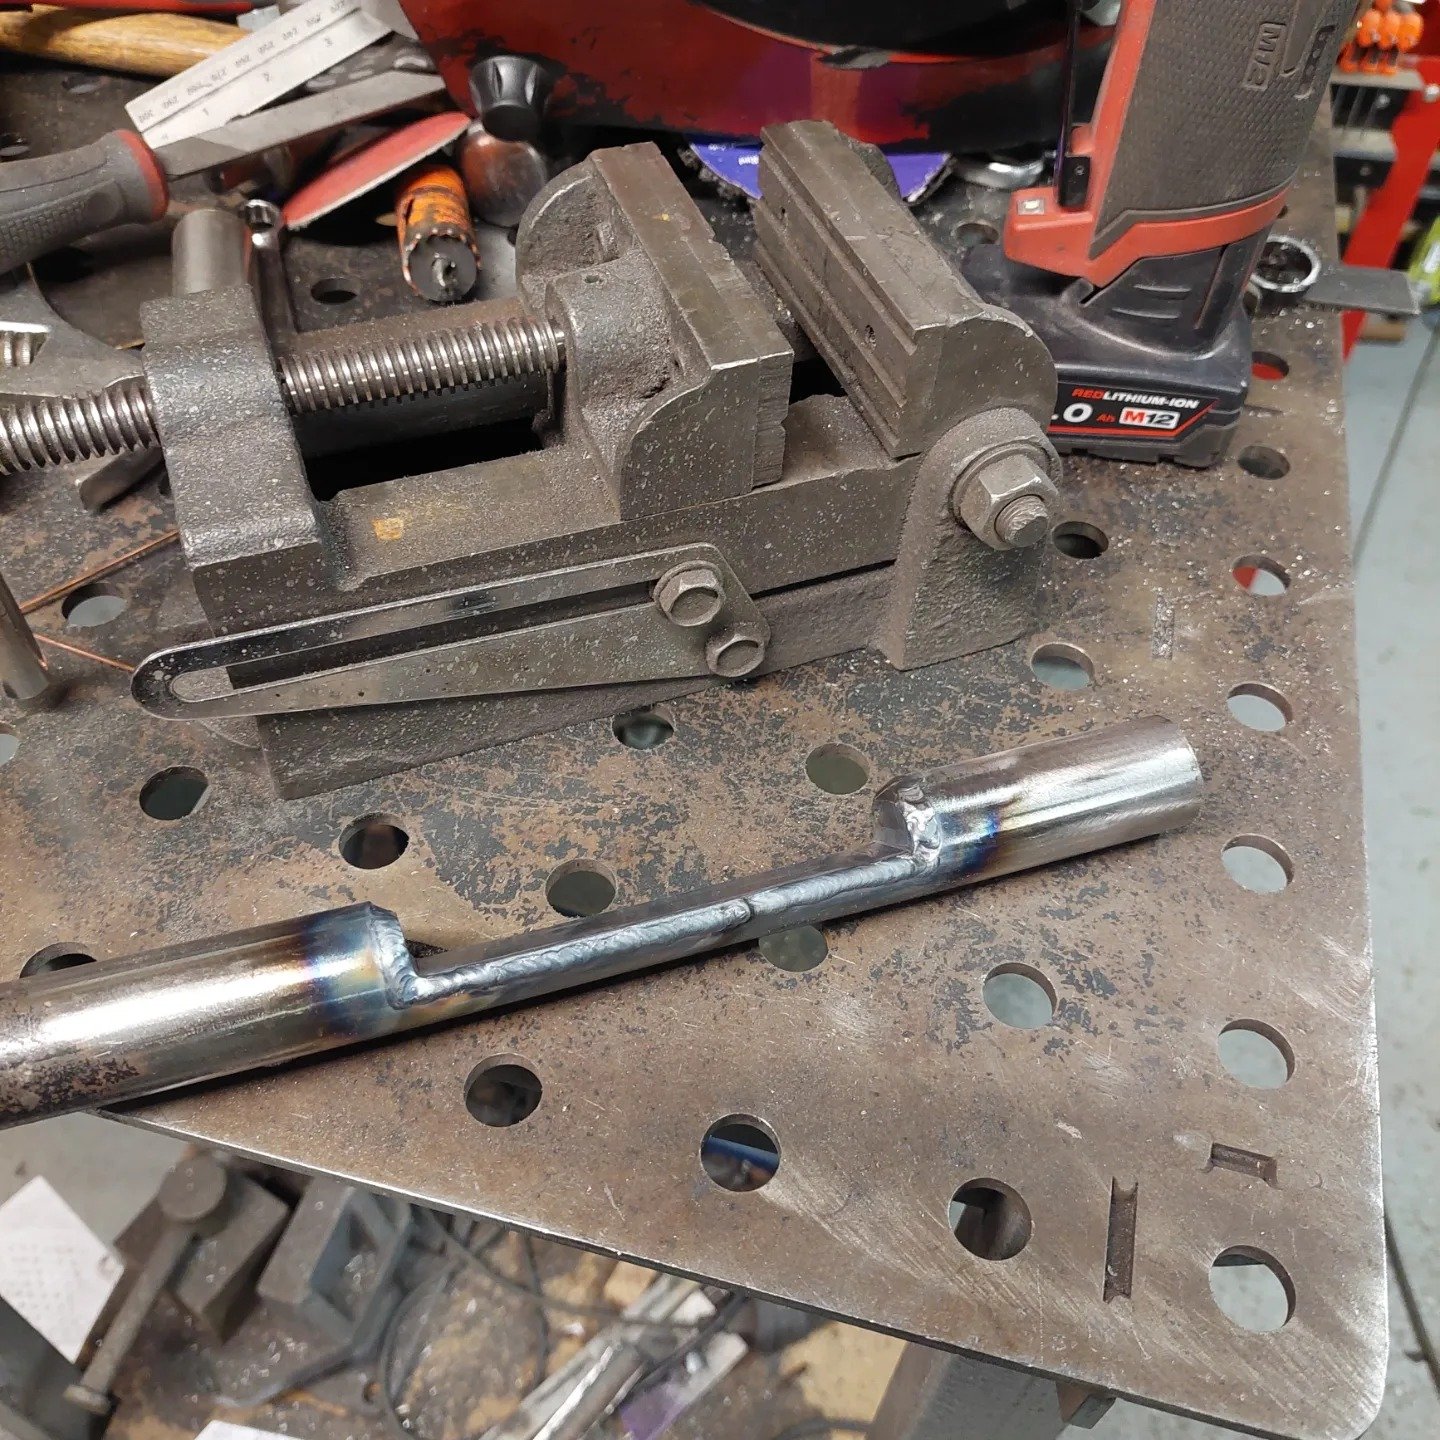
To get the front wheel rolling in a straight line I had to make some reducing spacers as the forks and axle are 12mm and the wheel bearings were 17mm one side and 15mm the other. It would have been easier to buy new bearings with the same od as the old ones and the same id as the axle. But I had some round bar and I have a lathe... I took it off the lift to get a good look at it from a distance, I'm pretty happy with it This bikes gonna have a sissy bar so I got some 16mm stainless round bar to make the sissy bar and some 19mm round bar to make the bungs. Before i go too far I need to figure out the seat pan and how far it goes back to meet the sissy bar. So I started making the base. I want it to fit as low as it can go so I had to accommodate the fuel gauge and the the fuel cap.
- 22 replies
-
- 11
-
-
-
Slip in to my Dm's Pete and we'll sort something out....
-
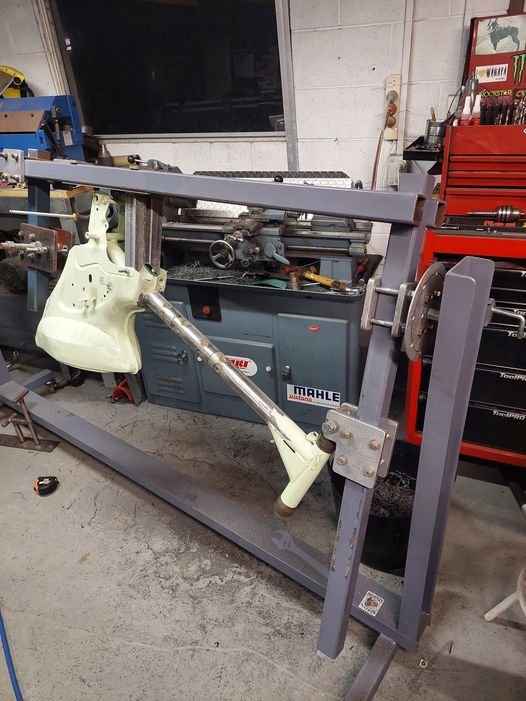
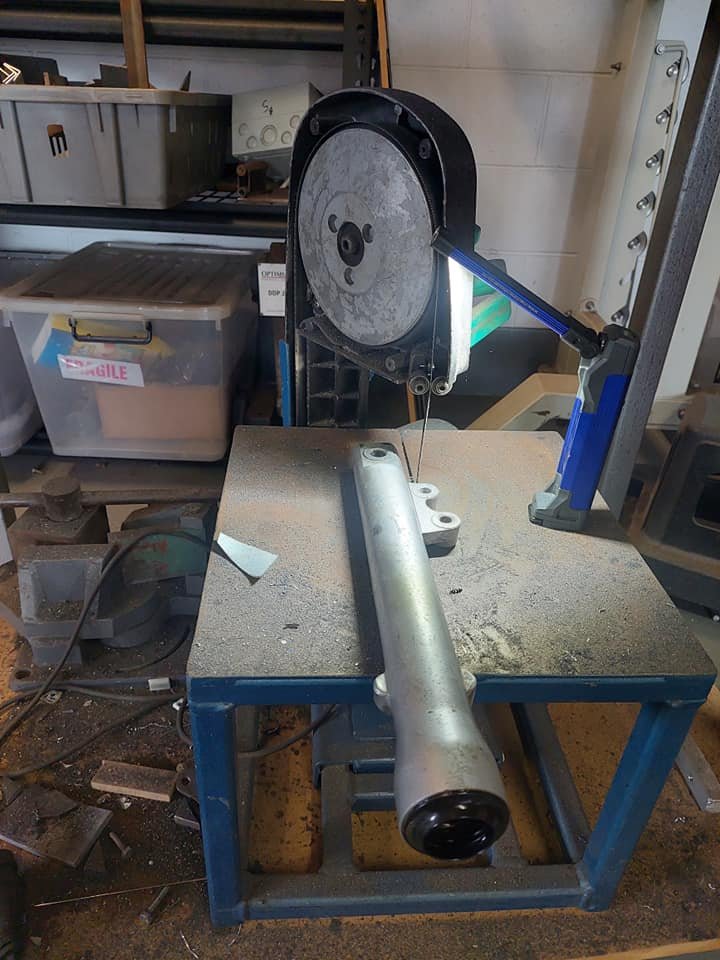
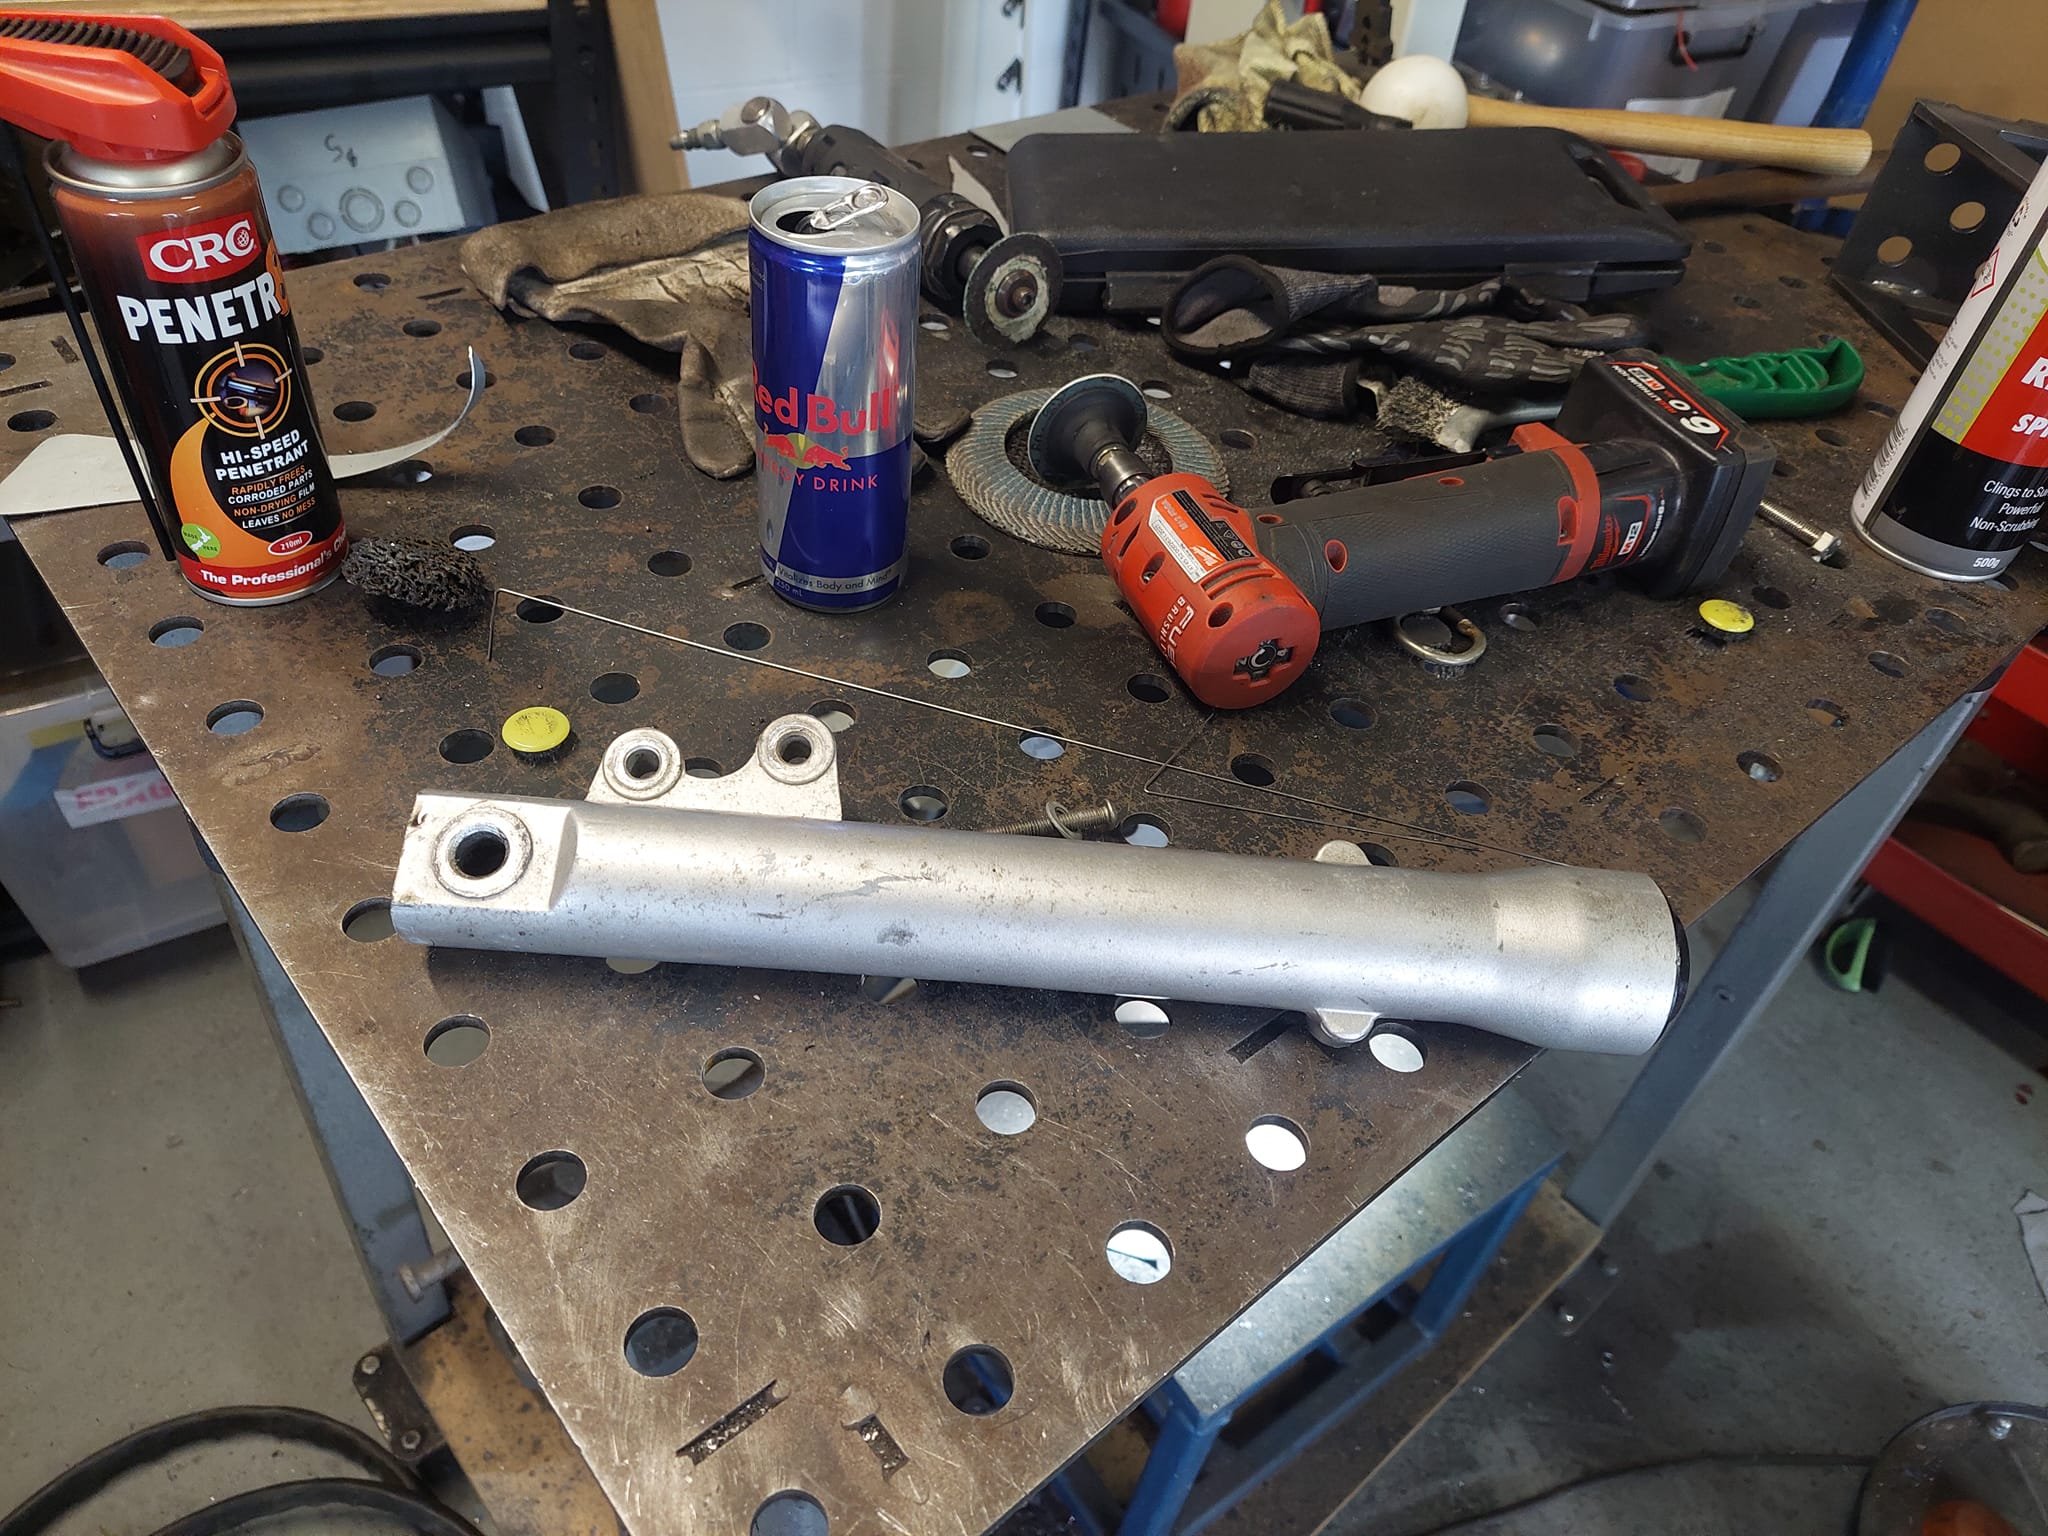
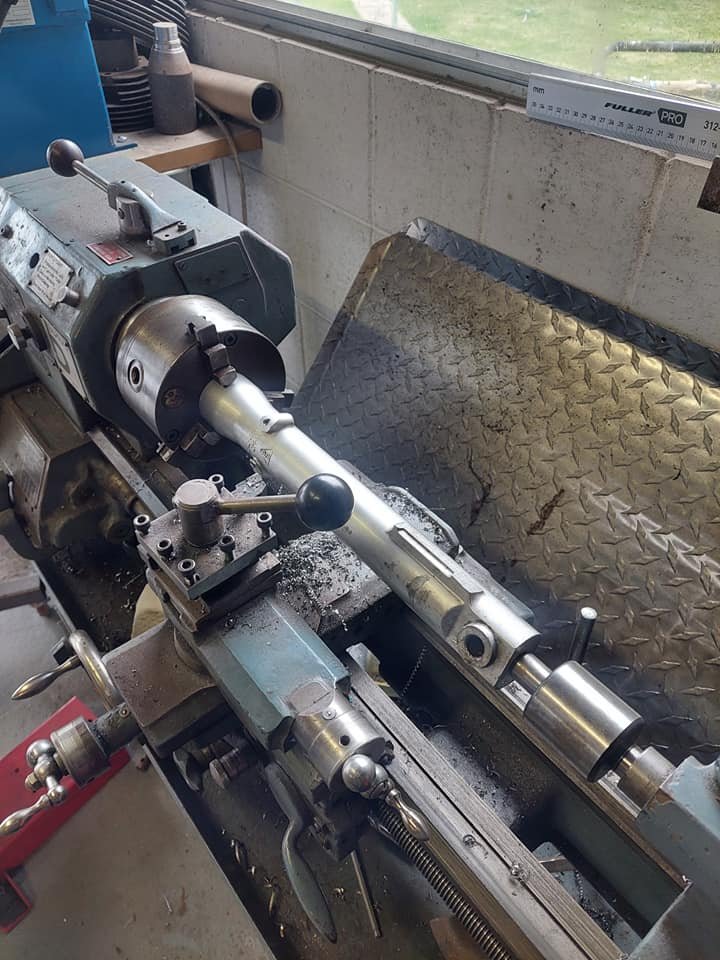
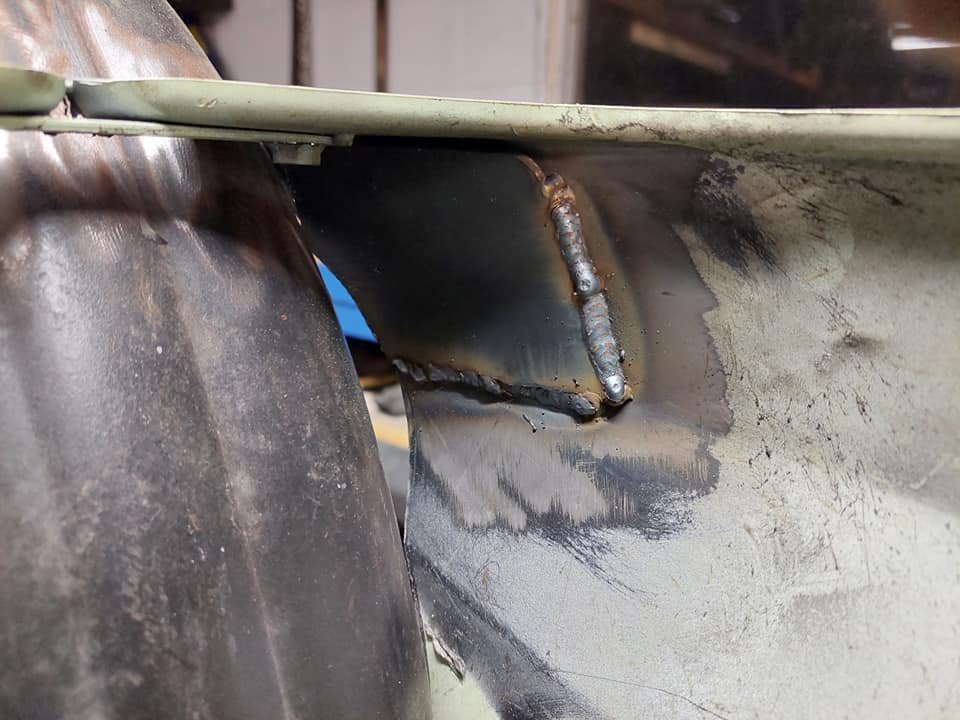
I thought I'd shave my legs this weekend, never done it before but I've seen it done heaps of times. First I dismantled them and removed the seals. Then proceeded to cut the unwanted tabs and mounts off with my noisy as fuck bandsaw. Once the bulk of them was removed I chucked it in the lathe and smoothed everything out I also fully welded the frame and welded the rear mudguard to the body and made some patches to fill in the gaps. I had extend the length of the steerer tube on the fork clamps as there wasnt enough thread for the top nut when it was all fully assembled. So I cut it and added 20mm. I drilled a 10mm hole through all the pieces and inserted some 10mm rod through them all for alignment and glued them all up with the tig. Once it had cooled I filed it down smooth then assembled it all to the frame, and mounted the headlight I bought at the swapmeet at the weekend
-
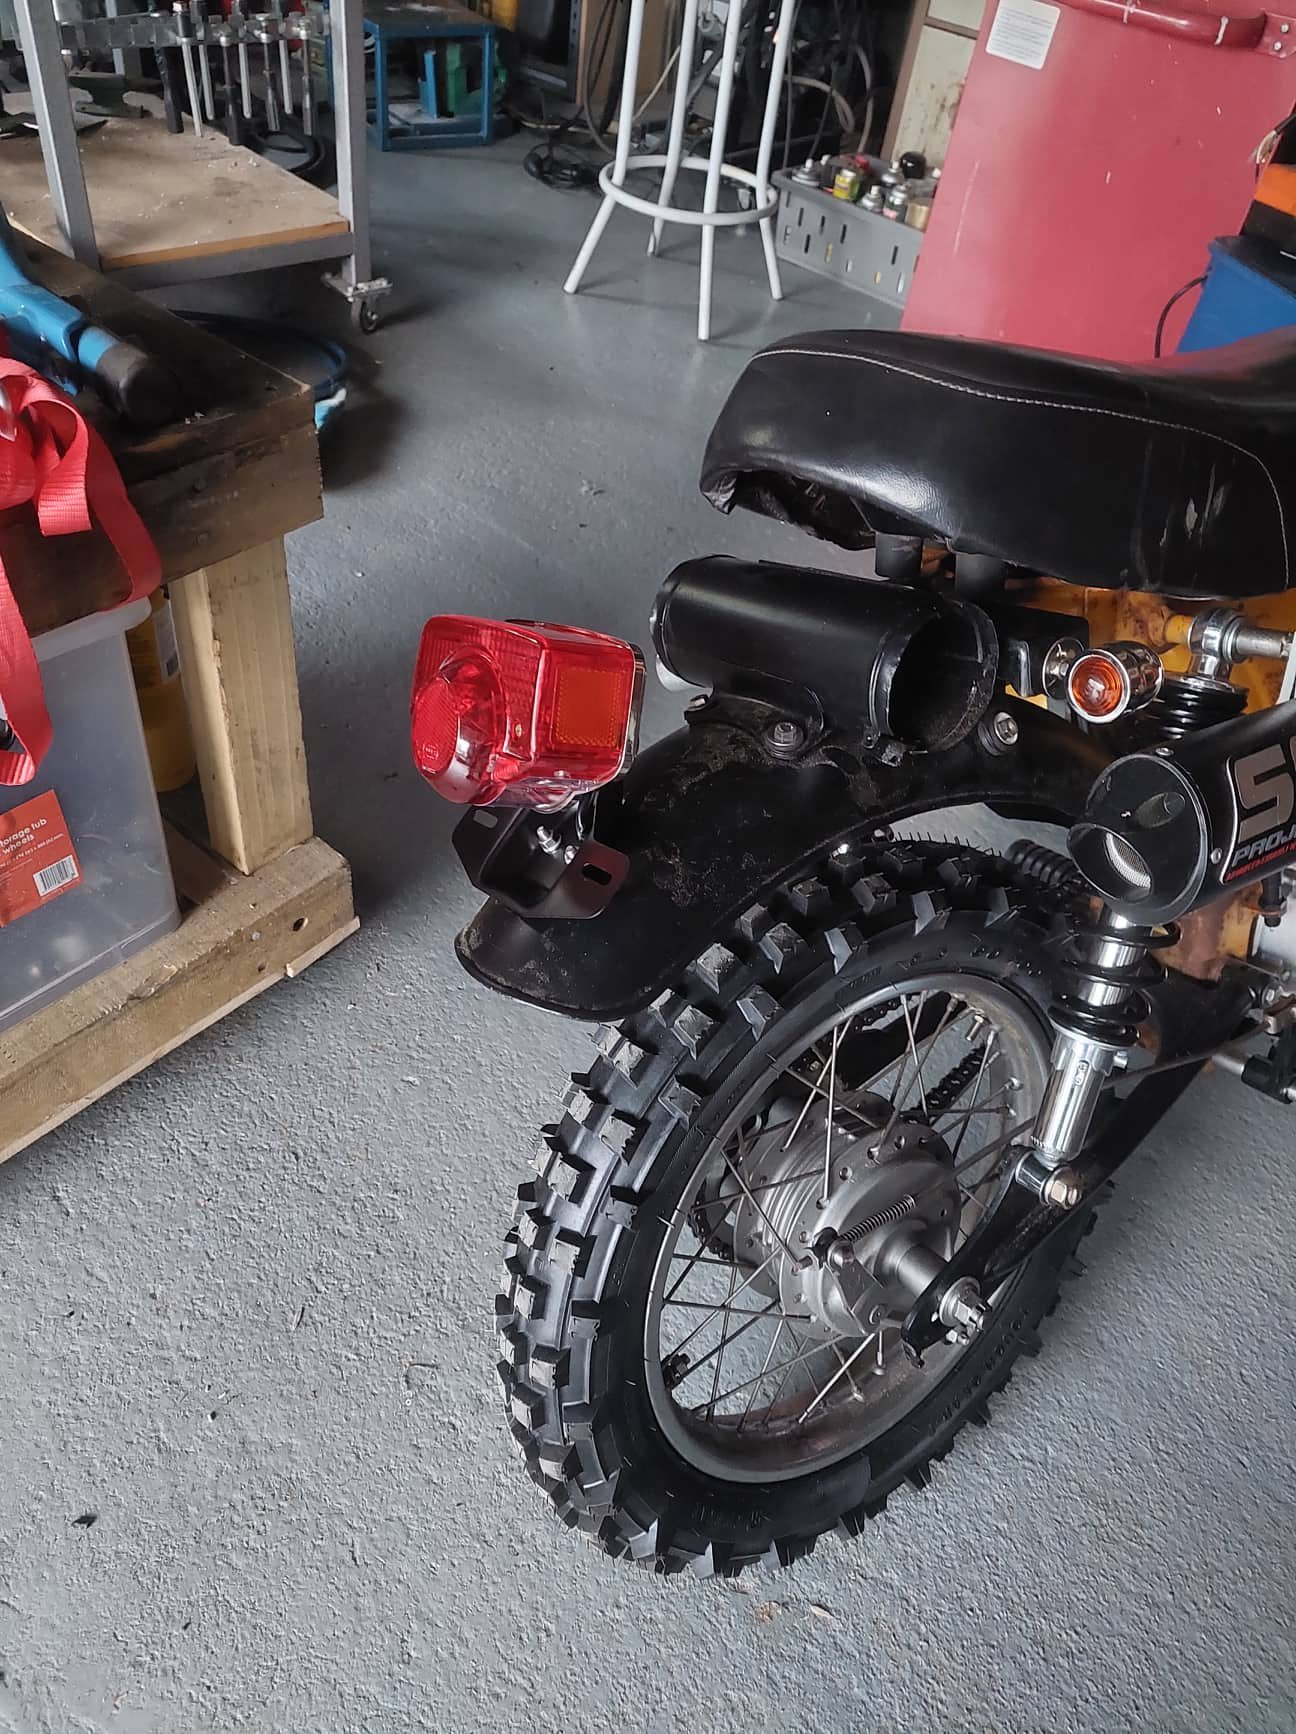
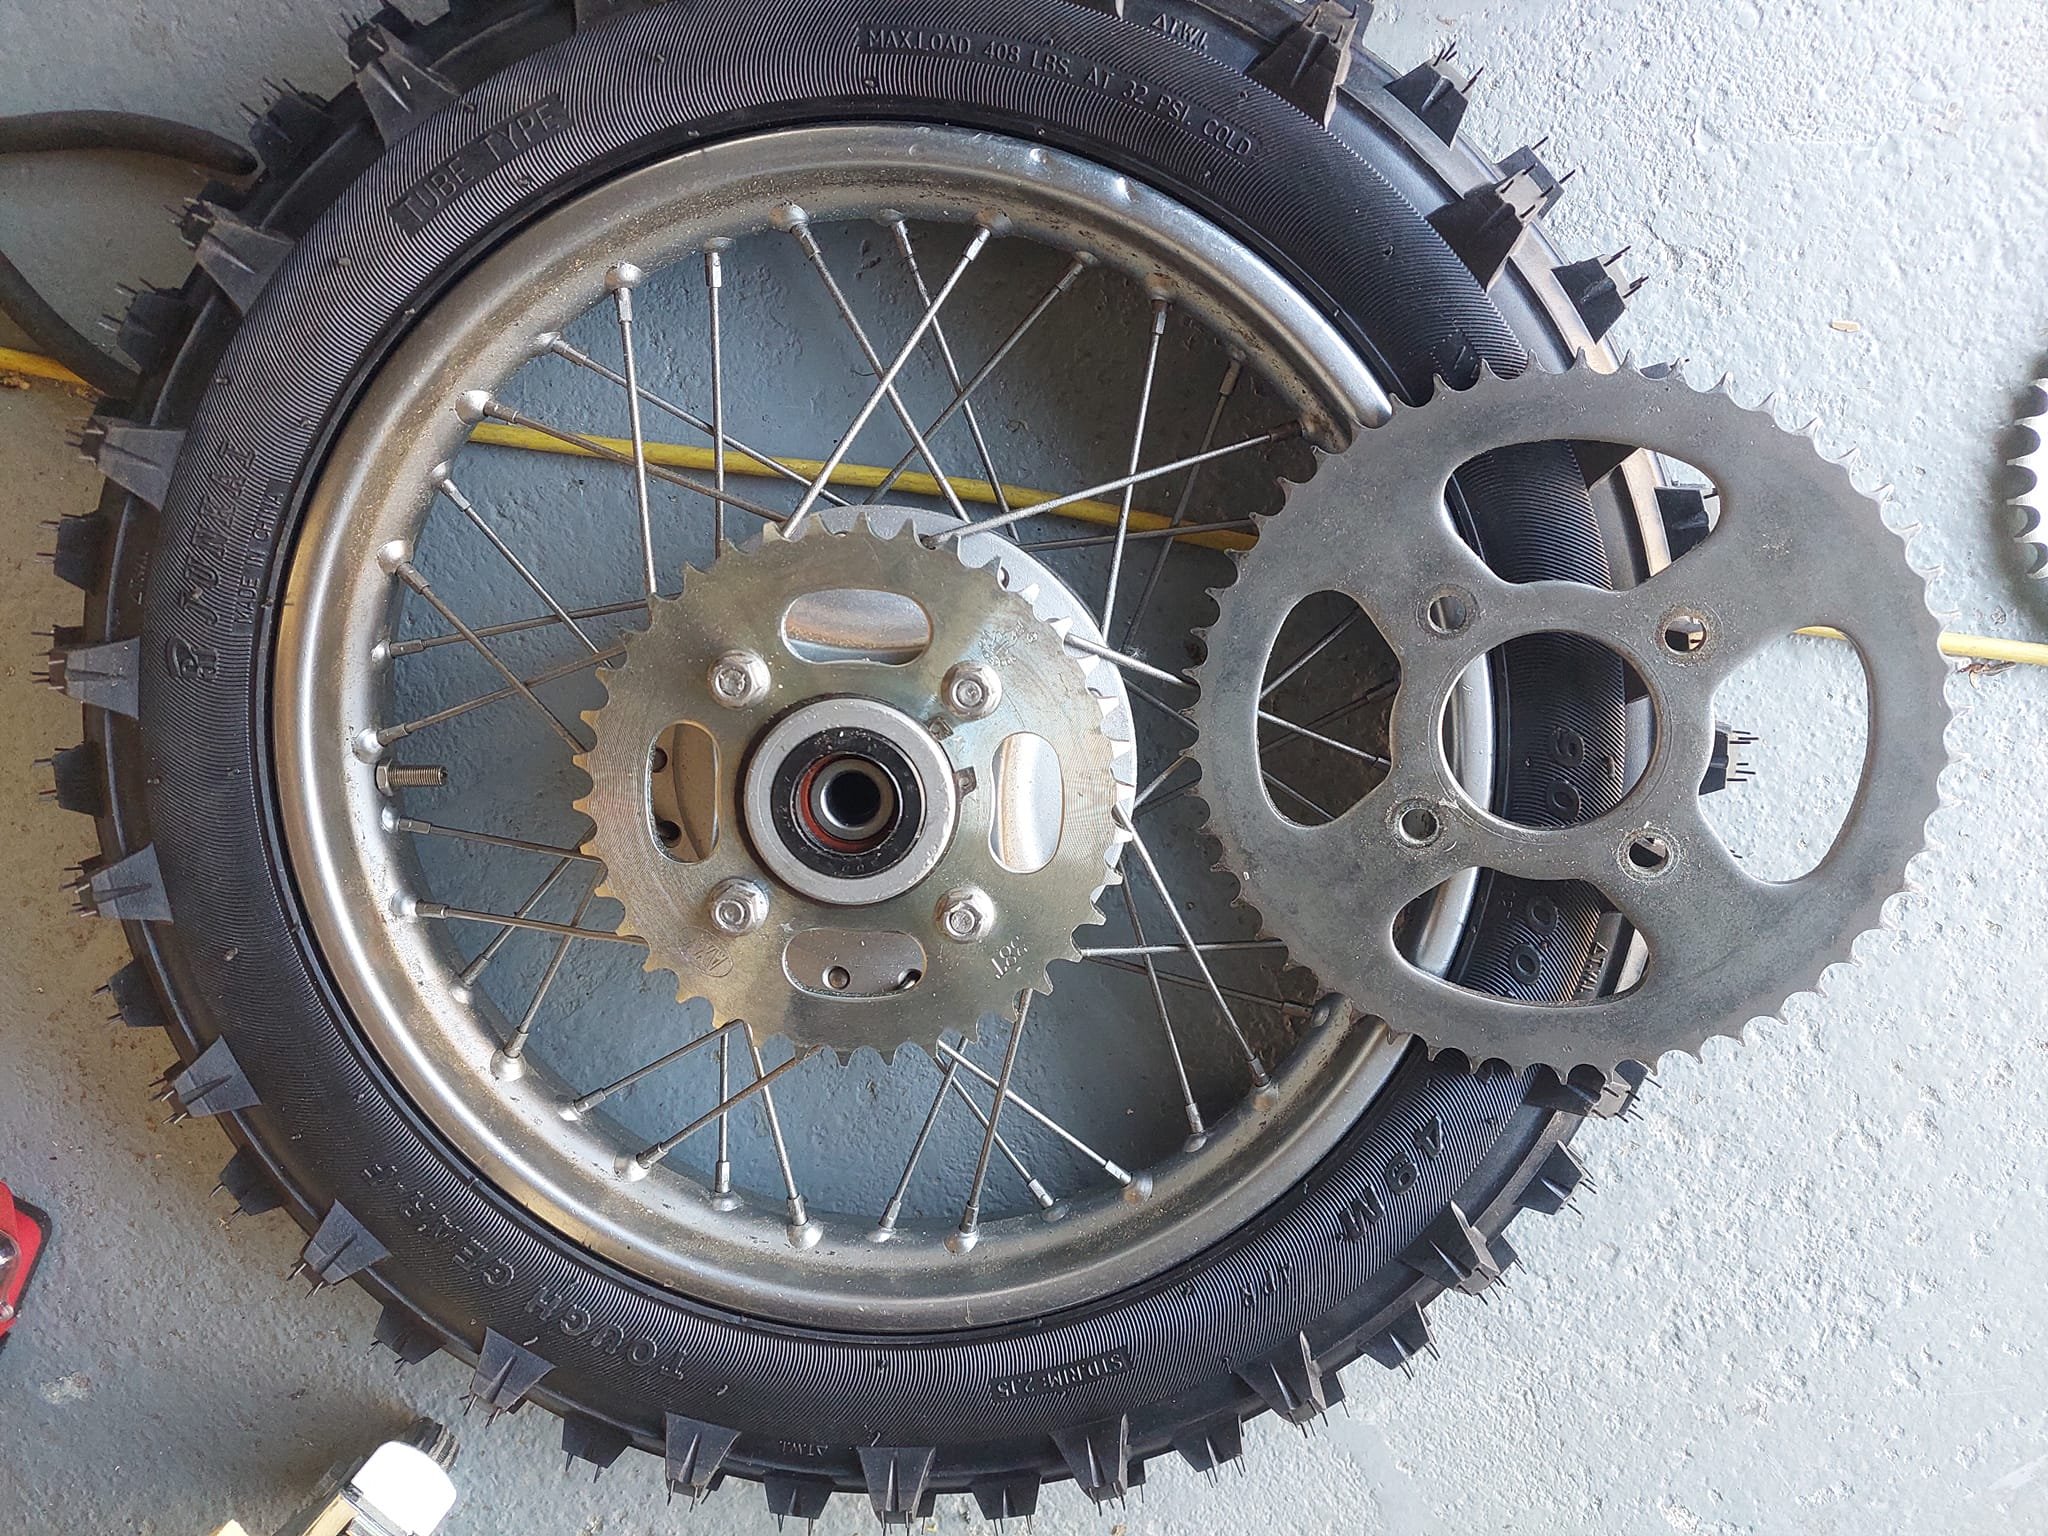
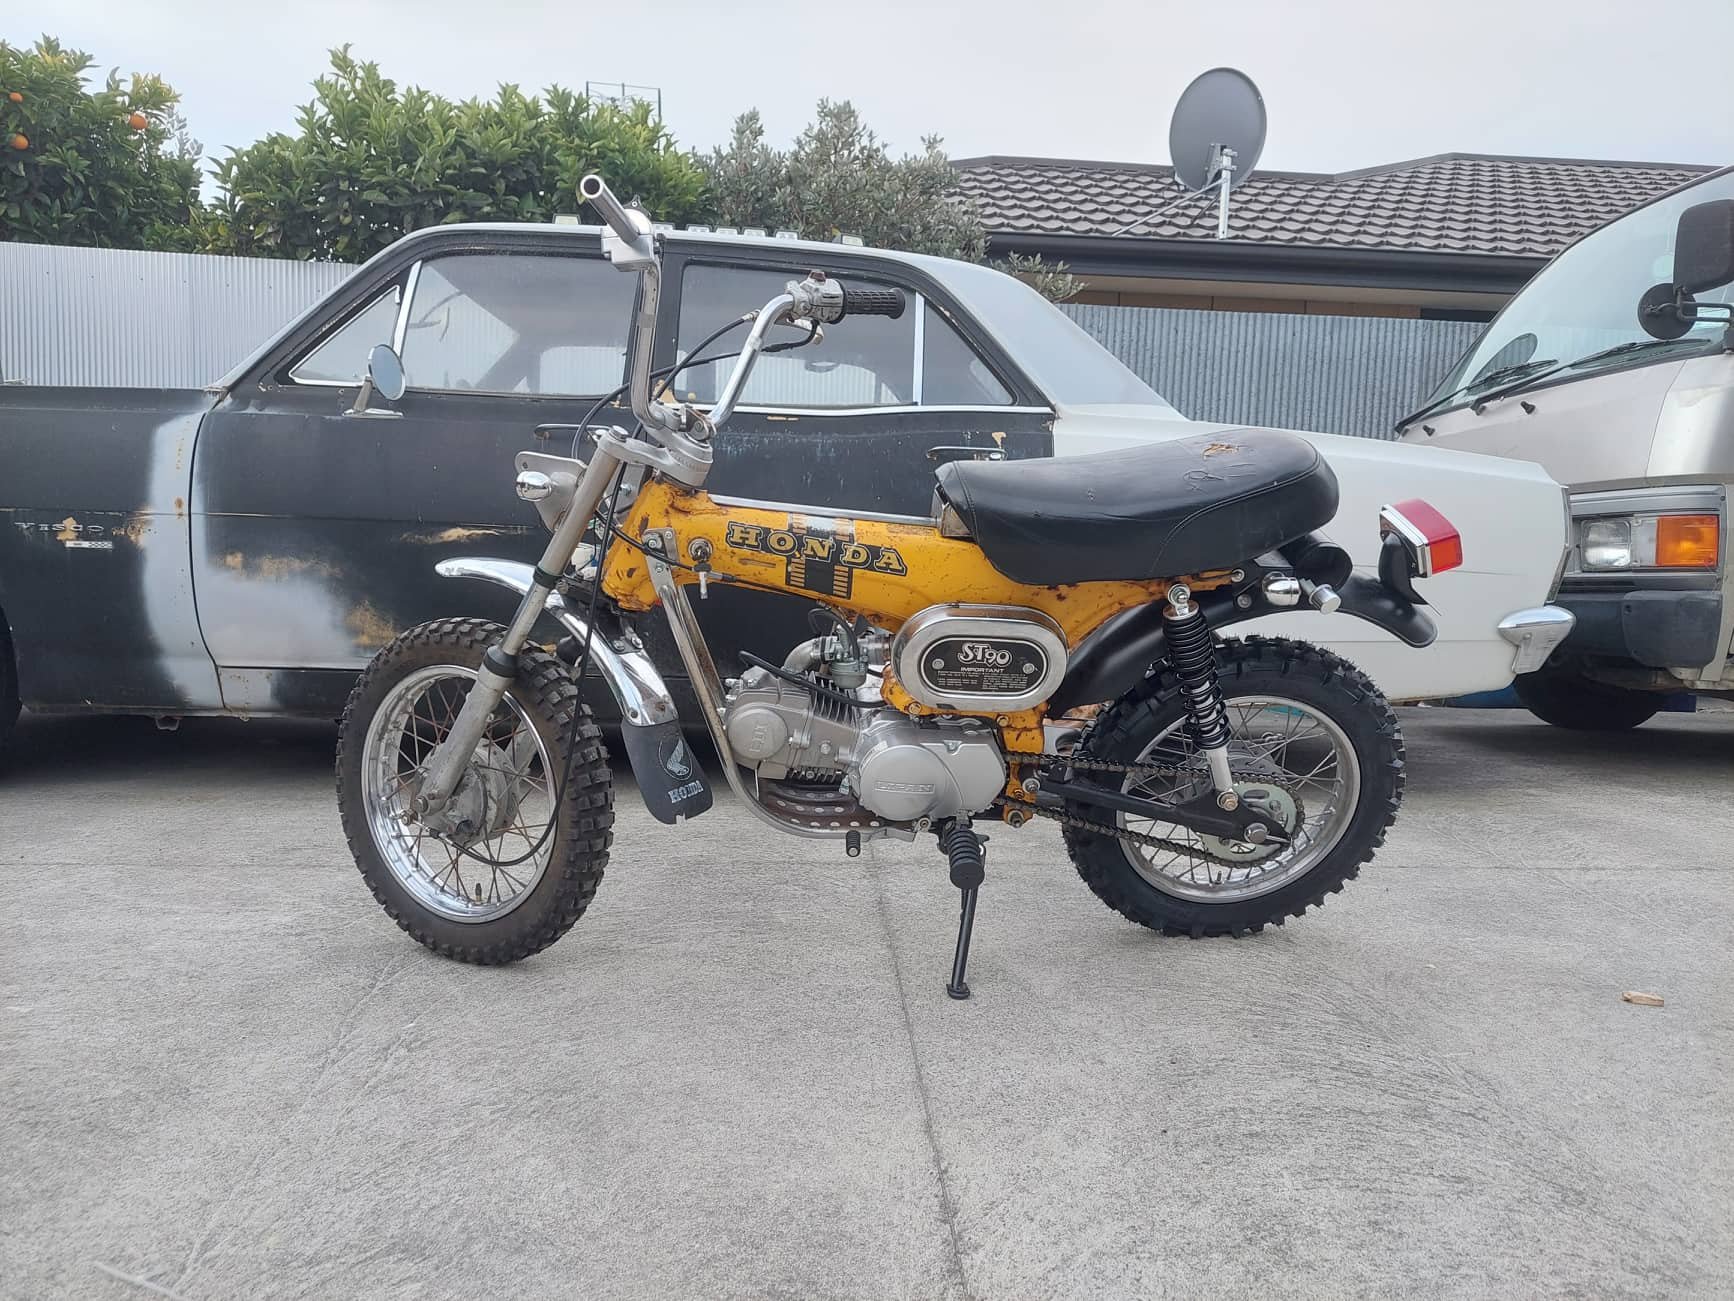
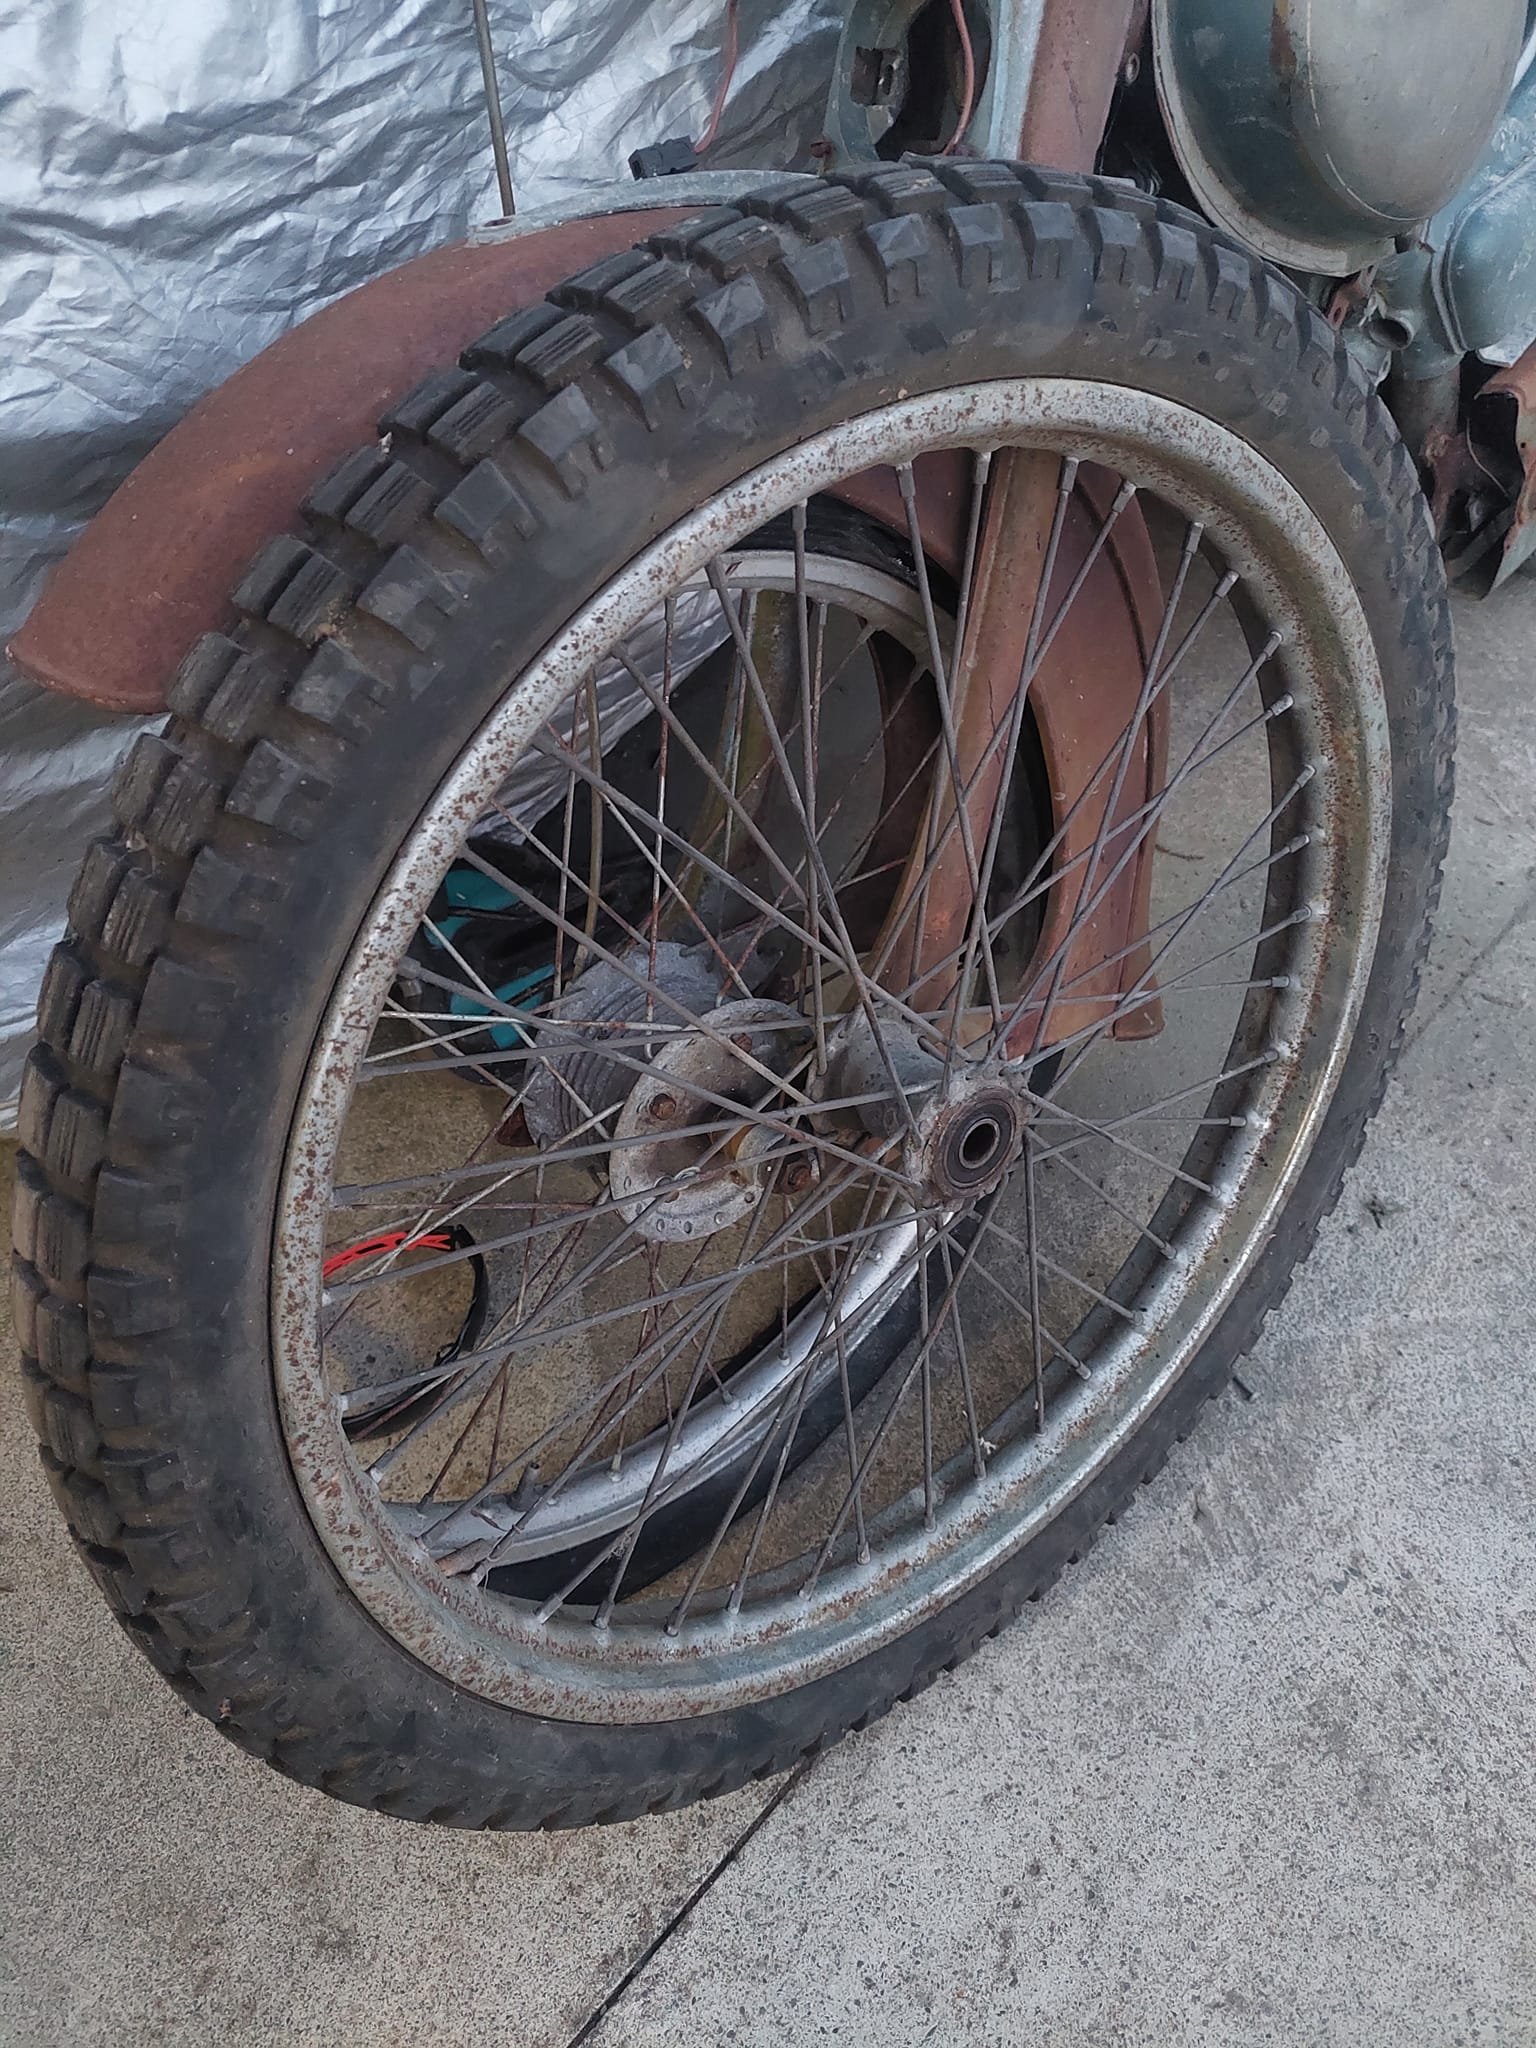
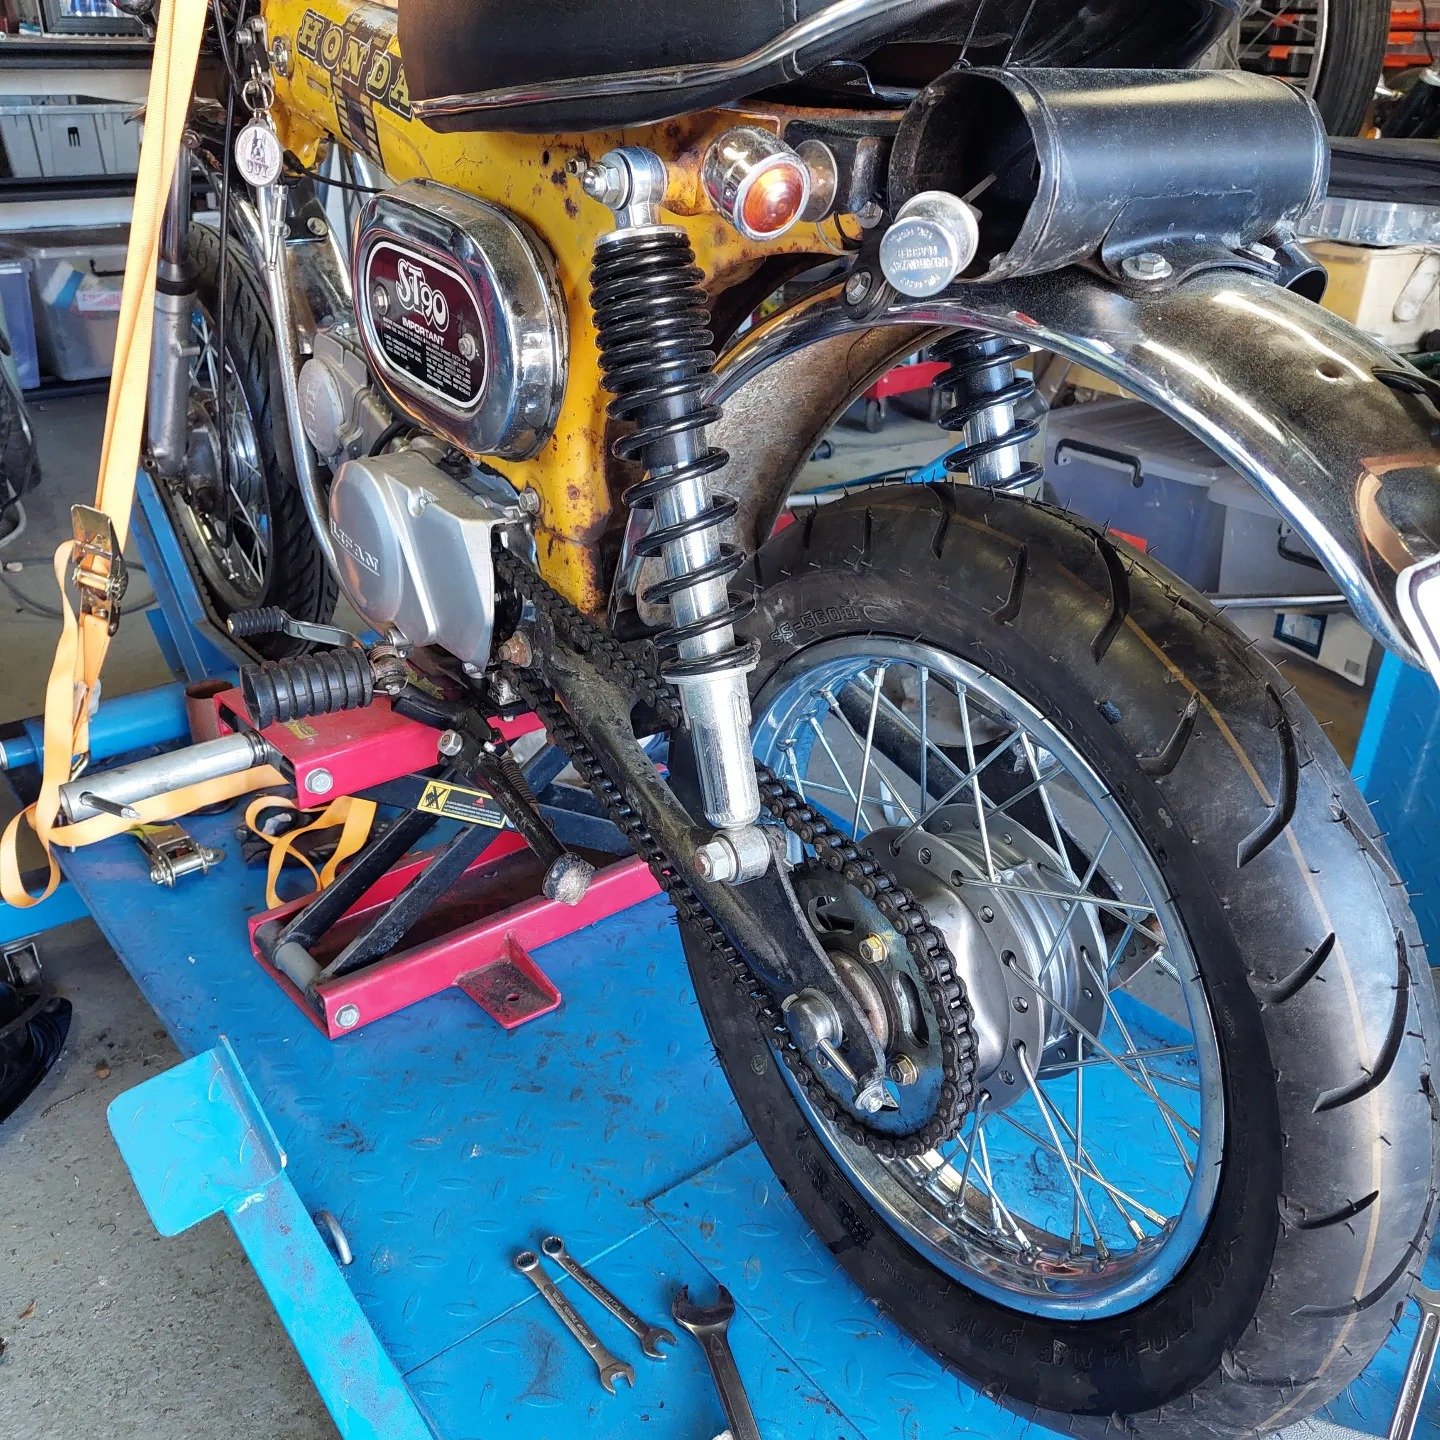
A few updates on the ST90. I got the front and rear wheels relaced with different rims and new spokes, also put more practical tyres on it too. I also got some better forks which werent pitted and leaking oil. They also had the quick release lever too which was snapped on mine. Got some chrome front and rear guards too and a new seat from mBike.
-
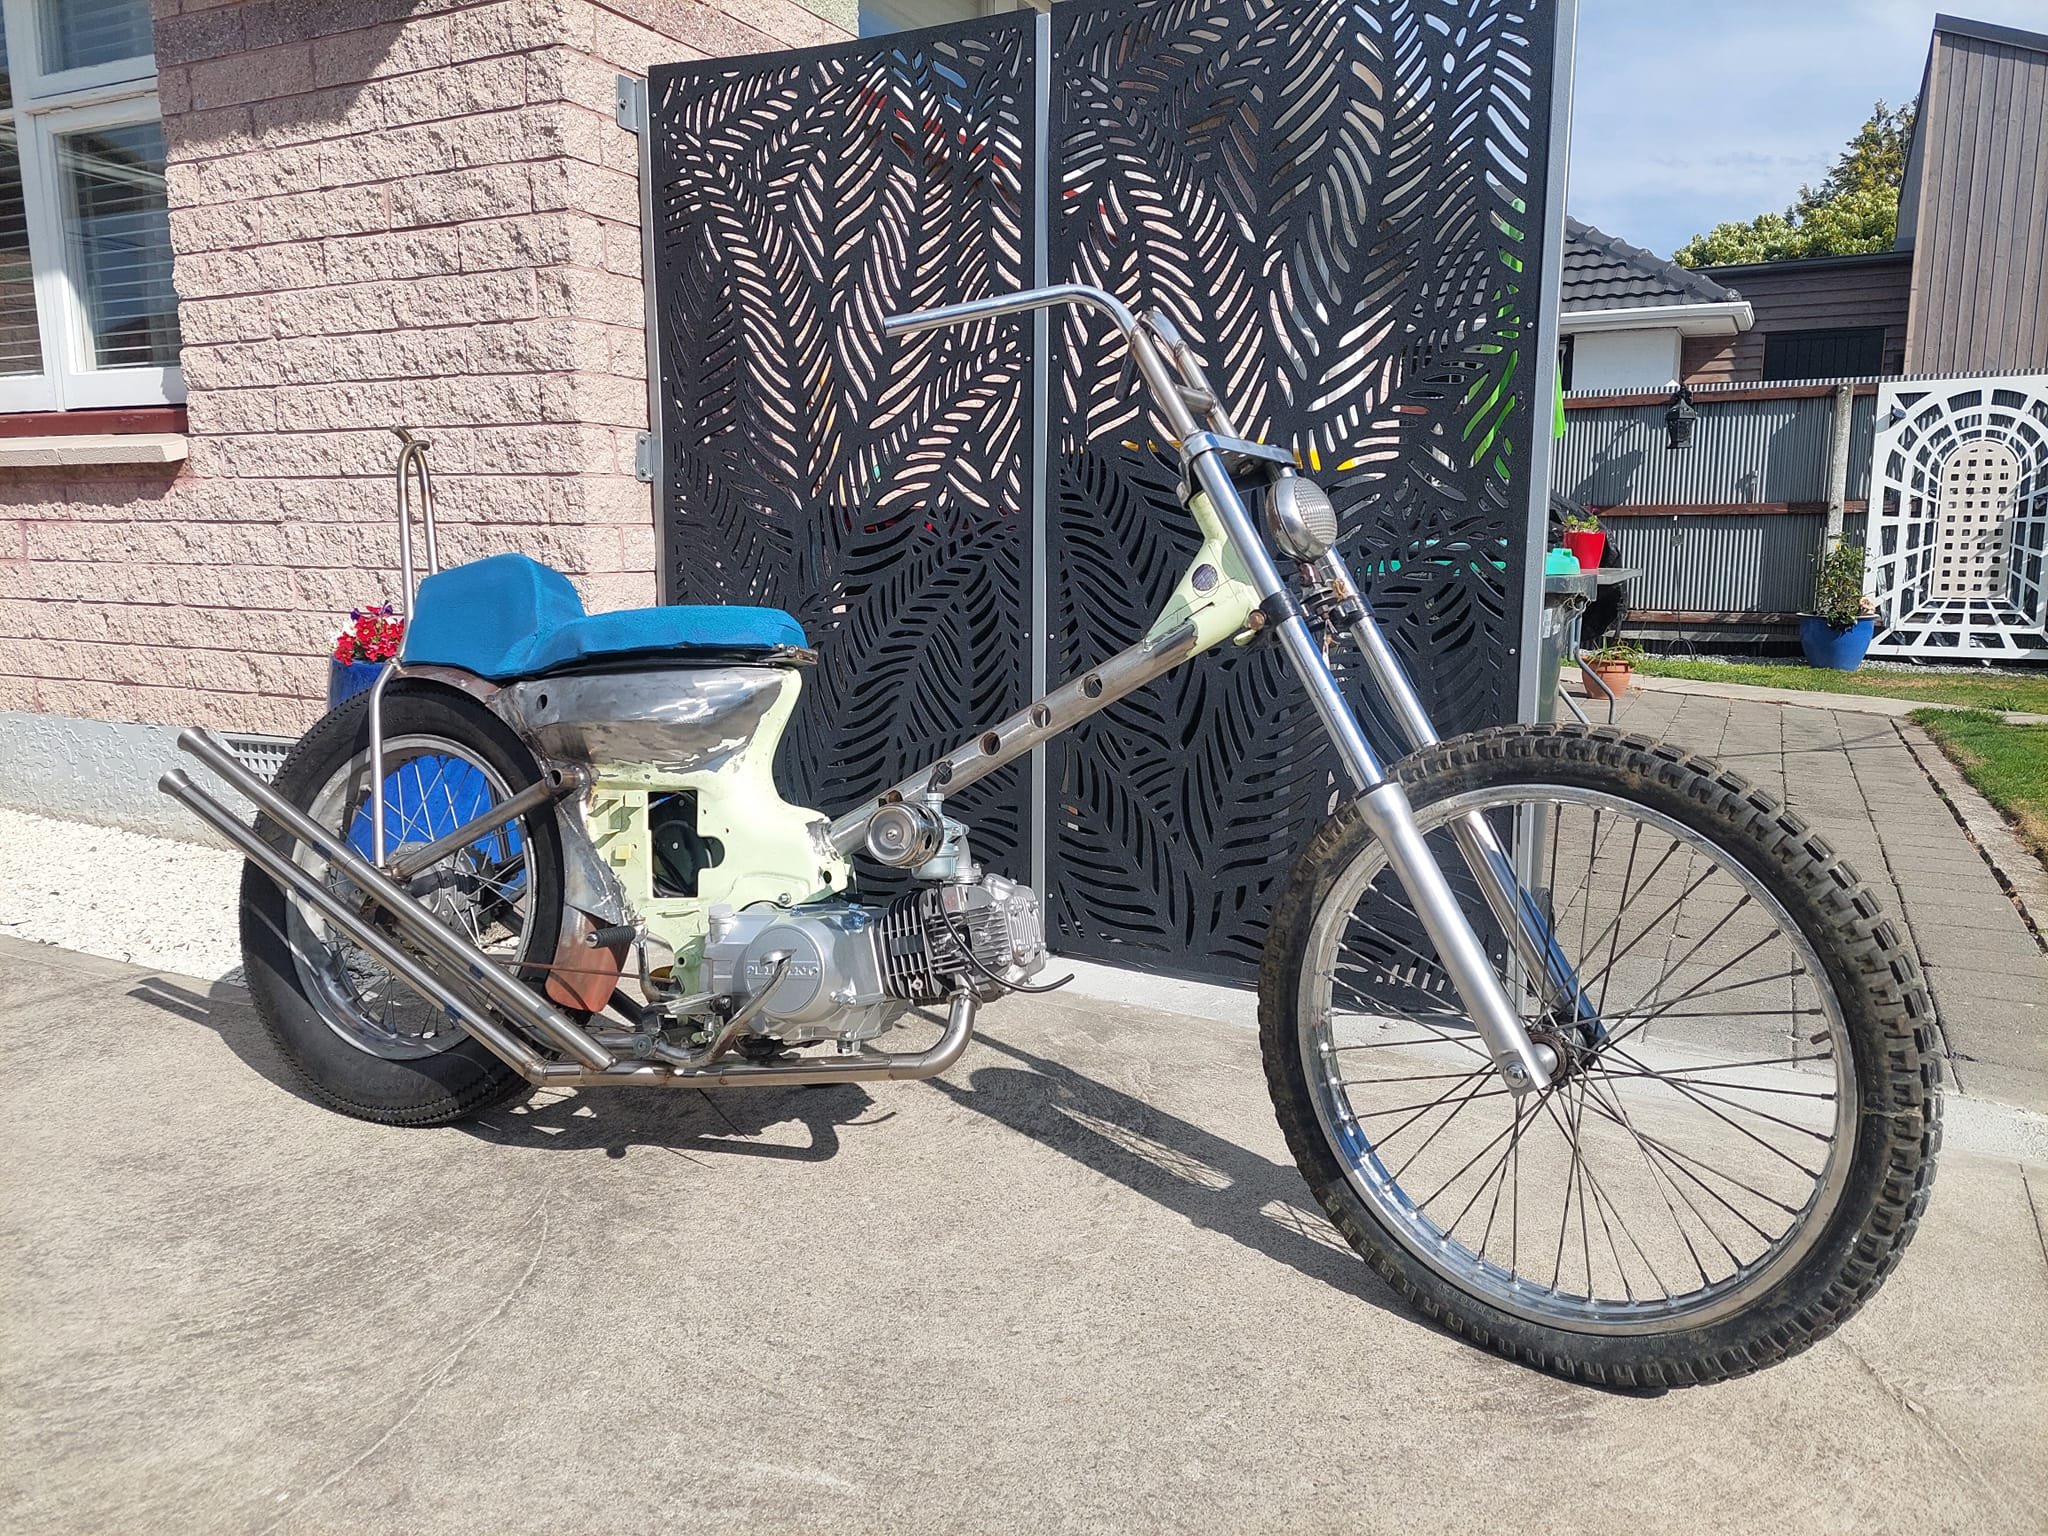
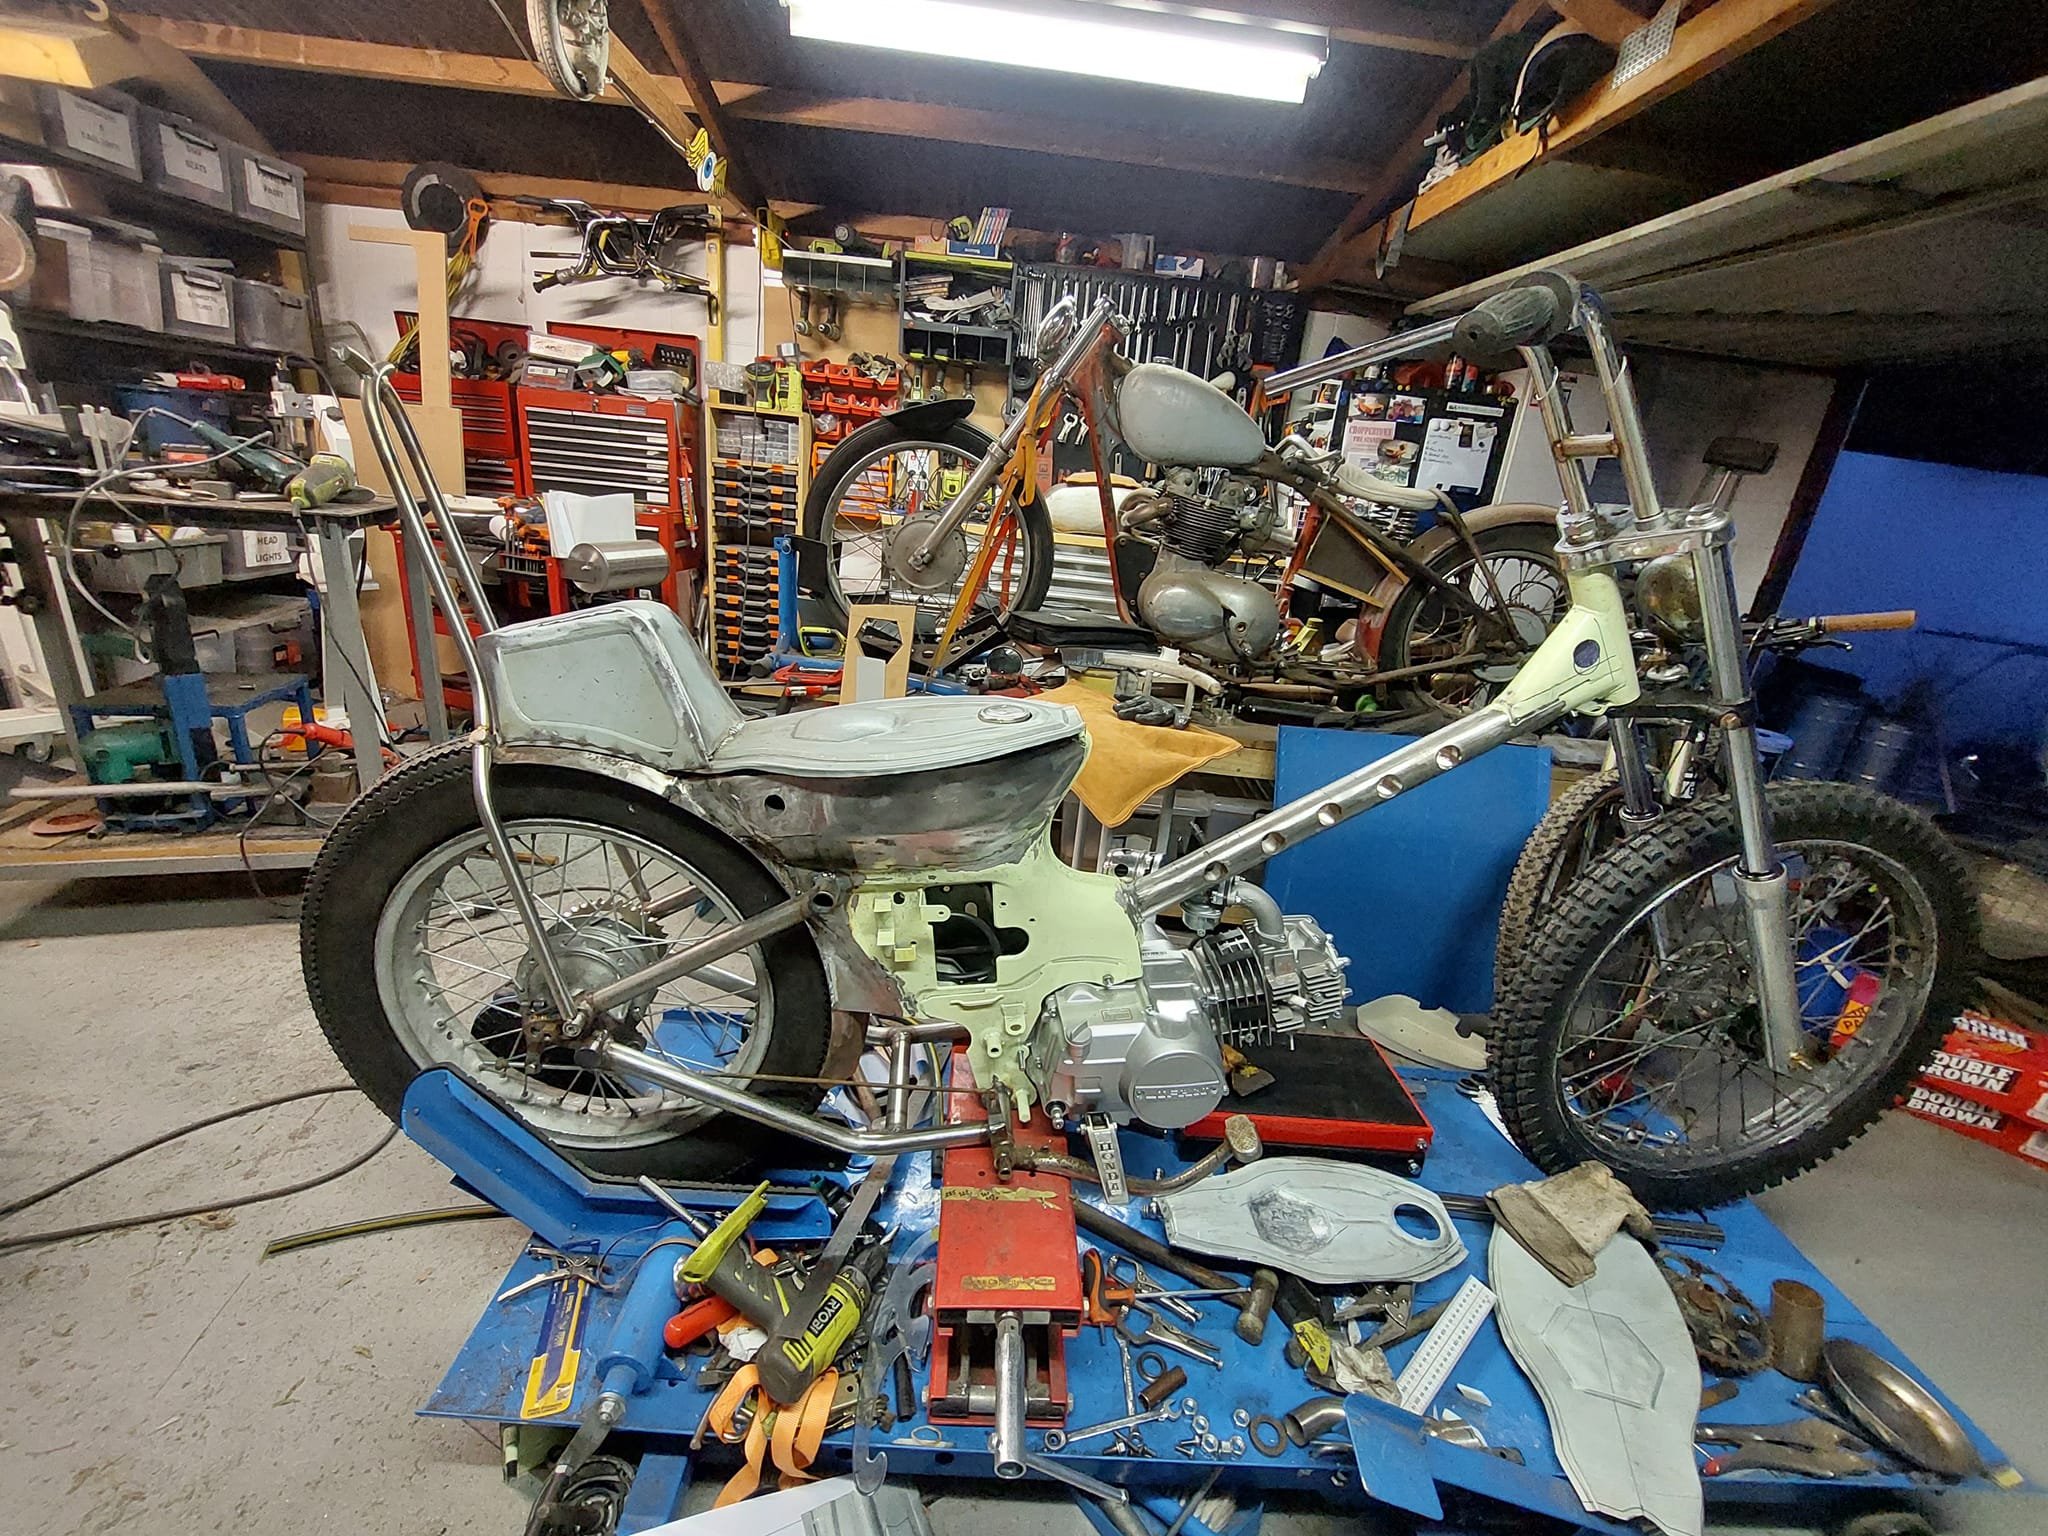
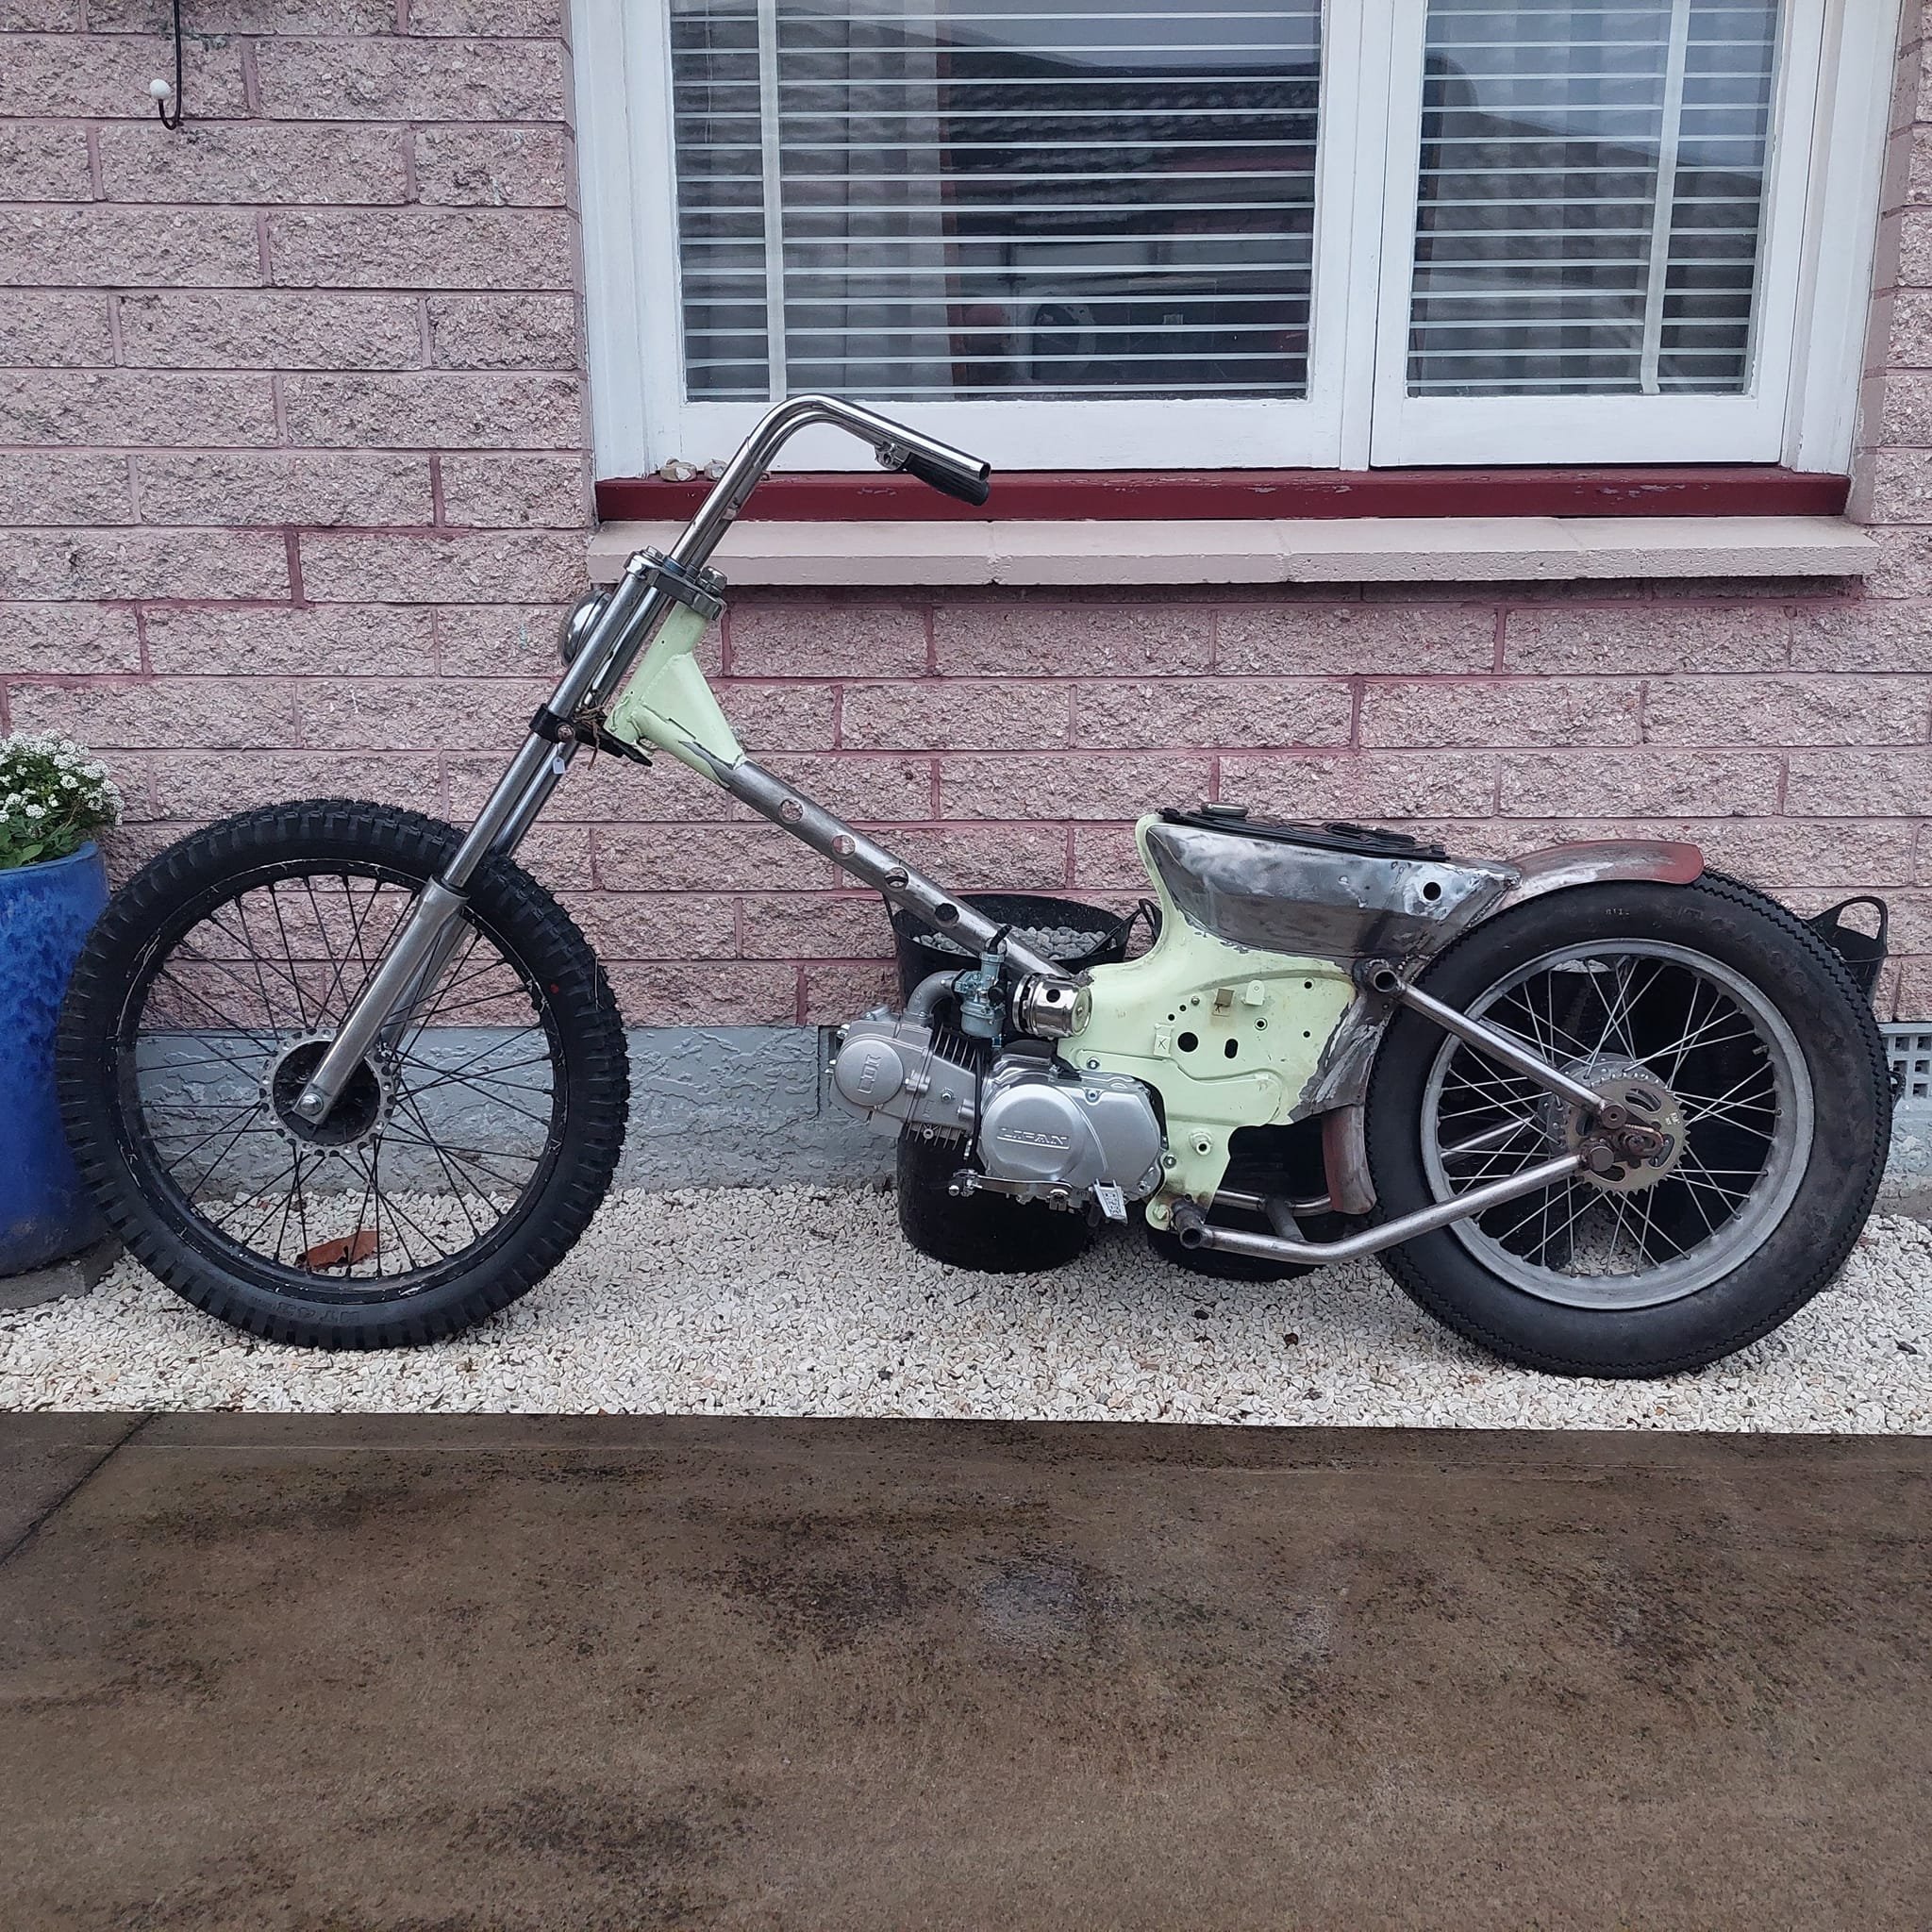
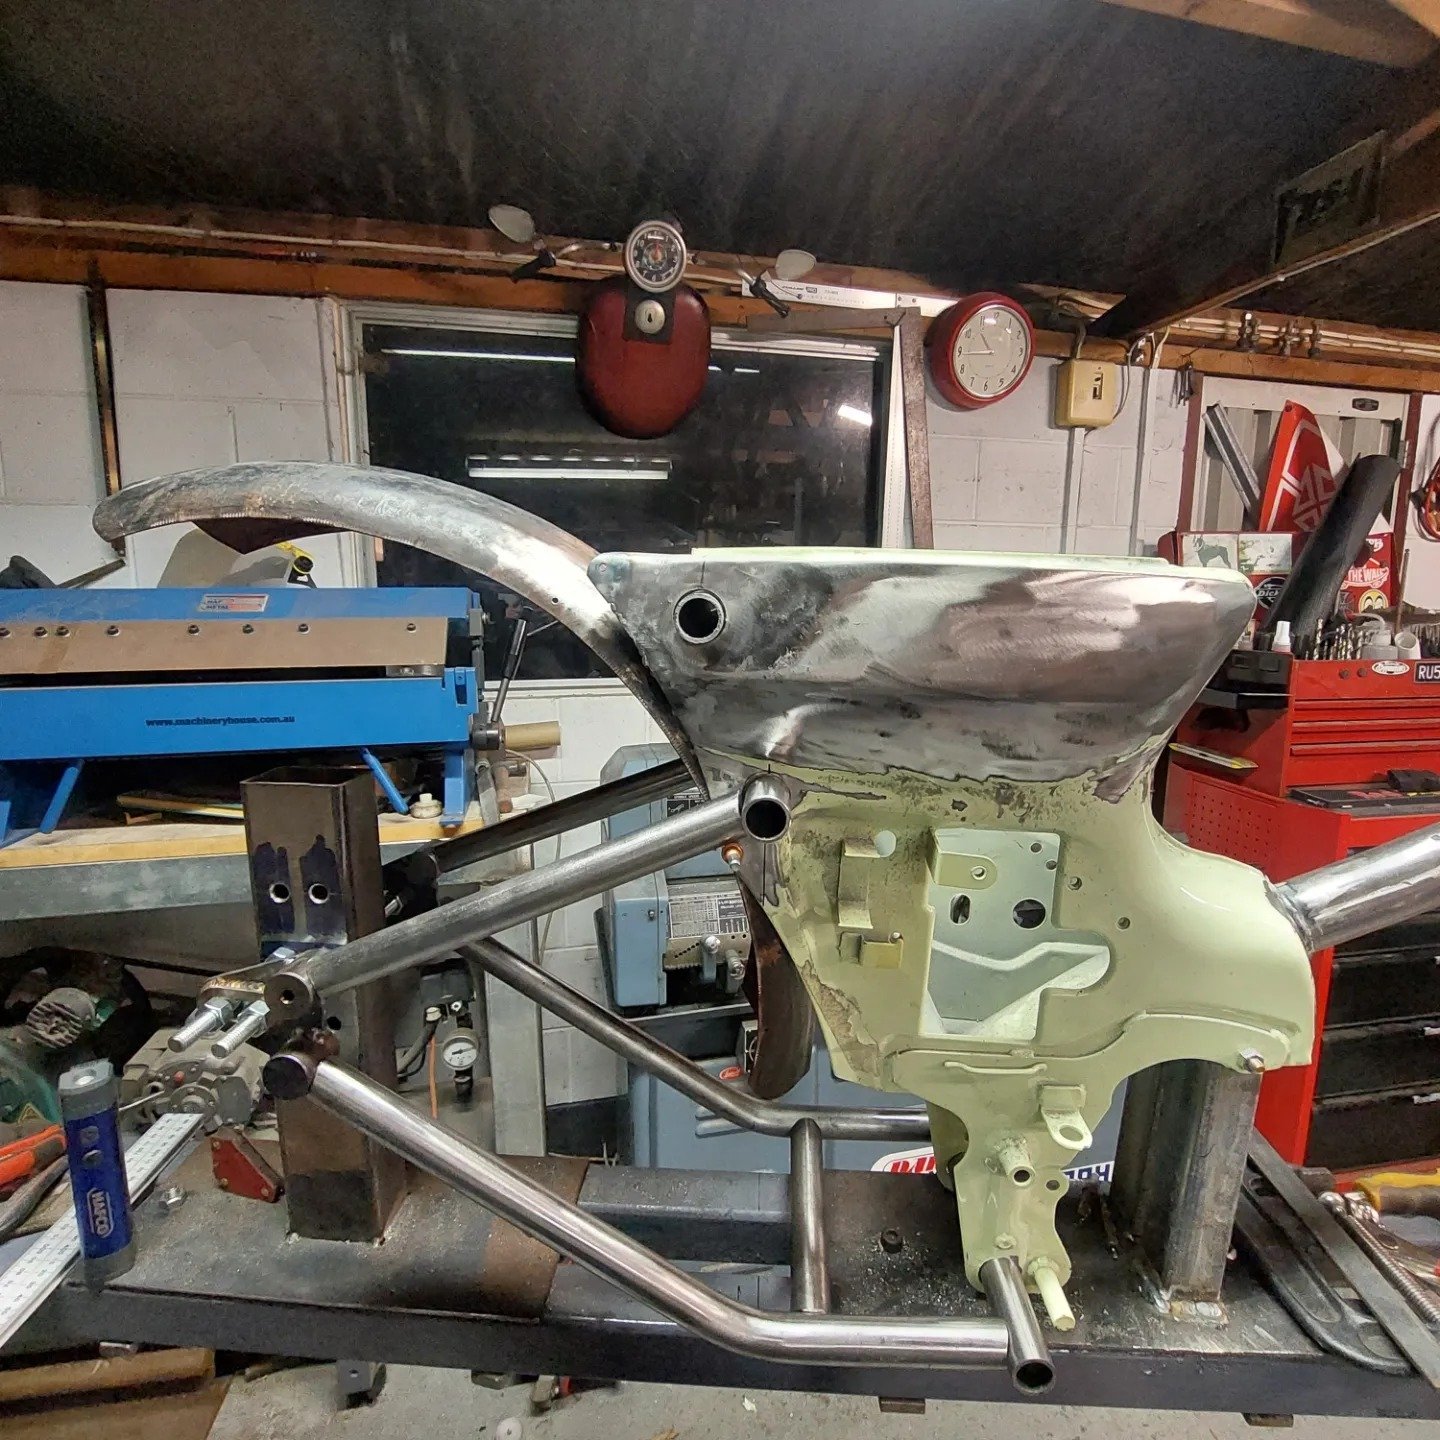
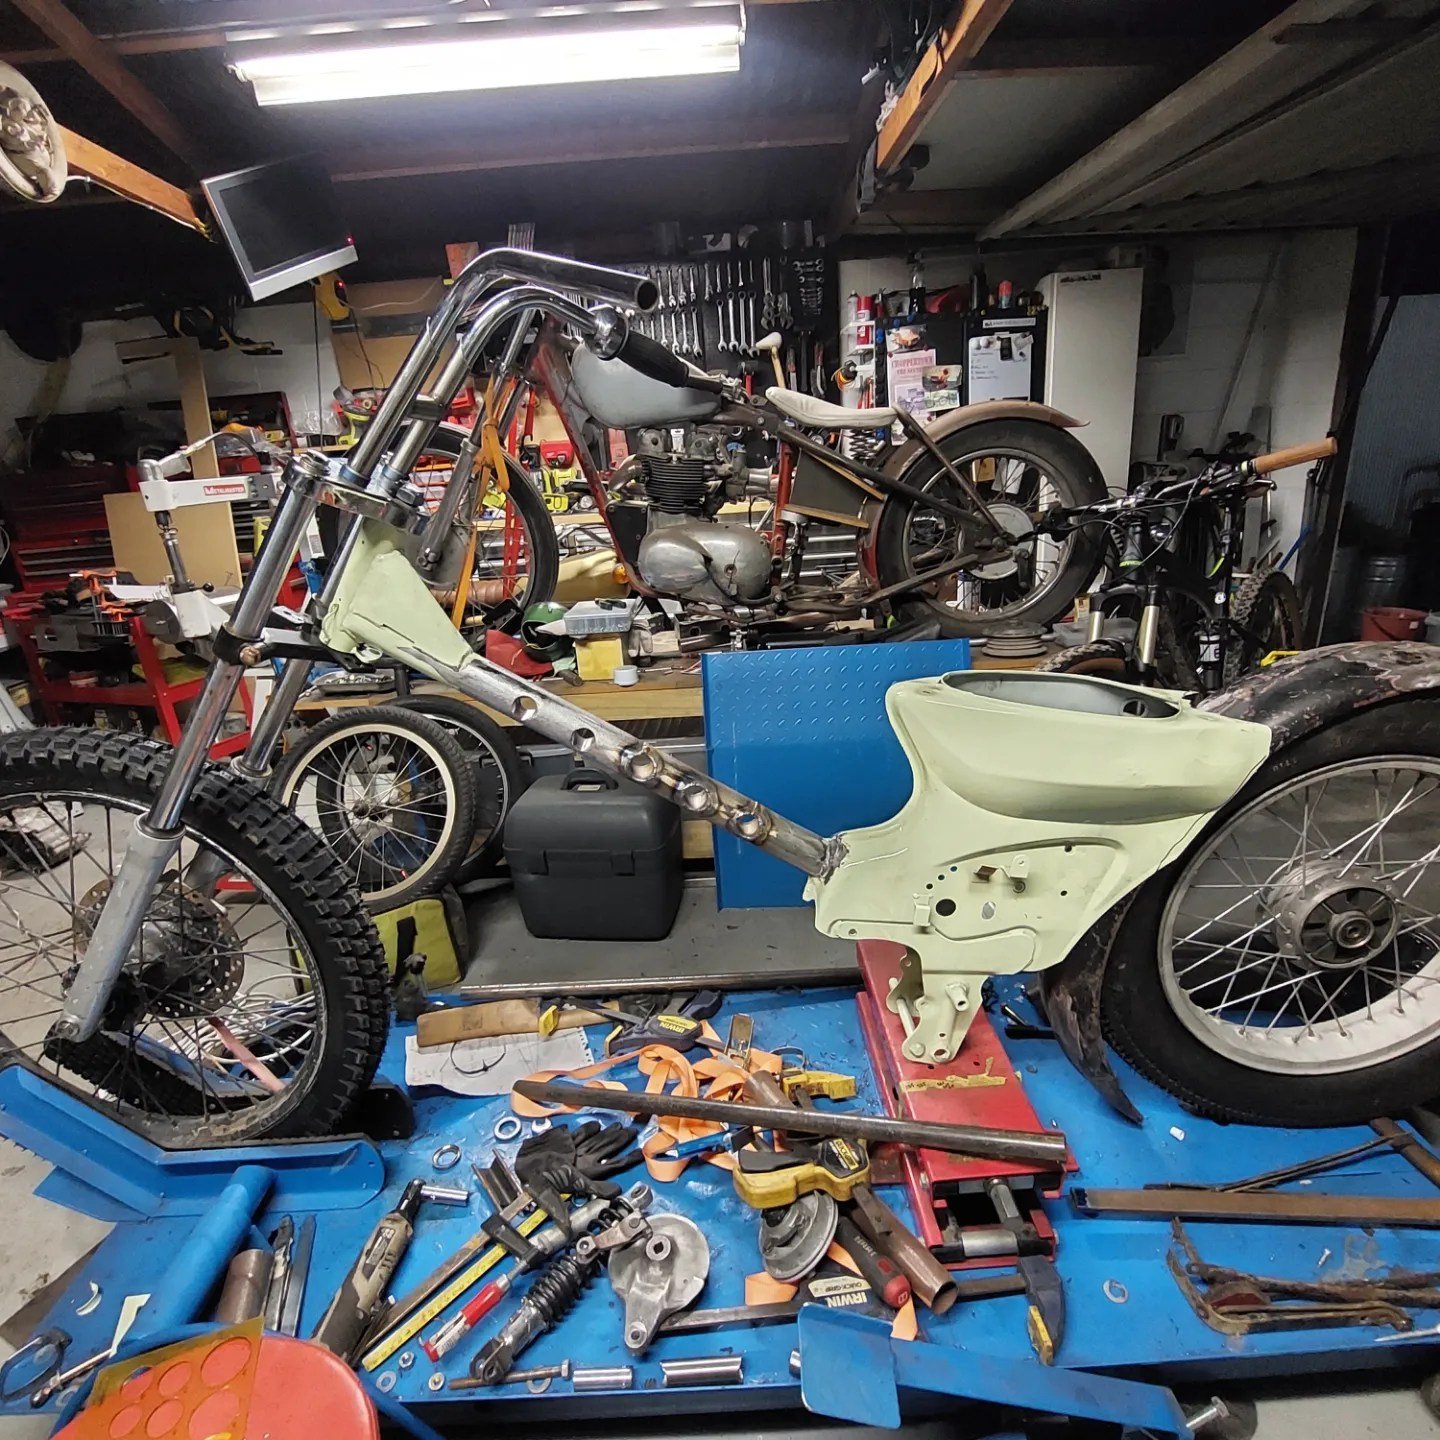
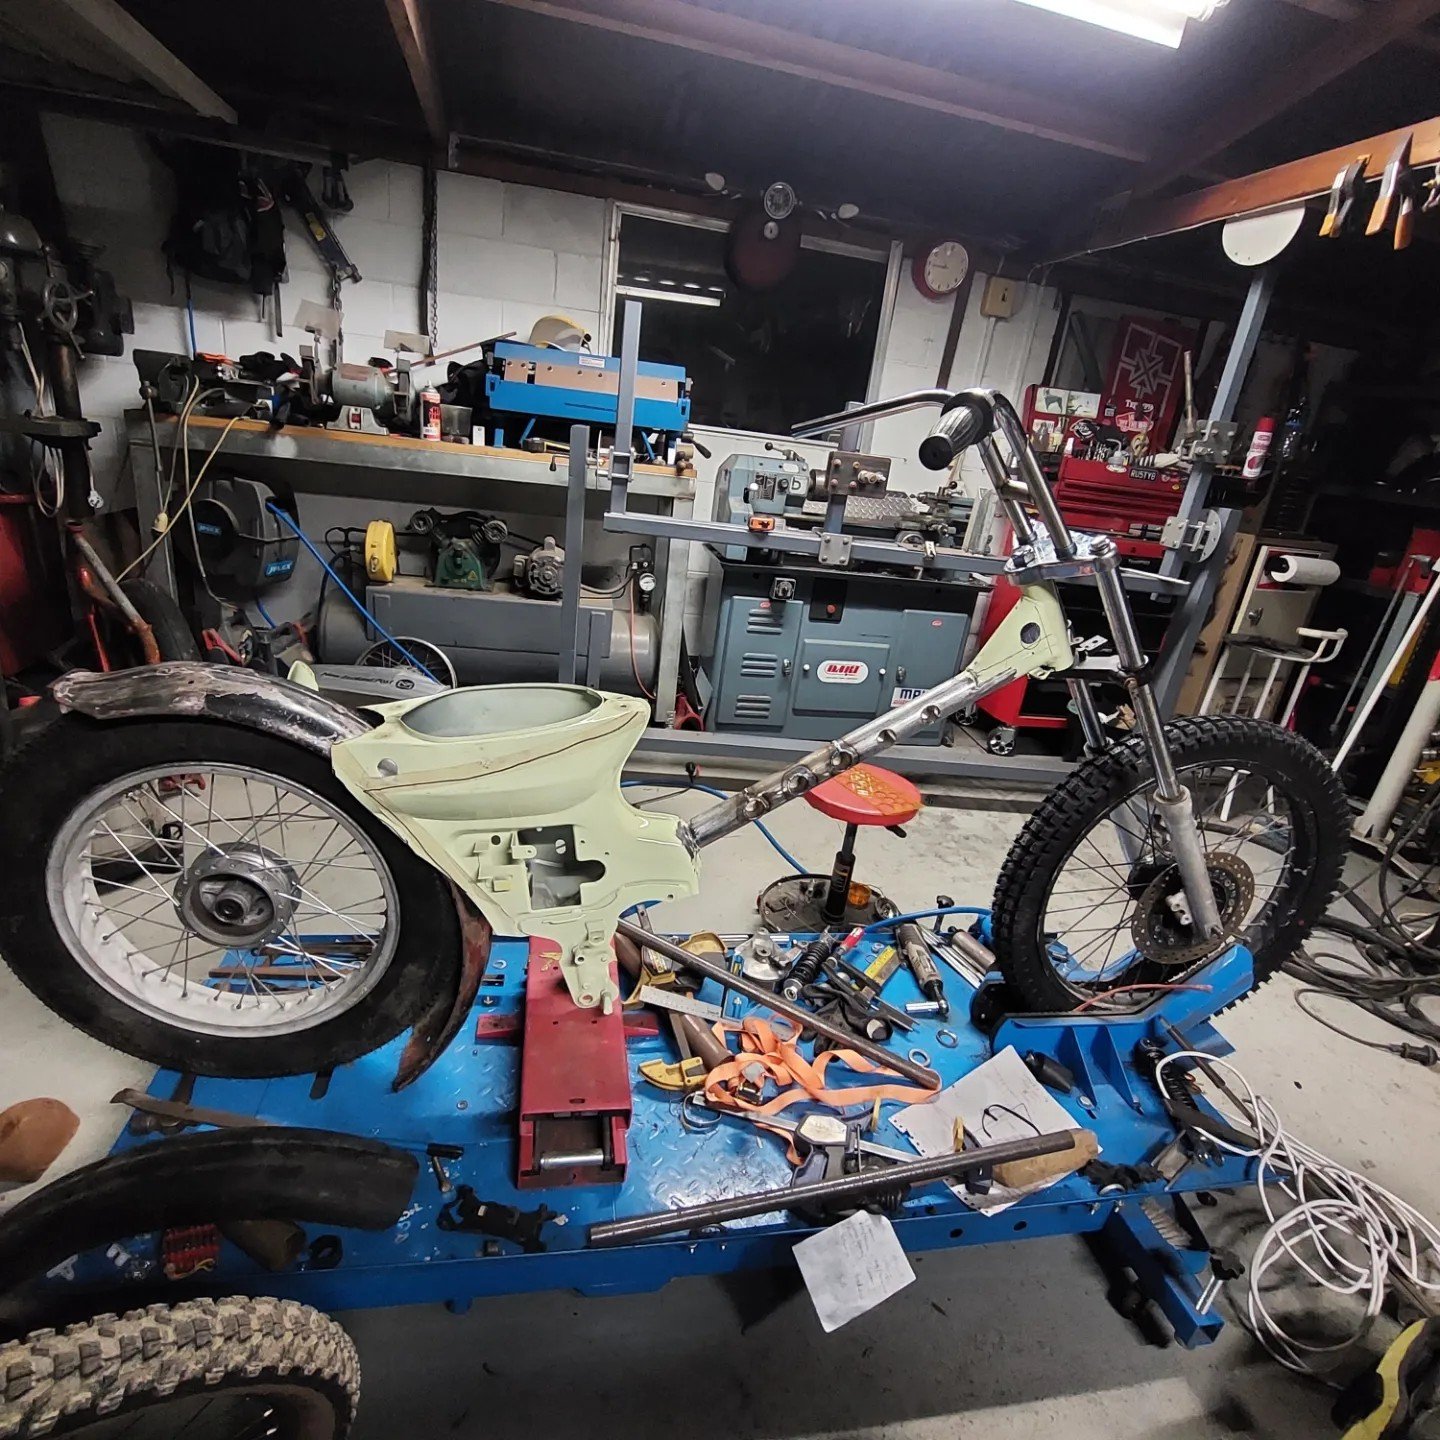
Not many pics to show this time but quite a bit of progression. I took the frame from the jig and put on the forks and wheels etc to make sure I've got the stance how I want it. The hardtail is just tacked up at the moment incase I need it make any alterations. Im pretty happy with how it sits. I bought a new 125 semi from Andy and Wie at mBike. Fitted that and a new rear sprocket to check for any alignment issues. Then I put on some Goldwing footpegs that I've been hoarding for a good few years and mounted them to a modified footrest that I'd originally had mounted to my chaly.
- 22 replies
-
- 15
-
-
I finally made a start on the tubes for the hardtail. Once I started putting the seatstay in to my original position it really didnt look right so I lowered it to just below the bottom of the fuel tank. It matches the lines of the frame better, especially the main tube. I had to notch the tube that goes through the frame to give clearance for the mudguard. once I had somewhere to aim for I cut, coped and bent some tubes for the seat and chainstays. Im really happy with how they've turned out. When I get a minute during the week ill tack it altogether, fir the wheels and forks just to see if I've got my measurements and proportions right
- 22 replies
-
- 12
-
-
-
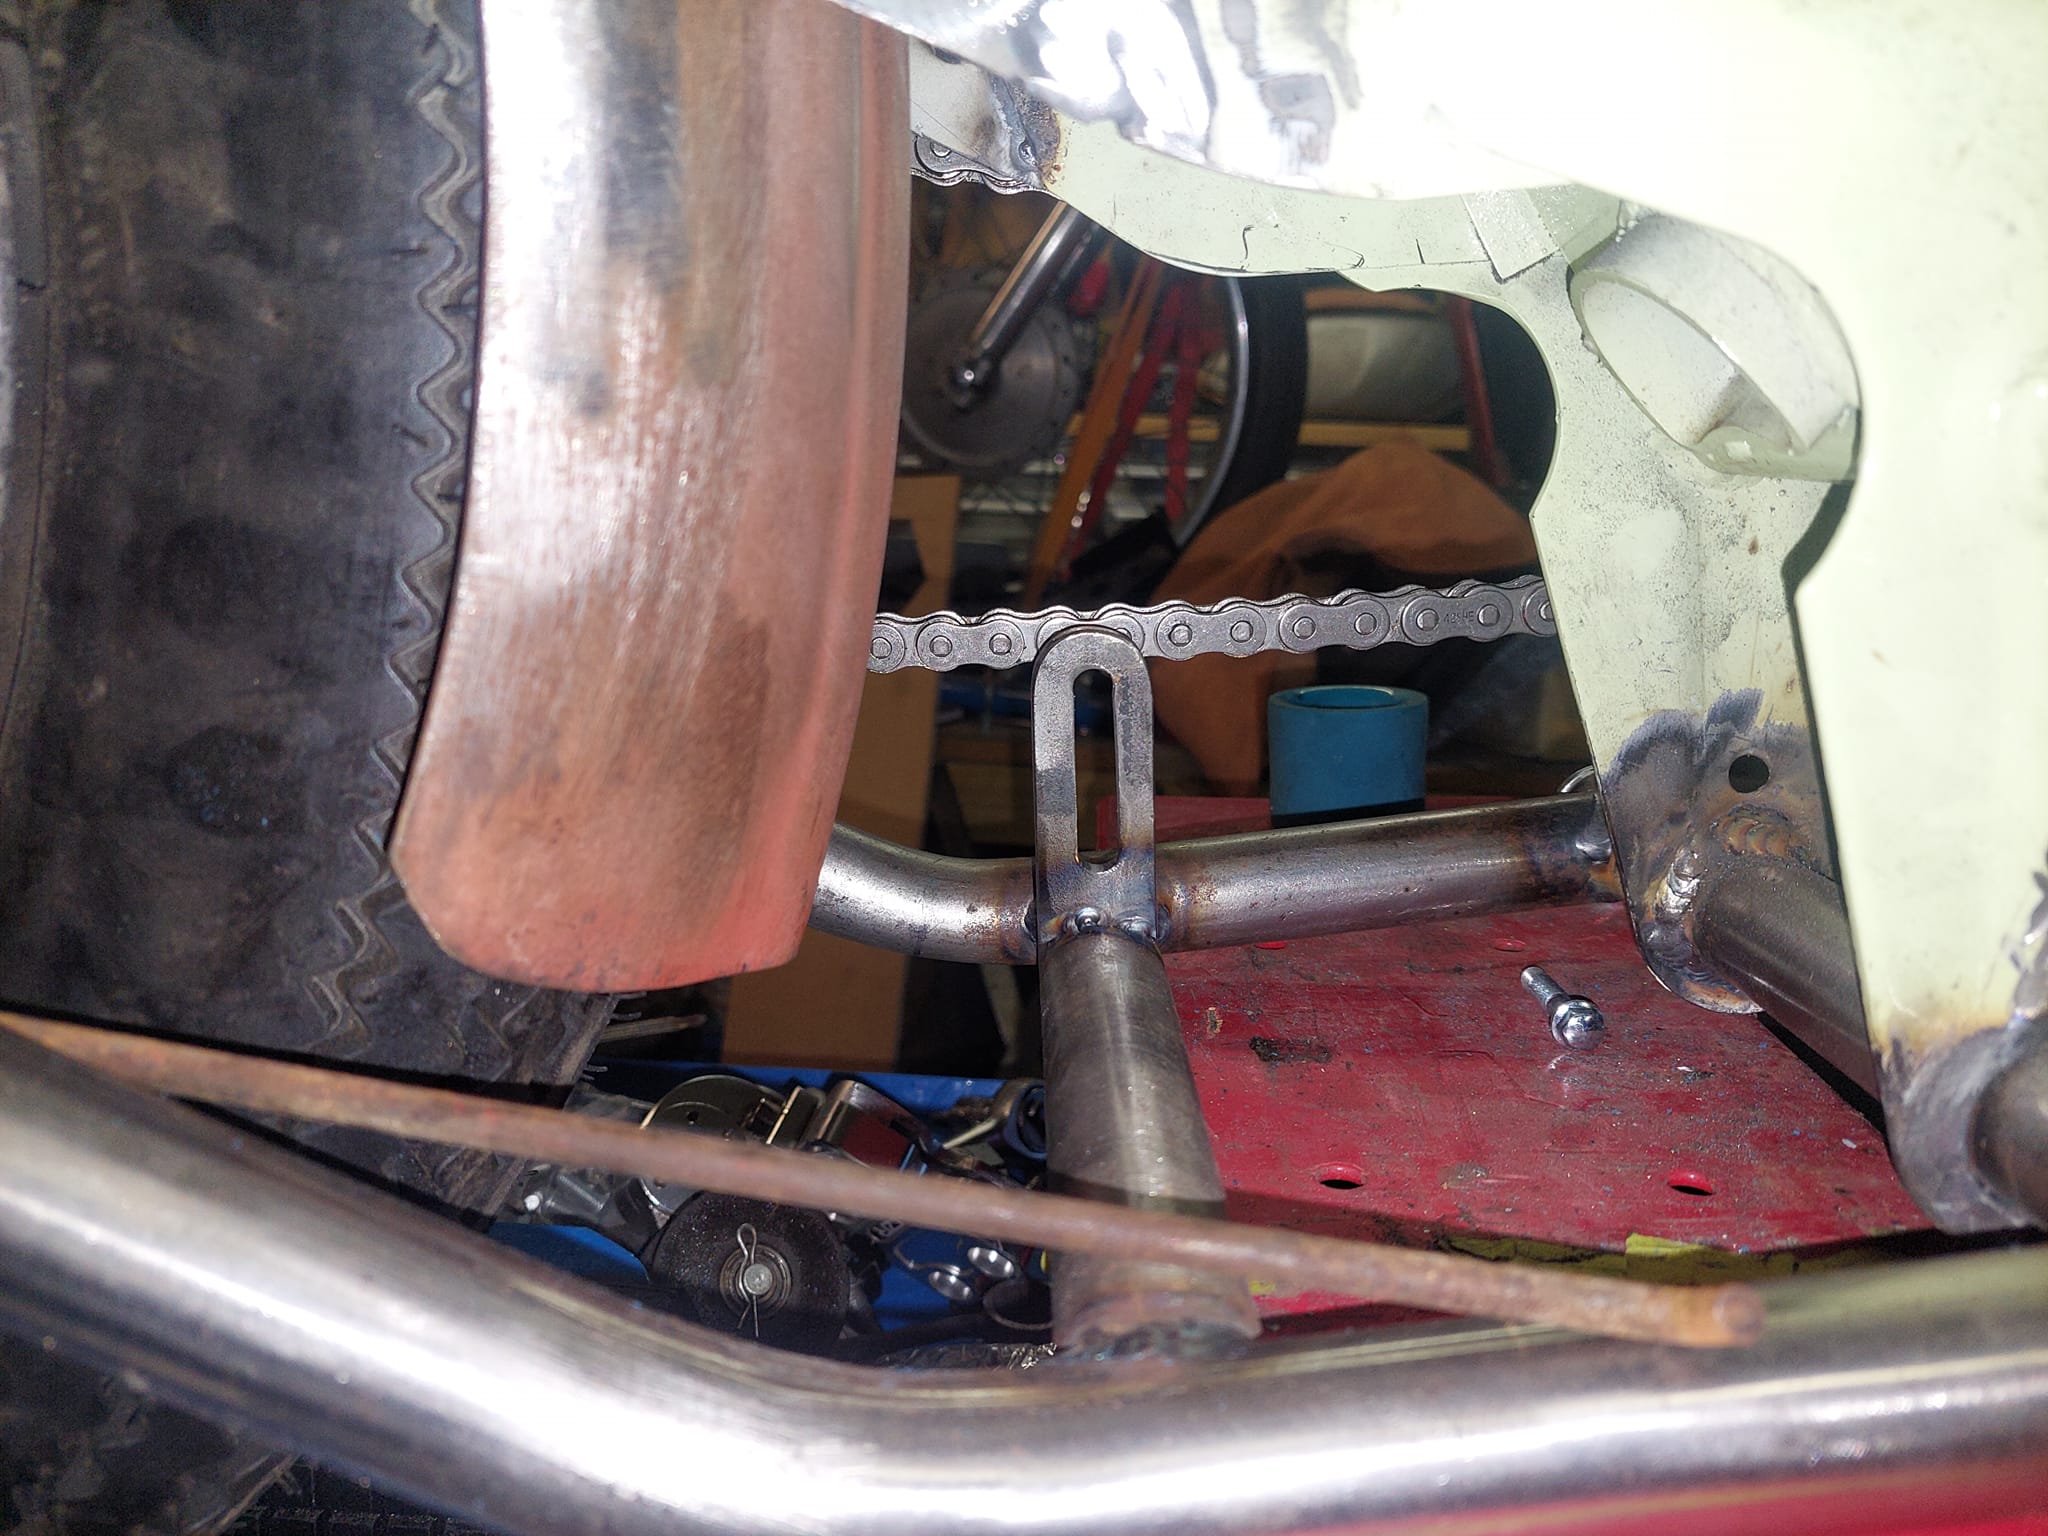
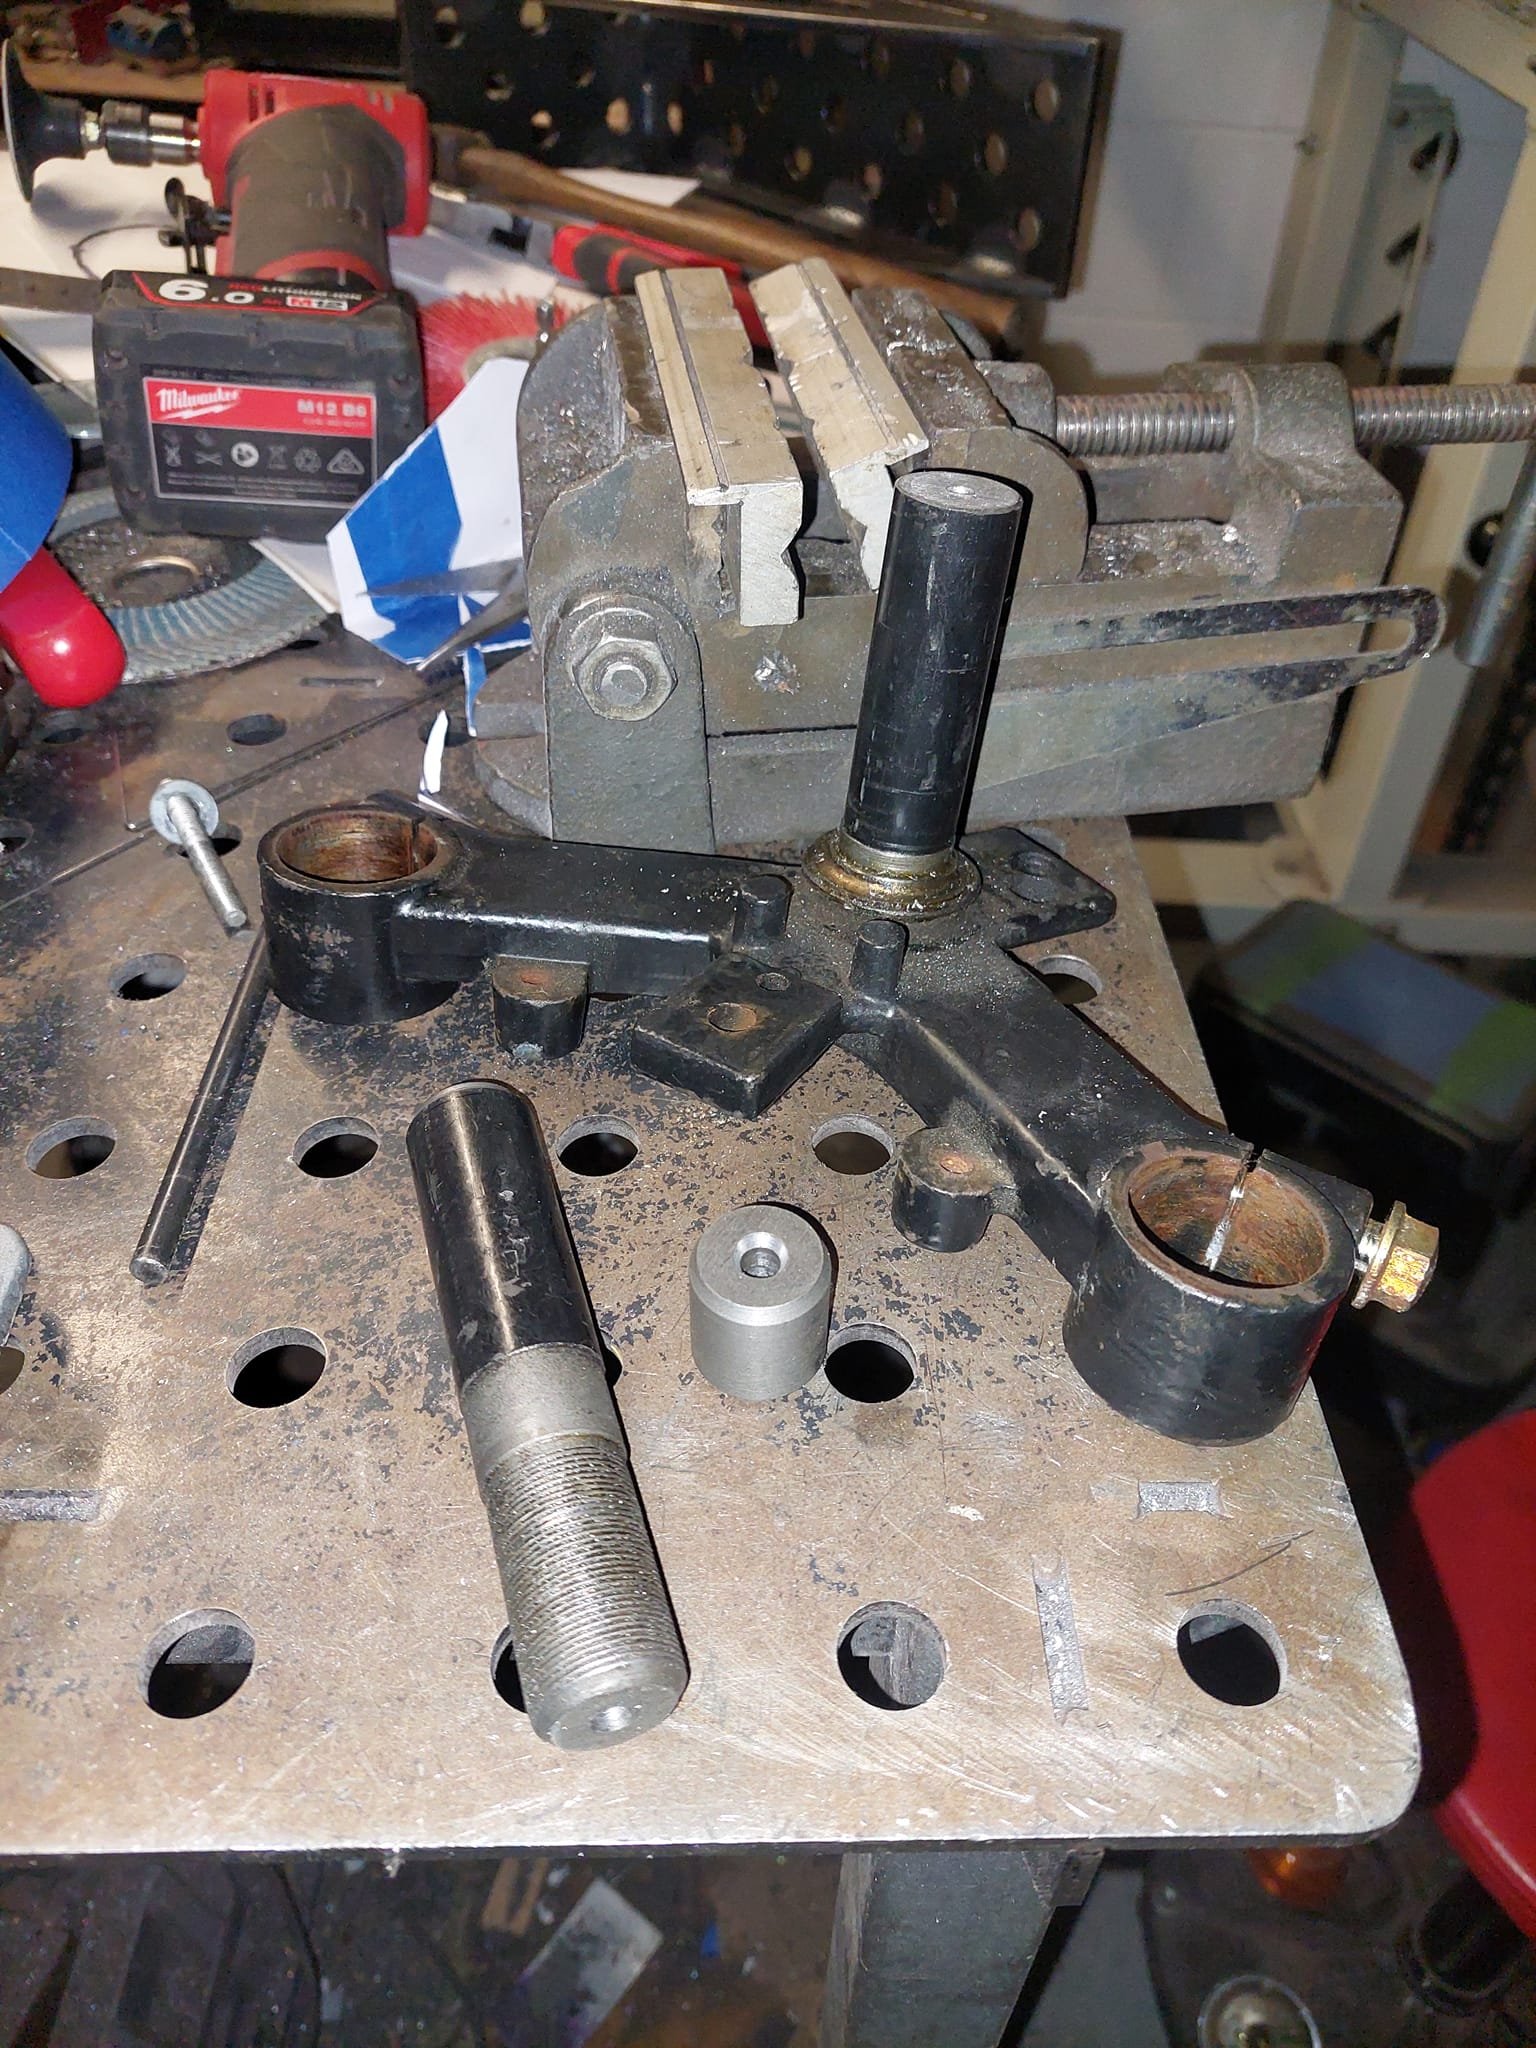
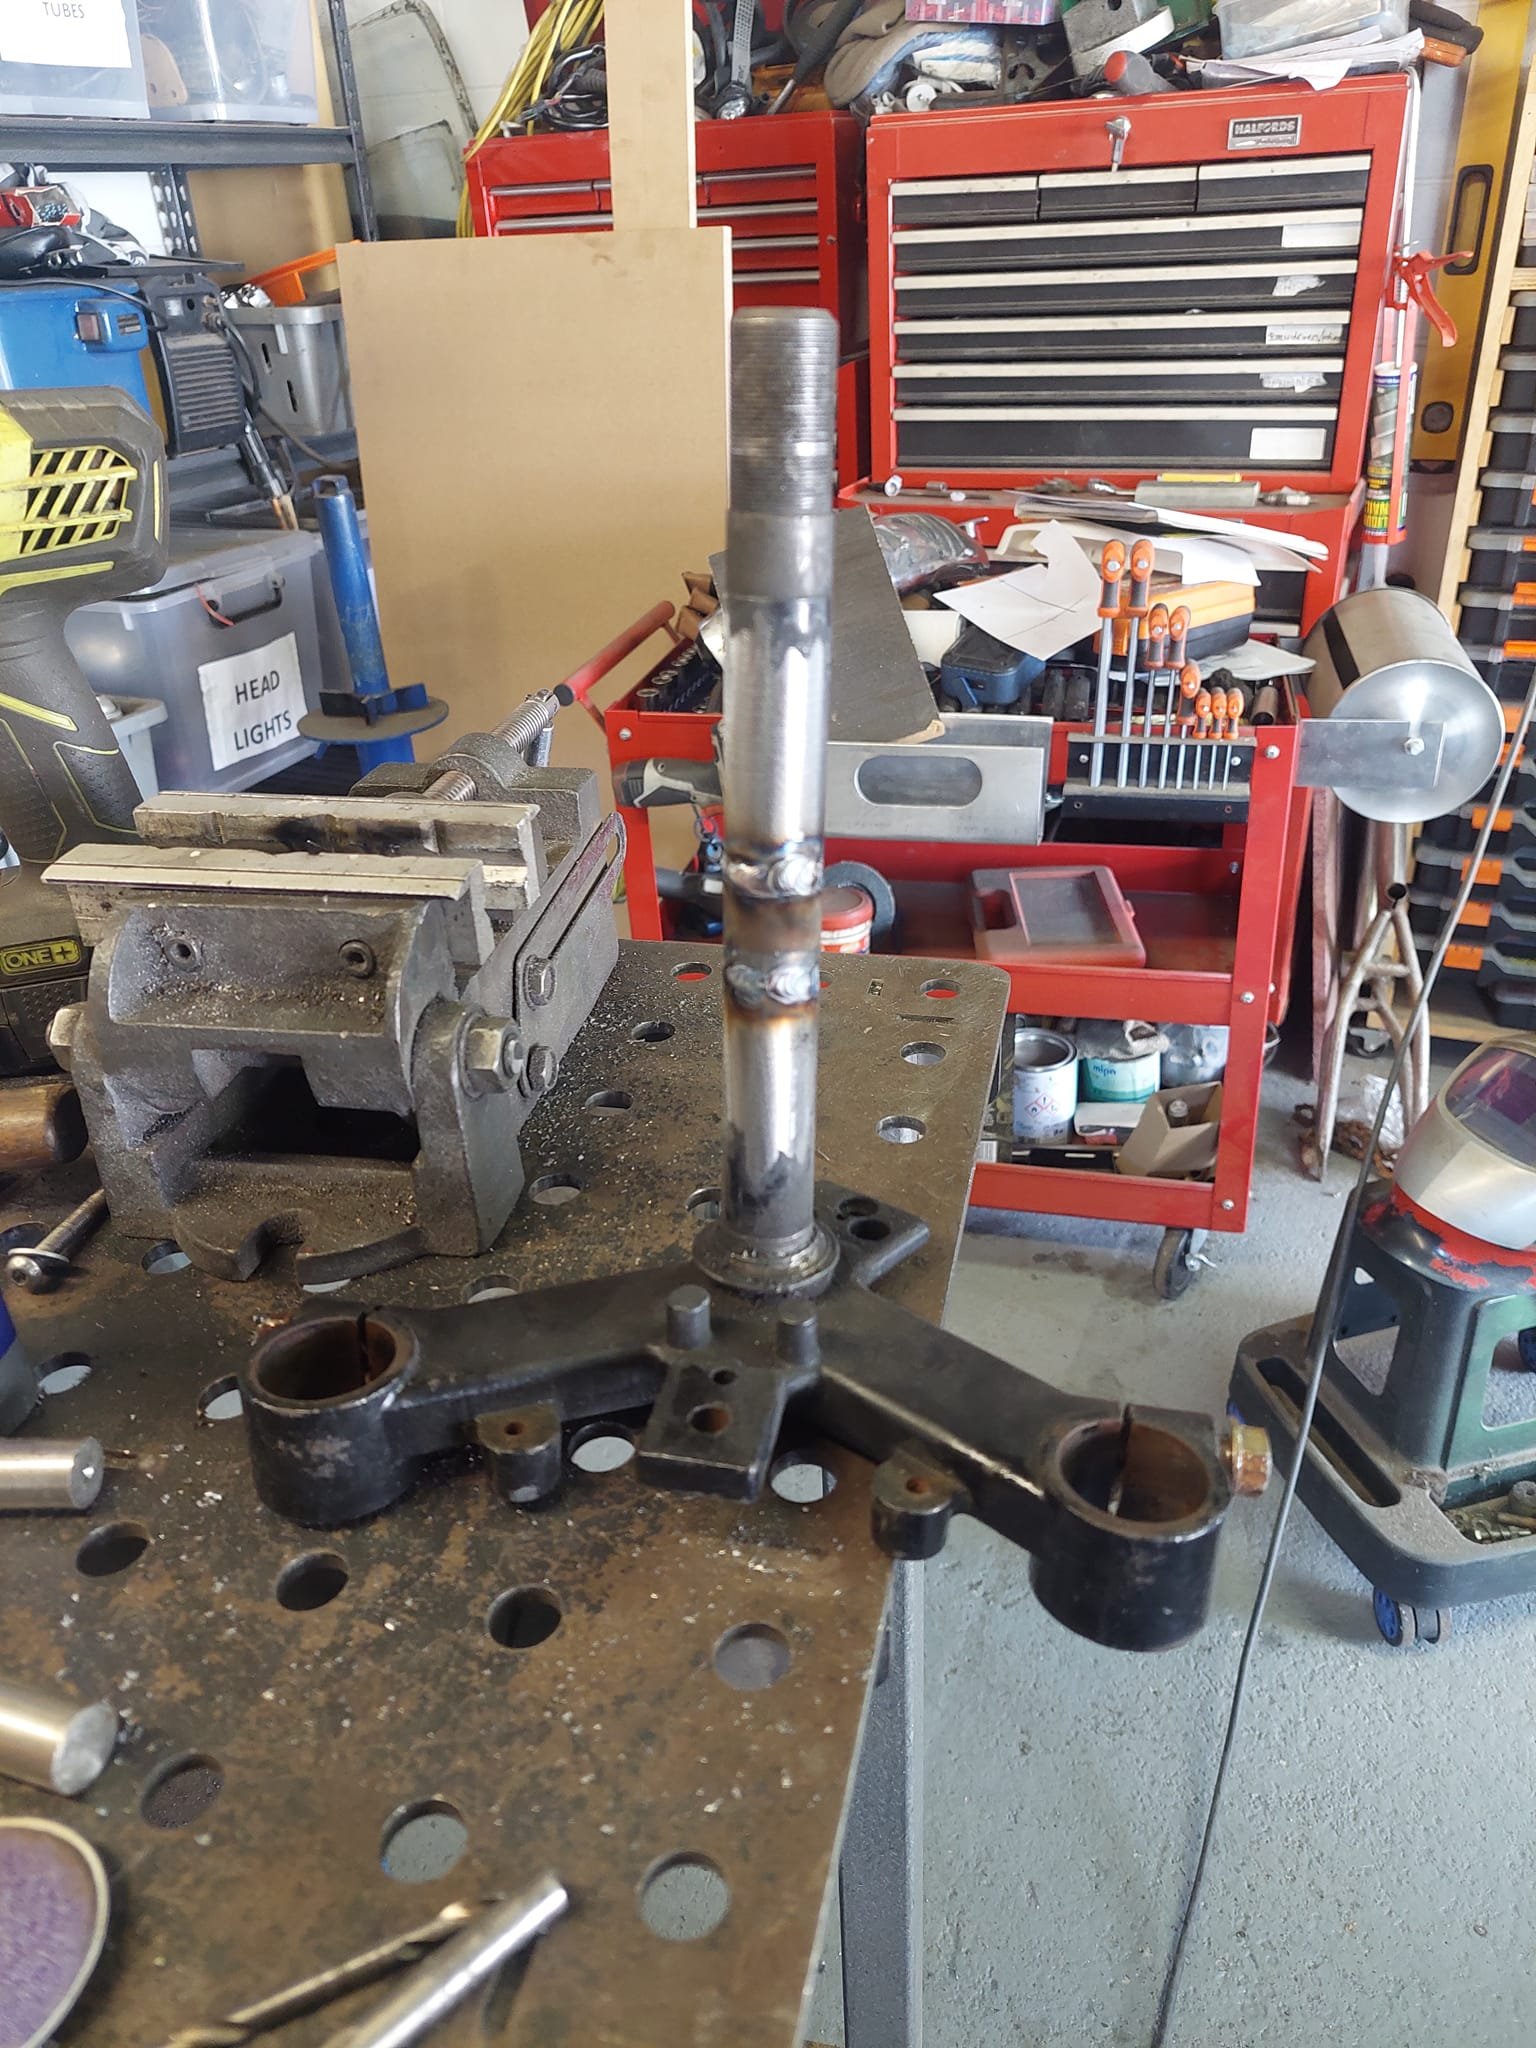
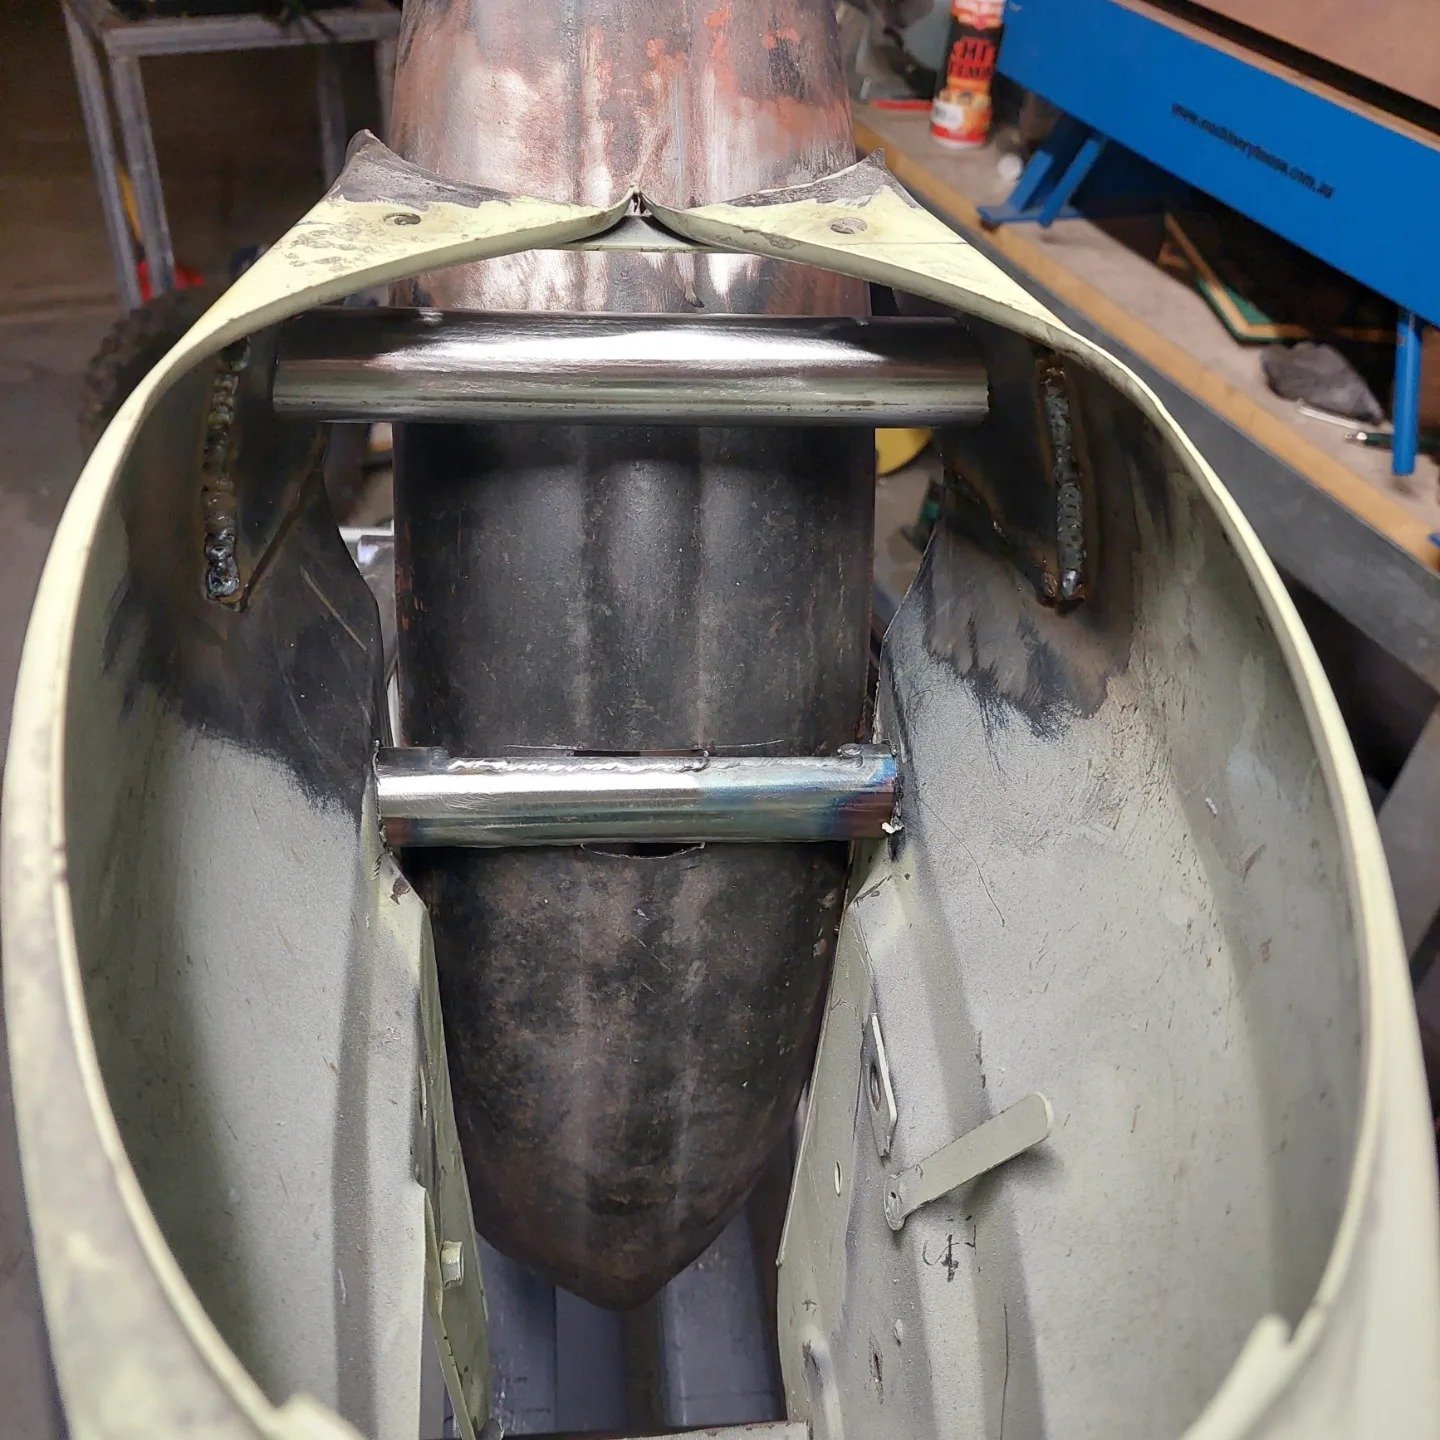
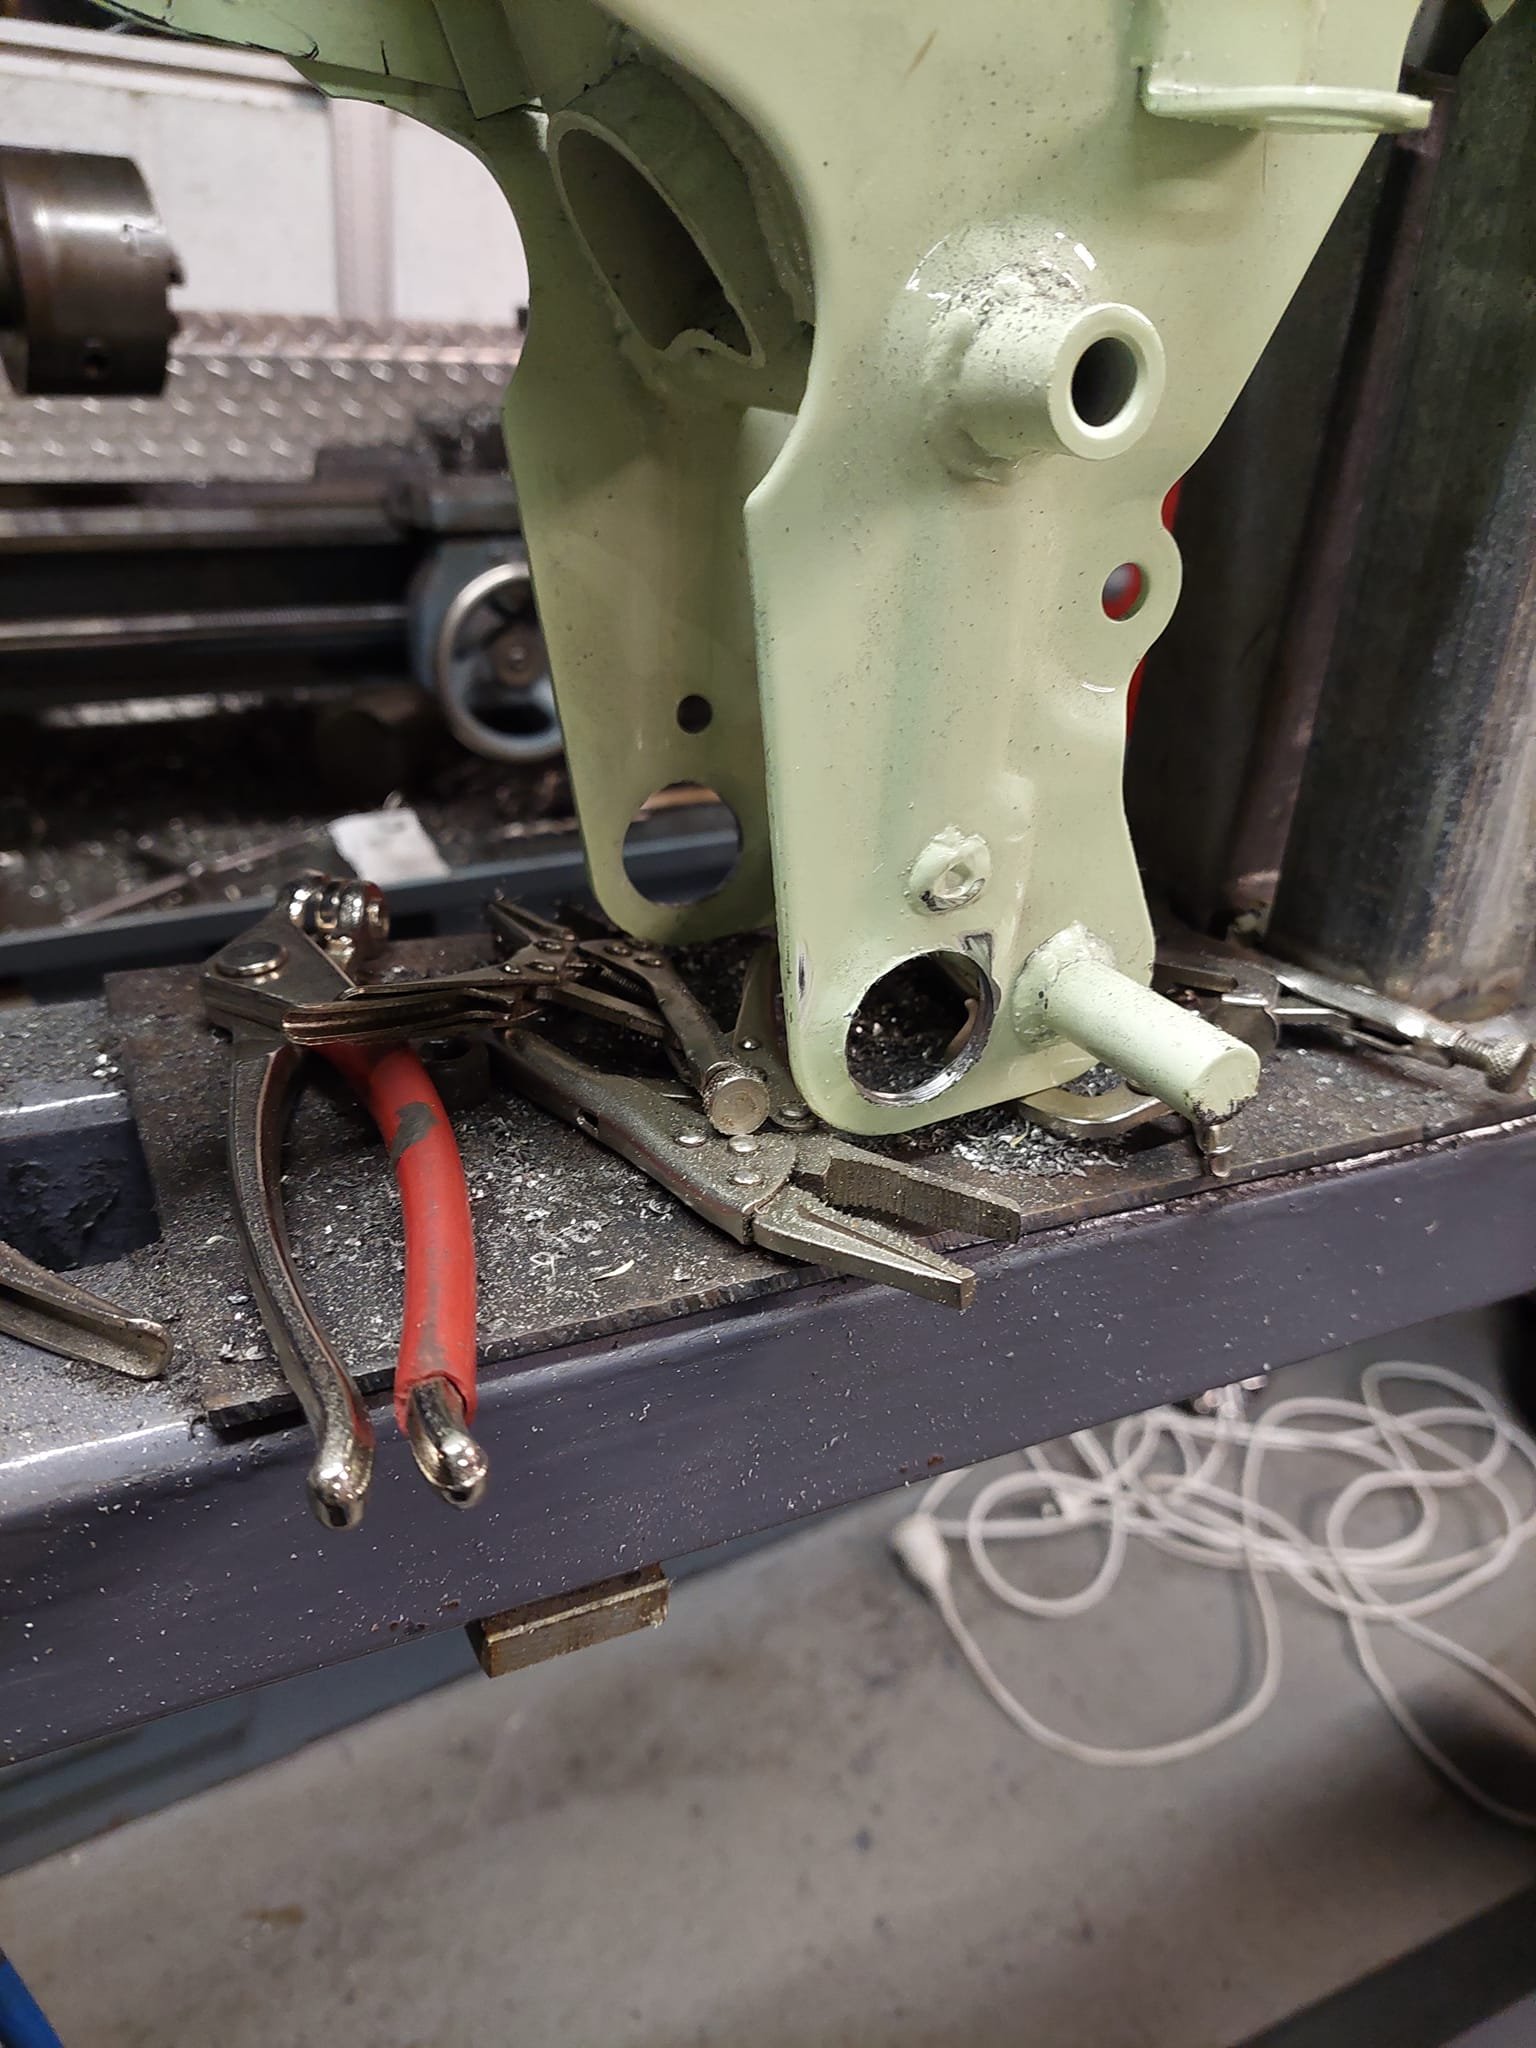
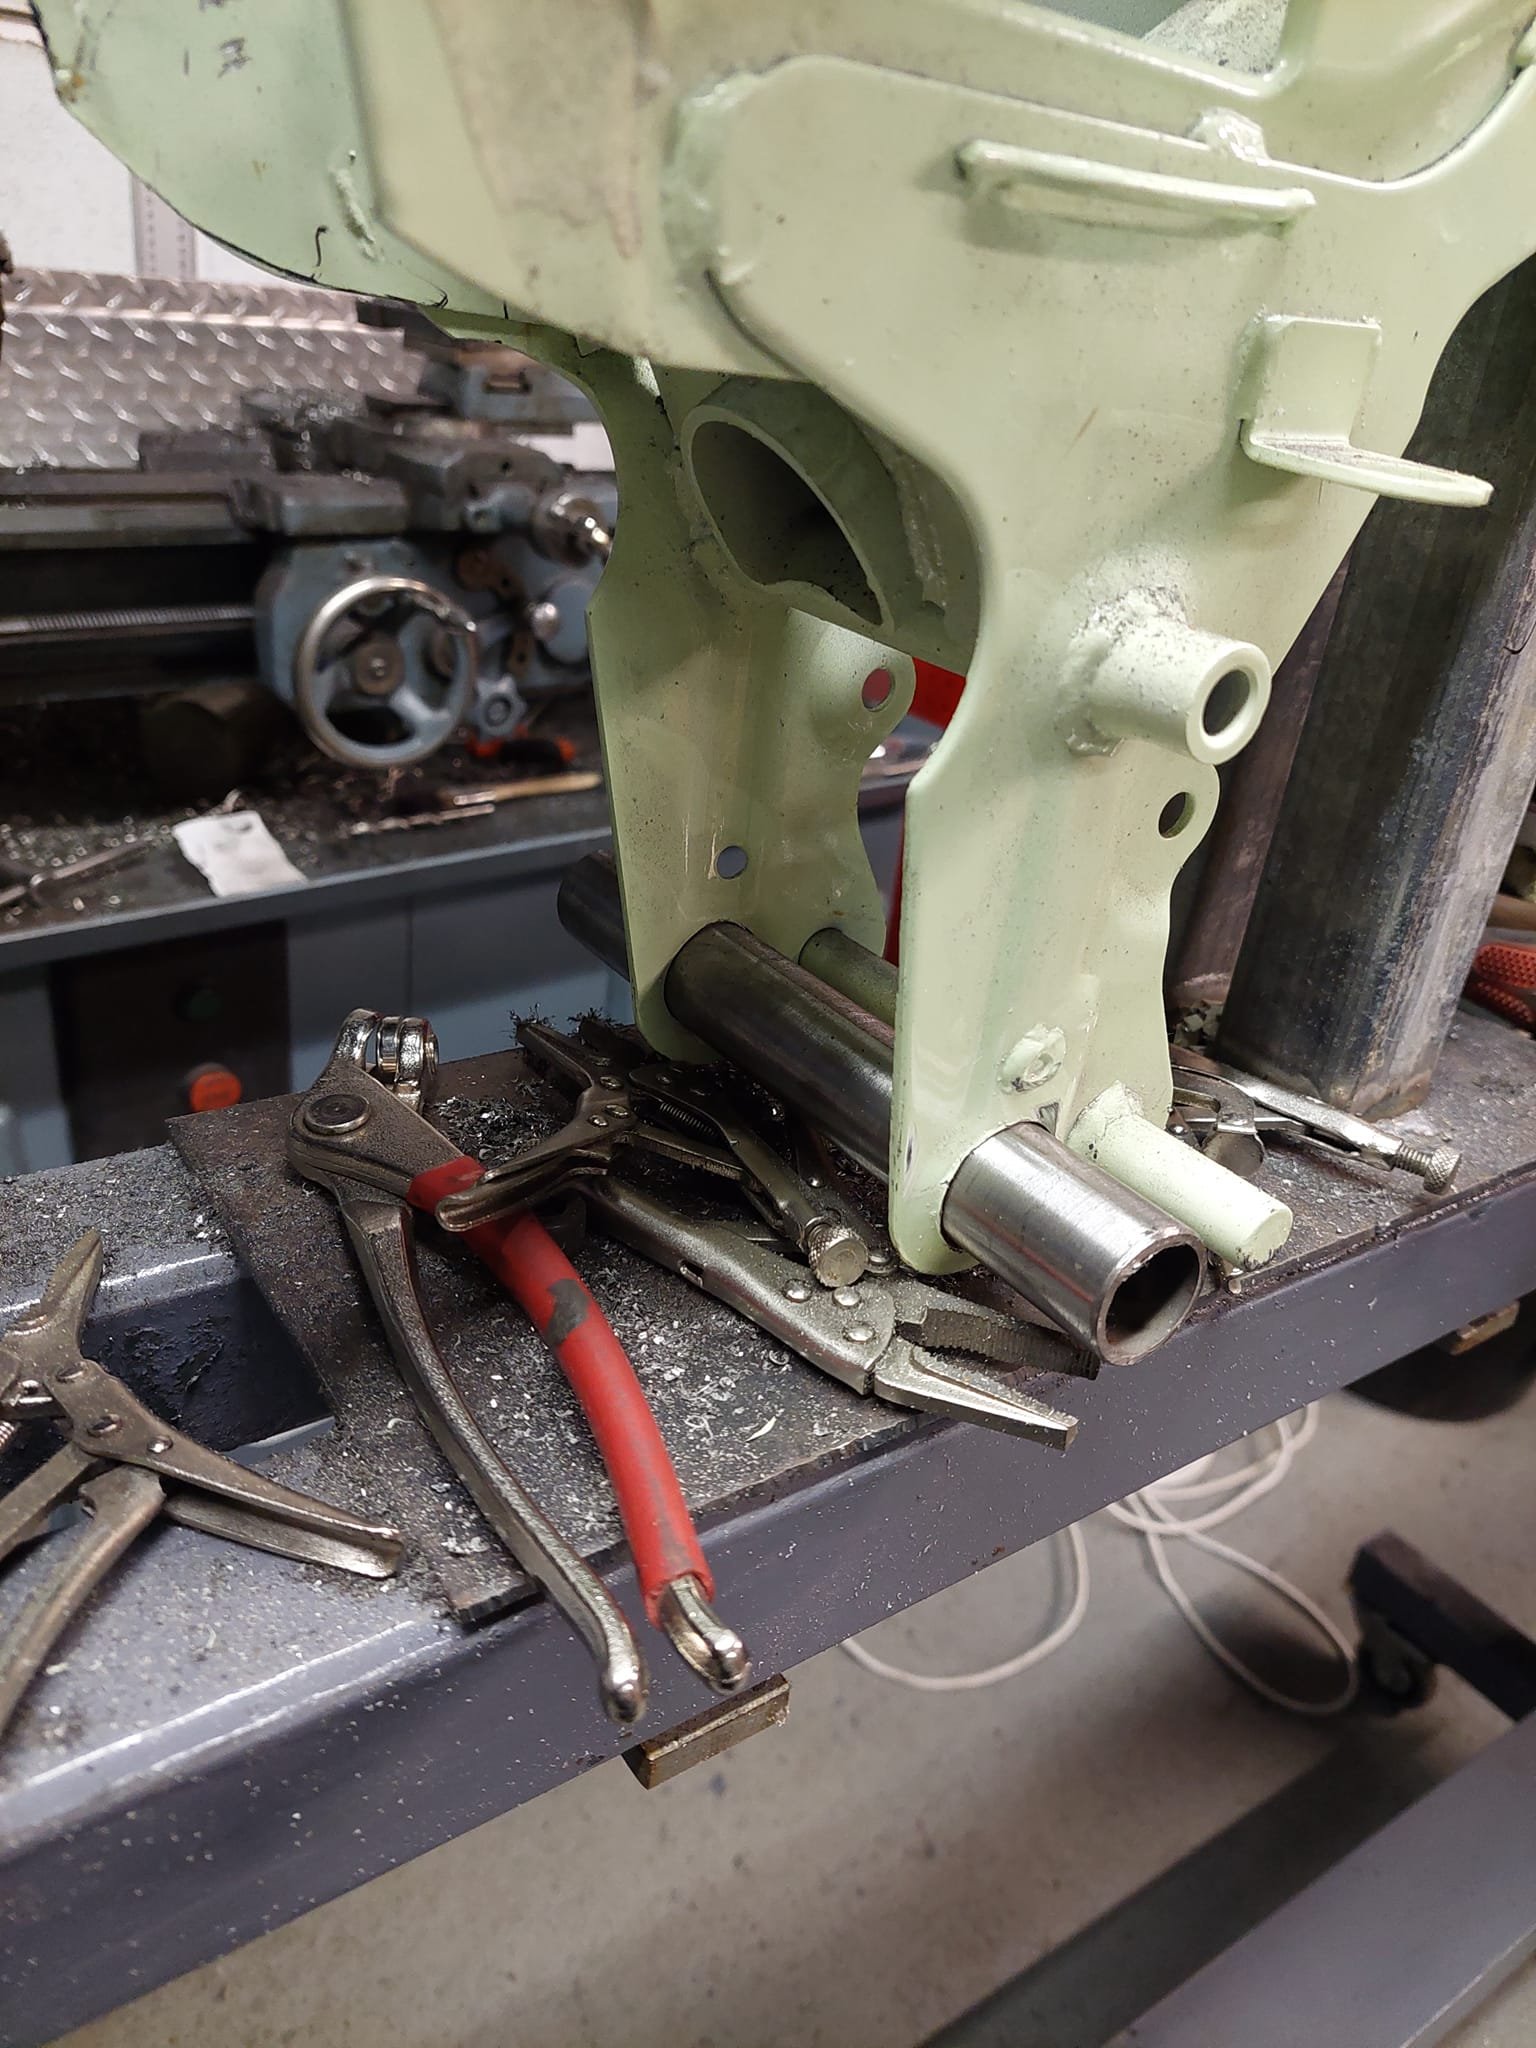
I modified the rear axle plate to accommodate the mounts for the seat and chainstay tubes. Theyre basically some 30mm round bar with one of them with a drilled and tapped hole so I can mount a sissy bar to them. Working away some more on the tube mounts I drilled out the holes that the rear brake pedal goes through to accept some tube that the front part of the chainstay will be welded to For the seatstay mounts Ive added some 3mm plate to the inside of the frame so I can drill some holes to pass through some more tube like the front chainstay mounting point. Then I offered up the mudguard in place and cleco it in place. Once I've got all of the hardtail tubes welded in place I'll be able to fully weld the mudguard in place which will add heaps of strength to the frame and stop my dickies and flannel shirt from getting all dirty.
- 22 replies
-
- 11
-
-
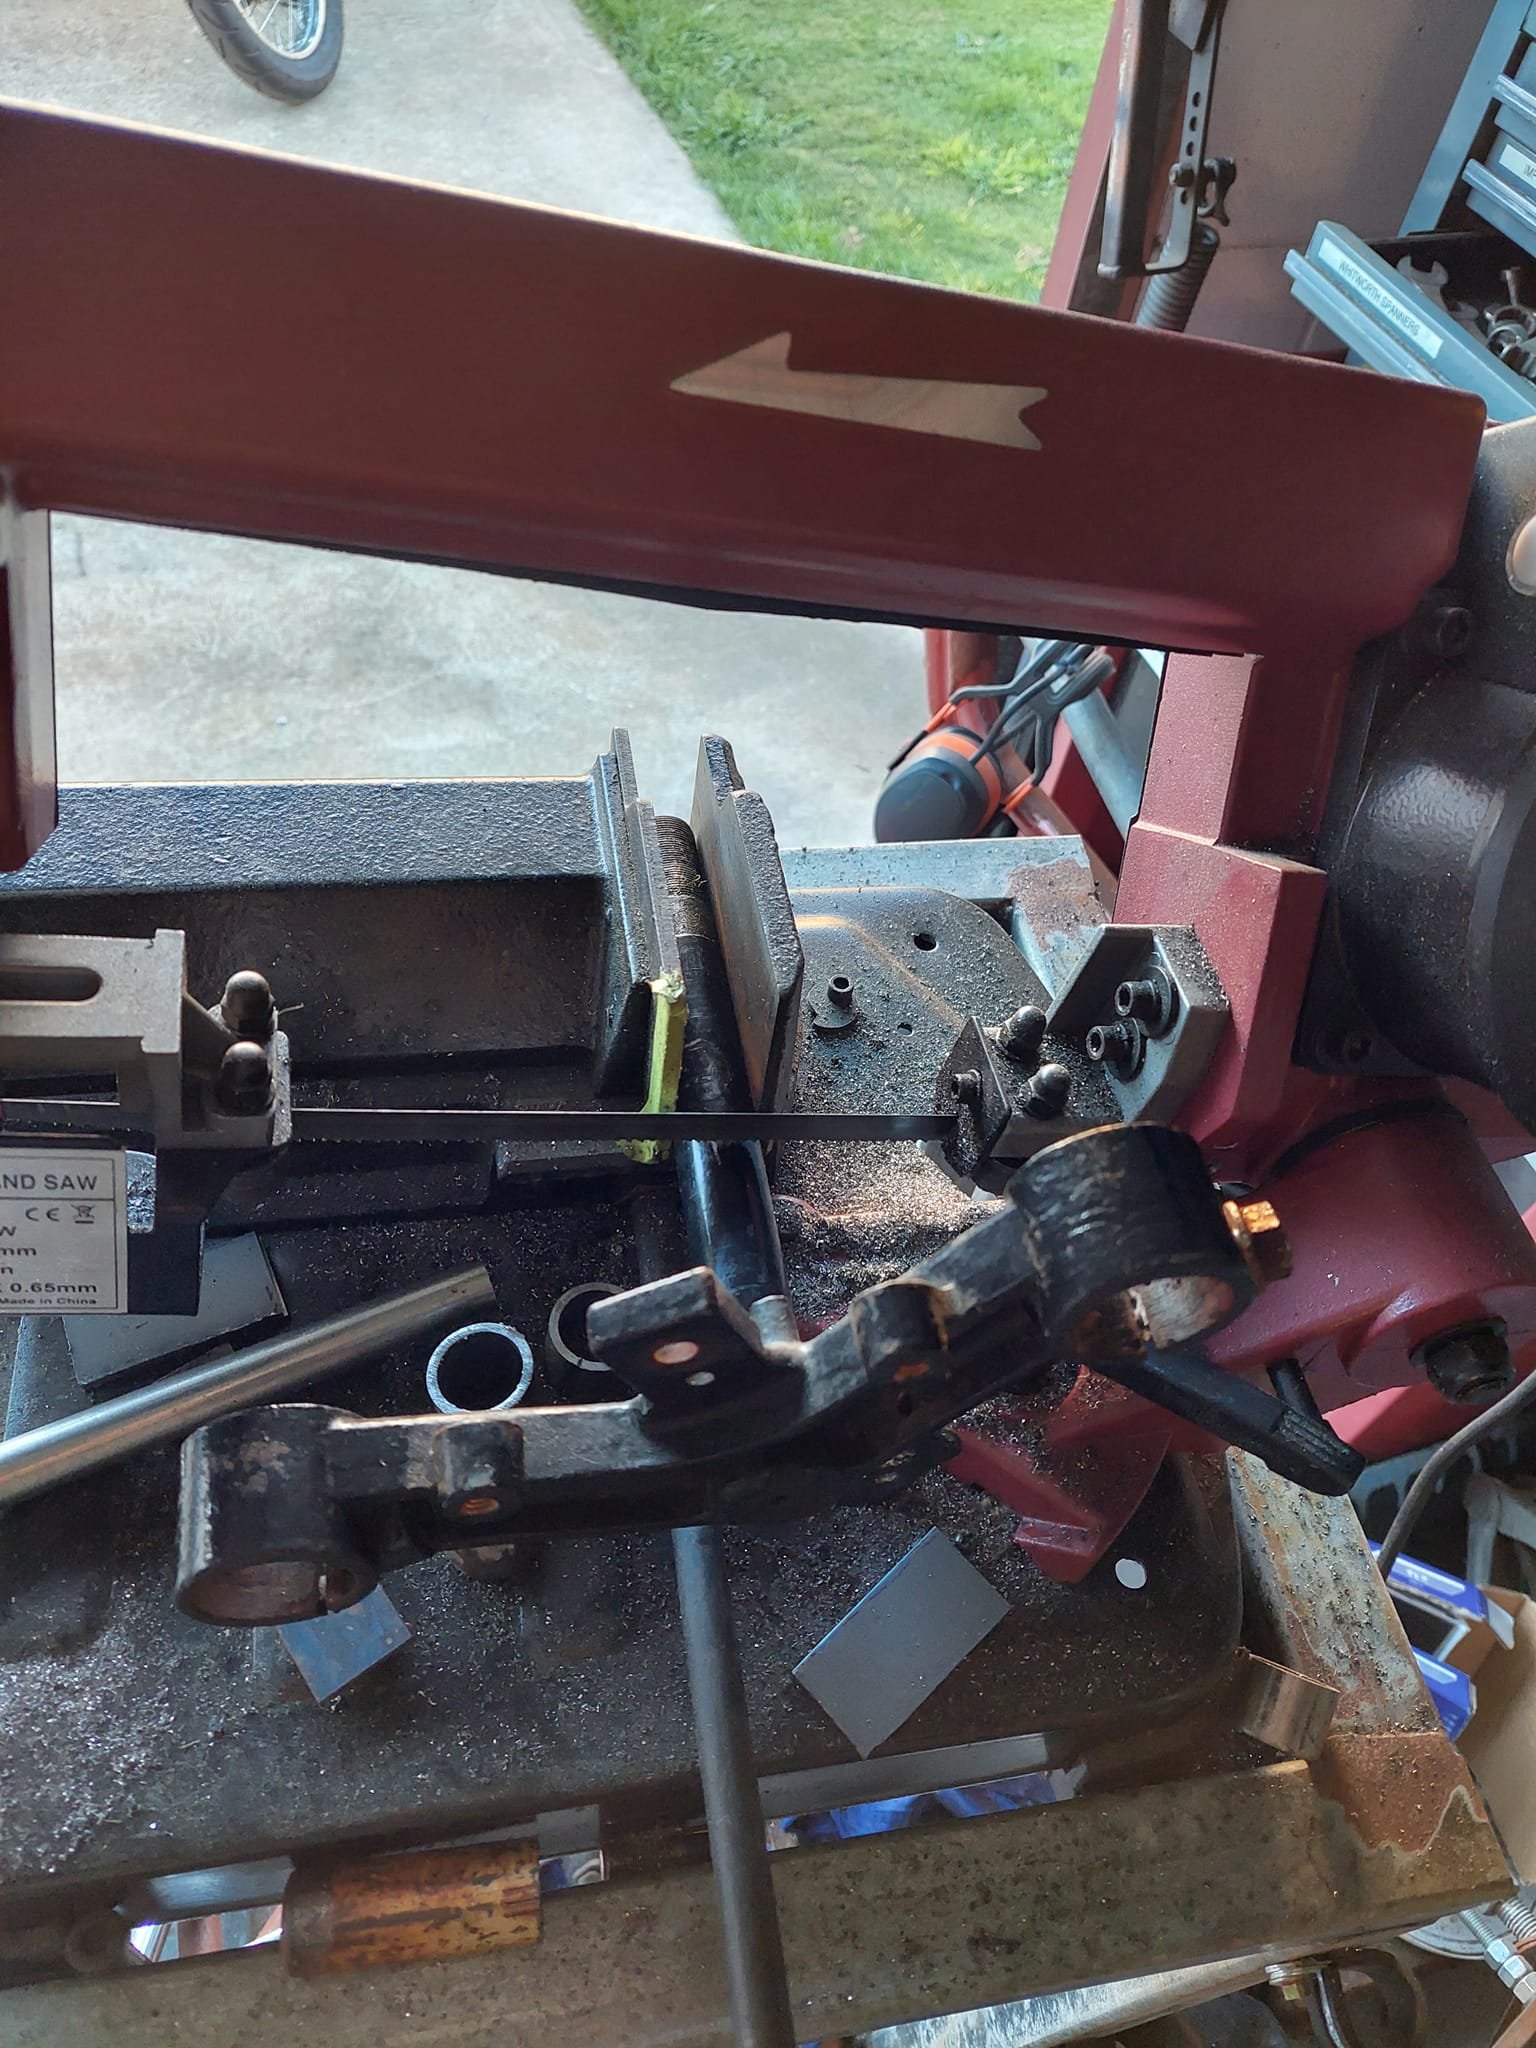
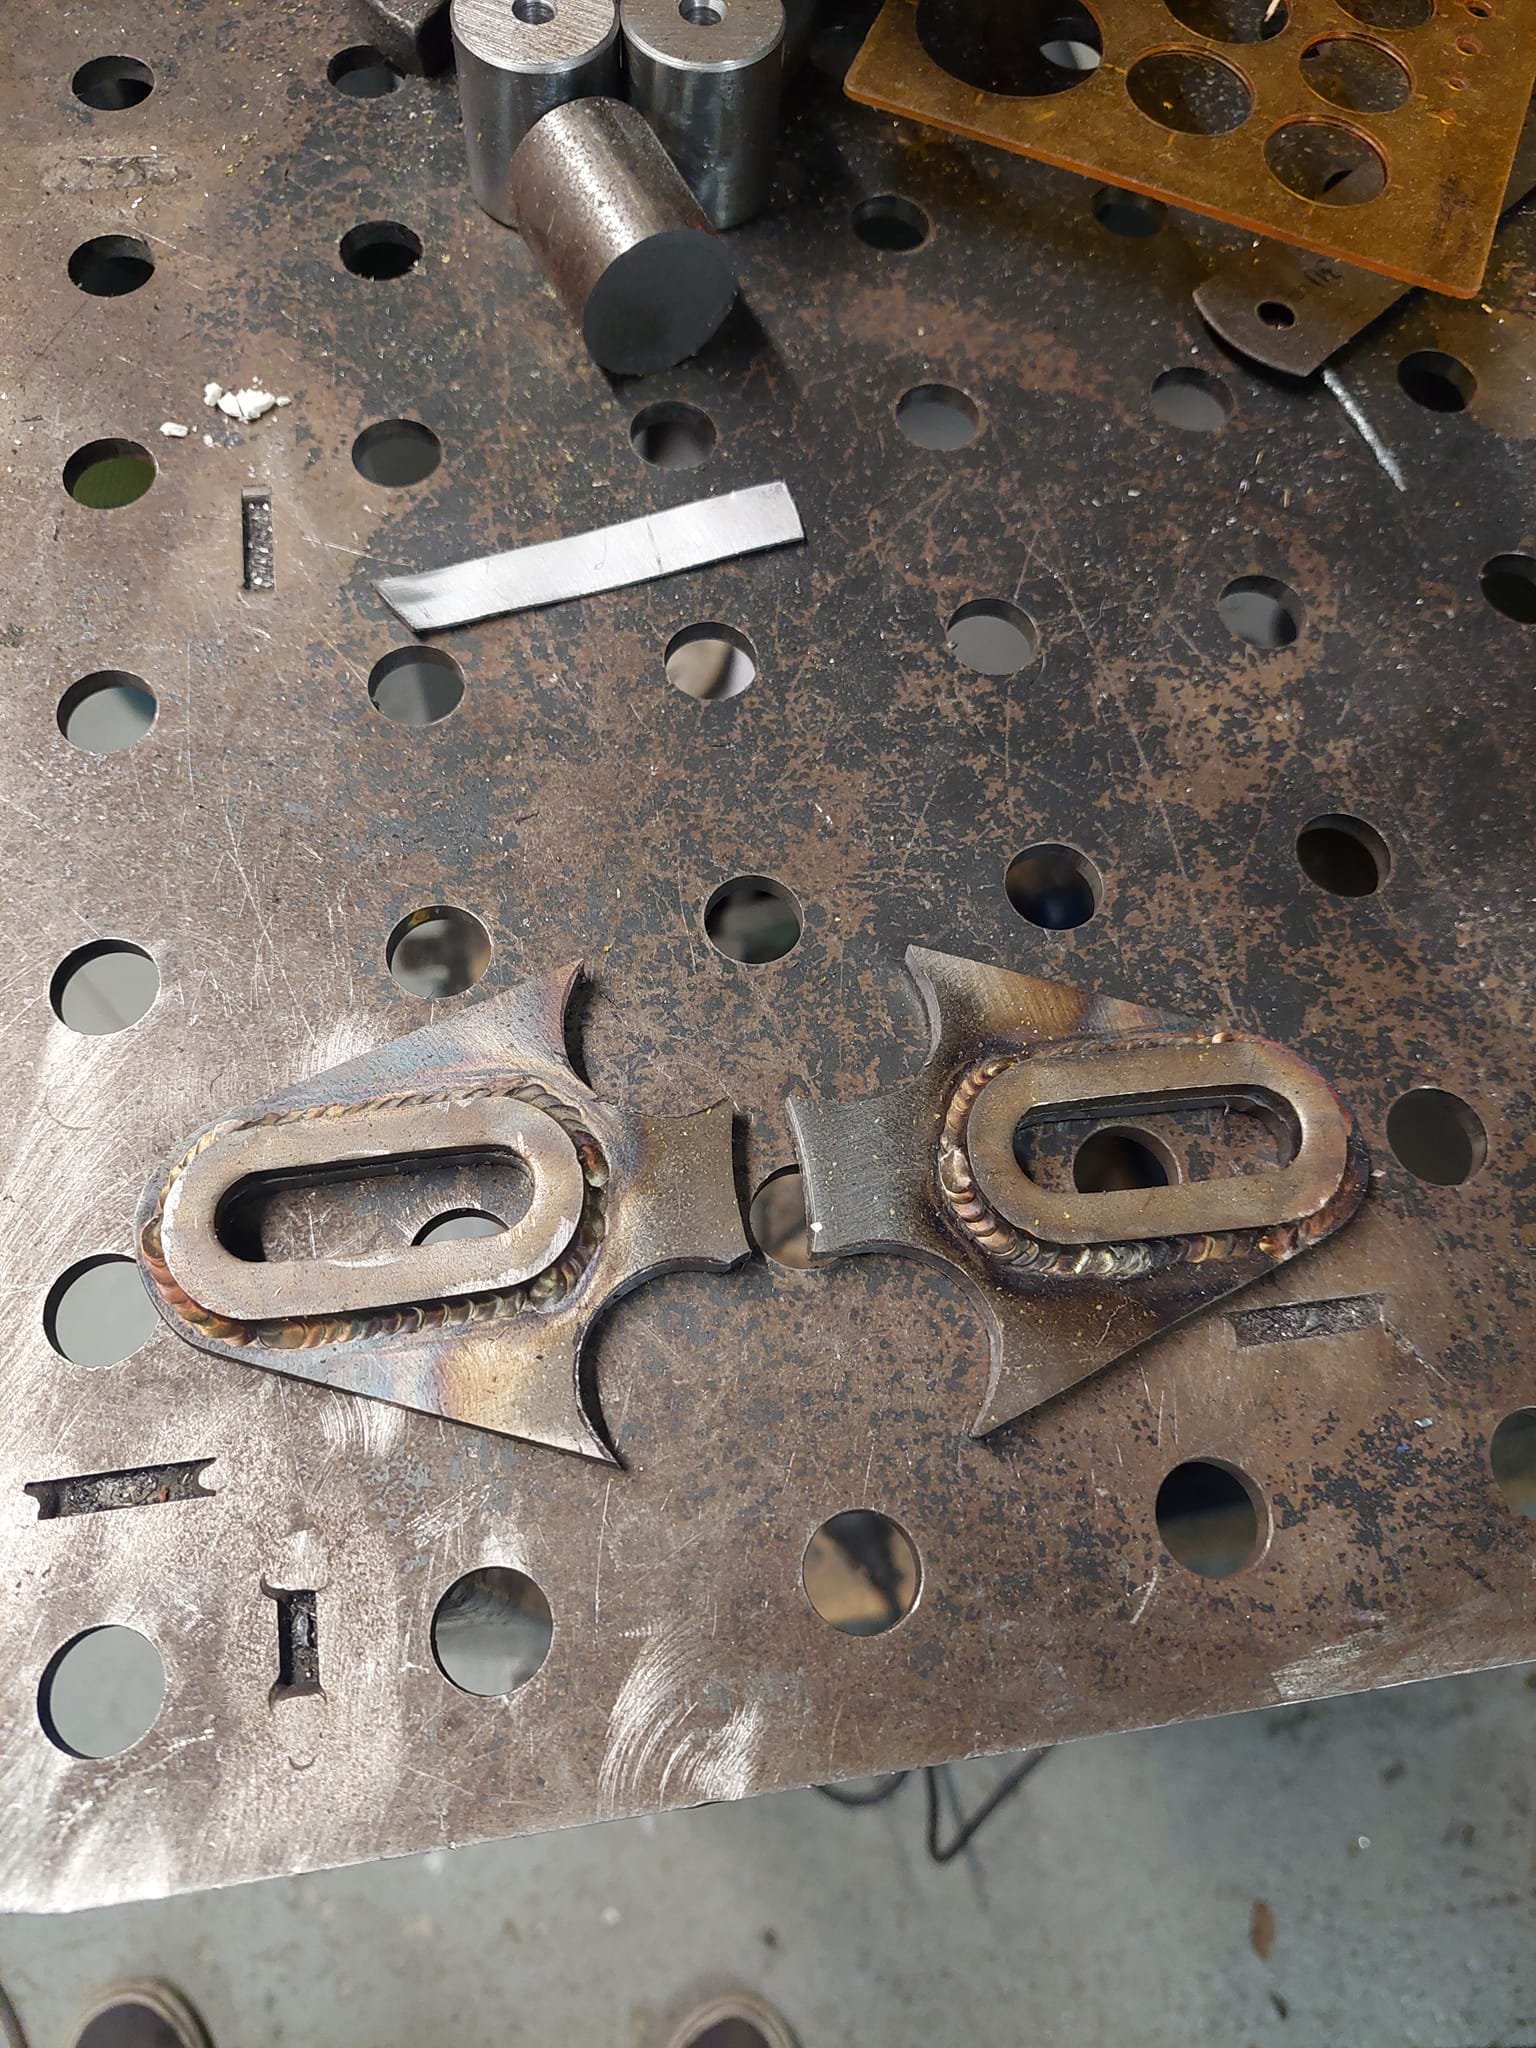
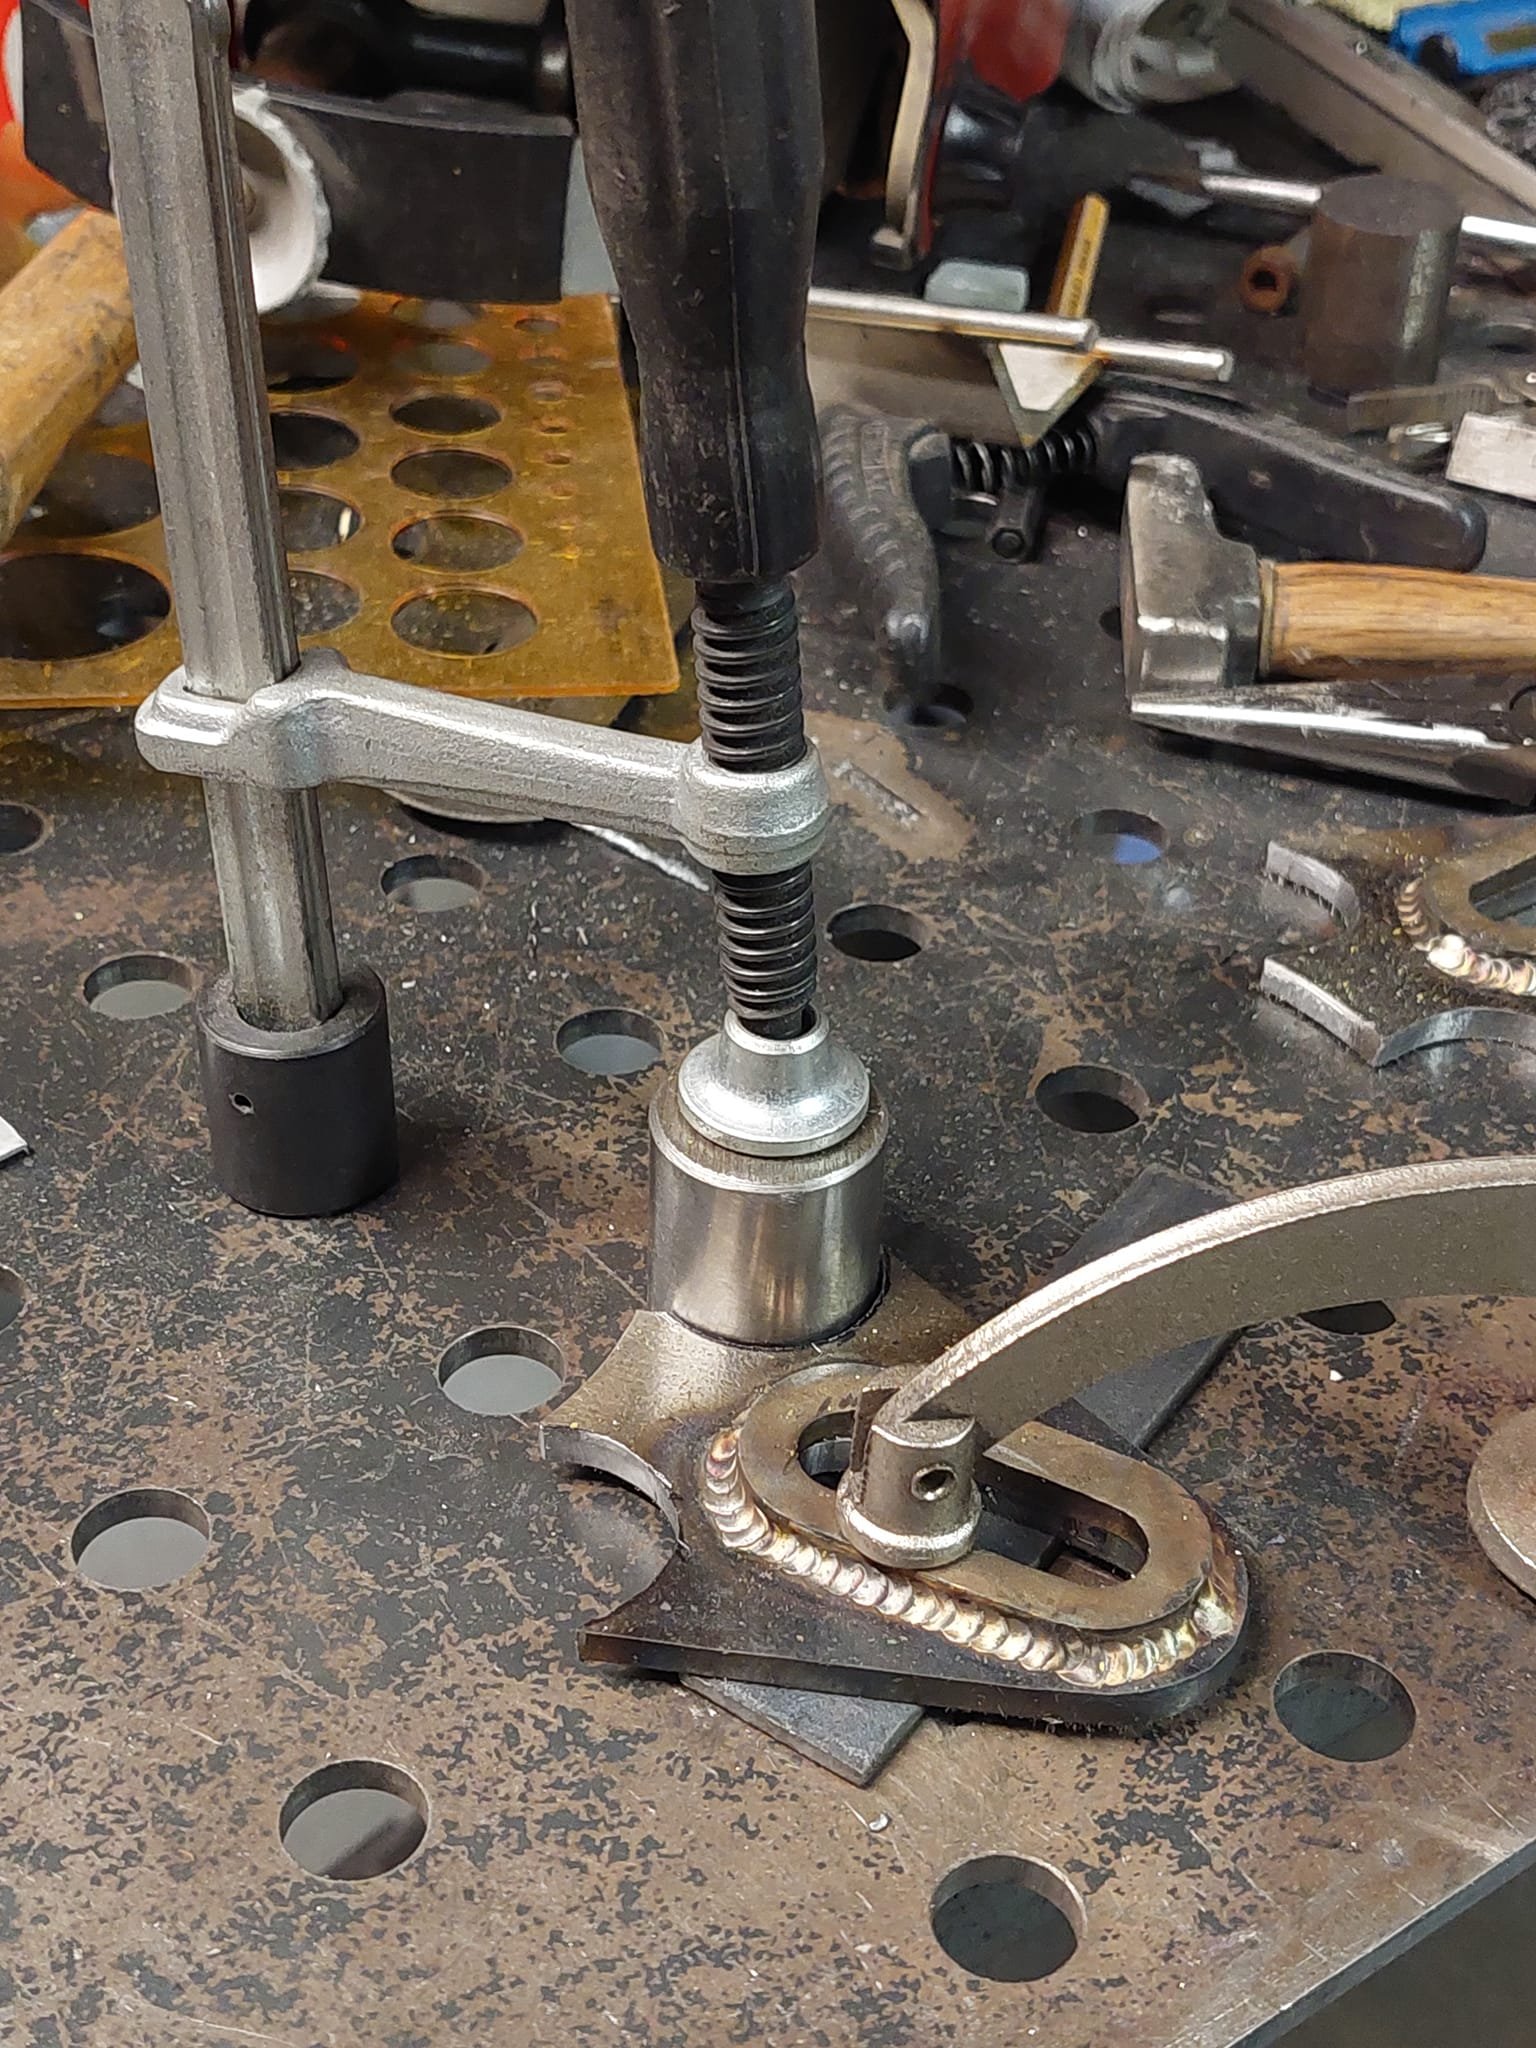
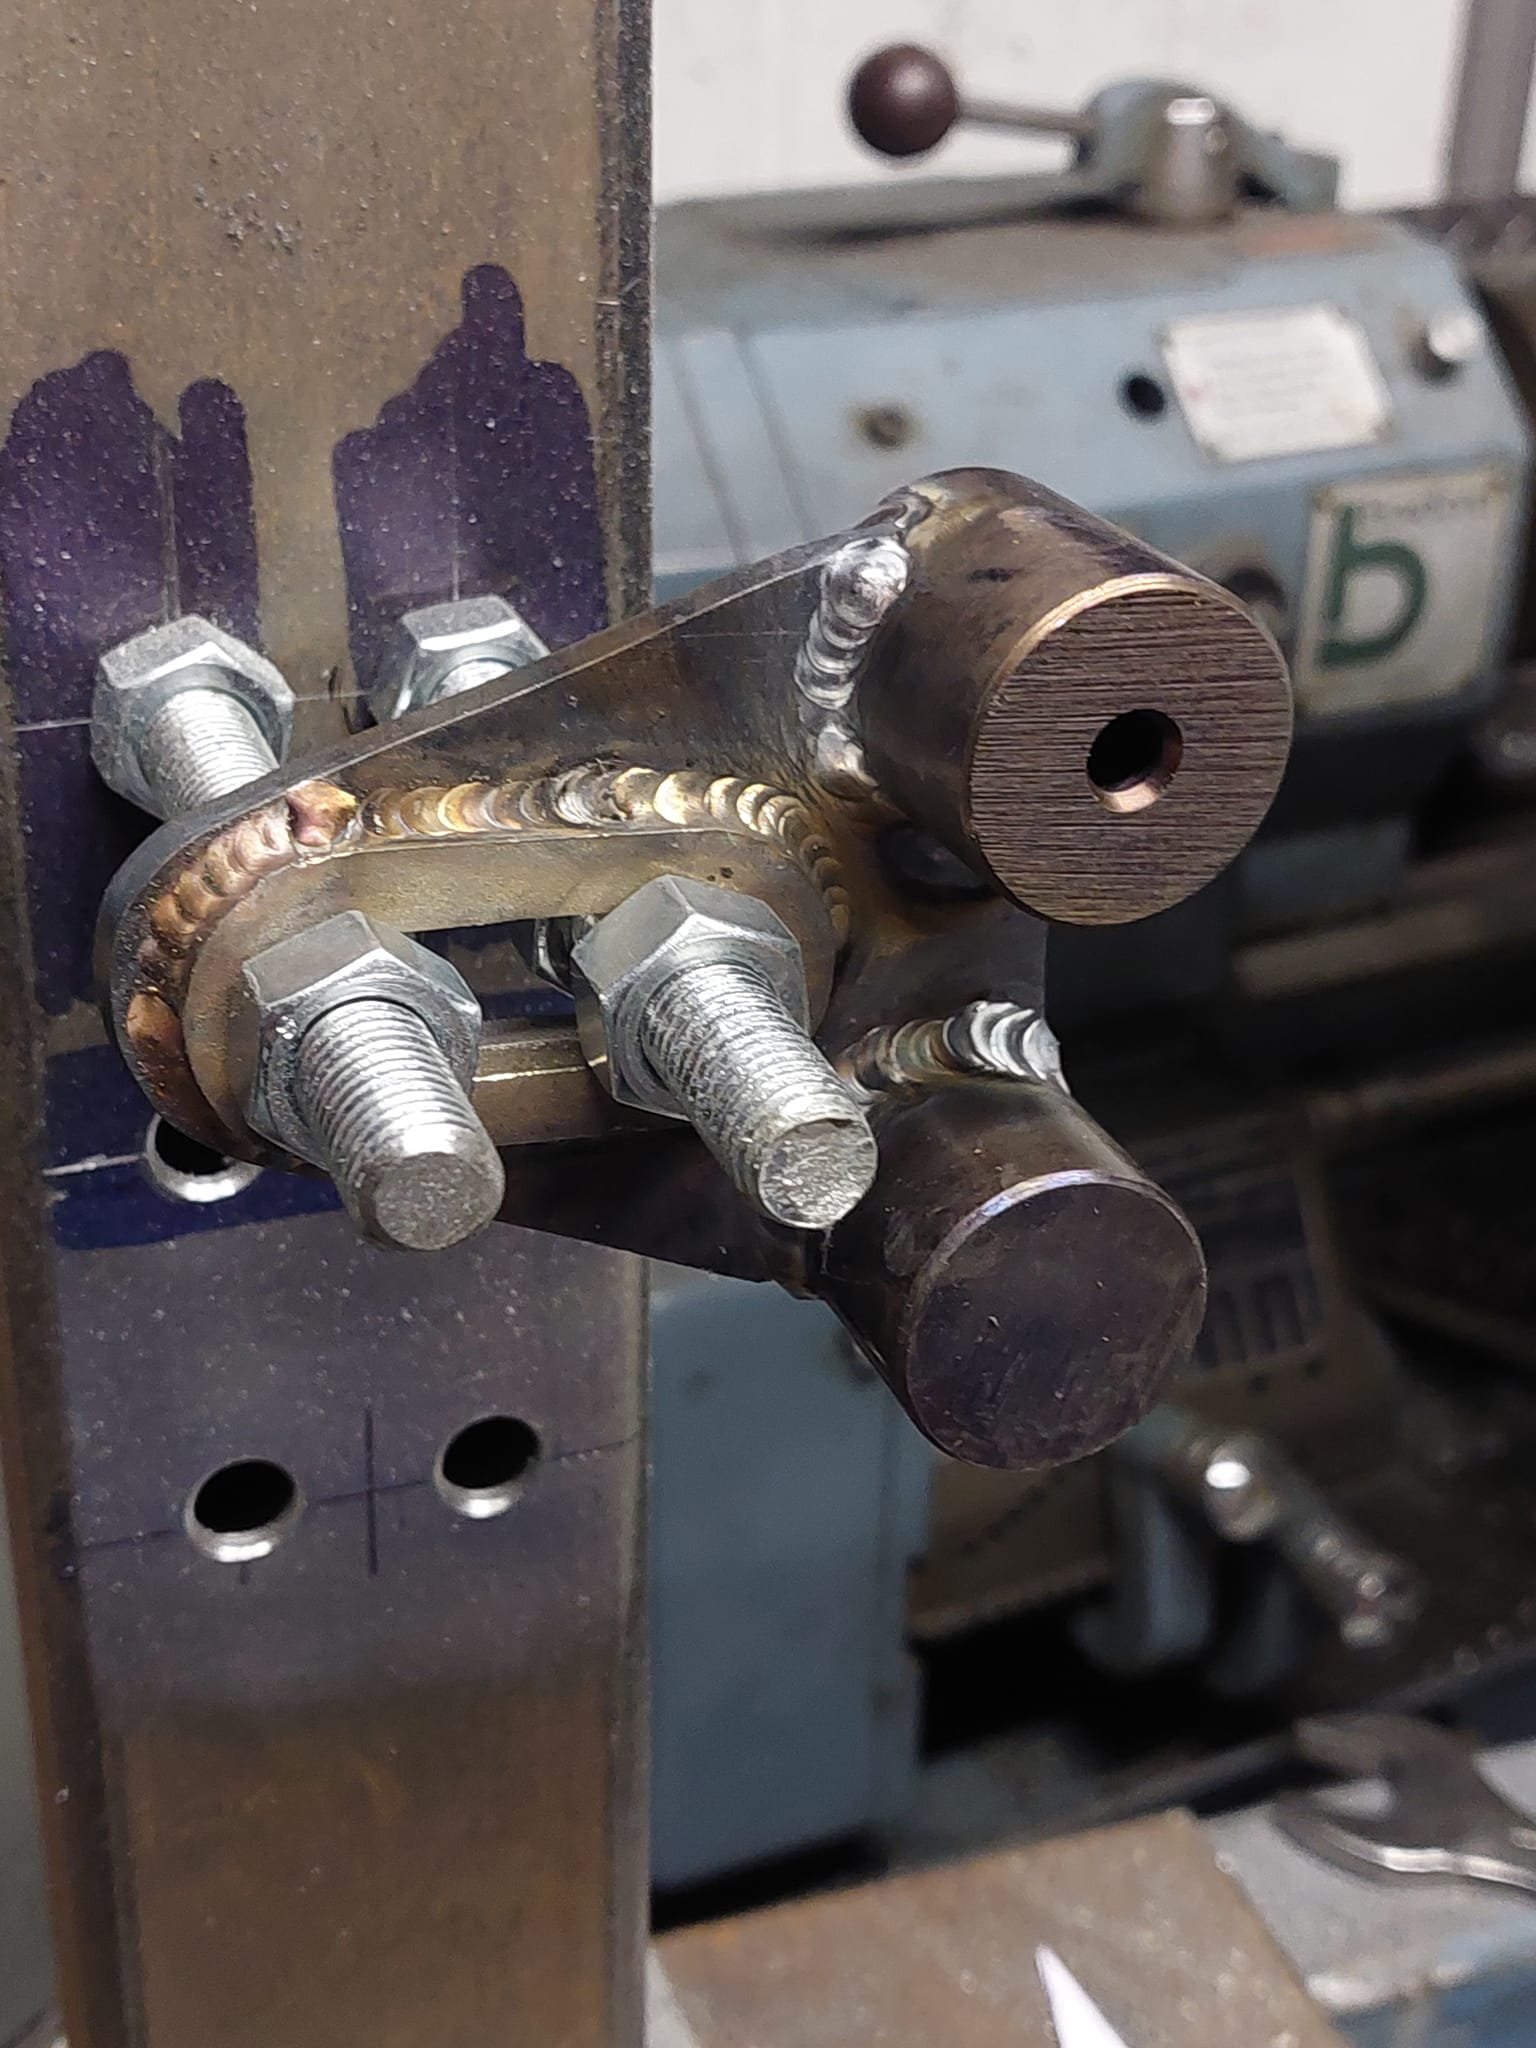
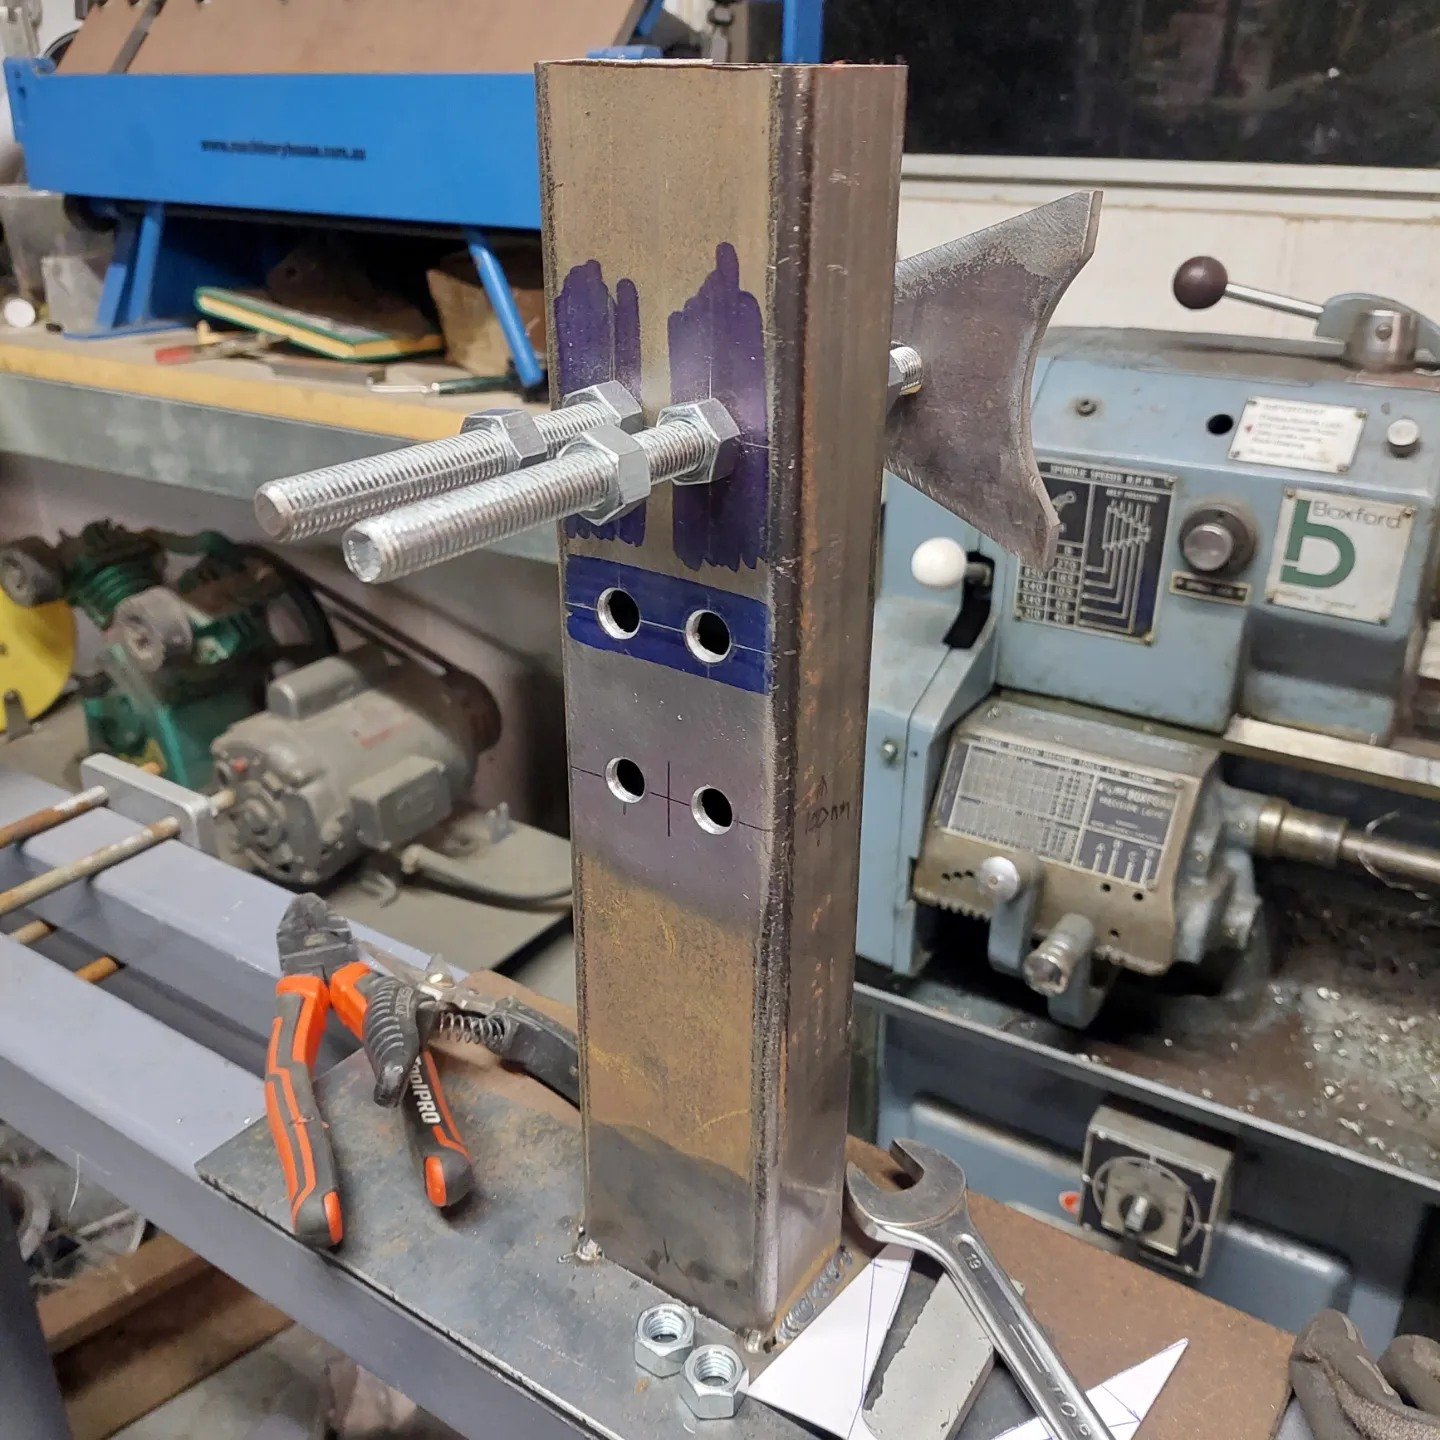
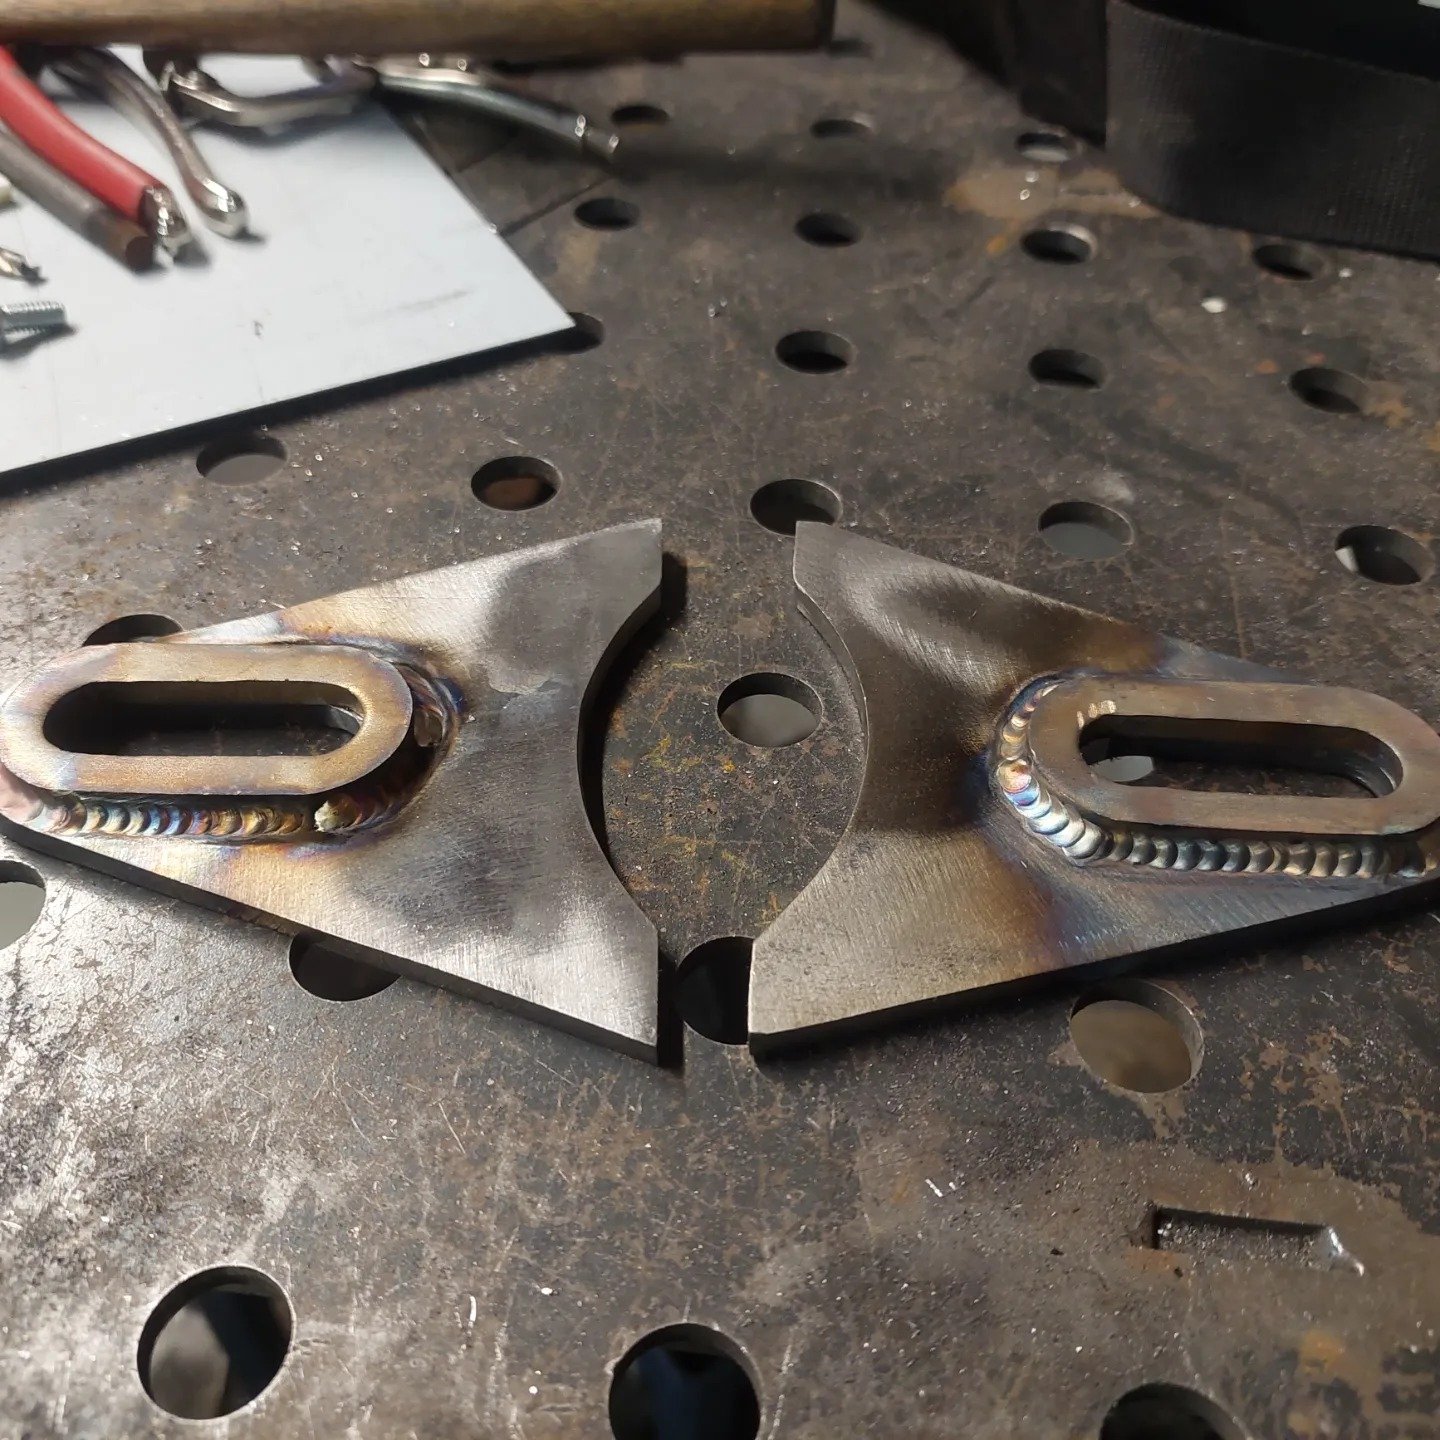
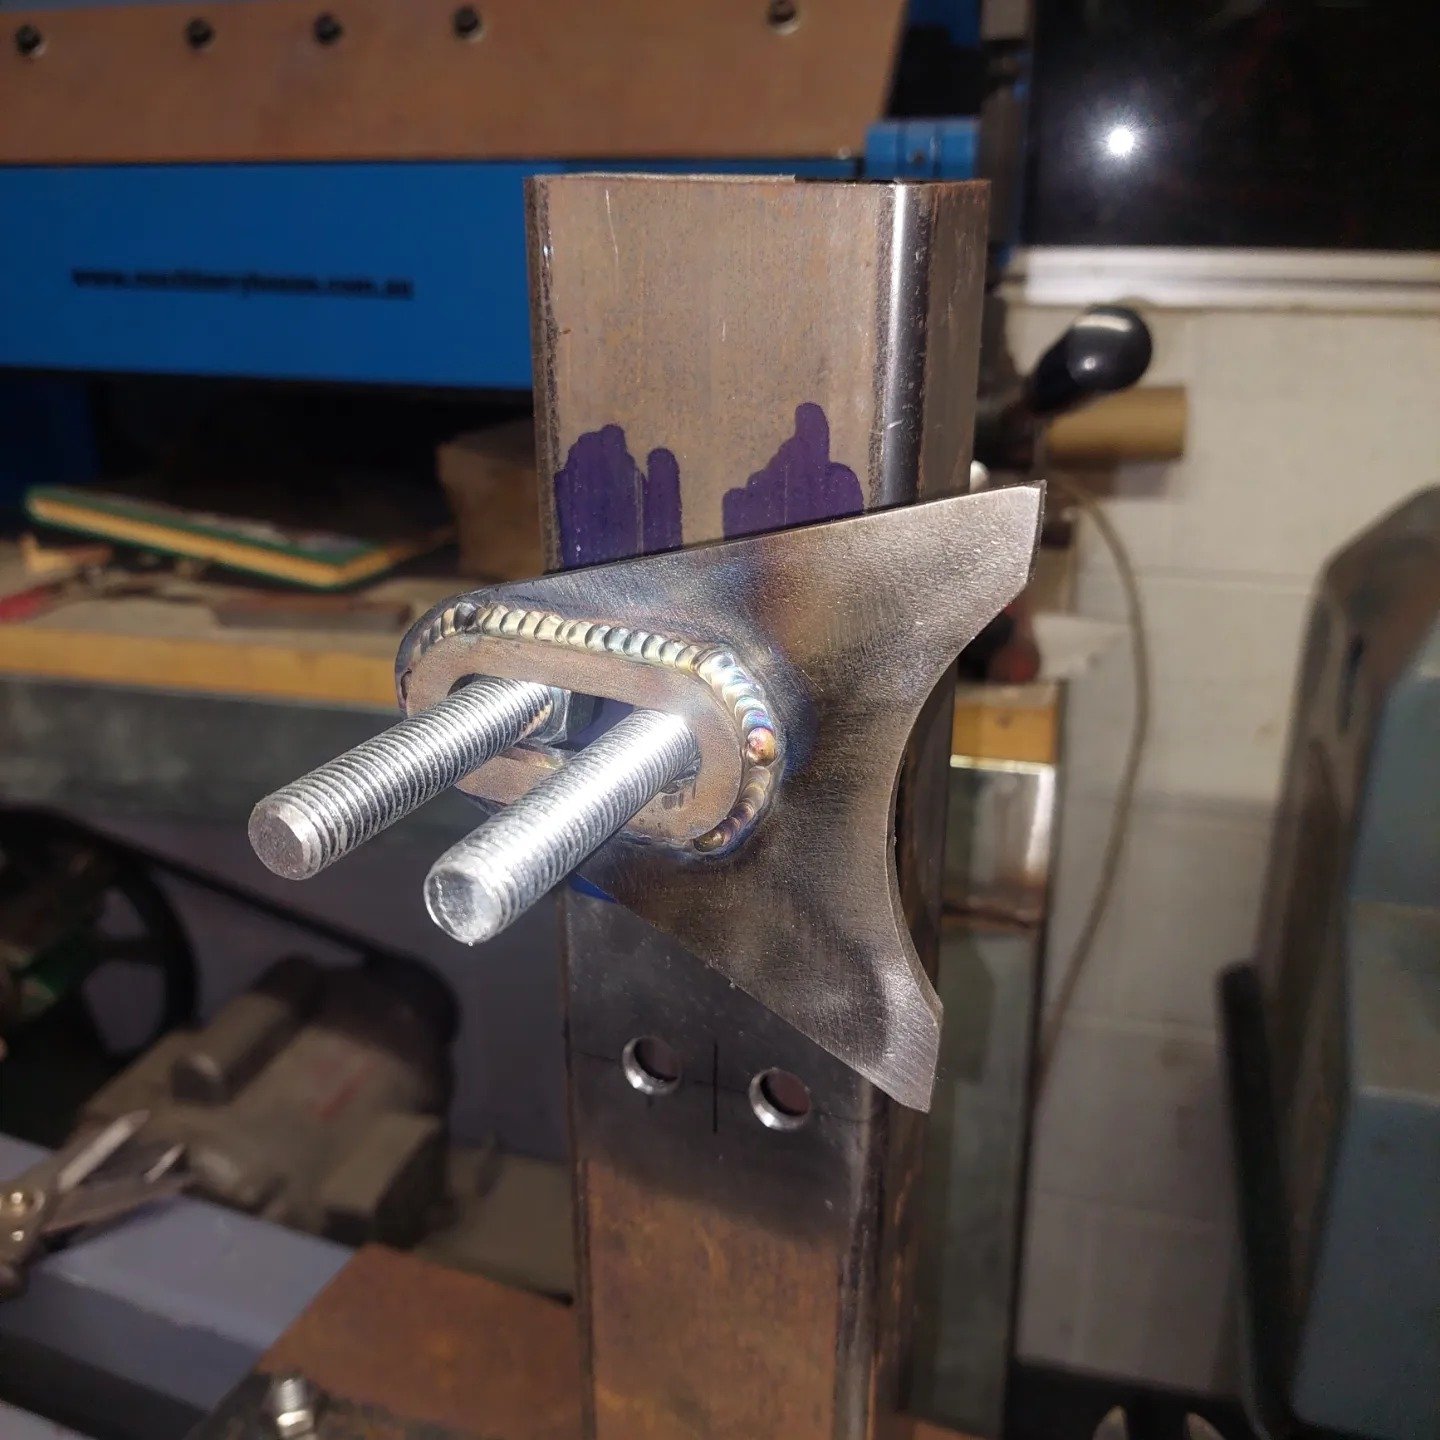
I grabbed some 75x50mm rhs from work and drilled a few holes to accomidate some 12mm threaded rod to clamp the axle plates to and welded it to some 150mm wide 3mm plate to clamp it to my frame jig. Then I cut out some axle plates from some 6mm steel plate then added a stainless steel detail to it to stop the paint from getting stuffed when adjusting the chain
- 22 replies
-
- 15
-
-
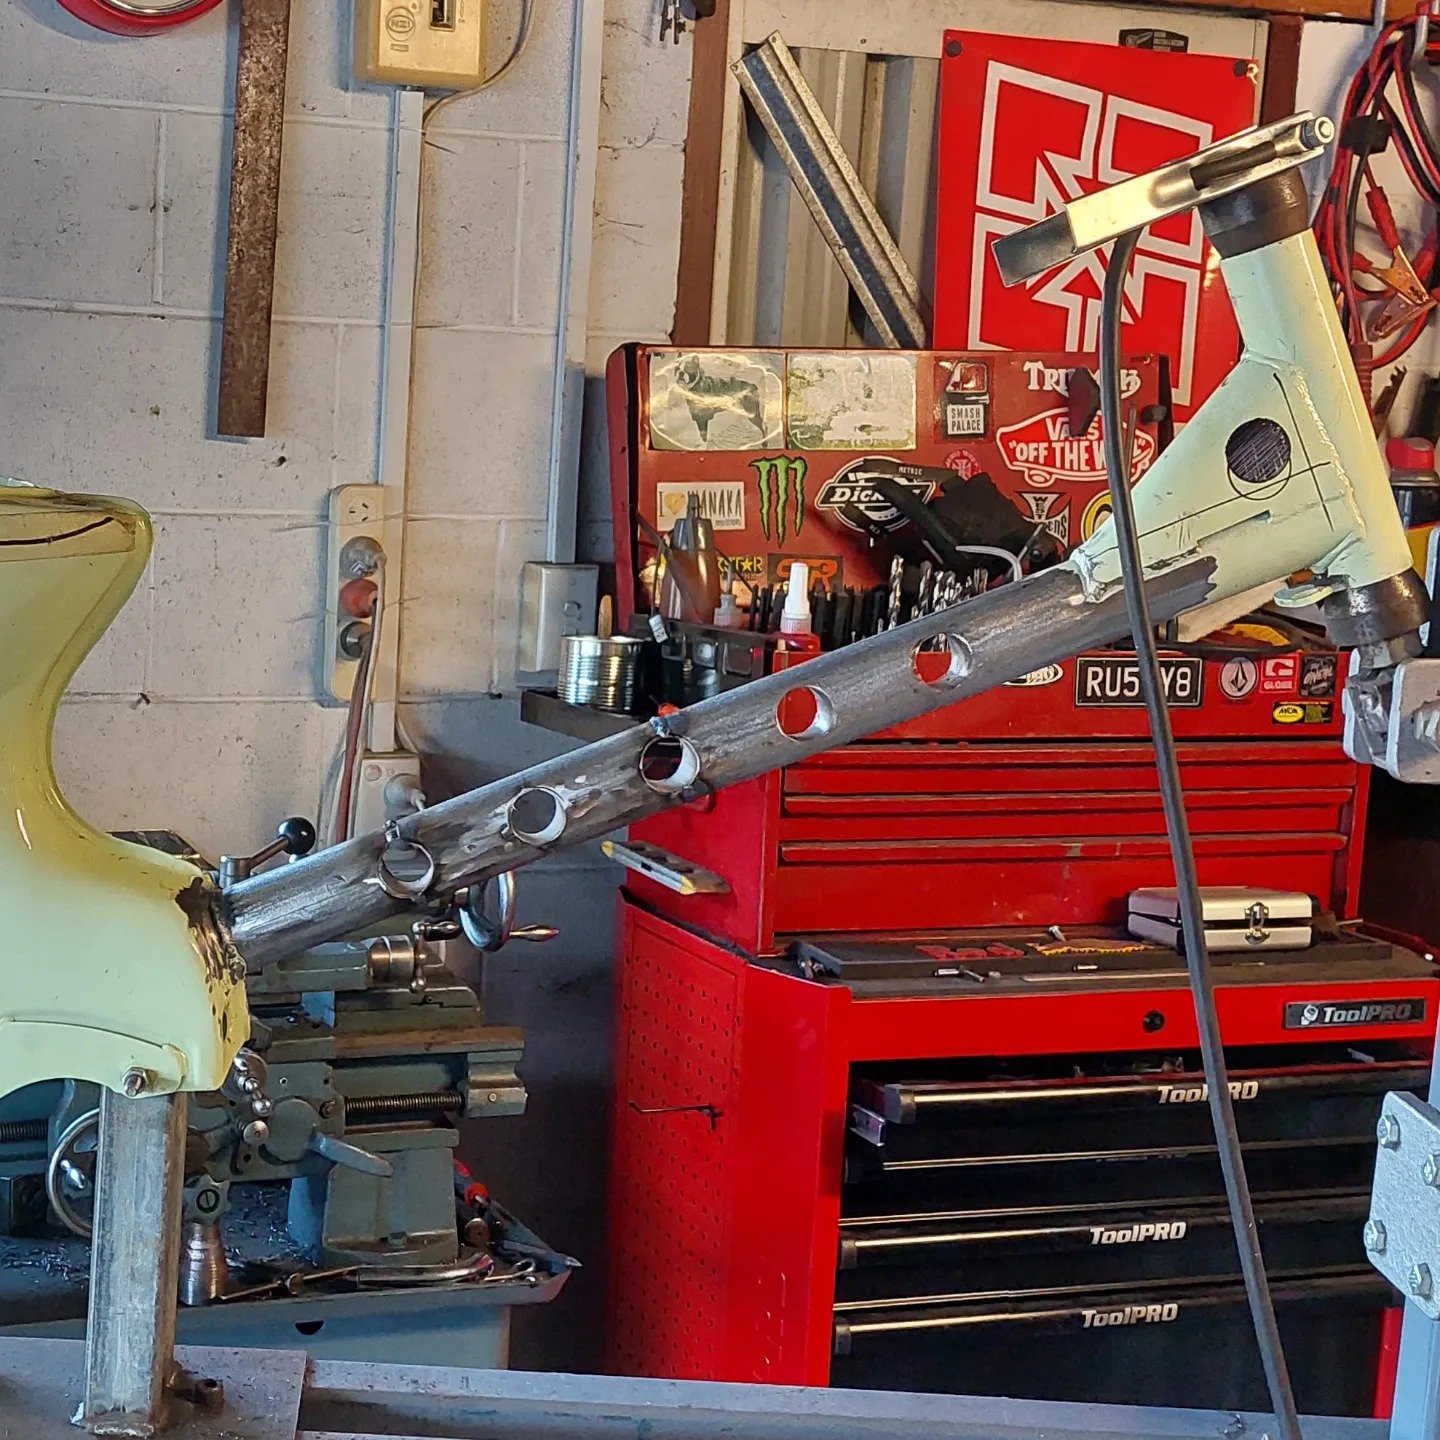
Today I smashed out all of the holes in the main tube, I'll try and metal finish everything tomorrow. I threw the rear wheel in position to get a rough idea of where my axle plates need to be then I can crack on bending the tubes for the hardtail and get the mudguard mounted in place and welded up.
- 22 replies
-
- 10
-
-
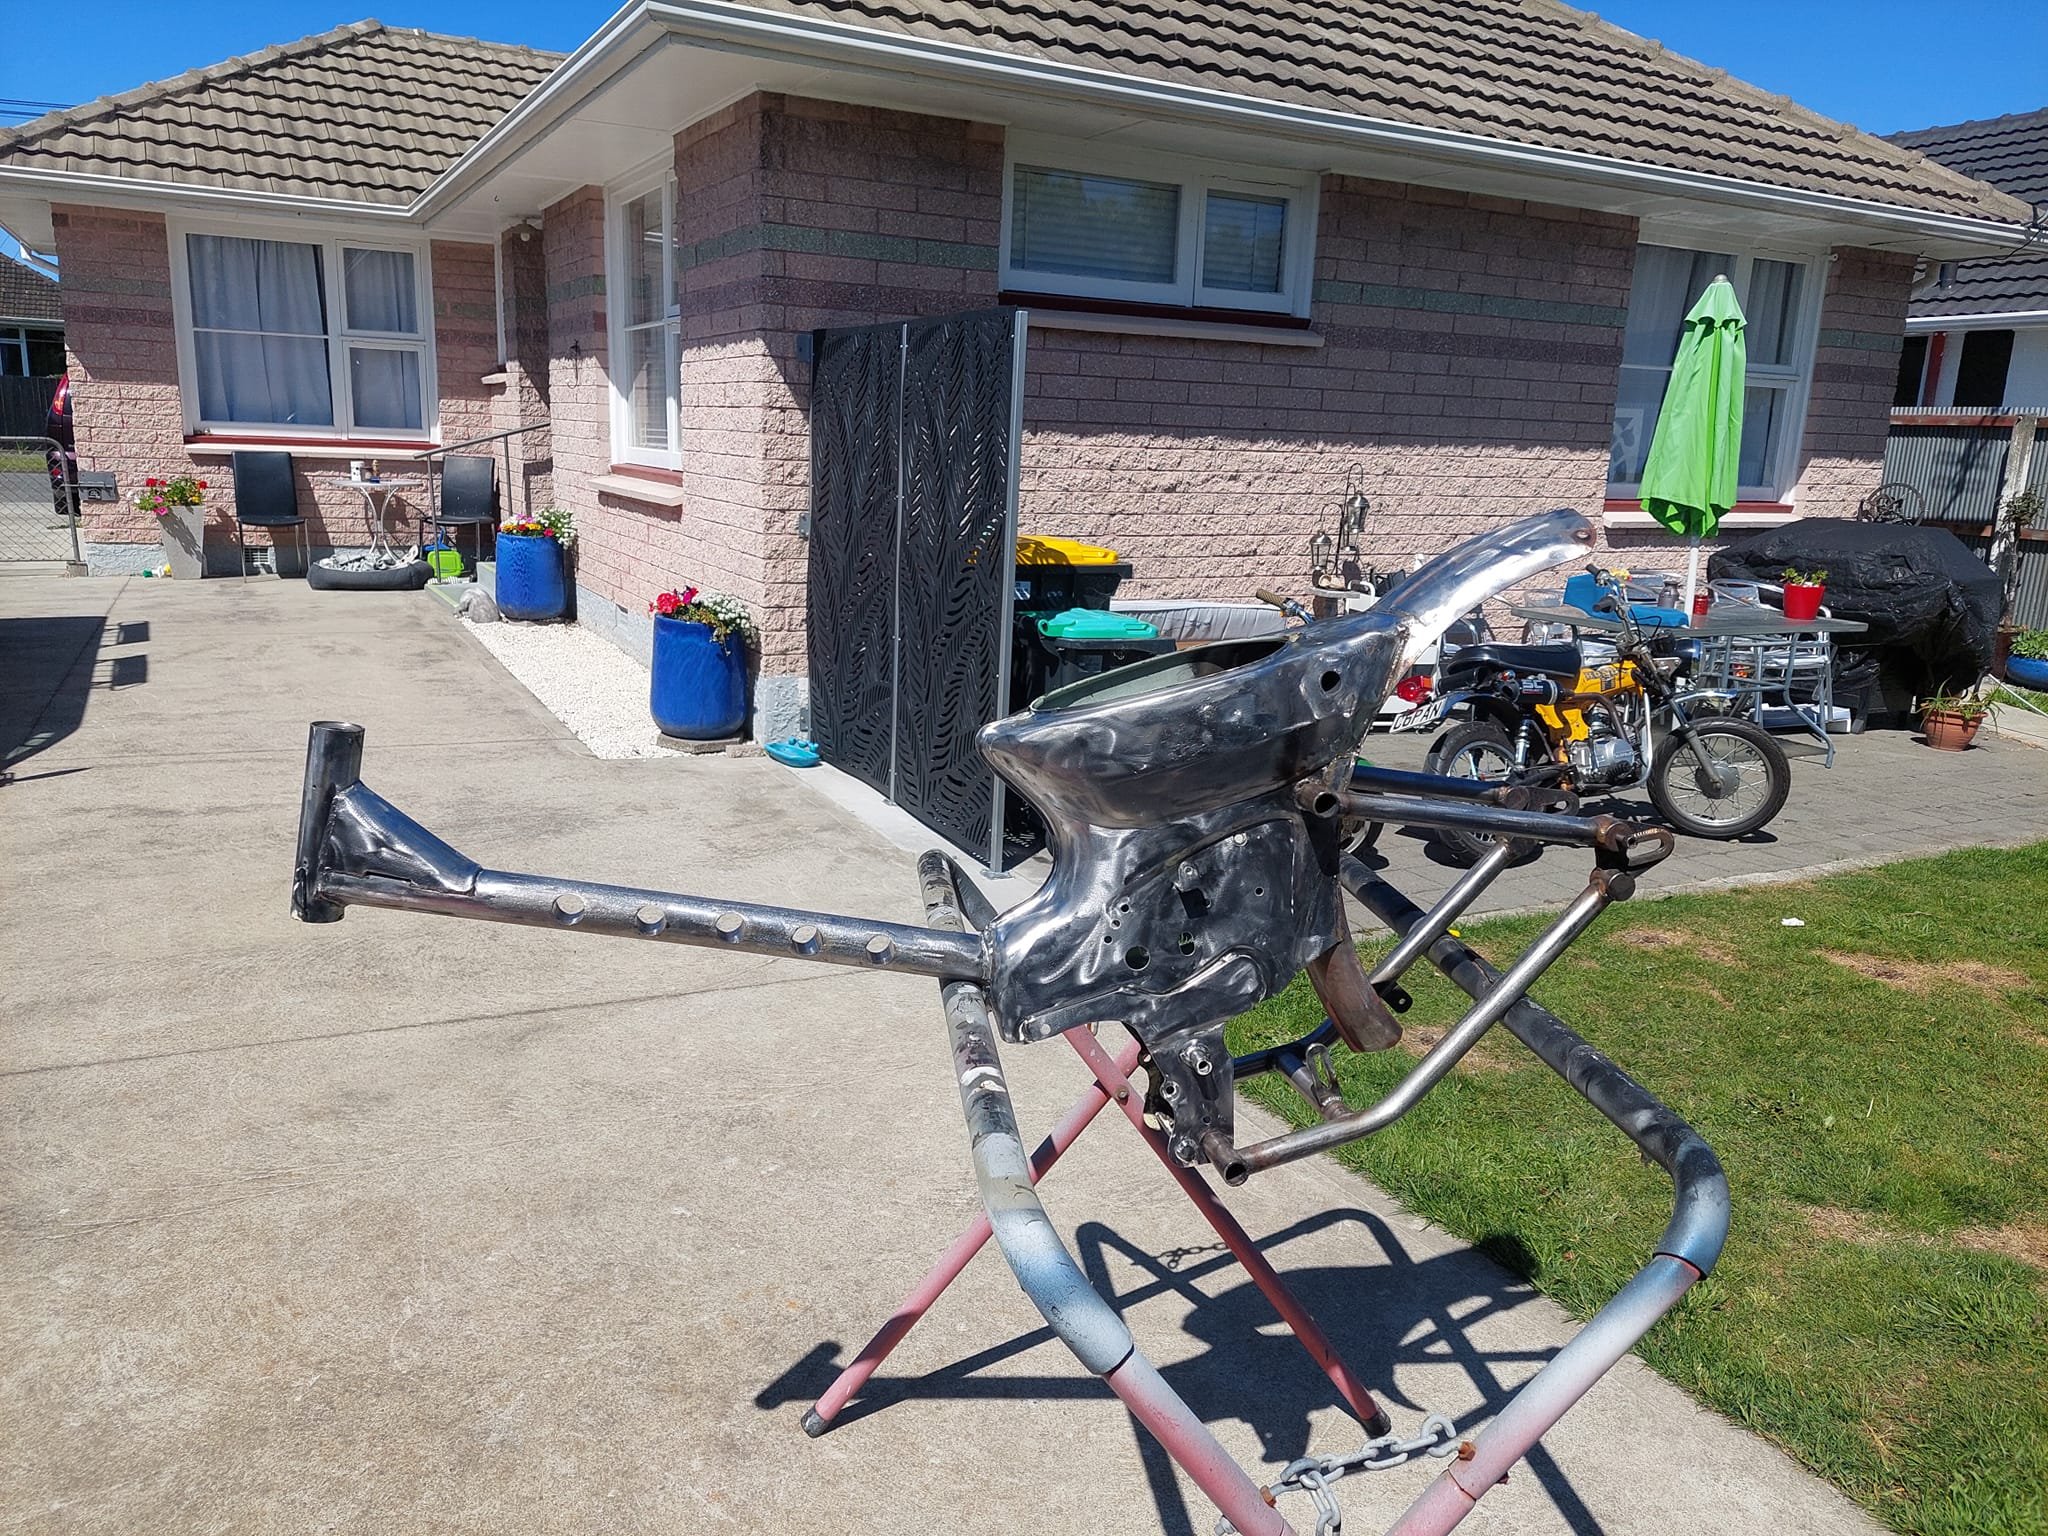
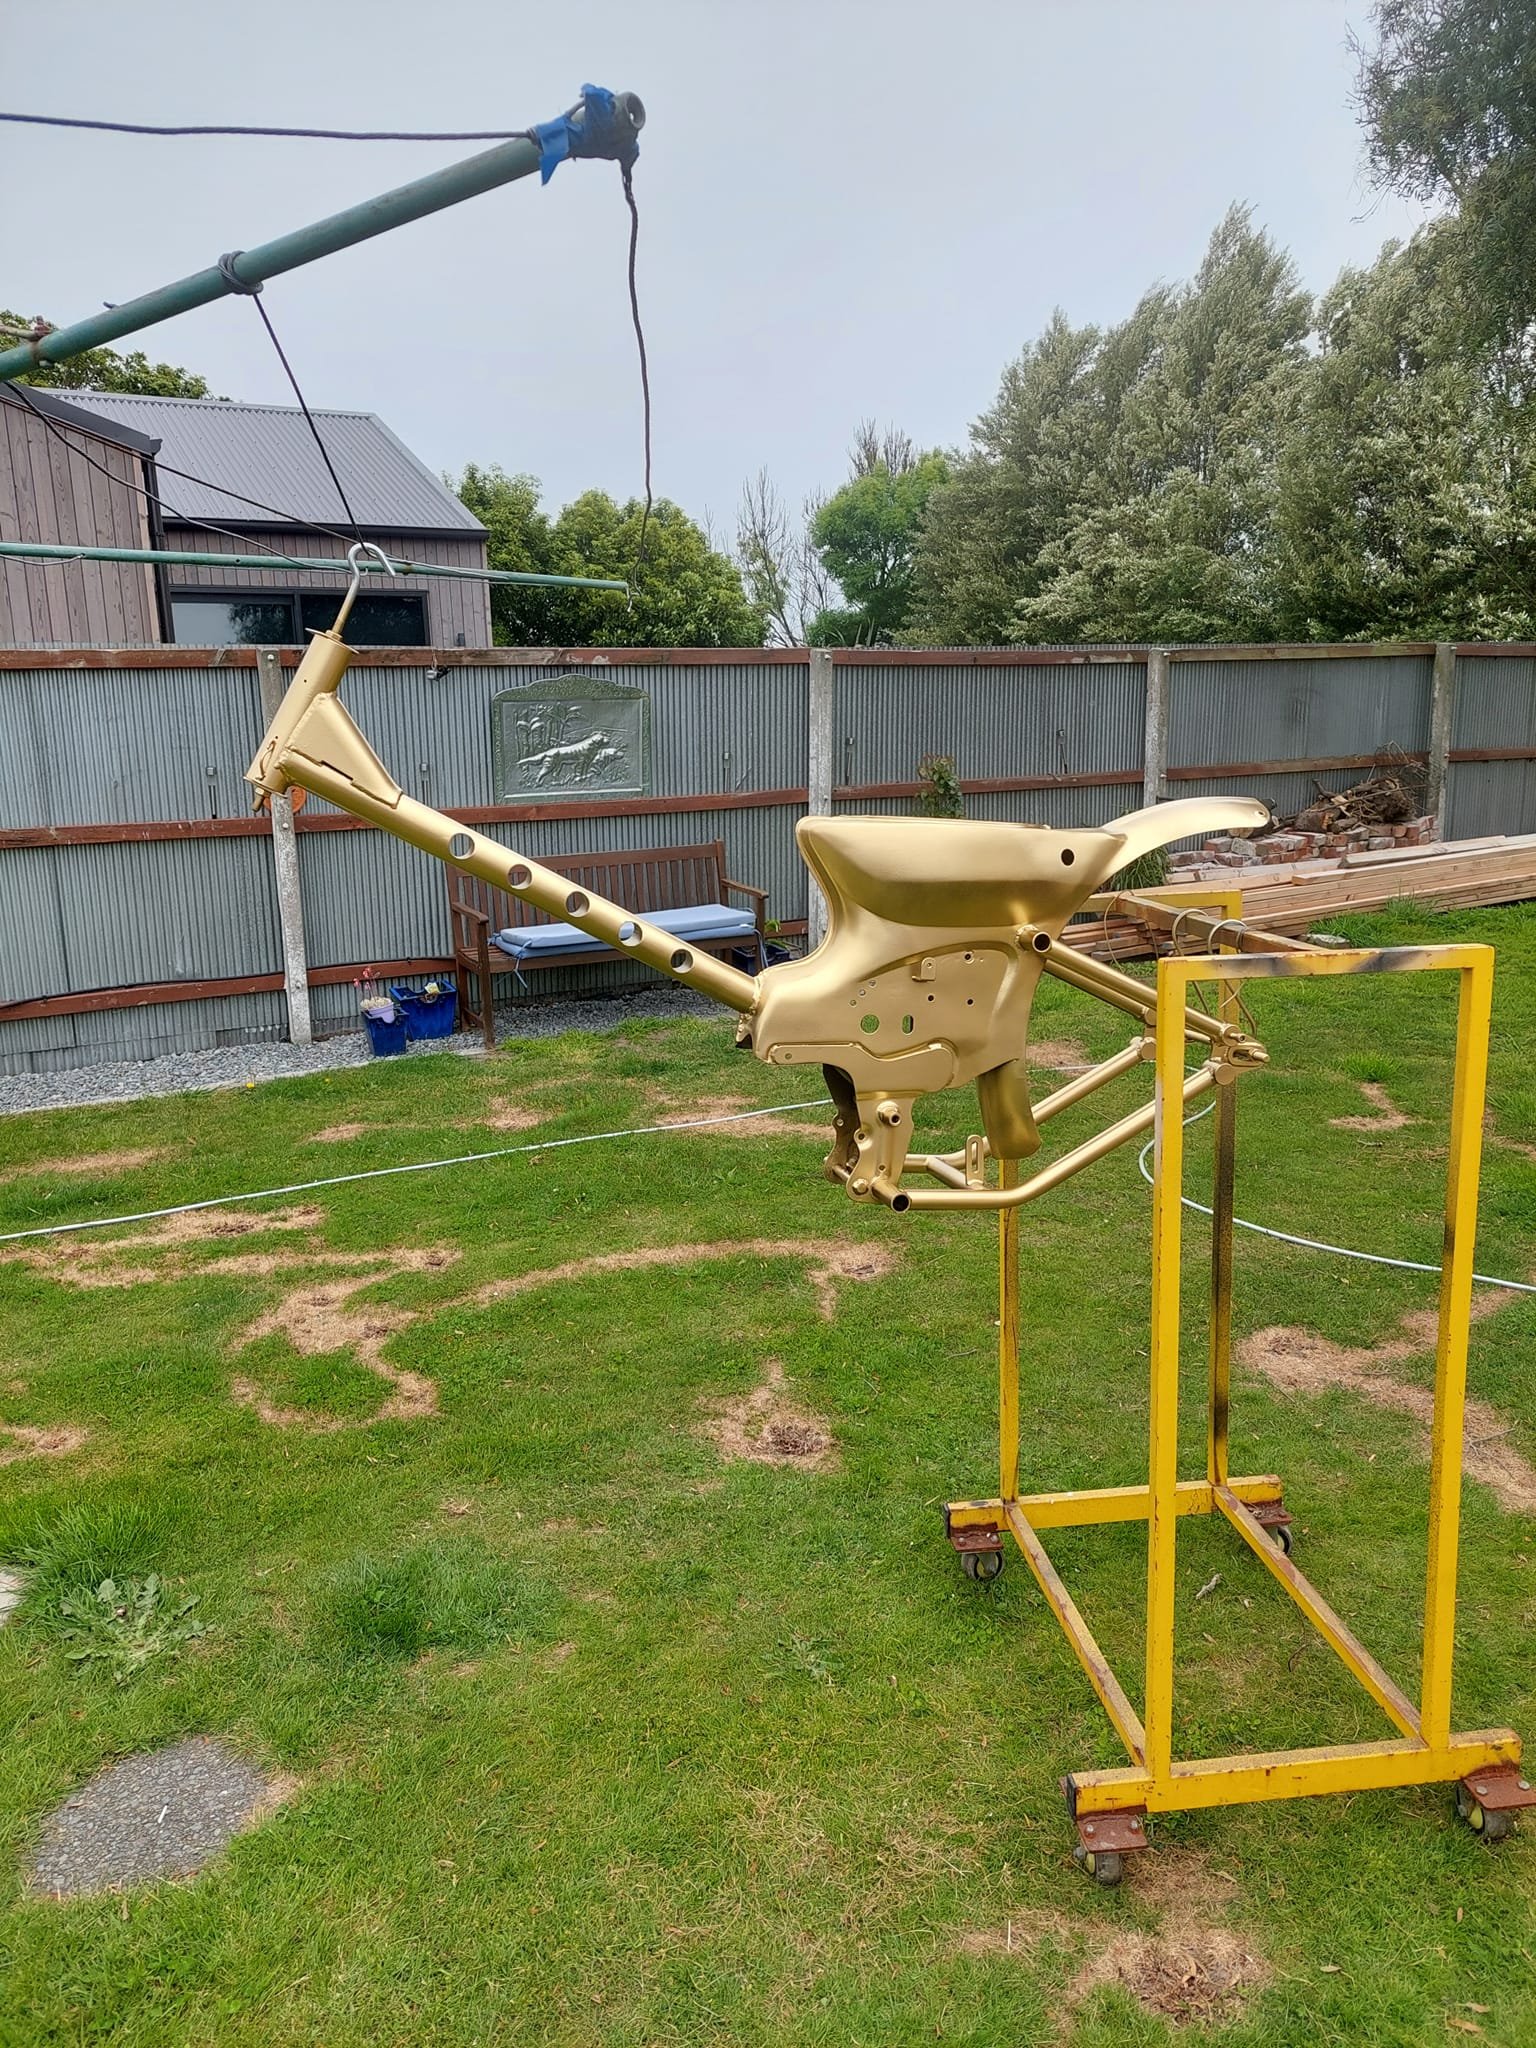
Some more progress with the frame. I've always been a fan of the Jesse James Sturgis special with the drilled downtube so i've basically copied that concept. I marked out where I want my holes and drilled a pilot hole first then blasted through with a 32mm holesaw. Inserted the tube and fully welded it. At this rate I'm getting about 1 hole drilled each night as I'm trying not to fuck the neighbors off too much. There'll be a total of 5 holes spaced 75mm apart. I'm debating whether to call the bike Glory Hole from now on?.....
- 22 replies
-
- 10
-
-
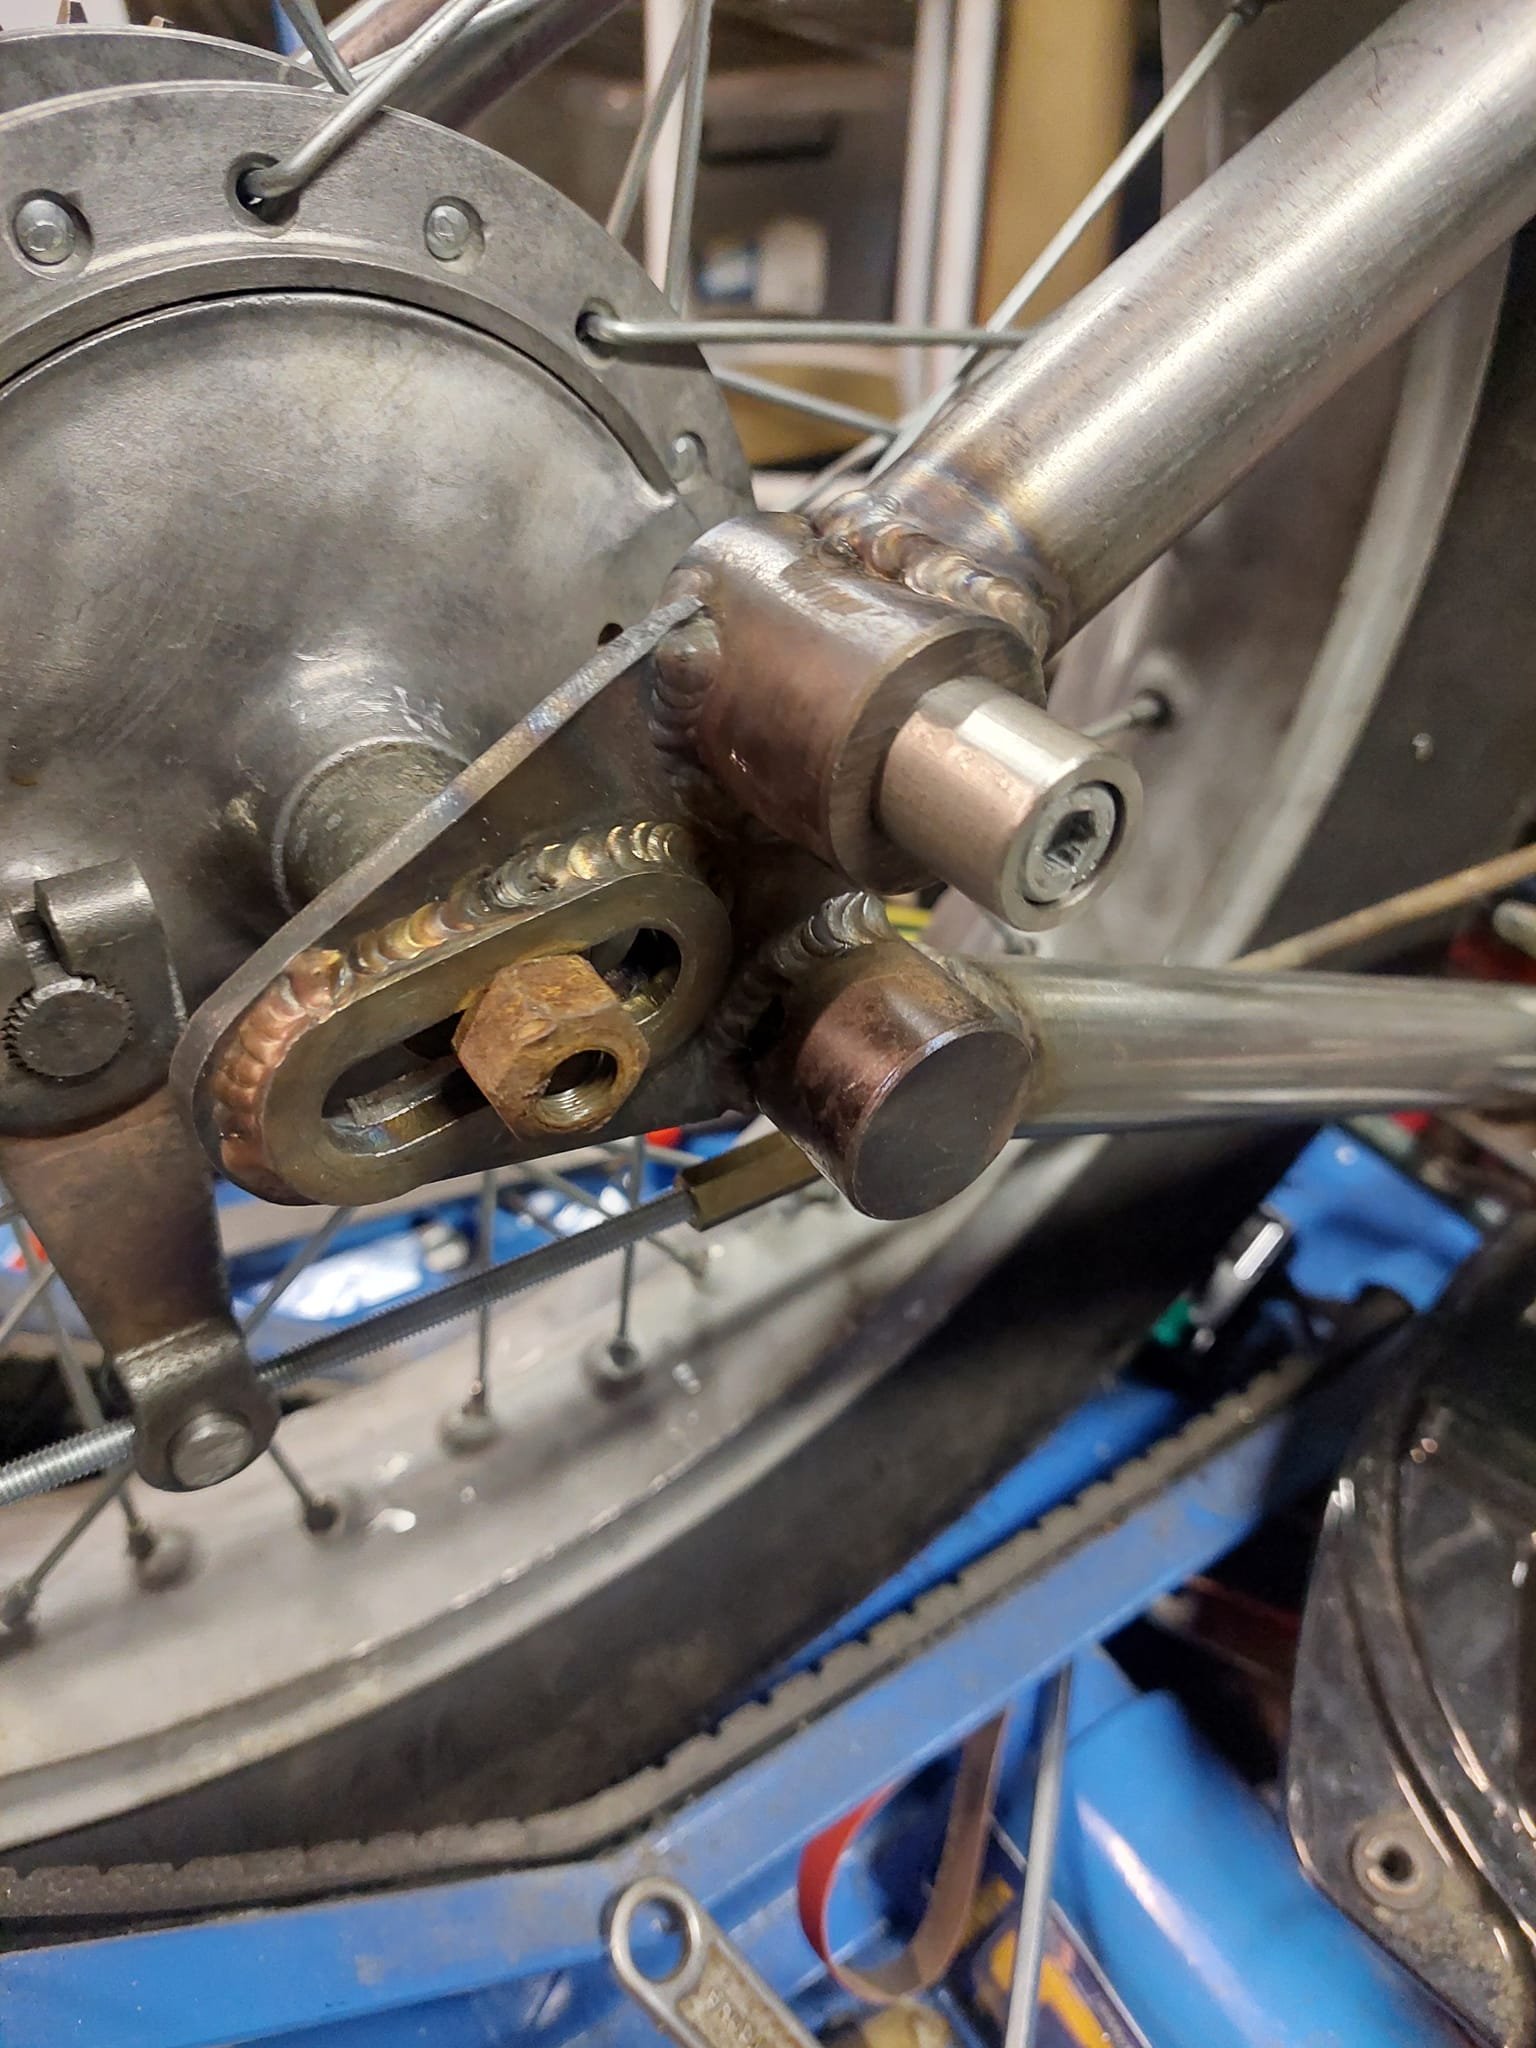
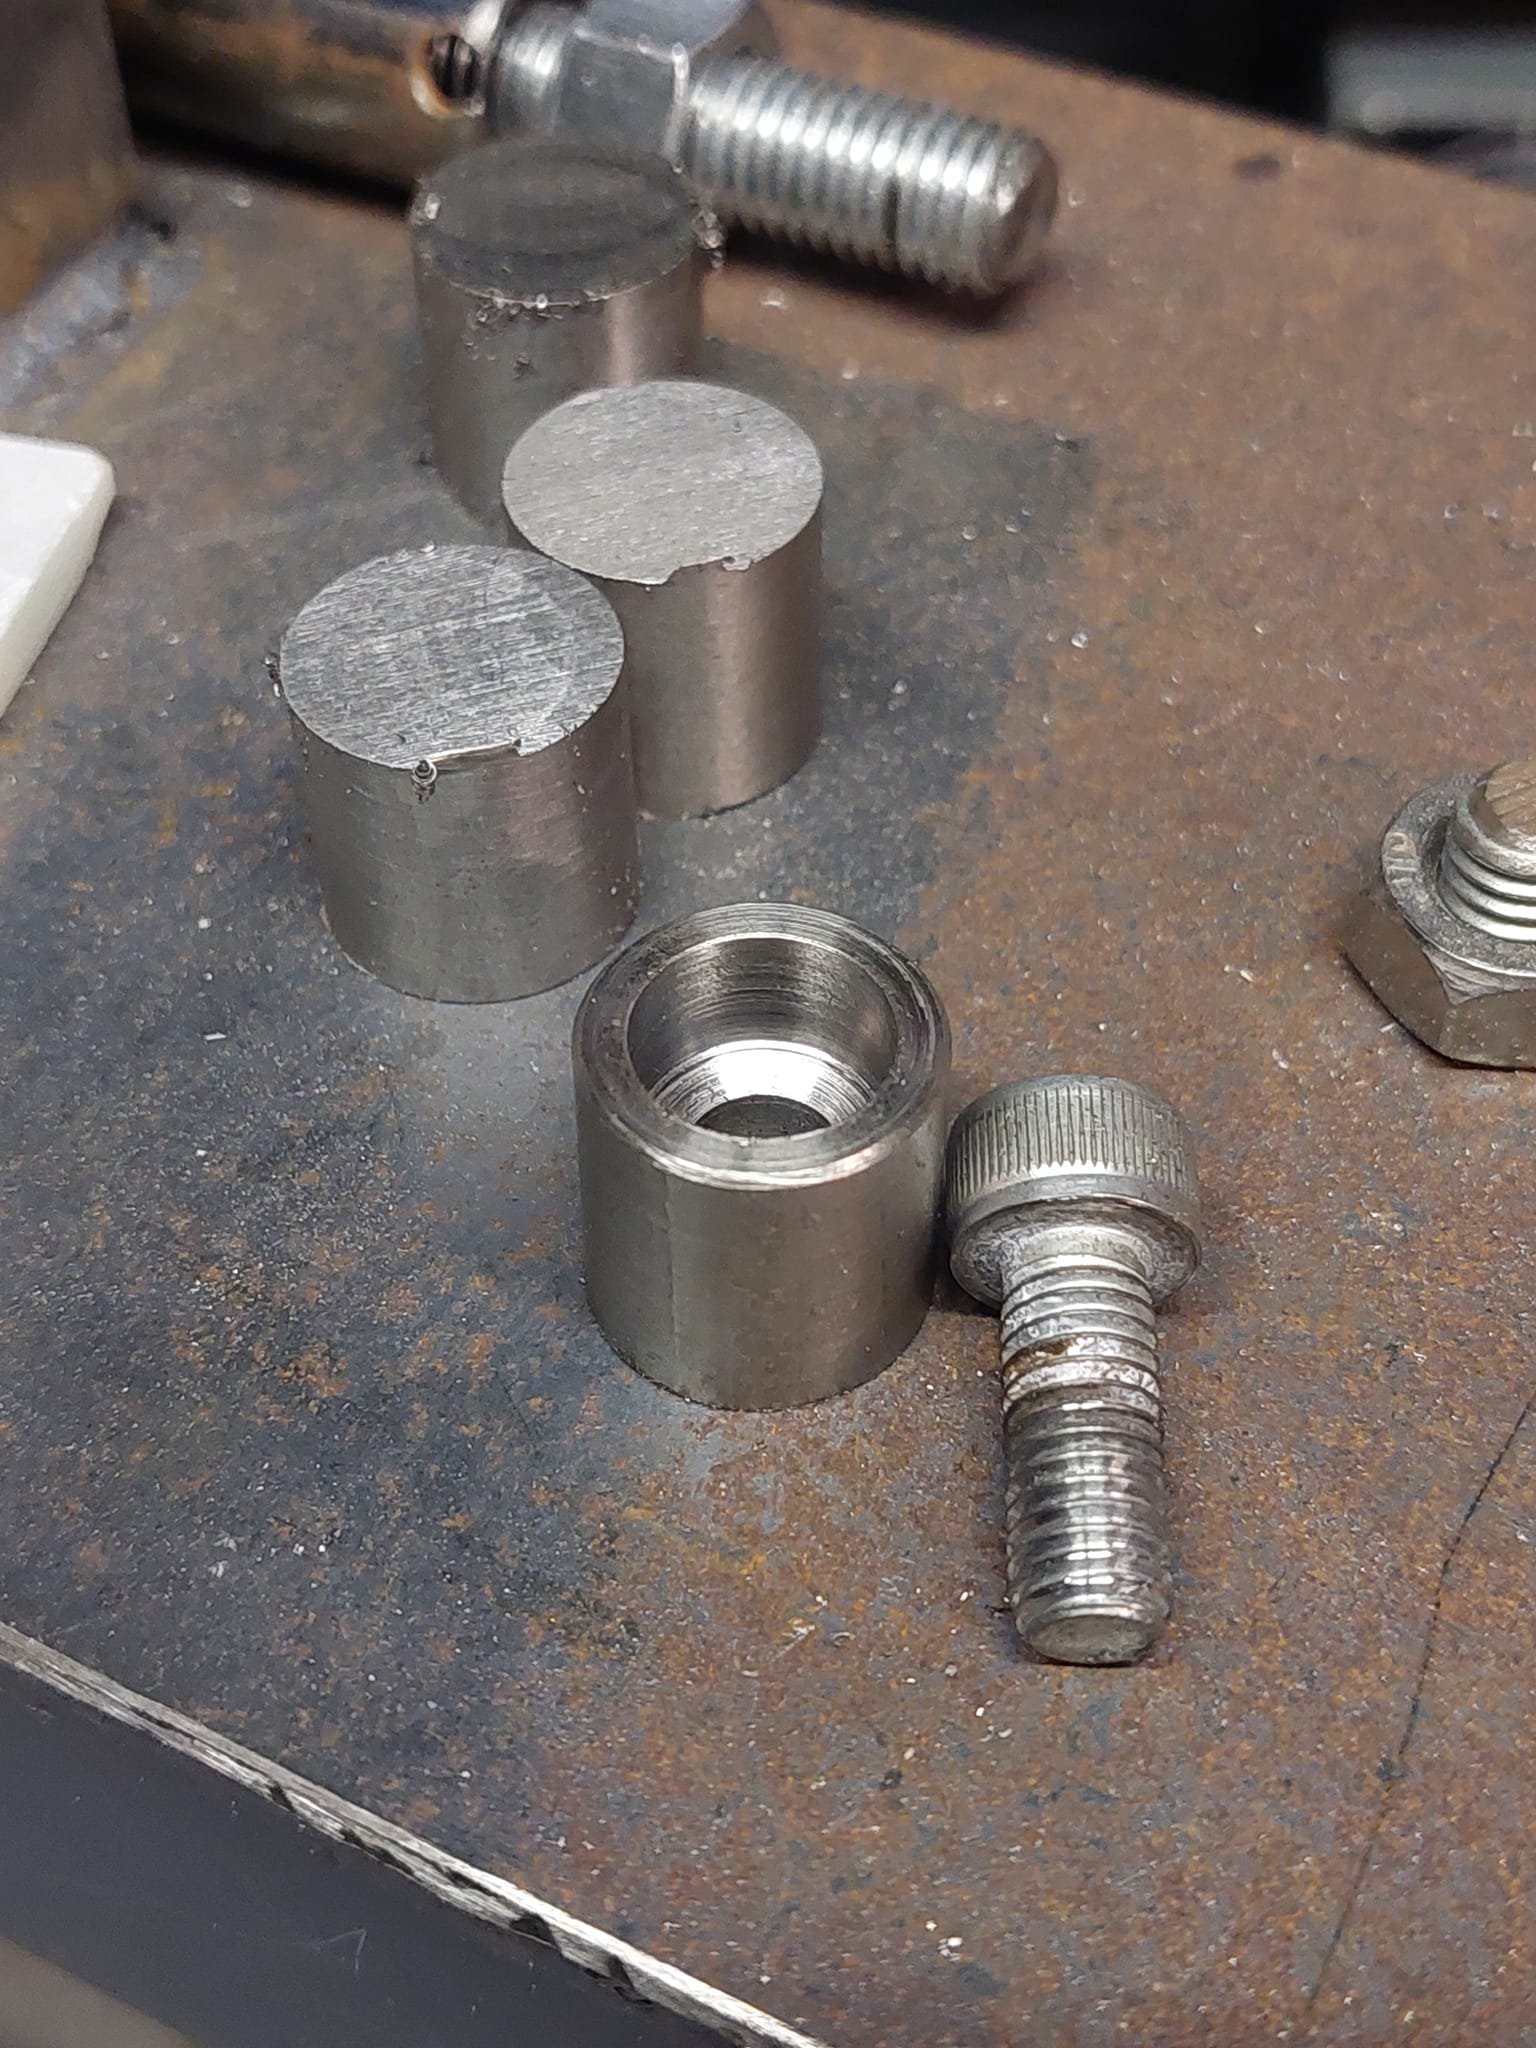
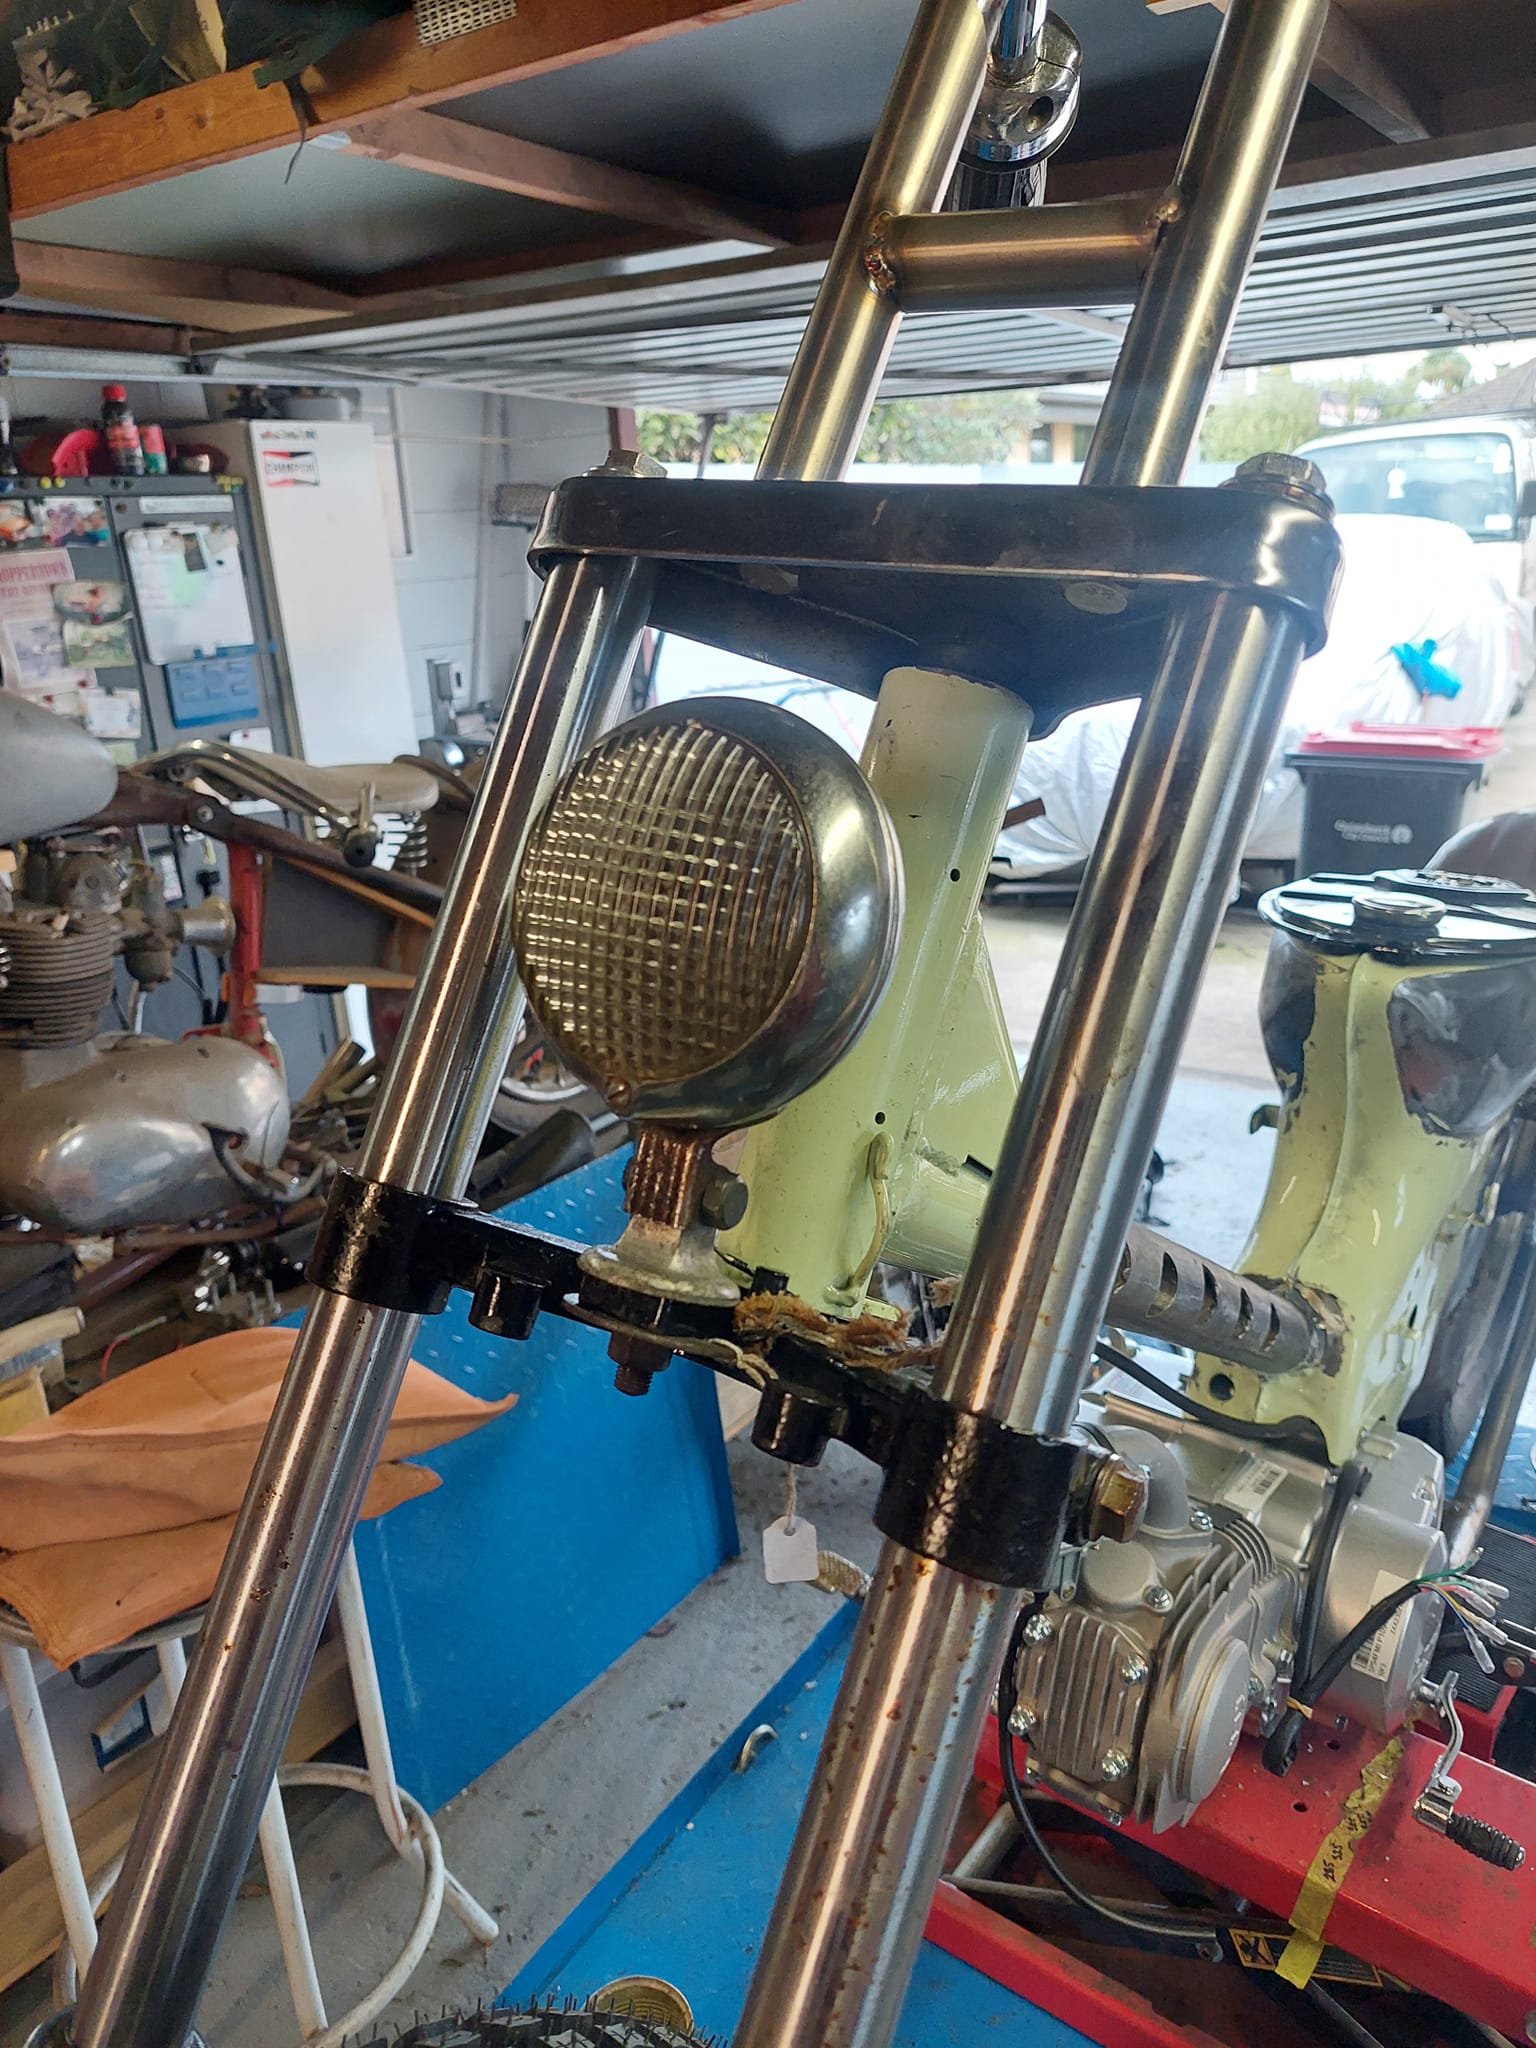
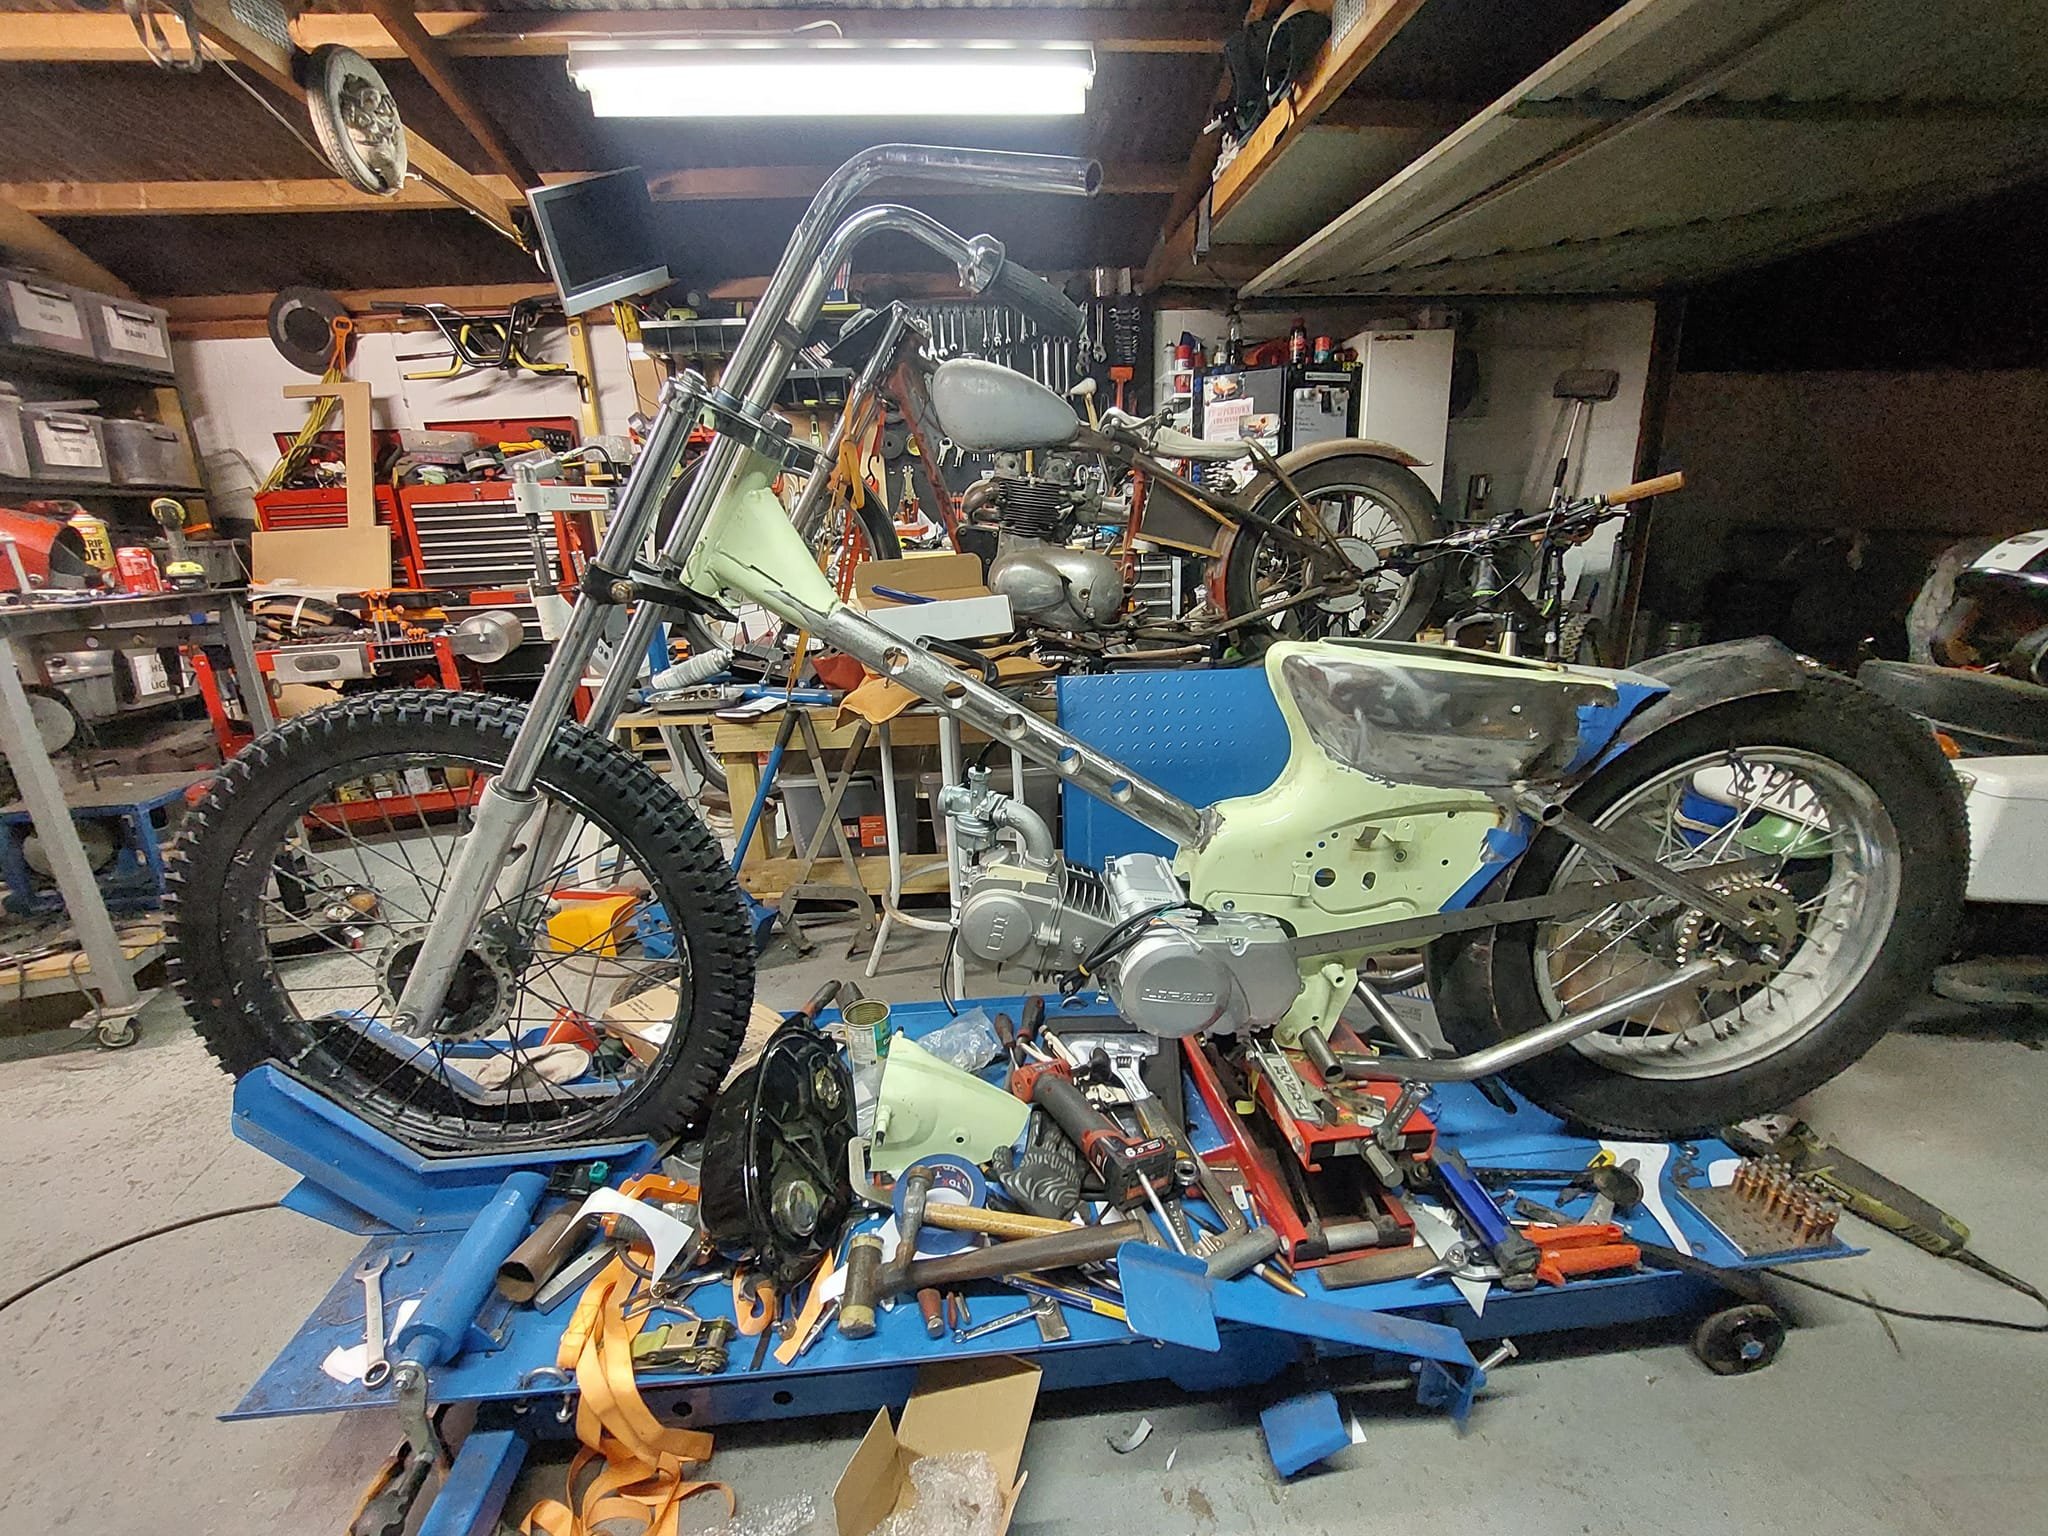
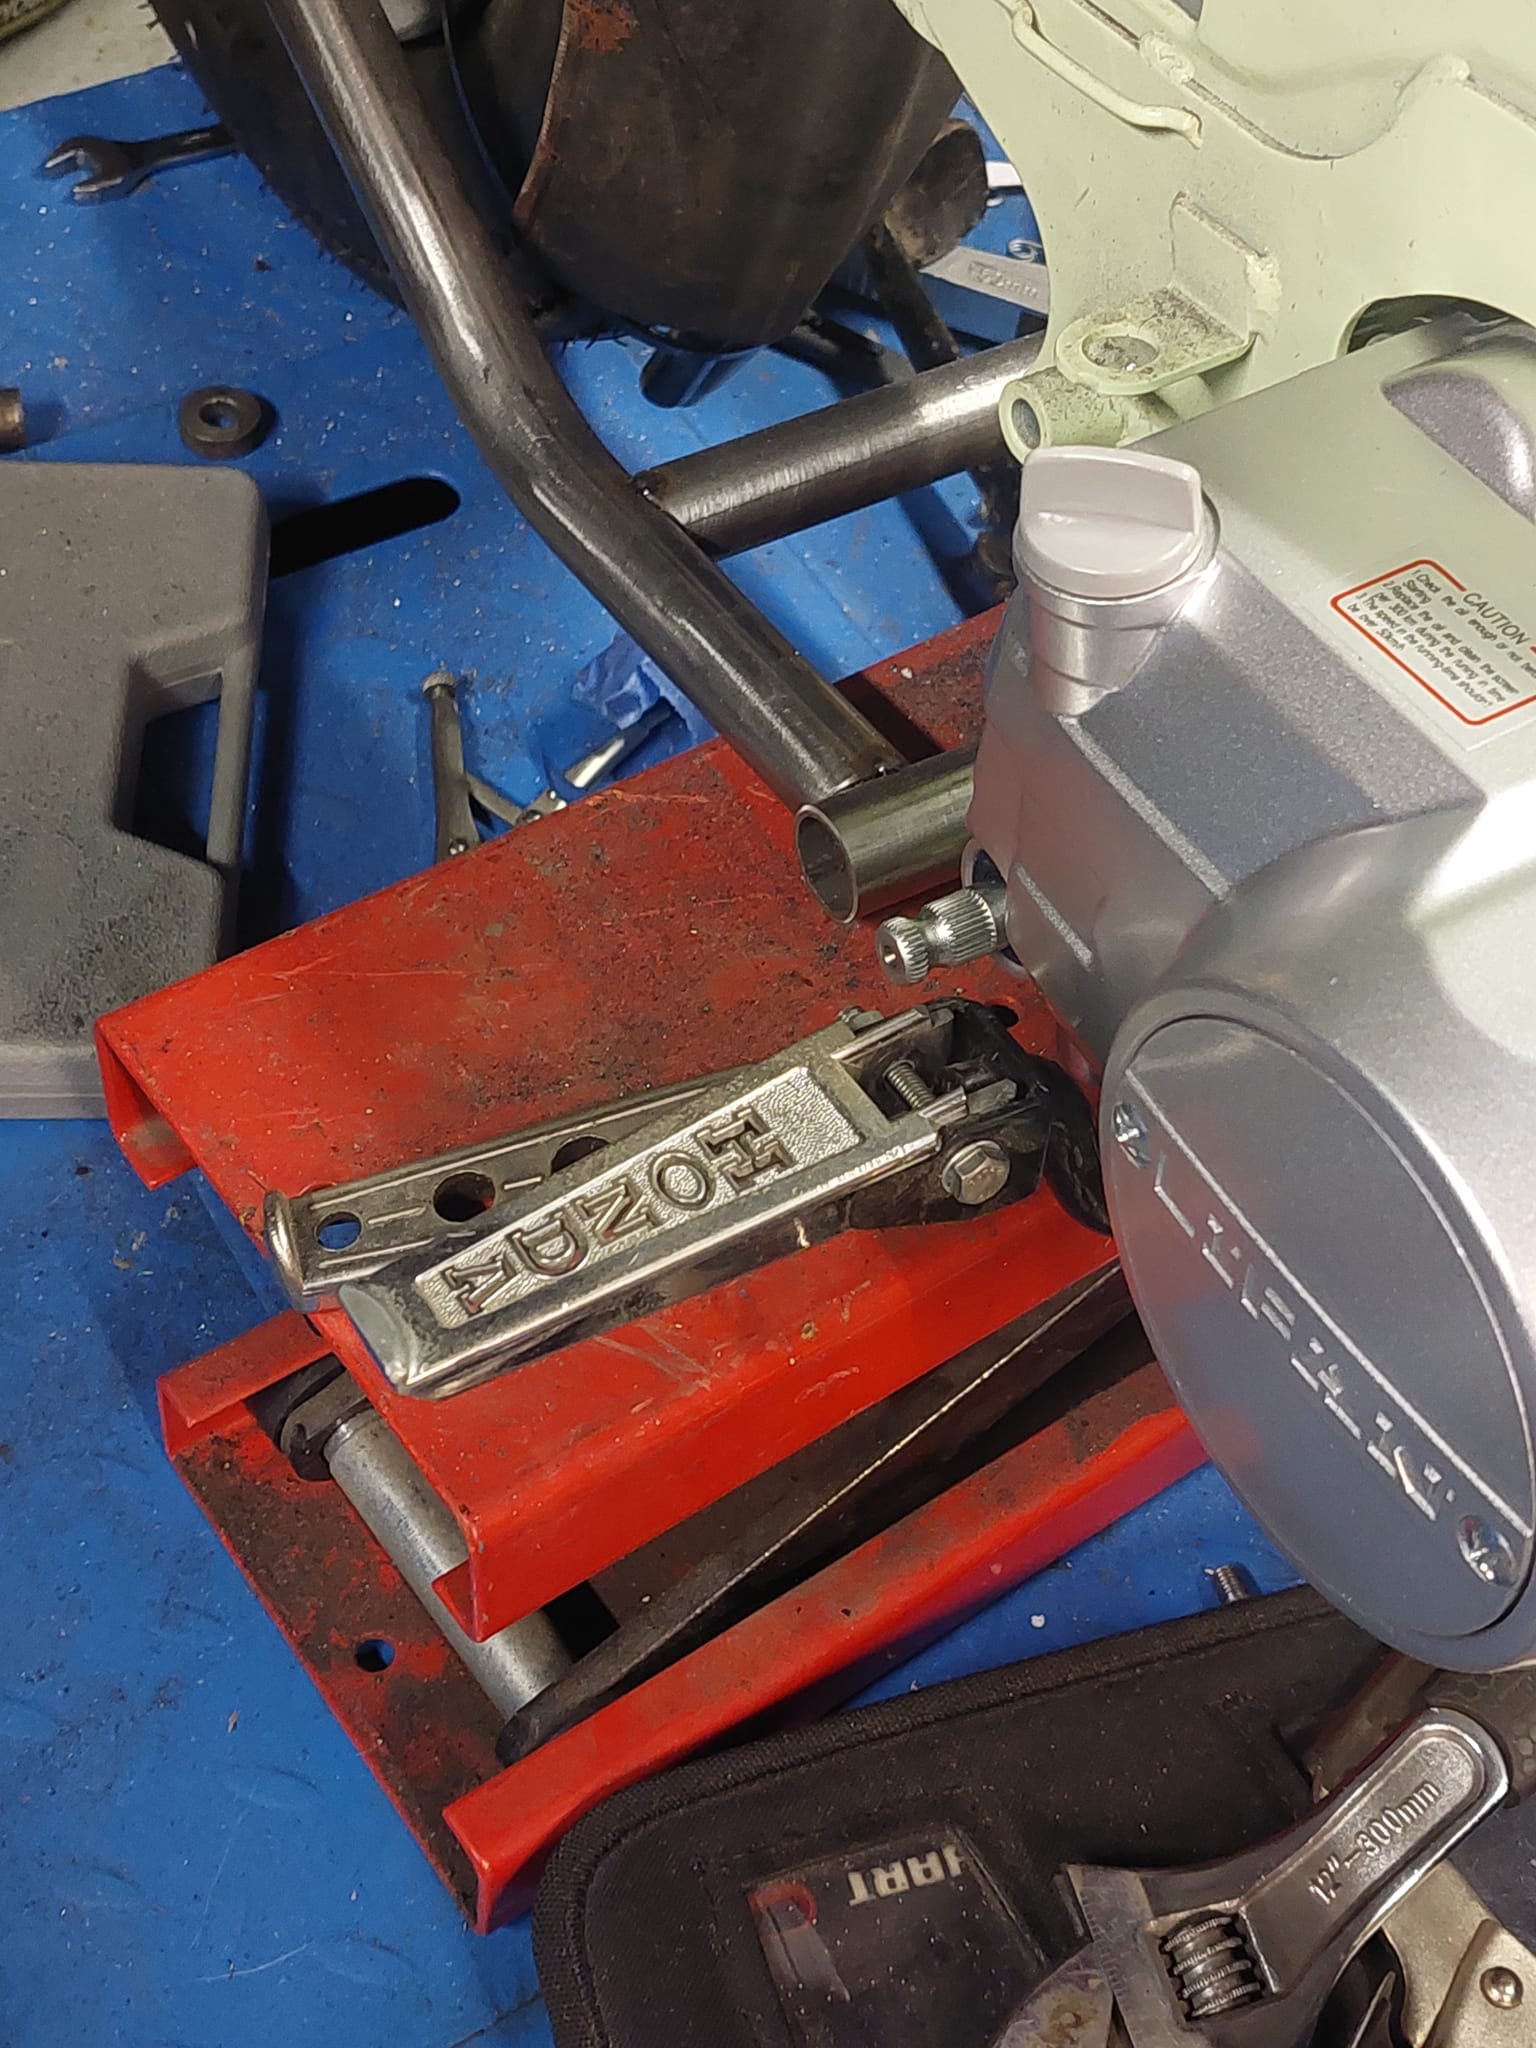
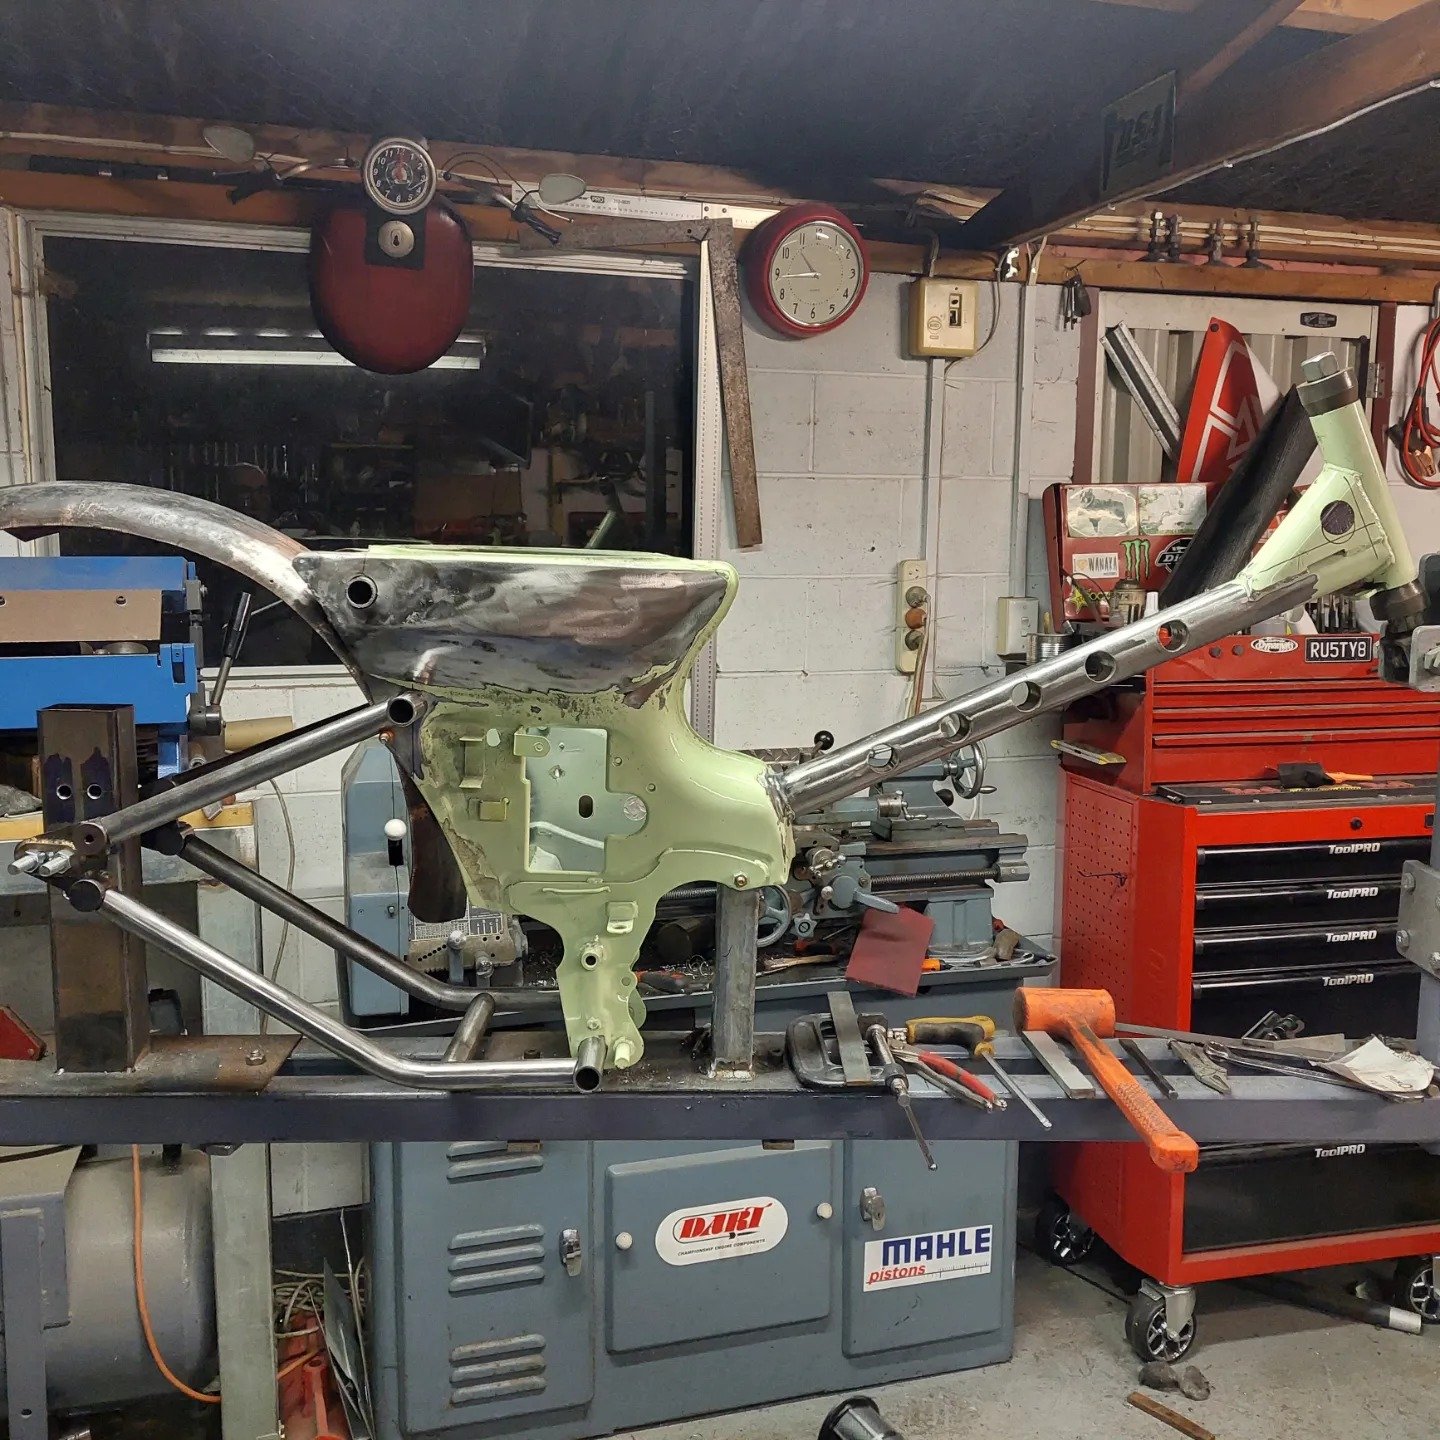
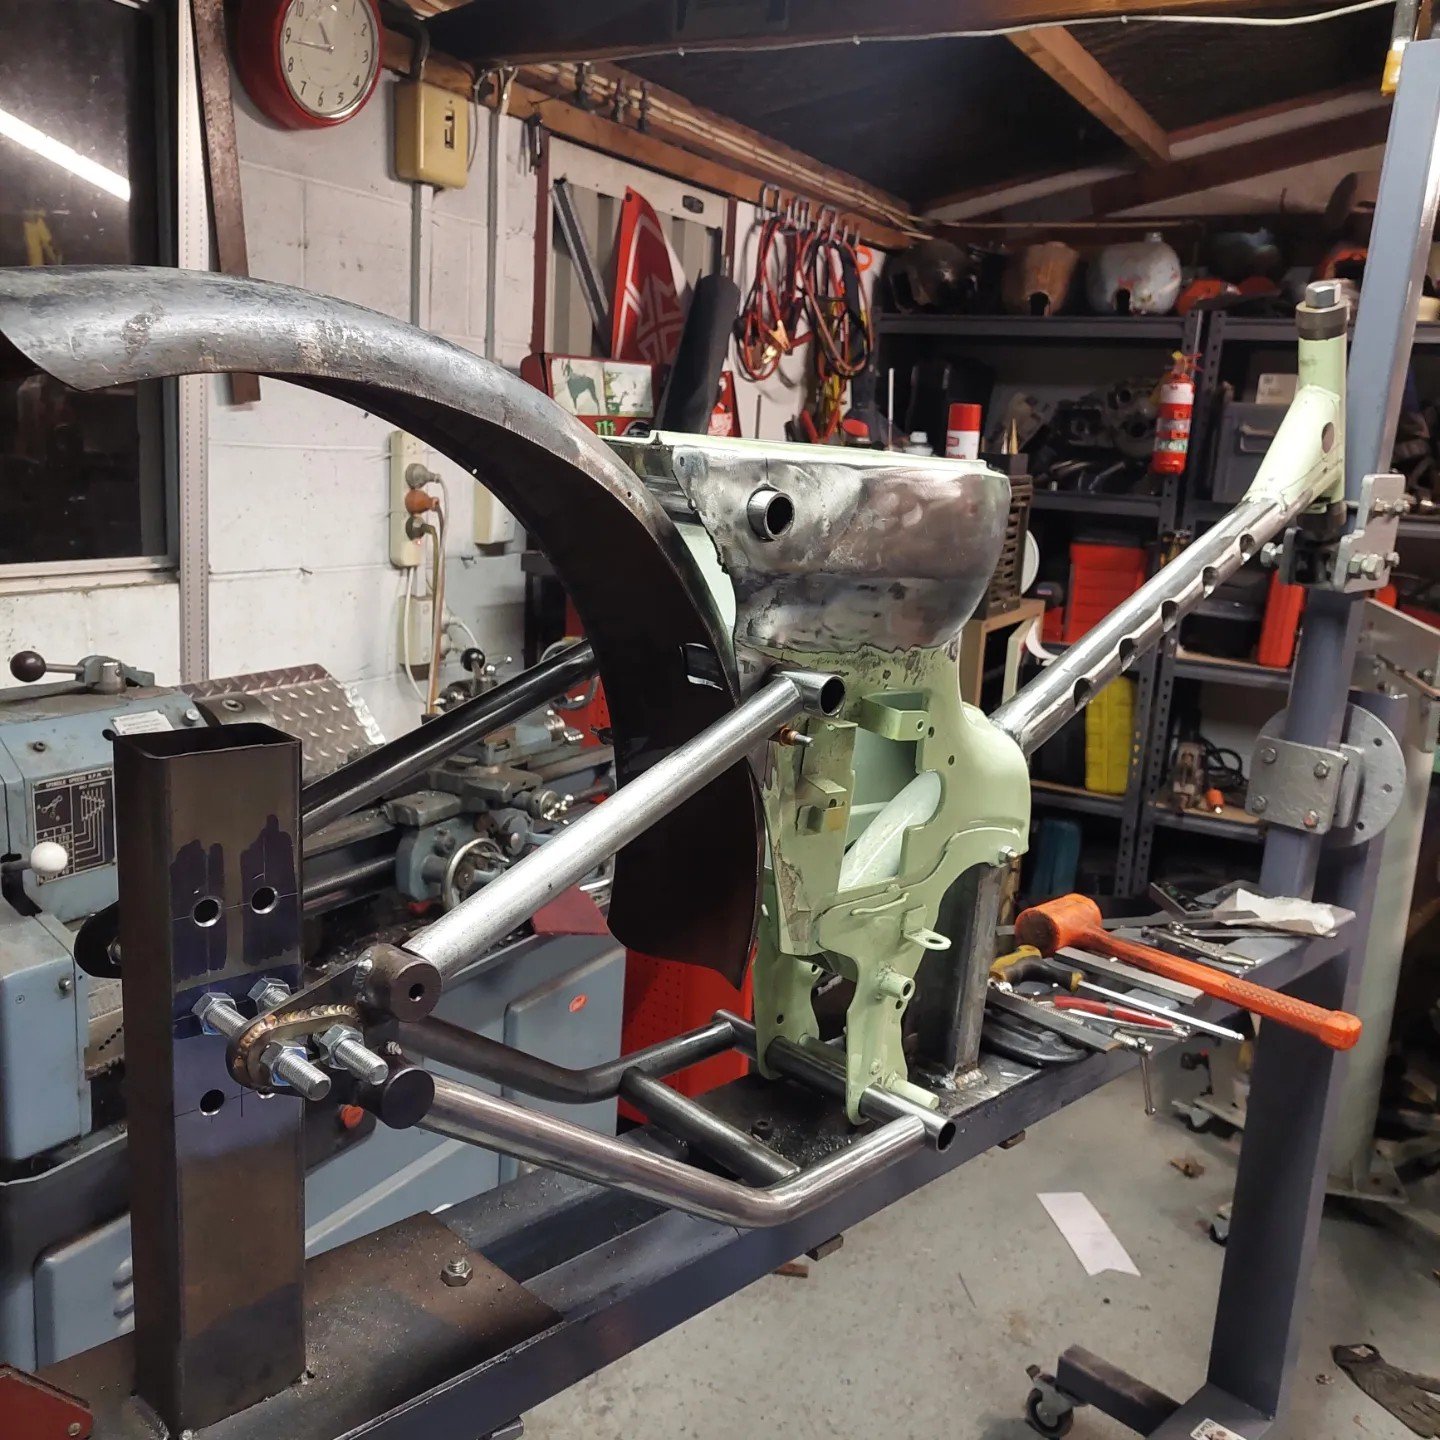
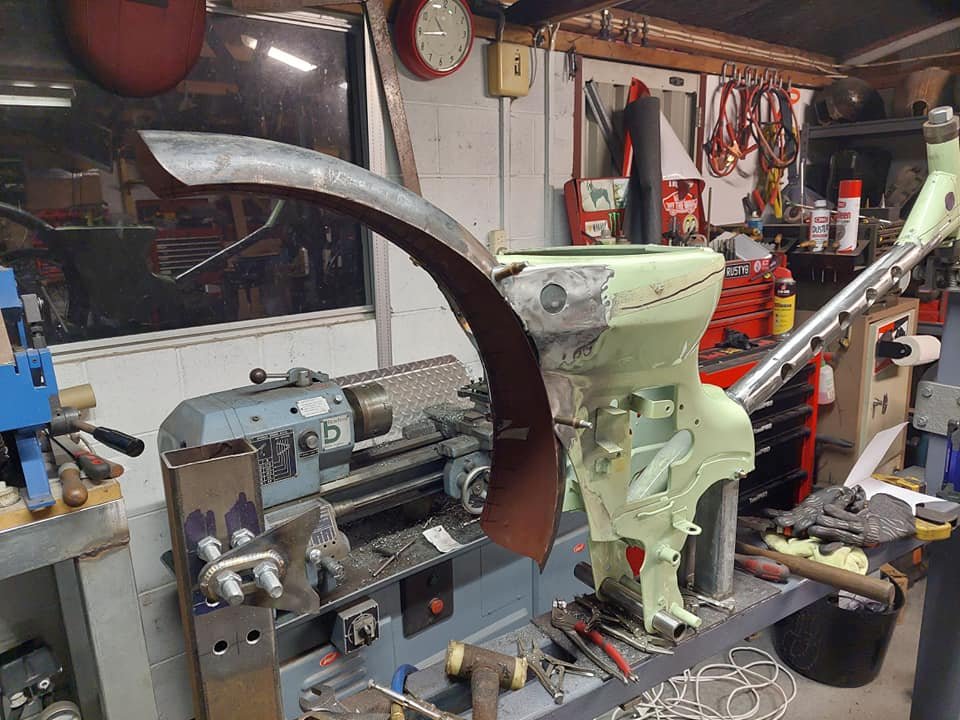
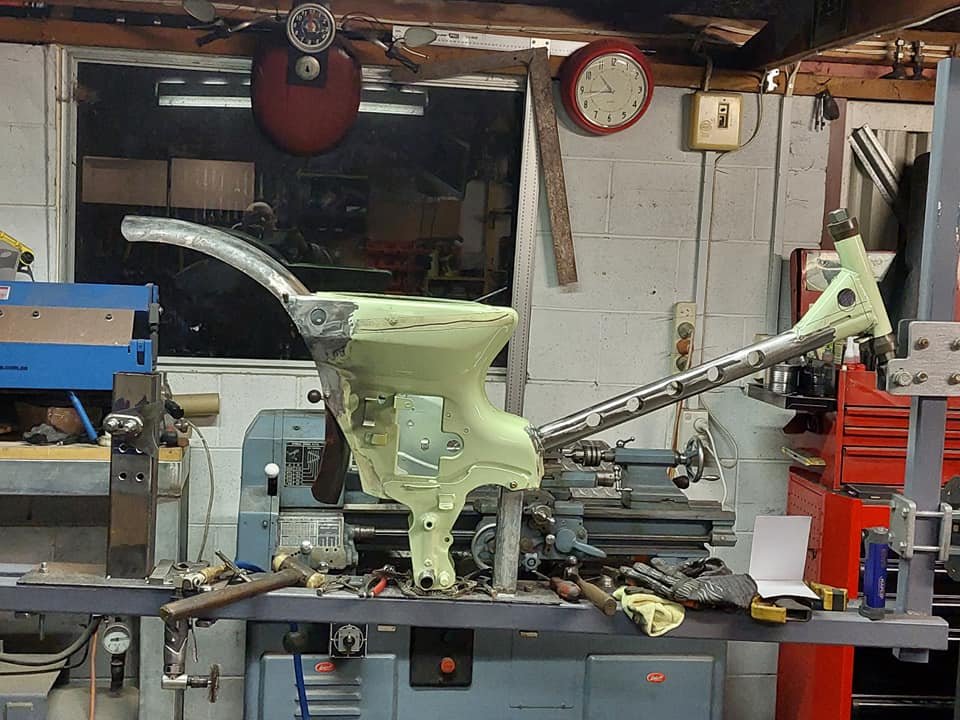
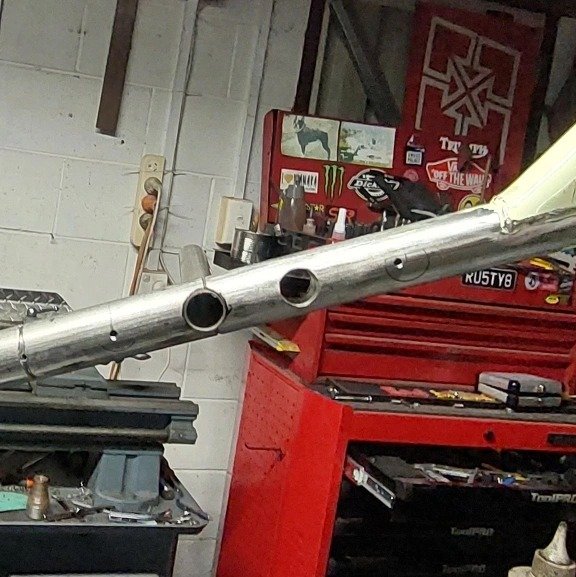
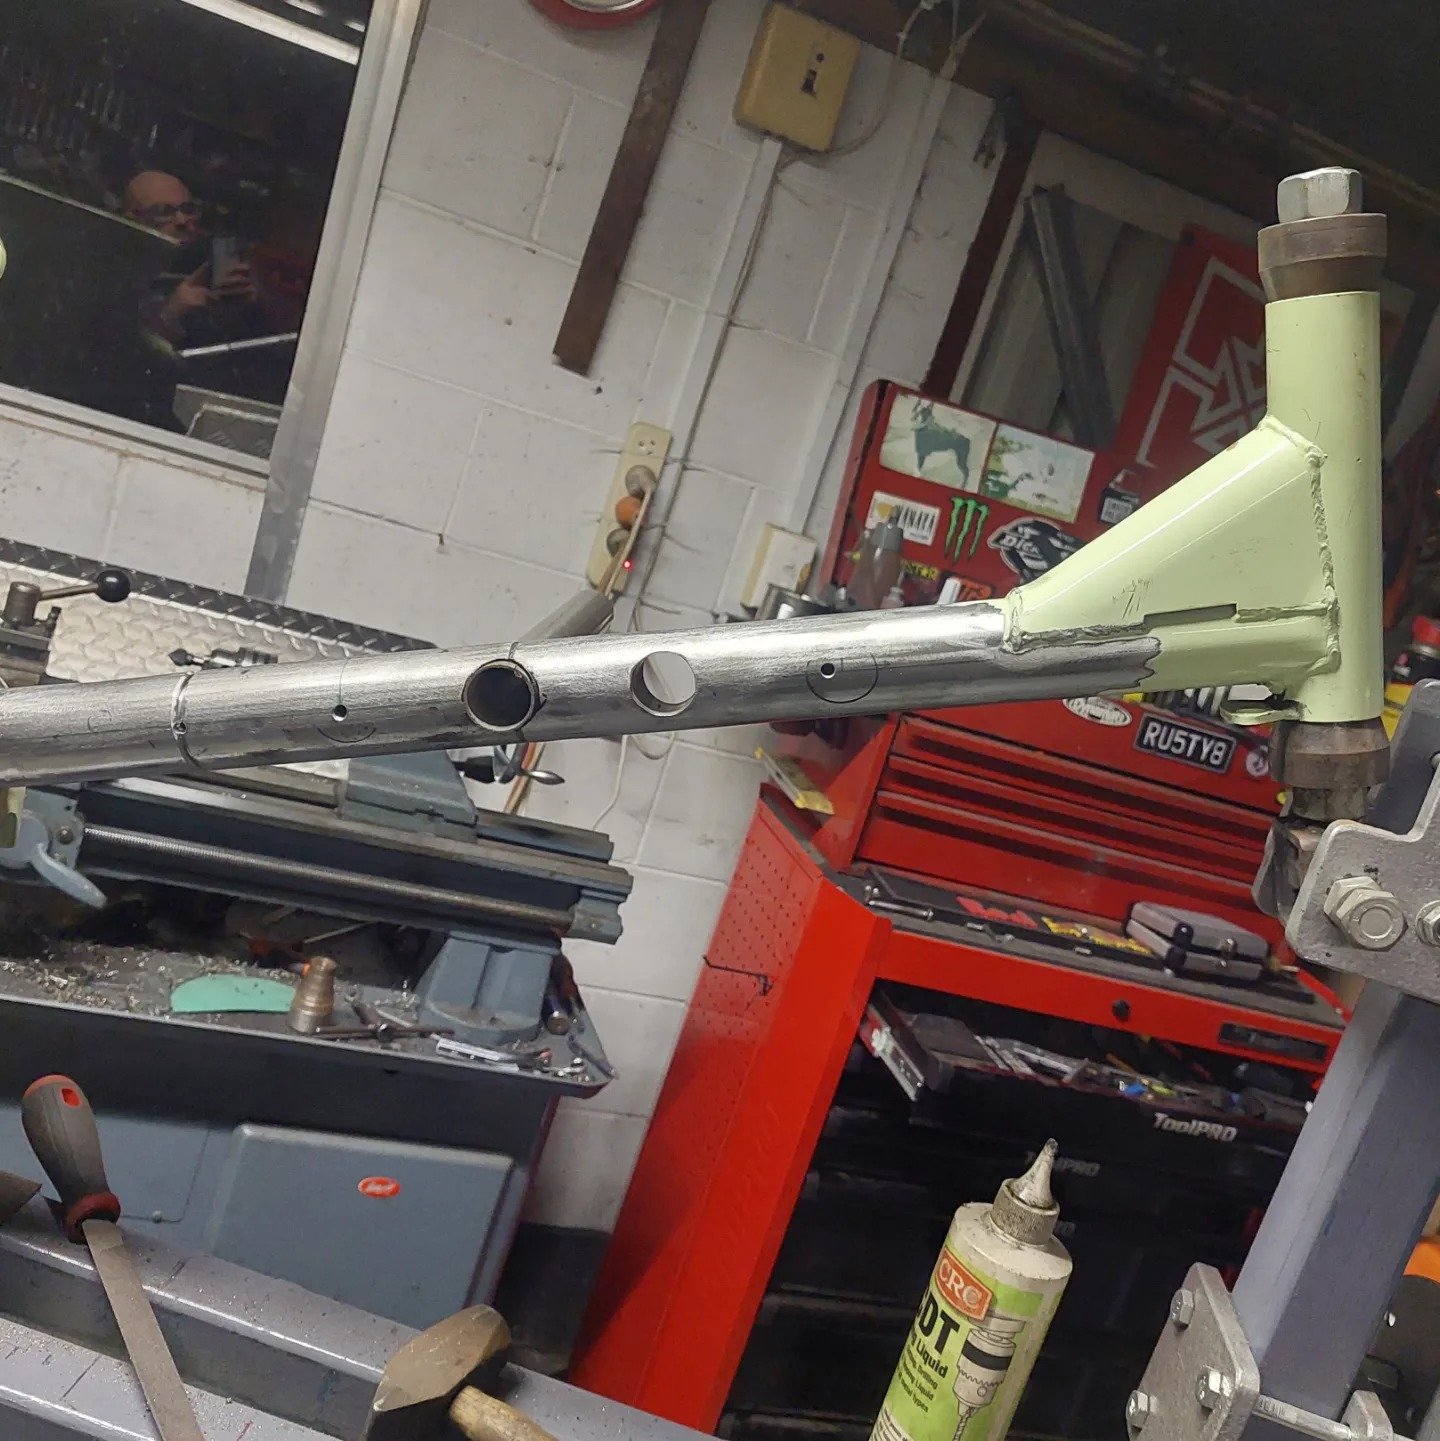
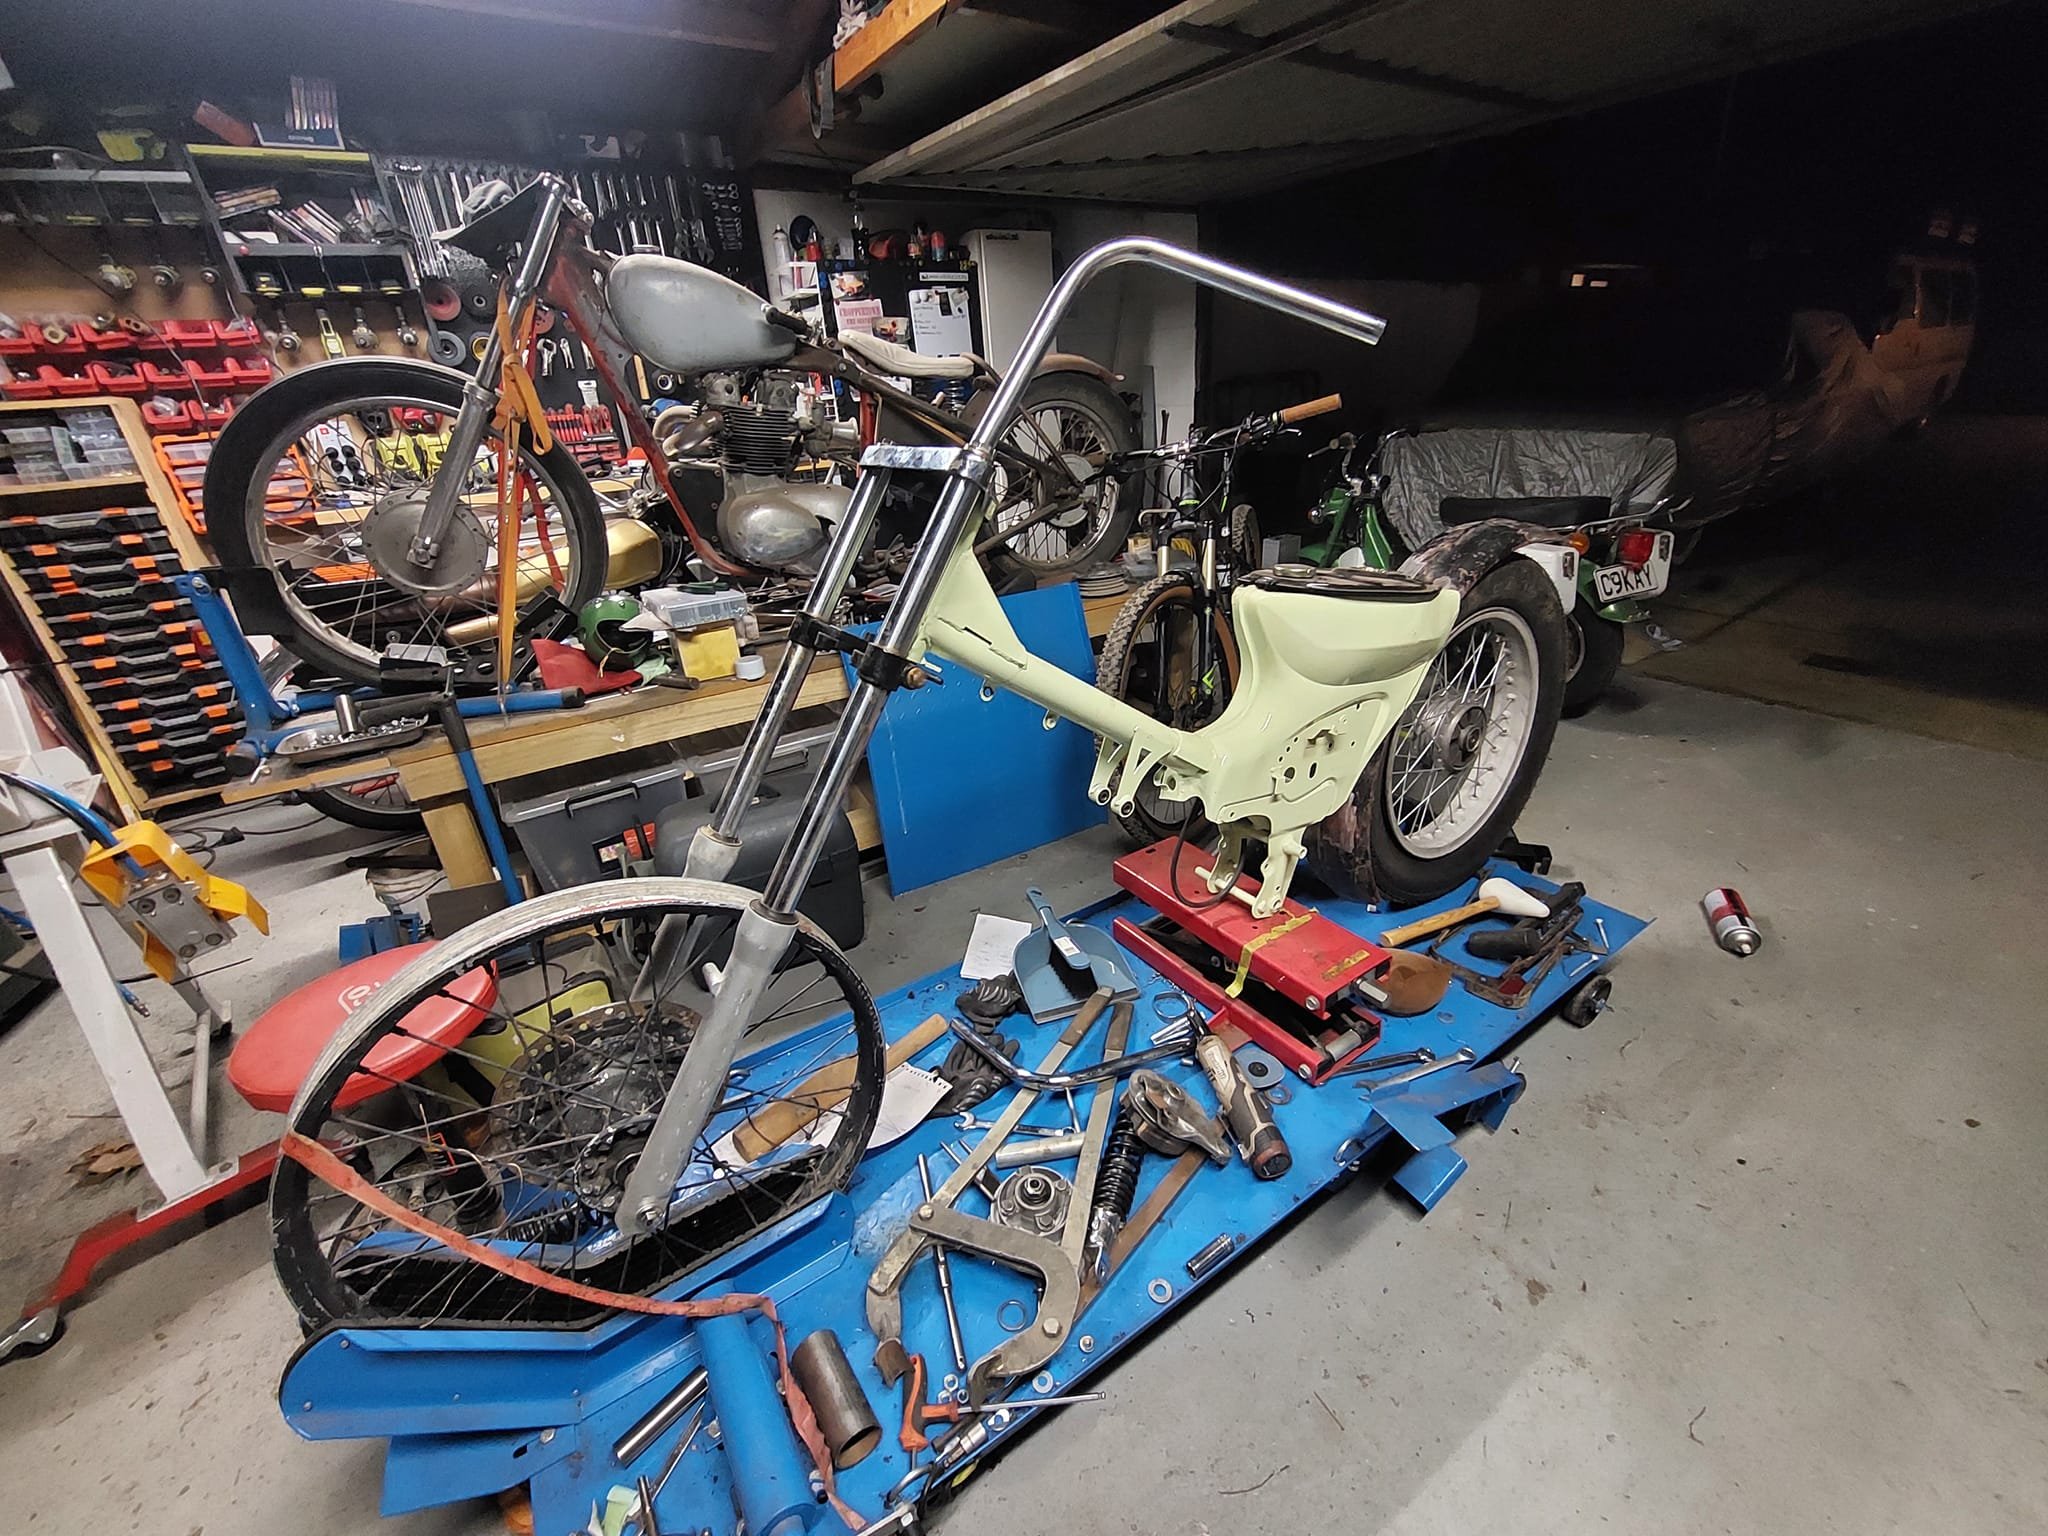
So I picked up another project cos it was a great deal and came with all the right parts for the base of a new build. A mate of mine was selling as a bundle and threw in some more parts for extra $$. Its an mBike chonda deluxe frame thats already been cut by my mate. The style I'm going for is the Indonesian choppy cub I'll be hardtailing the rear and stretching the front by 150mm. Luckily for me the downtube is the same OD as some steam pipe i have, so I'll make some slugs and splice the frame and steam pipe together. But before that I thought I'd mock up some parts to get the overall look of the bike. I knew I wanted rabbit ear bars for the bike so I took a pair of really ugly bars with quite a tall rise and cut them just before the bend at the bottom where they clamp and then sleeved and braced them with some 1 inch stainless tube. the 7/8 part is left loose until I figure out the position I like. I then mounted the frame in my jig and cut the frame and inserted the 150mm extension and slugs. Its held in place with plug welds until I get it fully welded up. Having a frame jig that rotates makes life so much easier!
- 22 replies
-
- 20
-
-
Awesome, thanks mate
-
Does anyone know of a windscreen fitter that does cashies? It's bonded in, doesn't have a rubber seal. The rear screen is already out and the body will be rust treated and painted prior to being installed. The cars a vauxhall viscount. Cheers, Gaz
-
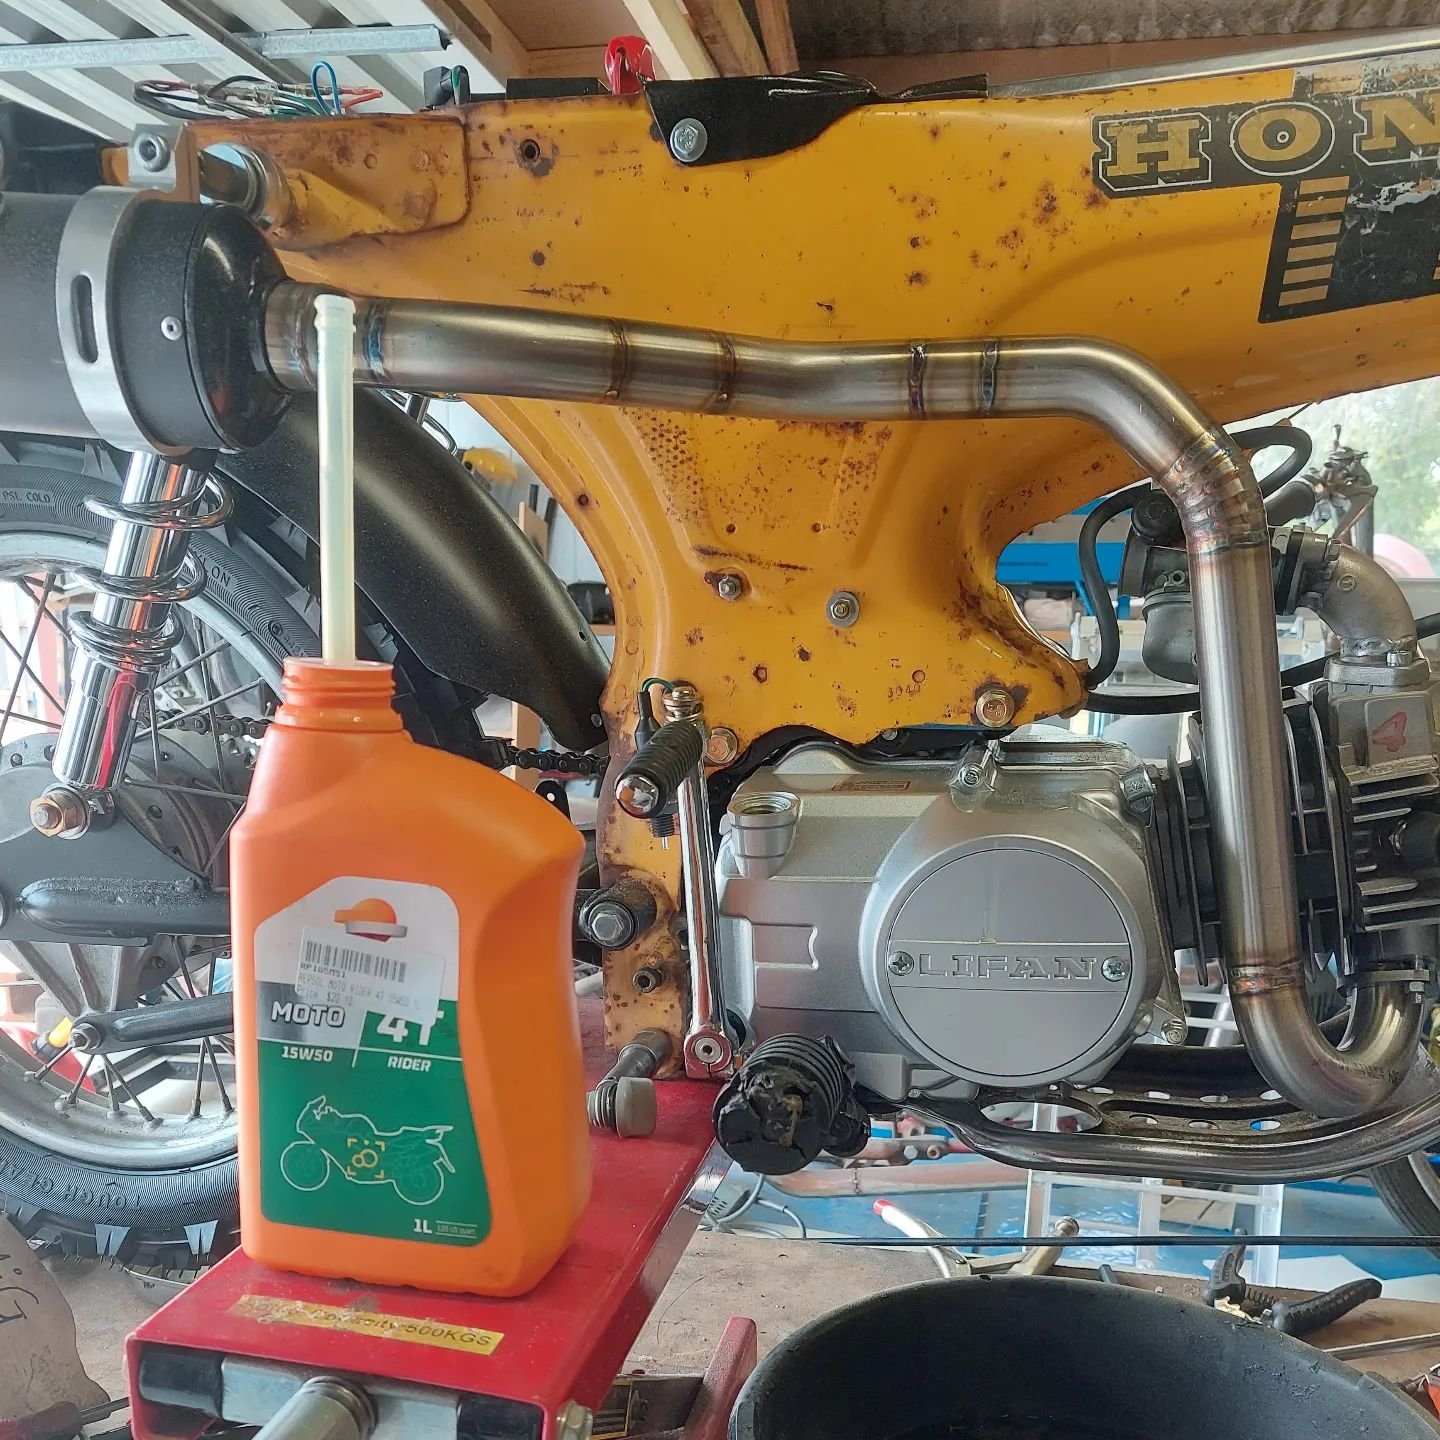
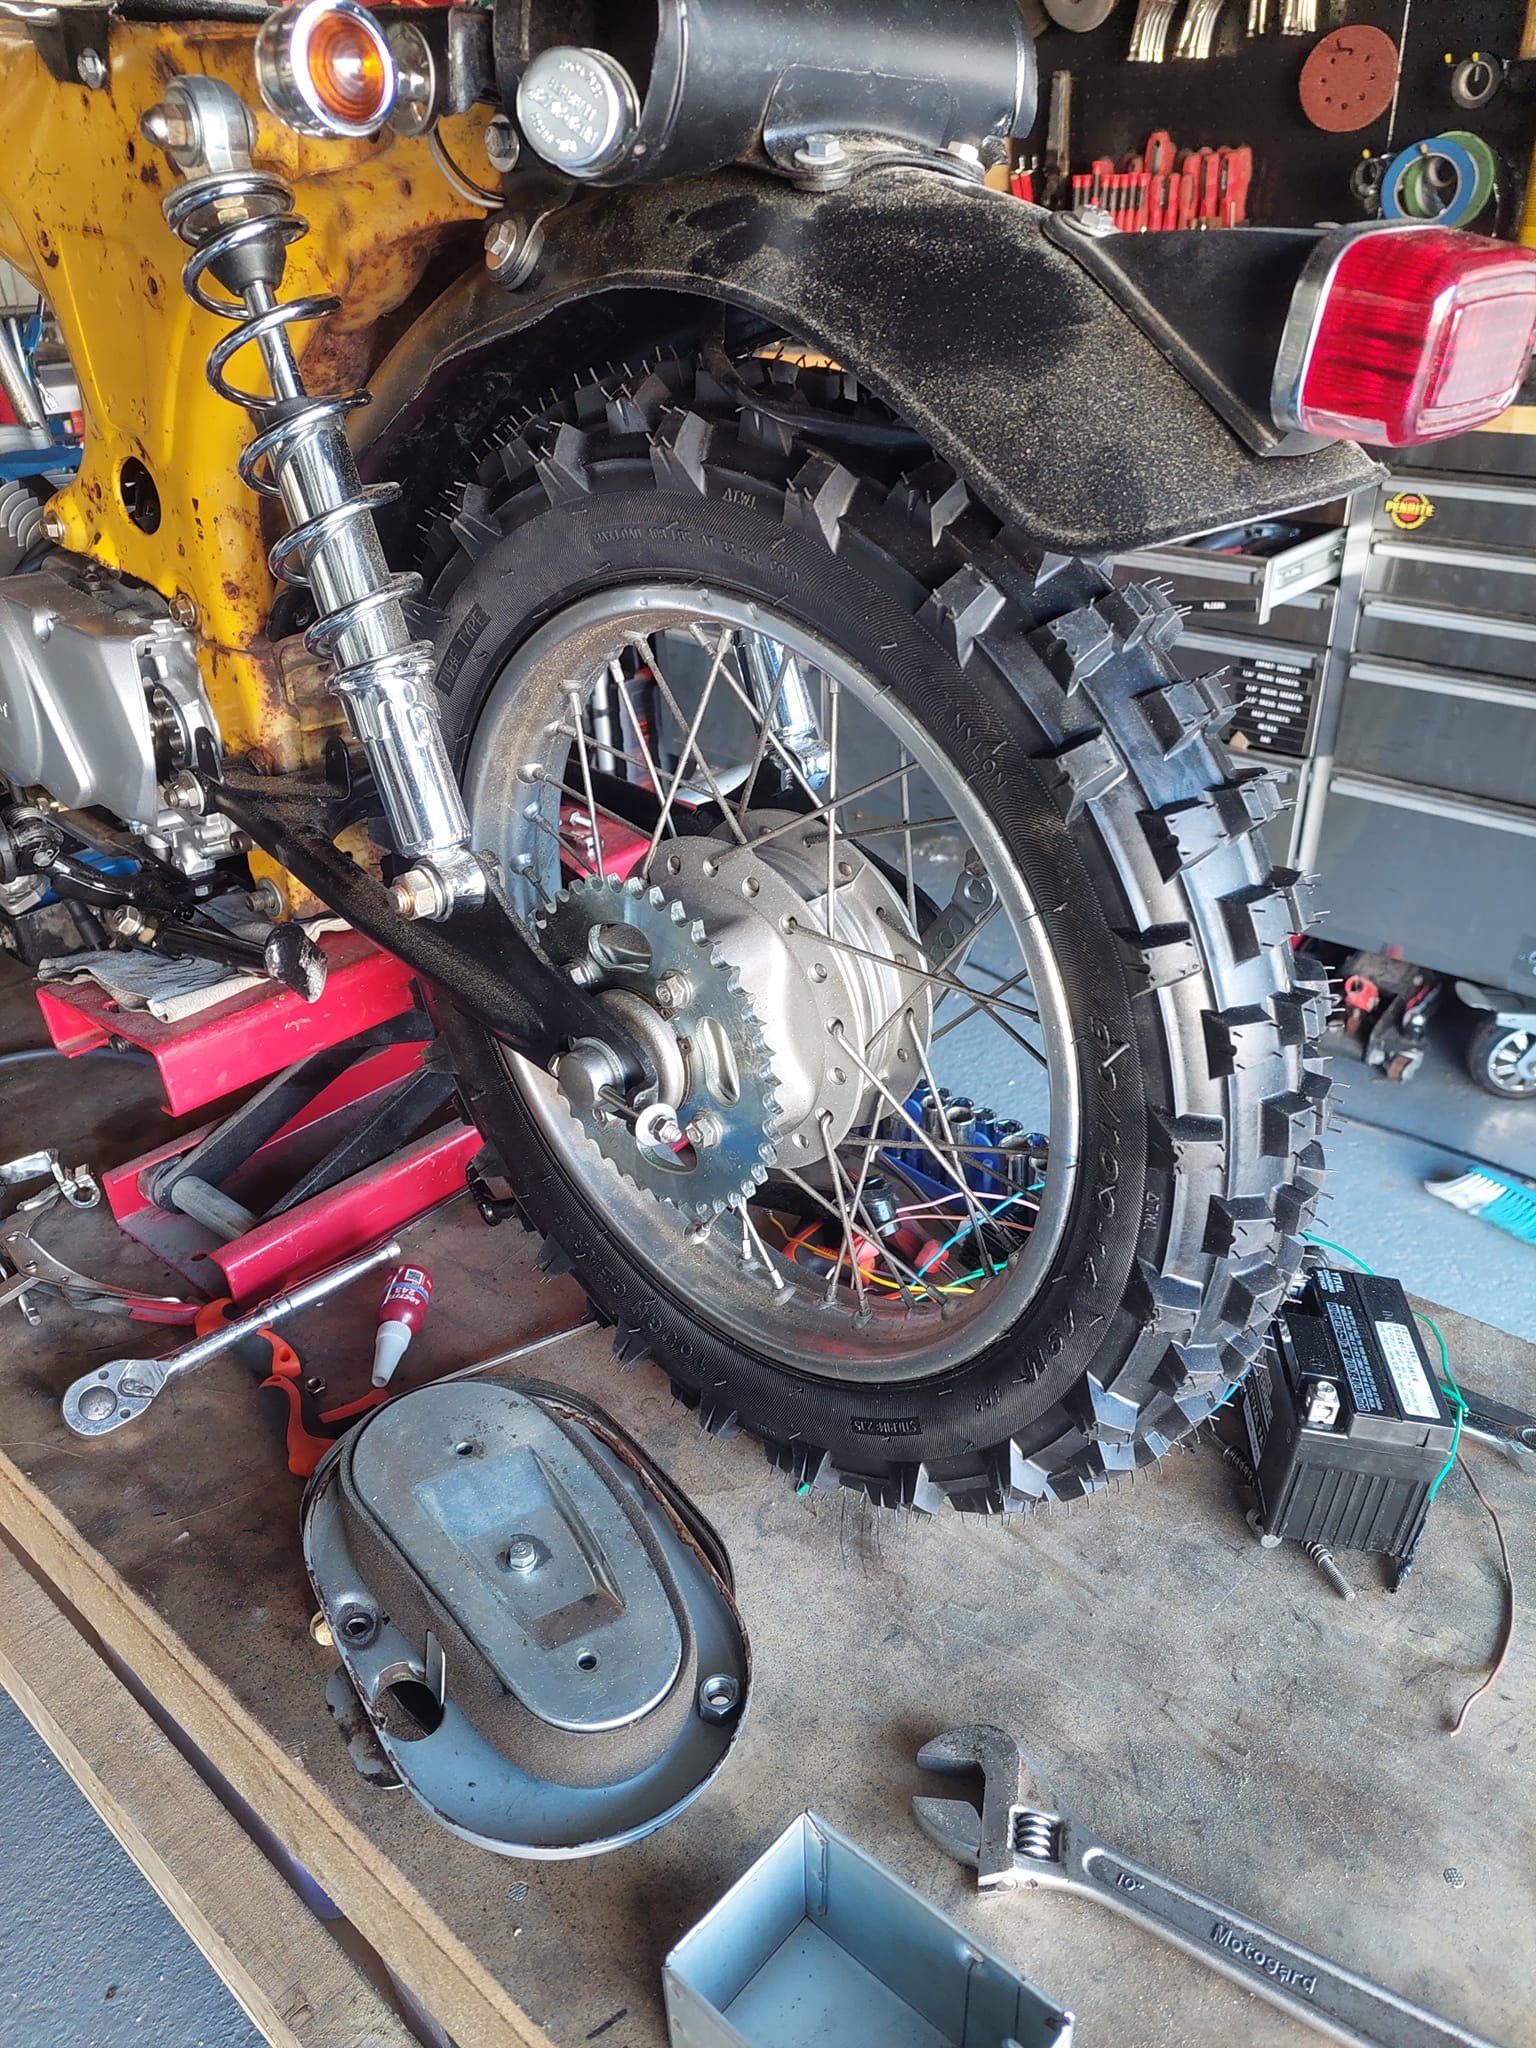
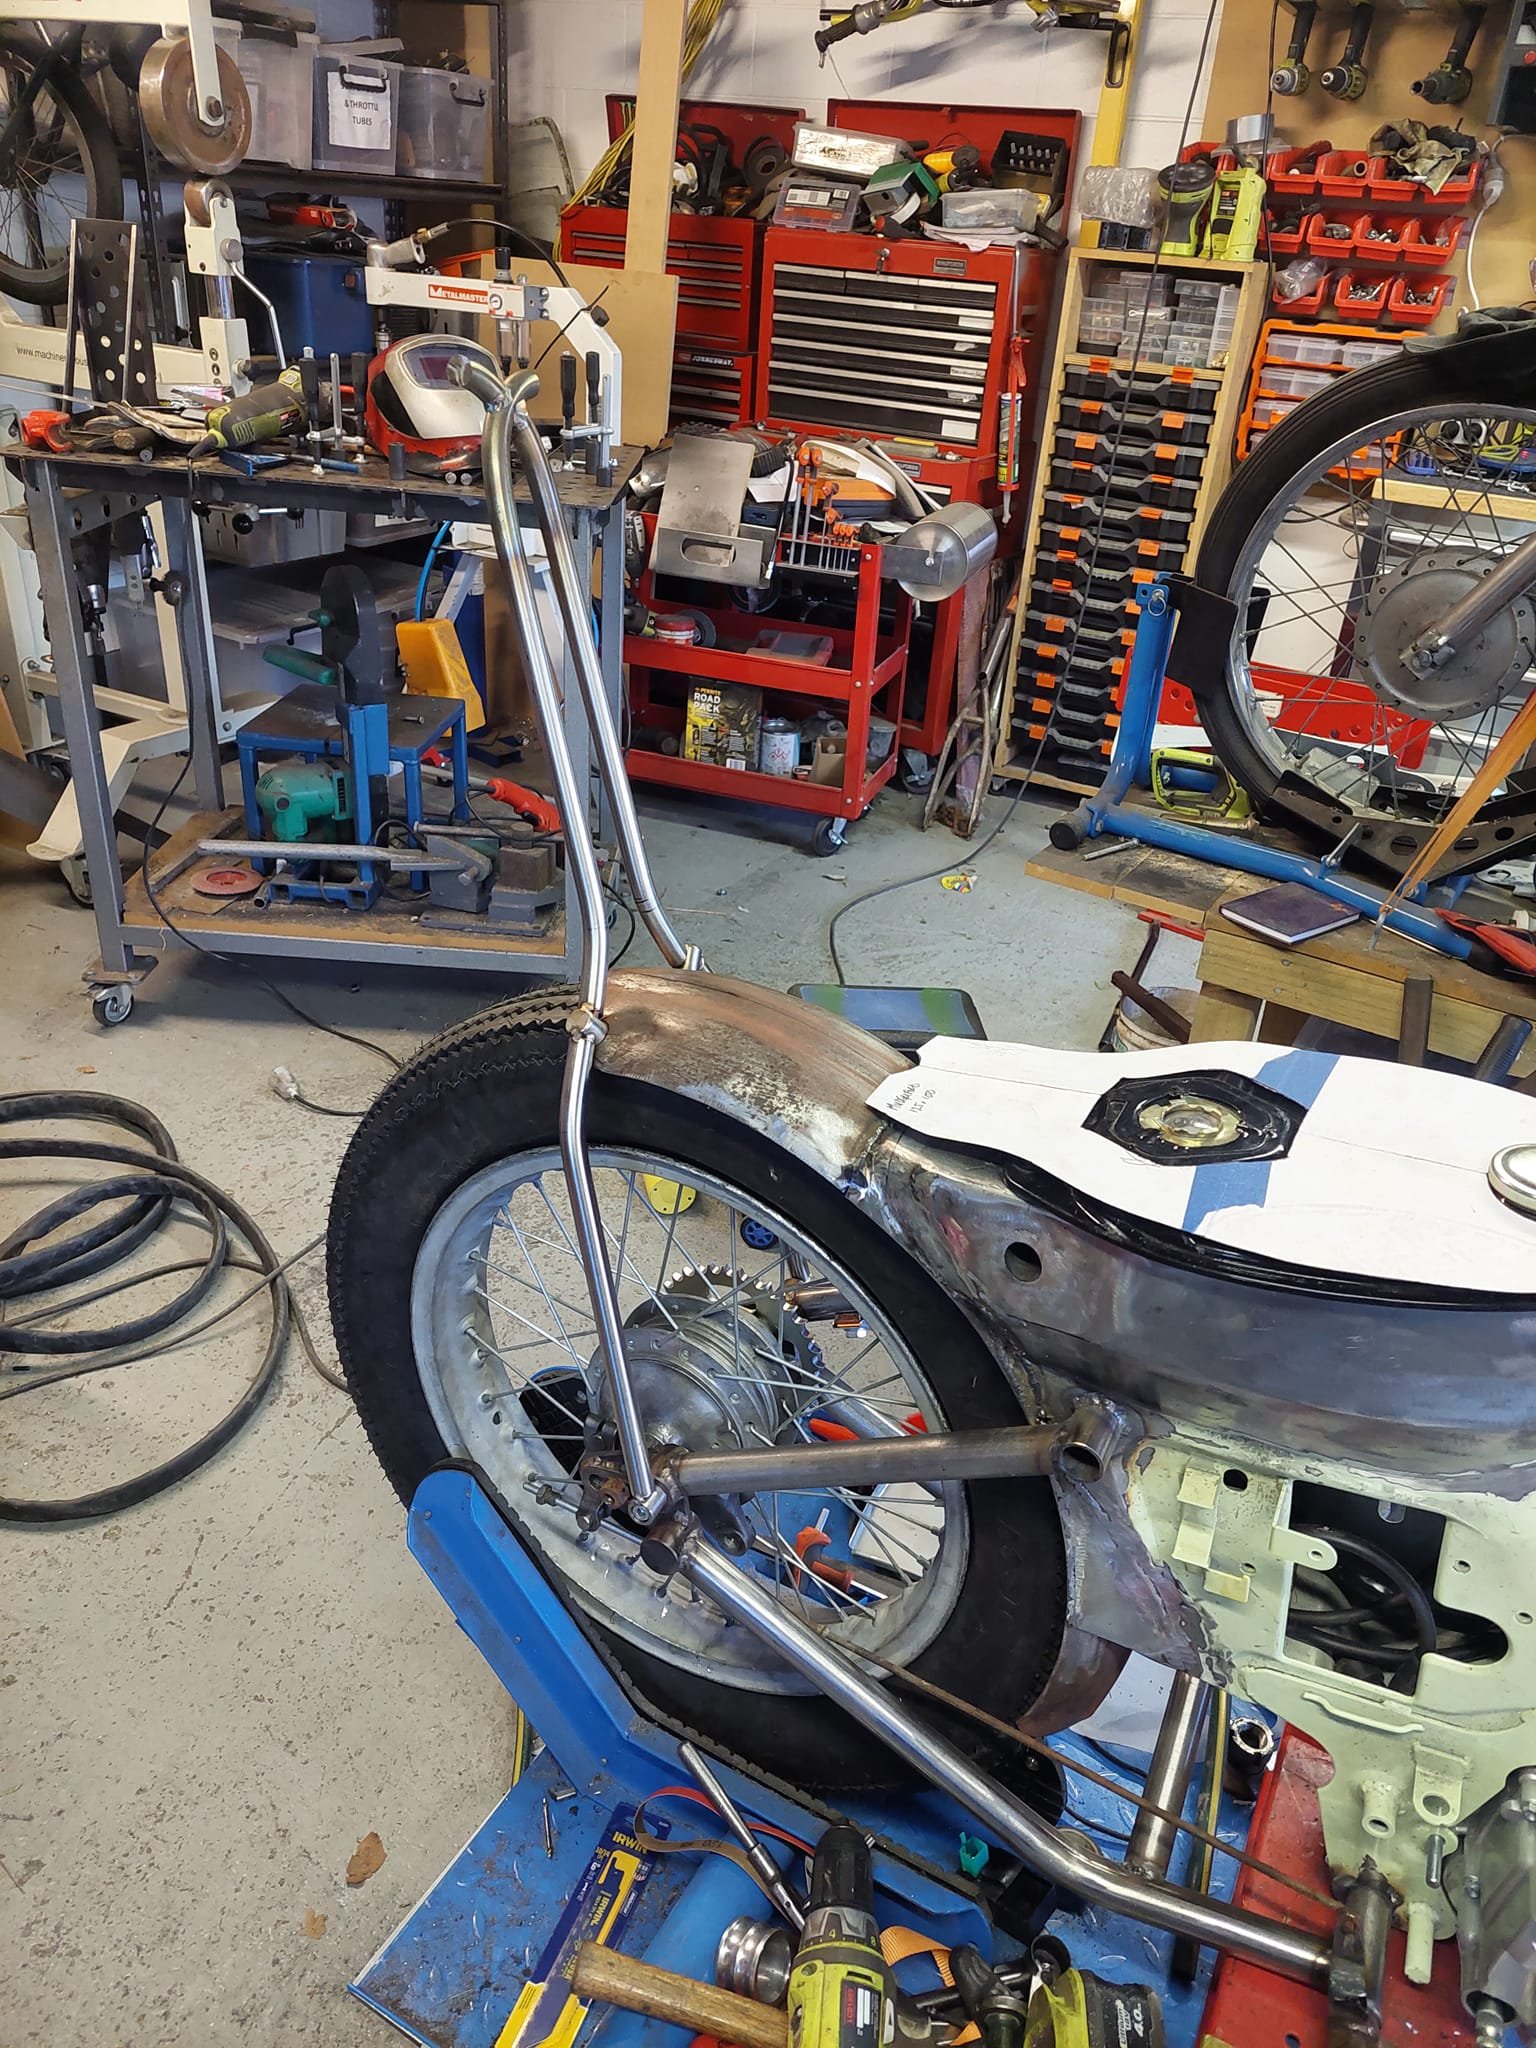
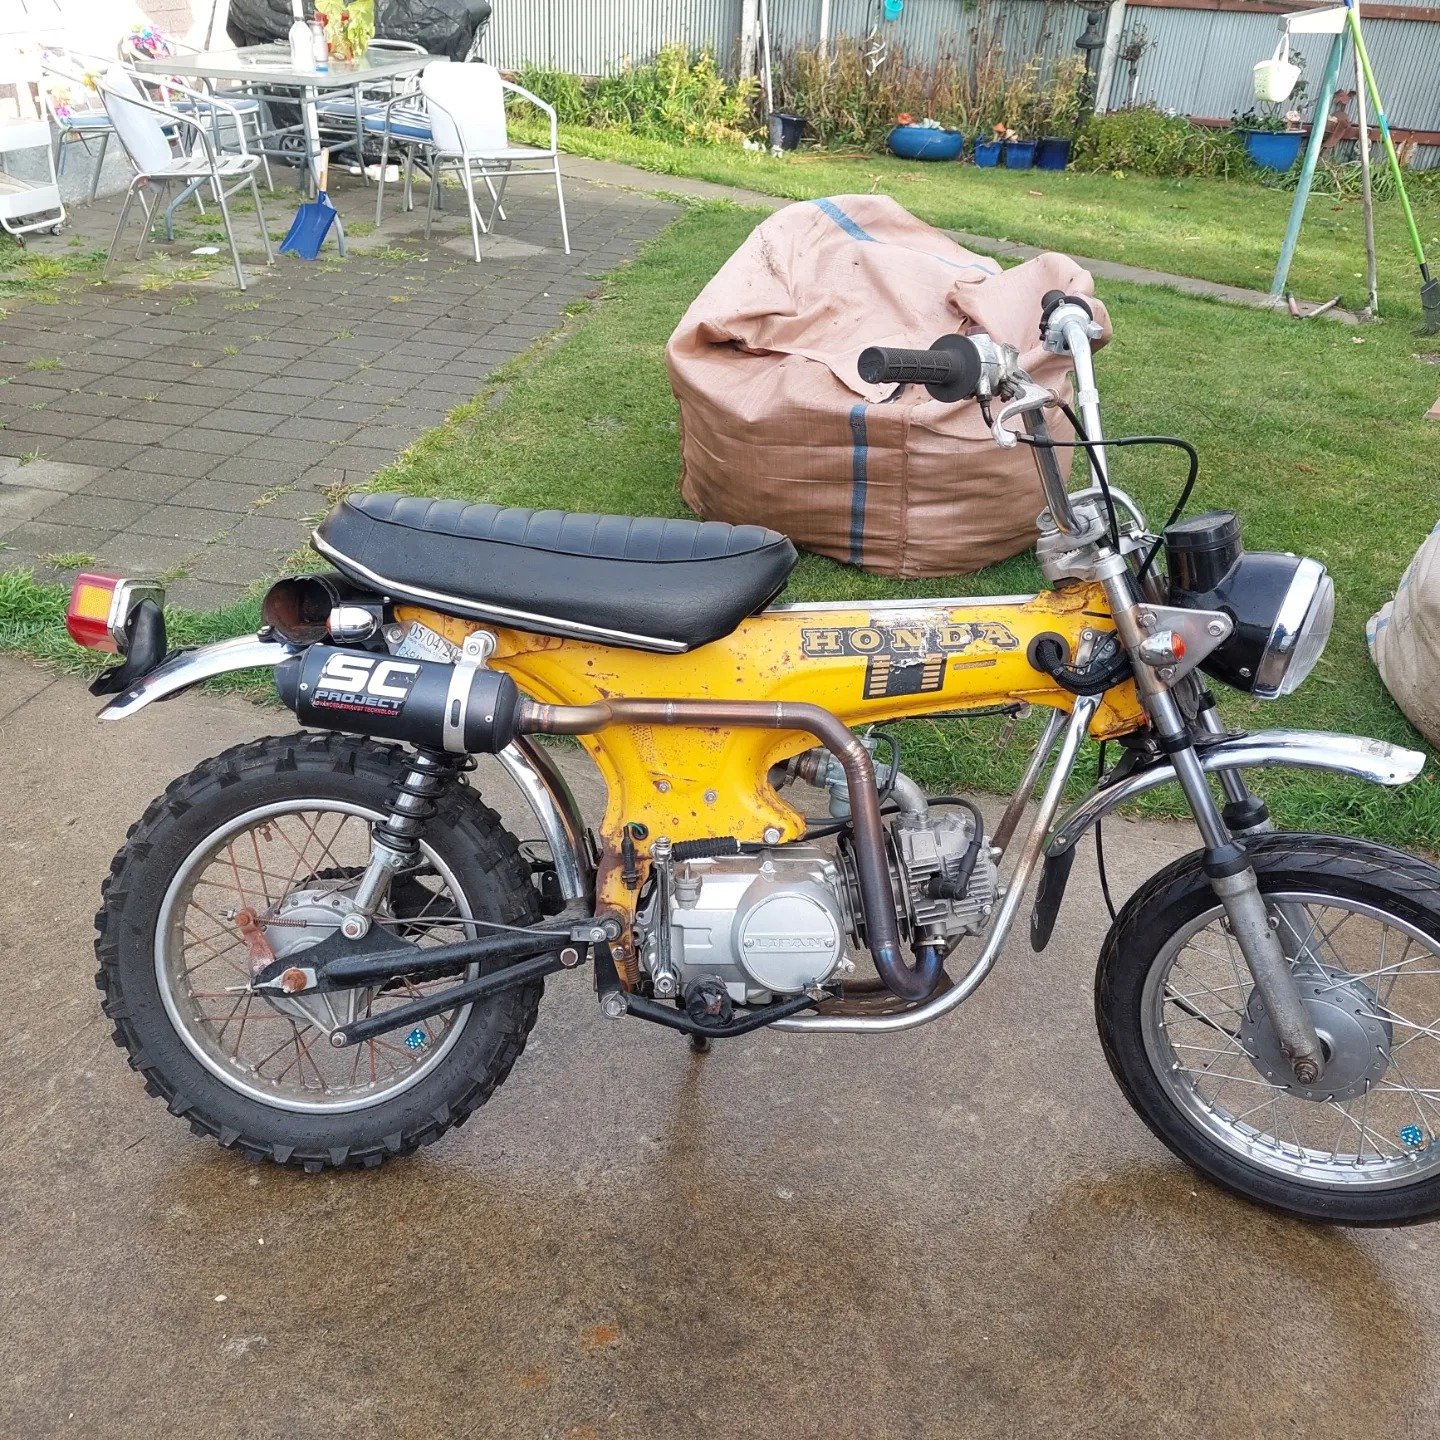
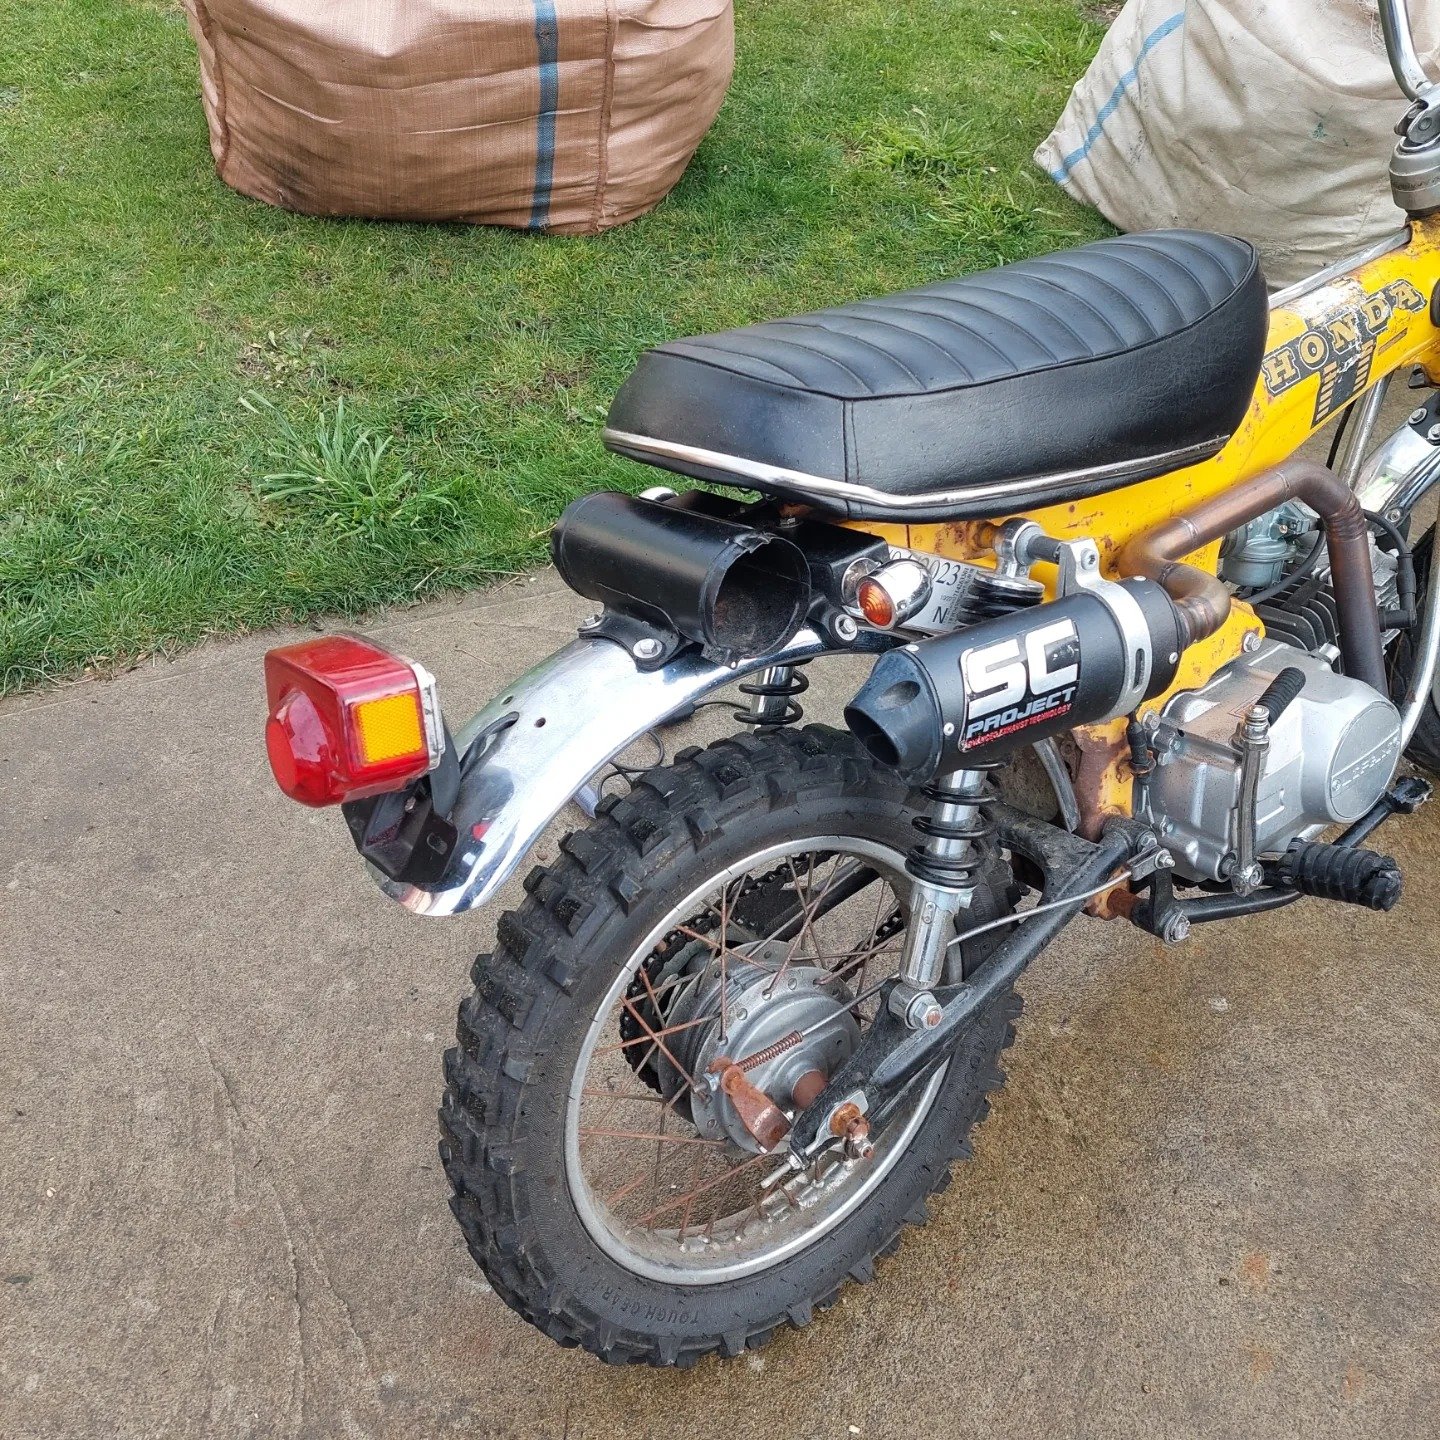
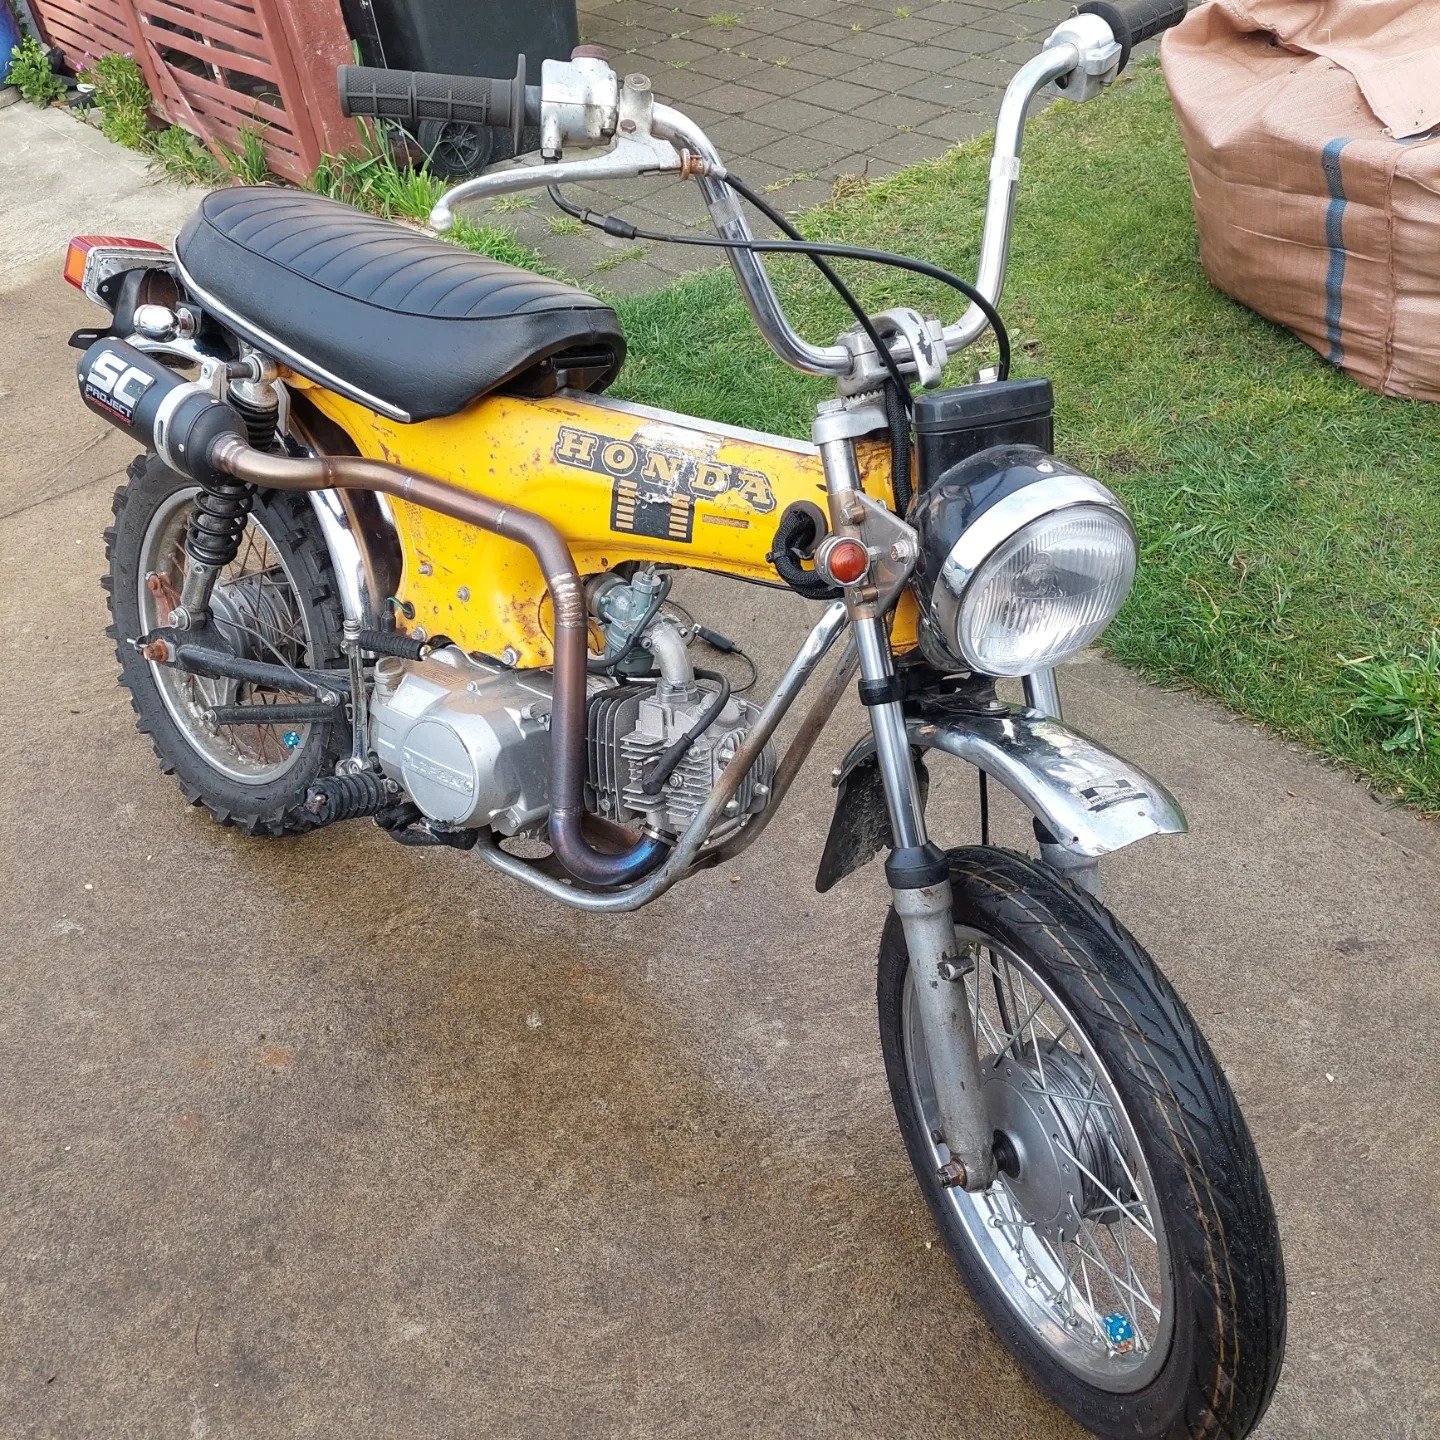
Over the weekend in between fitting a kitchen to my new house I gave a big push to trying to get it started. The 1st step was dropping the shipping oil that the engine came with, there was next to fuck all in there to be honest, not even 100ml. after filling it up with the required amount of oil, some fuel and messed around with the carb it fired up. I still need to tidy up the front end of the electrics and get the wiring stashed away in the headlight bucket. I grabbed some more goodies from Andy and Wei from mbike like taller shocks, rear tail light and rear sprocket, you might notice a new tyre which is from trademe.


.jpg.beece1a28e1b2829fa6b1b2f55e19e06.jpg)
.jpg.04c290231729054304460053f46c72a0.jpg)