
GARDRB
-
Posts
924 -
Joined
-
Last visited
-
Days Won
1
Content Type
Forums
Downloads
Events
Gallery
Everything posted by GARDRB
-
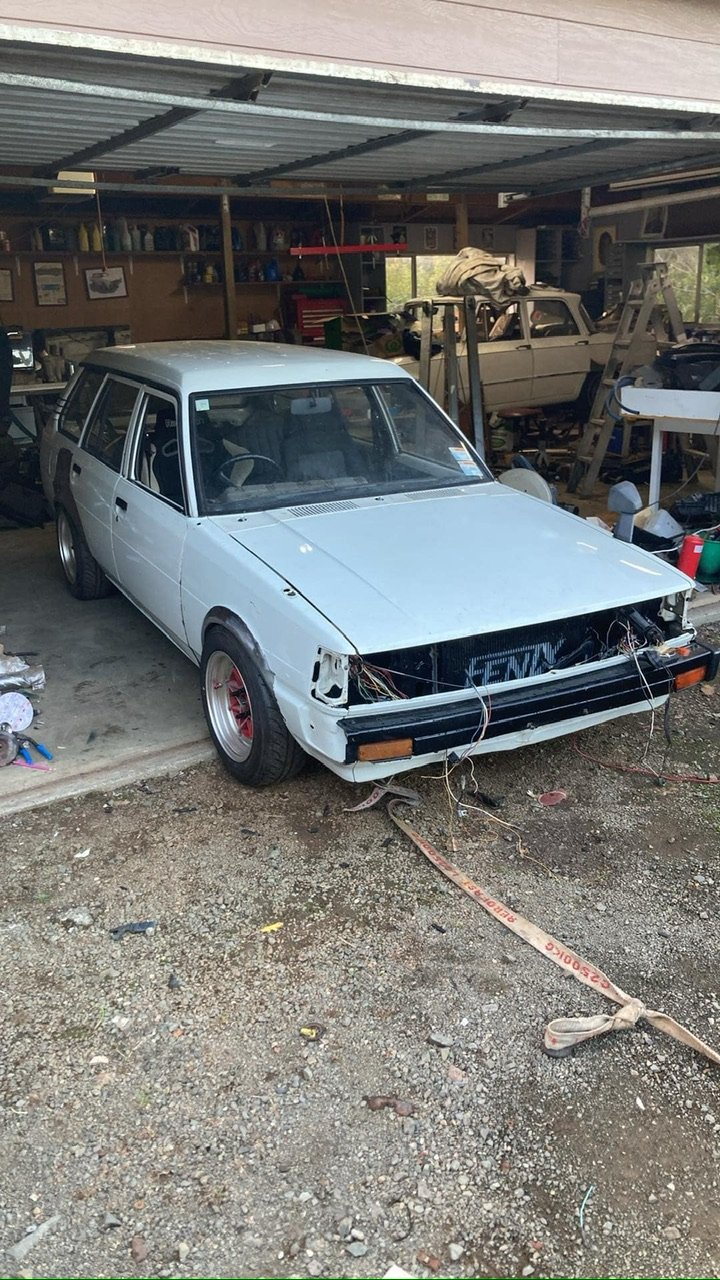
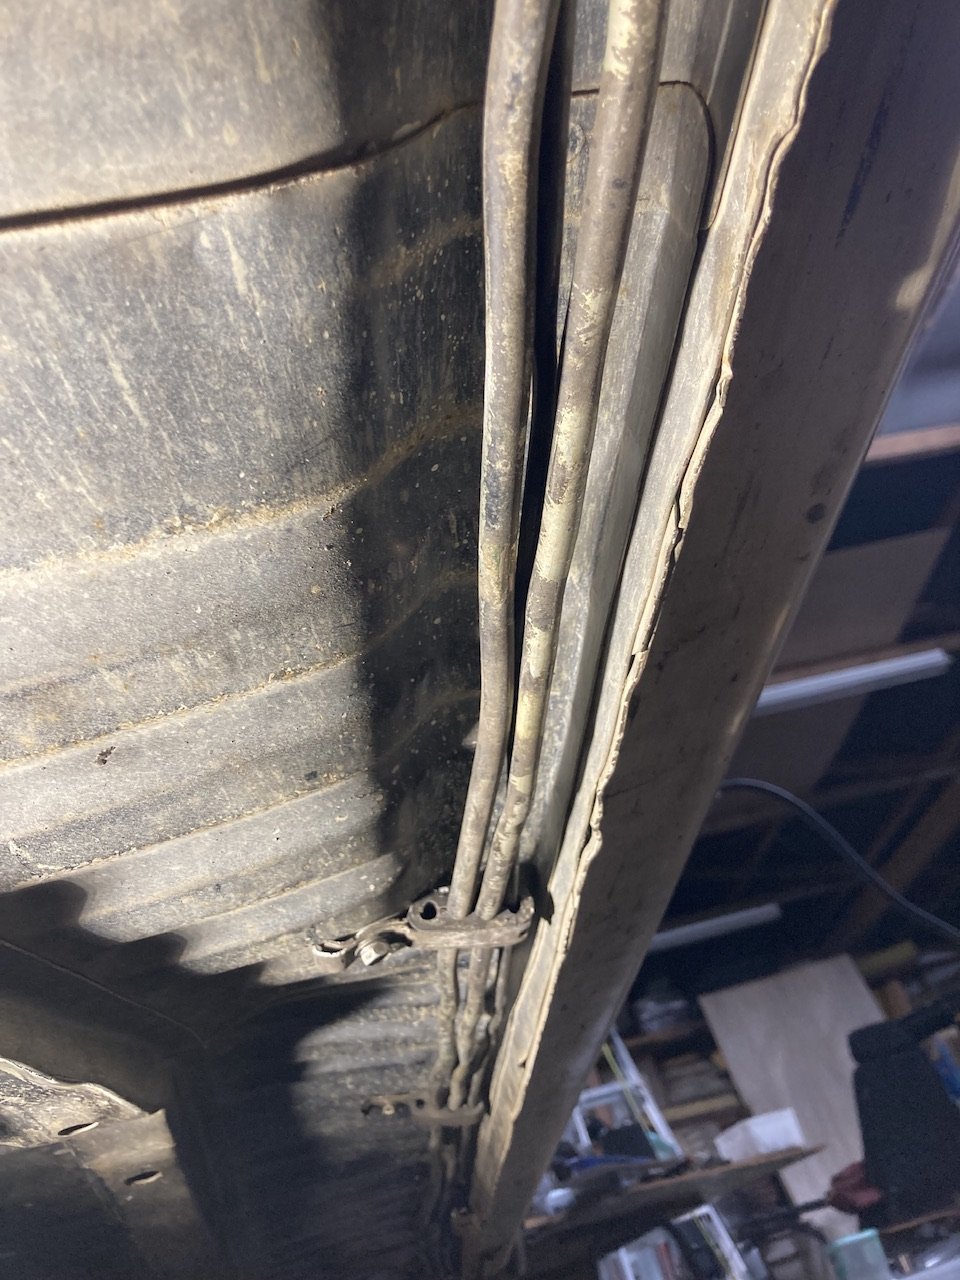
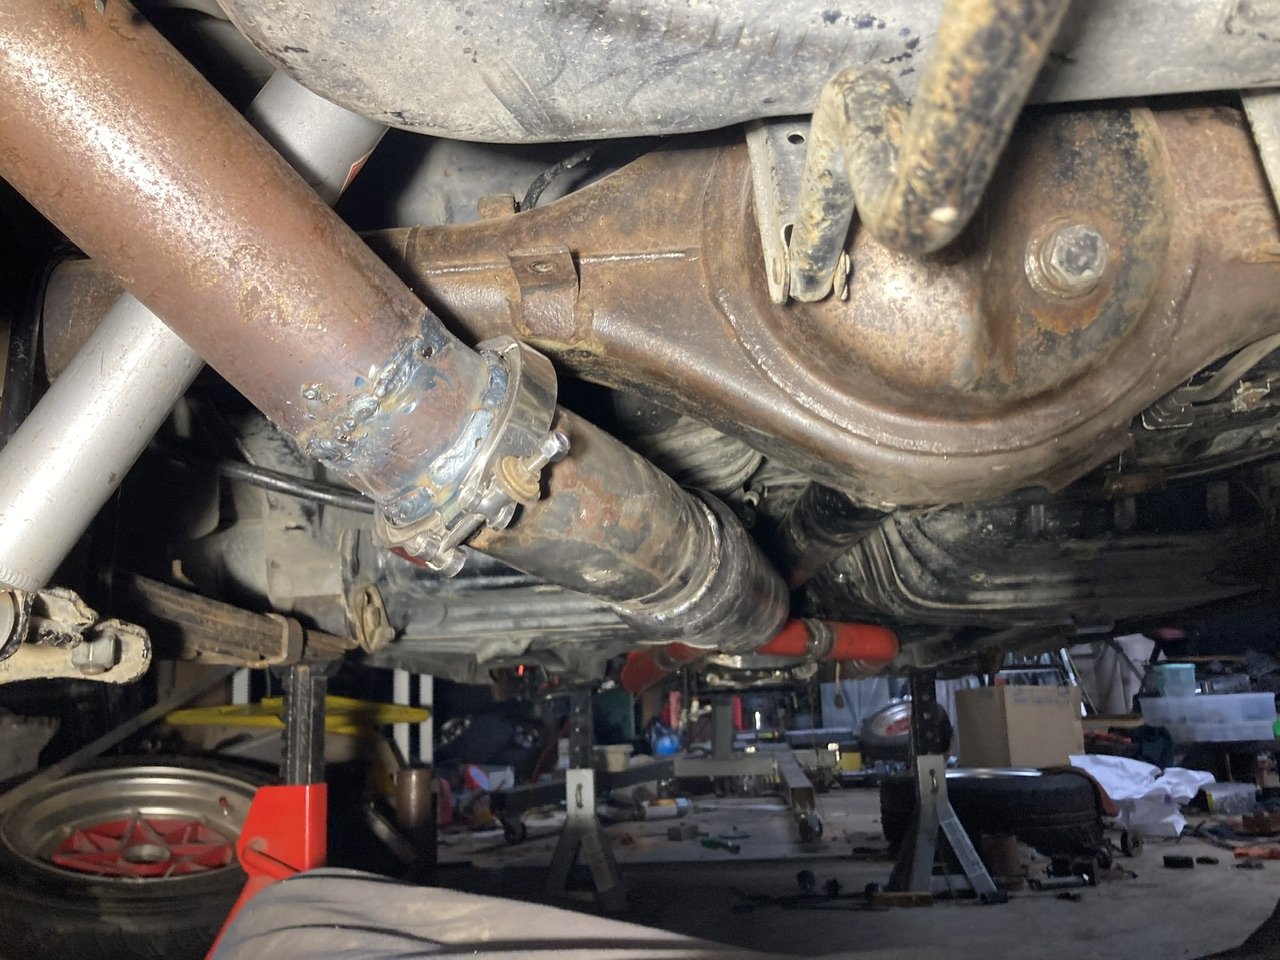
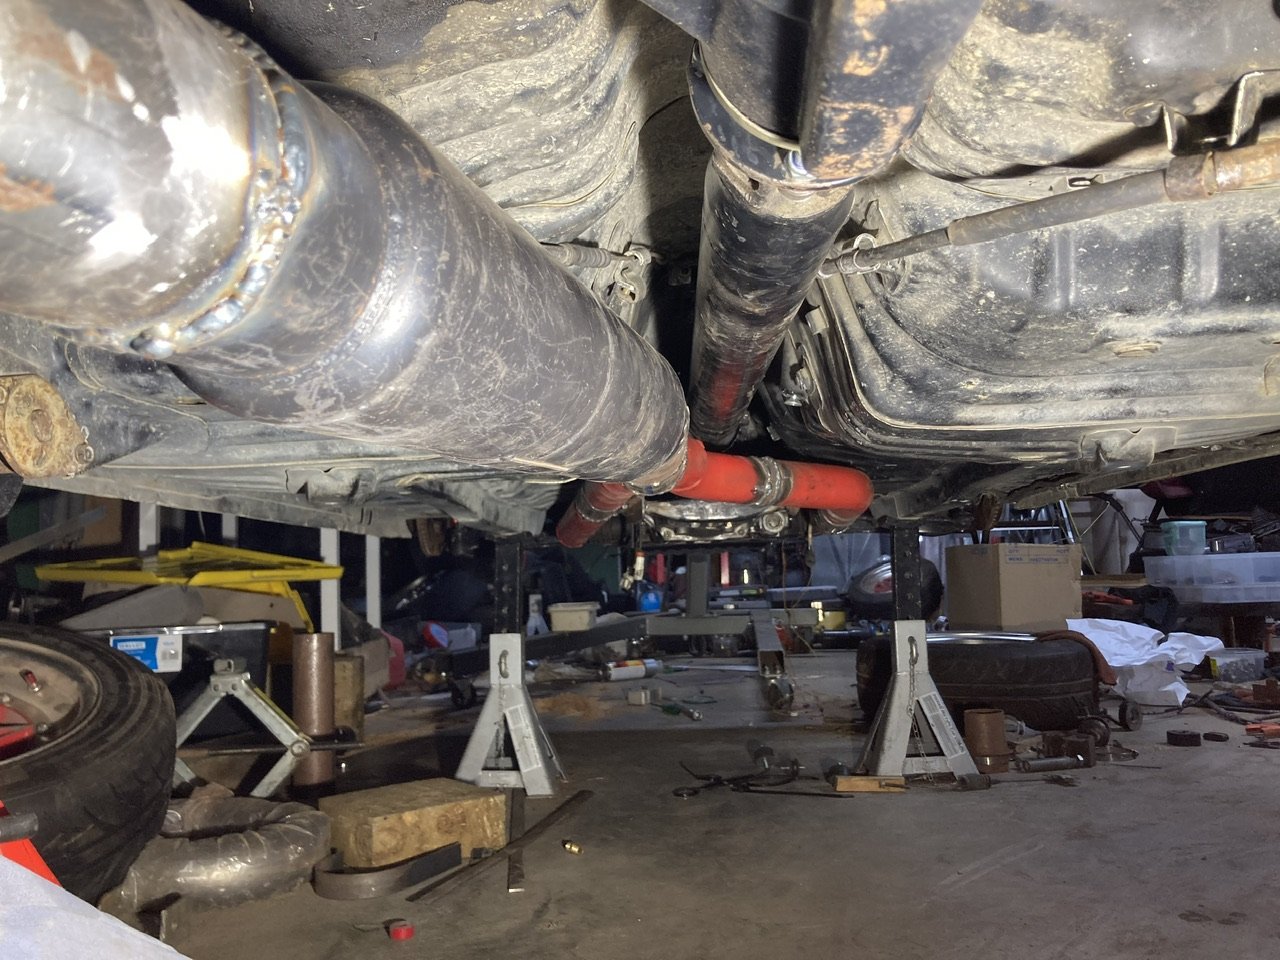
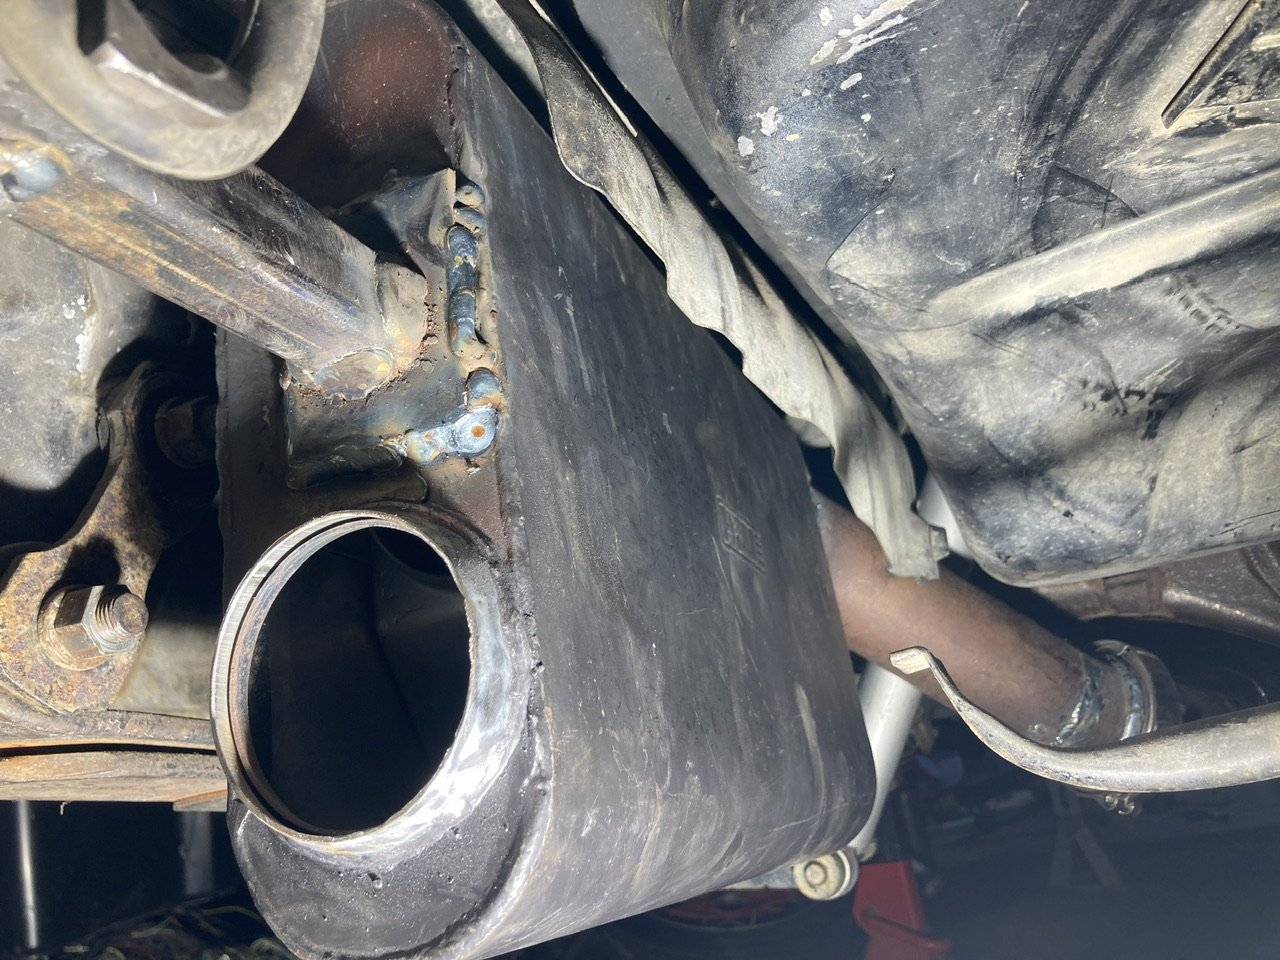
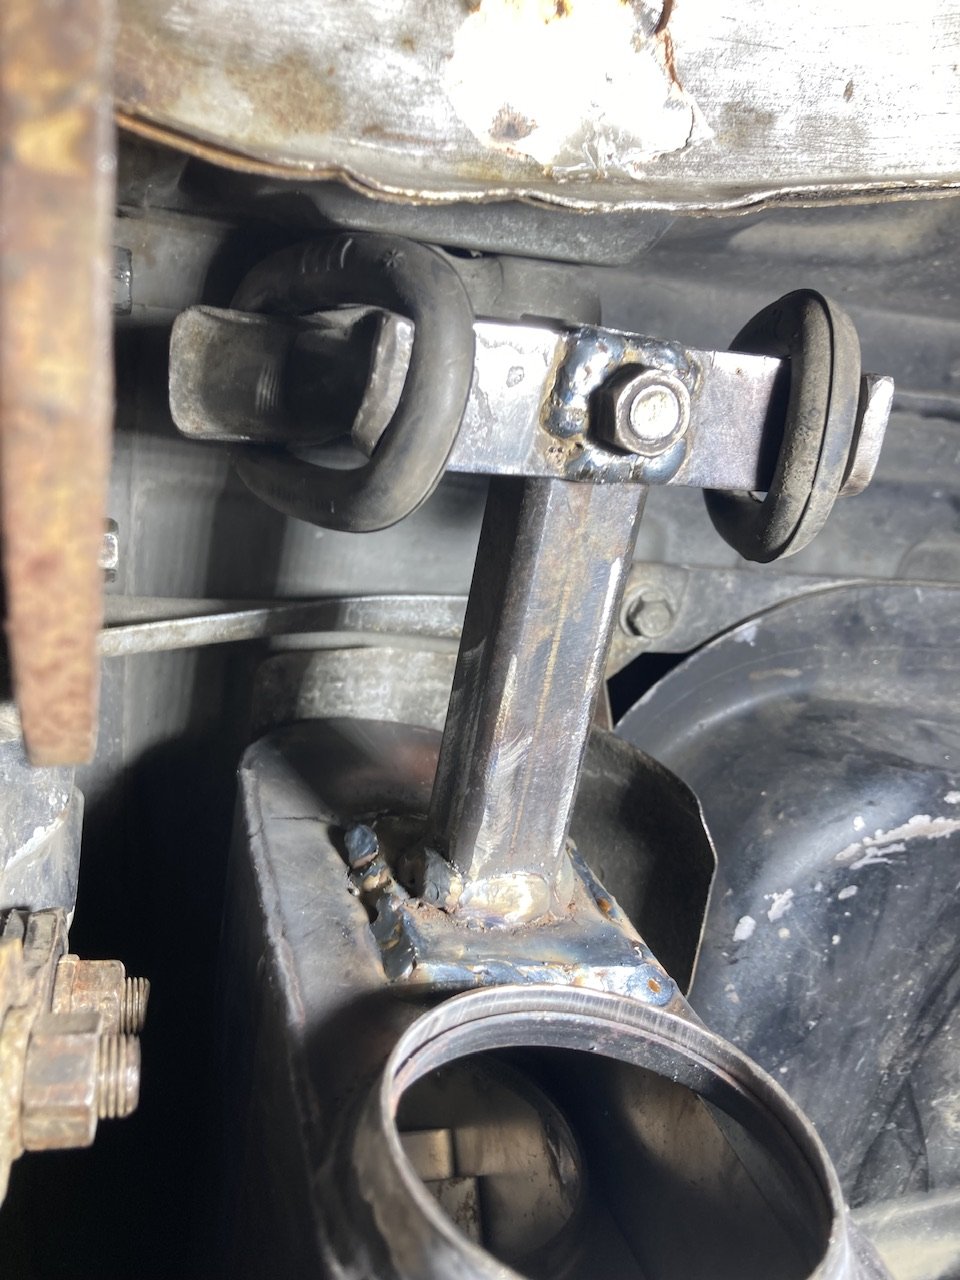
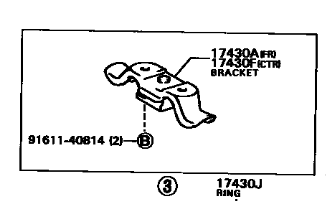
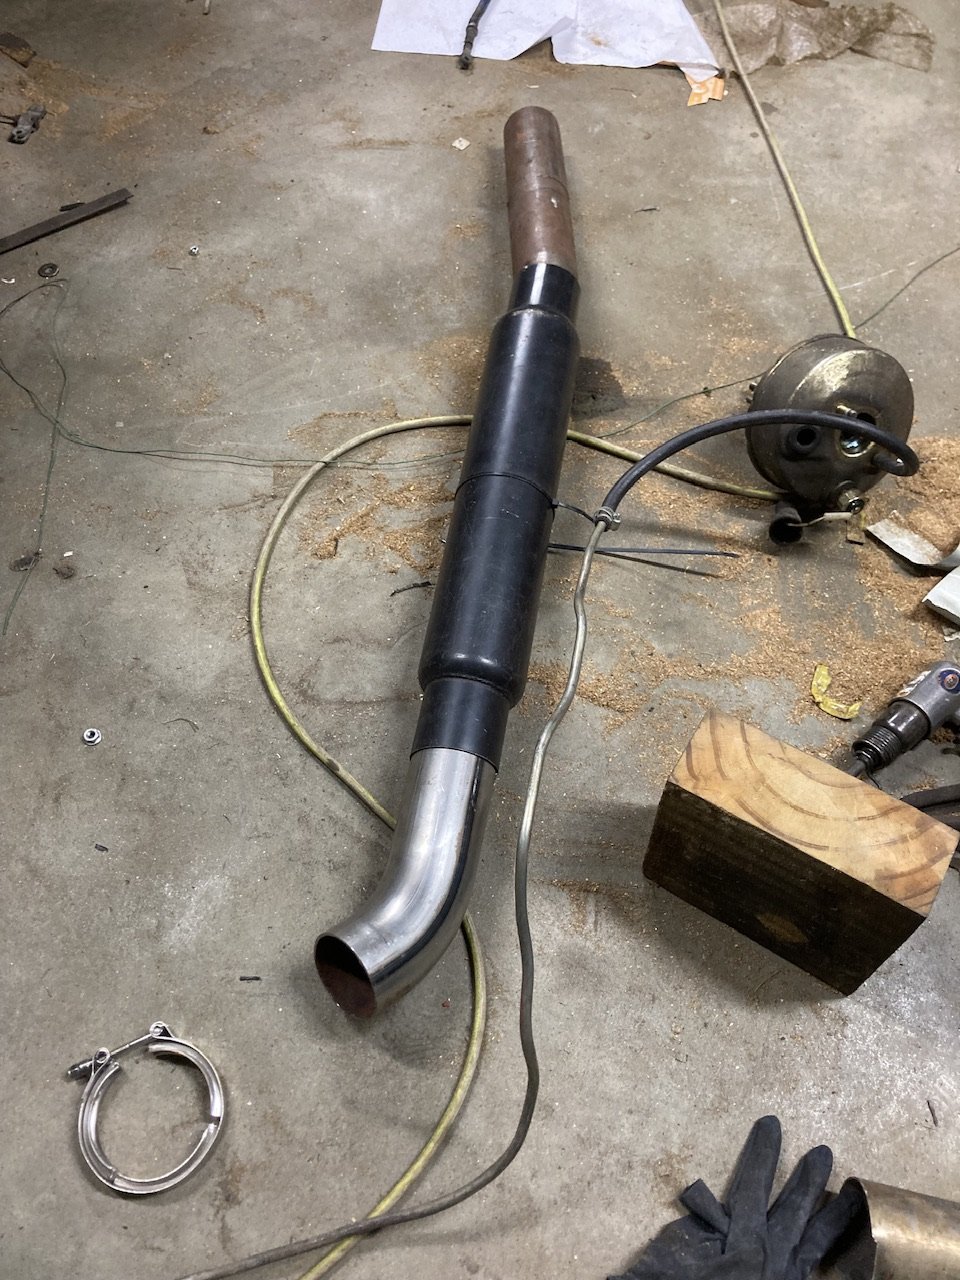
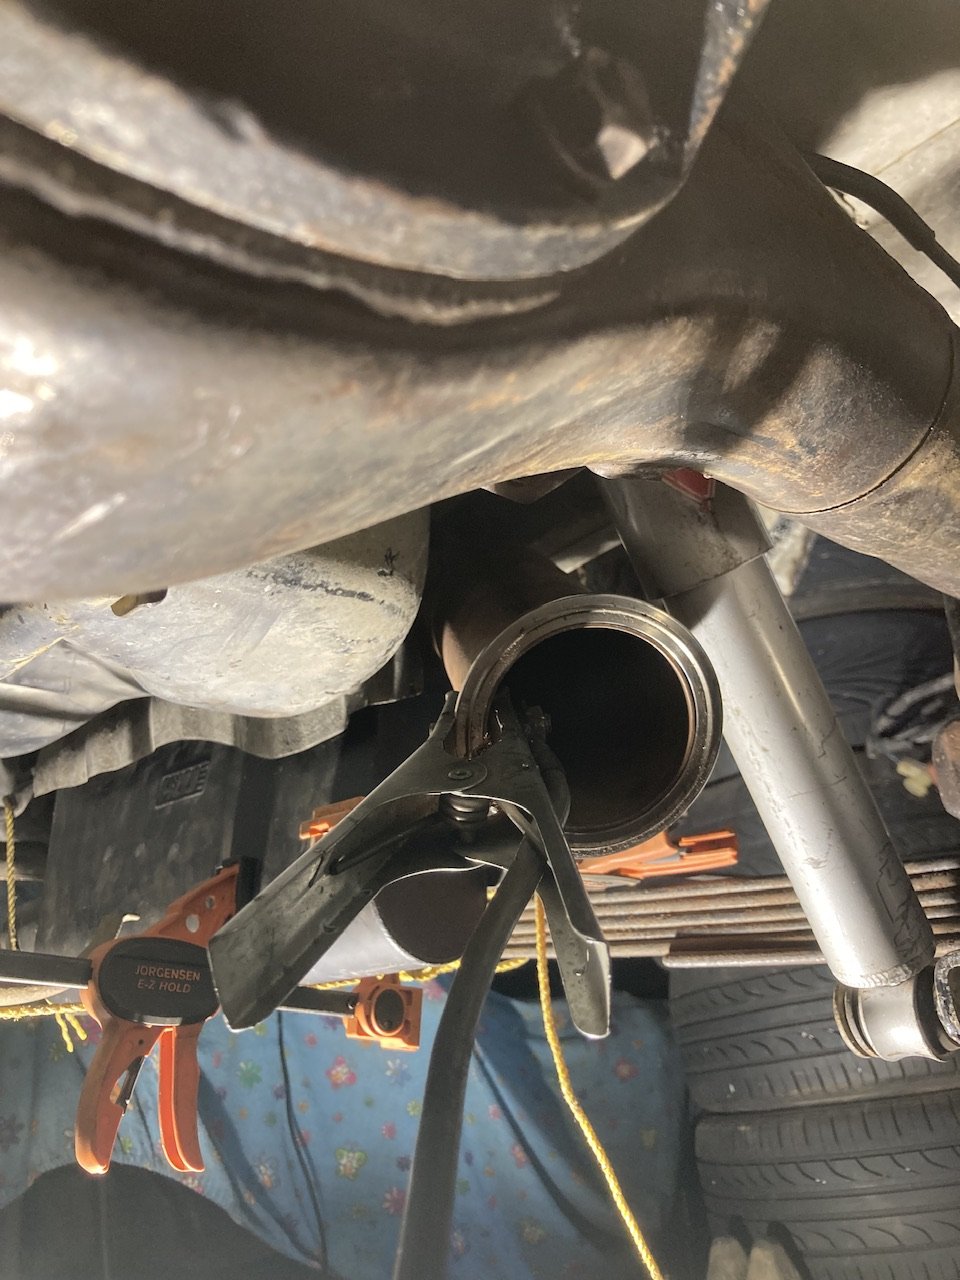
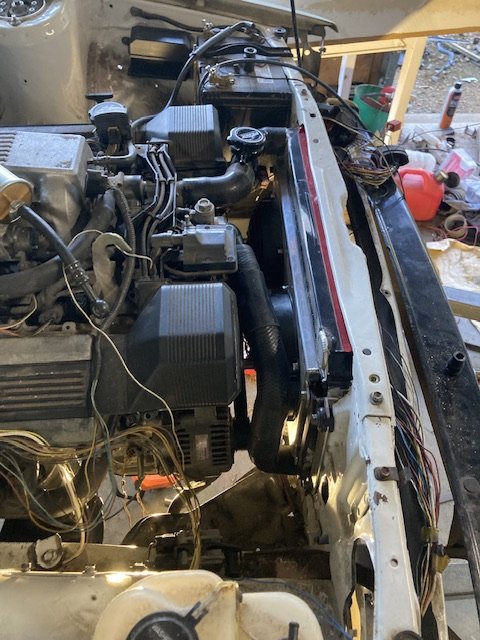
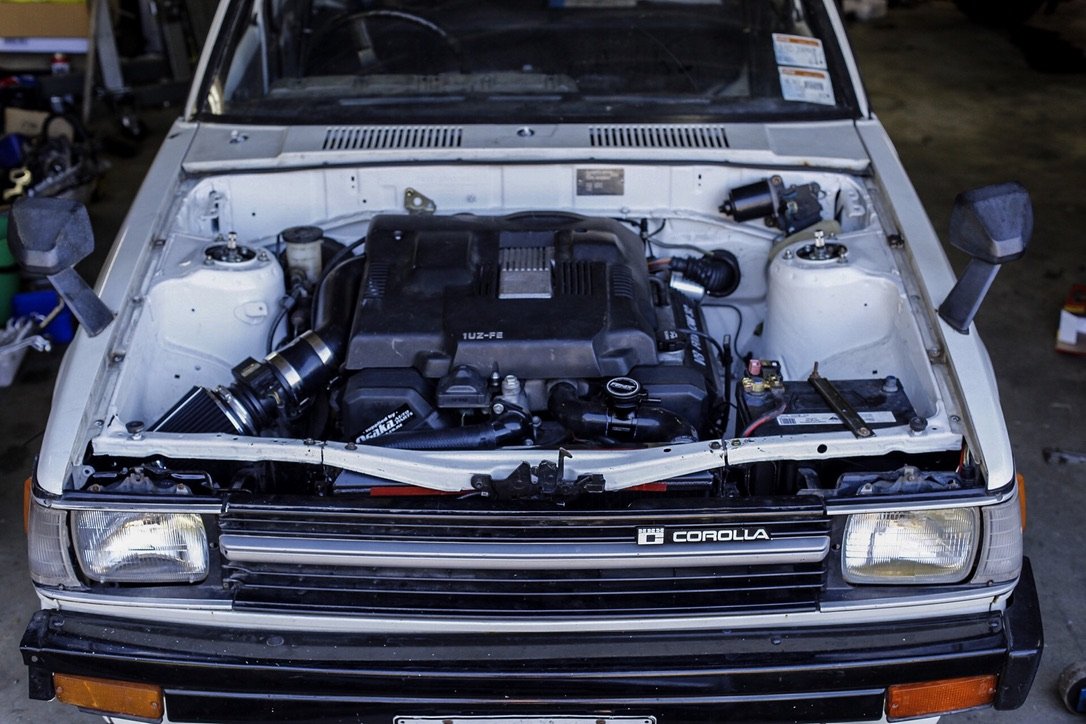
Ok, excuse the shit photos and the shit welding, but here we are, a computer update instead of just a phone one. I got the exhaust welded up and it hangs under it's own weight. It's a factory passenger's side UCF20 tubular header and a modified drivers side one to fit round the steering. From there it goes into two 2" v-bands, then some 2" bellows which have been a saving grace meaning I don't have to be an amazing fabricator and fit up in the engine bay meaning they don't hang down to catch on shit. Then it steps up to 2.5" coz that's what our 1uz guy recommended and runs round the gearbox and merges into a single 3" just behind the UJ. Then I've got an 18" M&H louvred fibreglass packed reso. It kicks up under the diff (which I'm still not sure is a good thing, coz once the suspension is compressed the exhaust hangs low) through a 3" v-band and up into an offset M&H muffler which sits on it's side in the factory location. I've mounted the muffler (just at the rear so far) using the factory exhaust bracket (much to @Dudley's disgust). I really like them cos they have a rubber block on them and then you hook the silly rubber loops on the end, so the mount can sit up against the rubber and the rings hold the mount up against it while still letting it pull away. The bolt that I ran through the mount also locates in a dimple in the centre of the rubber so it aligns it that way too. Overall considering it's the most welding/fabrication I've ever done and that I've never built an exhaust before I'm pretty happy with the results. The welding has definitely been improving and @Dudley has been giving me a couple of tips here and there and also reckons it's coming out decent for CO2 rather than argoshield. I've got a couple more mounts to make and need to secure the ae86 handbrake cables (that were the perfect length and fitted the ae92 fxgt calipers perfectly I need to mount these little retainers to stop the cable housing moving. I've made up some fancy little copies of the body mounts out of angle iron, but ran out of motivation for them and wanted to see the car on the ground. I knew I wasn't gonna get away with my fuel and brake lines down the tunnel, so have moved them out to the pinch weld and for now have just roughly straightened the factory lines with a second feed line to upgrade the tiny return. This was all so I could get the car on the ground and outside. Last time it was outside was 24 December 2017, so having the thing rolling and 98% complete felt amazing. I dragged it up the driveway to the same spot I took the last photos and grimaced and how rough the car looks since it was last outside, but it was nice to have it rolling again and outside and it felt like major progress.

- 31 replies
-
- 15
-

-

-
I have some 6mm dyneema on my little boat. It has a 2000kg breaking strain
-
Put oil in the diff. Put oil in the gearbox. Put it on the ground for the first time in ages. Took it outside for the first time since Xmas 2017. Washed the fine layer of sandblasting dust off it and then struggled to push it back inside. All going to plan next time it’s out of the shed I’ll be able to drive it back in.
- 31 replies
-
- 17
-
-
-
On the road? I hope this is getting one of those MT Performance Engines crank sensor kits
-
Little sticker that goes on your windscreen required by those of us who park in patrolled carparks
-
Yeah, the photos are harder to access so they think they have more leeway.
-
Nah the WOF guy being a dick is a separate problem to the car being dodgy. It was more a comment on the anxiety of going for a WOF and knowing that different things pass and fail based on whether they got laid in the morning. Case in point the lack of sun visors on my uncle's MG Roadster that we take for WOFs. Sometimes it fails for not having sun visors (which they never had) and sometimes it's fine, but when it fails it's a whole argument that usually has to be escalated to the owner of the business who 10 times out of 10 tells the guy doing the WOF to pull his head in. I understand wanting to cover your arse, but the inconsistency really gets me. Plus my brother's Surf has just been through a WOF and a wheel alignment with what turned out to be 2mm of play in a bottom balljoint that was completely missed by the WOF and alignment guy and we diagnosed in the driveway at home within two minutes. So I'm a little salty at shit service.
-
A little bog and some yellow paint and the grooves are gone, if they're set to their lowest then no one knows which other grooves are on there
-
That's orange with black accents
-
Ok team, I've always wanted a black interior with orange accents in this, but having an upholsterer for a brother and having seen @Dudleys green interior that he's been doing for him I'm tempted to give a brown and cream interior a go. I've been looking at @_Matt and @Snoozin's interiors a bit and have a mostly mint factory brown dash. I like the subtlety of Richies interior. I've got Recaros, a Twincam 16 Toyota wheel, a Black Racetech 4100 and a huge box of interior bits. I'm almost tempted to go brown top and tan lower. Thoughts?
-
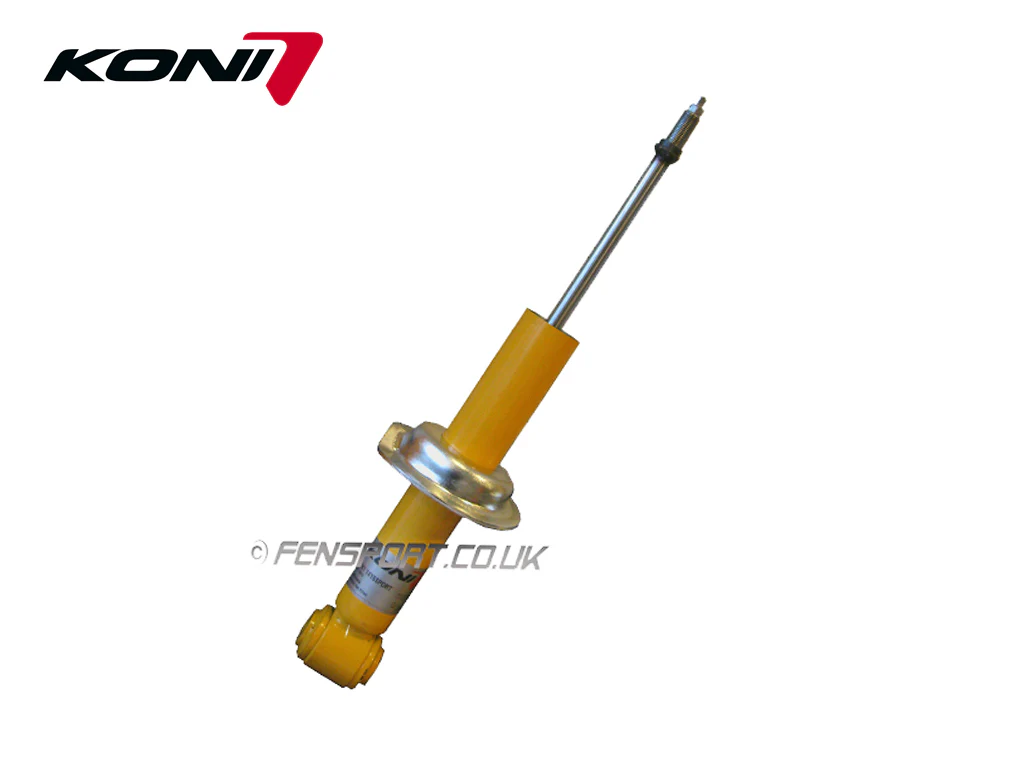
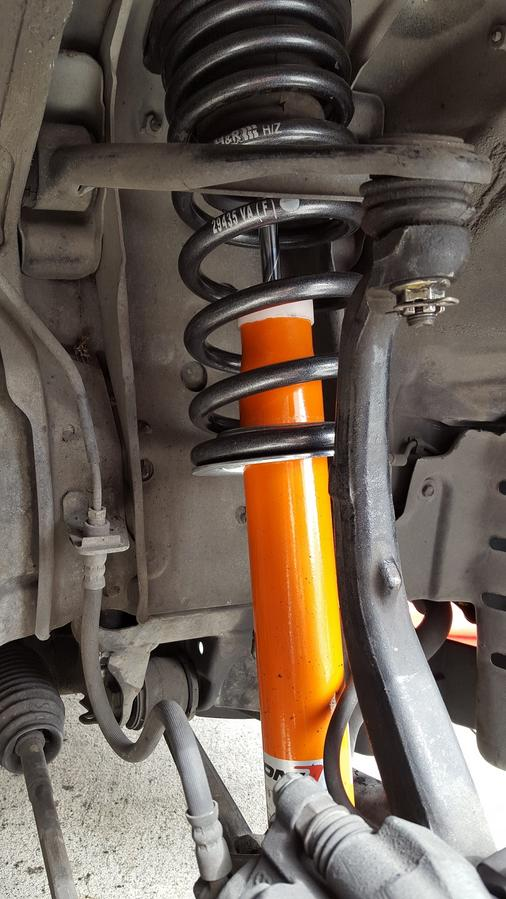
I think it's more that a lot of the Bilstein range (especially the one with eyes at the bottom) uses a slip on spring perch like this so they can essentially produce a smaller series of shock absorber bodies and slip a vehicle-specific perch onto them like how "body adjustable" coilovers are done so they don't need to weld up a million different clevises and perches. I'd interpret it as a replacement with a welded perch being fine, but once the manufacturing and attachment of the perch changes it becomes an issue So in my situation it appears that you also run into the same situation with a Koni adjustable shock too Hmm, and the Koni STR I mean, you'd probably get away with it, but I don't want to have something else to stress about come WOF time each year just because the WOF guy wants to be a dick. This is meant to be my low-stress car (once I wind more camber into it than I'm allowed for cert to get my tyres to clear my guards)
-
Coz who doesn’t want an extra couple of inches of length right?
-
You're such a barry, but we love you Rich
-
What about 3d printing a fancy knob to slip over it?
-
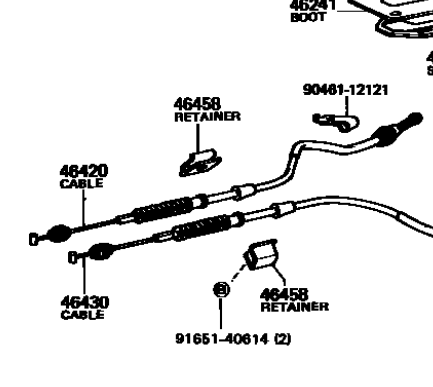
I know that circlip adjustable shocks are frowned upon and the WOF man will want to see a Cert, but what about Bilsteins with just a single circlip groove in them? They don't seem to do them without the alloy perch and circlip for my car. Am I gonna have any issues? Just to push my luck even further, I also have a set of bolt in Altezza Bilstein shocks with Bilstein springs, the catch is they run a keeper spring. Would the keeper spring be an issue? This is a kit that was offered by Bilstein with a matched shock and linear spring and keepers. I have two options to look at and I would rather not go down the Cert rabbit hold for either. 1) Use existing Bilstein Shock and spring with keeper on a new bilstein shock that hasn't got extra grooves cut in it. 2) Get new Bilstein Shocks that don't have grooves and run a normal lowering spring without the keeper. What are my chances of getting a WOF that doesn't require a WOF man that doesn't know or doesn't follow the rules?
-
Yeah I was nearly gonna put one in the driver's side before the merge if I hadn't just welded up a giant gap, there are two bellows up at the v-bands off the headers which give me a bit of leeway
-
Busy making foot content for my onlyfans
-
Helis in the shed right?
-
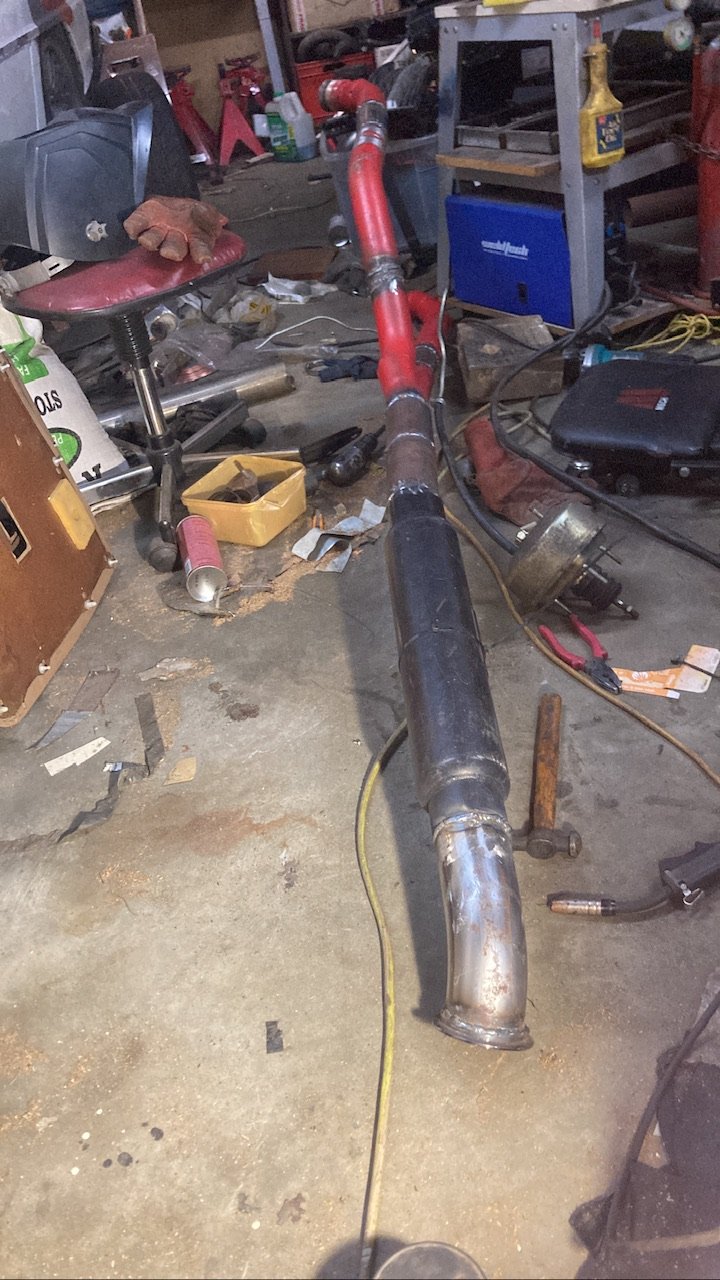
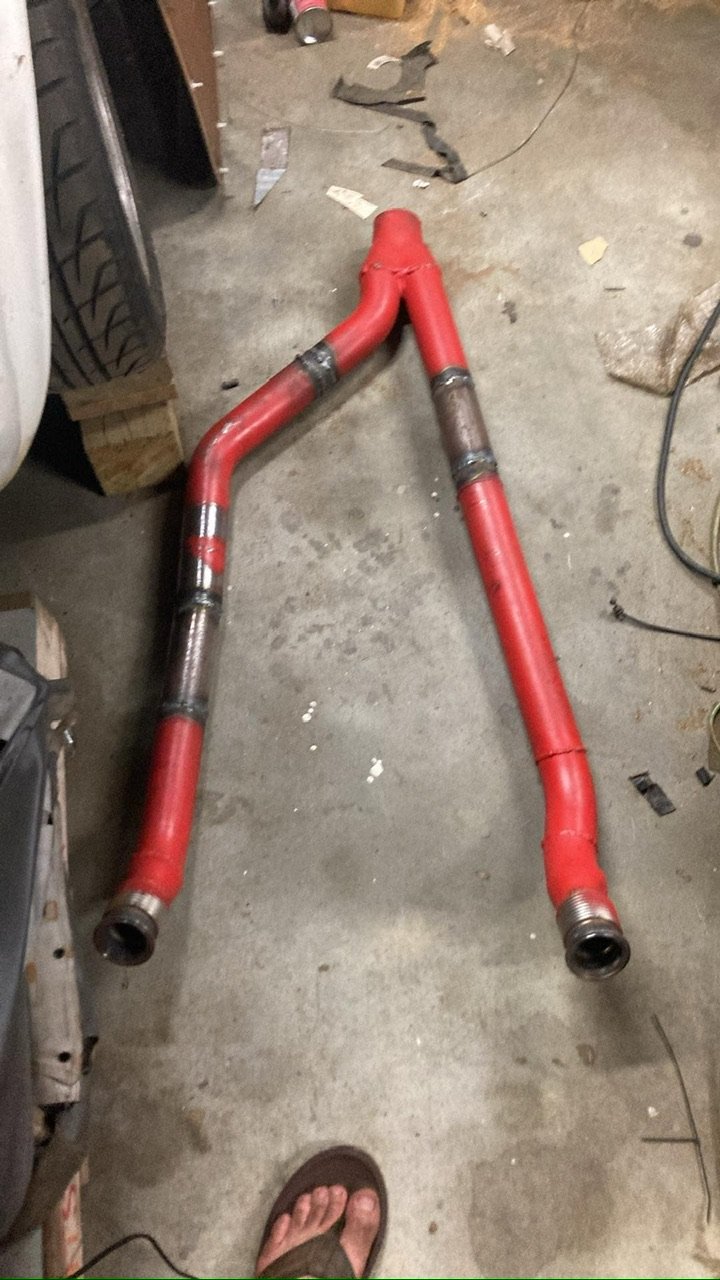
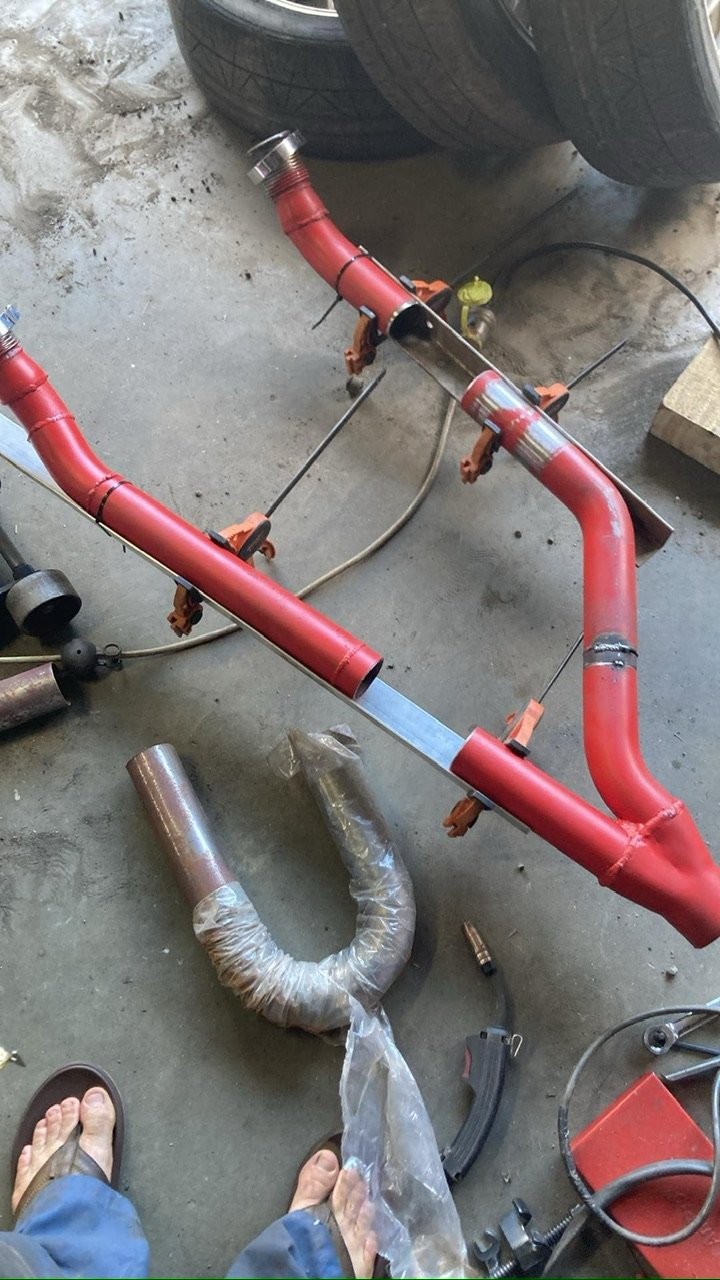
So this process has been exhausting to say the least. Two banks to merge into one is not fun as far as getting it all to line up nicely. The first two attempts turned to shit and I ended up jigging it up with angle and clamps and still having a mare. I’ve got the 2.5” 2 to 1 section made up and only had to 3D print one small bit with the welder. From the merge it runs down the tunnel to the resonator which I've kicked up to get as close to the bottom of the diff at full droop as possible. It then runs under the diff, up between the shock and the fuel tank through a 3" v-band into a rear muffler. This is not my forte, and I don't weld often, so it's been a lot of puzzling and cutting and re-welding. I almost feel like I've got a prototype to build a whole new exhaust off. I'd really like to be able to melt my welds down a bit as there are some areas where I've sucked too much and I feel like with a gas or tig welder I could push the weld around a bit more where I've ended up with too much filler. Definitely a learning curve though, my first ever exhaust build as someone who hasn't welded too much.
- 31 replies
-
- 24
-
-
Julian Edgar is god, I'll have a read
-
The 1NZ is going in the Low Standards car when I win that EDIT: I often wonder how I survived before knowing you @Dudley
-
Just an airflow/venting/ducting question. I know that there are different pressure areas around the back of the bonnet etc hence the intake for the HVAC being at the base of the windscreen, buuuut, what about heat extraction from under the bonnet? I've gone and stuffed way too much engine into a tiny space and have minimal room for exhaust ducting of the radiator, the radiator/shroud/fan and bonnet are very close to the engine which fills up a lot of the engine bay anyway. I have two bonnets so I'm tempted to get a bit choppy choppy on one. Is there an efficient way to exhaust hot air from under the bonnet without ducting/scoops protruding past the surface of the bonnet and ruining the lines of the car? Ideally anything would hide semi decently on a white bonnet, so maybe holes with a white mesh under them?
-

Truenotch's 1997 Toyota GranV - Francis Jellybean
GARDRB replied to Truenotch's topic in Other Projects
Yeah noticed that too, looked to be at the place with the crown and rx2 -
Truenotch's 1997 Toyota GranV - Francis Jellybean
GARDRB replied to Truenotch's topic in Other Projects
Yeah @di0n asked why we didn’t get one of them. The Crown and RX2 near your place are pretty badass