
GARDRB
-
Posts
924 -
Joined
-
Last visited
-
Days Won
1
Content Type
Forums
Downloads
Events
Gallery
Everything posted by GARDRB
-
Yeah, I looked into this, it appears that that's a flap AFM thing, and my AFM is hot wire doesn't have a FC pin in it. I'm currently waiting to hear back from the Guru, so we will see what he says.
-
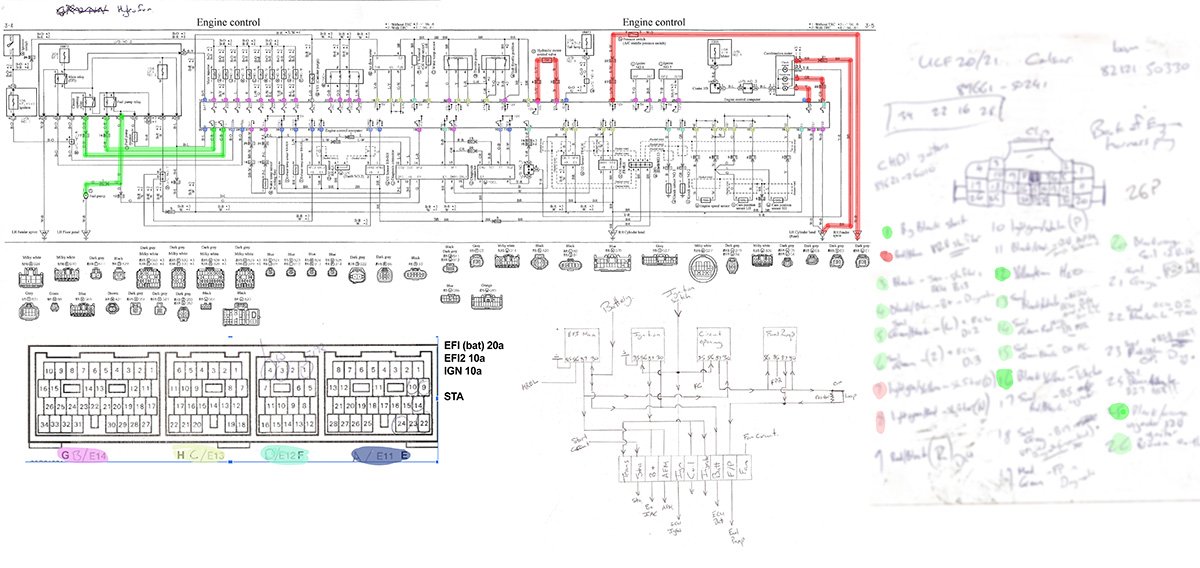
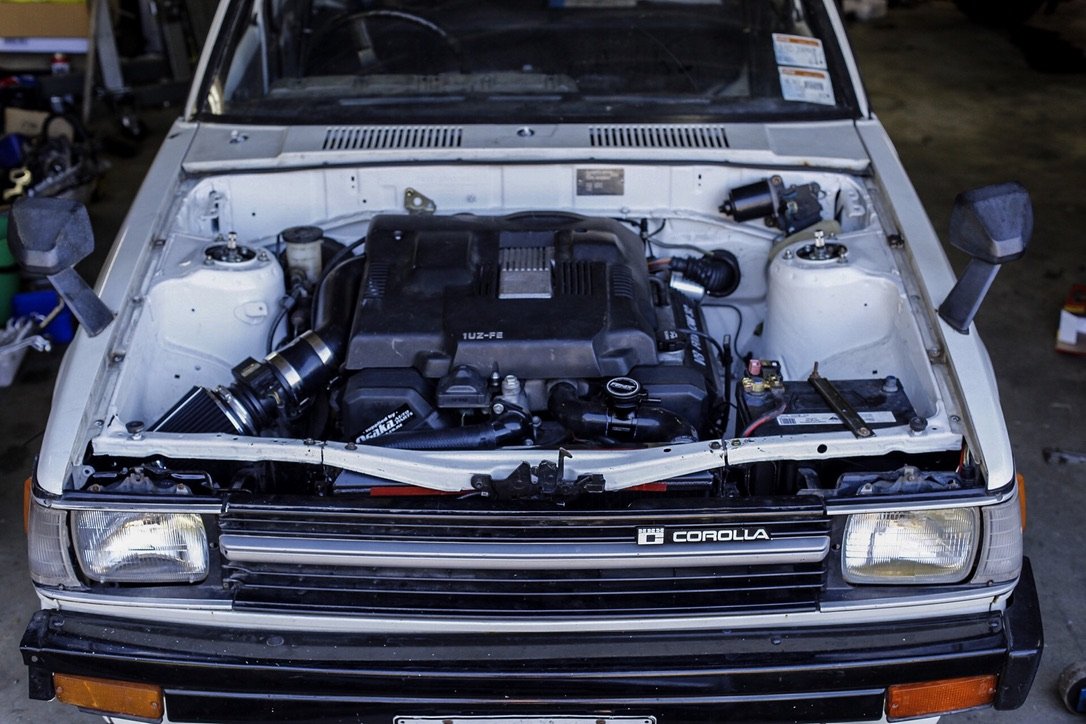
Updated: It's a UCF20 Celsior engine and ECU with the hot wire AFM, the FC pin on the AFM seems to be a UCF10 thing for the flappy AFM Heeelp. Electronics nerds, I need your brains. The FC pin on my UCF20 1UZ ECU isn't switching to low to trigger the circuit opening relay to run my fuel pump. I've tested it with a test light and a multimeter and checked allll the earths I've done allll the Googling but the pin doesn't seem to want to trigger. I've read all the things, from the theories (like the incorrect wiring instructions from Nigel Wade that are everywhere) that the pin doesn't actually trigger a relay (which has been proven wrong) to the pin should put out a positive voltage (also proven wrong). Does anyone have any ideas or deeper understanding that could way in? It sounds like there is a transistor that is switched by a wire in the AFM or something??
-
I’ve got locking nylock nuts and lock washers on my hose clamps
-
Yeah I've learnt that lesson the hard way. Hopefully this car won't be doing much sitting around now that it's almost drivable.
-
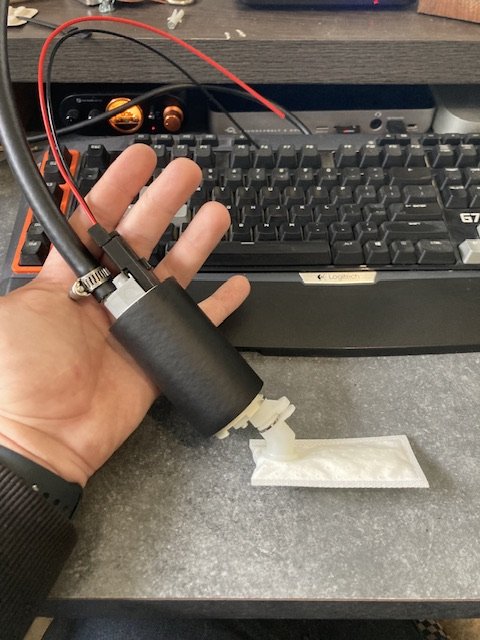
New pump and the world’s most expensive fuel hose showed up. Hopefully this pump and its bald eagles lasts a bit longer than the other one. Not sure how well it’s gonna fit in the lawnmower fuel container though

- 31 replies
-
- 11
-

-
I got all excited, I thought that was the @Esprit and @Snoozin Lantis
-
Ok so um… I did a thing. Installed a new fuel tank and fuel pump… And with the fuel pump relay earthed it starts like a dream.
- 31 replies
-
- 21
-
-

-
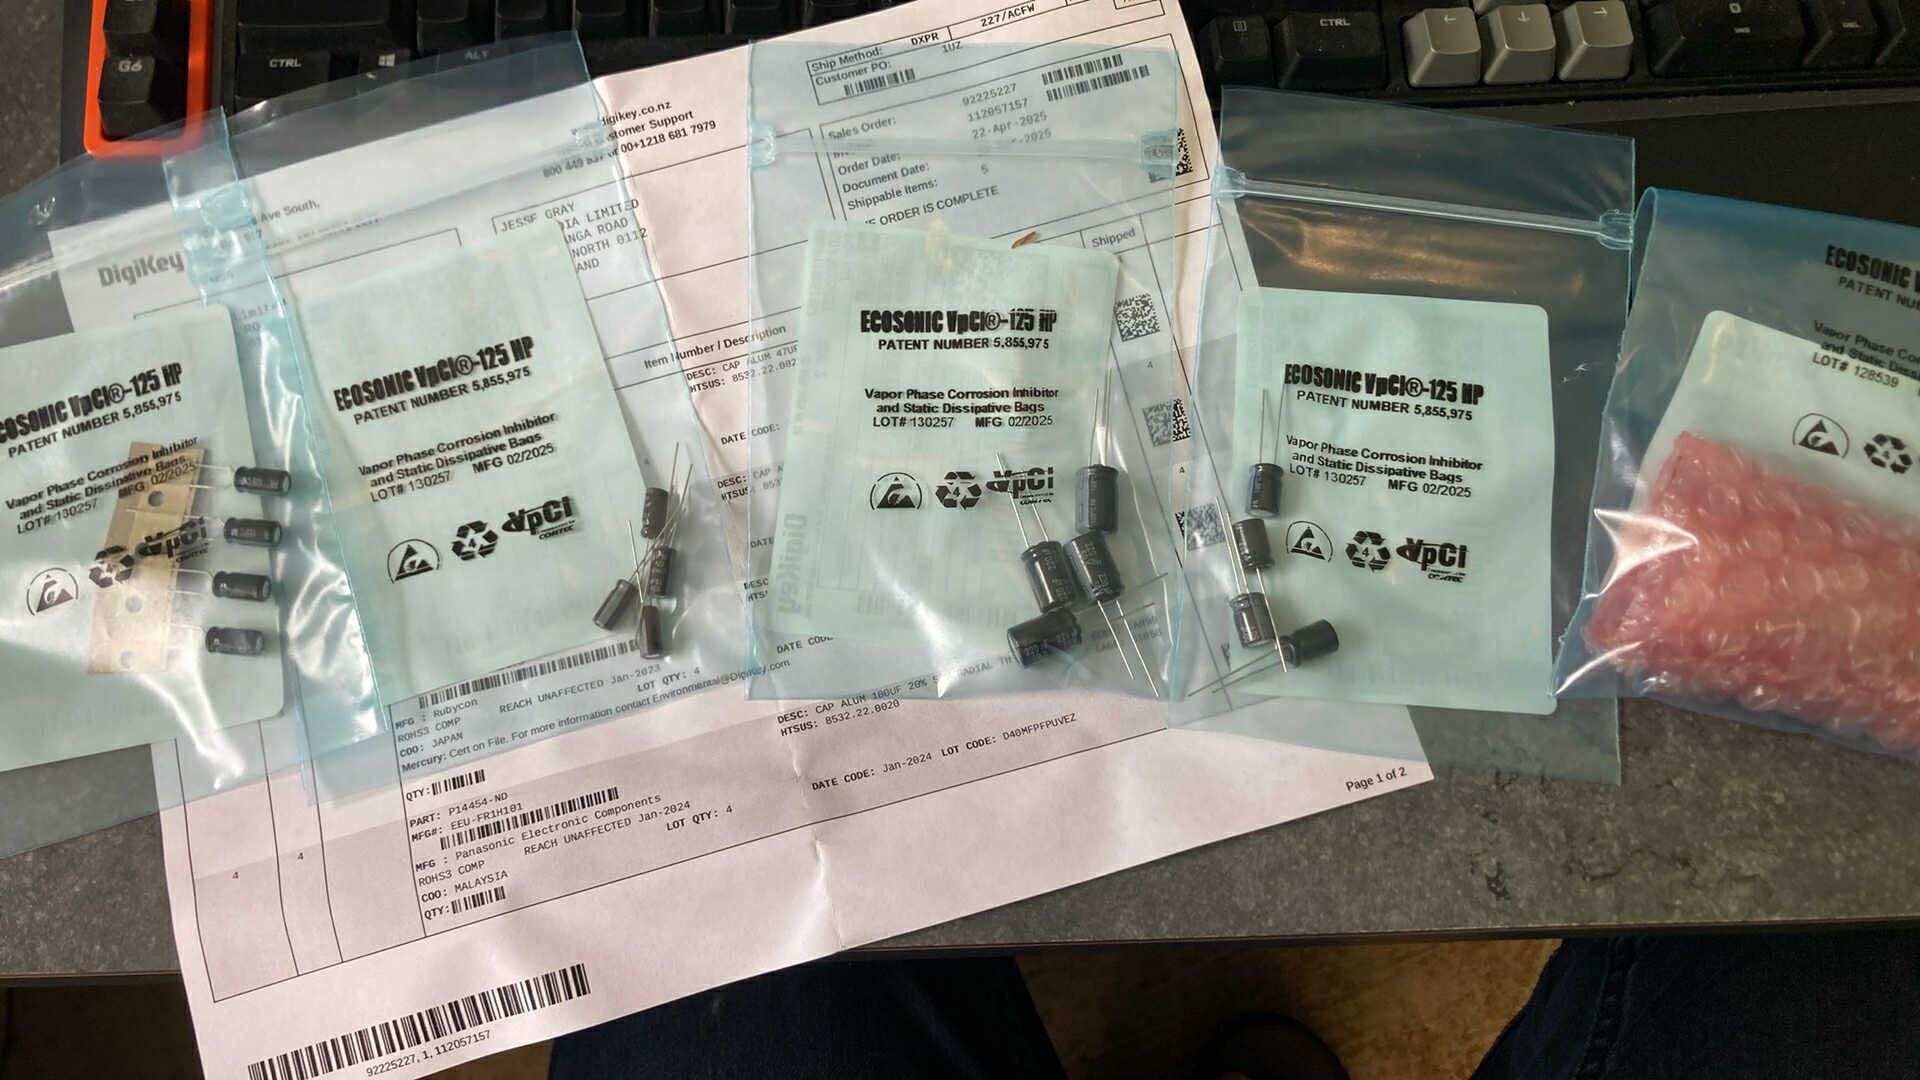
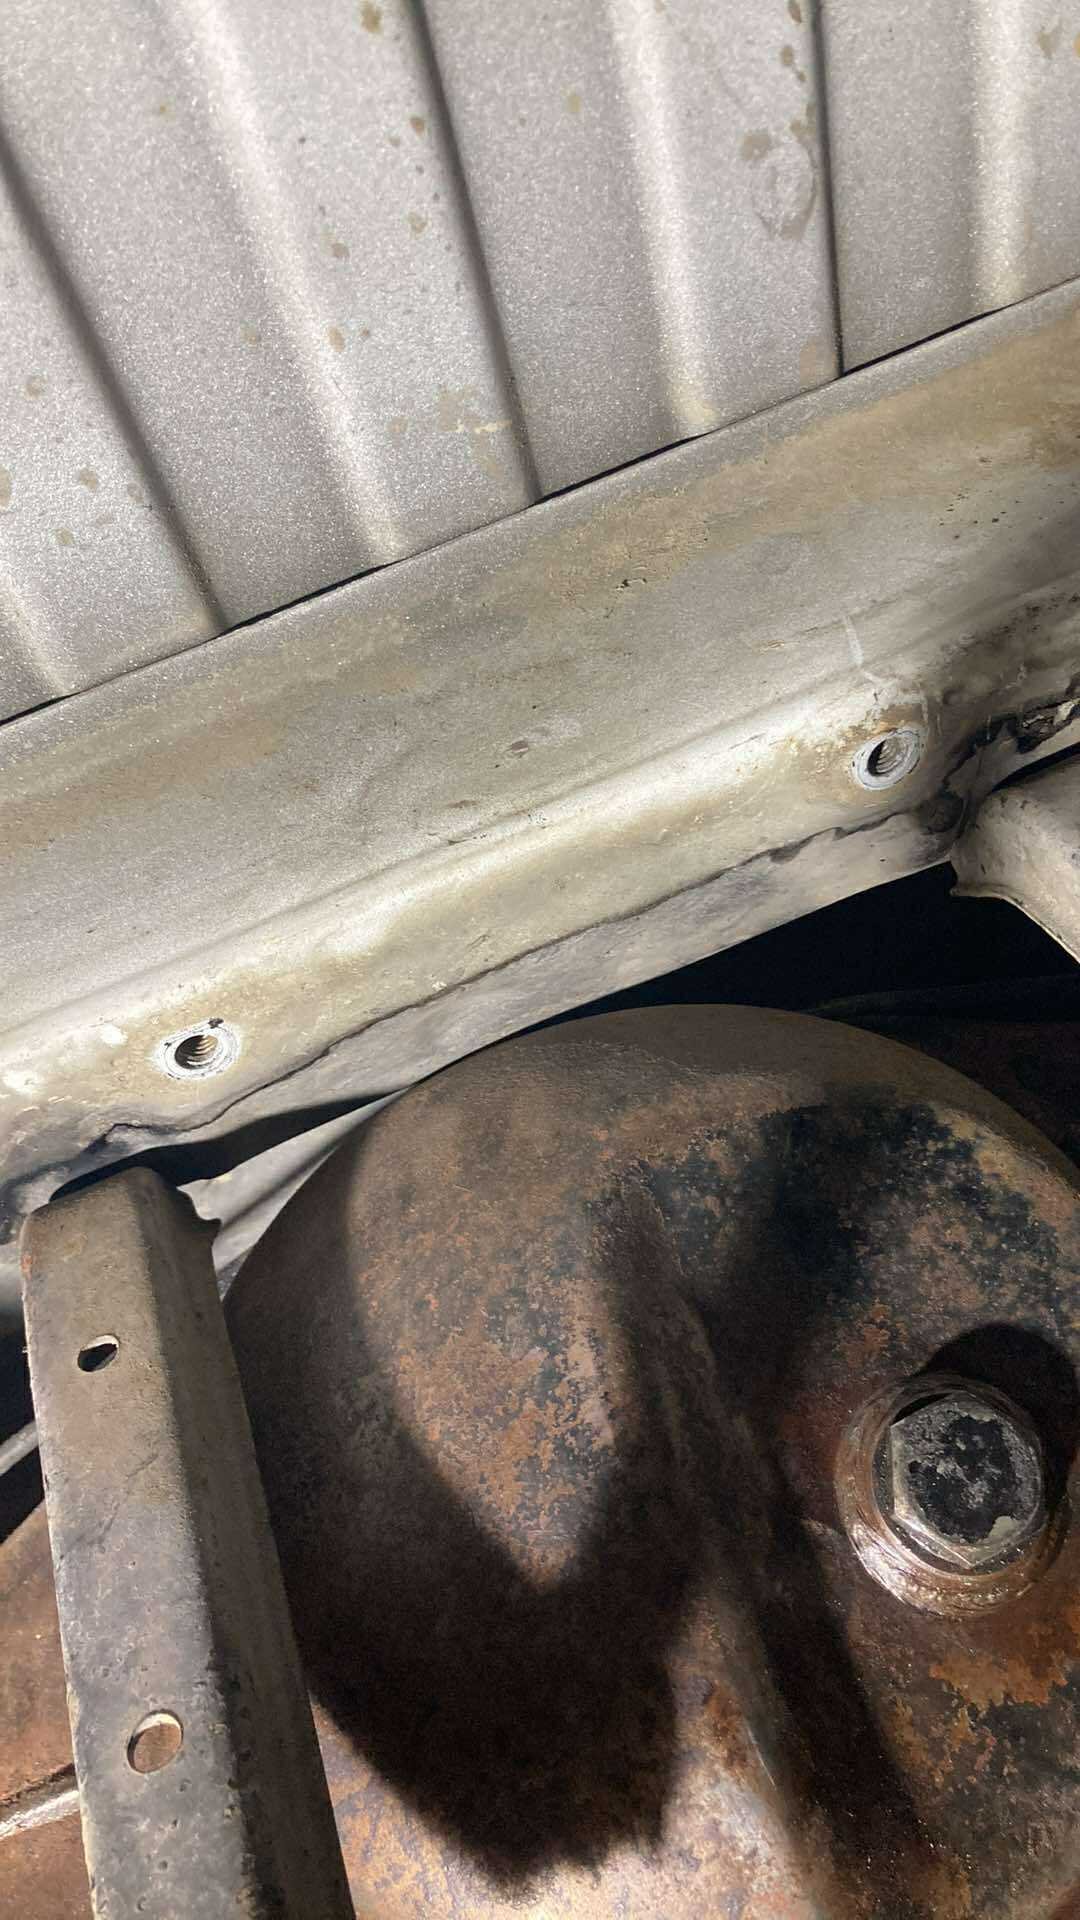
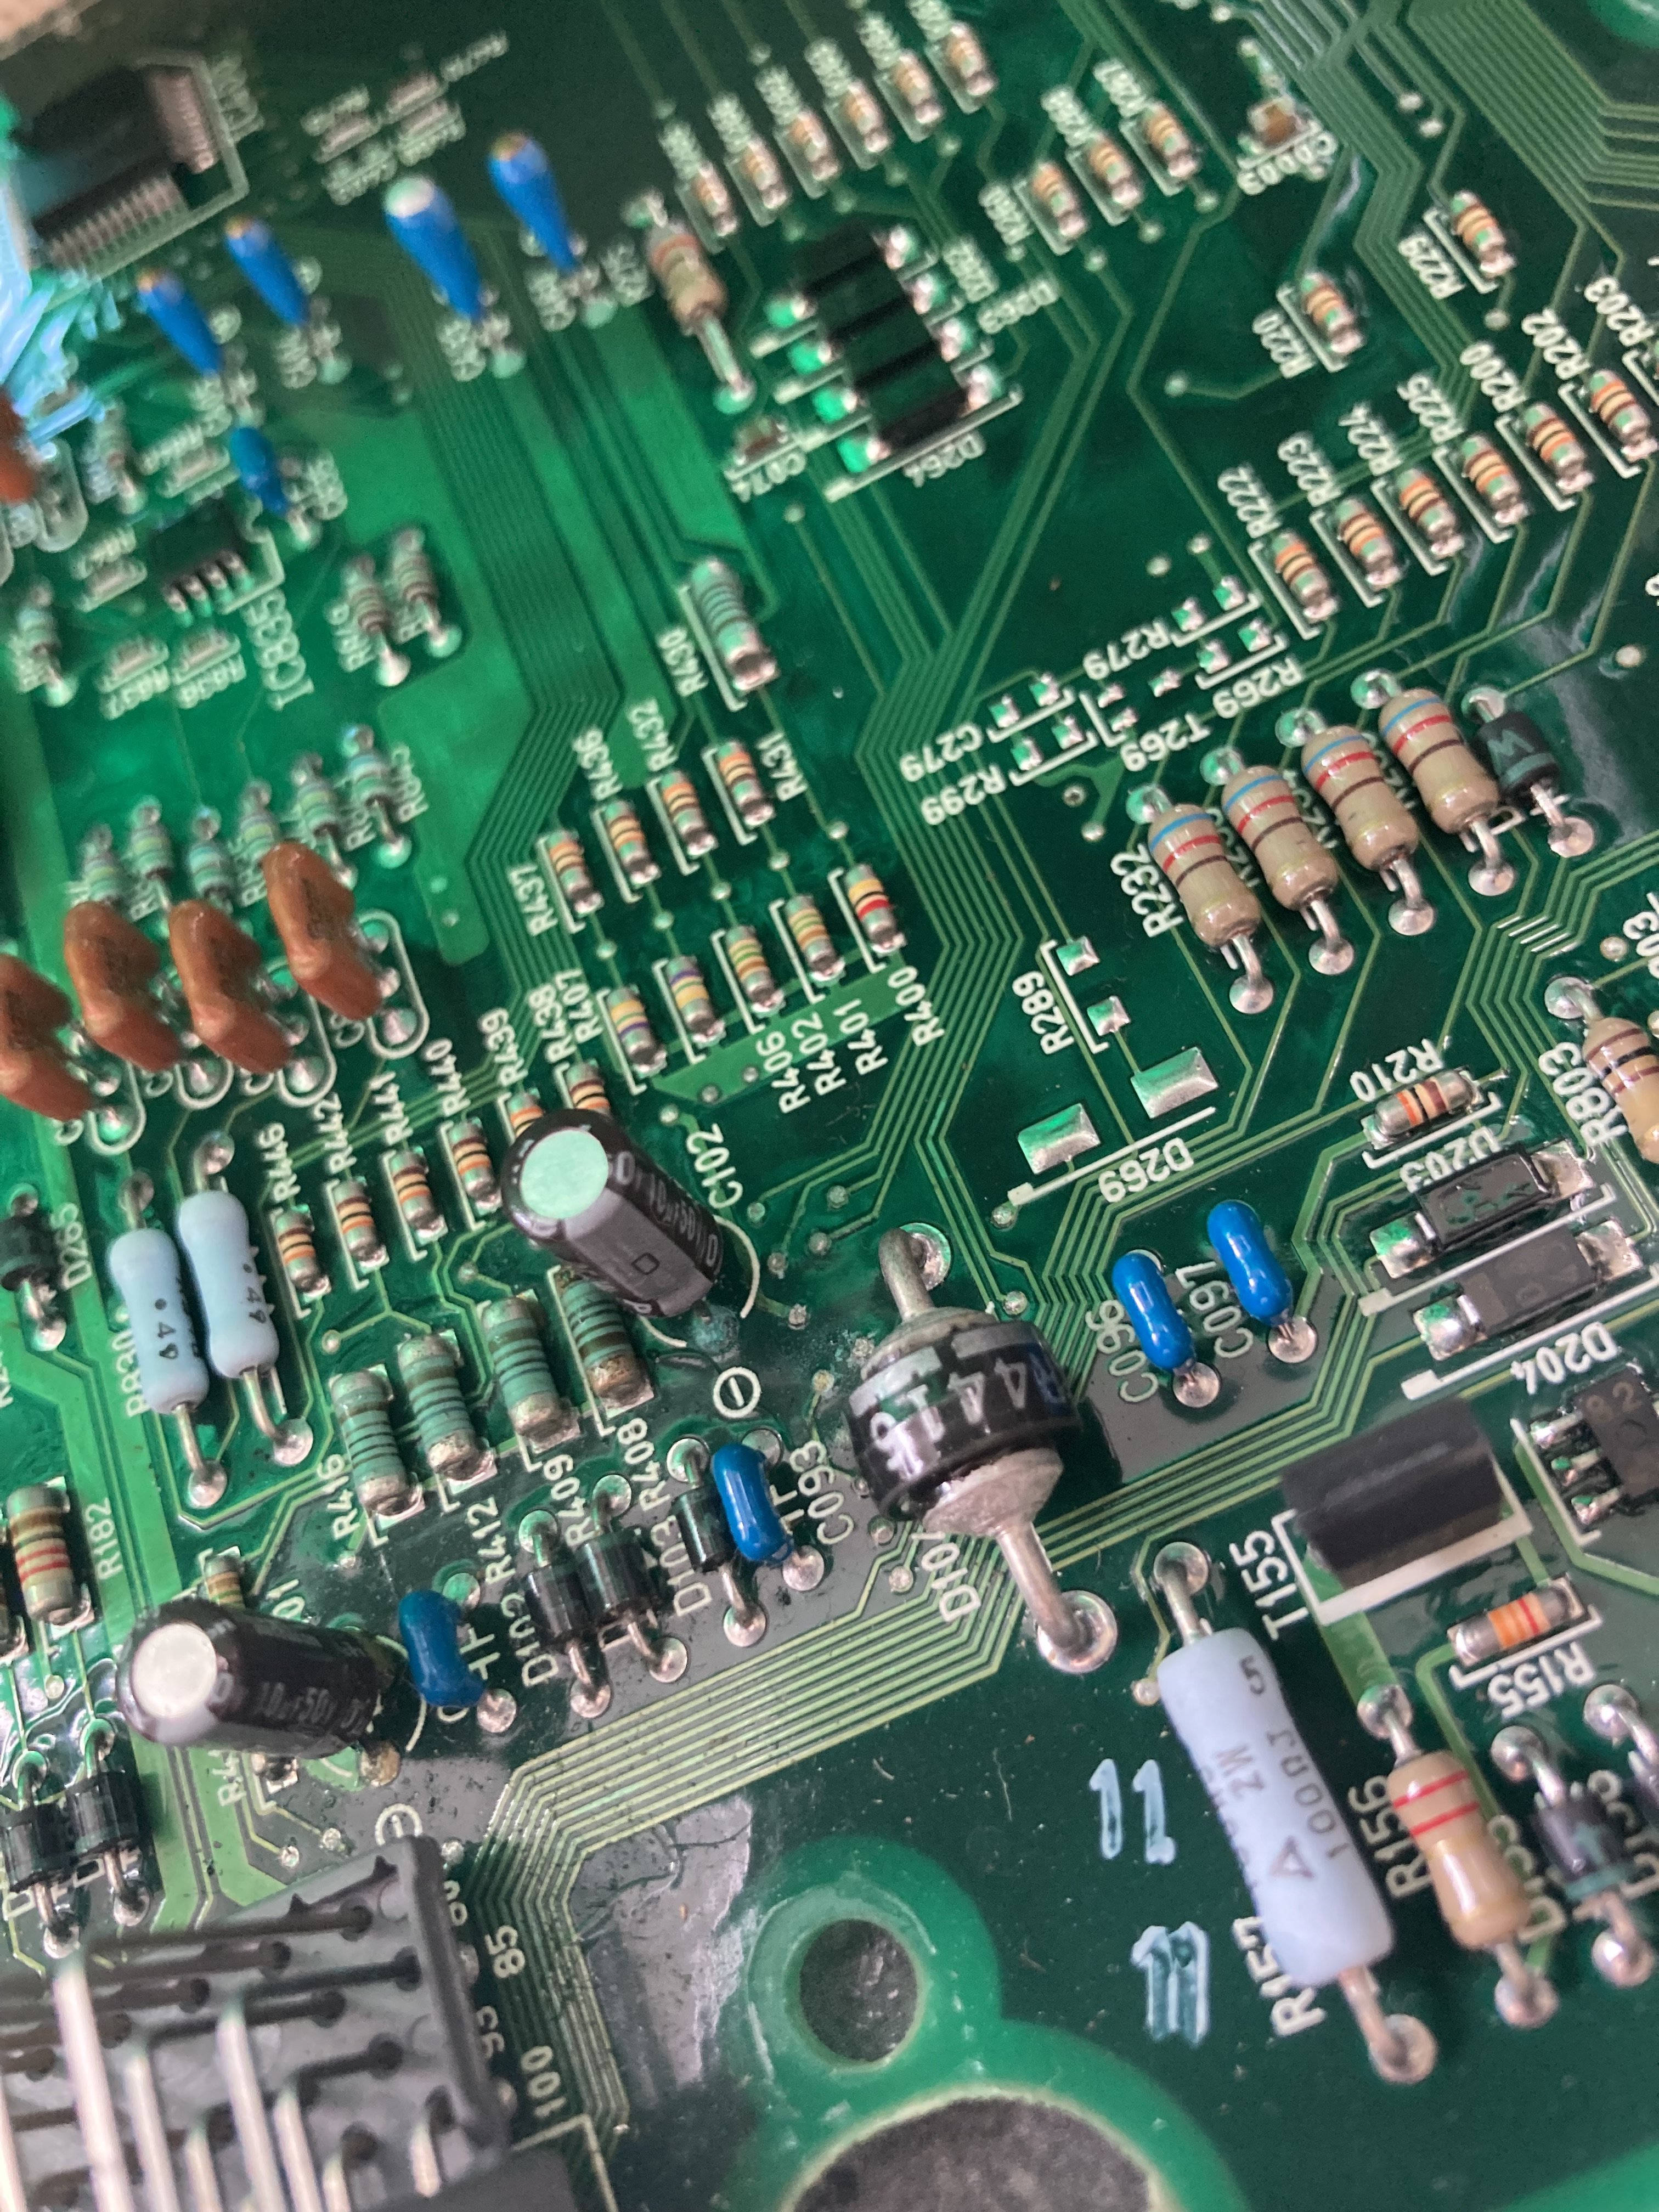
Caps recommended by an electronics expert on the interwebs showed up very quickly and affordably from Digi-Key. I've bought at least twice as many as I need and am working on getting brave enough to swap them out. While I had the fuel tank out, my diff surprised me by showing me it was touching the underside inappropriately. Seems there is a "too low". I've been getting the passenger's side rear guard mocked up and overthinking it a lot because I'm not 100% happy with how the driver's side one sits. So now I'm looking at finding the balance between lifting the car a little and how much floor I want to cut for clearance. It's looking like making smaller lowering blocks is going to be the easiest option as I seem to have a 19mm pin size, which is different to just about everything I've found and everyone seems to sell a 2" block, which is what I already have. I might buy some alloy flat bar and make some stackable modular ones that let me have different height increments.
-
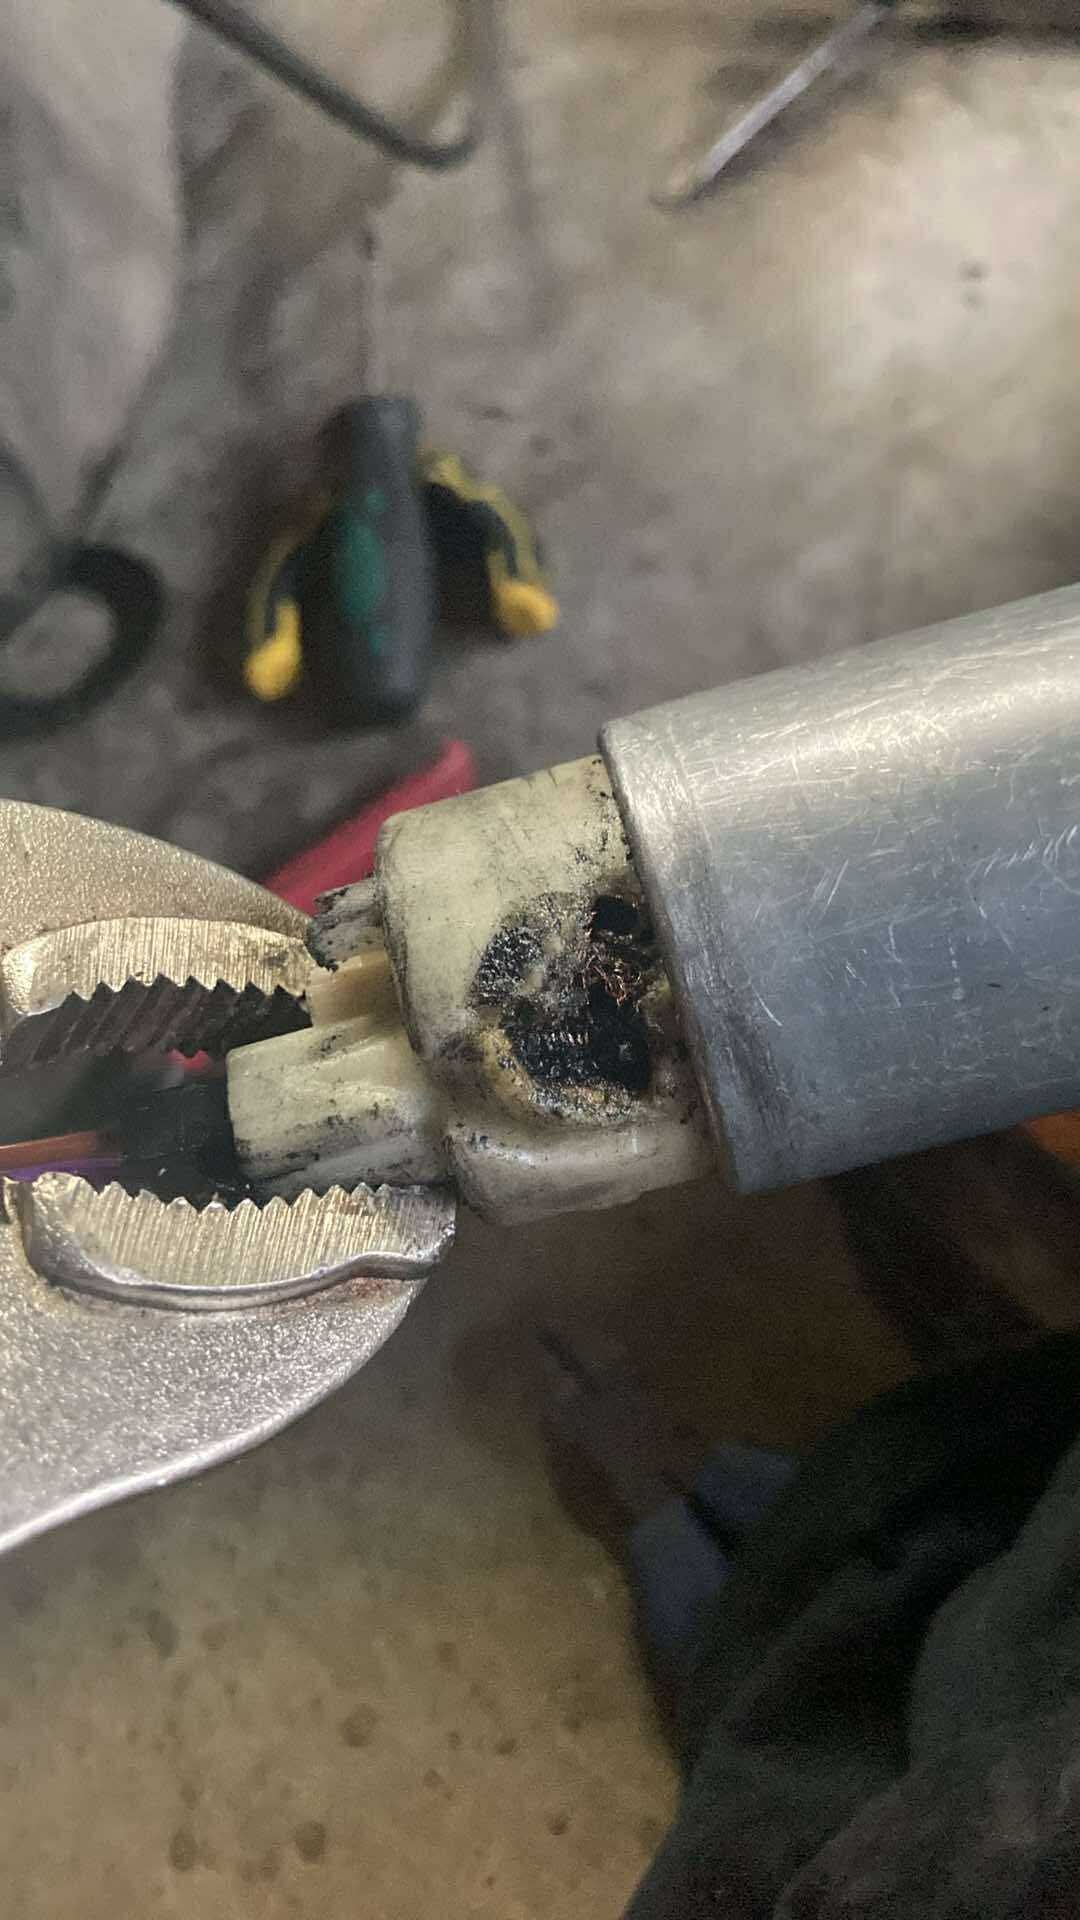
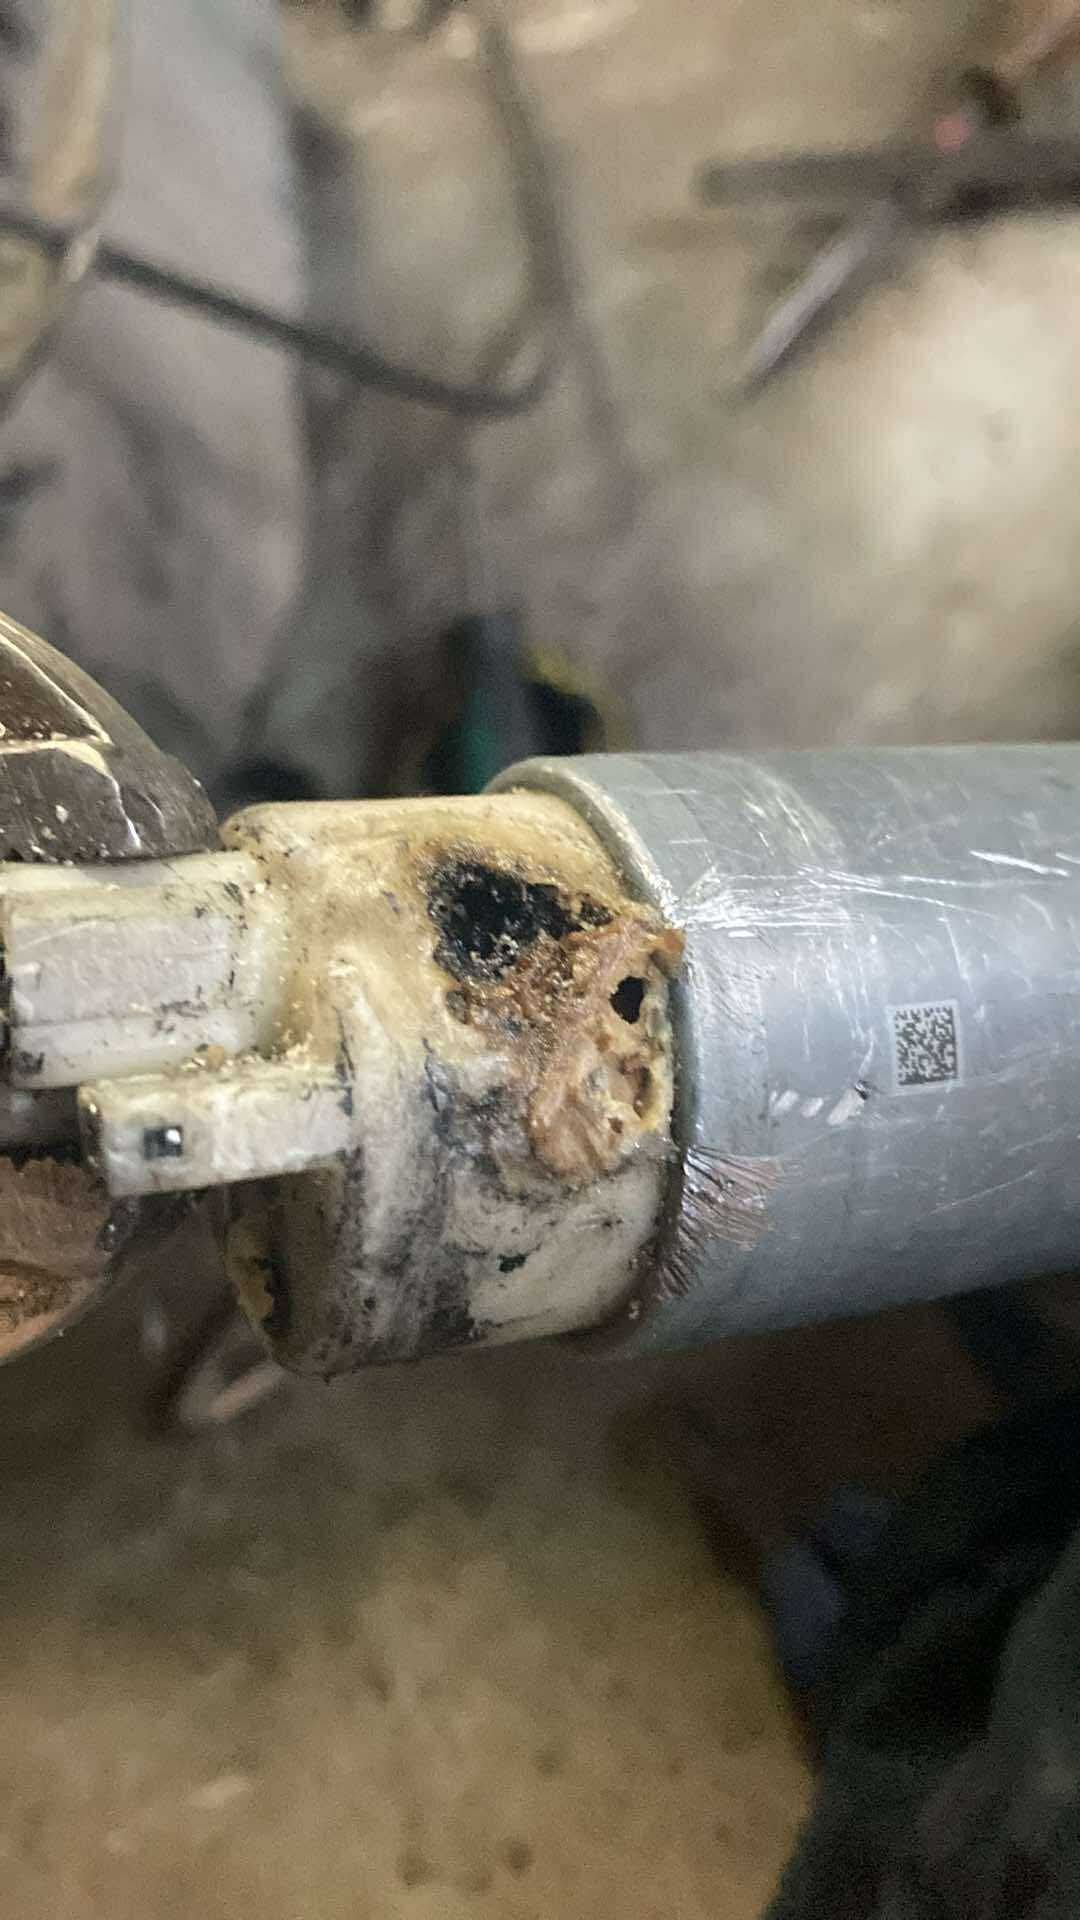
Well that’s less than ideal. 38mm fuel pump took about an hour to get out of the 45mm hole in the tank and needed the melted plastic bits cut off with a hacksaw blade through the hole. I “disassembled” it with a hammer after realising the plug was melted into it and there was melted plastic allll through it. Good times. Bought it from a well known NZ parts place as a Siemens pump too.
- 31 replies
-
- 14
-

-
-
-
like on @Roman's oil filters
-
"something like mrp" would need a pretty long rod
-
So I was reading some fancy documents somewhere about having to have sliders if your seat had sliders from the factory unless on an authority card. I have a Racetech that I was wanting to use as a driver's seat in my car, the belt seems to sit pretty happy if run through the belt holes in the sides of the seats and all is hunky dory except for the height of the seat on sliders. My thighs and the steering wheel end up in very close proximity for ingress and egress, past the bolster and it seems much safer if the seat just sits on the seat subframe without the slider. Is the slider a complete non-negotiable and should I just stick to my Recaros?
-
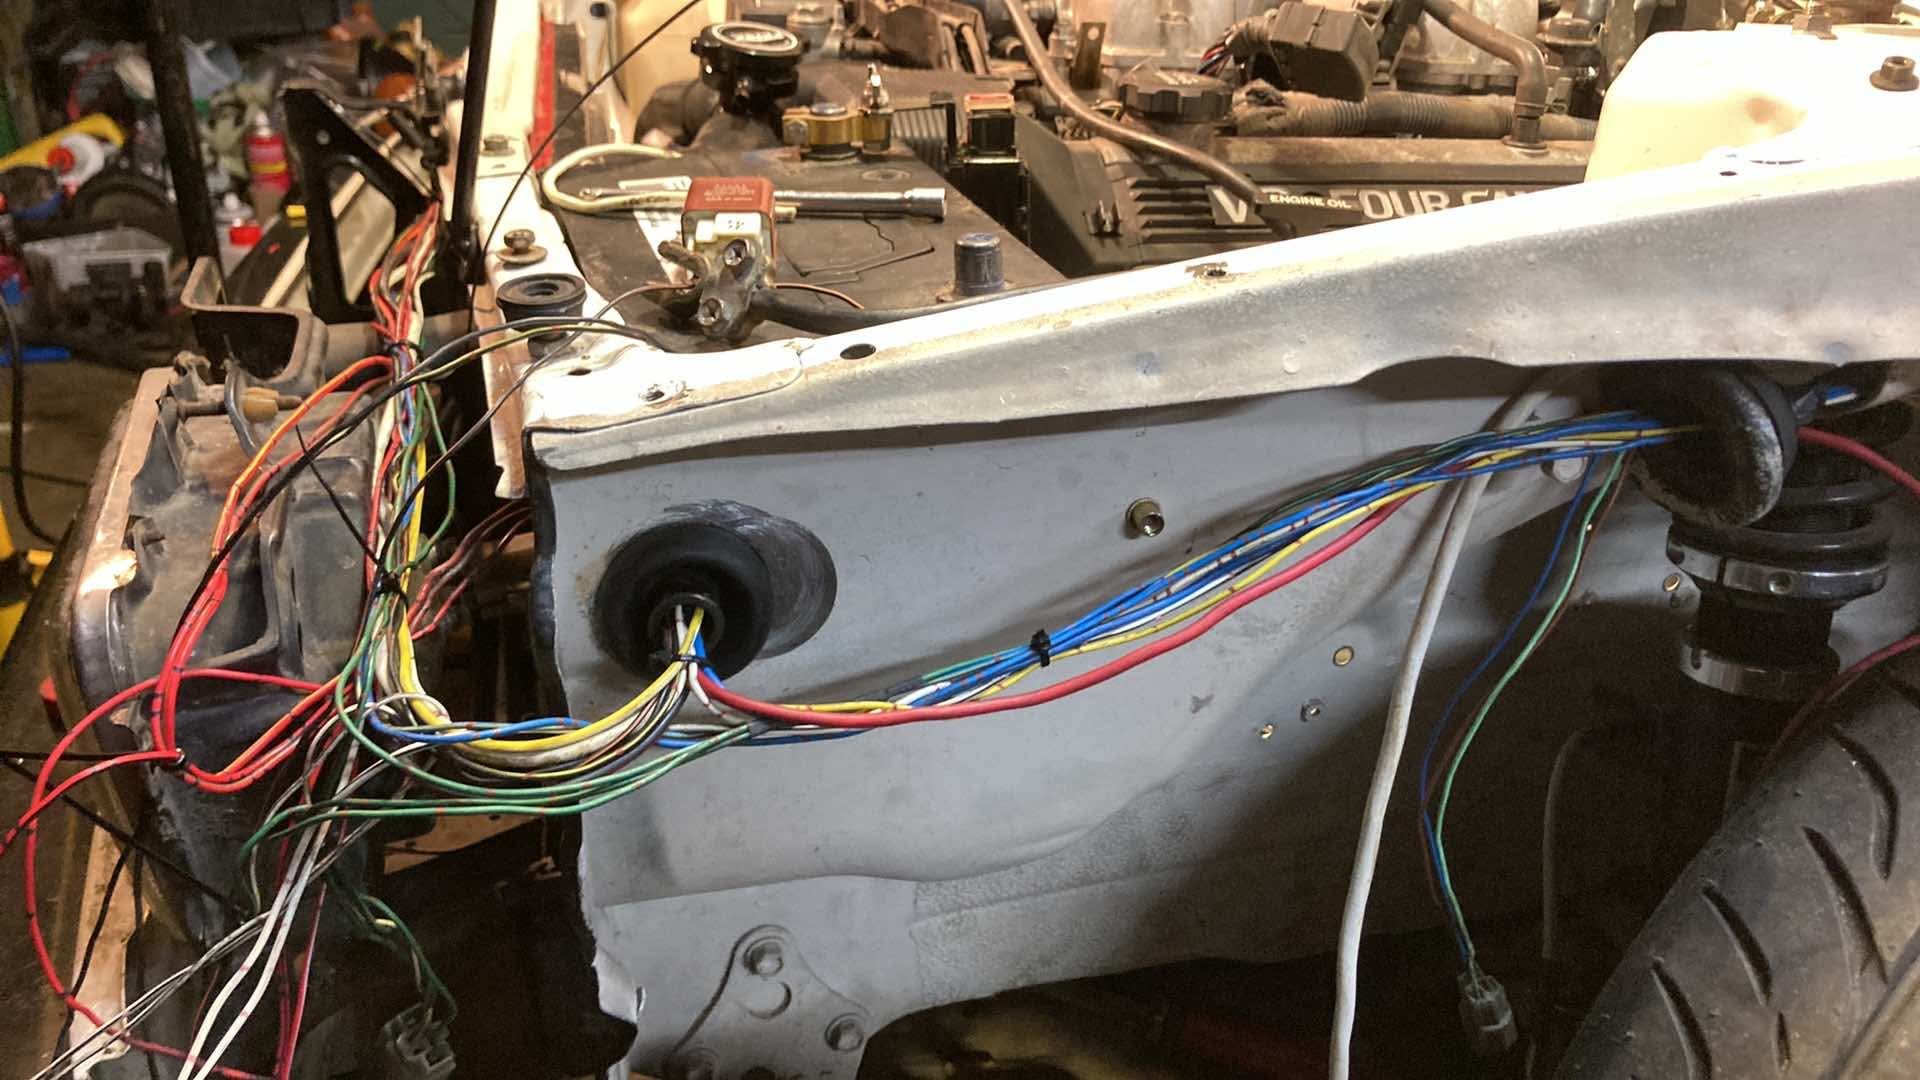
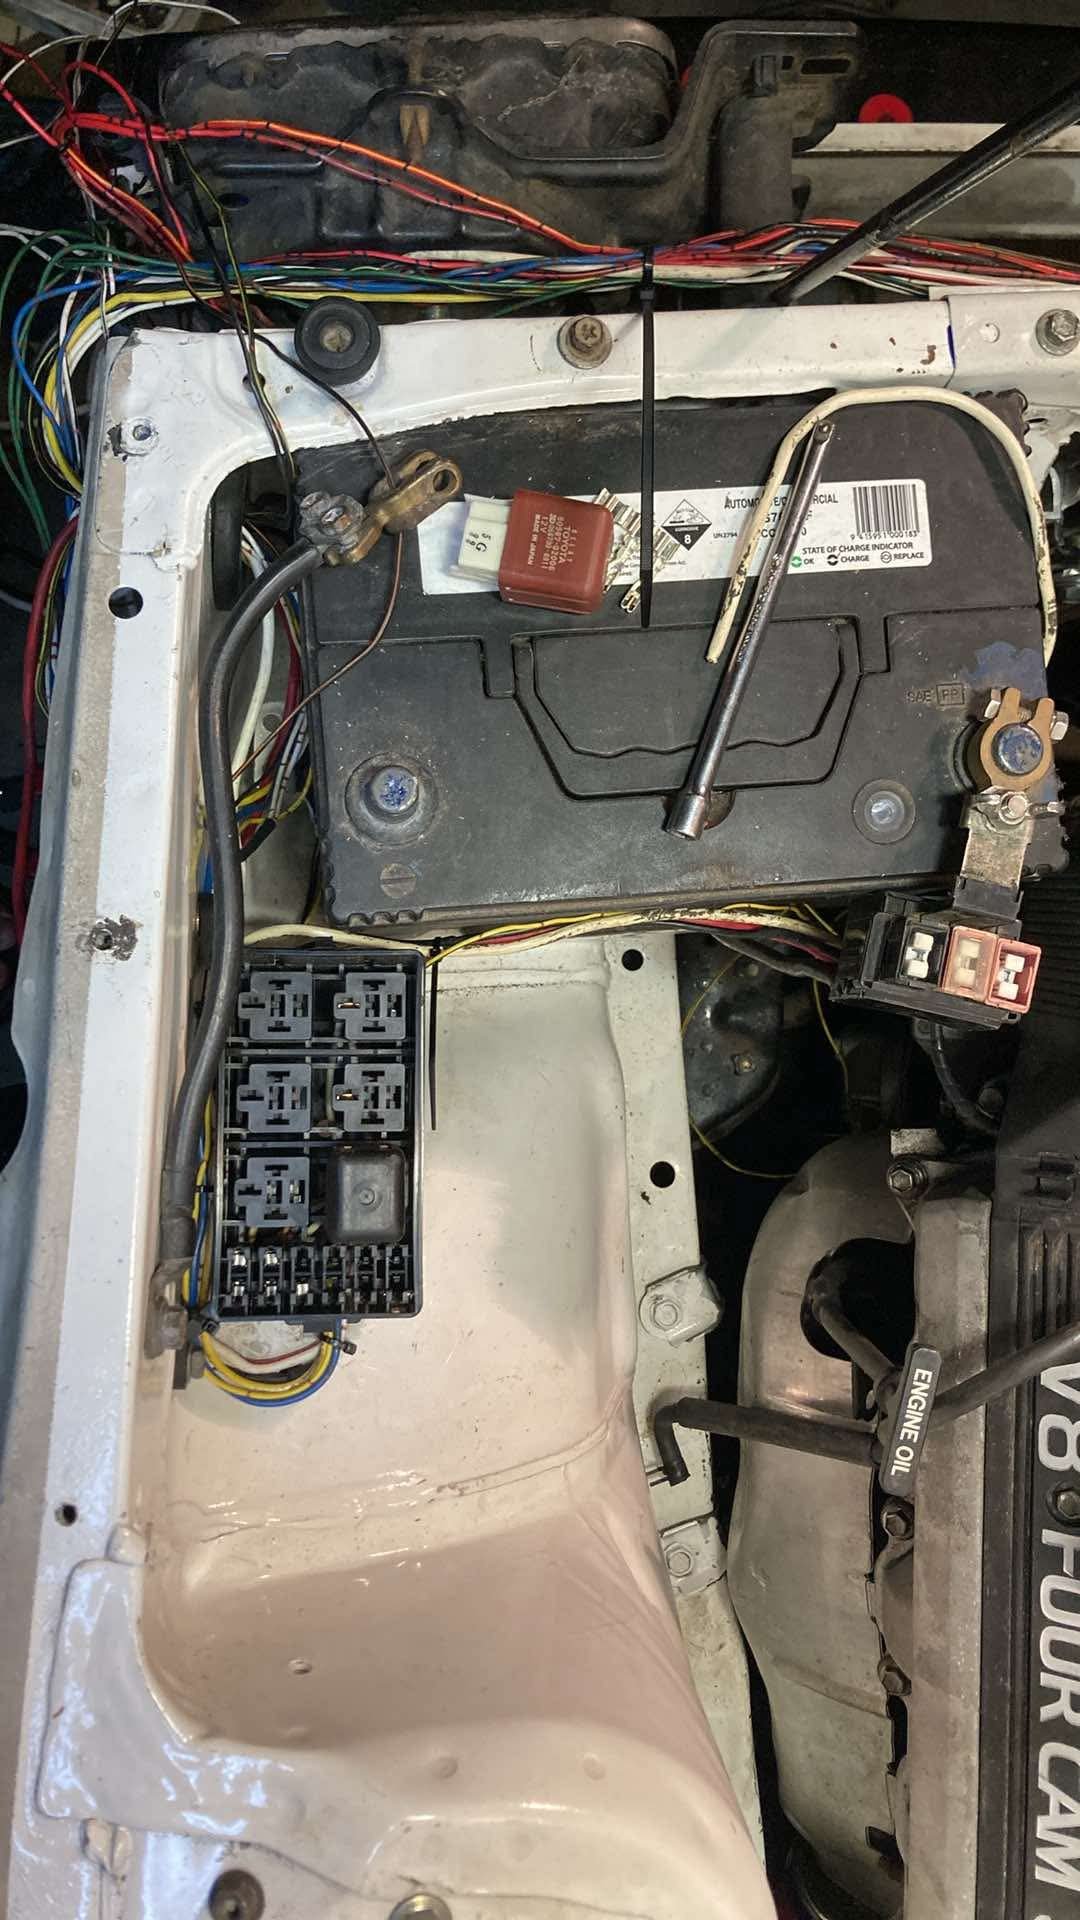
So I made a huuuuge push on the wiring over Easter. - Oil in - Filter plumbed - Tacho dash wired - Engine bay fusebox partially wired - Engine 99% wired - Fuel lines temporarily connected Bought a new battery for it and put some nice big earths on it. It cranks like a champion, but the FC output on the ECU isn't earthing to trigger the circuit opening relay. I hard wired the fuel pump and it looks like it hasn't appreciated sitting for a while and just heats the wires up rather than turning, so looks like I'm dropping the tank and getting the pump out and potentially buying a new one. I pulled the ECU apart, and it's got the old 90s leaking capacitors, I looked at ECU repair prices, and they were on par with buying a second-hand link, so I've ordered all the capacitors off DigiKey and will start with trying to repair it and if all else fails go to a second hand link. Not looking forward to pulling the tank and pump out, but @di0n has sold his Alfa so at least there is more room in the shed for activities now. I have a bunch of photos, but can't be bothered sorting through them right now.
- 31 replies
-
- 12
-
-
Pretty sure @kpr has had some made
-
Here I was reading through thinking "I hope he's put a picture of the sandblaster in" and you did. Thank you good sir
-
It's lucky Kris does all the work when you two are at work, coz I've seen your output and I've seen his
-
Fuck me, those collectors are art. What would secondaries to the diff like they do with rotary primaries be like? Obviously totally different engines, but different shit is cool
-
So I have a tacho dash for my ke70 but it only has three warning lights on it, battery, handbrake and oil pressure. It’s got three more spaces for lights on the back of it next to those three, but the flexible plastic circuit board is insulated over the pads for the bulbs. Whats the best way to remove this green insulation they these flexible dashboard PCBs from the 80s have?
-
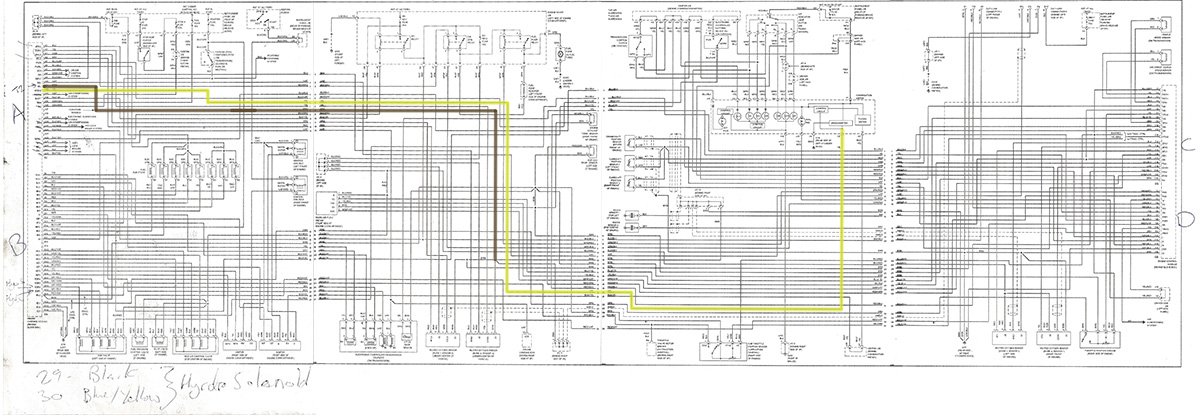
Last night was a big night, I spent hours crawling through schematics trying to work out what I'd done years ago when I first got it running and working out what all the wires from the Corolla were that I'd used for switched and starter feeds. Got the ECU, alarm and fusebox tucked away nicely and untangled the end of the loom. Then spent 3 hours trying to work out why one of the factory injector wires seems to run through the body loom. *I've blurred Kelvin's plug pinout coz it's his IP and I've paid him for it. I really should offer to make him some tidier diagrams
- 31 replies
-
- 12
-
-
An m-series headgasket is just a fuse for all the horse ponies
-
@kpr wouldn't have to spend so much time on his mill, I mean lathe, I mean horizontal drill press, chopping up 4ages if he'd started with the peak of Toyota performance instead of messing with that 16v junk
-
Funnily enough (as someone with ADHD) this is a rabbit hole that I've been down (when I was supposed to be working). There is a video I found of an American engineering dude on YouTube and he did similar, except he bought what I seem to remember was a treadmill motor, as this gave him speed control. I can't seem to find it at the moment, but he does a lot of cool tool conversions EDIT: found
-
So I was just thinking... The M13 and K15 Jimnys still use a divorced transfercase As such their manual gearboxes are essentially rwd gearboxes that bolt up to the M16/K14 Swift motors
-
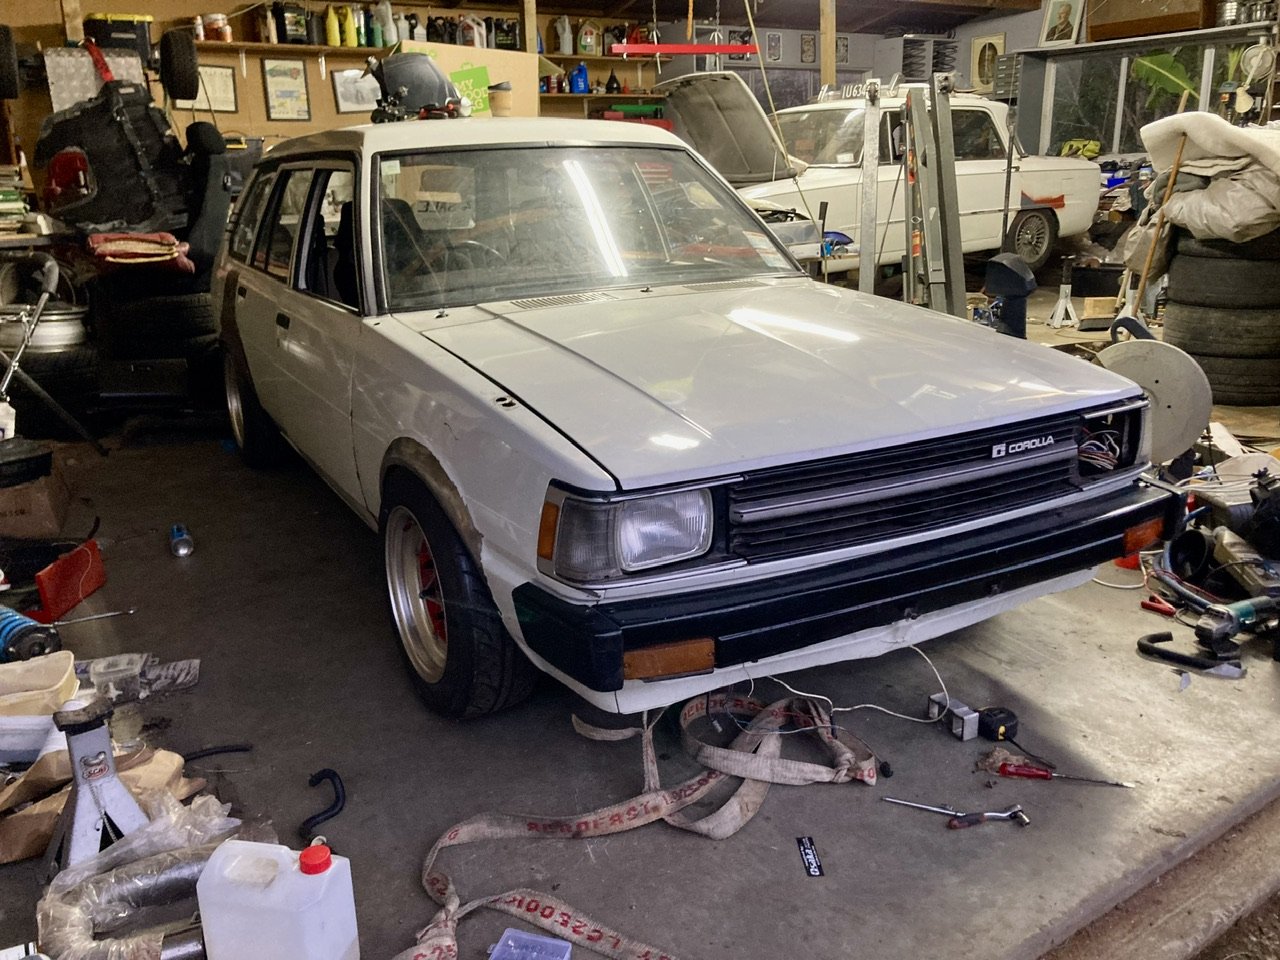
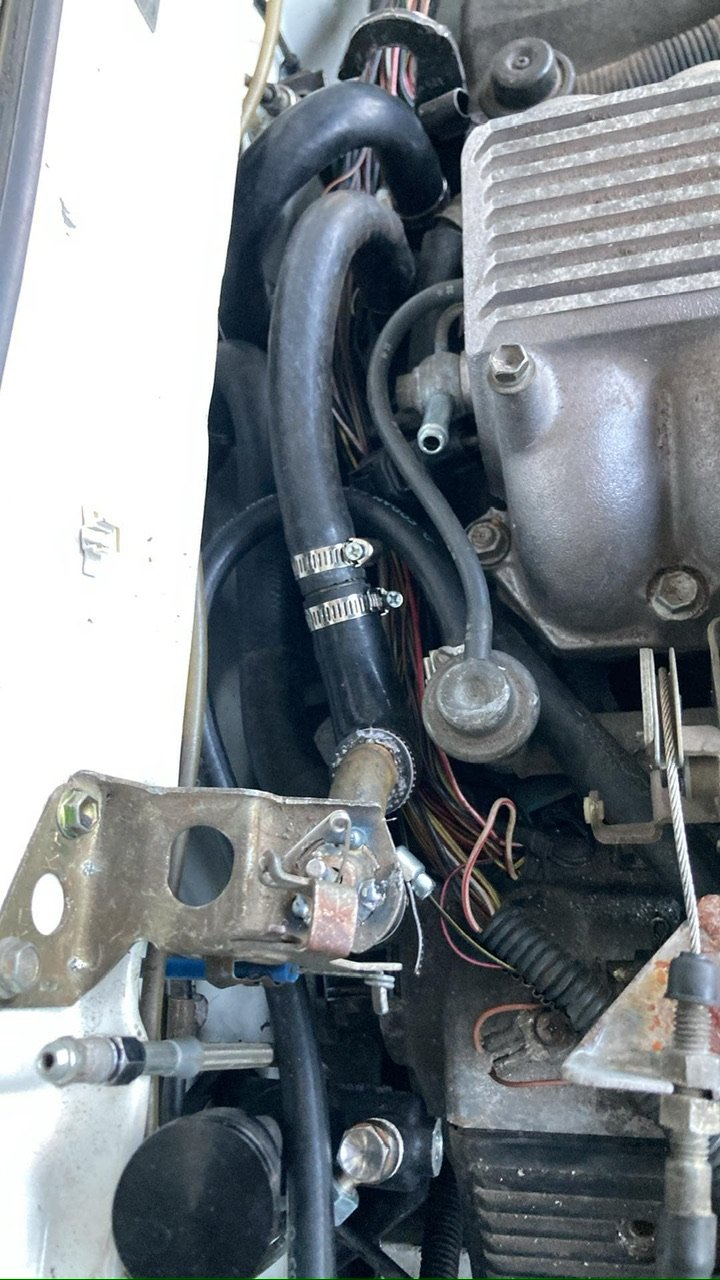
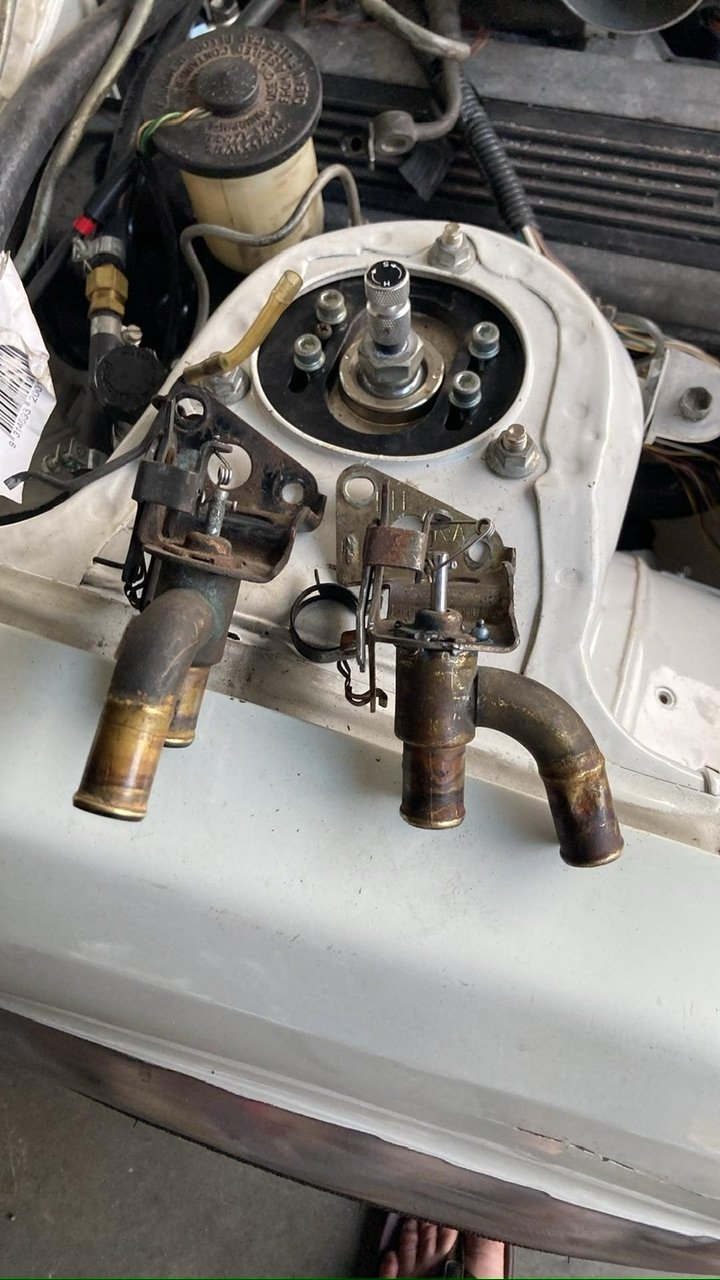
Just coz I'm on a roll, and wasn't super keen to work yesterday I reassembled more of the front of the Corolla. I'd been trying to work out the best way to get the heater hose to the right and keep the hoses running semi-decently. I realised the heater tap was held together with little tabs so I spent an hour or so pulling it apart, sticking a big hole in my hand with my pick tool and then reassembling it rotated 90 degrees to the right. I got impatient trying to get all the tabs to line back up so ended up tacking the top cover back on it, hoping that it's gonna work properly now that I've pulled it apart. You can see the difference between them here and at least I have a spare tap should I need to replace it. I also trimmed the passenger's side header heat shield coz I think it looks better than the factory header. Hopefully the heat shields help with keeping some of the heat out of the engine bay. I think I'm gonna make one up for the driver's side that attaches to the chassis rail and deflects the heat downward. - Goop up sump pan. - Re-mount remote oil filter (in the engine bay this time, coz disconnecting it to pull the engine out is a pain) - Connect fuel lines at tank and in the engine bay. - Connect last heater hoses. - Fill with oil - Fill with water - Rebleed brakes and clutch (potentially add a clutch pedal stop so I don't over extend my hydraulic release) - Finish off the alarm/ecu wiring now that I've finalised location of the ECU and alarm and add a plug to the body loom for the ECU. - Alternator wiring I looked long and hard at where I was gonna mount the oil filter and I think I'm shit out of luck for a spot in the engine bay where I can both remove it easily, have it look tidy and not spill oil all through the engine bay. So it's likely going behind the front bumper again.
- 31 replies
-
- 15
-
-
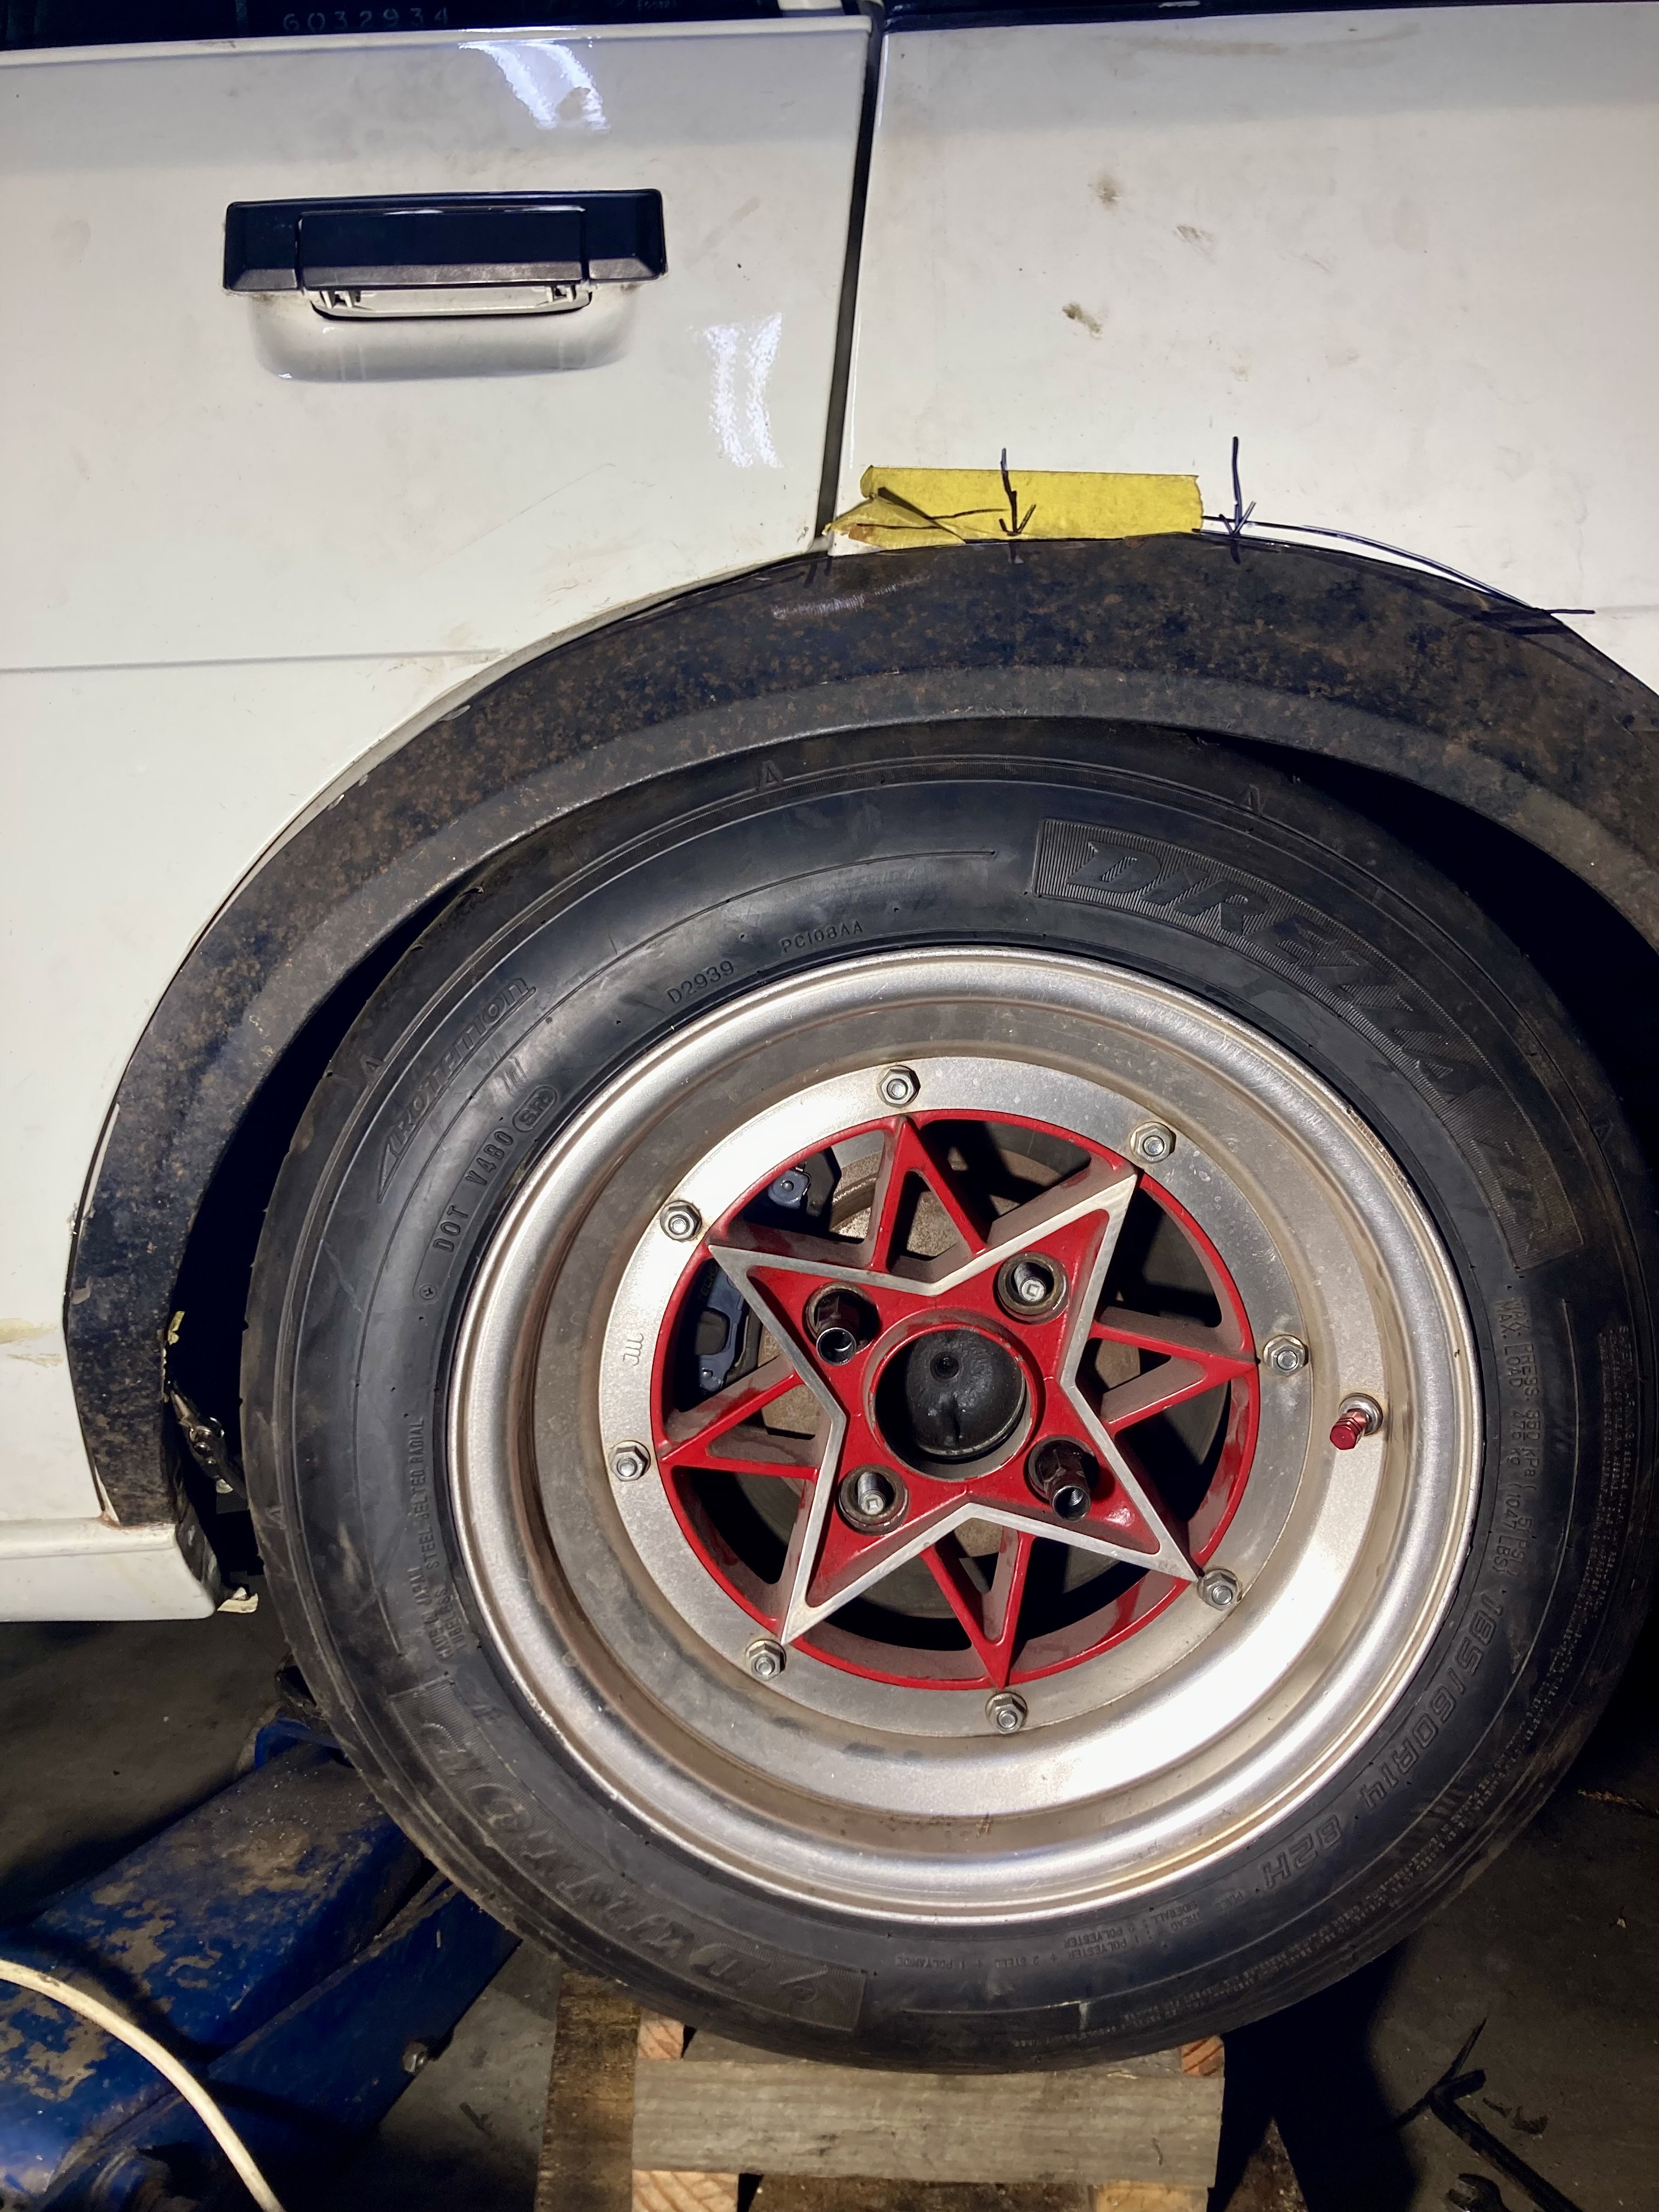
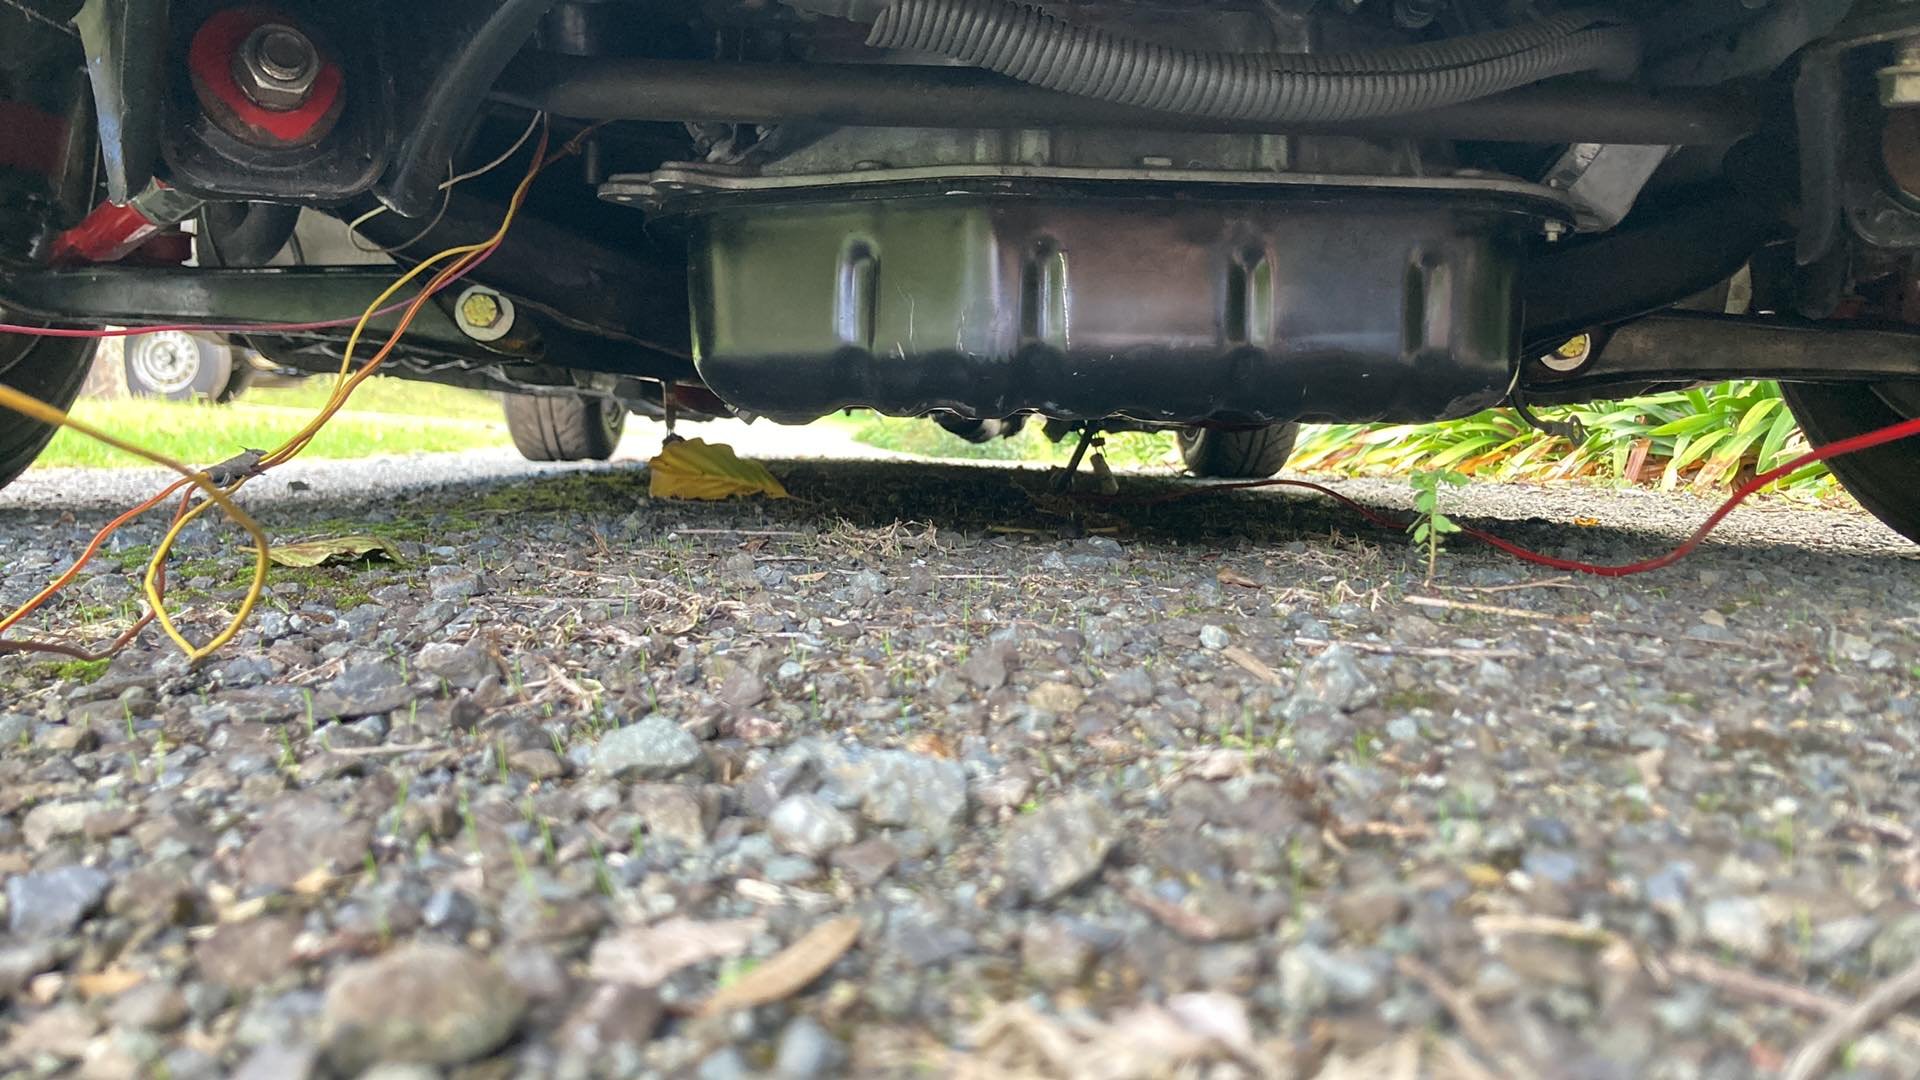
My little journey down the driveway has highlighted that the car is too low for how I want to be able to use it. I've got 50mm blocks and the Cs Garage leafs in it at the moment, but have some 40mm blocks to put in. I also need to cut my rear guards a little higher (up toward where the front flare comes down to) to give me some more travel before the tyre hits the guard. The front tyres are rubbing the guards all the time just rolling, so I'll lift the front up so there is a bit of guard gap. As it sits there is 80mm of clearance to the front edge of the sump pan, which isn't actually that terrible, but it's definitely lower than everything else and the crossmember has a lot of war wounds, so I'd like to section it to get it at least in line with the crossmember, which is probably only a 20mm sliver to take out. Ideally I'll wing it, so I might design something up in fusion and work out the best way to manufacture it, maybe a combo of 3d print and bolt together. The rear flare (a ke70 front flare) that's currently attached to the car looks like arse too, so I'm gonna cut that off and rotate it and try and get it fitting nicer. Ideally I'd like to drive it this week so for that to happen I need to do the following... - Goop up sump pan. - Re-mount remote oil filter (in the engine bay this time, coz disconnecting it to pull the engine out is a pain) - Connect fuel lines at tank and in the engine bay. - Connect last heater hoses. - Fill with oil - Fill with water - Rebleed brakes and clutch (potentially add a clutch pedal stop so I don't over extend my hydraulic release) - Finish off the alarm/ecu wiring now that I've finalised location of the ECU and alarm and add a plug to the body loom for the ECU. - Alternator wiring I thiiiiink that that is everything that needs to happen to drive it up and down the driveway. The goal is to have it driving by my birthday on Friday.
- 31 replies
-
- 18
-
-