Rhyscar
-
Posts
920 -
Joined
-
Last visited
-
Days Won
1
Everything posted by Rhyscar
-
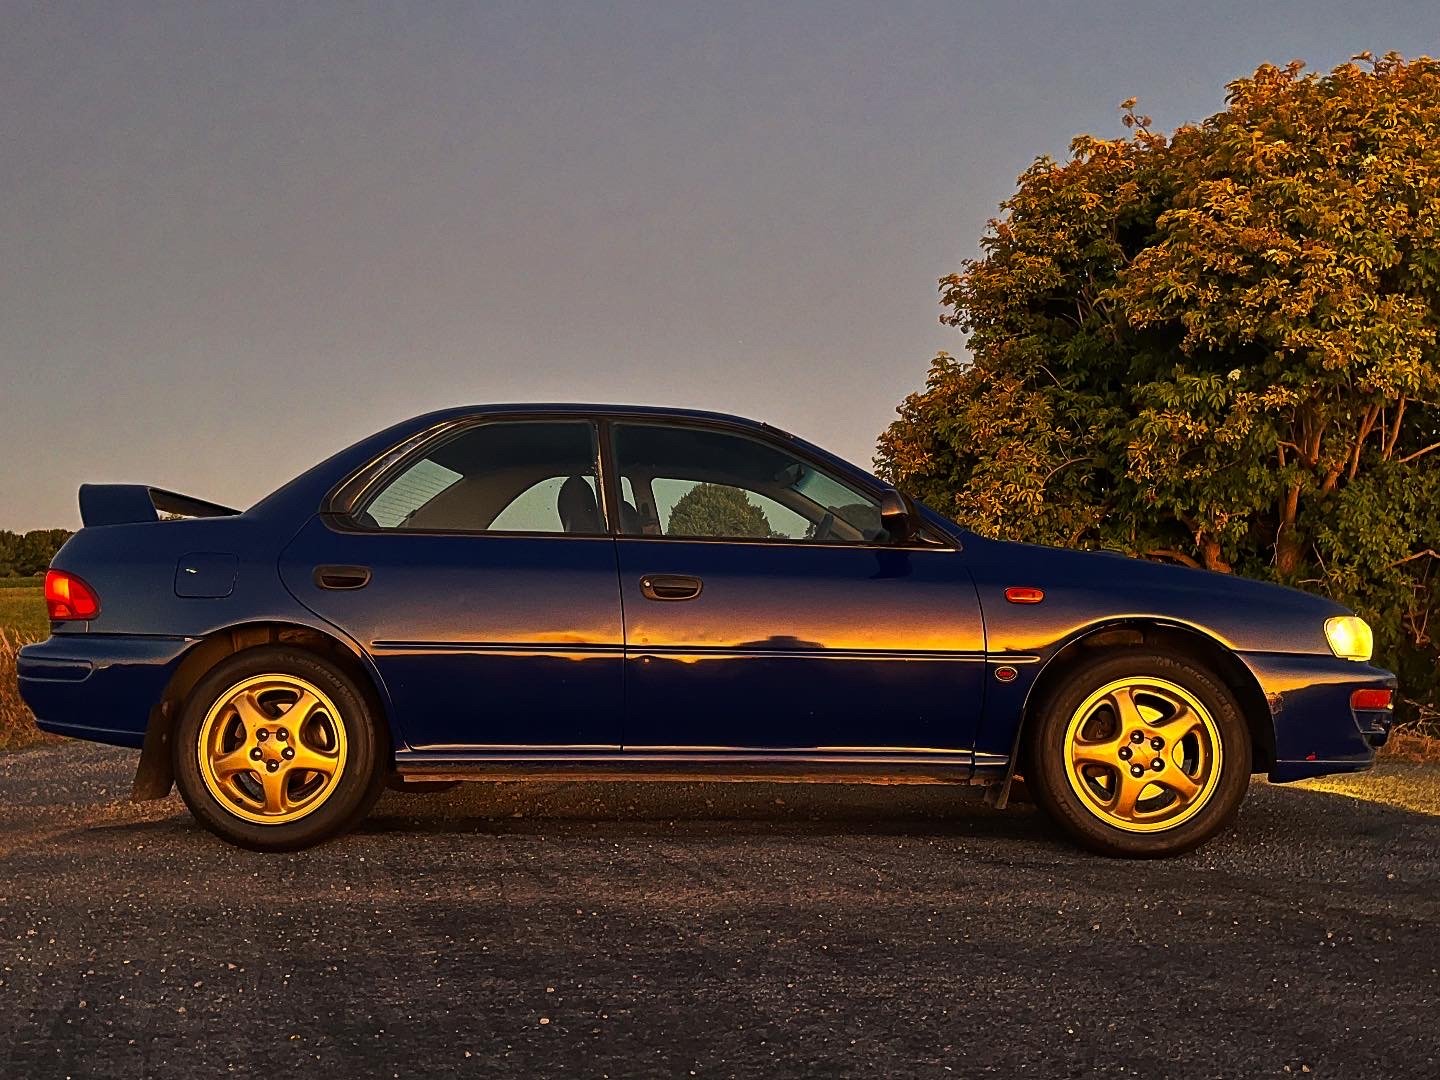
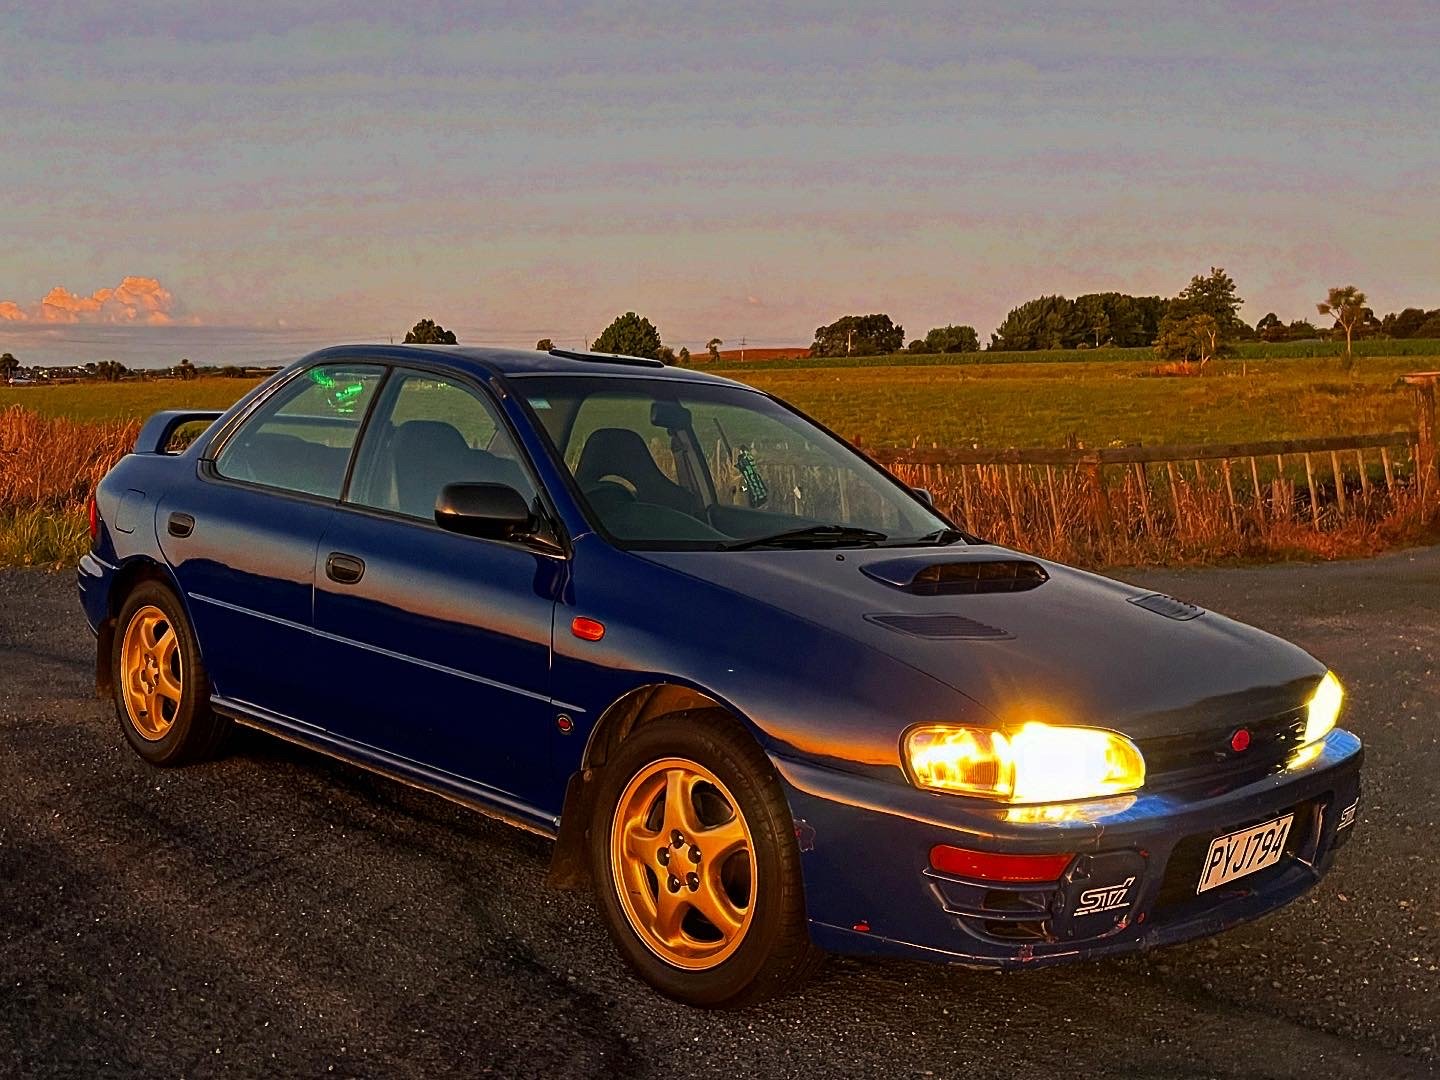
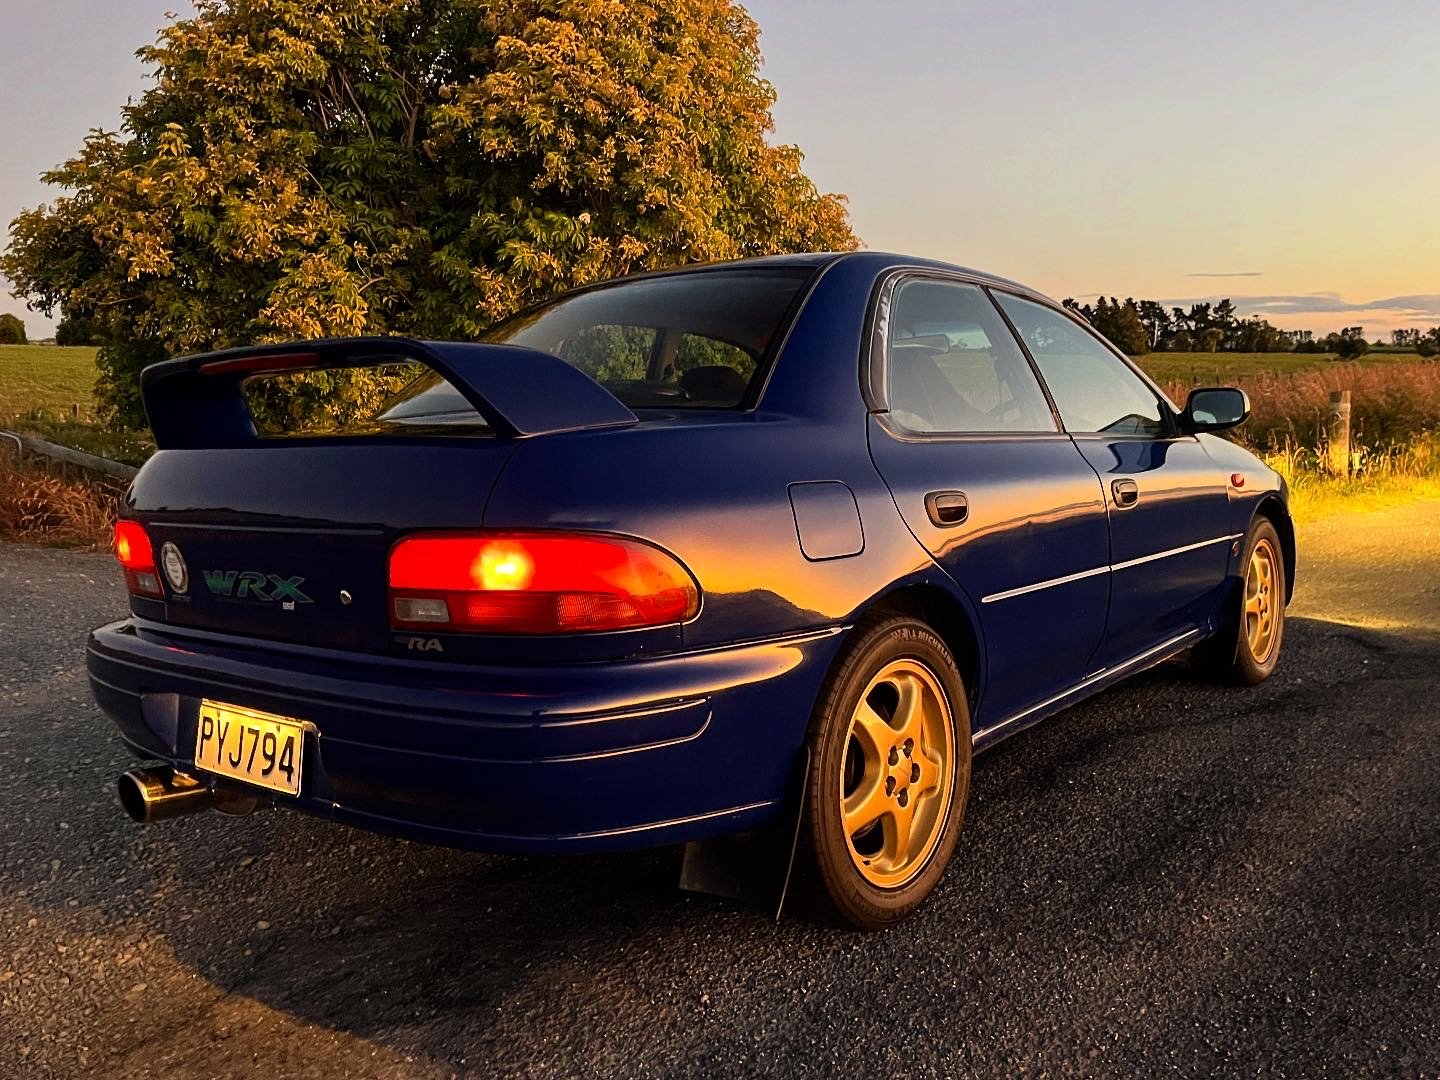
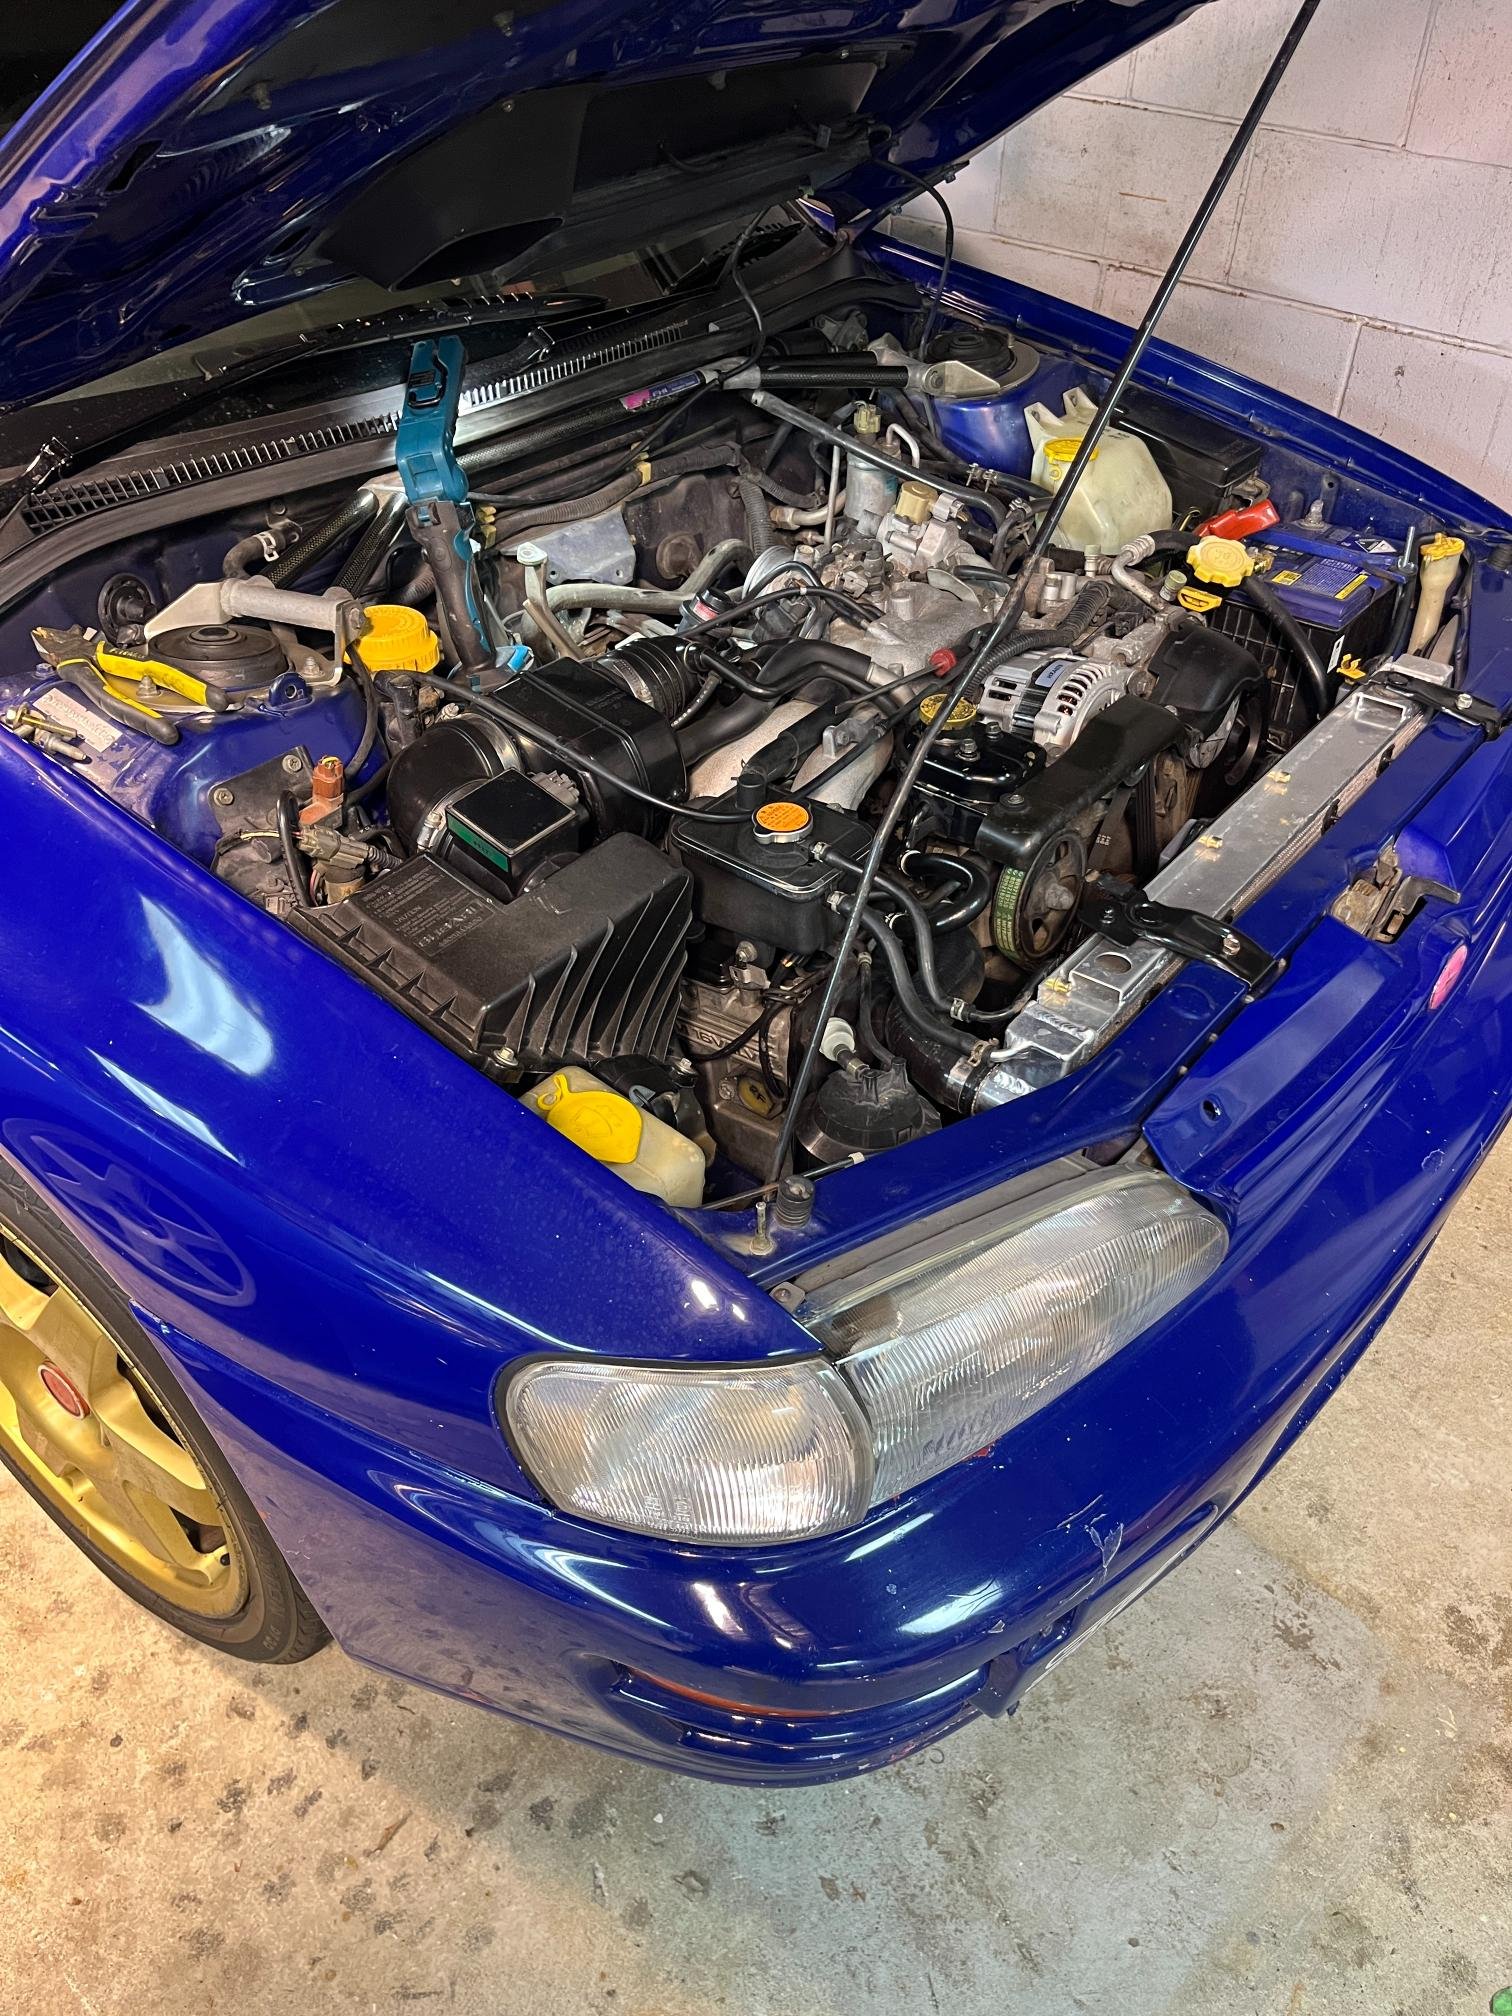
Rhyscar's Subaru Type RA of teenage dreams... where less is more
Rhyscar replied to Rhyscar's topic in Other Projects
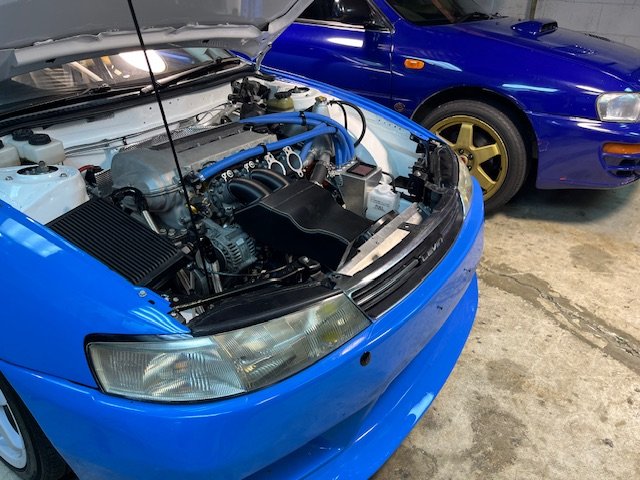
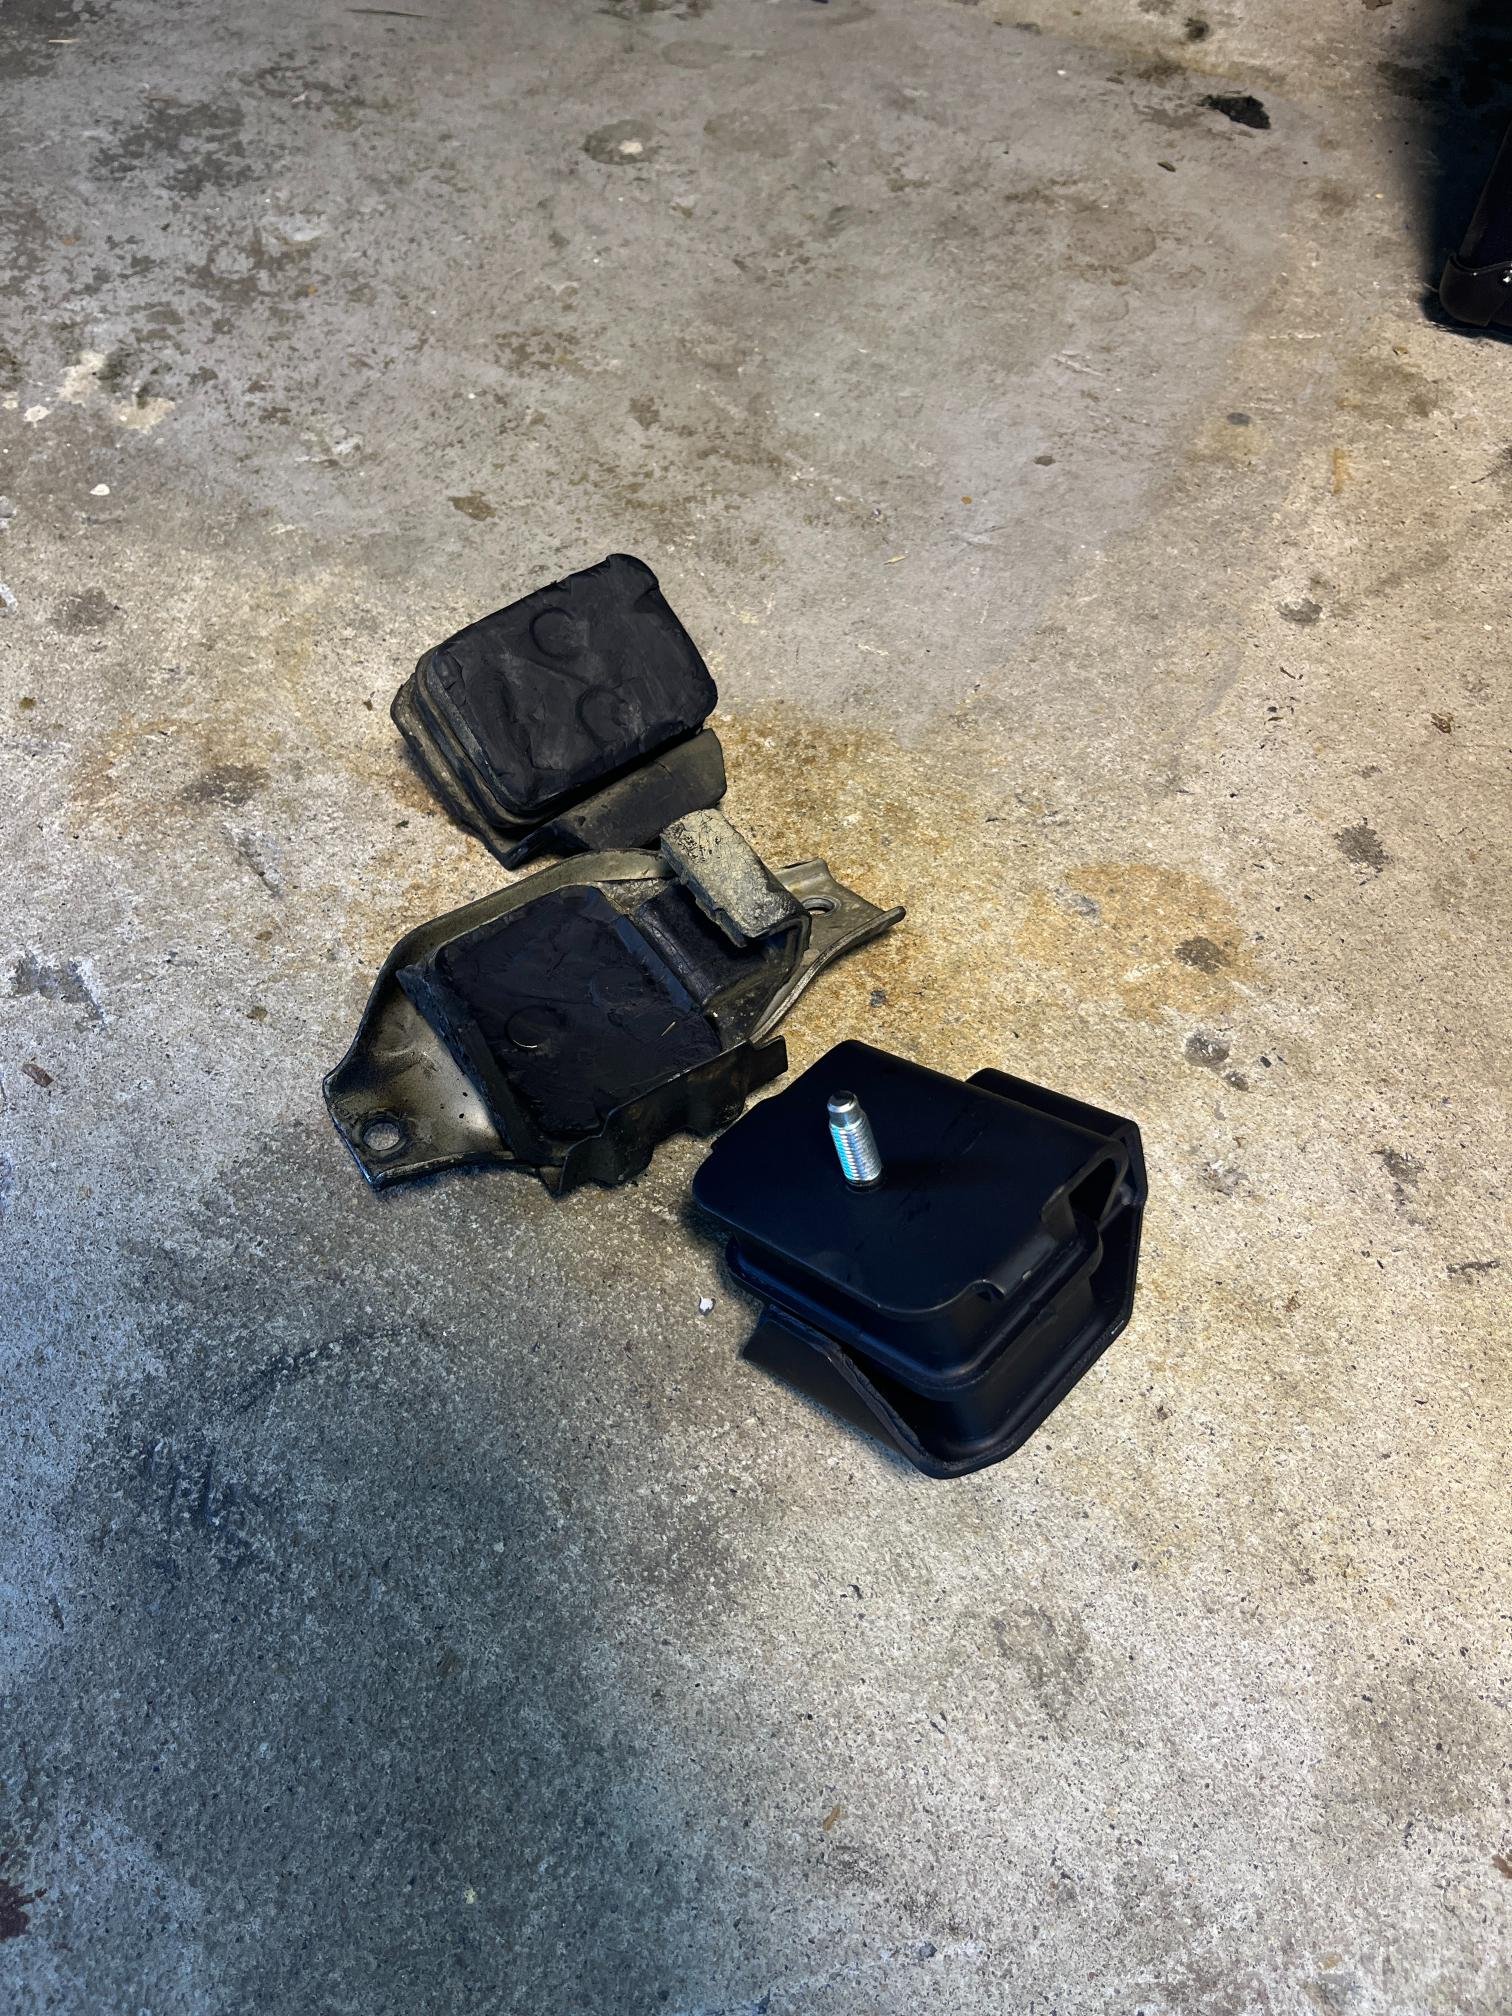
Been driving this a little lately and also starting to need to repair a bit of stuff. Alternator regulator had an intermittent fault so replaced the whole thing. Shortly after, the start motor did the same. Unfortunately this meant intercooler out, but I struggled to find the trick to getting these in easily. More practice required obviously. Very thankful for staff pricing at Repco/Napa via my father-in-law. Went for a WOF and found out the LH engine mount decided to disconnect itself. Not ideal. It's tempting to rag on this thing as it's super fun, but these repairs are just the tip of the iceberg that it needs to withstand full thrash mode (without even thinking about destroying the engine/gbox). I think I'll just keep enjoying it at a swift gentlemanly pace. Fresh WOF today so a bit of summer cruising on the horizon. There is a bit of rust rearing it's head under the battery needs attention soon, along with seatbelt, seat etc. Plan is once Levin is finished later this year we'll put some effort into starting to tidy it up. Here's some sweet sunset pics that make it look better than it is.
- 37 replies
-
- 19
-

-
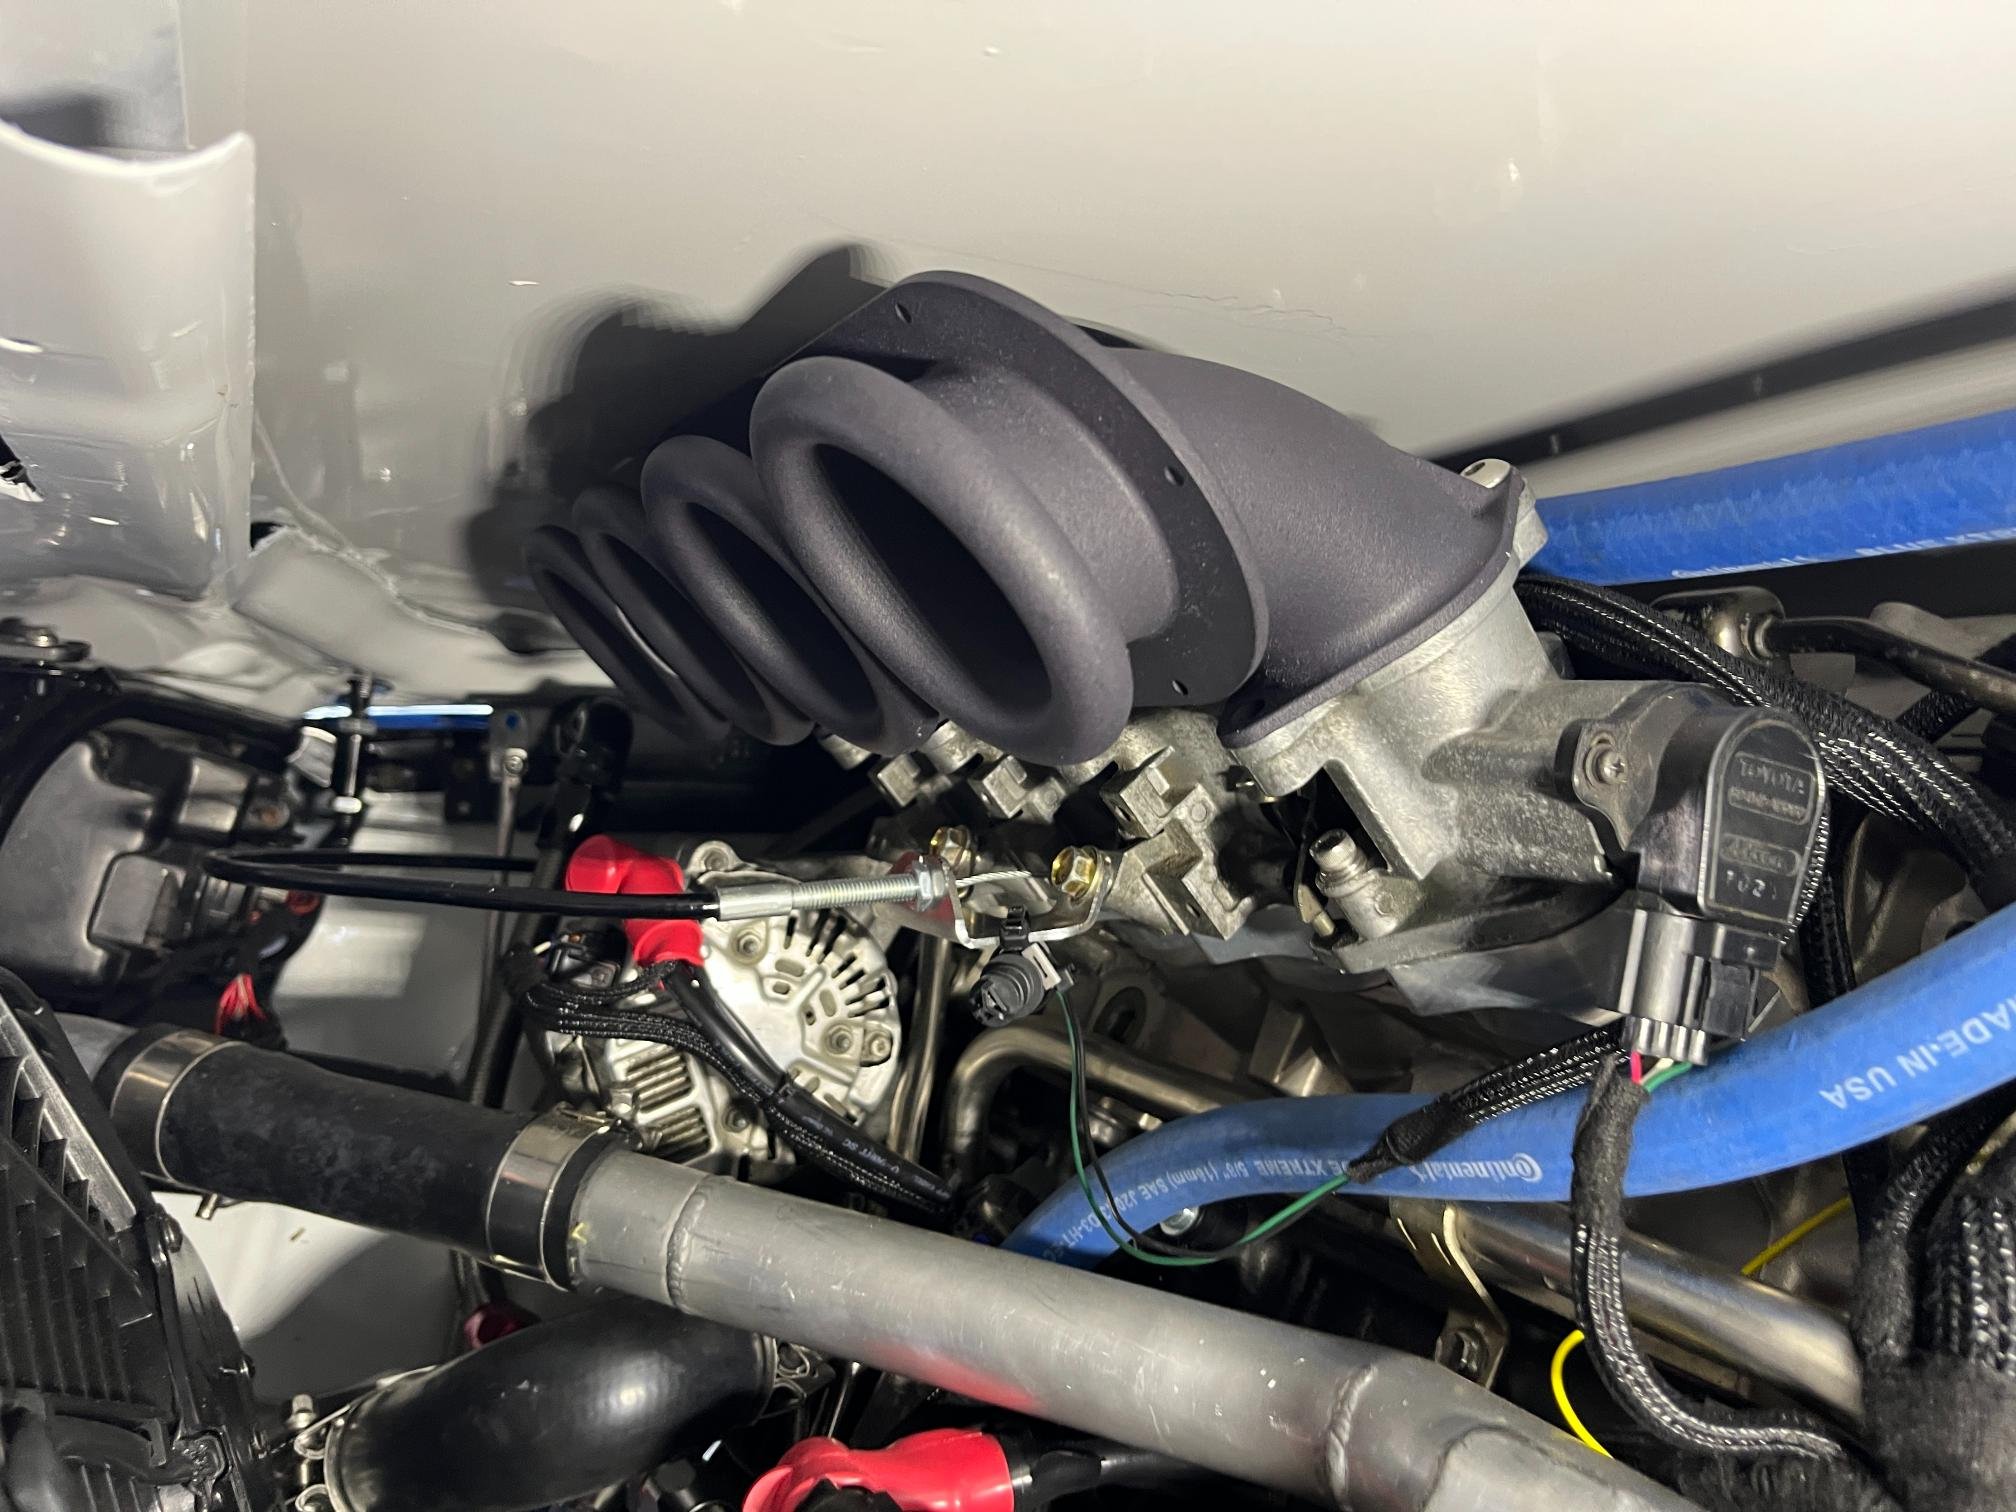
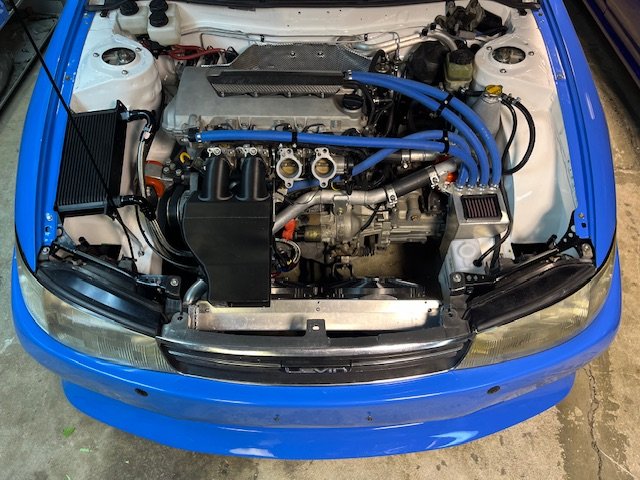
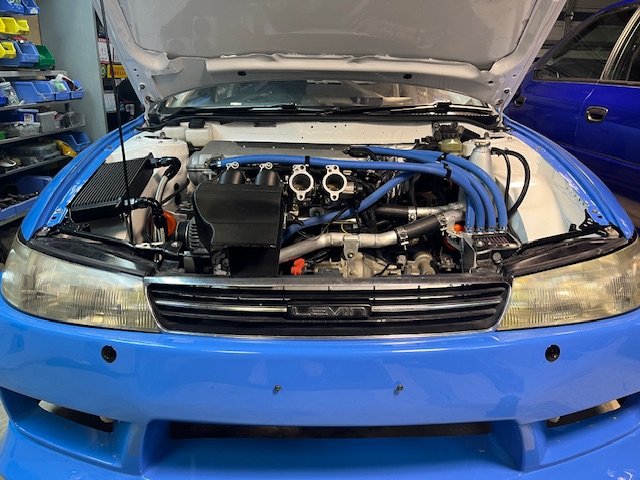
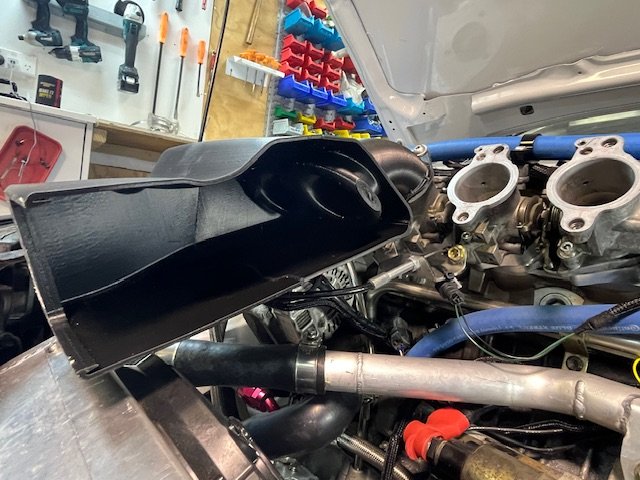
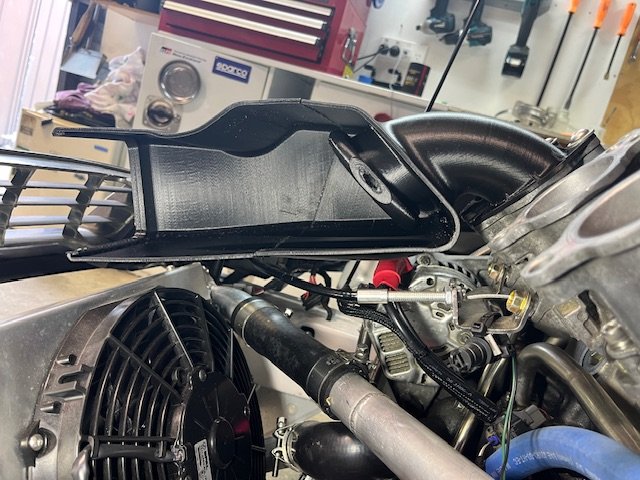
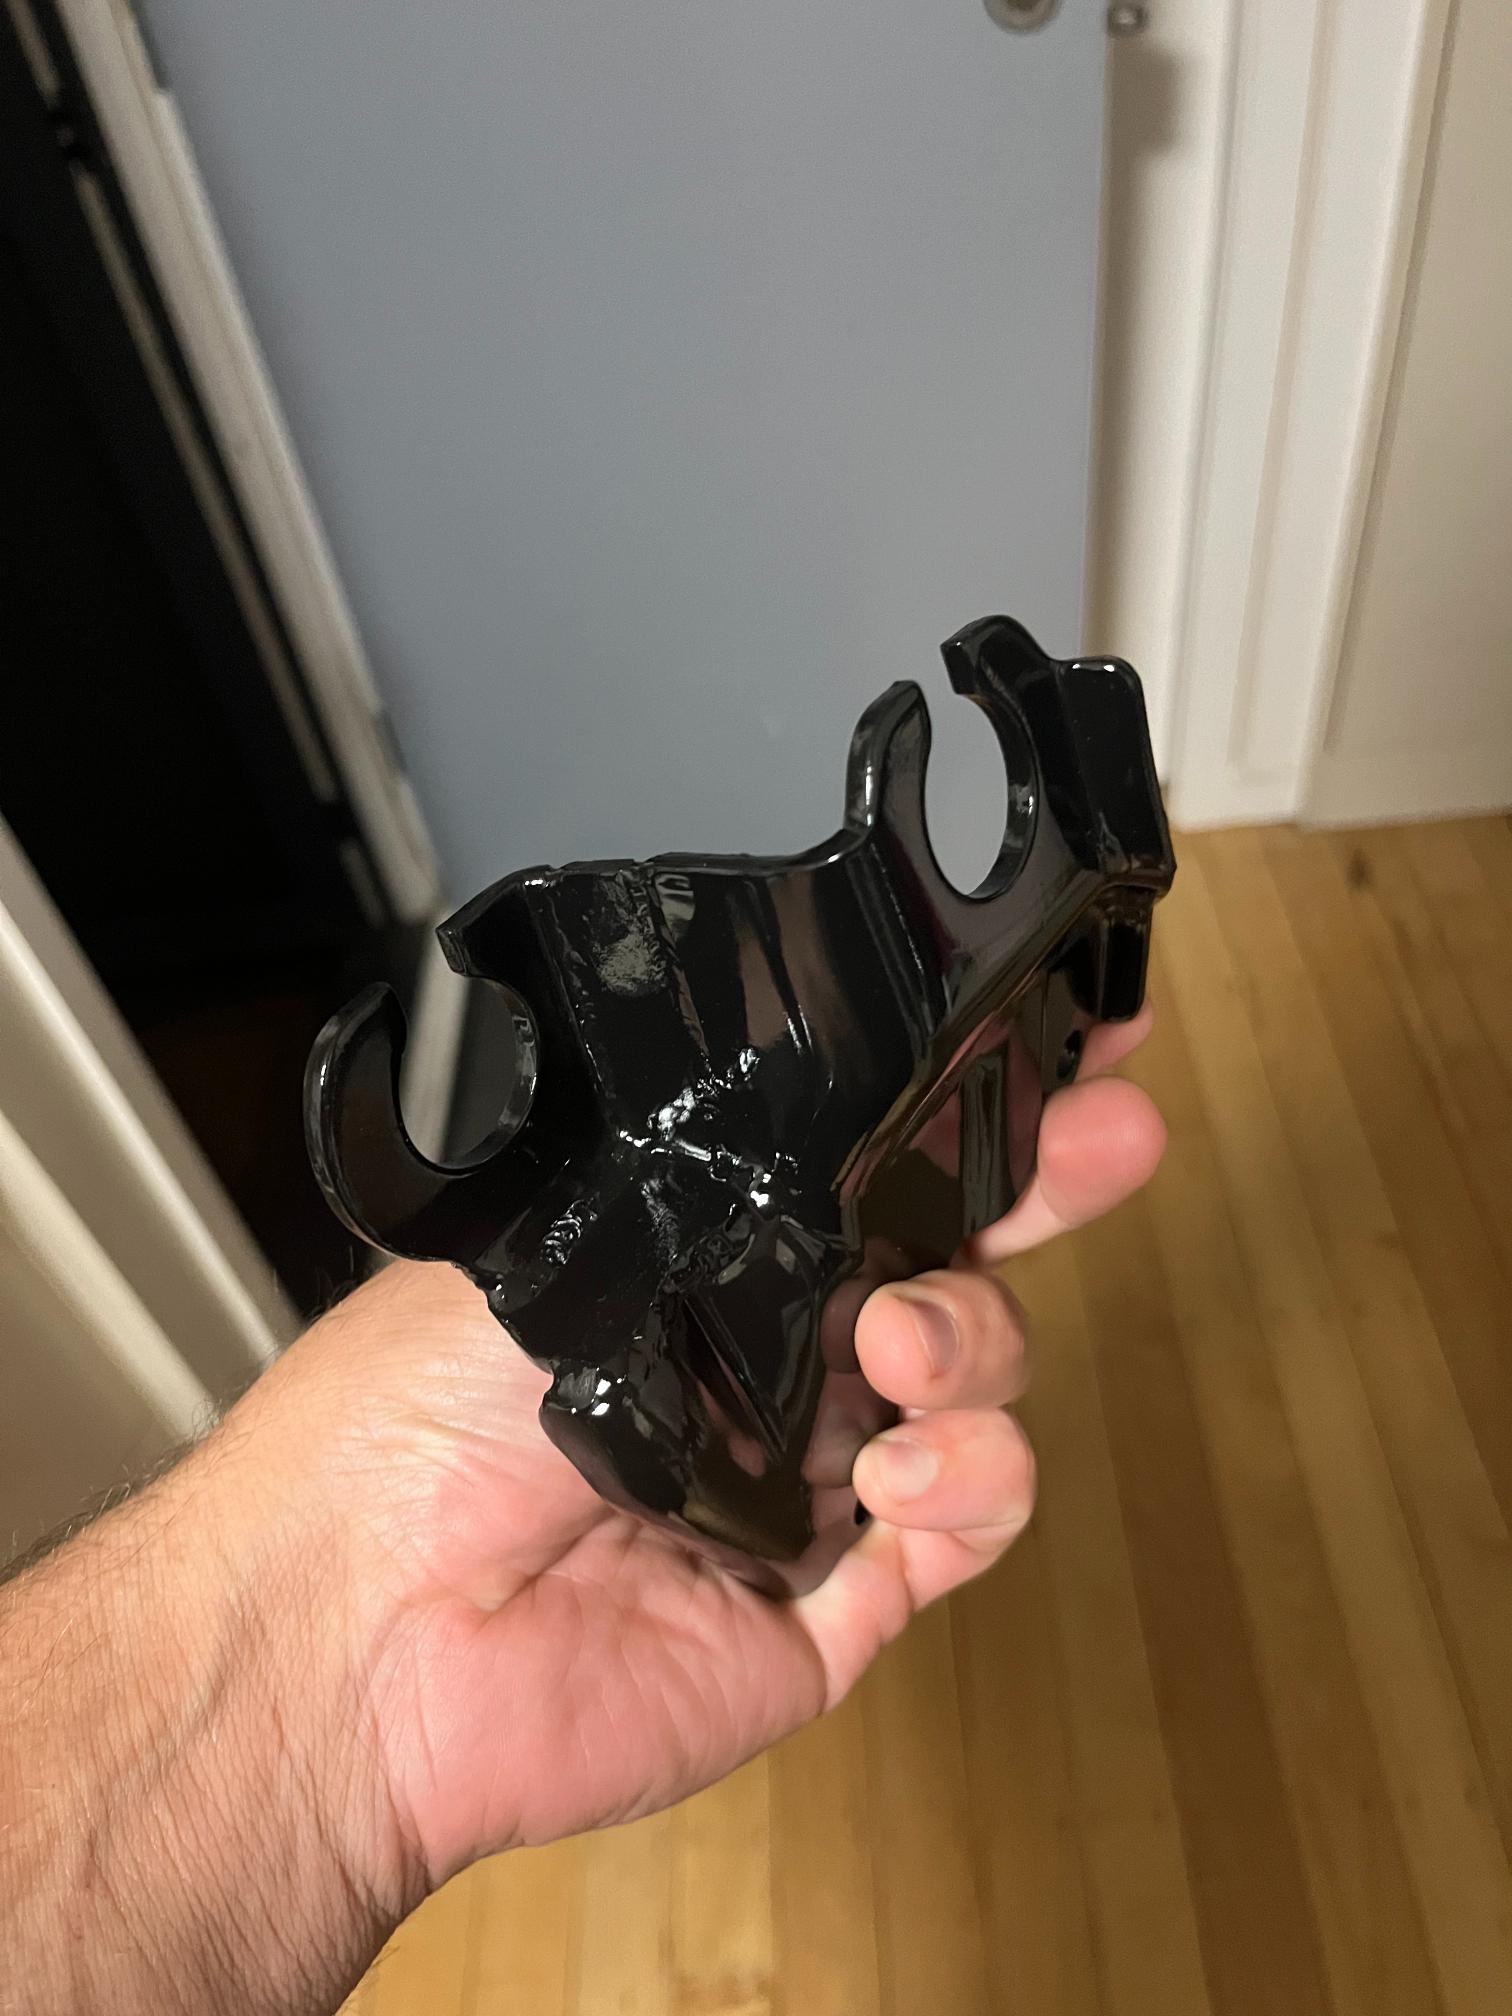
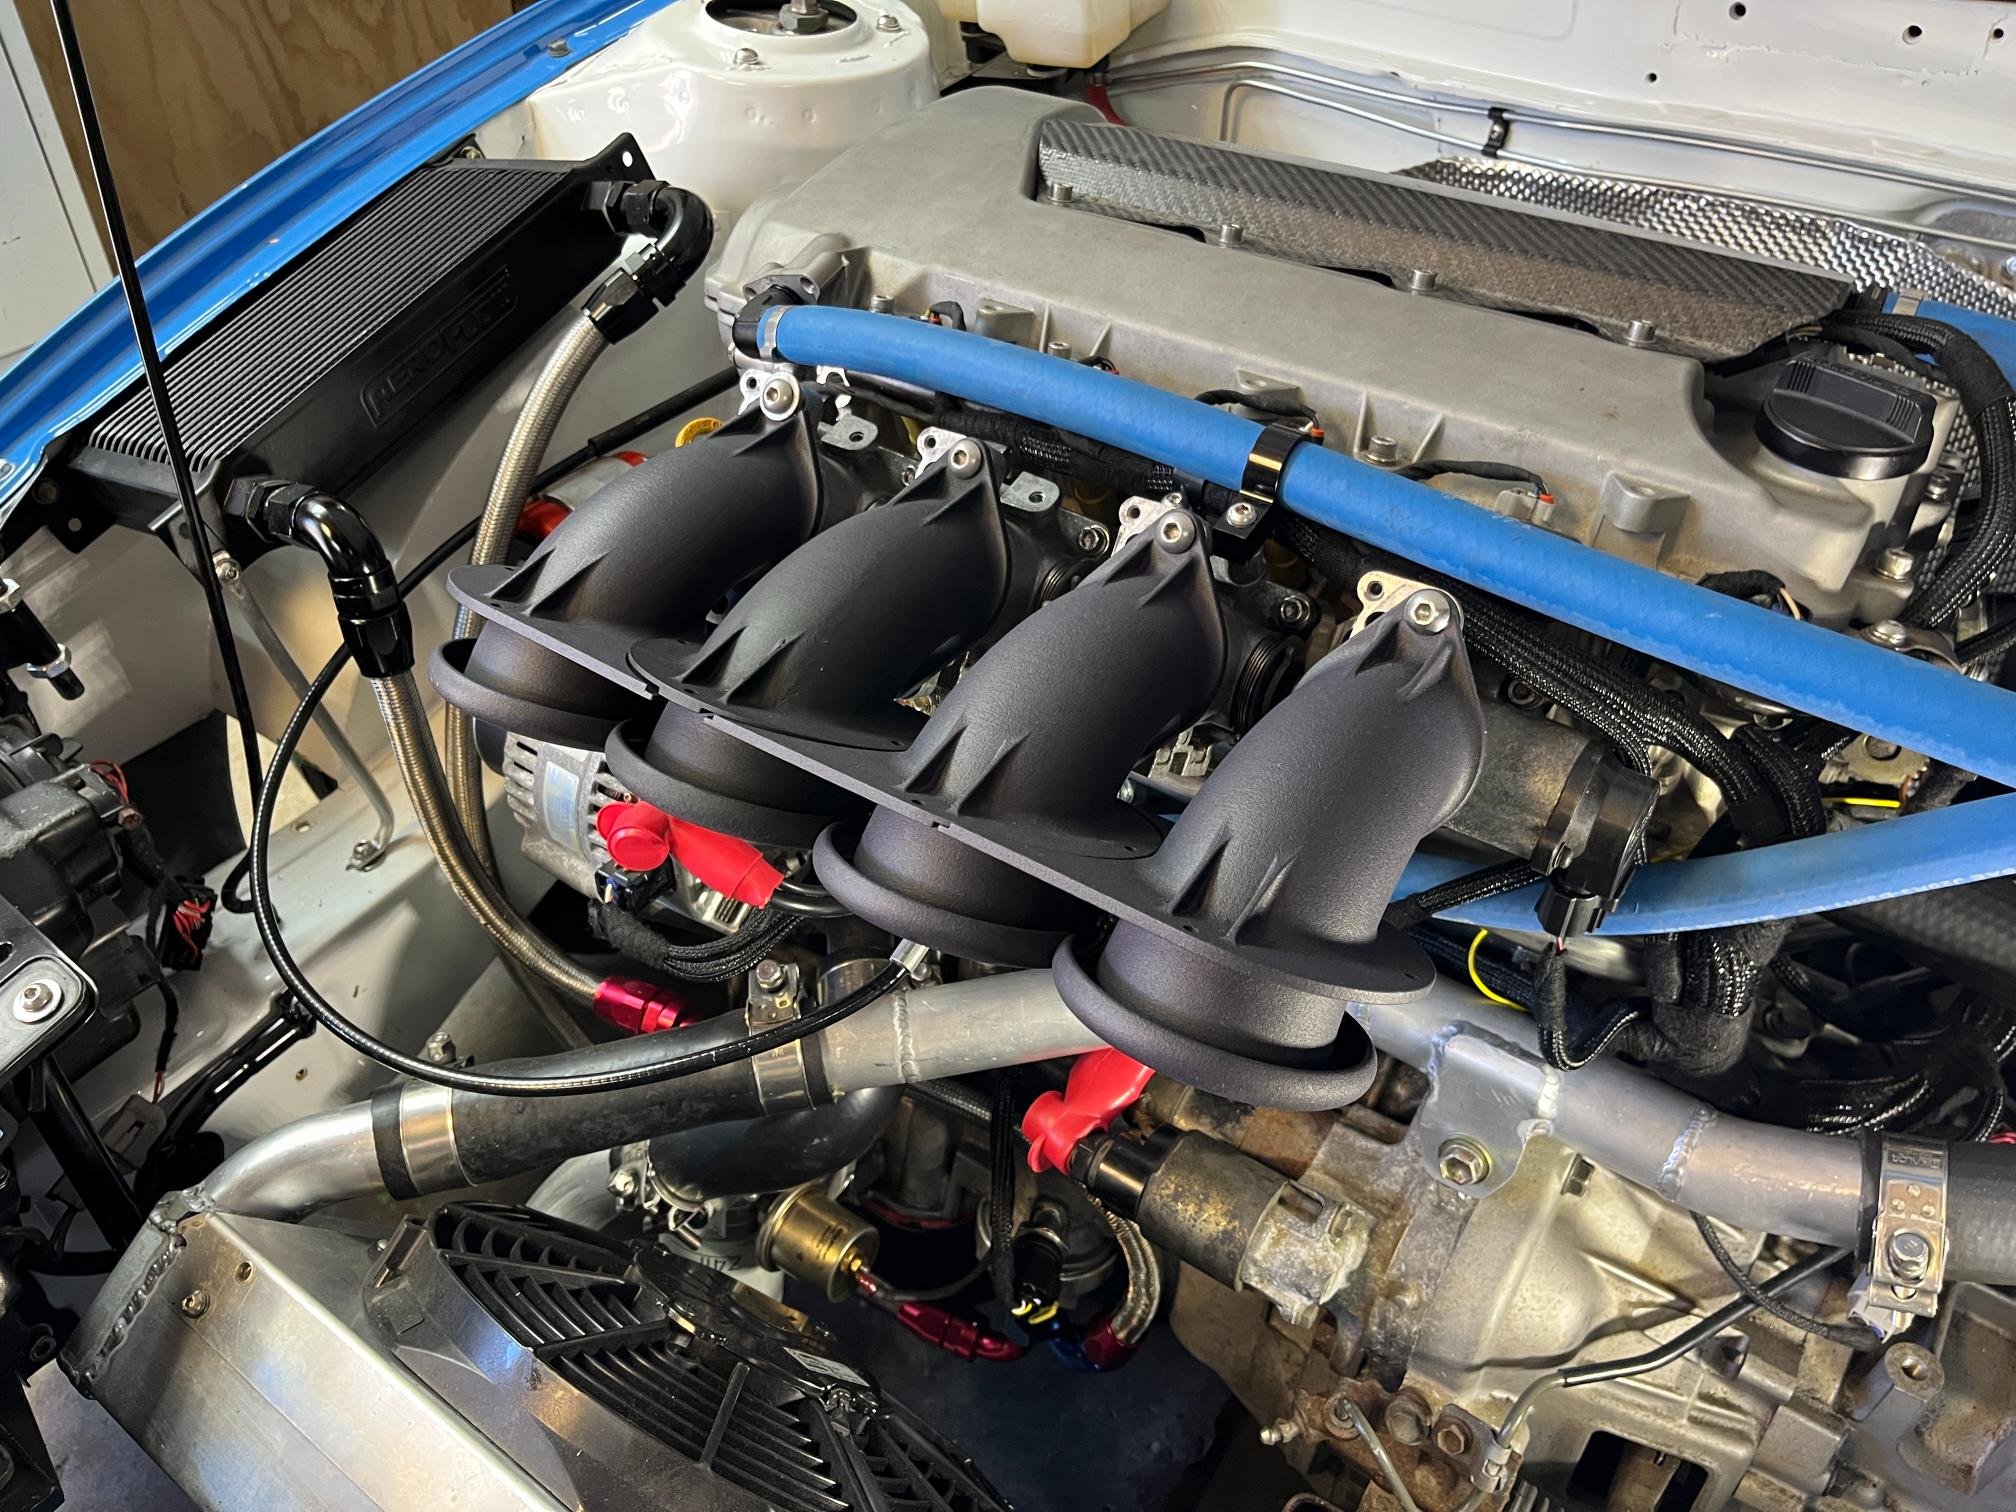
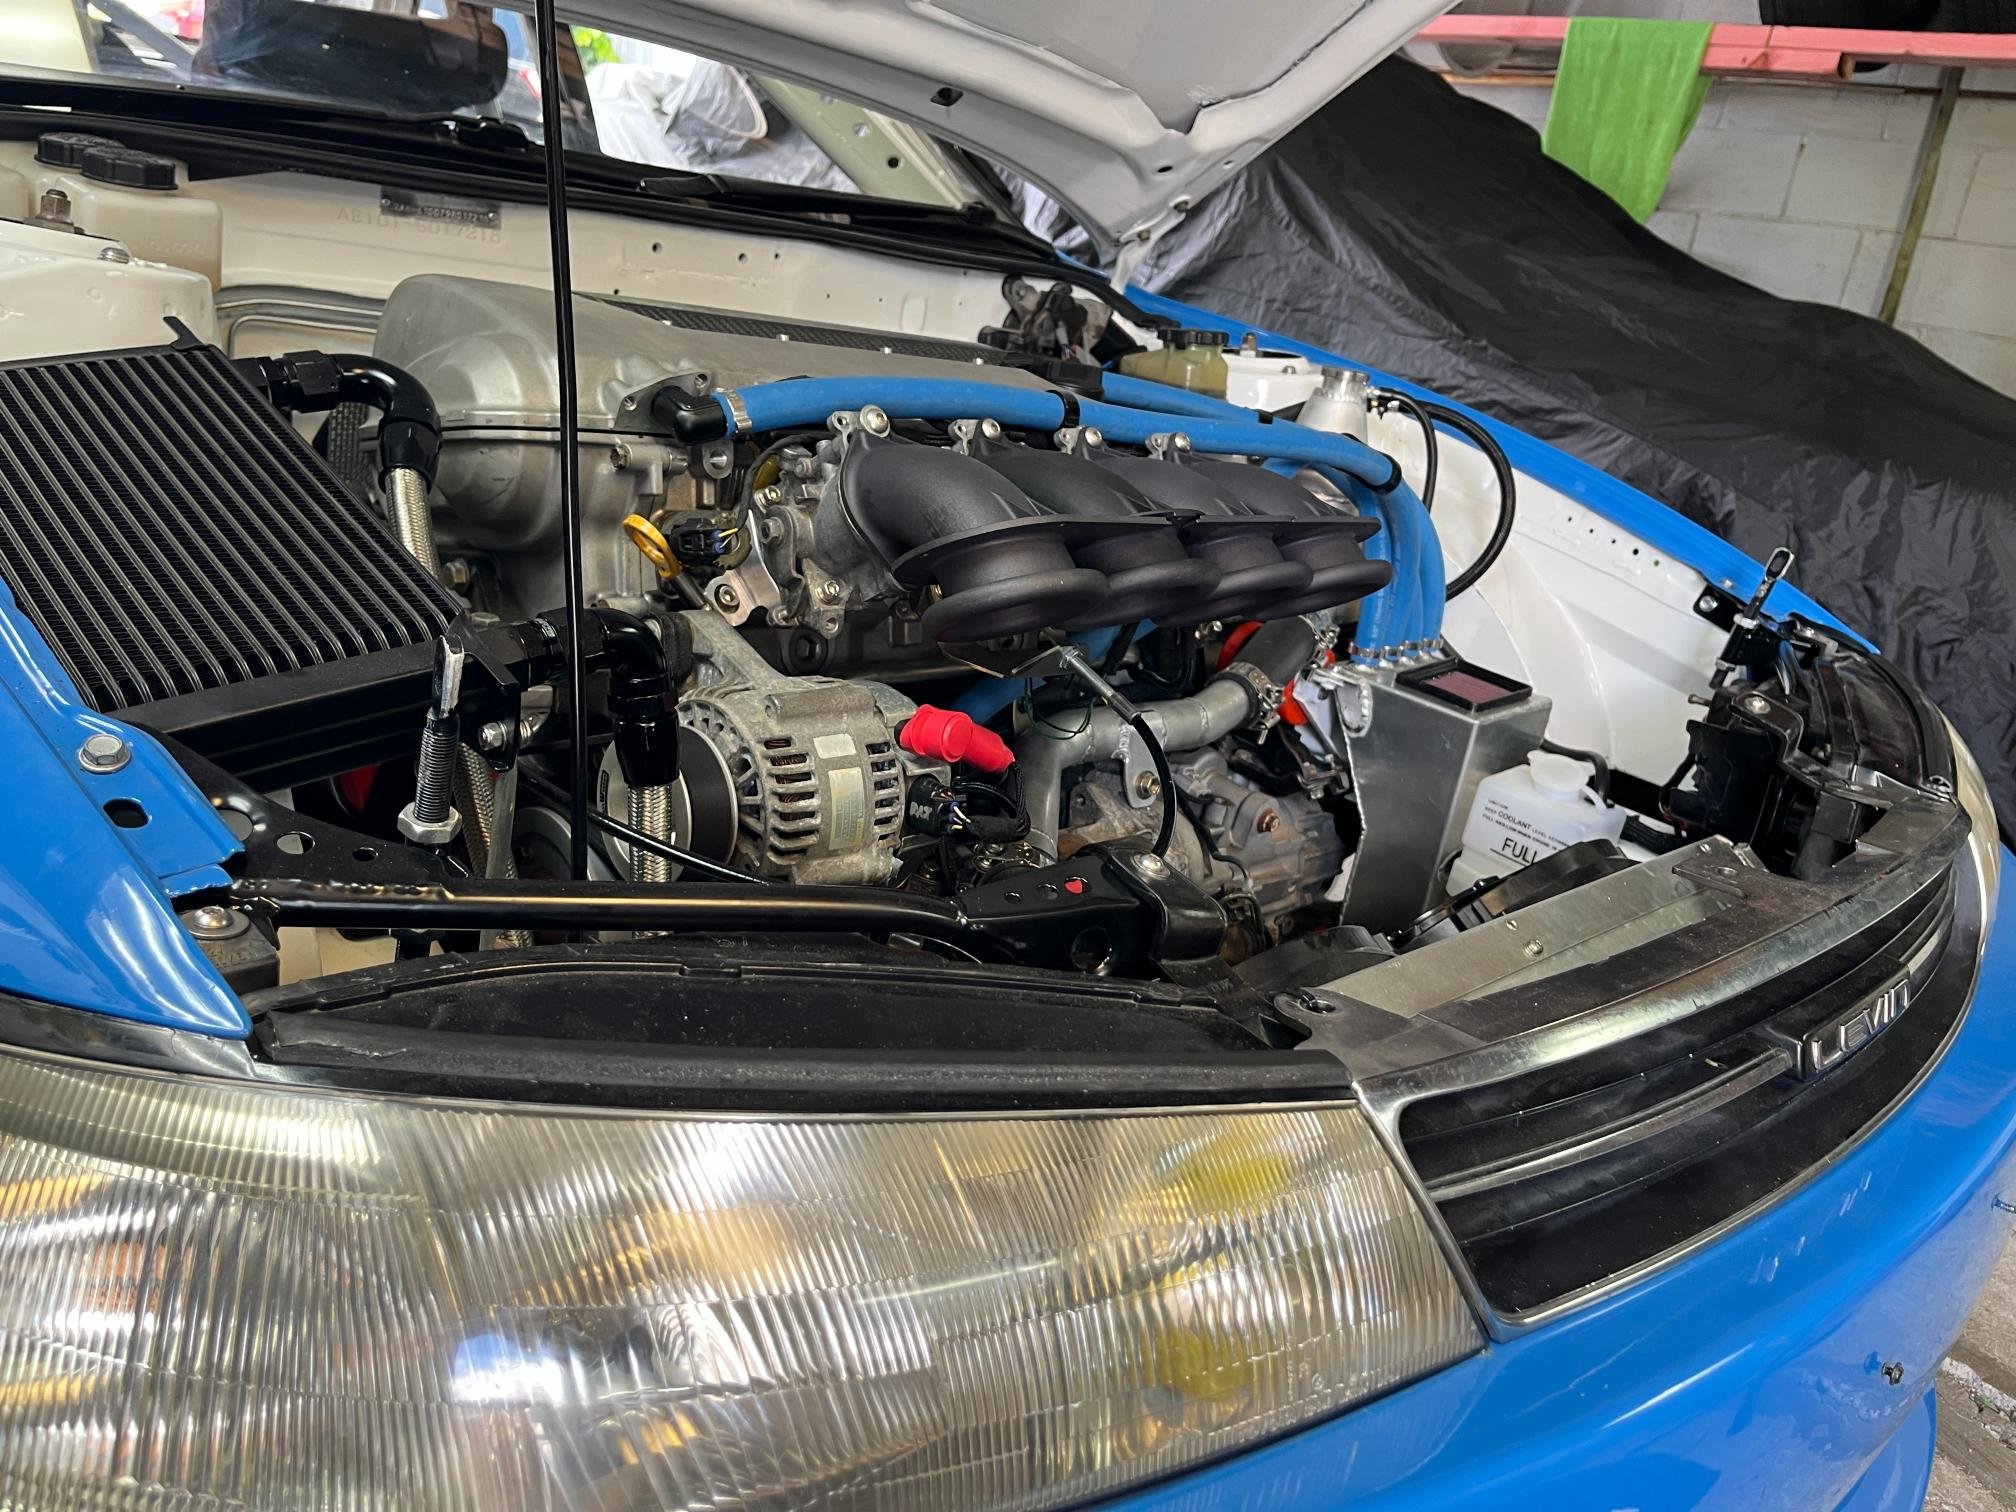
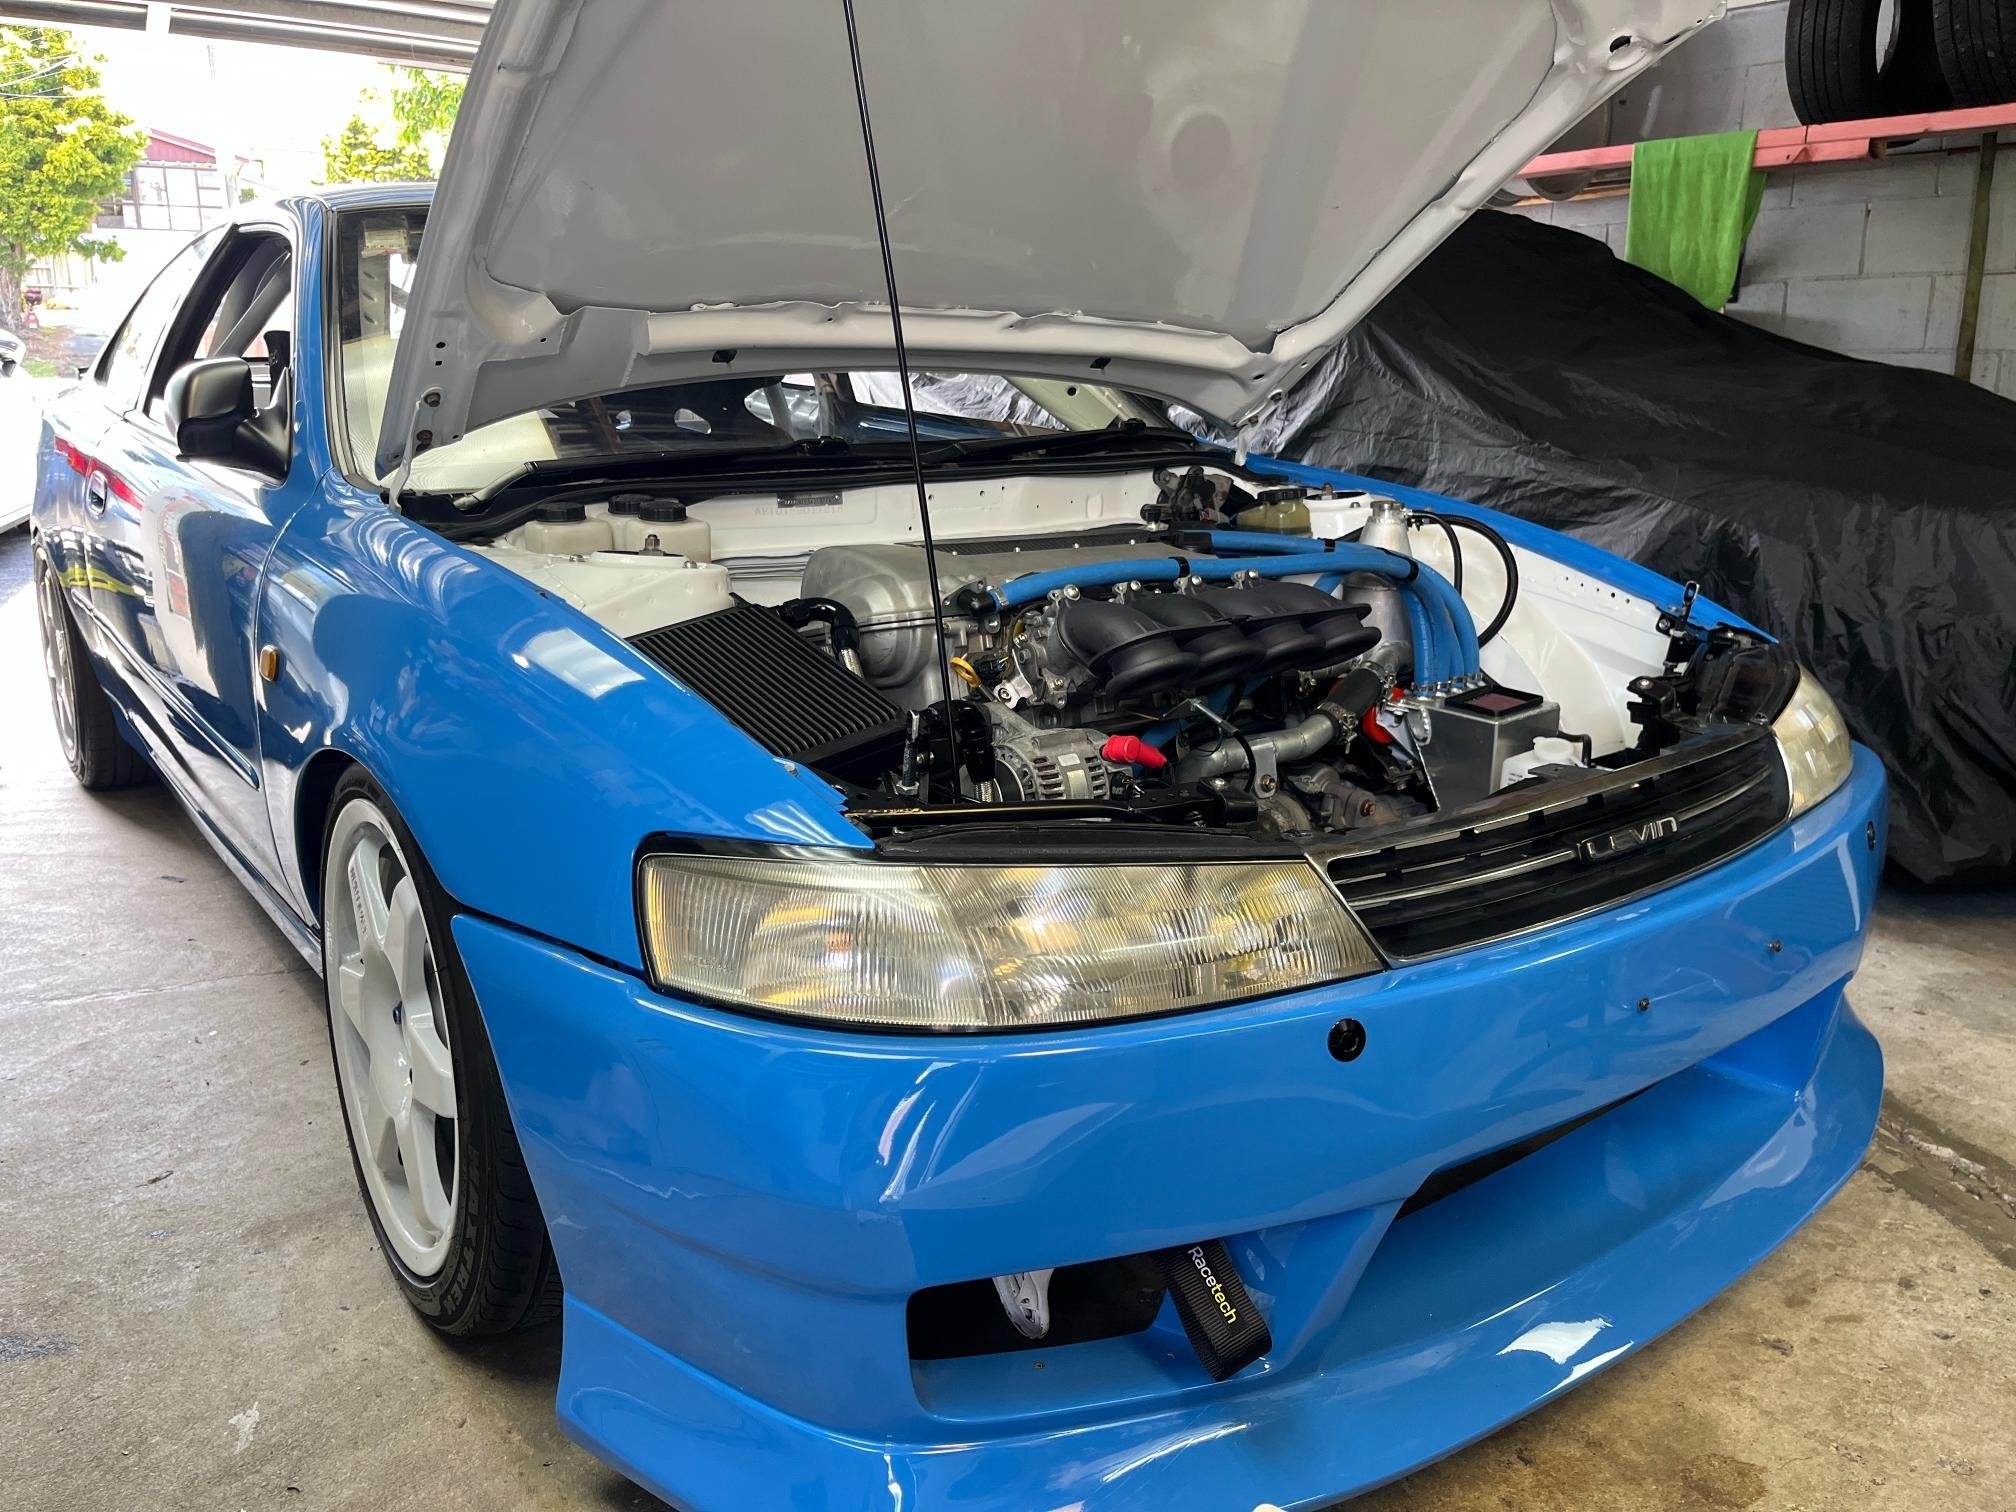
China is amazing. Order placed 19th Dec, printed on 25th Dec, shipped on Boxing day ready for local dispatch 30th Dec. Wouldn't get that kind of service here in NZ!! Unfortunately, #1 was damaged during transit so working through a solution there. It can still be used for now, but isn't ideal. So in the end these cost around $350 to get printed. Splitting them into smaller parts made them significantly cheaper to produce. Ended up going with Nylon PA12 for material. Has heat resistance up to 145deg C or so and better strength properties than the filament-based carbon fibre infused prints. It has a slightly textured finish which probably won't be a bad thing. Fitted up on the car Ready for some DOORTY noises. In hindsight, I could probably have straighten them out a little, but unfortunately the way I drew the trumpets meant I needed to keep a constant radius. They even clear the bonnet. What a SUCCESS!! Car is now pretty much ready for a tune. I'll add a few basic heat shrouds to keep radiator air from trumpets and need to check for exhaust leaks. We've got baby #2 arriving early March (expecting late feb TBH), so will see if I can squeeze this in beforehand or while on paternity leave
- 417 replies
-
- 23
-
-

-
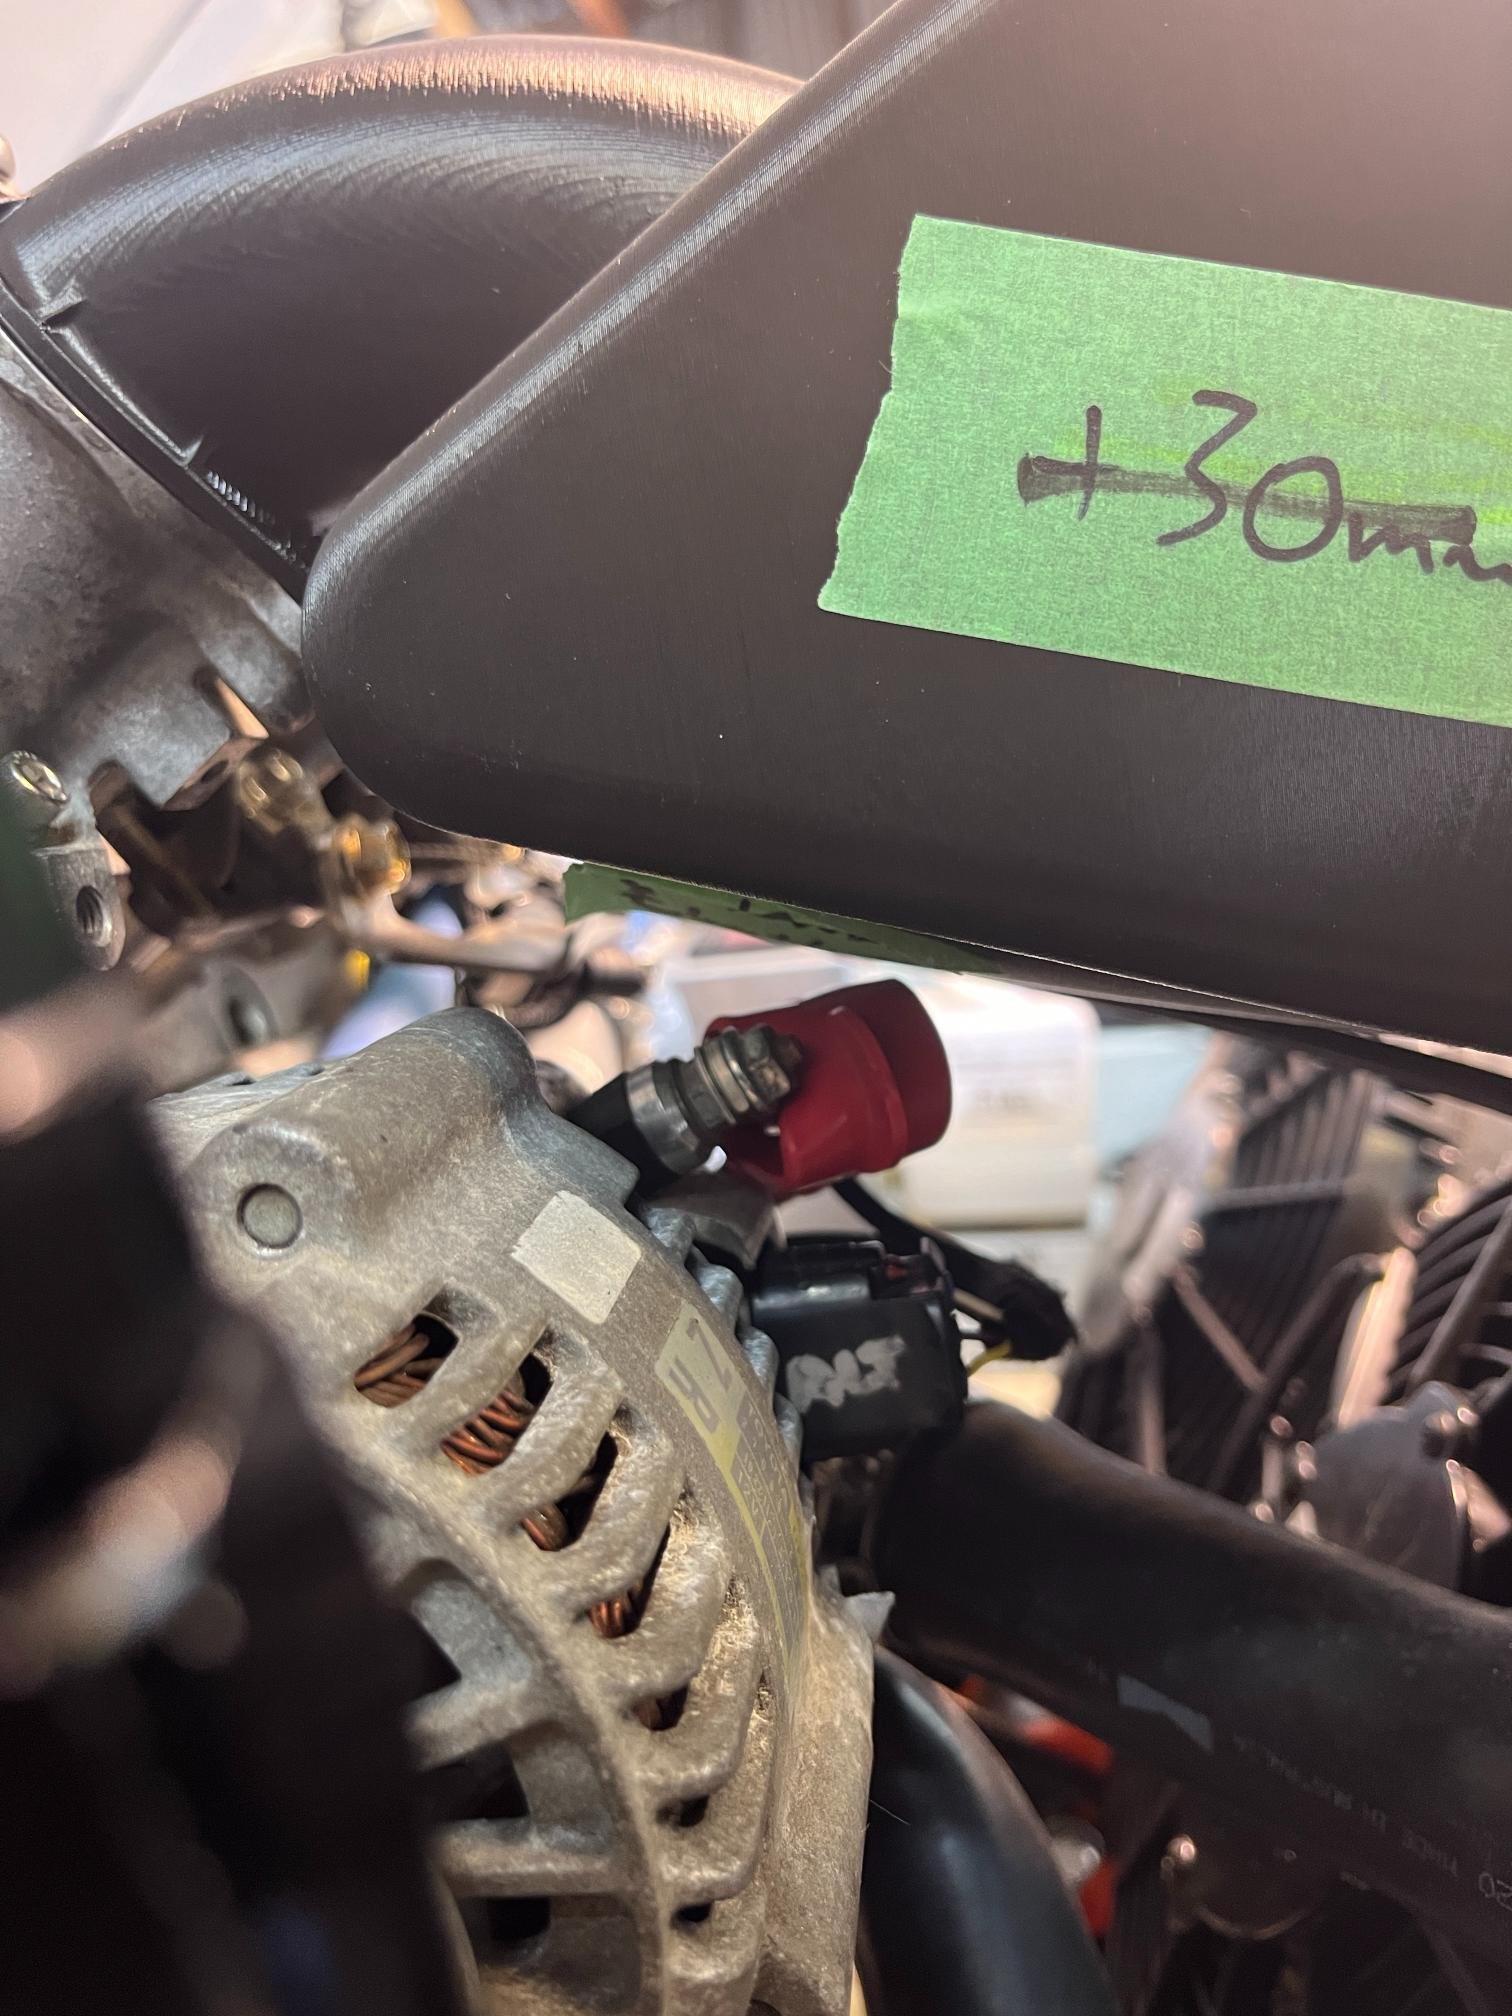
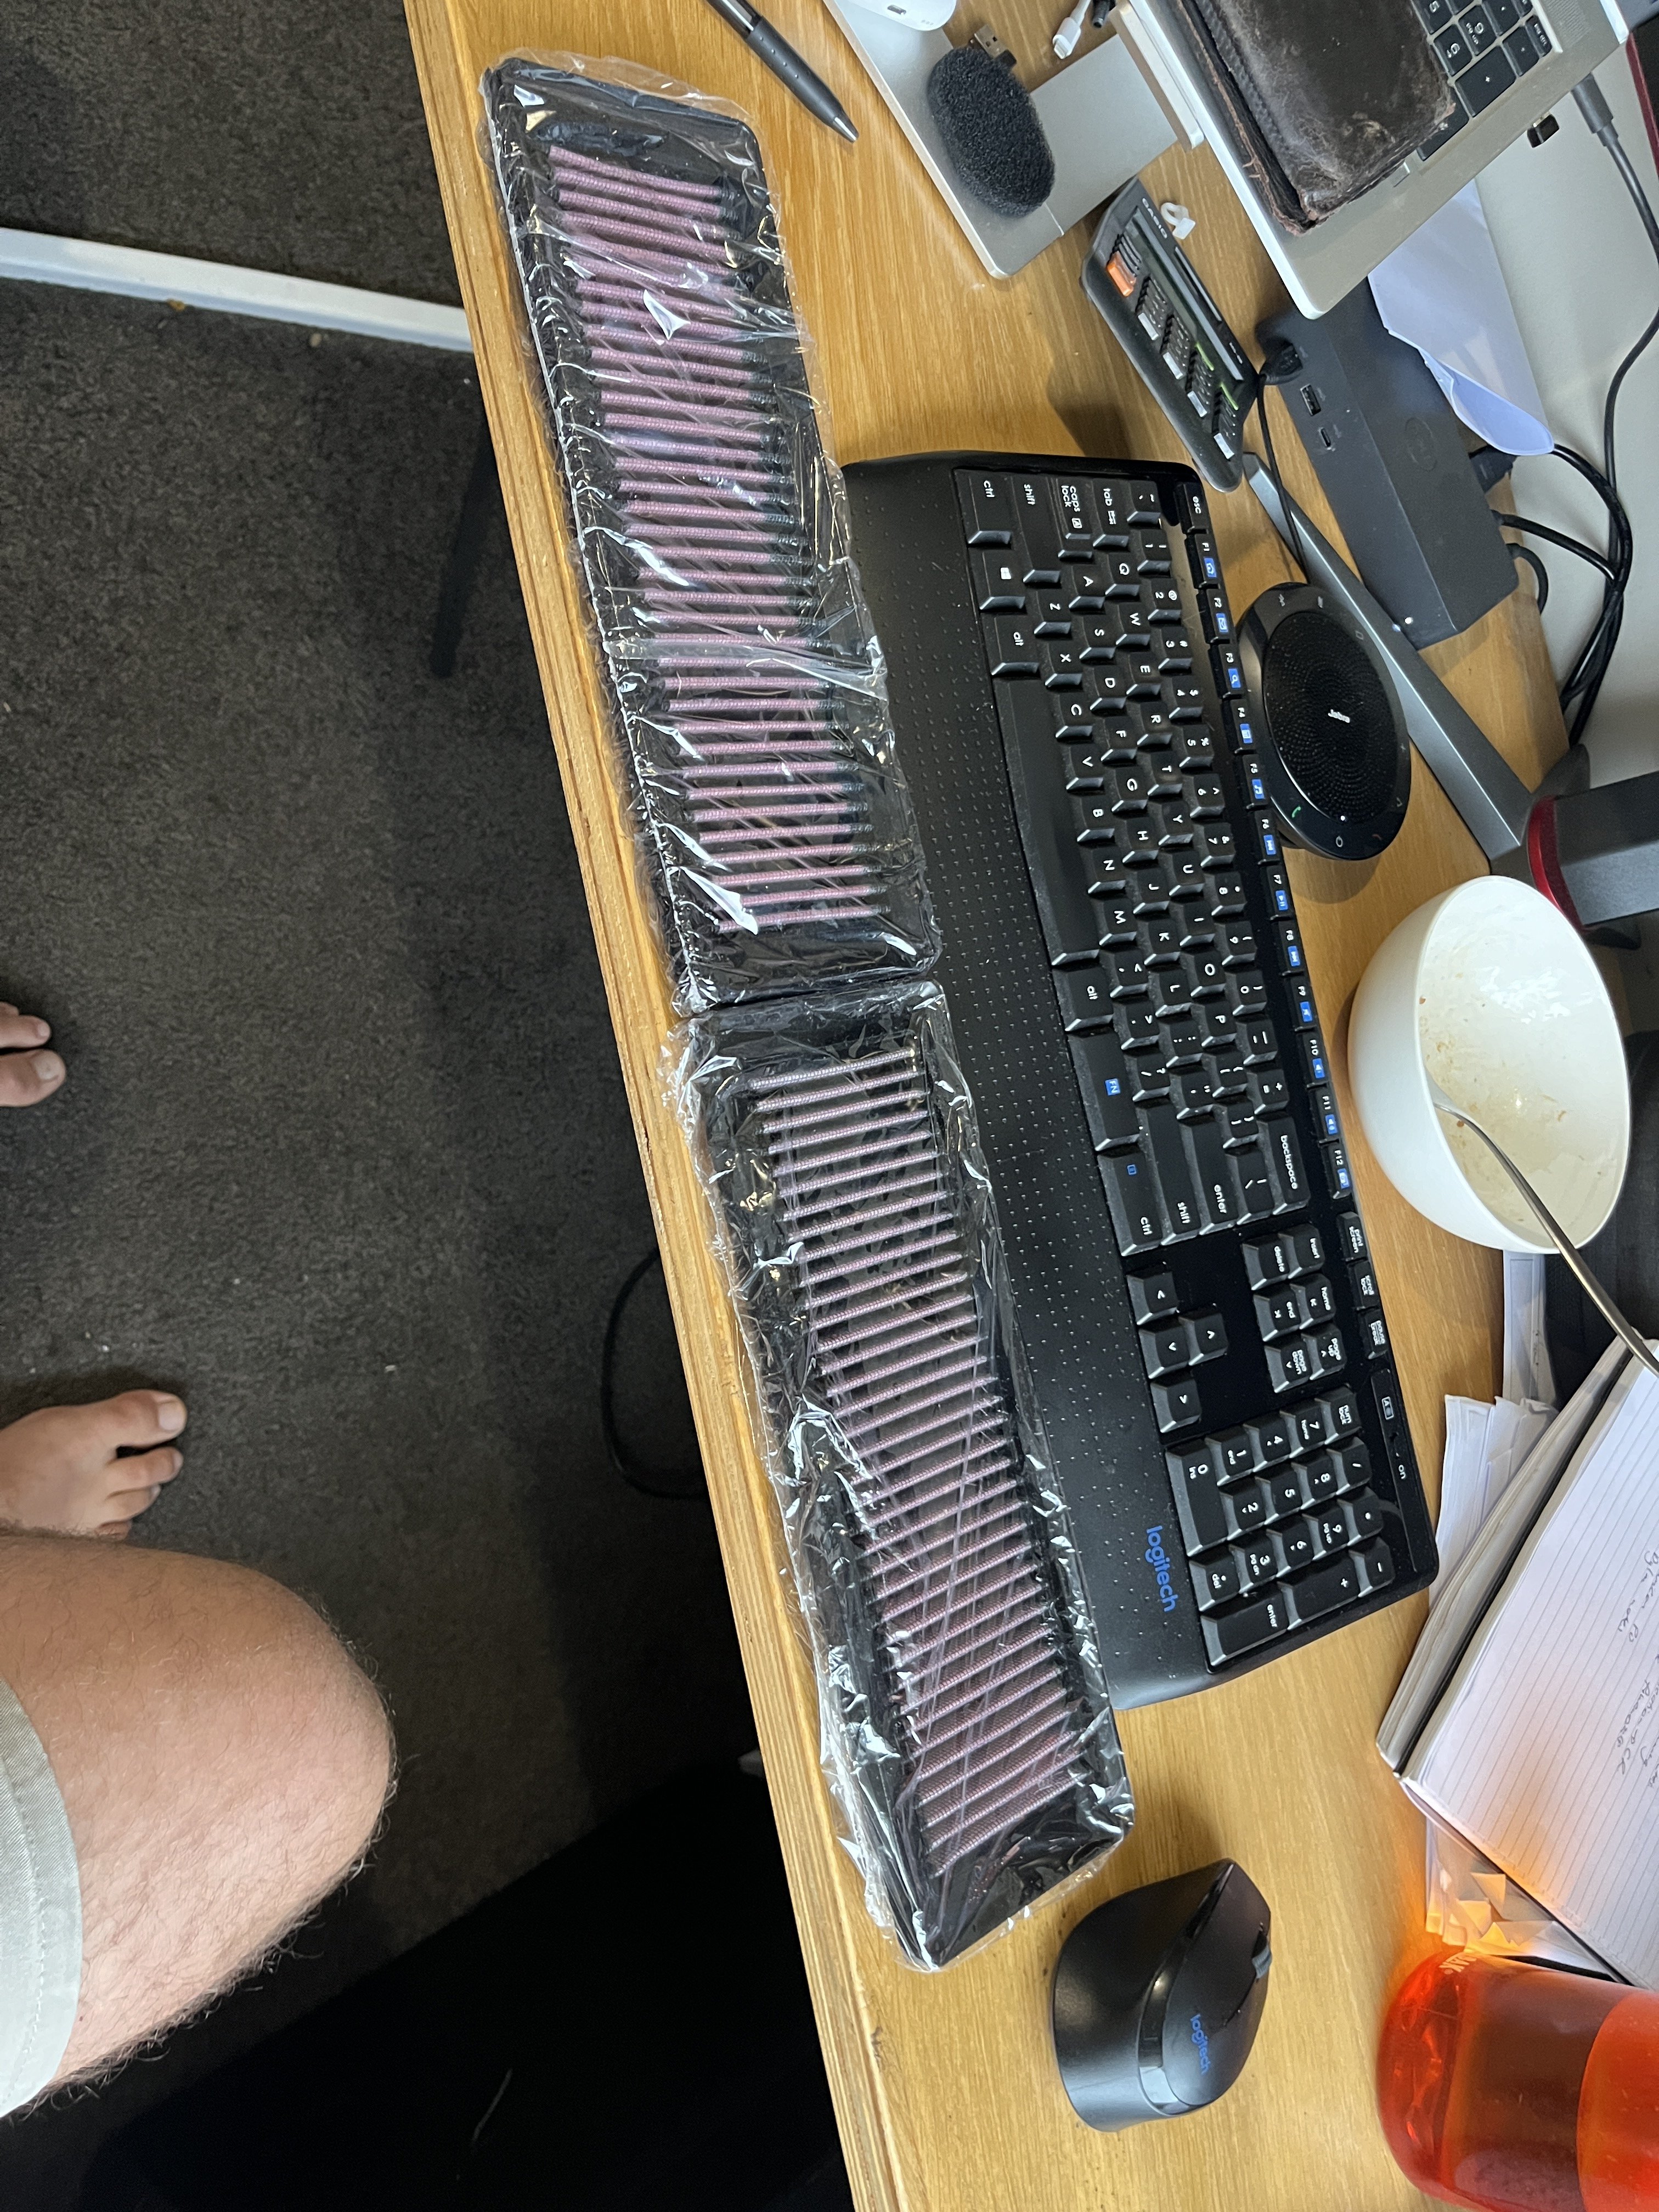
The airbox saga continues - one step at a time. So after printing the test piece, I made a bunch of adjustments to the design to maximise volume to from 13L to 19L, 2x porsche 928 K&N filters which gives it 50% more filter area than factory and generally improved the geometry around the trumpet bellmouth. This was a big constraint - alternator and charging post. I managed to measure it all up and create clearance. Increased clearance around trumpet to min of 30mm. Having a cutout for alternator also meant I could drop the base of the airbox by around 40mm. Completed design So I finished the design off and was like sweet lets print this bitch! But the size of this final part meant the price jumped from $6-800 up to $2500!! I also did some research/talking to Roman Dave I decided a powder-based material provided better final-part functionality than a filament-based print which probably increased price a bit. To an extent, the cost doesn't matter too much at this point as I'm already so deep in this project, but if anything was wrong with the design I'd be up for another $2500 which would hurt. So I decided to split the trumpets from the airbox so I could manufacture using different methods (print trumpets and carbon fibre from airbox due to size). Of course, this is where CAD sucks a bit because I needed to re-draw the whole thing to keep the geometry/features I wanted and not butcher the model too much. So another 10hrs of drawing and I'd split trumpets out, and added an interlocking flange on each trumpet for the airbox to mount to.
-
Watching with interest.....
-
Great effort getting this far man I'm super impressed at the progress in such a short time. Sucks about the license and logbook situation but there is always another event to go doorting at!
-
Yeah man, it sure does. I used the brackets from C56 and bolted them to the C60 and it bolts in. Even the drivers side mount is pretty close - just buy the little adapter plate from monkeywrench racing (I presume 2zr and 2zz will be very similar). There's also guy I chat with based in pukekohe/auckland? that's doing plug & play looms for 2zz to ae1xx chassis. Headers/exhaust are the hardest part. Factory headers fit but generally suck. Headers made for MRS/MR2 2zz swaps work in the ae1xx chassis.
-
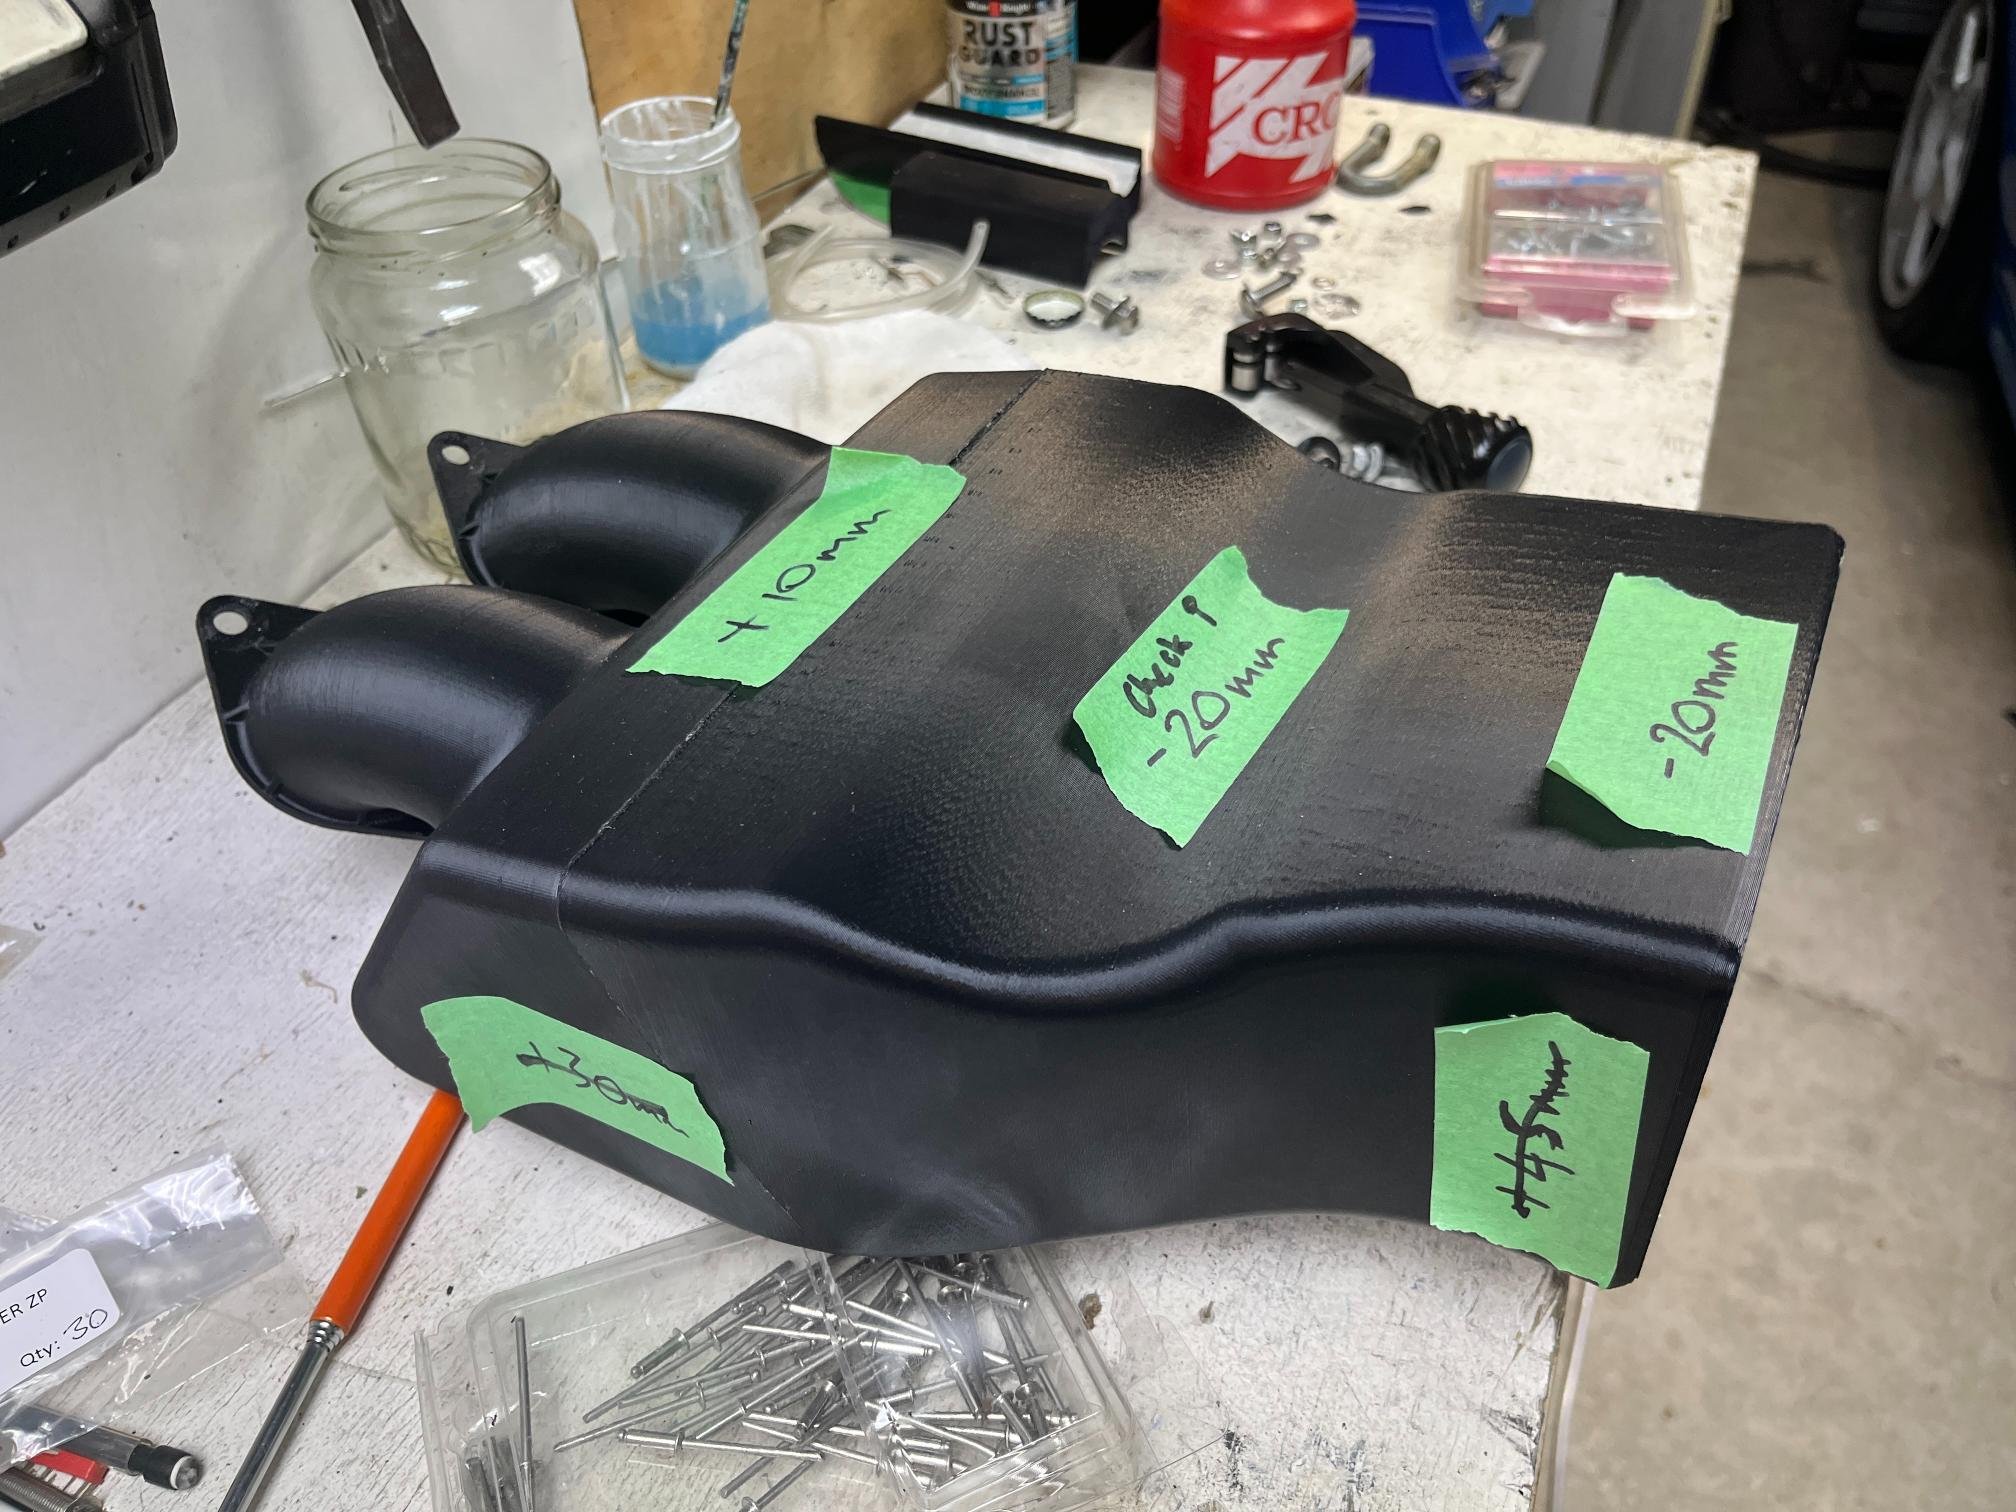
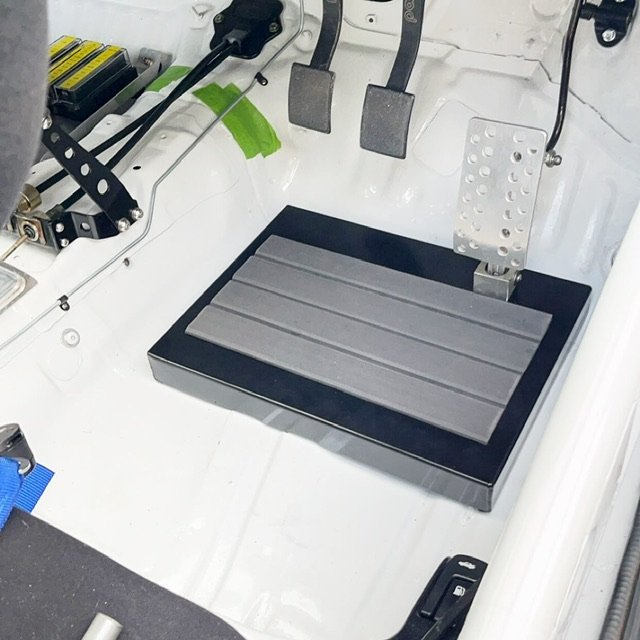
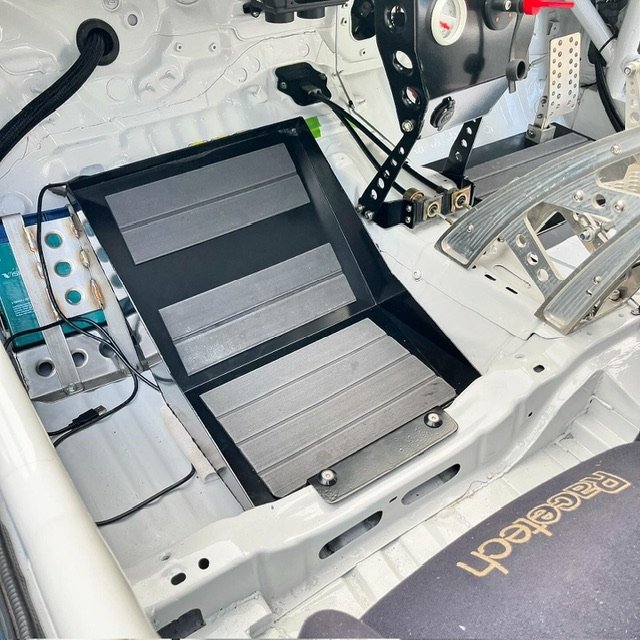
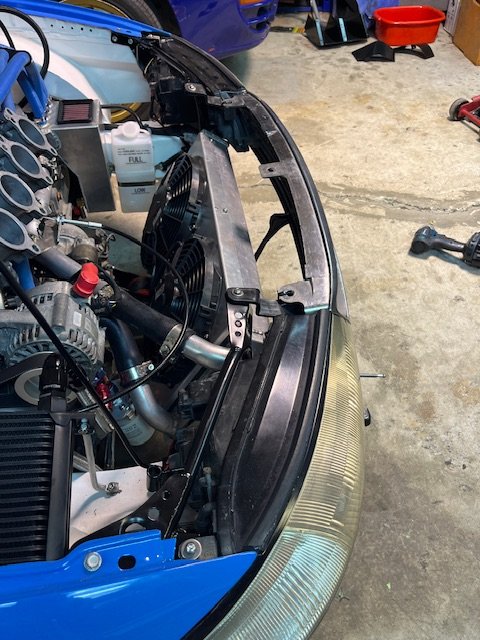
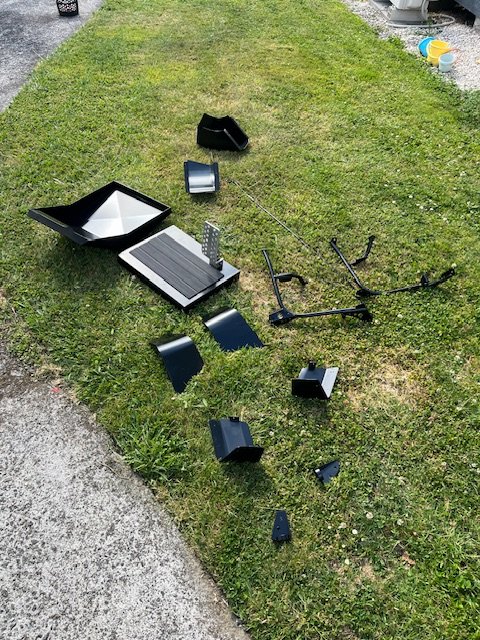
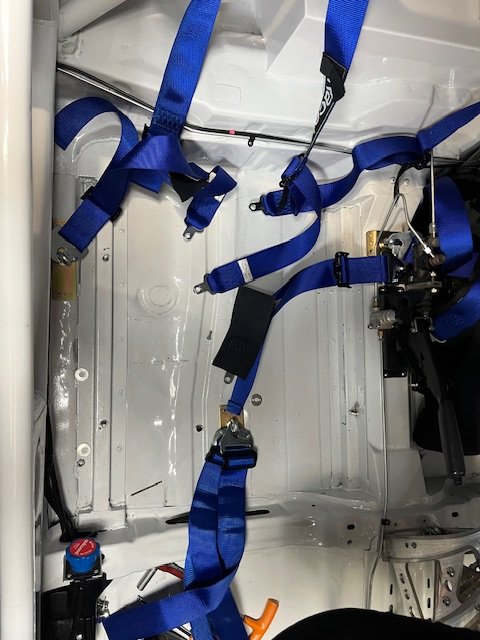
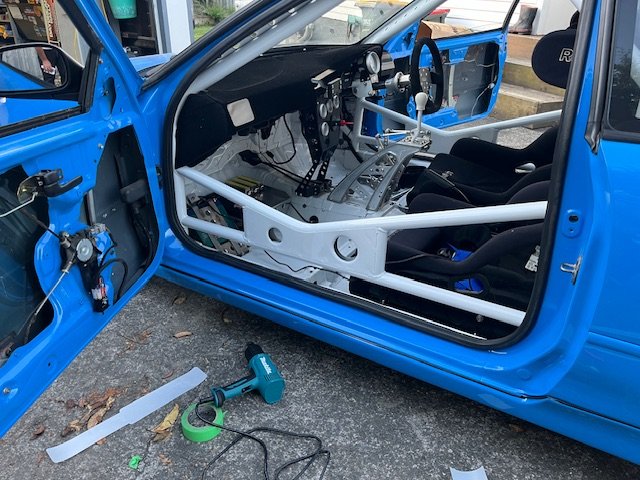
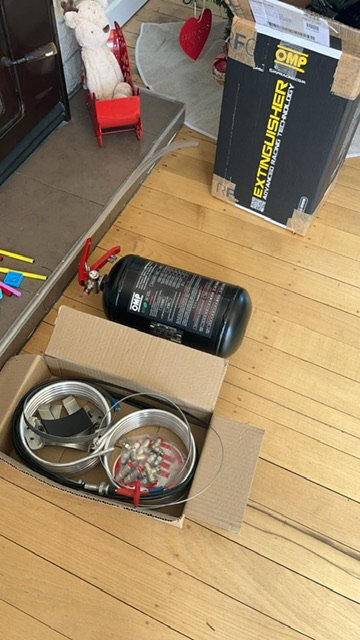
Wow where to start. Lots of little things starting to come together that have been ticking away in the background. First wee job was to apply 3m ppf to all the rollcage members. I knew as soon as I put belts in the car they would be forever chipping the paint. Very satisfying and can hardly notice the film. So next job was to mount seatbelts. I bought a matching set of belts from racetech for passenger seat and started figuring out how to mount these as be schedule A. Was an absolute prick of a job not made any easier by the passenger seat being directly above where the fuel lines run, and the fact that both my seats are slammed so low you can’t even get an eye bolt under them.. because touring car things of course.. Ended up opening a hole in the chassis rail to slide a 40x100mm plate inside for the passenger one. But very stoked to have this done. Have been chipping away at rollcage padding with the hard sfi foam. Quite fiddly to get fitting right and also need to buy some more to finish the job it’s pretty expensive stuff! Sorry no pics because I still haven’t accepted if I’m happy with what I’ve done 😂 Dropped a load of parts off at the powdercoaters. This should hopefully be the last batch and is lots of bits that will make everything look a little more finished. Footplates look sooo good. Used some left over tuff deck EVA foam from a job on the boat. Should be durable and grippy when wet. Headlight support structures look super tidy too and blend into headlight housing well. Also pushed the go button on a plumbed in extinguisher. This will be piece of mind for my over-customised car, particularly around the hot exhaust and fuel systems. It’s a massive job to install these things, so slowly chipping away at it. Last bit of progress has been on the airbox. A friend printed a test piece of my airbox design so I could check geometry and design features. Generally, I’m very happy with it, although I did I get the geometry wrong by 30mm or so. This was an easy way to validate the design so all part of the process. Few changes I want to make to the design; - fix geometry - increase thickness of itb flange to 5-6mm - increase volume. #3 & #4 runners have a lot of extra space underneath. Ideally I’d like to get volume up to 25-30L - incorporate support stays in behind filters to keep shape/hold filters in if I ever create positive pressure in this airbox - Vee the two filter positions maybe 20deg or so to form an air damn in the middle, also encouraging to to flow to the outer corners of the airbox. Should minimise width and maximise filter area. So this is what it looks like currently goddamn it’s going to look sexy once finished, but still a very long way to go!
- 417 replies
-
- 25
-
-
-
Wouldn't a T-series gearbox housing bolt up to these? Based on if a C56 can be bolted to them, them surely a T50 would work too? Every time I see one of these I need to do a double-take cause the valve cover is so similar to a 2zz, just weirdly slightly smaller.
-
VK327S 1986 VK Royale with Boost - Discussion
Rhyscar replied to vk327's topic in Project Discussion
Those wheels look great - love the red centre caps too. I'd recommend looking at off-the-shelf Bilstein options if you're going to replace shocks. Cut you circlip groove at the right height and you're away. Will end up with a much better ride than most coilovers can provide. I had some in my BA falcon a few moons ago and they were the best thing since sliced bread. -
These arrived today looks like they will work perfectly!
-
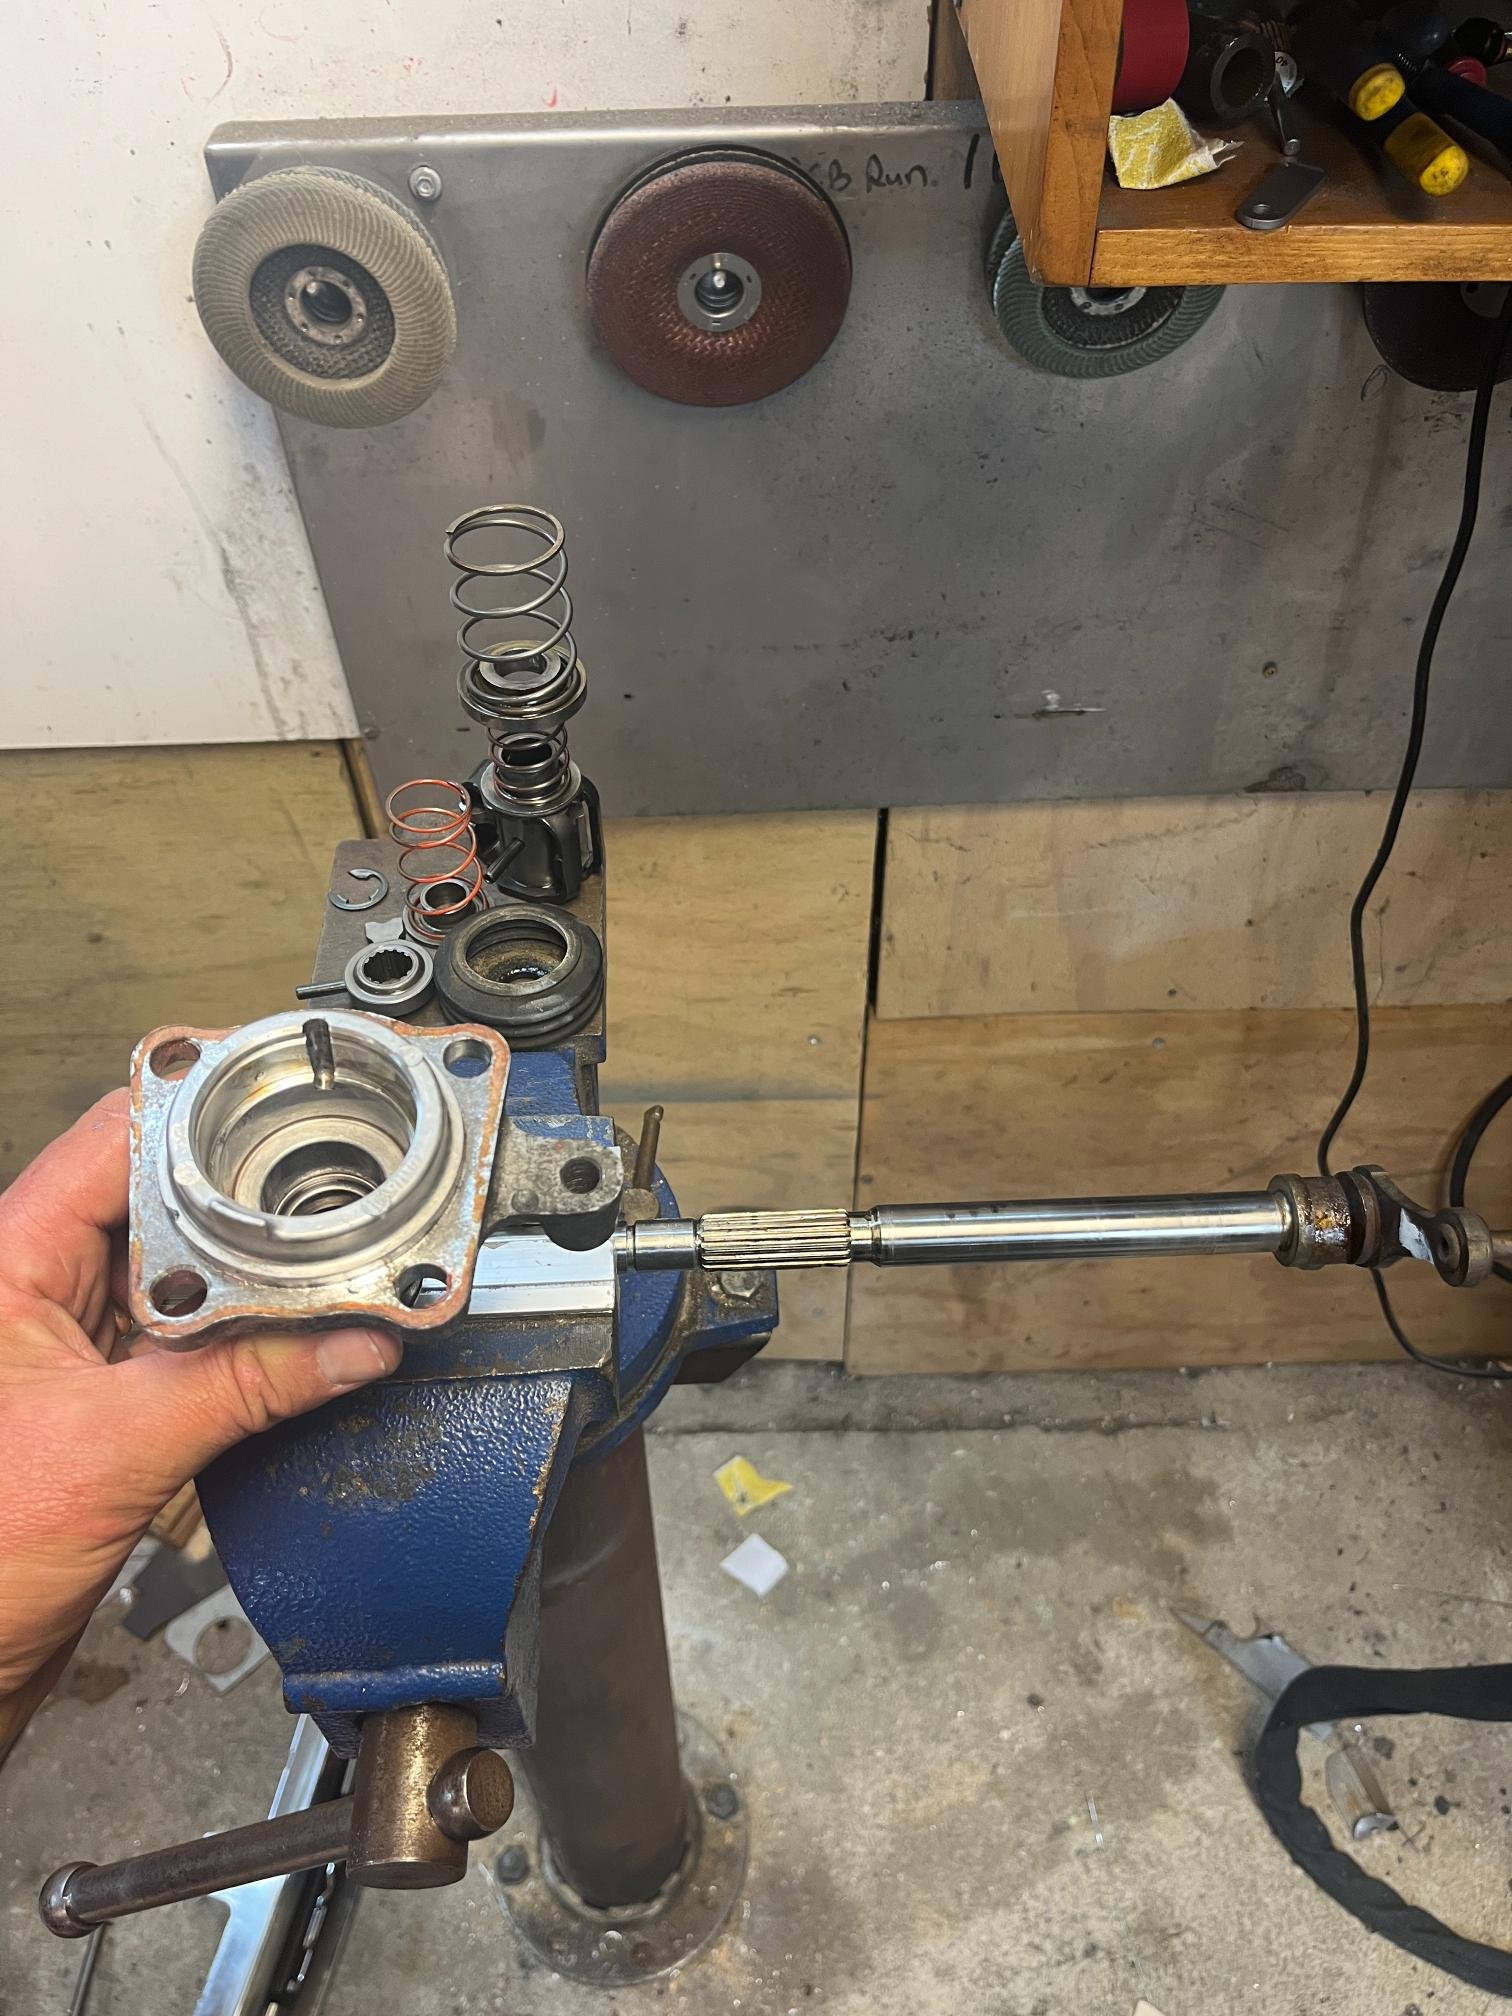
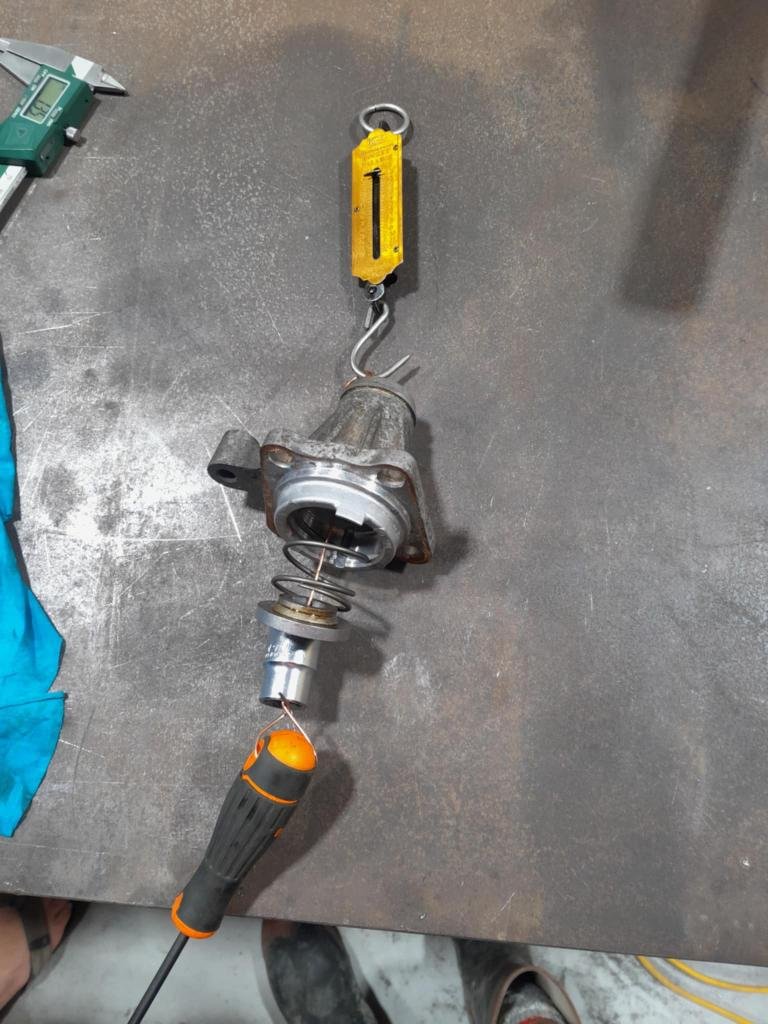
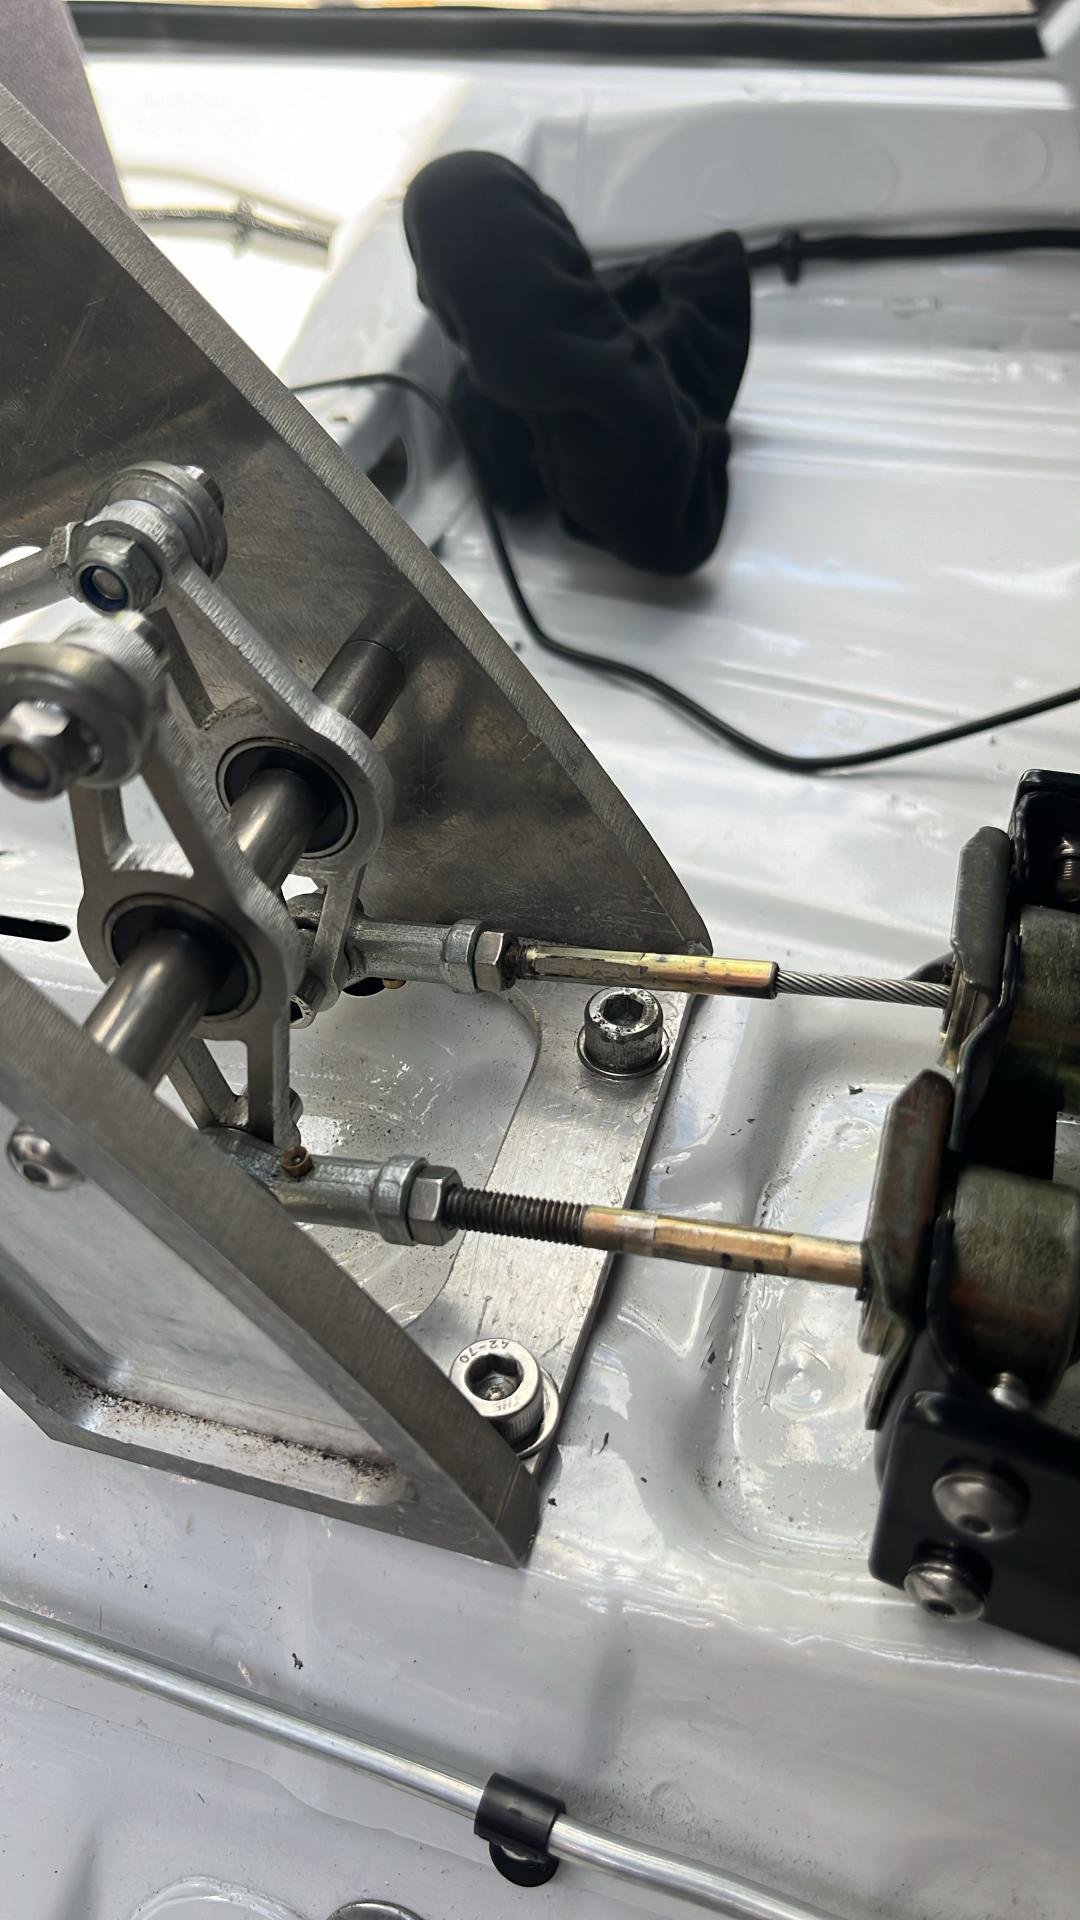
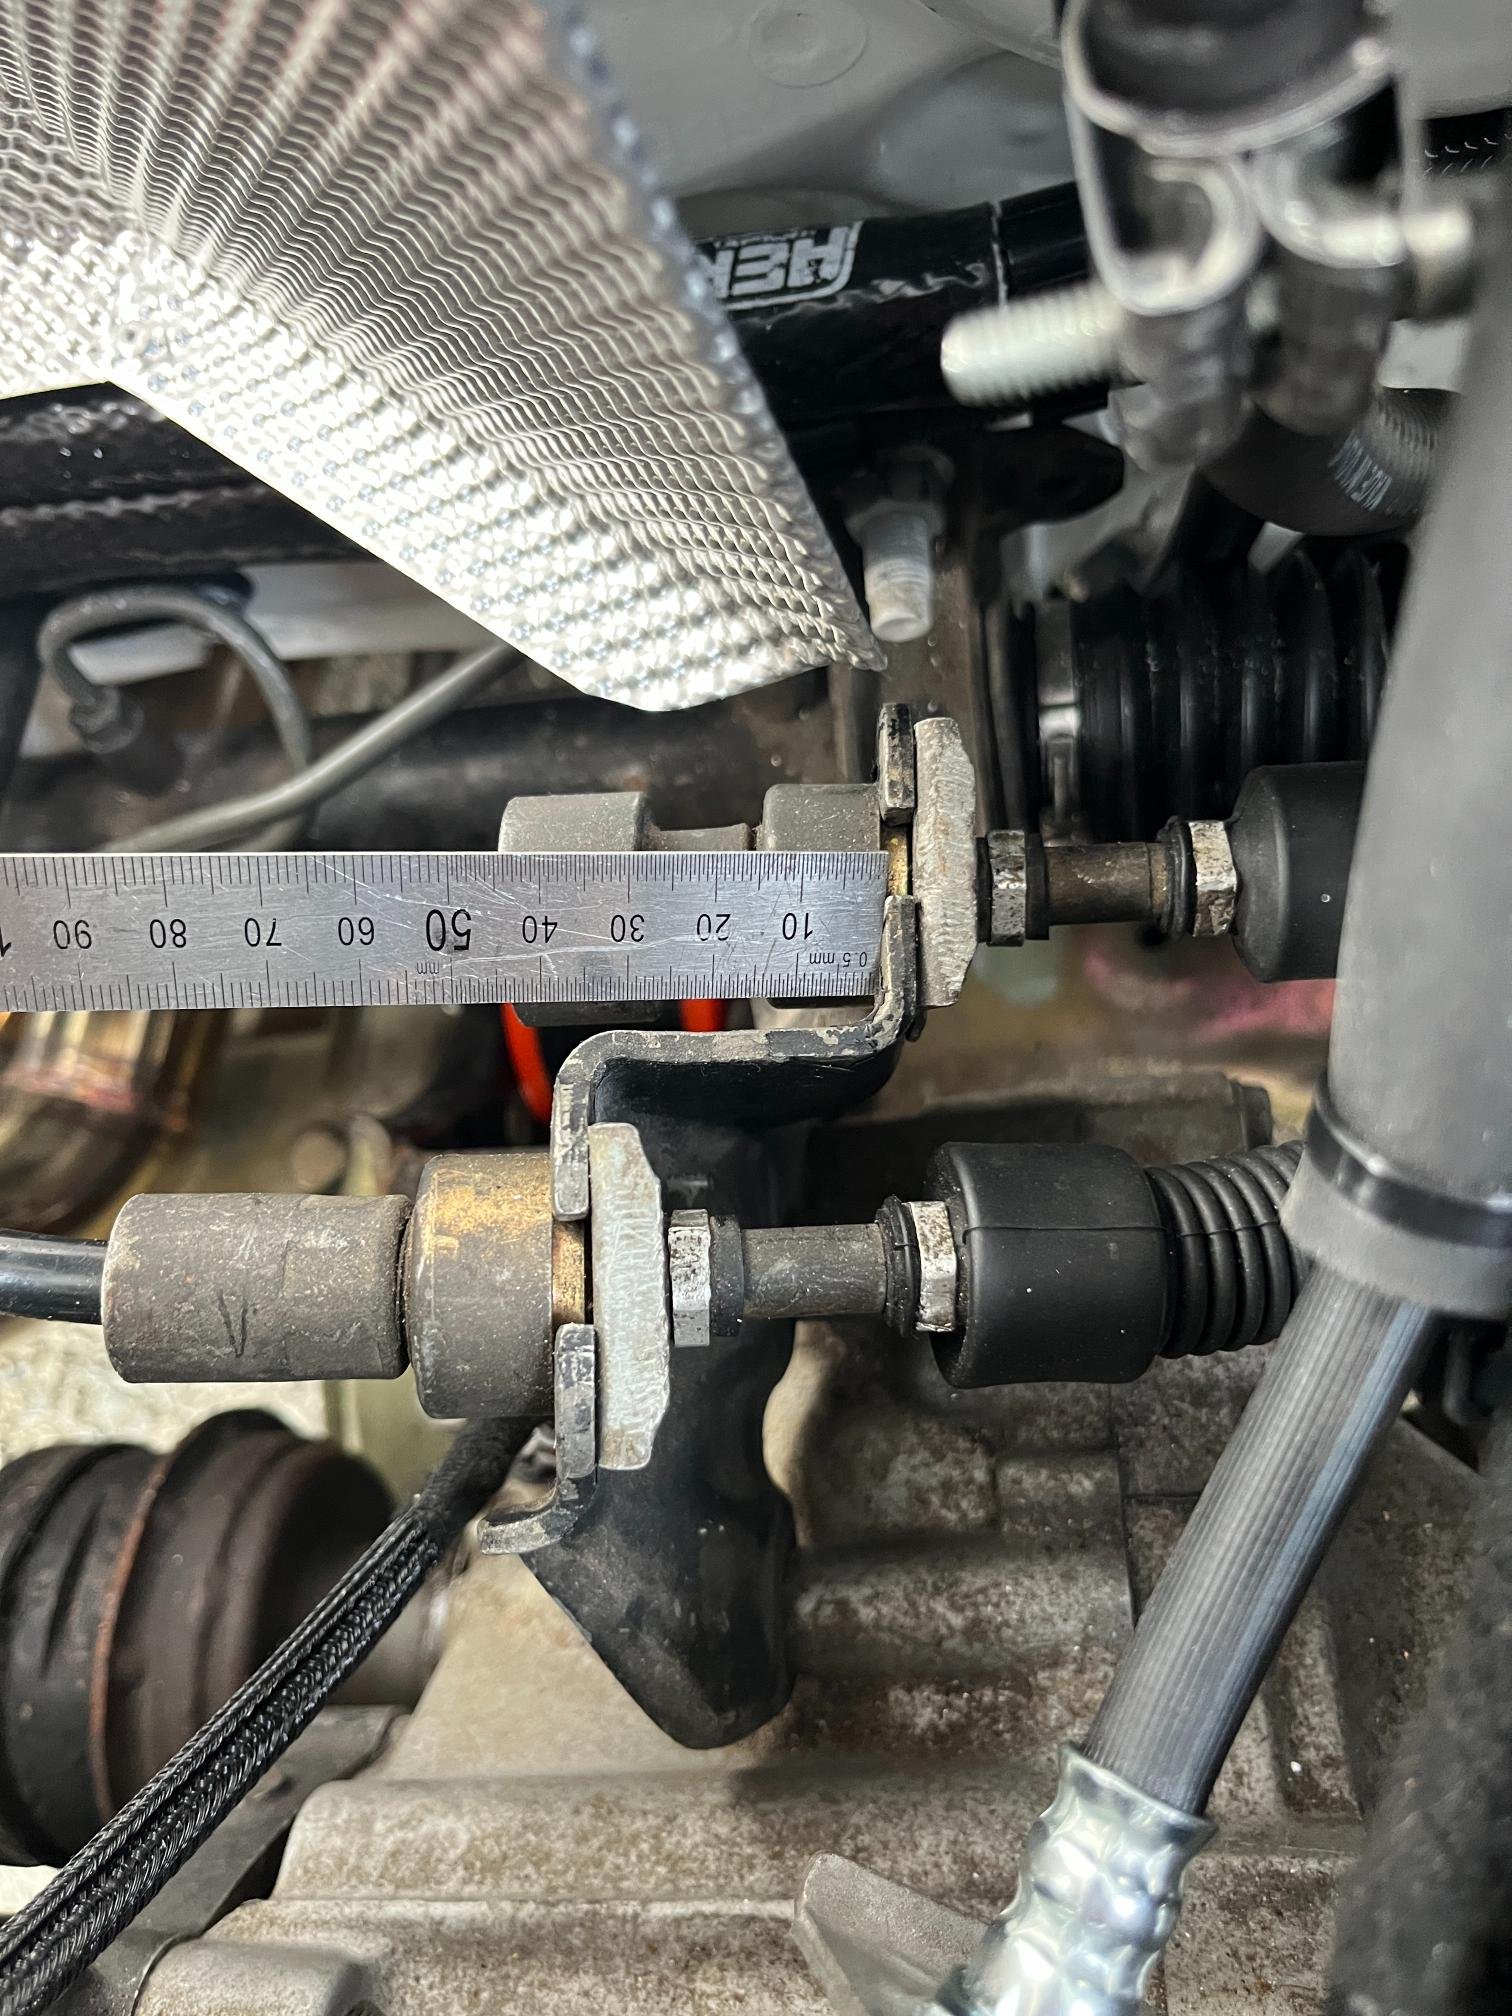
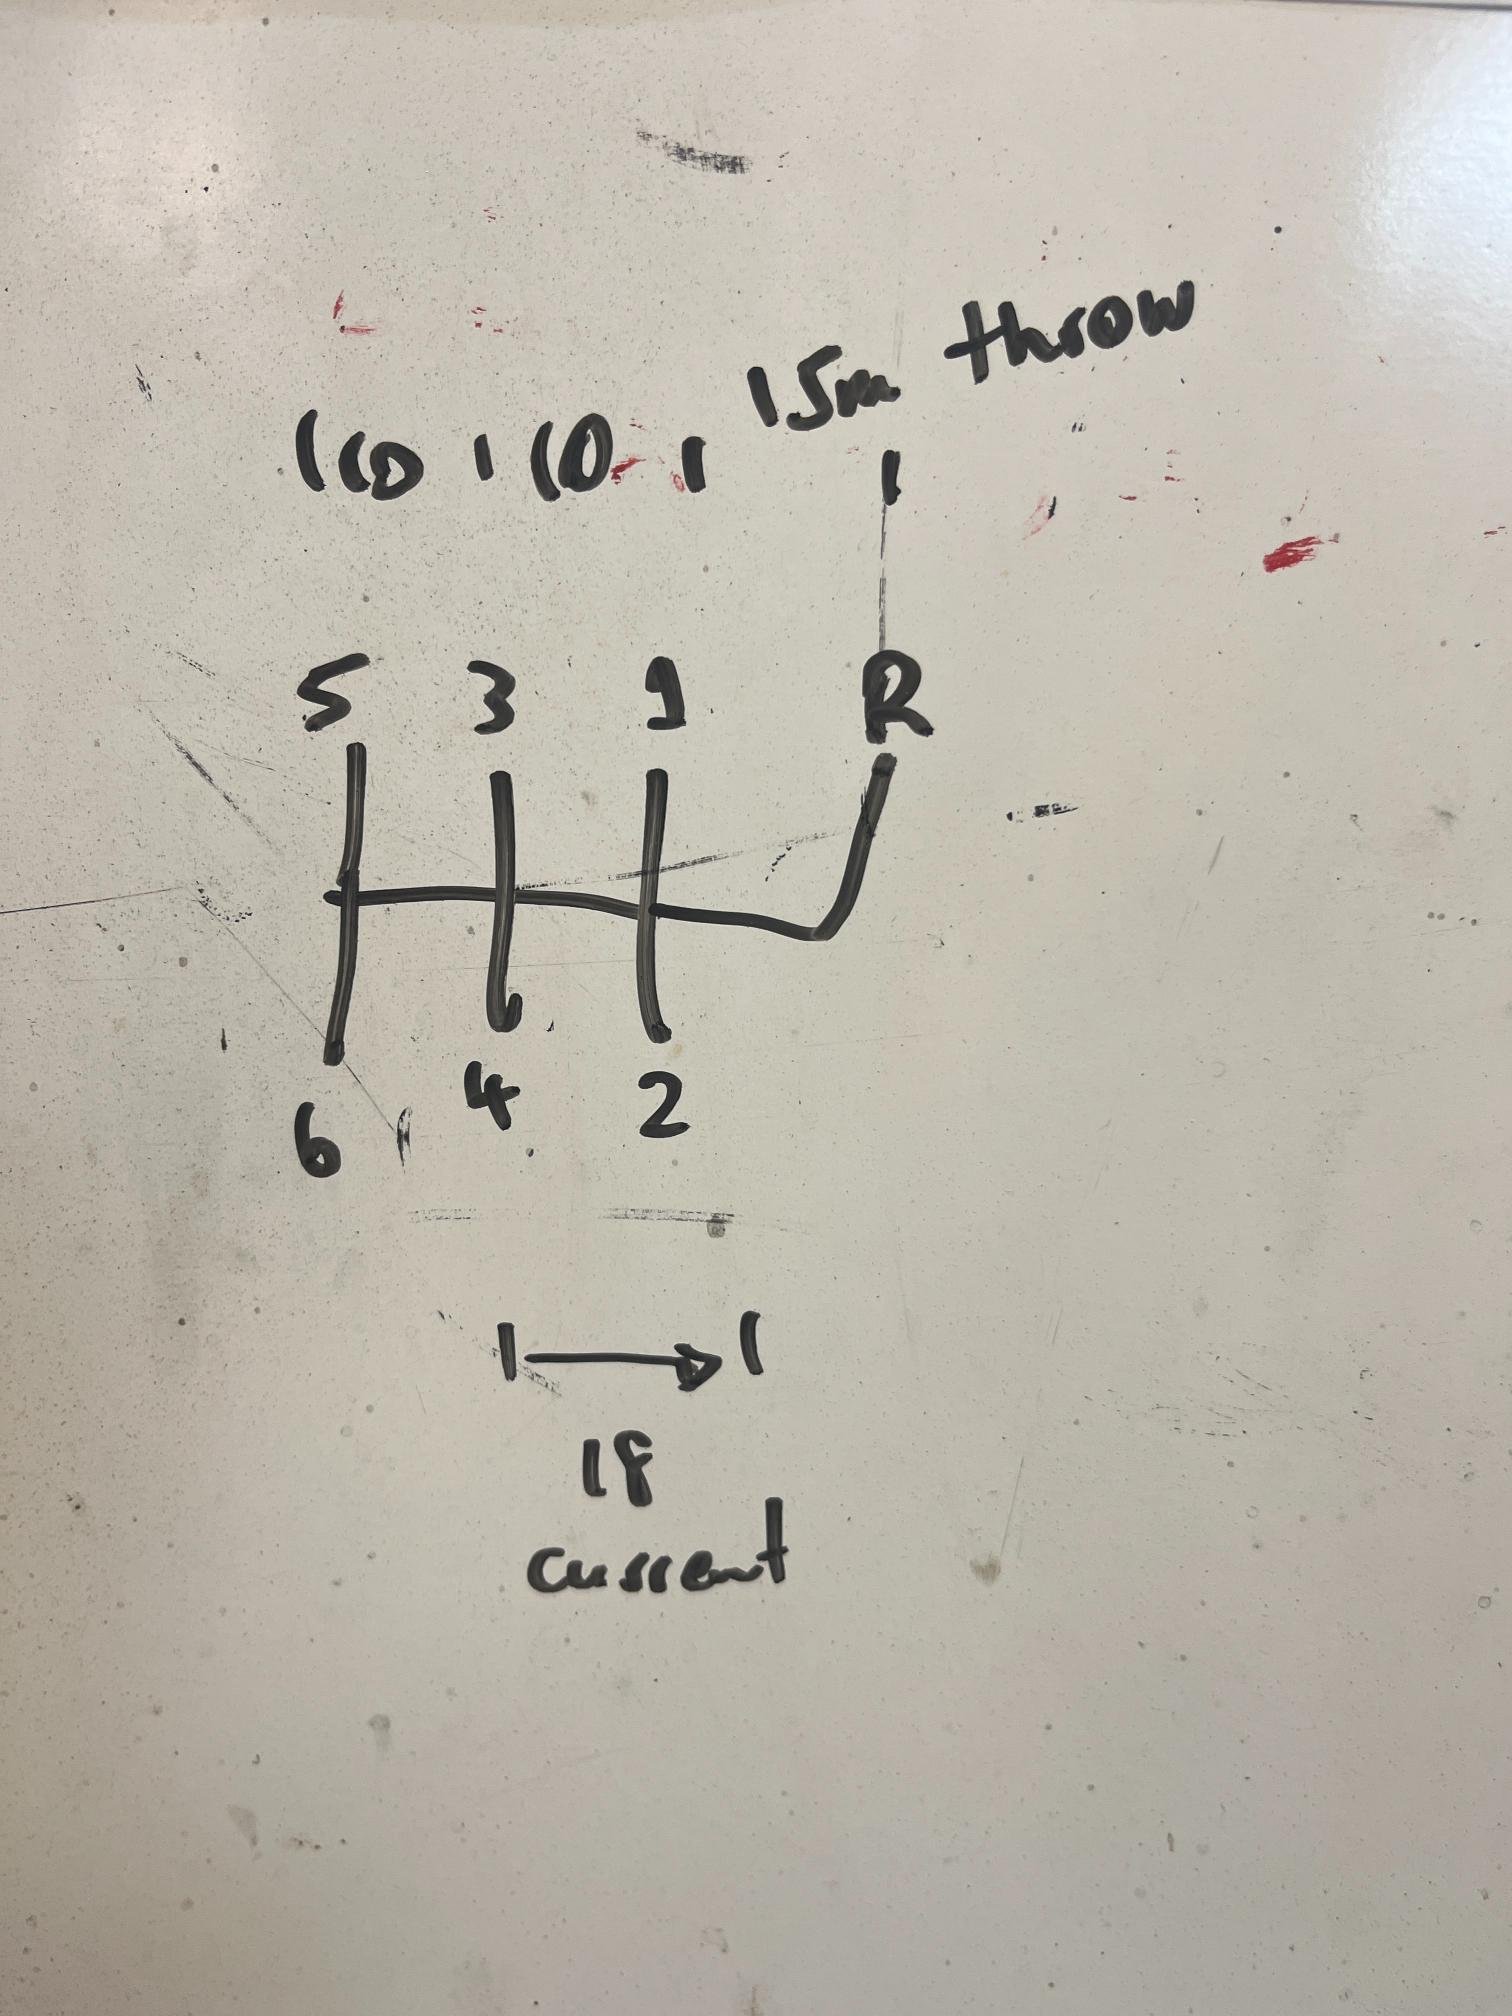
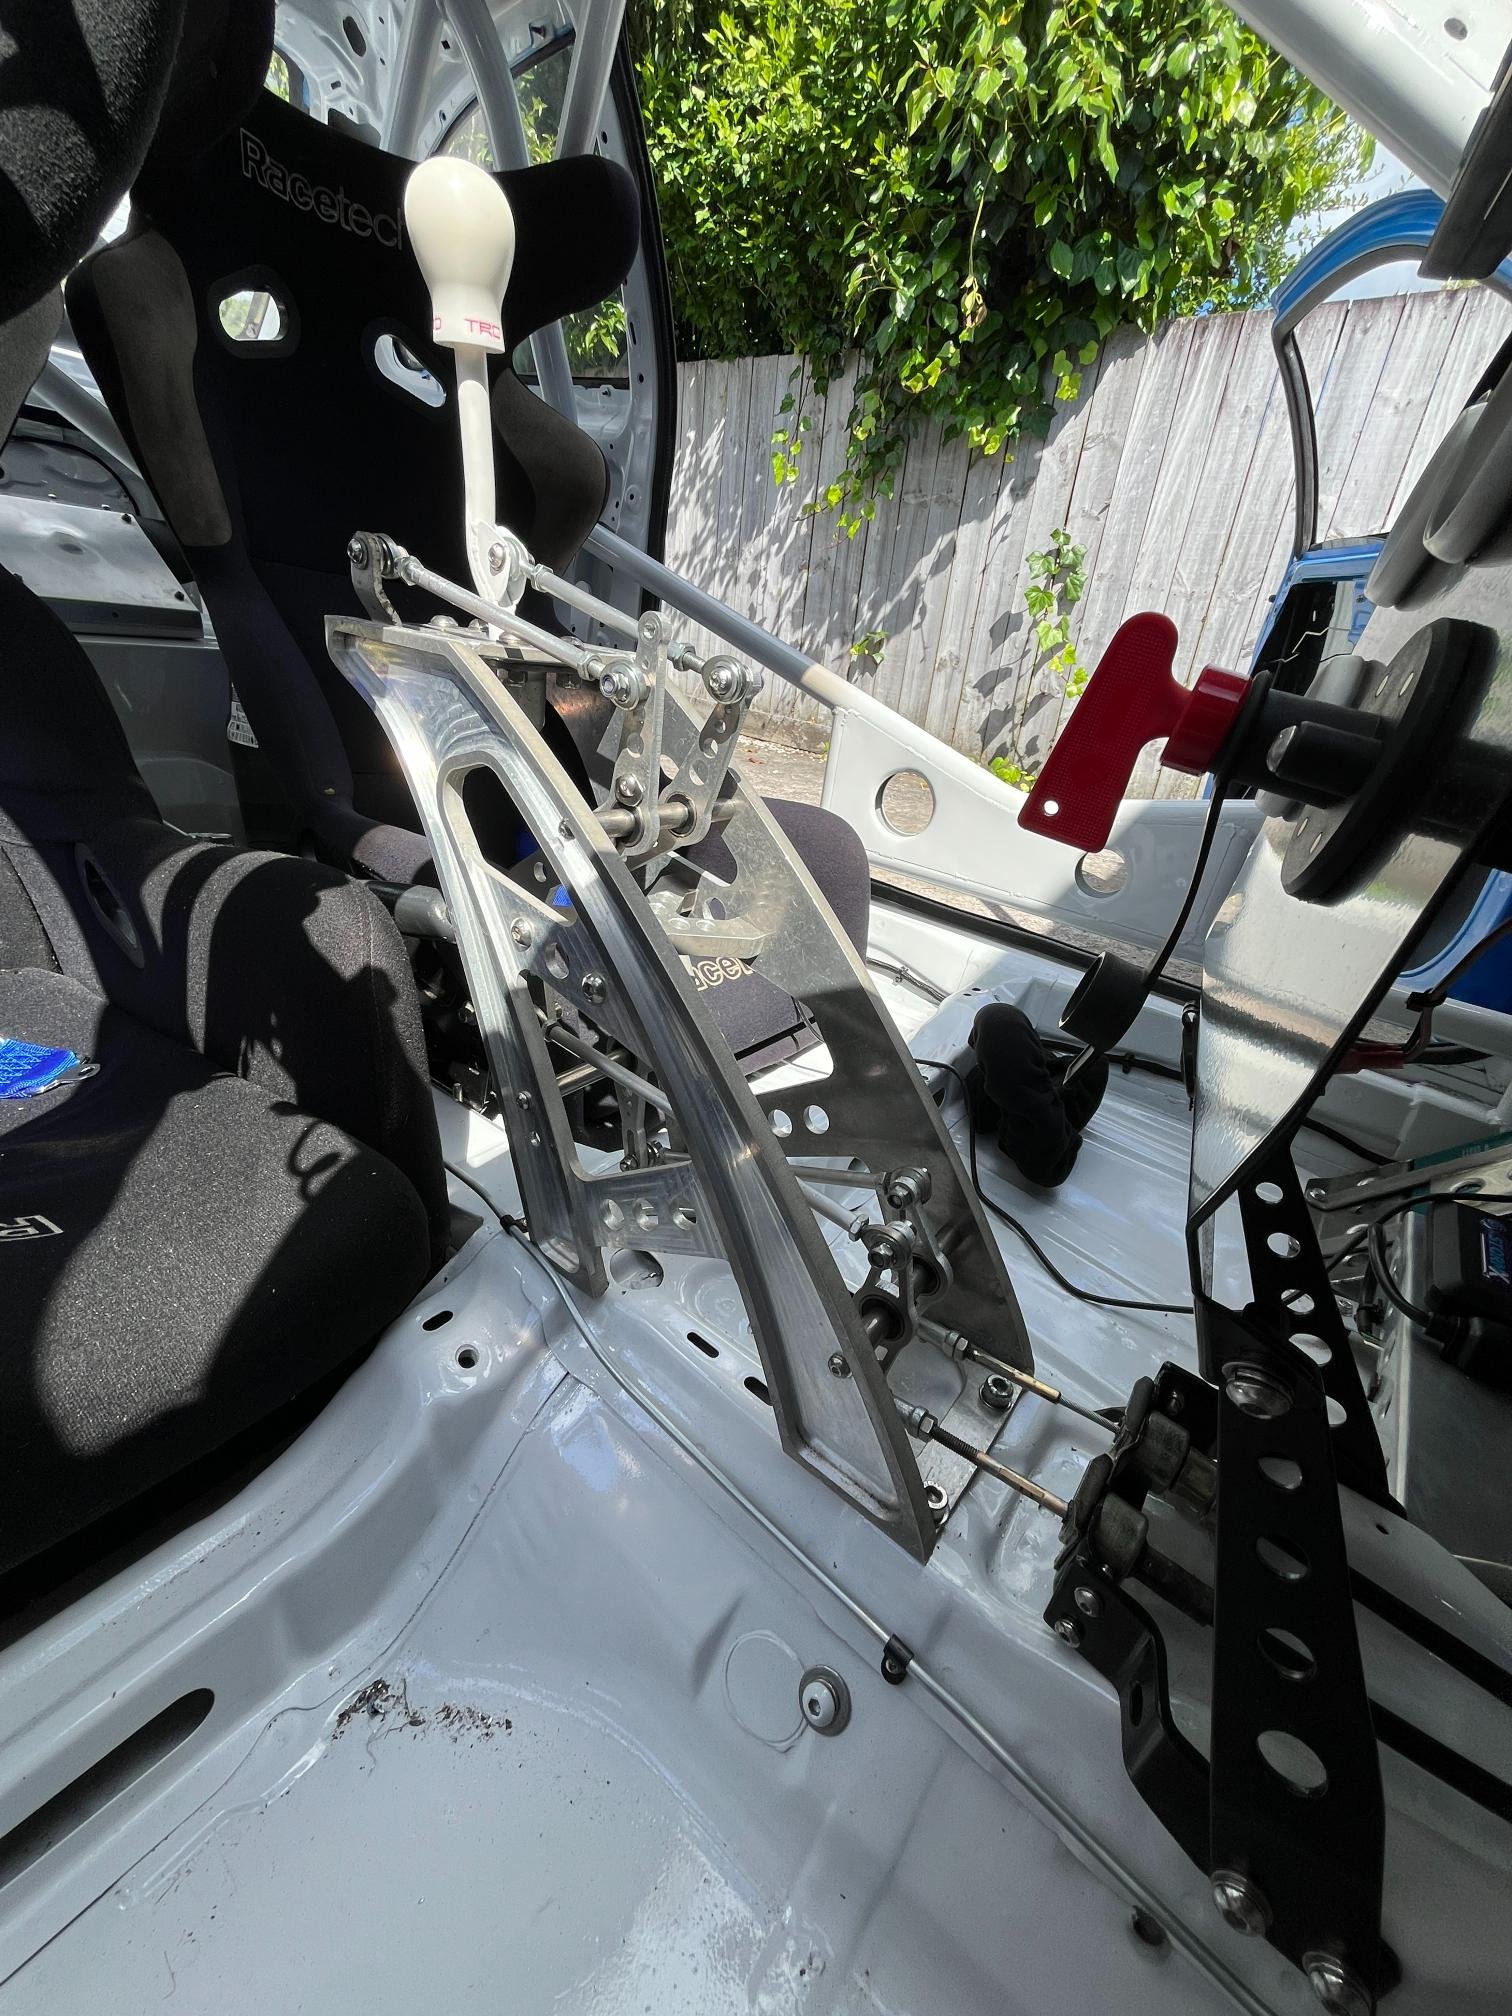
The reverse saga has finally come to an end! So I've been fighting an ongoing battle to figure out the reverse on my custom shifter. Glad to say I've finally got it sorted - although it's been quite a journey. Having to push the car onto the road whenever I want to take it for a quick drive is bloody hard work! First of all, I ended up rebuilding my shifter and swapping the fwd/back & side/side linkages as they have different gain ratios (1.6:1 vs 1:1). This condensed the side/side movement which I was hoping would give me enough movement. It didn't work, although turns out this is the way I had designed it to work in the beginning - somewhere along the way I forgot how to put it together properly. lol. This ruled out the issue being with the shifter throw or angle of linkages etc - provides at least 60mm of output travel without any issues. So I dove into the internet to try look for answers on the gearbox end. Lots of people convert 2zzge's & c60's into 'new' model MRS's, but I found very little info regarding this issue. Mostly due to MRS people being weirdo's and/or not very mechanical.. Reading between the lines of what I found, I decided my issue was the force needed to overcome the reverse lockout spring force. Due to my shifter having a short throw, I believed I didn't have the force to overcome the blockout spring. So @Geophy and I spent an evening removing material from the spring seat, ended up reducing spring pressure by 30% by removing 8mm of pre-load with the use of some handy fish scales. So after this didn't work, I went down the line of trying to figure out if I've got all the right bolt-on bits on my gearbox. It was so long ago I can't remember exactly how I got it and what I may have used from my old C56. Turns out everything was A-OK, apart from my shifter cables. So measured the throw on a factory car which identified the issue Had run out of adjustment on my rod end at the shifter end (reverse needed more 'push') After some investigation, I found the cables were limiting the throw. I think they were from a C52 originally, so no surprises that something about them wasn't right. At this point, the easiest answer (cause replacing the cables is a massive pain!) was to add 20mm to the gearbox end mount - moving the H pattern further along its available 58mm of travel... I went a little more than the 8mm I needed, so I could fine-tune the rest at the shifter end by shortening push rods etc. Also allows for some cable stretch in the future. So end result is that reverse works now and the spacing for rest of the gears is great! Super happy to have a fully functioning gearbox and the shifter actually works fantastic. It's actually very intuitive to use and position is so close to steering wheel. In hindsight, I actually wish I didn't modify the reverse blockout spring as it isn't as heavy as I'd like now. Oh well. Also relieved it isn't a complete fuck up after all the years of effort and thought put into it Best use of skateboard bearings and cheap rod ends I've ever found that's for sure! While I'm waiting for airbox things, car will be pulled apart to finish some stuff off. Won't be making drag day as we've got a wedding that weekend. Kinda nice to have the pressure off to make drag day to be fair. - Powdercoating - Mount harnesses & rollcage padding - Plumb-in Fire extinguisher - Carbon fibre doorcards Hoping to have it ready for dyno and basic trackdays early next year. 2nd child is due early March so push is on to get it pretty well sorted by then.
- 417 replies
-
- 22
-
-
-
Great work so far! Such a cool project, and I am definitely partial to a camper build. Following with my popcorn.
-
Oh yeah two of those would work mint! Thanks heaps
-
Thanks Dave and that is a brilliant idea for trying to figure out air filter sizes! I hadn’t come across that merc one yet. Ideally I want one 600mm long and just under 100m high. My current method has been scouring through summit racing using the size filter to narrow my search 😆
-
Oh wow that is not a good position to be put in! Is the centre diff the weak link with these? No viscous LSD or plate options available? what about front/rear?
-
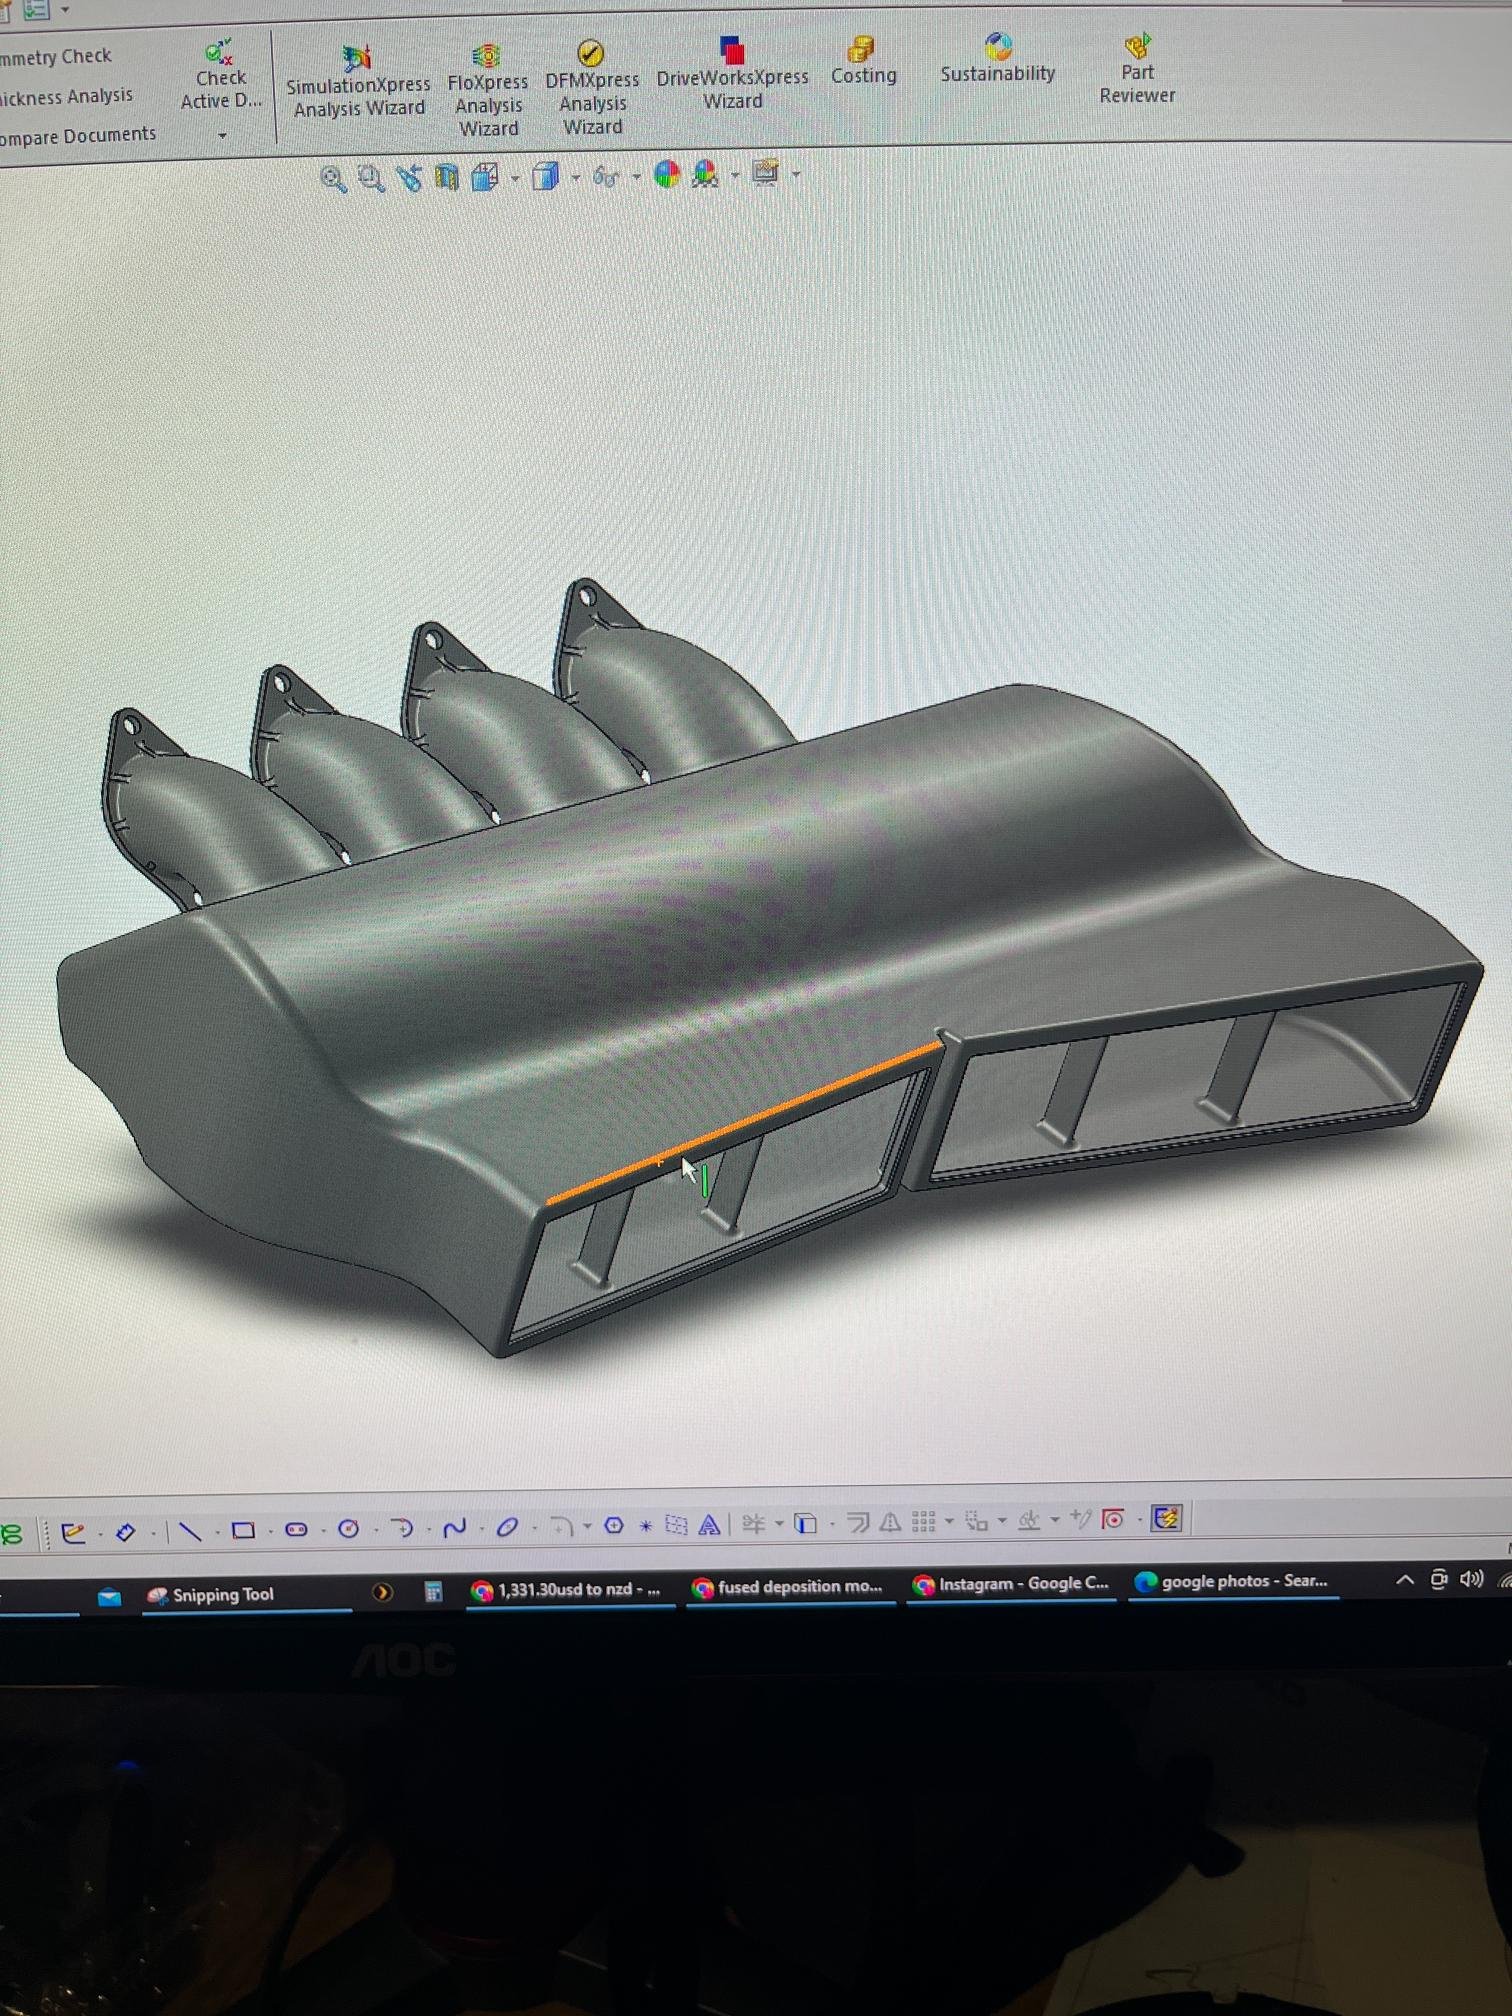
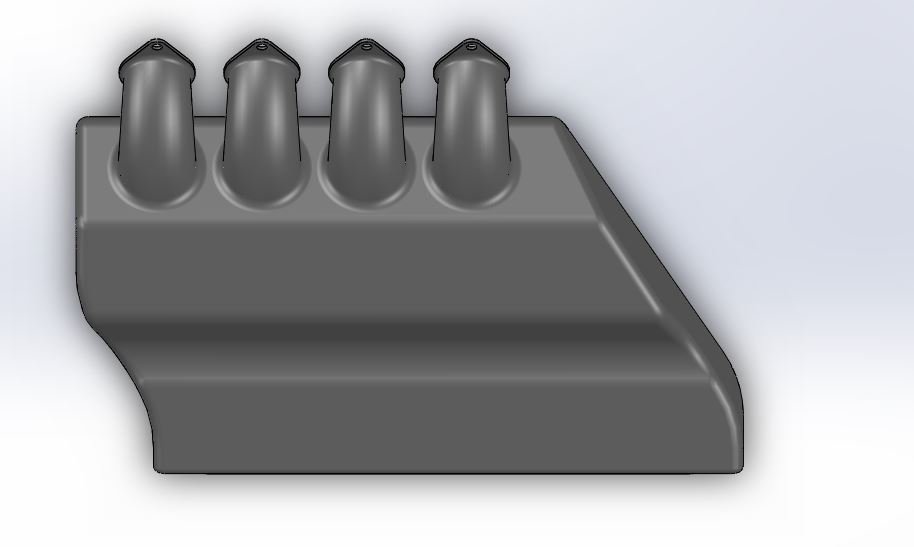
Been getting into modelling the airbox. Isn't as large as I initially thought so not too worried about 3D printing it now - its also got a good selection of curves and shapes to keep it strong. I've decided to add a sheetmetal alloy frame to the outside to provide a little extra support, but otherwise I'm confident in the strength it'll have. Next step is to slice off the first 2 trumpets and do a test-print to check for clearances The trumpets turned out pretty well. They aren't 100% perpendicular to ITB face, but pretty damn close. Making them perfect was an exponential amount more modelling work, so this will do. Trumpet approx 120-125mm long and goes from 49mm at base out to 63mm before the bellmouth. I'm going to be honest, it was pretty difficult to model a digressing profile swept through an arch... Bellmouth has 20-25mm clearance in the tightest spots to the outer airbox walls. A little more would be nice, but struggling for physical space. I put some bulges in the base to help give a little extra clearance - hopefully while avoiding the alternator post & throttle cable which is pretty closeby. Perhaps I should reduce the taper on the trumpet and bellmouth size to create a bit more clearance? Airbox capacity just over 13L, so not as big as I'd like, but ramming air into it through the grill should make up for it. After a bit more deep diving I'm little worried about the 1.6L Peugeot 206 filter size - it's slightly smaller than a standard 2zz filter. K&N should be less pressure drop than factory, however, I'm also wanting as many doorts as possible. Unfortunately, I can't find anything off-the-shelf in a similar profile (95mm) but longer (>450mm). Another option is making my own filter from uni filter foam - would catch the bugs at least! Anyway off to the shed to solve the irritatingly-difficult-to-solve unlock reverse in my 6 speed gearbox.
- 417 replies
-
- 11
-
-
-
She also said 130mm was long enough... touchy subject maybe
-
It will go hard. Had a few childish giggles cutting it out
-
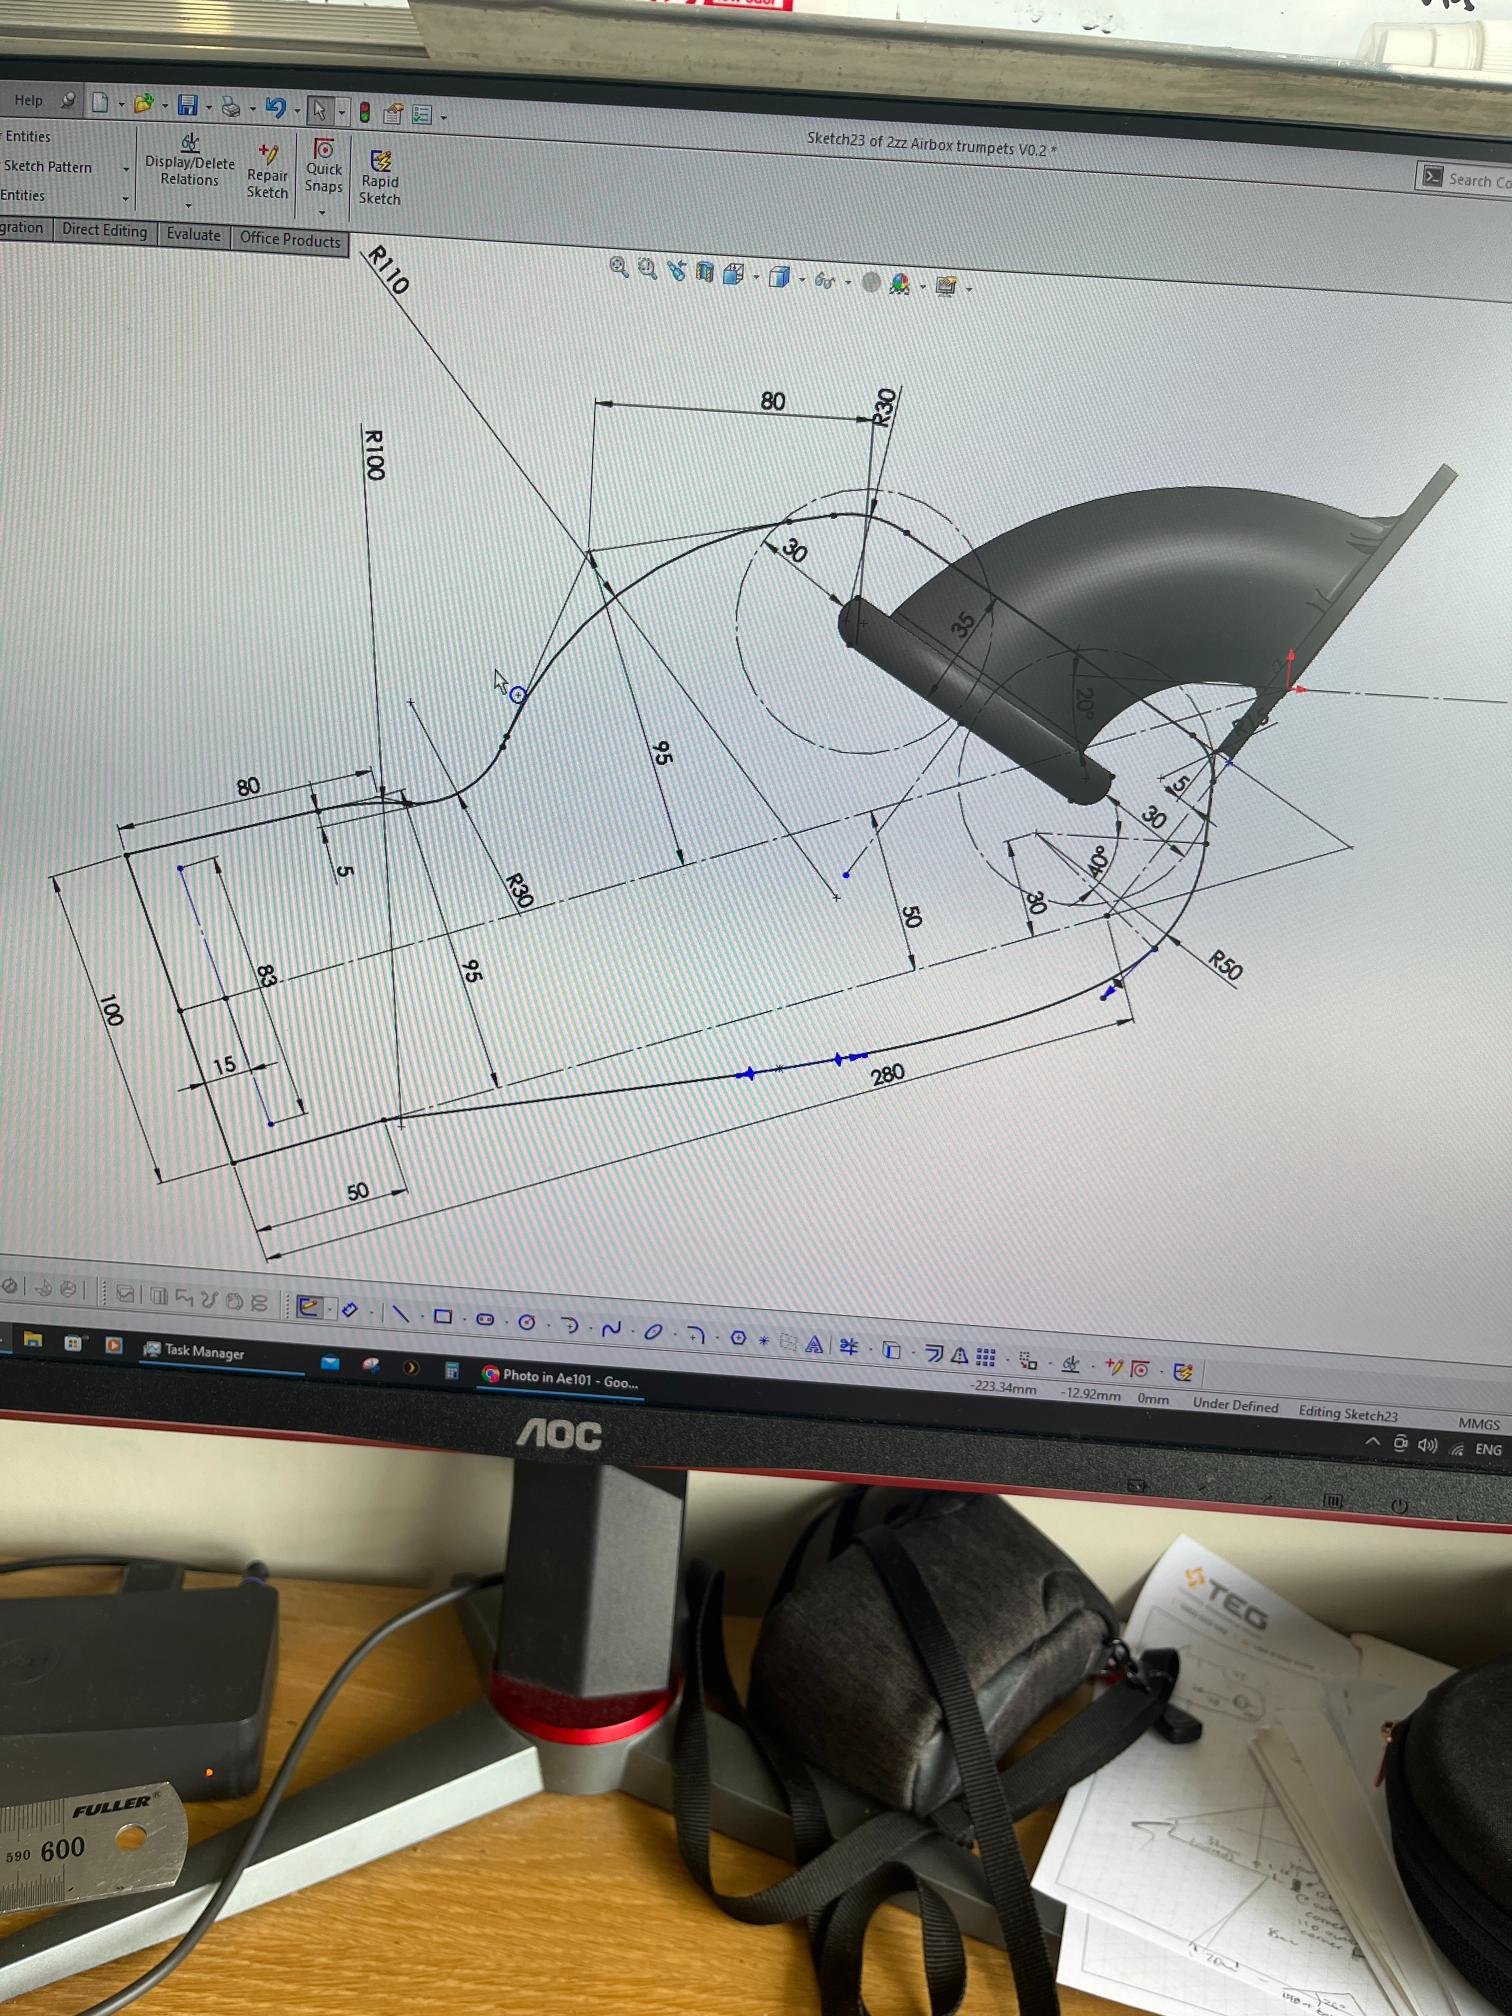
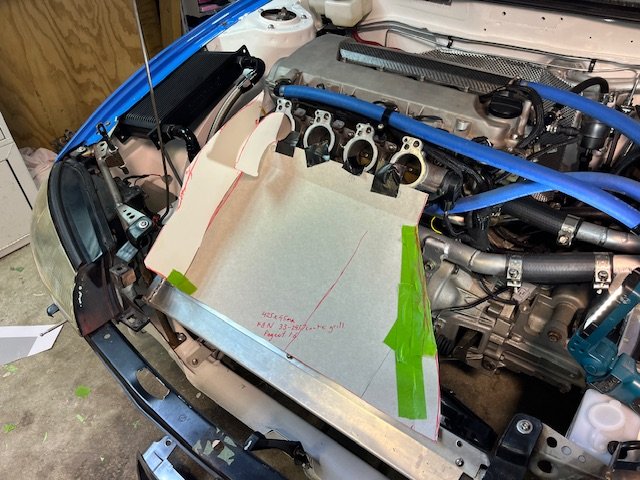
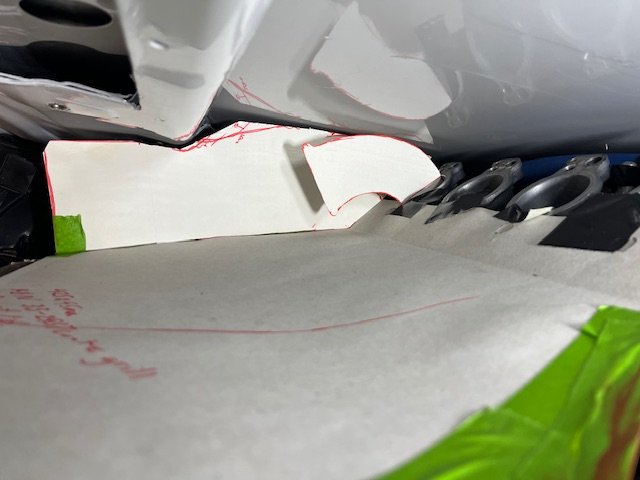
So had another crack at this and surprised myself by how good the brain is at visualising and adjusting spline curves. After half a dozen goes at getting the trumpet to have the right amount of droop came up with this which is the best solution. Has 25mm to top and bottom of the airbox. Aiming for 330mm intake length. Around 200mm from valve to end of throttles so trumpet 130mm long. Also decided to shorten the airbox section. I’ll make a aluminium duct that connects the grill (actually it doesn’t need to physically connect, just be close) to the filter. This means that a crash will only damage (hopefully) the easily replaceable aluminium duct work and not damage the airbox. Ive chosen to end it slightly in front of the radiator so I could run without a front duct without impacting performance too much. With my cardboard aids this will actually be quite easy to draw up in solidworks. Bonus of 3d printing being that it can all be one piece, and the trumpets can kiss/join with the top outer edge of the airbox for extra strength. Lots of creative options here. Also found a k&n filter about the right size that will do the trick https://www.summitracing.com/parts/knn-33-2937 The seemingly impossible task of the airbox is now very achievable, just got to keep moving forward on it now.
- 417 replies
-
- 11
-
-
-
Waiting with anticipation! This entered my brain a few times this morning and agree it might be a really good idea...
-
Yeah but not rectangular ones. A few years ago I was trying to speak to company in India a few years ago that made them but didn’t get very far. https://www.bellowcoverindia.com/rectangular-bellow-covers.html
-
I’ve looked high and low for a rubber seal that can be used like this and haven’t found anything. Would love to know if people have seen this type of corrogated bellows!! The engine is REALLY solidly mounted, and my exhaust manifold has a similar level of clearance so I don’t think I’d more than 5mm of movement at the end. Also had a thought that the filter should be permanently attached to the grill in a aluminium slot thing that has the airbox slot into it and semi-seal with foam or rubber. (Hard to explain clearly sorry) All this has also made me realise that in 100% gauranteed to damage the airbox if I nudge a bank or another car on the racetrack. Both are foreseeable events
-
@Roman the trumpets won’t be too bad. I’ve got 130mm length to play with and the weird shape bit will be in the first 50mm. I don’t think oval vs round trumpet entry will make much difference based on what Kpr has tested. The thing is even with a curved manifold I still only have the same amount of space to work with, it just makes one part slightly easier (but still quite difficult). @Truenotch that’s a great idea!. Would be easy to get all the flanges nice and square and could even add in some of those half round bit of trimming wood (dunno the right terminology here) to give the flat base some ribs.
-
Thats impressive. Pics or it didn't happen Yeah it'll be a top & bottom section at the very least, but even getting that flange to sit right after some time (and to model in Solidworks!!) can be a PITA. My experience designing plastic parts generally dictates that rounded corners and contours are your friend and flat surfaces are very hard to keep flat... This will be 350mm L x 600mm w x 130mm H - so unsure if this a reasonable size to be 3D printing in one piece or do I need to split it down the middle too?
-
Yeah change to the intake manifold is possible. I'm actually working on an updated manifold design that's curved atm but it's roughly 20-25mm longer after the throttle. But ultimately looking to sell that for profit/pay for stuff, not put on this car as I think I can make what I've got work. Also a shorter manifold is better - intake length before throttle rather than after is better (in terms of air path). Yup I use Solidworks sheetmetal but I tend to find its easier/quicker to just cut and fold stuff unless it's super complex. Means you can double check and make adjustments as you go and end up with a better result than laser cutting & realising something isn't right. Yeah I get what you mean, this could work OK but then airbox would need more support. I don't think I can get rid of vibration, just a matter of choosing materials that don't hate it like Ali (particularly once welded!!). The whole car vibrates when it's running.. Making molds is a great use of 3D printing but creates an extra step. If there isn't a production run of parts, @Roman has proved one-off 3D printing and overlaying in carbon is a very time effective process. Perhaps not as nice finish as a molded based CF part, but I think it will suit my purposes just fine.
.jpg.087da5db8ae9ac7f8ef1bda96ce44539.jpg)