azzurro
-
Posts
2744 -
Joined
-
Last visited
-
Days Won
3
Everything posted by azzurro
-
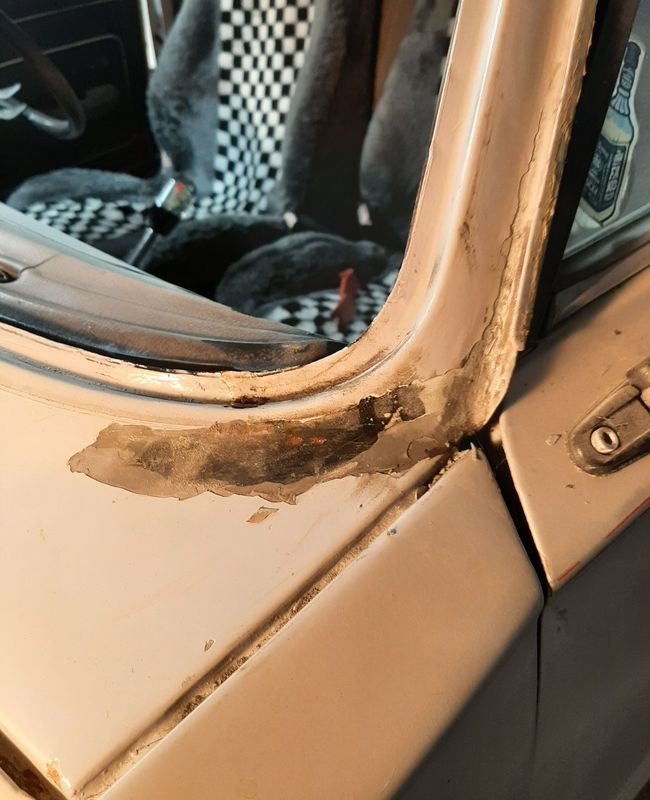
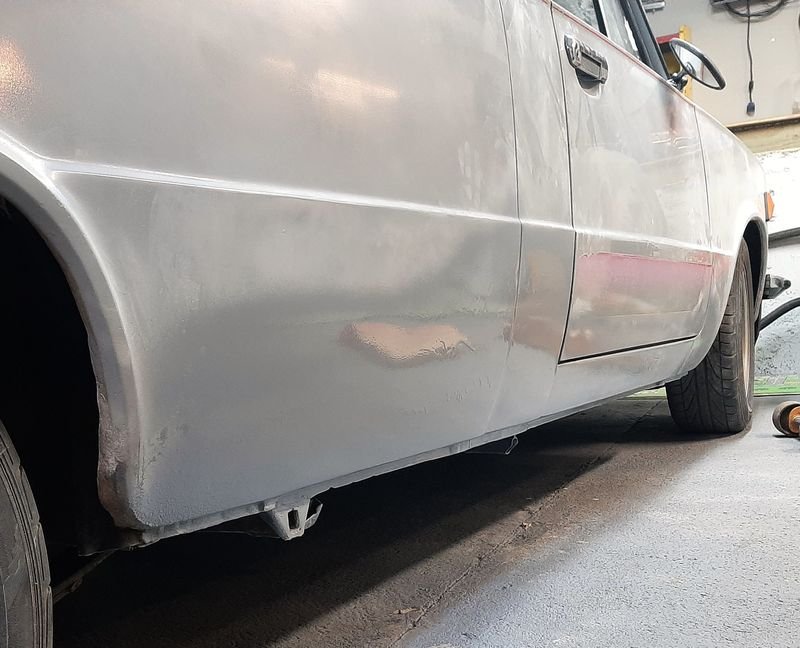
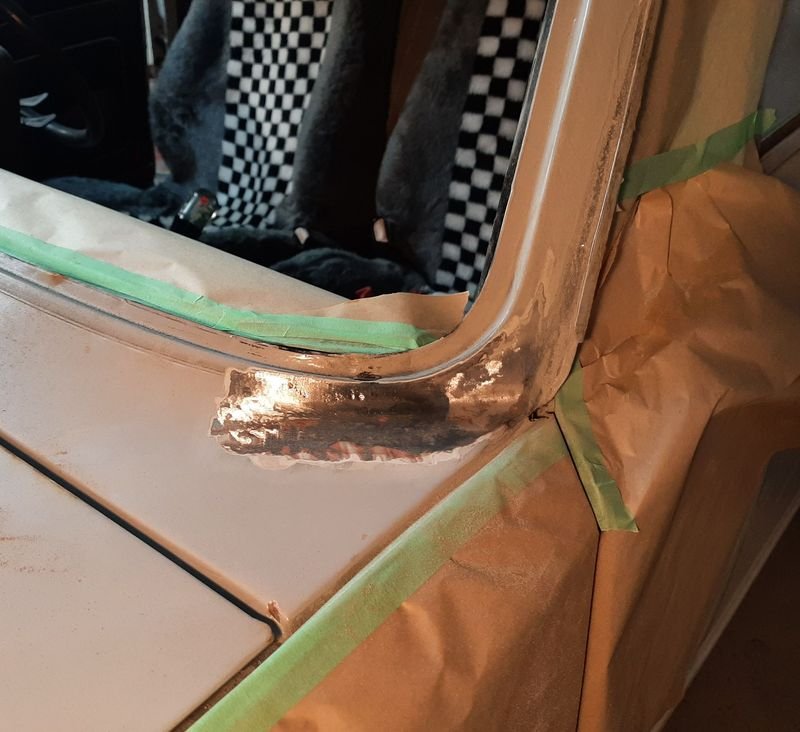
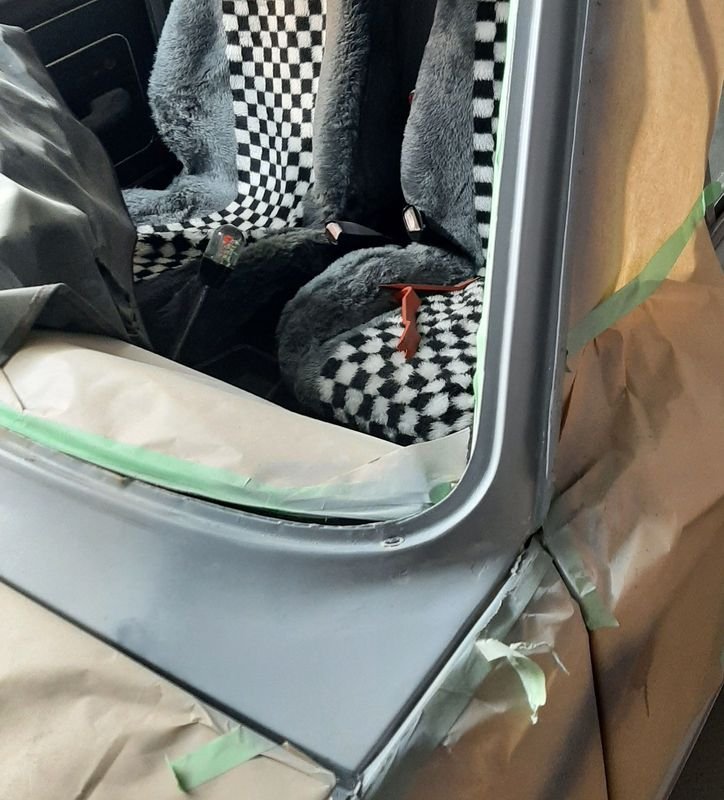
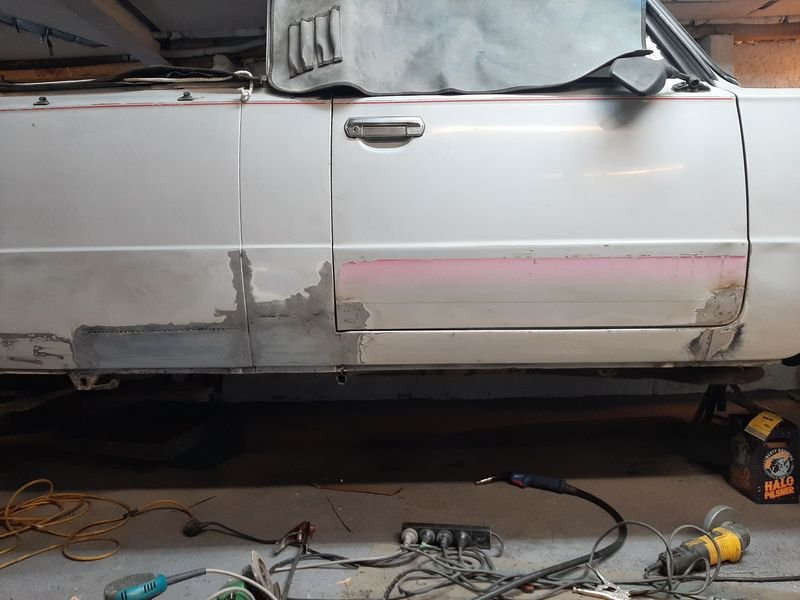
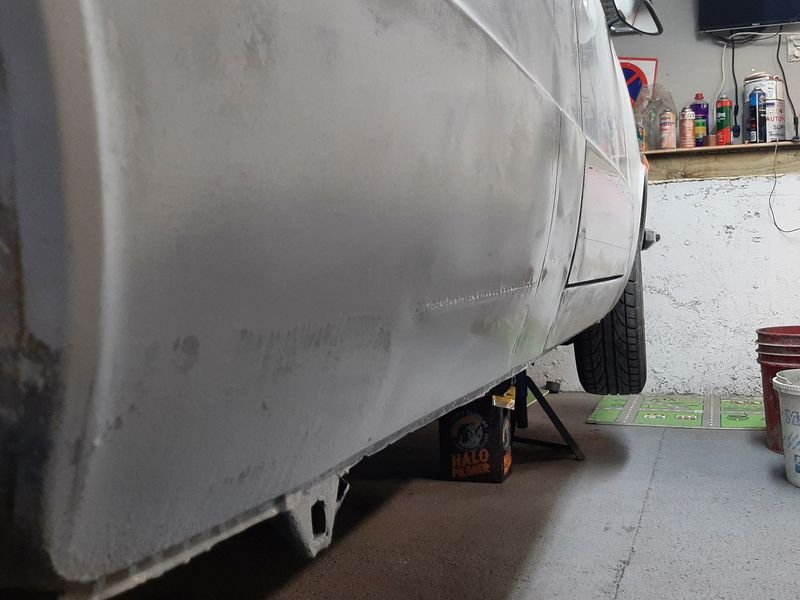
Some small lockdown progress. Mainly slow because i just really hate sanding and bogging, its so dusty and takes way too long. Anyway, the sill repair got smoothed in and some rattle can primer for now. Pretty good colour match, hah! That done, dropped it off the stands and popped the windscreen out to get the passenger scuttle. This is result of some paint reaction just bubbled and flaked off. Looked back in the thread when i last had the screen out and i had a bad paint crazing reaction in that area when i was first gun priming it in the driveway, probably from a mix of rattle cans i would have used to seal it overnight etc, but i must not have cleaned these areas out. Flakey paint goes up the gutter a bit too. First grind back, back to bare metal Picked at some other scabs around the opening, and got the first layer of filler - one and done on most of the other bits, but a couple yet to go in this corner I reckon. Its a tricky tightening concave that always takes me ages to blend in.

- 81 replies
-
- 12
-

-
- gottacatchemall
- fiat 125
- (and 4 more)
-

azzurros 1966 FIAT Duemilatrecento Familiare Discussione
azzurro replied to azzurro's topic in Project Discussion
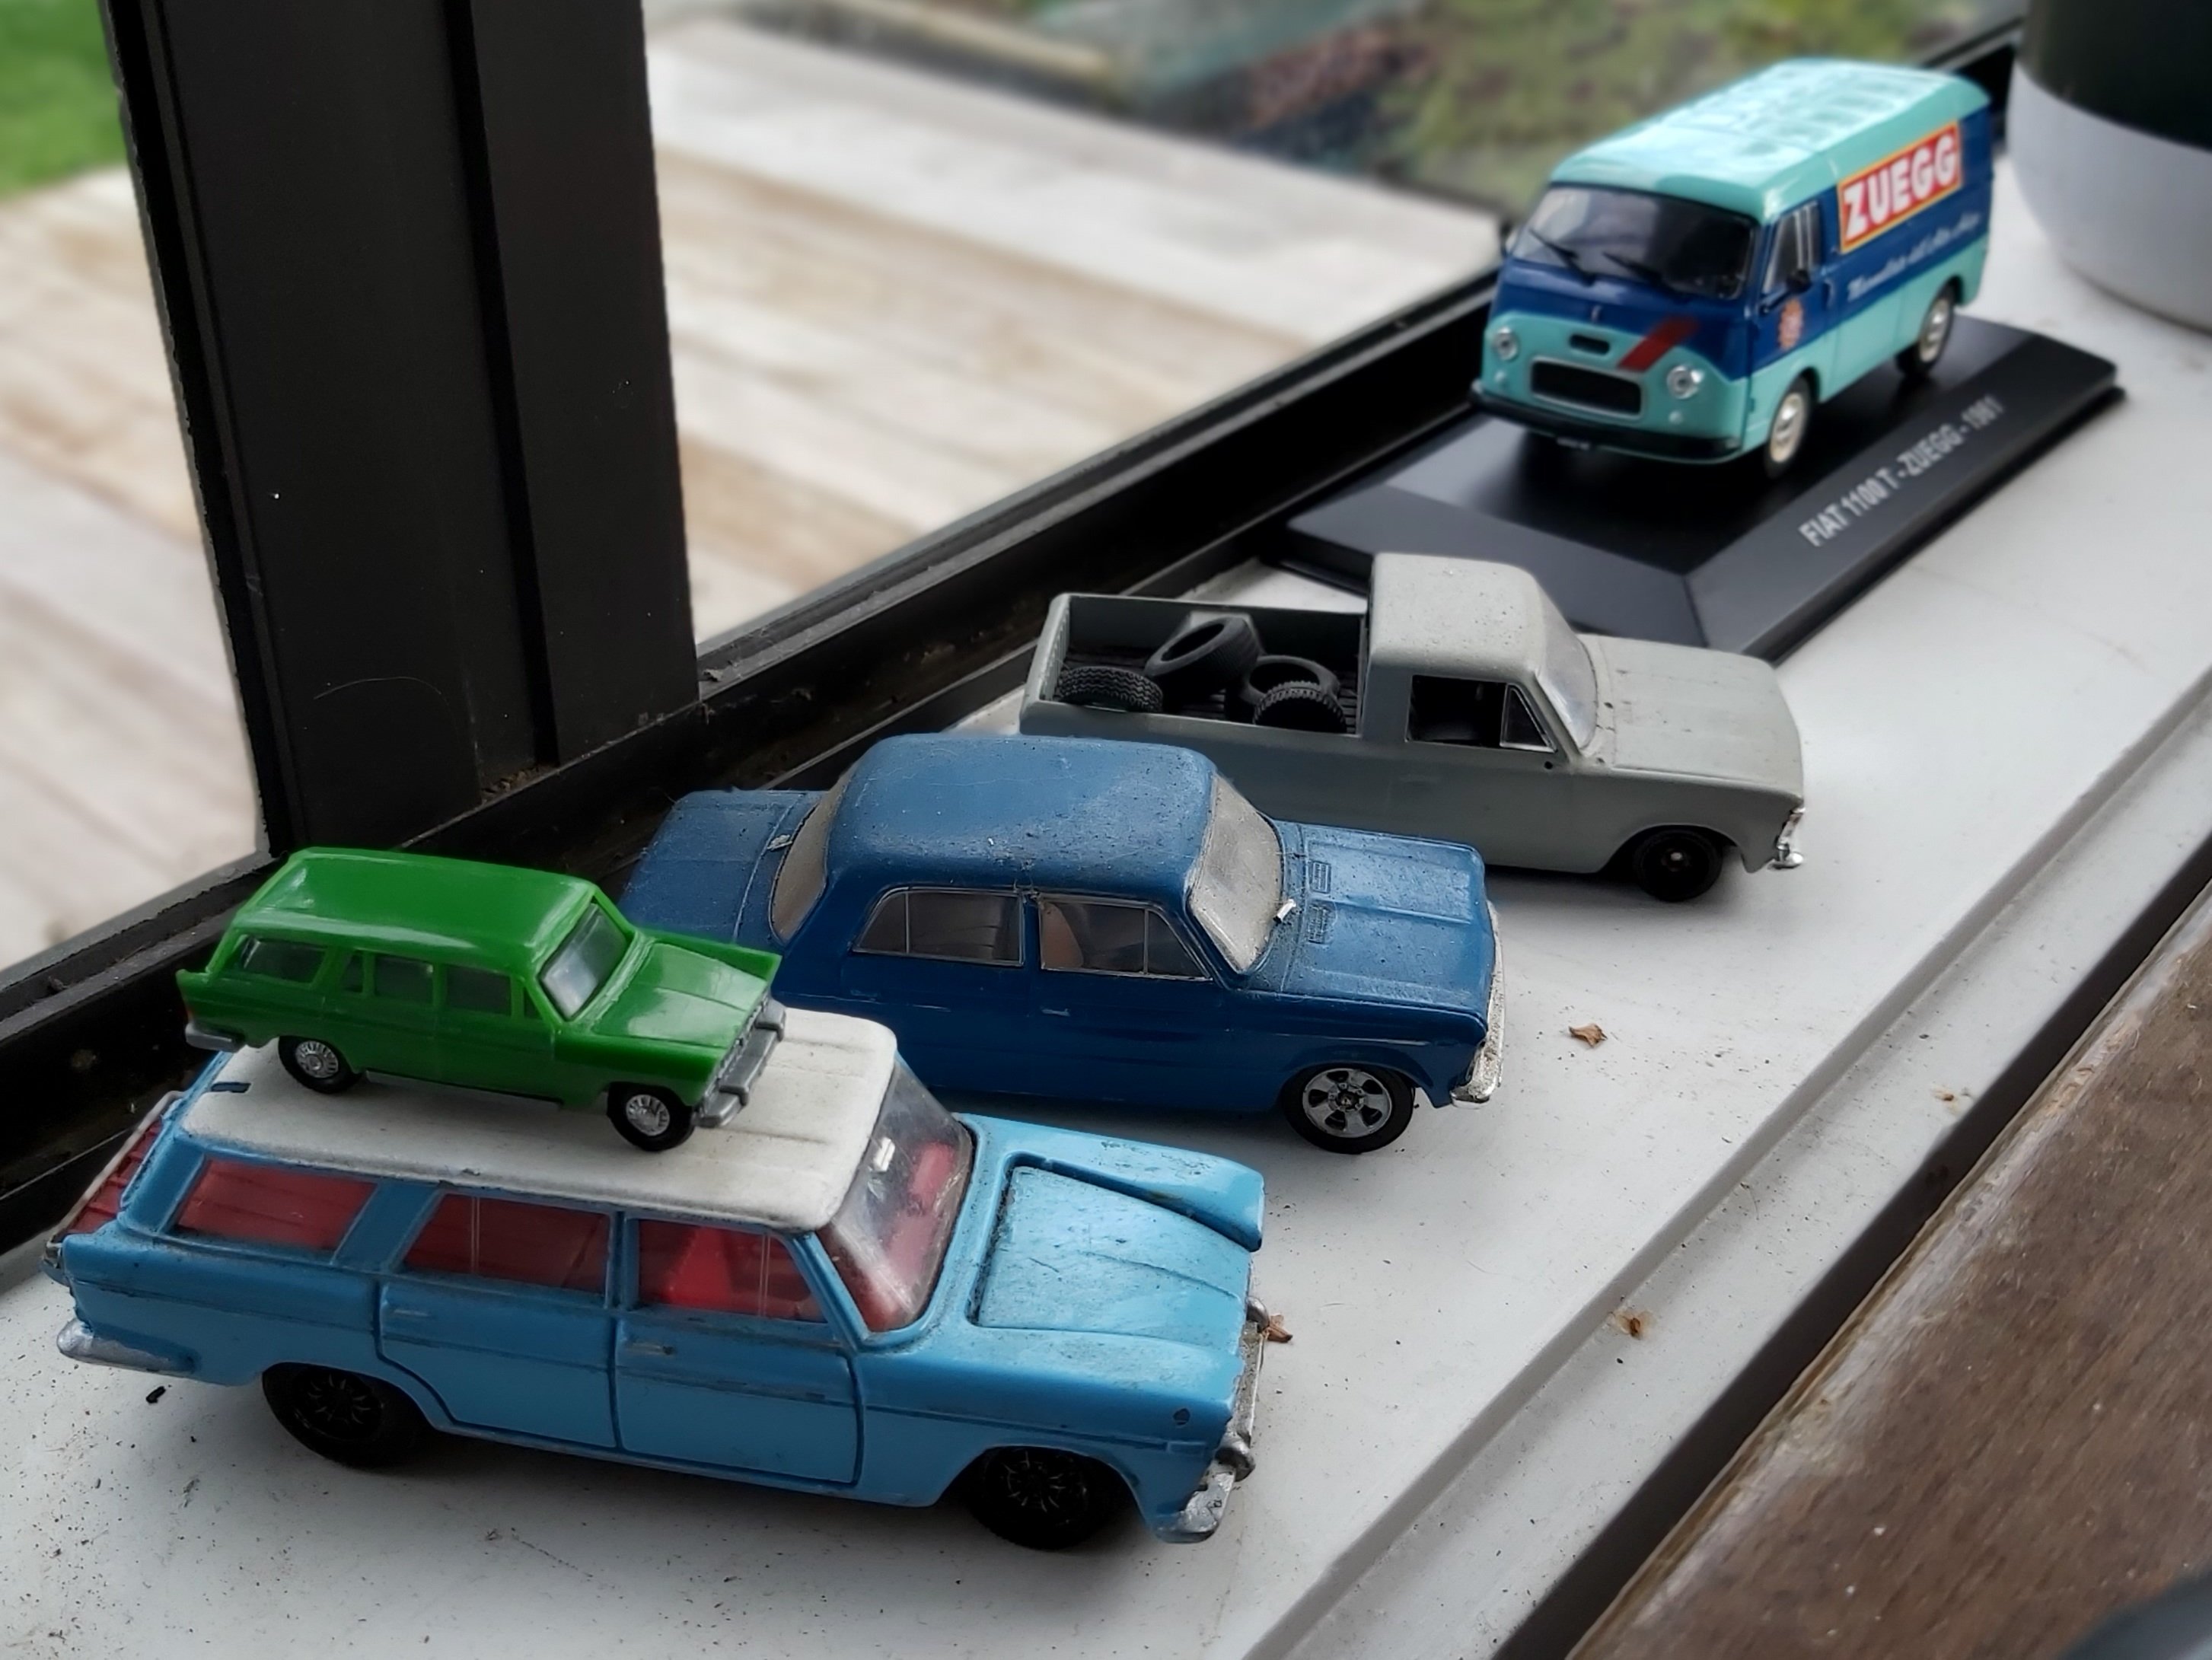
Need a parts car to go with my other miniwags. Looks like it might be a different brand tho, so new parts car too good = new project! Mini fleet
-
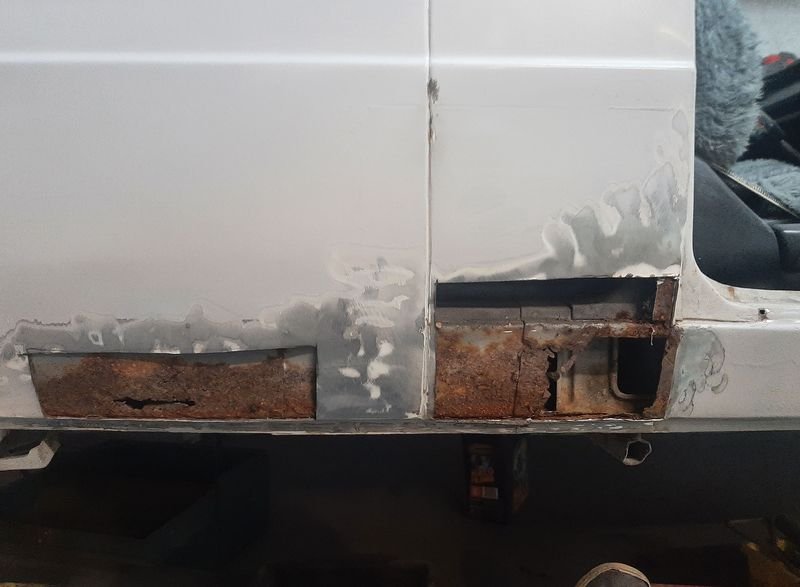
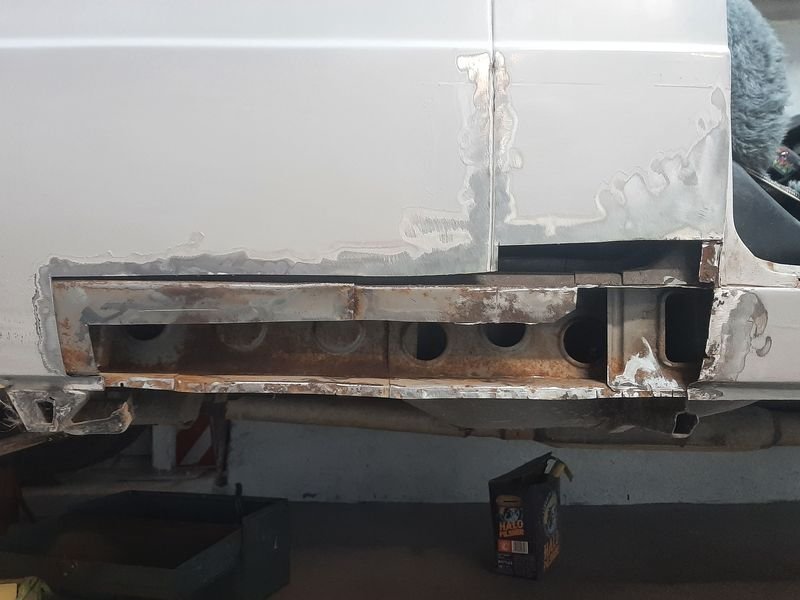
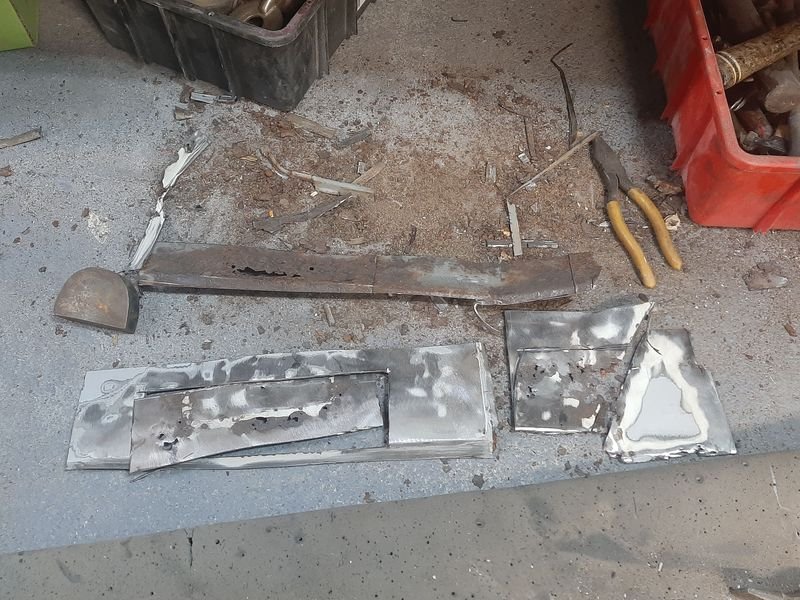
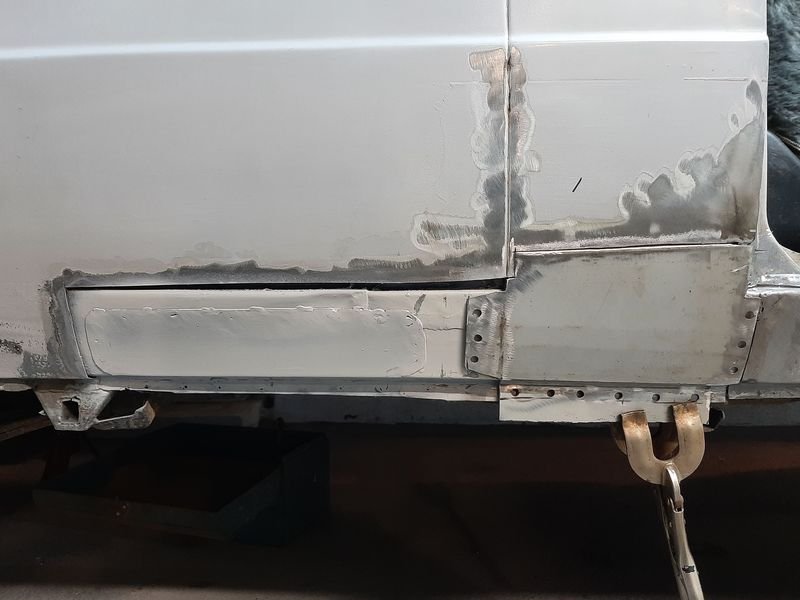
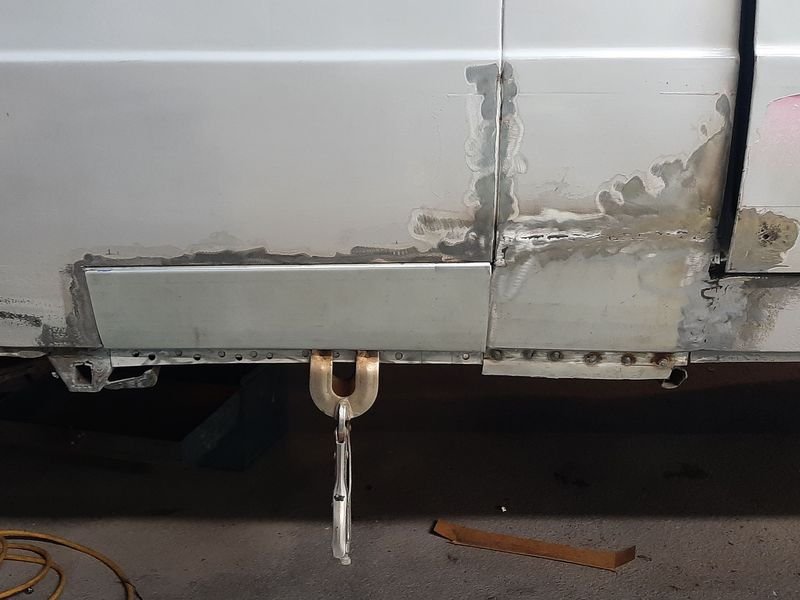
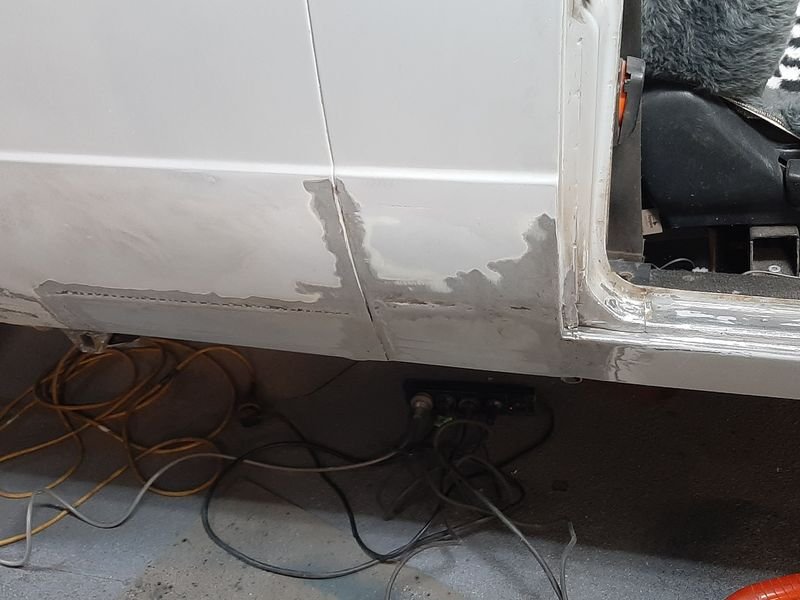
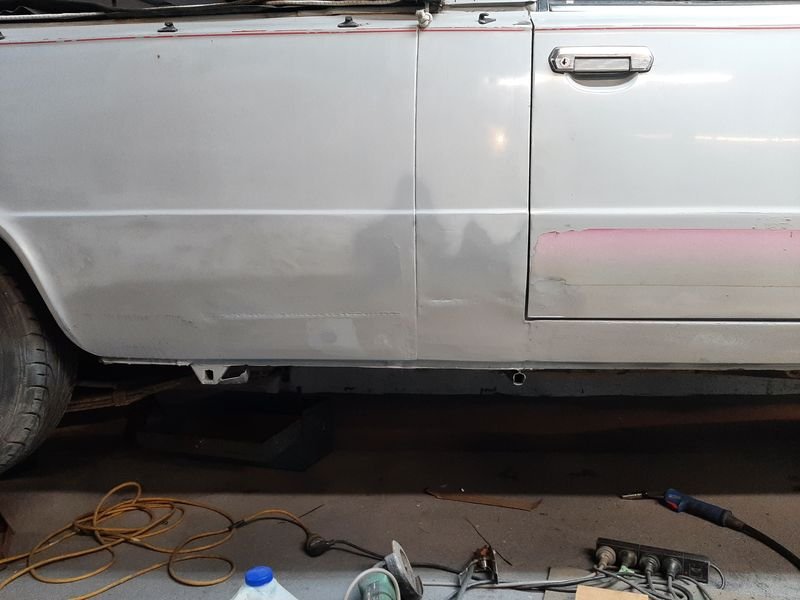
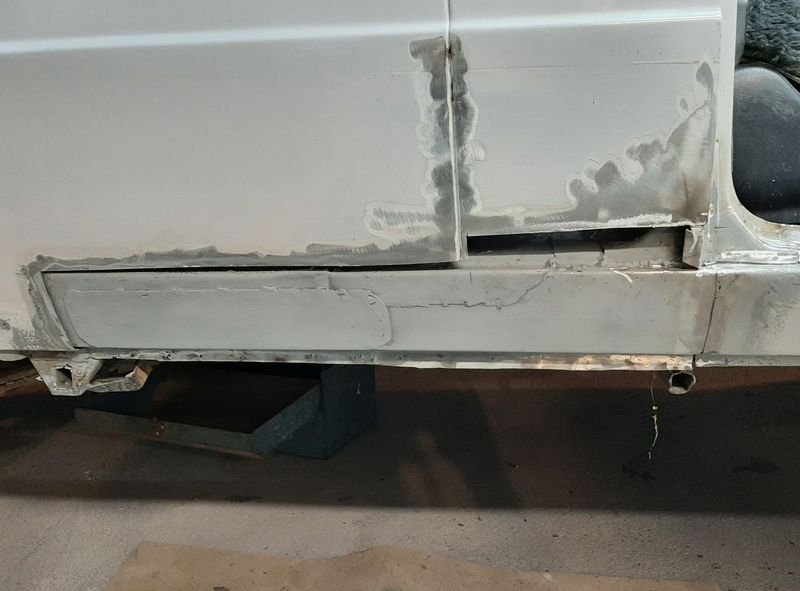
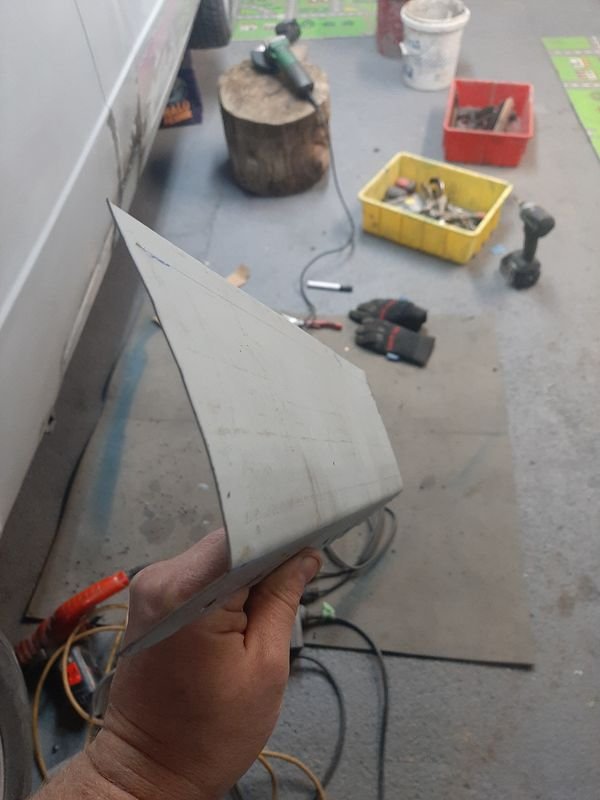
Sick of looking at this up on jack stands. I need to finish the rust so it can go back outside where trucks belong, and so the sedan can have the garage again. So, picked at the rust bubbles bursting through the previous repairs on the drivers side sill. On the Sedan what is the inner sill on this, is actually the outer sill. The panel behind the door is used on Ambulance (long wagon) and Limo and matched by a panel between the front and rear floor pans. The Ambulance and Limo have a rear sedan door and the sill continues under it. On the Pickup, the bedside panel also wraps over the Sill. The back paint you can see on the top of the inner sill is actually black bedliner stuff i sprayed on the lower floor, which is under the tray bed. Pretty easy to see how water and stuff from the tray falls down between the sill and outer and rots out. Ill fill this with wax. Old grossness. Only 2 small patches, but they were both tack welded over rust then a bog artiste blended it in. Given the quality* of metal work under such bog mastery on the passenger side on the top of a double skinned water trap, unsurprised to have to take it quite a way back to find clean metal . One big patch is easier than lots of small ones IMO Inner sill reconstructed plus the fillet plate at the corner of the door opening First outer panel. Thought i would try joggling the top to add a bit of strength, as well as way easier to weld to and maybe reduce warping. Pretty happy to be looking after @nzstato folder, makes this stuff super easy! And second patch during one of the last of 456,908 fit ups Done Couple of shitty little patches in the corners of the door done too. Little fuckers warped pretty bad, but kind matches the existing dent above it, so meh. Quick rattle can primer to finish up and get an idea for how much bog ill need to fill out all the wobbles. Not as much as there was on there before maybe? Given its a skim going over solid metal instead of hiding making rust, im pretty happy with that!
- 81 replies
-
- 22
-
-
- gottacatchemall
- fiat 125
- (and 4 more)
-
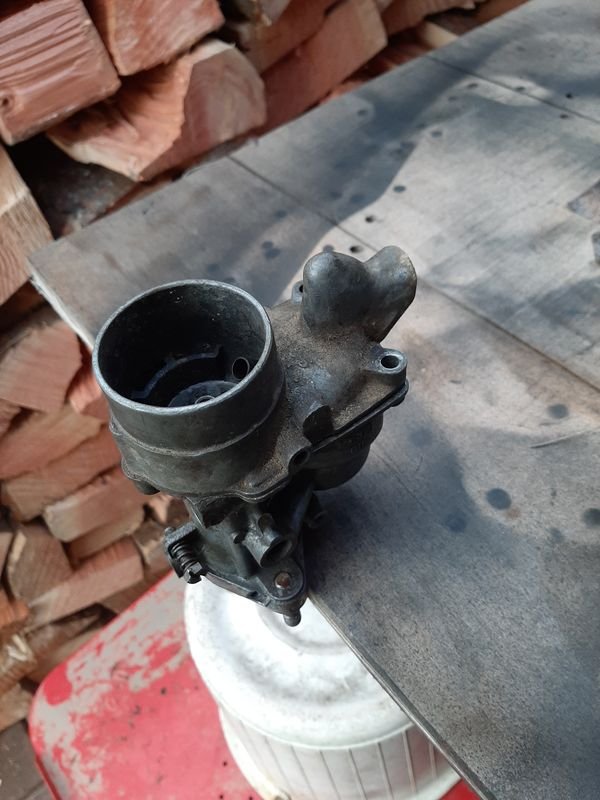
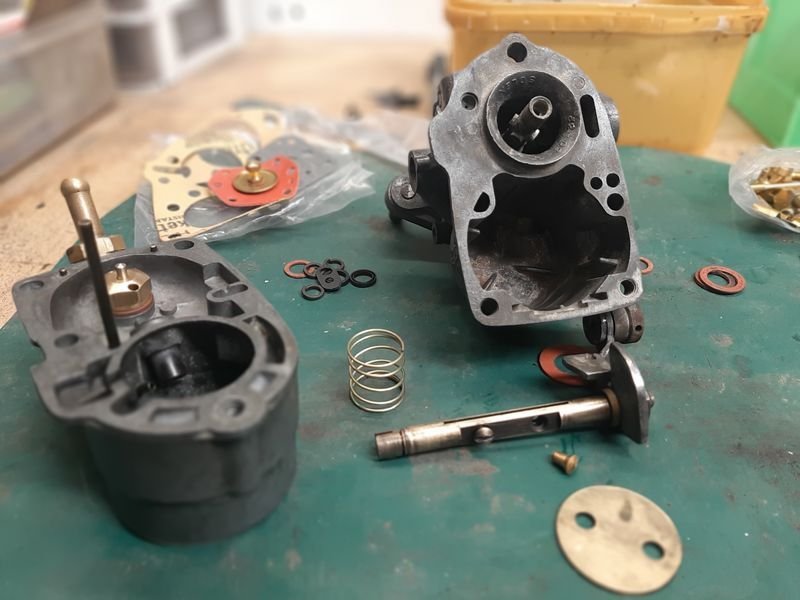
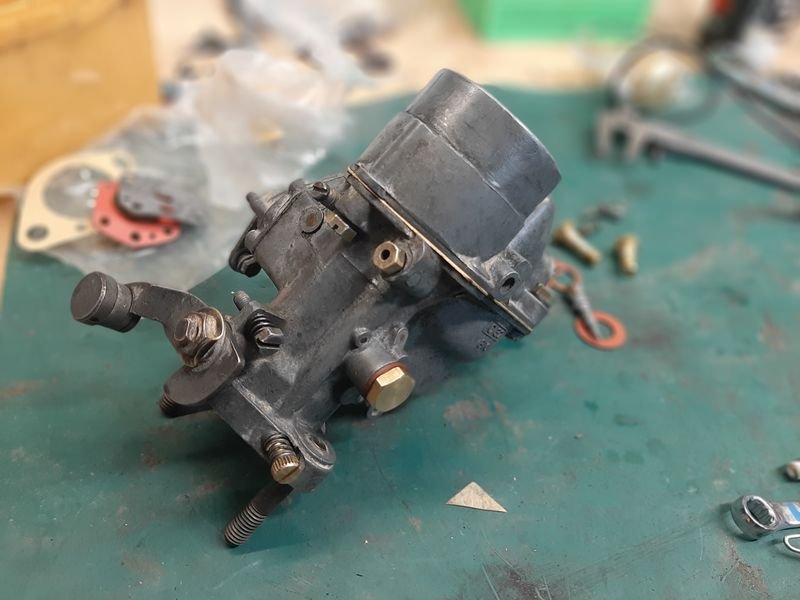
Carb rebuild kit for the Single barrell Solex PIC turned up - seems heaps of old shite uses these carbs so a full kit with spare jets and holders etc (Fits: Willys Jeep) was easy to find for $not much off ebay. Pre cleaning Used as much of the kit as a i could - the jets are a bit richer than the originals, so that may be useful later, especially as the throttle shaft has a bit more play than id like. Its a pretty simple carb and couldnt find any reason why this wouldn't 'work' Just need to find a throttle return spring. Nice to have another thing for the 'ready to bolt on' pile
- 64 replies
-
- 33
-
-
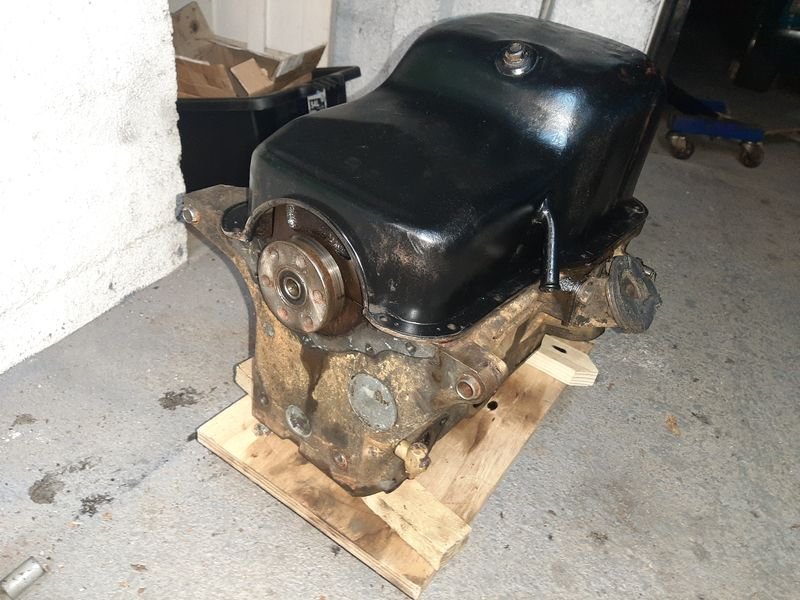
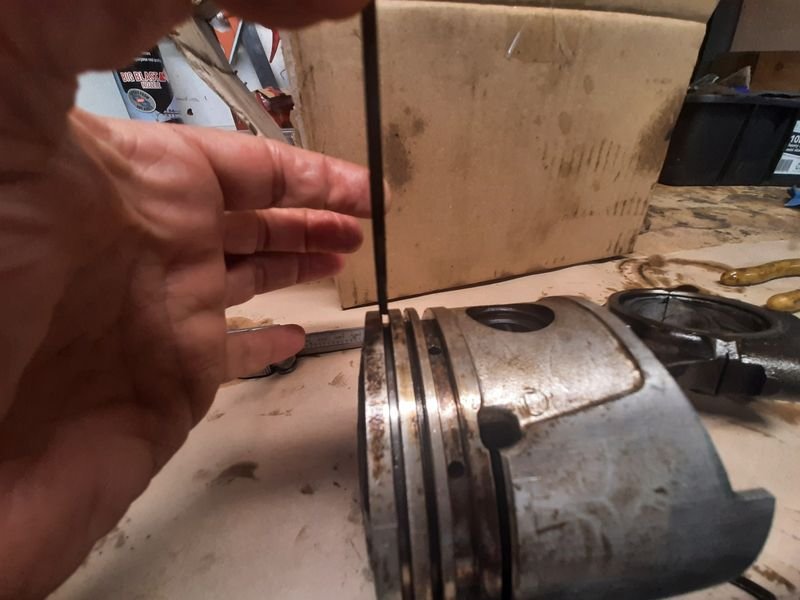
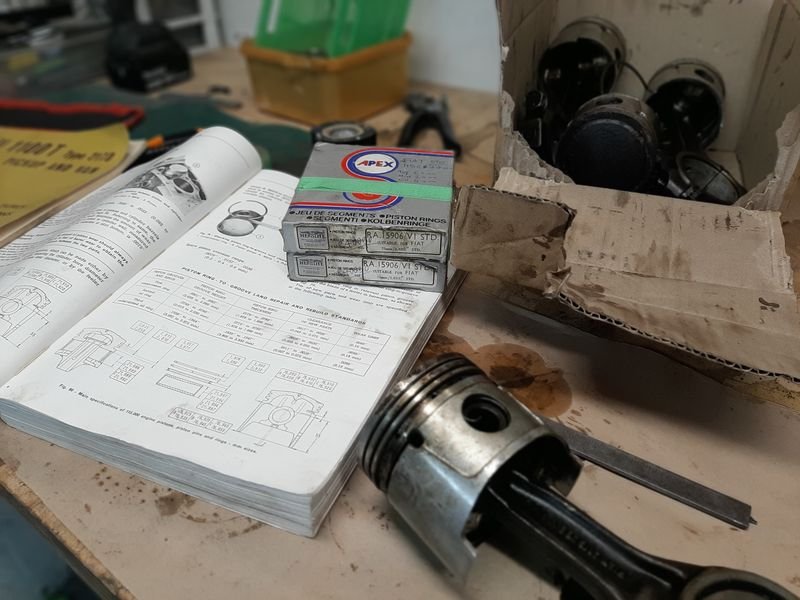
Lots of bits and pieces turned up while i was away Like a NOS Piston Ring kit - 77mm, standard sized for Fiat 1500 (and 2300) Ring Thickness 2.0, 2.0 and 4.0 Sept it dont blimmin fit, innit! These are from the Car engine which i thought may have had new liners and bearings at some stage. I really should have measured these properly, as they are obviously different domes to the book and the pistons in the van engine, but i just assumed they may have been later block vs early differences. However, seems these are not FIAT pistons, but Mazda 323 UC Engine (rwd 1400) or Honda EK, EL or EP engine pistons! Anyway on the lookout for some +030 (77.6mm (yep, not standard!) ) piston rings for the above, ring thickness 1.5, 1.5, 4.0 - looks like Bowden Auto Parts has some for $80 according to his pdf's! I have heard about these pistons being a replacement for both 1500 and the 1608cc twin cam that comes in 125s, as even in the 70's and 80s pistons where hard to find for these, but never seen an engine with it before. Before spending even more money on obscure parts, I thought i may as well have another look at the van engine to try pop those pistons out as they are factory. THis has been soaking with ATF and Engine oil after getting a degrease and a water blast when i first disassembled it Lol, nope, they are not going to slide out. Popped the pan back on and rolled that back out of sight! More parts to order then.
- 64 replies
-
- 10
-
-
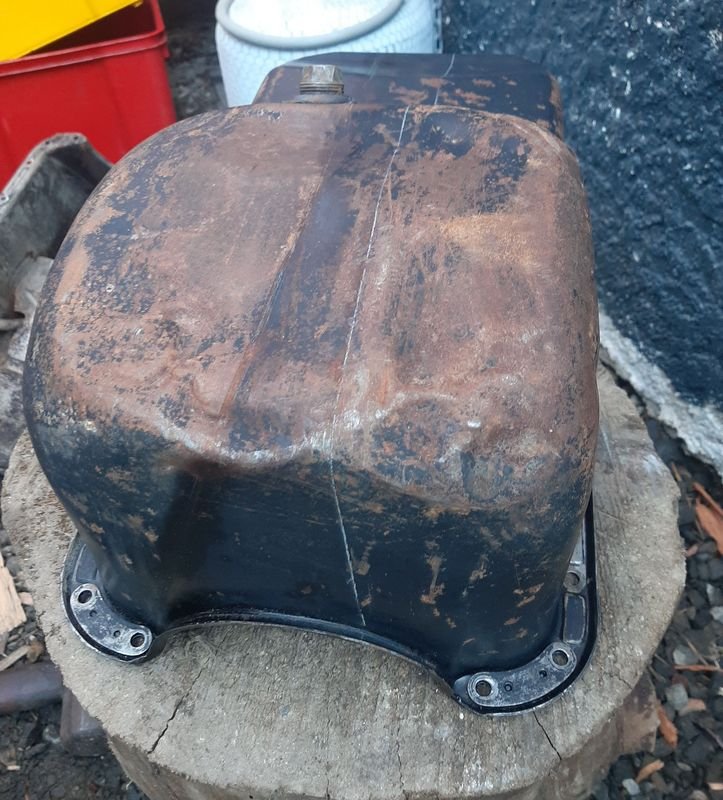
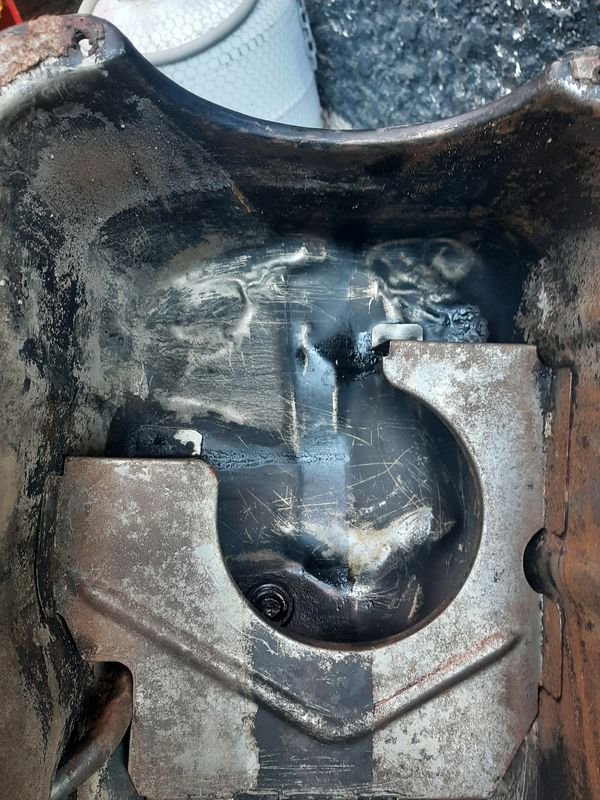
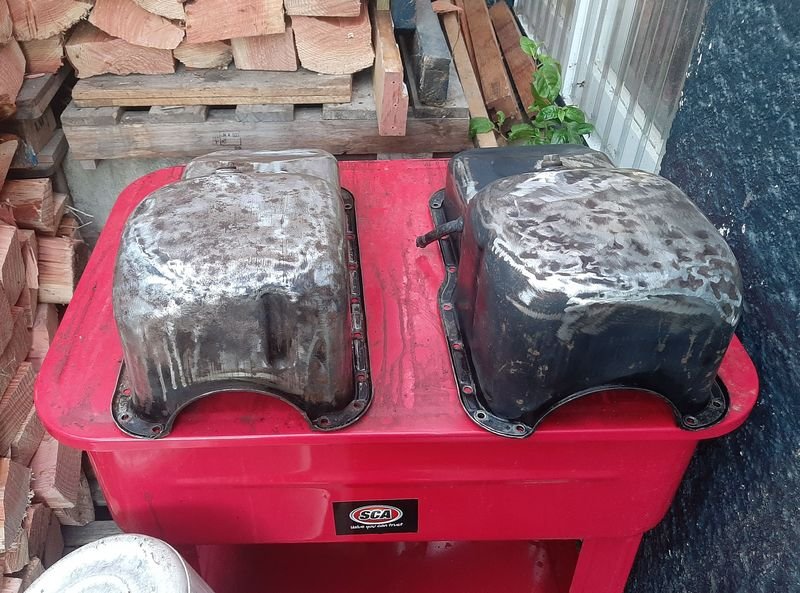
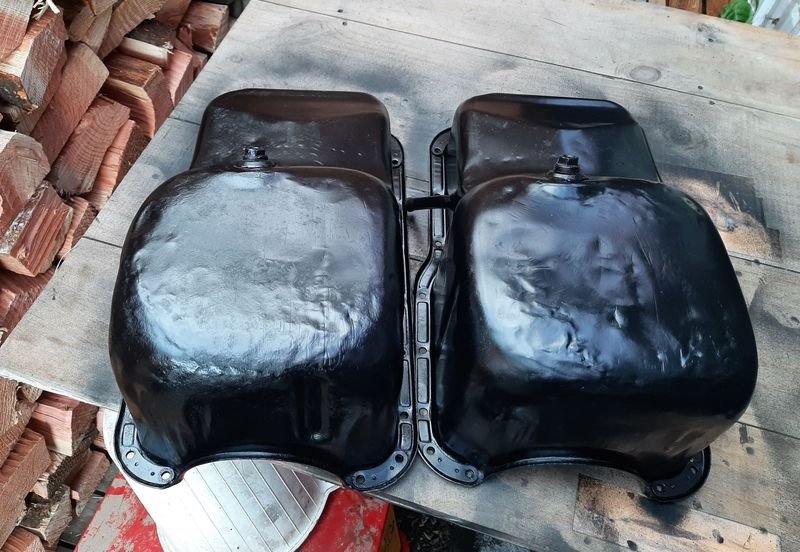
Id been soaking the oil pans off both engines in the part cleaner for the three weeks i was gone plus a few more days for luck. They were both very very gross and i had scraped the sludge and given them a few rounds of the water blaster etc before that. This is where they ended up Both were pretty dented, the car engine one slightly less bad than the vans one. This is the car engine one. They were both pretty bad so i decided to fix up both and whichever comes out better can go on the runner engine. An hour or so with a blow torch, various hammers drifts and and dollies then a quick whizz with the flap wheel Lazy coat of satin black and done. Earlier block and is made form slightly thicker metal and has an extra pressing on the front for no reason, otherwise the same. The car one sat flatter on the test block and came out much smoother so we will go with that. Van one is on the left, car one on the right
- 64 replies
-
- 10
-
-
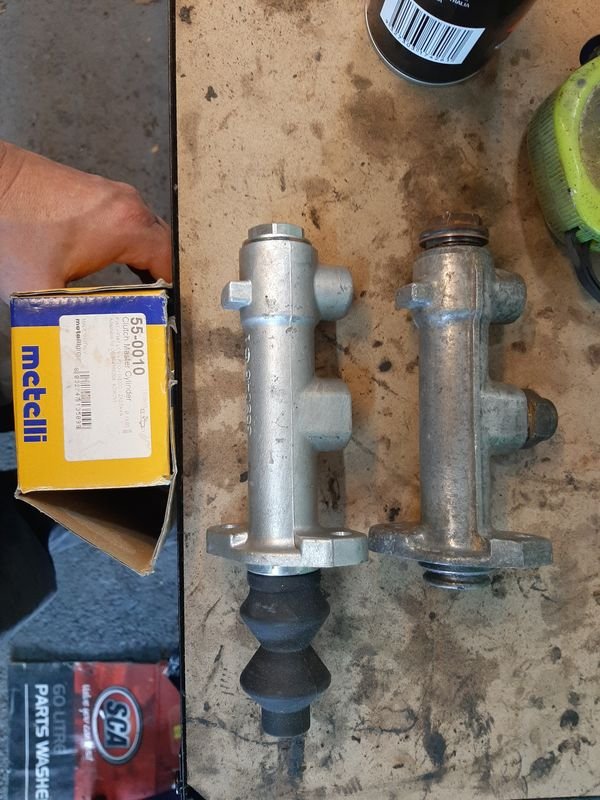
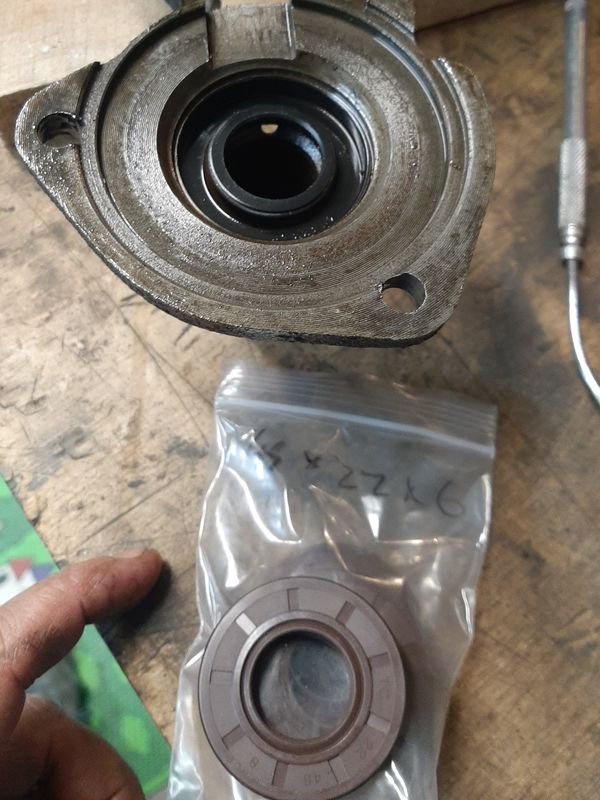
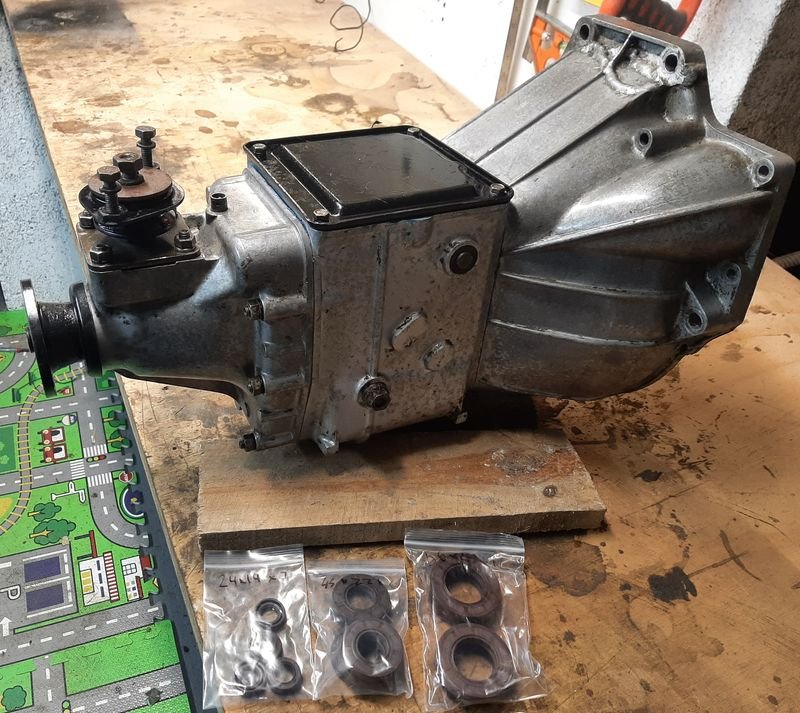
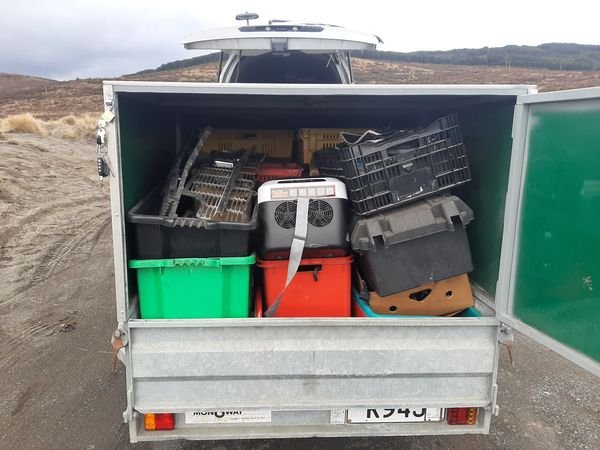
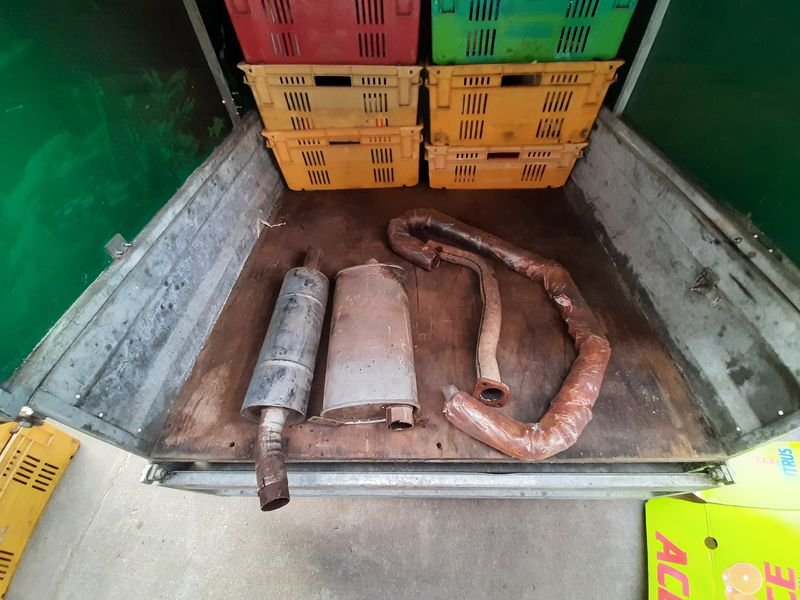
based off the sizes on the old ones, I ordered two full sets of gearbox oil seals including shipping from Ali Express for less than the Buy it now price of a single NOS seal via Ebay. Definitely due for some! This one is the rear seal and a real shit to get the old one out as its face is flush with the inside of the recess. Gearbox is now as ready as it ever will be. Been pretty busy with work and a couple of weeks in Auckland visiting family and dragging back a solid van load (+ trailer) of shite from my storage unit - still another load to go. Anyway, some of the retrieved treasure includes a Fiat 1500 clutch master i got ages ago to try on the 2300 wagon, that didn't fit. Perfect match for the Van Various bits for a new exhaust And all sorts of other rusty shite treasure that will maybe come in handy one day for the Van and maybe the rest of the fleet.
- 64 replies
-
- 18
-
-
Looks really good, perfectly functional/nice but plenty of room for personal touches. Hopefully you get a result that makes it worthwhile.
-
Had to collect the 125 from gc@nzstato offsite storage facility so he can put his own stuff in it. First time these have been together. Dropped the super heavy (C beam, 0.25" plate and angle iron) rear bumper/towbar that some PO had added (no rear bumper from factory!) and sanded the paint on the valance/ rear quarters behind it. Aaaand went over a few other patches again and so thats the last* of the maroon paint and its primer. Gave the cab a wipe down . Then gave the side i see the most a wizz with the polisher Not bad!
- 64 replies
-
- 34
-
-
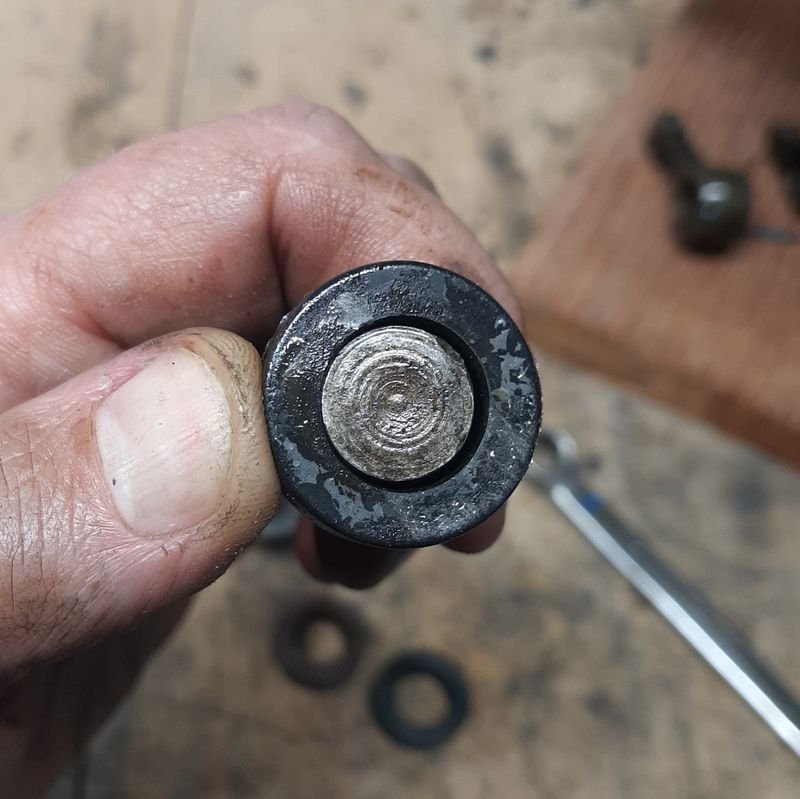
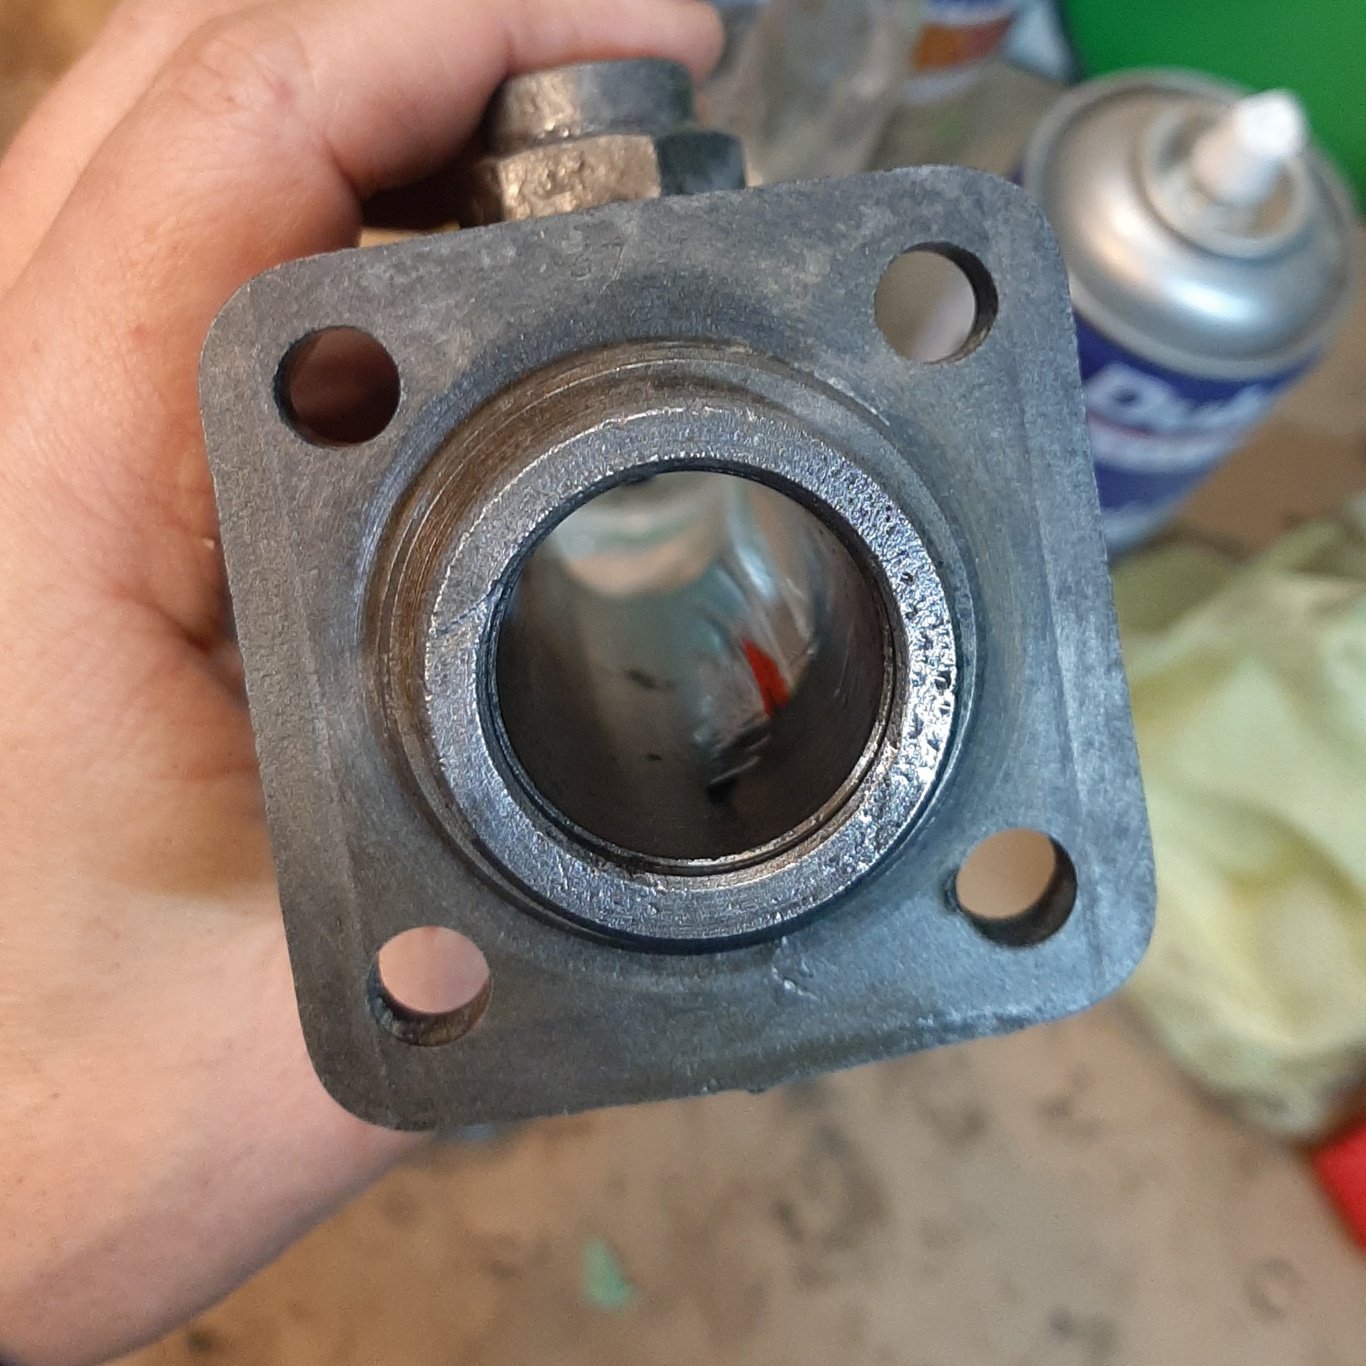
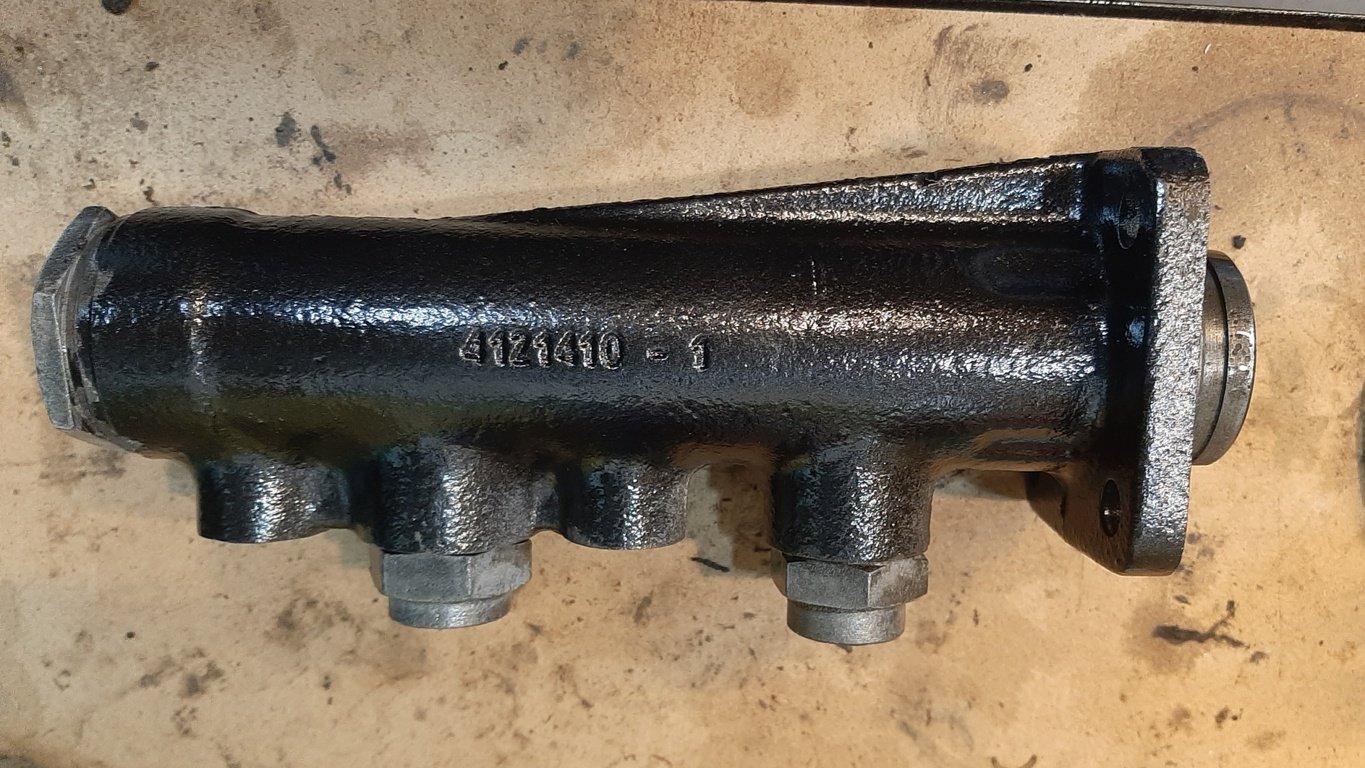
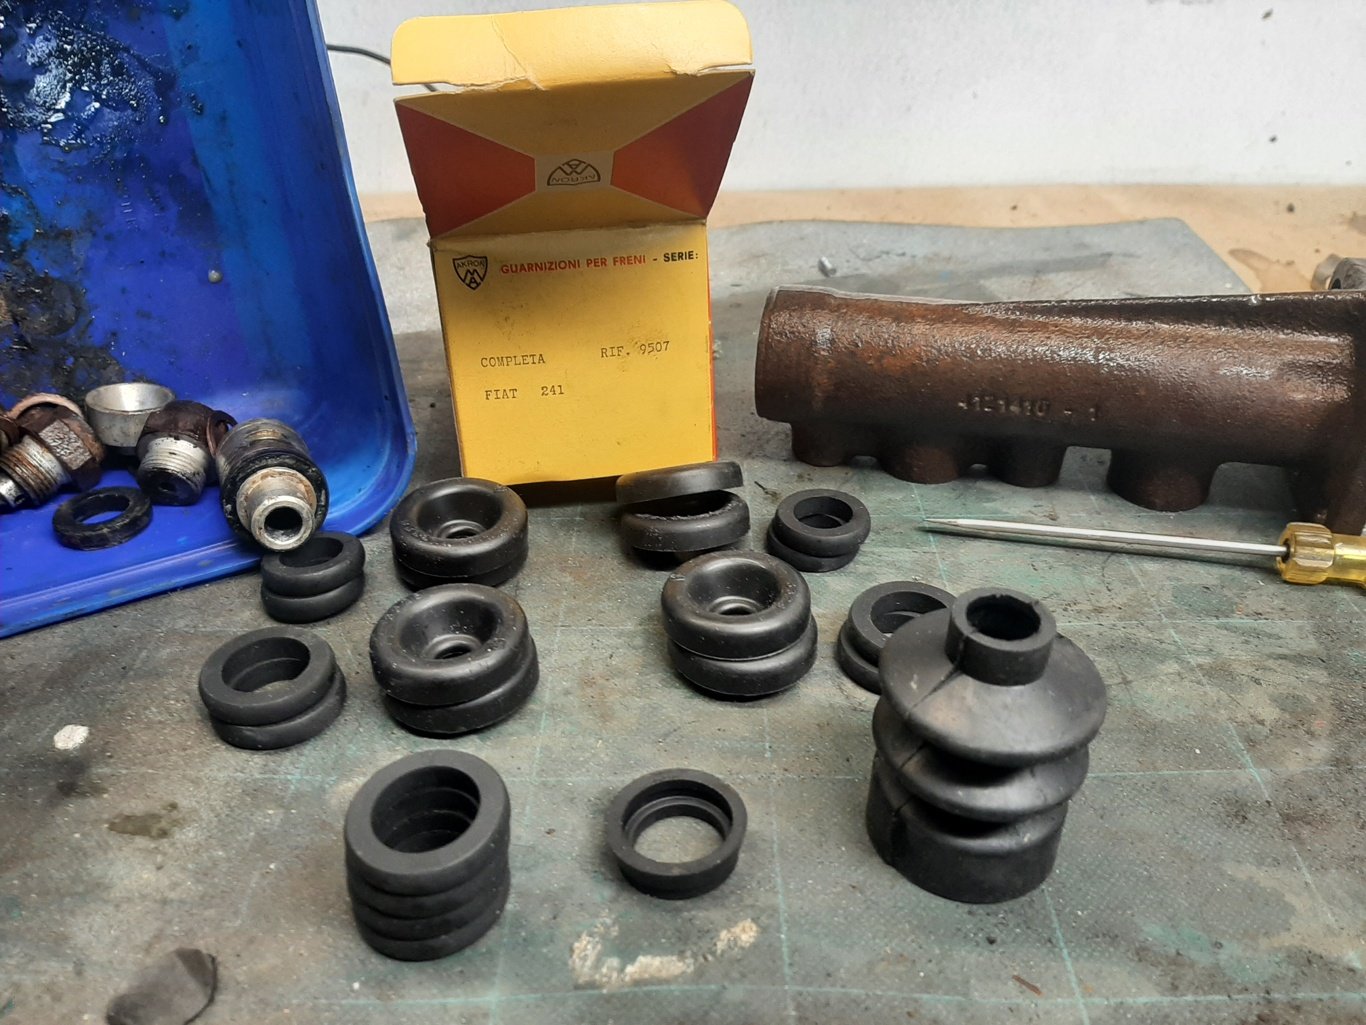
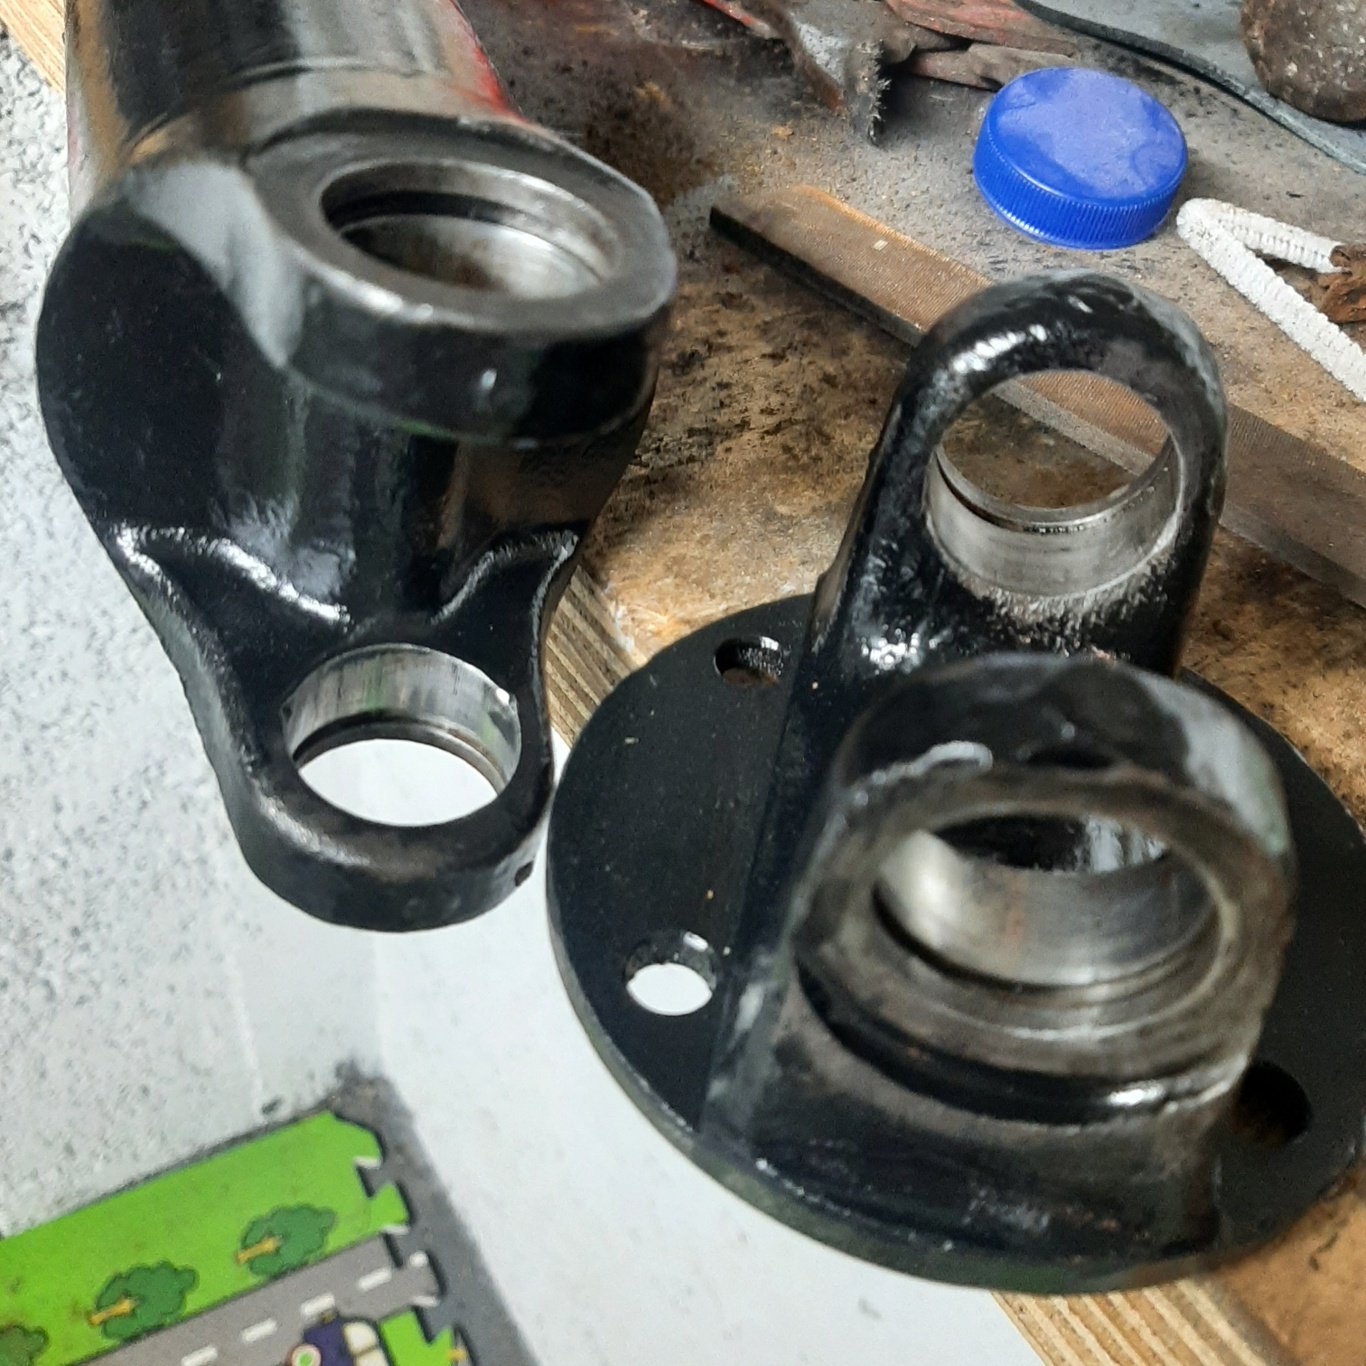
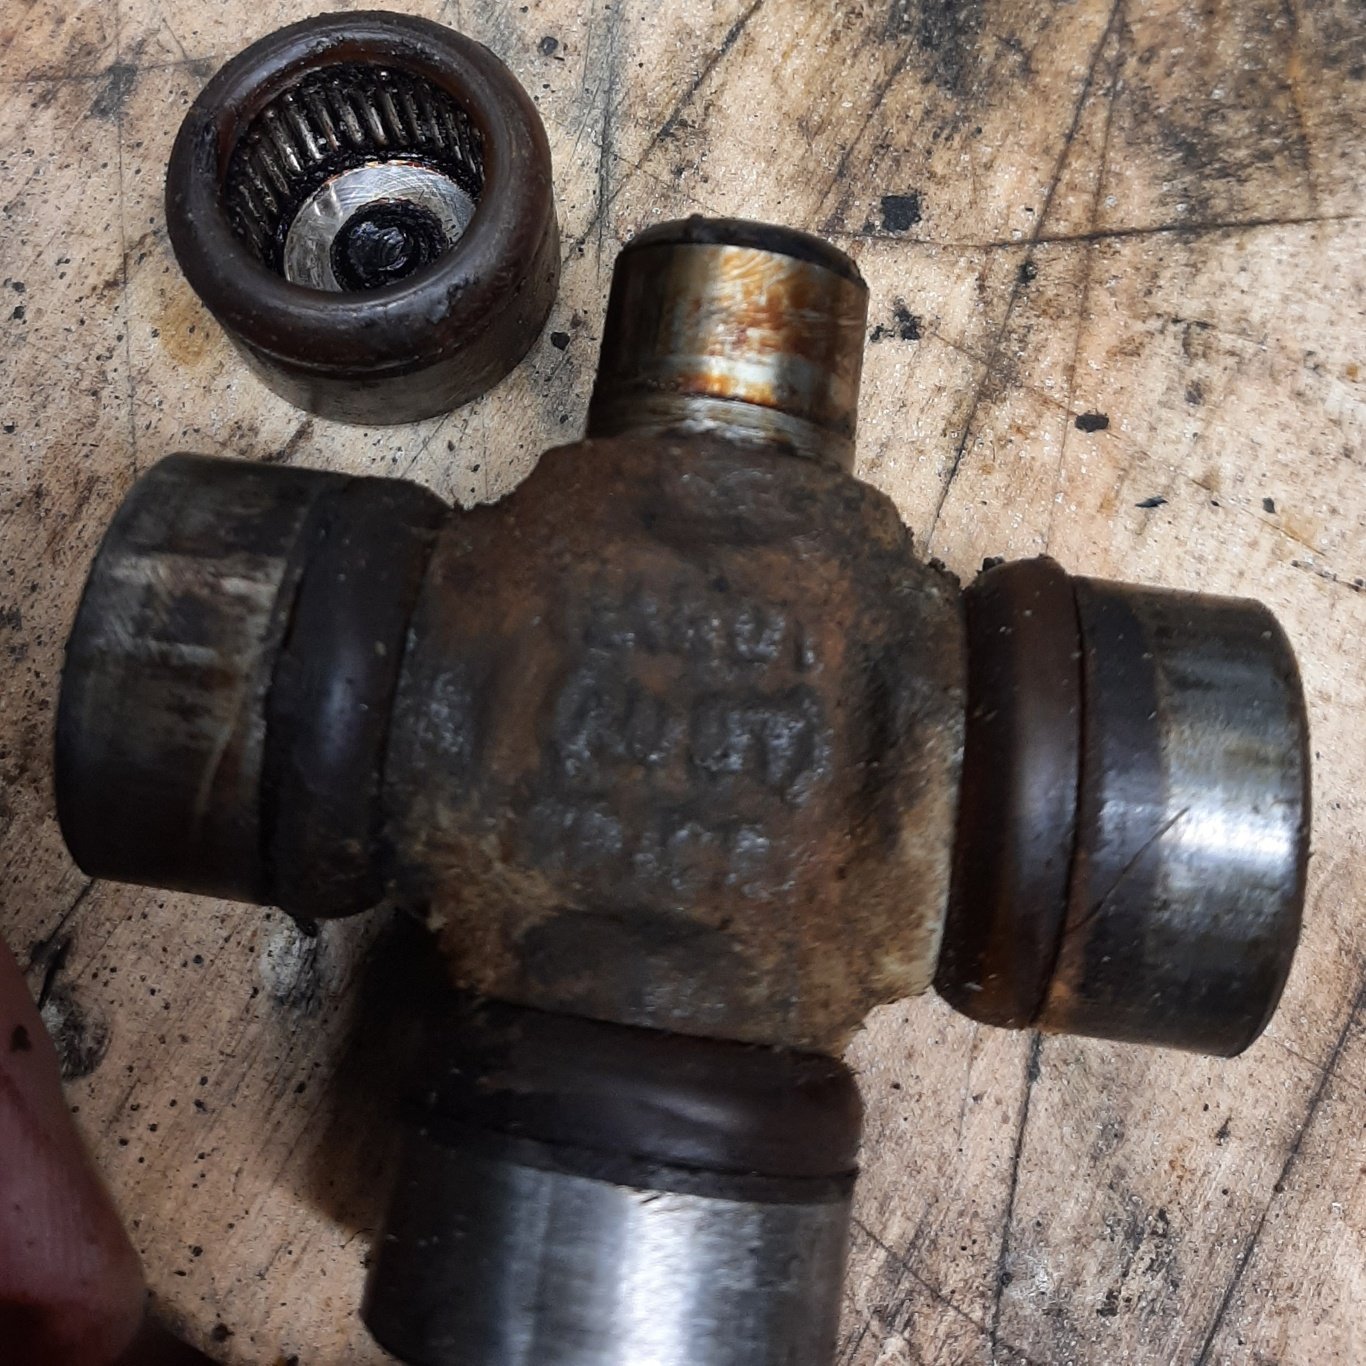
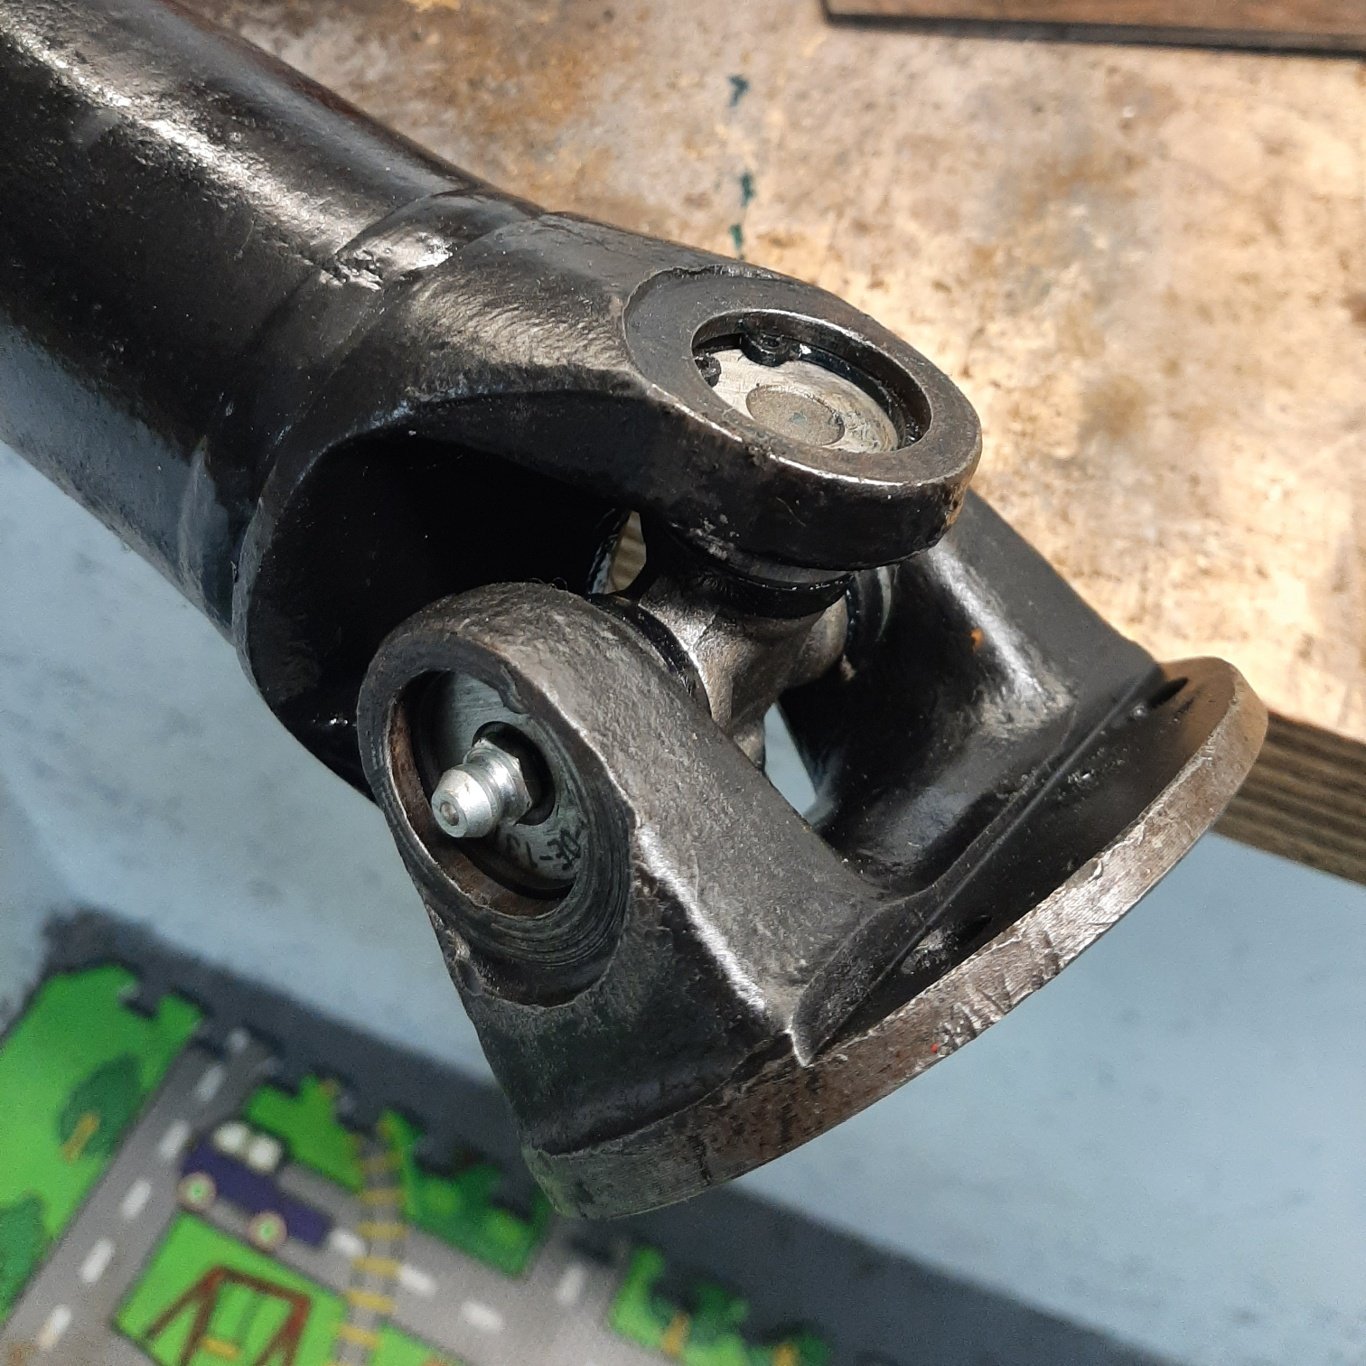
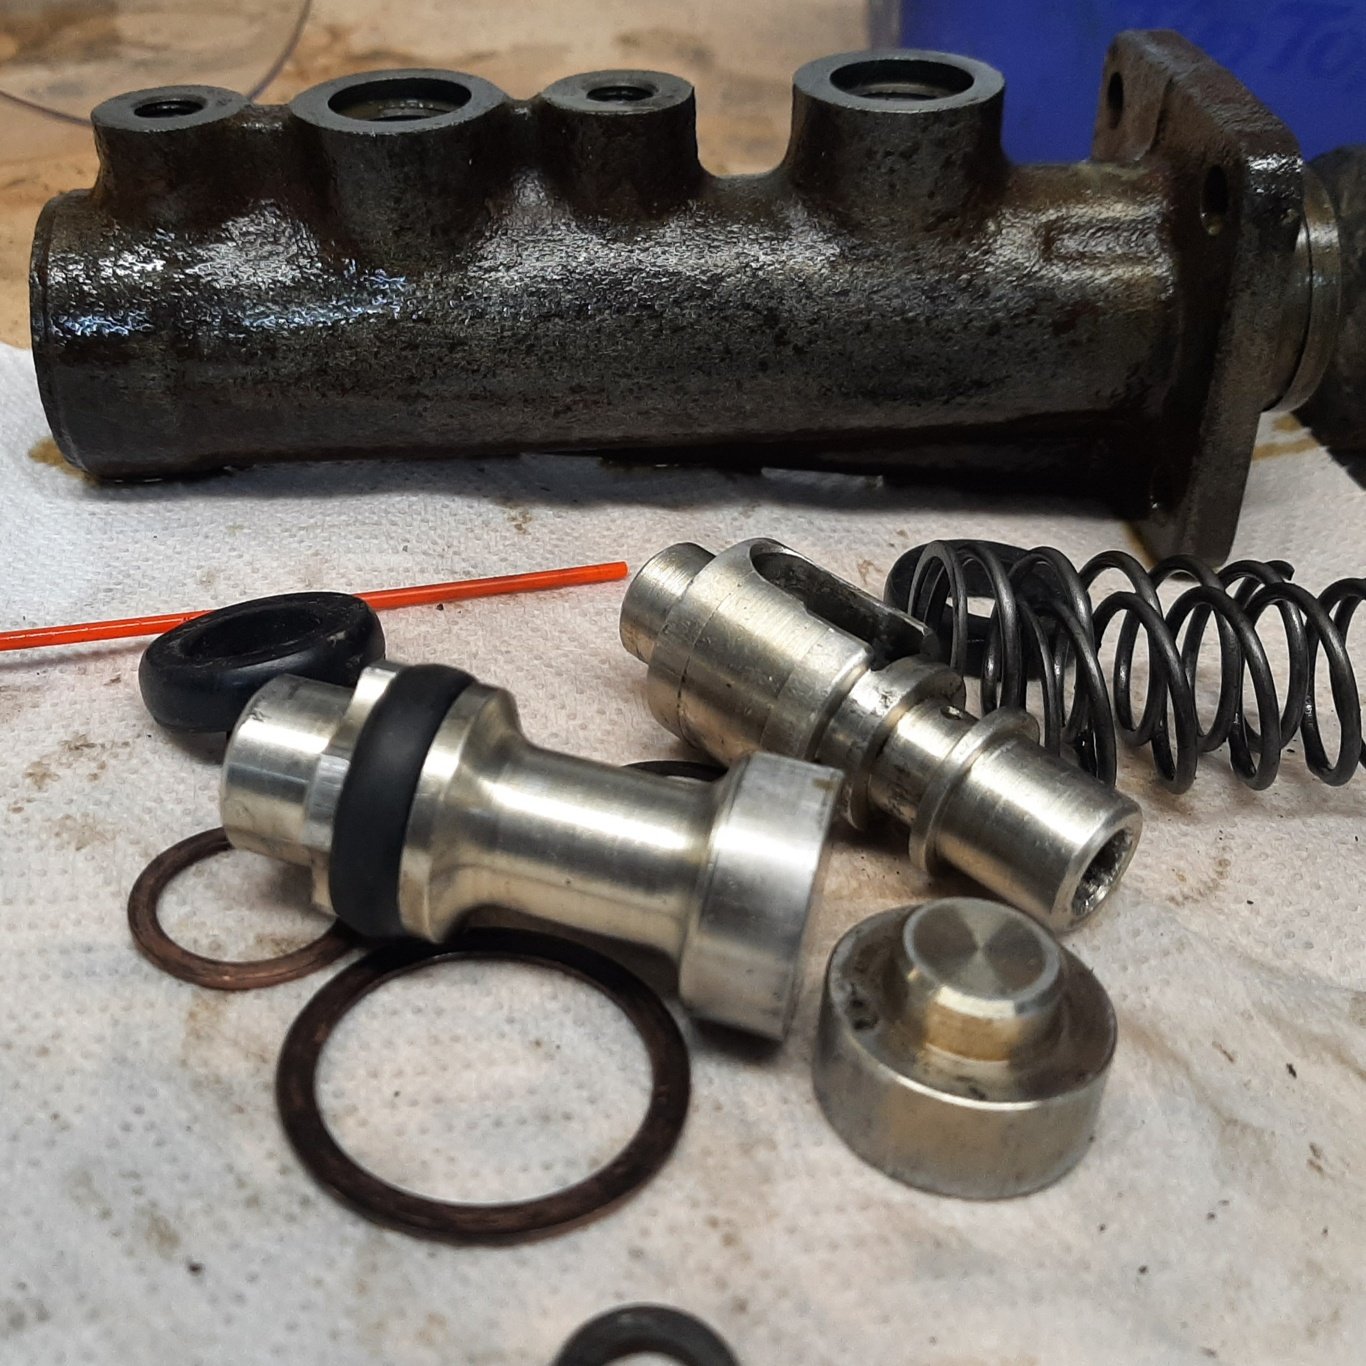
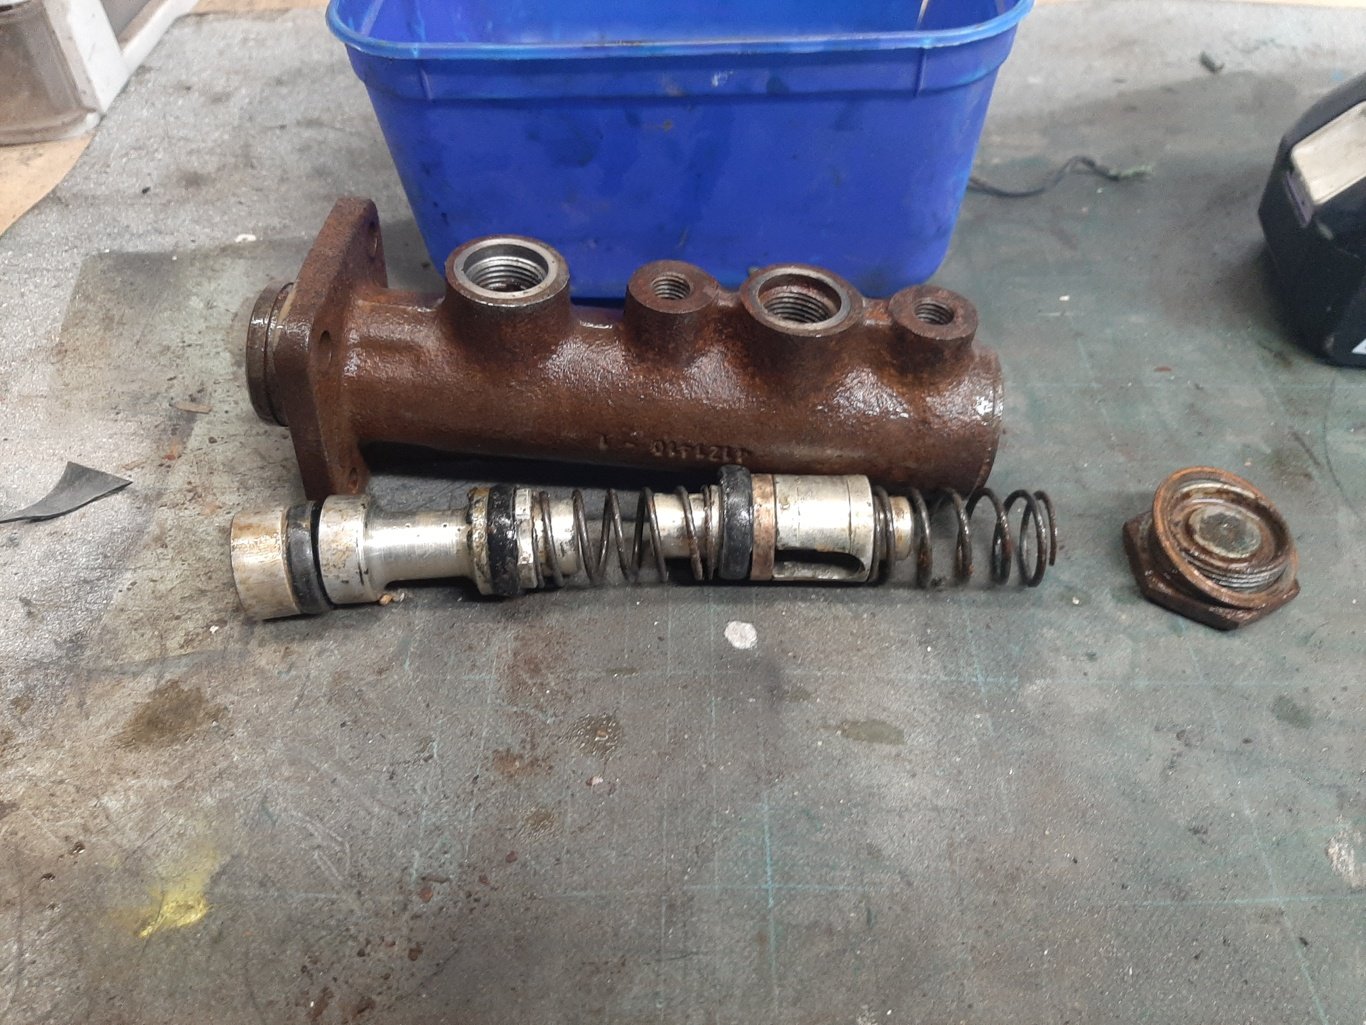
Some orders turned up in the last couple of weeks: - piston rings - front brake cylinders - engine gasket set - gear box linkage bushes and misc rubber bits - valve guides - water pump Still need a few more bits, mostly brake related, and have a big ladapower order that should do the trick. Brake master cleaned up ok, but has one quite bad rust crater right under one of the inlet ports. Ill probably get it ss sleeved before i install my lovely NOS rebuild kit Also tidied up the propshaft I replaced one universal as it felt a bit sticky, but it looked pretty low milage once removed. " Hardy Spicer (Aust)" on it so definitely a replacement, so i left the other one which felt fine
- 64 replies
-
- 13
-
-
thrust rods for all the boys. I may have a spare one? Ill let you know in a week or so
-
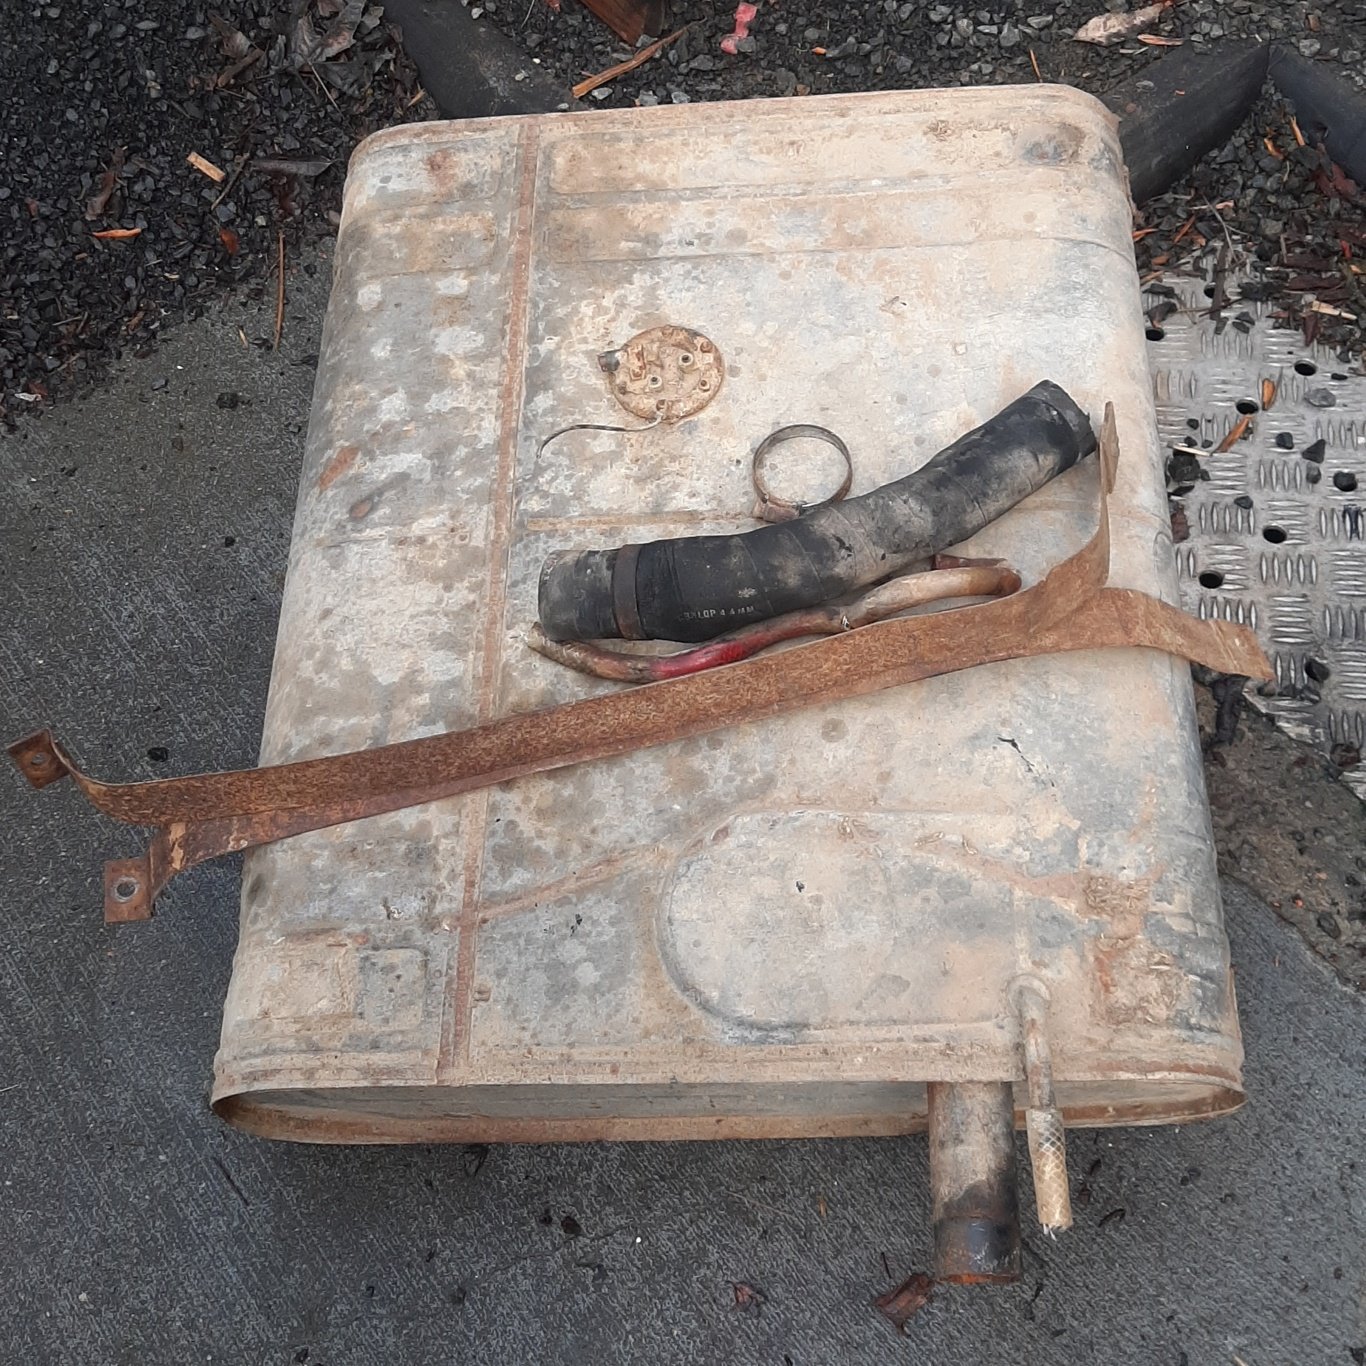
Scott at Radiator Services is my man. Waiting on a price for a recore on the radiator, but the fuel tank is a total loss. Its a pretty simple shape and fairly common wagon/van mounting arrangement so either a new custom tank or bodging something to fit (lada niva?) will be in my future. Given its got no engine or brakes, im in no big rush at the mo! Pull and Pay is permanaently closed
-
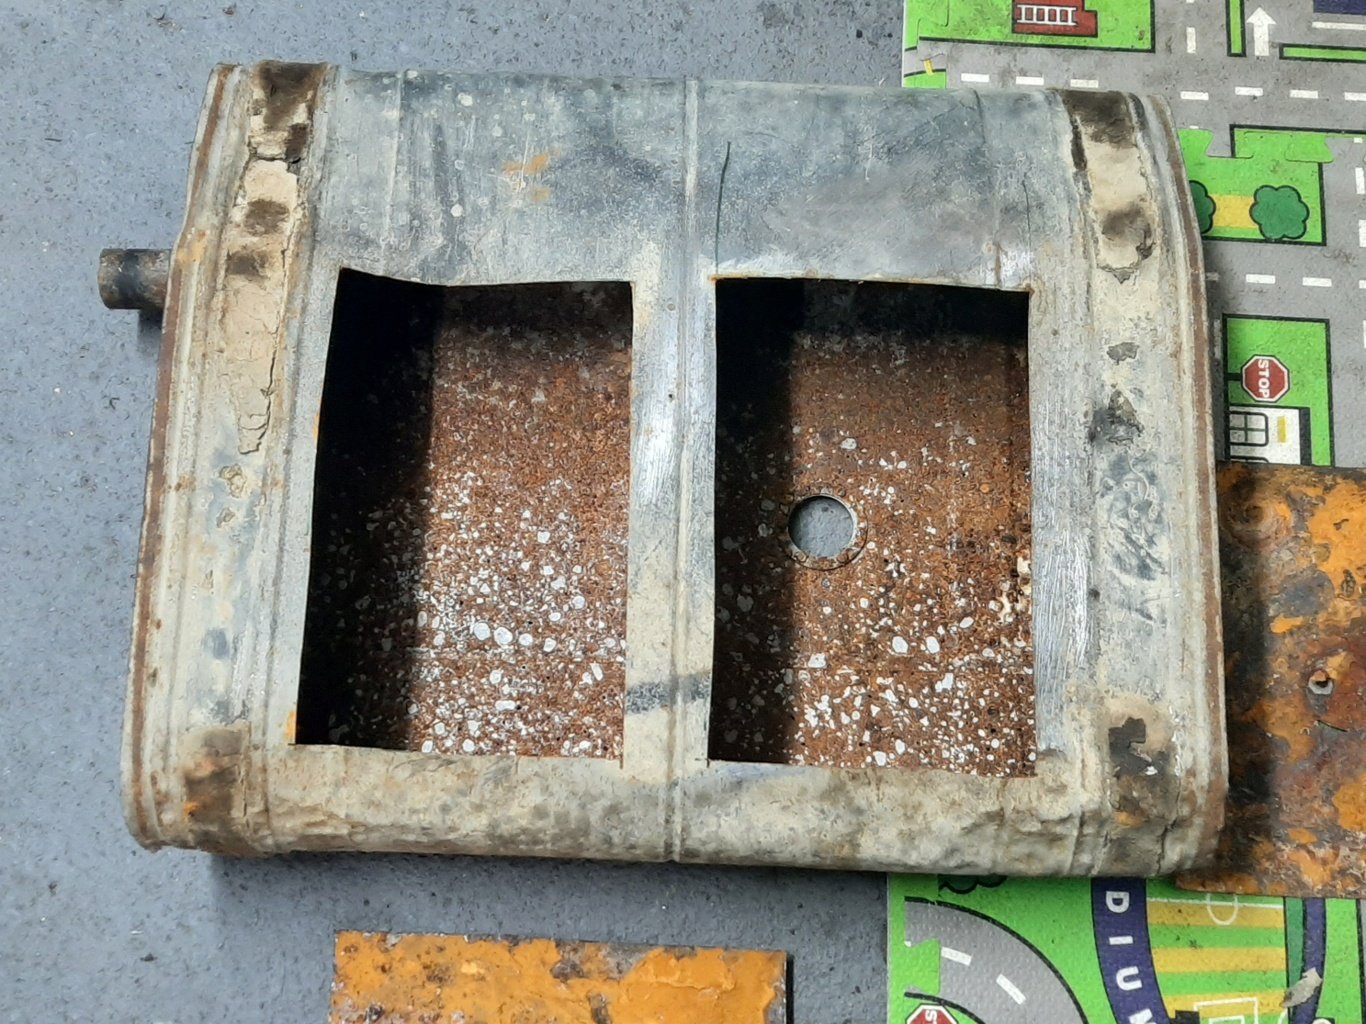
The man did not have good news Swiss cheese, rusted from the inside out. Radiator needs a recore too. Suggestions for custom fuel tank replacement on a postcard. Lada Niva tanks have a similar general shape, pipe location and attachment style/location, so will dig into that for starters Shame theres no pickaparts down these ways to go wander with a tape measure
- 64 replies
-
- 11
-
-

-
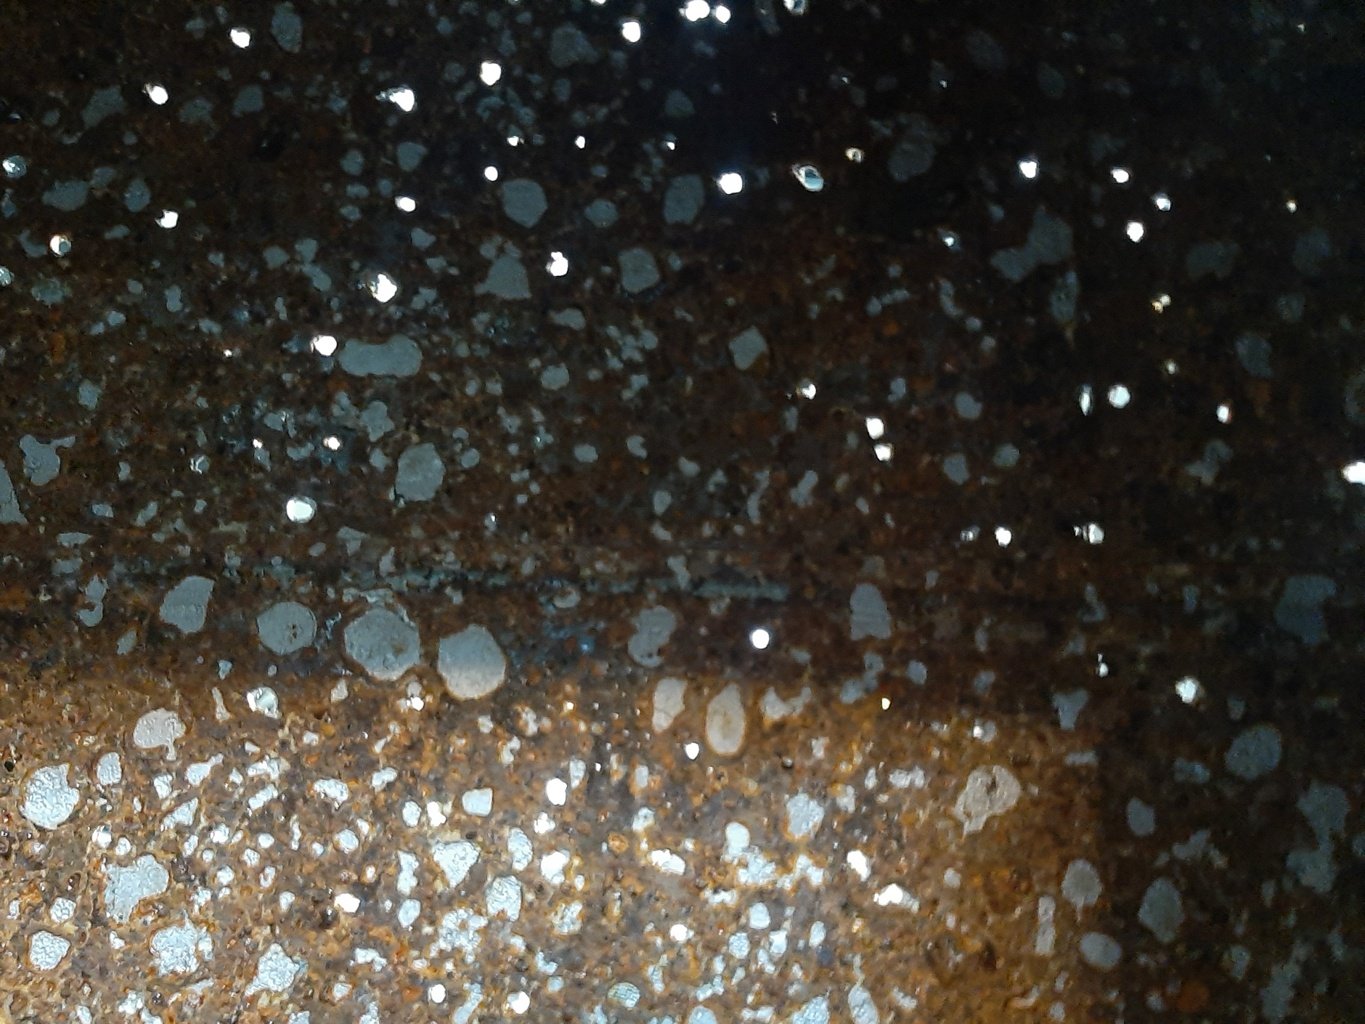
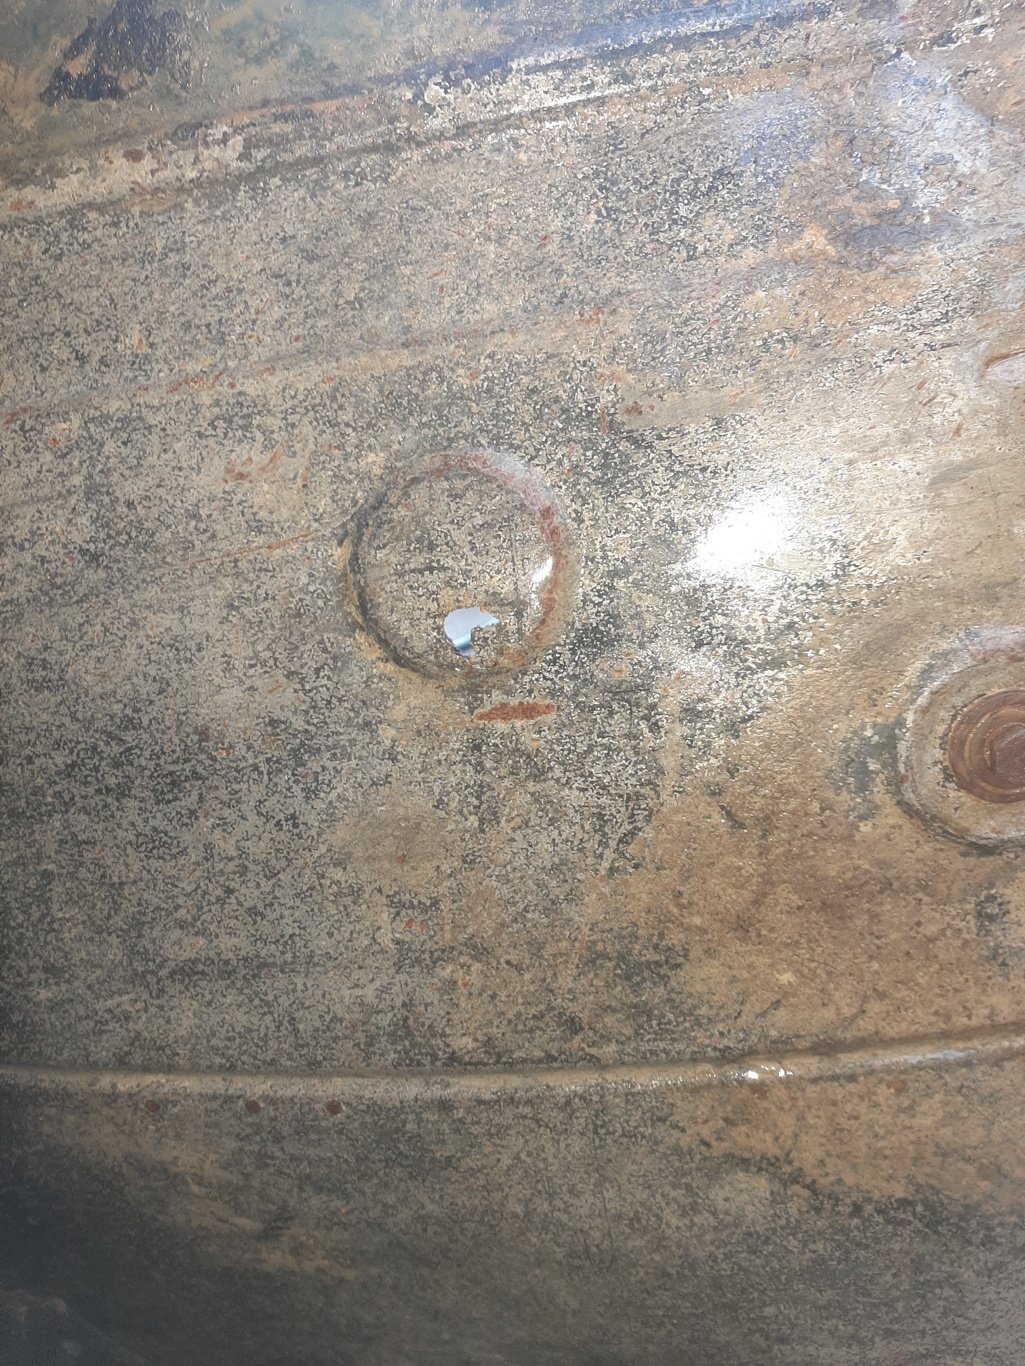
Dropped the fuel tank. Filler and vent rubber had been replaced with radiator and garden hose respectively Was empty which i took as a good sign. Its dented underneath but looks watertight and is galvanised. Level sender not looking so good. Floats are cork. See what happens after an overnight soak in vinegar. Thats just nasty After a rinse with the hose this appeared, looking al the way through back out the sender hole. Dang it. Plan was to take this and the radiator to get dipped and cleaned. Radiator has a split too. Hopefully the whole bottom of the tank isnt thinned from the inside out. Will see what the man says.
- 64 replies
-
- 15
-
-
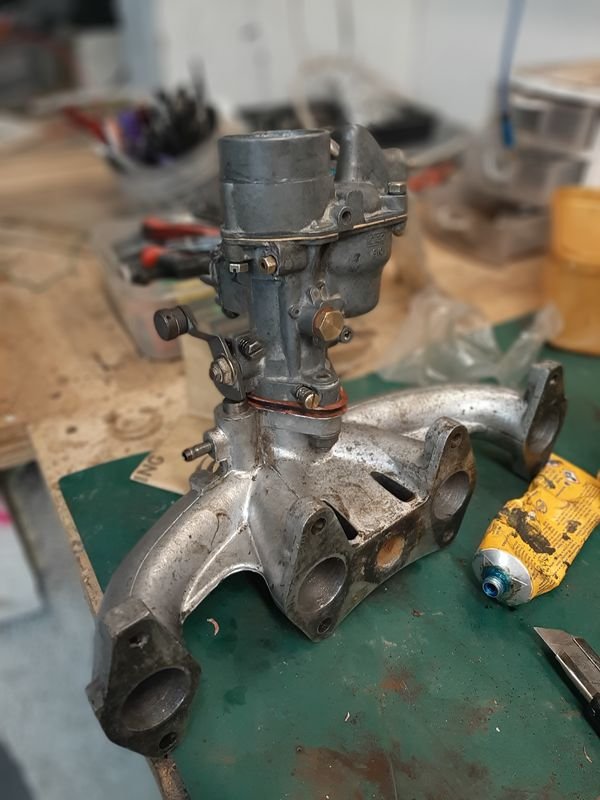
Brake master cylinder is cleaning up nice. Got a rebuild kit to go in. Trying to figure what intake to run. The potential performance advantage of the twin barrel car manifold over the single Solex 32 BIC is obvious But so is the size. Might rub on the cab. Fitting a different carb with the gubbins mostly facing the head would probably work too. Maybe later. Anyway, variations on the Solex BIC single carb was used in many small and medium cars from the 50s to the 70s, and much later in the third world so parts are plentiful (and cheap!) and so now have a 'Willys Jeep' full rebuild kit on the way so will start with keeping it originale.
- 64 replies
-
- 13
-
-
Chur Is that other Fiat project of mine giving you the shits yet
-
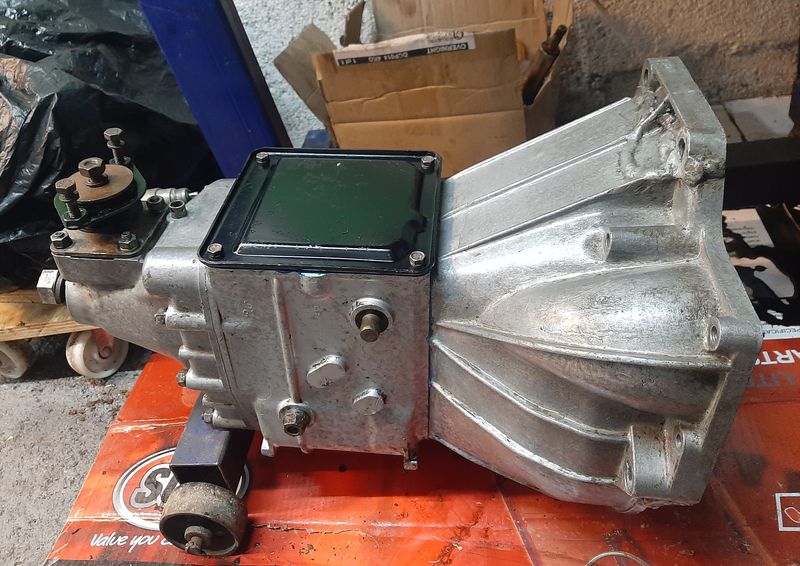
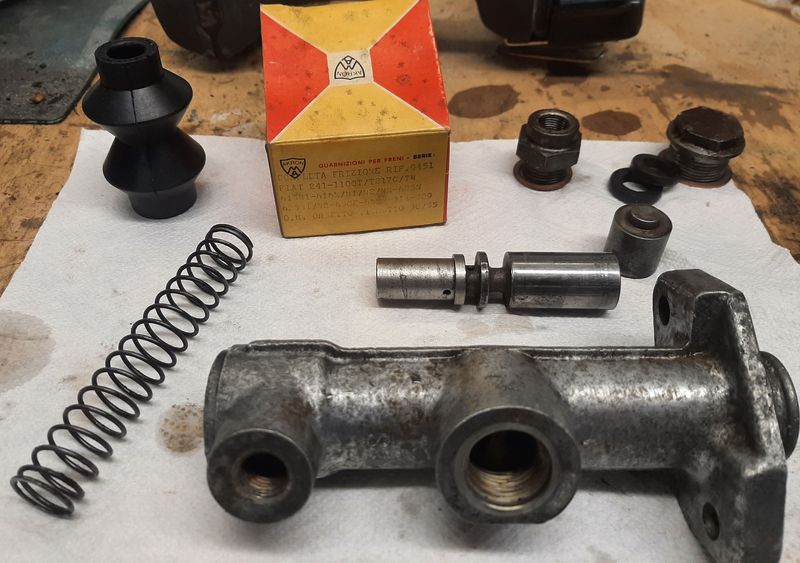
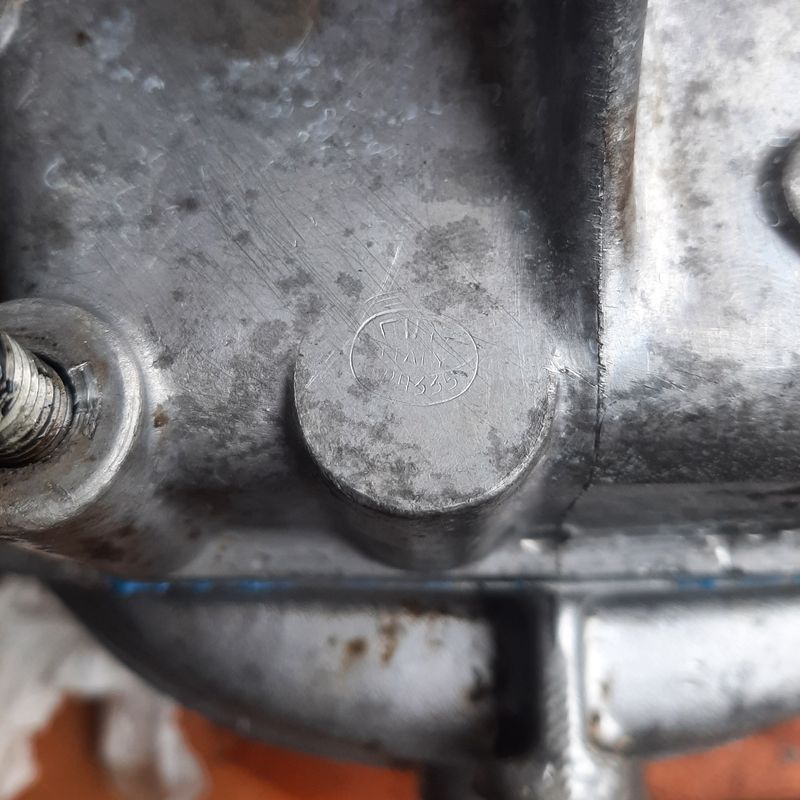
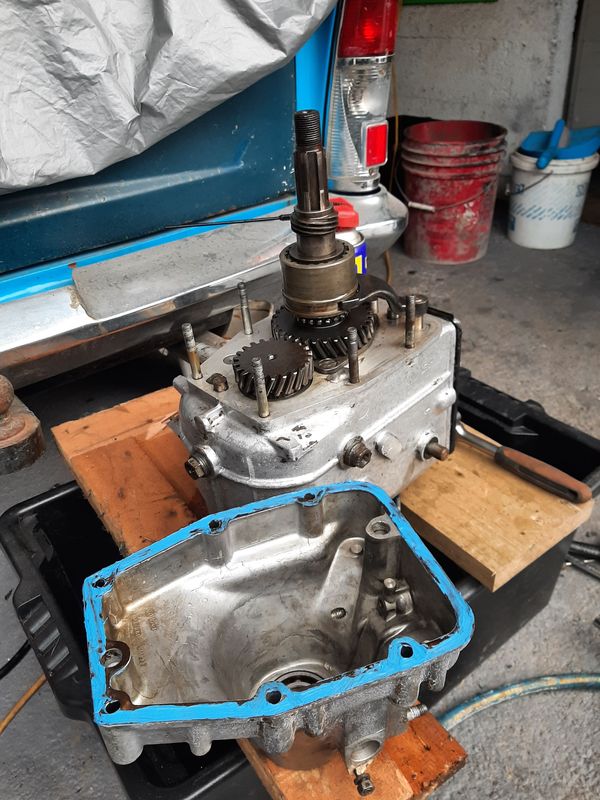
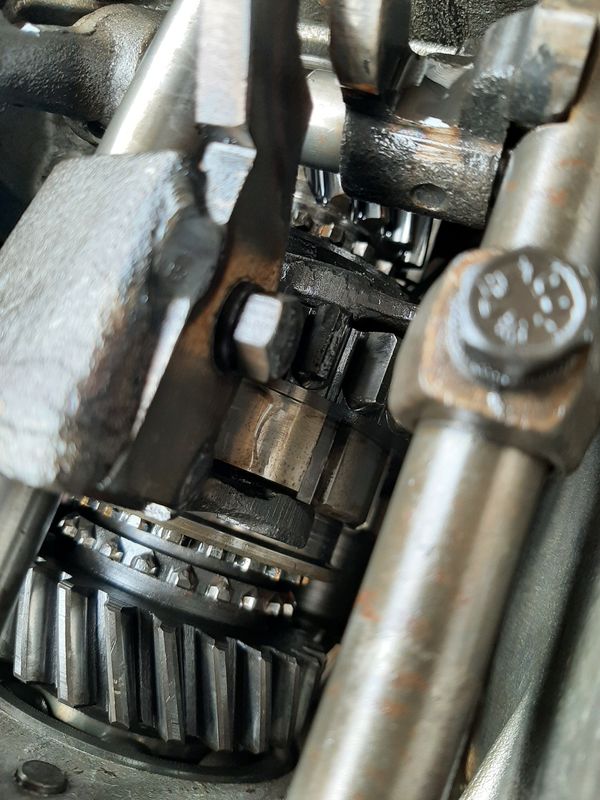
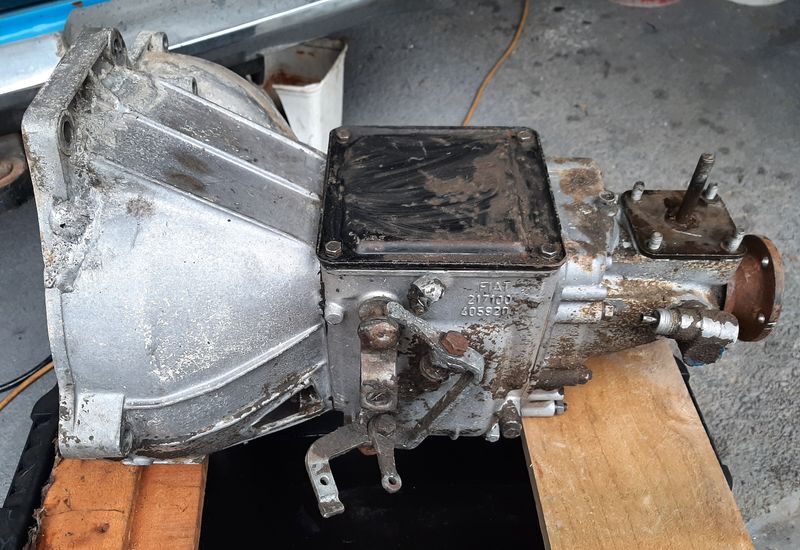
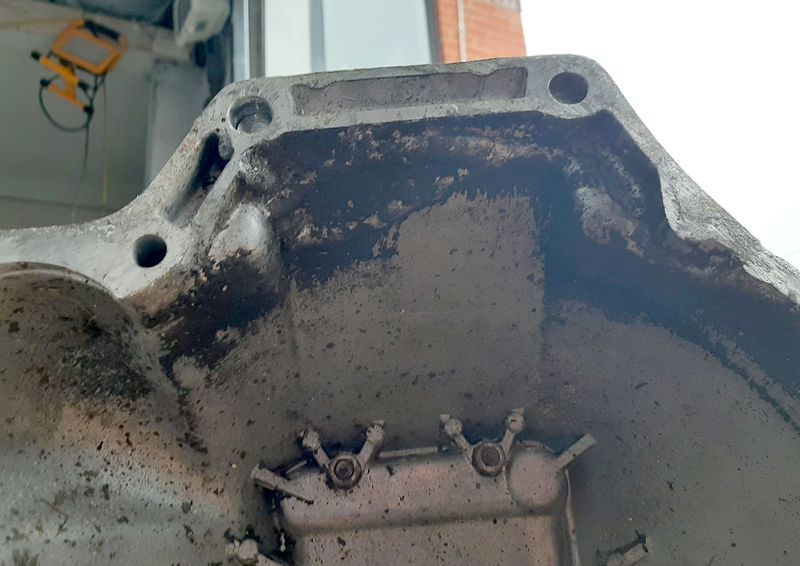
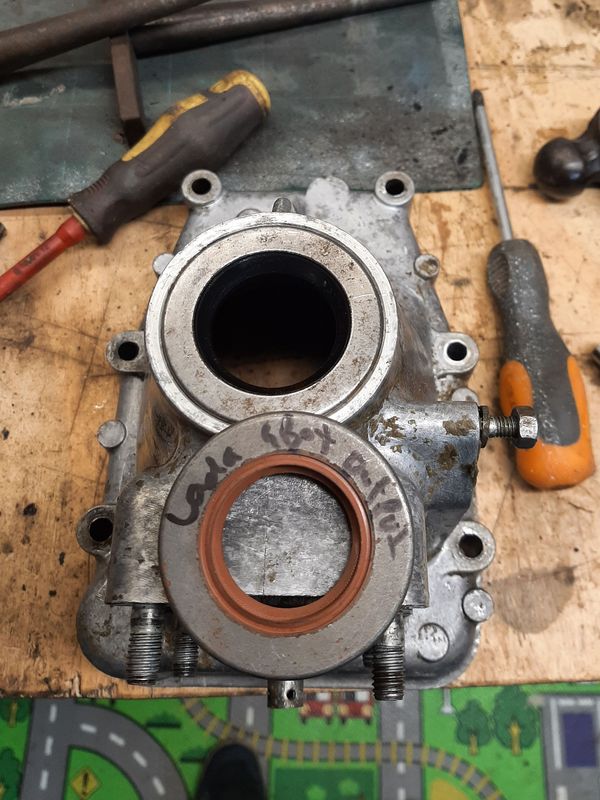
So onto other stuff, Gearbox has been sitting in the corner since being removed It looked pretty suboptimal on initial glace After a waterblast looking better. Box is early 1100 style so pretty light and small. Similar design to my 2300 but that has a steel case and is i bit beefier all round. Linkage has been fuckled with and the top of the bell housing looks to be welded back on. Mounting face is flat and the holes line up, so im letting it be. Insides look ok, i guess? Turns out the output seal is the same as a lada/124/125/1100/1500/2300 which is good as i had one 'in stock' from a past order FIAT ITALY PA335 Removed the bell housing and tail shaft. Nothing seems missing or broken, there is some wear, but nothing i can do anything about. New oil seal and some bloo goo on the original gasket Put back together - ive ordered some more seals for future reference: 1100T 217.000 gearbox output seal - 32x56x10 - same as lada/124/125/1100/1500/2300 input seal - 22x45x8 - shared with other 1100 group boxes selector rod seal - 14x24x7 - shared with 850/1100/2300 Clutch master came apart and cleaned up pretty nicely too - i have already got a NOS rebuild kit ready to go, but i also have also a strong feeling this is a lada compatible part (the slave is) so may drop one in my next ladapower order just in case.
- 64 replies
-
- 24
-
-
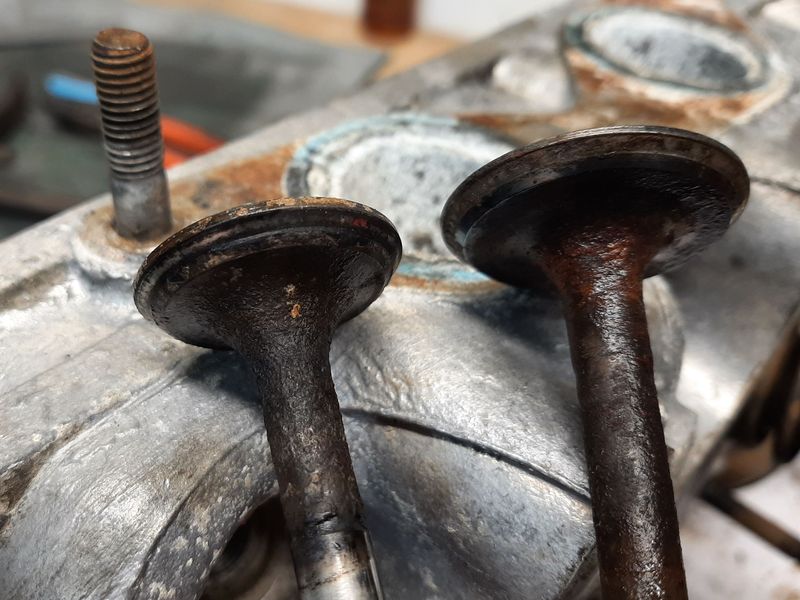
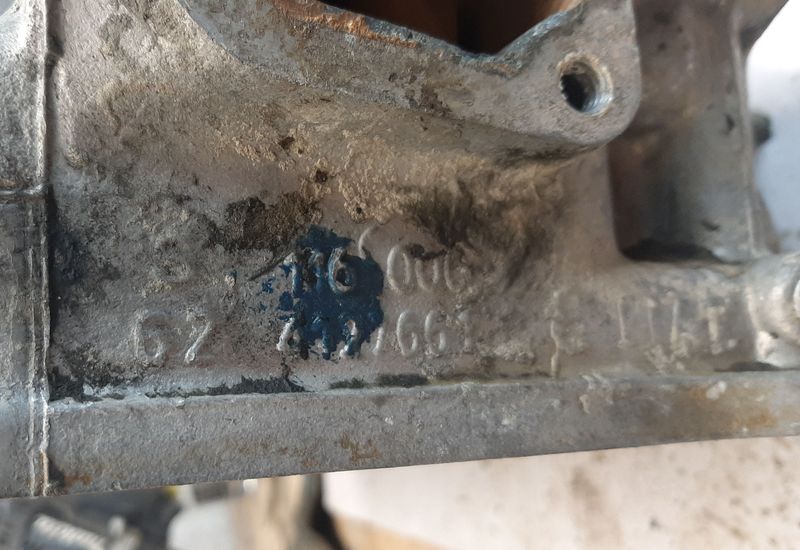
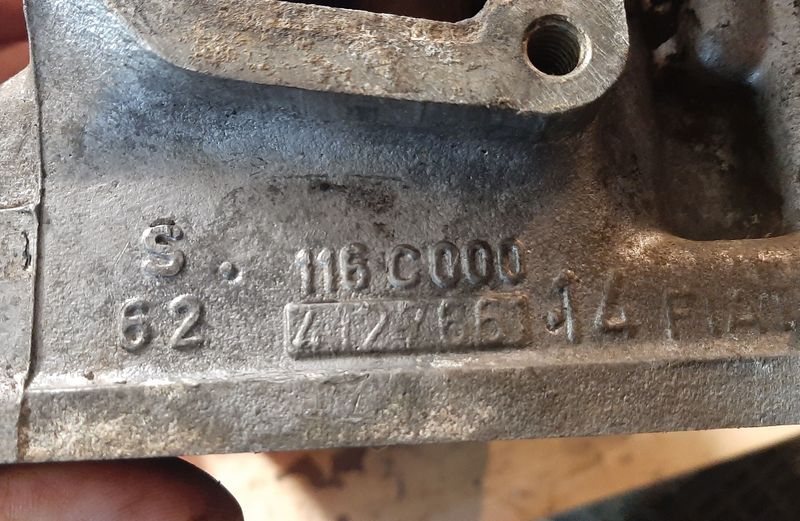
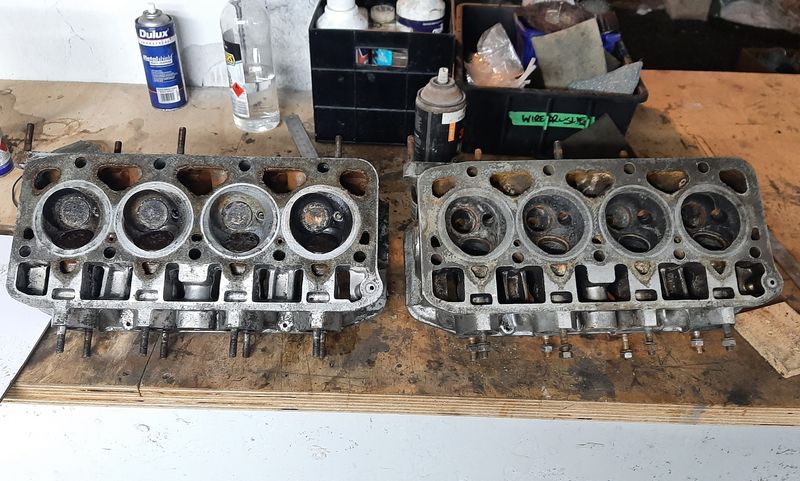
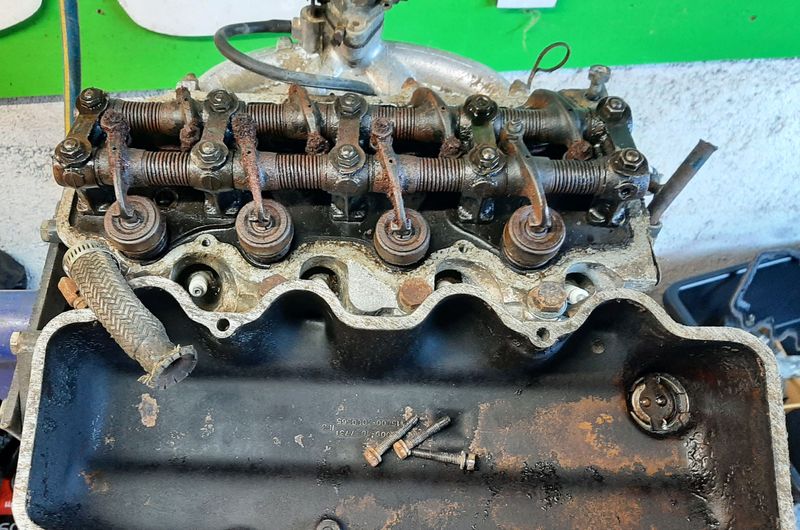
Fingats crossed the van head (left) is better than the Car head (right Both have the same casting number with the van being an '8' the car head being the later one is a '14', chamber head is very slightly different as well Dang it, looks like i will need two new sets of valves and might even need to pay a guy to re grind the seats properly and other similar stuff. Bugger
- 64 replies
-
- 12
-
-
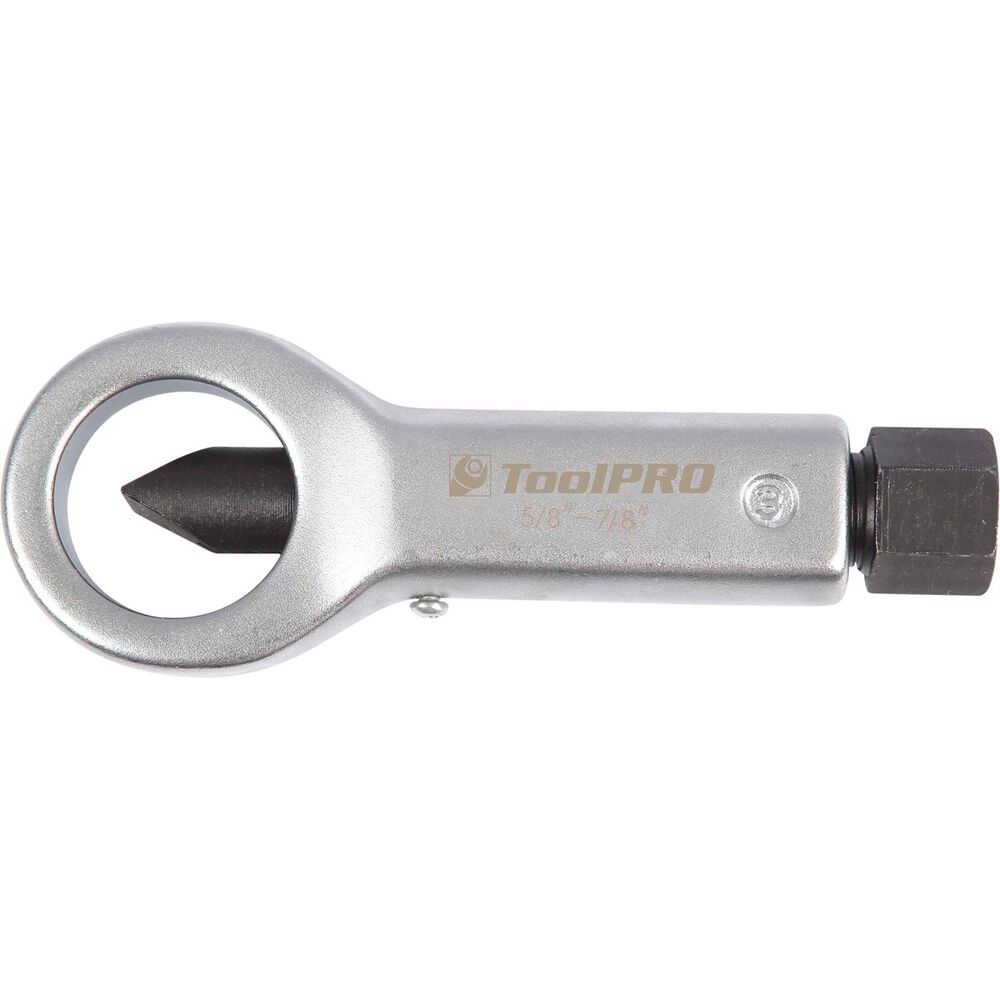
those castor rod nuts were tight as feck on all mine too The design of the valence means you cant get a rattle gun on there either. I think i used a nut splitter on at least one of mine in the end
-
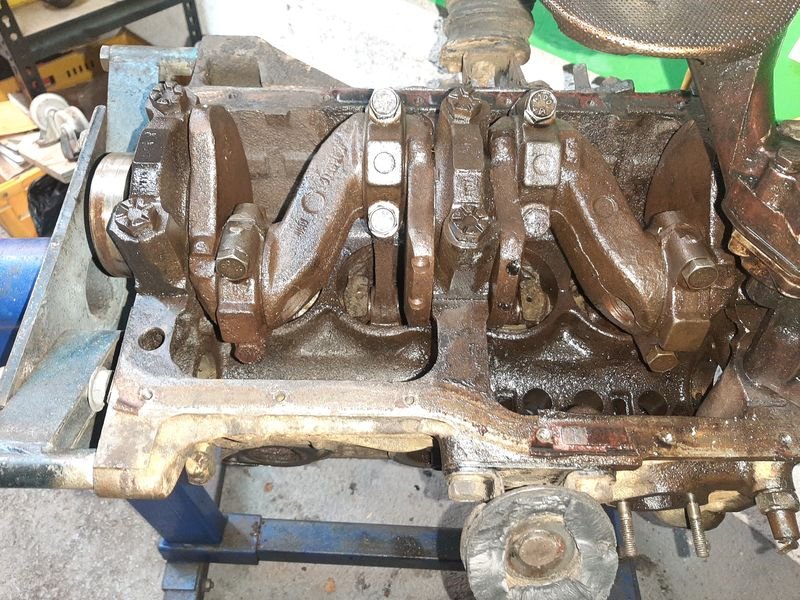
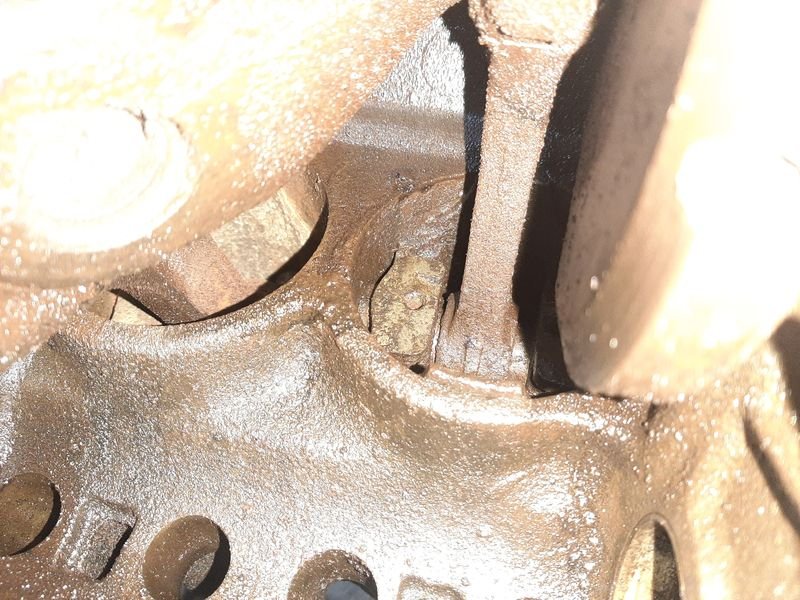
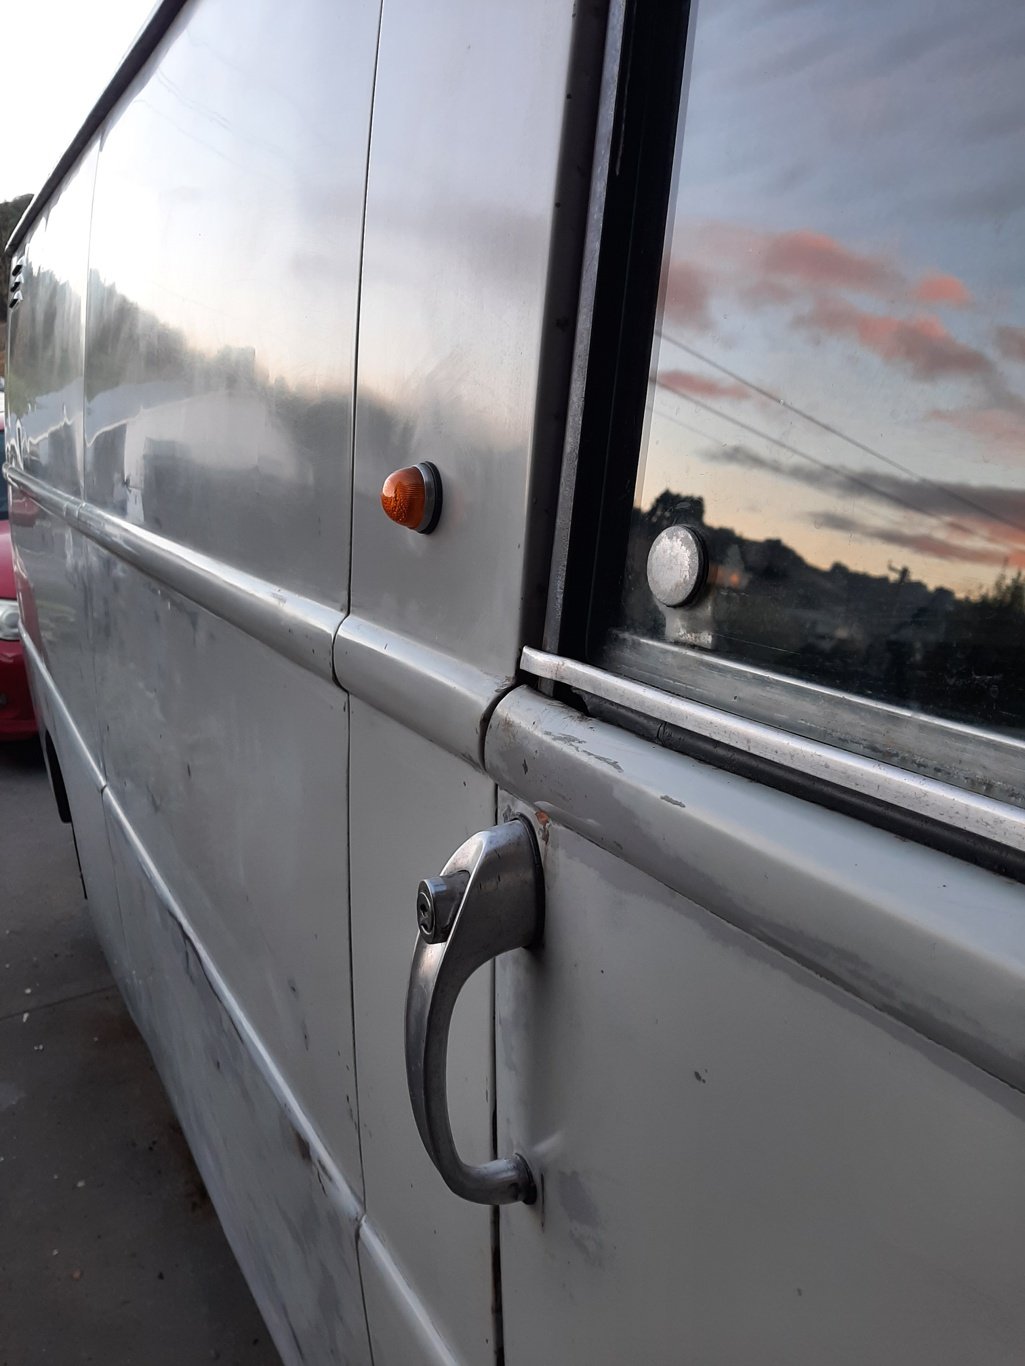
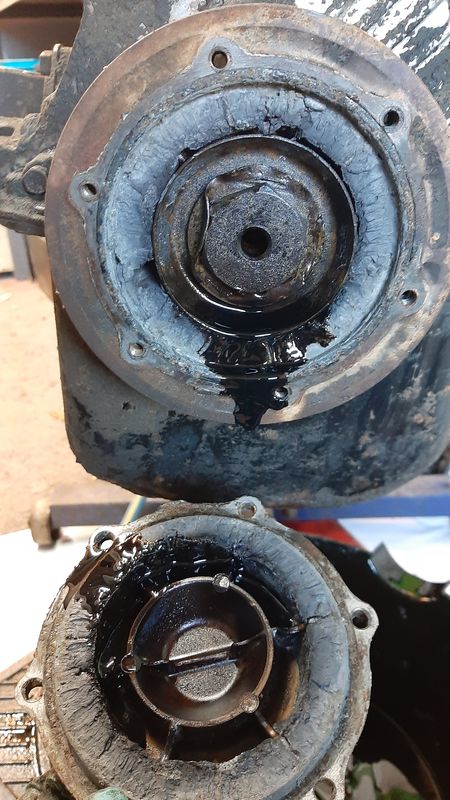
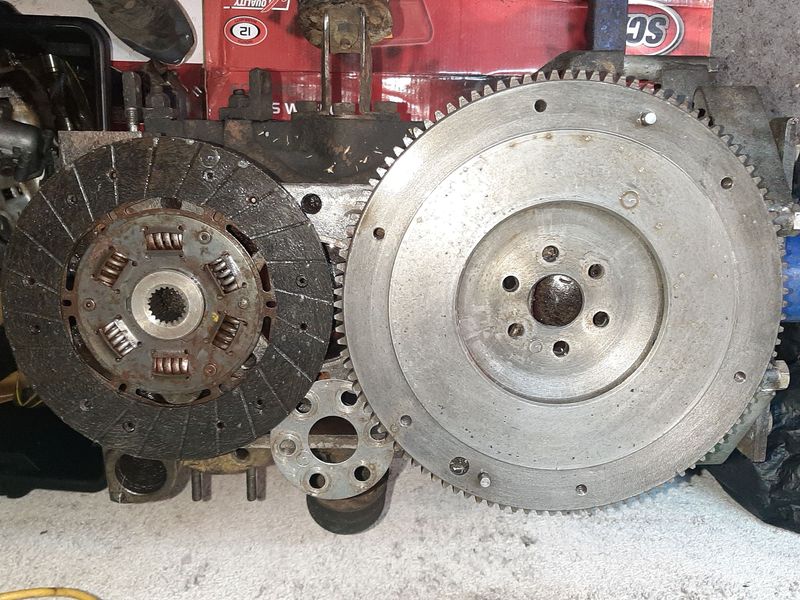
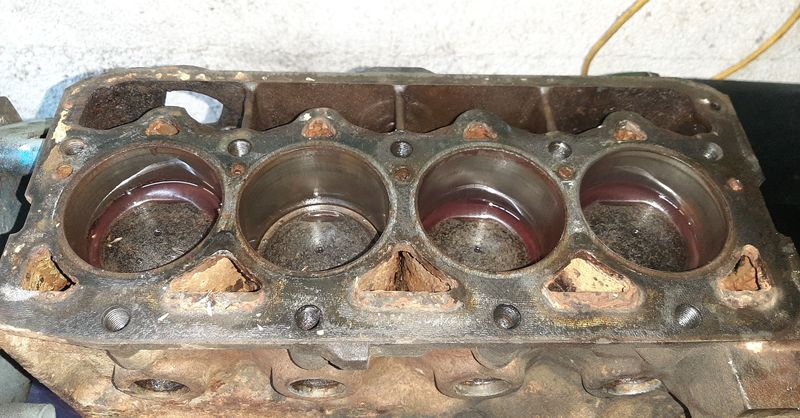
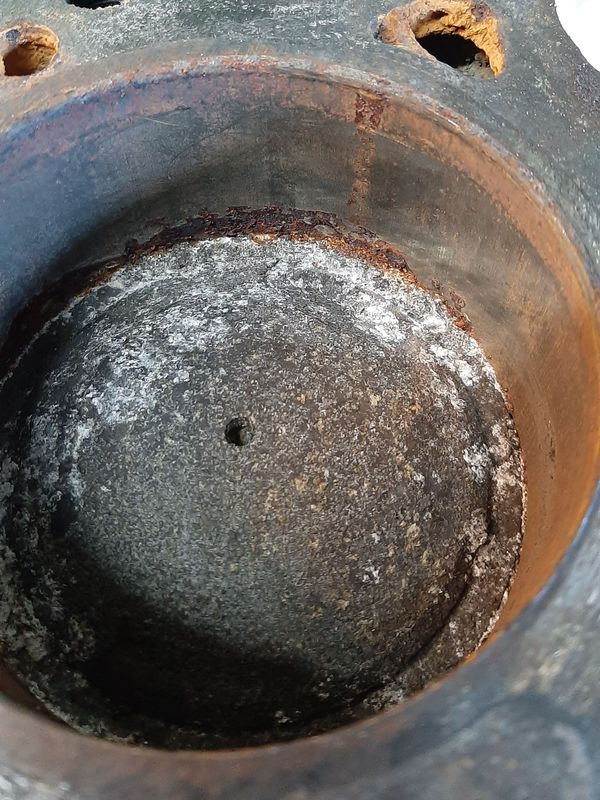
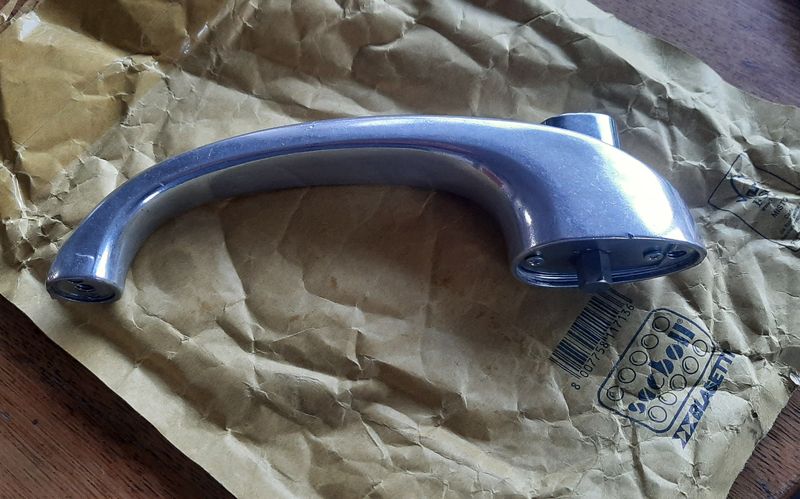
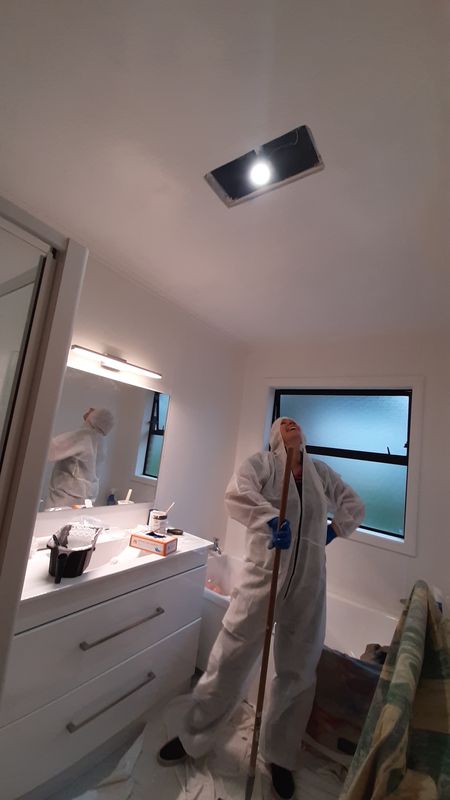
slow progress this week finally started painting the bathroom ceiling i rejibbed after replacing the old 3 in 1 fan a few months ago. Some more treasure from Italy showed up, its the missing sliding door handle. Popped that on and now the van (furgone) is pretty much complete now. Just doesnt go or stop... So shuffled the 'car' engine off the stand and under the bench and got the original one from the van ready, removed clutch and flywheel, and got it on the stand to start the tear down to see what we have to work with. Got a new parts washer - its a revelation - good for cleaning things before (remove the greasy smeg) and after a soak in the vinegar bath (to neutralize it) and after the sand blasting cabinet to get the sand off things before putting them away - flywheel and clutch plate are both in great condition and came up well I know this engine is hard seized and the engine number is about 50,000 lower than the car engine. Both are 115C 000 blocks, but the van one is #35xxxx, car one is #409707. Centrifugal oil filter shows signs of a lot of deferred maintenance! Popped the valve cover, the inside and the head very blackened (from dirty old oil getting hot) and the valve gear has some surface rust from condensation A couple of valves were sticky but they freed up once the head was off and i could tap them back up. Ill strip the head down after work this week some time, hopefully its better than the other one. The valve gear off the other engine is nicer than this This is Cylinder 1 after popping the head off and a quick vacuum. That will buff out? After a good water blast and air dry i stripped the rest of the accessories out. Cam looks ok - cam gears, chain and cover are also in good nick - no witness marks from loose chains either so ill use that cover at least. Oil pump shaft is stuck in its hole- and BLACK Left some ATF and Acetone sitting in the cylinders overnight - only #2 drained out - i know for sure #1 is rusty and stuck, but maybe #3 and #4 just have really good rings? HA haaaa haaaahaaaahahahaha hhmmmm. Hmmm. Shame because it looks like this engine has standard pistons still (77mm vs 77.2 on the car block) and apart from the rust the cylinder walls look less worn as well. Will see if it frees up, but i think ill stick with the car block, hopefully the head off this one turns out to be ok, or at least better than the car one, and with a few other bits swapped around and some new rings ill get 'a runner'
- 64 replies
-
- 27
-
-
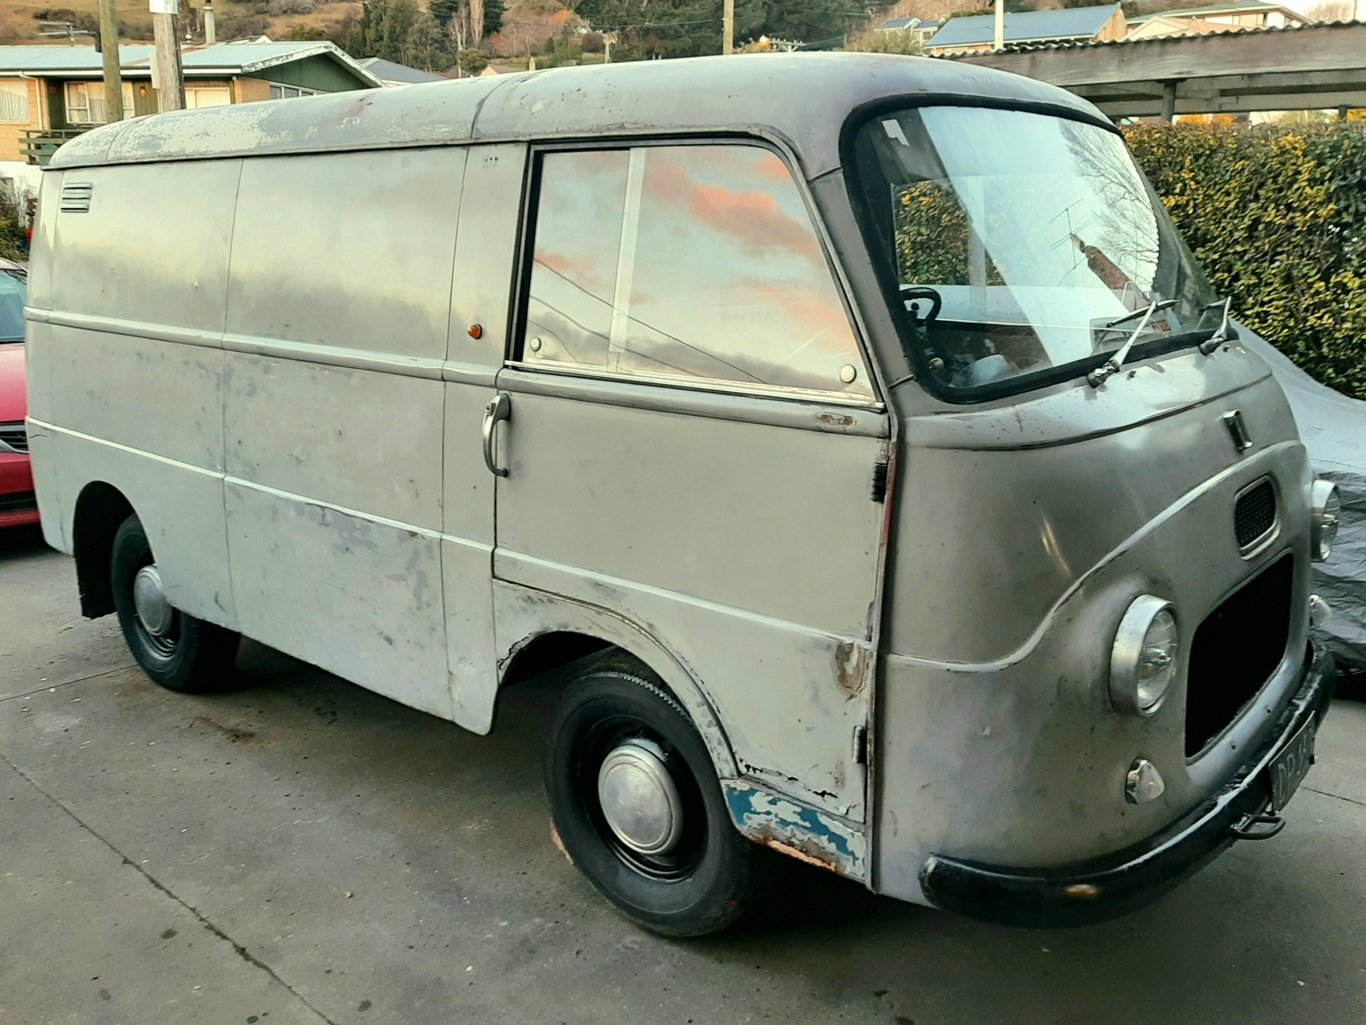
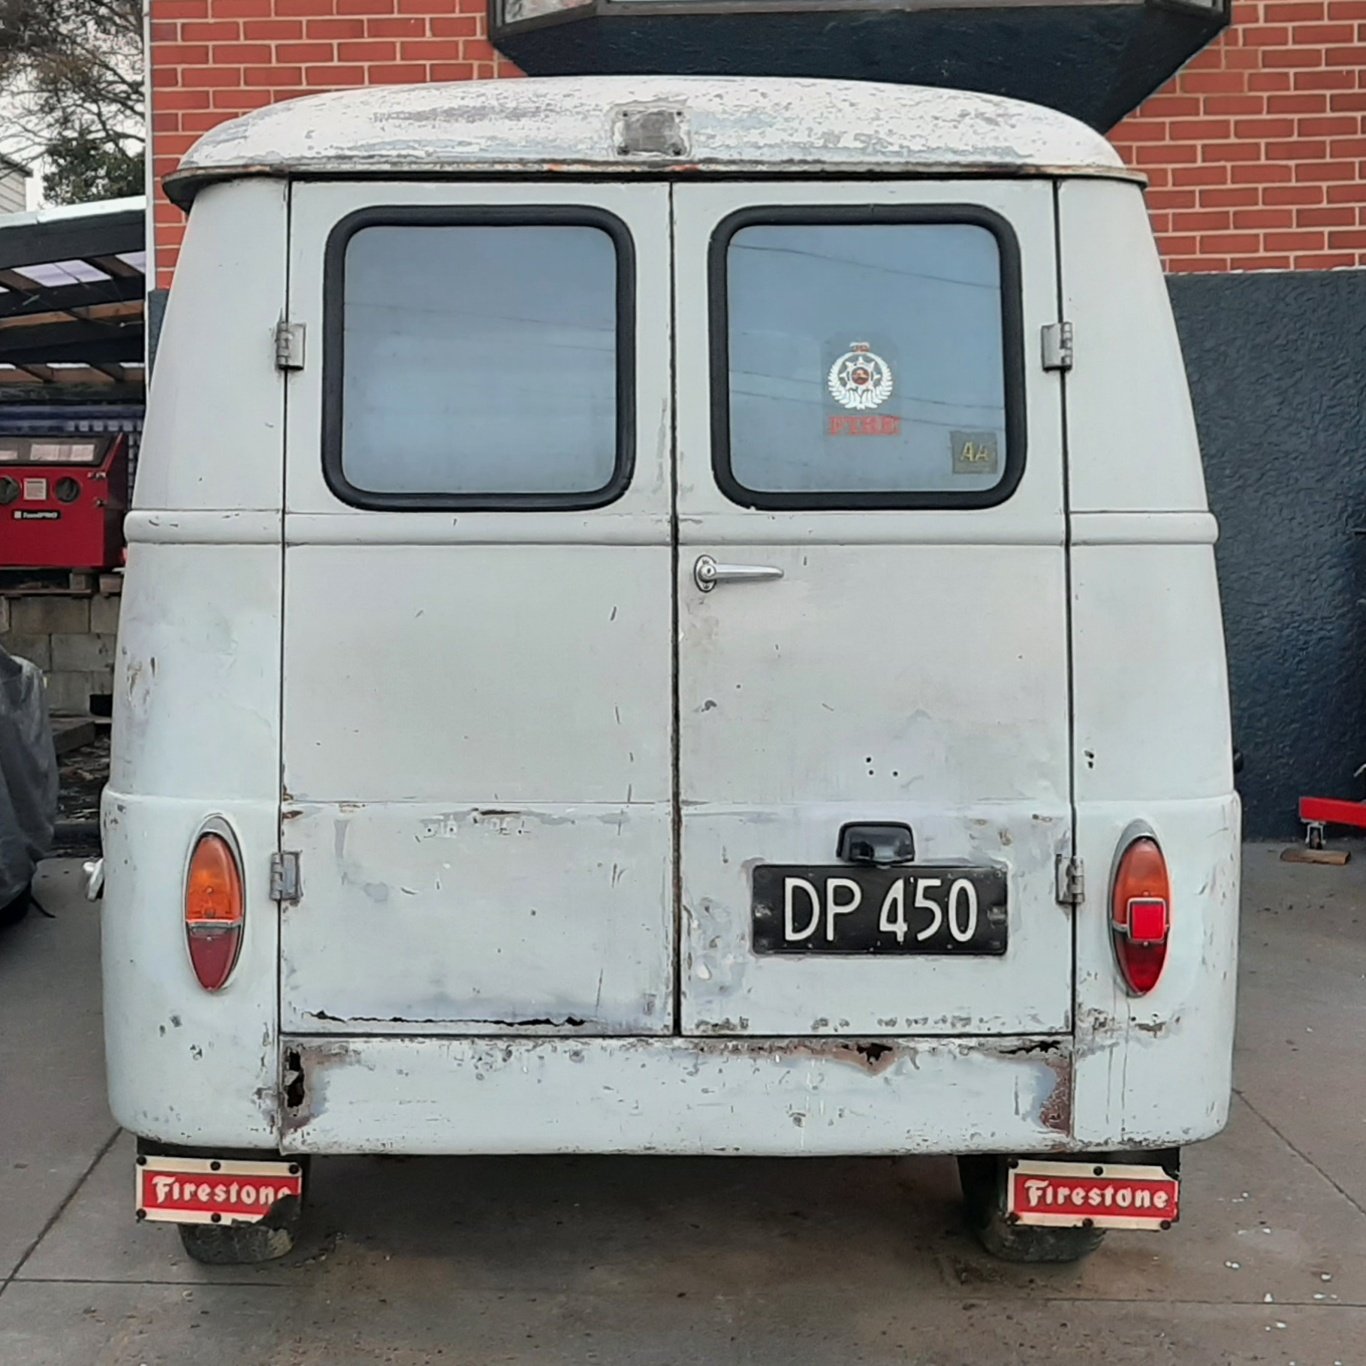
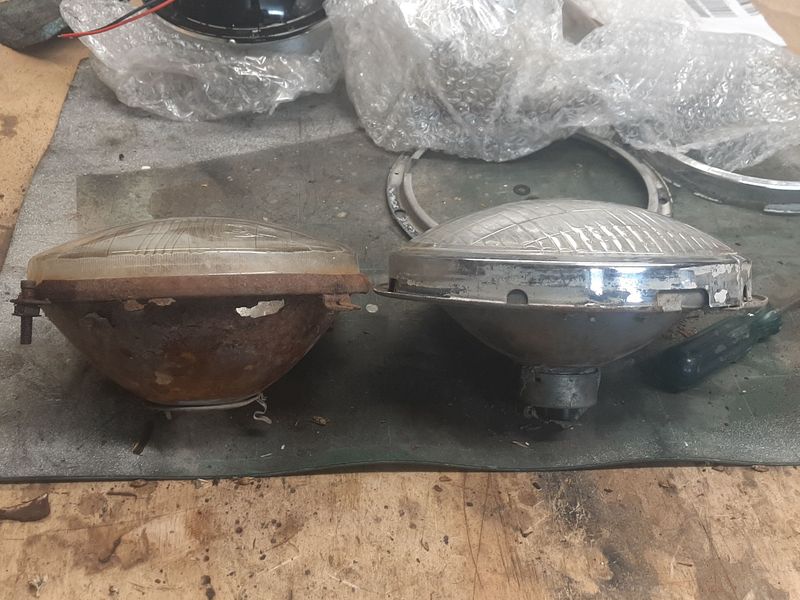
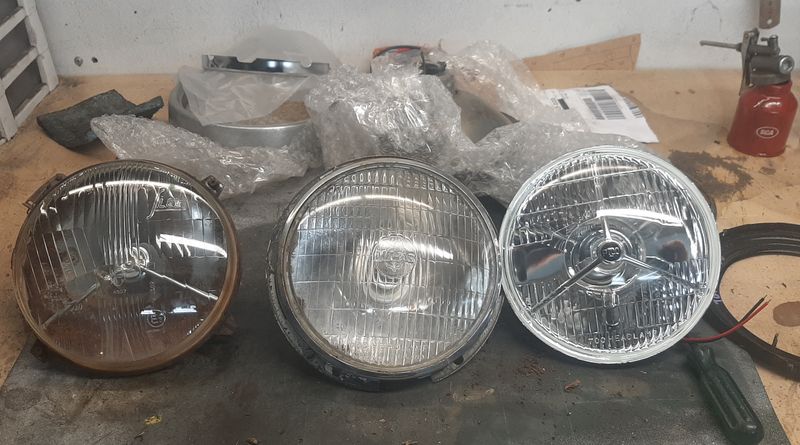
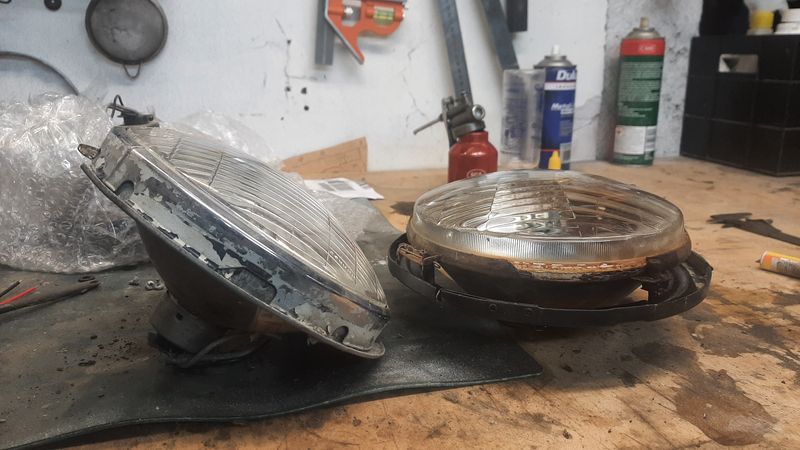
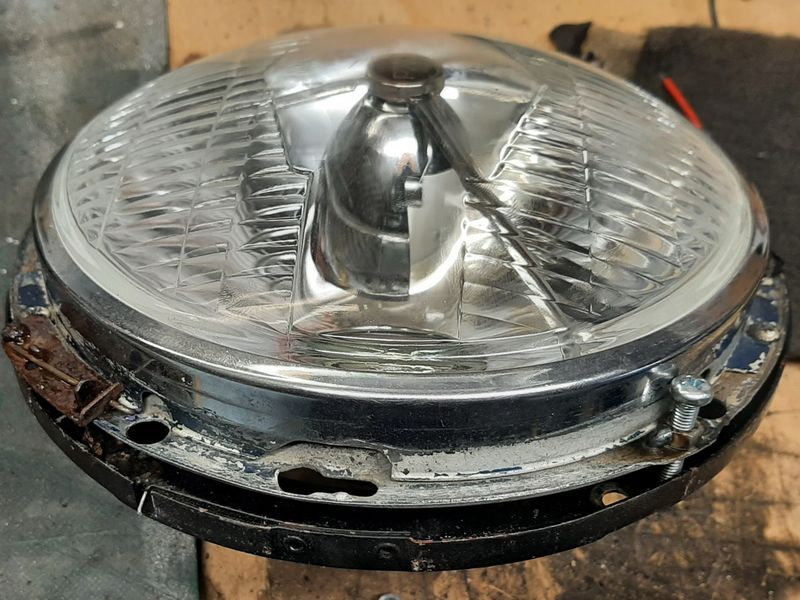
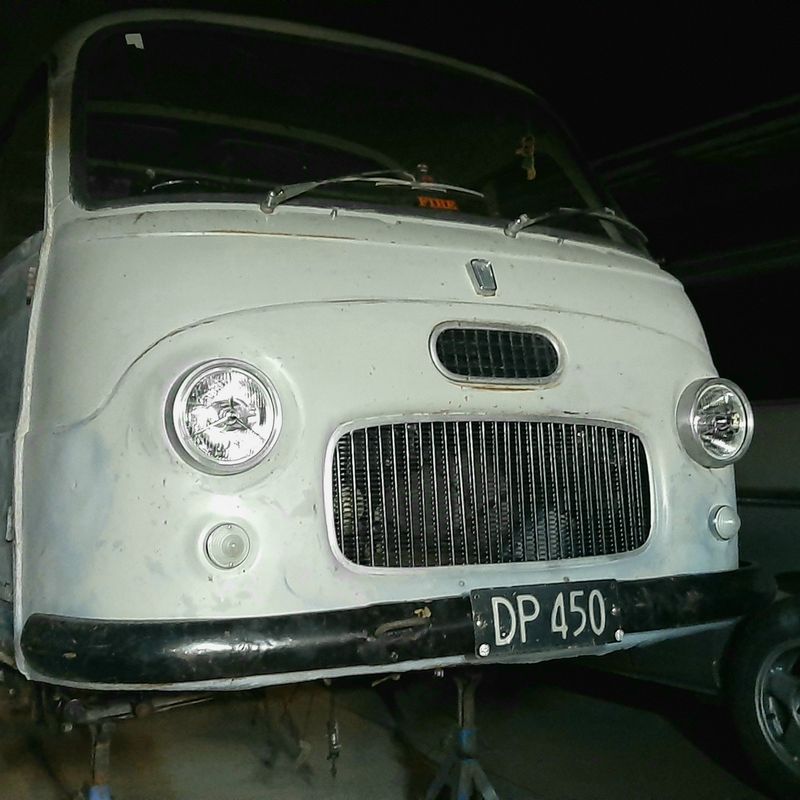
Headlights These take a 7" H1 bulb headlight, which seems common enough, but the bulb housing has the mounting and adjustment built in and clip on to the bucket and are only available NOS, like these for only $500NZ + postage, and these aren't even RHD. https://www.ebay.com.au/itm/124135811511 So i bought the cheapest 7" headlights i could find with a peace symbol which tuned out are Lucas STYLE 700 lamps from here along with some other stuff: https://www.classiccaraccessories.co.nz/collections/lighting/products/classic-lucas-style-p700-headlamps?variant=29025370636376 Unfortunately they didn't mount quite how i imagined but luckily some actual Lucas headlights popped up on FBM and they had the mounting rings too, so I could fabri-cobble something together. OEM SIEM light (H1 bulb), old Lucas 700 with mounting ring (bayonet style bulb) , modern Lucas 'Style' 700 lamp (H4 bulb) The SIEM lamp has a 'long' side glass which gives room for adjustment within the light trim ring. The mounting ring on the lucas makes it a bit tighter Reusing the original mounting buckets (they have small clips for the trim ring built in as well) meant cutting one wee clip off the old headlights, cutting some slots and adding some captive nuts to make some adjusters And they actually fit! Van finally has its face back. H1 and H4 bulb wiring is pretty much the same but ill probably add some relays in for these and a few other things at some point This is normal right? Classic OS, 'saving' money on buying the right thing, by spending almost as much buying old junk that doesn't quite work and spending hours making it fit. Should have probably just bought these, but they were out of stock or I would have https://www.classiccaraccessories.co.nz/collections/lighting/products/7-inch-headlamp-cone-assembly-metal-with-gasket
- 64 replies
-
- 30
-
-
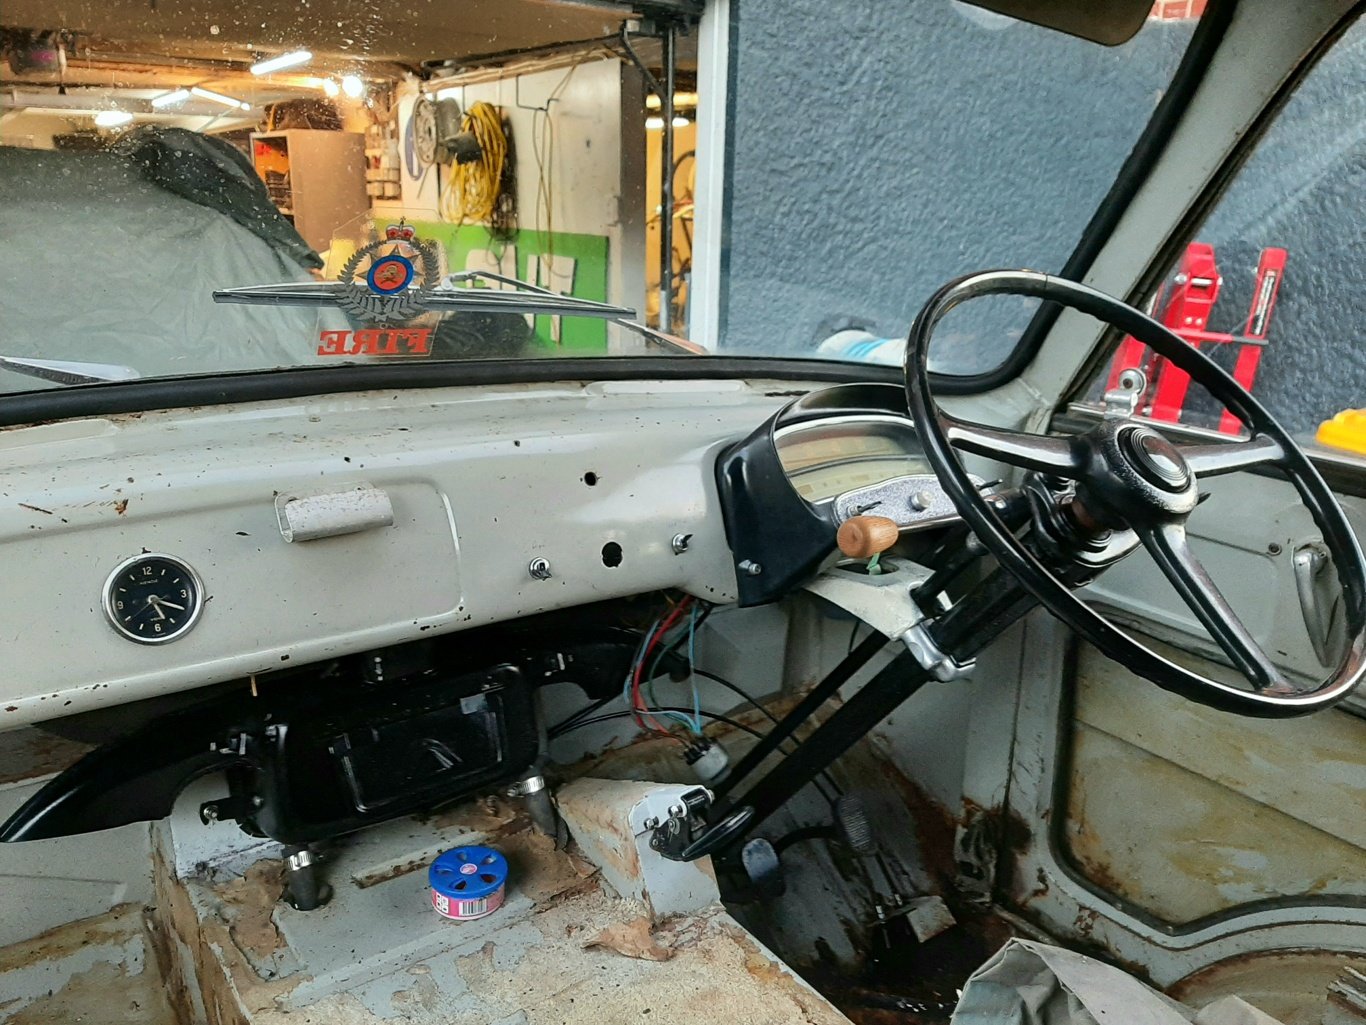
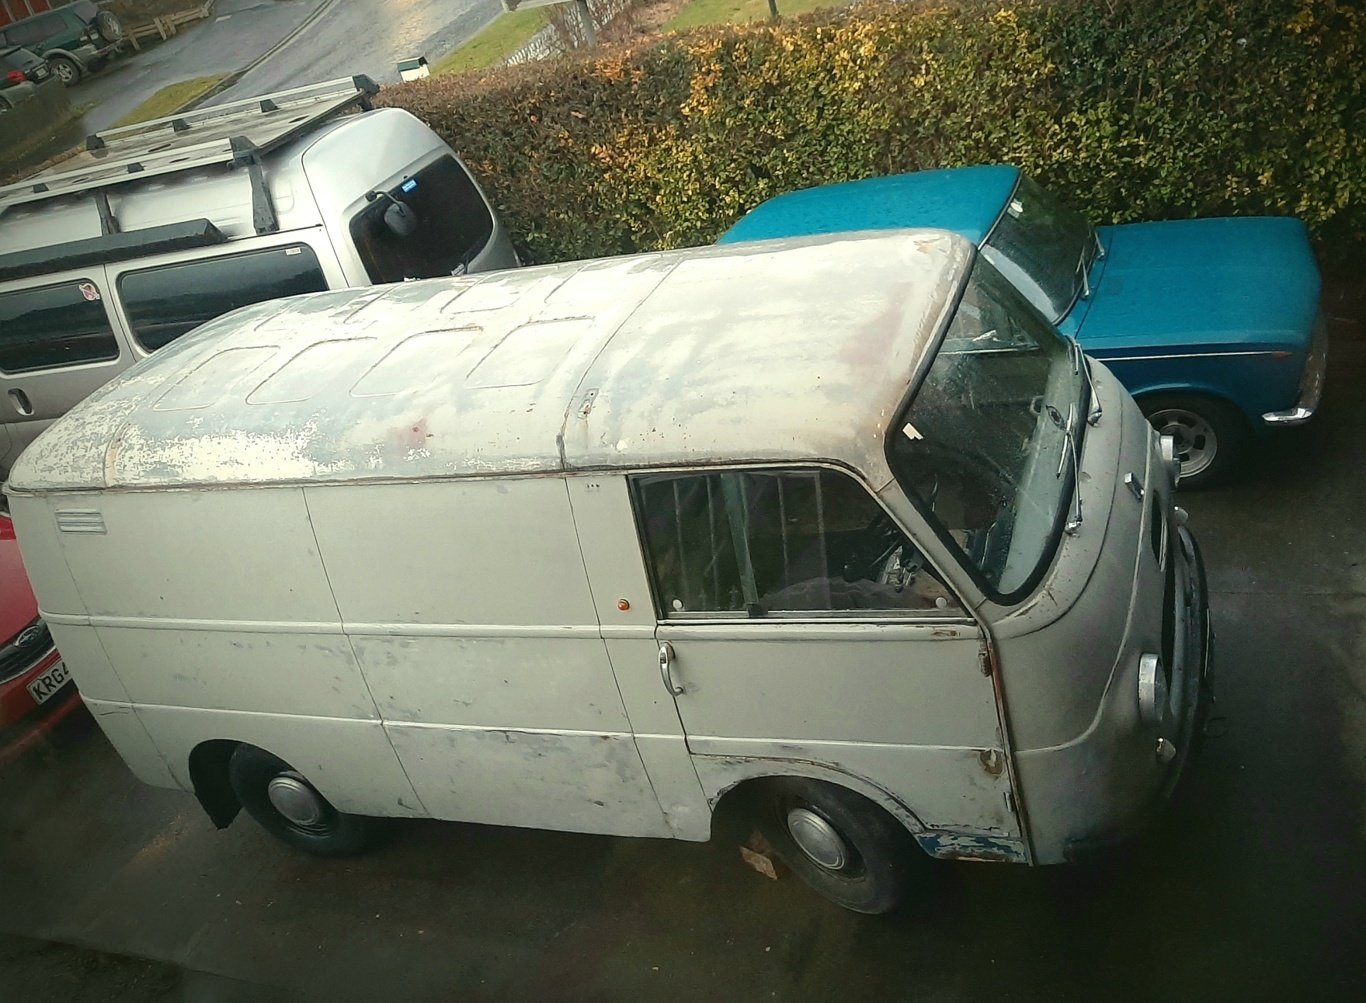
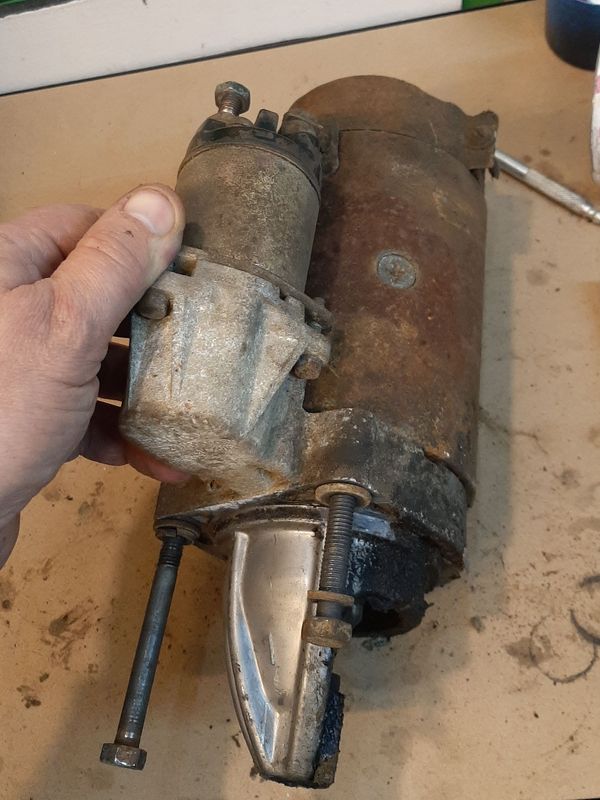
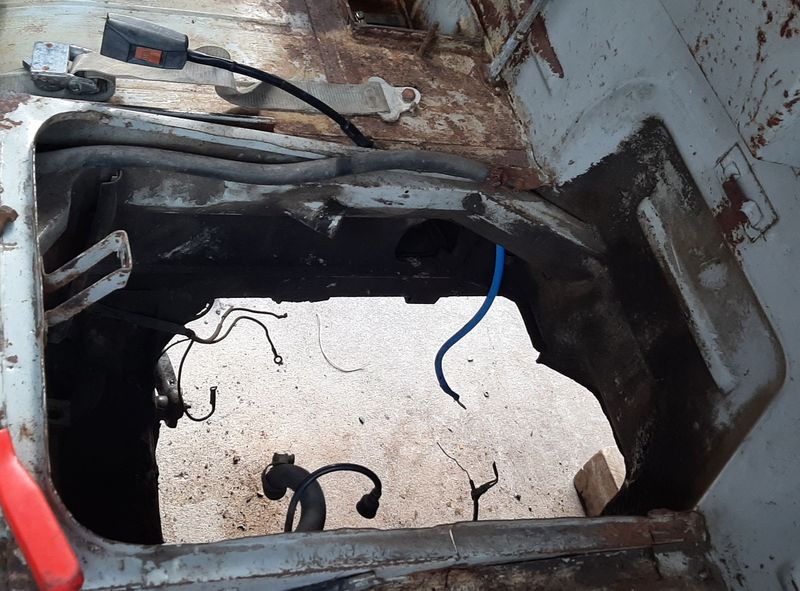
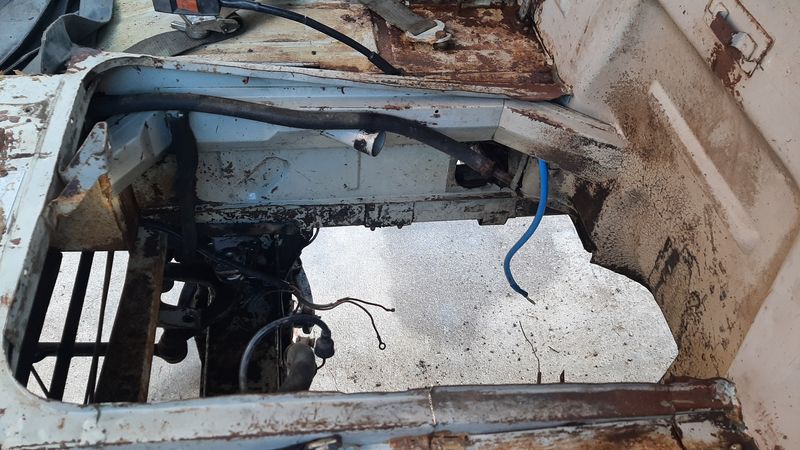
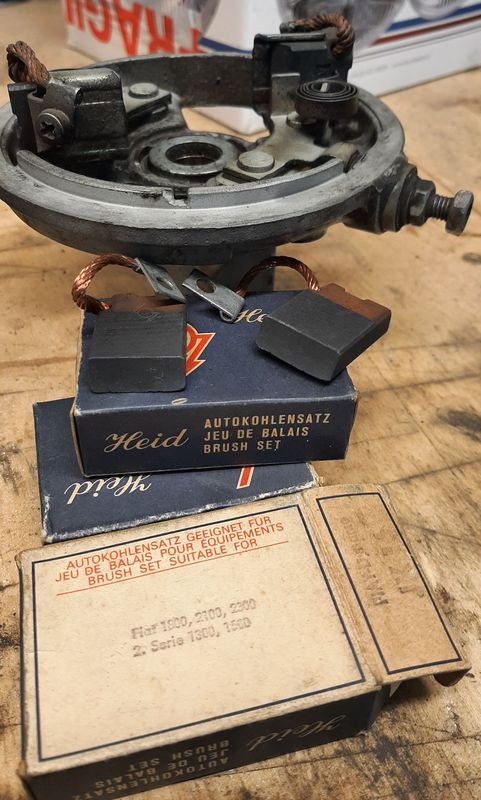
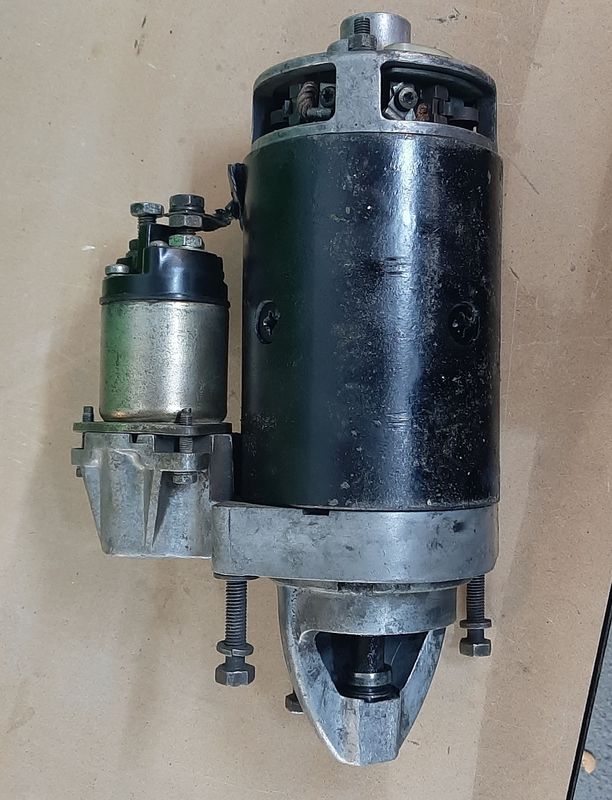
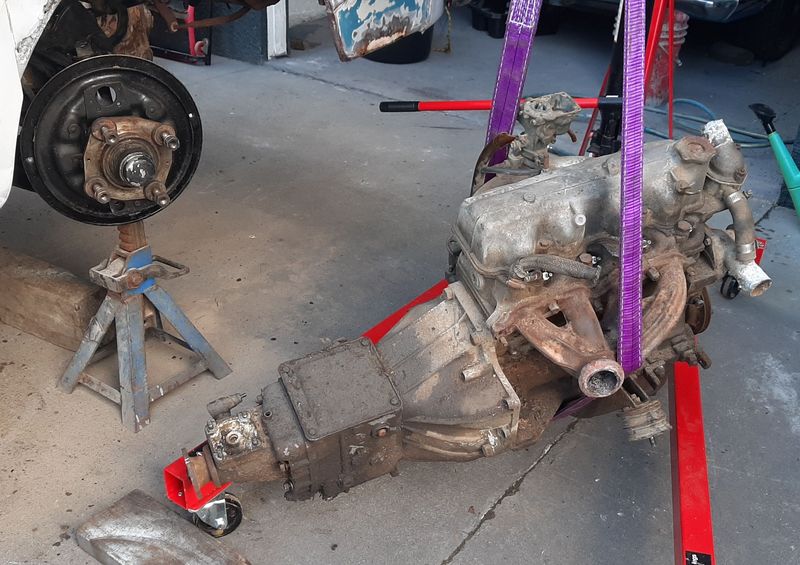
Had a combo of not raining and the Mrs in a mood to help, so got the van turned around. Not quite Austin powers 100 point turn style but nearly - i had a roller jack under the diff which made it a bit easier to pirouette. Jacked it right up, stuck the engine crane though the drivers door and after disconnecting everything (-1) eventually pooped this greasy lump out. Thats a single barrel Solex with about a 25mm venturi and the exhaust manifold is van specific to poke though the engine bay into the front wheel well. Smelly greasy hole Two cans of degreaser later and its much much better - the opening behind that loose pipe is for the exhaust pipe. What looks like a chassis rail the pipe resents on is actually the cold air feed, from in front of the radiator, dumping behind the firewall, with a smaller round hole for the carb - i wonder if that has a ram effects? Tidied up the starter motor, came up really nice, solenoid even has yellow plating still on it, and even bench tested successfully, and happily a bit smoother and quieter than it was before the tidy up Mid tidying up Fresh alternator brushes, I got 4 boxes of these these cheap as (like $10 euro for all four boxes?) ages ago for my 2300, quality West German made. I also swapped the starter bushes for the old 2300 ones i swapped were actually quite a bit longer than the ones in the one that came off the van engine (never throw anything away!) And compared the spare that actually looked slightly better on the outside (but felt a bit crunchy spinning).
- 64 replies
-
- 16
-
-
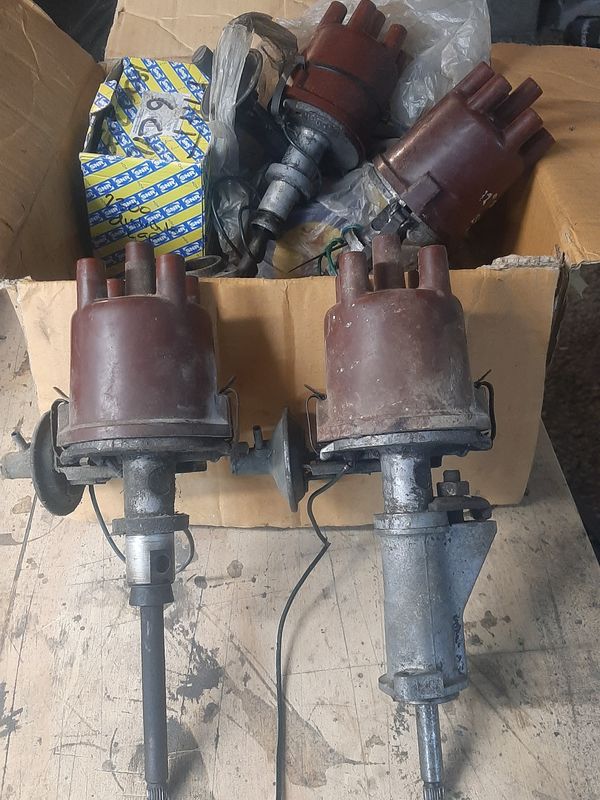
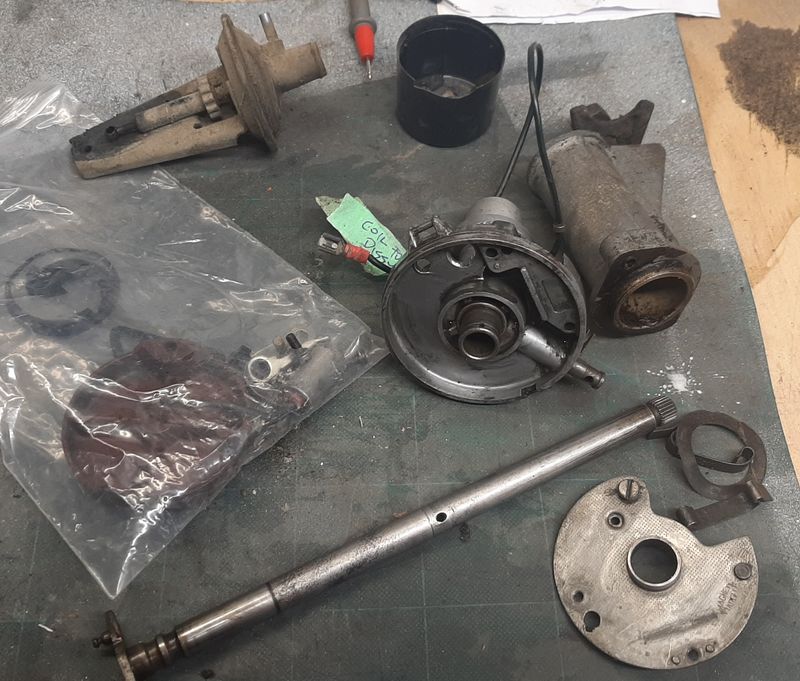
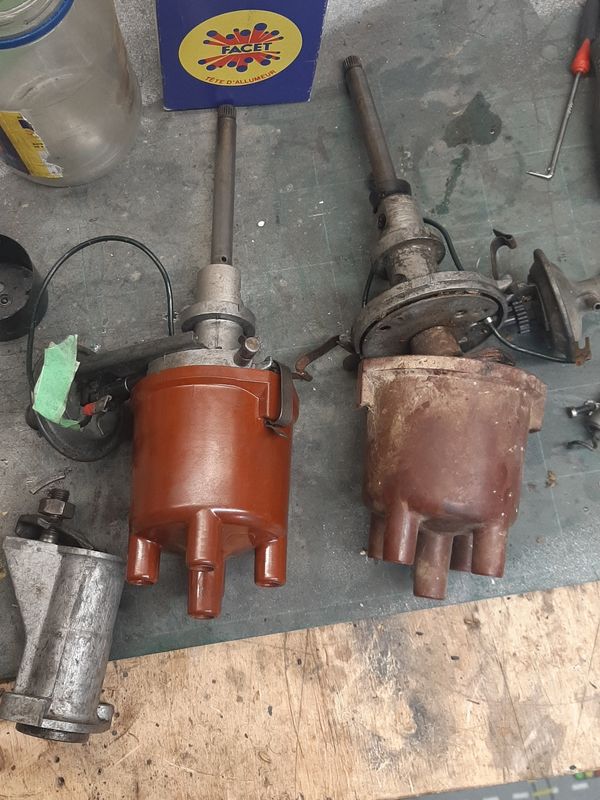
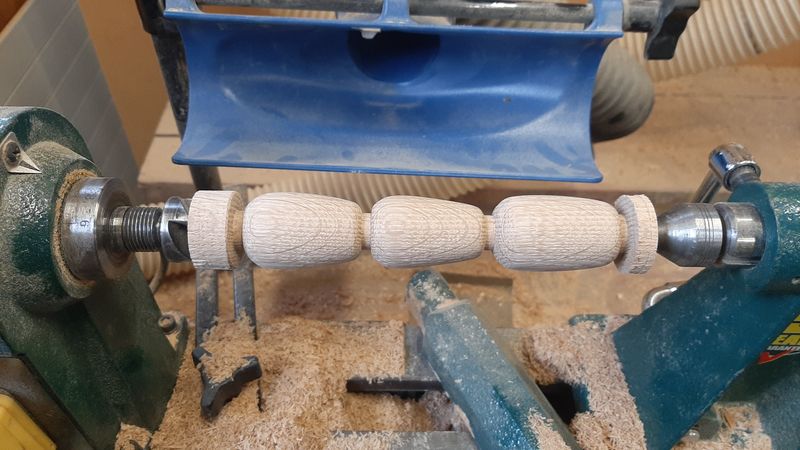
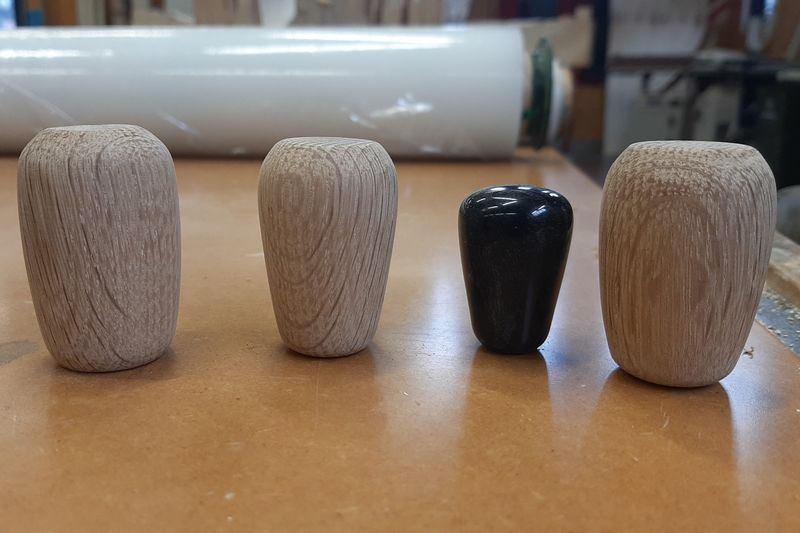
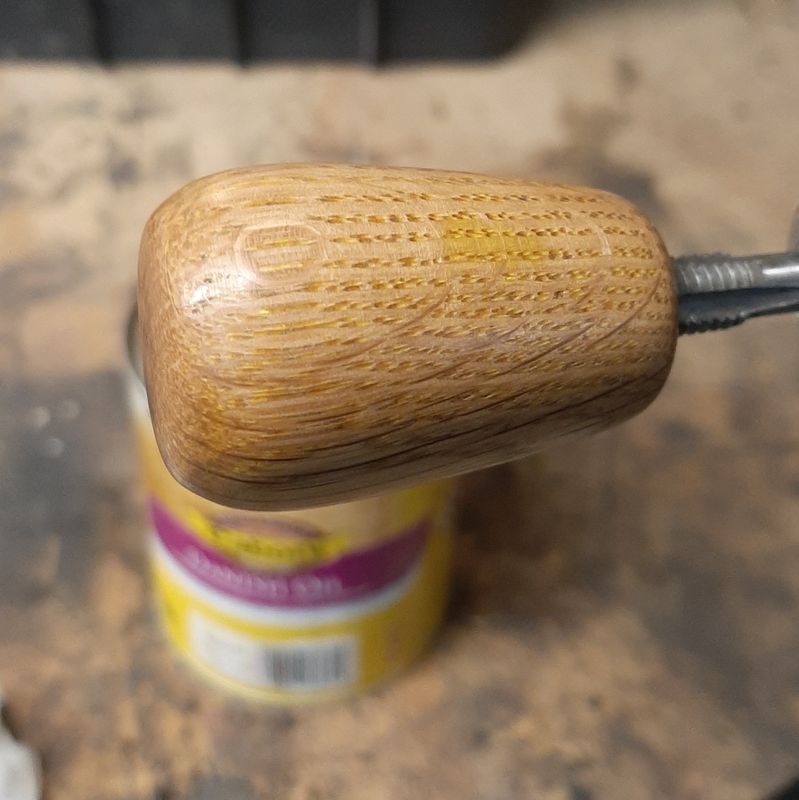
Been poking away at things. Ol' mate runs a Tech room at the local high school, so i did a C+ effort on turning up some oak gear knobs one weekend The black one is the knob off the 2300 wagon, which would be close to if not the exact factory size on the van - ie pretty small, about 25 diameter x 40 long. I havnt been able to find these for sale anywhere, and they are an usuay (for a gear knob) thread The other ones might get used on some other cars. M8 x 1.25 threaded tap into a 7mm drilled hole, and some danish oil. Also tidied up the dizzy. One off each engine, one slightly better nick then the other. Very similar design to the 2300 one (box of bits in the background) but I didnt need to steal any bits. As i managed to make one good one from the two, one set of points was pretty much new, one vacuum advance worked, etc. Reassembled and adjusted up. Got a couple of cheap NOS dizzy caps in a recent order so unboxed that and all looking good.
- 64 replies
-
- 18
-
-
@epoxy124 more 125 content please!
-
Dang. Costs changes are related to variations tho? not just "yeah, nah, quote was for $ but lol, jokes heres the invoice for $$$"? Shame cause otherwise seems like it was going pretty good, nice tidy site, good progress, quality work, etc?