BlownCorona
-
Posts
6,540 -
Joined
-
Last visited
-
Days Won
4
Content Type
Forums
Downloads
Events
Gallery
Everything posted by BlownCorona
-
 most of us do because we suspect the investment per fish would be best spent on more tools
 -
im very sure that you'll be able to find a suitable drop in replacement. a specialist brake shop should be able to help you with a catalouge, i did this with my '71 corona and matched up a datsun master that had dual circuits and an appropriate bore size for running no booster. If you end up remaking the mounts you could consider going with dual cylinders and a bias bar, i would quite like that on mine. my car only has a single circuit master cylinder so an upgrade to dual circuit is very much on the cards for me. Edit, i just saw you mentioned your locan brake guy had no luck, still, i would encourage you to browse catalogs for options
-
My rear diff had aparently been changed from the factory viva diff to a large torana diff, I bought wheel bearings and slave cylinders to suit torana and the fit correctly, but I can't confirm that they are original. Also I'm all but certain that these chevrons are not the same company as the British chevron sports cars. I think it's just a coincidence.
-
i haven't tried the new wheels yet, they are 4x100mm whereas the chevron is 4x4" (4x101.6). i think i will get some floating taper wheel buts but this may require a change in wheel stud as ive not had much luck finding 5/8ths floating nuts, it will also be smart to run hub centric spacers to make sure the wheels a center properly. Im toying with the idea of machining the front lip off the rear wheels and fitting deeper lips to fill out the rear fender instead, but they are very heavy and the stud holes are insanely close to the very large centre bore so i do prefer the idea of the wide steels, they look the part too. i dont have a build guide, but my car was more than likely bought assembled by the factory as it has both a chevron branded VIN plate and chassis number plate. The rest of the hard copy stuff i received was just photocopy's of various books from a library that were simply info related to the engine and carb tuning ect. certainly from a time before the internet where all of that stuff was much easier to get. ive been putting some effort into getting it ready for this summer so with some luck, it might see the light of day again shortly! i very much miss driving it.

-
No problem, message any quesions here and ill do my best. that way they will become searchable on google for any others looking, there are also people who know these cars/lotus reps better than I on here too. Congrats on the purchase of an epic car though, i love mine and im just about to head out to the shed to make a start on getting it ready for summer, for various reasons, ive missed out the last couple of summers and it feels like a crime to have a lotus 7 and just not use it. This might prompt me to actually make the deflectors properly as the ones i have now were just to test if it fixed the problem, they are definitely a massive improvement though! i just had a quick google because id never heard the term shadow 7 before, it absolutely blows my mind that Australia has replica Chevrons! im not surprised though, other than the big names, the chevron is one of the nicest lotus replicas ive seen.
-
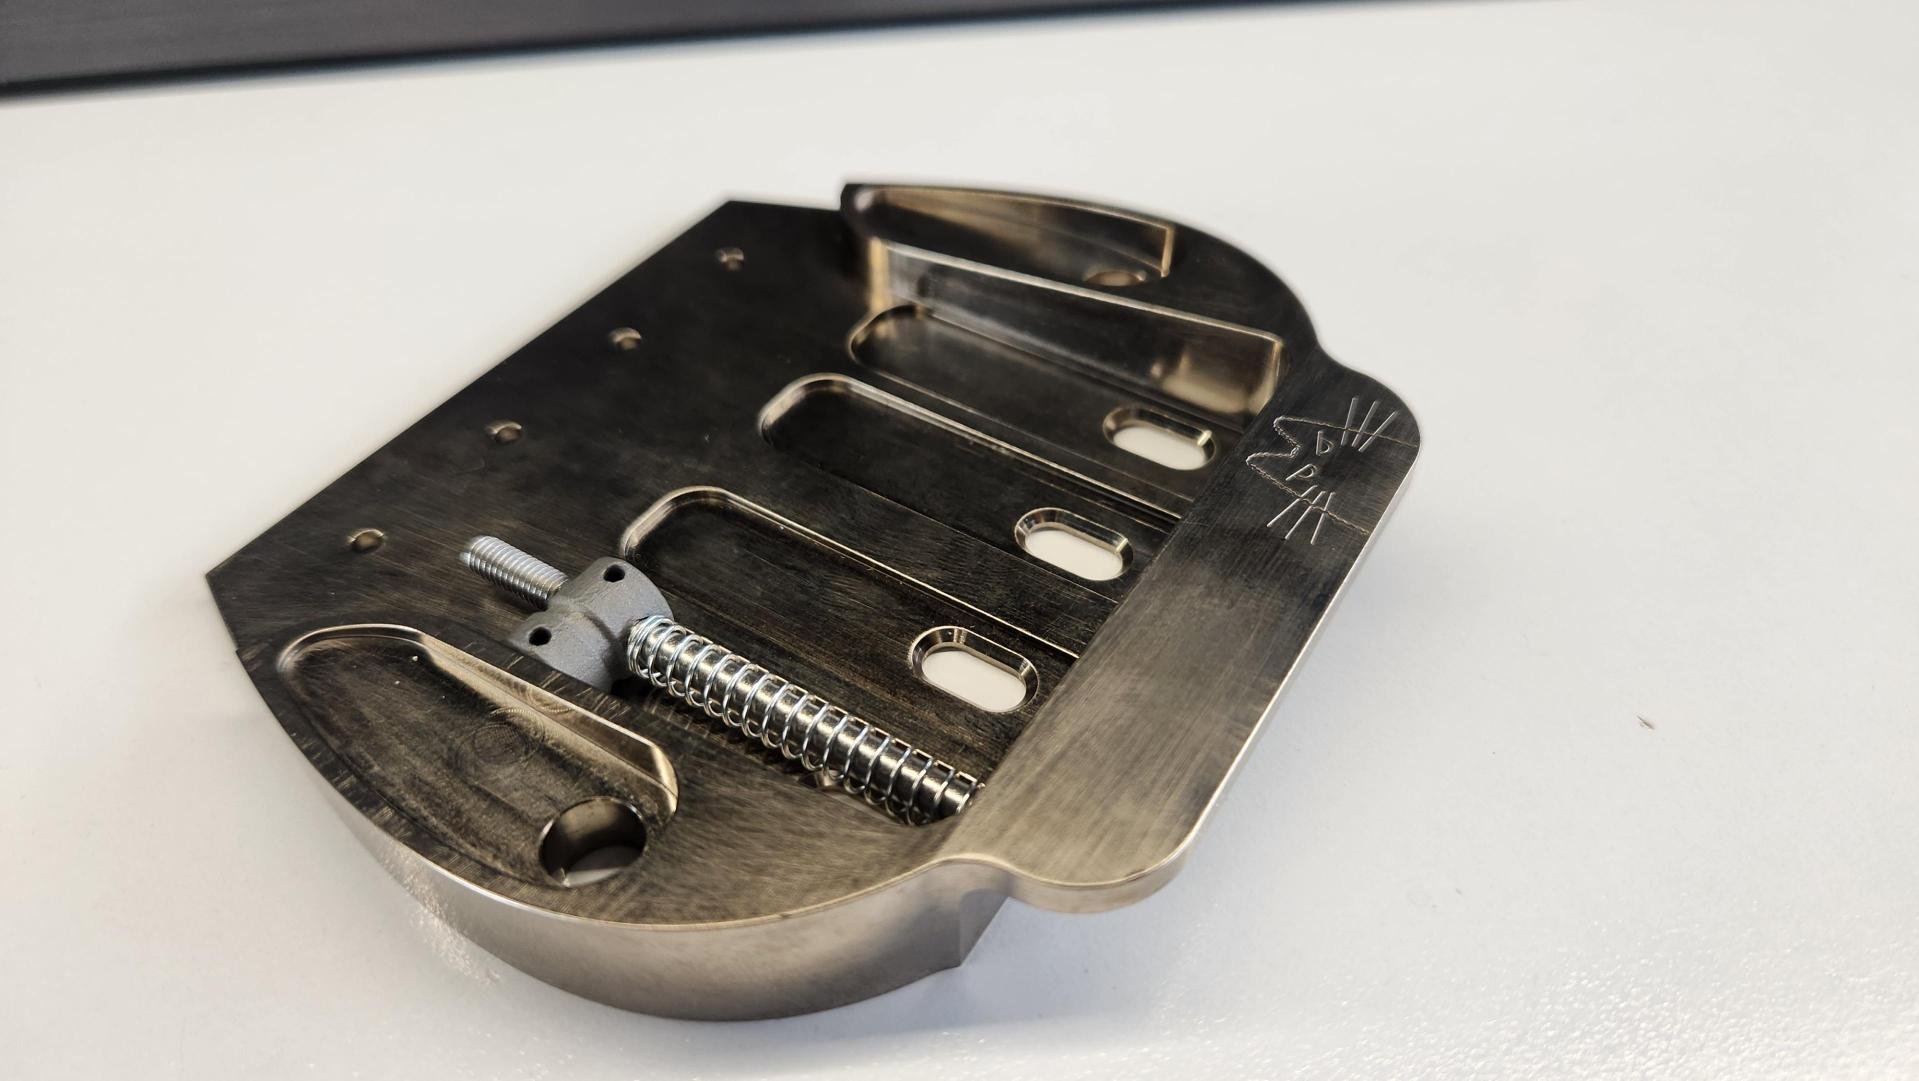
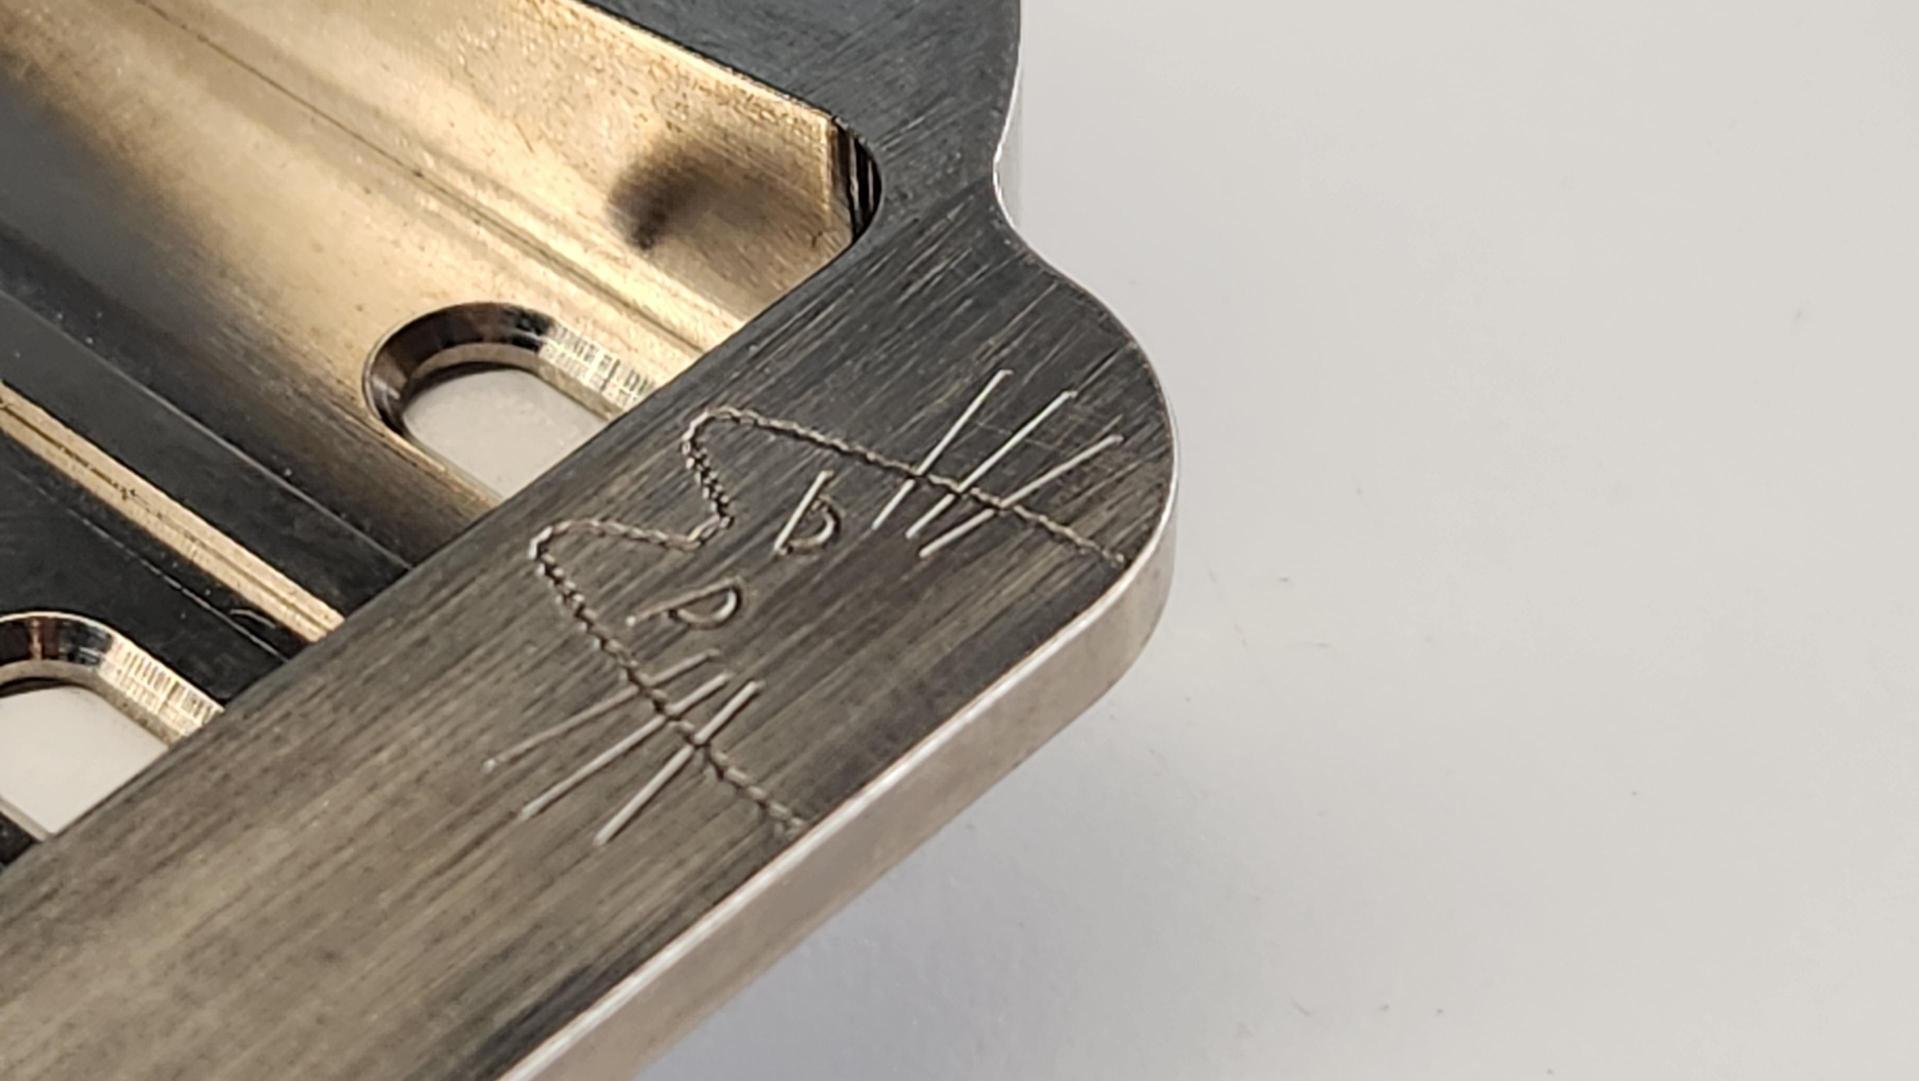
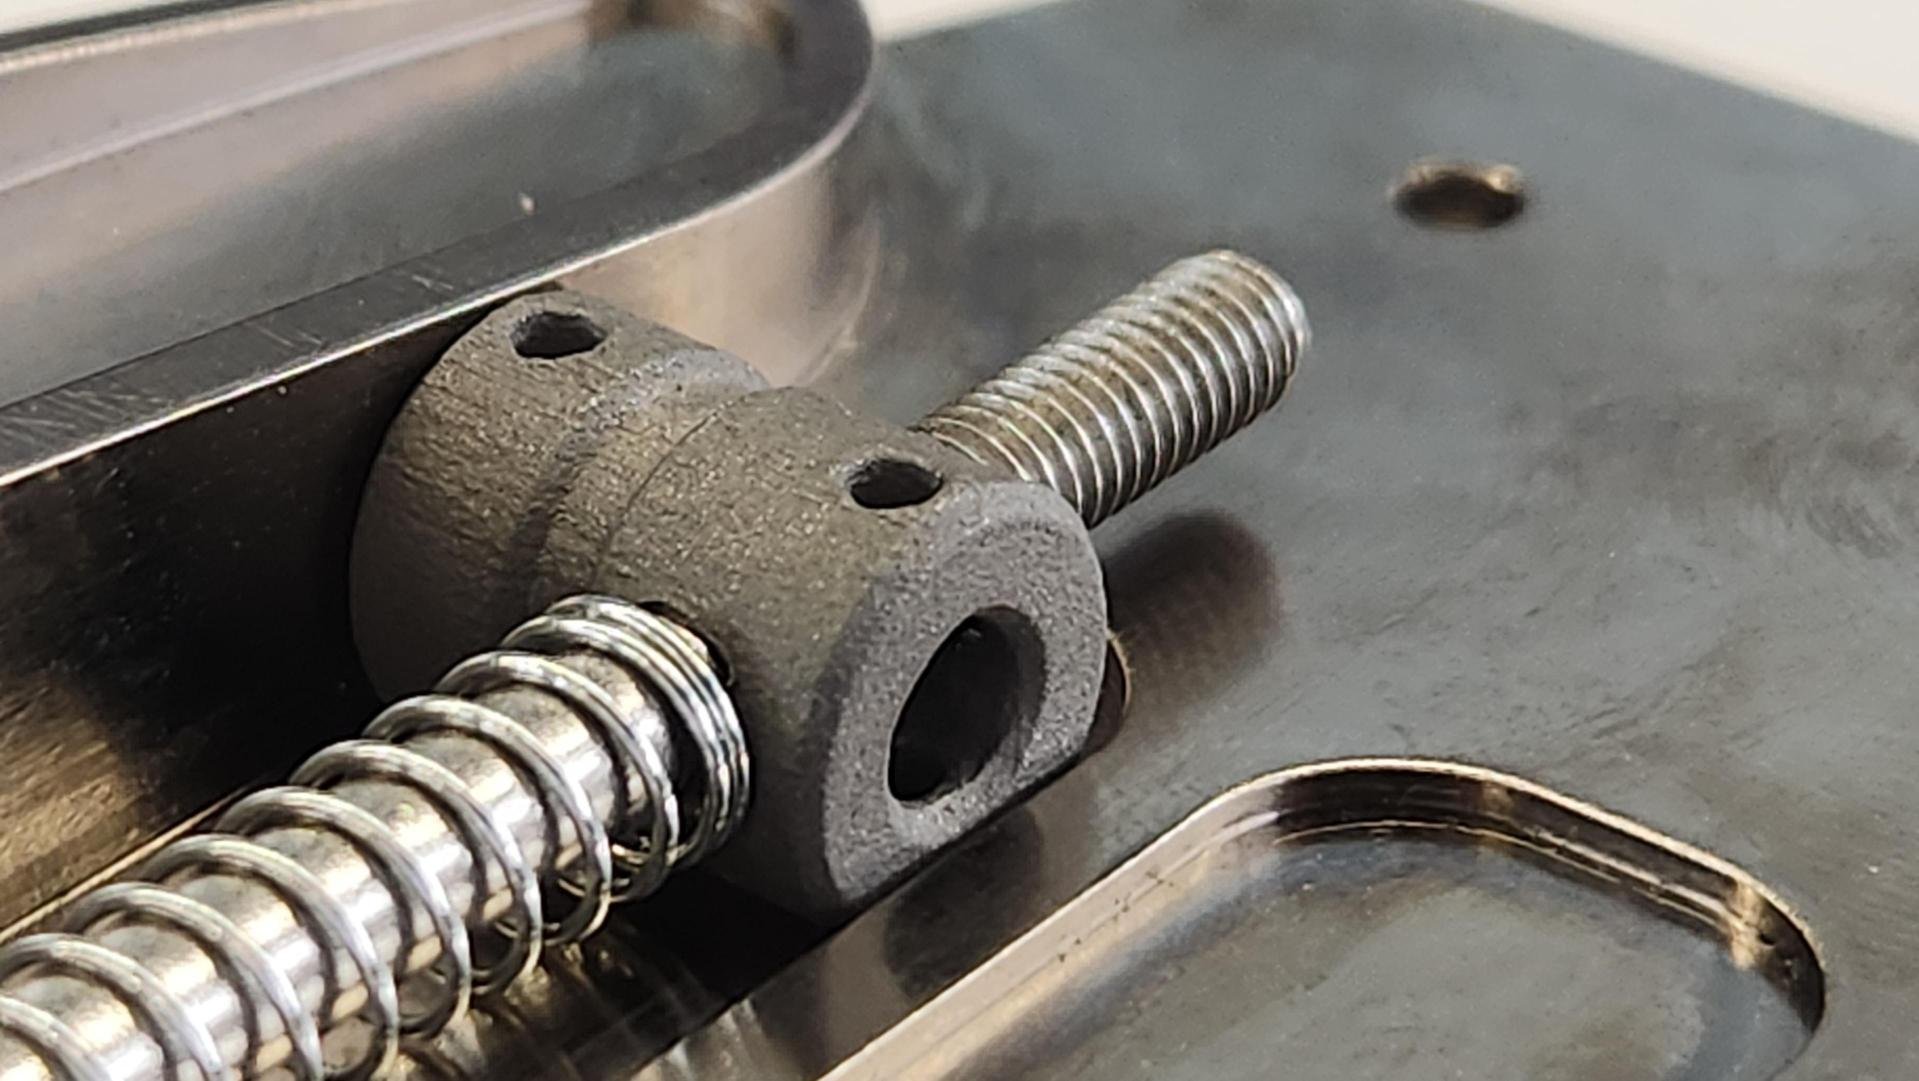
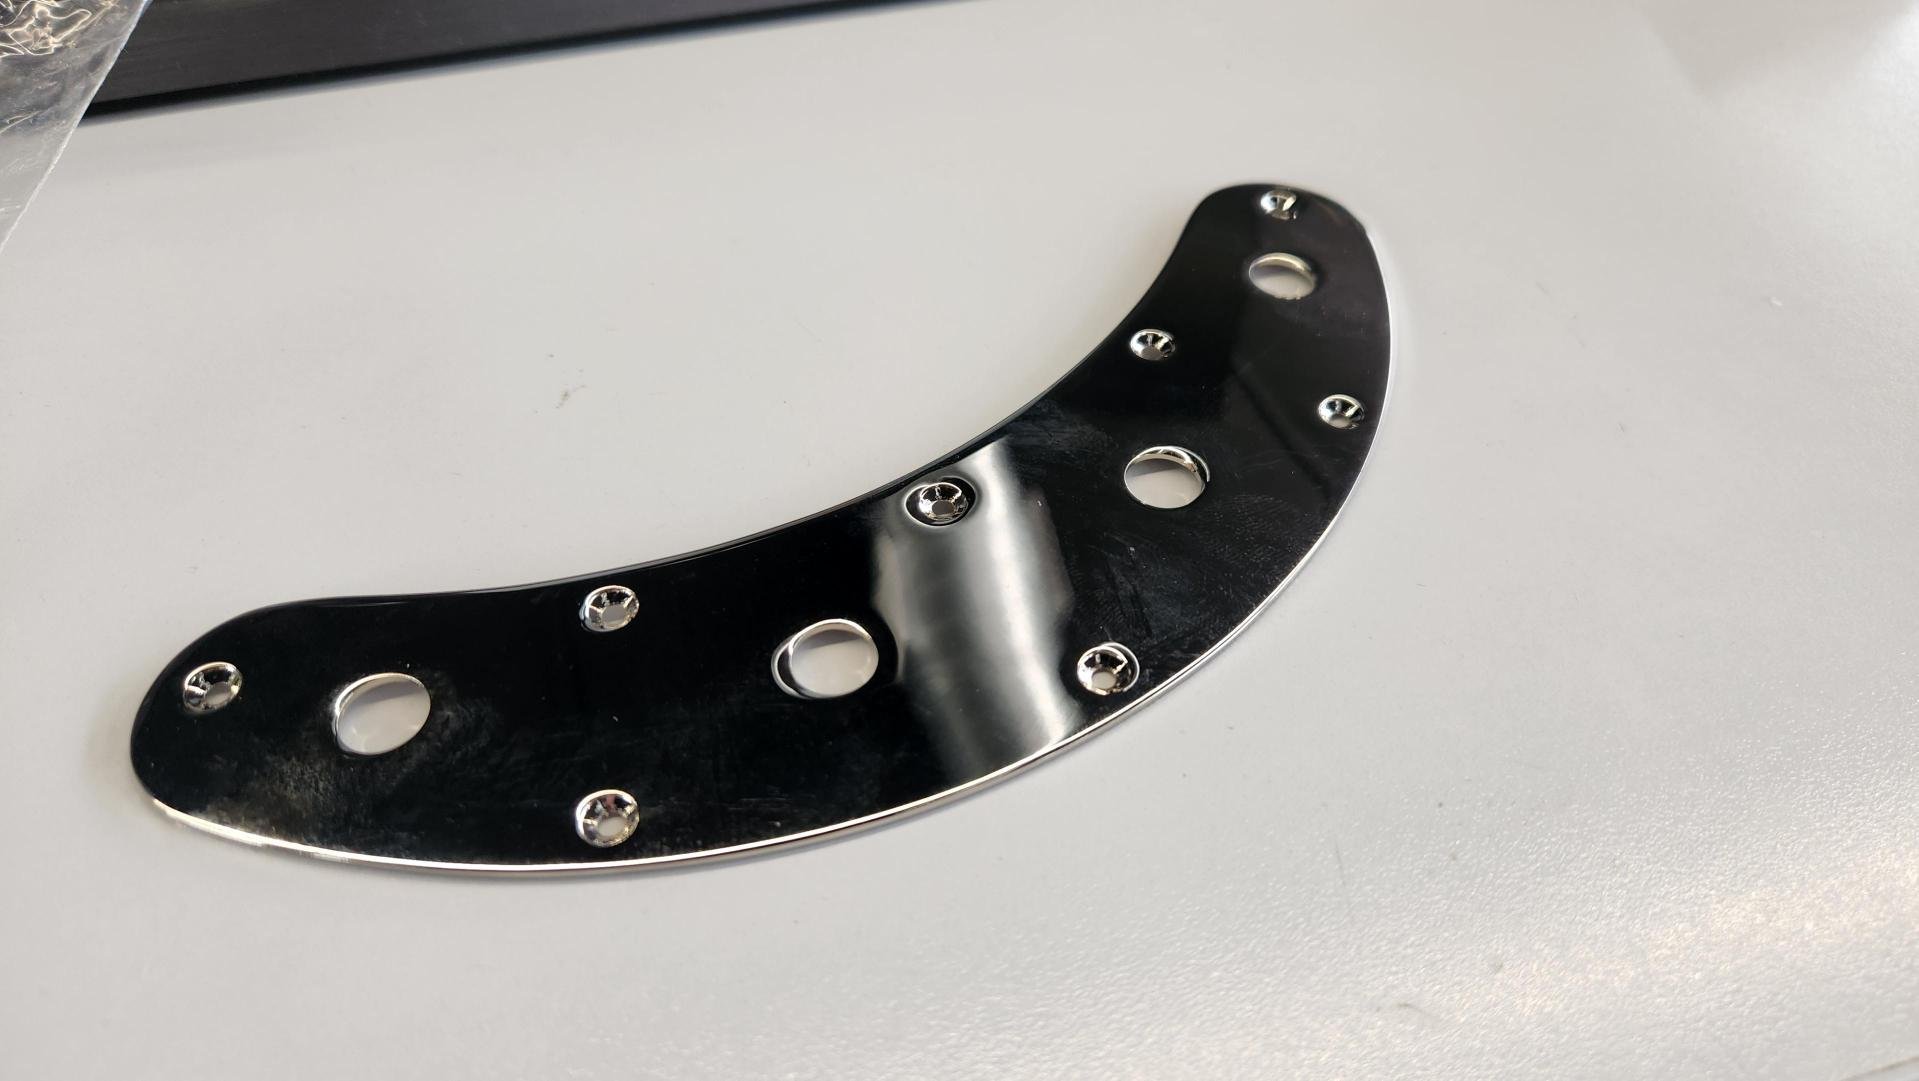
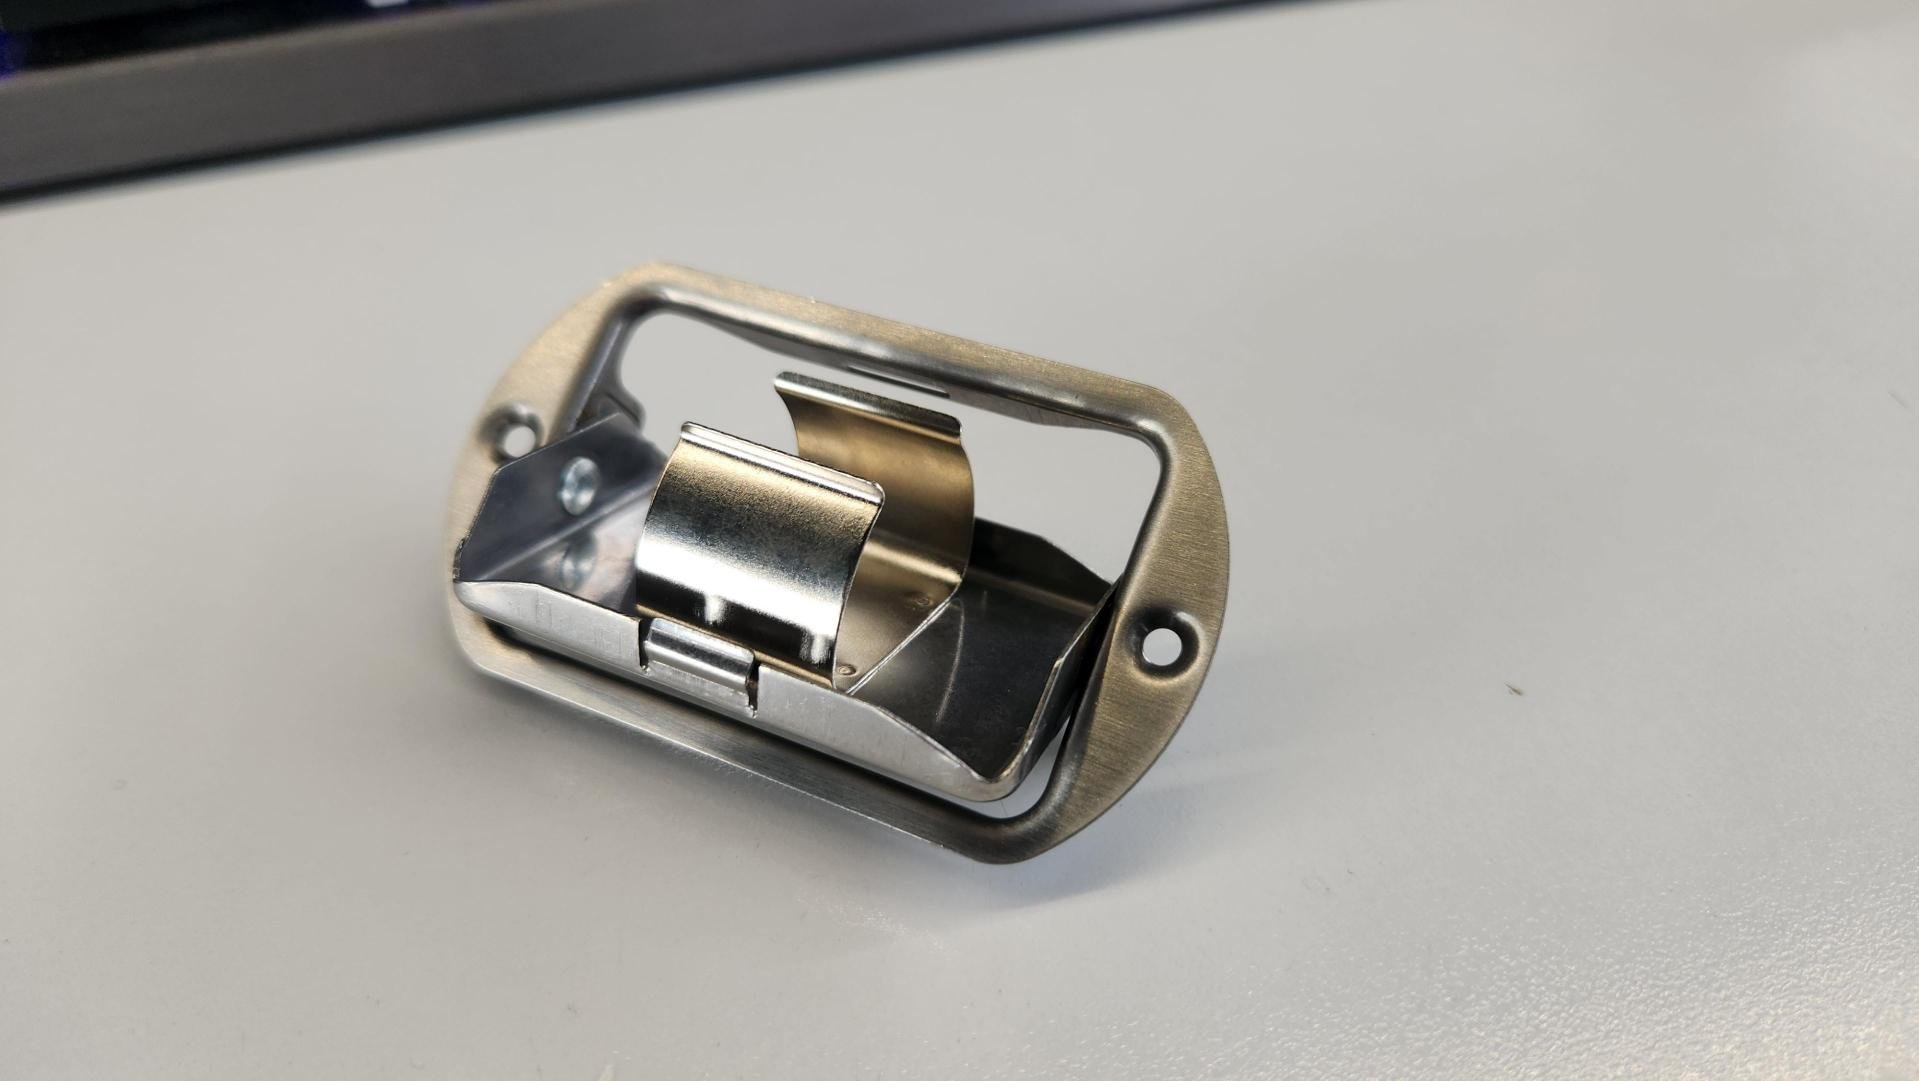
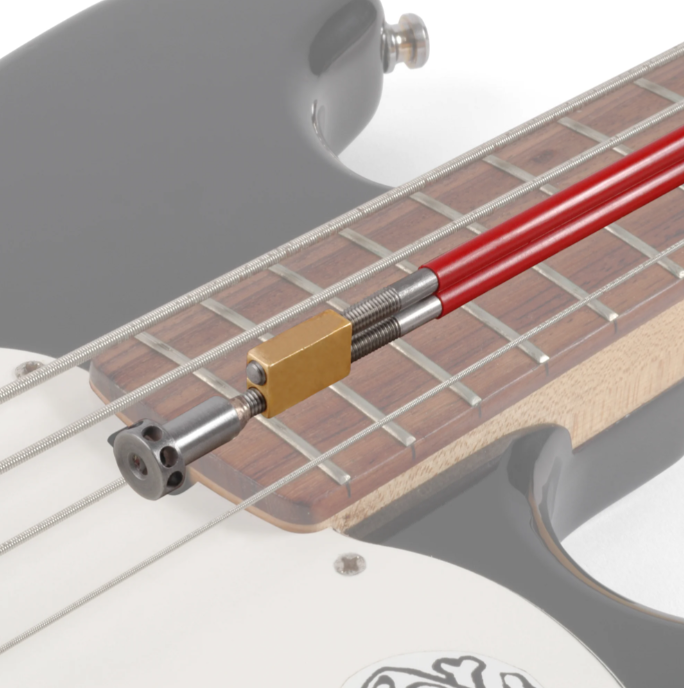
Third and final update for today, my custom one off bridge came in and boy am i stoked. this was the right choice and i love it. the surface finish wasn't super polished before plating (because i didnt pay for that) but its really only notible on these close up photos, im 95% sure i will leave it as supplied and once furnished will hardware and strings it will all just look pretty and remain a real center piece to the instrument. Gosh i love it. My 5 year old daughter who loves making noise with me (little digital drum kit) just about died from adoration of the cartoon. As you can see the adjustment screws are too long. this is just what i had on hand. i also need to clearance drill and tap all of the adjustment threads and source some M2.5 brass grub screws, probably from aliexpress. I think ill leave them "as cast/printed" on their own they look a bit rough but next to all the shiny the contrast really works. i also will paint the two recessed bolt areas with black wrinkle, which was always the plan but does happen to be where the machining marks are that i wouldn't have been happy to live with, win win. you can also see the four holes for the mute pad kit, which you can buy from Music Man... if you live in america... didnt notice that part before i included it. It remains to be seen wether i fork out for freight forwarding the kit or make my own.
- 35 replies
-
- 11
-

-

-
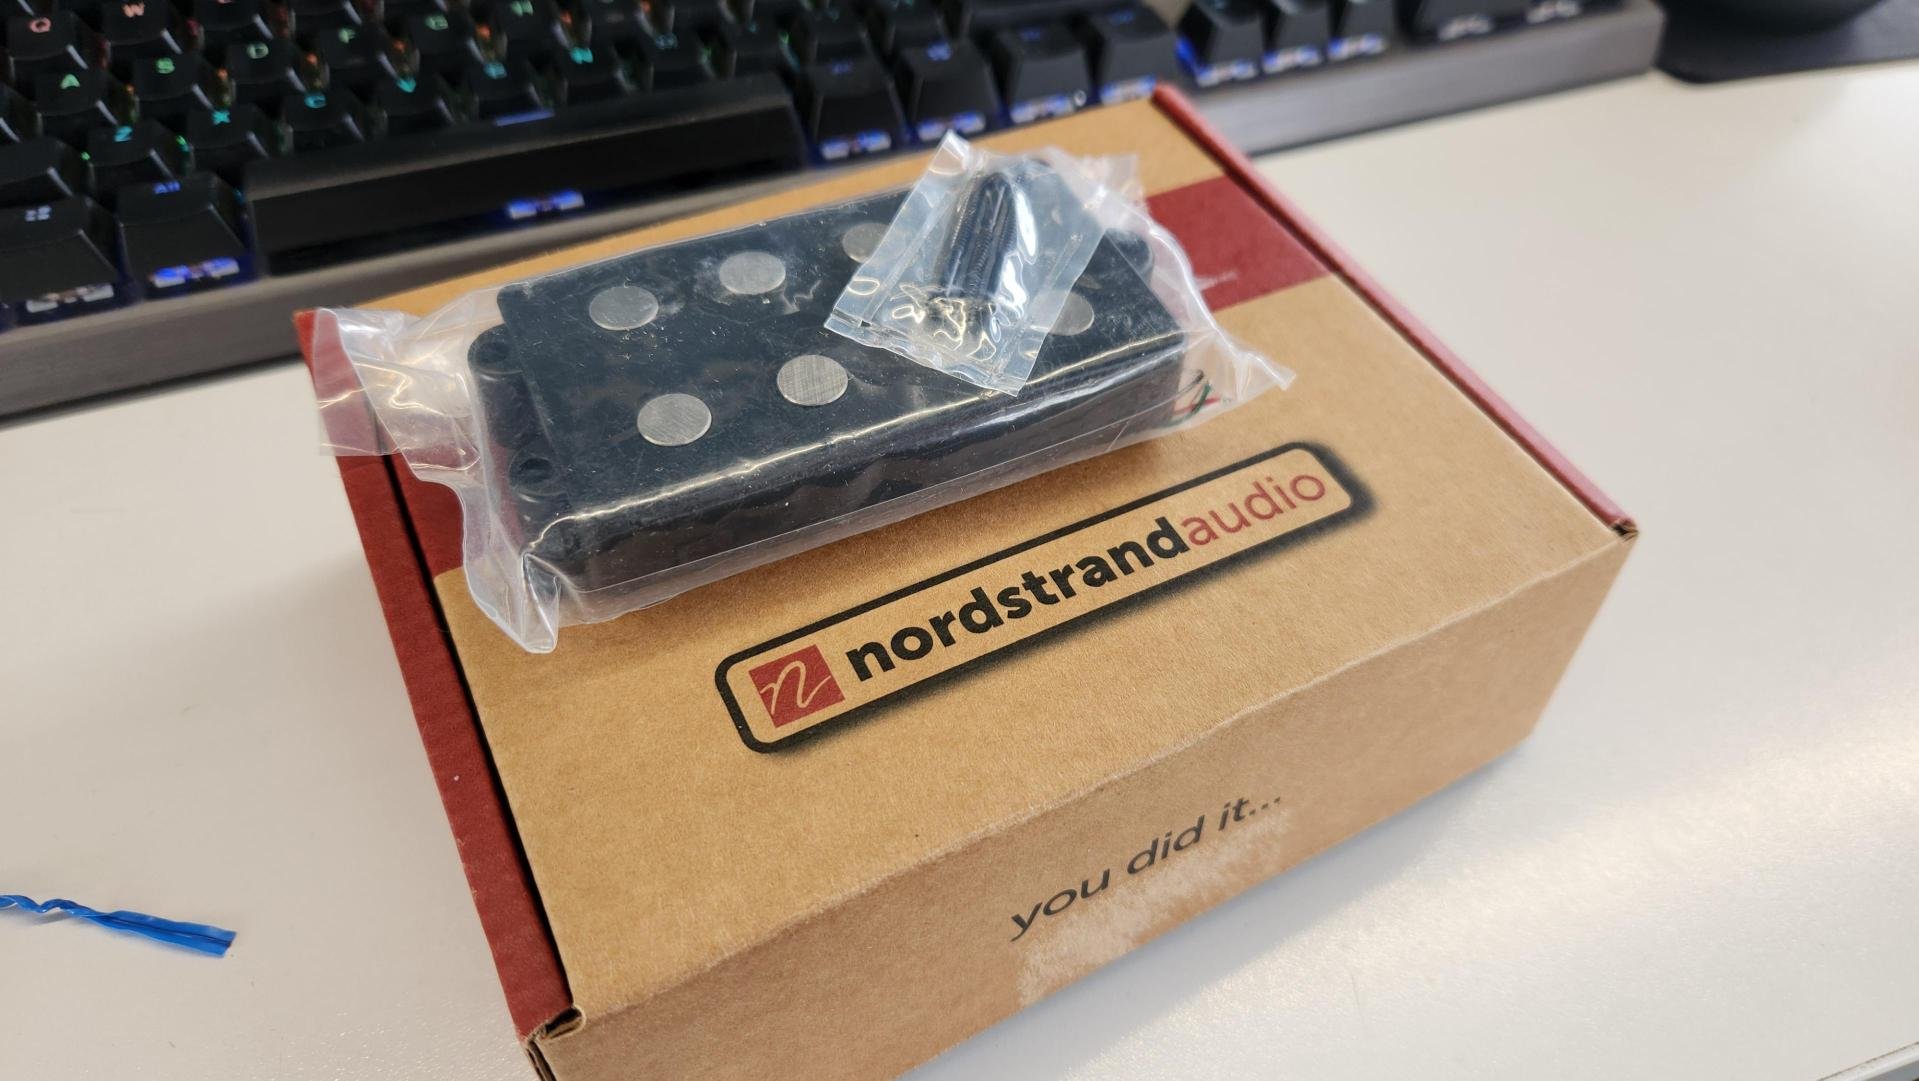
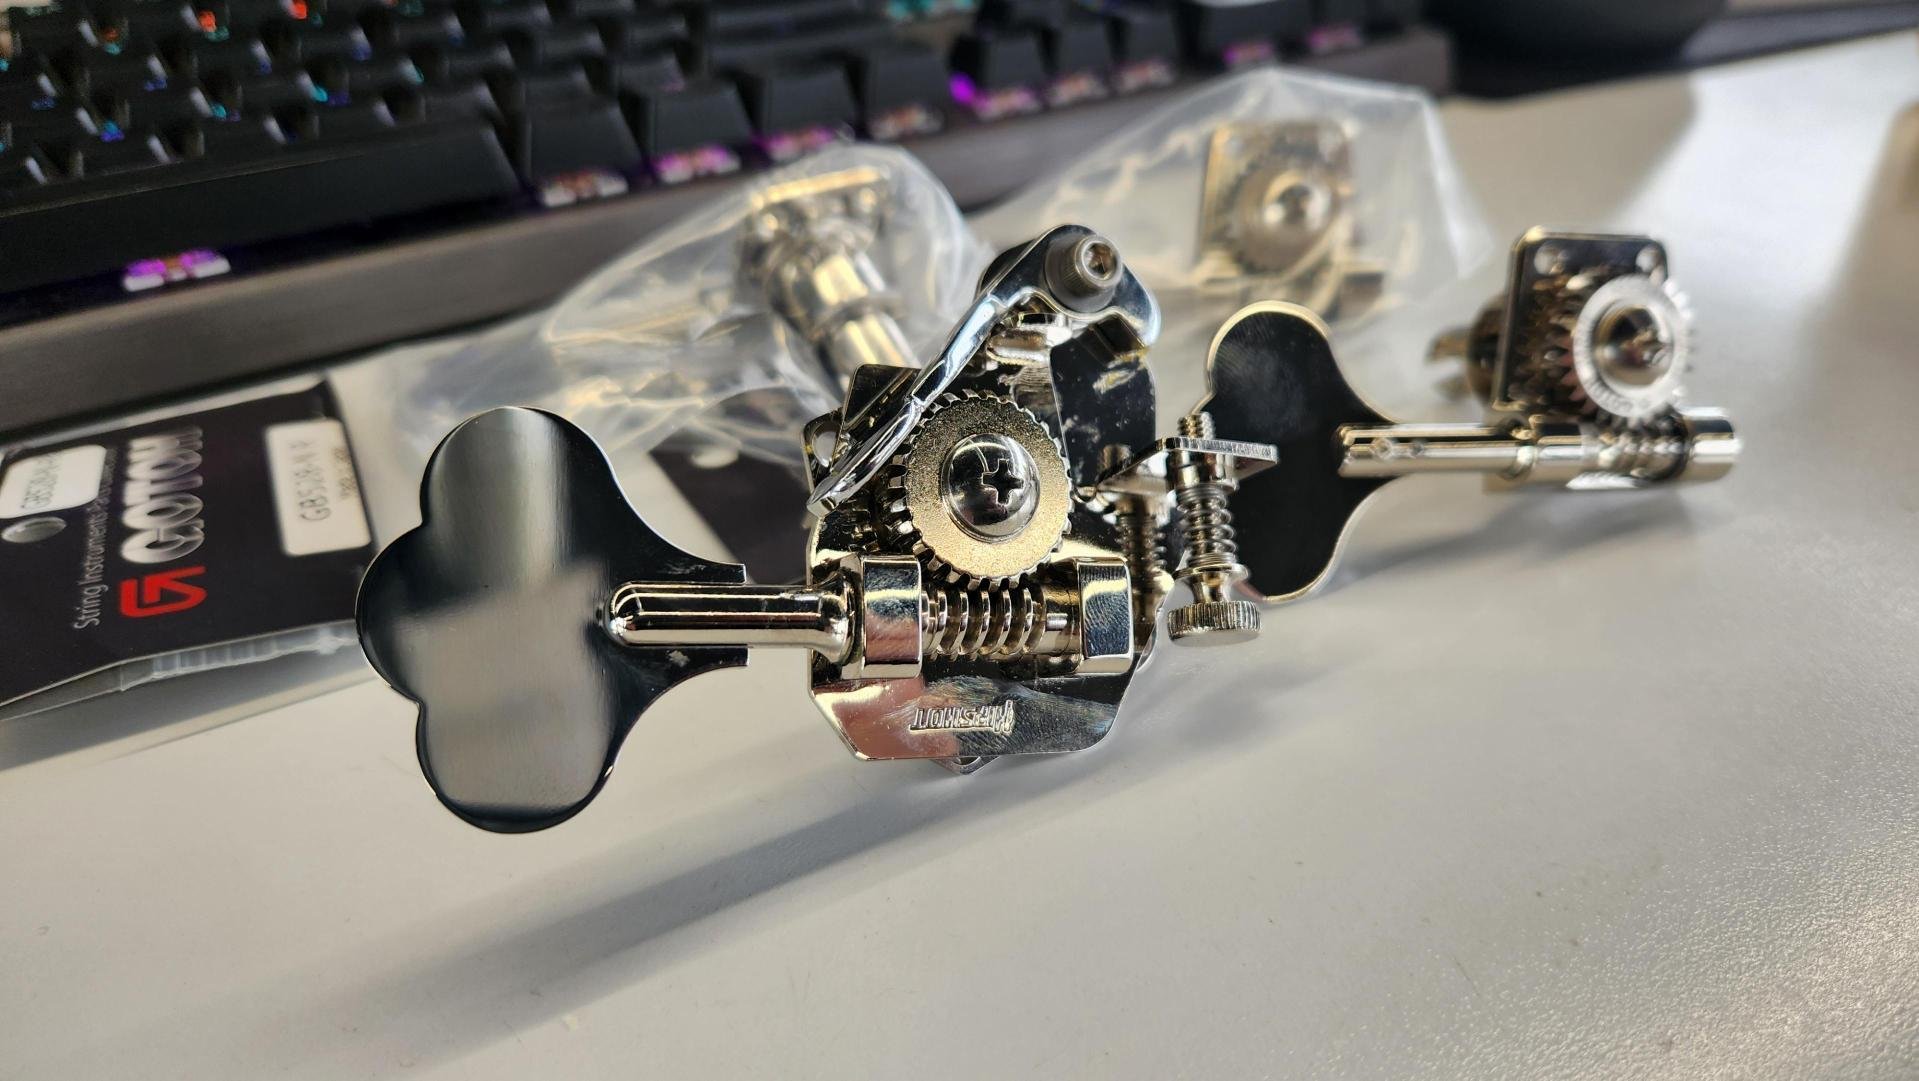
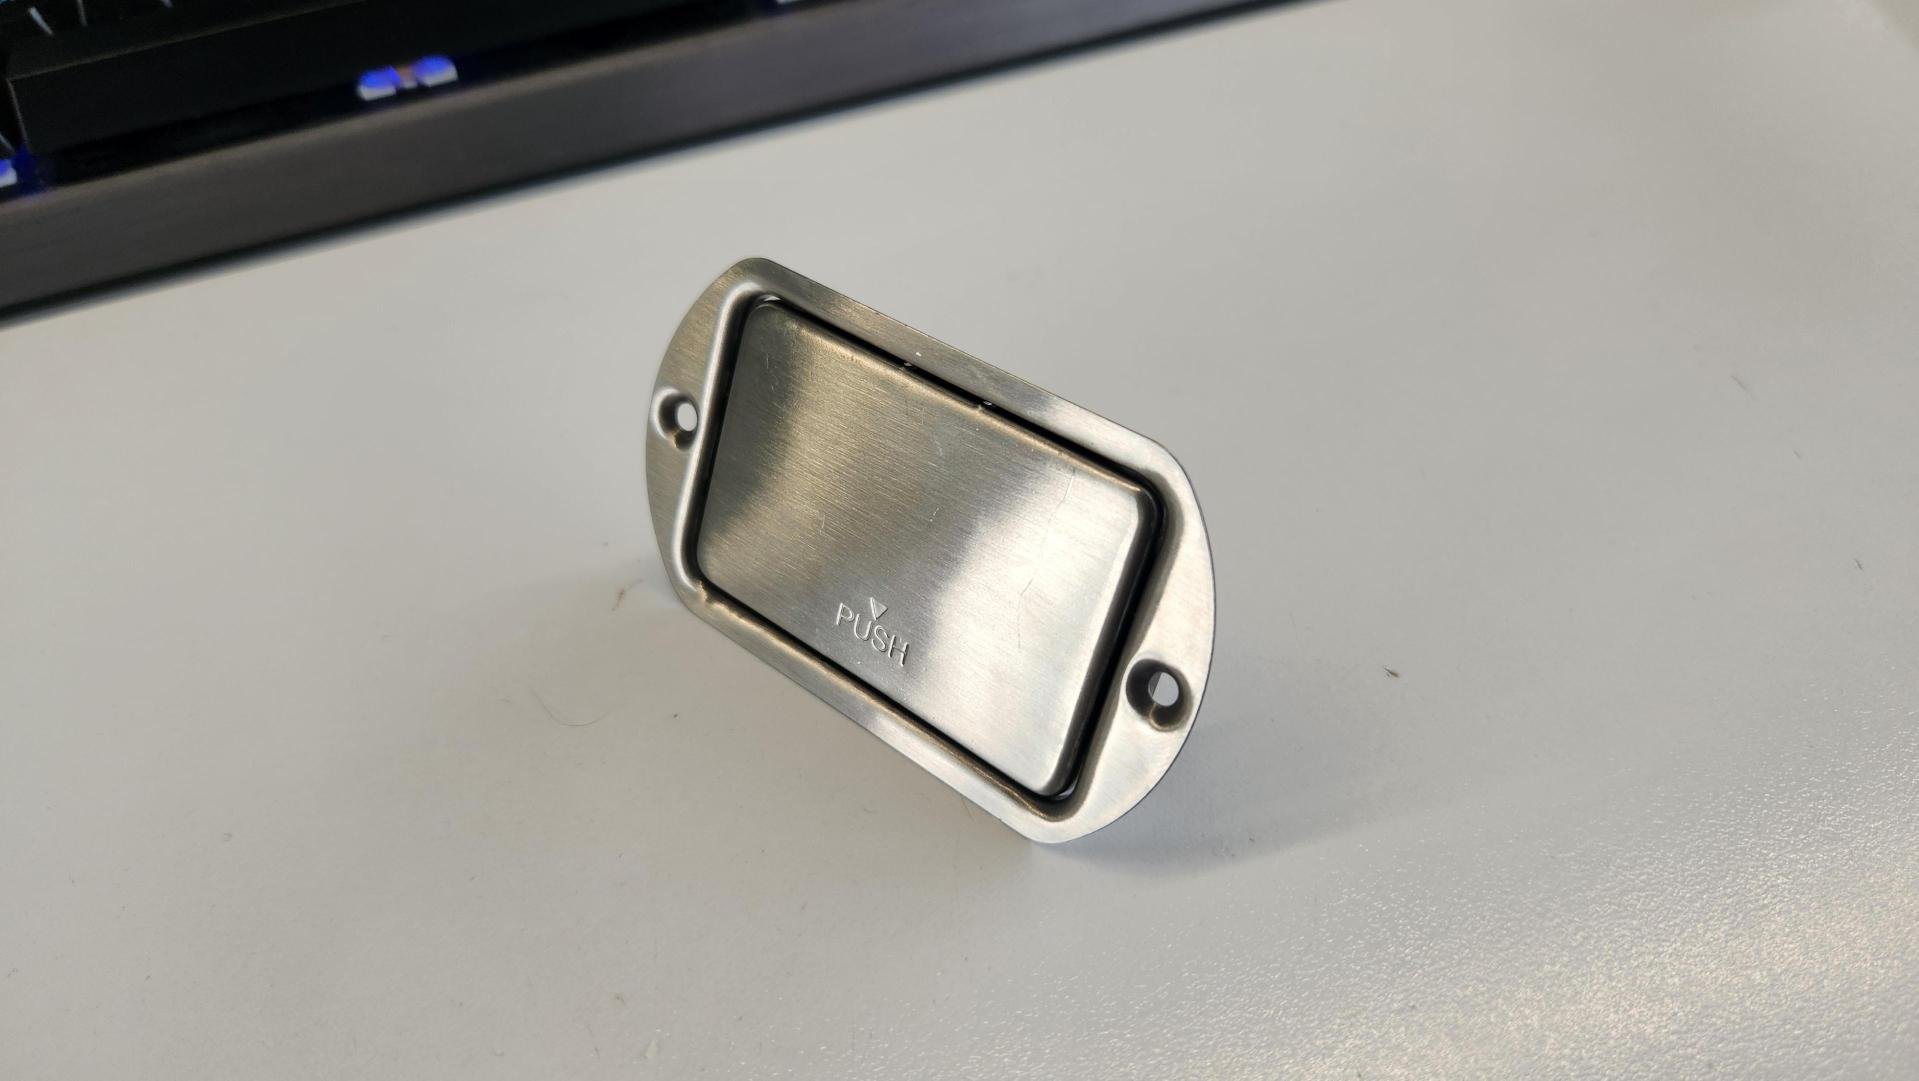
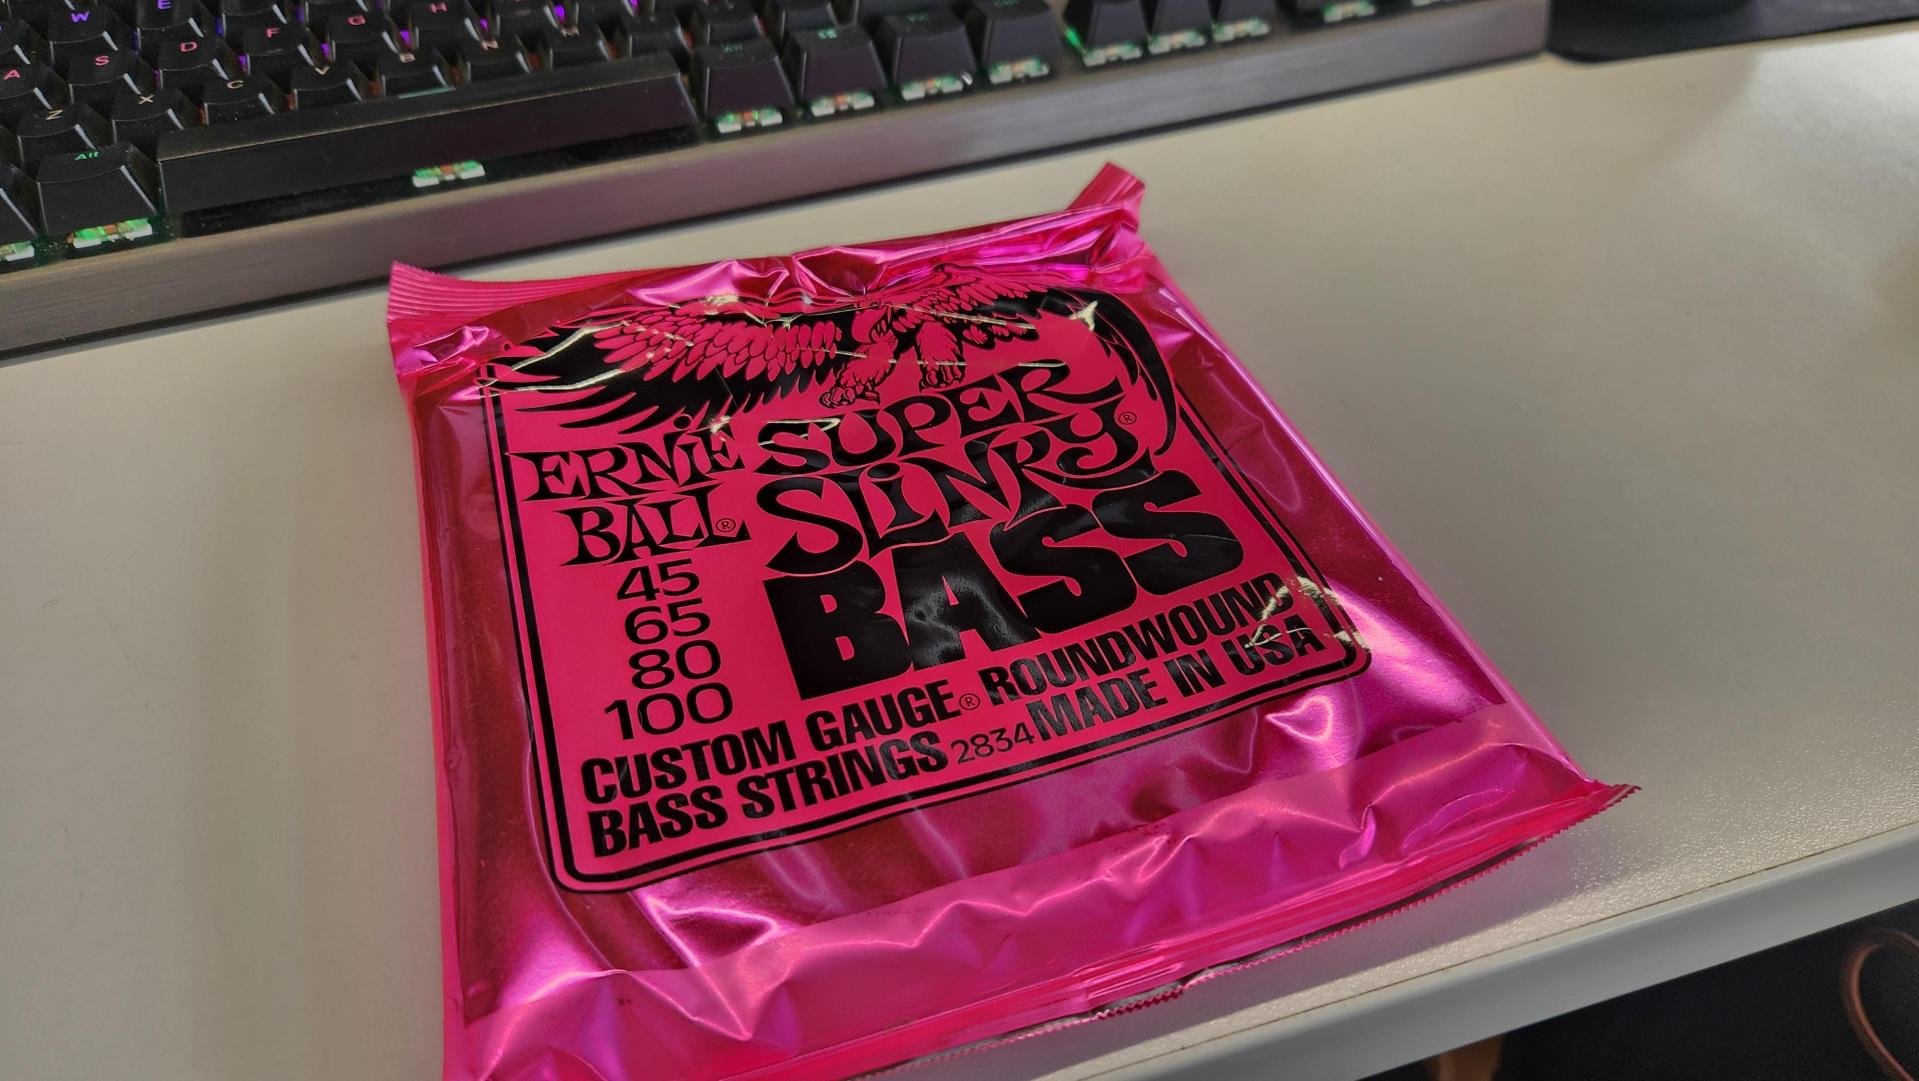
And heres a long and expensive list of things ive bought. however the amount of money ive spent is still less than buying the cheapest good quality instrument from a shop and this (should) be of far far higher quality. the most important first. Nordstand MM4.2 Pickup. This is one of two options i found for recreating the original sound faithfully (in conjunction with the correct preamp - more on that in a later episode) The the tuning machines. Gotoh Res-o-lites x3 and one Hipshot drop D tuner for the e string. this is unnecessary but i really wanted one. it allows you to pretune the E string to D and lets to flick a lever back and forth for the two tunings. just cool. Gotohs over Hipshots for the other 3 because they were substantially cheaper and look the same, still really high quality. StewMac truss rod Nickel Plated control cover Cool little stainless steel preamp battery holder. i dont want any plastic. and a set of standard but correct spec strings
- 35 replies
-
- 10
-
-
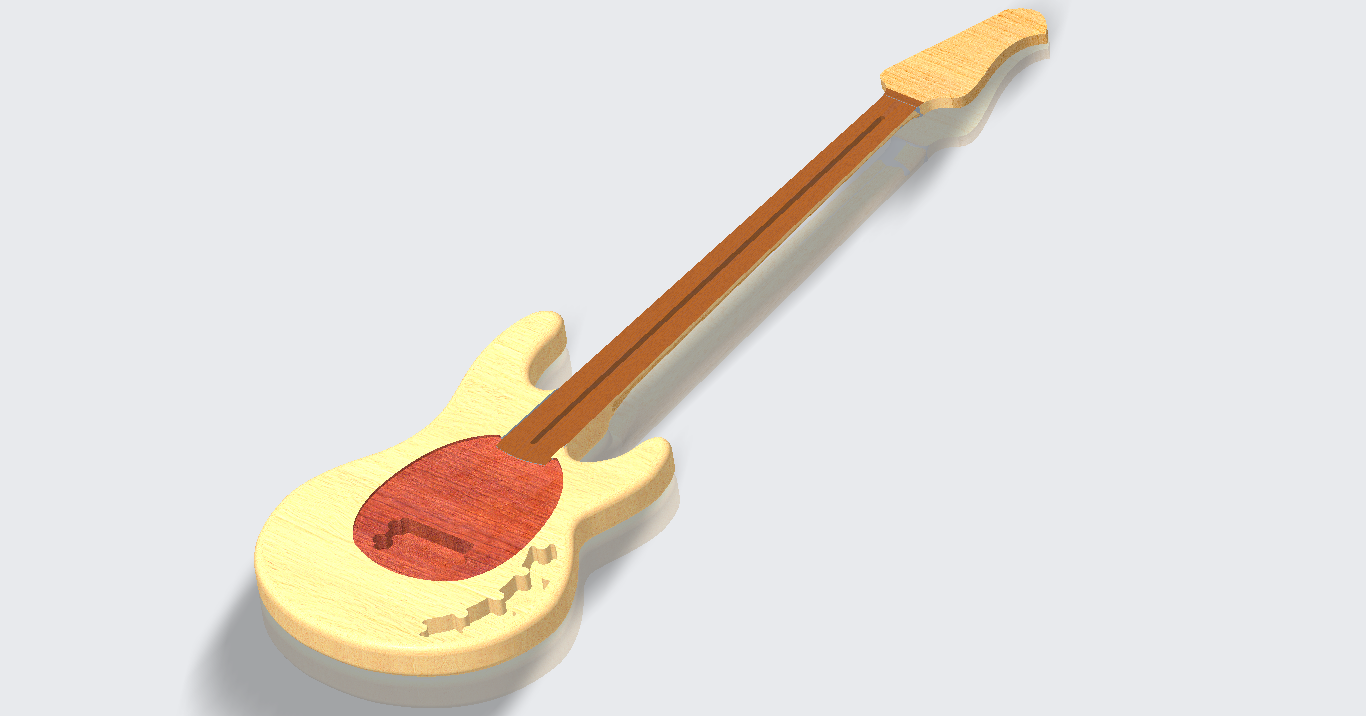
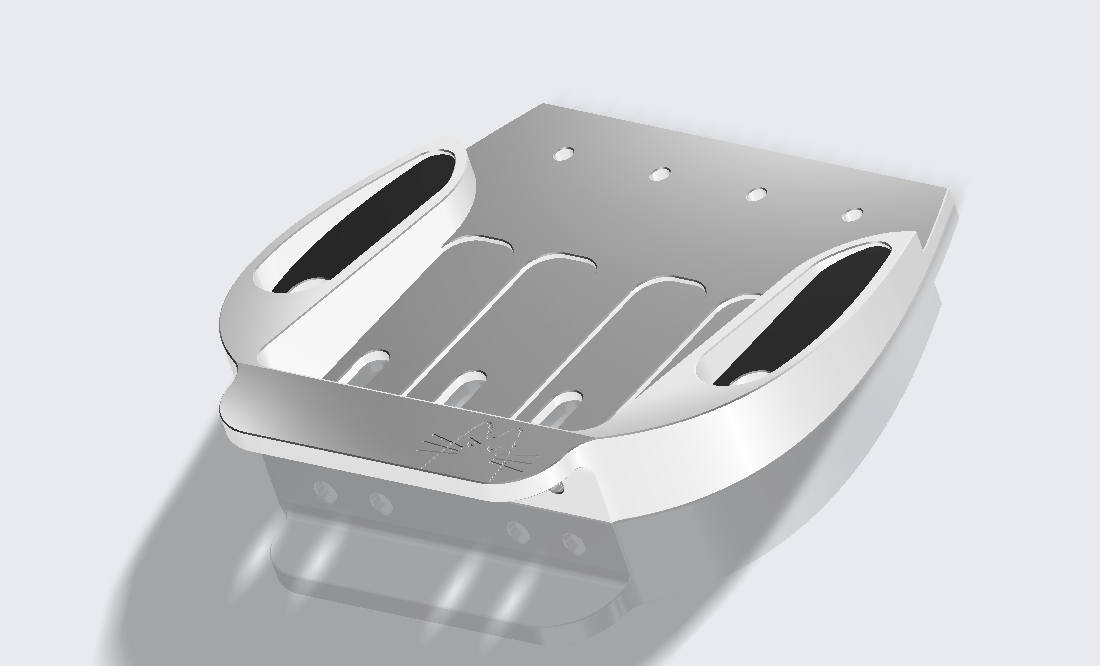
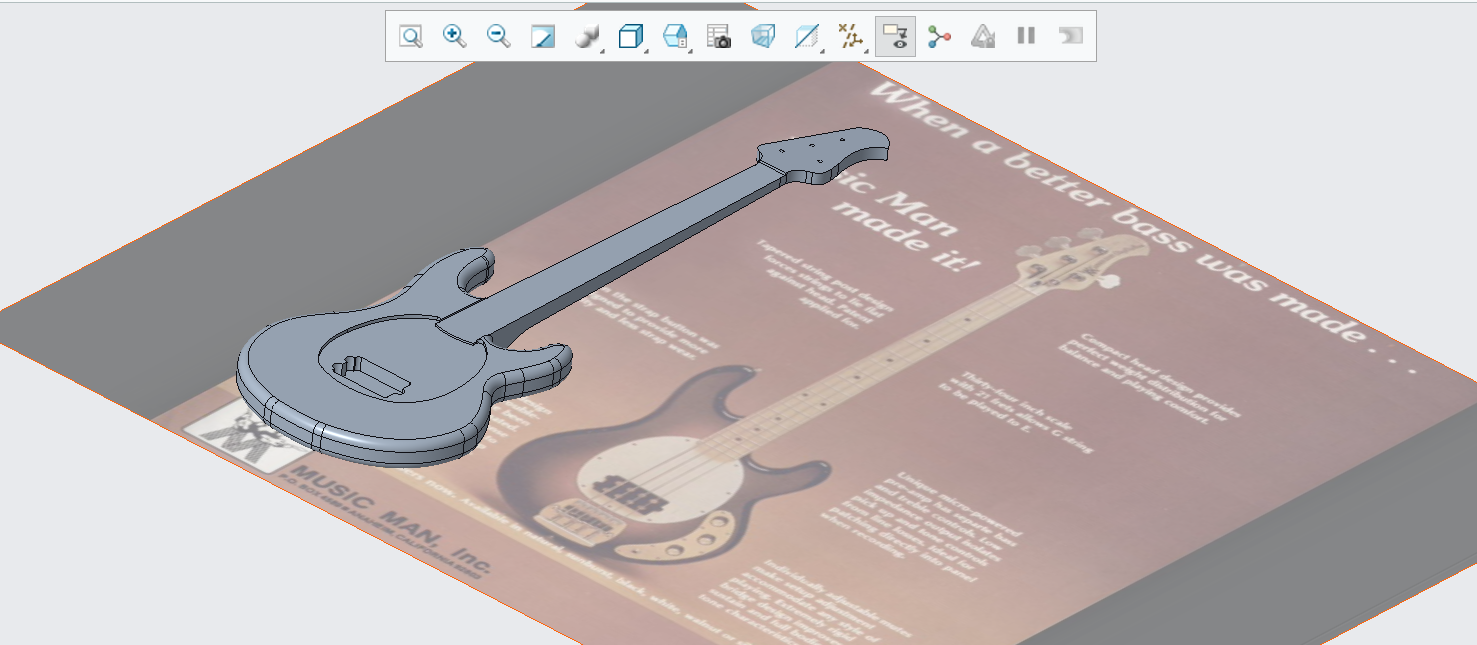
I have been doing quite a bit of work (and purchasing) on this project. Firstly i finalised the 3d model, as seen above. threw some vaguely right colors over it but you'll see the hardwood blank looks quite different. next, i needed a bridge, the part which anchors the strings and affords various adjustments for string intonation. The problem is that i never really liked the orginal StingRay bridge. they were just a pressed steel thing and looks pretty plain, however i felt the overall footprint was important to the shape. i also really wanted something with the mute pads. I couldn't find anything that i liked until i came across this item from Sandberg, however they only sold within the EU and i couldn't find an NZ distributor. So.. i gave up and gave into my desire to just design my own. i took a leaf out of @Roman book and sent the design away for CNC machining from aluminium and nickel plating. i also had the saddles 3d printed from stainless steel This also presented the opportunity to include a little hand drawn sketch of my cat who actively loves listening to the bass. if i stop, she will demand i continue. She is very fluffy which leads to her looking perpetually angry, a great little logo i thought.
-
7.5 +4
-
i still have the wheels from my old crown, but only 16". Epsilon Raguna ZZYZX. set of 5 but noone wants to give me what i think they are worth (surely 1500 at least id have thought?) so they will probably live in my shed forever lol
-
https://www.bunnings.co.nz/citristrip-paint-stripper-gel-946ml_p0130269 Dad gave me a bottle of this stuff when i was paint stripping 100 years of paint off my lathe. i was dubious that it would do anything but was shocked with how good it worked. he used to use it for stripping paint off brass/chrome window and door hardware when we was still a carpenter. i would certainly recommend a test spot to ensure it doesnt fuck up wood, but holy hell it worked well for me and it doesnt stink or burn like tergo did, though i did still use PPE. Edit - some of those reviews dont reckon its good for wood. though i bet the one person who said it turned her wood black was probably using it on something like oak and isnt aware that you can ebonise oak with acidic products. (looks fucking cool when done properly and netts a jet black wood, probably looks like shit when its done with sporadic paint stripper)
-
yeah ive gone down the youtube hole of 3d printed guitars and basses, some people have real solid success. I also enjoyed the solid bronze bass which the guy smelted himself. it weighed an ungodly amount and he couldnt play a full song without it cutting the circulation to his leg off. He never put it on a strap because he was terrified of the strap breaking and it crushing his foot. hilarious. i 3d printed my model for fun and to have a bit of a real world look as sometimes cad models on a flat screen can look a bit weird. It now lives on my desk as decoration. A test cut with some MDF and then ill be cutting the hardwood. truss rod from Stewmac arrived today aswell, and 90% of the hardware has been selected, purchased and is sitting in a freight forward depot in the states to consolidate freight to nz/make use of free US shipping.
-
also, if you feel like selling the sachs far far below market value, let me know. that rotary trutest guy buys them all for heaps
-
I'll work that out, I need to anyway, and let you know. Its just a standard 34" scale, but I need to find out if being through neck changes anything.
-
There wasn't much left, but I've saved it with a mind to turn it into control knobs, perhaps laminated with metal.
-
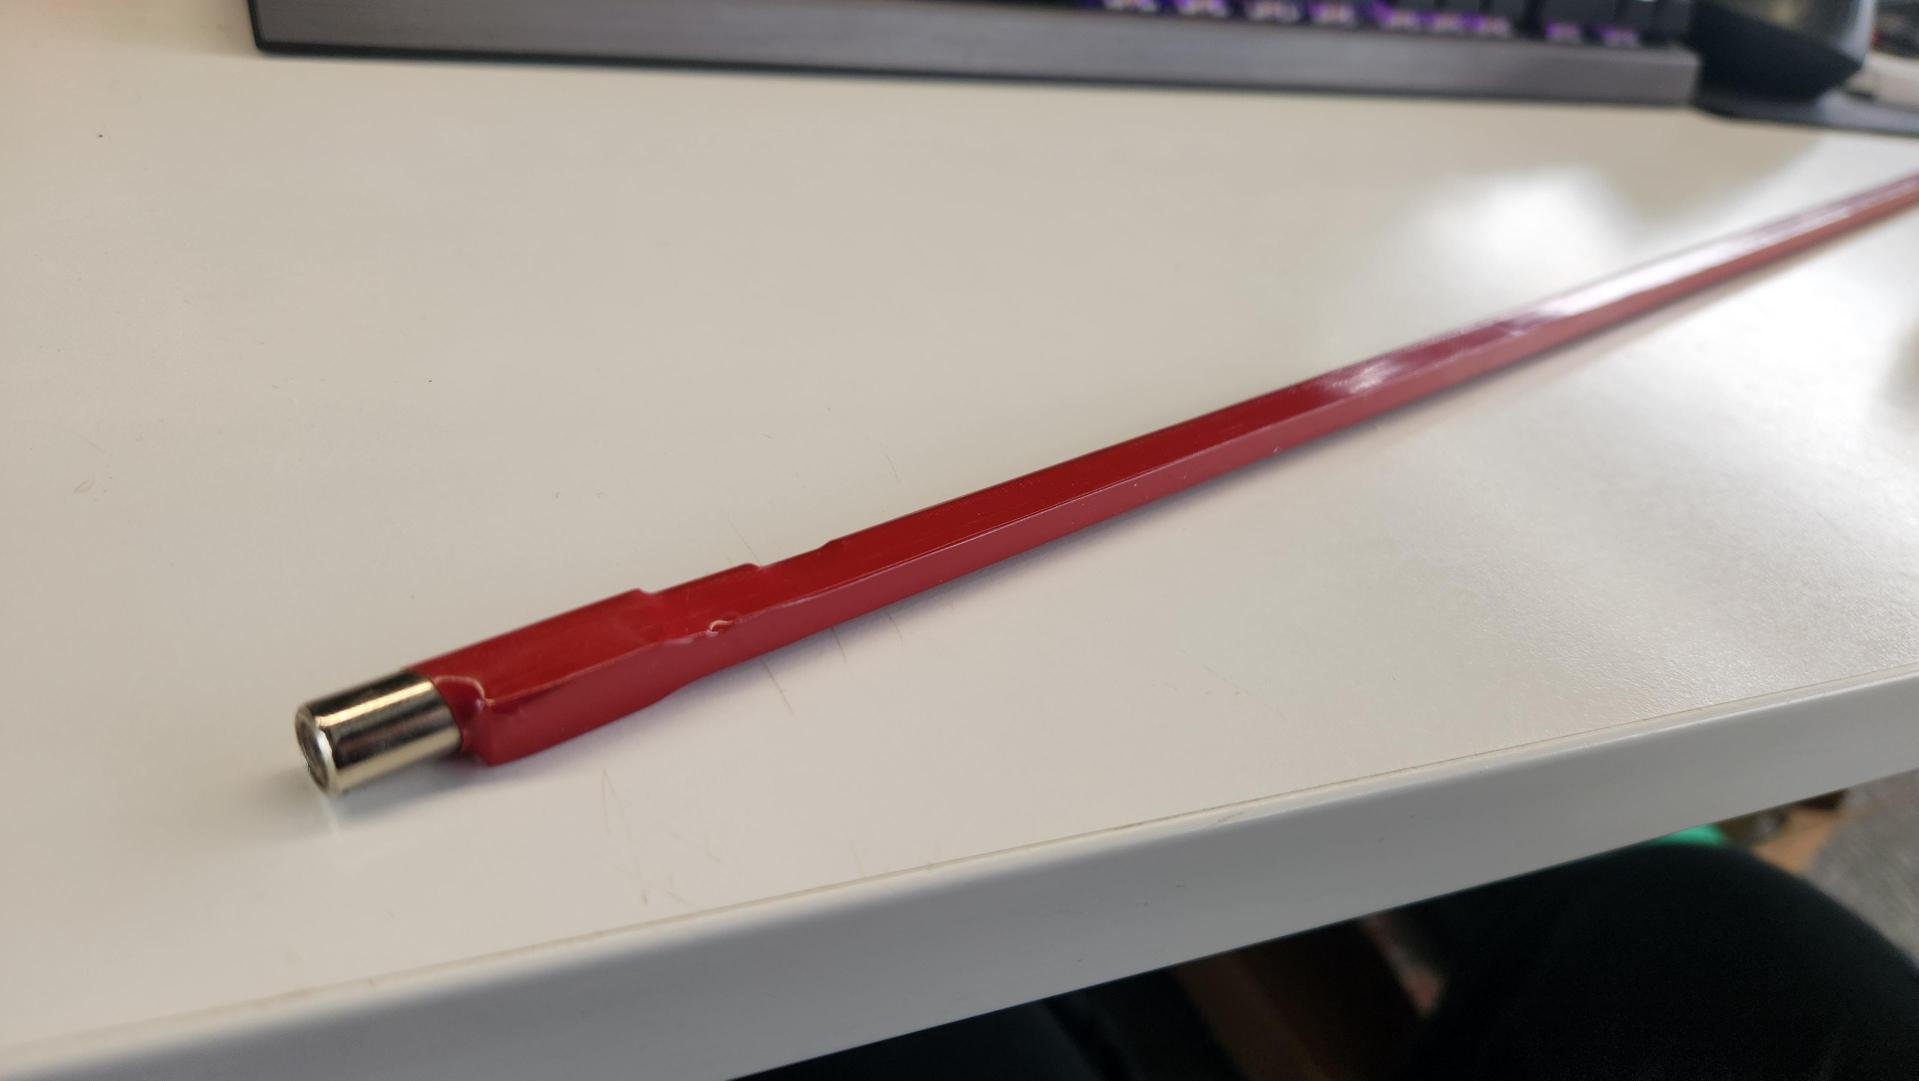
i certainly will, far too much risk to not have any way to adjust the neck, doubly so when that neck doesnt come off. though if anything goes horibly wrong i can still route out a neck pocket and convert it to a bolt on. if you have any other recommendations for quality truss robs im all ears, otherwise im sort of thinking about just making one in the same style as the stewmac ones. for all those unaware of what we are talking about here, in the neck of most guitars and basses exists a component call a truss rod. this component is an adjustable method of counteracting the forces from the strings (in the case of a bass, it can be a metric fuckton of tension) and this force arches the neck forwards. To a certain degree we want the neck to have an arch, otherwise when pressing down on a fret, the string would touch multiple points but if the strings pulled too much of an arch, it would be unplayable or it might even snap. the truss rod applies an adjustable force in the opposite direction by way of two rods, one fixed length and the other adjustable, causing the assembly to bow and allowing a balance to be achieved. there are a few different setups but they usually all follow this general idea.
-
I do, but they are out off stock for their bass rods. the truss rod is really the next thing i need to order, despite preferring to look at shiny tuners and bridges.
-
BlownCoronas 1971 Toyota Corona
BlownCorona replied to BlownCorona's topic in Projects and Build Ups
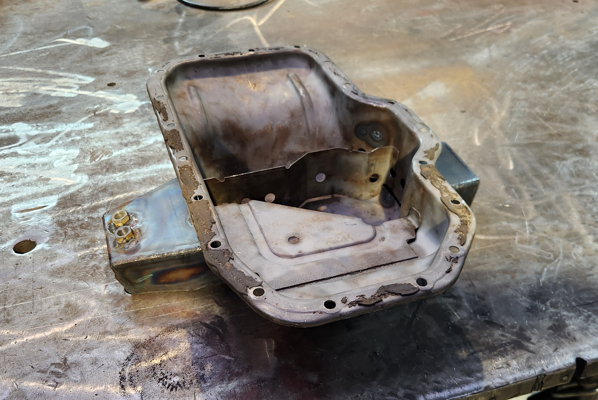
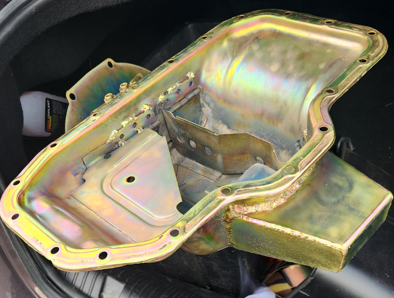
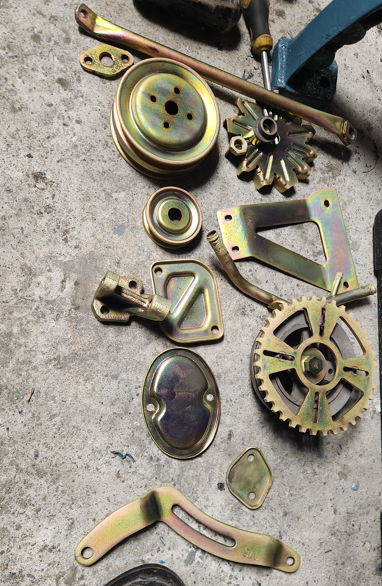
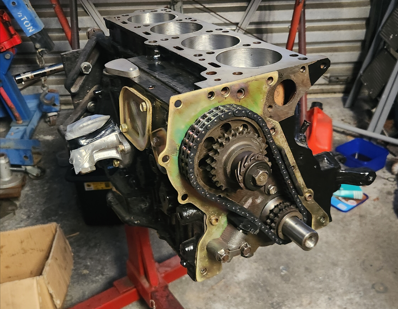
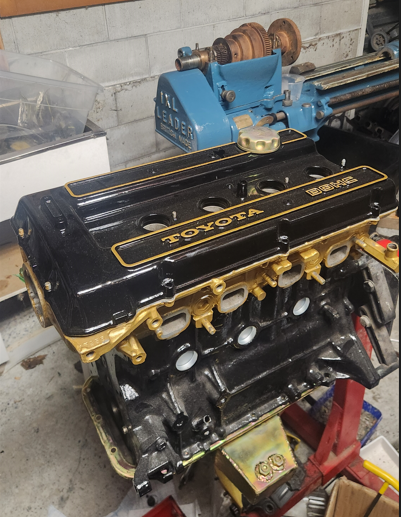
The few remaining jobs to do before assembly have been one. Machined down the head bolt lands, this allows the use of starion ARP head bolts. Added wings and trap door baffles to the sump. this is mostly because the big yamaha head and associated oil pump runs the risk of starving the bottom end, and as the sump was the same for single cam and twin cams, there isnt very much oil onboard. this should add somewhere near an extra liter, plus i always loved the hotrod gold zinc milodon oil pans.. So i gathered up all the hardware and everything else steel that wasnt an actual engine part and sent them in for gold zinc plating. i always loved the gold rainbow irridencent look of the plating. Not pictured - two big bags of smalls and hardware, oil filler cap & front and rear sandwich plates. This weekend i started assembly. Spent a bunch of time filing the piston rings and then installed the now balanced rotating assembly. As per the manual swap i did on the crown a few years ago, the large amount of time spent thinking, planning and acquiring all the bits and pieces before hand has mean the assembly job is going smoothly and not taking much time at all. I also buried the valve cover in 2k gloss black a few months ago and patted metallic gold paint onto the raised edges. It looks awesome. See here mocked up with the gold zinc oil pan and filler cap.
- 140 replies
-
- 23
-
-
-
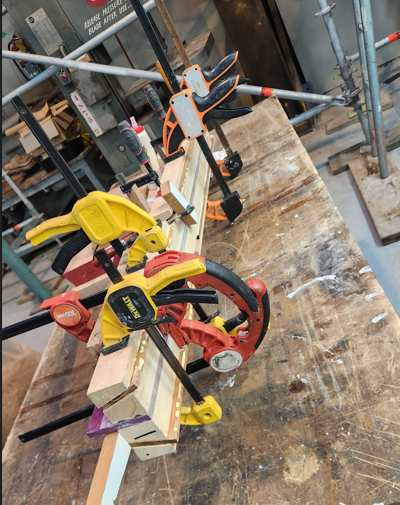
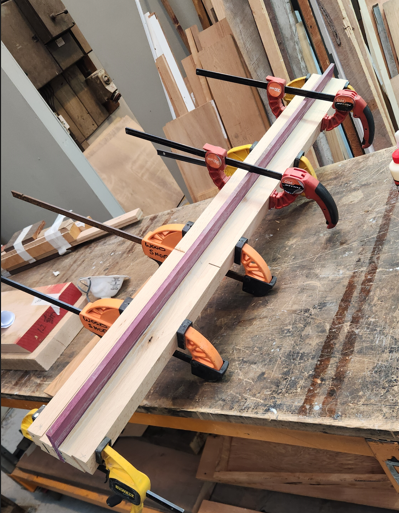
I then loosely flattened off the bottom so i could clamp the wings down aswell as into the neck blank. one downside to the angles was that it was pretty anoying to glue up, as i had made nice slippery ramps, but nothing that clamping scrap timber across didnt sort. And clamped the Oak wings on and left it over the weekend. (there is alot of excess timber on those bits and ive left is there for now incase its beneficial for clamping it down later.)
-
-
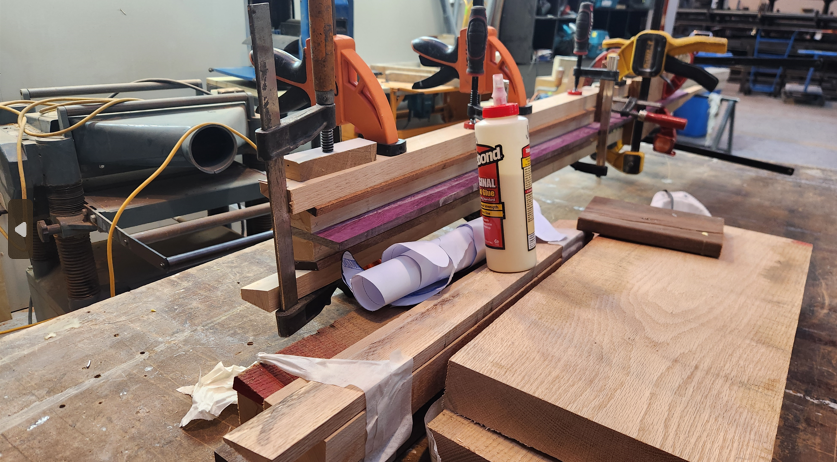
More glueup pics
-
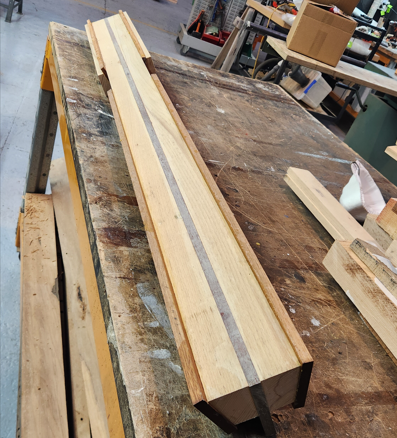
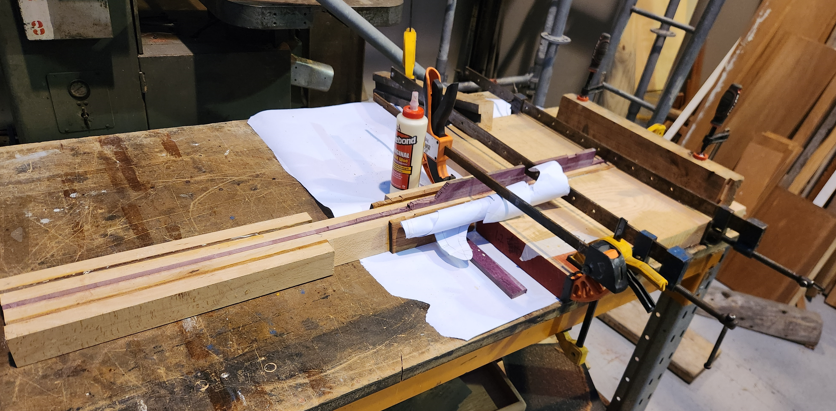
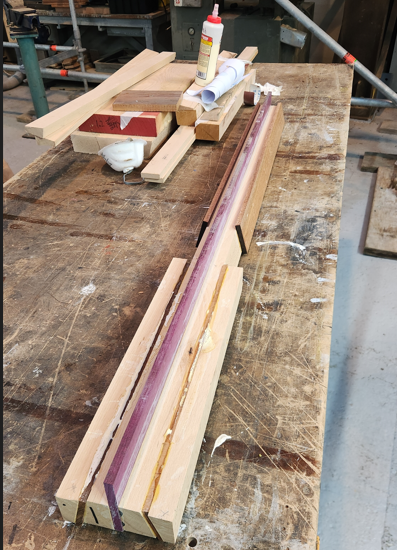
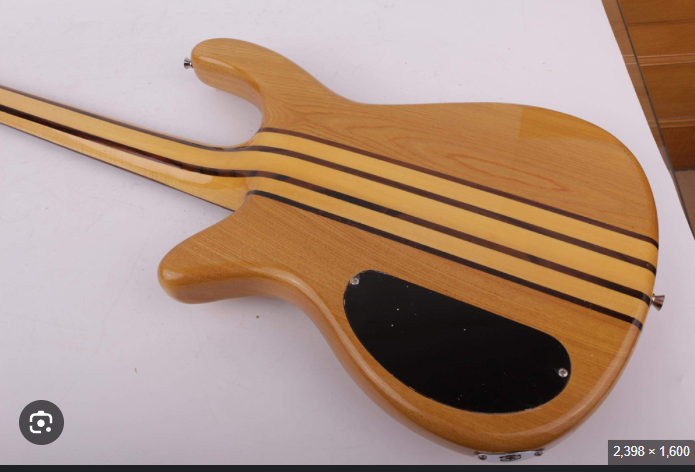
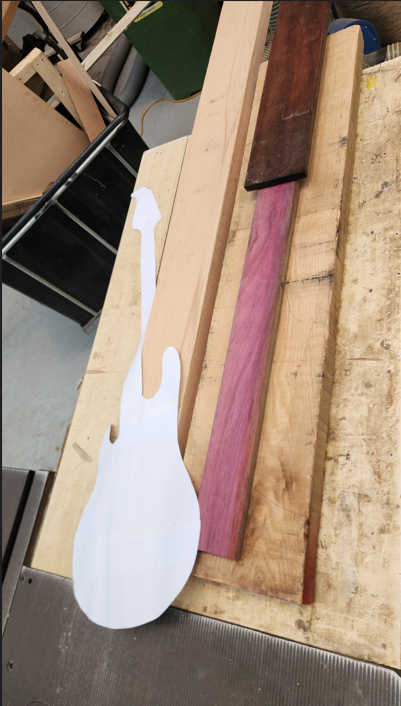
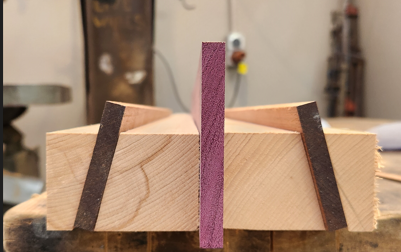
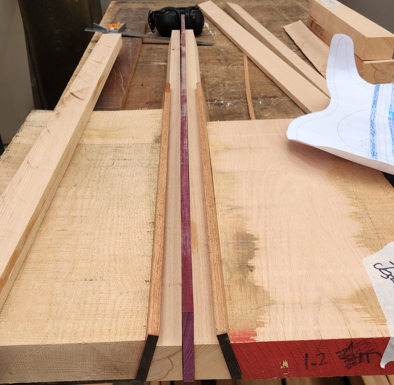
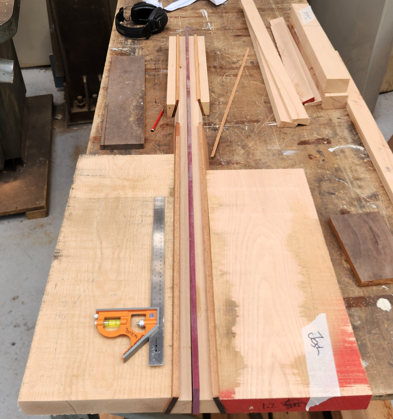
When i was starting to think about this project i was looking around at various construction methods. The moment i laid eyes on through neck, decoratively laminated instruments i was blown away, they just looked so great. its not especially difficult but it is more labor intensive and probably hard to automate you dont tend to see many cheap instruments looking like this. So with a very loose plan in place i set out to acquire several different bits of timber. I ended up being given some Filipino Mahogany and some (not picture) Australian Iron Bark and purchased some African Purple Heart aswell as some American Red Oak for the wings and i ended up with some European Beech for the neck. I had wanted Maple for this but it was a special order thing. however because im laminating the neck and will also be reinforcing it with some twisted carbon twill, the Beech' properties are near enough and it looks great to boot. Next i had to figure out what i was going to do in terms of laminations, que several hours of blankly staring at a pile of timber and shuffling it around. I knew the two lengths of Beech were too wide (i hadnt commited to a layup yet) but i still wasnt too happy with the look. Then i had a thought, which kind of required commitment before being able to see it as i may not be able to square the timber back up.. i put, i think a 20 degree angled cut along one of the Beech Necks and the corrosponding Red Oak wings, putting the outboard decrotive Mahogony strips on an angle. Not something i had seen in any of the instruments i was looking at. I hope theres nothing inherently wrong with doing this because i really was happy with how it looked. Shown below with Beech on both sides. And with the Red Oak And again, with the headstock blank, which uses the offcut Beech vs the Oak. Happy, I set to glueing everything up. Clamping it to hell and back to ensure a solid joint. I used Titebond Original for this as the internet said it was good. Ive run out of image space, so will continue next post
- 35 replies
-
- 14
-
-
he should use the sachs for that. "i have a bridgeport lathe" "do you mean mill?" "no"
- 528 replies
-
- 17
-
-

-
-
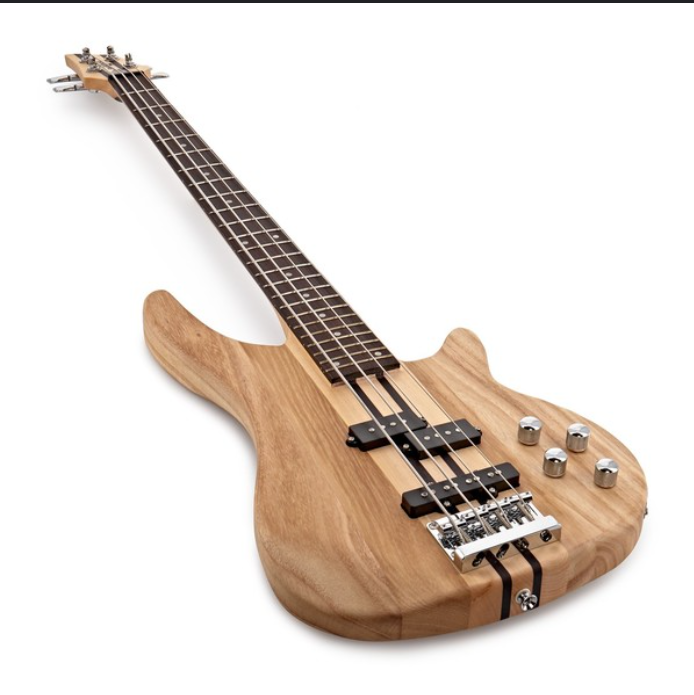
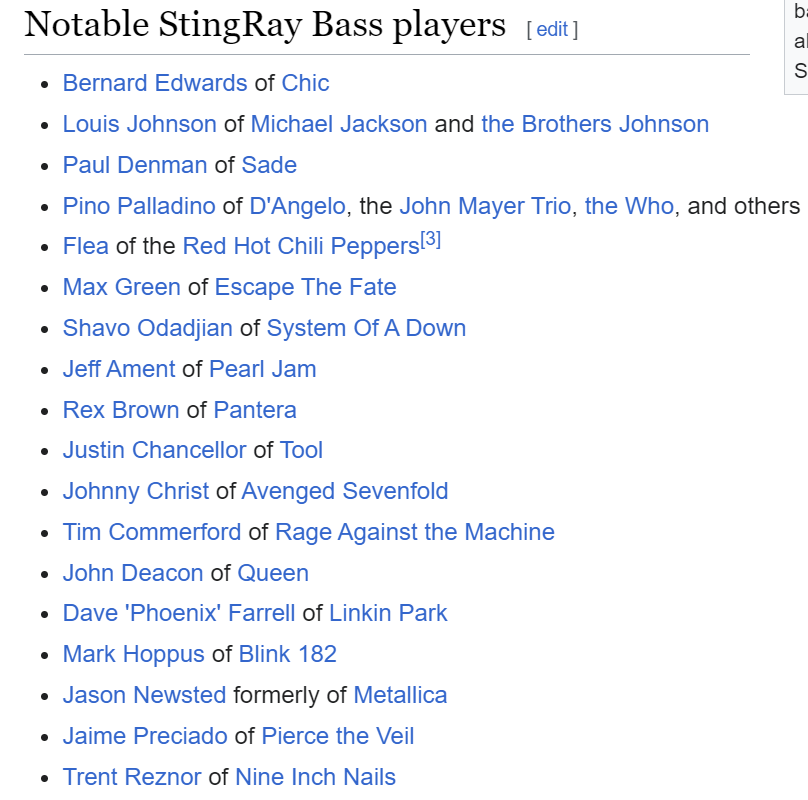
No not a Chevrolet Over the last year or so i have been learning to play the bass guitar after a lifelong love for the instrument and how it has shaped my entire taste in music, paired with nearly a lifetime of thinking it was worthless to try to learn an instrument as an adult, while im still not very good, i can play music and i love it. When ever i think back to songs i love, no matter if there rock songs, hip hop beats, jazz or even early electronica, you can usually find a prominent bass line. If you dug further you might notice something curious, more often than not, the artist behind many of those songs are playing a Music Man Stingray. They remain to this day one of the most sought after bass guitars and while being particularly distinctive in their sound somehow fit right into many different styles of music. Aside from the excellent sound, i also really like the shape and style of the Stingray, its iconic for good reason. Tim Commerford - Rage Against the Machine Kim Deal - Pixies Dave Farrell - Linkin Park Trent Reznor - Nine Inch Nails Cliff Williams - AC/DC And from wiki You get the idea, its an instrument that has lent its iconic sound to most great corners of music. I want one, i want one bad. I told myself that when i got better i would let myself have a nice instrument instead of the 2nd hand facebook bass i currently have, however the world took a swan dive in that time and i dont have much expendable income and the problem is proper Stingrays are pretty fucking expensive and im not a successful musician. They do offer entry level stingrays, but they just arnt the same. I am however sick enough in the head to assume that i can build anything, so why not, how hard can it be to build a high end instrument? I have begun with choosing one of the earliest Stingrays, the 'pre Earnie Ball' ~76 model as a base mostly because i prefer its rounded edges, but im also a sucker for vintage. now while this will be a shameless replica, i will be picking and choosing a few details from the 70s - 80s range and perhaps adding in some personal touches. This is my model as it stands now after a couple of lunch breaks, the image has been moved to the side so you can see how it was used to trace the iconic silhouette. There still alot of work to do on the model and you may notice one difference being the lack of a bolted on neck and the pickgaurd being recessed. more on that later. With the help of many others, im very much looking forward to this one.
- 35 replies
-
- 17
-
-
I'm not as versed on this as others though @yoeddynz would be the most recent to fall victim that I can recall. I'm pretty sure that it won't have done anything if it never warmed up and built pressure. You certainly don't need to waste the coolant, just remove it for the first wee while and then you can put it back in once everything is nice and seated