-
Posts
2,279 -
Joined
-
Last visited
Everything posted by Adoom
-
3HP belt drive. Apparently if the start cap is bad, I should be able to 'roll start' it and it should keep going. I can't/it doesn't. Mine will turn over and seem like it's going to run, then pop the fuse.
-
Where can I get a 40uF run capacitor for my compressor? Mine is bung. I reckon it's the run cap because it turns over and tries to run, but then pops the resettable fuse. Stuff I am finding is either drop shipped or has the stud on the bottom that makes it not fit or >$50
-
I've got no bottles for the OxyAcetylene so I am incapable of making it orange hot. But anyway, the Car Constructors manual specifies that the steering arm balljoint taper is to be reamed.
-
So the taper I machined on the lathe was 'close' but not perfect. A little wide at the big end. But I thought, oh well, good enough to test with. Oh, maybe I'll take the welded prototype off the car. And compare it to the machined one. FUUUUUUUUUU!!!!!. So I somehow managed to fuck up the original measurement by 11mm. Then drew the scale drawing using that measurement. Then machined it from the drawing. So, start again. SO SO MUCH SWARF! I also bought a tapered reamer. YAY! It's the correct taper angle. Ouch! It was $175! Only $16 shipping from USA though. In only 9 days?!
- 201 replies
-
- 25
-

-
I have some doors in a similar state to yours. My plan is to scrape and vacuum/compressed air blast as much of the loose stuff out as I can. Then make a water tight trough thing just big enough to place the bottom of the door in. Then fill it with a chelation rust remover like Metal rescue or Evapo-rust, enough to cover the seam. Then leave it for as long at it needs to make the rust go away. It doesn't eat the metal, so you can just leave it for ages. This stuff really does work. But it does get used-up after a few uses. Wash it out with water, then heat it up so it's 100% dry, then flood the area with epoxy. Later,once the door is painted, probably put some cavity wax in there too.
-
So work gave me some Repco gift vouchers.... #PROBABLYNOTGETTINGAPAYRISETHISYEAR Does anyone have any experience with the spray guns they sell? Are they okay, or should I not bother? I need something to spray epotec408 (>1.8mm nozzle I think). And an as yet undecided top coat, possibly 2k.
-
Was that Howat Engineering in Lower Hutt you used? What did he charge you for cutting the splines? ....I've got some CV shafts I need to get shortened and was planning to go see Brian about it eventually.
-

Wellington Monthly Meet - Discussion thread
Adoom replied to KKtrips's topic in Lower North Island Region
Mixed grill FTW -
I found far too many NOPES for this setup to last longer than 5 seconds before exploding. Maybe the faceplate......? That seems..... less dodgy. Never used a faceplate before.... Am I gonna die? Do I need some counterweight.... you know, so there's more shrapnel to fly off and hit me, or smash through the roof? How many rpm....? It's a small hole and aluminium, so quite fast.... but death and dismemberment do not appeal.
-
Any idea what range you might get out of it?
-
Never bought any 90deg. But here are some old quotes to give you an idea. They are kinda old, 2020 and 2019. Just email them and be all "how much is?"
-
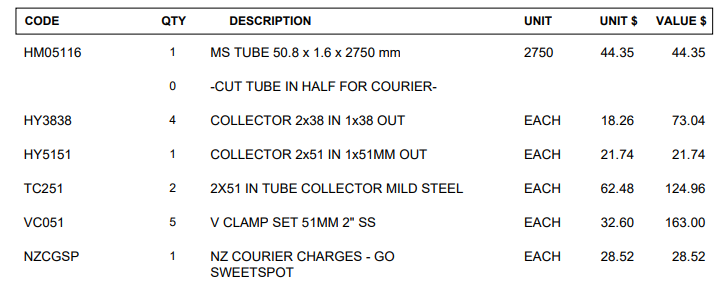
I've used Autobend a few times for exhaust bits. They do deal with the pooblik. They have the catalogs online, but you need to email them for prices, then they email you an invoice and your bits turn up with the courier.
-
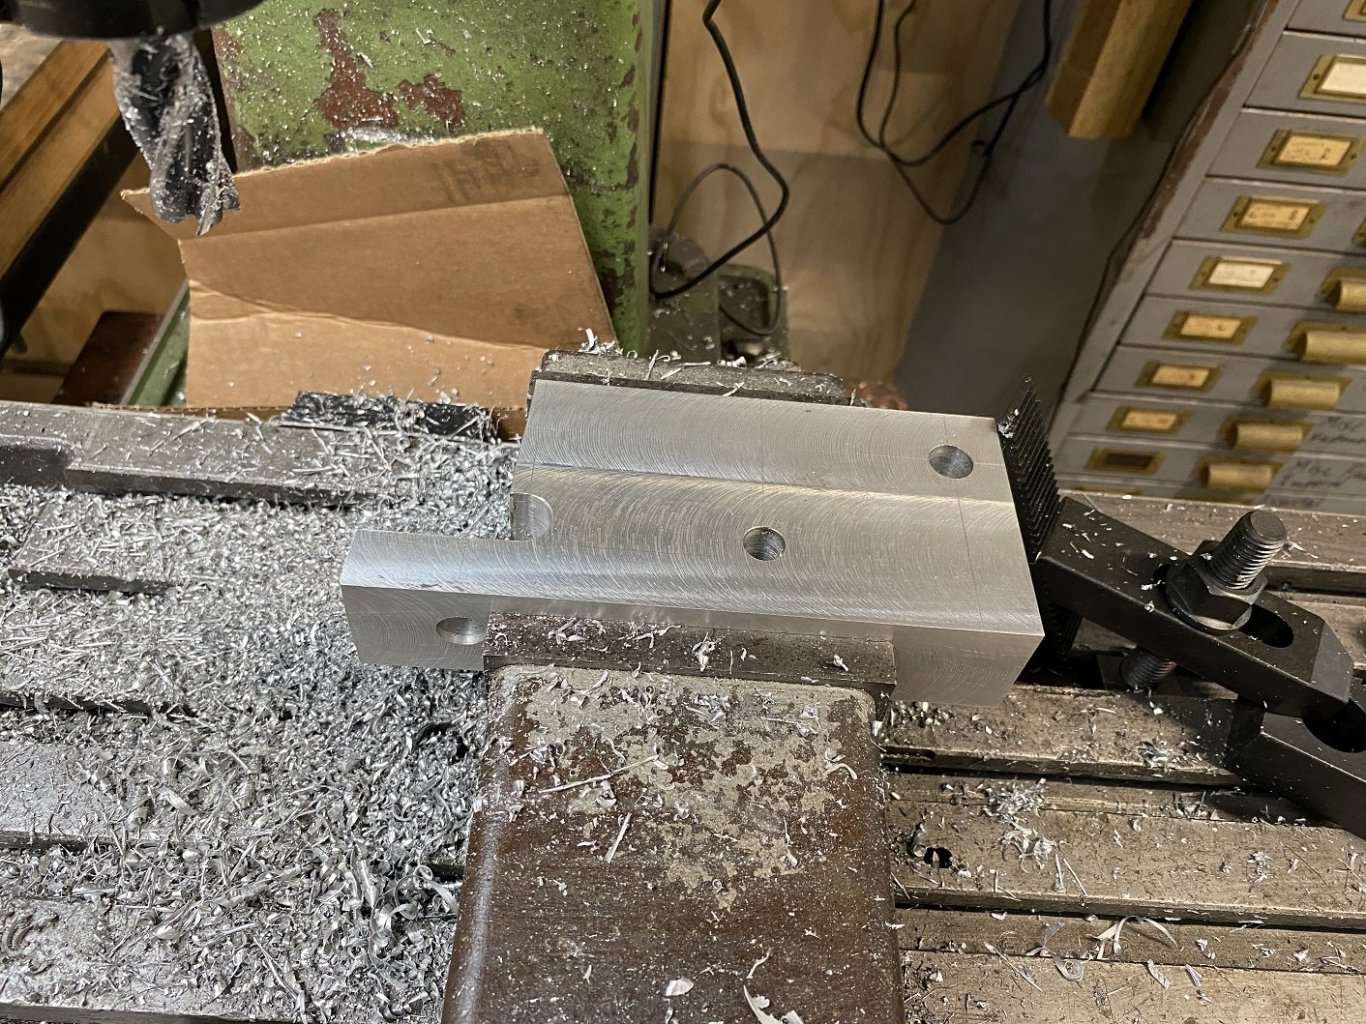
Working out how to machine the steering arm with some aluminium I had. Much easier to machine than a big block of steel, that I don't have. I used the bandsaw to cut out that corner, much faster than turning it all to swarf. I had plans to machine the balljoint taper(the hole on the left) using the lathe. As it is now, I should be able to fit it in the big 4 jaw to center the hole. But I just tried a practice taper in some scrap and it seems real close, but the finish is not as smooth as the oem hole which I don't think is good enough. I'd buy a taper reamer, but OMFG they are expensive. Also, as far as I can accurately measure, the taper is 4 degrees(per side) and I cannot find anything that size. I think for the steel version, I'll get it profile cut as a rectangle, so I have my reference surfaces, but also cut out most of the material I need to remove. So I don't have to spend hours at the bandsaw cutting the outline, I would just need to cut some tabs.
- 201 replies
-
- 13
-

-
I ended up replacing my sacrificial anode with a sheet of steel. More surface area and easier to wipe the scum off. Pretty much all the rust is gone, except for the bit in the middle due to the size of my container. A lot of the paint came off too. I did no scrubbing, just shot it with the water blaster. Most of the grease came off(it turned white) but probably due to soaking for days in the washing soda that's used to make the electrolyte solution. I got mine from Mitre10 ages ago but I can't find it anymore, it's this stuff. https://www.countdown.co.nz/shop/productdetails?stockcode=276728&name=greenwood-washing-soda-crystals
- 52 replies
-
- 13
-

-
The subframe has a bit of surface rust. And some oily greasy stuff that the water blaster didn't shift. This is a bit of a no-effort experiment. I know the electrolysis will remove the rust and after a few days it may lift some of the paint(from previous experience). But I want to see if it will lift any of the oily stuff. I could do with a deeper container... but where can I get one that's as cheap as a $18 warehouse paddling pool? An IBC tank with the top cut off would be good, but I can't find anything nearby and I also don't want to spend ~$100
- 52 replies
-
- 16
-

-
- 201 replies
-
- 18
-

-

-
Imagine a mini. Now remove the front subframe with the engine and suspension. Also remove just the steering rack. Now remove the rear subframe and suspension. Also remove the exhaust. Take off the bonnet, but leave the hinges. Remove the wiper mechanism, but leave the bracket and wiper arms. Remove the front seats. Remove the boot lid. Remove the fuel tank but leave the strap and bolts. Remove the rear lights. Remove the front grill. Remove the doors, but leave the inside handles and door card. All the stuff that's left, I need all of that, except the actual shell of course. I may be interested, but I'd prefer to get a bulk lot with most of the bits I need. If I buy a bit here and a bit there, it will end up costing a shitload.
-
Whittled the old front panel off. Realised later I should have also removed those flanges on the front of the inner wings.... the new front panel already has them. But that will make it easier to flatten out the damage in the front of the drivers inner wing. No photo, but I offered up the new panel. Bloody hell the edges are sharp. Cut my hand.
-
I'd use paint stripper. The stuff from super cheap that has dichloromethane in the ingredients is safe for aluminium. Stinks terribly, I think it has ammonia in it. Works great for removing carbon from pistons and valves and stuff without scratching too. Don't get it on your skin, even a tiny little bit will start to burn in a few seconds.
-
PBT took forever to ship the grill I bought from Blenheim. I already have the top bit on the bonnet I bought. It's pretty straight, just missing some rivets. I will be able to use the grill and the bonnet to align the front panel.
-
- 52 replies
-
- 10
-

-
Other side. And same double plating over rusty metal. I think the sill has been replaced before. That hole at the top looks like it was caused by a chisel. And the flange on the left has been partially cut off. Clamping a bit of copper behind the holes so I can weld them without making bigger holes. And fixed all the cuts and nicks. I also used the vacuum and compressed air to clean out the sill and the inside of the crossmember that goes across the car.
- 52 replies
-
- 14
-

-
I think I'll pass. It would have been interesting to build an engine, but with the added cost of bearings and gaskets, I'll be better off just getting a good CGA3DE. Thanks for the offer.
-
Yeh, I did further thinking after going to bed. That all makes sense. According to the workshop manuals I have....... CG10 rod is ~9mm longer. CGA3 and CG13 uses the same rod length. All of the engines seem to have the same size valves. CGA3 and CG13 share the same cam. I'm assuming the combustion chamber volumes are the same for all engines and the pistons have more/less dish to get the compression ratio to 9.5:1 Assuming the CG10 pistons are flat top(google images seem to back this up), my rough mathculations for the longer stroke give me a compression ratio of 11.8:1 Which seems a bit high since I'd like to boost it. I suppose I could chuck the pistons in the lathe and dish them myself.


