anglia4
-
Posts
3,568 -
Joined
-
Last visited
-
Days Won
2
Everything posted by anglia4
-
Yeah I live by the beach... I'm sure I can see the thing rusting if I squint
-
Thanks for the intel @_Matt Thats kinda what I was worried about with clearcoat, as I end up with the cars outside quite a bit as well. I'm leaning towards trying out the RIPO oil. @Bistro where did you buy it from?
-

Tim k’s 1967 EJ20 VOLKSWAGEN discussion thread
anglia4 replied to Timk's topic in Project Discussion
Love it! im thoroughly enjoying your build! -
How is the RIPO on the painted parts? I would like the nicer paint on the car to still be quite shiny, like its been waxed. I wonder how it would go if I buffed and waxed all the paint, and used RIPO or Penetrol just on the heavy patina. I get the feeling it wouldn't go well... but not sure why.
-
I've just watched a couple of videos where they use either penetrol or a boiled linseed/turps combo to preserve it. Which looks ideal on the barer steel, but unsure how it would be to maintain on the more painted surfaces.
-
Yeah was gonna hunt that out. I have seen his truck in person, and its exactly what I would like to achieve.
-
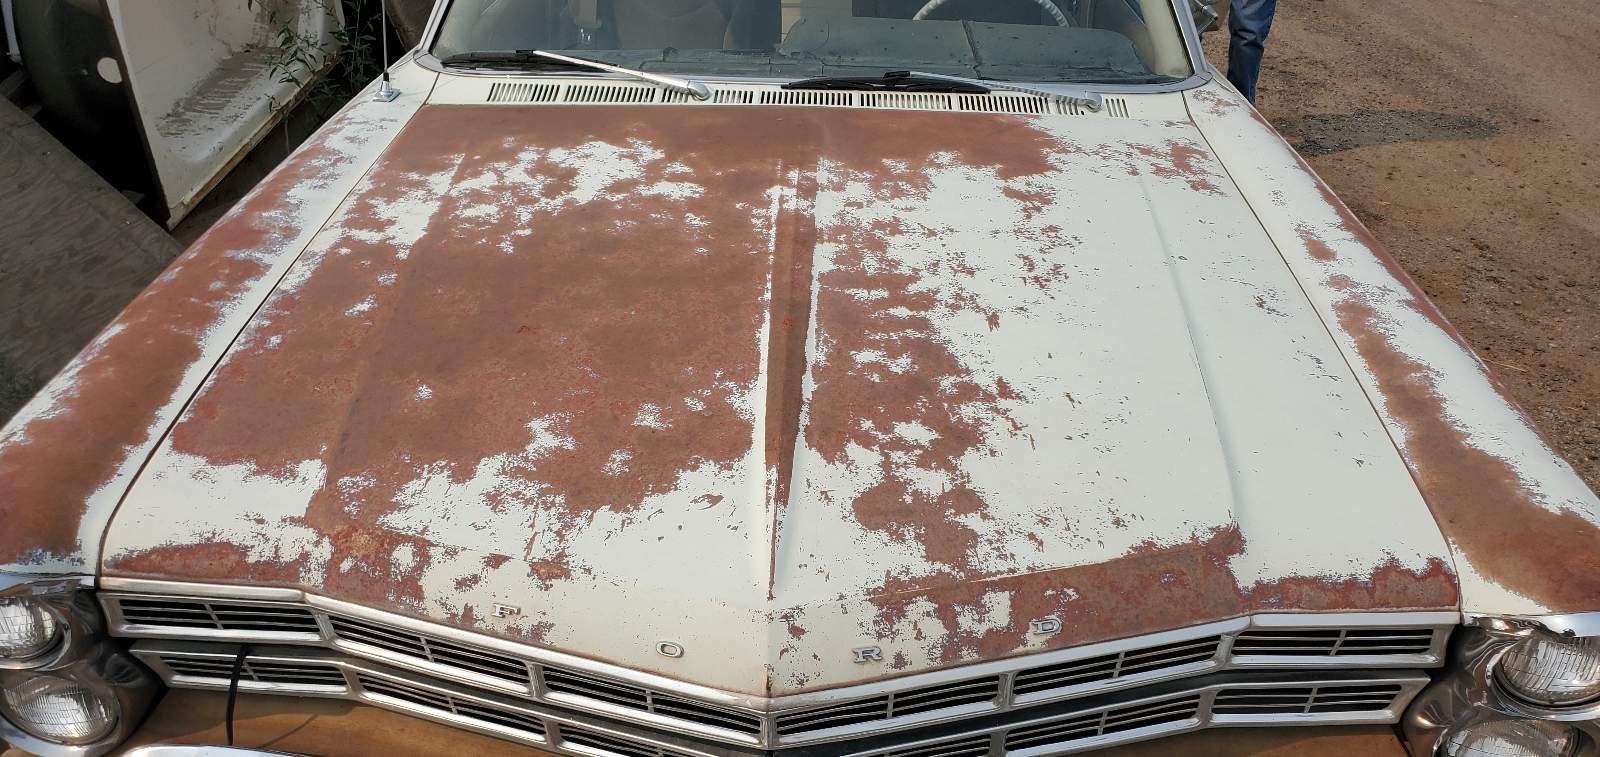
Ye olde thread dredge. So my new Galaxie has a pretty wicked patina. Much of the bonnet and front guards have weathered down to near bare steel and since it has moved from Montana to the coast and NZ it has immediately started to corrode. I would like to clean it up and clearcoat it, has anyone on here done that before? How do I prep it? - I was thinking a scotch brite would be the way to clean up the bare parts, but would that be too harsh on scratching up the remaining paint? Would you use a satin or a gloss clear?

-
Who is our resident expert on patina preservation? @_Matt??
-
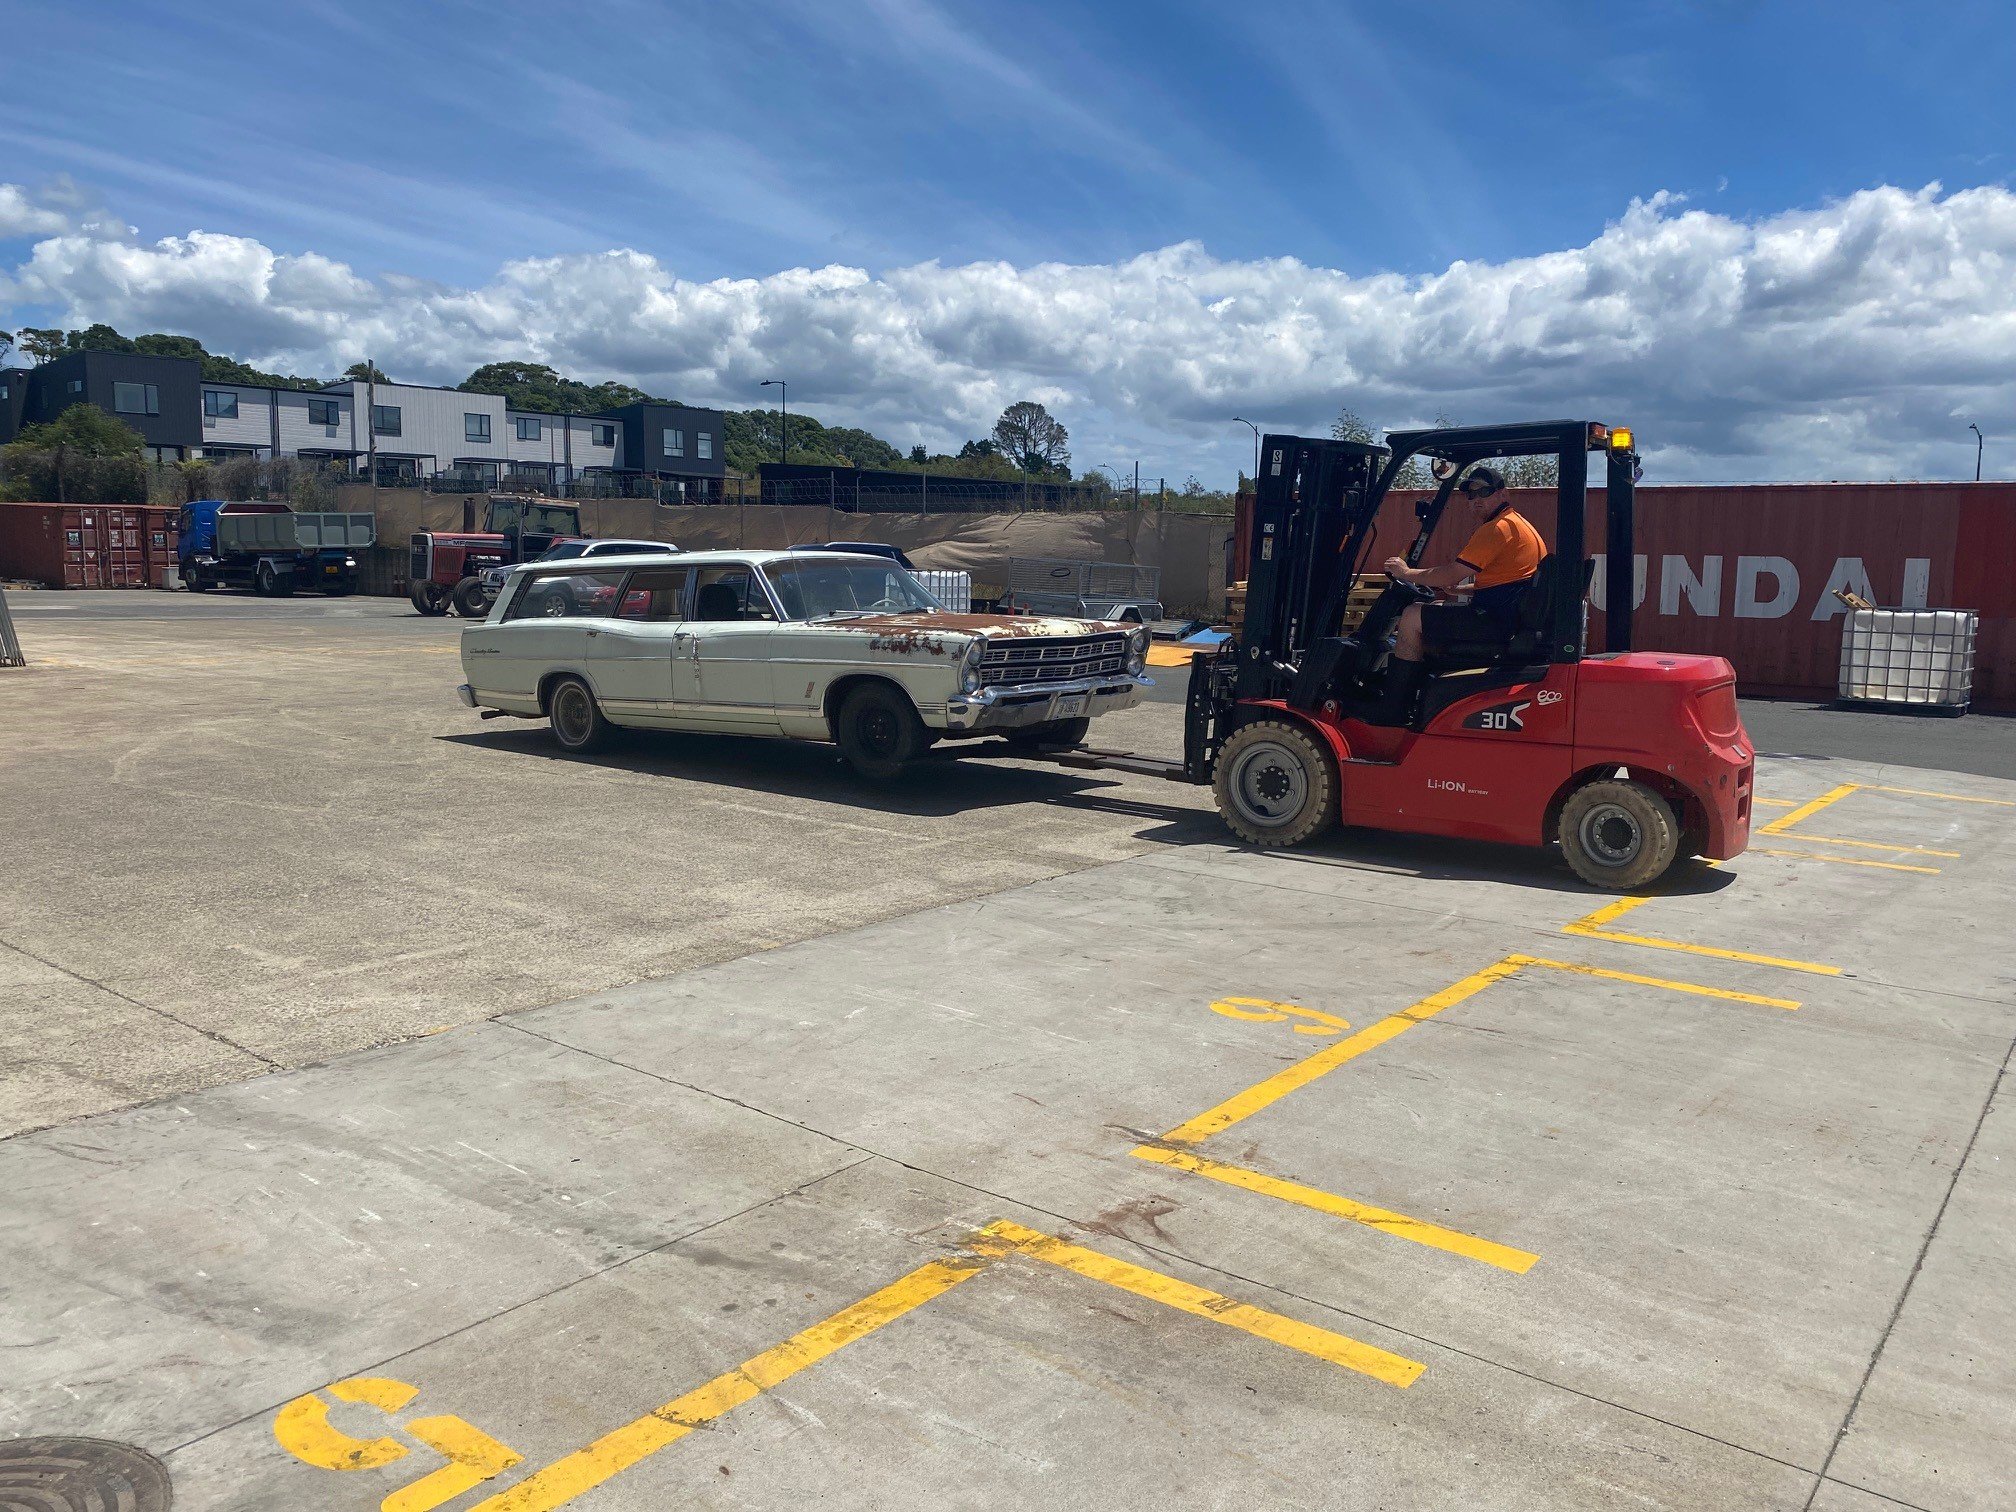
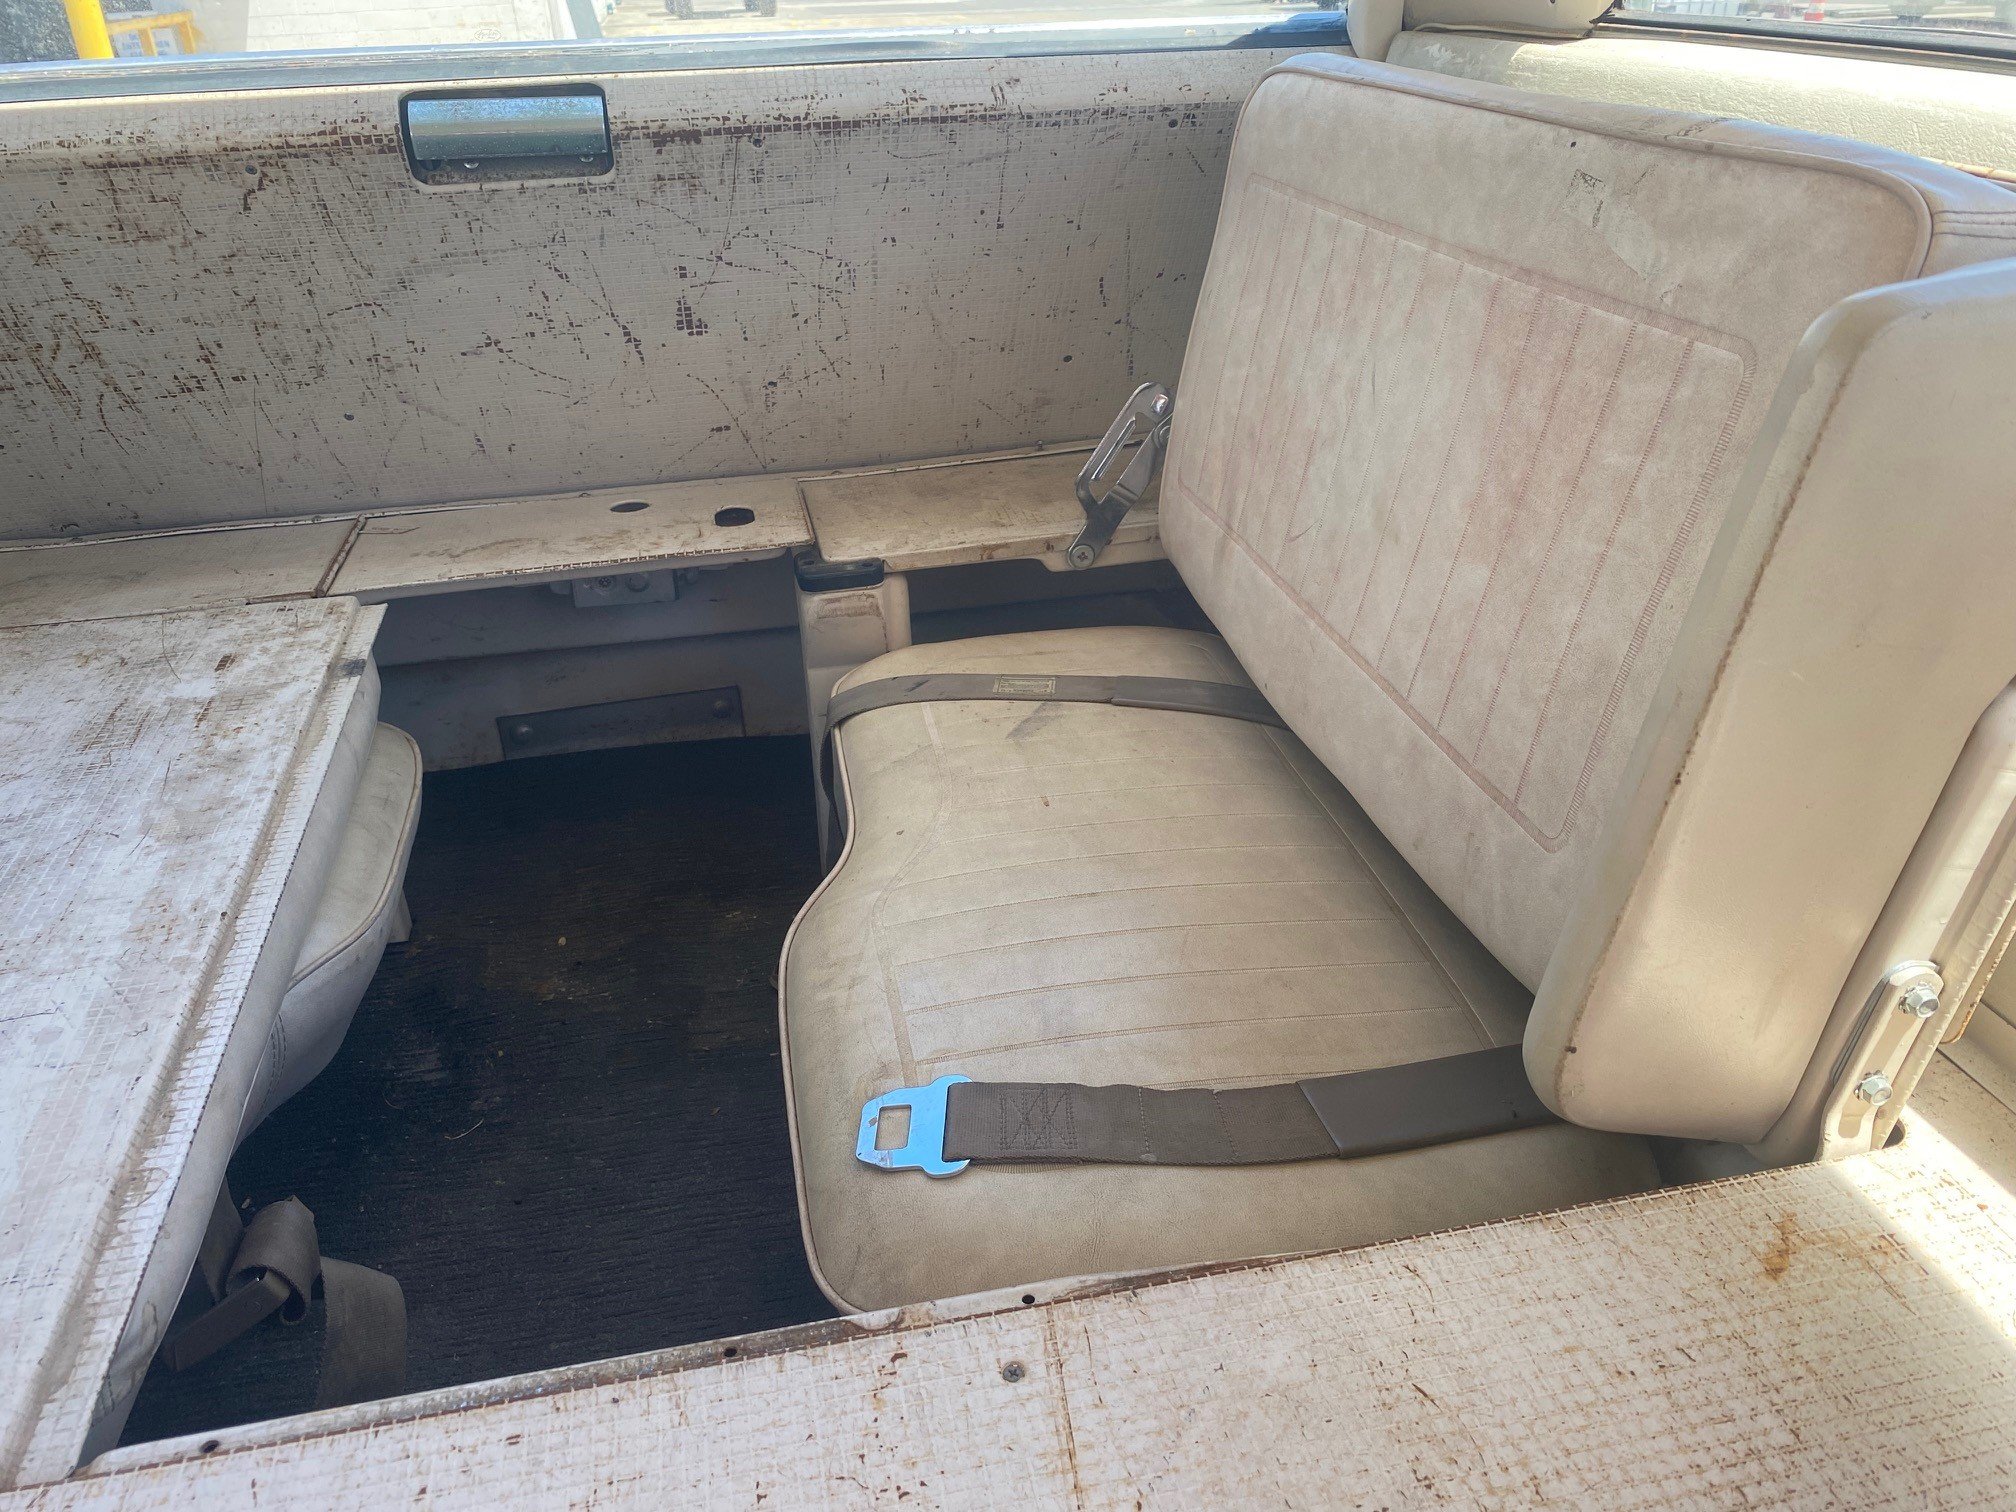
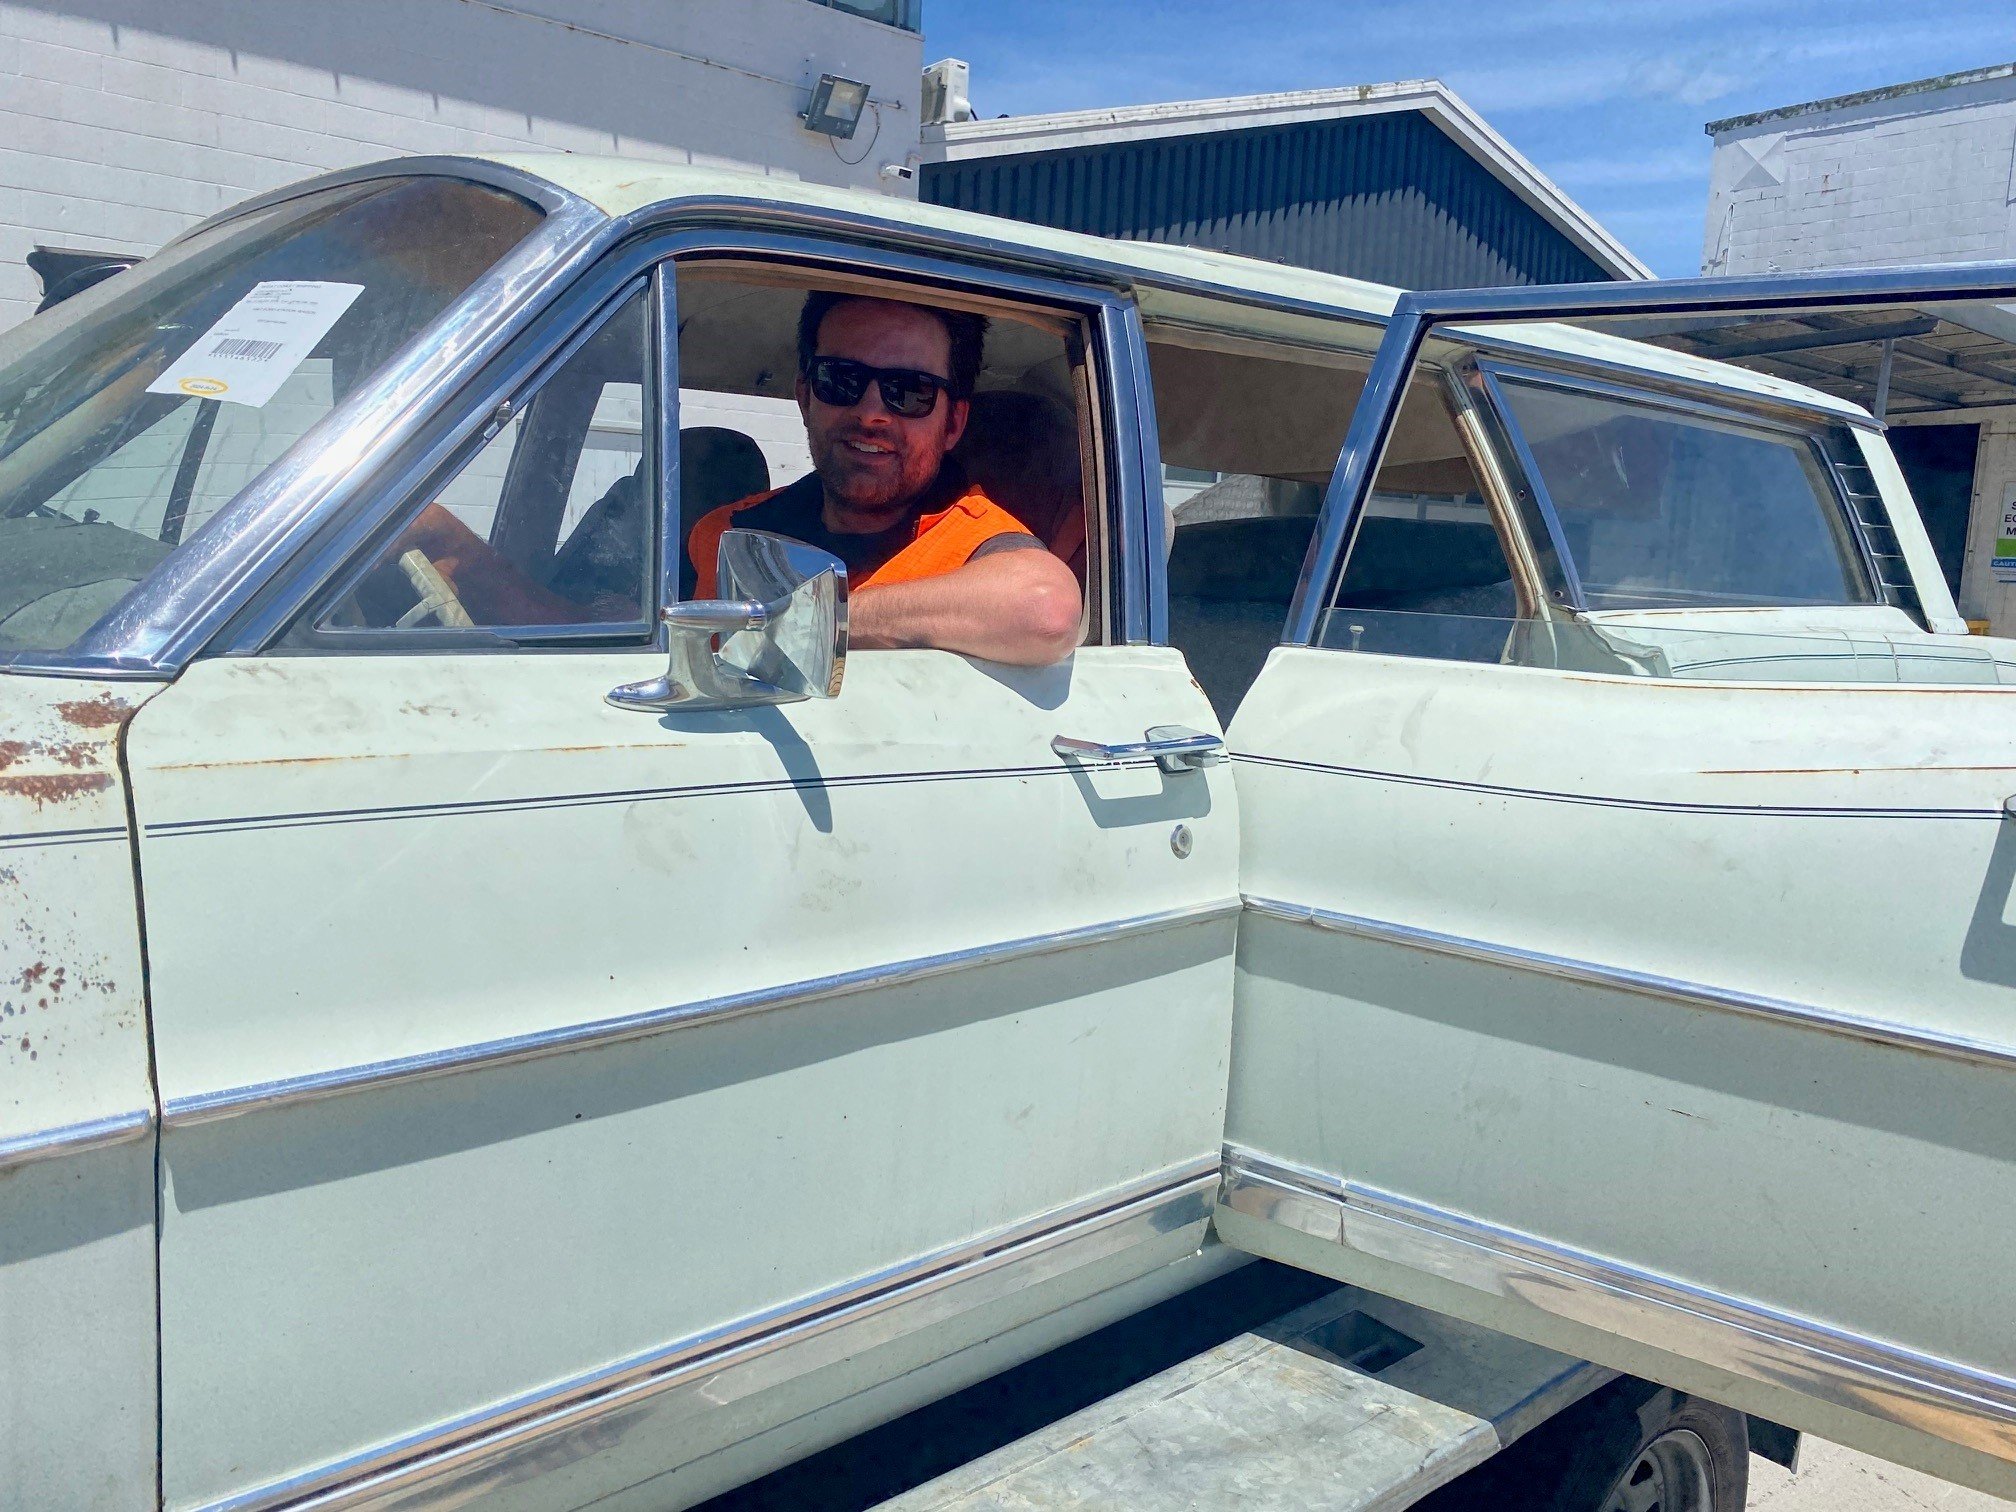
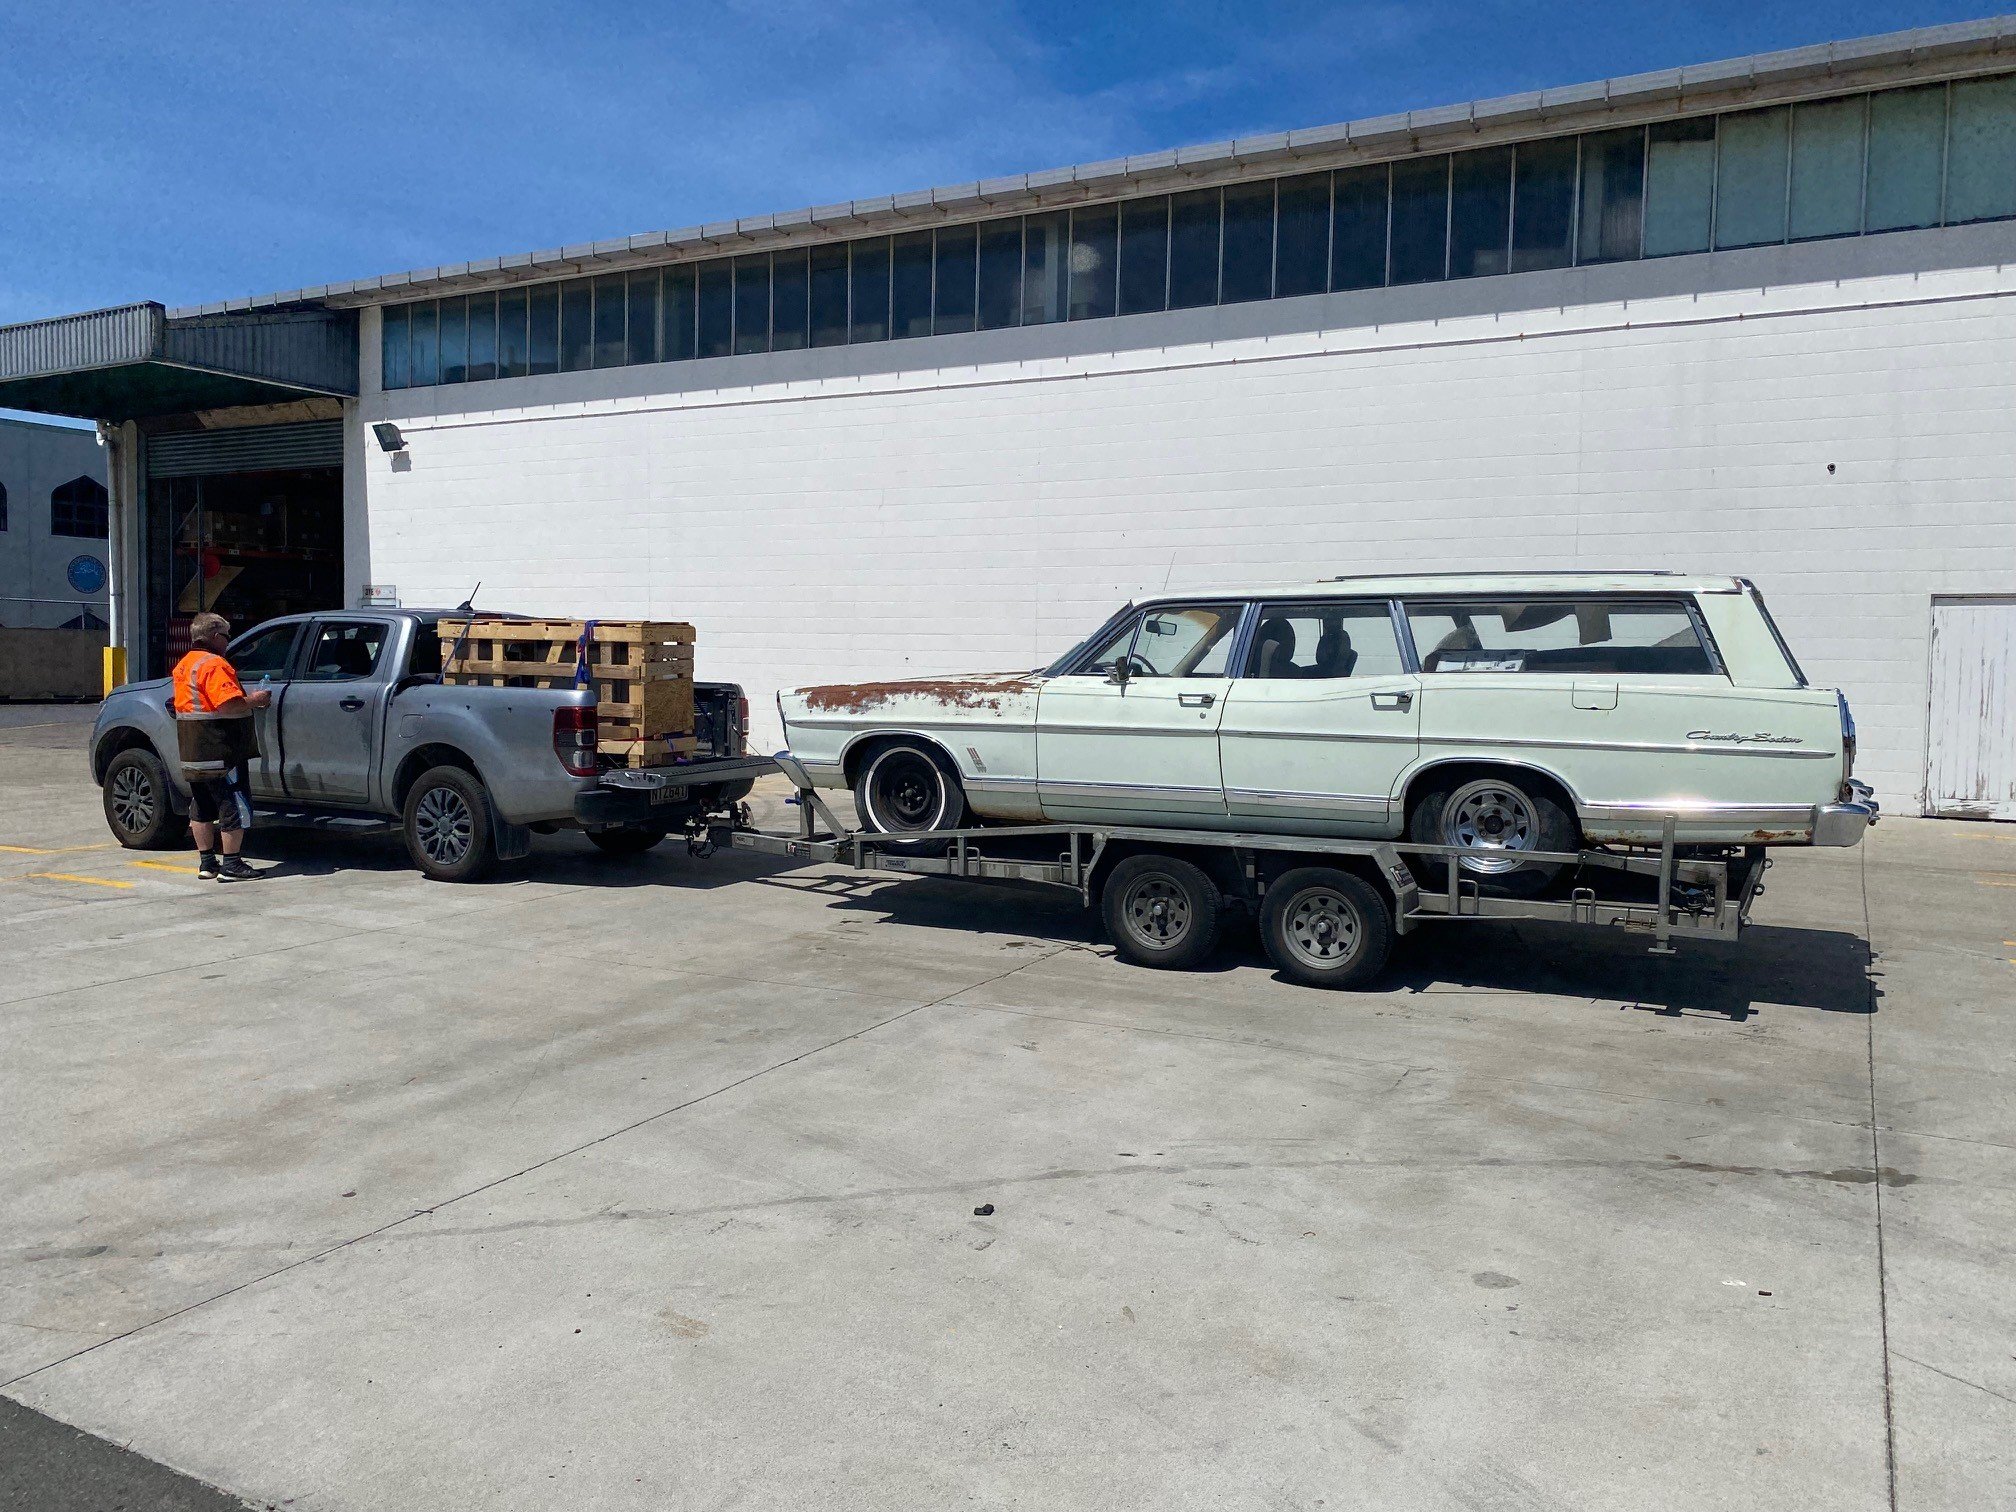
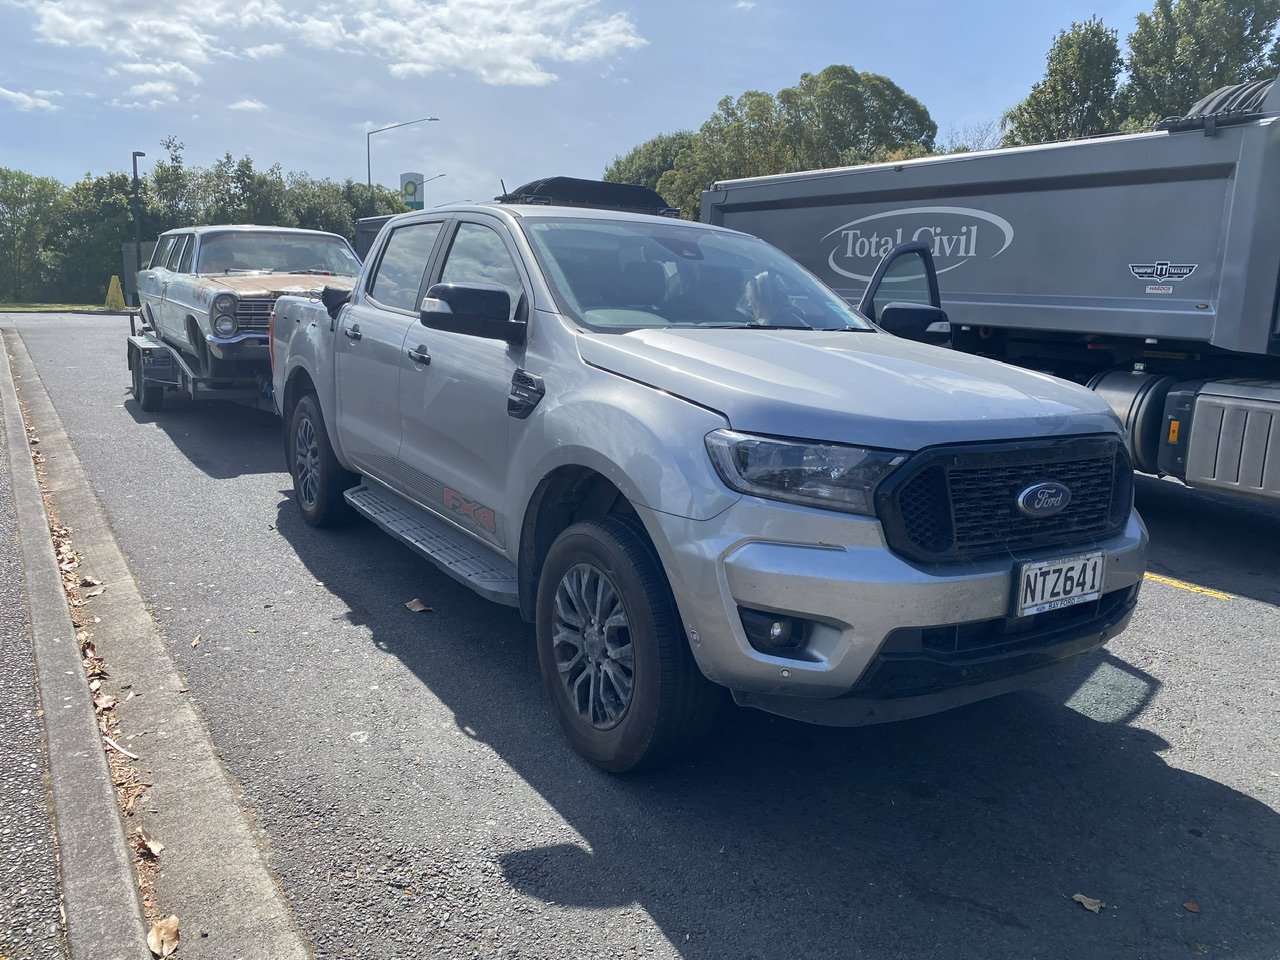
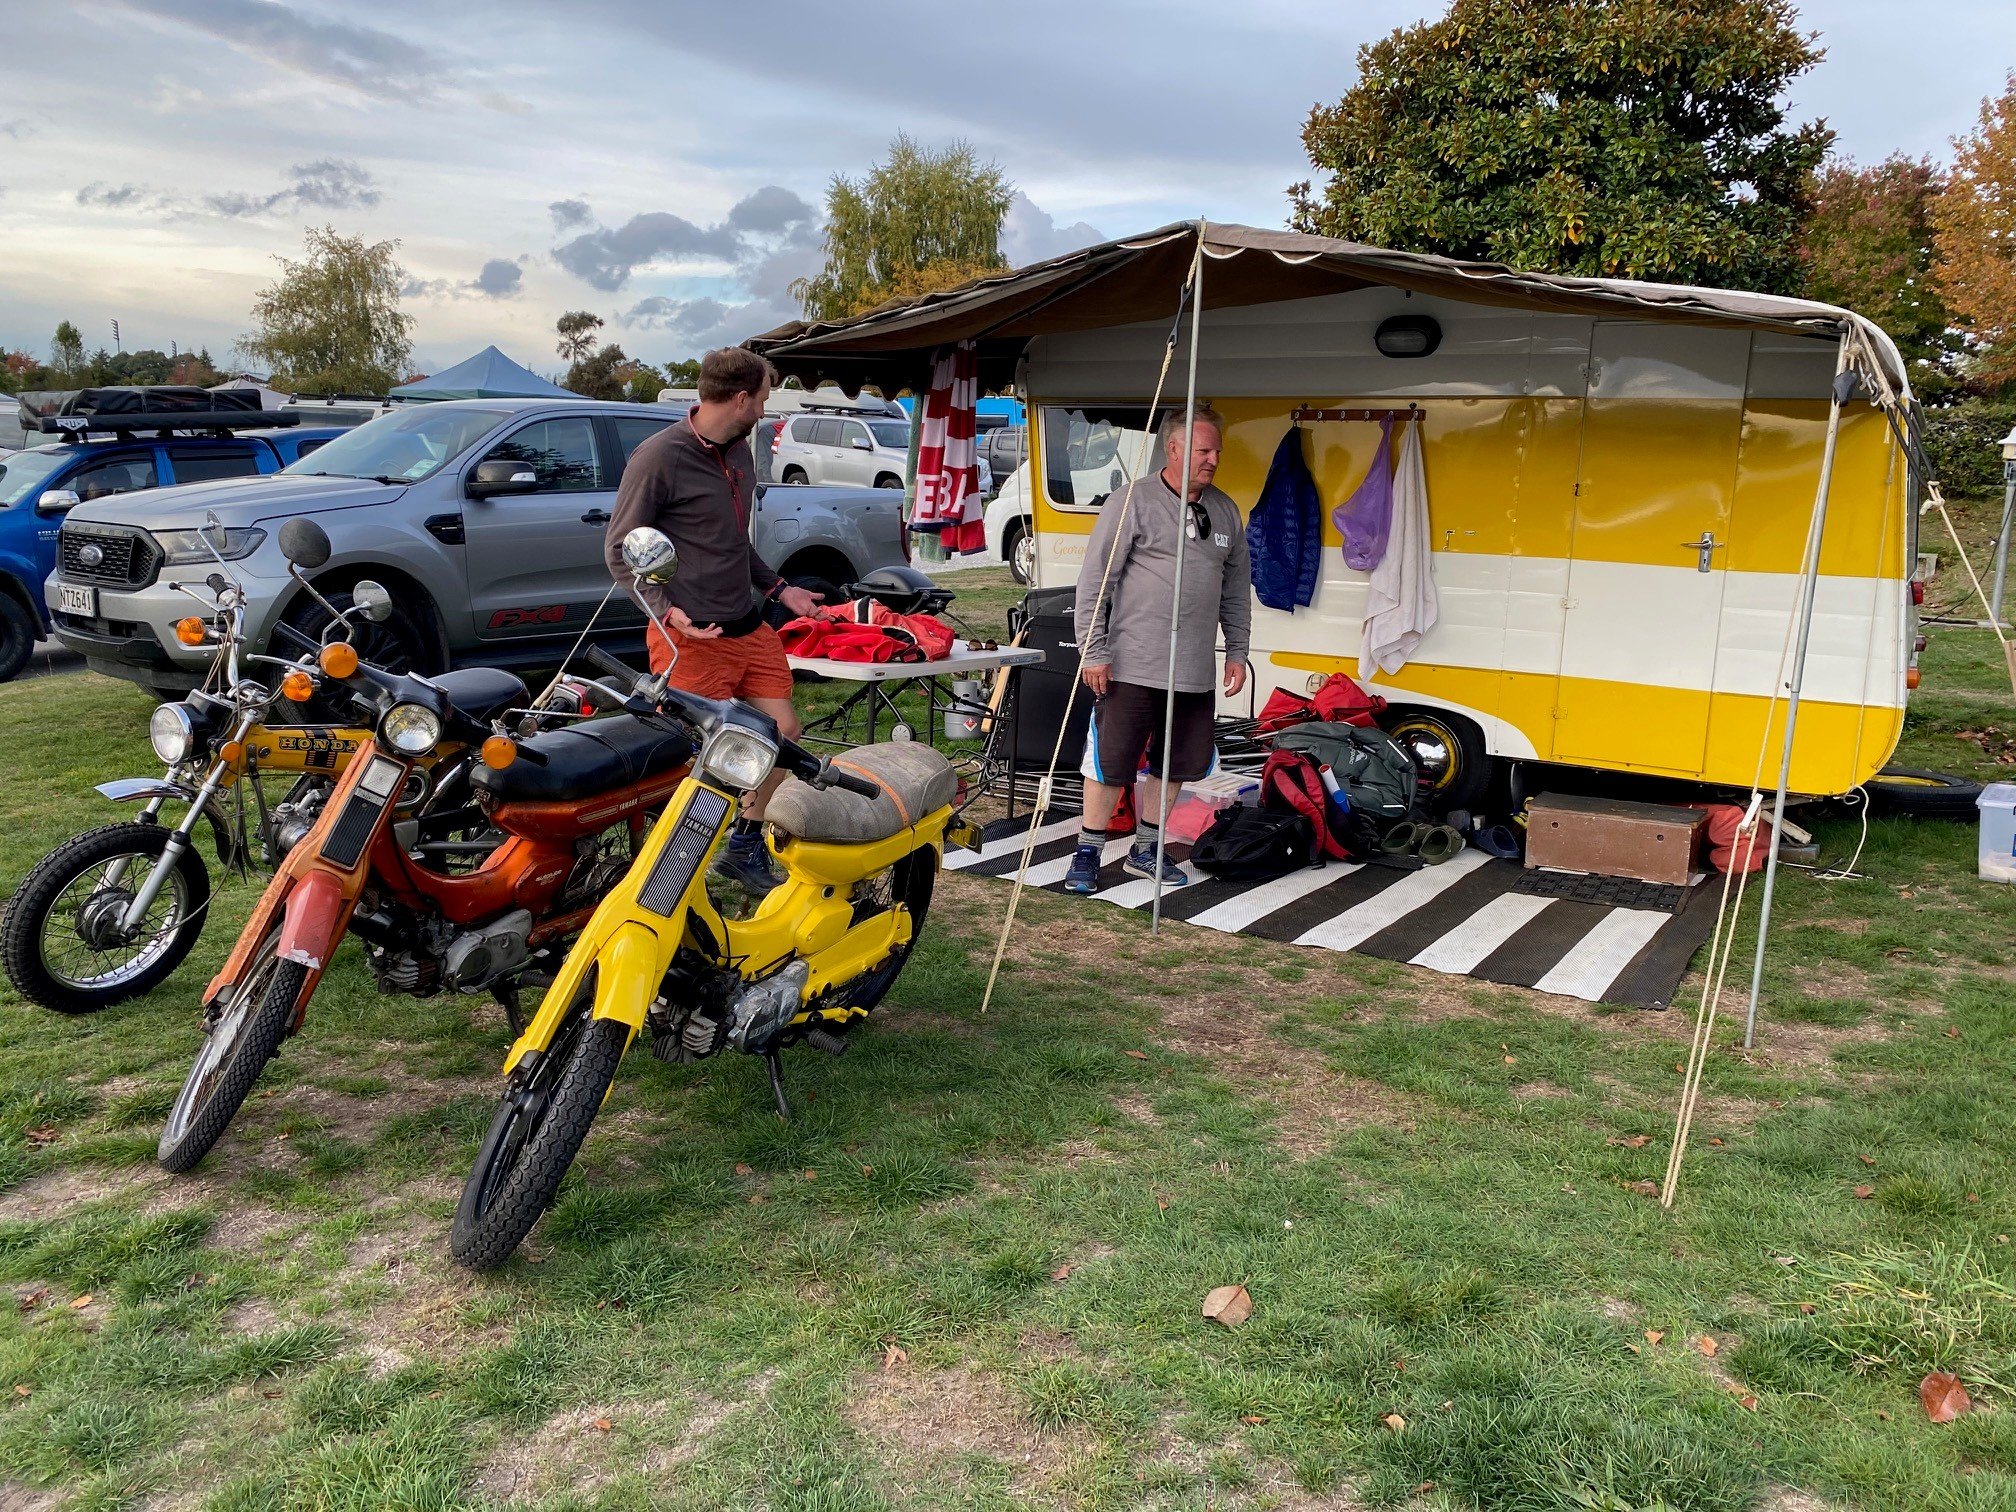
So yeah, its here! I got the message on Monday that it was all ready to go, so I promptly booked a trailer and a day off work. I had pre-measured the trailer, and knew it wouldn't fit. The trailer comes with full width fold up ramps at the back, and there was no way the Galaxie was going on there with the ramps folded up. So we drifted the hinge pin out of the ramps and left them at home, taking some smaller aluminium ramps from our race car trailer (enclosed jobby that the Galaxie was also never going to fit in). The day went nice and smooth, we managed to pack all the boxes of parts into the Galaxie and the windscreen crate onto the ranger. About 13 hours after we left New Plymouth, we backed into the driveway with a (not so shiny) new wagon. The guys at the shipping yard were legends, super helpful, and there was no problem that they couldn't solve with a forklift (like the tip trailer trying to flatten out before the back wheels had got onboard). All loaded up and tied on: It makes the ranger look scarily small, for months I've been telling myself its not that big of a car... turns out its genuinely fucking huge. Aaaaand, there's this... I had seen the fold up panels for the rear seats in the photos I got sent, so was hoping to be able to make some foam and covers up to make them functional again... This was the very first thing I went to look at when I got to the car, as the 10 seats is something we really wanted to have, but the seller had told us it didn't have seats in the trunk. FUCK YEAH! Seats, seat belts, the lot. I assume he had just never lifted those panels to see what was underneath. So yeah, i'm absolutely fizzing. Its rough paint and interior wise, but it is exactly what I was expecting to turn up. Its straight as, all the emblems etc are there. Its a perfect base for tidying up. Unfortunately, spending a couple of months at the shipping yard in San Fran looks like its been pretty hard on the patina, and its starting to get active corrosion on it, so I need to figure out what to do with that pronto. I'm picking i'll need to give it a gentle scotch brite and then clear it ASAP.
- 25 replies
-
- 47
-

-

-
We are on the road! if you see us coming, hang out the window with the team America world police secret signal.
- 25 replies
-
- 38
-
-
-
Dads car hoist (2 post with a motor and screw on each post) solves this problem with a small toothed belt and rotary encoders. While it is lifting the car it will stop whichever post is getting ahead for a moment to let the other catch up.
-
Tim k’s 1967 EJ20 VOLKSWAGEN discussion thread
anglia4 replied to Timk's topic in Project Discussion
What is the hoist you are using? Looks like a very handy little unit -
VGs Little FJ40/Off Brand Power Wheels & Trailer
anglia4 replied to Vintage Grumble's topic in Other Projects
-
VGs Little FJ40/Off Brand Power Wheels & Trailer
anglia4 replied to Vintage Grumble's topic in Other Projects
Jeez it really boogies along doesn't it! -
Tim k’s 1967 EJ20 VOLKSWAGEN discussion thread
anglia4 replied to Timk's topic in Project Discussion
Impressive quality of work! Loving the lip edge repairs. -
Fingers crossed it won't need much to get on the road. I've got new shocks, brake shoes, etc and all the bushings I could find on Rock-auto coming over with it. Hopefully with fresh gas, a battery, fluids and a carb kit it will be a runner...
-
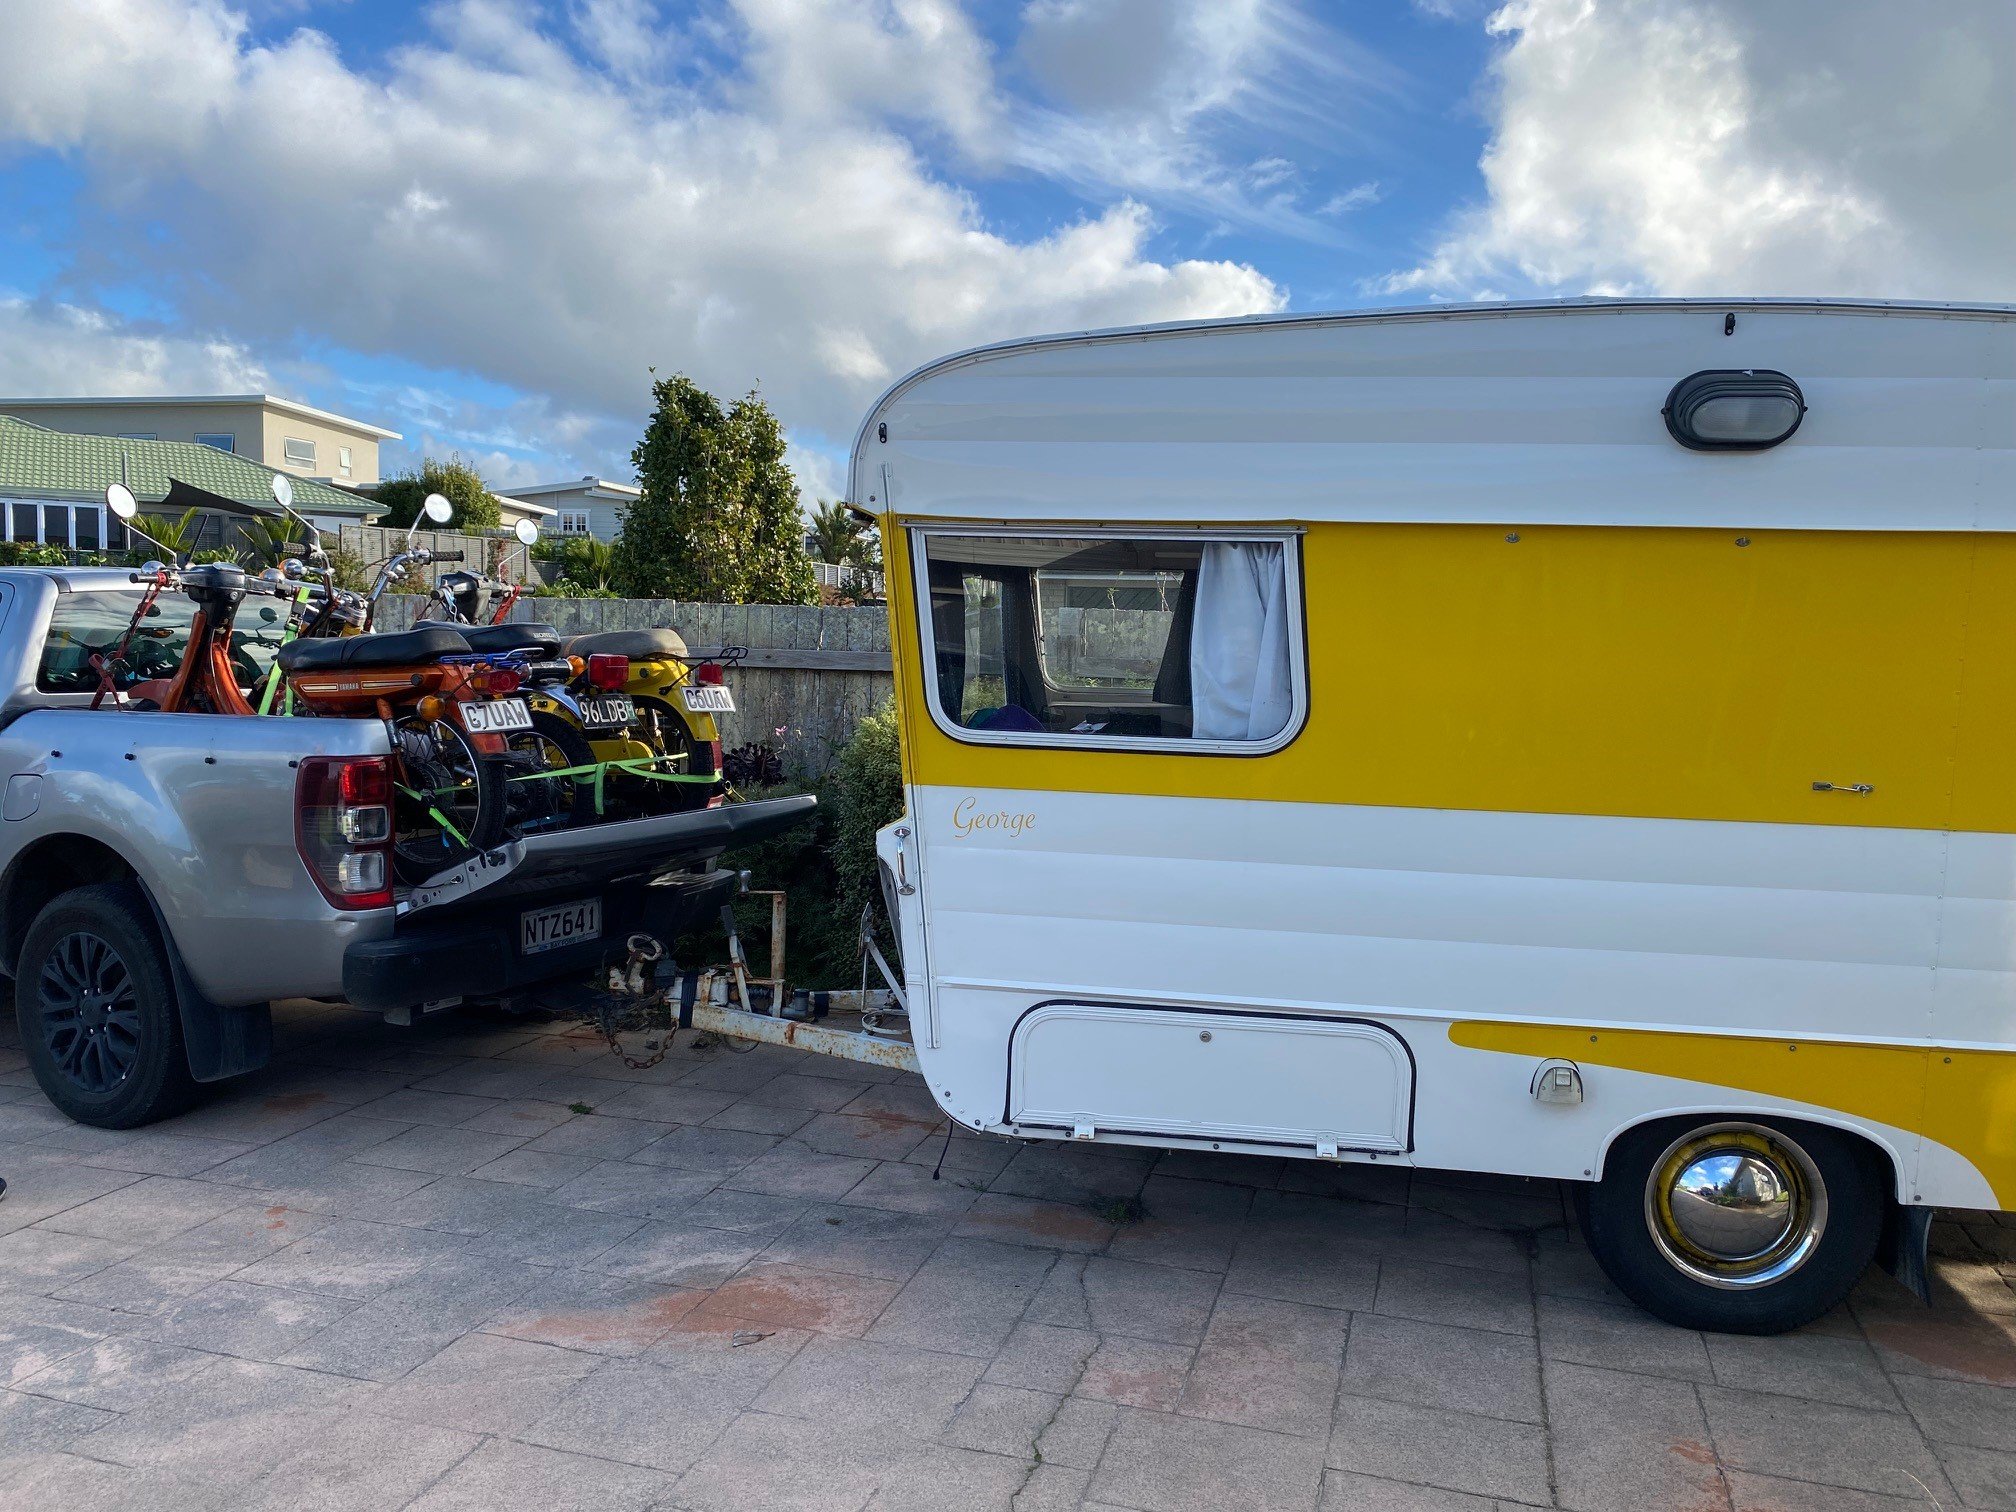
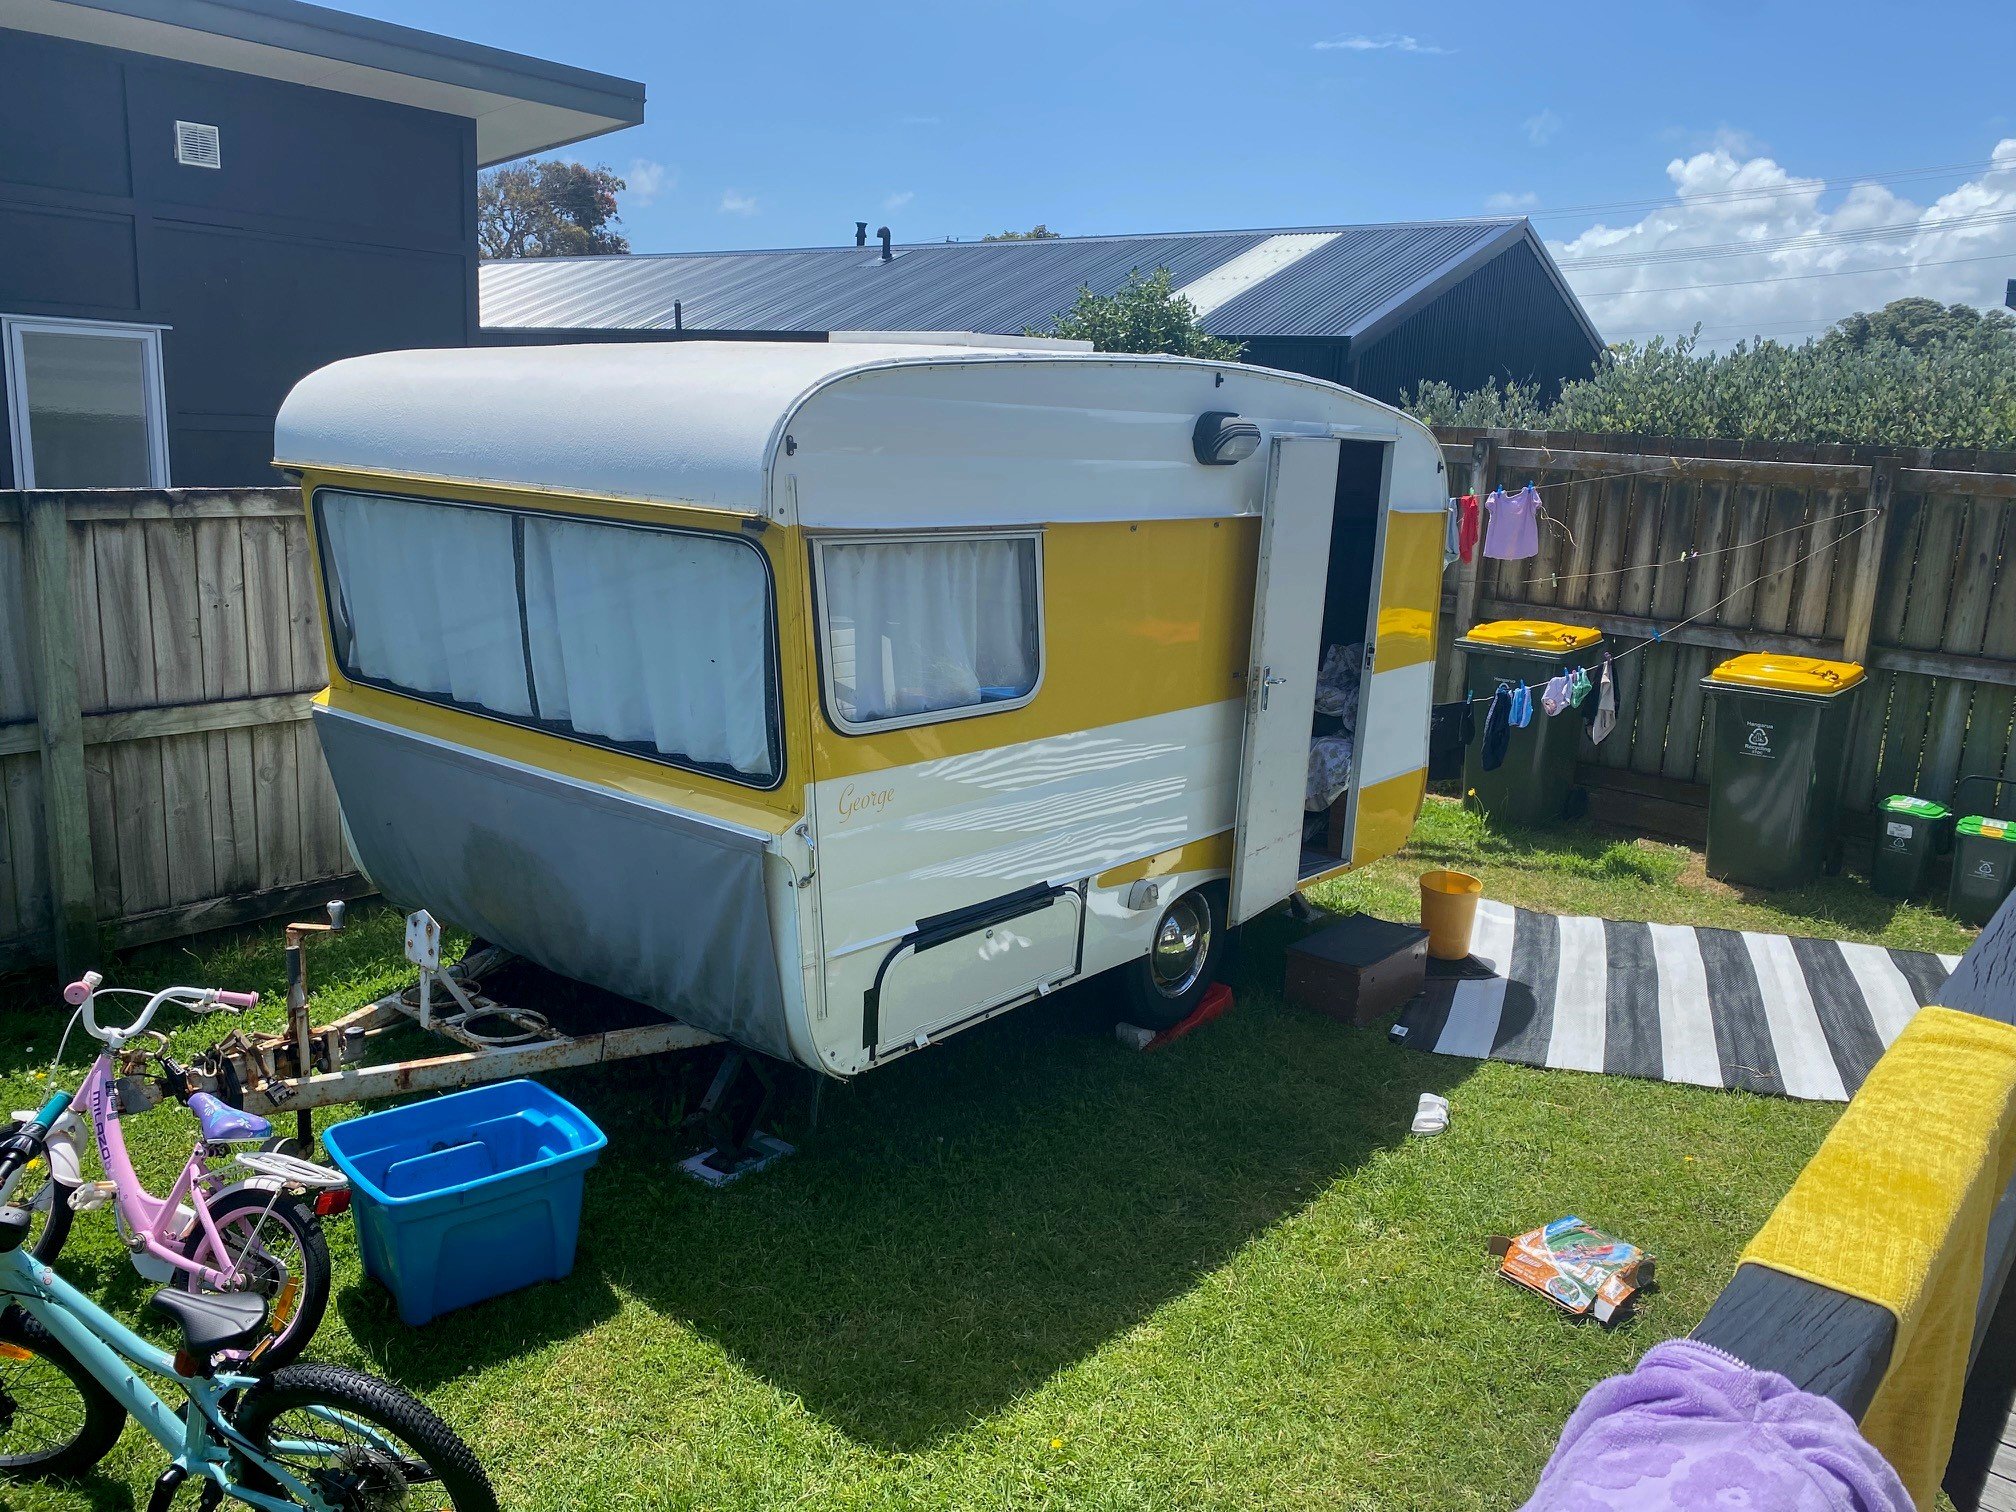
Yep, Luckily my wife is quite excited about the caravan reno, as she was with painting the exterior, which means its easy to get time to spend on it. I was hoping to get the wagon on the road in time for Americarna, but I think that will be extremely unlikely now, especially with the caravan focus.
-
The ship arrived on the 27th of December. Still waiting for it to clear customs... I'm checking my emails every 5 minutes. Surely it must be nearly ready!!! I've re-arranged all the cabinetry in my garage to gain the extra 50mm of length I need to fit it in the shed. And then my caravan has thrown up its interior, so when it does finally arrive, I am going to be in a real space crisis.
-
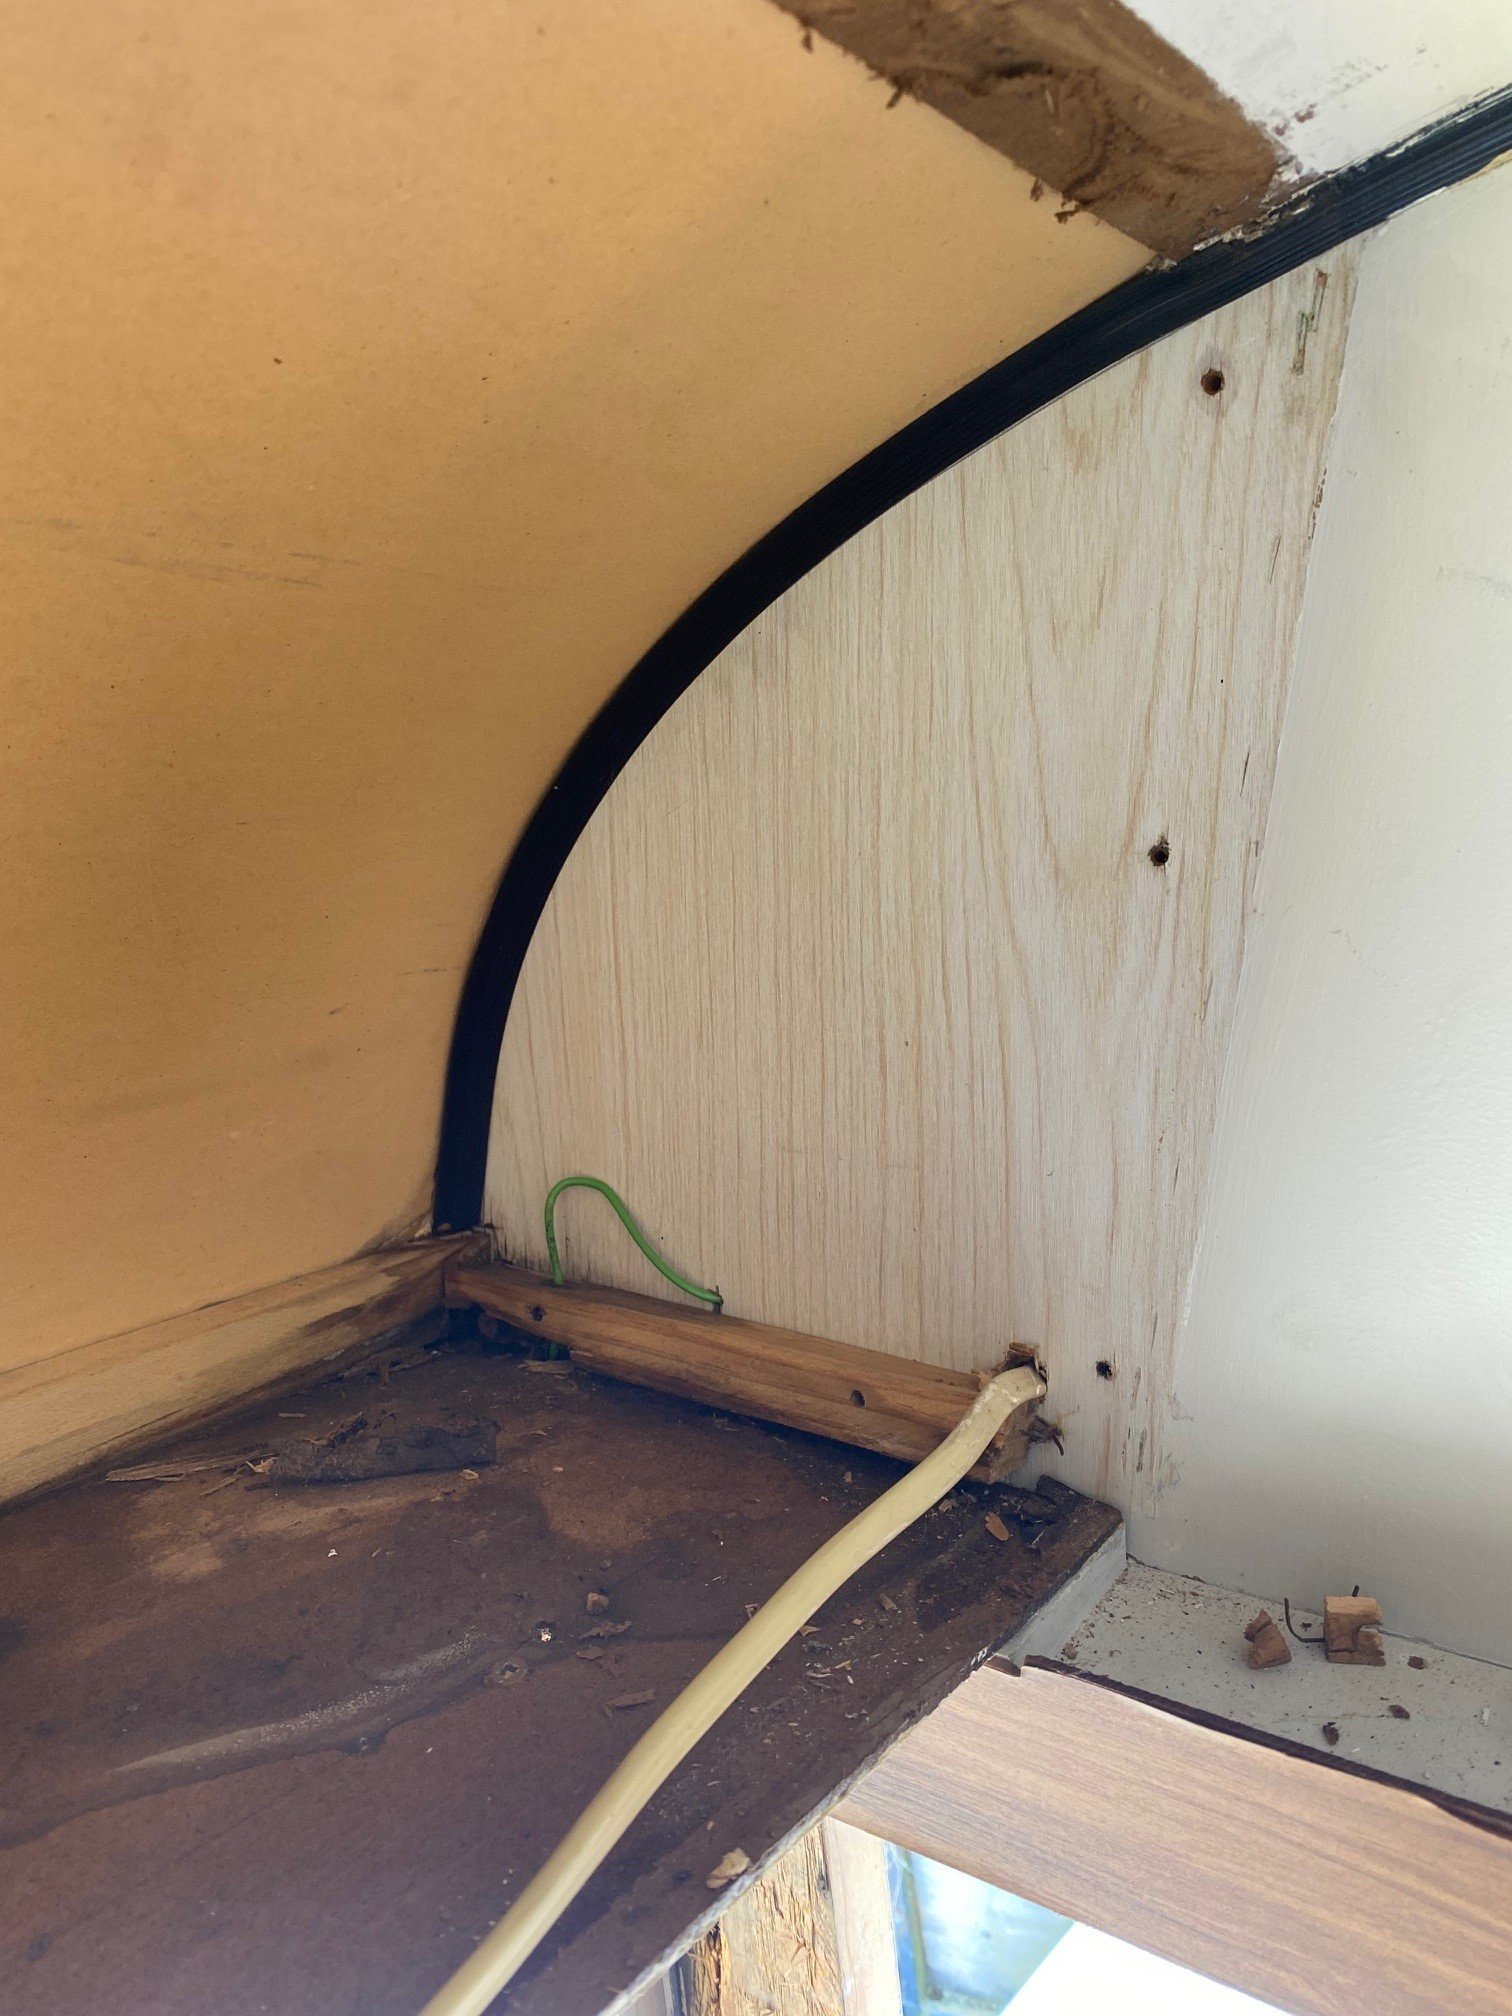
Untreated timber seems to be the done thing. This piece of ply definitely won’t be the weak link in the framing. I’ll definitely be putting some effort into making sure the cladding is well sealed though!
-
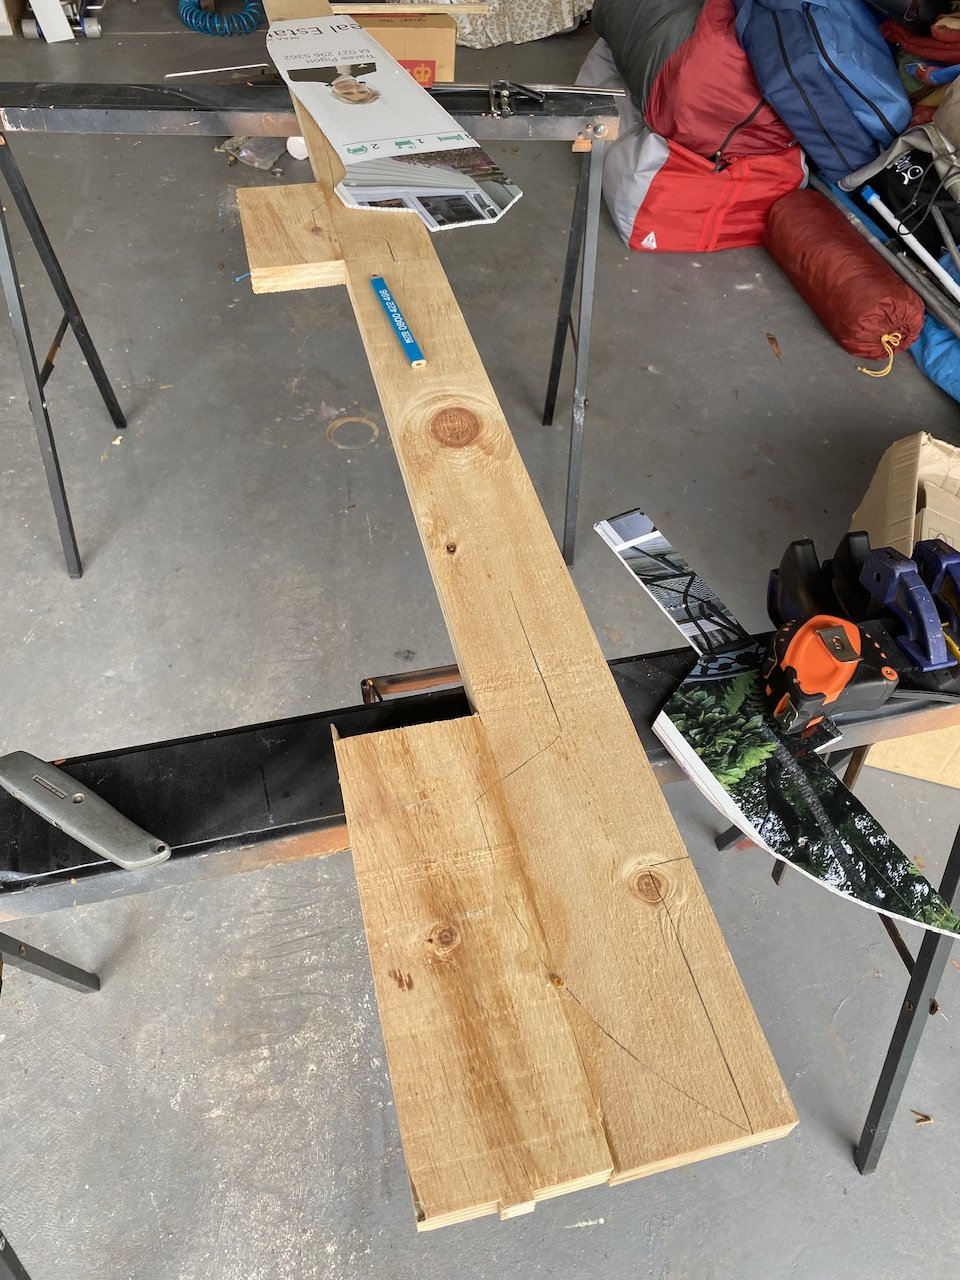
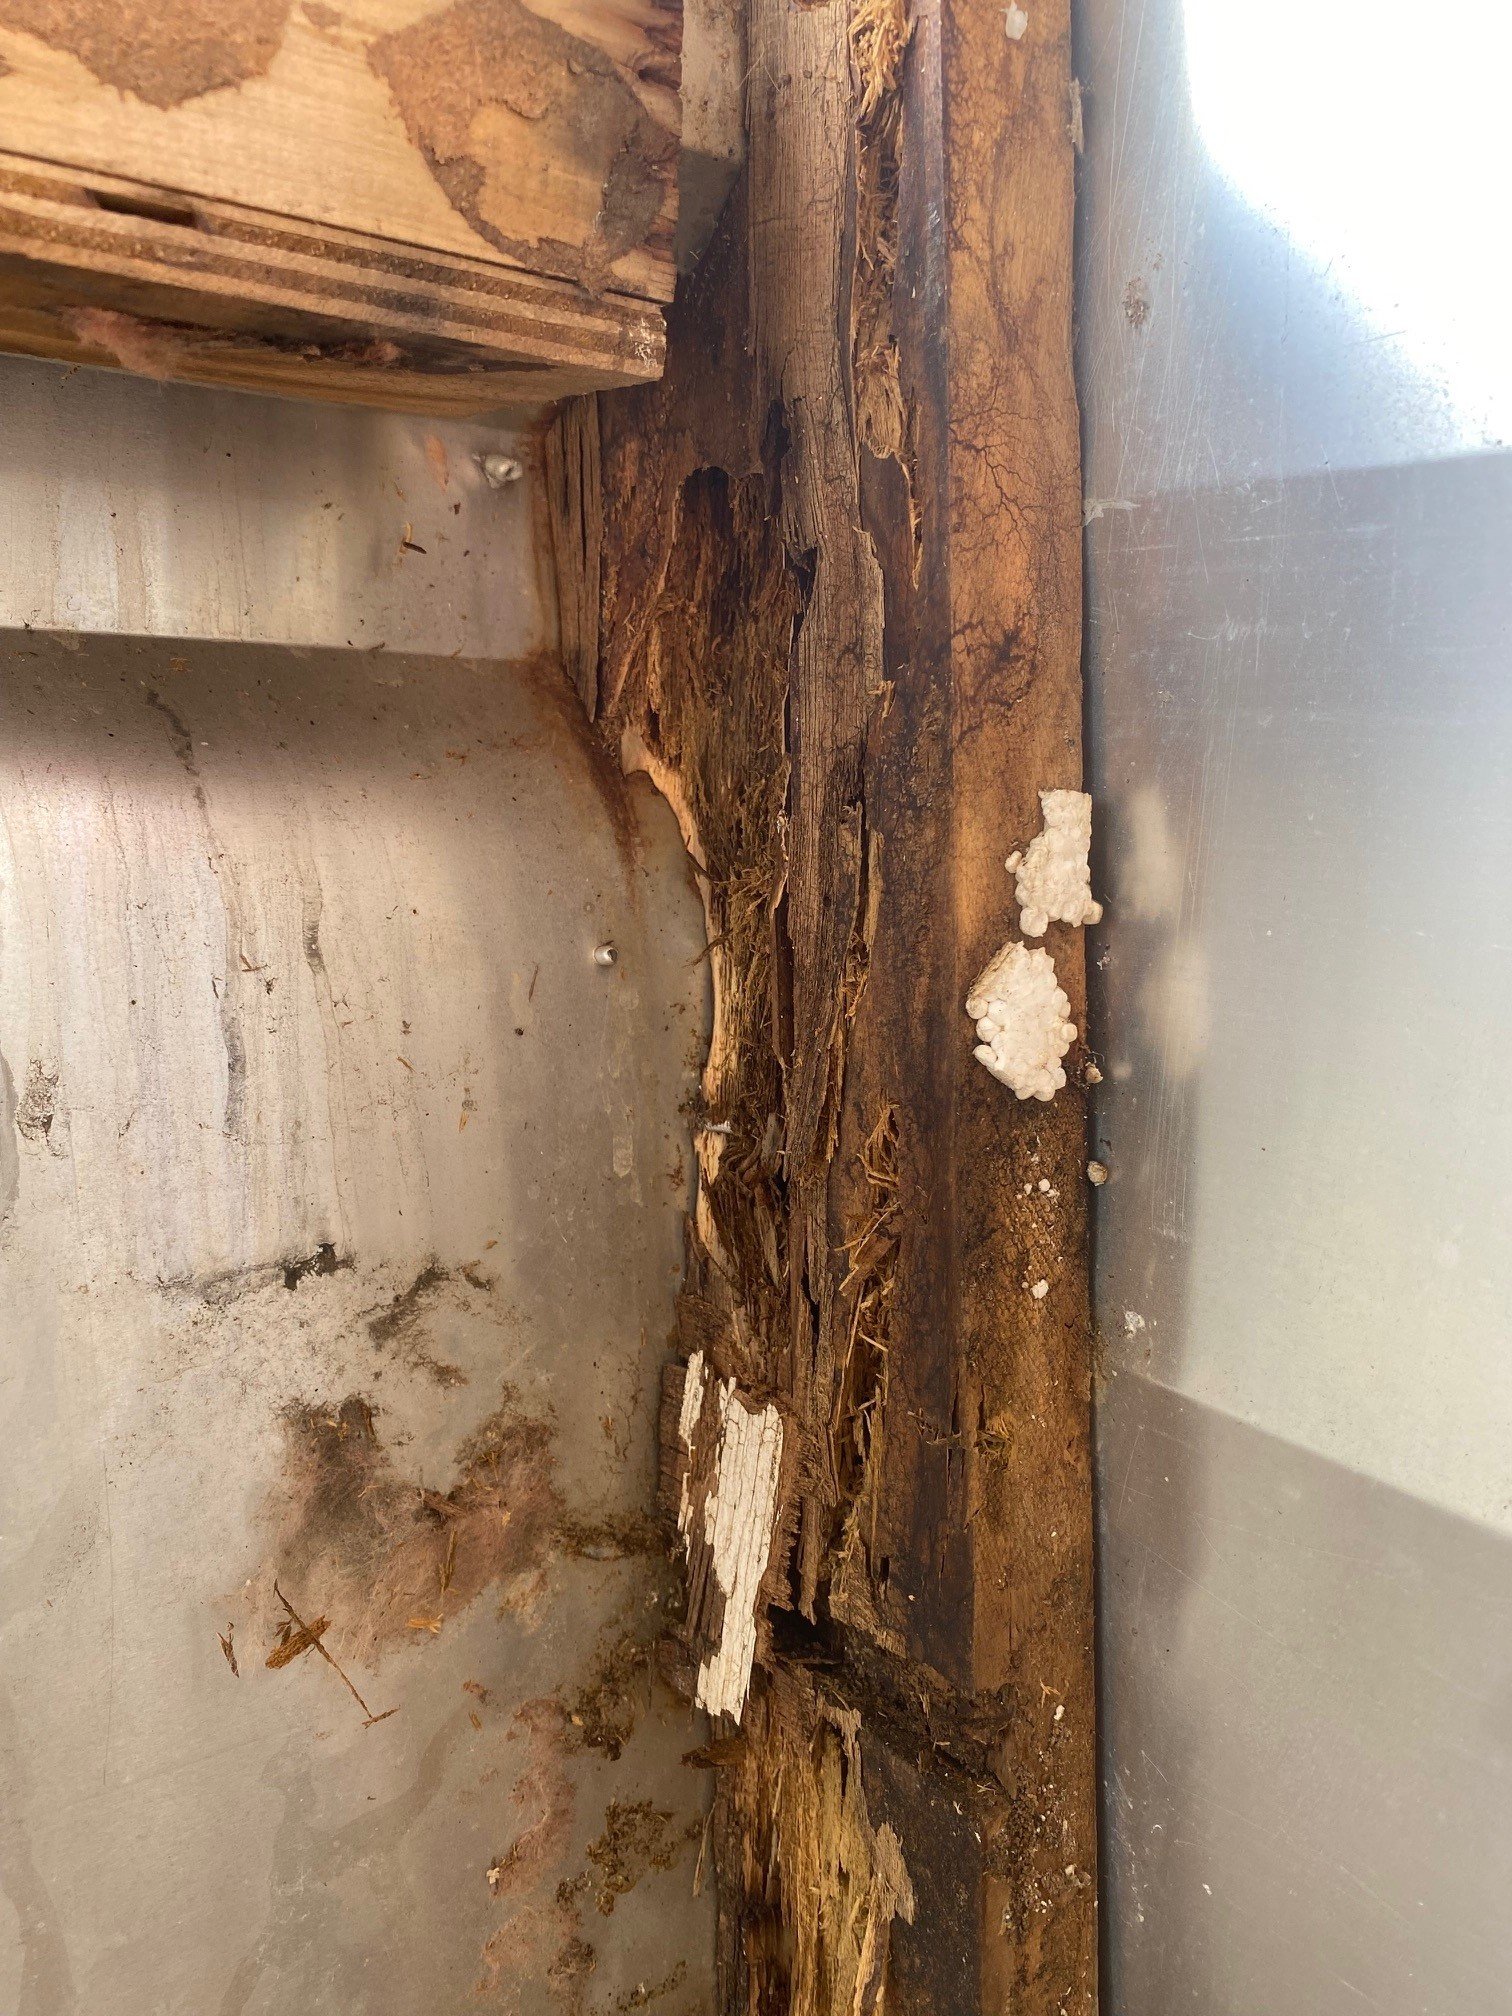
Today I managed to get the new corner post templated, laminated and cut out. Also managed to get the rotten old piece out. Im glad it was so rotten, it would have been a real ball ache if half it was decent timber on account of all the little tack nails holding the aluminium in the corner. Just need to massage the shape slightly to get the fit right and then glue/screw it in.
-
Just went to buy that sheet and he had boards of it 110x30x2.7m for $4 each. So I got 6 of those instead of spending a fortune on a sheet I can’t lift. Winning.
-
The Ply Guy locally has 30mm sheets of untreated industrial ply that I think will be the way to go. https://www.plyguy.co.nz/taranaki/shop/timber/jumboply-3020x1220x30mm-ut-industrial-grade/
-
Any clever ideas for framing timber? It needs to be un-treated to avoid reacting with the aluminium. Its 30mm thick. I'm tossing up laminating some dressed pine to get to 30mm or cutting what I need out of 30mm UT ply. Thoughts?
-
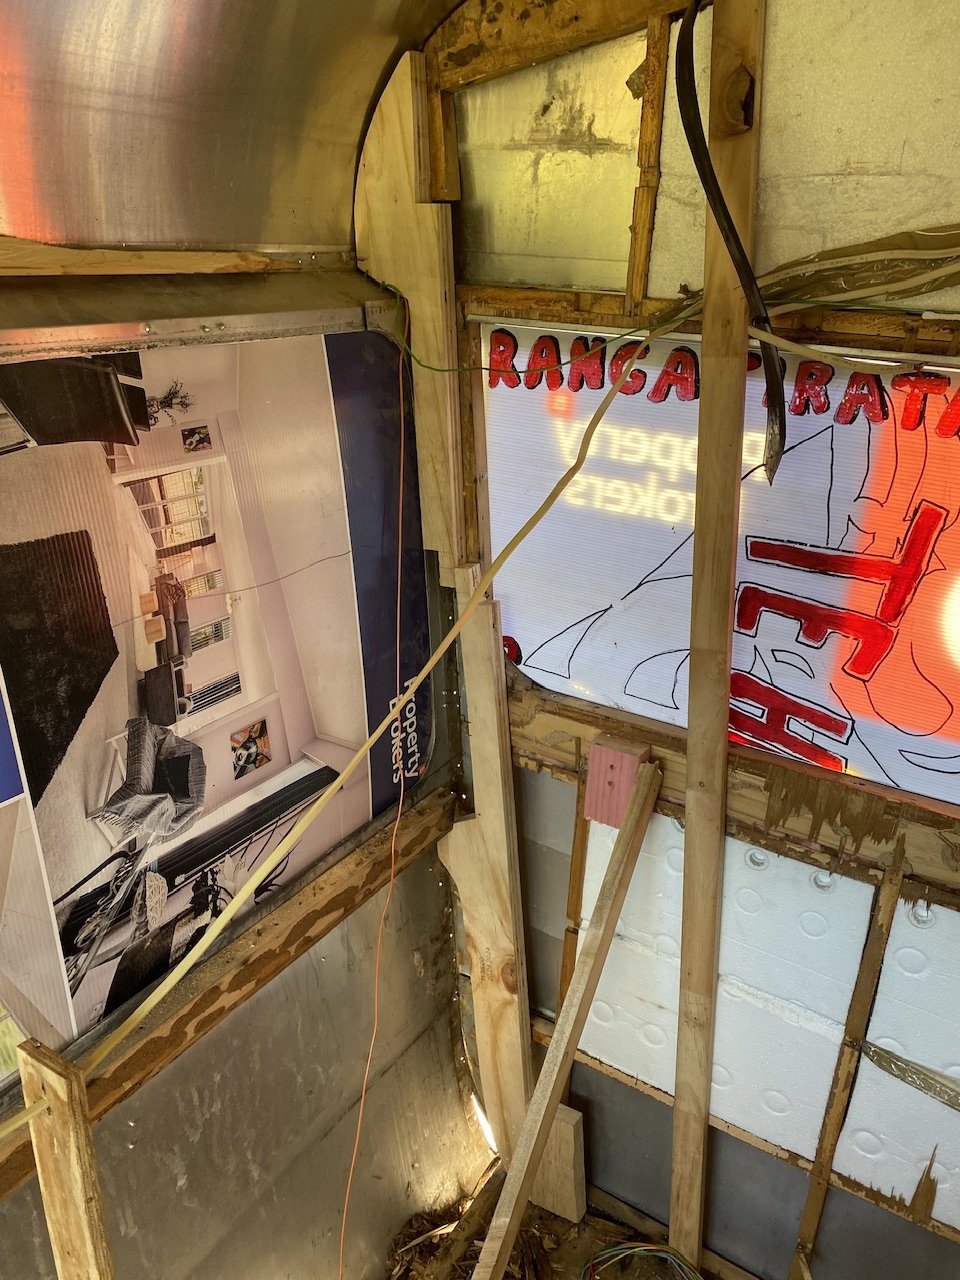
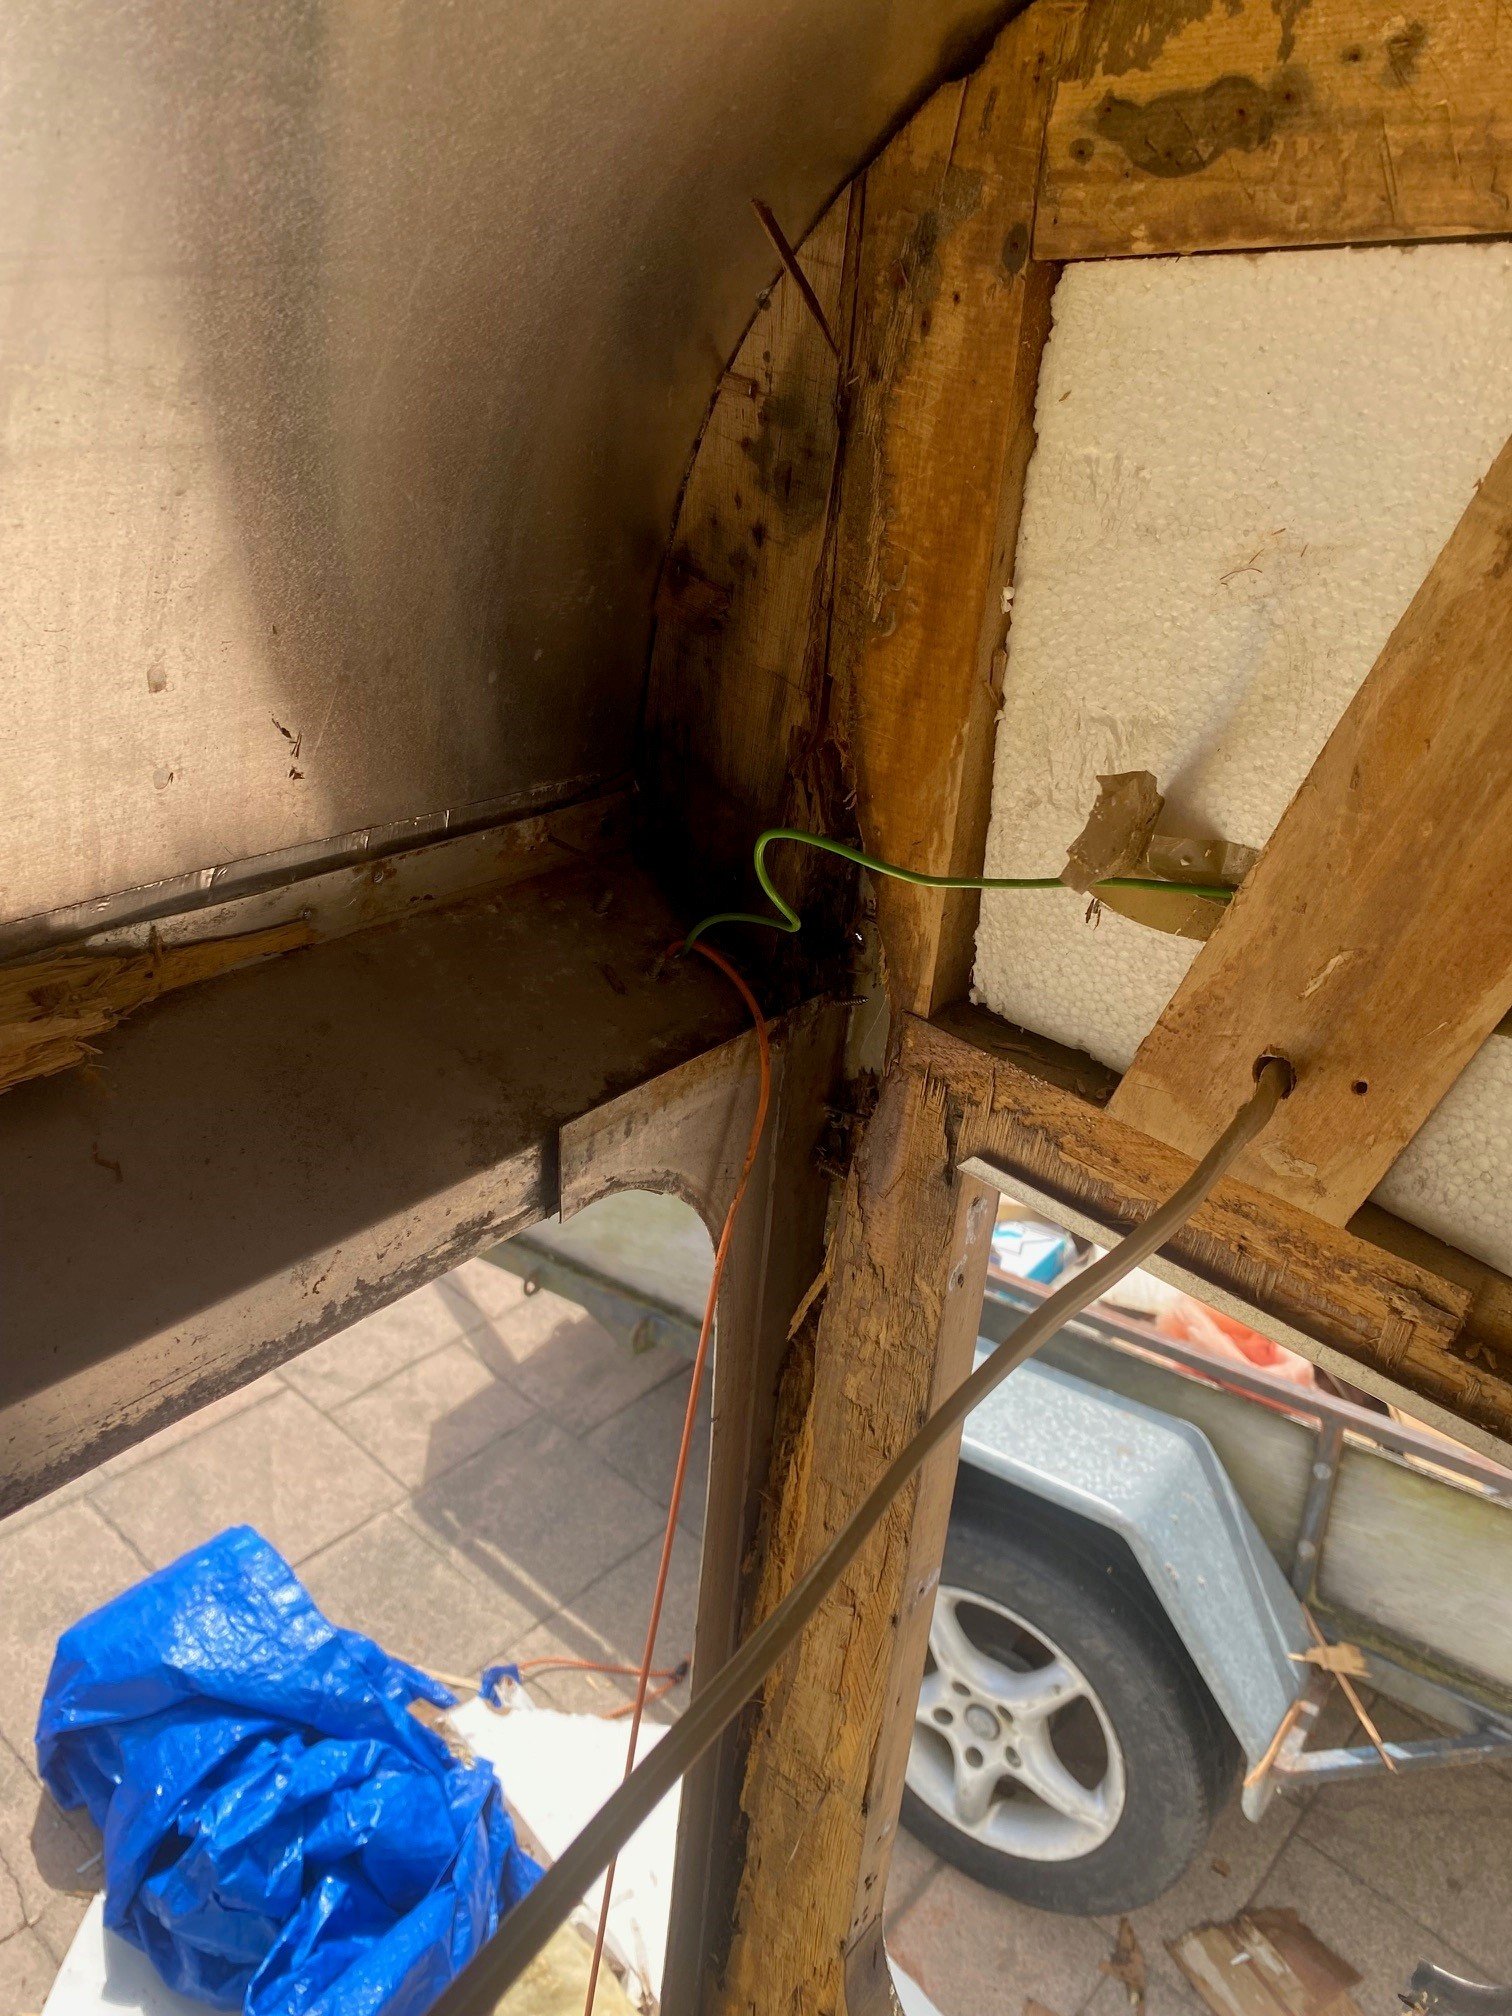
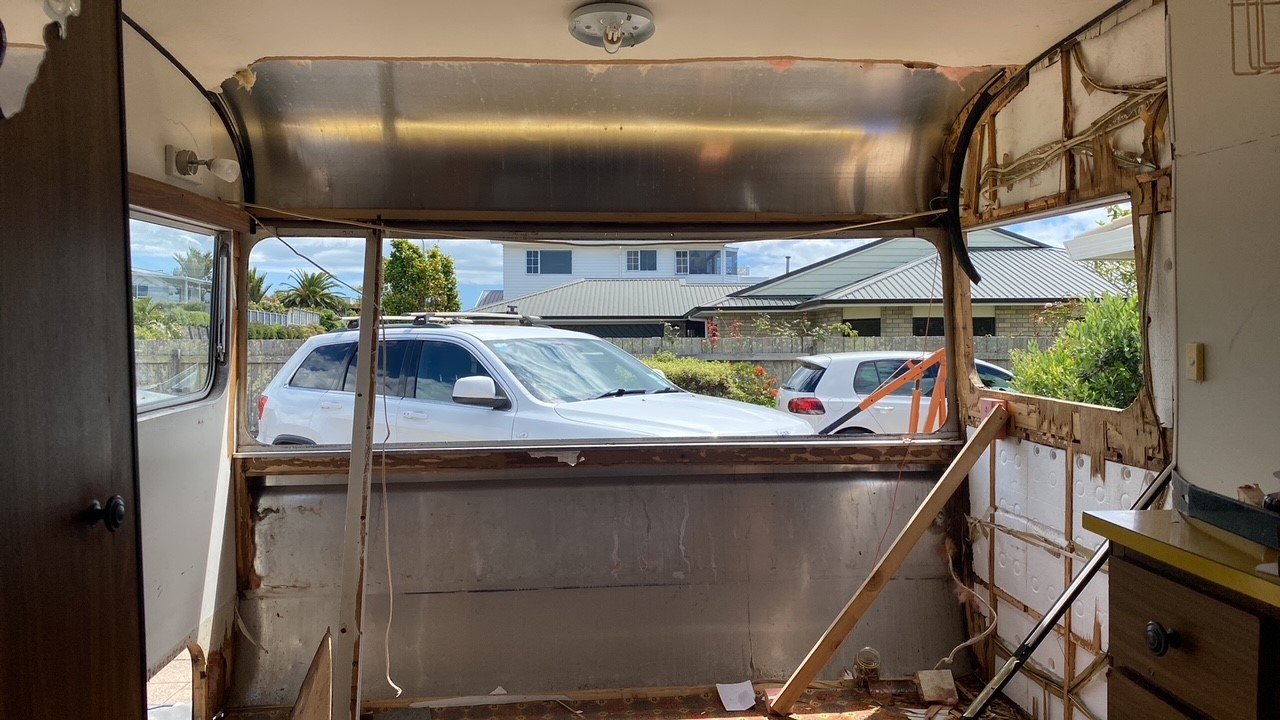
The whole right hand corner is completely rotten, both lower corners have detached, and the front panel has detached. Genuinely, the bed frames were the ONLY thing holding the entire front of the caravan together. Once I lifted the beds out, I noticed that when I was walking around, the entire front wall of the caravan was moving side to side relative to the floor. So I'm in for a major here... eek. Plan at this stage is: Replace the front ~300mm or so of floor to get a good solid base. Rebuild the rotten front corners and framing Reinstall the window with toughened glass Continue through the rest of the caravan doing the same trip and repair. I'm expecting some more major drama around the doorway. Completely re-fit the interior with a layout that better suits our family So now George looks like all the caravan projects that I wasn't allowed to buy... This is something we had always wanted to do in the future, but with the Galaxie arriving any day now, the timing to dive into this project couldn't be any worse. Just gonna have to get stuck in and git-er-dun.
- 29 replies
-
- 10
-

-
-
-
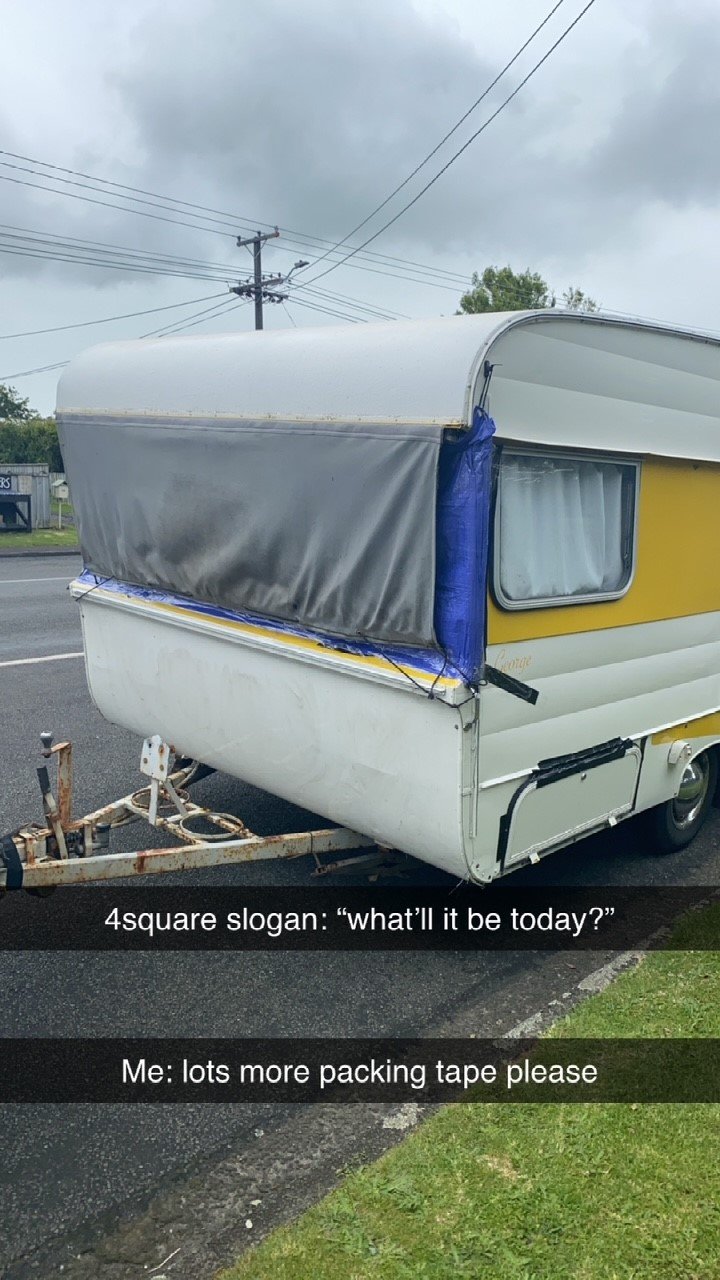
So, after all that last summer we used George a couple of times throughout the year with the duct tape still in place to make sure the window stayed put. Most notable trip was to Taupo for the supercars with the small bikes and @alfalfa. Then spent some money and got a new windscreen made up and installed with a better sized rubber "so the window won't fall out again"... For our summer break this year we decided just to hang around Taranaki and setup the caravan at my parents batch in Opunake. On the drive to Opunake we kept having the awning hatch pop open, which was a bit weird, so out with more duct tape to stop that happening. Then on the drive home, the bloody window popped out again... I had a thorough look over it with the glazier, and we couldn't find any obvious reason for it popping out, so we started to talk about gluing in a new window. I decided to have a bit of a probe around the framing as there were a couple of bits that looked a slightly doughy... Teeny bit of off-colour in the corner of the cabinet: So decided "fuck it, its renovation time". And started stripping the lining off