-
Posts
885 -
Joined
-
Last visited
Everything posted by Abarth
-
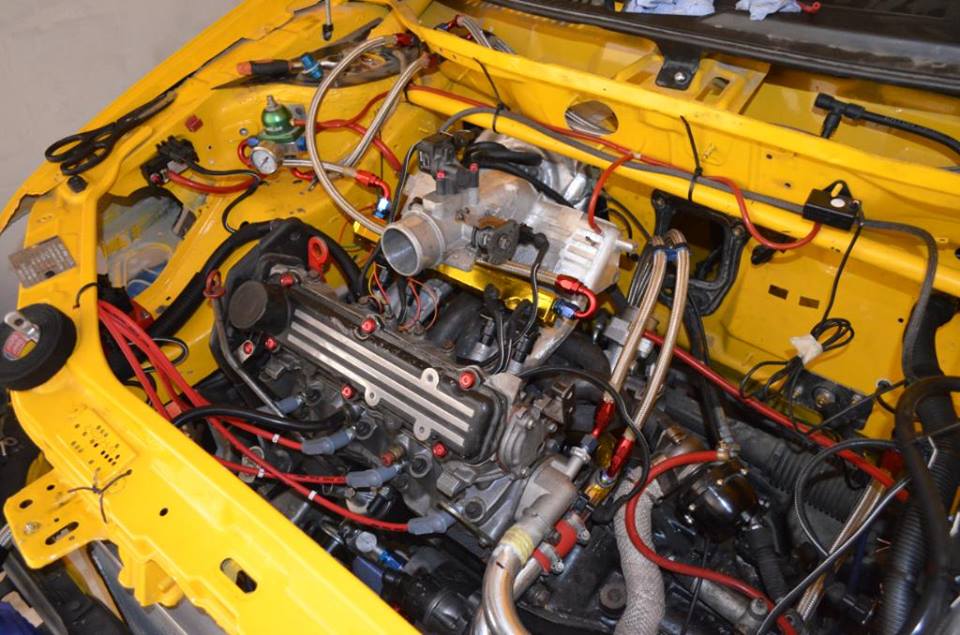
Might give that a go, the factory rail runs this fuel pressure reg on the end which as been replace by a Malpassi one like in the yellow car. Aiming to follow a similar setup as the yellow car in the photo. Did you tap a helicoil in to the AN10 thread?
-
Added a new chain, front and rear sprockets, what a difference! Since this is my first bike and all my previous two wheel rides were Vespas I had no idea the old chain had so much slop in it. Also banged in a genuine Honda oil seal behind the engine sprocket just for future piece of mind. After a lot of work she seems to be running good mechanically now so the focus is on to tidying this up externally. I'm torn on keeping that big chrome, stock fenders classic look or cut everything down to create a cafe racer. In the mean time I brought new mufflers to replace the old rusted out pieces. They came with the thinnest sound baffle already (yellow) so I added an extra sound baffle kit (white) to reduce the noise. Goes well now, although I need to have a fiddle with the carbs again to balance them out, one header pipe had a baffle jammed in it and the other side didn't. Who knows why but I removed it so both cylinders flow at the same rate.
-
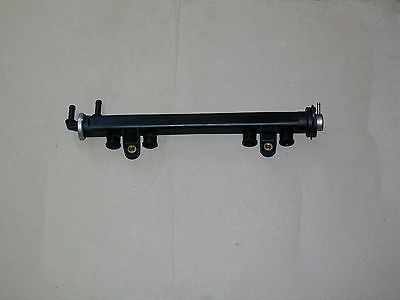
Hey Looking at getting a new fuel rail for a Fiat Punto GT. Been searching on the interwebs and there are a couple round Europe but they are steep at 199 Euros each. I was wondering if anyone has had one custom made locally in NZ? Cheers
-
Those side covers look mint man, I'm keen to do this on my K0. Are you going to spray them with matt clear coat to keep them crisp?
-
The tires on it also looked about the same age as the shocks so they were binned for new ones, I liked the ribbed vintage look so I got some new Chen Sheng and Maxxis tires. Then had a massive day at the workshop; Installed new rear shocks New tires, inner tubes and rim tape Stripped and rebuilt the front forks, new genuine Honda seals and fork oil. New brake shoes, lubed the brake drum mechanisms. Tided up some rough as guts wiring around the points. Rides well now, handles solid round corners and the brakes actually work. Stoked!
-
Next mission was to upgrade the way it went round corners, with blown front seals weeping milky fork oil and shocks on the rear which looked like the factory ones it was lose in the corners. Offered a lush ride over bumps but thats about it. Got some new rear shocks and painted the tops black to blend into the bike better.
-
This graph is for a Vespa 50cc 2 stroke but should be similar to the Honda 50cc 2 stroke. Handy for guessing peak power with different exhausts.
-
7.5 grams would be good to start with. Factory ET2 and LX50 vespas ran these weights and could hit 70kph on the flat.
-
Yeah that port is effectively a breather, filtered through a carbon canister for emissions etc. Apparently people plumb it to the air filter? With the idle mixture screw, generally its clockwise lean, anticlockwise rich. There will be a manual or something which specifies that the screw should be 2 to turns out from close. Set it 2 turns out,start the motor and warm it up, then screw the idle mixture screw slowly in till the motor starts to stumble, this will make it run too lean. Then slowly like quarter turns screw it anti clock wise to let more fuel in, you should hear the engine speed pick up a bit and smooth out. Too far antilock wise and it'll start to run poor again as it'll be rich. Should land somewhere close 2 turns out. I used a glass spark plug to set this up on my motorbike thread, makes it an easy job but you should be able to get it reasonable good by ear.
-
Man this car is sweet, I've enjoyed watching it's progress. That's a port to the carbon canister. How does it run rough? Just Idle? These motors respond well to side draft carbs. I had 40mm Solex's on my Fiat (same motor) and it was good for 130hp in standard tune.
-
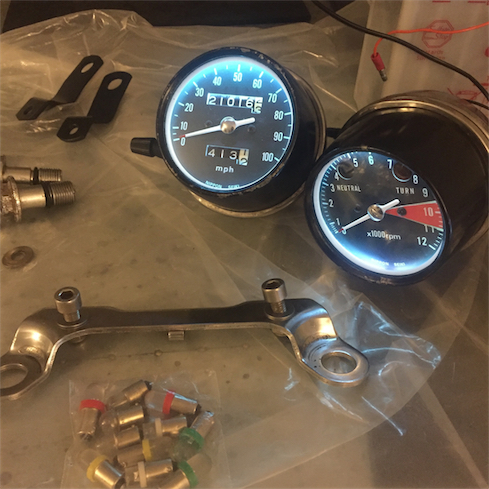
Been riding this as my daily, everything was running good except the battery kept going flat. Found these specs on the net: CB250 = 110W output (~8A)1156 bulb draw - 27.3 watts EACH (1.93A)1157 bulb draw - 26.9 watts full (1.92A), 8.3 watts running (.6A)Headlight - OEM - 25W/35W (1.7A/2.5A)coil charging (assuming 5 ohm primary resistance, 14.5 volts) - 42 watts (2.9A)neutral/indicator bulbs - 3 watts (.2A) So the charging system wasn't up to the task of keeping the battery charged while riding round with the headlights on 100% of the time. To fix this I upgraded to LED bulbs which use about 1/8 the power; brake light, park lights and gauge lights. Way brighter now and the battery stays topped up.
-
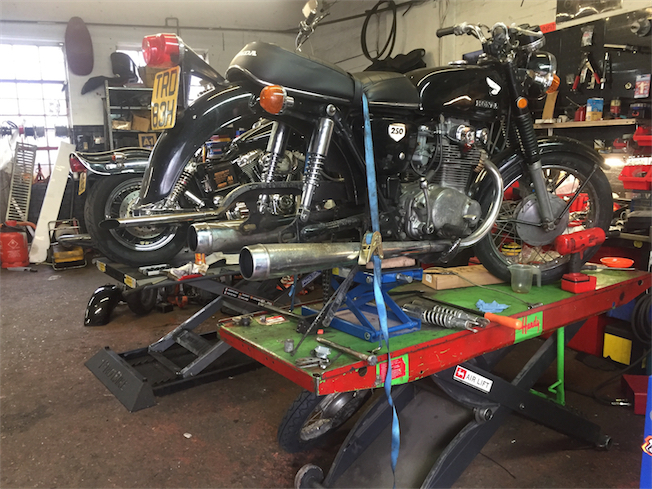
New box of Honda bits arrived, installed new air filters, new rubber carb mounts, battery strap and clutch cable. Old ones were fairly rooted Popped open the clutch cover to see this mess, 45+ years of grease mixed with dirt. Cleaned in up and banged the new cable in. Adjusted the clutch bite and took it for a ride. Totally changed the feel of the bike! Clutch is smooth and gear changes are direct. Stoked, simile on dial achieved. / cool exhaust baffle, i'll replace this soon. Thanks for looking!
-
Seedy's right it uses the vacuum from the carb to raise a little ball to a number. In this case the little ball is more of a peg shape sitting inside the orange plastic case, in the photo is hanging round the 1 on the gauge. When both carbs we in sync the gauge read about 2.5 for both carbs, do one at a time. These are the tools: https://www.machinemart.co.uk/p/gunson-g4053-carbalancer/?da=1&TC=GS-052114053&gclid=CIfA4peDz9ACFQoB0wodavkDSA https://www.machinemart.co.uk/p/gunson-g4074-colortune-single-plug-kit/
-
Yeah they work mint, I set it all up initially by ear and following workshop manuals like the pilot screw should be approx 1.5 turns out etc. But I was way out, running rich with the left cylinder doing all the work. Looking forward to using this on the Fiat's DCOE's when I get back to NZ.
-
Had this running ok but still had trouble with the idle once it got hot it'd sit at 2k rpm when pulling up to the traffic lights then slowly drop until the engine shut off. All the valves were set correct so I got a Gunson Colortune and Carbalancer kit to tune the carbs. Found the carbs were running way too rich as indicated by the yellow flame from the glass spark plug. I adjusted out the pilot jet adjustment removing fuel till I got a good light blue burn going. Once each side's fuel mixture was set I attached the carb balancer and adjusted them till they were in sync. After this the engine happily sat at 1,100rpm idle, thoroughly recommend these two tools for setting up carbs, runs so mint now. New shoes next, looking at Avon Road-riders Gave it a quick clean, as it stands now:
- 42 replies
-
- 10
-

-
Clutch springs will help with launching it at every set of traffic lights. Keep the factory air box if you're keen to keep the noise down. With the pipe it's important to find which RPMs it makes the most power. Then attach cheap tachometer and tune the CVT gearbox to run at peak power RPM using different roller weights.
-
Off with the seat, duct tape fix wasn't cutting it anymore so I ordered a new seat cover and set about recovering it. The foam underneath was actually pretty good, also drowned the metal seat pan in rust killer to tidy the underside up a bit. Stretched the cover back on, refitted the chrome lining and strap. The second hand Keihin carbs arrived too so I pulled them apart for a rebuild as my original ones were toast. Amazingly the insides of these replacement carbs were immaculate, I simply swapped out the rebuild kit parts from the old ones to the new and blew them out with carb cleaner. Along with the new seat I put the carbs on the motor. Fired straight up and no leaks! Hooray! Then it pissed down. Wet weather testing, after it cleared up the little Honda fired straight back up. Good to know it won't cut out riding through the rain. Riding it round after the rain felt ok, clutch was grabby and jolty like it hadn't been used in a long time. Finding neutral was a hard, I noticed a lot of slack in the tie rod between the engine and gear leaver, are they meant to have slack? All and all happy with how its running.
-
While waiting for the tank to cure I hit the engine with a brass wire brush to tidy up the oxidation on the engine. Worked surprisingly well. Before After: Other side of the engine but yeah it tidied up good. Also got the new seat cover which was for the later model one, waiting on the right one to come now but even the incorrect one tidies up the look of bike. Put some fuel in it and tried starting it after the carb rebuild and the right carb isn't running right, left one pulls RPMs no worries but there must still be an issue on the right. It also leaks like crazy with a cracked overflow pipe in the fuel bowl so I have ordered another set of carbs to build one good get out off.
-
Inside of the fuel tank was very rusty and kept dropping bits of rust into the fuel so I got a POR15 tank kit to fix this. First I stared with the degreaser: Then added the Metal Ready rust converted for 2 hours turning every 30mins: So far so good, have to wait for it to dry out completely before adding the final seal paint to the tank. After that it's a four day wait to let it cure before filling up. Added the sealant paint, came out a bit lumpy, but coverage is good. Earlier in the week I cleaned the inside of the carbs but reused the all the old parts to get it running. Which it did but not well, wasn't making any power. I decided to give them a proper rebuild with a Keyster carb kit:
-
After riding the Honda home the right cylinder started smoking like crazy in traffic, bellowing a white smoke screen behind, which is great from high speed escapes but not so much oil consumption. I assume what's happening is that once the oil heats up it runs past seal and into the combustion chamber. Question is - is there an easy way to change them without having to take the head off? It looks like a generic collet that holds the valve spring. Need a valve spring compressor that bolts to the head?
-
Got stuck into the bike as soon as we got it home, side walk mechanic style complete with the necessary G&T. This bike hadn't run properly for 8 years so I started off with the basics, gave it a good clean and degrease. Rust stains on everything, use the tinfoil and lemon trick on the chrome which brought it back to life. Cut the paint too which actually came up not too bad in low light Removed the rear chrome parcel carrier which I'll hang onto if I ever decide to do some long distance rides. The carbs on the other hand; dang time has been unkind to these. I pulled them apart and soaked them in carb cleaner over night. After this they actually came up alright, I still need to put a proper rebuild kit in as the O rings are toast and one leaks from the float valve not shutting properly. Ordered a tone of spare parts to throw at it, amazingly 95% of the parts available are genuine Honda ones. Put in new Points, Condenser, Spark Plugs, Spark Plug Cap, Fuel Tap seals, Fuel Line, Battery, etc. Amazingly as soon as I hooked up battery everything electrical worked. I put the freshly cleaned carbs back on and hooked up the fuel lines. After a fair amount of cranking she burst into life sitting there idling da.da....da.da.....da.da, 180 degree cranks have a pretty cool idle sound I reckon. Took it down for a MOT and it passed so she's all legal. Now I can focus on tidying this up and getting it running smoother with a carb rebuild. As mentioned earlier rust stains, so much!! Where the chrome was absolutely gone I brought new parts to tidy it up. Still a long way to go but the previous owner threw in a full stainless hex screw kit for it too which I was stoked about. On with the hotness! Makes the rest of the bike look rough as guts now haha.
-
After a long time of not having wheels here in London I finally found something worth getting. I was searching for an older vintage bike and as a bonus of living in the UK there are loads of old vintage Japanese stuff here, CX500's, RD350's and I've course CB's. This example is a 1970 Honda CB250 K something which had been sitting under a tarp for 8 years behind the previous owners garage. Luckily the frame is rust free and the engine appears solid with 33k on the clock. Its only 250cc however these motors were also built in 350cc form so a future upgrade will be on the cards which will probably be plenty for round central London. I go pick it up this Saturday, plans are to tidy it up and lower it a bit. Heres the pictures of when we first went to check it out -


