Mr.Mk1
-
Posts
3,531 -
Joined
-
Last visited
-
Days Won
4
Content Type
Forums
Downloads
Events
Gallery
Everything posted by Mr.Mk1
-
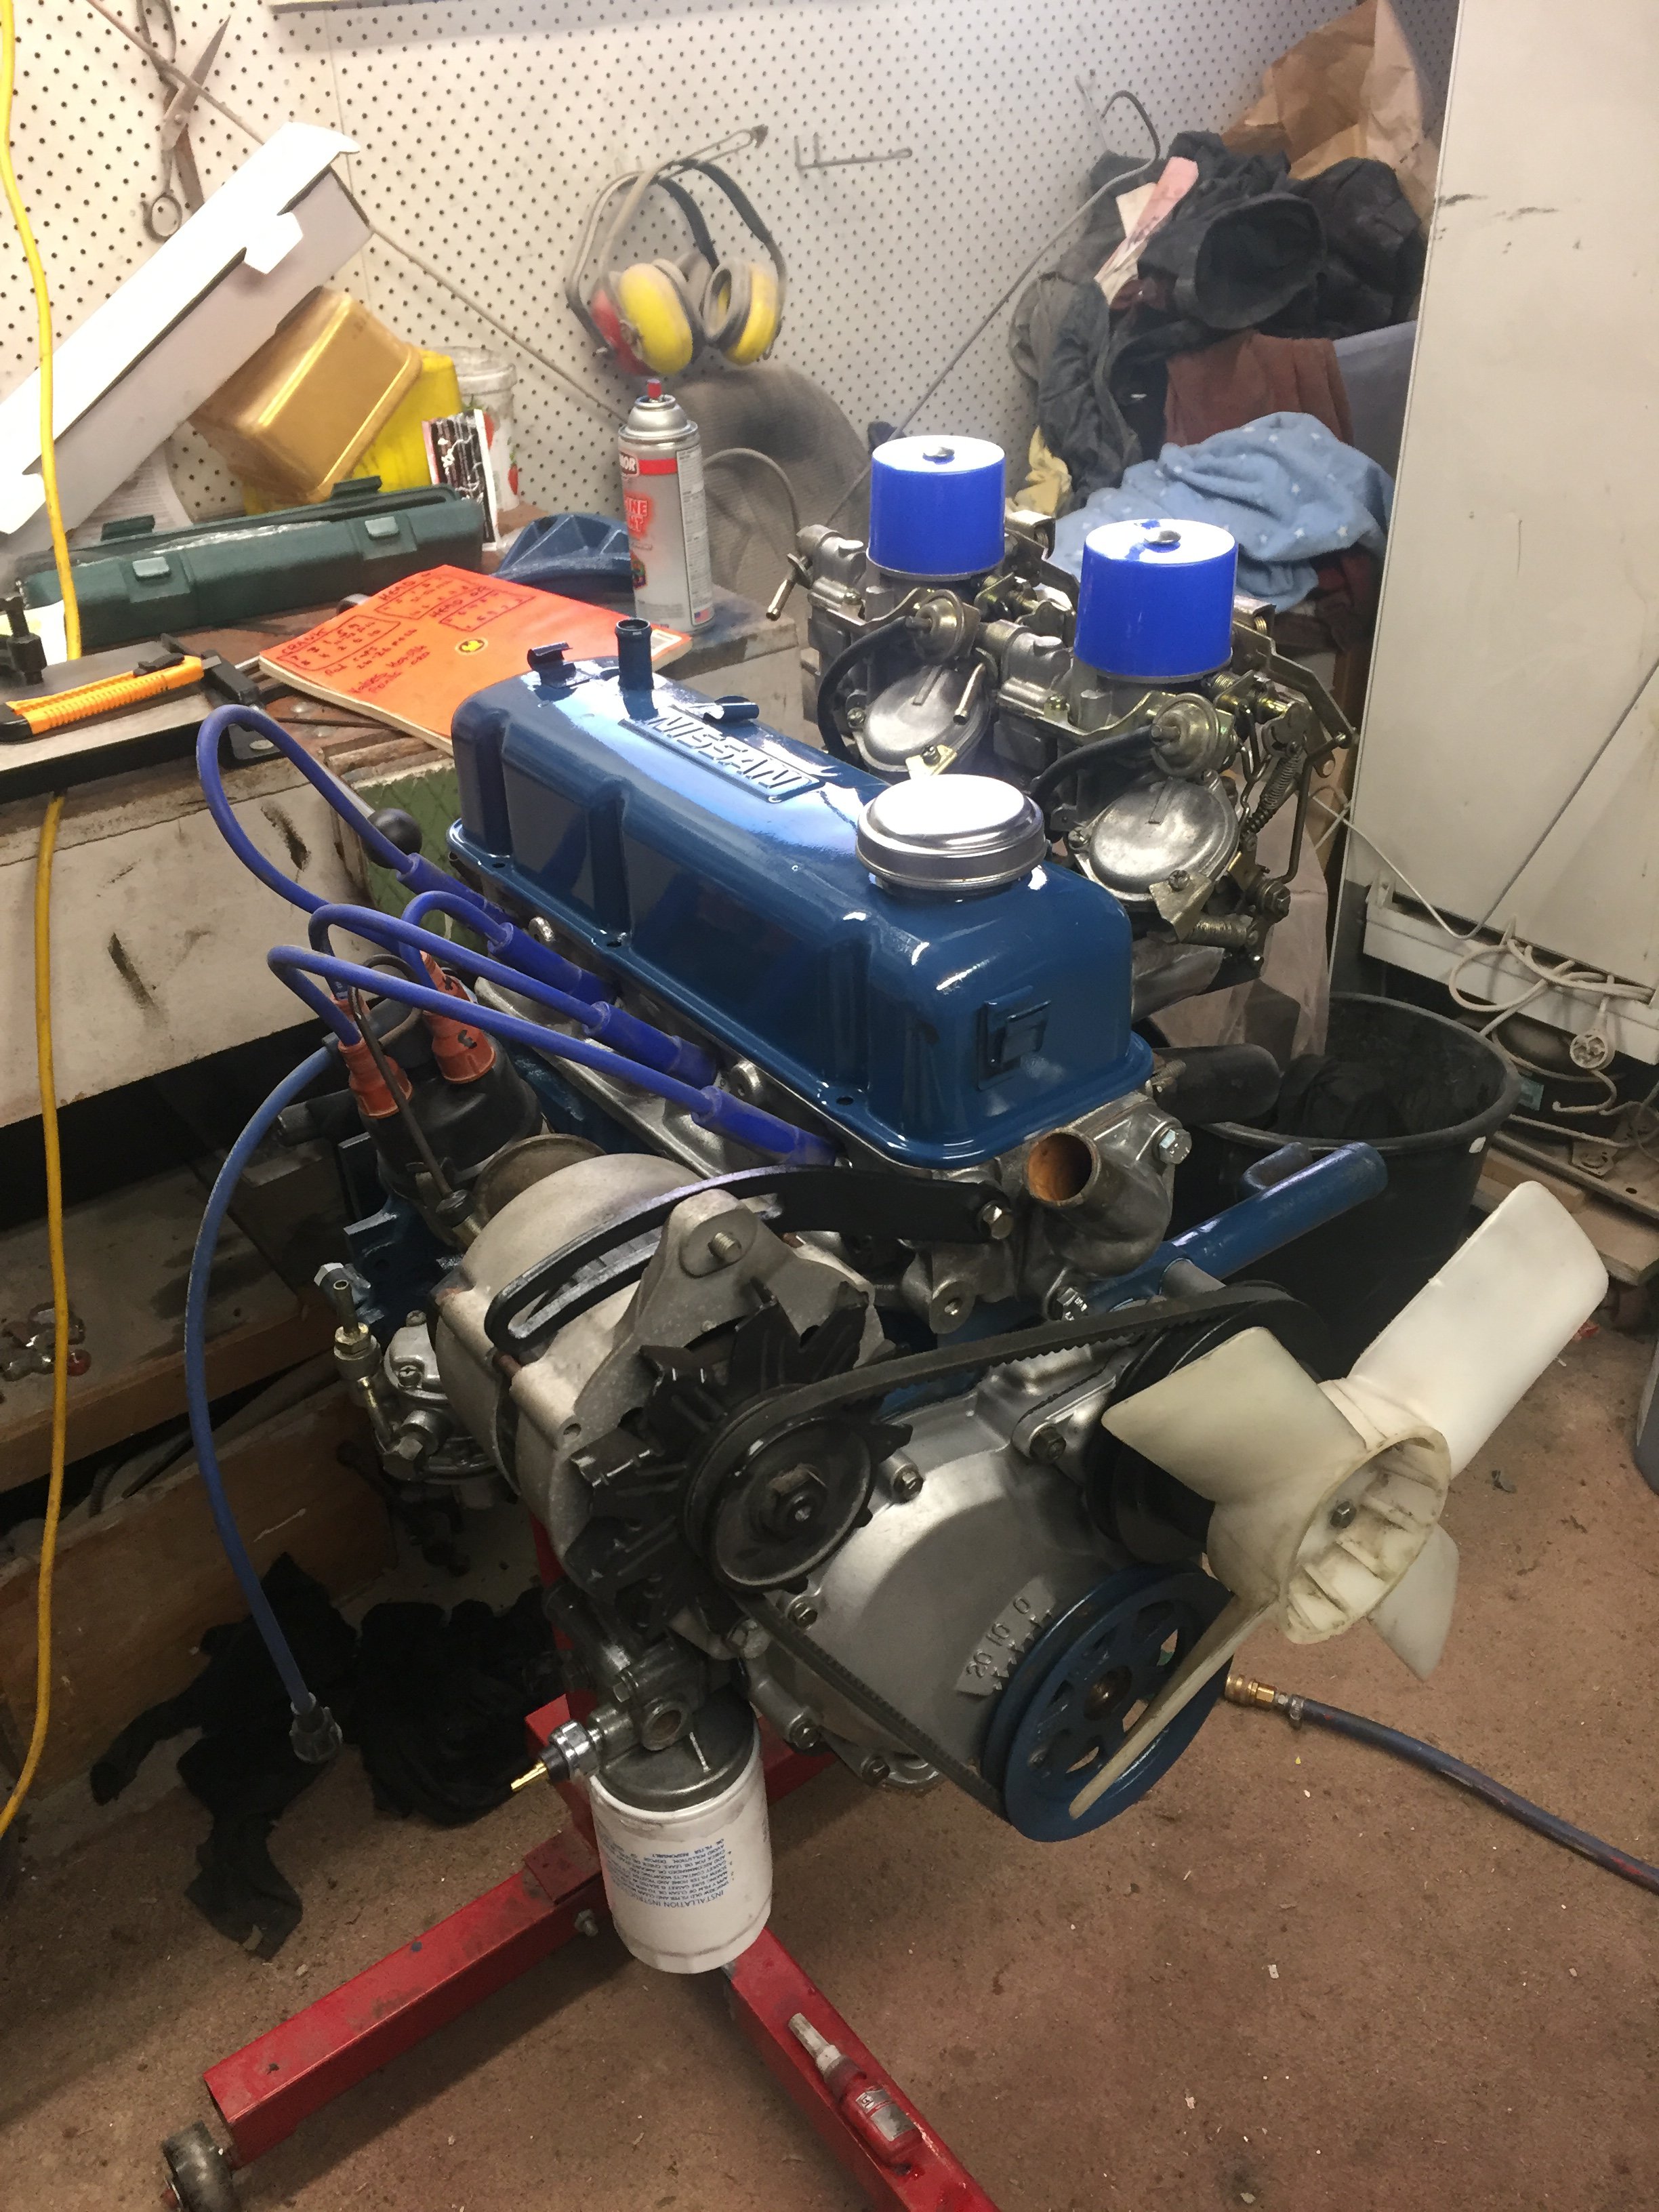
Engines back in and plumbed, borrowed a standard inlet and carb from mint16 to use while its run in to eliminate teething issues with twin carbs. just missing one carb bit and I can fire it up. Haven't attached headers to exhaust yet just incase it needs to come out for any reason. Even though they are 120y flows they clear everything well, just had to trim the last 4 inches off cause it tilted upward and was touching the modified gearbox member but now it's trimmed off its nicely in line with the old system. hoarding cured a few problems I had with radiator and breather hoses so that was a good result with no outlay! stand by
- 106 replies
-
- 19
-

-
Things happened and the motors in the bay
-
started off a bit hmmmm. the hardner went off so tried some other stuff I have laying around and seem to have gotten away with it! It's touch dry and I can leave it sit for a week. Yes I painted over the brake lines but it's so frustrating unmasking them that I now just put paper behind them and spray them black with an aerosol.
- 106 replies
-
- 16
-
-
Good day today, went well filled and tidied 20-something holes that weren't needed, cleaned and sanded, masked up ready to spray some red tomorrow. Also painted the horn, brackets, regulator, wiper motor etc. chopped out some wires that went to nowhere, trimmed back the old fuel return.
- 106 replies
-
- 10
-
-
Got the thing assembled...mostly Heres the cut and shut manifold we made, came out wicked, thanks nick! Was choked by the gasket set missing 2 sump parts and a rocker cover gasket... ACL set had lots of spare Manifold and hotbox gaskets and missing the vital ones. Permaseal has EVERYTHING! the set was left over from when engine builder supplied gasket set for wife's A14. And I too had permaseal from work. That and no crank pulley bolt. Pinched the wife's one while assembling and luckily remembered to give it back.

- 106 replies
-
- 22
-
-
Out you come old chum
-
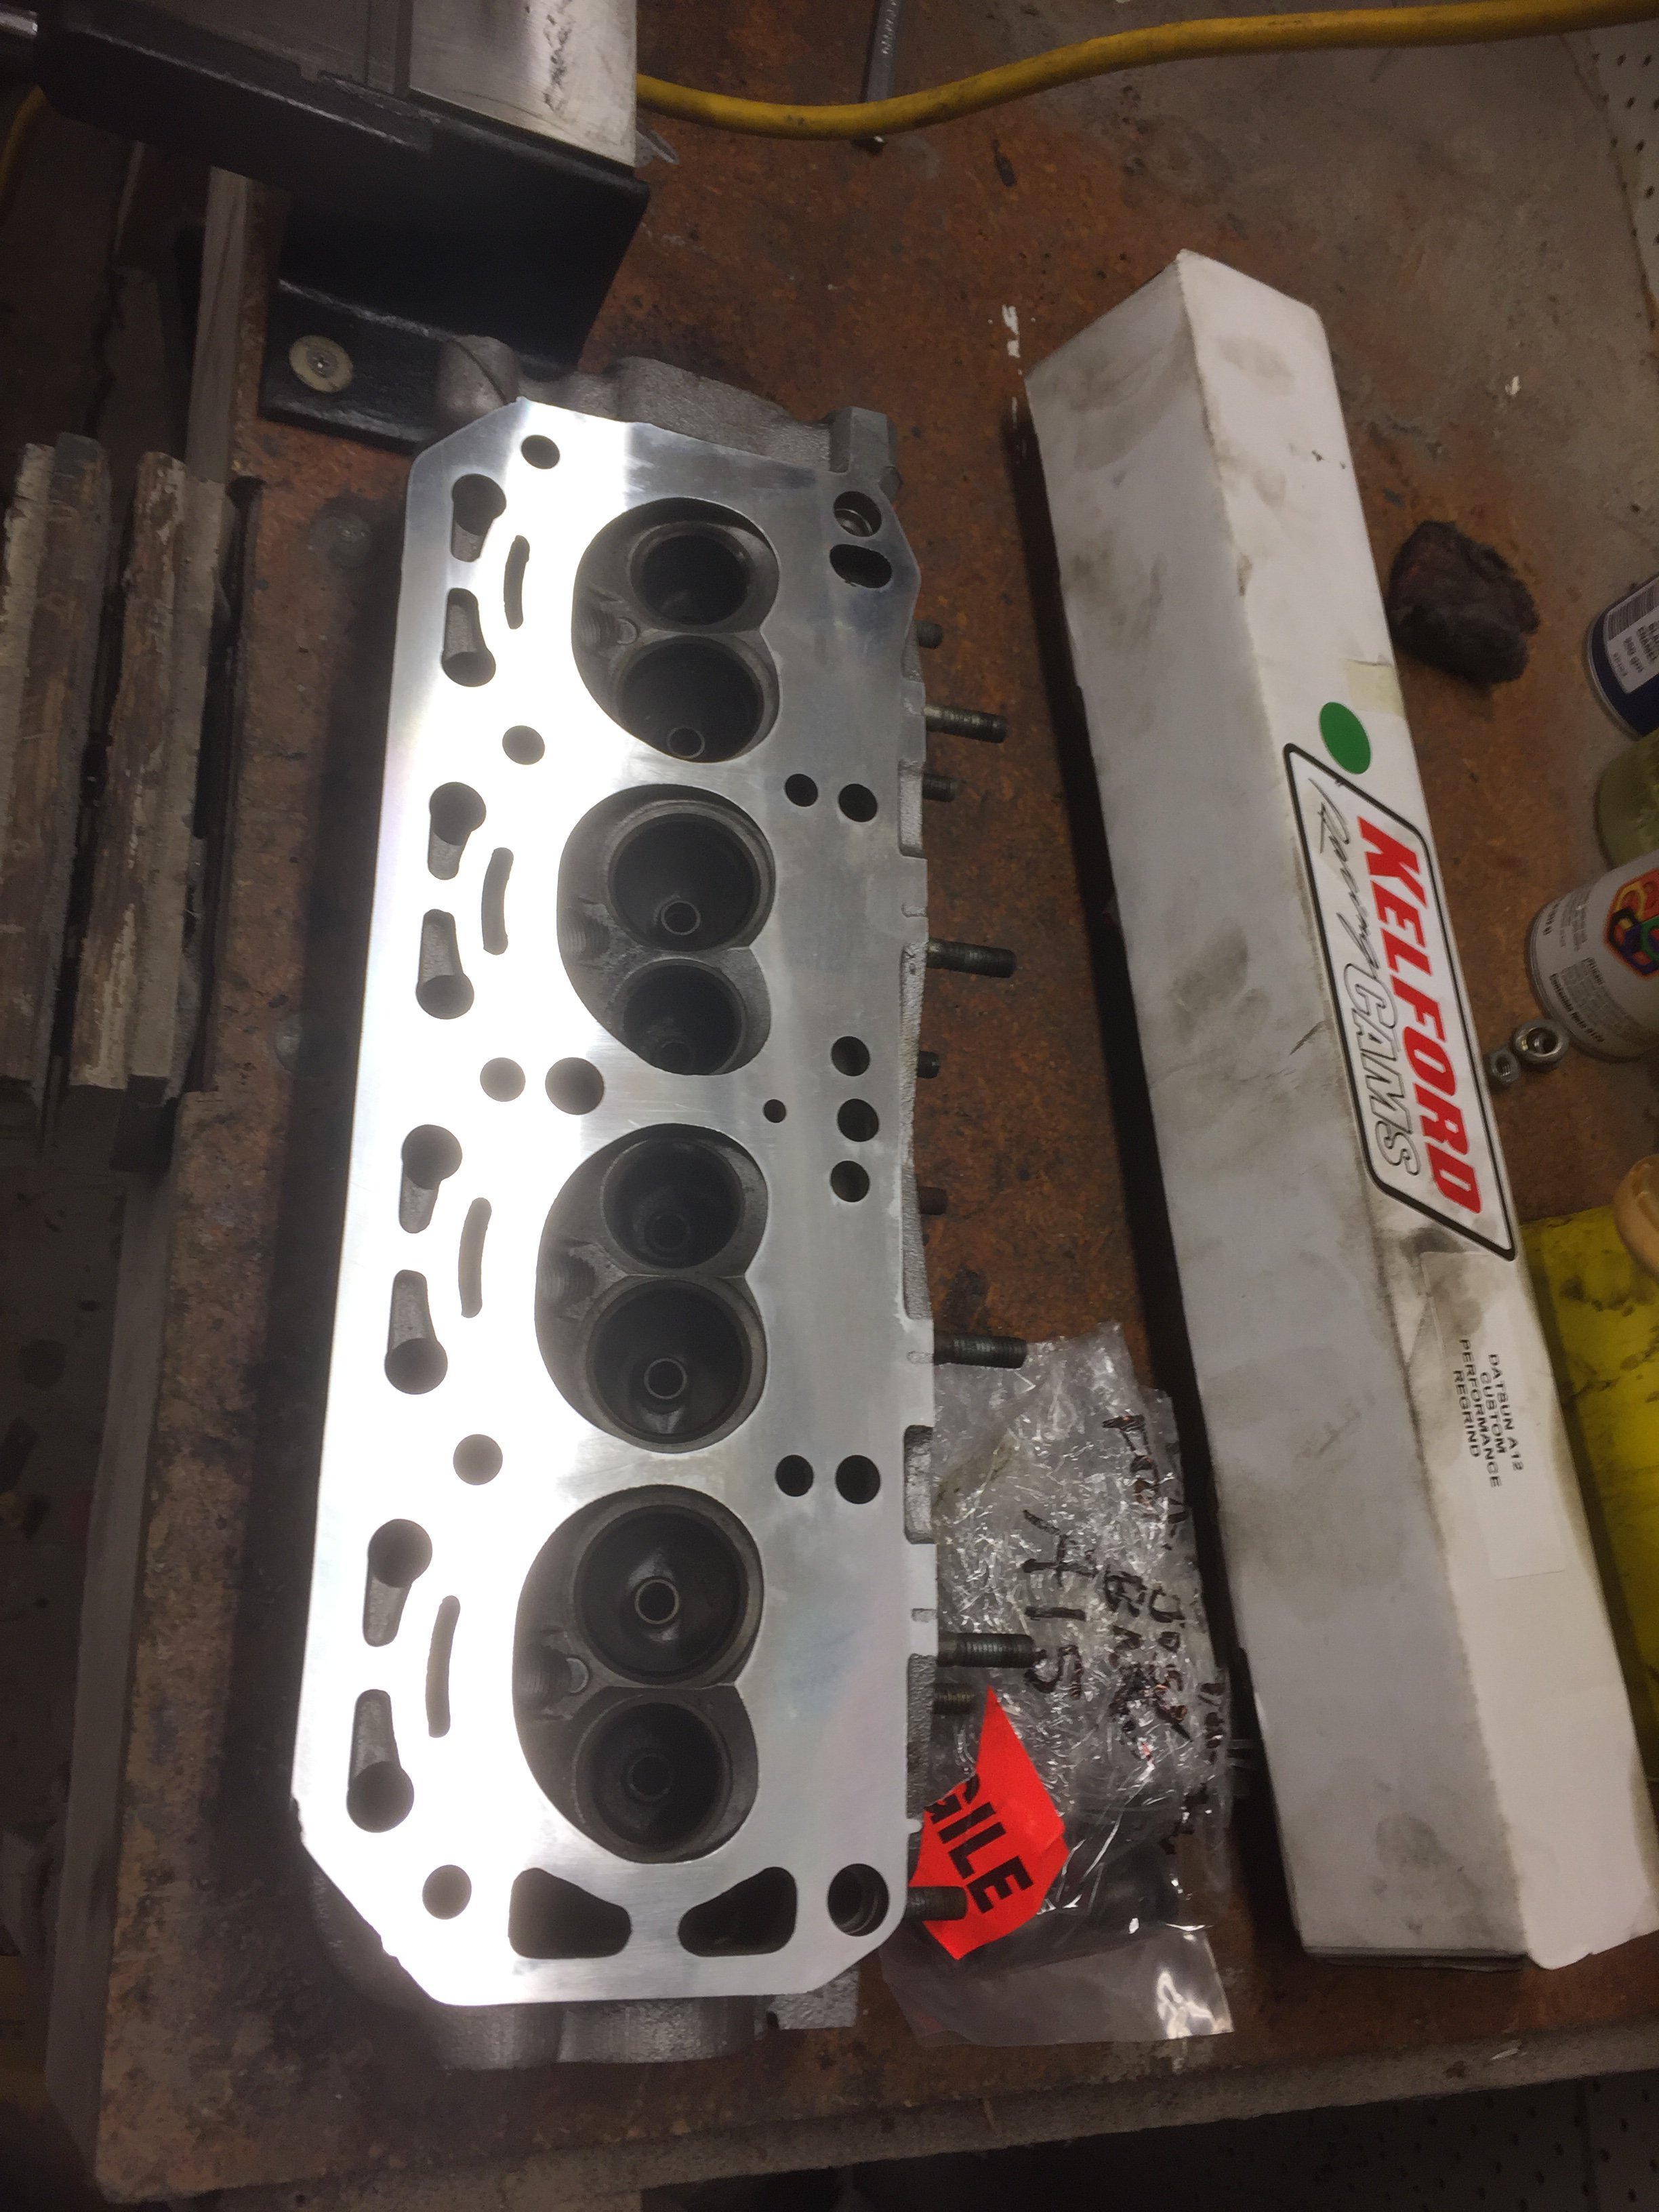
I'm back! had another jobs taking up all my spare time but that's out of the shed and I can forge on with Mine. in the interim, in no particular order I got some dobi springs and mk1 golf gas shocks, front of car bottoms out pretty bad when cornering and bumping. Probably doesn't have bump stops in there but may as well upgrade, they were cheap. Need to shorten the struts to accept the shorter golf shocks. nick the fab wizard at MFS has the manifolds and carbs to cobble together. I got Rob to spec up a cam and kelford ground it, gave stuff to ERS in tai tapu- head planed around a mil, he skimmed the block for free 'cause it looks good and the gasket will grip nice', and installed the cam bearings. brendon gave me a stack of rockers to go through and find a good one so I did, pulled it apart and cleaned up ready. picked engine up last nite so today I cleaned up the ports and casting marks, cleaned the head, lapped the valves, loaded the springs and put the rockers on. also cleaned and polished the crank, rehoned, cleaned out the block and galleries. i was in the mood to assemble it but a mate is keen to see how they go together so I'll hopefully do that this week.
- 106 replies
-
- 14
-
-
The body is done! Just need to put some sealer on the underside of wheel arches then move onto the front guards and bonnet. Have a donor bonnet that's good apart from one back corner so will slice it off the blue one.
- 42 replies
-
- 36
-
-

Runamucks - VG Valiant Sedan of Lawn Ornament & Rust
Mr.Mk1 replied to CUL8R's topic in Project Discussion
The last time it happened, was also on a public holiday! -
Then I was doing a patch in the sill and RAN OUT OF GAS. Fucking rage. So I was left to make all the rest of the body patches and rust kill and seal seams. While feeding rust converter all around through a hole, the brush posed no resistance.. FUUUUUUCK. Most akward placement. like an archaeological dig in the rear guard, that's about 4 inches of dirt. found a bulb. Luckily the rust hasn't eaten through the inner yet so took a good clean and rust kill. made patches for the bottom of the guard x2, outer C pillar x2, another 4 in wheel arch and the ugly one for the inner guard, coaxed the frame off the other front guard then gave up for the day.
- 42 replies
-
- 19
-
-
Runamucks - VG Valiant Sedan of Lawn Ornament & Rust
Mr.Mk1 replied to CUL8R's topic in Project Discussion
Told you! -
- 42 replies
-
- 10
-
-
I didn't get a decent pic but the piece beside the new patch directly above was cut out, but was actually fine underneath so I cleaned it up, rust killed and welded back in. i did other life stuff this morning so only a few hours this afternoon. More tomorrow and Monday
- 42 replies
-
- 10
-
-
Runamucks - VG Valiant Sedan of Lawn Ornament & Rust
Mr.Mk1 replied to CUL8R's topic in Project Discussion
ABSOLUTELY -
Fuuuuuck. Was hopeful to smash it today but the more I dug the more was missing. Thats the firewall, so had go slow so as not to burn it with fire. while I was waiting for the rust converter to dry inside the sill I cut open the outer C pillar and the inner between drip rail and door shut. Not good news. Also hung the door back on without any issues, Stoked it even closes! wire wheeled, rust killed and etched the upper wheel arch where the guard bolts on. Soaked the captive nut clips in acid then converter ready to go back onto the area just etched
- 42 replies
-
- 17
-
-
Had to work this morning so only half day on this: this cheeky wee shit was a recipe for wet carpet, right behind the wheel then I spotted this wheelarch becoming the engine bay
-
- 42 replies
-
- 11
-
-
It seemed like a scratchy day and I didn't achieve as much as previous days but it all counts. Seam sealed where needed and threw the door back on, couple of patches where the guard bolts on Going to be a laugh making this cunt again! HAZAH! Moved the car across and Got the drivers guard off and the sill is far far better! Guard it's-self not as bad as passengers but the brace and bottom is still cooned
-
Thanks KK, I've just about drunk away the memories of the bodywork , lol. The box seems fine/stereo/I've got used to it now. But while donk is out I'd do the bearing..
-
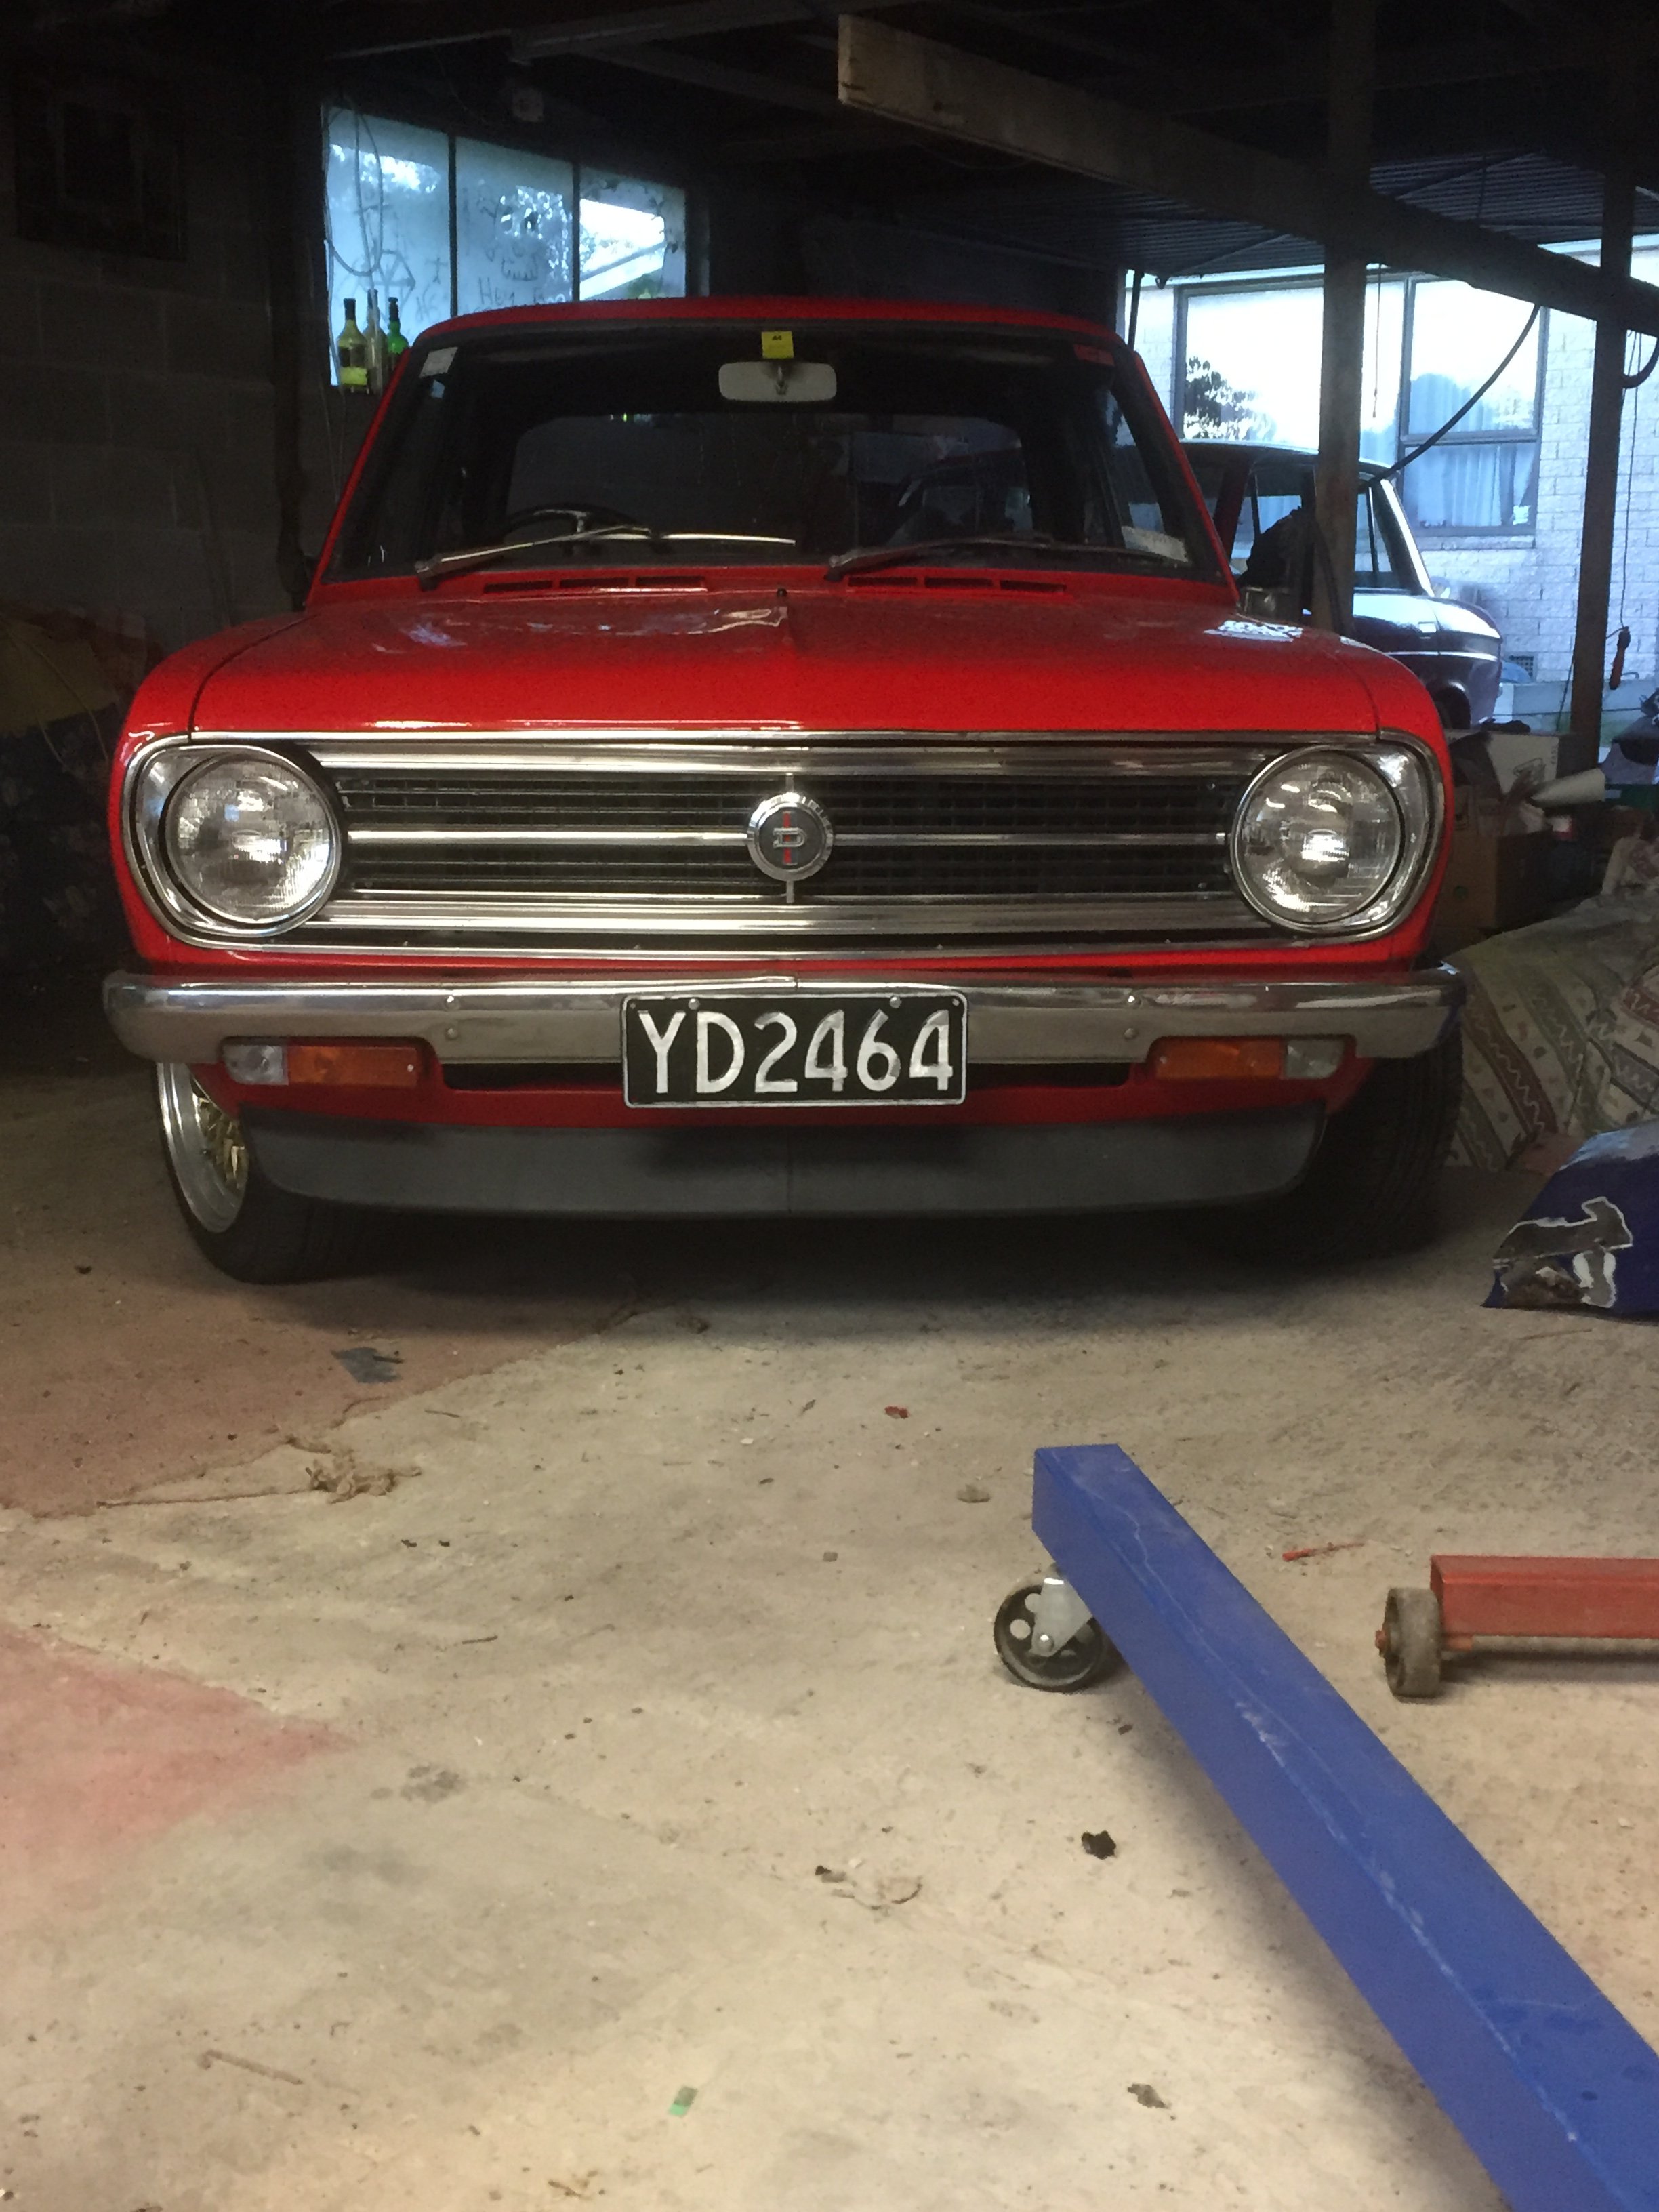
I got this golf lip for it, the valence I used had already had one on so I left the holes in when I painted it for this reason. it sits high, not hideous but I will lower it and see. That will change the angle too. i scrubbed clean and painted the sump yesterday
- 106 replies
-
- 21
-
-
I really hope the other side is better
- 42 replies
-
- 24
-
-
Folder showed up, one of those save barn special on trademe. Goes good for what it is. More again tomorrow
- 42 replies
-
- 15
-
-
That wasn't the plan! But yeah, your right. likely I'll pinch the branch car from work for a week so I can paint the engine bay and dial in the extractors while it's all apart and not have to rush it to drive to work on Monday like my usual missions with mine and wife's cars.
-
when your mates on a big A series pine and has a bead blaster at work, pretty things happen