Ash Kelly barr
-
Posts
197 -
Joined
-
Last visited
Content Type
Forums
Downloads
Events
Gallery
Everything posted by Ash Kelly barr
-
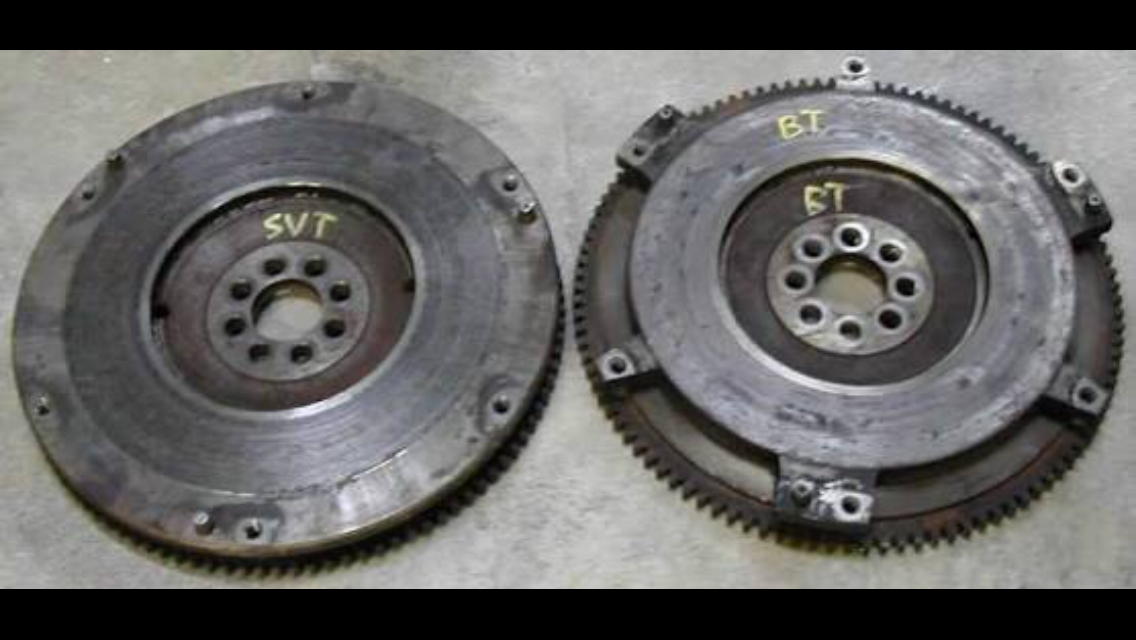
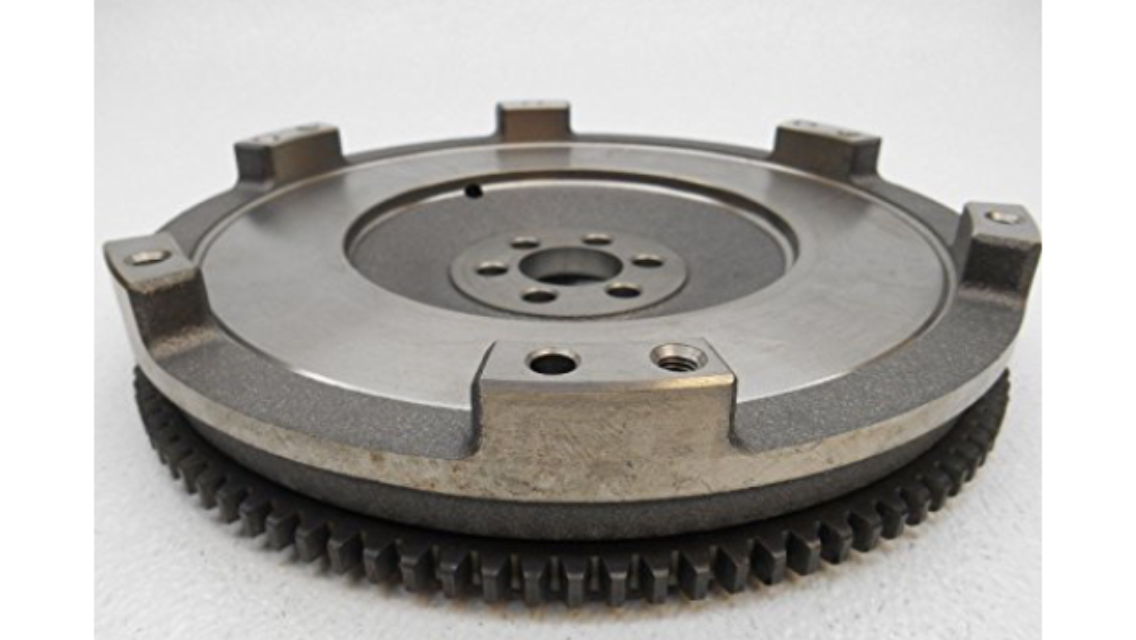
Hey dude. Picture was just for reference of mounting points for pressure plate. it is 212mm and is 8 bolt, and dose bolt to a crank I have here. So everything is correct, just that the mounts for the pressure plate aren't flush and the new ae111 clutch I ordered, is a flush mount one to suit the top right flywheel
-
Hey, so I picked up what I thought was a blacktop flywheel. its cut out like the one in the first photo on the right hand side. however it's pressure plate mounts are offset like the one in the one in the last photo. i bought a new clutch threw Toyota for a blacktop and the pressure plate mounts are flush with the surface of the flywheel. has anyone had this issue before or is this not a blacktop flywheel?

-
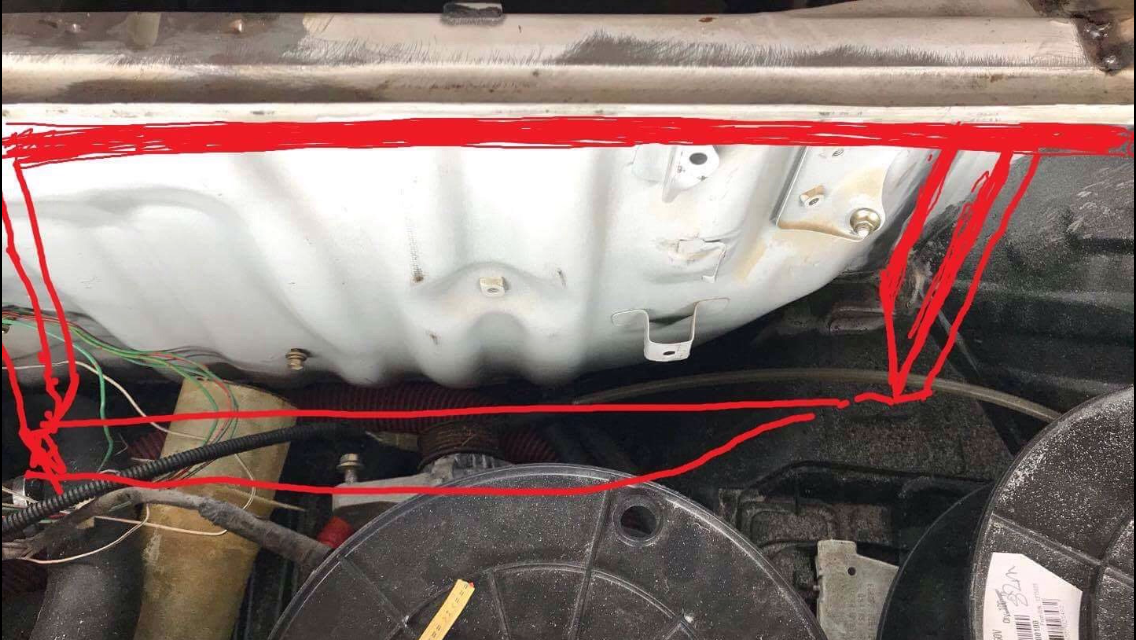
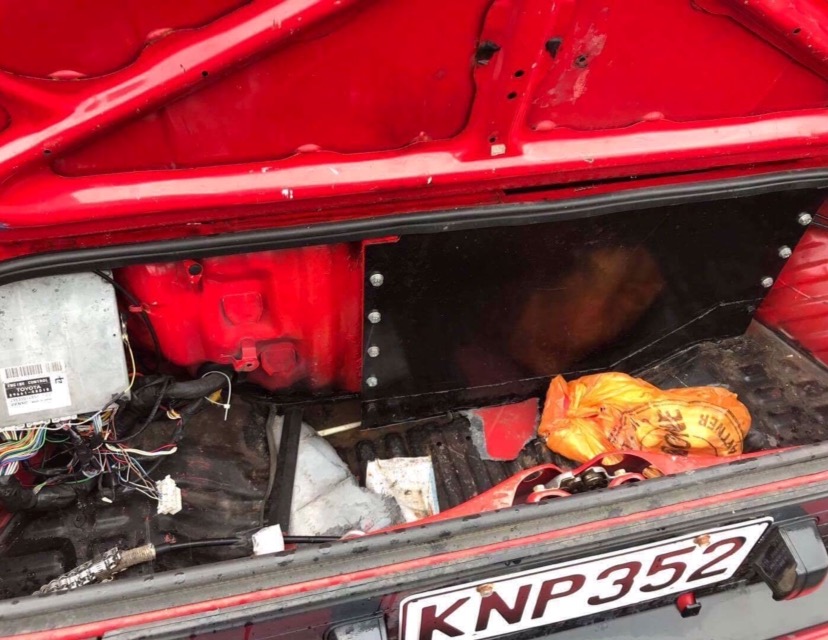
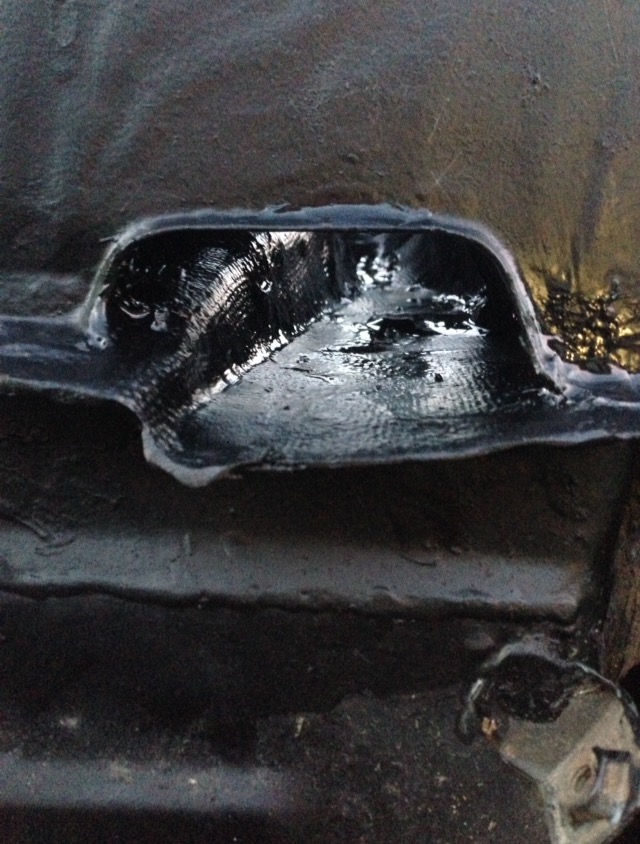
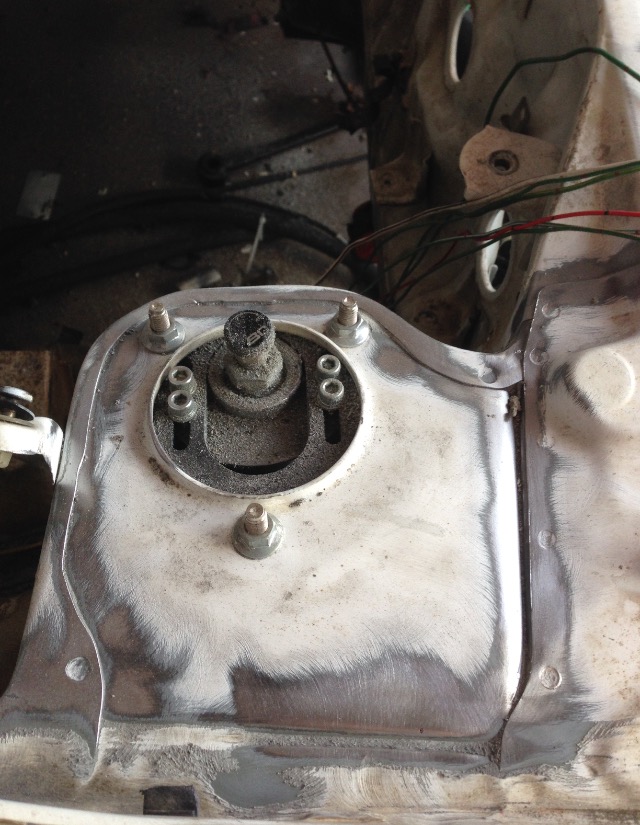
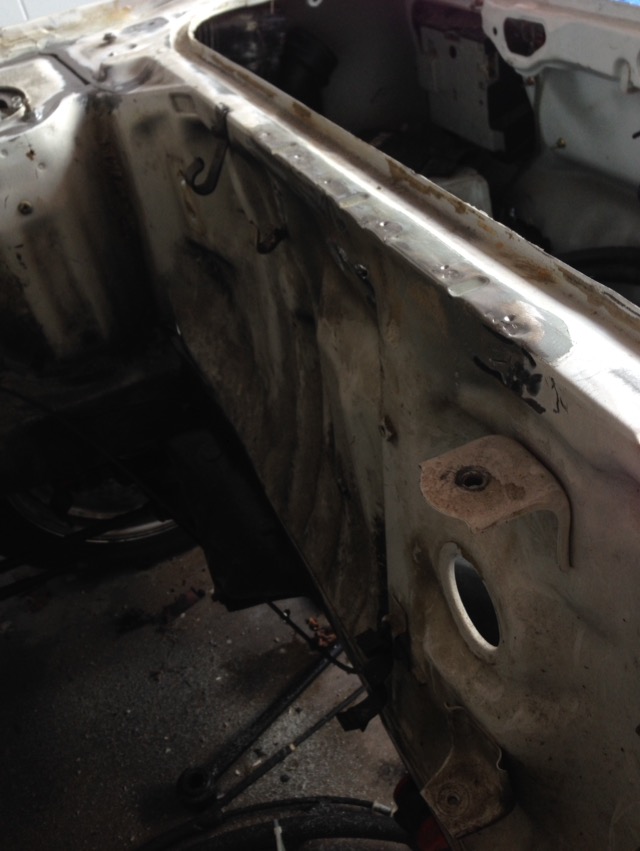
Be staying in Auckland for a while hopefully so can start to smash this out. before anything else can go ahead I need to figure out what to do with the rear fire wall. This being the wall between engine bay and rear boot. on the donor car it's been boxed out and a panel made. im hoping to do the same but am waiting to hear back as I feel how it's done will be at the certifiers descrestion and the donor being certed some 6-7 years ago I'm no sure it'all fly. my idea is to weld box tube (30x70mm or something) along point 1. Then box the rest out under it. ive messaged Clint so hopefully he's not to busy to spare some time and have a look. i had a look under 155-30(02) and 155-40(02) and the wall doesn't fall under frontal or interior zone B or C so I'm guessing it's at the certified descretion of structural integrity?? after that it's find/borrow/rent a compressor to paint the engine bay and rear boot, do this before I put the motor is as I know I won't want to take it out again
-
Ash's 82 AA60 rina of rustic glory
Ash Kelly barr replied to Ashkellybarr's topic in Projects and Build Ups
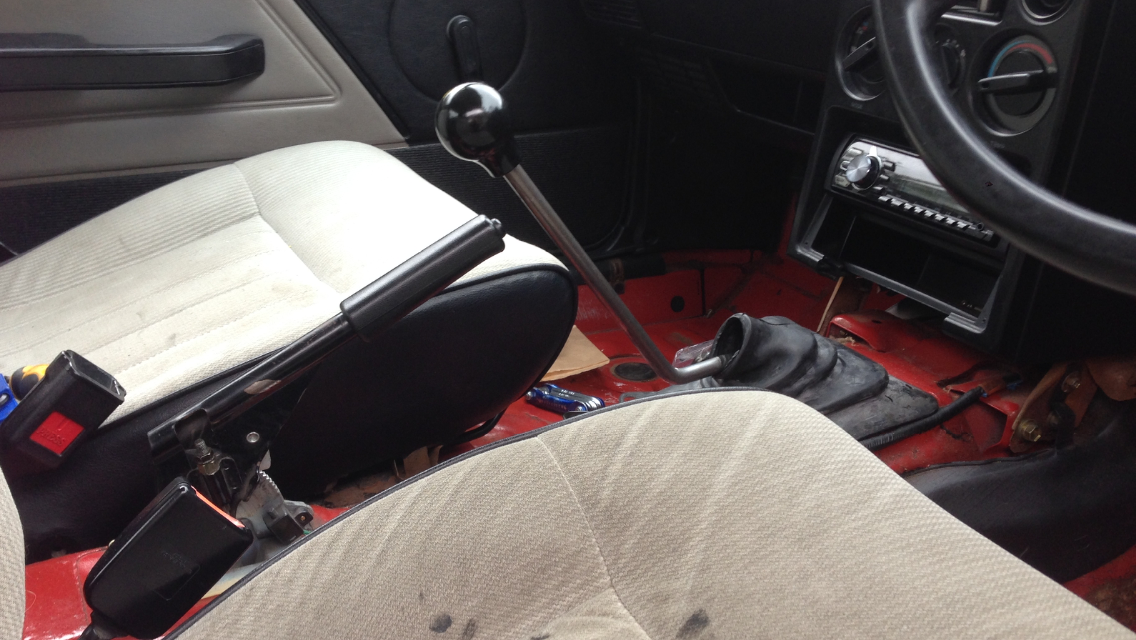
Since I'll be keeping the t50 for some time longer I thought I'd make it more comfortable to drive. i naturally sit back and pretty low when I drive. Like some sort of g but without actually trying. i find this means shifting into 1st,3rd,5th my arms nearly fully straight. that short shifter helped but I've taken that out as I don't think their very good for the gearbox's got some scrap 12mm rod and bent it up to sit the gear knob further back (about 80mm back), threaded the end M12x1.25 for yota knobs. sitting in the car it's far better now. factory throw between gears is quite a bit, it's taller now too witch adds to this. The factory steel welded up real nice so I'm thinking I'll chop the bottom leg off and weld 6-7mm in there. Then get a guy at work to mill the spacer for the short shifter down to the same amount. just to take some throw out of it and make a kind of half short shifter that's still friendlyer on the gears obviously not weighted either, so might weld a washer half way down then lay a stack on top and run a tac down the outside so the don't rattle around
-
Ash's 82 AA60 rina of rustic glory
Ash Kelly barr replied to Ashkellybarr's topic in Projects and Build Ups
For Ye ol multi ratio machine matt from westspeed motorsports been hooking it up. he's in west Auckland and does odds and ends from engine building to servicing. Works for motul too witch is handy
-
Haha nah dw I feel like moron already im my defence I redid the sliders. weird though, both sides had thinner outer pads, like a lot thinner and aren't that old. need to hook the calipers onto a compressor to pull the pistons out a see what's going on. hoping it's not the change from dot4 to dot5.1 (not to be confused with dot5) the guy at racebrakes AND motul BOTH said it'll be fine with a good bleed....
-
Ash's 82 AA60 rina of rustic glory
Ash Kelly barr replied to Ashkellybarr's topic in Projects and Build Ups
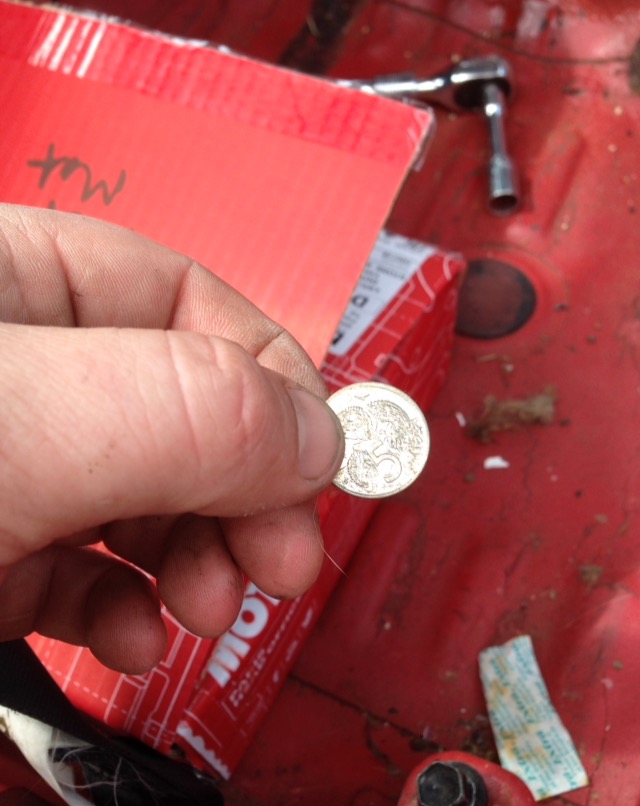
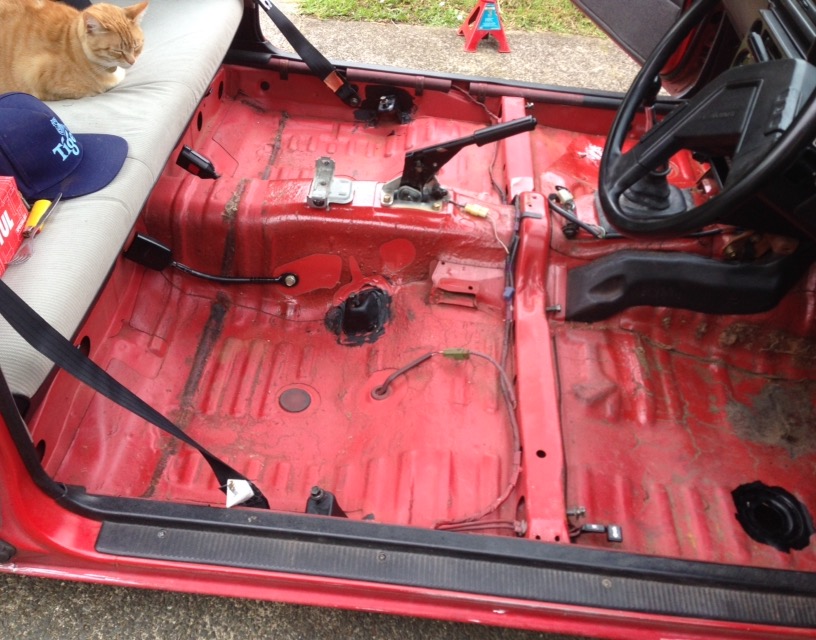
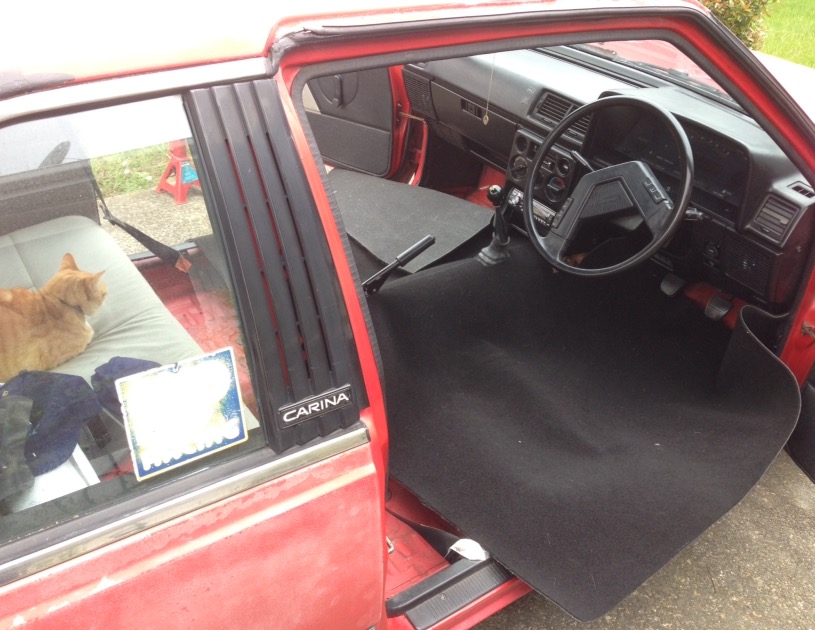
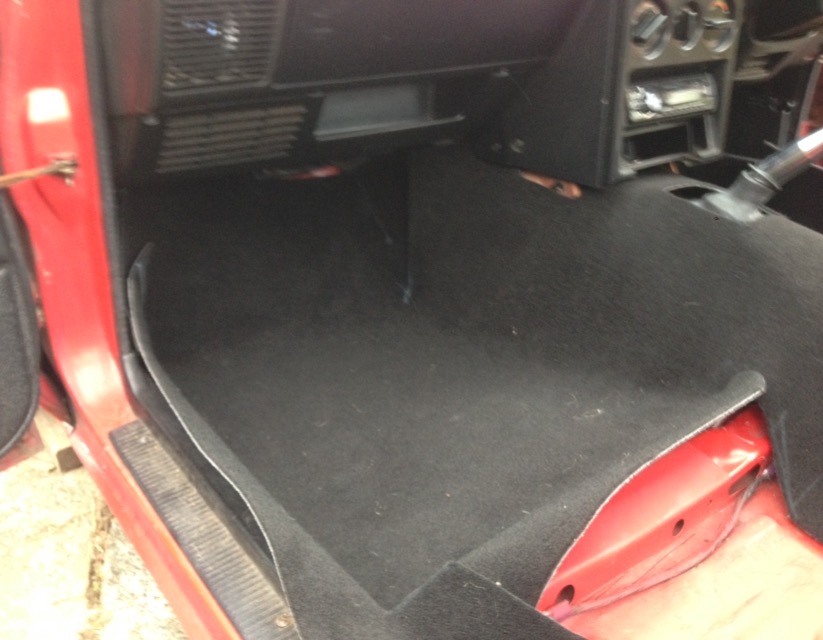
Picked up carpet. started fitting carpet. pretty stoked with the first days work. Small cuts/refit/cut/refit. will haft to sew it up into shape but it's mint so far. Rear will be the hardest, probably haft to do it in two parts and sew them together. couple little places where I'll need to add carpet and sew it from behind but that's sweet, will be perfect fit and hard wearing when done. got 5meters so I'll do mats and dash protector too. wahoo! Car will be more civilised again found oldschool coins too, I'll chuck me back under when I'm done
-
Ash's 82 AA60 rina of rustic glory
Ash Kelly barr replied to Ashkellybarr's topic in Projects and Build Ups
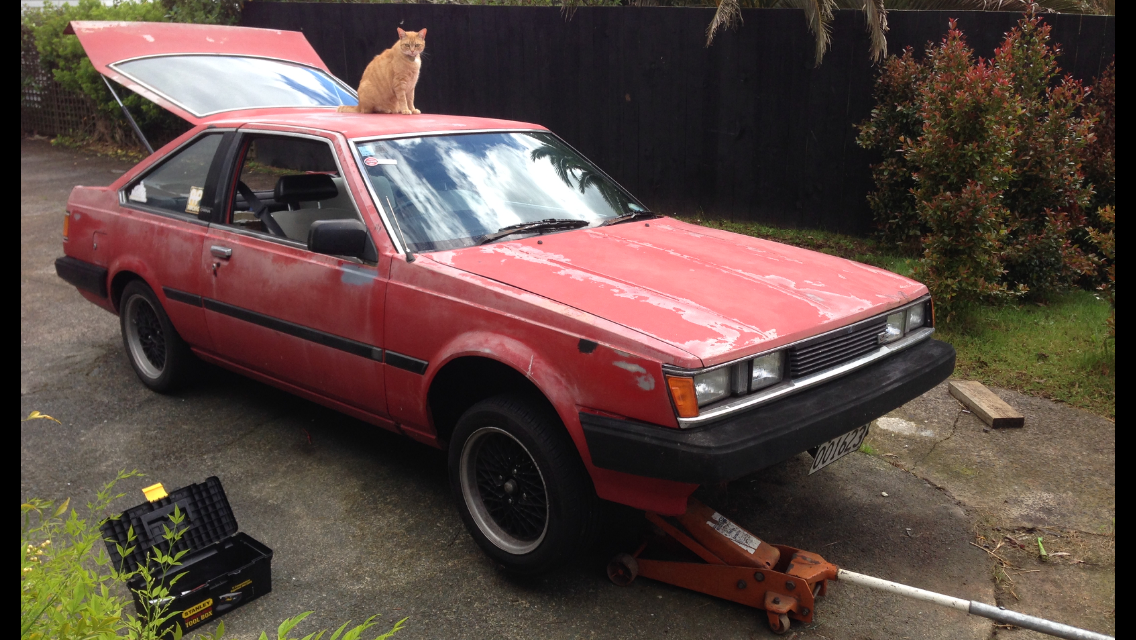
Fuck Finley looks angry in that photo.. struts in, brakes in, brakes bleed, car stops, fucking mint. put 80kms on it today with no weird noises, slowly reached 130 no issues, and surprisingly kicked the ass out around my favourite round abouts in light drizzle. smiles all round lets see what else I can muster before I go back to work -
Ash's 82 AA60 rina of rustic glory
Ash Kelly barr replied to Ashkellybarr's topic in Projects and Build Ups
One day of driving.... and the wheel bearing shits it's self again. 6th or so time now.. pulled the calipers off. Sliders are sweet. Pistons getting stuck. I'll open it up and see what's going on. put some random struts/calipers in for the time being. Just finish bleeding the brakes now.. fuck my life least finley the cats a g and hung out all day
-
Ash's 82 AA60 rina of rustic glory
Ash Kelly barr replied to Ashkellybarr's topic in Projects and Build Ups
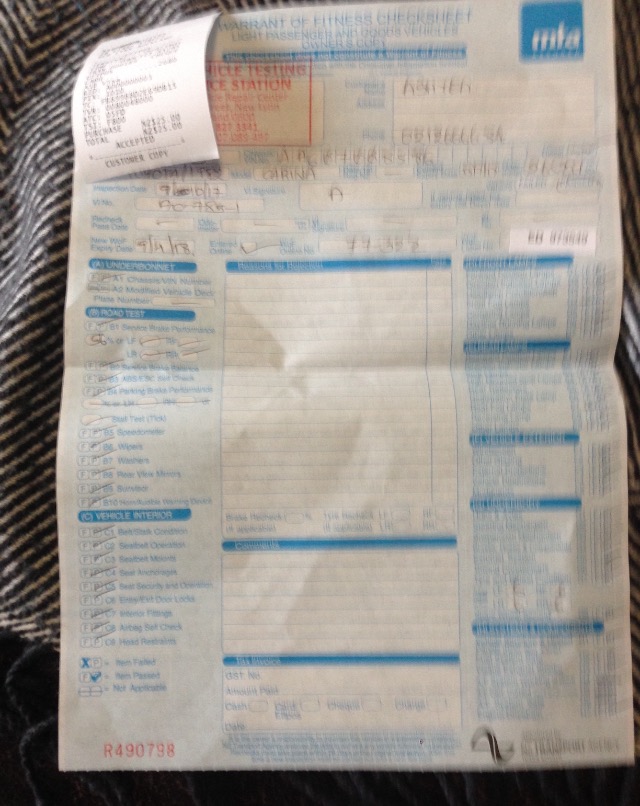
Third WOF since I've taken ownership Took it to a non dodgy place as my usuall guys away on holiday and came back sweet with no notes or anything. Winning! going to talk to a guy on Thursday about getting it painted professionally. The paints wearing so thin the whole thing will look like the gaurd or some stanced out e30 soon. see if I've got some money spare and get some carpet too since I've got week off
-
Ash's 82 AA60 rina of rustic glory
Ash Kelly barr replied to Ashkellybarr's topic in Projects and Build Ups
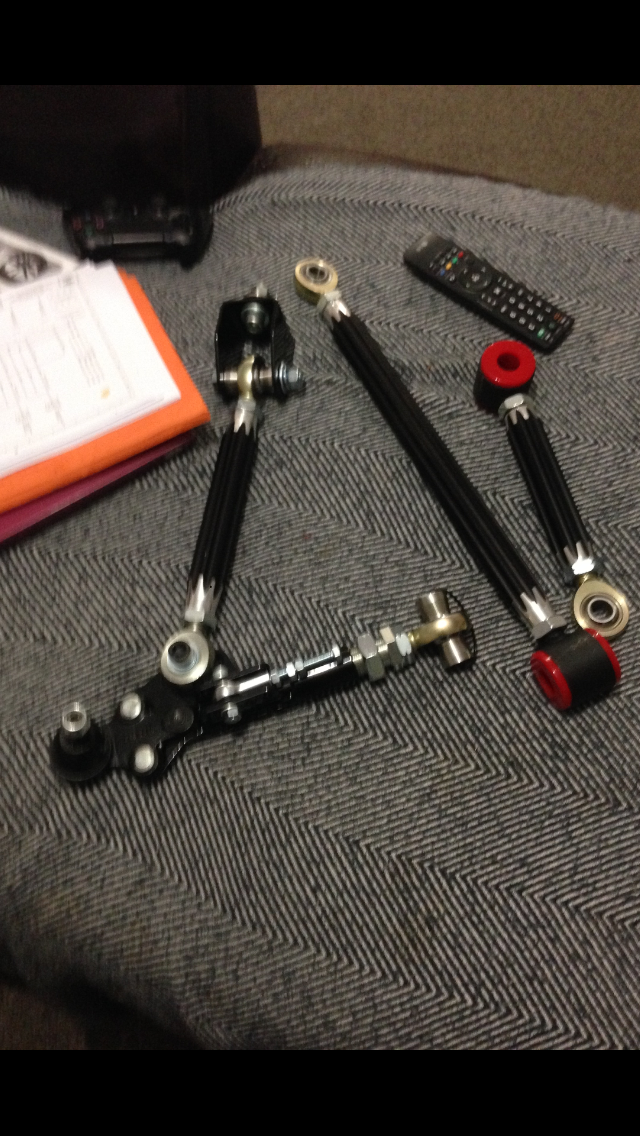
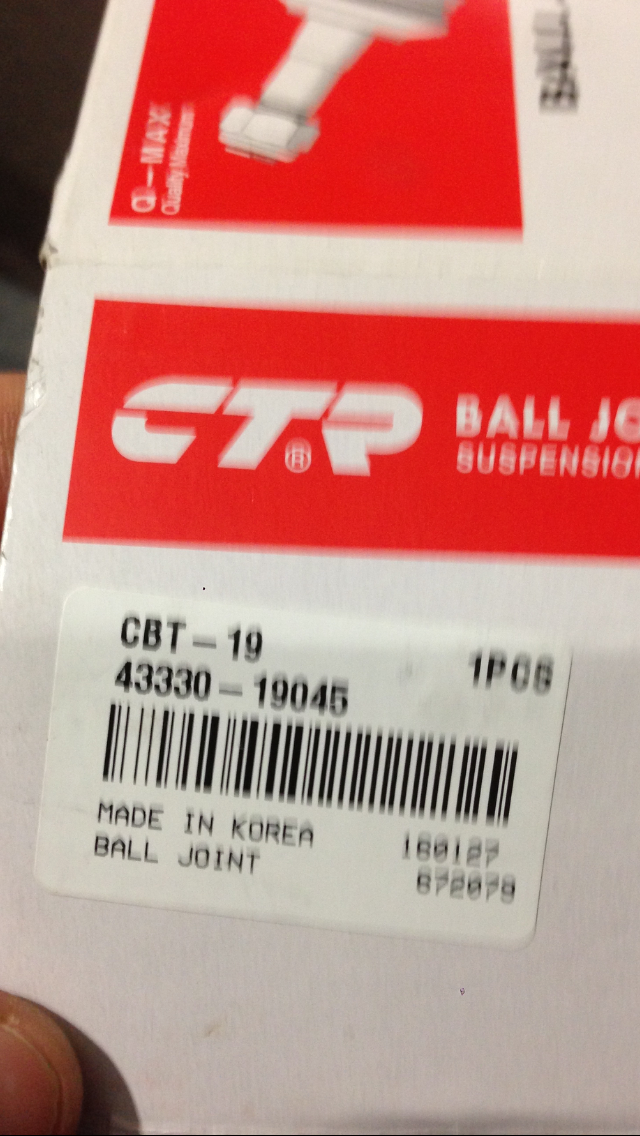
Brand new MRP alloy 4link and MRP chromemolly lower control arms. all far lighter then the standard stuff and certable for street use. balljoints not the ae86 one, it's a different one to suit the AA60 steering arm shank. Part number for reference.
-
Ash's 82 AA60 rina of rustic glory
Ash Kelly barr replied to Ashkellybarr's topic in Projects and Build Ups
Hopefully pick up some more shiny bits before I fly out again
-
Ash's 82 AA60 rina of rustic glory
Ash Kelly barr replied to Ashkellybarr's topic in Projects and Build Ups
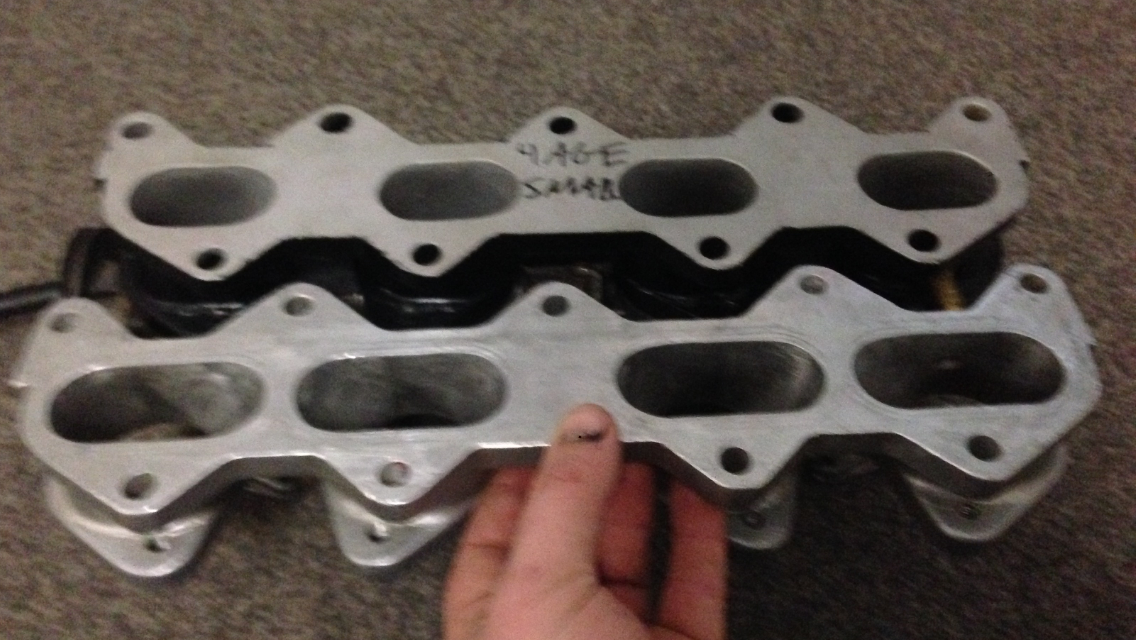
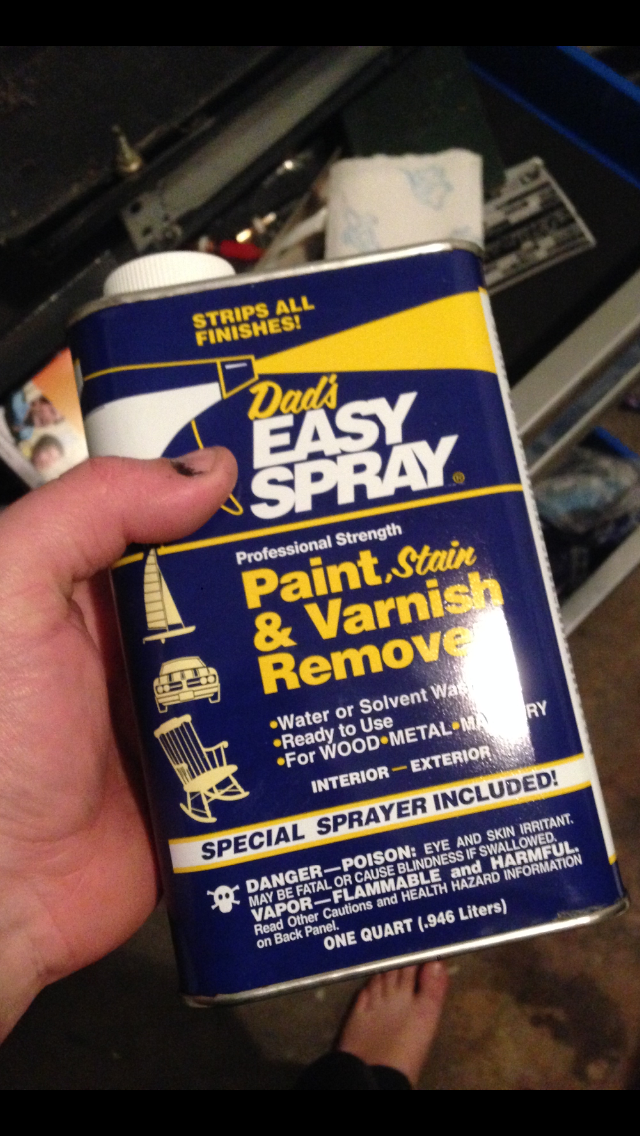
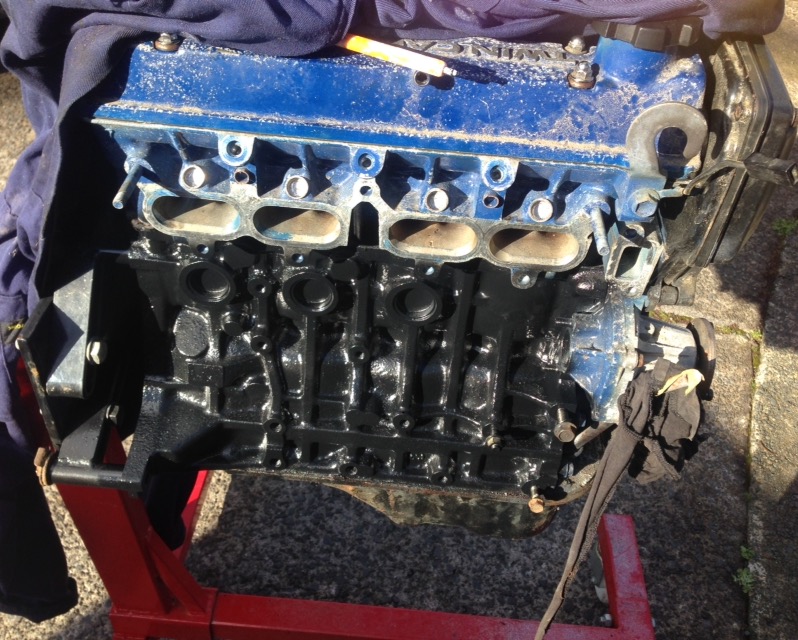
Picked up a BP manifold off a nice bloke in RCIS. not super cheap but a fair price and was local for pick up so that's ok. oh, and I highly recommend this paint stripper! Seriously! Beats that jelly crap by far list: skim and balance BT flywheel Replace fins on rad.
-
Ash's 82 AA60 rina of rustic glory
Ash Kelly barr replied to Ashkellybarr's topic in Projects and Build Ups
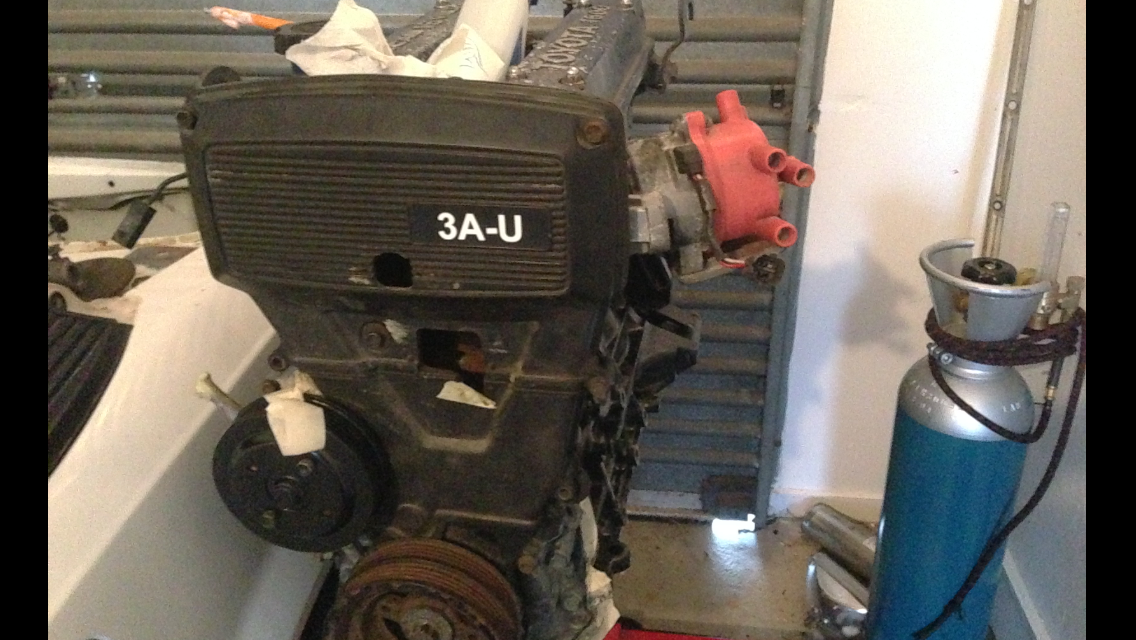
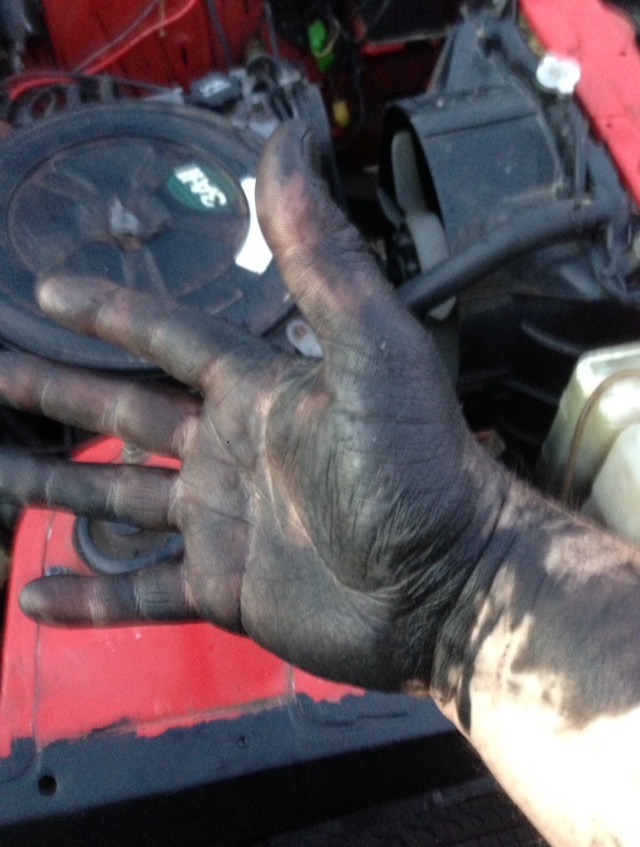
Pulled the sump off the 80dolla motor and all seems good. Painted the block, need to strip the blue off the head. Tapped some frost plugs in the injtr holes. just need a manifold to bolt my dellortos on and we're go hopefully go for a wof next week
-
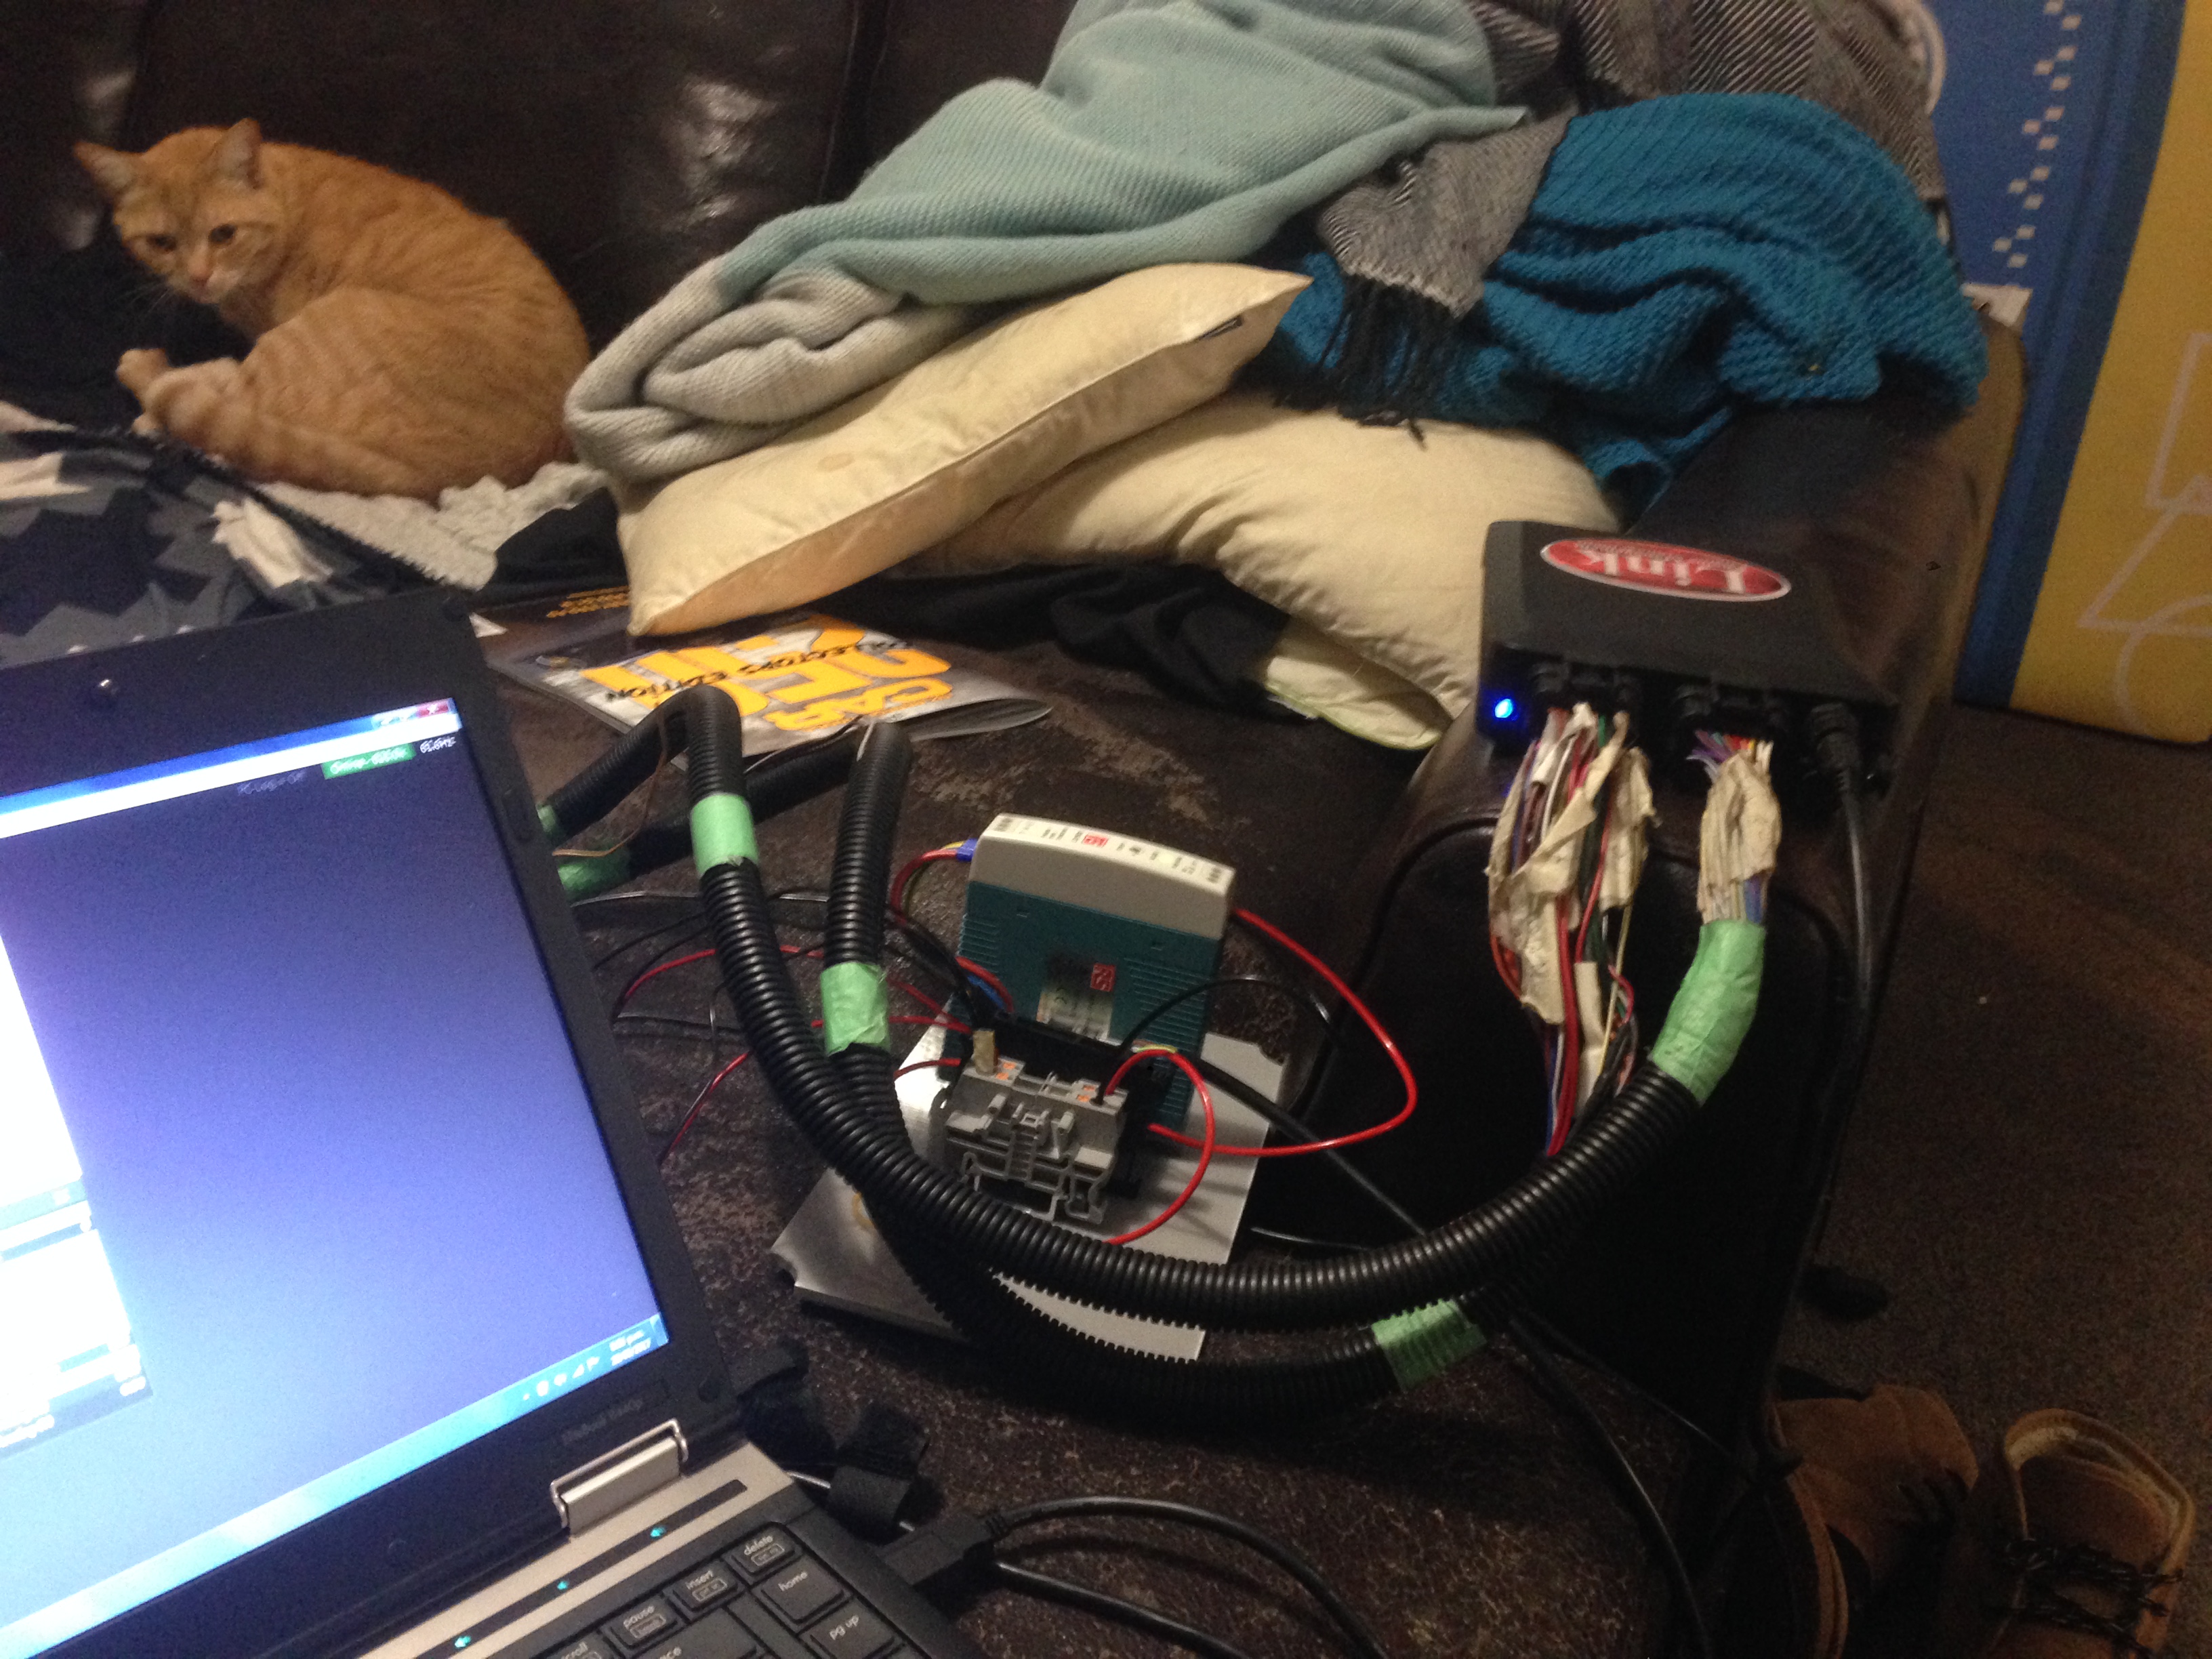
Made up a power supply for the ECU's I'm setup for the cars. had some maps sent to me from another guy running G4 and have started swapping the maps etc over to the G4+ firmware. opening up the G4+ extreme black ECU is pretty awesome, also pretty overwalming. the amount of options and things influencing maps is pretty fanominal and I've definitly got a lot to learn and work threw. happy I've got it powered up to start before I've waited to get it wired in, definitely help kill some down time before it goes in. other news I've got a new set of enkei rpf1's on their way. i finally pulled the ma60 F type gaurs out of the mould. Unfortunitly the gel coat didn't bond properly and the mould fucked out and fell apart on separation so I've got some work to do to get that done also. hopefully soon as I'll be in Aus and the states for work for a while and I've had poor davids gaurd for two years now so should really get it back to the bloke soon
-
Ash's 82 AA60 rina of rustic glory
Ash Kelly barr replied to Ashkellybarr's topic in Projects and Build Ups
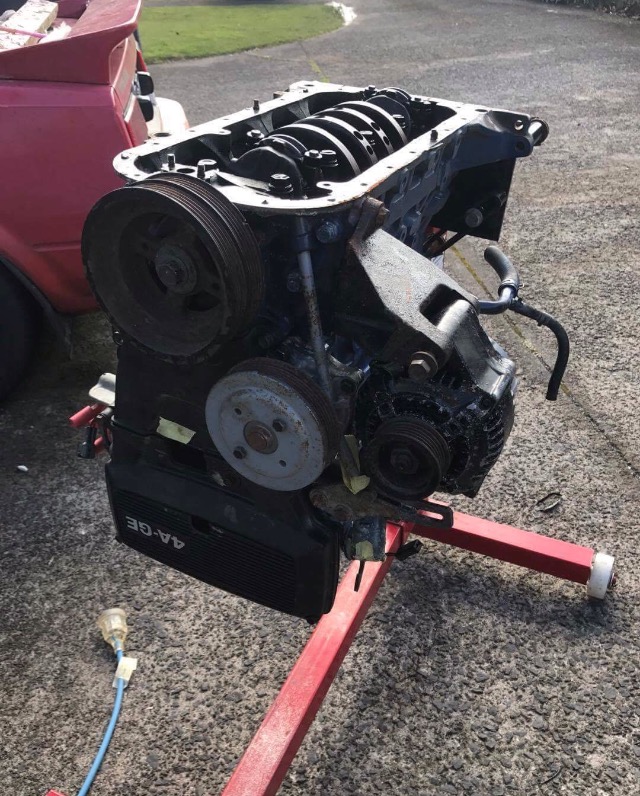
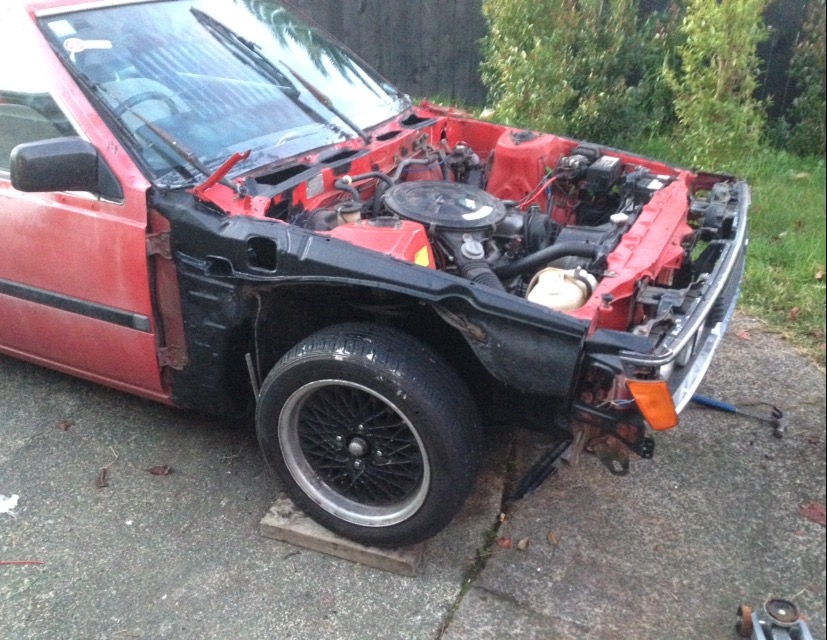
Yus it's off stands!! Rear ends back together rust is all welded up, painted. in other good news I picked up a rebuilt 4age long block with rwd water fittings and other accessorys for box of piss and pack of durries. That with a blacktop clutch I should have it swapped soon. still plans to build the 7A at some point. But since this is cheap I can fuck around with the megasquirt and if it blows up or falls apart I won't be heart broken
-
Ash's 82 AA60 rina of rustic glory
Ash Kelly barr replied to Ashkellybarr's topic in Projects and Build Ups
Picked up cool Adriano thermo switches for the fans. Means I can stage the fans at any temp. pulled the standard rad out of my old AW11 and tidied it up. Fans are pretty bad in spots so I'll see if I can get replacements or something to press in???? going for wof next week if I pull my finger out and drop it off stands. plans for respray next!!
-
Ian's 1969 alfa spider (1750 GT veloce)
Ash Kelly barr replied to Ash Kelly barr's topic in Projects and Build Ups
Here's discussion thread and some random photos of past track cars (not the Ferrari's unfortunitly)
-
Chat page, I'll answer what I can and put the old boys email on here for people
-
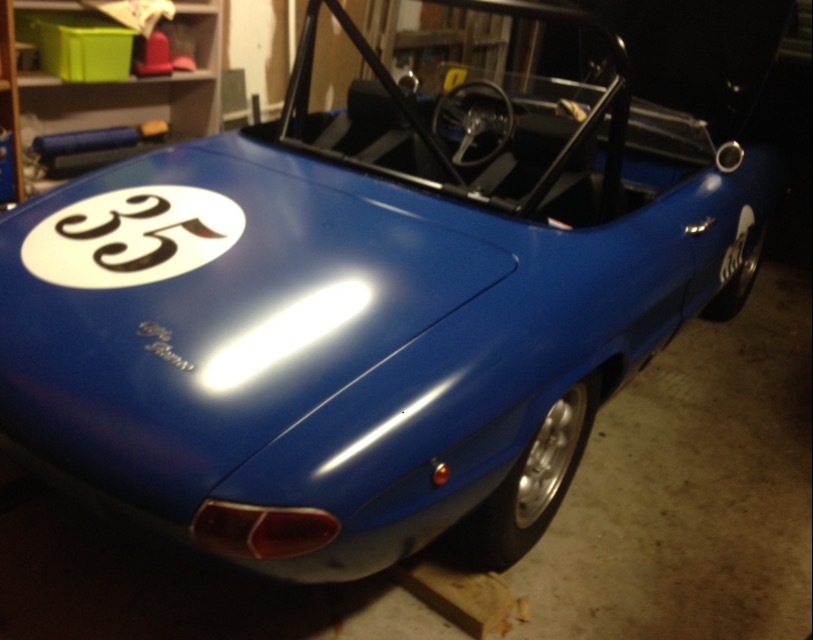
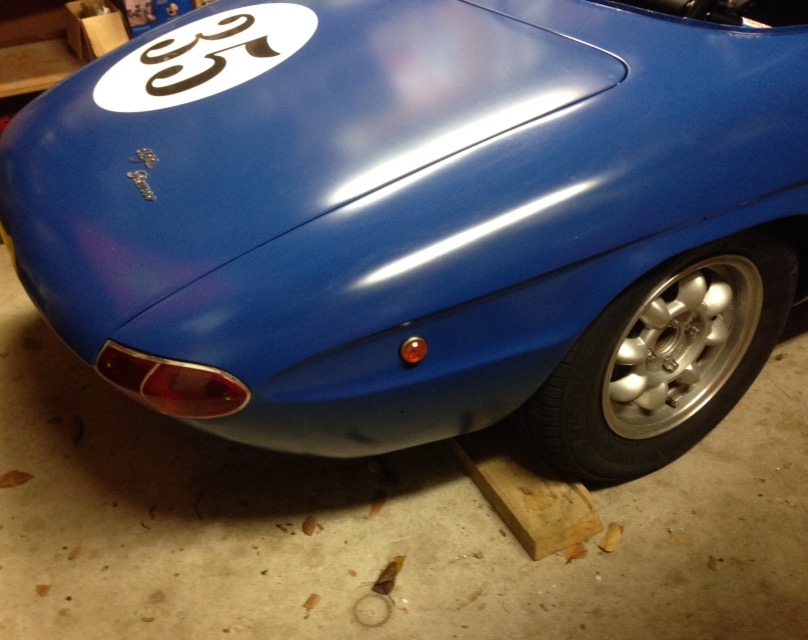
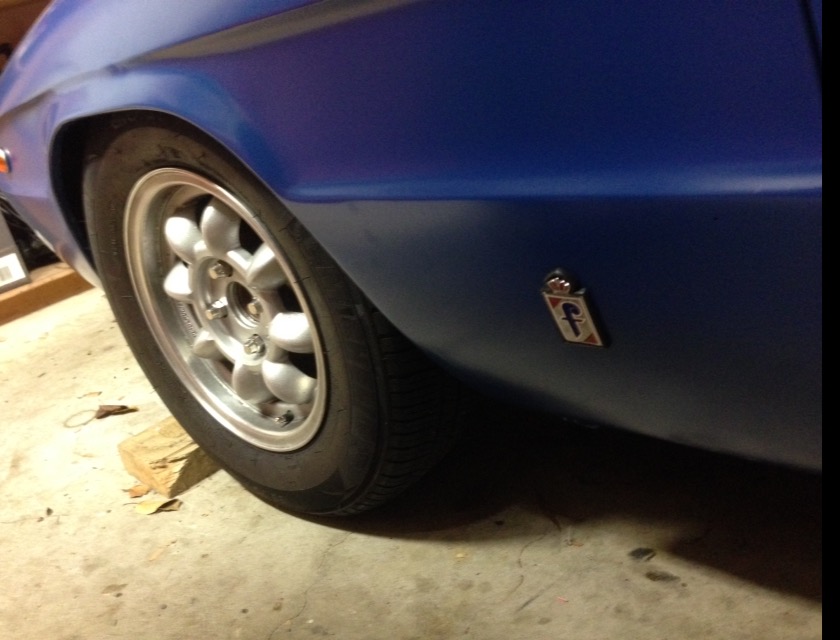
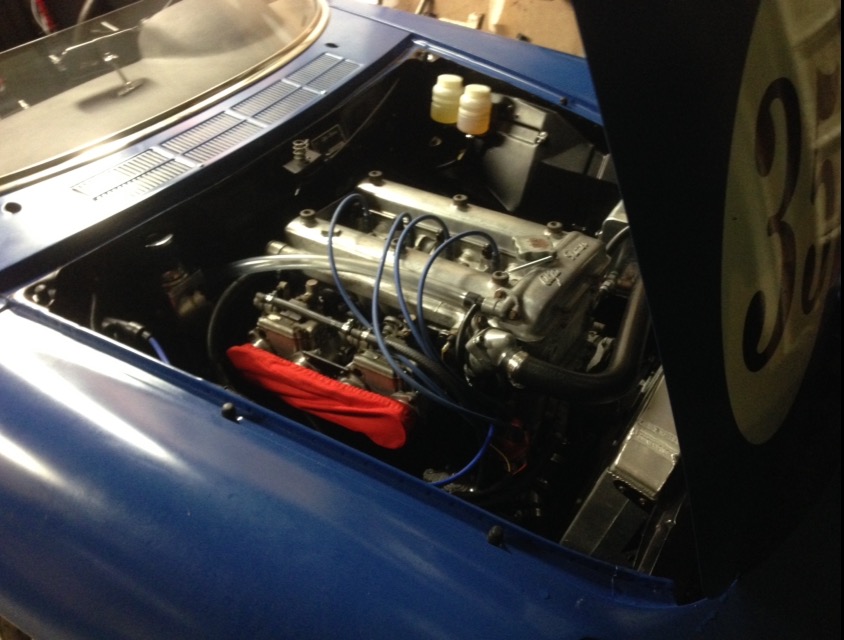
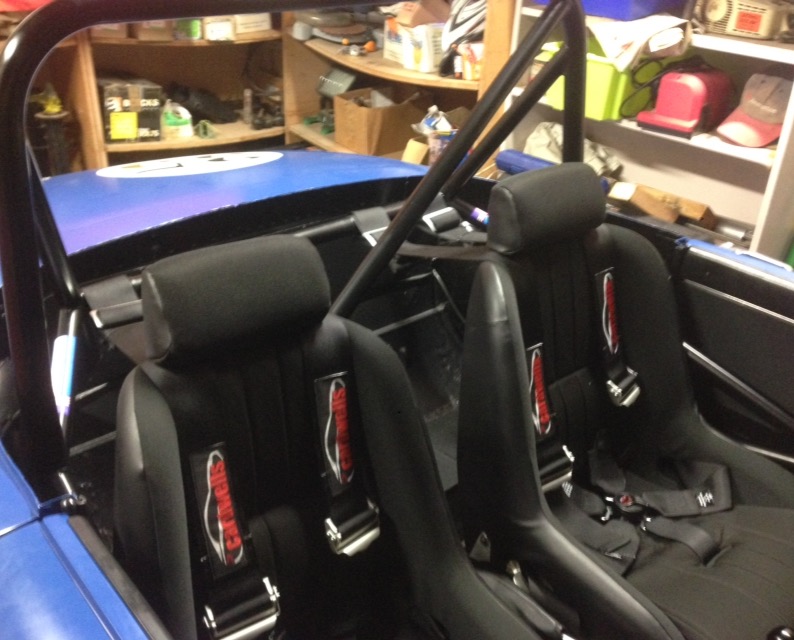
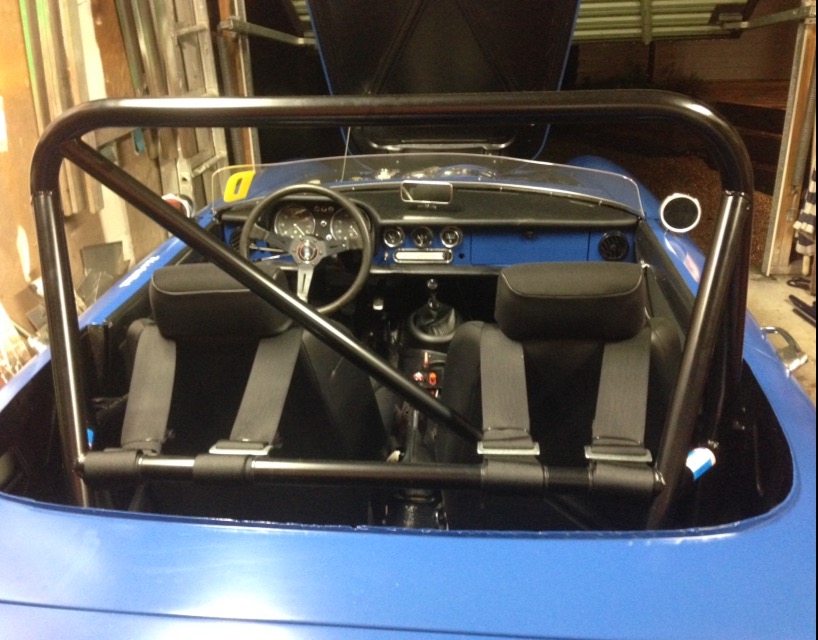
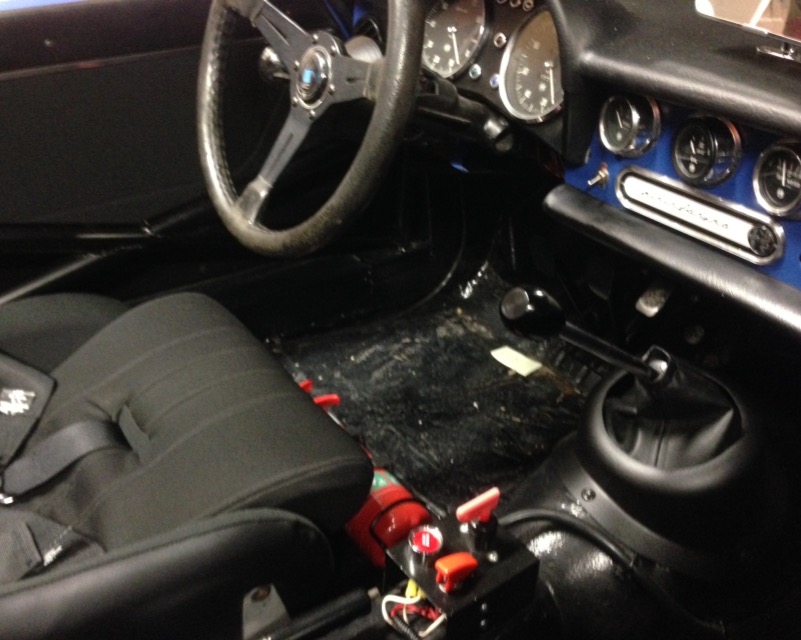
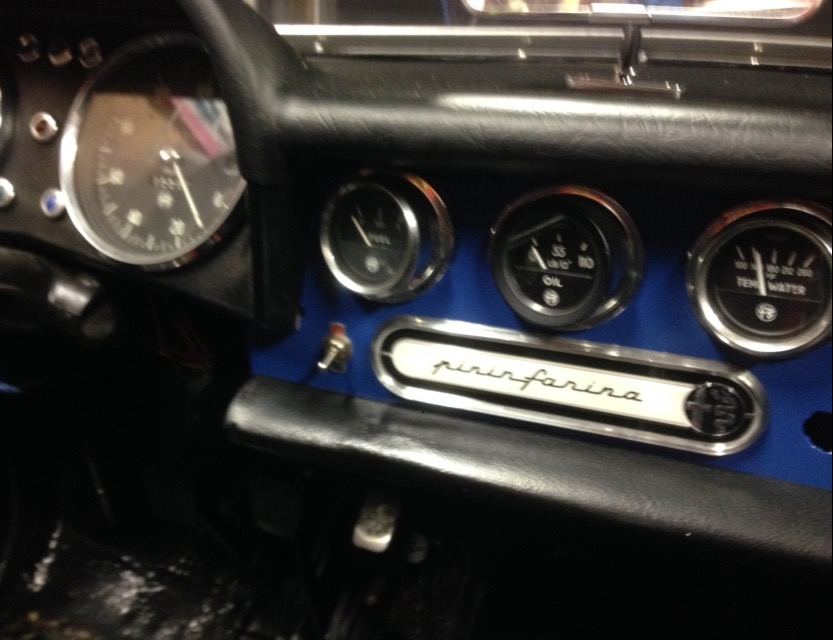
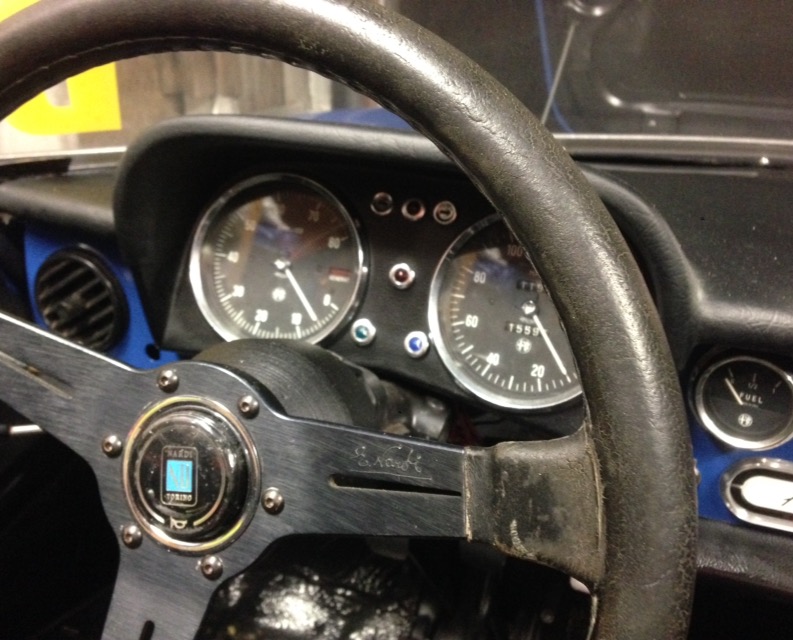
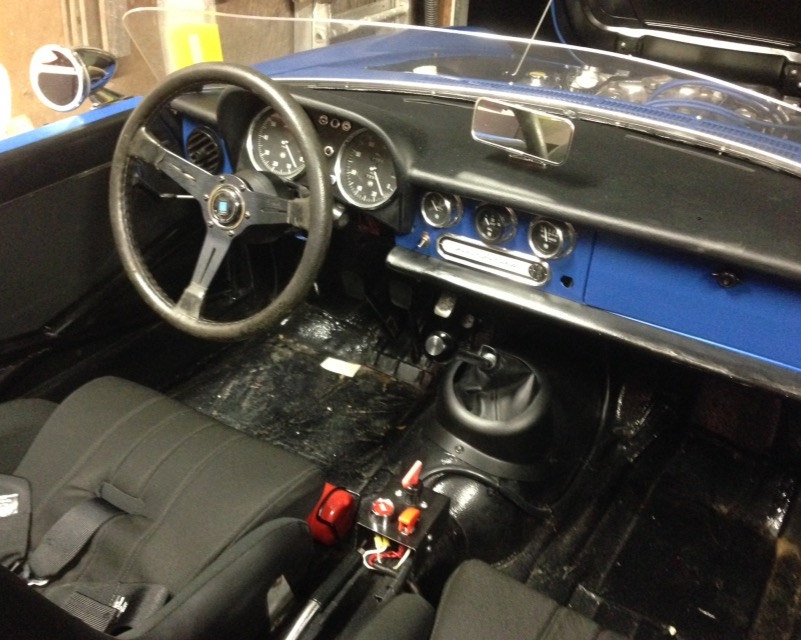
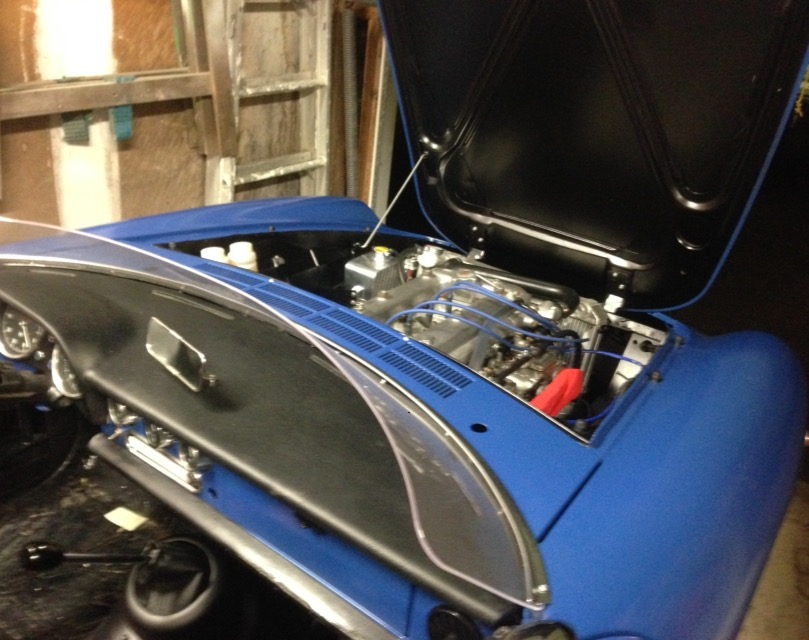
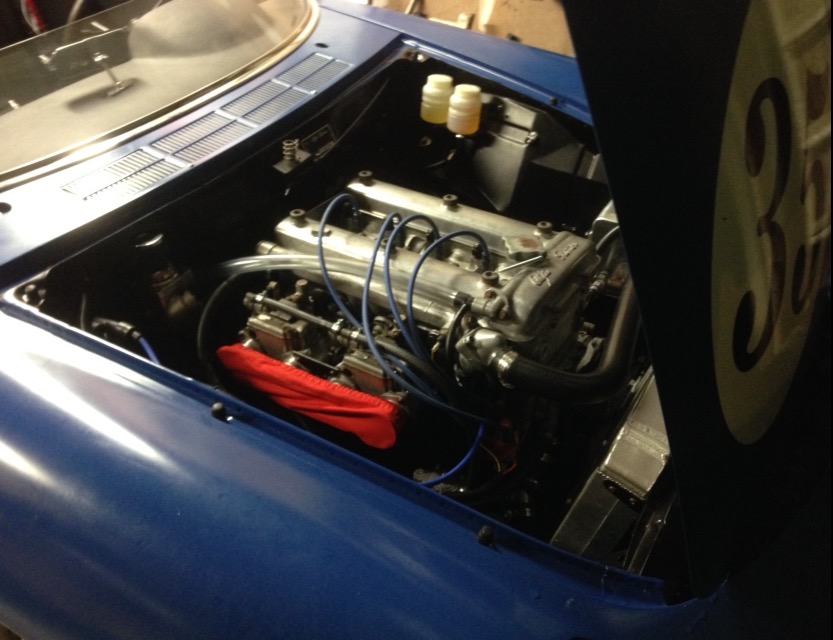
Alright thought I'd post this up here as I know there's some big Alfa enthusiasts on the forum. Been telling the old boy to get on here but he hasn't pulled his finger out. This his 1969 Alfa boat tail spider we have been building for the last.. 5?..years It's taken a long time I know that! Purchased as a complete bare shell witch was picked as a failed resto project. The shell being imported with some parts out of Canada. However the car was originally from the states and came with California plates and obviously being left hand drive. This model being the 1750 GT veloce, of witch I'm told only 1300 were ever made. And being designed by some bloke called Pininfarina The project has taken a lot of hours and money, getting the shell in bad shape most of the floor had to be replaced. Not one panel was straight so a lot of pulling and massaging steel had to be done. Parts were sourced from collectors all over the word, and with all most all of the suspension being replaced with brand new gear from https://www.alfaholics.com. Where the sport and track upgrade package was bought including adjustable koni's and higher rated springs, along with the bigger brake kit with bigger rotors and brand new calipers. The intention was to tidy it up and turn it into a track car, naturly things got a bit carried away and has now been wired setup so it can be complied for the road. That said, it has a nzms complied roll bar, with side intrusion bars and 6 point style frame to tie the struts together. Autosport seats that have been recovered with custom frame rails and harness' to suit. Currently the motors just the 1750 with some custom extractors and the webbers I rebuilt. Motor DOHC 16v crossflow with alloy block and head. Pretty flash for a domestic car in the mid 60's Plans of a full built 2L later down the track are there once funds allow for it This is all for now, there's loads of photos and other details to add witch I'll do in my free time. And if anyone's interested let me know and I can put you in touch with the old boy. He's Alfa obsessed and loves a good yarn/natter theres a track day coming up so hopefully get some high quolity photos of it on the new Hampton club track to put on iforce instead of my lazy phone camera crap. be keen to get it to OS drag day too come to think of it
-
Ash's 82 AA60 rina of rustic glory
Ash Kelly barr replied to Ashkellybarr's topic in Projects and Build Ups
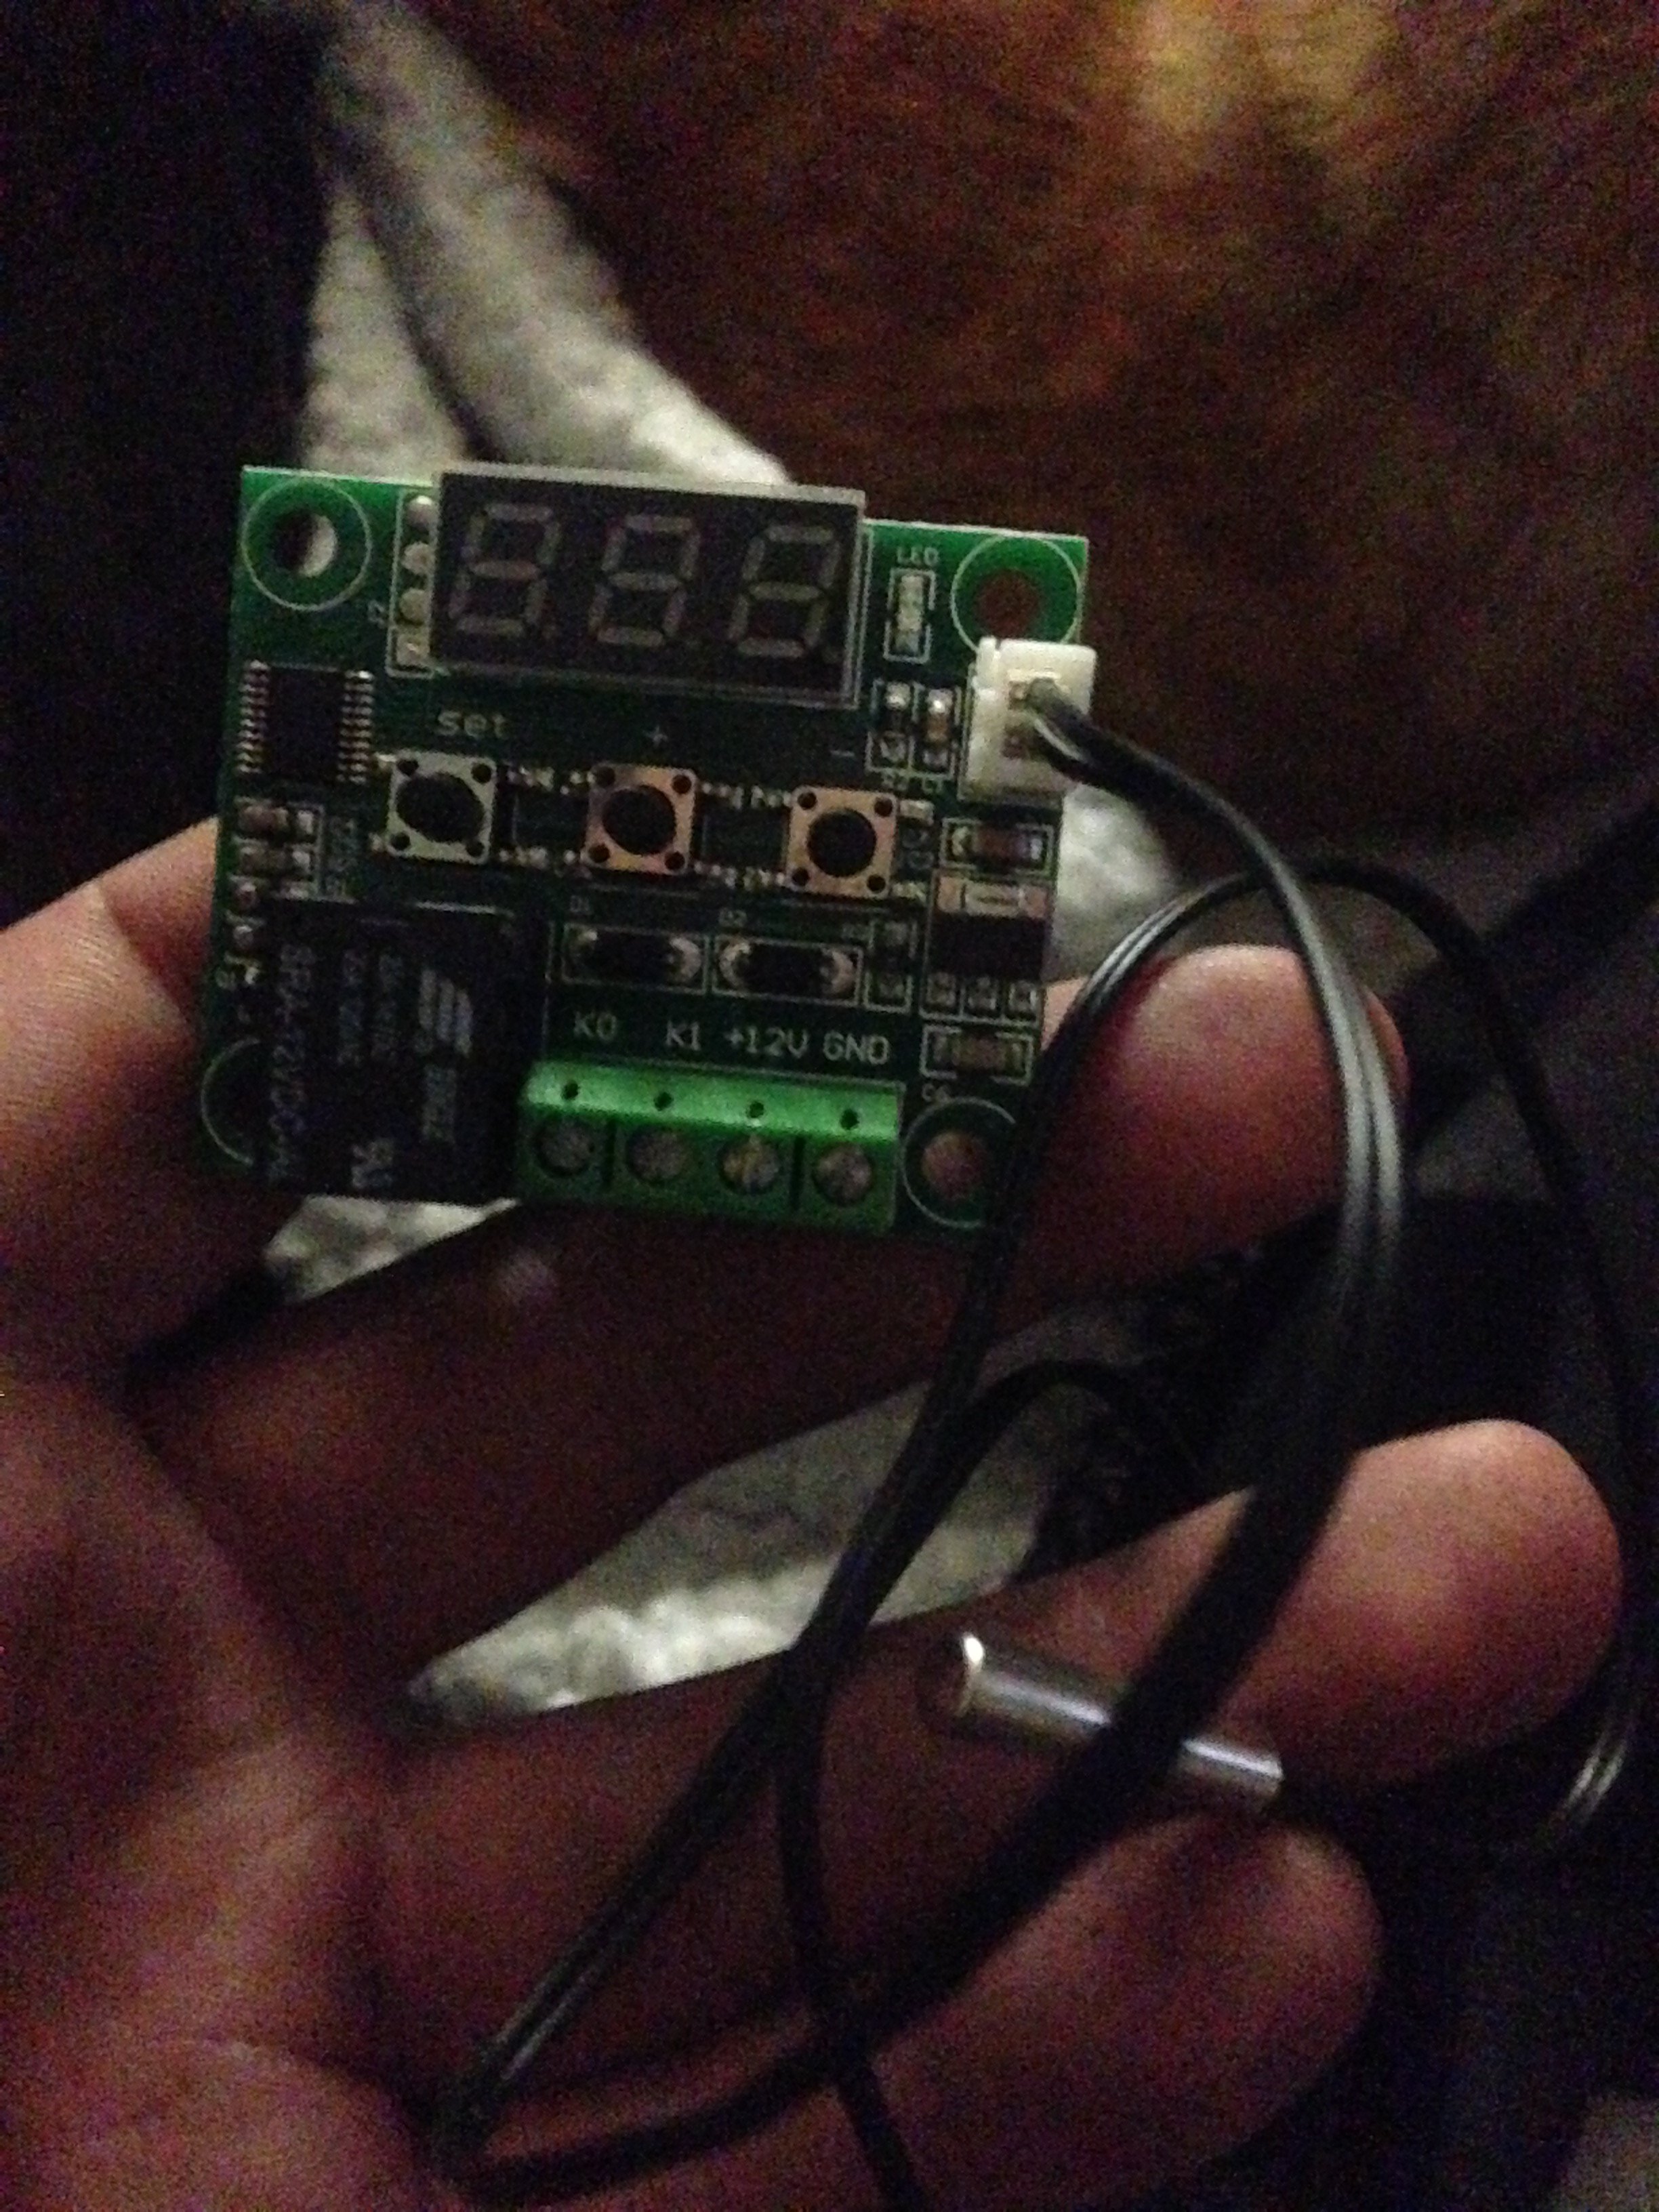
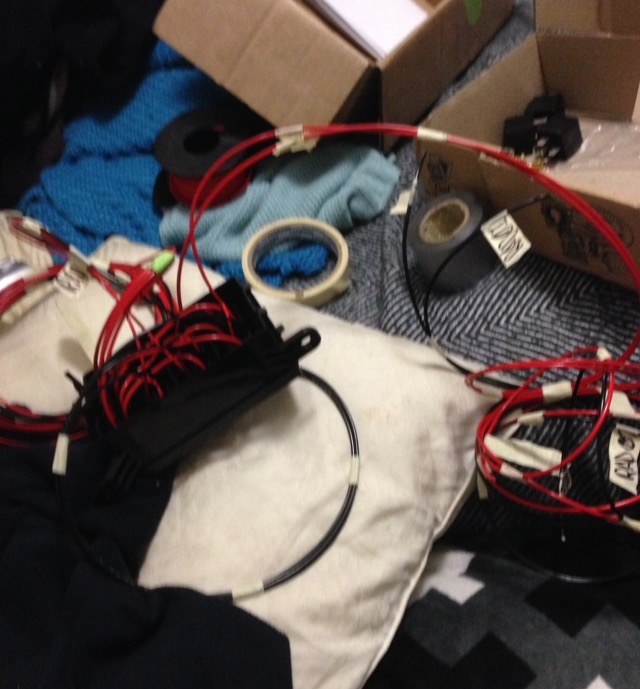
Getting busy in this little box.. changed it around a bit. alowed for two fans thermo switch no longer switches 0v of the fans. instead, switching the 0v of the fan contactors not wanting to get stuck with no fans if the AliExpress special thermo switch thinger decides to die (witch I garrentee will when I'm away on a long weekend) I've added a switch to bypass the thermo switching for one of the fans so I can still get back to home base. turned into a lot of cabling already and I haven't even started on the IGN system
-
Ash's 82 AA60 rina of rustic glory
Ash Kelly barr replied to Ashkellybarr's topic in Projects and Build Ups
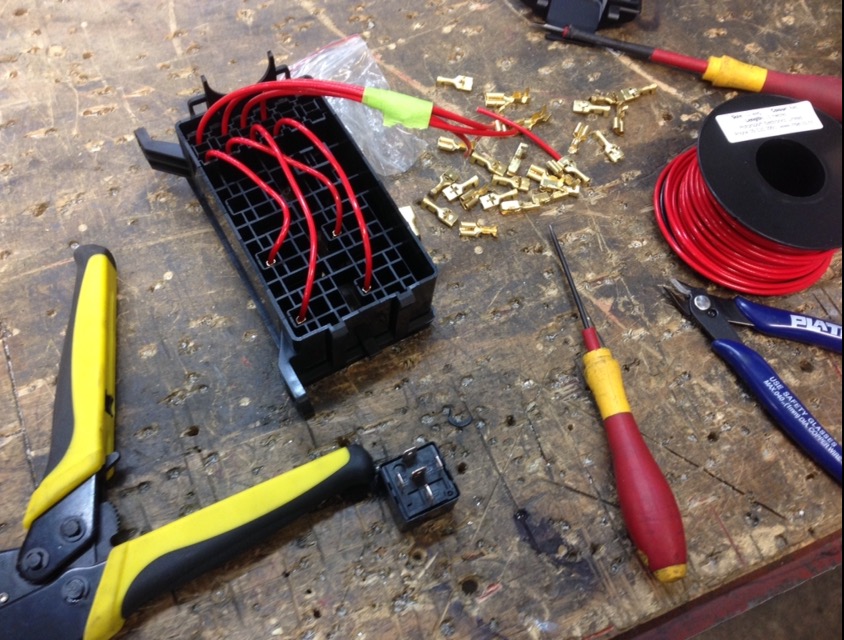
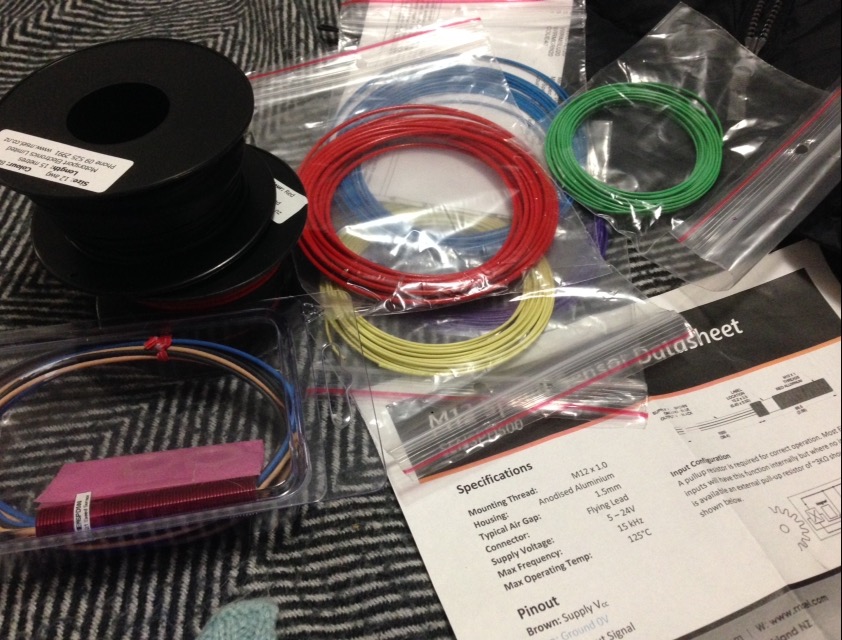
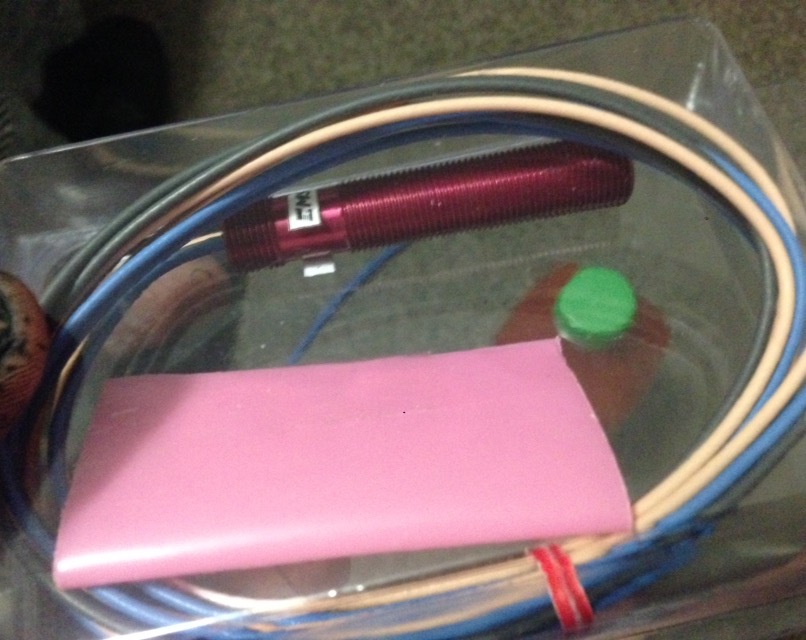
Mil spec cable turned up. I'll fit off the fuse and relay box tomorrow, get lengths run out and loom it up. then see if there's any crimps or fittings I need pick up using a "cherry" sensor for the crank trigger, don't know much about them but their pretty well recommended. Most of the hall sensors are around a hundred bucks. picked mine up from an NZ company called Msel for $65 witch was a best deal I could find, and with over night courier as well. Mint
-
Ash's 82 AA60 rina of rustic glory
Ash Kelly barr replied to Ashkellybarr's topic in Projects and Build Ups
Boat cloth done black epoxi shit done 2k paint for the door jams and engine bays should be here this week. see if I can get cracking on that before I fly out for work next week thinking dark blue..? These with a couple shade of tint and very light metalic coat http://www.ppgpittsburghpaints.com/color/paint-colors/blues/chinese-porcelain-ppg1160-6 http://www.ppgpittsburghpaints.com/color/paint-colors/blues/singing-the-blues-ppg1159-7 Got a guy who painted a mates car who can do a closed door, still a bit off doing that though
-
Think someone's working on a k20 to W series bellhousing adaptor. could get some yota in there too
-
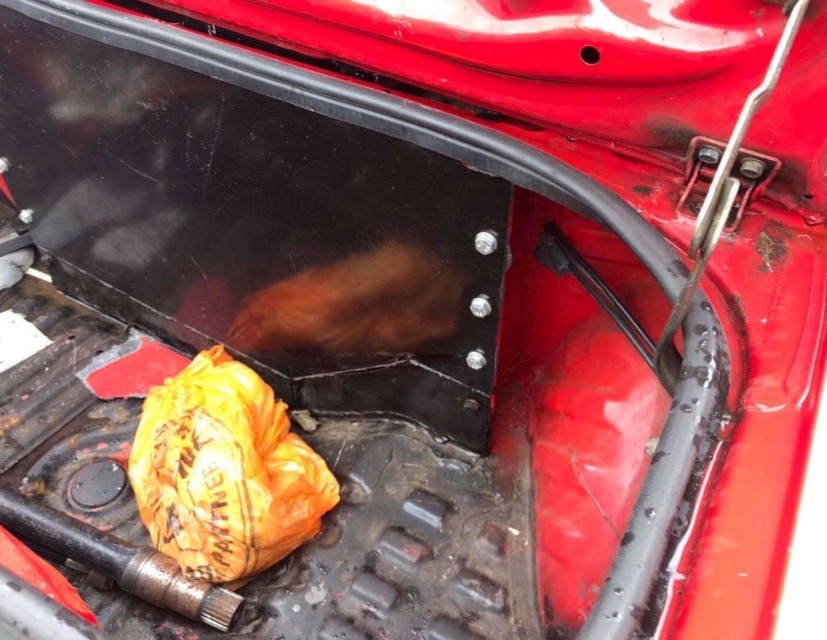
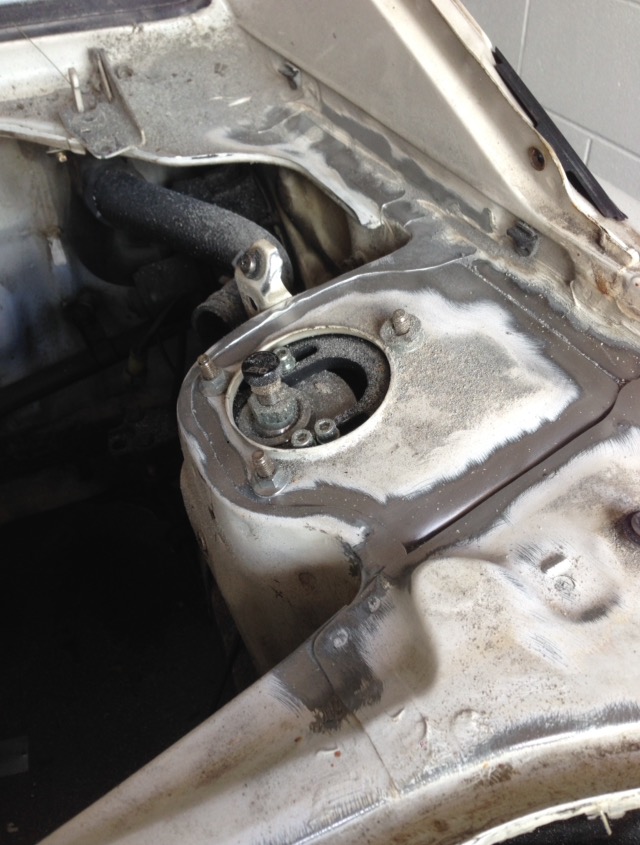
With the weather I've turned to the inside project witch has been lacking attention. cleaned back sureface rust. removed brackets and other random things from the engine bay I won't be needing. ill do some small stitch welding to tie it up better around the struts and c pillars towards the b pillars ivr got some seam sealer and black 2k paint on order to once that's done